

Page 1

USER’S MANUAL
Version
2.6
ARTURIA – MOOG MODULAR V 2.6 – USER’S MANUAL 1
Page 2

Programming:
Robert Bocquier
Nicolas Bronnec
Pierre-Jean Camilieri
Thomas Diligent
Sylvain Gubian
Xavier Oudin
Gilles Pommereuil
Cedric Rossi
Graphics:
Yannick Bonnefoy
Thomas & Wolfgang Merkle [Bitplant]
Manual:
Antoine Back (V2.5)
Silvère Letellier (V2.5)
Jean-Michel Blanchet
Tomoya Fukuchi
Tom Healy
Sadahiro Nakano
Xavier Oudin
Gilles Pommereuil
Cedric Rossi
Takashi Uesugi
Yuji Sano
Sound Designers:
Wally Badarou
Jean-Michel Blanchet
Celmar Engel
Michel Geiss
Christoff Harbonier
Mateo Lupo
Hideki Matsutake
Scot Solida
Katsunori Ujiie
Very special thanks to:
Robert A. Moog and Isao Tomita
Thanks to:
Michael Adams, Bruno Begani, Ned Bouhalassa, Geoff Downes, Clay Duncan, Pavle
Kovacevic, Roger Luther, Sadahiro Nakano, Fabrice Paumier, Ben Turl, Peter Willems,
and the numerous beta testers.
© ARTURIA SA – 1999-2011 – All rights reserved.
4, Chemin de Malacher
38240 Meylan
FRANCE
http://www.arturia.com
Information contained in this manual is subject to change without notice and does not represent a commitment on the
part of Arturia. The software described in this manual is provided under the terms of a license agreement or nondisclosure agreement. The software license agreement specifies the terms and conditions for its lawful use. No part of
this manual may be produced or transmitted in any form or by any purpose other than purchaser’s personal use,
without the express written permission of ARTURIA S.A.
Other products, logos or company names quoted in this manual are trademarks or registered trademarks of their
respective owners.
2 ARTURIA – MOOG MODULAR V 2.6 – USER’S MANUAL
Page 3

IInnttrroodduuccttiioonn ttoo vveerrssiioonn 22..55 ooff tthhee MMoooogg MMoodduullaarr VV mmaannuuaall
The first version of the Moog Modular V was commercialized in March 2003 having been
announced at the NAMM show of the same year.
It quickly became popular being the first to offer an emulation of a modular synthesizer.
The name Moog® was obviously a trigger as for many it remains synonymous with the golden
age of vintage synthesizers. But strong interest from well-known musicians such as Isao
Tomita, Klaus Schultze, Geof Downes, Stevie Wonder, Herbie Hancock and many others helped
create a real buzz around the launch of the Moog Modular V.
At Arturia, we have received many messages of congratulations as well as requests for the
evolution and modifications for upcoming versions of the synthesizer.
Version 2 of the Moog Modular V has taken many of these requests into account and brings
many unexpected developments.
Firstly, as you will see when you launch the program, is a new means of viewing the
synthesizer giving an overview of the entire instrument if your computer can support the
resolution. On screens with lower resolutions, by using the “scroll” command, it becomes
possible to access all of the modules on the same screen, a feature that will delight many
musicians.
We have also broadened the configuration possibilities for the synthesizer. Some modules can
now be interchanged, which brings the Moog Modular V closer to the original instruments that
could be configured by Moog Music upon order.
Improvements have also been made to the audio, making use of the evolution of our TAE®
technology which has seen improvements during the year. We have answered a frequent
request in relation to Audio-in so that you can now use the Moog Modular V filters or
sequencer on an external source.
Of course, we have also developed new modules, six to be precise. The 928 (Sample and Hold)
and 912 (Envelope Follower) were popular demands and can be found in this new build.
Also added are very rare modules such as the 1630 Bode Frequency Shifter – around a dozen
models produced - or completely new modules such as the Formants Filter
Last but not least is the addition of 200 new presets to this version. They make use of the new
options offered by the Moog Modular V, and will be a great starting point for those who wish to
discover this new version. Go to the last part of Chapter 7 if you wish to jump into using the
new modules offered.
Hoping that you enjoy this evolution, we wish you the greatest pleasure in your use of the
Moog Modular V 2.5
The Arturia team
ARTURIA – MOOG MODULAR V 2.6 – USER’S MANUAL 3
Page 4

TABLE OF CONTENTS
1
What's new in Moog Modular v 2.6......................................................................... 7
2
Introduction........................................................................................................ 8
2.1
The birth of modular moog systems.................................................................... 8
2.2
A modular synthesizer, why? ........................................................................... 12
2.3
A better emulation thanks to TAE® .................................................................. 12
2.3.1 Aliasing-free oscillators: .............................................................................. 13
2.3.2 Better reproduction of analog wave forms:..................................................... 13
2.3.3 Better reproduction of analog filters .............................................................. 14
2.3.4 Implementation of soft clipping .................................................................... 15
3
Installation ....................................................................................................... 17
3.1
Windows Installation (XP, VISTA, 7) ................................................................. 17
3.2
Installation Mac OS X ..................................................................................... 19
4
Authorization .................................................................................................... 20
4.1
Registration................................................................................................... 20
4.2
License download ........................................................................................... 22
5
Quick Start ....................................................................................................... 25
5.1
The 4 sections of the Moog Modular V............................................................... 25
5.1.1 The synthesis section .................................................................................. 25
5.1.2 The other three sections .............................................................................. 26
5.1.3 Reduced view of the keyboard and the real time controllers ............................. 27
5.2
Using presets................................................................................................. 27
5.3
Modular synthesizer ....................................................................................... 29
5.3.1 First connections......................................................................................... 29
5.3.2 Description of the synthesis section modules .................................................. 33
5.4
The other sections.......................................................................................... 37
5.4.1 The sequencer............................................................................................ 37
5.4.2 The effects................................................................................................. 40
5.5
the virtual keyboard and its real time controllers................................................ 45
5.5.1 The keyboard ............................................................................................. 45
5.5.2 The keyboard controllers ............................................................................. 46
5.5.3 The play modes .......................................................................................... 47
5.5.4 The sound design controllers ........................................................................ 48
6
The interface .................................................................................................... 51
6.1
Using the presets ........................................................................................... 51
6.1.1 Choice of bank, sub-bank, preset .................................................................. 51
6.1.2 Creation of a bank, sub-bank, preset............................................................. 52
6.1.3 Saving a user preset ................................................................................... 53
6.1.4 Import / Export of a preset bank .................................................................. 53
6.2
Work pages ................................................................................................... 54
6.2.1 The complete view ...................................................................................... 54
6.2.2 The reduced usage page .............................................................................. 55
6.3
Using controllers ............................................................................................ 55
6.3.1 Knobs........................................................................................................ 55
6.3.2 Joysticks.................................................................................................... 56
6.3.3 Selectors ................................................................................................... 56
6.3.4 Keyboard ................................................................................................... 57
6.3.5 MIDI control............................................................................................... 57
6.4
Using cables .................................................................................................. 61
6.4.1 Audio and modulation connections ................................................................ 61
6.4.2 Modifying a connection ................................................................................ 63
6.4.3 Modulation level setting............................................................................... 63
6.4.4 Cable display options .................................................................................. 63
6.4.5 Trigger connections..................................................................................... 64
6.4.6 Synchronization connections ........................................................................ 65
4 ARTURIA – MOOG MODULAR V 2.6 – USER’S MANUAL
Page 5

6.4.7 Key follow or sequencer connections ............................................................. 65
7
The modules ..................................................................................................... 68
7.1
Programming section ...................................................................................... 68
7.1.1 Description ................................................................................................ 68
7.1.2 Oscillators.................................................................................................. 68
7.1.3 Filters........................................................................................................ 72
7.1.4 Modulation envelopes .................................................................................. 77
7.1.5 Output amplifiers (VCA)............................................................................... 78
7.1.6 Low frequency oscillators (LFO) .................................................................... 79
7.1.7 Controlled amplifiers / Mixers ....................................................................... 80
7.1.8 Trigger delay.............................................................................................. 81
7.1.9 Noise generator .......................................................................................... 83
7.1.10
7.1.11
7.1.12
7.1.13
7.1.14
7.2
7.2.1 Description ................................................................................................ 88
7.2.2 Resonant filter bank .................................................................................... 89
7.2.3 Chorus ...................................................................................................... 90
7.2.4 Phaser....................................................................................................... 91
7.2.5 Stereo Delay .............................................................................................. 92
7.2.6 Sequence generator .................................................................................... 93
7.3
7.4
7.4.1 Keyboard follow management ...................................................................... 97
7.4.2 General settings ......................................................................................... 98
8
8.1
8.1.1 The oscillator or VCO................................................................................... 99
8.1.2 The filter or VCF ........................................................................................102
8.1.3 The amplifier or VCA ..................................................................................106
8.2
8.2.1 The keyboard ............................................................................................106
8.2.2 The envelope generator ..............................................................................107
8.2.3 The low frequency oscillator ........................................................................107
9
9.1
9.1.1 Simple patch #1 ........................................................................................109
9.1.2 Simple patch #2 ........................................................................................110
9.1.3 Complex patch #1 .....................................................................................113
9.1.4 Complex patch #2 .....................................................................................117
9.2
9.2.1 Sequence #1.............................................................................................120
9.2.2 Sequence #2.............................................................................................122
9.2.3 Sequence #3.............................................................................................125
9.3
9.3.1 Creative use of key follows..........................................................................126
9.3.2 Creative use of triggers and trigger delays ....................................................128
9.3.3 Stereo without the effects ...........................................................................130
9.4
9.4.1 The Bode Frequency Shifter ........................................................................131
9.4.2 The Envelope Follower ................................................................................134
9.4.3 The sample and hold ..................................................................................137
Sample and hold ..................................................................................... 84
Envelope follower .................................................................................... 85
Ring modulator ....................................................................................... 86
Formant filter.......................................................................................... 87
Bode Frequency Shifter ............................................................................ 87
Second section .............................................................................................. 88
Third Section ................................................................................................. 96
Fourth section................................................................................................ 96
The basics of subtractive synthesis ...................................................................... 99
The three main modules ................................................................................. 99
Complimentary modules ................................................................................106
A few elements of sound design .........................................................................109
Modular sound synthesis ................................................................................109
The sequencer ..............................................................................................120
Bonus features .............................................................................................126
using the new Moog Modular V 2.0 modules .....................................................131
ARTURIA – MOOG MODULAR V 2.6 – USER’S MANUAL 5
Page 6

10
Using the Moog Modular V in different modes.......................................................140
10.1 Stand-alone..................................................................................................140
10.1.1
10.1.2
10.2 Using your plug-in in a host............................................................................141
10.2.1
10.2.2
10.2.3
10.3 VST™ ..........................................................................................................142
10.3.1
10.3.2
10.3.3
10.4 Audio unit ....................................................................................................146
10.4.1
10.4.2
10.5 Pro Tools™ (RTAS) ........................................................................................150
Launching the application ........................................................................140
Configuration of an instrument: the tool bar ..............................................140
MIDI connection .....................................................................................141
Saving preset.........................................................................................141
Automation............................................................................................141
Cubase™ ...............................................................................................142
Ableton Live™ ........................................................................................144
Sonar™ .................................................................................................145
Logic Studio™ ........................................................................................146
Digital Performer™ .................................................................................148
6 ARTURIA – MOOG MODULAR V 2.6 – USER’S MANUAL
Page 7

1 WHAT'S NEW IN MOOG MODULAR V 2.6
Moog Modular V 2.6 includes the following new features:
• Support for 64-bit VST and Audio Unit
• Improvement for MIDI assignments
o MIDI assignment configurations can be saved and restored
o Controls can be assigned to multiple parameters
o Minimum and maximum ranges for an assigned parameter can be set
• Standalone program updated
• Bug fixes
System requirements:
• MAC OSX 10.5 and 10.6 Intel
o PPC no longer supported
o MAC OSX 10.4 no longer supported
• Windows
o Seven
o Vista
o XP
ARTURIA – MOOG MODULAR V 2.6 – USER’S MANUAL 7
Page 8
2 INTRODUCTION
2.1 T
Robert A. Moog was born in May 1934 in New York. A passionate for music (he took piano
lessons for 12 years), he was introduced to electronics by his father, an engineer in this
domain. During his adolescence, he discovered the Thereminvox plan, invented during the 30’s
by a Russian engineer, Leon Theremin (or more exactly Lev Sergeivitch Termen). Seduced by
this instrument with its never before heard sounds, he began to produce his own models and
founded his own company in 1954.
Frequenting musical professionals, and in particular electronic and concrete music, R. Moog
realized that there was a real demand for electronic instruments of a higher quality.
One of the first clients to come to Robert Moog, the professor of music Herbert A. Deutsch,
asks him to listen to a song he had composed. Moog is immediately convinced and they decide
to associate their work. Their co-operation produced the first VCO.
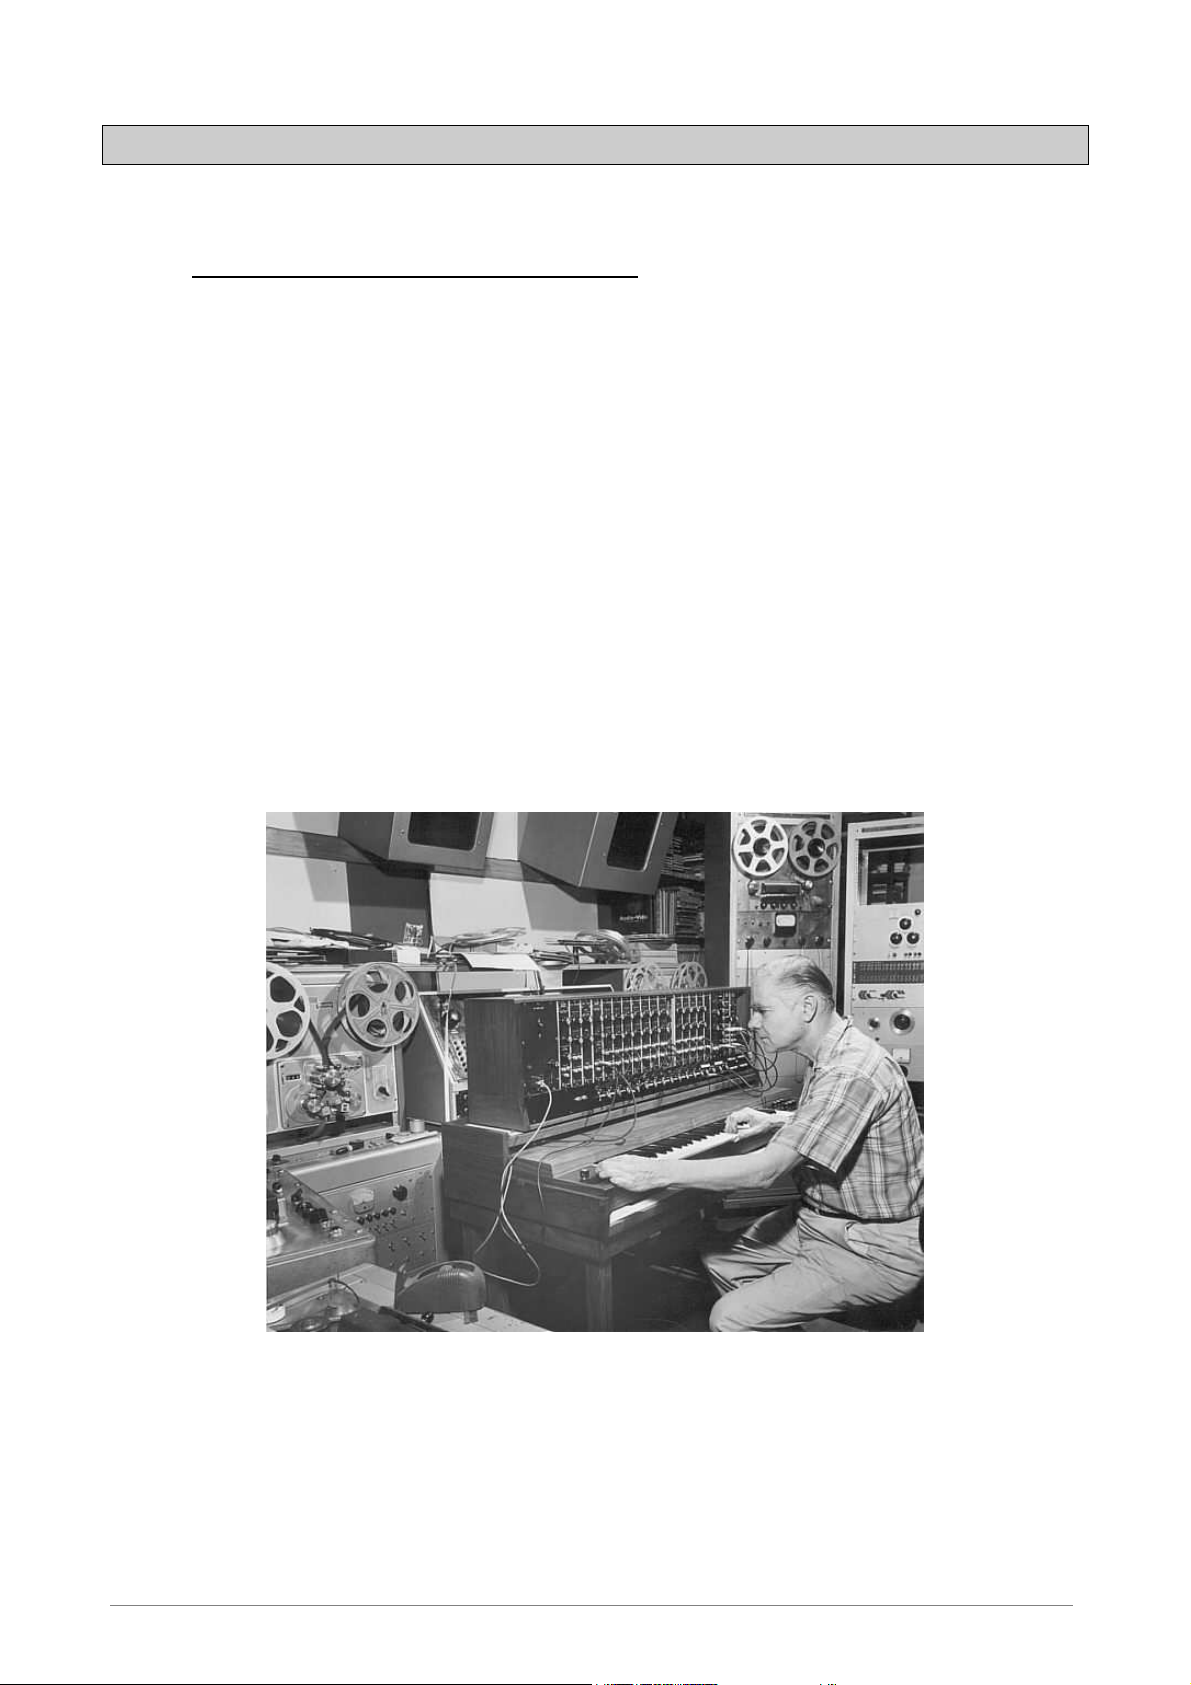
In 1964, the first prototype of a Moog synthesizer was produced. It was a modular system with
a voltage controlled filter (VCF), an envelope generator, a white noise generator, a trigger and
two keyboards each with a generator module (sawtooth, triangle and impulsion) as well as a
voltage controlled amplifier module (VCA).
HE BIRTH OF MODULAR MOOG SYSTEMS
The first modular Moog system (1964) (Courtesy of Roger Luther, MoogArchives.com)
Then other musicians helped Robert Moog in creating different modules:
Walter Carlos (who later became Wendy) helped for elaboration of a sequencer. He also
pushed Bob Moog to lend his name to his machines.
Vladimir Ussachevsky, who was one of the professors of de W. Carlos, specified the 4 parts of
the envelope generator (ADSR), allowing the accomplishment of the VCA and gave him the
idea for the envelope follower.
Gustave Ciamaga helped with the creation of the first tension controlled low-pass filter.
8 ARTURIA – MOOG MODULAR V 2.6 – USER’S MANUAL
Page 9

A second prototype, regrouping the all of the new modules, was built during the summer of
1964 and was presented during the AES show (Audio Engineering Society), where Moog
worked from an unused stand. This new product generated a huge amount of interest, but
Moog did not yet realize the commercial punch of his machines. Two or three orders were
obtained at AES and kept Moog busy for several months. In 1965, after the success at the
show, Moog decided to release the 900 series for commercial sale.
The R.A. Moog Company at Trumansburg, NY
(Courtesy of Roger Luther, MoogArchives.com)
The first client to buy the full Moog system was choreographer Alwin Nikolais. Also among the
first users were composers Eric Siday and Chris Swansen. The first commercial uses of the
Moog synthesizers were done in advertising. They were also used for jingles and in recording
studios.
In 1967, Bob decided to release different machines each with a certain number of modules.
This marked the birth of modular systems I, II and III. This same year, Paul Beaver for the
first time used a modular Moog system on a record.
The modular system III (1967)
(Courtesy of Roger Luther, MoogArchives.com)
ARTURIA – MOOG MODULAR V 2.6 – USER’S MANUAL 9
Page 10

In 1968, worldwide recognition came with the success of “Switched-On Bach” by W. Carlos.
This album, where classical music is played on a Moog, sold over one million copies as it was
bought both by classical music fans (it was in the American “Classical” charts for 94 weeks)
and fans of pop. It won three Grammy awards.
“Switched-On Bach” by W. Carlos
A little later, Keith Emerson, keyboard player for the groups Nice and ELP (Emerson, Lake and
Palmer), was he himself to become an ambassador for Moog synths. He was one of the first to
play a Moog modular on stage during a tour (A 3C system). Jan Hammer was also one of the
first users of Moog systems. Big groups like Tangerine Dream, the Beatles or the Rolling
Stones, would also become modular Moog owners.
The 3C modular system (1969)
(Courtesy of Roger Luther, MoogArchives.com)
10 ARTURIA – MOOG MODULAR V 2.6 – USER’S MANUAL
Page 11
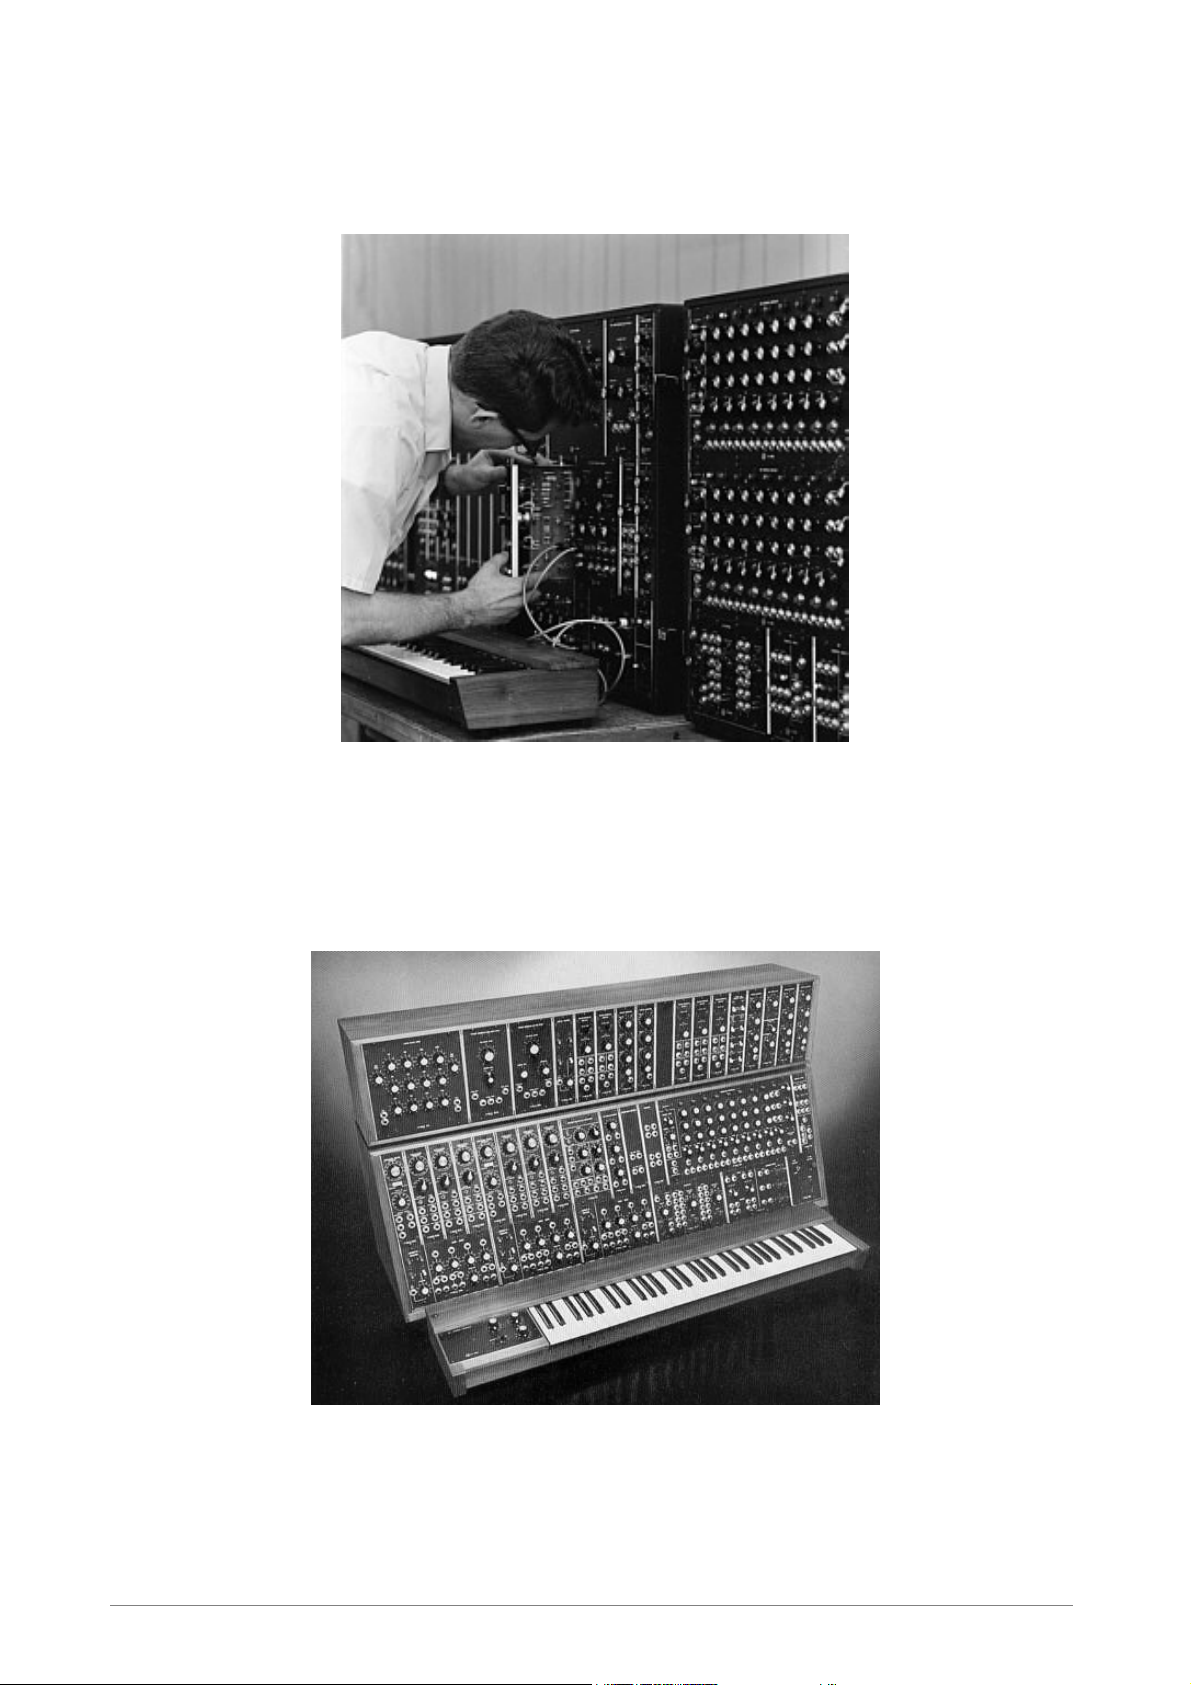
In 1969-70, the company which now has around forty employees was building up to three
modulars per week and the order book was always full. The modular had 5 years of high sales,
and sold around 200 models in the United States.
Construction and testing of a modular Moog
(Courtesy of Roger Luther, MoogArchives.com)
In 1969, Bob Moog received demands for a more compact instrument that could be
transported more easily, directed more to stage than studio. With the help of an engineer from
Berkley, Jim Scott, and the advice from numerous musicians he was about to create another
mythic synth: the Minimoog…
System 55, the last version of the Moog modular (1974)
(Courtesy of Roger Luther, MoogArchives.com)
ARTURIA – MOOG MODULAR V 2.6 – USER’S MANUAL 11
Page 12

2.2 A
Why create a modular synthesizer, that is to say comprised of independent modules that we
must connect ourselves, sometimes with difficulty, before obtaining a sound?
The answer, as you can imagine, is very simple: the modularity brings immense possibilities
for the creation of sound.
To convince you, let’s look at some basic concepts.
Sound synthesis is essentially based on the use of generators and filters. From these
components, the sound designer must create sounds that can be used by musicians. To
succeed, the different parameters that we have access to (height of note, filter cut-off
frequency, output volume, wave form…) must evolve in time. And for this, we must link
different modules between each other.
Let’s take an example: an oscillator, which has inputs to modulate each of its parameters.
Let’s connect the output of an envelope generator to the oscillator frequency modulation input,
and there we get a signal depending on the use of a keyboard. Now we’ll connect a low
frequency generator to the impulse width modulation input and here we have the waveform,
which will evolve in time.
But why not have internal cables, fixed from the start?
Here again, another example will help. Let’s take an envelope and two oscillators. The latter
possess three modulation inputs: a frequency modulation, an impulse width modulation and a
volume modulation.
Effecting every combination with fixed connections would oblige us to have six independent
buttons for the modulation of the parameters.
If we now take 9 oscillators, 6 envelopes, a modulation wheel and a velocity setting, we would
need… 216 setting buttons.
What can we therefore say for the Moog Modular V, which on top of this has three filters, a
noise generator, a sequencer and two control pads?
Connections in a modular synthesizer can sometimes seem difficult, but the often-unexpected
results are always a source of great musical inspiration.
Either way, don’t worry, the presets created by experienced musicians will allow you, if
necessary, a gentle introduction to the art of sound creation.
This new version presents new modules and a notable improvement to the sound quality and
synthesis possibilities. As was the case with the previous versions, it remains faithful to the
original Moog Modulars and offers the possibility to organize the arrangement of certain
modules. Ergonomically this version remains very close to the previous so as not to loose time
learning the different functions again.
MODULAR SYNTHESIZER, WHY
?
2.3 A
TAE® - standing for True Analog Emulation - is a new technology dedicated to the digital
reproduction of analog circuits.
When implemented in software code, TAE’s algorithms guaranty the respect of hardware
specifications. This is why your Moog Modular V offers an unparalleled quality of sound.
12 ARTURIA – MOOG MODULAR V 2.6 – USER’S MANUAL
BETTER EMULATION THANKS TO
TAE®
Page 13

In detail, TAE means:
2.3.1 Aliasing-free oscillators:
Standard digital synthesizers produce aliasing in high frequencies, and when using Pulse Width
Modulation or FM.
TAE® allows the production of totally aliasing-free oscillators in all contexts (PWM, FM…), and
at no extra CPU cost.
Aliasing
Linear frequency spectrum of an existing well-known software synthesizer
Linear frequency spectrum of the Moog Modular V oscillator made with TAE®
2.3.2 Better reproduction of analog wave forms:
Original analog oscillators used condensers’ unloading to produce common wave shapes (saw
tooth, triangle, square). This means that waveforms were slightly curved. TAE® allows the
reproduction of Condenser’s Unload.
ARTURIA – MOOG MODULAR V 2.6 – USER’S MANUAL 13
Page 14

Temporal representation of a waveform on a Modular Moog 55
Temporal representation of the waveform of an existing Moog-like software synthesizer
Temporal representation of the Moog Modular V waveform thanks to TAE
In addition, original analog oscillators were unstable. Actually, their wave shape was always
slightly different from one period to another. In addition, due to analog hardware sensitivities,
new period trigger times varied with the temperature and other environmental conditions.
TAE simulates the instability of oscillators, helping to create warmer and fatter sounds.
2.3.3 Better reproduction of analog filters
TAE allows the emulation of analog-designed filters in a much more precise way than any
existing digital filter. In particular, TAE has managed to reproduce the legendary Moog 24dB
low-pass resonant filter with great respect towards the original.
14 ARTURIA – MOOG MODULAR V 2.6 – USER’S MANUAL
Page 15

Standard 24 dB digital low
Low-pass resonant filter
Input
Output
Current limiting
emulation
pass resonance filter for a
typical software
synthesizer
Very selective 24 dB
resonance filter of the
MiniMoog
TAE made Moog Modular
V resonance filter: First 24
dB resonance filter to be
that selective
Comparative response filters
2.3.4 Implementation of soft clipping
In analog synthesizers, the resonant filter uses a current limiting function, preventing the
signal from being too loud (soft clipping).
TAE reproduces this current limiting function, making the sound more natural. It also allows
filters to enter self-oscillation like original hardware synthesizers do.
ARTURIA – MOOG MODULAR V 2.6 – USER’S MANUAL 15
Page 16

1,5
-1
0
1
1
0,5
0
0,2
0,4
0,6
-0,5
-1,5
-0,8
-0,6
-0,4
-0,2
-1
0,8
Soft-clipping transfer function
16 ARTURIA – MOOG MODULAR V 2.6 – USER’S MANUAL
Page 17

3 INSTALLATION
3.1 W
Insert the CD-ROM in the drive. Explore the CD-ROM content; double-click on the “Moog
Modular V 2 Setup PC.exe” icon
At the first step in the installation, choose the folder to install the Moog Modular V. It will be
installed by default in C:\Program Files\Arturia\Moog Modular V2. You can change the
destination with the Browse button.
INDOWS INSTALLATION
(XP, VISTA, 7)
Choice of installation folder
The Moog Modular V2.6 will be installed as a standalone application. The following step allows
you to install the Moog Modular V2.6 as a plug-in. To do this, choose the protocol(s) that you
use (VST, RTAS). For more information on these protocols, look at chapter 9.
ARTURIA – MOOG MODULAR V 2.6 – USER’S MANUAL 17
Page 18

Choosing the protocols
For the VST and RTAS protocols, you need to choose the installation folder to allow the host
application to use the Moog Modular V2.6 as a plug-in. Selecting all is a good idea..
Installation folder choice for the VST plug-in
The installation program now has enough information to complete the installation. When the
installation process is completed, please proceed to authorization step (Chapter 3).
18 ARTURIA – MOOG MODULAR V 2.6 – USER’S MANUAL
Page 19

3.2 I
Insert the CD-ROM into the drive. Explore the content of the CD-ROM, then double-click on the
icon named “Moog Modular V2.6 Setup”.
Follow these steps:
When prompted, enter the administrator name and password of your computer in the
authentication window.
NSTALLATION MAC OS
X
Read and accept the End User License Agreement,
Select a destination.
Authentication window
The Moog Modular V2.6 will next be installed as a standalone application, but also as VST, AU
and RTAS plug-ins.
The installation program now has enough information to complete the installation. When the
installation process is completed, please proceed to authorization step (Chapter 3).
ARTURIA – MOOG MODULAR V 2.6 – USER’S MANUAL 19
Page 20

4 AUTHORIZATION
Now your Moog Modular V 2.6 has been installed, you have to authorize the synthesizer.
Earlier versions used an “original CD + license number” protection scheme, however, the Moog
Modular V 2.6 uses the Soft-eLicenser full-software solution. Avoiding the use of a USB port by
default, this system allows using the synthesizer on one machine which must be connected to
the Internet during the authorization process.
To transfer your license on another computer, or simply use your synthesizer on several computers (one instance
at a time), you will need:
_ to use one USB-eLicenser hardware dongle (sold separately, also used by many other software editors);
_ in the eLicenser Control Center, to drag-and-drop your license from Soft-eLicenser to USB-eLicenser.
This transfer, requiring a valid Internet connection, can be done both ways:
_ from Soft-eLicenser to USB-eLicenser;
_ from USB-eLicenser to Soft-eLicenser.
For any further technical detail, please check our website www.arturia.com/elicenser.
4.1 R
EGISTRATION
The first step is to register your software in order to obtain the activation code that will enable
you to actually use the software.
You should have handy the Serial Number of Moog Modular V and the Unlock Code (these
are an integral part of the software and are printed on a small plastic card):
Connect your computer to the Internet, and go to this web page:
http://www.arturia.com/login
If you don’t have any Arturia account yet, please create one now, this will bring you to this
form:
20 ARTURIA – MOOG MODULAR V 2.6 – USER’S MANUAL
Page 21

Or if you already have an account, simply log in:
Once you are logged into your account, you can register your Moog Modular V and request
your activation code. Go to the “My Registered Products” section of your account and click
on the “Add” button:
In the form that appears, select “Moog Modular V” from the drop down menu, and type in
your synthesizer serial number and unlock code (as written on the registration card):
ARTURIA – MOOG MODULAR V 2.6 – USER’S MANUAL 21
Page 22

Moog Modular V
Moog Modular V
You will then see the confirmation screen:
And finally there is a screen from which you can copy the eLicenser Activation Code,
which is needed for the next step. The very same information is sent to you by email as a
backup.
4.2 L
Now that you have retrieved the activation code, launch the eLicenser Control Center. This
under a Windows XP/Vista/7 environment. The same functions apply, only the graphical user interface slightly differs
and possibly also the language used. These little details should not prevent you from understanding the full process.
22 ARTURIA – MOOG MODULAR V 2.6 – USER’S MANUAL
ICENSE DOWNLOAD
application has been automatically installed on your computer along with the Moog Modular
V; it is accessible here:
Windows: Start > Programs > eLicenser > eLicenser Control Center
Mac OS X: Finder > Applications > eLicenser Control Center
The screenshots below have been taken on a Mac OS X operating system; however the process is strictly identical
Page 23

In the eLicenser Control Center main window you should see a Soft-eLicenser (SeL) virtual
Moog Modular V
2.5
dongle created onto your computer.
eLicenser Control Center main window, showing an empty Soft-eLicenser.
Click on the Enter Activation Code button, and enter the code when prompted. Simply
paste in the 32-digit code you’ve just copied from your account on the ARTURIA website:
Enter the activation code
ARTURIA – MOOG MODULAR V 2.6 – USER’S MANUAL 23
Page 24

The eLicenser Control Center is now ready to download the software license that will allow
you to use Moog Modular V. Click on Start, the progress bar should anime until download
completion. A popup window will confirm completion, just click Close.
Now the main eLicenser Control Center window should show your Moog Modular V license
installed and activated.
License is installed and activated
It’s now time to launch the Moog Modular V synthesizer in standalone mode to check
everything runs just fine:
Windows: Start > Programs > Arturia > Moog Modular V 2 > Moog Modular V 2
Mac OS X: Finder > Applications > Arturia Moog Modular V 2> Moog Modular V 2
24 ARTURIA – MOOG MODULAR V 2.6 – USER’S MANUAL
Page 25

5 QUICK START
This section of the manual will allow you to learn the general principles of how the Moog
Modular V works. This will be a presentation of the different views available, the modules and
signals used while using the program for the first time. You will find a detailed and precise
description of all of the modules and controllers visible on the screen in the following chapters.
The Sound Design chapter located in the second half of this manual is also recommended for
users who have never used a modular system before, and who wish to learn the fundamentals
of this domain.
5.1 T
The Moog Modular V is made up of four distinct sections:
The first at the top holds a sequencer and a certain number of effects.
The second, underneath, is for working on the sound synthesis with the different inter-
The third is an extension allowing us to regroup the different external input-outputs and
The fourth holds the virtual keyboard, as well as a section dedicated to the key follows
It is possible to keep only the fourth section on the screen, by clicking on the Keyb icon on the
toolbar.
When the whole synthesizer is displayed, we can move it vertically by using the icons that
represent the different views or by clicking and dragging the background.
5.1.1 The synthesis section
HE 4 SECTIONS OF THE MOOG MODULAR
connectable modules.
some internal cables.
and essential controllers.
V
Visible as soon as the synthesizer is opened, it is made up of two parts (cabinets). It integrates
the 33 modules necessary for the creation of sounds. The modules in the upper part can be
exchanged via the menu that appears when their name has been clicked. It is thus possible to
replace an envelope with a ring modulator, a filter with a frequency translator.
ARTURIA – MOOG MODULAR V 2.6 – USER’S MANUAL 25
Page 26

The first section composed of 2 cabinets
5.1.2 The other three sections
The first, situated at the top of the synthesizer, contains the step sequencer and 4 effects (the
right hand effect can be either a chorus or phaser). The two others are found under the
synthesis section. One is a small extension containing the internal cables, while the other holds
the virtual keyboard and its assignable controllers.
The second section composed of a sequencer and effects
26 ARTURIA – MOOG MODULAR V 2.6 – USER’S MANUAL
Page 27

The virtual keyboard and extensions section
5.1.3 Reduced view of the keyboard and the real time controllers
You also have the possibility to only keep the keyboard and its assignable controllers visible on
the screen. The goal is to have quick access to all of the important real time controllers and
sound presets all while having a smaller work surface.
Reduced view of the keyboard
5.2 U
SING PRESETS
Using presets is one of the main areas of evolution of the Moog Modular V when compared to
its predecessor, which did not save sound.
A preset contains all of the inter module connection information and the different controller
settings needed to reproduce an identical sound.
To make you familiar with the different sounds contained in the Moog Modular V, we will select
the preset Bass1.
For this, click on the button above the LCD screen indicating “C.Engel” (this screen
presents the name of the bank currently being used). By clicking, you will see a scrolling
menu appear which will indicate a list of the available banks. Choose the bank named
“JM.Blanchet”. Now click on the button above the second LCD screen presenting the word
“Leads” (this screen indicates the name of the sub-bank currently being used). Choose
“Basses”. Do the same thing on the 3rd LCD screen and select “Bass1”.
ARTURIA – MOOG MODULAR V 2.6 – USER’S MANUAL 27
Page 28

Select the preset bass1
The presets, located on the Moog Modular V toolbar, are classed in “banks” and “sub-banks”. Each bank contains a
certain number of sub-banks, which determine in general a type of sound: sub-bank “basses”, sub-bank “sound
effects”, etc. Each sub-bank contains a certain number of presets.
The Moog Modular V is supplied with 800 additional “factory” sound banks, which allow you to get acquainted with
more sounds and sequences of the synthesizer. A bank called “User” offers a selection of presets allowing you to begin
from a base configuration to start the programming of a sound (for example the sound “1 oscillator” comes with an
oscillator pre-connected to the first filter – a low pass-, the signal then goes to VCA1).
Now let’s modify this preset To do this, we will start with a simple manipulation. Modify the
cut-off frequency of filter1, the first module on the top left of the synthesizer (a low-pass
resonant filter). Turn the “frequency” button in the direction of the hands of a watch. The
sound becomes increasingly “brilliant”. Set this knob as it pleases you.
The setting of filter1 cut-off frequency
By performing this first setting, you have already modified the preset “Bass1”. We will now
save the sound that you have created.
To save this newly created sound among the user presets, click on the Save icon in the
toolbar: the sound setting being used will be saved in the currently selected preset.
If the current preset is a “factory” preset, the factory preset will not be replaced (the “save”
icon will not be available). To choose another destination for this sound, click on the “Save as”
icon and choose the location. Select, for example, “new” in the choice of banks (“bank”). 2
new bank and sub bank (“Sub bank”) locations and a new preset are created the names
“default0”, “default0” and “default0” will appear in their respective displays (if other default
names exist, then the number is incremented). Click on each one to modify the name of the 3.
28 ARTURIA – MOOG MODULAR V 2.6 – USER’S MANUAL
Page 29

Saving a preset
5.3 M
ODULAR SYNTHESIZER
The modular synthesizer cabinet contains 28 modules, which will help you to create an infinite
variety of sounds. These 28 modules can be broken down into different categories and will be
connected by cables.
5.3.1 First connections
Let’s see how to quickly create an evolving polyphonic sound:
To correctly understand the programming of the Moog Modular V, select the “Blank_ synth”
preset in the “User” / “Blank” bank. It holds no connections and thus produces no sound.
Take the “saw” output of oscillator2 and connect it to the audio input of filter1 (low-pass 24
dB). To do this click on the output jack of the waveform (a cable will appear) and drag it to
the filter1 input “in”. Once the cable has been released in the input jack, the connection
has been made.
Connection between oscillator 1 and filter 1
You can also create a connection by choosing the cable destination with a menu with a right click (or shift click) on
the output jack.
To delete a cable, click on it, it will then appear in a clearer color to show that it is selected. Press the “DEL” key on
the keyboard to remove the connection.
Now connect the audio output of this filter to the VCA1 (voltage controlled amplifier) audio
input. Once the connection has been made, you can “play the sound” on your MIDI
keyboard or the virtual keyboard offered by the Moog Modular V.
ARTURIA – MOOG MODULAR V 2.6 – USER’S MANUAL 29
Page 30

Connection of the filter1 audio output to the VCA1 audio input
Once you have obtained a basic sound, you can add elements to enrich the sound.
Take the “saw” output of oscillator2 and connect it to the audio input of filter2.
Connection between oscillator 2 and filter 2
Next connect the audio output of this filter to the VCA2 audio input.
30 ARTURIA – MOOG MODULAR V 2.6 – USER’S MANUAL
Page 31

Connection of the VCA2 audio input
Slightly detune the pitch of the second oscillator by turning the “frequency” button. You will
obtain a sound that is more “alive” and “thick”.
Detune the pitch of the second oscillator
Continue to complete the sound with modifications acting on the 2 filters. For this, connect
the “sin” output of LFO1 (placed next to the 3 filter modules) to one of the modulation
inputs of filter1.
The LFO1 module
Turn the jack ring (transformed to a knob after the cable connection) to change the level of
modulation. If you turn to the right, the modulation will be positive, and if you turn to the
left negative.
ARTURIA – MOOG MODULAR V 2.6 – USER’S MANUAL 31
Page 32

Turn the jack ring
On the original Moog Modular, it was not possible to directly set the value of the modulation input signal. To do this
we needed to go through controllable VCAs or dampening modules of which there were not very many. On the virtual
synthesizer, it is possible to control the input modulation level (once the connections have been made) by turning the
ring of the connected jack – this ring will “transform” virtually into a knob.
You can repeat these operations with filter2 (you can use the audio outputs as many times
as you like, one of the miracles of computers.)
To obtain a different modulation to the one applied on filter1 (all while remaining
synchronous), turn the jack ring of filter2 in the opposite direction of what you had
previously done with filter1.
Set the attack of the output VCA envelopes to 10 o’clock so that the sound will arrive
progressively when you press keys on your MIDI keyboard.
The Attack (A) settings for the output VCS envelopes
To finish, turn the panoramic knobs on the 2 output VCAs, the first to the left and the
second to the right. You will obtain a very natural stereo without the use of external
effects.
Don’t forget to save your preset in a bank to your name and a sub-bank with the name
“Pads”. Then, enter the preset name “Stereo_Pad”.
32 ARTURIA – MOOG MODULAR V 2.6 – USER’S MANUAL
Page 33

The final patch
5.3.2 Description of the synthesis section modules
5.3.2.1 The oscillators
They are 9 in total, regrouped in threes like the original Moog:
1 “Driver” oscillator: allow the management of the frequency and impulse width of the 3
“slave” oscillators. These 3 “slave” oscillators can be tuned and modulated separately. They
deliver 4 waveforms that can be simultaneously used.
An oscillator bank: 1 “driver” and 3 “slave oscillators”
5.3.2.2 The white and pink noise generator
To the oscillators previously described we add a white or pink noise generator. It is accessible
in the form of 4 outputs. This mode also has two 6 dB/oct. filters: a low-pass (LPF) and a highpass (HPF). With these, you can, for example, change the nature of the noise to make it more
or less brilliant
ARTURIA – MOOG MODULAR V 2.6 – USER’S MANUAL 33
Page 34

White and pink noise generator
5.3.2.3 The filters
The Moog Modular V possesses 3 filters. Each of these filters can be chosen between 4 types:
Low pass 24 dB/octave (type 904A)
High pass 24 dB/octave (type 904B)
Band pass and band reject 24 dB/octave (type 904C)
Multi-modes 12 dB/octave (low-pass, high-pass, band pass, band reject, bell, shelf).
The type change is done by clicking on the title of the filter type and by selecting the desired
filter in the proposed menu.
The 4 filter types
5.3.2.4 The auxiliary ADSR modulation envelopes
They are 6 in total, allowing the evolution of the sound in time.
34 ARTURIA – MOOG MODULAR V 2.6 – USER’S MANUAL
Page 35

The auxiliary envelope
5.3.2.5 The dual trigger delay
A module with two trigger delays allows the management of the signals used to trigger
envelopes and sequencer.
The trigger delays
5.3.2.6 The LFOs
Two low frequency oscillator modules (“Low Frequency Oscillator”) are used to create a cyclic
modulation on one (or several) sound setting.
The “slave” oscillators can also be used as LFOs when they are brought to low frequency positions when they are
switched in low frequencies (“low freq”). This gives a total availability of 11 LFO modules.
ARTURIA – MOOG MODULAR V 2.6 – USER’S MANUAL 35
Page 36

The LFO module
5.3.2.7 The VCAs
There are two output amplifiers (VCA), each with an individual envelope. We can imagine
placing a VCA on the right and one on the left to create a stereo effect.
An output VCA
5.3.2.8 Mixers and amplifiers
16 independent amplifiers are at your disposal. Each has its own volume setting with the
rotating “level” button and amplitude modulation input.
These amplifiers can be regrouped to create mixers. To regroup two amplifiers simply click on
the “link” button that separates them.
When two amplifiers are regrouped, the output signal of the first corresponds to the sum of the
output signals of the two amplifiers, while the second remains as it was before the regrouping.
36 ARTURIA – MOOG MODULAR V 2.6 – USER’S MANUAL
Page 37

The mixer VCAs
5.4 T
HE OTHER SECTIONS
5.4.1 The sequencer
This module conforms to the original Moog while simplifying the programming with internal
connections.
It is with this module that you can create melodic sequences or sequences applied to a
parameter (a sequence line applied to the opening of the frequency can, for example, be very
efficient).
The sequencer has 3 sections:
Low frequency oscillator controls the timing of passage from one sequence to another. Its speed can be set
statically with the “frequency” button and dynamically with the modulation input on the first page. Two buttons, “on”
and “off” respectively start and stop this generator.
Eight-step sequence manager. Each step defines 3 levels of output modulations, using 3 knobs. The manager
moves from one step to another on each pulse from the low frequency generator. The 3 rows of sequence can also be
chained to create a longer sequence (up to 24 steps)
The output controller allows the management of the 4 modulation outputs for the current step. The first 3 outputs
take their values from the rotating buttons of the current step (on the corresponding line), eventually with a
configurable smoothing through the “smooth” buttons. The fourth output, for which the smoothing can also be set
through the “smooth” button, is managed in the following manner. It takes the value from one of the 3 outputs in
function with the current step and the type of progression specified with the “Chain” selector: This allows the linking
sequences to create variations. For example to link lines 1, 2 and 3 to obtain a 24 step on the same controller.
The sequencer sections
To create an 8-step note sequence from the sound you have previously edited (“bass1”):
ARTURIA – MOOG MODULAR V 2.6 – USER’S MANUAL 37
Page 38

Assign “Driver” oscillators to one of the 4 sequence lines. For this, on the sequencer screen
click a few times on the corresponding LCD display on the bottom of the “Driver”, (on the
right) to select the sequence line :L1, 2, 3 or 4.
Validation of a sequence line on the “Driver” oscillator
On the 2 VCAs, click on the “trigg out” plug to apply a “trigg”, corresponding to the
sequencer output (“Sequencer trigger”), so that it can be taken into account and freely
react, without the help of a keyboard trigger. The sequencer will work on its own when you
start it.
Apply a sequencer output to the VCA (here VCA2)
Now go to the second screen and click on the “On” button situated in the “Oscillator” of the
sequencer. This will play the sequence in a loop.
38 ARTURIA – MOOG MODULAR V 2.6 – USER’S MANUAL
Page 39

Click on “on” to start the sequencer
Set the pitch of each note in turning the knobs of the sequence row applied to the Driver
oscillator.
Setting of the values corresponding to the pitch of the oscillators
Also set the length of the notes with the “length” knob
Set the length of each note
You can add a little portamento by turning the “smooth” knob on the right of the line
corresponding to your sequence.
ARTURIA – MOOG MODULAR V 2.6 – USER’S MANUAL 39
Page 40

Turning the “smooth” knob
It is also very easy to rhythmically enrich the sequence by linking (“link” button) or
repeating certain notes (select the number of repetitions by clicking several times in the
LCD display beside the “repeat” button and click on the latter to confirm the repetition of
the notes)
Click on the “repeat” button
If you wish to add more steps to your sequence, 16 for example, select “L4” in the LCD
display below the oscillator “Driver” of the sequencer. Now select “L12” in the LCD display
on the right of the sequencer (“chain”). To have 24 steps, select “L123”.
To have 24 steps, select “L123”
5.4.2 The effects
The second section also has three effects, which will allow you to bring more color and space
to your sound or sequence.
These are on the right of the sequencer; the chorus can be replaced by a phaser.
40 ARTURIA – MOOG MODULAR V 2.6 – USER’S MANUAL
Page 41

The 3 effect modules
Resonant filter bank (Fixed Filter bank): affects equalization to the outgoing signal
coming from the 2 output amplifiers in function with the state of the interrupters
“VCA1” and “VCA2”. This equalization is done with the help of resonant filters with 12
band-pass filters; each of the bands has a level (positive or negative) and bandwidth
setting. This module also possesses a low-pass filter (80 Hz) and a fixed high-pass (12
kHz).
Chorus: the chorus module allows a frequency modulation where the rapidity can be
set with the rotating “rate” button, the amplitude with the rotating “amount” button,
and the width by the rotating “delay” button.
Stereo delay (Dual Delay): allows the repetition of the incoming signal independently
for the left and right, which explains the presence of 2 control columns, one for each
side.
5.4.2.1 The fixed filter bank
The fixed filter bank
ARTURIA – MOOG MODULAR V 2.6 – USER’S MANUAL 41
Page 42

To add a complex filtering with the fixed filter bank, start by activating the 2 switches
“VCA1” and “VCA2”. This will connect the effect to the two VCA outputs.
Modify the filter frequency bands by turning the gain knobs. This will increase (to the right)
or reduce (to the left) the gain corresponding to these frequencies.
Increase the gain of the chosen frequency
You can refine the equalization with the bandwidth knob corresponding to the frequency
you have chosen. If you turn the knob (underneath the frequency gain setting) to the right,
you will reduce the bandwidth around the central frequency to make the equalization
setting increasingly precise. On the other hand, by turning it to the left, you will increase
the bandwidth, making the equalization less precise.
Set the frequency band width
If you have applied several strong equalizations, (with very pronounced band reductions for
example) you run the risk of having a consequential decrease in volume. To regain a
normal volume level, turn the “gain” knob (on the bottom right of the filter bank) towards
the right. Watch out for saturation.
Filter bank output gain
Thanks to MIDI, it is possible to record frequency gain and band width knob movement (with the MIDI sequencer).
This will make the sound “speak” or evolve in a manner that synthesizer filters cannot. Try it for yourself.
5.4.2.2 The “Dual delay”
You can also enrich your sound and give it more stereo space; for this, add stereo delay.
42 ARTURIA – MOOG MODULAR V 2.6 – USER’S MANUAL
Page 43

The delay effect
As is the case for all of the Moog Modular V effects, the Dual Delay works in “real” stereo in the
sense that it possesses an independent input and output for both sides.
To activate the delay effect, begin by triggering the 2 “VCA1” and “VCA2” switches. This
will commute the action of the effect to the 2 audio outputs of the sequencer.
It is also possible to keep a part of the sound effect free by deactivating one of the two VCA switches. This can be
very interesting when using the synthesizer for multiple tones (for example, a bass sound played on the keyboard
coming out to the VCA1 which is set without effect and an arpeggio sound played by the sequencer which will be
directed to the VCA2 where the effects will be activated)
On the delay, set the time between repetitions (“time” buttons) for each side of the stereo
(“L” left and “R” Right)
If you wish to get a stereo echo, apply a different setting for the repetition of the left and
right. So that the delay is synchronous, activate the “Sync” switch at the top of the module.
Set the time between repetitions
To control the repetitions reinsertion intensity, increase or decrease the value on the 2
“feedbacks”. Do the same thing for the “crossed” repetitions (one on the left and one on
the right “Cross feedback” buttons).
ARTURIA – MOOG MODULAR V 2.6 – USER’S MANUAL 43
Page 44

The “feedback” settings
Now, set the balance between the sound without effect (“dry” knob) and the delay return
(“wet” knob).
The “dry” and “wet” settings
5.4.2.3 The chorus
Chorus is used to create a doubling effect on a sound; this will give it more width and
“thickness”. If you accentuate the effect intensity, you will obtain a very discordant sound.
The chorus effect
Like the other effects, activate the VCA1 and VCA2 switches to commute the action of the
effect to the 2 audio outputs of the synthesizer.
44 ARTURIA – MOOG MODULAR V 2.6 – USER’S MANUAL
Page 45

To correctly hear the different modulation depths, simply increase the value of the
“amount” knob. The higher the value, the more discordant the sound.
The “amount” parameter
Set the modulation rate by turning the “rate” knob. The faster the speed, the quicker the
detuning.
You can also widen the stereo action field by increasing the value of the “stereo width”
knob.
The stereo settings
With chorus, it is also possible to obtain the stereo sweeping of the sound by decreasing the “amount” knob and
working only on the value of the “stereo width” (depth) and “stereo rate” (oscillation speed) knobs. This will create an
“auto pan” effect. The effect will be even more present if you lower the level of the signal without effect (“Dry”),
leaving only the effect return (“wet”).
5.5
THE VIRTUAL KEYBOARD AND ITS REAL TIME CONTROLLERS
A virtual keyboard is used to control the synthesizer notes and add supplementary real time
modulation settings. It can either be coupled with the sequencer section and the effects or
used alone to save space.
The keyboard and its controllers
5.5.1 The keyboard
The virtual keyboard situated on the bottom of the second screen, allows the quick testing of
the sounds of the presets, or the sound that you are editing, and this without the need for an
external MIDI keyboard.
ARTURIA – MOOG MODULAR V 2.6 – USER’S MANUAL 45
Page 46

The pitch bend and modulation dials are also available for height (affected to the oscillator or
filters) and modulation settings (affected to any of the synthesizers modulation sources). The
connections are made by cables on the first screen.
5.5.2 The keyboard controllers
The different settings concerning the real time controllers affected to the keyboard can be
found on the left, above the virtual keyboard.
Here you will find all of the settings applied to the 4 key followers, the pitch bend and
modulation wheels, as well as velocity and aftertouch.
Before using them, go back to the module section to define the parameters, which will be
modulated by these controllers. The connection jacks are found underneath the modular
synthesizer section.
The controller connection jacks
For this example, let’s take the “stereo_pad” sound created earlier. Connect the output of
the modulation dial “mod” (at the bottom of this section) to the filter1 cut-off frequency
modulation input. Set the amount parameter of this modulation to your liking so that it can
be taken into account by the wheel. Now test by turning the dial on your MIDI keyboard or
the virtual keyboard.
Connections for modulation and velocity outputs on the frequency modulation of filters 1 and 2
Now do the same thing, connecting the velocity output (“vel”) to the filter2 cut-off
frequency modulation input. To test velocity settings, use your MIDI keyboard, the virtual
keyboard naturally is not sensitive to velocity.
46 ARTURIA – MOOG MODULAR V 2.6 – USER’S MANUAL
Page 47

4 independent key follows: apply a continuous change of a modulation parameter in relation to the scale of the
keyboard (tune the oscillators for example).
The pitch bend and modulation dials: add a modulation to the parameter(s) connected to its source.
The portamento (“Glide”): adds a frequency smoothing (portamento) between 2 notes.
The velocity: adds a modulation to the parameters, which are affected by the force with which the key is played on
the MIDI keyboard.
Aftertouch: adds a modulation to the parameters connected to its source by a variation in the force used on the keys
of the MIDI keyboard.
You can continue the experience with one of the four key follow outputs. There are two means
of connecting a key follow modulation:
The simplest and fastest is the automatic connection through the LCD displays situated
on the “drivers” oscillators and on the 3 filters. This method produces a perfect pitch for
all the scale of the keyboard.
A cable connection gives you the possibility to have finer but more complex settings.
We recommend this type of modulation for non “tuned” parameters, like an impulse
width modulation (“PWM”) on the “driver” oscillators, or simply the volume of a VCA.
The key follow settings
5.5.3 The play modes
The play modes provide a choice between the different manners of playing the MIDI keyboard.
These different settings are situated underneath the pitch bend settings.
The play mode parameters
The “mono/unison/poly” switch lets you choose: a monophonic playing mode (a single note
played at a time, chords cannot be produced in this mode. This mode corresponds to the
mode used in the original Moog Modular), a polyphonic mode (several notes can be played
at the same time to form a chord). The maximum number of voices is displayed in the
corresponding window. The unison mode is identical to the monophonic, but there are as
many voices played at the same time as the polyphonic voices.
The “legato” button, active when the synthesizer is in monophonic mode, allows the
activation of the portamento – or “glide” in English – freely on all of the notes when it is
active. If you wish to only use portamento on notes that are linked, deactivate the legato
mode.
ARTURIA – MOOG MODULAR V 2.6 – USER’S MANUAL 47
Page 48

The “retrig” button, also active when the synthesizer is in monophonic mode, allows the
systematic re-triggering of the envelopes, even if you link the notes in your playing
sequence. If, on the other hand, you don’t wish to re-trigger the envelopes when 2 notes
are linked, leave the button raised.
When the synthesizer is in polyphonic mode, 1 LCD display on the right of the switch allows
the setting of the maximum number of notes that can be played simultaneously (“poly”
screen. This setting can limit the CPU load provoked by each simultaneous note played on
your MIDI keyboard or sequencer.
To activate the portamento mode, click on the “ON” button under the portamento intensity
knob (“glide”), situated next to the 2 dials, on the right of the virtual keyboard.
The portamento settings
5.5.4 The sound design controllers
Three control surfaces allow the modulation of the sound parameters in a fast and intuitive
manner:
Eight sliders that allow control of the envelopes of the output VCA 1 and 2
Two 2D controllers that can be assigned to the parameters of your choice
Three knobs for the setting of cut-off frequency off the 3 filters.
5.5.4.1 The envelope control sliders
The two envelopes are directly linked to those of the VCAs: if you modify one of the
parameters (Attack, Decay, Sustain or Release – the 2 slope parameters are not represented
here for simplicity), the modification will automatically and identically be taken to the
synthesizer. The opposite is also true.
5.5.4.2 The 2D Pads
Now try to use one of the 2D controllers to modulate the cut-off frequency (to X) and the
resonance of filter1 (to Y).
For this, go back to the first screen to assign the 2 parameters to the 2D controller #1
outputs. The output connections can be found at the bottom of the synthesizer section (2D
pad X /Y).
48 ARTURIA – MOOG MODULAR V 2.6 – USER’S MANUAL
Page 49

The connection of modulation inputs of filter1 to the 2D controller
Return to the second screen and manipulate the 2D controller handle vertically (X) or
horizontally (Y) to hear the result of the modulation.
Using the 2D controller
To have access to these 2 modulation inputs on a low-pass resonant, it is essential to change the filter type (the
low-pass 24dB Moog does not possess a modulation input in the resonance.) Take the multimode filter and set it to
low-pass mode, if it isn’t already the case.
5.5.4.3 The filter cutoff frequency controller
On the right of the 2D Pads you will find controls for the cutoff of the 3 filters modules
These will only be active if the filters are used in the current sound (a diode above each knob
indicates if it is active)
In our (“Stereo pad”) example the first two filters are used, you will notice that the first 2
knobs are active.
Simply try to change the settings and you will immediately hear the result on your sound.
ARTURIA – MOOG MODULAR V 2.6 – USER’S MANUAL 49
Page 50

The three filter cutoff frequency controllers
This chapter has given you a look at some of the many aspects of the Moog Modular V. Now
try to go a little deeper using the rest of the documentation. You will find all of the details
concerning the modules, the sequencer and the many different modes of use of the Moog
Modular V.
50 ARTURIA – MOOG MODULAR V 2.6 – USER’S MANUAL
Page 51

6 THE INTERFACE
6.1 U
The presets memorize the Moog Modular V sounds. A preset contains all of the inter module
connections and the different controller information necessary for the recreation of an identical
sound. In the Moog Modular V, presets are classed in “banks” and “sub-banks”. Each bank
contains a certain number of sub-banks, which determine a type of sound: sub-bank “basses”,
sub-bank “sound effects”, etc. Each sub-bank contains a certain number of presets.
The Moog Modular V comes with several “factory” sound banks. It is possible to create new
“user” sound banks, each containing an unfixed number of sub-banks and presets. For
security, the “factory” settings are not directly modifiable. It is, however, possible to modify a
sound on the base of a factory preset and to record it to a “user” bank.
6.1.1 Choice of bank, sub-bank, preset
The banks, sub-banks and presets being currently used are always displayed in the synthesizer
toolbar.
SING THE PRESETS
Display of bank, sub-bank, and preset being used
To choose a preset in the current sub-bank, click on the button on the left of the current
preset, a drop-down menu appears with a list of presets from the same sub-bank. You can
choose another preset in the menu by selecting the corresponding line. Once the preset has
been chosen, you can play the new sound from your MIDI keyboard or sequencer.
Choice of preset in the same sub-bank
To choose a preset in the same main bank, but in a different sub-bank, click on the button on
the left of the current sub-bank, a drop-down menu will appear with the list of sub-banks
contained in the same main bank. Each sub-bank in the menu allows you to open a sub-menu
containing its presets. A click on a preset lets you directly choose a preset in the new subbank.
ARTURIA – MOOG MODULAR V 2.6 – USER’S MANUAL 51
Page 52

Choice of preset in another sub-bank
To choose a preset in another main bank, click on the button on the left of the name of the
current bank. A drop-down menu appears with the choice of the main banks that are available,
and the sub-lists corresponding to the sub-banks defined in each main bank and the presets
contained in each sub-bank. You can now freely choose a preset by clicking on its name.
Choice of a preset in another main bank
Once a preset has been changed (modification of a controller or connection), an asterisk
appears next to its name in the tool bar.
6.1.2 Creation of a bank, sub-bank, preset
To create a new bank of sounds, click on the button on the left of the current bank. In the
drop-down menu, select “New bank...” to create a new bank of sounds. You can then change
the name of this bank by clicking on its name in the toolbar and typing the new name.
To create a new sub-bank, again just click on the button on the left of the current sub-bank,
and select “New sub bank...”. You can also change the name of the new sub-bank.
Finally, to create a new preset, click on the button on the left of the name of the current preset
and select “New preset...”. The new preset is created using the current Moog Modular V
settings (controllers and connections). You can then work on the settings of the sound, and
save it by clicking on the save button (see the next paragraph). You can also change the new
preset name by clicking on its name.
52 ARTURIA – MOOG MODULAR V 2.6 – USER’S MANUAL
Page 53

6.1.3 Saving a user preset
To save your current settings under the current preset, click on the “Save” button on the Moog
Modular V toolbar.
“Save” button on the toolbar
If you want to save your preset under a different preset name, click on the “Save As” button in
the toolbar. A drop-down menu will appear allowing the choice of either an existing preset (in
this case, the preset contents will be replaced by the current setting), or to save your preset
as a new preset (in this case, click on “New Preset…” in the sub-bank of your choice).
“Save As” menu on the toolbar
When you are working on a factory preset, which cannot be erased, clicking on the “Save”
button will not replace the current factory setting, but will automatically open the “Save As”
function to save the current setting as a user preset.
6.1.4 Import / Export of a preset bank
It is possible to import new preset banks created for the Moog Modular V. To import a new
bank of presets, click on the preset bank import button in the toolbar:
ARTURIA – MOOG MODULAR V 2.6 – USER’S MANUAL 53
Page 54

Preset bank import button on the toolbar
When you click on this button, a dialog appears allowing the choice of Moog Modular V preset
bank files (*.amb). Choose the file that you want to import, and click on “Open”. The new
preset bank will automatically appear in the available banks.
The Moog Modular V also offers the option to export your own sound banks to save them, use
them on another machine, or share them with other users. It is possible to export a preset, a
sub-bank, or a complete bank. To export a bank, sub-bank, or current preset, click on the
export preset bank button on the toolbar:
Current preset bank export button in the toolbar
Select the type of export that you wish to perform (bank, sub-bank or preset) from the list and
a window will appear prompting you to choose a destination folder and a name for the file you
are about to export.
6.2 W
ORK PAGES
The Moog Modular V offers 2 work pages. The first contains the 4 Moog Modular V sections,
and the second holds the keyboard and shortcuts to the main controls.
6.2.1 The complete view
Complete view
54 ARTURIA – MOOG MODULAR V 2.6 – USER’S MANUAL
Page 55

The complete view contains all of the Moog Modular V sections. The full interface being too big
to be displayed on a single screen, a scroll function allows you to move to the desired section.
Simply click on the background of the synthesizer and drag the mouse up and down to move
it.
Work page selection buttons
The ‘+’ and ‘-’ buttons in the toolbar let you make the plug-in window bigger or smaller so as
to adapt to your screen and resolution. The size will automatically be saved as a plug-in
preference, and will be reused upon next launch.
6.2.2 The reduced usage page
The last shortcut button on the toolbar will take you to the reduced view.
The reduced usage page contains the keyboard and the main controls. In this mode, the Moog
Modular V is ready for immediate use of the presets of recorded sounds, with quick access to
all of the major real-time controllers. The Moog Modular V window is smaller, but the
sequencer and effects cannot be directly accessed.
Reduced usage page of the Moog Modular V
6.3 U
SING CONTROLLERS
6.3.1 Knobs
The knobs are the most numerous controllers of your Moog Modular V. They can be controlled
in different manners, which are explained in detail underneath:
6.3.1.1 Mouse control (linear)
Certain sequencers allow the knob mode of functioning to be changed with the mouse by
moving to linear mode. In linear mode, the knob can be set only by moving the mouse
vertically, without going around it. The linear mode can sometimes be simpler to use than the
rotation mode. It can, at the same time, be less precise (the precision is limited by the number
of vertical pixels contained in the screen on which the mouse movements are being
evaluated). The linear mode can be accessed in the sequencer options. In Cubase™, for
example, the choice can be accessed through the “Edit/Preferences” menu, and can be found
in the “General” tab in the dialog window.
ARTURIA – MOOG MODULAR V 2.6 – USER’S MANUAL 55
Page 56

6.3.1.2 Mouse control (higher linear precision)
The Moog Modular V allows access to a higher level of precision when adjusting the knobs with
the mouse, with the use of the right click (or [Shift]+click). In this mode, the precision of
movement is multiplied by 4 in relation to the normal linear mode. This mode can be accessed
no matter which mode has been chosen on the sequencer (circular or linear).
6.3.1.3 Mouse control (circular)
Click on the knob and turn in a circle around it to change the value of the controller. The
rotation mode gives a higher level of precision in the manipulation of controls: the farther the
mouse goes from the knob, the higher the precision of the setting.
6.3.2 Joysticks
The usage page of the Moog Modular V offers two 2 dimensional control joysticks. The outputs
can be used as a source of modulation for all of the synthesizer’s modules. The utility of these
joysticks is that they simultaneously give control of two parameters to the mouse, with great
ease. The 2 joystick outputs are visible in the conception page:
The control joystick outputs are available in the conception page
When the joysticks are connected, the names of the concerned modulation inputs appear in
the digital displays above the joysticks.
The names of the connected modulation inputs appear above the joysticks
6.3.3 Selectors
The Moog Modular V presents selectors of several types:
• The “switch” type selectors: simply click on these selectors to change their state.
“Switch” type selectors
• Rotating selectors: used like knobs (by click and drag with the mouse)
56 ARTURIA – MOOG MODULAR V 2.6 – USER’S MANUAL
Page 57

Rotating selectors
• The digital displays: They are notably used in the sequencer. We can manipulate by
click and drag (like the knobs), or by a simple click: a left click increments the value,
while a right click ([Shift]+click for Mac) decrements the value.
Digital displays
6.3.4 Keyboard
The keyboard lets us listen to the synthesizer sounds without having to use an external master
MIDI keyboard, and without programming a melody in the sequencer. Simply click on a key to
hear the corresponding sound. The keyboard also has a modulation wheel and a pitch-bend
wheel, which can be moved with the mouse.
6.3.5 MIDI control
Most of the knobs, sliders and switches on the Moog Modular V can be manipulated with
external MIDI controllers. Before anything else, make sure that the MIDI device that you wish
to use is correctly connected to the computer, and that the sequencer or the Moog Modular V
application is correctly configured to receive MIDI events coming from the device.
6.3.5.1 Learn menu
A new button and menu have been introduced in Moog Modular V 2.6.1. The button and menu
provides access to MIDI assign functionalities.
The left part of the button activates the MIDI learn mode, while the right part (small down
arrow) opens the control management menu.
“Learn” Menu
“Learn Mode” Button
The “Learn” Menu is composed of 2 sections:
First section provides
• “New Config” creates a new control set
ARTURIA – MOOG MODULAR V 2.6 – USER’S MANUAL 57
Page 58

• “Save Config As” saves current configuration to a new one
• “Delete Current Config” removes current configuration from list
The second section contains the list of existing configurations
• The checked one is the currently selected MIDI map
• Click on a configuration to load it
6.3.5.2 Assigning MIDI controls
In order to start assigning MIDI controls, click the “Midi Learn” button (left part). The button
remains highlighted to indicate that the “learn mode” is ON.
Click on a controller of the GUI to open the MIDI assignment popup.
Assigned
Plug-in parameter
name
or not
Control
number
MIDI assignation popup
Learn assignment
The fastest and easiest way to assign a control is to move the fader, knob or button for it to be
recognized by Moog Modular V.
Manual assignment
It is also possible to change the assigned MIDI control number by clicking on Control#xx and
select another value.
Support for NRPN
In addition to MIDI Control Change messages, NRPNs are supported: either send NRPN MIDI
control messages to Moog Modular V, or check NRPN, then select LSB# and MSB# numbers:
MIDI assignation popup, NRPN activated
Remove assignment
Assignments can be removed by clicking the “Clear” button. The message “Unassigned” will
then be displayed.
Continue selecting the parameters you want to map to create a complete configuration.
58 ARTURIA – MOOG MODULAR V 2.6 – USER’S MANUAL
Page 59

6.3.5.3 Manage configurations
New in Moog Modular V 2.6: the possibility to maintain multiple configurations.
Default configuration
By default, Moog Modular V loads the configuration for Arturia Analog Experience keyboards.
Select one configuration
A configuration is loaded by clicking the corresponding entry in bottom part of “Learn menu”.
Create a new configuration
A new configuration can be created by clicking on the “Learn menu”, “New Config” entry. This
will open a popup: enter the name you want to call your configuration and click on the “SAVE”
button. A new entry for your configuration now exists in the list of available configurations.
You may now fill in this initially empty configuration by performing the assignment operations
described in the previous section.
Copy a configuration
It is possible to copy a configuration by loading it and then clicking on “Save Config As”.
A popup opens: enter the name of your configuration. A new entry for your configuration now
exists in the list of available configurations.
Remove a configuration
It is possible to remove a configuration by first loading it and then clicking on “Delete Current
Config”.
6.3.5.4 Minimum and maximum ranges
For each assignment, a minimum range value and a maximum range value can be set. This
allows you to limit how much the controller will affect the parameter on Moog Modular V.
The assigned parameter will have the configured minimum value when the controller
will be at its lowest position
The assigned parameter will only reach the configured maximum value when the
controller will be at its highest position
You can invert (Negative Slope) the Min and Max so that parameter will have minimum
value when control has the highest value, and parameter will have maximum value
when control has the lowest value
ARTURIA – MOOG MODULAR V 2.6 – USER’S MANUAL 59
Page 60

Input
MAX
MIN
parameter
values
Inp
MAX
MIN
parameter
values
Input
MAX
MIN
Output
parameter
values
control
values
DEFAULT
Output
Output
ut
POSITIVE SLOPE
control
values
NEGATIVE SLOPE
control
values
parameter_value = MIN + (MAX – MIN) * control_value
6.3.5.5 Multiple assigned parameters
It is possible to assign multiple parameters to a single control. This allows you to change many
parameters with one fader or knob.
Activate “Learn” mode, select a parameter (GUI control)
Tweak control to assign it (optionally setup minimum and maximum)
Select a second parameter
And tweak the same control
Deactivate “Learn” mode
Tweaking assigned control should modify both parameters with regards to assignation setup
(Min, Max).
6.3.5.6 Tricks
The Oscillator 1 to 9 tune controls have two parameters: FINE and COARSE tune. If
“Learn” mode is ON, clicking on control provides access to the assignation of the FINE
parameter, shift+clicking on control provides access to assignation of the COARSE
parameter.
60 ARTURIA – MOOG MODULAR V 2.6 – USER’S MANUAL
Page 61

6.4 U
The connection of different modules is the base work of creating a new patch. The Moog
Modular V owes its creative possibilities in no small part to the innumerable connections
possible between modules. On the original system, all of the connections were made with
cables of two types:
Audio and modulation cables (which allow for example the connection of an oscillator
sawtooth signal to a filter input).
The trigger cables (which allow for example the connection of the keyboard to auxiliary
envelopes). The trigger cables transport trigger information for envelopes or the sequencer
for example.
In the Moog Modular V, for ergonomics and graphical readability, only part of the connections
is displayed on the screen in cable form. The other connections are made either by menus, or
with digital displays on which we can click.
The different types of connections we can use on the Moog Modular V are as follows:
Audio connections / modulation connections: these connections are made with cables that are
visible on the screen.
Trigger connections: these connections are only done through menus.
Synchronization connections: these connections are only done through menus.
Key follow or sequencer connections: these connections are available and can be modified
through visible digital displays on the filters and drivers modules.
SING CABLES
6.4.1 Audio and modulation connections
The audio connections allow, for example, the routing of a sound to the VCA/mixers or to the
inputs of different filters. The modulation connections allow, for example, routing of an LFO
output or an envelope generator to an oscillator PWM or VCA modulation input. These audio
and modulation signals are totally compatible, the only difference being that the audio signals
are “audible” if you connect them directly to an output VCA, while the modulation signals are
generally not audible (as the frequency is too low for the human ear). Modulation signals are
thus generally used to program “slow” variations on certain synthesis parameters, like the cutoff frequency of a filter for example.
The audio output and input connectors, and the modulation output connectors are identical in
the graphical interface:
Audio input or output connectors, or modulation output connectors
The modulation input connectors are graphically distinguished from the other connectors as
they include an extra function: a modulation level setting, described later in this paragraph.
ARTURIA – MOOG MODULAR V 2.6 – USER’S MANUAL 61
Page 62

Modulation input connectors
To connect a modules output to the input of another module, click on the output and drag it to
the target input while holding down the mouse button. When you are above the input, the
connector lights up. In this case, you just need to release the mouse button to link a cable
between the selected output and input.
Creating a new cable and finding an appropriate input, by click and drag
Another means is to right click (or [Shift]+click for Mac) on the input or output of a module. In
this case, a menu appears with a list of possible connection points for this output/input. It can
happen that the input/output is already connected to certain modules, and in this case, the
already selected connection points appear in the menu. Simply select one of the connection
points in the “Connect to” menu to create a connection. It is also possible to delete all of the
connections by choosing the “Remove connections” option or delete one of the connections by
clicking on it in the menu.
Input/output connection menu appears after a right click (or [Shift]+click)
The module inputs can only be connected to one output connector. On the other hand, each output connector can
be connected to any number of input connectors, which allows, for example, the use of the same modulation signal to
modify several synthesis settings.
62 ARTURIA – MOOG MODULAR V 2.6 – USER’S MANUAL
Page 63

6.4.2 Modifying a connection
To disconnect the end of a cable at input connector level, and reconnect it to another input,
click on the end of the cable concerned and hold down the mouse button. You can now drag
the end of the cable to another input with the mouse and release the button.
To delete a connection, you can use the menu available with a right click (or [Shift]+click).
Another method is to click on the cable to select it, upon which the cable will appear in a
lighter color to show that it is selected, and press the “DEL” button on the keyboard to delete
the connection.
You will have a lot of trouble clicking on a cable if the “Move away cables” option is active. In this mode, the cables
will automatically flee the mouse pointer. To avoid this, deactivate this option before trying to select a cable (see
1.4.4.3)
6.4.3 Modulation level setting
As explained above, the modulation input connectors have an interesting feature: they allow
the setting of a modulation level (from –100% to +100%) directly at connector level, and so
without passing by a VCA which is normally needed to set the amplitude of the modulation
signal. When the modulation input connector is connected, click on one of the edges of the nut
and drag the mouse up or down to change the quantity of modulation.
Setting the modulation quantity
By using a right click (or [Shift]+click) instead of the left click, you will obtain a higher
precision.
If you click on the center of a connector, you will select the cable end to change the connection. To access the
modulation setting, make sure you click on the connector device (the nut). In the same manner, if you right click (or
[Shift]+click) on the center of the connector, you will open the connection menu instead of accessing the modulation
quantity setting.
6.4.4 Cable display options
6.4.4.1 Cable display filter
The Moog Modular V displays the cables in several colors depending on their type. The cable
type is determined in relation to the input to which it is connected. Here is the list or colors
and the corresponding cable type:
• Red cable : audio cable coming from an oscillator.
• Yellow cable : audio cable coming from a filter.
• Green cable : modulation cable coming from an LFO or auxiliary envelope.
• Blue cable : cable coming from a VCA / Mixer.
• White cable : other cables.
ARTURIA – MOOG MODULAR V 2.6 – USER’S MANUAL 63
Page 64

The cable display filter allows the display of a section of existing cables in a given patch,
depending on their type. The cable display filter is controlled by the buttons on the Moog
Modular V toolbar:
The cable display filter menu
When a button is selected (pressed), the cables of the corresponding color are displayed. If the
“ALL” option is selected, all of the cables are visible despite the state of the color filters.
6.4.4.2 Cable tension
It is possible to set the Moog Modular V cable “tension” by using the knob in the toolbar of the
synthesizer. Modifying the cable tension can help you to discover a region on the synthesizer
that had previously been hidden by cables, without using the cable display filter.
Setting cable tension
6.4.4.3 Spreading the cables
Visualizing the different cables existing between modules is very useful for the creation of a
patch on the Moog Modular V. At the same time, cables can sometimes hide access to useful
settings on different modules. So that you are not bothered by this, it can be useful to activate
the “Move away cables” mode. In this mode, the cables will automatically move when the
mouse comes across them, leaving a clear path for the modification or visualization of a knob.
Don’t forget to deactivate this mode when you want to select a cable with the mouse to delete
it.
6.4.5 Trigger connections
The trigger signals transport trigger information to the envelopes of the sequencer etc.
Connecting the keyboard trigger output to an envelope, for example, allows the triggering of
the envelope signal each time a key is pressed on the keyboard.
The only trigger connections visible on the screen are trigger inputs. The output connectors are
not displayed, their presence is implicit. When we click on a trigger input, the following menu
appears:
64 ARTURIA – MOOG MODULAR V 2.6 – USER’S MANUAL
Page 65

Trigger type input connection menu
This menu tells us to which module a trigger input is connected, and allows us to create a new
connection or delete an existing one. When a trigger input is connected, its graphical aspect
changes, and this tells us if a module is connected without checking the menu:
Trigger input disconnected – Trigger input connected
6.4.6 Synchronization connections
Synchronization connections are used to activate the synchronization of one of the nine
oscillators available to another oscillator.
Synchronization input
The same as for the trigger connectors, here, only the input connectors are visible, the
existence of outputs is implicit, and the connections can only be made through the menus:
Synchronization input connection
6.4.7 Key follow or sequencer connections
The Moog Modular V oscillators generate periodic signals in which the frequency varies in
function with the note played on the keyboard. It is this difference in frequency, which allows
us to recognize two different notes. To determine the ideal frequency related to a note played
on the keyboard, the oscillator refers to a key follow. The function of the key follow is to
ARTURIA – MOOG MODULAR V 2.6 – USER’S MANUAL 65
Page 66

convert a key on the keyboard to a Hertz frequency value that can be used by the oscillator.
The Moog Modular V has four different key follows. The default setting for each key follow is
that of the Western tempered (scale of twelve equal semi-tones). It is possible to set the key
follows differently to create other types of scales (scale of quarter tones, tones, etc.). The key
follows can be edited in the keyboard page of the synthesizer. At the level of each driver
module and each filter, a digital display allows the selection of one of the four available key
follows, by a simple click, as well as one of the 4 sequencer follows.
Key follow digital display on a driver module or filter module
The sequencer follow allows the easy creation of melodies with the sequencer, staying in the
tempered intervals (semi-tones), which is more practical than using a sequencer output as a
continuous oscillator pitch modulation, often difficult to tune.
The following table explains the signification of the different values displayed:
66 ARTURIA – MOOG MODULAR V 2.6 – USER’S MANUAL
Page 67

Key follow
, or trigger from the
oscillator works
lyphonic track
Driver Oscillator Filter
K1 Key follow No 1 K1 Key follow No 1
K2 Key follow No 2 K2 Key follow No 2
K3 Key follow No 3 K3 Key follow No 3
K4 Key follow No 4 K4 Key follow No 4
No No key follow
LFO
No key follow
keyboard; the
permanently on a po
(LFO mode)
No
No key follow
Sequencer follow
Driver Oscillator Filter
S1 Follow of line 1 of the sequencer S1 Follow of line 1 of the sequencer
S2 Follow of line 2 of the sequencer S2 Follow of line 2 of the sequencer
S3 Follow of line 3 of the sequencer S3 Follow of line 3 of the sequencer
S4 Follow of line 4 of the sequencer S4 Follow of line 4 of the sequencer
No No sequencer follow No No sequencer follow
ARTURIA – MOOG MODULAR V 2.6 – USER’S MANUAL 67
Page 68

7 THE MODULES
Oscillators
The Moog Modular V can be broken down into 4 parts, from top to bottom, a section containing
sequencer and effects, a section dedicated to the sound programming, a small extension
where the external cables are regrouped (velocity, after-touch, external signals...) and finally a
section containing the keyboard and different play settings.
7.1 P
7.1.1 Description
The programming section gathers all of the modules, which need to be connected by cables. It
is on this screen that the different connections (Patch) needed for the programming of the
sound will be made.
It is sometimes necessary to connect a module in the programming section to a module in the
sequencer section. To simplify connections between the 2 screens, the inputs and outputs of
the sequencer section are grouped on a small extension under the sound programming
section.
The sound programming section contains:
• Nine oscillators, grouped in threes, which can also be used as modulation source.
• Two low frequency oscillators dedicated to modulations.
• Three filters.
• Six envelopes dedicated to modulations.
• Two envelopes dedicated to output amplifiers.
• A dual trigger delay.
• A noise generator and the associated filters.
• 1 ring modulator
• 4 envelope followers
• 2 sample and holds
• 1 frequency translators
• 1 formant filter
• A set of amplifiers, which can be grouped to form mixers.
The number of spaces at the upper part of the section being inferior to the number of modules,
the choice is made through a menu. It is thus possible to organize them at your convenience.
ROGRAMMING SECTION
7.1.2 Oscillators
The oscillators, nine in total are regrouped in threes. Each group has a 921A type controller
and three 921B type slave oscillators.
Controller
A group of oscillators
68 ARTURIA – MOOG MODULAR V 2.6 – USER’S MANUAL
Page 69

The controller is for the management of the impulse frequency and width of the 3 slave
Keyboard follow
oscillators. It can be used either statically with the knobs or thanks to the modulation inputs,
which can be connected to the output of any module (envelope, oscillator, modulation dial…).
The slave oscillators can equally be tuned and modulated separately with a knob and a range
selector. These oscillators provide four waveforms that can be used simultaneously.
This method of organizing the oscillators, typical of Moog modular synthesizers, helps to
rapidly obtain a very rich tone. The tree oscillators tuned separately and waveforms mixed give
very dense tones. This tone can then easily be modulated with the controller. Adding a vibrato
effect on this sonority is immediate using a modulation input of the controller. This would not
be the case if each of the modulation inputs of the slave oscillators had to be set.
7.1.2.1 Controller 921A
Frequency
State
Impulse width
PWM Inputs FM Inputs
Sequencer choice
Oscillator 921A
Frequency General tuning of the 3 slave oscillators
State General tuning mode choice (by 1/2 tone, by octave)
Impulse width Signal impulse width “Sawtooth”, “Square”, “Triangle”
FM Inputs Frequency modulation input connection jacks
WPM Inputs Pulse width modulation connection jacks
Keyboard follow Keyboard follows choice tuning the master oscillator (off, no, follow 1,
2, 3 or 4).
Sequencer Choice Choice of the sequencer output tuning the master oscillator (no
sequencer, sequencer 1, 2, 3 or 4).
The general tuning of the 3 slave oscillators is done with the “Frequency” knob. Depending on
the position of the “State” interrupter, the range of the knob is +/- an octave by semitone or
+/- six octaves par fifth and quarter.
The impulse width affected to the “sawtooth”, “triangle” and “square” signals of the 3 slave
oscillators is modified with the “Width” knob.
Three frequency modulation inputs and 2 impulse width modulation inputs allow the control of
these parameters thanks to the outputs of the other modules.
When one of these inputs is connected, a click on the Jack will modify the amplitude of the
modulation. The Jack knob functions like a rotating dial where the position for inactivity (no
modulation) is at the center. The modulation can thus be positive (button turned to the right)
or negative (button turned to the left).
ARTURIA – MOOG MODULAR V 2.6 – USER’S MANUAL 69
Page 70

Sync
hronization
Audio outputs of the
The first two frequency modulation inputs work in an exponential mode, while the third, “Lin” works in a linear
mode.
Connected directly to a generator (envelope, oscillator, sequencer…), the maximum amplitude
of the modulation is of +/- 4 octaves. When it is necessary to have a stronger modulation, an
amplifier module must amplify the signal of the generator.
A certain number of internal connections simplify the use of the keyboard follow, sequencer,
portamento and pitch bend.
To avoid having to manage the tuning of the keyboard follow with the amplitude of the
modulation input, with a visualizer we can choose which keyboard follow (from 1 to 4) is to be
used. This keyboard follow is directly configured to tune the oscillator in function to the note
played.
The functioning is the same for the sequencer outputs (1 to 4) controlling the tuning of this
group of oscillators. In the “no” follow position, the oscillator is set to the note C3, irrespective
of the keyboard notes. In the same manner, when set to the “no” sequencer position, this
group of oscillators is disconnected from the sequencer output.
A keyboard follow can of course be connected to modulation input. In that way, the pitch of
each notes can be adjust very fine. We can then simulate the non-linearity of analog keyboard.
The “LFO” position of the display indicates that the oscillator group is no longer dependant of
the keyboard. That is to say, it permanently functions on a monophonic voice. This function is
especially useful when we want to use this oscillator group as source of low frequency
modulation.
Furthermore, each of the keyboard follows can activate the response of oscillators and filters to
portamento and pitch bend.
7.1.2.2 Slave oscillator 921B
Synchro input
FM Inputs
Frequency
Range
4 wave forms
Oscillator 921B
Frequency Sets the frequency of the oscillator. By left click, setting by semi-tone, by
Range Setting of the oscillator range. (low, 32, 16, 8, 4, 2)
Synchronization Synchronization interrupter Soft/Hard
Synchro input Menu to select the synchronization oscillator
FM Inputs Frequency modulation input connection jacks
Outputs Connection jacks for the four oscillator outputs
70 ARTURIA – MOOG MODULAR V 2.6 – USER’S MANUAL
right click fine setting.
Page 71

The 921B type slave oscillators possess four outputs that can be used simultaneously:
sawtooth, sinusoid, triangle, square.
There is also an output generating a trigger signal synchronous with the square signal and with
an identical width, which lets us trigger envelopes and sequencer in a cyclic manner. This
output is visible only visible at trigger input menu level.
Sawtooth Square
Triangle Sinusoid
These oscillators are independently tuned with the “frequency” knob. This button possesses a
coarse +/- an octave per semi-tone setting with a left click and a fine tune setting +/- a semitone with a right click.
The “range” selector allows the setting of oscillator range on 6 positions: Low, 32, 16, 8, 4 and
2. With the Low position the oscillator can be used at a very low frequency (on a cycle of more
than 6 minutes). The other positions set the oscillator to octaves 1,2,3,4 and 5. That is to say
the note C3 is played respectively on C1, C2, C3, C4 and C5.
At the Low position the oscillators perform modulations using lower calculation power than the other positions.
Two modulation inputs allow the separate setting of each of the oscillators in the group. They
are very useful for modifying the tuning between oscillators thanks to a low frequency
oscillator, a keyboard follow or other modulation source.
Like the controller modulation inputs, they can be connected to the output of another module.
Connected to an oscillator functioning in the same audible spectrum, they can obtain sonorities
with FM characteristics.
A synchronization input and the associated interrupter allow the synchronization of the slave
oscillator on one of the other oscillators. In this case, the synchronizing oscillator will be heard
while the synchronized oscillator will improve the tone.
In the low position, the synchronization is said to be “hard”, which is to say that the
synchronized oscillator will restart a cycle for every cycle on the synchronizing oscillator.
In the high position, the synchronization is said to be “soft”, and in this case, the synchronized
oscillator will only restart its cycle if it is coming to the end of the cycle when the synchronizing
oscillator begins its cycle.
ARTURIA – MOOG MODULAR V 2.6 – USER’S MANUAL 71
Page 72

A connected oscillator is active and consumes calculation power. It is therefore necessary to verify that the
connected oscillators are in use. Similarly, a group of oscillators disconnected from the keyboard by the “keyb”
interrupter is permanently active.
7.1.3 Filters
The Moog Modular V possesses 3 filter modules. It is possible to choose one of four types of
filter for each of the modules: a low-pass 24 dB/octave (type 904A), a high-pass 24dB/octave
(type 904B), a band-cut and band-pass 24 dB/octave (type 904C) and finally a multi-mode 12
dB/octave filter. Clicking on the name of the module and selecting the filter from the menu
proposed does the type change.
All of these filters possess internal connections to simplify the use of keyboard follows,
portamento, pitch bend and sequencer.
To avoid having to manage the tuning of the keyboard follow with the amplitude of the
modulation input, with a display we can choose if a keyboard follow is to be used and which
one. This keyboard follow is done to get a correct pitch from the keyboard. Depending on the
configuration of the chosen keyboard follow, the portamento and the pitch bend will be applied
or not to this filter.
The functioning is the same for the sequencer outputs (1 to 4) controlling the tuning of the
cut-off frequency of this filter. In the “no” follow position, the filter is independent of the notes
played on the keyboard. In the same manner, set to the “no” sequencer position, the filter is
disconnected from the sequencer output.
It is still possible to connect a keyboard follow or a sequencer output to a modulation input
obtaining a tuning as fine as necessary.
7.1.3.1 Low pass 24 dB/octave filter (904A)
Audio Input
Keyboard follow
Low pass filter
Frequency
Resonance
Audio Output
Modulation inputs
Sequencer choice
Frequency Sets the filter cut-off frequency
Resonance Sets the filter resonance
Audio Output Filter output connection jack
Audio Input Filter input connection jack
Modulation inputs Frequency modulation input connection jacks
Keyboard follow Keyboard follow choice tuning the filter (no follow, follow 1, 2, 3 or 4).
Sequencer choice Choice of the sequencer output tuning the filter (no sequencer,
sequencer 1, 2, 3 or 4).
72 ARTURIA – MOOG MODULAR V 2.6 – USER’S MANUAL
Page 73

The low-pass 24 dB/octave filter is typical of Moog synthesizers. It has a setting for the cut-off
frequency and a setting for the resonance. Only connecting the output of any module to one of
the 3 modulation inputs can dynamically modulate the cut-off frequency.
Like all of the modulation inputs, once connected, turning the dial of the jack with a right click
sets its amplitude. Receiving a modulation directly from the output of a generator (envelope,
oscillator, and sequencer), the maximum modulation amplitude is of +/- 9 octaves. When it is
necessary to have a stronger modulation, an amplifier module must amplify the signal of the
generator.
The following image represents the spectrum of a low-pass resonant filter with a cut-off
resonance of 500 Hz.
Low-pass 24 dB/octave filter
7.1.3.2 High-pass 24 dB/octave filter (904B)
Frequency
Audio Output Audio Input
Modulation inputs
High-pass filter
Frequency Sets the filter cut-off frequency
Audio Output Filter output connection jack
Audio Input Filter input connection jack
Modulation inputs Frequency modulation input connection jacks
Keyboard Follow Keyboard follow choice tuning the filter (no follow, follow 1,2,3 or 4).
Sequencer Choice Choice of the sequencer output tuning the filter (no sequencer,
sequencer 1, 2, 3 or 4).
ARTURIA – MOOG MODULAR V 2.6 – USER’S MANUAL 73
Page 74

Unlike the low-pass 904A filter, the high-pass 904B filter does not possess resonance. The cut-
Resonance
off frequency can be set with the rotating “frequency” dial or by the 3 modulation inputs which
function in the same manner as the inputs of the low-pass.
The following image represents the spectrum of a high-pass filter with a cut-off frequency of
500 Hz.
High-pass 24 dB/octave filter
7.1.3.3 Band-pass 24 dB/octave filter (904C)
Audio Input
Type
Frequency
Audio Output
FM Inputs Mod. Width input
Band-pass filter
Frequency Sets the filter cut-off frequency
Resonance Sets the bandwidth of the filter
Type Choice of filter type (band reject or band pass)
Audio Output Filter output connection jack
Audio Input Filter input connection jack
FM Inputs Frequency modulation input jacks
Mod. Width input Bandwidth modulation input connection jack
Keyboard follow Keyboard follows choice tuning the filter (no follow, follow 1, 2, 3 or 4).
Sequencer Choice Choice of the sequencer output tuning the filter (no sequencer,
sequencer 1, 2, 3 or 4).
The 24dB band pass filter resembles the Moog 904C filter, but the difference from it is that
while the Moog 904C is a pairing of the 2 associated low-pass and high-pass filters, this one is
independent of the 2 other filters. The central frequency can be set with the rotating
“Frequency” button, the bandwidth, of 1/3 octave to 3 octaves with the “Resonance” knob. The
74 ARTURIA – MOOG MODULAR V 2.6 – USER’S MANUAL
Page 75

first modulation input allows the dynamic modification of the bandwidth, the 2 others, the
central frequency.
A “type” selector provides a choice of filtering, band pass or band reject.
The following images represent the spectrum of the band-pass and band-reject filters where
the central frequency is 500 Hz.
Band-pass 24 dB/octave filter Band reject 24 dB/octave filter
7.1.3.4 Multi-mode 12 dB/octave filter
Resonance
Audio Input
Type
Frequency
Gain
Audio Output
ModRes Input
FM Inputs
Multimode 12 dB/octave filter
Type Choice of filter type
Frequency Sets the filter cut-off frequency
Resonance Sets the resonance of the filter
Gain Sets the gain for bell, shelf High and Low.
Audio Output Filter output connection jack
Audio Input Filter input connection jack
FM Inputs Frequency modulation input jacks
ModRes Input Resonance modulation input connection jack
Keyboard follow Keyboard follow choice tuning the filter (no follow, follow 1, 2, 3 or 4).
Sequencer Choice Choice of the sequencer output tuning the filter (no sequencer,
sequencer 1, 2, 3 or 4).
ARTURIA – MOOG MODULAR V 2.6 – USER’S MANUAL 75
Page 76

The multi-mode 12 dB/octave filter has different types of filtering that the original Moog
modular synthesizers could not offer. The selector holds six types if filtering: low-pass, bandpass, notch, high-pass, low-shelf, high-shelf, bell.
The 3 knobs “Frequency”, “Resonance”, and “Gain” respectively set the cut-off frequency, the
resonance, and the gain (used only for the shelf and bell)
Three modulation inputs allow the dynamic modification of the cut-off frequency.
The following images represent the different spectrum of the different filters, the cut-off
frequency is constant at 500 Hz.
Low-pass 12 dB/octave High-pass 12 dB/octave
Notch 12 dB/octave Bell 12 dB/octave
Low-shelf 12 dB/octave High-shelf 12 dB/octave
76 ARTURIA – MOOG MODULAR V 2.6 – USER’S MANUAL
Page 77

7.1.4 Modulation envelopes
D
S
A
R
Trigg
On
Attack (A)
Decay (D)
Release (R)
Sustain (S)
Input Trigg
Output
Envelope
Attack Sets the attack time (Attack)
Decay Sets the decay time
Release Sets the release time
Sustain Sets the sustain level
Input Trigg Trigger signal input connection
Output Envelope output signal
Six in total, the modulation envelopes make the sonority evolve in function with time. An
envelope possesses four sequentially following temporal periods: attack, decay, sustain and
release. When the input trigger goes from an inactive to an active state, the envelope launches
its sequences “attack” followed by “decay” and remains in the “sustain” state as long as the
input trigger remains active. When it goes to an inactive state, the envelope begins the
“release” sequence. If the input trigger becomes inactive before the first 2 sequences have
finished, the envelope goes directly to the “release” phase.
The input trigger can be connected to the output trigger coming from the keyboard, the trigger
delay module, the oscillators trigger output, or from the sequencer.
The time of the different periods are controlled by the “Attack”, “Decay” and “Release” knobs.
The “Sustain” knob is to set the level of the envelope output during the sustain period.
Representation of the envelope
ARTURIA – MOOG MODULAR V 2.6 – USER’S MANUAL 77
Page 78

7.1.5 Output amplifiers (VCA)
Slope Time
Input Trigg
Attack
Decay
Release
Sustain
Slope Level
Mod Output
Soft Clip
AM Input
Panoramic
Audio Input
Gain
Output envelope
Attack Sets the attack time
Decay Sets the decay time
Release Sets the release time (release)
Sustain Sets the sustain level
Slope Time Sets the intermediate decay time
Slope Level Sets the intermediate decay level
Input Trigg Input trigger signal connection jack
Envelope out Envelope out connection jack
Audio Input VCA input connection jack
Panoramic Sets the position in stereo space
Soft Clip Use of gentle saturation
AM Input Audio modulation Input jack
There are 2 output amplifiers, each possessing its own envelope. These amplifiers are
internally linked to a panoramic manager, which allows, through the “panoramic” knob, to
position the output in stereo space.
These amplifiers are the last step in the generation of a sound. The associated envelope
sculpts the temporal form of the signal at the end of the sequence after the application of all of
the other modulations. Unlike the modulation envelopes, it has an extra period between the
“attack” and “decay” sequences, called “slope”. The time and level can be set for this period
and allows the envelope to move from the high point after attack to slope before moving to the
decay:
78 ARTURIA – MOOG MODULAR V 2.6 – USER’S MANUAL
Page 79

D
S
A
R
Sn
St
On Trigg
Representation of the output VCA envelope
The output amplifier internally connected to this envelope has volume “gain” and amplitude
input modulation settings.
The input trigger can be connected to the output trigger coming from the keyboard, the trigger
delay module, the oscillators or LFO trigger output, or from the sequencer.
Each of the two amplifiers possesses a trigger output, which is activated when the signal level
is cancelled. This output can be very useful for stopping the sequencer for example.
A jack allows the connection of the output of the associated envelope to other modulation
inputs.
A button applies the simulation of the current regulation present in the original Moog amplifiers
(soft clipping).
Soft saturation is heavy on CPU calculation.
7.1.6 Low frequency oscillators (LFO)
Mode
Frequency
FM Input
Delay
Width
Fade in
PWM Input
Outputs
Low frequency oscillator
ARTURIA – MOOG MODULAR V 2.6 – USER’S MANUAL 79
Page 80

Audio Input
Frequency Sets the oscillation frequency
Delay Delay time setting after a keyboard trigger
Mode Choice of frequency setting: low, mid, synchronized on the MIDI tempo
Fade in Sets the time constant for the increase of modulation
Width Sets the impulse width
PWM Input Input connection for the impulse width modulation
FM Input Frequency modulation input connection
Outputs Connection jacks for the different outputs
The use of a low frequency generator as a modulation source is typical. It allows the gentle
evolution of the tone of a sound or to simulate vibrato and tremolo.
Even though the oscillators can be used at very low frequencies, there are 2 modules
specifically for this purpose, which allow the oscillators to be kept for use in the audible
domain.
These oscillators possess five outputs that can be used simultaneously: sawtooth, sinusoid,
triangle, square, random.
The oscillation frequency can be statically set with the rotating “frequency” button dynamically
with the associated modulation input. The impulse width can also be statically set with the
“width” button and by its modulation input.
The “mode” interrupter synchronizes the oscillation frequency with the tempo of the host
sequencer. In this mode, the rotating button chooses a frequency depending on the
application’s tempo (multiple or sub multiple).
Two other buttons are affecting a delay and a fade in at the output of this generator. Initialized
on a keyboard trigger, the generator output will only begin to oscillate when the internal
counter reaches a time value set with the “delay” knob. This oscillation wills gently increase
following the time constant set with the rotating “fade in”.
There is also an output generating a trigger signal synchronous with the square signal and
with an identical width, which lets us trigger envelopes and sequencer in a cyclic manner. This
output is visible only visible at trigger input menu level.
7.1.7 Controlled amplifiers / Mixers
AM Input
Controlled amplifier (VCA)
Audio Input Amplifier input connection jack
Audio Output Amplifier output connection jack
AM Input Amplitude modulation input connection jack
Volume Input gain setting
Soft Clip Use of soft clipping
Inverse Request inversion of the input signal
Link Next amplifier mixing
Link
Soft Clip
Inverse
Volume
Audio Output
80 ARTURIA – MOOG MODULAR V 2.6 – USER’S MANUAL
Page 81

There are 16 independent amplifiers. Each has its own volume setting with the rotating “level”
button and its amplitude modulation input.
These amplifiers can be regrouped to form mixers. To group 2 amplifiers, just click on the
“Link” button separating them.
When 2 amplifiers form a group, the output signal of the first corresponds to the sum of their
collective outputs, whereas the output of the second remains identical to the signal before
grouping.
To restore their independence, just click on the “Link” button.
It is possible to add as many amplifiers as necessary. In this case it is still the output of the
first amplifier, which will have the signal corresponding to the sum of all of the amplifiers of
the group, the others retaining their independence.
Thanks to this method, with 16 amplifiers to begin with, it is possible to create a large range of
mixing while keeping a few amplifiers available for modulation.
We can, for example, form a group of the first six amplifiers to mix the first six oscillators,
then a group with the next 3 to mix the 3 last oscillators, and finally a group with the next 2 to
mix the outputs of 2 filters which will respectively treat the output of the first amplifier and the
output of the seventh. There are 5 remaining amplifiers for modulation or other mixes.
Each amplifier possesses a current limiting function allowing a soft clipping. This function is
activated with the “clip” button. The “inv” button lets you invert the signal, as input to the
corresponding amplifier..
The four right VCA are modulated with a linear function, on the contrary, the other are
modulated with a exponential function.
7.1.8 Trigger delay
Trigg 1 Input
Trigg2 Input
Time1
Mode
Time2
Trigger delay
Time 1 Sets the time for the first delay
Trigg 1 Input Choice of trigger input for the first delay
Mode Choice of mode (independent, parallel, series)
Time 2 Sets the time for the second delay
Trigg 2 Input Choice of trigger input for the second delay
ARTURIA – MOOG MODULAR V 2.6 – USER’S MANUAL 81
Page 82

A trigger delay module manages the signals used for triggering envelopes and sequencer.
There are 2 delays, which can function independently, in series or parallel following the setting
on the “mode” selector.
Set to the “off” position, the 2 delays are independent. When their trigger input moves to an
active state, their internal counter is initialized. The output will move to an active state when
their internal counter reaches the value specified by the rotating “time” button. When the
trigger input returns to an inactive state, the output immediately goes not an inactive state.
Set to the “parallel” position, the 2 internal counters start at the same time when the trigger
input of the first delay goes to an active state. Each manages its output in function with its
time setting.
In the series position, the second counter only begins when the output of the first delay moves
to an active state.
Independent mode
Parallel mode
82 ARTURIA – MOOG MODULAR V 2.6 – USER’S MANUAL
Page 83

7.1.9 Noise generator
Serial mode
Low Pass Frequency
Low Pass Input
Low Pass Output
High Pass Frequency
High Pass Input
High Pass Output
White Noise
Pink Noise
Noise generator
Low Pass Frequency Sets the low-pass filter cut-off frequency
Low Pass Input Low Pass filter input connection jack
Low Pass Output Low Pass filter output connection jack
Low Pass Frequency Sets the Low Pass filter cut-off frequency
High-pass Output High-pass filter output connection jack
High-pass Input High-pass filter input connection jack
White Noise White noise output connection jack
Pink Noise Pink noise output connection jack
The noise generator allows the simultaneous management of a white and pink noise. It also
possesses a low-pass and a high-pass of the first order (6 dB/octave) in which the cut-off
frequency can be statically set with the “frequency” knobs.
ARTURIA – MOOG MODULAR V 2.6 – USER’S MANUAL 83
Page 84

White noise spectrum Pink noise spectrum
Clock Rate
Trigg selection
Trigg input
Output
Input
Whether it is for white or pink noise, the two output jacks correspond to two independent noise
generators.
7.1.10 Sample and hold
Glide
Sample and hold
Clock Rate Sets the internal clock frequency
Trigg Input Menu selecting the choice of external input used to trigger the sampling
Trigg Selection Choice source of external trigger for sampling
Glide Sets output glide
Output Output connection jack
Input Input connection jack
This module lets you sample the signal connected as input. The values are taken for every
trigger where the source can be external (trigger source connected to the Trigg input) or
internal, clock where the frequency is set with the “Clock Rate” dial. The choice is made with
the “Trig selection” interrupter.
The values sampled are presented as output, with more or less glide, set with the “Glide” dial.
It is this module, when sampling noise, which is used to product random modulations.
84 ARTURIA – MOOG MODULAR V 2.6 – USER’S MANUAL
Page 85

7.1.11 Envelope follower
Time choice
Threshold
Time
Follow in
Follow out
Comparator in
Envelope follower
Time choice Selection of follow mode
Time Sets the constant time of the level measurement
Threshold Sets the threshold of comparator
Follower out Envelope follow output connection jack
Follower in Envelope follow input connection jack
Comparator in Comparator input connection jack
This module possesses two functions. The first generates an envelope from the audio signal
connected to “Follower in”. The “Time” setting determines the detail for the envelope follower.
The lower the value, the more the input signal variations will be respected. This setting relies
on the “Time Choice” which can be “short” or “long”. In the first case, the analysis of the input
signal will be very precise, generating a signal with fast variation. The calculation power
required is thus heavier than the second position, where the output signal will have slow
variation.
This module also allows you to generate a trigger signal. The triggering is calculated in relation
to a certain threshold set with the “Threshold” dial and the signal connected to the
“Comparator in”. If no signal is connected to this input, an internal connection will link the
follow output to the comparator.
This module generates two types of trigger, a positive trigger, and a negative. When the
comparator input signal exceeds the threshold, the positive trigger is activated, while the
negative trigger is cancelled. When the input signal goes below the threshold, the opposite
happens. A lighting indicator allows the observation of the positive trigger signal.
ARTURIA – MOOG MODULAR V 2.6 – USER’S MANUAL 85
Page 86

7.1.12 Ring modulator
Frequency
Depth
Freq. Mod. Input
Depth Mod. input
Mul Signal Input HiQ Selection
Signal In
Signal Out
Ring modulator
Frequency Sets the frequency of the multiplicative sinusoid
Depth Sets the amplitude for the multiplication of signals
HiQ Selection High quality selection
Freq. Mod. Input Frequency modulation connection jack
Depth Mod. Input Depth modulation connection jack
Mul Signal Input Multiplicative signal connection jack
Signal Input Input jack for signal to be treated
Signal output Output jack for treated signal
The ring modulator multiplies two signals to create non-harmonics frequency. It is then easy to
produce metallic sounds.
When “Mul Signal Input” is not connected, the input signal is multiplied by an internally
generated sinusoid signal for which the frequency can be set with the “Frequency” button. The
modulation amplitude and subsequently the effect amplitude obtained can be set with the
“Depth” button. Once connected, “Mul Signal Input” becomes the source of the multiplicative
signal.
The depth and the frequency of the internal sinusoid can be modulated with the corresponding
modulation inputs.
The “HiQ” interrupter, at the cost of an increase in calculation load, increases the quality of the
sound.
86 ARTURIA – MOOG MODULAR V 2.6 – USER’S MANUAL
Page 87

7.1.13 Formant filter
FM Input
RM Input
Gain Mod Input
Input Vowel Output
Frequency
Resonance
Gain
Vowel Mod.
Input
Formant filter
Frequency Sets the frequency
Resonance Sets the resonance
Gain Sets the gain
FM Input Frequency modulation connection jack
RM Input Resonance modulation connection jack
GM Input Gain modulation connection jack
Vowel setting of o pre-selected vowel
VM Input Connection jack for the modulation of the vowel pre-selections
This module regroups four bell filters connected in a series. Each filter can be set and
modulated, independently of the others, in frequency, gain and resonance (or bandwidth).
It is possible to preset these four filters to reproduce the formation of a particular vowel with
the “vowel” selection window. This preselection can also be modulated with the associated
modulation input.
The preselection is done before the filter settings. It is thus possible, during a modulation, to
make the vowel evolve, and to gently change the settings.
7.1.14 Bode Frequency Shifter
ARTURIA – MOOG MODULAR V 2.6 – USER’S MANUAL 87
Audio Input
FM Inputs
Scale
Amount of Shift
Mixed out
Negative output
Positive output
Bode frequency shifter
Page 88

Scale Sets the scale frequency
Amount of Shift Sets the frequency transition
Mix Mix between the positive and negative translations
Mixed output Mix of negative and positive translations output connection jack
Positive output Positive translation output jack
Negative output Negative translation output jack
FM Input Frequency modulation connection jack
Audio Input Input signal connection jack
This module is used for a linear translation of the frequencies contained in the input signal.
Because of this linearity, the initial harmonic relations are totally modified.
It is easy with this module, to produce metallic sounds.
There are three available outputs: two for each of the translations possible (negative and
positive), the other for a mix of the two, the mix is set with the “Mix” button.
The translation rate, which is to say the difference in frequencies, is set with the “frequency”
button. Following the selected scale (“scale” selector), the button will give a different gap. The
scale also influences the amplitude and type of modulation.
In the exponential position, the translation goes from 2 Hz to 1024 Hz, the modulation being
exponential. In the other positions (5,50,500,5k), the translation will be of a maximum of 5
Hz, 50 Hz, 500 Hz or 5000 Hz, in positive or negative.
7.2 S
7.2.1 Description
The second section of the Moog Modular V regroups all of the effect modules and the
sequencer. The outputs and inputs of this page needing connections with the modules of the
first section are moved to the latter, in a small extension.
This section contains a module for equalization through a bank of resonant filters, a chorus
module, a phaser, a stereo delay module, and a type 960 sequencer.
The 3 effect modules, filter bank, chorus and stereo delay are applied to the signal of the
output amplifiers in function with the interrupters “VCA1” and “VCA2”. They are applied in the
predefined order.
The choice between the chorus and the phaser is done through a menu displayed by clicking
on the name of the module.
ECOND SECTION
88 ARTURIA – MOOG MODULAR V 2.6 – USER’S MANUAL
Page 89

7.2.2 Resonant filter bank
Resonance
Gain
Output gain
Connection
VCA1-VCA2
Reset
Filter bank
Gain Sets the band level to positive or negative
Resonance Sets the bandwidth
Connection VCA1-VCA2 Connection of the filter bank to the VCA1 or VCA2 output
Output Gain Sets the output gain
Reset Resets the filter bank
This module allows the equalization of the signal coming from the 2 output amplifiers in
function with the state of the interrupters “VCA11” and “VCA2”.
This equalization is done with the help of the resonant filters and has 14 bands. Each has a
level (amplification and alleviation) and bandwidth setting, excepting the first and last bands,
which are respectively, the low-pass and high-pass filters.
The cut-off frequencies of these filters are fixed at the following values: 80 Hz, 125 Hz, 175
Hz, 250 Hz, 350 Hz, 500 Hz, 700 Hz, 1000 Hz, 1400 Hz, 2000 Hz, 2800 Hz, 4000 Hz, 5600 Hz
and 6400 Hz.
A button allows the resetting of the default values and a rotating button sets the output level
after filtering.
ARTURIA – MOOG MODULAR V 2.6 – USER’S MANUAL 89
Page 90

7.2.3 Chorus
Types
Rate
Time
Depth
Stereo Rate Stereo Width
Wet Dry
VCA1-VCA2
Chorus
Types Sets the 3 chorus Types
Rate Sets the chorus rate
Depth Sets the depth of the chorus action
Time Sets the delay applied to the input signal
Stereo Rate Sets the speed of the stereophonic evolution
Stereo Width Sets the width of the stereophonic space
Dry Sets the gain applied to the input signal
Wet Sets the gain applied to the treated signal
VCA1-VCA2 Connection of the chorus to the output of VCA1 or VCA2
A Chorus module allows the treatment of the signal coming from the 2 output amplifiers,
eventually treated by the equalizer, in function with the state of the interrupters “VCA1” and
“VCA2”.
The chorus module allows a frequential blurring where the speed is set by the “speed” knob,
the amplitude by the “depth” and the width with the “Delay”. This frequency blurring is
different for the left and right tracks. This allows us to get a stereophonic signal from a
monophonic signal. The difference between the 2 tracks can be set with the “stereo width” and
the speed of the left right rotation with the “stereo rate” knob.
A selector presents the choice of chorus type: simple, medium, complex.
The input signal level and treated signal can be respectively set with the “gain direct” and
“gain effect” knobs.
90 ARTURIA – MOOG MODULAR V 2.6 – USER’S MANUAL
Page 91

7.2.4 Phaser
Amount
Sweep
Stages
Rate
Stereo width
Resonance
Dry
Wet
VCA1-VCA2
Phaser
Amount Sets the depth of the phaser action
Rate Sets the speed of the phaser
Sweep Sets the phaser resonance
Stereo width Sets the width of the stereo space
Dry Sets the gain applied to the input signal
Stages Sets the phaser type (6 or 12 stages)
Wet Sets the gain applied to the treated signal
VCA1-VCA2 Connects the phaser to the VCA1 or VCA2 output
The phaser module treats the signal coming from the 2 output amplifiers, eventually treated
by an equalizer, in function with the state of the 2 “VCA1” and “VCA2” interrupters.
The action consists of dephasing the input signal and combining it with the original signal. Thus
we can have a filter that combs (with notches) the frequency spectrum to the rhythm of an
oscillator which follows the frequency set with the “rate” button. The “depth” button sets the
amplitude for the action of the filtering, while “Resonance” amplifies certain harmonica. The
rotating “stereo width” button sets the amplitude of the stereophonic aspect of the phaser.
When the “stereo width” is set to 0, the left and the right channel are in phase. When it is set
to 0.5, the sound seems to rotate, and when it is set to 1, the sound seem to go from one side
to another.
There are two types of phaser, one has 6 levels, the other has 12, set with the “type” selector.
A 6-stage phaser has 3 notches, and a 12-stage has 6.
The rotating “dry” and “wet” buttons are respectively used to set the amplitude of the original
signal and the treated signal.
ARTURIA – MOOG MODULAR V 2.6 – USER’S MANUAL 91
Page 92

7.2.5 Stereo Delay
MIDI sync
Time left
Time right
Feedback left
Feedback to right
Dry
Feedback right
Feedback to left
Wet
VCA1 & VCA2
Stereo Delay module
MIDI sync Synchronizes delay with the tempo of the host application
Time left Sets the time of the right track
Time right Sets the time of the left track
Feedback left Sets the feedback gain for the right track
Feedback right Sets the feedback gain for the left track
Feedback to left Sets the feedback gain of the right track towards the left track
Feedback to right Sets the feedback gain of the left track towards the right track
Dry Sets the gain applied to the input signal
Wet Sets the gain applied to the treated signal
VCA1-VCA2 Connection of the delay to the output of VCA1 or VCA2
A stereo delay module treats the signal coming from the 2 output amplifiers, eventually
treated by the equalizer and chorus, in function with the state of the interrupters “VCA1” and
“VCA2”.
This module allows the repetition of the input signal independently on the left and right tracks,
which explains the presence of 2 columns of controls.
The repetition speed can be set with the “time” knob, while the level of the repetitions, and
eventually the number of audible repetitions is set with the “feedback” knob. The third knob
sends a part of the treated signal to the other track.
The repetition speed can be synchronized with the tempo of the host application, and in this
case, the “time” knob selects the multiples and sub-multiples of this tempo.
The levels of the input and treated signals can be respectively set with the rotating “gain
direct” and “gain effect” buttons.
92 ARTURIA – MOOG MODULAR V 2.6 – USER’S MANUAL
Page 93

7.2.6 Sequence generator
Fw / Rw
Sequencer
Also called sequencer, this module is similar to the original Moog 960 sequencer while
simplifying the programming with internal connections.
This module has 3 parts: low frequency oscillator, the 8-step sequence manager and the
output controller.
Frequency
MIDI Synchronization
On
Off
On / Off Input Triggers
Length
Next Trigger
Sequencer clock
Frequency Sets the sequencer clock speed
On Starts the sequencer
Off Stops the sequencer
On Input Trigger Connection of a trigger signal to start the sequencer
Off Input Trigger Connection of a trigger signal to stop the sequencer
Length Length of the trigger signal generated by the sequencer
MIDI Synchronization Synchronization of delay with host application tempo
Next Trigger Connection of a trigger signal for the passage to the next step
Fw - Fw/Bw Select the sequencer mode (forward, or forward/backward)
ARTURIA – MOOG MODULAR V 2.6 – USER’S MANUAL 93
Page 94

The low frequency oscillator gives rhythm to the passage from one sequence to another. The
speed can be statically set with the “frequency” knob and dynamically with the modulation
input situated on the first section. The “synchronization” interrupter synchronizes this
generator on the tempo of the host application. In this case, the “frequency” knob selects
multiples and sub-multiples of this tempo.
The passage from one step to the next can also be done by the means of a trigger signal (from
the keyboard for example) connected to the “next trigger” input.
The two “On” and “Off” button start and stop this generator. When it starts, it resets the
sequence manager on the first step.
The starting and stopping can be done dynamically with the associated trigger inputs.
The “length” knob sets the trigger signal width coming from the sequencer.
The “backward” interrupter allows a round-trip progression, instead of a progression indicated
by the next step indicators.
Level Output1
Level Output2
Level Output3
Hold
Link
Repetition
Next Step
On Forcing trigger input
Sequencer column
Level Output1 Sets the level of modulation or tuning for output1
Level Output2 Sets the level of modulation or tuning for output2
Level Output3 Sets the level of modulation or tuning for output3
Link Link to the previous step (no trigger)
Hold Number of clock beats of hold on this step
Repetition Request for output trigger for each held clock beat
Next Step Selects the next step
On Forcing step
Forcing trigger input Forcing input or not
The sequencer has 8 steps. Each step defines 3 output levels with the help of 3 rotating
buttons. The manager moves from one step to another at each impulse of the sequencer clock
or upon the reception of a signal on the trigger input “next trigger”. The led above each of the
steps lights up when active.
94 ARTURIA – MOOG MODULAR V 2.6 – USER’S MANUAL
Page 95

It is possible to force the sequencer to initialize itself on a particular step, either by clicking on
the “Forcing” button of the desired step, or through a signal in the associated input trigger.
Every time the sequencer comes to a step, the corresponding trigger output is activated,
allowing the start-up of certain envelopes.
It is possible to remain on a particular step by modifying the “Hold” display. In this case, we
need a certain number of clock impulses from the sequencer (or from the trigger input) equal
to the number indicated to go to the next step.
The rotating selector indicates the next step. It possesses 10 positions, the first 8 represent
the next steps, the ninth is a random selection, and the last is the generator stop.
When this last position is chosen on a step, the sequencer clock is stopped, the manager is
reset on the first step and the outputs set to zero.
At every change of step, a general trigger signal from the sequencer is activated. This output
will be activated at every clock impulse if the “repetition” interrupter is active. In the same
manner, there is no activity from this signal if the “link” interrupter is inactive.
On Line 1
Forcing Trigger Input 1
Smooth1
On Line 2
Forcing Trigger Input 2
Smooth2
On Line 3
Forcing Trigger Input 3
Smooth3
Smooth4
Mode Output 4
Sequencer outputs
Smooth 1 Sets smooth for output 1
Smooth 2 Sets smooth for output 2
Smooth 3 Sets smooth for output 3
Smooth 4 Sets smooth for output 4
On Line1 Forcing of the selection from output 4 to output 1
Forcing Trigger Input 1 Forcing trigger input of the selection from output 4 to output 1
On Line2 Forcing of the selection from output 4 to output 2
Forcing Trigger Input2 Forcing trigger input of the selection from output 4 to output 2
On Line3 Forcing of the selection from output 4 to output 3
Forcing Trigger Input3 Forcing trigger input of the selection from output 4 to output 3
Mode Output4 Choice of progression mode of output 4
The control section of the sequencer outputs allows the management of four outputs in
function with the current step. The first outputs take their values from the values specified by
the rotating buttons of the current step, eventually with a smooth that can be set with the
“smooth”.
ARTURIA – MOOG MODULAR V 2.6 – USER’S MANUAL 95
Page 96

The fourth output, for which the smooth can also be set with a “smooth” knob, is managed in
the following manner. It takes the value of one of the 3 outputs in function with the current
step and the type of progression specified by the “Mode output 4” selector.
When placed in the “none” position, the fourth output takes the output value selected by the
“Forcing Line” button and its corresponding trigger input. It is therefore possible to have 3
different sequences, activated either manually by a click or dynamically by a trigger.
When the “Mode Output 4” selector is placed on the “L123” position, the fourth output will
automatically cross outputs 1,2 and 3 each time the current step arrives on the eighth step. In
this manner, it is possible to have a 24-step sequence. Placed at the “L321” position, the lines
will be done in the inverse order. In the same manner, on the “L12” “L13” or “L23” positions,
the fourth output will cover lines 1 and 2, or 1 and 3, or finally 2 and 3, thus obtaining 16 step
sequences.
When the “Mode Output 4” selector is placed on the “C123” position, the fourth output covers
lines 123, but the change takes place at every sequencer clock impulse. We just need to wait
for 3 impulses at every step, to alternatively have lines 1,2 and 3 of each of the steps. The
functioning is the same on positions “C321”, “C12”, “C13” and “C23”.
On the “Rand” position, the choice of fourth output is random.
7.3 T
A small section has been added bellow the connection section. It regroups all of the external
input-outputs on the sequencer, and the key follow outputs. You will also find an interrupter
which activates A440.
The output jacks “External audio” are used to treat the external signals and use the Moog
Modular V as an effect.
The “Out” jacks correspond to the two left and right output jacks on the Moog Modular V. It is
thus possible to loop it to itself and obtain special effects.
7.4 F
The fourth section contains a virtual keyboard, control for the 4 key follows, 2 modulation
surfaces, and a few shortcuts to the most frequently used settings (Envelope for the 2 output
VCA and cut-off frequency settings for the 3 filters). You will also find general settings like
choice of Monophonic/polyphonic, the “retrigg” mode or “legato”.
It is also in this mode that we find the volume control and general tuning.
HIRD SECTION
OURTH SECTION
Internal connections
96 ARTURIA – MOOG MODULAR V 2.6 – USER’S MANUAL
Page 97

7.4.1 Keyboard follow management
Slope
Threshold
Pivot
Low/High
Bend/Portamento
Keyboard follow
Slope Sets the slope of the keyboard follow
Pivot Selects the pivot note of the keyboard follow
Threshold Selects the threshold note of the keyboard follow
Low/High Selects the low (high) note of the generator for the trigger of the
keyboard follow
High Selects the high note of the generator for the trigger of the keyboard
follow which can also be inverted
Bend/Portamento Request for affectation of a pitch bend (portamento) or glissando to the
keyboard follow
There are four independent keyboard follows. Each possessing a slope setting with the “Slope”
knob, a pivot note chosen in the “pivot” display and a threshold note chosen with the
“threshold” display begin from which the slope is null.
Keyboard follow management
Each of the keyboard follows can generate a trigger signal. Two displays allow the choice of a
low and high note. When the keyboard detects a note between the 2 limits, the trigger signal
is active as long as the note remains active. When the note is outside of the limits, the trigger
signal remains inactive. If the notes selected for the upper and lower limits are such that the
lower note is higher than the upper, then the note detected by the keyboard must be outside
of the limits to activate the trigger signal.
The “Portamento” and “PitchBend” buttons of each of the keyboard follows allows the
affectation of a portamento or pitch bend. The pitch bend can be inverted (the modulation is
negative when the command is positive), which allows us, for example, to lower the filter cutoff frequency insofar as the tuning of the oscillators is raised.
It is also possible to replace the portamento (continuous glide of the frequency) with a
glissando (frequency glide by semi-tone)
ARTURIA – MOOG MODULAR V 2.6 – USER’S MANUAL 97
Page 98

7.4.2 General settings
Course Bend (tune)
Course Bend (filter)
Poly
Mono
Legato Re Trigger
General settings
Course Bend (filter) Filter coarse for the pitch bend wheel
Course Bend (accord) Oscillator tuning coarse for the pitch bend wheel. (by semitone
from 0 to 4 octaves)
MonoPoly Selects synthesizer mode: ( Monophonic, Unison or polyphonic )
Legato Selects legato mode (the portamento is active when the notes are
detached).
Re Trigger Selects the re trigger mode (the keyboard generates a trigger
when the notes are linked)
Nbr Release Select the number of release notes
Poly Gives the number of polyphonic tracks (16-32-64)
The Moog Modular V responds to the pitch bend depending on the position of the “tune”
selector. This selector sets the amplitude of this response to +/- four octaves per semi-tone.
The knob close at hand noted “filter”, allows the setting of the excursion of the response to the
tuning wheel for the filter cut-off frequency,
The “MonoPoly” interrupter takes the synthesizer from monophonic to polyphonic mode. The
Unison position allows us to play the indicated number of voices in parallel, while the playing
mode remains monophonic.
In the monophonic mode, 2 interrupters allow the control of the triggering of the envelopes.
The first, “re trigger” allows the reactivation of the trigger signal in the case where the notes
are linked. The second, “legato” allows the affectation of frequency smoothing (portamento)
whether the notes are linked or not.
The rotating “Volume” button sets the general volume of the Moog Modular V, while the
rotating “tune” button allows us to set the tuning with amplitude of 1 tone.
98 ARTURIA – MOOG MODULAR V 2.6 – USER’S MANUAL
Page 99

8 THE BASICS OF SUBTRACTIVE SYNTHESIS
Of all of the forms of sound synthesis, subtractive synthesis is still one of the oldest and most
frequently used today. This method was developed from the 60’s on Moog analog synthesizers,
and then later on ARP, Buchla, Oberheim, Sequential Circuits (Prophet series), Yamaha (CS
series), Roland, Korg (MS and PS series) to name but a few. This synthesis technique is still
used on most of the current digital synthesizers, added to sample reading or wave tables,
which have progressively replaced analog oscillators since the 80’s. The modular Moog
systems, and your Moog Modular V, represent the best illustration of the immense possibilities
of subtractive synthesis.
Modular synthesizers use a certain number of base modules, placed in sections where the size
varies in relation to the importance of the systems. These modules, once connected, allow the
creation of a multitude of sounds.
8.1 T
8.1.1 The oscillator or VCO
The oscillator (Voltage Controlled Oscillator) can be considered as the starting module (with
the noise module that we often class among the oscillators) for the creation of a sound on a
modular system. It is here that the first sound signal is created and we can consider the
oscillator like the strings of a violin which, when stroked or plucked, vibrates to create a sound.
The main oscillator settings are the pitch and the waveform.
The pitch is determined by the oscillation frequency. The oscillator frequency setting is done
with two controllers: firstly the Range selector which mainly determines the fundamental
frequency, often expressed in feet: 32,16,8,4,2 — the highest number (32) gives the deepest
tone, and on the other hand, 2 gives the highest tone; Secondly, the frequency setting which
will tune the oscillator more precisely.
The waveform determines the harmonic richness of the audio signal. 4 waveforms are
available on the Moog Modular V: sawtooth, square/PW, triangle and sinus.
HE THREE MAIN MODULES
• The sawtooth is the richest audio signal of the 4 available waveforms (it contains all of
the harmonics at decreasing volume levels in high frequencies). Its “brassy” sound is
ideal for brass sounds, striking bass sounds or rich accompaniments.
Sawtooth waveform
• The square possesses a more “hollow” sound than the sawtooth (it only contains
impair harmonics) but nevertheless, its sonic richness (notably in the low frequencies)
ARTURIA – MOOG MODULAR V 2.6 – USER’S MANUAL 99
Page 100

could be used for sub basses emphasized in the mix (the square oscillator should be
thus set an octave below the that of the saw tooth), wooden sounds (clarinet if the
square signal is a little filtered), etc.
The PWM (Pulse Width Modulation) is a setting which allows the modification of the
square ware form cycle (or wave width). This can be done manually with the “PW” knob
or through modulation (using an envelope or a LFO). This variation of impulse width is
translated by a spectrum modification, not unlike a waveform change.
Unlike classic analog synthesizers, the Moog Modular V allows you to change the impulse width through not only the
square waveform, but also the sawtooth and triangle. This offers a large number of sonorities on top of the base
signals.
Square waveform
• The triangle could be considered like a much-filtered square signal (thus very soft). It
is very poor in harmonics (impair equally) and will be very useful for creating sub
basses, flute sounds, etc.
100 ARTURIA – MOOG MODULAR V 2.6 – USER’S MANUAL
 Loading...