

Page 1

HDTV
Cable In
Cable In
Cable Out
Audio
In
Audio
Out
Audio
In
Audio
Out
LR
LR
Video In
Video Out
Video In
Video Out
or
S-Video In
S-Video Out
or
S-Video In
S-Video Out
TV
VCR
(optional)
or
Y
Pb
PR
DVI-HDTV
Cable/
Antenna In
L/MONO
Digital
R
In
Audio
In
LR
Optical
Audio
Out
Component
Video Input
Y
Pb
Pr
or
DVI
or
VCR
Audio
Video In
Cable In
Cable Out
In
Audio
Out
LR
Video Out
S-Video In
S-Video Out
TO
TV/VCR
From
Cable Outlet
CABLE
Cable In
From
Cable Outlet
DVI
AUDIO
Video In
AUDIO IN
RL YPb Pr
OUT
ETHERNET
IR
IN
Audio
In
USB
LR
Audio
Out
Video Out
S-Video Out
SPDIF IN
S-Video In
VIDEO
OUT
Pass Card
TV
S-VIDEO
TV
OPTICAL
SPDIF
IEEE 1394
SWITCHED
105-125V
60Hz
4A MAX
500W MAX
CONVENIENCE
OUTLET
DVI-HDTV
Cable/
Antenna In
TO
TV/VCR
L/MONO
CABLE
IN
Digital
R
In
Optical
or
or
Y
Pb
PR
Cable In
Cable Out
Audio
In
Audio
Out
Video In
LR
Video Out
S-Video In
S-Video Out
VCR
Optional
IR
Cable In
Cable Out
ETHERNET
USB
Audio
In
Audio
Out
AUDIO IN
DVI
RL YPbPr
AUDIO
OUT
LR
Audio
Video In
In
LR
Audio
Video Out
Out
VIDEO
SPDIF IN OUT
S-Video Out
TV
Pass Card
Component
Video Input
Y
Pb
Pr
S-Video In
S-VIDEO
OPTICAL
SPDIF
IEEE 1394
HDTV
VCR
SWITCHED
105-125V
60Hz
4A MAX
500W MAX
CONVENIENCE
OUTLET
or
DVI
S-Video
Video
Right
Left
Digital Receiver
From
Cable Outlet
TO
TV/VCR
CABLE
IN
Monitor
Out
IR
option A
ETHERNET
USB
In
AV
#2
or
AUDIO IN
DVI
RL YPb Pr
AUDIO
OUT
SPDIF IN
or
VIDEO
OUT
Pass Card
TV
or
S-VIDEO
OPTICAL
SPDIF
or
In
Out
AV
#1
Digital
Coaxial
Optical
Out
S-Video
Video
Monitor
Y
Right
Pb
Left
Pr
#1
#2
In
AV
#2
In
Out
AV
#1
Digital Receiver
In
Video1
Digital
Coaxial
#1
Optical
#2
or option B
or
option A
Optional
ETHERNET
IR
USB
AUDIO IN
DVI
RL YPbPr
AUDIO
OUT
SPDIF IN
VIDEO
OUT
IEEE 1394
Pass Card
S-VIDEO
TV
OPTICAL
SPDIF
SWITCHED
105-125V
60Hz
4A MAX
500W MAX
CONVENIENCE
OUTLET
IEEE 1394
SWITCHED
105-125V
60Hz
4A MAX
500W MAX
option B
CONVENIENCE
OUTLET
or
TO
TV/VCR
From
Cable Outlet
CABLE
IN
Page 2
Be sure to allow adequate ventilation and airflow around the DCT5100 to prevent overheating.
Position the DCT5100 with at least
2 inches of space above
and on all sides.
VENTILATE
2 inch space
2
Do not block the slots and
openings in DCT5100.
Do not place anything on top
of the DCT5100.
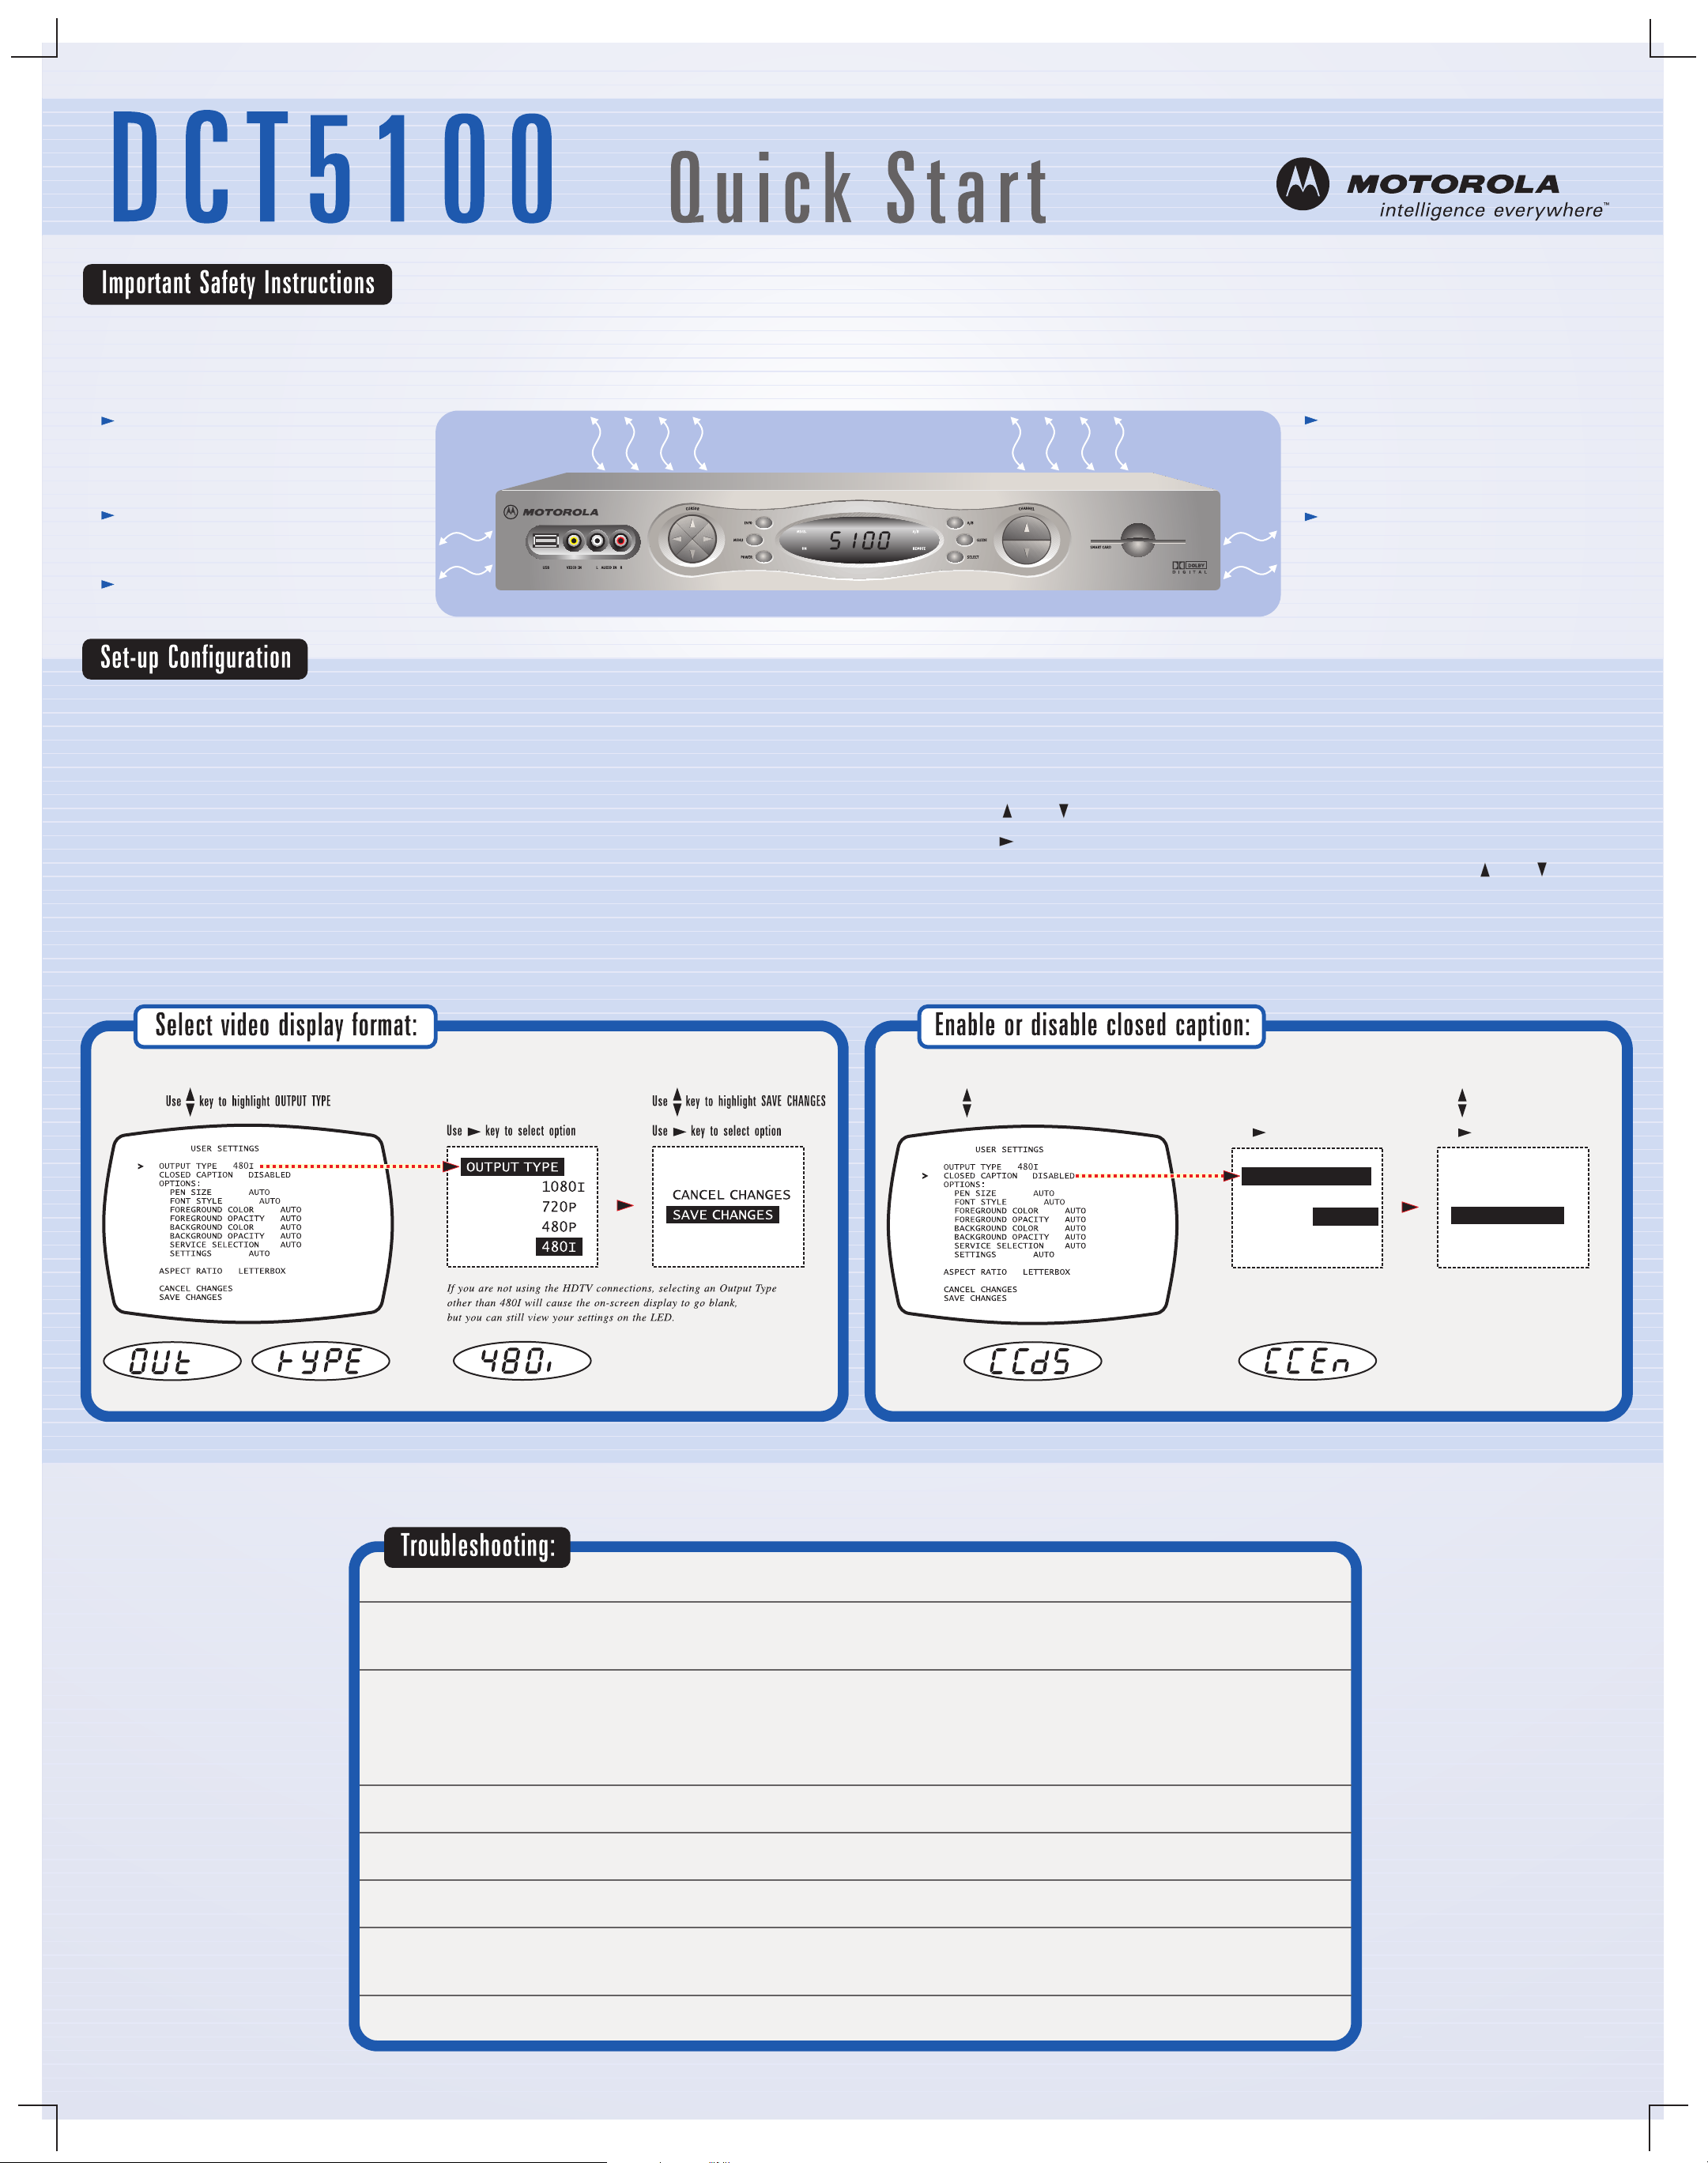
Use the on-screen display menu to configure your video display and closed caption settings.
To access your configuration settings, press the MENU key on the
front panel or your remote control while the DCT5100 is turned off.
If your TV is on, the on-screen display menu appears listing the settings
you can configure. The user settings will also be displayed on the
front panel LED whether your TV is off or on.
inch
Do not position the DCT5100 in an
enclosed space that would restrict
airflow around the unit.
2
inch
Use your remote control or the cursor keys on the front panel
to navigate the on-screen display:
- Press the and keys to highlight the settings you wish to change.
- Press the key to select an option for that setting.
- To exit the setting and move to another setting, use the and keys.
Do not position the DCT5100 near
any external heat source that could
raise the temperature around the unit.
When you first access the on-screen display, your TV screen may appear
blank if your DCT5100 is not set at the correct video display format.
You can still view your settings on the front panel LED (see below).
When you are finished configuring your settings turn the DCT5100 back on.
For more information on configuration settings, refer to the DCT5100 User Guide.
Use key to highlight CLOSED CAPTION
Use key to select option
CLOSED CAPTION
DISABLE
ENABLE
Use key to highlight SAVE CHANGES
Use key to select option
CANCEL CHANGES
SAVE CHANGES
Before calling your service provider, review the troubleshooting guide.
This information is to help you quickly solve the problem. If your problem still exists, contact your service provider.
Problem
No sound
No picture
Picture or sound is noisy
on one channel
Sound from only one
stereo speaker
No power
Remote control
does not work
Cause
Accidentally pressed MUTE on the remote control.
The stereo is tuned to the wrong entertainment component.
You are watching TV using your VCR, and your VCR is off.
Cable signal may not be reaching your home. Check to be sure that all cables are connected properly and that your TV is tuned to the cable channel 3 or 4.
Coaxial cable is disconnected or loose. Reconnect the cable and hand-tighten if loose.
Cable connections are disconnected or loose.
Power cord is disconnected. Reconnect the power cord.
Remote isn't set in cable TV mode.
Obstruction between remote and cable terminal.
Dead batteries.
Possible Solution
Press MUTE on the remote control to restore the volume level.
Check that the stereo is looking at the proper input source.
Turn your VCR on.
Hand-tighten the cable connections if necessary.
If connected through the baseband RCA video connection, make sure the cables are connected properly.
If you are watching TV using your VCR, be sure your VCR is on.
Ensure that the proper video display format for your TV has been selected.
Hand-tighten or reconnect the cables properly.
Ensure that wires are not frayed and plugs are not bent or broken.
Ensure that the DCT5100 is plugged into an outlet that is always live.
Press CABLE on the remote control.
Ensure that nothing is on the DCT5100 or blocking a clear line of sight between it and the remote control.
Change the batteries in your remote control according to the instructions in the section, “Installing Batteries.”
Poor audio quality
Audio levels on external devices not set
relative to DCT5100 volume level.
For best audio quality, use the remote control to set the DCT5100 to approximately ¾ of maximum volume level
and then adjust the audio levels on the external devices.
 Loading...