

Page 1

Chapter 4: Working with Time Guardian Pro
Company Profile
The Company profile and general settings can be set in the Setup Wizard or in the Company screen.
The Company window consists of two tabs: General and Settings. The General tab is used for
Company profile information and the Settings tab is used for hours and time format, Pay Period data
protection, auto polling, IM settings, display units, and auto-synchronization with Access Control.
Time Guardian Pro v3.5 4-1
Page 2

To set the Company Profile with General Settings:
1. Select the Company module within the Setup group in the Tree View. The General tab will appear
in the Table View.
2. Enter the following (Fields in yellow are required):
• Company Name: Enter your company name here.
• Address: Enter your company’s street address.
• City: The city where your company is located.
• State: The state or province where your company is located.
• Zip: The postal zip code of the city where your company is located.
• Country: The country where your company is located.
• Phone: The phone number of your company.
3. Click on the Settings tab and the following is an example of the Company view that will appear:
4-2 Time Guardian Pro v3.5
Page 3

4. Select the following:
• Hours Format: Hours/Minutes (60th’s: 8 hours, 30 minutes = 8:30), or Hundredths (100th’s: 8
hours, 30 minutes = 8.50).
• Time Format: Select either Standard (12-hour: 3:00 PM), or Military (24-hour: 15:00) format.
• Access Control:
a. Auto Sync Access on Login: When checked, Time Guardian Pro will synchronize with the
installed Amano Access control software (AXP-200 or AmanoNet) at Login. If None was
selected as the installed access control software during installation, this option will be
disabled
b. Repunch Protection: Enter the interval, in seconds, that will prevent duplicate punches
from being recorded. If an employee attempts to punch twice at the terminal during the
interval set, the second punch will not been accepted. Once the interval has passed, the
employee’s punch will be accepted. This option is only available if used with Amano
Access control software (AXP-200 or AmanoNet).
• Misc.:
c. Close Pay Period: When checked, data from previous Pay Periods will be “Closed” (Read-
only) from editing.
d. Auto Poll on Login: When checked, Time Guardian Pro will poll all connected terminals at
Login.
• IM Settings: Escalation Frequency - The number in minutes before the Escalation Server will
update messages.
• Benefit: Tracking Type: The choices are; None, Deaccruals, and Import Balances. When
Deaccruals are selected employee benefit use will be tracked by the system, but the system
will not accrue benefits. Benefits must be entered as values into the system, and then the
system will keep track of updating available amounts based upon use. When Import Balances
is selected, the system will accept existing benefit values and keep track of their use, but it will
not allow additional values to be added (accrued).
5. Click on the
button to save your settings
Time Guardian Pro v3.5 4-3
Page 4
Labor Levels
Labor levels are used to determine where an employee worked and what an employee worked on. Up
to (6) main Labor Level categories can be created with an unlimited number of entries per category.
These multiple levels can be used simultaneously for where an employee worked as well as what an
employee worked on.
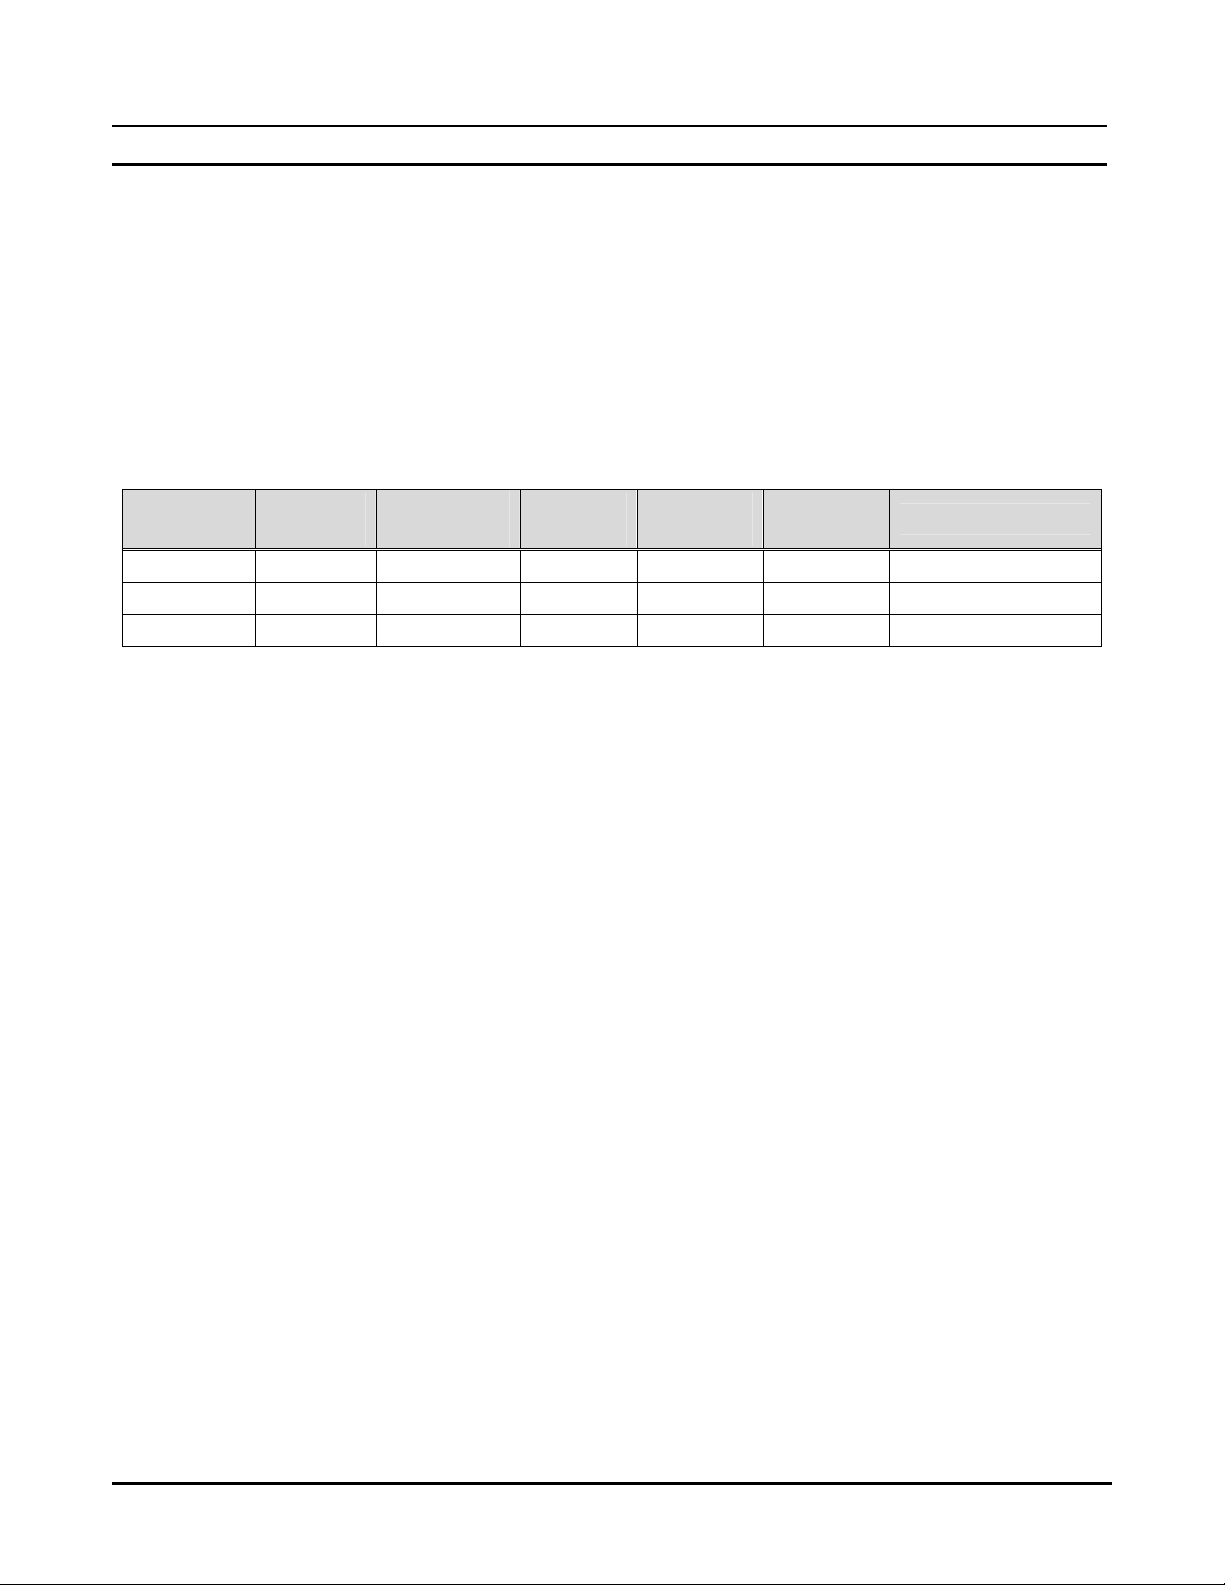
Example of Multiple Labor Levels:
An employee is scheduled to work from 9:00 AM to 6:00 PM. From 9:00AM to 11:00AM, they work in
Building A and in the Production Department. While working in Production, the employee performed
the job of welding parts that were needed for Work Order # 100200, and then from 11:00 AM to 6:00
PM, the employee switched to the job of Assembly of parts needed for Work order # 100300. The
assignment of labor for the day would look like this:
Time of
Day
9:00-11:00 2:00 Regular Building A Production Welding Work Order# 100200
11:00-5:00 6:00 Regular Building A Production Assembly Work Order# 100300
5:00 - 6:00 1:00 Overtime Building A Production Assembly Work Order# 100300
Hours
Worked
How many labor levels the employee’s hours are assigned to simultaneously varies from company to
company and is therefore part of the software configuration. Labor Levels can be created through the
Setup Wizard or by selecting the Labor Levels module within the Company module.
Pay
Code
Labor
Level 1
Labor
Level 2
Labor
Level 3
Labor Level 4
4-4 Time Guardian Pro v3.5
Page 5

To create Labor Levels, you must specify how many of them you wish to use, and then enter a name
for each in the desired level in the General Tab and check Active for each Labor Level used. By
default, Level 1 is always active.
Time Guardian Pro v3.5 4-5
Page 6

Once entered, the main Labor Level name will appear in the desired field number. To add levels
within each Labor Level, click on the Edit Names
Names window for the selected Labor Level will appear as shown in the following example:
button in the desired row. The Labor
4-6 Time Guardian Pro v3.5
Page 7
To add a Labor Name, click on the button. All the fields in the window will go blank. In the Name
field, enter a name for the Labor Name. In the number field, enter a number that will be associated
with the Labor Name. Enter a brief description of the Labor Name in the Description field.
If the Labor Name is to expire on a specified date, click on the
button and select an expiration date
from the calendar. When you have finished, click on the
to the Labor Names window.
To save the Labor Name, click on the
To delete a Labor Name, select the labor name from the list and click on the
Name will be removed from the list.
button. The Labor Name will appear in the Names List.
button to save your settings and return
button. The Labor
You can use the drop down list in the Names list or the
Labor Names.
To modify a Labor Name, select the desired Name from the active list and click on the
button to view the General tab window for that labor name, change current labor name to new name
and save your changes. To add a new Labor Name make an inactive level active by clicking on the
box alongside “Active”
Click on the
After you have finished entering Labor Levels, click on the
save your settings and return to the main tree view.
button to save your settings and return to the Labor Levels window.
.
button in the Labor Levels window to
buttons to view other
Time Guardian Pro v3.5 4-7
Page 8
Wages
To assign a Cost or Billable Rate for wages, click on the Add button or check Use Rate Template.
For Use Rate Template check the box:
Select the desired Rate Template from the list in the Template field.
4-8 Time Guardian Pro v3.5
Page 9
To Add a rate:
Click on the Add button and a row will appear in the Rates box. In the Date field, enter a date
when the rate for the labor level will be in effect. Enter a rate for the labor level in the Rate field. In
the Operation field, select Rate, Add to, Percentage. Rate is the labor level's actual rate. Add to
will add to the existing rate (as defined in Rate Setup). Percentage will increase the existing rate
for the labor level by the percentage as defined in Rate Setup.
Rates can be increased using the Operation field or clicking on the Percent Increase
button. The following window will appear for percent increase:
Click on the
rate you wish to increase the rate by. Click on the
button to enter an effective date for the increase and enter in a percentage of the
button when finished.
To delete a rate or rate operation, select the desired row, and click the Delete button.
Time Guardian Pro v3.5 4-9
Page 10
Rate Setup
The Rate Setup module allows you to classify employee wages or rates in terms of cost or billable
rates per employee or Labor Level(s). There are (2) types for each; Standard or Combined. Standard
applies the rate based on the order set, and Combined applies the rate based on the combination of
items (Employee and Labor Levels) selected. For multiple employees, a Rate Setup template must be
configured for each individual employee.
To define the criteria for Rate Setup templates:
1. Select the Rate Setup module within the Company group in the Tree View.
2. The top line can be used as a filter to select the desired row. Also, clicking on any column heading
in the list will sort the list in ascending/descending order based upon the column that was clicked
on. Select a row and click on the
4-10 Time Guardian Pro v3.5
button to edit a Rate Setup.
Page 11

3. In the General tab, select the number of decimal places (2 thru 5) that will be used for the rates.
4. Click on the Standard tab.
Time Guardian Pro v3.5 4-11
Page 12

5. Select either Cost Rate or Billable Rate Order in the Type field.
6. To add a selection, highlight the desired item in the Available list and click the Add button. To
select all the listed items, click the Add All button. To remove an item, highlight the desired item in
the Selected list and click the Remove button. To remove all the listed items, click the Remove All
button.
7. Click on the Combined tab.
8. Select either Cost Rate or Billable Rate Order in the Type field.
9. To add a selection, highlight the desired item in the Available list and click the Add button. To
select all the listed items, click the Add All button. To remove an item, highlight the desired item in
the Selected list and click the Remove button. To remove all the listed items, click the Remove All
button.
10. Click on the
4-12 Time Guardian Pro v3.5
button to save your settings.
Page 13
Combined Cost Rates
This module enables you to create Combined Cost Rates, and is enabled when at least one item is
assigned to the Cost Rate Order in the Combined tab of the Rate Setup window, and at least one
employee has been added in the Employees module. The rate templates created here are assigned
to employees in the Wage tab of the Employees module.
To create a Combined Cost Rate:
1. Select the Combined Cost Rates module within the Company group in the Tree View.
2. Click the
the desired template within the Combined Cost Rates module in the Tree View and click the
button, or double-click on the template row and the following type of screen will appear.
button to create a new Cost Rate. To edit a Combined Cost Rates template, select
The items assigned to the Cost Rate Order in the General tab of the Rate Setup window will
appear in the Combined Cost Rates window.
3. Using the drop down lists provided, select the employee or the Labor Level subcategory you wish
to track. To save your changes, click the
Time Guardian Pro v3.5 4-13
button.
Page 14

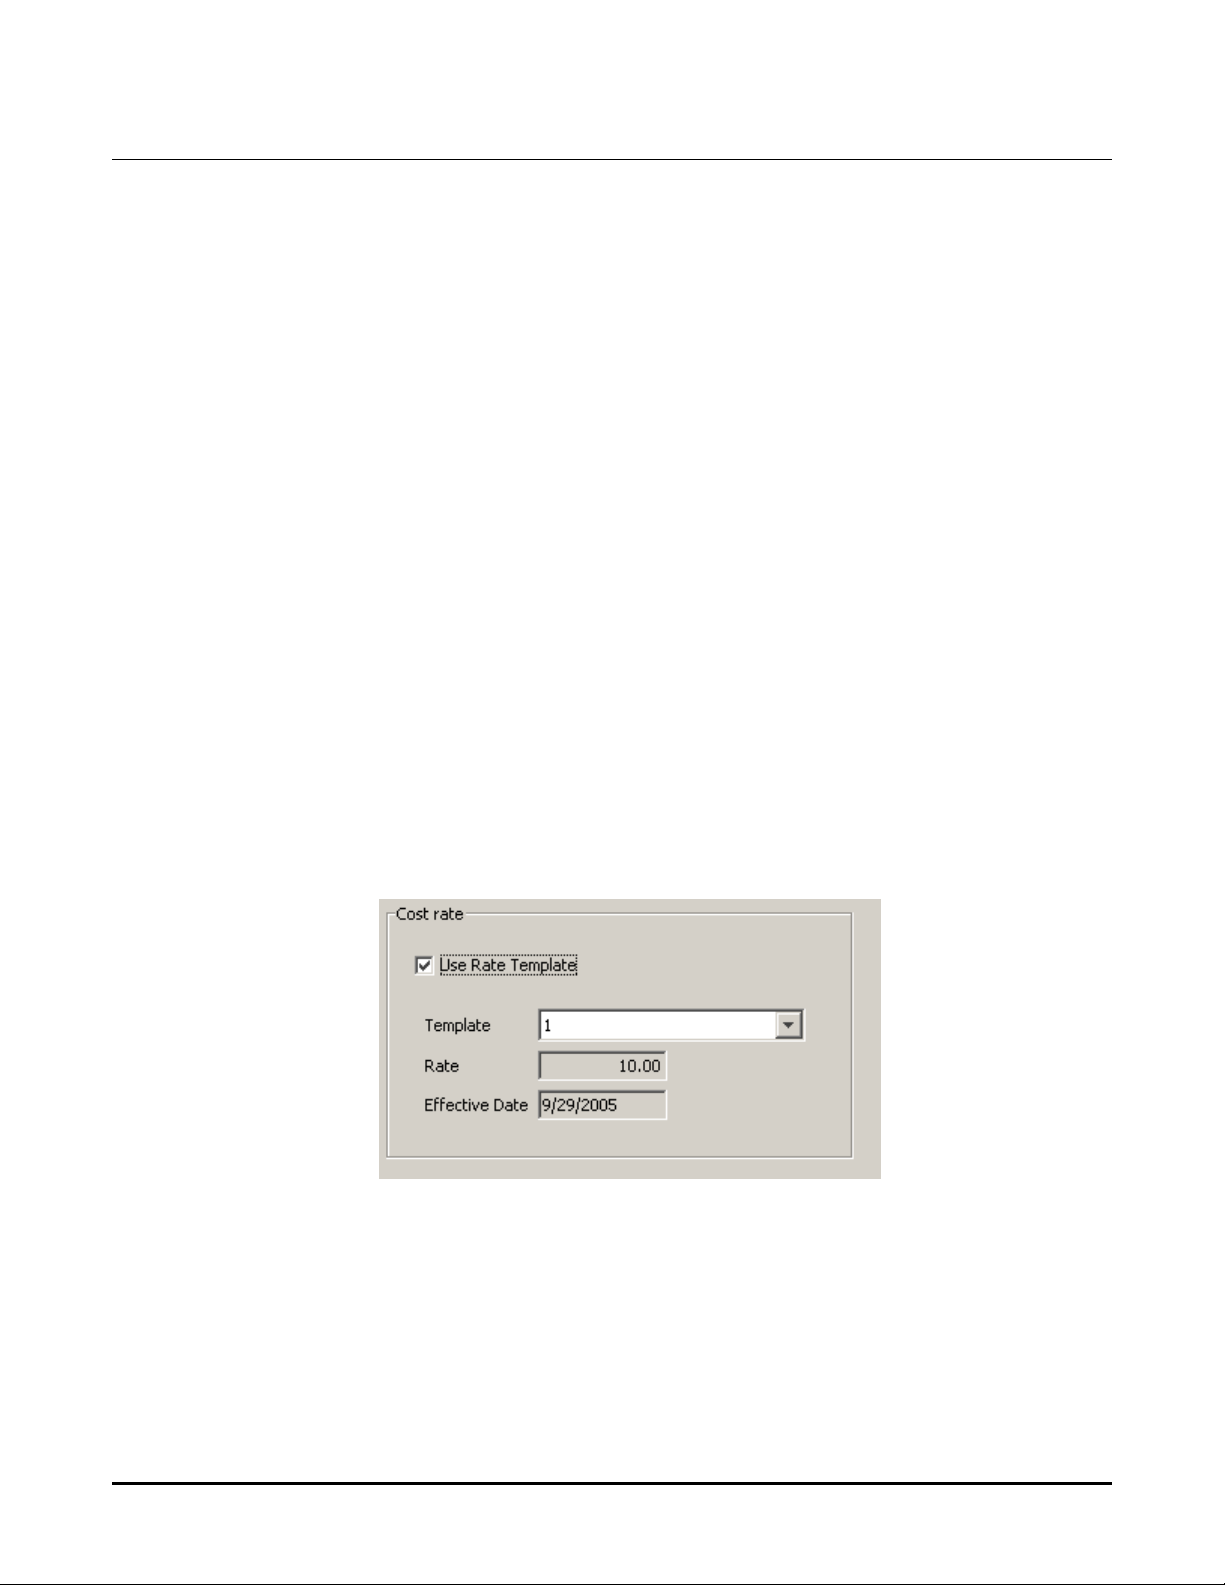
4. To add a rate based on a Rate Template, check the Use Rate Template option and select a Rate
Template using the drop down list in the Rate field as illustrated in the following example.
If you do not wish to use a Rate Template, click on the Add button. A row will appear in the Rates
box as shown in the following example.
4-14 Time Guardian Pro v3.5
Page 15

5. Click on the button in the Date field to enter the effective date for the rate will be in effect.
When you have finished, click on the
Template window.
6. Enter a rate in the Rate field.
button to save your settings and return to the Rate
Time Guardian Pro v3.5 4-15
Page 16
7. Repeat Steps #3 thru #6 to add additional Rates to this template.
8. To delete a rate select the desired row and click on the Delete button.
9. To automatically increase the rate by a %, click on the Percent Increase
button.
10. Click on the
button in the Date field to enter the effective date for the rate increase and enter
the percentage increase of the rate in the Increase field. When you have finished, click on the
button to save your settings and return to the Combined Cost Rates window.
11. Click on the
button to save your settings. The Combined Cost Rate will be added to the Main
View.
Editing a Combined Cost Rate Template
To edit a Combined Cost Rate Template, select the desired template within the Combined Billable
Rates module in the Tree View and click the
save your changes, click the
button.
button, or double-click on the template row. To
Deleting a Combined Cost Rate Template
To delete a Combined Cost Rate Template, select the desired template within the Combined Billable
Rates module in the Tree View and click the
button.
4-16 Time Guardian Pro v3.5
Page 17

Combined Billable Rates
This module enables you to create Combined Billable Rates, and is enabled when at least one item is
assigned to the Billable Rate Order in the Combined tab of the Rate Setup window, and at least one
employee has been added in the Employees module. The rate templates created here are assigned
to employees in the Wage tab of the Employees module.
To create a Billable Cost Rate:
1. Select Combined Billable Rates module within the Company group in the Tree View.
The items assigned to the Billable Rate Order in the Combined tab of the Rate Setup window will
appear in the Combined Cost Rates window.
2. Using the drop down lists, provided, select the employee or the Labor Level subcategory you wish
to track.
Time Guardian Pro v3.5 4-17
Page 18

3. To add a rate based on a Rate Template, check the Use Rate Template option and select a Rate
Template using the drop down list in the Rate field.
If you do not wish to use a Rate Template, click on the Add button. A row will appear in the Rates
box.
4-18 Time Guardian Pro v3.5
Page 19
4. Click on the
have finished, click on the
window.
button in the Date field to enter the date that the rate will be in effect. When you
button to save your settings and return to the Rate Template
Time Guardian Pro v3.5 4-19
Page 20

5. Enter a rate in the Rate field.
6. Repeat Steps #3 thru #6 to add additional Rates to this template.
7. To delete a rate select the desired row and click on the Delete button.
8. To automatically increase the rate by %, click on the Percent Increase
button.
4-20 Time Guardian Pro v3.5
Page 21
9. Click on the
enter the percentage increase of the rate in the Increase field. When you have finished, click on
the
10. Click on the
Main View.
button to save your settings and return to the Combined Billable Rates window.
button in the Date field to enter the date that the rate increase will be in effect and
button to save your settings. The Combined Billable Rate will be added to the
Editing a Combined Billable Rate Template
To edit a Combined Billable Rate Template, select the desired template within the Combined Billable
Rates module in the Tree View and click the
save your changes, click the
button.
button, or double-click on the template row. To
Deleting a Combined Billable Rate Template
To delete a Combined Billable Rate Template within the Combined Billable Rates module, select the
desired template in the Tree View and click the
button.
Time Guardian Pro v3.5 4-21
Page 22

Rate Templates
A Rate Template allows you to create a rate to assign to employees. Rate Templates are assigned to
employees in the Wages tab of the Employee window.
To create a Rate Template:
1. Select the Rate Template module within the Company module in the Setup group in the Tree
View. The following Rate Template window will appear:
2. Enter a number for the Rate Template in the Number field.
3. Enter a name for the Rate Template in the Name field.
4. In the Description field, enter a brief description of the Rate Template.
5. To add a rate, click on the Add button. A row will appear on the Rates box.
4-22 Time Guardian Pro v3.5
Page 23
6. Click on the button in the Date field to enter the effective date for the rate. When you have
finished, click on the Apply
window.
7. Enter a rate in the Rate field.
button to save your settings and return to the Rate Template
8. Repeat Steps #5 thru #7 to add additional Rates to this template.
9. To delete a Rate from a template, select the desired row and click on the Delete button.
10. Click on the Apply
button to save your settings and return to the Labor Levels window.
Editing a Rate Template
To edit a Rate Template, select the desired Rate Template in the Tree View and click the button,
or double-click on the template row. To save your changes, click the
Time Guardian Pro v3.5 4-23
button.
Page 24
Deleting a Rate Template
To delete a Rate Template, select the desired Rate Template in the Tree View and click the
button.
Users
The Users module in the Setup group is used to create user profiles/accounts and assign access
privileges to these accounts. This is accomplished through the use of User ID’s, Passwords, and
Groups (access levels). Groups are specific levels of rights and accessibility privileges. These levels
are custom to your company’s needs and are created in the Groups module, which is beneath the
Users module in the Tree View. Groups must be created before Users can be assigned.
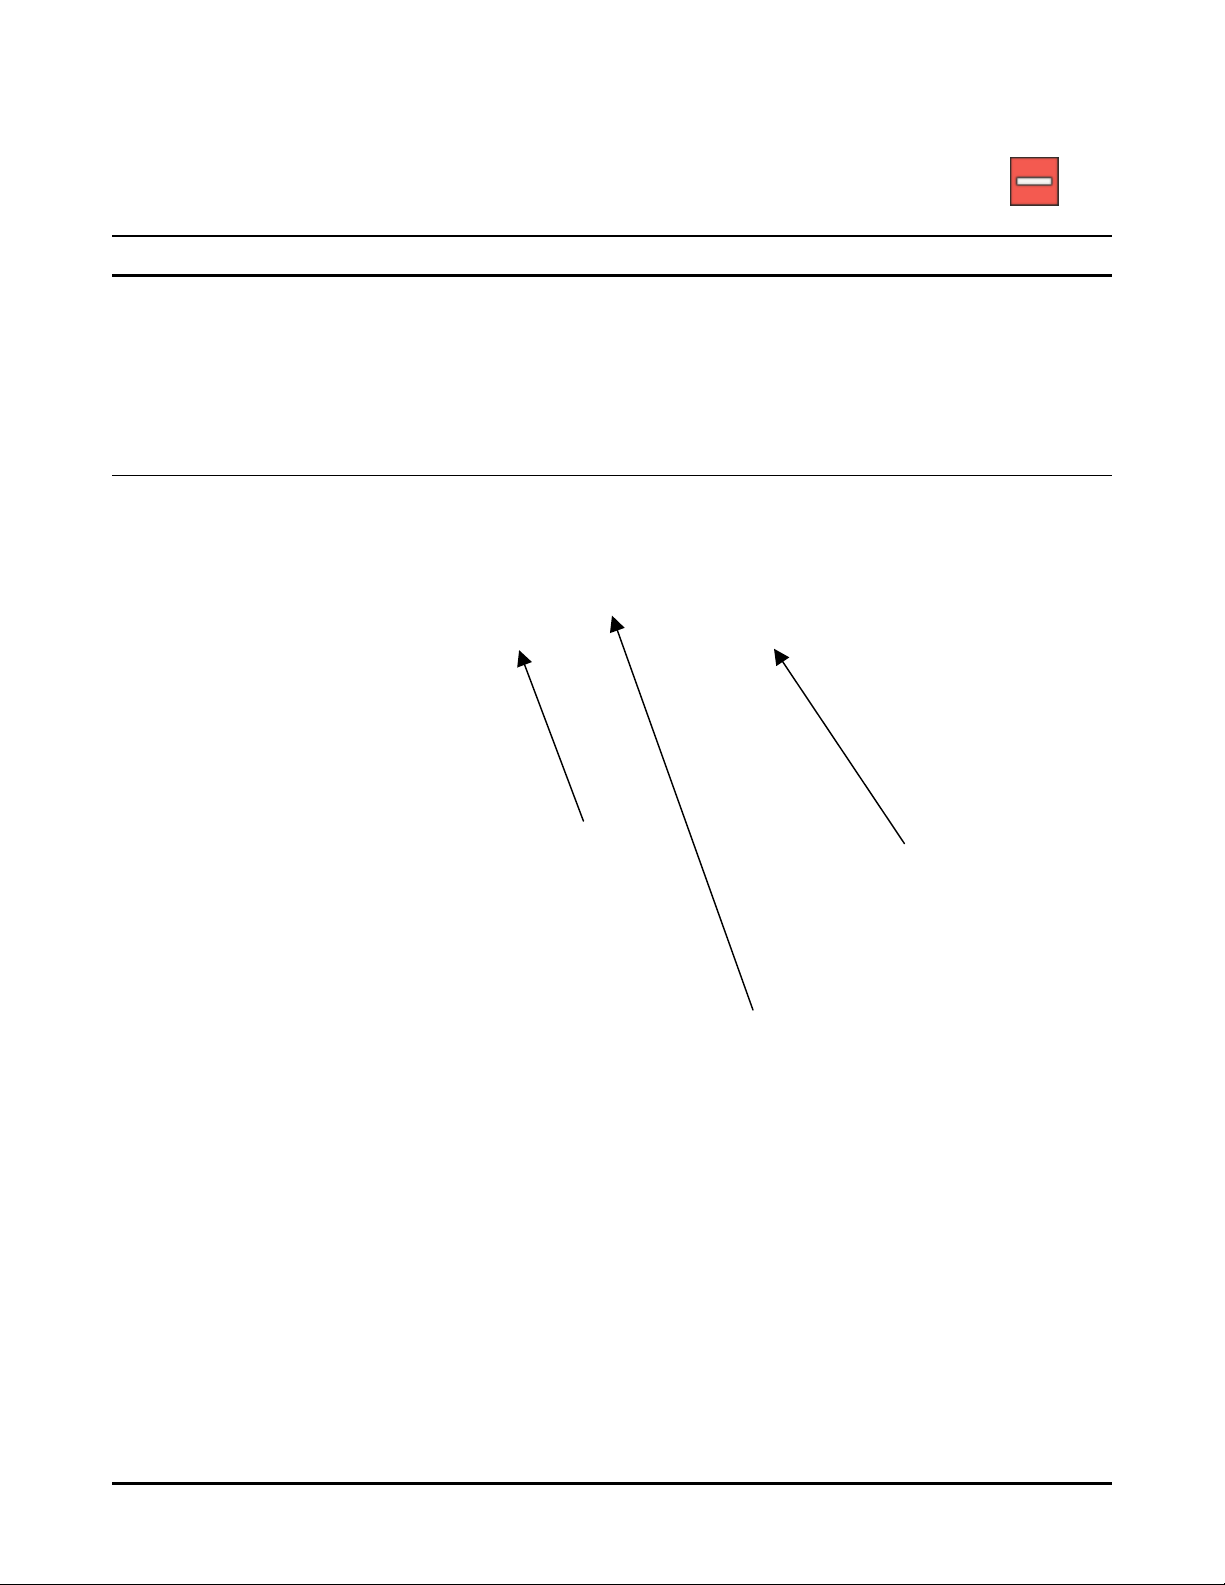
Groups
Access privileges are set in the Groups selection of the Users module in the Tree View.
Filter tool for
Groups using
Name or
Description
Secondary filter field
Click on column
headings to sort by
ascending or
descending (toggled)
Note: The Administrator and Support Groups are default groups and cannot be deleted.
User Groups can be initially filtered in ascending order by using a field with a drop down list located
on the top of the groups window (see above illustration). The choices in this list are; Name or
Description.
Additional filtering in ascending order can be accomplished by entering characters in a case sensitive
field located to the right of the drop down list (see above illustration).
Click in the column headings anywhere to further sort both columns. Each click toggles between
ascending, or descending order.
4-24 Time Guardian Pro v3.5
Page 25

To add Groups:
1. Click on the
2. In the General Tab, enter a name and a description for the Group in the fields provided.
3. Click on the Modules tab, and the following type of window will appear:
button. The following is an example of the Groups window that will appear:
By default, all modules are selected for each new group and will appear in the Selected List. When
a module is highlighted or selected from within this list, the privileges or rights options for that
module will be enabled in the checkboxes below the Selected list. They are:
• Read: Read-only
• Write: Modify records in the module.
• Add: Add records in the module.
• Delete: Delete records in the module.
Time Guardian Pro v3.5 4-25
Page 26
Placing or removing a check in each checkbox can modify the privileges or rights options. If you
disable the Write (Edit), Add, or Delete functions for the Group, the corresponding buttons (
, and ) will be disabled when a user assigned to the Group is using the software.
Modules can be removed from the Group by selecting them in the Selected list and clicking on the
Remove button. All the modules can be removed from the Selected list by clicking on the Remove
All button.
4. Make your selections for the Group’s rights and privileges and click the
close without saving, click on the
button.
button to save. To
Editing a Group
To edit a Group, select the desired Group name in the Tree View and click the button, or just
double-click on the group row. To save your changes, click the
button.
Deleting a Group
To delete a Group, select the desired Group name in the Tree View and click the button.
,
4-26 Time Guardian Pro v3.5
Page 27

Users
To create a User account:
1. Click the button with the Users module selected in the tree view. The User’s window will
appear. The User’s window can consist of up to (10) tabs: General, Password, Employee,
Payclass, and the up to 6 user defined Labor Levels.
2. In the General tab, enter the name of the individual or account you are adding in the Name field.
3. Select the Group that this user will belong to.
4. In the Account Settings section, select the following:
• Disabled: If checked, the user will be disabled. (Enabled is default)
• Expires: When checked, the password will expire on a given date. When the date arrives, a
check will automatically be placed in the disabled option.
• Read Rates: When checked, the user will have read-only access to the Rates’ modules.
• Write Rates: When checked, the user will have write access to the Rates’ modules.
5. Click on the Password tab.
Time Guardian Pro v3.5 4-27
Page 28

6. Enter in a password for the user. The password must then be confirmed.
Note: The minimum required password length is (6) characters, and can be any combination of letters
and numbers and is case-sensitive.
7. Set the password expiration options. The choices are:
• Must change password on next login: The user will be prompted to enter a new password for
this account at login.
• Never expires: The password created will never expire.
• Expires after: This allows you to set a specific date for the password to expire. After this date
the user will be prompted to enter a new password.
• Cannot change password: The users will not be able to change their password.
8. Click on the Payclass tab. This tab is used to set which Pay Class the user has access to. The
employee list will only show the employees belonging to the selected payclass.
By default, all Pay Classes are selected and will appear in the Selected list. Pay Classes can be
removed from the Group by selecting them in the Selected list and clicking on the Remove button.
All the Pay Classes can be removed from the Selected list by clicking on the Remove All button.
9. Repeat the above procedure for the remaining Labor Level tabs (up to 6 user defined).
4-28 Time Guardian Pro v3.5
Page 29
10. Click on the Employee tab. This tab is used to set which employee records the user will have
access to.
Select sort
criteria from the
drop down list to
filter employees
Enter information
in this dedicated
field to filter the
Available list
Enter information
in this dedicated
field to filter the
Selected list
11. By default, all employee records are selected and will appear in the Selected list. Employees can
be removed from the Group by selecting them in the Selected list and clicking on the Remove
button. All the employees can be removed from the Selected list by clicking on the Remove All
button.
Employees can be simultaneously
UfilteredU in both the “Available” and Selected” lists in ascending
order by using the Sort field drop down list. The choices in this list are; employee number, badge
number, payroll number, last name, first name, or comment field.
Additionally, Employee(s) can be UfilteredU in the “Available” or “Selected” lists by entering additional
case sensitive characters in dedicated Criteria fields (see above illustration). The Criteria field
located above the “Available” list filters only that list, while the Criteria field above the “Selected”
list filters that list. Each list is filtered independently in ascending order.
Note: By unselecting Pay Classes, it will reduce the Employees that the user can have access to.
Editing a User Account
To edit a user account, select the desired User name in the Tree View and click the button. To
save your changes, click the
button.
Deleting a User Account
To delete a user account, select the desired User name in the Tree View and click the button
Note: The Administrator and Support accounts cannot be deleted.
Time Guardian Pro v3.5 4-29
Page 30
Pay Codes
Pay Codes determine how an employee’s hours will be categorized and displayed throughout the
system.
To create a Pay Code:
1. Click on the Pay Codes module within the Setup group in the Tree View.
2. Click the Add
button. The Pay Codes window will appear.
3. In the Name field, enter in a name for the Pay Code.
4. In the Description field, enter in a brief description of the Pay Code.
5. Enter the Position number, if desired. A Position number is assigned automatically but can be
changed. This number is used for display order on reports and the Timecard grid.
6. Select the Primary Type (how the hours awarded to a specific Pay Code will be classified). Hours
corresponds to worked hours (REG, OT) and non-worked hours (SIC, VAC). Dollars corresponds
to monetary amounts given to an employee (Bonus, Tip).
7. Select the Hours Type: Non-worked (SIC, VAC, etc.) or Worked (REG, OT)
8. In the Cost Multiplier field, enter in the cost multiplier for the Pay Code. For example, TT = 3.0 in
the example shown above.
9. In the Billable Multiplier field, enter in the billable multiplier for the Pay Code. For example, TT =
1.0 in the example shown above. For example, this field could be used to markup the cost of labor
charges that are billable for rendered services.
10. Check Split Hours if you want the Pay Code to be used for Split Hours. Split hours allow the
system to move hours from one Pay Code to another.
4-30 Time Guardian Pro v3.5
Page 31

For example, if overtime is awarded after 40 hours:
Day Pay Code Split Hours
Monday REG Y 8.0
Tuesday REG1 Y 8.0
Wednesday REG Y 8.0
Thursday REG Y 8.0
Friday REG1 Y 10.0
The overtime hours after the Split become:
Day Pay Code Hours Overtime
Monday REG 8.0
Tuesday REG1 8.0
Wednesday REG 8.0
Thursday REG 8.0
Friday REG1 8.0 2.0
If the REG1 hours were not set to Split, the overtime hours will be:
Day Pay Code Hours Overtime
Monday REG 8.0
Tuesday REG1 8.0
Wednesday REG 8.0
Thursday REG 6.0 2.0
Friday REG1 10.0
11. Check Counts Towards Attendance if you want the Pay Code to override the Absence exception
or not.
12. When you have finished, click on the
click on the
button.
button to save your settings. To exit without saving,
Time Guardian Pro v3.5 4-31
Page 32

Shifts
All setup rules will fall into (3) categories: shift rules, daily rules, or multiple day rules. Shift rules apply
to a given shift or schedule. They include punch rounding; shift rounding, punch pair rounding, meals,
exceptions, etc. These rules are assigned to the shift in the Shifts module. Daily rules apply to a day
and may cover multiple shifts and schedules. Daily rules are created in the Daily Rules module.
Multiple day rules apply to a period that extends greater than one day. They include weekly overtime,
weekly rounding, pay period rounding, etc. Multiple day rules are created in the Pay Class module.
A Shift is the set of rules for a given shift or schedule. A Shift consists of the following elements:
• Rounding Template: Determines how an employee’s punches will be rounded.
• Exceptions: Codes used to track employee’s time deviations from assigned schedules.
• Meal Templates: Defines employee breaks and meal breaks.
• Shift Overtime: Defines the overtime rules for the schedule.
Rounding Templates
Rounding moves an employee’s punches or hours to an even amount to make it easier for
calculations. There are (2) methods available, either by rounding individual punches (Punch) or by
rounding the total hours (Hours). Only one method can be selected.
A Rounding Template is used to set a particular rounding rule. The template can then be assigned to
a Shift. Additional rounding can be found in the Daily Rules (Daily Rounding) and Pay Class
(Weekly/Pay Period Rounding) modules. Refer to these modules for more detail.
To create a Rounding Template:
1. Click on the Rounding Template module within the Shifts module in the Tree View.
2. Click the button. The following is an example of the Rounding Templates window that will
appear:
4-32 Time Guardian Pro v3.5
Page 33

3. Enter a name for the Rounding Template in the name field.
4. Enter a description of the Rounding Template in the Description field.
5. Click on Break/Meal if rounding template is to be applied.
6. Select the desired rounding type and options: hour rounding or punch rounding. If selecting Punch
Rounding the boxes alongside Grace, First IN/Last OUT, All IN/OUT, Open Schedule, and
Transfer will become selectable. The corresponding tab on the Rounding Templates screen will
become configurable depending upon the type(s) of Punch Rounding selected.
7. When you have finished configuring the Rounding Template, click on the
settings. To exit without saving, click on the
Note: If you wish to duplicate the properties of an existing Rounding Template for another Rounding
Template, select the desired Rounding Template, open it, enter in a new name and click on the
button. The new Rounding Template will appear in the Main View.
Note: If you wish to visualize the properties of a Rounding Template, view the Rounding Demo by
clicking on the
Rounding Demo view will appear:
button on the bottom of the Rounding Templates screen. The following
button.
button to save your
Clicking in the drop down boxes for Hour and Minute will set the actual time clock display, while
clicking in the drop down boxes in Unit and Point will enter the rounding rules. This presents a real
time visual display of actual time versus rounded time.
Time Guardian Pro v3.5 4-33
Page 34

Grace Rounding
In grace rounding, a window of time is setup around the start and end times of a schedule. If the IN
punch falls within the window for the scheduled start time, it is rounded (changed for calculation) to
the start of the schedule. If the OUT punch falls within window for the scheduled end time, it is
rounded (changed for calculation) to the end of the schedule.
To create a grace zone, enter the desired number of hours and minutes (HH:MM) before and after the
scheduled start time. Repeat for the scheduled end time.
For example, the schedule for the employee is 8:00 AM to 4:00 PM. The grace window for the start of
schedule is set for 15 minutes before (7:45 AM) and 15 minutes after (8:15 AM) the scheduled start
time. If the first IN punch for the day occurs between these two times it will be rounded to the
scheduled start time of 8:00 AM. The grace window for the end of the schedule is 30 minutes before
(3:30 PM) and 30 minutes after (4:30 PM) the scheduled end time. If the last OUT punch for the day
occurs between these two times it will be rounded to the schedule start time of 4:00 PM.
First IN/Last OUT
This rounding occurs outside of the grace rounding windows and when an employee has a schedule
with start and end times.
4-34 Time Guardian Pro v3.5
Page 35

In the First In/Last Out tab, there are (4) Units and (4) Points used to determine rounding. A Unit is a
numeric value used to adjust employee punch time to a consistent measurement of time. Common
units are: 1, 3, 6, 15, and 30 minutes. The Unit is used in conjunction with the Point. A Point
determines if the punch will be rounded backward or forward.
The Units and Points to be set are:
• Early IN: The first punch of the day before the start of the schedule and not inside the grace
window.
• Late IN: The first punch of the day after the start of the schedule and not inside the grace
window.
• Early OUT: The last punch of the day before the end of the schedule and not inside the grace
window.
• Late OUT: The last punch of the day before the end of the schedule and not inside the grace
window.
Example:
Unit = 15 minutes
Point = 7 minutes
The example above shows how the rounding occurs for the punches. This same rounding procedure
is done for the rest of the rounding discussed in this section. For example, it shows that if a punch
occurs between 0 and 6 minutes it will be rounded to 0, so that a 9:06 AM will be rounded to 9:00 AM.
Time Guardian Pro v3.5 4-35
Page 36

It then shows that if a punch occurs between 7 and 15 minutes, it will be rounded to 15, so that 9:07
AM will be rounded to 9:15 AM.
All IN/OUT
If First IN/Last OUT is selected in the General tab, all punches that occur between the first IN and
OUT punches will be rounded using the Units and Point set in this tab. If First IN/Last OUT is not
selected, this rounding will be used for all punches including the first IN and last OUT punches. A Unit
and Point must be assigned to both the IN and OUT punches.
4-36 Time Guardian Pro v3.5
Page 37

Open Schedule
Open Schedule rounding is used when a schedule for the day has no start or end time defined. There
are four types of rounding performed for the open schedule. A Unit and Point must be entered for
each type. They are:
• First IN punch of the day
• All OUT punches
• All IN punches
• Last OUT punch of the day
Transfer Rounding
Transfer rounding is used on punches that are designated as transfer punches by an employee
pressing the transfer button on the terminal.
Transfer rounding works the same way as Break/Meal rounding. When a punch is designated as a
transfer punch it will use transfer rounding if it is activated. If it is not activated, then IN/OUT rounding
will be used.
Time Guardian Pro v3.5 4-37
Page 38

Hour Rounding
Hour Rounding is enabled in the General Rounding tab. You must select either Punch Pair or
Schedule as the Rounding Type. Punch Pair rounds the amount of time worked between two punches
after the automatic break/meal deductions are taken out. Schedule rounds the total amount of time
worked for a schedule after the automatic break/meal deductions are taken out.
Example: Interval/punch pair rounding occurs on multiple punches in a day.
The first interval or punch pair is 8:07 AM and 11:00 AM. These punches calculate to 2 hours and 53
minutes of time. If a Unit of 15 and Point of 7 is used, then this time would be rounded to 3 hours and
0 minutes.
The second interval or punch pair is 12:32 PM and 5:00 PM. These punches calculate to 4 hours and
28 minutes of time. This time is rounded to 4 hours and 30 minutes. This would give the employee a
daily total of 7 hours and 30 minutes.
4-38 Time Guardian Pro v3.5
Page 39

Example: Schedule Rounding
The first schedule is from 8:00 AM to 12:00 PM. The four punches within the schedule calculate to 3
hours and 21 minutes of time. If the Unit is set to 15 and the Point is 7, this time would be rounded to
3 hours and 15 minutes.
Note: The minus 6 minutes will be taken away from the last interval hours in Schedule 1.
The second schedule is from 1:00 PM to 5:00 PM. The four punches within the schedule calculate to
3 hours and 20 minutes of time. This time would be rounded to 3 hours and 15 minutes.
Note: The minus 5 minutes will be taken away from the last interval hours in Schedule 2.
This would give the employee a daily total of 6 hours and 30 minutes.
Time Guardian Pro v3.5 4-39
Page 40

Break/Meal Rounding
Break/Meal is used on punches that are designated as break or meal punches as in the Meal
Templates module within the Shift module.
You must select either Hour or Punch Rounding for the break or meal. Hour Rounding will round the
total time taken and Punch Rounding will round the punches to the unit.
If Hour Rounding is selected, you must set the Unit and Point for the entire Break and Lunch (Meal). If
Punch Rounding is selected you must set the Unit and Point for the Break OUT, Break IN, Lunch
(Meal) OUT, and Lunch (Meal) IN punches.
4-40 Time Guardian Pro v3.5
Page 41

These punches are not
These punches are
consider break
punches by the
software.
assigned to either a
break or lunch.
Therefore are consider
just IN/OUT punches.
05:00 PM
Schedule
08:00 AM
03:09 PM 04:10 PM
12:00 PM
04:00 PM
08:00 AM
08:00 AM
08:10 AM
10:52 AM 11:07 AM 11:22 AM 11:37 AM 11:52 AM 12:07 PM
10:45 AM
02:55 PM 03:10 PM 03:25 PM 03:40 PM 03:55 PM
02:45 PM
Indicates what Unit the punch rounds to
11:02 AM
11:02 AM 12:08 PM
11:00 AM 11:15 AM 11:30 AM 11:45 AM
03:09 PM 04:10 PM
03:00 PM 03:15 PM 03:30 PM 03:45 PM
12:08 PM
In the example shown above the configuration for the IN/OUT rounding is as follows:
Type Unit Point
12:15 PM
04:10 PM
04:15 PM
IN 15 10
OUT 15 10
The configuration for the Break/Meal rounding is as follows:
Type Unit Point
Break OUT 15 7
Break IN 15 7
Meal OUT 15 7
Meal IN 15 7
The 11:02 AM and 12:08 PM punches are assigned by the system to a break. The 03:09 PM and
04:10 PM are not assigned to any break or meal.
Time Guardian Pro v3.5 4-41
Page 42

Exceptions
Exceptions are used to track deviations in an employee’s time and attendance from assigned
schedules. Exceptions in Time Guardian Pro are defined by a group or set and then assigned to a
Shift.
To create a group or set of Exceptions template:
1. Click on the Exception module within the Shifts module in the Tree View.
2. Click the
button. The Exception window will appear.
3. Enter a name for the Exception set in the name field.
4. Enter a description of the Exception set in the Description field.
Note: If you wish to duplicate the properties of an existing Exceptions template for another Exceptions
template, select the desired Exceptions template, open it, enter in a new name and click on the
Save As
4-42 Time Guardian Pro v3.5
button. The new Exceptions template will appear in the Main View.
Page 43

5. Click on the Exceptions tab.
6. To add an Exception, highlight the desired Exception in the Available list and click the Add button.
To select all the listed Exceptions, click the Add All button. To remove an Exception from an
employee’s record, highlight the desired Exception in the Selected list and click the Remove
button. To remove all the listed Exceptions, click the Remove All button.
7. For some Exceptions in the Selected list, you can enter in the Minute Requirement (HH:MM)
which will determine if the Exception will be reported once the Minute Requirement has been
reached. For example, Time Guardian Pro can be configured to not generate a LI (Late In
Exception) if the employee is late by less than 5 minutes.
8. When you have finished configuring the Exceptions set, click on the
settings. To exit without saving, click on the
button.
button to save your
Time Guardian Pro v3.5 4-43
Page 44

Meal Templates
Meals are the deduction of hours taken from an employee or hours given to the employee for meals
and breaks. The meals are broken up into (3) categories; meals, breaks, and coffee breaks. There are
two types of deduction: fixed or flexible.
Note: If you wish to duplicate the properties of an existing Meal template for another Meal Overtime
template, select the desired Meal template, open it, enter in a new name and click on the
button. The new Meal template will appear in the Main View.
Fixed
A fixed meal or break has to be taken at a set time of the day.
To create a fixed Meal Template:
1. Click on the Meal Templates node within the Shifts module in the Tree View.
2. Click the
button. The Meal Templates window will appear.
3. Enter a name for the Meal Template in the name field.
4. Enter a description of the Meal Template in the Description field.
4-44 Time Guardian Pro v3.5
Page 45

5. Select the Default (Punch) Position that the meal would be deducted from should the employee
take less time than the allotted time. If Start is chosen, the time will be deducted starting from the
start of the break or meal, and moving forward. For End, the time will be deducted starting from
the end time of the break or meal, and moving forward.
6. Select Fixed as the Type.
7. Place a check in the Auto Meal check box if you wish to have an automatic break deduction. Enter
in the required number of hours to work in Fixed Position before for the deduction is applied.
Select the (Punch) Position of the shift to deduct from.
8. Click on the Breaks tab.
9. To add a break, click on the Add button. A row will appear in the Fixed Breaks box. Must doubleclick on From, To, and/or Length fields to enter data.
10. Enter From and To times for the break (in 24-hour format) and Break Length (in HH:MM format).
11. Click on the
Time Guardian Pro v3.5 4-45
button to add more breaks, or click on the button to remove a break.
Page 46

12. Click on the Coffee Breaks tab.
13. To add a Coffee Breaks interval, click on the Add button. A row will appear in the Fixed Coffee
Breaks box. Must double-click on From, To, and/or Length fields to enter data.
14. Enter From and To times for the break (in 24-hour format) and Break Length (in HH:MM format).
15. Click on the
4-46 Time Guardian Pro v3.5
button to add more breaks, or click on the button to remove a break.
Page 47

16. Click on the Meals tab.
17. To add a meals interval, click on the Add button. A row will appear in the Fixed Meals box. Must
double-click on From, To, and/or Length fields to enter data.
18. Enter From and To times for the interval (in 24-hour format) and Meal Length (in HH:MM format).
19. Click on the
20. When you have finished configuring the Meal Template set, click on the
settings. To exit without saving, click on the
Time Guardian Pro v3.5 4-47
button to add more meals, or click on the button to remove a meal.
button to save your
button.
Page 48

Flexible
A flexible meal is a meal that can be taken at any time of the day. There are (4) types:
• Clock: Employees must press a button on the clock before punching IN and OUT for breaks. Only
works with MTX-15 clock.
• Interval: Punches that occur within certain preset intervals are assigned to breaks or meals. This
takes a look at the amount of time an employee punches out for.
• Sequence: Breaks or meals are assigned in sequential order, and each punch pair is assigned to
a break or meal in the order that they occur. This setting requires an employee to take a break and
meal in the proper sequence.
• Window: Punches that occur within certain preset windows of time are assigned to breaks or
meals.
To create a Flexible Interval or Clock Meal Template:
1. Click on the Meal Templates node within the Shifts module in the Tree View.
2. Click the
3. The Meal Templates window will appear.
button.
4. Enter a name for the Meal Template in the name field.
4-48 Time Guardian Pro v3.5
Page 49

5. Enter a description of the Meal Template in the Description field.
6. Select the Default (Punch) Position that the meal would be deducted from should the employee
take less than the allotted time. If Start is chosen, the time will be deducted starting from the start
of the break or meal, and moving forward. For End, the time will be deducted starting from the end
time of the break or meal, and moving forward.
7. Select Flex as the Type and Interval or Clock as the Flex Type.
8. Place a check in the Auto Meal check box if you wish to have an automatic break deduction. Enter
in the required number of hours to work before the deduction is applied and select the (Punch)
Position of the shift to deduct from.
9. Click on the Breaks tab.
10. Select the Break size based on Default Size or Shift Break Size. For breaks based on default size,
enter the number of breaks and the default break size in the fields provided.
For breaks based on Shift break size, the following selection will appear:
Time Guardian Pro v3.5 4-49
Page 50

For breaks based on Shift break size, click on the button. The following Define Breaks window
will appear:
To enter the Number of breaks based on shift length click on the Add button. A row will appear.
Enter the From and To times of the shift and the number of breaks for that shift.
To enter the Break size based on shift length click on the Add button. A row will appear. Enter the
From and To times of the shift and the size of each break for that shift.
When you have finished the number of breaks and break sizes, click on the
your settings.
11. In the Deduction for Short Break box, set how the break will be deducted if the employee uses a
shorter period of time than allocated for the break.
a. In the Threshold field, enter the amount of time (HH:MM) that will be used in the determination.
b. In the Less and More Than Threshold fields, set the conditions if the time taken for the break is
both less or more than the threshold in the fields provided. They choices are:
• Allowed break: Which is the amount of time the employee is allocated for the Regular
break or Coffee break
• Amount taken: Which is the amount of time the employee actual punched out for the
Regular break or Coffee break.
button to save
4-50 Time Guardian Pro v3.5
Page 51

• Amount under or over: Which is the amount of time that exceeds or is under the time
allocated for the Regular break or Coffee break.
• Nothing: Which is to deduct no time from the employee.
• Allowed break and taken time: Which will deduct the time allocated for Regular break or
Coffee break plus the time taken for Regular break or Coffee break.
• Allowed break and amount under or over: Which is the amount of time the employee is
allocated for the Regular break or Coffee break and which is the amount of time that
exceeds or is under the time allocated for the Regular break or Coffee break.
12. In the Deduction for Long Break box, set how the break will be deducted if the employee uses a
longer period of time than allocated for the break.
a. In the Threshold field, enter the amount of time (HH:MM) that will be used in the determination.
b. In the Less and More Than Threshold fields, set the conditions if the time taken for the break is
both less or more than the threshold in the fields provided. They choices are:
• Allowed break: Which is the amount of time the employee is allocated for the Regular
break or Coffee break
• Amount taken: Which is the amount of time the employee actual punched out for the
Regular break or Coffee break.
• Amount under or over: Which is the amount of time that exceeds or is under the time
allocated for the Regular break or Coffee break.
• Nothing: Which is to deduct no time from the employee.
• Allowed break and taken time: Which will deduct the time allocated for Regular break or
Coffee break plus the time taken for Regular break or Coffee break.
• Allowed break and amount under or over: Which is the amount of time the employee is
allocated for the Regular break or Coffee break and which is the amount of time that
exceeds or is under the time allocated for the Regular break or Coffee break.
c. Click on the Coffee Breaks tab. Repeat steps 10 through 12 for the Coffee Breaks.
d. Click on the Meals tab. Repeat steps 10 through 12 for the Meals.
An example of how this would be used is to look at an employee who is assigned a 1:00 hour
meal size to be taken during the day. When the employee actually takes his or her meal, if he or
she takes less than 1:00 hour the software will denote this as a Short Meal and if he or she takes
more than 1:00 hour the software will denote this as a Long Meal. Using the example above as the
setup a short meal example would be, if employee takes 00:45 minutes for meal the software will
denote this as a Short Meal. The employee will have a short meal of 00:15 minutes (01:00 –
00:45). Therefore, the short meal of 00:15 minutes is less than the threshold and then the software
will deduct the Allowed Meal of 1:00 hour. If the employee takes 00:20 minutes for meal the
software will denote this as a Short Meal. The employee will have a short meal of 00:40 minutes
(01:00 – 00:20). Therefore, the short meal of 00:40 minutes is more than the threshold and then
the software will deduct the Amount Taken of 00:20 minutes.
Time Guardian Pro v3.5 4-51
Page 52

e. If you have selected Interval as the Flex Type, Click on the Assignments tab.
f. Enter the From and To (interval) times for each break. The employee punch times will be
assigned to one of the Meal Template types (Break, Meal, or Coffee Break) based on the time
between the OUT and IN punches.
g. When you have finished configuring the Meal Templates, click on the
settings. To exit without saving, click on the
4-52 Time Guardian Pro v3.5
button.
button to save your
Page 53

To create a Flexible Sequence Meal Template:
1. Click on the Meal Templates node within the Shifts module in the Tree View.
2. Click the button.
3. The Meal Templates window will appear.
4. Enter a name for the Meal Template in the name field.
5. Enter a description of the Meal Template in the Description field.
6. Select the Default (Punch) Position, Start or End, that the break or meal will be based on.
7. Select Flex as the Type and Sequence as the Flex Type.
8. Place a check in the Auto Meal check box if you wish to have an automatic break deduction. Enter
in the required number of hours to work before for the deduction is applied and select the (Punch)
Position of the shift to deduct from.
9. Click on the Breaks tab.
Time Guardian Pro v3.5 4-53
Page 54

10. Select the Break size based on Default Size or Shift Break Size.
For breaks based on default size, enter the number of breaks and the default break size in the
fields provided.
For breaks based on Shift break size, click on the
will appear:
button. The following Define Breaks window
To enter the Number of breaks based on shift length click on the Add button. A row will appear.
Enter the From and To times of the shift and the number of breaks for that shift.
To enter the Break size based on shift length click on the Add button. A row will appear. Enter the
From and To times of the shift and the size of each break for that shift.
When you have finished entering the number of breaks and break sizes, click on the
to save your settings.
4-54 Time Guardian Pro v3.5
button
Page 55

Click the Combine multiple employee breaks to one check box if you wish to have all employee
breaks combined together as one break.
11. In the Deduction for Short Break box, configure how much time will be deducted from the
employee when an employee punches out for a shorter period of time than they were allocated for
in the break:
a. Enter in the amount of time (HH:MM) that the action is to be taken.
b. Set the conditions if the time taken for the break is either less or more than the threshold in the
fields provided. The choices are:
• Allowed break: Which is the amount of time the employee is allocated for the Regular break or
Coffee break.
• Amount taken: Which is the amount of time the employee actually punched out for the Regular
break or Coffee break.
• Amount under or over: Which is the amount of time that exceeds or is under the time allocated
for the Regular break or Coffee break.
Time Guardian Pro v3.5 4-55
Page 56

• Nothing: Which is to deduct no time from the employee.
• Allowed and taken time: Which will deduct the time allocated for Regular break or Coffee
break plus the time taken for Regular break or Coffee break.
• Allowed break and amount under or over: Which is the amount of time the employee is
allocated for the Regular break or Coffee break and which is the amount of time that exceeds
or is under the time allocated for the Regular break or Coffee break.
12. In the Deduction for Long Break box, configure how much time will be deducted from the
employee when an employee takes a longer period of time than they were allocated for in the
break:
a. Enter in the amount of time (HH:MM) that the action is to be taken.
b. Set the conditions if the time taken for the break is either less or more than the threshold in the
fields provided. The choices are:
• Allowed break: Which is the amount of time the employee is allocated for the Regular break or
Coffee break.
• Amount taken: Which is the amount of time the employee actually punched out for the Regular
break or Coffee break.
• Amount under or over: Which is the amount of time that exceeds or is under the time allocated
for the Regular break or Coffee break.
• Nothing: Which is to deduct no time from the employee.
• Allowed and taken time: Which will deduct the time allocated for Regular break or Coffee
break plus the time taken for Regular break or Coffee break.
• Allowed break and amount under or over: Which is the amount of time the employee is
allocated for the Regular break or Coffee break and which is the amount of time that exceeds
or is under the time allocated for the Regular break or Coffee break.
13. Click on the Coffee Breaks tab. Repeat steps 10 through 12 for the Coffee Breaks.
14. Click on the Meals tab. Repeat steps 10 through 12 for the Meals.
15. Click on the Assignments tab.
4-56 Time Guardian Pro v3.5
Page 57

16. Assign sequence of Meal Template types.
17. When you have finished configuring the Meal Templates, click on the button to save your
settings. To exit without saving, click on the
button.
To create a Flexible Window Meal Template:
1. Click on the Meal Templates node within the Shifts module in the Tree View.
2. Click the
button. The Meal Templates window will appear.
Time Guardian Pro v3.5 4-57
Page 58

3. Enter a name for the Meal Template in the name field.
4. Enter a description of the Meal Template in the Description field.
5. Select the Default (Punch) Position, Start or End, that the break or meal will be based on.
6. Select Flex as the Type and Window as the Flex Type.
7. Place a check in the Auto Meal check box if you wish to have an automatic break deduction. Enter
in the required number of hours to work before the deduction is applied and select the Meal
Position of the shift to deduct from. The Meal Position is used to determine where in the
employee’s worked hours the system will deduct the time for the flexible meal if the employee
does not take it. You have the choice of deducting the meal length from the Start or End of the
employee’s shift. If Start is selected, then the length of the meal will be deducted starting at the
employee’s first IN punch and working forward. If End is selected then the length of the meal will
be deducted starting at the employee’s last OUT punch and working backwards.
8. Click on the Breaks tab.
4-58 Time Guardian Pro v3.5
Page 59

9. Select the Break size based on Default Size or Shift Break Size.
For breaks based on default size, enter the number of breaks and the default break size in the
fields provided.
For breaks based on Shift break size, click on the button. The following Define Breaks window
will appear:
To enter the Number of breaks based on shift length click on the Add button. A row will appear.
Enter the From and To times of the shift and the number of breaks for that shift.
To enter the Break size based on shift length click on the Add button. A row will appear. Enter the
From and To times of the shift and the size of each breaks for that shift.
When you have finished defining the number of breaks and break sizes, click on the
button
to save your settings.
Time Guardian Pro v3.5 4-59
Page 60

10. In the “Deduction for short break” box, configure how much time will be deducted from the
employee when an employee punches out for a shorter period of time than they were allocated in
the break:
a. Enter in the amount of Threshold time (HH:MM) before the action is to be taken.
b. Set the conditions if the time taken for the break is either less or more than the threshold in the
fields provided. The choices are:
• Allowed break: Which is the amount of time the employee is allocated for the Regular break or
Coffee break.
• Amount taken: Which is the amount of time the employee actually punched out for the Regular
break or Coffee break.
• Amount under or over: Which is the amount of time that exceeds or is under the time allocated
for the Regular break or Coffee break.
• Nothing: Which is to deduct no time from the employee.
• Allowed break and taken time: Which will deduct the time allocated for Regular break or
Coffee break plus the time taken for Regular break or Coffee break.
• Allowed break and amount under or over: Which is the amount of time the employee is
allocated for the Regular break or Coffee break and which is the amount of time that exceeds
or is under the time allocated for the Regular break or Coffee break.
11. In the “Deduction for long break” box, configure how much time will be deducted from the
employee when an employee takes a longer period of time than they were allocated in the break:
a. Enter in the amount of Threshold time (HH:MM) before the action is to be taken.
b. Set the conditions if the time taken for the break is both less and more than the threshold in
the fields provided. The choices are:
• Allowed break: Which is the amount of time the employee is allocated for the Regular break or
Coffee break.
• Amount taken: Which is the amount of time the employee actually punched out for the Regular
break or Coffee break.
• Amount under or over: Which is the amount of time that exceeds or is under the time allocated
for the Regular break or Coffee break.
• Nothing: Which is to deduct no time from the employee.
• Allowed and taken time: Which will deduct the time allocated for Regular break or Coffee
break plus the time taken for Regular break or Coffee break.
• Allowed break and amount under or over: Which is the amount of time the employee is
allocated for the Regular break or Coffee break and which is the amount of time that exceeds
or is under the time allocated for the Regular break or Coffee break.
12. Click the Add button to create a Break window and enter the following:
4-60 Time Guardian Pro v3.5
Page 61

• Hours to Work: The starting point of the break window. The number of hours the employee
must work after the From field setting before the break window begins.
• Length: Length of window in which the employee must punch to be awarded the break.
• From: Select the Schedule Start or 1st IN Punch.
• Penalty: Select this box to apply the penalty. This applies when an employee is not able to
take their assigned break for the day. The employer is penalized.
• Penalty Length: Enter the penalty window length. If an employee takes their break during
this window, the penalty is the amount of time assigned the penalty window, minus the
lunch taken at the penalty paycode.
• Paycode: Select appropriate paycode from the dropdown list.
• Apply Short Penalty: Select this box to apply the short penalty.
To delete a break window, select the desired row and click on the Delete button.
13. Click on the Coffee Breaks tab. Repeat steps 10 through 12 for the Coffee Breaks.
14. Click on the Meals tab. Repeat steps 10 through 12 for the Meals.
15. When you have finished configuring the Meal Templates, click on the
settings. To exit without saving, click on the
button.
button to save your
Break Credit
Break Credit is used to apply the left over or remaining time that an employee has from a meal or
break to other meals or breaks where the employee exceeded the time allowed.
Time Guardian Pro v3.5 4-61
Page 62

For example, the Break Credit is setup to allow break time to be credited to meals for the Maximum
Amount of 15 minutes. The break time allocated for the employee is 20 minutes and the meal time
allocated is 45 minutes. The employee takes a 10-minute break and 55-minute meal. The 10 minutes
that employee did not take for the break will be applied to the 10 minutes the employee went over on
the meal. No extra time will be deducted from the employee for taking a longer meal than allowed.
The total time taken from the employee is 65 minutes. If the Break Credit is not used (set to None),
then 75 minutes would deducted from the employee (20 minutes for breaks and 55 minutes for meal).
To configure the Break Credit:
1. Click on the Meal Templates node within the Shifts module in the Tree View.
2. Click the
button. The Meal Templates window will appear. Click on the Break Credit tab.
3. In the Meal Credit box, select how the unused meal time will be credited to using the drop down
list. The choices are; None, Meals, Coffee Breaks, All Breaks, Breaks and Meals, Coffee Breaks
and Meals, or All Breaks and Meals.
4. In the Maximum Amount field, enter the maximum amount of time (HH:MM) that will be credited.
5. In the Break Credit box, select how the unused Break time will be credited to using the drop down
list. The choices are; None, Meals, Coffee Breaks, All Breaks, Breaks and Meals, Coffee Breaks
and Meals, or All Breaks and Meals.
6. In the Maximum Amount field, enter the maximum amount of time (HH:MM) that will be credited.
7. In the Coffee Break Credit box, select how the unused Coffee Break time will be credited to using
the drop down list. The choices are; None, Meals, Coffee Breaks, All Breaks, Breaks and Meals,
Coffee Breaks and Meals, or All Breaks and Meals.
8. In the Maximum Amount field, enter the maximum amount of time (HH:MM) that will be credited.
4-62 Time Guardian Pro v3.5
Page 63

9. When you have finished configuring the meal template, click on the button to save your
settings. To exit without saving, click on the
button.
Shift Overtime
Overtime is the time an employee works that extends beyond a certain level of time set by the
company’s policies. Shift overtime is based on hours worked and is a way of rewarding the employee
for working more hours than a set hour value in one shift (Schedule). The hours that exceed the set
hour value are normally paid at a high wage or rate.
Up to (4) levels of Shift Overtime can be used. Each level can be assigned its own threshold limit. The
hours worked beyond the threshold will be moved to the specified OT paycode.
To create a Shift Overtime template:
1. Click on the Shift Overtime node in the Shifts module in the Tree View.
2. Click the
button. The Shift Overtime window will appear.
3. Enter a name for the Shift Overtime rule in the name field.
4. Enter a description of the Shift Overtime rule in the Description field.
Note: If you wish to duplicate the properties of an existing Shift Overtime template for another Shift
Overtime template, select the desired Shift Overtime template from the Shift Overtime window,
open it, enter in a new name and click on the
appear in the Shift Overtime window.
Time Guardian Pro v3.5 4-63
button. The new Shift Overtime template will
Page 64

5. Click on the Level tab.
6. In the Level table, enter the threshold limits and assign a Pay Code to each level of overtime.
7. Click on the Count tab.
8. In the Count table, check the Pay Codes in each column that you want to be combined to achieve
each level’s threshold. For example, if you checked REG and HOL in the Level1 column, then the
hours for REG and HOL pay codes will be combined to reach Level1’s threshold value.
4-64 Time Guardian Pro v3.5
Page 65

Note: You can select all the Pay Codes in a given column by clicking on the column heading. You can
also deselect any checked Pay Codes in a column by clicking on the column heading. Also, you
can select/unselect all paycodes by clicking on the Check/Uncheck All
9. Click the button to save your settings. To exit without saving, click on the button.
icon.
Editing a Shift Overtime Template
To edit a Shift Overtime template, select a row from the list in the Table View and click on the
button or double-click on the desired row. When you have finished your modifications, click on the
button to save your settings.
Deleting a Shift Overtime Template
To delete a Shift Overtime template, select a template from the list in the Shift Overtime window and
click on the
button.
Outside Shift Overtime
Outside Shift overtime allows you to create a finite set of overtime rules for employees that work
before or after their scheduled Shift or Schedule.
Up to (4) levels of Outside Shift Overtime can be used. Each level can be assigned its own threshold
limit. Hours worked beyond the threshold will be moved to the specified OT paycode.
To create an Outside Shift Overtime template:
1. Click on the Outside Shift Overtime node in the Shifts module in the Tree View.
2. Click the
Time Guardian Pro v3.5 4-65
button. The Outside Shift Overtime window will appear.
Page 66

3. Enter a name for the Outside Shift Overtime rule in the name field.
4. Enter a description of the Outside Shift Overtime rule in the Description field.
5. Select either Before Shift, After Shift, or both. The Before and After tabs will be active only if they
are checked.
Note: If you wish to duplicate the properties of an existing Outside Shift Overtime template for another
Shift Overtime template, select the desired Outside Shift Overtime template from the Outside
Shift Overtime window, open it, enter in a new name and click on the
Outside Shift Overtime template will appear in the Outside Shift Overtime.
6. Click on the Before Shift tab.
button. The new
4-66 Time Guardian Pro v3.5
Page 67

7. In the Level table, enter the threshold limits and assign a Pay Code to each level of overtime.
8. Click on the Count tab.
9. In the Count table, check the Pay Codes in each column that you want to be combined to achieve
each level’s threshold. For example, if you checked REG and HOL in the Level 1 column, then the
hours for REG and HOL pay codes will be combined to reach Level 1’s threshold value.
Time Guardian Pro v3.5 4-67
Page 68

Note: You can select all the Pay Codes in a given column by clicking on the column heading. You can
also deselect any checked Pay Codes in a column by clicking on the column heading. Also, you
can select/unselect all the paycodes by clicking on the Check/Uncheck All
10. Click on the After Shift tab.
icon.
11. In the Level table, enter the threshold limits and assign a Pay Code to each level of overtime.
12. Click on the Count tab.
4-68 Time Guardian Pro v3.5
Page 69

13. In the Count table, check the Pay Codes in each column that you want to be combined to achieve
each level’s threshold. For example, if you checked REG and HOL in the Level1 column, then the
hours for REG and HOL pay codes will be combined to reach Level1’s threshold value.
Note: You can select all the Pay Codes in a given column by clicking on the column heading. You can
also deselect any checked Pay Codes in a column by clicking on the column heading. Also, you
can select/unselect all the paycodes by clicking on the Check/Uncheck All icon.
14. Click the button to save your settings. To exit without saving, click on the button.
Editing an Outside Shift Overtime Template
To edit an Outside Shift Overtime template, select a row from the list in the Table View and click on
the
on the
button or double-click on the desired row. When you have finished your modifications, click
button to save your settings.
Deleting an Outside Shift Overtime Template
To delete an Outside Shift Overtime template, select a template from the list in the Outside Shift
Overtime window and click on the
button.
Time Guardian Pro v3.5 4-69
Page 70

Creating A Shift
Once Rounding, Exception, Meal, Shift Overtime, and Outside Shift Overtime templates have been
set, a shift can be created. To do so perform the following:
1. Click on the Shifts module in the Tree View.
2. Click the button. The following Shifts window will appear.
3. Enter a name for the Shift in the name field.
4. Enter a description of the Shift in the Description field.
5. Assign a Rounding template to the Shift using the drop down list provided.
6. Assign an Exception template to the Shift using the drop down list provided.
7. Assign a Meal template to the Shift using the drop down list provided.
8. Assign a Shift Overtime template to the Shift using the drop down list provided.
9. Assign an Outside Shift Overtime template to the Shift using the drop down list provided.
10. Click the
button to save your settings. To exit without saving, click on the button.
Editing a Shift
To edit a Shift, select a Shift from the list and click on the button or double-click the desired Shift.
When you have finished your modifications, click on the
button to save your settings.
Deleting a Shift
To delete a Shift, select a Shift from the list and click on the button.
4-70 Time Guardian Pro v3.5
Page 71

Daily Rules
The Daily Rules module is used to set the rules which govern daily punches, such as Rounding,
Break/Lunch Rounding, and Daily Overtime.
Daily Overtime
Overtime is the time an employee works that extends beyond a certain level of time set by the
company’s policies. Daily overtime is based on hours worked and is a way of rewarding the employee
for working more hours than a set hour value in one day. The hours that exceed the set hour value
are normally paid at a higher wage or rate.
Up to (4) levels of Daily Overtime can be used. Each level can be assigned its own threshold limit that
move the hours from one pay code to another.
To create a Daily Overtime template:
1. Click on the Daily Overtime node within the Daily Rules module in the Tree View. Click the
button.
2. The following Daily Overtime window will appear:
3. Enter a name for the Daily Overtime template in the name field.
4. Enter a description of the Daily Overtime template in the Description field.
Time Guardian Pro v3.5 4-71
Page 72

5. Click on the Settings tab and the following window will appear:
6. In the Level tab, select the day of the week that this overtime rule will apply to, using the Day of
the Week/Holiday(s) field. The choices are Sunday through Saturday, Default, or Holiday Group.
The Default setting will be used for any day(s) or Holiday(s) not defined explicitly. Enter the
threshold limits and assign a Pay Code to each level of overtime.
7. Click on the Count tab and the following window will appear:
4-72 Time Guardian Pro v3.5
Page 73

8. On the Count table, check the Pay Codes in each column that you want to be combined to
achieve each level’s threshold. For example, if you checked REG and HOL in the Level1 column,
then the hours for REG and HOL pay codes will be combined to reach Level1’s threshold value.
Note: The (4) buttons at the top right of the Level tab allow you to Select (or De-select) all, copy, cut,
and paste the (Overtime) Pay Codes into different days or holidays. The buttons are as
follows:
Button Function
Check/Uncheck all
Cut
Copy
Paste
9. Click the
button to save your settings. To exit without saving, click on the button.
Editing a Daily Overtime Template
To edit a Daily Overtime template, select a template from the list and click on the button or
double-click on the desired template. When you have finished your modifications, click on the
button to save your settings.
Deleting a Daily Overtime Template
To delete a Daily Overtime template, select a template from the list and click on the button.
Time Guardian Pro v3.5 4-73
Page 74

Period Overtime
Period Overtime is a method of awarding an employee for working more hours than a set hour value
in a given period of time. Multiple periods can be set in a given day. Each period begins with an IN
punch and expires the number of hours set from that punch.
The setup for this overtime is similar to that of Daily Overtime. The levels and counts can be setup for
each day of the week, Default (any day not explicitly set), and Holidays. The day for which levels and
count will be used is based on the calculation day and the IN punch that begins the period. Up to (4)
levels of Period Overtime can be used. Each level can be assigned its own threshold limit that move
the hours from one pay code to another.
For example, (2) 24-hour periods:
4-74 Time Guardian Pro v3.5
Page 75

To create a Period Overtime template:
1. Click on the Period Overtime node within the Shifts Module in the Tree View. Click the
button.
2. The Period Overtime window will appear.
3. Enter a name for the Period Overtime template in the name field.
4. Enter a description of the Period Overtime template in the Description field.
5. Select Period Hours. The choices are; Current Calculated Day, or Previous Calculated Day of the
st
P
1
P
In-Punch.
6. Enter the Period Length in HH:MM.
7. Click the check box if you wish the Period to start on the first In Punch only. If this setting is not
checked, a new period will be created for every IN punch. When multiple periods are in effect, an
employee can receive overtime for each period.
Time Guardian Pro v3.5 4-75
Page 76

8. Click on the Settings tab.
9. In the Level tab, select the day of the week that this overtime rule will apply to, using the Day of
the Week/Holiday(s) field. The choices are Sunday through Saturday, Default, or Holiday Group.
The Default setting will be used for any day(s) or Holiday(s) not defined explicitly. Enter the
threshold limits and assign a Pay Code to each level of overtime.
10. Click on the Count tab and the following window will appear:
4-76 Time Guardian Pro v3.5
Page 77

11. On the Count table, check the Pay Codes in each column that you want to be combined to
achieve each level’s threshold. For example, if you checked REG and HOL in the Level1 column,
then the hours for REG and HOL pay codes will be combined to reach Level1’s threshold value.
Note: The (4) buttons at the top right of the Level tab allow you to Select (or De-select) all, copy, cut,
and paste the (Overtime) Pay Codes into different days or holidays. The buttons are as
follows:
Button Function
Check/Uncheck all
Cut
Copy
Paste
12. Click the
button to save your settings. To exit without saving, click on the button.
Editing a Period Overtime Template
To edit a Period Overtime template, select a template from the list and click on the button or
double-click on the desired template. When you have finished your modifications, click on the
button to save your settings.
Deleting a Period Overtime Template
To delete a Period Overtime template, select a template from the list and click on the button.
Time Guardian Pro v3.5 4-77
Page 78

Zone Differentials
Zone Differentials are a way to increase an employee’s pay for working during certain times or
“Zones” of the day. Zone Differentials consist of a Zone Code, Qualification Rules, and Zone Award.
The Zone Differential module is located within the Daily Rules module in the Tree View. Zone
Differentials are assigned to a Daily Rule.
Click to sort
Drop down list
for initial filter
Secondary filter field
columns
Zone Differentials can be initially filtered in ascending order by using a field with a drop down list
located on the top of the zone differential window (see above illustration). The choices in this list are;
Name or Description.
Additional filtering in ascending order can be accomplished by entering characters in a case sensitive
field located to the right of the drop down list (see above illustration).
Click in the column headings anywhere to further sort both columns. Each click toggles between
ascending, or descending order.
4-78 Time Guardian Pro v3.5
Page 79

Zone Codes
The Zone Code is used to name or reference the window of time in a day that an employee can work
to receive premium pay. Zone Codes are assigned to Zone Differentials. To create a Zone Code,
perform the following:
1. Click on the Zone Differential node within the Daily Rules module in the Tree View.
2. Expand the view of the Zone Differential node and click on Zone Codes.
3. Click the
button. The Zone Codes window will appear.
4. Enter a name for the Zone Code in the name field.
5. Enter a description of the Zone Code in the Description field.
6. Assign a Number to the Zone Code in the Number field.
7. Click the
button to save your settings. To exit without saving, click on the button.
Time Guardian Pro v3.5 4-79
Page 80

Qualification Rules
Qualification Rules are rules that govern whether an employee can be awarded hours (Zone Award)
in a particular Zone Code for working inside the eligibility windows.
To create Qualification Rules:
1. Click on the Zone Differential node within the Daily Rules module in the Tree View.
2. Expand the view of the Zone Differential node and click on Qualification Rules.
3. Click the
button. The following Qualification Rules window will appear:
4. Enter a name for the rule in the name field.
5. Enter a description of the rule in the Description field.
6. Click on the Settings tab and the following settings view will appear:
4-80 Time Guardian Pro v3.5
Page 81

7. Click the Add button to add a Qualification Rule and enter the following information:
Type: Select one of the following options:
• Work: Looks at all work hours for the day.
• All Schedule: The hours worked by the employee will be compared to all shifts, and the
employee must qualify on all shifts to get the Zone Award.
• Single Schedule: The hours worked by the employee will be compared to a particular shift, and
the employee must qualify on any of these shifts to get the Zone Award. Each single schedule
has to pass the rule to get this.
• Zone: Looks at the time in the window.
Condition: Select one of the following options:
For Type set to All Schedule, Single Schedule and Zone the options are:
• Work before
• Work within
• Work after
• Work before %
• Work within %
• Work after %
• Punch before
• Punch after
• Punch before %
• Punch after %
• Schedule type
For Type set to Zone, the options include all the above and:
• Schedule within
• Schedule within %
• Schedule start before
• Schedule start before %
• Schedule start after
• Schedule start after %
• Schedule end before
• Schedule end before %
• Schedule end after
• Schedule end after %
• First In punch after zone start
• Last Out punch before zone end
Paycode Filter: Select either All or Selected. If selected is chosen, use the
button in the Paycode Selection column to select the Paycode hours to count towards the Zone
Award.
Time Guardian Pro v3.5 4-81
Page 82

Comp: This field will compare the value in the Value column to the Condition. The options are:
• < (Less than)
• <= (Less than or equal to)
• = (Equal to)
• > (Greater than)
• >= (Greater than or equal to)
• <> (Not equal to)
Value and Value Type: Enter in the amount of hours or dollars in the Value column and select
Hours or Dollars in the Value Type column.
Labor Level Filter: Select either All or Selected. If selected, use the
button in the
Labor Level Selection column to select the Labor Levels to count towards the Zone Award.
Connector: This field is used to connect the next line or rule to the condition. The options are;
− AND
− OR.
8. To add another Qualification Rule, click the Add button. A new Qualification Rule line will appear
beneath the line just created.
To delete a Qualification Rule, click the Remove button. To move a Qualification Rule up in the
sequence, select the desired line and click the Move Up button. To move a Qualification Rule
down in the sequence, select the desired line and click the Move Down button.
9. Click the
button to save your settings. To exit without saving, click on the button.
4-82 Time Guardian Pro v3.5
Page 83

Zone Award
The Zone Award allows you to transfer the hours to another pay code, duplicate hours to another pay
code, or award hours or dollars after the employee has met the Zone Qualification Rules. Multiple
rules can be award for each zone window and qualification.
To create Zone Award Rules:
1. Click on the Zone Differential node within the Daily Rules module in the Tree View.
2. Expand the view of the Zone Differential node and click on Zone Award.
3. Click the button. The Qualification Rules window will appear.
4. Enter a name for the rule in the Name field.
5. Enter a description of the rule in the Description field.
6. Click on the Settings tab.
Time Guardian Pro v3.5 4-83
Page 84

7. Enter the following information:
Source: Select one of the following options:
• Move Paycode: Use to filter out paycodes you do not want to use
• Work hours: Awards all work hours in addition.
• Before Schedule: Hours worked before scheduled.
• Within Schedule: Hours worked in schedule.
• After Schedule: Hours worked after schedule.
• Schedule: Use this to setup award for schedule.
• Zone: Use zone window to award hours.
• Value: Used to award hours, or dollars.
• Hour Multiplier: Get all hours within zone X multiplier
• Change Rate: Used to change rate of pay for both cost & billable rates.
• Change Billable Rate: Change only billable rate.
• Change Cost Rate: Change only cost rate.
• Set Zone Number: Used to select zones.
• Guaranteed Hours: System gives you guaranteed amount across all schedules or single
schedule.
Type: Select one of the following options when source is set to:
• Value and Hour Multiplier: select either Hours, or Dollars.
• Change Rate: select Fix Value, Add To, or Percentage + Base.
• Set Zone Number: select either Set All, or Set in Window.
• Schedule: select either In Zone or All.
• Guaranteed Hours: select either Single Schedule or All Schedule.
Value: Enter in the amount of hours or dollars.
Paycode Filter: Select either All or Selected. If selected is chosen, use the
button in the Paycode Selection column to select the Paycode hours to count towards the Zone
Award.
Assign Paycode: Select either All or Selected.
Labor Level Filter: Select either All or Selected. If selected is chosen, use the
button in the Labor Level Selection column to select the labor categories to count towards the
Zone Award.
Labor Award: Select either Labor working in, Home labor, or Fixed labor. If Fixed labor is selected,
use the
that will be included in the Zone Award.
Zone Codes: Select the zone code to set the awarded hours to.
8. Click the
button to save your settings. To exit without saving, click on the button.
button in the Labor Award Selection column to select the Zone Award
4-84 Time Guardian Pro v3.5
Page 85

The following table displays the options for the Zone Award based on the Source selected:
Time Guardian Pro v3.5 4-85
Page 86

Creating a Zone Differential
1. Click on the Zone Differential node within the Daily Rules module in the Tree View.
2. Click the button. The Zone Differential window will appear.
3. Enter a name for the Zone Differential in the Name field.
4. Enter a description of the Zone Differential in the Description field.
5. The Assigned Day field is read-only and set in the Day(s) of the Week/Holiday field of the Settings
tab. To do so, click on the Settings tab.
4-86 Time Guardian Pro v3.5
Page 87

6. In the Day of the Week/Holiday(s) field, select the Day of the Week or Holiday(s) that the Zone
Differential will be in effect. The choices are: Default, Sun, Mon, Tue, Wed, Thu, Fri, Sat, or
Standard.
7. To add a Zone Differential Rule, click on the Add button and enter the following:
• Type: Select Fixed Times, Schedule Start, or First IN Punch.
• Day: The day that the Zone Differential will begin. For Schedule Start or First IN Punch types
this field is set to Current. For Fixed Time, select either Current or 1 Day Before.
• From: Enter the time (HH:MM) that the Zone Differential will begin.
• Day: The day that the Zone Differential will end. For Schedule Start or First IN Punch types
this field is set to Current. For Fixed Time, select Current, 1 Day After, 2 Days After, or 3 Days
After.
• To: Enter the time (HH:MM) that the Zone Differential will end.
• Punch Type: For Fixed Time and Schedule Start this field is set to Actual Time. For First IN
Punch, select either Actual or Rounded Time.
• Qualification: Click on the button to set the Qualification. The Zone Qualifications
window will appear:
a. Select a Qualification from the Qualification list and click on the Add button. The choices
are; Work Hour, Before Schedule, Within Schedule, After Schedule, Schedule, and Zone.
A row will appear in the Qualification Rule box.
b. Enter the following:
• Process Type: Select either Stop or Next(nth). Stop will process the qualification rule if
the qualification is met, and “Stop”, disregarding any subsequent rules. Next(nth) will
process the qualification rule if the qualification is met, and move to the Next or nth
Qualification Rule.
• Process Number: Required when Next(nth) is set as the Process Type. It designates
which Qualification Rule will be processed when the qualification is met in the current
rule. If the qualification is met, then the “Next” or “nth number” rule is processed in
relation to the current rule’s position and not order of appearance.
Time Guardian Pro v3.5 4-87
Page 88

• Not Qualified Zone Code: Select the Zone Code from the list that will be applied to the
qualification.
• Zone Award: Click on the Zone Award button. The following window will appear:
To add a Zone Award to the Qualification, select the desired Zone Award from the
Available list and click the Add button. To add all the Zone Awards, click on the Add All
button.
To remove a Zone Award from a Qualification, select the desired Zone Award from the
Selected list and click the Remove button. To remove all the Zone Awards, click on the
Remove All button.
c. To add more Qualification Rules, repeat the previous steps. To change the order of the
Qualification Rules, select the desired rule in the list and click the Move Up or Move Down
buttons. To remove a Qualification Rule, select the desired rule from the list and click the
Remove button.
d. Click the
To exit without saving, click on the
button to save your settings and return to the Zone Qualifications window.
button.
8. Click the button to save your settings and return to the Zone Differential window. To exit
without saving, click on the
button.
9. To “Set zone code for all windows to”, click on the dropdown box and select one of the following
choices; None, Highest Zone Code, Majority hours, First In Punch, or Last Out Punch.
10. To add more Zone Differential Rules click on the Add button and repeat Steps #4 thru #6. To
change the order of the rules, select the desired rule in the list and click the Move Up or Move
Down buttons. To remove a Zone Differential Rule, select the desired rule from the list and click
the Remove button.
11. In the Set Zone code for all Windows field, choose one of the following; None, Highest Zone Code,
Majority Hours, First In Punch, and Last Out Punch
12. Click the
button to save your settings.
4-88 Time Guardian Pro v3.5
Page 89

Creating a Daily Rule
To create a Daily Rule:
1. Click on the Daily Rules module within the Setup group in the Tree View.
2. Click the
button. The Daily Rules window will appear.
3. Enter a name for the Daily Rule in the Name field.
4. Enter a description of the Daily Rule in the Description field.
5. Assign a Daily Overtime template to this rule using the Daily Overtime field.
6. Assign a Period Overtime template to this rule using the Period Overtime field.
7. Assign a Zone Differential to this rule using the Zone Differential field.
8. Click on the
Time Guardian Pro v3.5 4-89
icon to activate the Rounding Demo to visualize the results of rounding rules.
Page 90

9. Click on the Rounding tab.
10. Click on the New button.
11. In the Day of Week/Holiday(s) field, select the day that the rounding rule will be in effect. The
choices are Default, Sun., Mon., Tue., Wed., Thu., Fri., Sat., or Standard. The Default setting will
be used for any day(s) or Holiday(s) not defined explicitly.
12. Select the Unit and Point in the fields provided.
13. Click on the Add button. The rounding settings selected will appear in the list box.
To delete a daily rounding rule, select the rounding rule from the list and click on the Delete
button.
To update (change) a daily rounding rule, select the rounding rule from the list and make the
appropriate changes in Day of week/Holiday(s), unit, and/or point fields and click on the
button.
14. Click on the
icon to activate the Rounding Demo to visualize the results of rounding rules.
4-90 Time Guardian Pro v3.5
Page 91

Example: How daily rounding occurs during a day.
Schedule 1 is from 8:00 AM to 12:00 PM. There are four punches within the Schedule 1 that total to 3
hours and 21 minutes of time. Schedule 2 is from 1:00 PM to 5:00 PM. There are four punches within
Schedule 2 that total to 3 hours and 20 minutes of time. If Schedule 1 hours (3:21) are added to
Schedule 2 hours (3:20), the total time for the day would be 6:41. If the Unit is set to 15 and the Point
is set to 7, the total time for the day will be rounded from 6:41 to 6:45.
Note: The extra 4 minutes will be added onto Schedule 2. It will be added to the last hour record that
occurs in Schedule 2.
Time Guardian Pro v3.5 4-91
Page 92

15. Click on the Break/Meal tab.
16. Click on the New button.
17. In the Day or Week/Holiday(s) field, select the day that the rounding rule will be in effect. The
choices are Default, Sun., Mon., Tue., Wed., Thu., Fri., Sat., or Standard. The default setting will
be used for any day(s) or Holiday(s) not defined explicitly.
18. Select either Hour or Punch Rounding.
19. Select the Unit and Point in the fields provided.
20. Click on the Add button. The rounding settings selected will appear in the list box.
To delete a daily rounding rule, select the rounding rule from list and click on the Delete button.
21. Click on the
icon to activate the Rounding Demo to visualize the results of rounding rules.
4-92 Time Guardian Pro v3.5
Page 93

Pay Class
Weekly Overtime
Weekly Overtime rewards employees overtime hours for working more hours than a set hour value for
that particular week or Pay Period. The hours that exceed the set hour value are normally paid at a
higher wage than regular (REG) Pay Code hours. Weekly Overtime is set in the Weekly Overtime
window, which is accessed by selecting the Weekly Overtime node within the Pay Class module in the
Tree View.
Up to (4) levels of Weekly Overtime can be used. Each level can be assigned its own threshold limit
that move the hours from one pay code to another.
Daily Overtime From To Pay Code
Base 00:00 08:00 REG
Level 1 08:00 10:00 OT
Level 2 10:00 12:00 DT
Level 3 12:00 24:00 TT
Level 4
Additionally, you can set the Pay Codes that will count toward weekly overtime level.
Creating a Weekly Overtime Template
1. Click on the Weekly Overtime node within the Pay Class module in the Tree View.
2. Click the
3. Enter a name for the weekly OT template in the name field.
4. Enter a description of the weekly OT template in the Description field.
button. The Weekly Overtime window will appear.
Time Guardian Pro v3.5 4-93
Page 94

5. Click on the Level tab.
6. Enter the threshold limits for each level of weekly overtime.
7. Click on the Count tab.
8. In the Count table, check the Pay Codes in each column that you want to be combined to achieve
each level’s threshold. For example if you checked REG and HOL in the Level 1 column, then the
hours for REG and HOL pay codes will be combined to reach Level 1’s threshold value.
Note: You can select all the Pay Codes in a given column by clicking on the column heading. You can
also deselect any checked Pay Codes in a column by clicking on the column heading. To select
all Pay Codes in the grid, click on the
button. This button will also deselect all the Pay
Codes in the grid, if all were selected.
4-94 Time Guardian Pro v3.5
Page 95

9. Click the button to save your settings. To exit without saving, click on the button.
Editing a Weekly Overtime Template
To edit a Weekly Overtime template, select a template from the list and click on the button or
double-click on the desired template. When you have finished your modifications, click on the
button to save your settings.
Deleting a Weekly Overtime Template
To delete a Weekly Overtime template, select a template from the list and click on the button.
Consecutive Overtime
Consecutive Overtime awards overtime based on the qualifying number of consecutive or nonconsecutive days within a week or Pay Period and number of hours worked per day. Consecutive
days are days that are worked one right after another with no days off in between.
Up to (4) levels of Consecutive Overtime days can be created with (4) levels in each assigned to a
Pay Code.
Creating a Consecutive Overtime Template
1. Click on the Consecutive Overtime node within the Pay Class module in the tree view.
2. Click the
button. The Consecutive Overtime window will appear:
3. Enter a name for the overtime template in the name field.
4. Enter a description of the overtime template in the Description field.
Time Guardian Pro v3.5 4-95
Page 96

5. Click on the Consecutive 1 tab.
6. Enter the threshold limits and assign a Pay Code to each level.
7. Repeat Steps 5 and 6 for Consecutive 2 thru 4 (If applicable).
8. Click on the Count tab.
4-96 Time Guardian Pro v3.5
Page 97

9. In the Count table, check the Pay Codes in each column that you want to be combined to achieve
each level’s threshold. For example if you checked REG and HOL in the Level1 column, then the
hours for REG and HOL pay codes will be combined to reach Level1’s threshold value.
Note: You can select all the Pay Codes in a given column by clicking on the column heading. You can
also deselect any checked Pay Codes in a column by clicking on the column heading. To select
all Pay Codes in the grid, click on the
button. This button will also deselect all the Pay
Codes in the grid, if all were selected.
10. Click the
button to save your settings. To exit without saving, click on the button.
Editing a Consecutive Overtime Template
To edit a Consecutive Overtime template, select the desired template from the list and click on the
button or double-click on the desired template. When you have finished your modifications, click
on the
button to save your settings.
Deleting a Consecutive Overtime Template
To delete a Consecutive Overtime template, select the desired template from the list and click on the
button.
Time Guardian Pro v3.5 4-97
Page 98

Range Overtime
Range Overtime awards overtime based on the qualifying number of hours in a given period (or date
range). A start and end date are required for each period. An unlimited number of “Ranges” or periods
can be setup in a given Range Overtime template, but they cannot overlap.
Creating a Range Overtime Template
1. Click on the Range Overtime node within the Pay Class module in the tree view.
2. Click the
3. Enter a name for the Range Overtime template in the Name field.
4. Enter a description of the Range Overtime template in the Description field.
5. Click on the Settings tab.
button. The Range Overtime window will appear:
4-98 Time Guardian Pro v3.5
Page 99

6. Click on the Add button to create a date range or period. A row will appear with the Start and End
Date fields enabled.
7. In the Start Date field, enter a start date manually in MMDDYYYY format or click on the
The Select Date dialog box will appear:
Using the drop down lists, select the Month and Year. Click on the desired day in the calendar.
When you have finished, click on the
and close the dialog box and return to the Settings tab of the Range Overtime window.
button on the Select Date screen to save your setting
button.
Time Guardian Pro v3.5 4-99
Page 100

8. In the End Date field, enter a start date manually in MMDDYYYY format or click on the
The Select Date dialog box will appear:
button.
Using the drop down lists, select the Month and Year. Click on the desired day in the calendar.
When you have finished, click on the
and close the dialog box and return to the Settings tab of the Range Overtime window.
4-100 Time Guardian Pro v3.5
button in the Select Date screen to save your setting
 Loading...