

Page 1
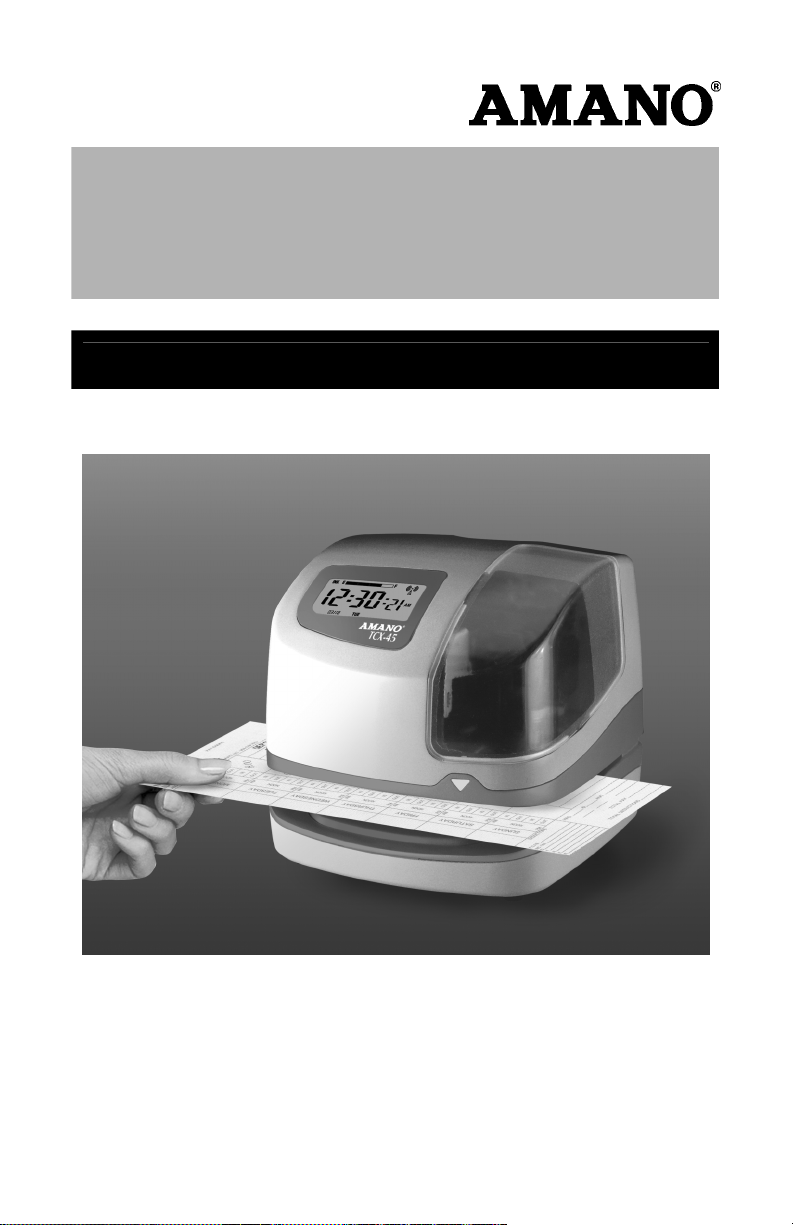
TCX-45
Atomic Time Clock
Operation Manual
Page 2

Proprietary Notice
This document contains proprietary information and such information may not be
reproduced in whole or part without the written permission from Amano
Cincinnati, Inc. 140 Harrison Ave., Roseland, New Jersey 07068.
Amano Cincinnati, Inc. reserves the right to make equipment changes and
improvements, which may not be reflected in this document. Portions of this
document may have been updated to include the latest hardware or firmware
version, if applicable. We recommend that this document be read in its entirety
before any attempt is made to operate the equipment.
Thank You….
For purchasing another fine product from
Amano Cincinnati, Inc.
Important! Do not return this clock to the retailer. If you have
any questions or need assistance, please call us toll free at
,
Warranty Notice
Any claim for warranty, express or implied, due to the clock’s failure to properly
receive the radio signal because of interference, whatever may be the source of
this interference, are hereby expressly excluded.
For more information about the WWVB-Radio signal visit NIST’s website at:
www.boulder.nist.gov
For actual signal coverage in North America visit:
www.boulder.nist.gov/timefreq/stations/wwvbcoverage.htm
1-800-253-9836
Need Ribbons, Keys and Accessories?
Visit
www.amano.com
Or call 1-800-253-9836
Specifications
Power Requirements
• For Clock Input:
• For AC Adapter:
• Battery:
Ambient Temperature:
Ambient Humidity:
Dimensions:
Weight:
Environment:
i www.amano.com • 1-800-253-9836 TCX-45
16.5 VDC, 60Hz, 0.6A (Max.)
100 VAC ± 10%, 50/60Hz
120 VAC ± 10%, 60Hz
230 VAC ± 10%, 50/60Hz
Lithium Battery for Memory Backup in case of power
failure.
-10°C to 45°C (14°F to 113°F)
10% to 90% (non-condensing)
6-11/16"(170 mm) Wide X 6- 7/16”(163 mm) High X
6-5/8"(168 mm) Deep.
Approximately 3.6 lbs. (1.63 kg)
Indoor use only; dust-free environment. Keep out of
direct sunlight.
Page 3
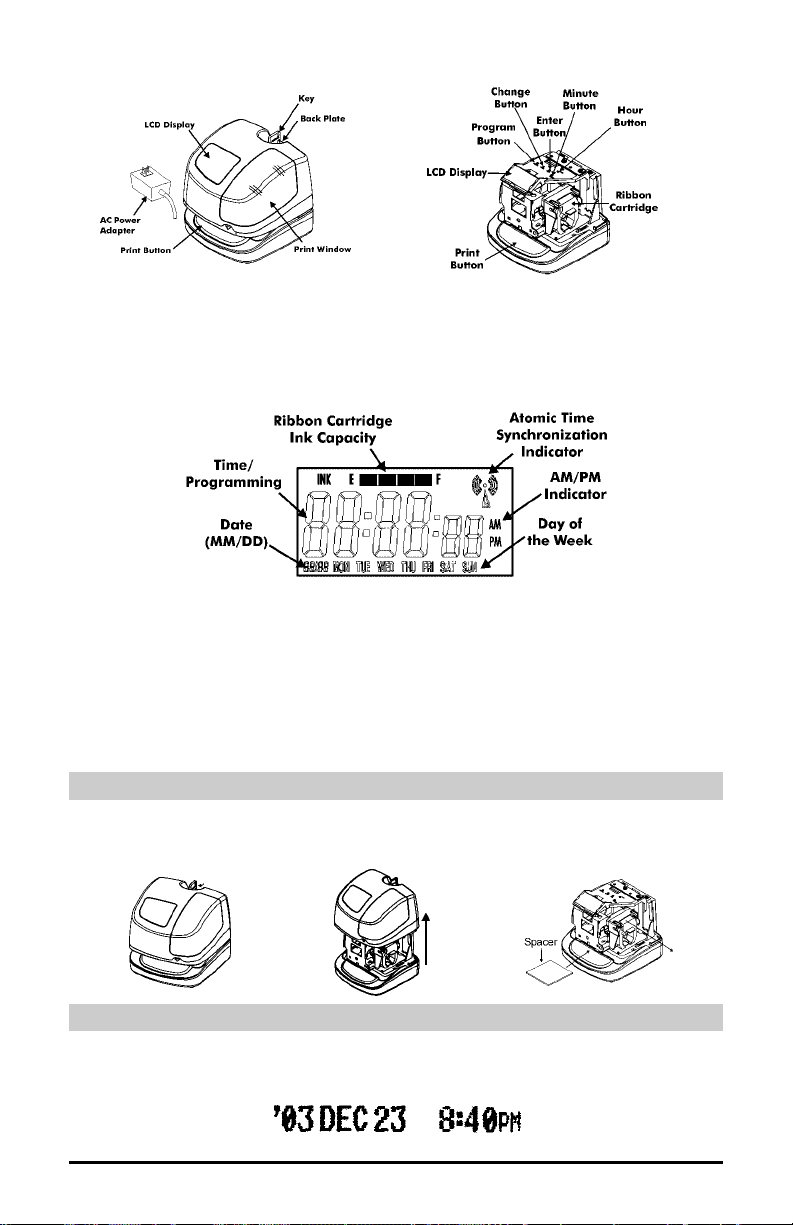
External View Internal View
• The PROGRAM button is used to enter and exit the Program Mode.
• The CHANGE button is used to change the informatio n on the display.
• The ENTER button is used to accept the information shown on the display and
save it in memory.
• The HOUR button advances the hour in the display by increments of 1.
• The MINUTE button advances the minutes in the display by increments of 1.
The LCD Display contains an Ink Capacity gauge. This gauge indicates the
amount of ink remaining in the ribbon cartridge using four bar segments, from E
(Empty) to F (Full).
The TCX-45 calculates the ink capacity of the ribbon cartridge from the number
of imprints made. As the ink capacity decreases, the bars in the gauge will
disappear. If the ribbon reaches below 25% capacity, the word “INK” will appear.
The “E”, “F” and “INK” characters will blink until the ribbon is replaced and the ink
counter is reset.
Removing the Cover & Packing Material
1. Insert the key provided and turn clockwise to unlock the cover.
2. Lift the cover to remove.
3. Remove the spacer between the Ribbon Cartridge and the Printer Carriage.
Making a Test Print
1. Make sure the TCX-45 is plugged in.
2. Insert a piece of paper or time card into the TCX-45. The clock will
automatically print YEAR, MONTH, DATE and TIME with AM or PM.
3. If the imprint is satisfactory, the TCX-45 is ready for use.
2 www.amano.com • 1-800-253-9836 TCX-45
Page 4

Setting the Time (If Displayed Time is Incorrect or In
Different Time Zone)
1. Unlock and remove the cover.
2. Press the HOUR advance button until the correct hour appears.
3. Press the MINUTE advance button until the correct minute appears.
Note: You must follow this procedure if you are installing the TCX-45 in a
different Time Zone from where it is currently located.
Changing the Print Style
1. Press the PROGRAM
button until
appears.
2. Press the CHANGE
button until
flashes in the display.
Press the ENTER
button.
3. The display will flash
the current setting.
Press the CHANGE
button until the desired
print style code
appears (see diagram).
4. When the display
flashes the correct
setting, press the
ENTER button and
press the PROGRAM
button to exit.
dA E PI
Prn P4
Changing the Print Direction
1. Press the PROGRAM button until dA E PI appears.
2. Press the CHANGE button until
the display. Press the ENTER button.
3. Press the CHANGE button until
display. Press the ENTER button.
4. Press the CHANGE button until the correct print
direction
in the display, then press the ENTER button.
5. Press the PROGRAM button to exit.
TCX-45 www.amano.com • 1-800-253-9836 3
r9h (Right Side) or LEf (Left Side) flashes
0 hr P5 flashes in
Prdr I 3 flashes in the
Page 5

Disabling Daylight Saving Time
1. Press the PROGRAM button until dA E PI appears.
2. Press the CHANGE button until
display. Press the ENTER button.
3. Press the CHANGE button to turn Daylight Saving Time to
Off, then press the Enter button.
4. Press the PROGRAM button to exit
Enabling or Disabling Auto Print
1. Press the PROGRAM button until dA E PI appears.
2. Press the CHANGE button until
display. Press the ENTER button.
3. Press the CHANGE button until
display. Press the ENTER button.
4. Press the CHANGE button until the desired code
appears on the display, then press the Enter button.
The Auto Print codes are as follows:
Code Mode Description
P on
OFF
P:5 on DO NOT USE
5. Press the PROGRAM button to exit.
Auto Print
Manual
Print
dLS P3 flashes in the
0 hr P5 flashes in the
A Pr I 4 flashes in the
Will automatically print a
single print when media
is inserted.
Requires you to use the
PRINT button when
printing.
Setting the Month and Date
1. Press the PROGRAM button until dA E PI appears, and
press the ENTER button.
2. Press the CHANGE button until the correct year appears,
then press the ENTER button.
3. Press the CHANGE button until the correct day appears,
then press the ENTER button.
4. Press the CHANGE button until the correct month
appears, then press the ENTER button.
5. When the display flashes the correct month, date and
year, press the ENTER button.
6. Press the PROGRAM button to exit.
4 www.amano.com • 1-800-253-9836 TCX-45
Page 6

Wall Mounting
Placement considerations:
1. Remove the Cover and remove the Back
Plate by pressing the tab.
2. Using the Back Plate as a template, mark
the lower mounting hole on the wall.
3. Mount the plate using a #10 wood screw (or
equivalent).
4. Level the Back Plate and mark the location
of the two upper mounting holes. Secure to
the wall using #10 wood screws (or
equivalent).
5. Feed the cable of AC Power Adapter
through one of the holes in the Back Plate.
6. Align the clock with the two upper tabs on
the back plate. Tilt the back of the clock
upwards to fully insert the back plate tabs
into the clock. Be careful not to pinch the
power cord with the bracket.
7. Once the tabs are inserted, tilt the clock
back down and push it against the wall. The
tabs will snap into place.
8. Replace the cover and lock it in place.
TCX-45 www.amano.com • 1-800-253-9836 5
Page 7

Atomic Clock Feature
The Amano atomic clock receives time signals on long
wave radio (60 kHz) from the National Institute of
Standards and Technology (NIST) operated WWVB
time signal transmitter located in Fort Collins, Colorado
and coupled with the atomic cesium clock in Boulder. It
receives the WWVB time signal via its built-in antenna
system. Your clock will try to find the signal on a daily
basis.
The Atomic Time Synchronization Indicator in the
LCD Display indicates the status of the signal. When
you first receive the clock, it may be necessary to
adjust the hour and minute. If your TCX-45 is located
in an area that cannot receive the Atomic time signal, DO NOT be concerned.
The TCX-45 will accurately keep the time using its Quartz mechanism (plus or
minus three seconds per week).
Please visit to www.boulder.nist.gov/timefreq/stations/radioclocks.htm for
more information about how radio-controlled clocks work, where they work, and
what to do when they don’t work.
Searching
for Signal
Found
Signal
Disabling the Atomic Clock
1. Press the PROGRAM button until dA E PI appears.
2. Press the CHANGE button until
display. Press the ENTER button.
3. Press the CHANGE button until
display. Press the ENTER button.
4. Press the CHANGE button until Clr d 4 flashes in the
display. Press the ENTER button.
5. Press the CHANGE button to enter the last digit of the
code (3) and ENTER to accept it. The display will move
to the first digit of the code (0). Press ENTER to accept it.
When the display flashes the correct code (03), press
ENTER.
6. Press the PROGRAM button to exit.
0 hr P5 flashes in the
DIA9 I 8 flashes in the
6 www.amano.com • 1-800-253-9836 TCX-45
Page 8

Ribbon Cartridge Replacement
1. Remove the cover.
2. Pull the two ribbon release tabs upward.
3. While holding the release tabs in an upward
position, pull the ribbon cassette out of the
cradle.
4. If the print mechanism is down and a piece of
paper cannot be inserted, unplug the clock, then
plug it back in to move the carriage up. This will
make the ribbon installation easier.
5. Insert a new ribbon underneath the printer head
as shown.
6. Turn the knob on the cassette clockwise one turn
to take up any slack in the ribbon.
7. Check the printing quality to confirm that you
have installed the ribbon properly.
8. Reset the INK capacity gauge by pressing the
CHANGE and ENTER buttons at the same time
9. Replace the cover.
Error Messages
Error Code Cause
Pr E I Home sensor, motor carriage stuck
Pr E 2 Timing sensor, carriage stuck
Pr E 3 Home sensor
Pr E 4 Carriage stuck
Pr E r General print error
dL Daylight Saving Time Program
For error messages Pr E I through Pr E r, unplug the clock before checking to
see that the carriage is not stuck or jammed. Also, check to see that the ribbon
cables are in good condition. After clearing any jams, unplug the clock, then plug
it back in. Contact us at 1-800-253-9836 if you need assistance.
dL error message signifies that an attempt was made to get into the
The
Program mode during the Daylight Saving changeover one-hour lockout. Wait
one hour and you will be able to program the clock.
Cleaning
Do not use any chemical solvents or oils to clean or lubricate your TCX-
45. This will damage your clock.
To clean the inside of your clock, blow it out with air.
AJR-331500 © Copyright 2004 03/04/100
 Loading...