


P1311102W
Amana P1311102W, ESU15JW, P1311103W, ESU20JW, P1311104W Service Manual
...
Service
Upright Freezers
Models and manufacturing
numbers in this manual
ESU12JW P1311101W
ESU15JW P1311102W
ESU17JW P1311103W
ESU20JW P1311104W
ESUF15JW P1311105W
ESUF17JW P1311106W
ESUF20JW P1311107W
ESU12JW P1179615W
ESU15JW P1179616W
ESU17JW P1179617W
ESU20JW P1179618W
ESUF15JW P1179619W
ESUF17JW P1179620W
ESUF20JW P1179621W
AU120KW P1317701WW
AU120KW P1317714WW
AU150KW P1317702WW
AU150KW P1317715WW
AU170KW P1317703WW
AU170KW P1317716WW
AU200KW P1317704WW
AU200KW P1317717WW
AUF150KW P1317705WW
AUF150KW P1317718WW
AUF170KW P1317706WW
AUF170KW P1317719WW
AUF200KW P1317707WW
AUF200KW P1317720WW
This manual is to be used by qualified
appliance technicians only. Amana does not
assume any responsibility for property damage
or personal injury for improper service
procedures done by an unqualified person.
RS1500000
Revision 2
November 1999

Important Information
Pride and workmanship go into every product to provide our customers with quality products. It is possible,
however, that during its lifetime a product may require service. Products should be serviced only by a qualified
service technician who is familiar with the safety procedures required in the repair and who is equipped with
the proper tools, parts, testing instruments and the appropriate service manual. REVIEW ALL SERVICE
INFORMATION IN THE APPROPRIATE SERVICE MANUAL BEFORE BEGINNING REPAIRS.
Important Information
Important Notices for Consumers and Servicers
!
To avoid risk of serious injury or death, repairs should not be attempted by an unauthorized personal, dangerous
conditions (such as exposure to electrical shock) may result.
!
Amana will not be responsible for any injury or property damage from improper service procedures. If performing
service on your own product, assume responsibility for any personal injury or property damage which may result.
To locate an authorized servicer, consult your telephone book or the dealer from whom you purchased this product.
For further assistance, contact: 1 (800) 628-5782 first, if no answer call number listed below.
CONSUMER AFFAIRS DEPT. OR 1 (800) 843-0304
AMANA APPLIANCES CALL
AMANA, IOWA 52204
If outside the United States contact:
AMANA
ATTN: CONSUMER AFFAIRS DEPT
AMANA, IOWA 52204, USA
Telephone: (319) 622-5511
Facsimile: (319) 622-2180
TELEX: 4330076 AMANA
CABLE: "AMANA", AMANA, IOWA, USA
WARNING
CAUTION
Recognize Safety Symbols, Words, and Labels
DANGER
!
DANGER - Immediate hazards which WILL result in severe personal injury or death.
WARNING
!
WARNING - Hazards or unsafe practices which COULD result in severe personal injury or death.
CAUTION
!
CAUTION - Hazards or unsafe practices which COULD result in minor personal injury or product or property
damage.
RS1500000 Rev 2 2

Table of Contents
Important Information ................................................. 2
Model Identification .................................................... 4
Installation Instructions
Unpacking ............................................................... 5
General ................................................................... 5
Location................................................................... 5
Electrical Connection ............................................... 5
Door Handle ............................................................ 6
Leveling ................................................................... 6
Test After Installation ............................................... 6
General Instructions
Electrical Requirements .......................................... 7
Asure Extended Service Plan .............................. 7
Proper Disposal of your Freezer .............................. 7
Model Identification ................................................. 7
Operating Instructions
Setting Controls ....................................................... 8
Temperature Control ............................................... 8
Audible Alarm (Some models) ................................. 8
Features .................................................................. 9
Reversible Rack (some models) ............................. 9
Freezing Guide ........................................................ 9
Care and Cleaning
General ................................................................. 10
Adhesives.............................................................. 10
Door Gaskets ........................................................ 10
Odor Removal ....................................................... 10
Defrosting .............................................................. 11
Light Bulb (some models) ...................................... 11
General Tips
Energy Tips ........................................................... 12
Vacation Tips ......................................................... 12
Normal Operating Sounds ..................................... 12
Before Calling For Service..................................... 12
Operating Sounds ................................................. 13
Component Testing
Refrigeration System Test Procedures .................. 14
Testing Main Condenser ........................................ 15
Testing for Leaks ................................................... 16
Electrical System ................................................... 16
Compressor Electrical Tests.................................. 16
Testing Compressor Direct .................................... 16
Capacitor ............................................................... 17
Overload Protector ................................................ 17
Testing Overload Protector .................................... 17
PTC Relay ............................................................. 18
Testing PTC Relay................................................. 18
Interior Light and Switch ........................................ 18
Checking Control Operation .................................. 18
Temperature Control ............................................. 19
Defrost Timer ........................................................ 19
Checking Timer ..................................................... 20
Defrost Heater and Thermostat
No Defrosting Models ............................................ 20
Freezer Fan No-Defrosting Models ....................... 21
Testing Freezer Fan Motor .................................... 21
Troubleshooting................................................... 23-25
Disassembly Procedures
Replacing Dryer..................................................... 26
Replacing Compressor .......................................... 26
Replacing Heat Exchanger
Refrigerated Shelf Model ....................................... 27
Replacing Heat Exchanger
No-Defrosting Models............................................ 28
Replacing Freezer Shelving
Refrigerated Shelf Models ..................................... 29
Replacing Freezer Coil No-Defrosting Models ....... 30
Replacing Light Switch .......................................... 31
Replacing Control .................................................. 31
Replacing Heater................................................... 32
Replacing Freezer Fan Motor ................................ 32
Cabinet Door Assembly ......................................... 33
Door Handle .......................................................... 34
Door Lock Assembly ............................................. 34
Removing Door Lock Assembly ............................ 35
Cabinet Door Alignment ........................................ 35
Checking Gasket Seal ........................................... 35
Improving Gasket Seal .......................................... 35
Hinge Adjustments ................................................ 35
Cabinet Assembly ................................................. 36
Service Information
System Operation.................................................. 37
Checking Operational Pressures ........................... 38
Operational Testing ............................................... 39
Service Hints ......................................................... 39
Refrigeration System Complaints .......................... 40
Refrigerant Leaks .................................................. 41
Evacuation and Charging Procedures ................... 42
HFC134a Service Information ............................... 43
Health, Safety, and Handling ................................. 44
Drier Replacement ................................................ 44
Replacement HFC134a Service Compressor........ 45
Refrigerant Charge ................................................ 45
Leak Testing .......................................................... 45
Evacuation and Charging ...................................... 45
Dehydrating Sealed Refrigeration System ............. 47
Brazing .................................................................. 47
Refrigerant Precautions ......................................... 47
Open Lines ............................................................ 47
Line Piercing Valves .............................................. 48
Altitude Adjustment ............................................... 48
Cabinet Shell ......................................................... 49
Cabinet Liner (Food) ............................................. 49
Drain System ......................................................... 49
Wiring Diagram and Schematic ........................... 50-52
3 RS1500000 Rev. 2

Model Identification
Upright freezer models vary in trim and accessories,
but all models have the same basic construction.
"Operating Instructions" and "Service Instructions"
apply to all cabinets unless stated otherwise.
1997 Model Identification
ESU F 15 J W
Color
W White
Series
H
J
Storage Capacity
12 Cubic Foot
15 Cubic Foot
17 Cubic Foot
20 Cubic Foot
Defrost Type
Blank Manual
F Free-O-Frost
Product
ESU Energy Saving Upright Freezer
For positive identifications of individual units, state
complete serial number, model, and type. This
information is found on the serial plate located on front
upper right hand corner of foodliner or on some
models, exterior back of the outer casing.
An explanation of coding contained in Type position is
shown below.
1998 and 1999 Model Identification
A U F 7 0 K W
Color
W White
Series
K
Feature Level
0 Good
Storage Capacity
7 Cubic Foot
10 Cu bic Foot
15 Cubic Foot
22 Cubic Foot
Defrost Type
Blank Manual
F Free-O-Frost
Product
U Upright Freezer
RS1500000 Rev. 2 4
Amana
Installation Instructions
Unpacking
Remove all protective packaging. Cardboard shipping
braces and/or protective tape used to prevent damage to
baskets, shelves, speciality racks, and compartment
dividers during shipment. Use soapy water to remove
any adhesive residue. Do not use alcohol or nail polish
remover.
Door/Lid, handles, and hinges:
Support and secure door lid before transporting or
moving the freezer.
Install freezer handle if applicable
Do not use door or handle for leverage to lift or push
unit.
Defrost drain plug and drain pan:
Verify drain plug is installed on non-frost-free
freezers
Before operating frost-free freezer verify frost drain
pan is installed behind toe grille located at bottom
front of freezer with drain hose placed in the pan.
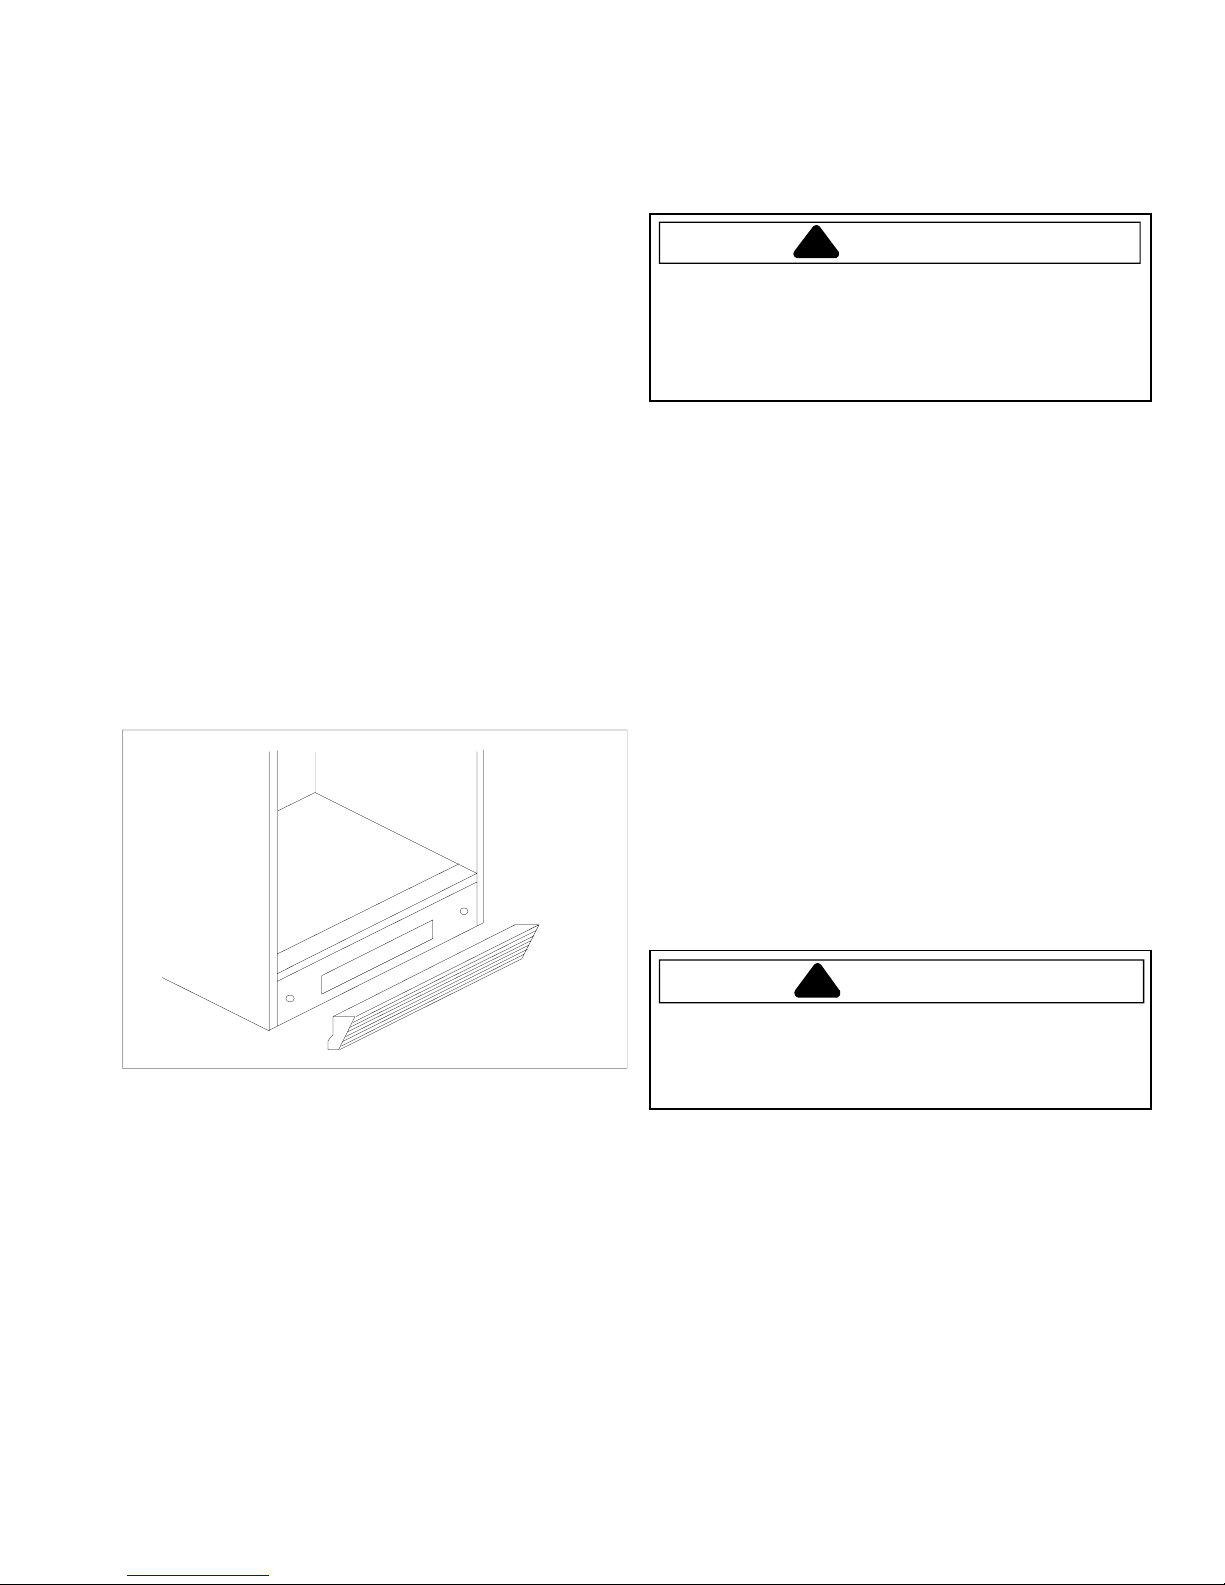
Toe grille:
Toe grille at bottom front of freezer can be removed
to locate drain tube and levelling gliders.
Remove toe grille by grasping both ends and pulling
straight outward. Replace by pressing ends of toe
grille into slots on cabinet and snapping into place.
Location
These recommendations and explanations may help
customer receive maximum efficiency from freezer and
avoid service calls.
CAUTION
!
To avoid personal injury, wear gloves when installing
freezer.
To avoid property damage, protect soft vinyl or other
flooring with cardboard, rugs or other protective
material during installation or servicing.
If freezer is to be placed in basement, back porch, etc.,
place freezer on wooden slats up off floor.
1. Freezer is designed for installation as a
"freestanding" (not "built-in") unit.
2. Locate freezer with at least 3 inches of clearance on
both ends and back to provide adequate air
circulation to dissipate condenser heat.
3. Avoid locations near stoves, radiators, hot air ducts,
or where sun may cause excessive heat.
4. Do not locate where surrounding temperature could
drop below 32°F (0°C). Temperatures below 32°F
(0°C) cause compressor oil to thicken delaying
lubrication of sensitive components at compressor
start-up.
5. Avoid placing freezer on plush carpet which may
retard air flow over bottom, causing bottom sweating.
Toe grille
General
Secure door before moving freezer. Do not use door
or handle to lift or push freezer. If hinges must be
removed, check instruction label on rear of freezer
cabinet.
Amana freezers are currently rated for domestic use,
not designed for commercial application.
Confirm the following items are installed.
Free-O-Frost Upright Freezer Models
Defrost drain pan behind toe grille.
Standard Upright Freezer Models
Drain plug in bottom front of freezer liner.
(some models)
Electrical Connection
1. Electrical supply should be checked for proper
voltage and ground.
WARNING
!
Do not, under any circumstances, cut or remove the
round grounding prong from the plug. Freezer must
be grounded at all times. Do not remove warning tag
from power cord.
2. Avoid extension cords. If absolutely necessary, use
an Appliance Extension cord (at least
16 AWG) of less than 10 feet. If possible, have
freezer on separate circuit.
5 RS1500000 Rev. 2
Installation Instructions
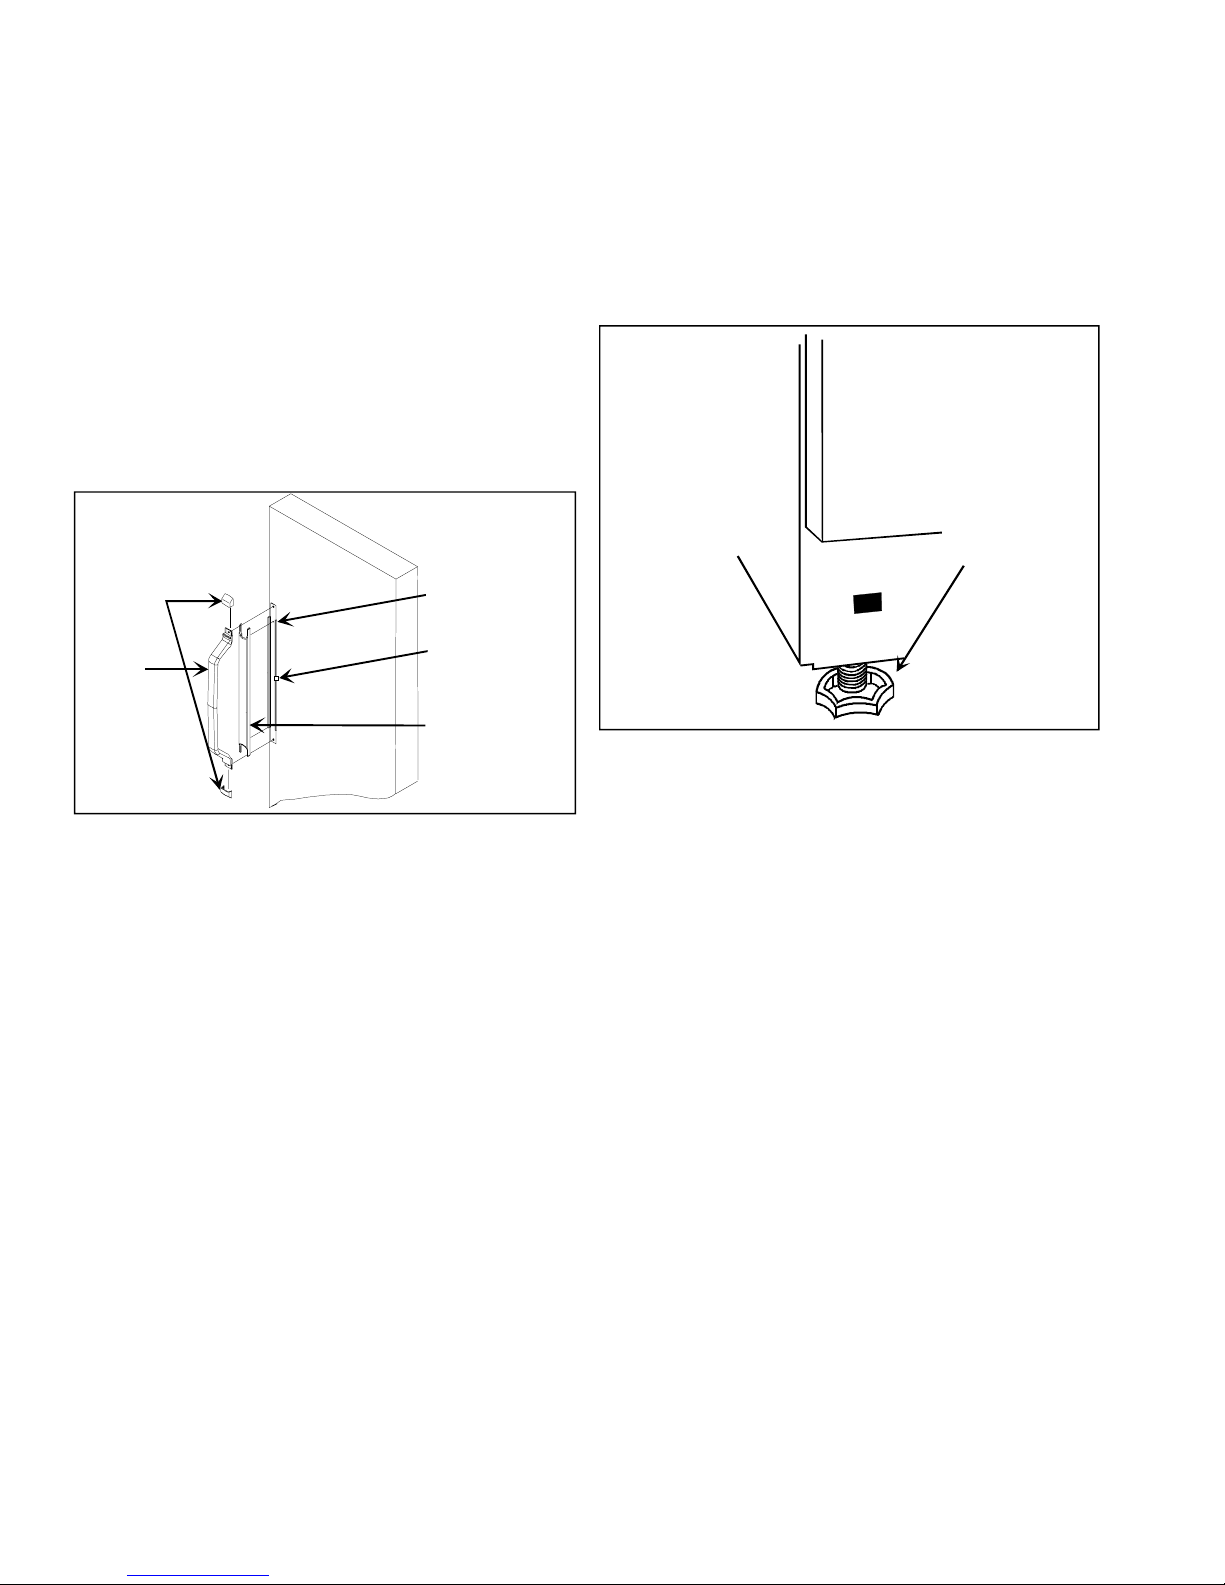
Door Handle
1. If handle trim has not been factory installed,
slide right edge of handle trim under right edge
of trim retainer. Verify rib on right inside edge of
handle trim fits into trim retainer notch. Snap outside
edge of handle trim over outside edge of trim
retainer.
2. Install handle on freezer door as shown. Verify
freezer handle is angled inward towards opposite
side of freezer. Secure handle to freezer door with
screws provided. Verify screws are secure.
3. Slide end caps over ends of handle until end
caps snap in place. End cap marked L goes on
top end of handle. End cap marked R goes on
bottom end of handle.
End
caps
Handle
Trim
retainer
Trim retainer
notch
Leveling
1. Install leveling legs under front corners behind toe
grille.
2. Level freezer side to side and tilt freezer 1/4" from
front to back. Turn legs clockwise to raise freezer and
counterclockwise to lower freezer. If freezer cannot
be level due to flooring, use shims under rear of
freezer cabinet to level freezer.
Leveling
foot
Handle trim
3. Check freezer 2 or 3 weeks after loading with food
and confirm freezer is level.
Test After Installation
1. For proper compressor operation, voltage must be
measured at the compressor terminals at the
moment of starting. Voltage must be in the range
shown on Freezer Wiring Diagram.
2. Check freezer is reasonably level.
3. Check lid gasket seal.
4. Be sure light(s) work.
5. Check lock.
6. Wipe off any dirt and smudges.
RS1500000 Rev. 2 6
6 RS1500000 Rev. 0
General Instructions
Electrical Requirements
WARNING
!
Electrical Grounding InstructionsThis freezer is
equipped with a three-prong (grounding) plug for
protection against possible shock hazards. If a twoprong wall receptacle is encountered, contact a
qualified electrician and have the two-prong wall
receptacle replaced with a properly grounded
three-prong wall receptacle in accordance with the
National Electrical Code.
Freezers are designed to operate on a separate
103 to 126 VAC, @ 15 A., with a 60 Hz cycle.
Do not under any circumstances cut or remove the
round grounding prong from the plug. Freezers must
be grounded at all times. Do not remove warning tag
from power cord.
Do not use a two-prong adapter. Do not use an
extension cord.
Asure Extended Service Plan
Amana offers long-term service protection for this new
freezer. Asure Extended Service Plan is specially
designed to supplement Amanas strong warranty. This
plan covers parts, labor, and travel charges.
Call 1-800-528-2682 for information.
Proper Disposal of your Freezer
NOTE: Child entrapment and suffocation are not
problems of the past. Junked or abandoned
freezers are still dangerouseven if they sit for
"just a few days". When you get rid of your old
freezer, please follow the instructions below to
help prevent accidents.
Model Identification
Read the Owner's Manual thoroughly. This manual
provides proper maintenance information for consumers.
Any questions, call the Consumer Affairs Department at
1-800-843-0304 inside U.S.A. and 1-319-622-5511
outside U.S.A.
Complete enclosed registration card provided in
owners manual and promptly return. If registration card is
missing, call the Consumer Affairs Department.
When contacting Amana, provide product information.
Locate product information on the serial plate. Chest
freezer serial plate is located on upper right wall. Record
the following information:
Model Number:
Manufacturing Number:
S/N or Serial Number:
Date of purchase:
Dealers name and address:
Keep a copy of sales receipt for future reference.
Locate an authorized servicer by calling
1-800-NATLSVC (628-5782) inside U.S.A. and
319-622-5511 outside U.S.A. Warranty service must be
performed by an authorized servicer. Amana also
recommends contacting an authorized servicer if service
is required after warranty expires.
Amana offers a complete line of appliances,
refrigerators, freezers, ranges, cooktops, wall ovens,
microwave ovens, dishwashers, washers and dryers.
Amana also manufactures a complete selection of high
efficiency gas furnaces plus both central and room air
conditioners.
Enjoy this new Amana freezer.
Before Throwing Away Old Freezers:
Take off the doors.
Leave the shelves in place to prevent children from
easily climbing inside unit.
7 RS1500000 Rev. 2
Operating Instructions
Setting Controls
This freezer operates most efficiently in normal
household temperatures of 65° to 90°F.
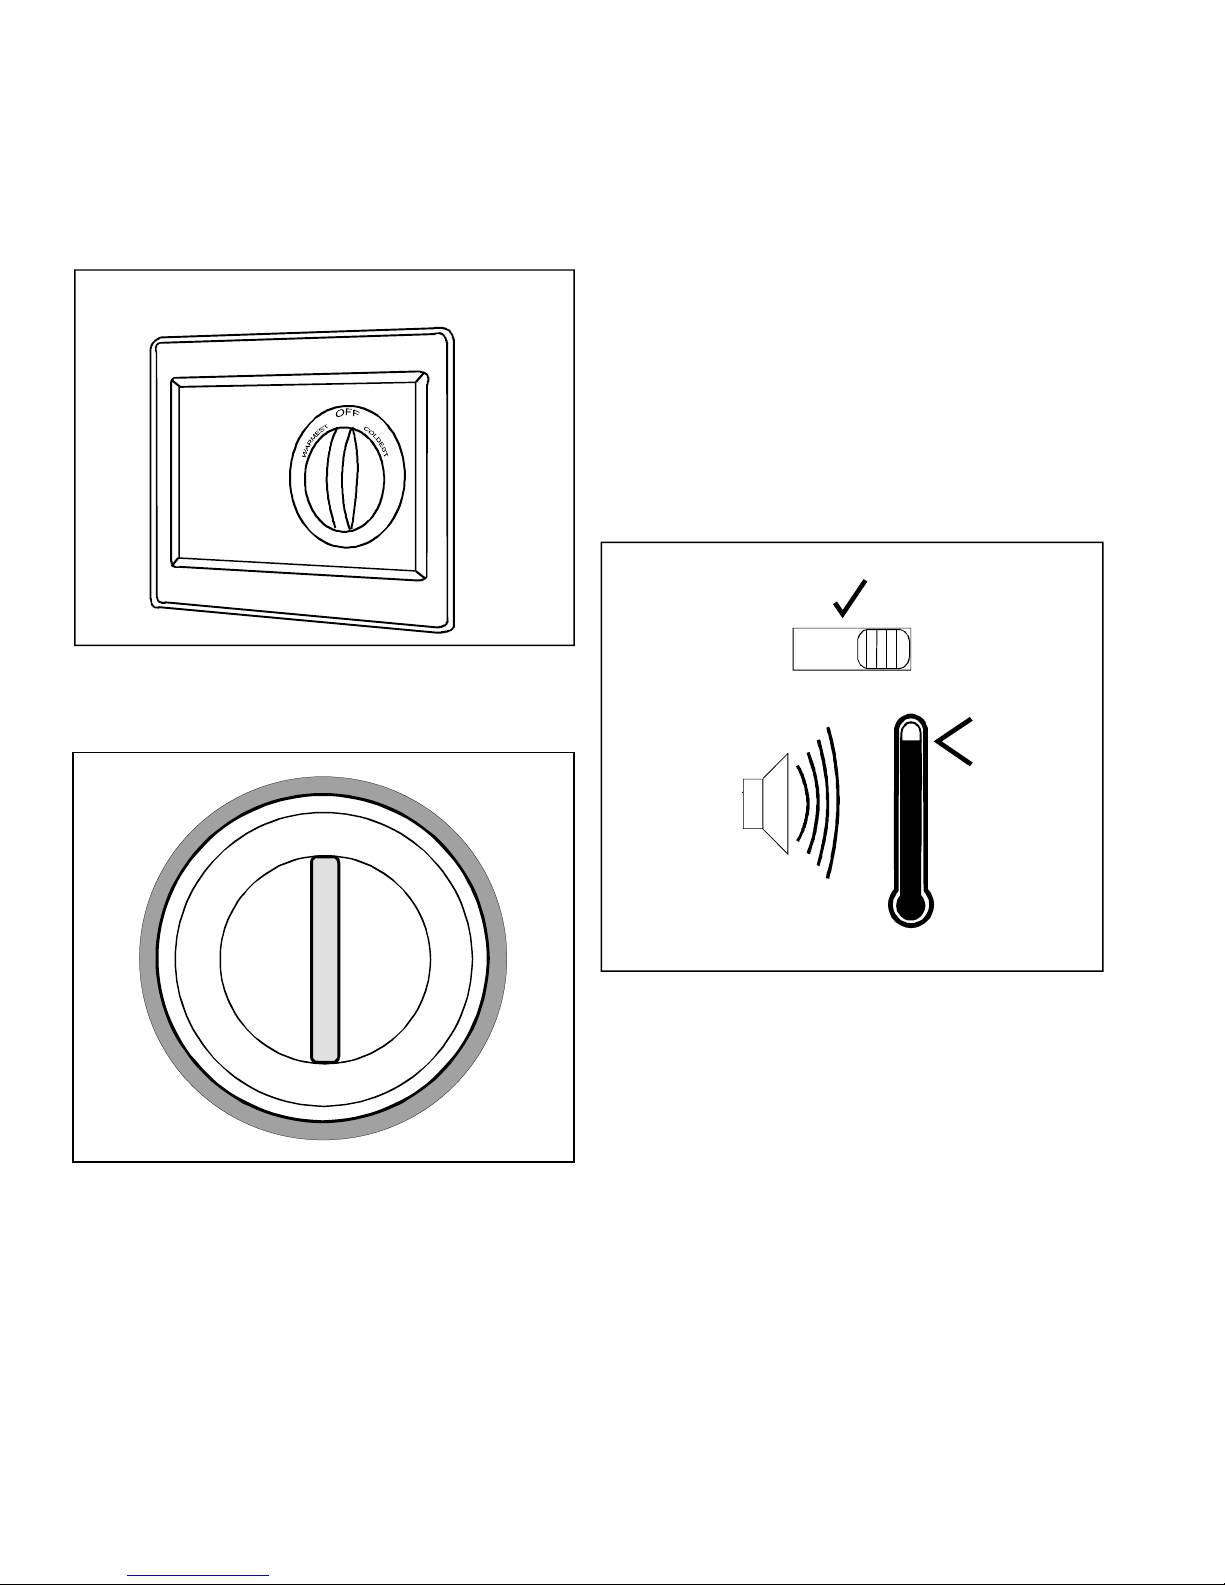
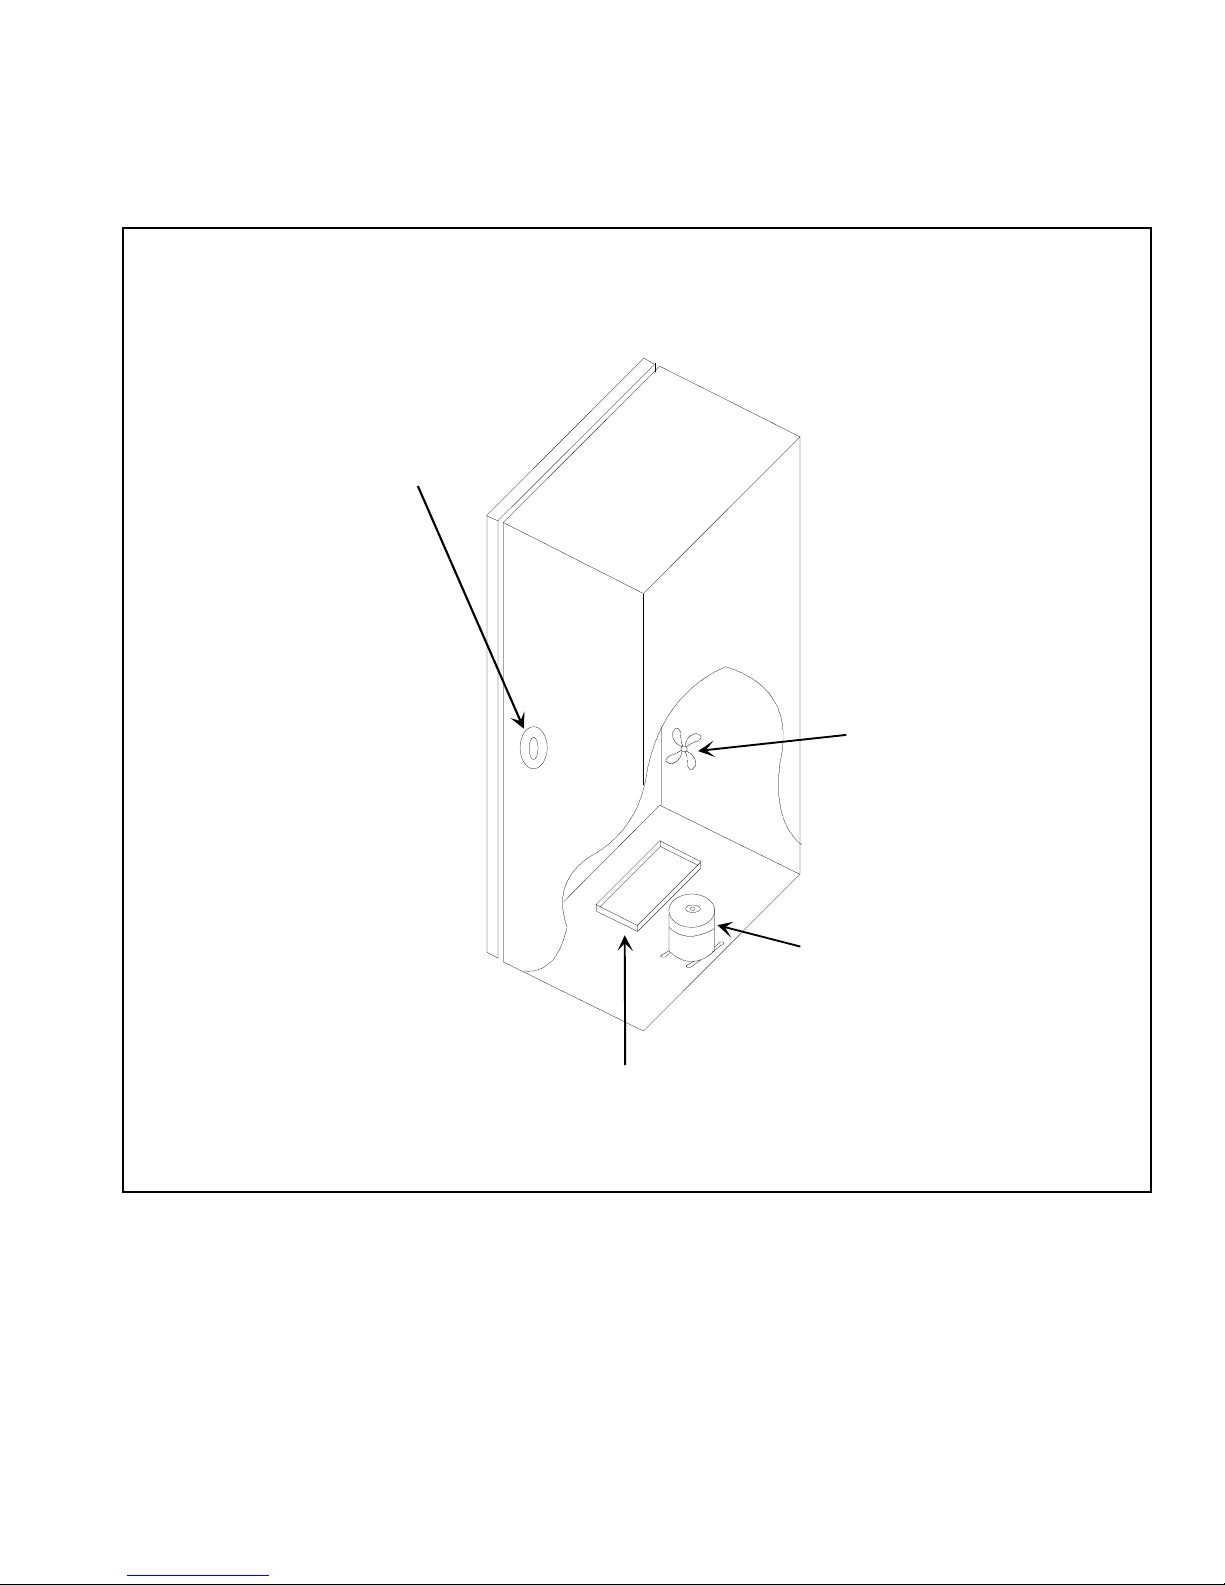
Temperature Control
1
Locate temperature control on right side of interior
freezer cabinet wall.
7
Audible Alarm (Some models)
Locate audible alarm on right side of freezer cabinet near
bottom right corner.
Alarm sounds if temperature in freezer rises 10°F or
more above normal for selected setting. Alarm may
sound if temperature control dial is turned to a much
lower/colder setting or if a large amount of unfrozen food
is added at one time.
Alarm is controlled by a three-position switch.
0 prevents alarm from sounding when freezer is
warm, such as during initial start-up or defrosting.
Ö sounds alarm regardless of temperature. Alarm
system should be tested at least once a month.
1 is proper setting for normal freezer use. Return
switch to 1 after defrosting.
0
1
OFF
C
7
ST
1
E
M
R
A
W
2
3
O
L
D
E
S
T
6
5
4
When control is set to OFF, freezer will not cool. Initially,
set control to 4. Wait 3 hours after connecting power for
freezer to reach desired temperatures, then add food.
After 24 hours, adjust control as desired. 1 is warmest
setting and 7 is coldest.
Set temperatures precisely using a household
thermometer that includes temperatures between -5° to
50°F. Put thermometer snugly between frozen packages
in freezer. Wait 58 hours. If freezer temperature is not
0° to 2°F, adjust control, one number at a time. Check
again after 58 hours.
RS1500000 Rev. 2 8
Operating Instructions
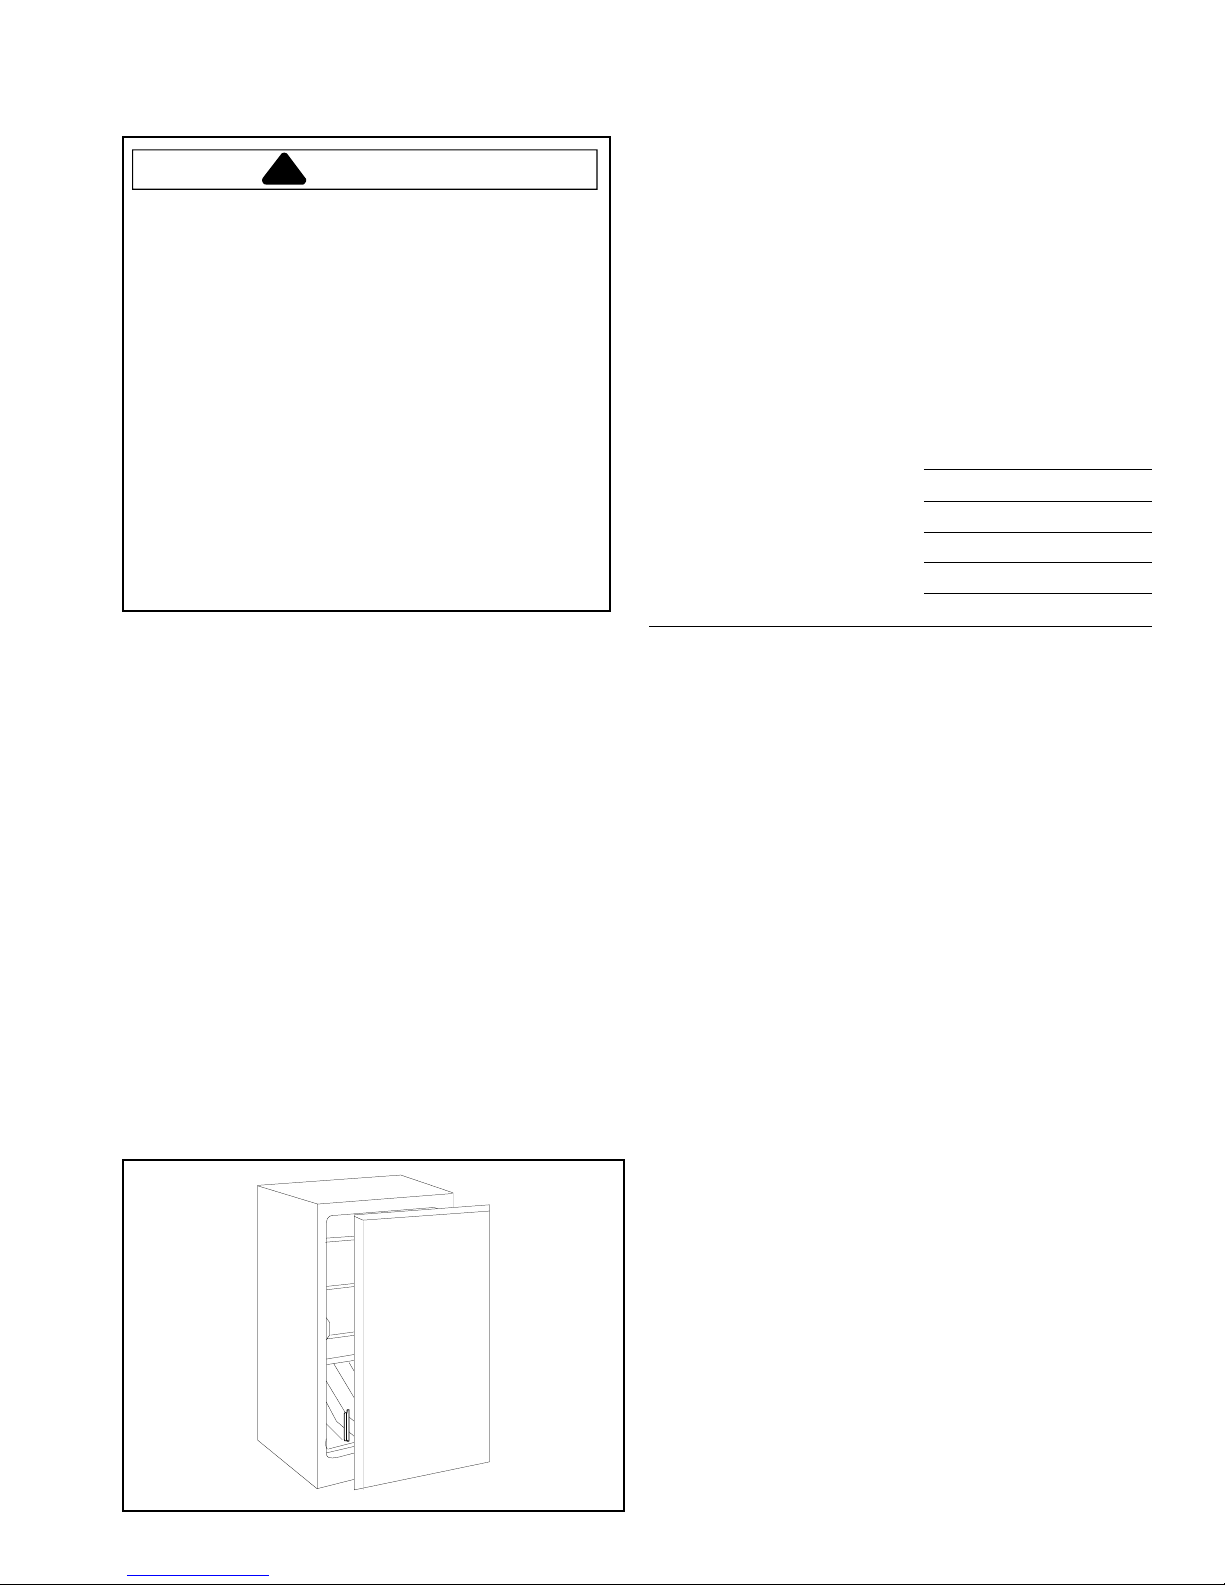
Features
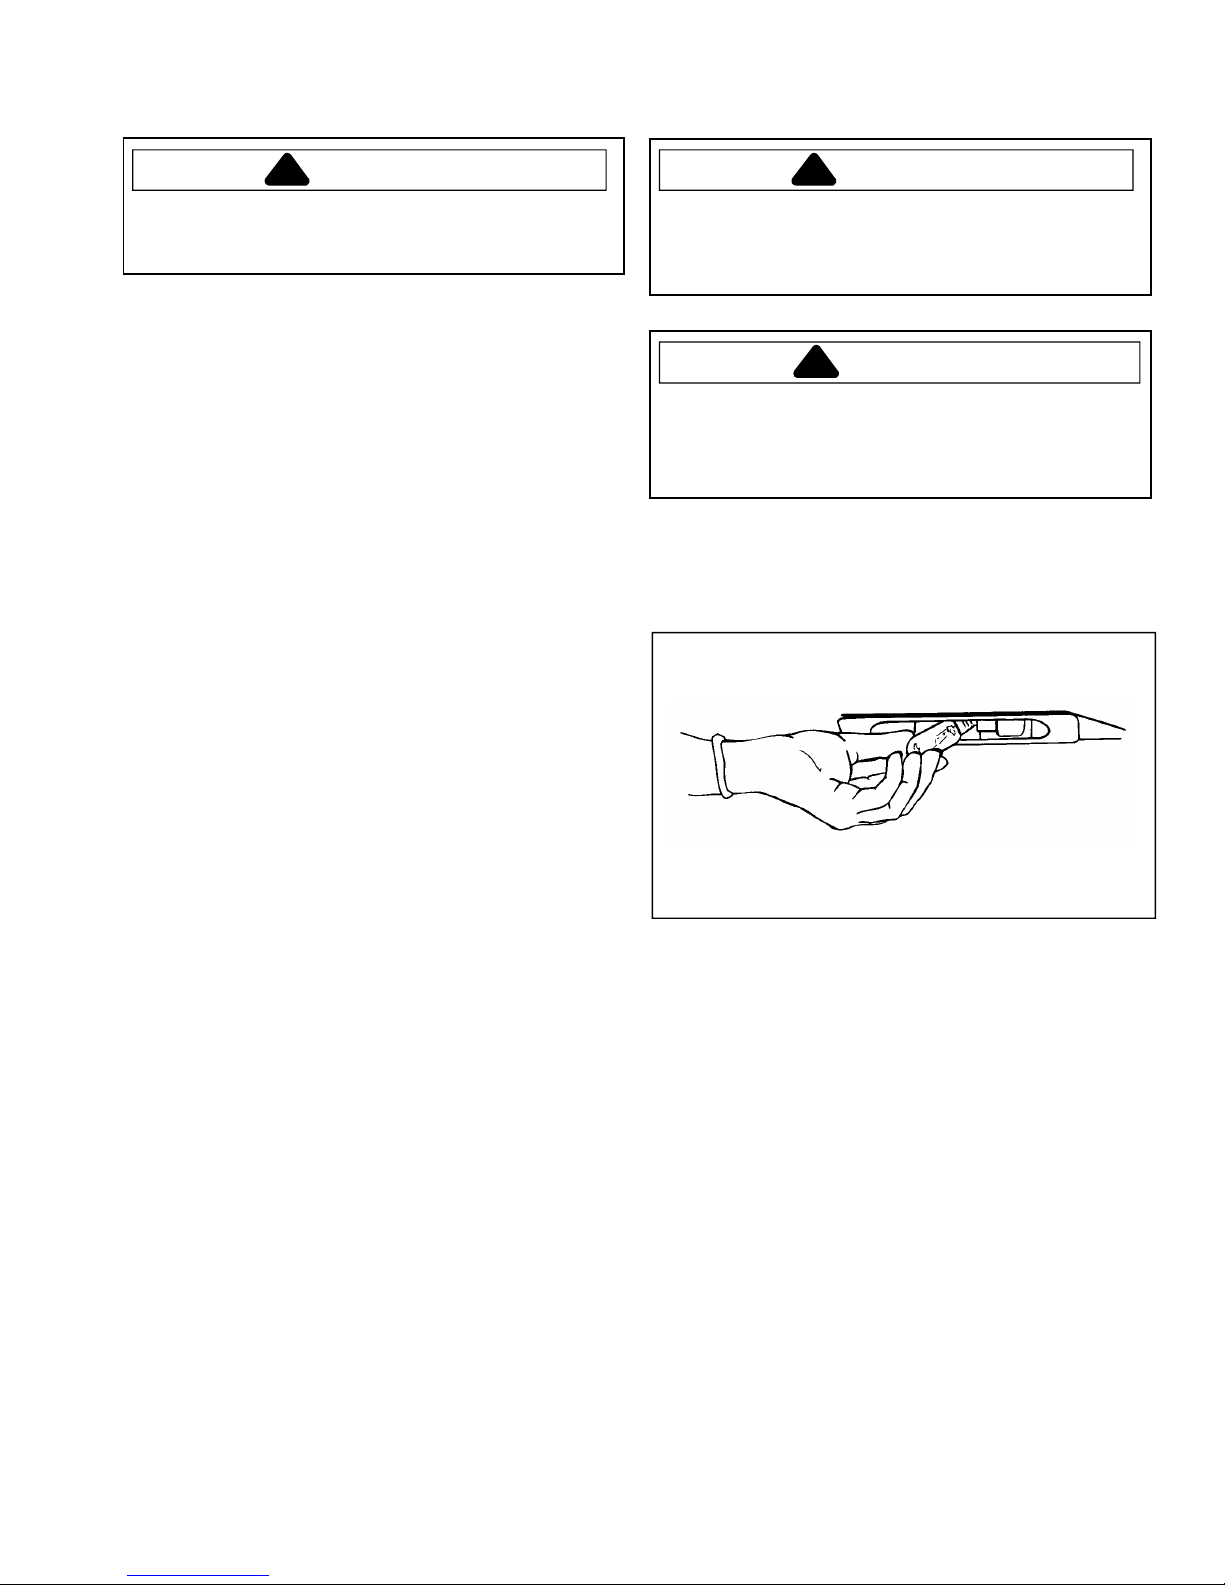
Door Lock
Lock freezer door by completing the following:
1. Insert key into lock approximately 1/4".
2. Turn key clockwise to lock door and counterclockwise
to unlock door.
WARNING
!
To help prevent child entrapment keep key out of
reach of children and away from cabinet.
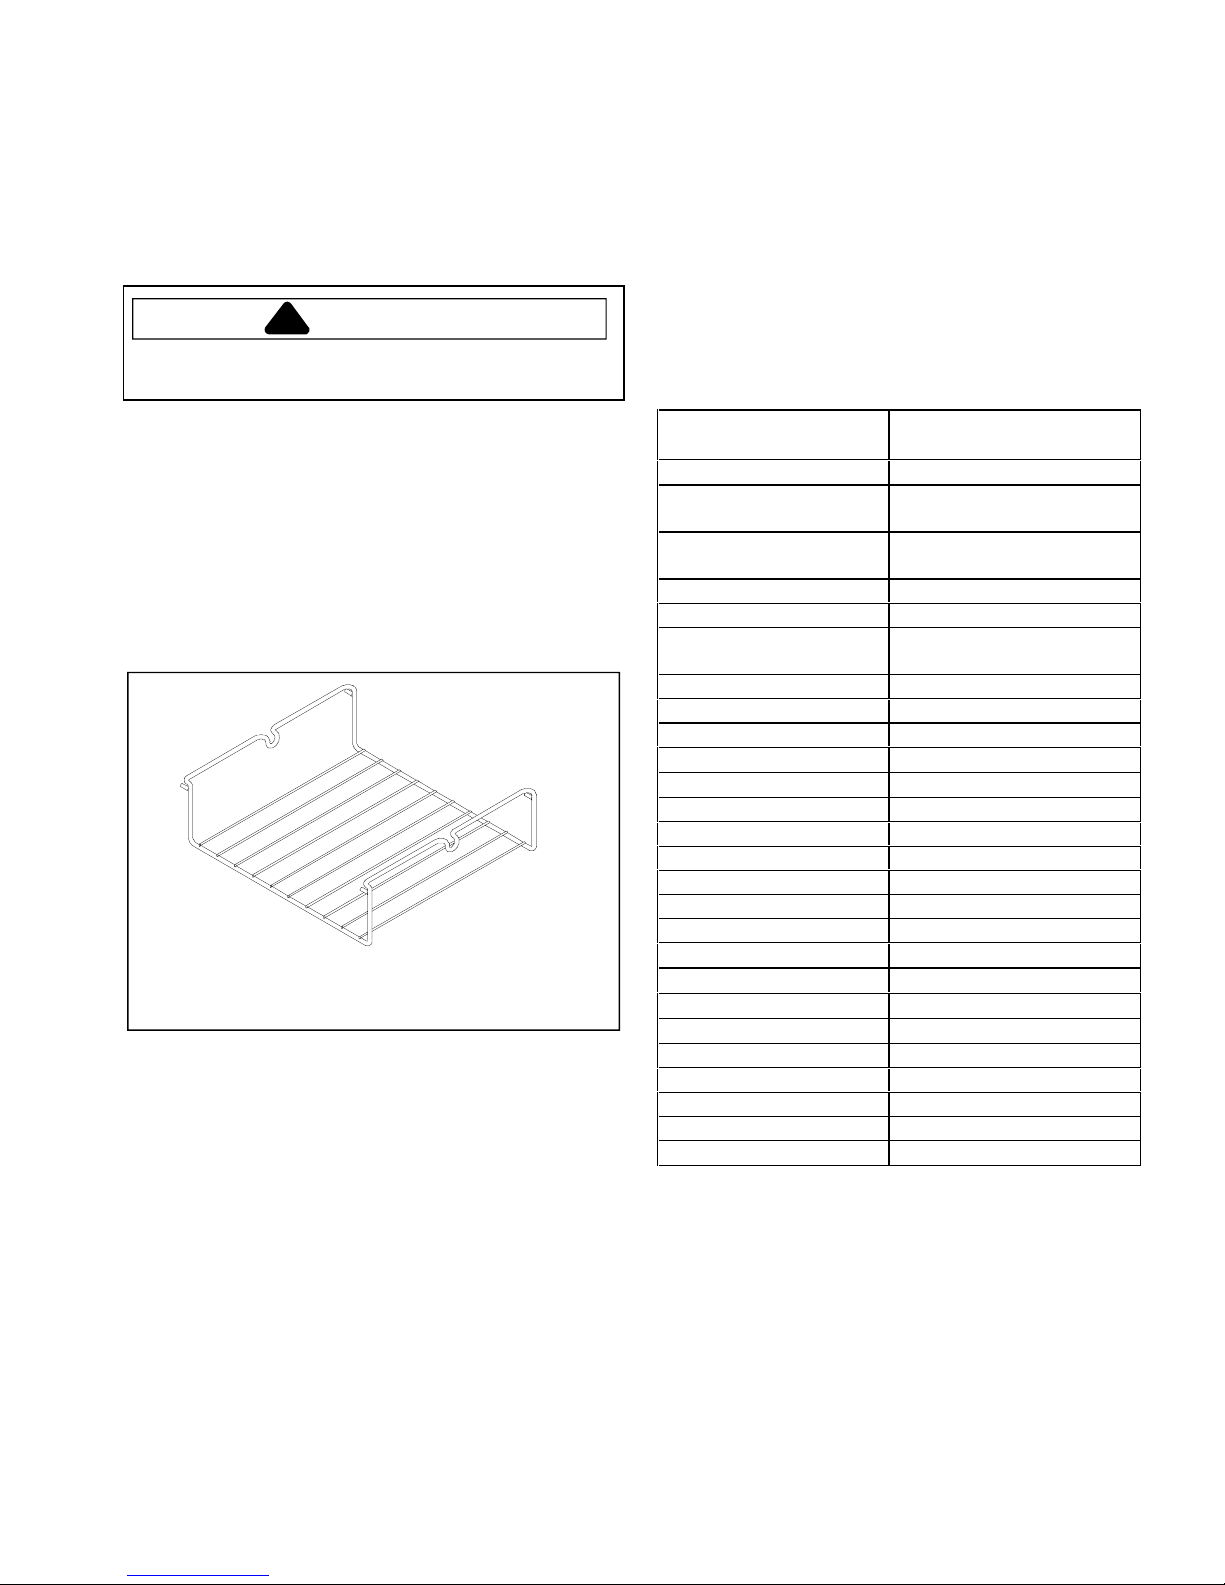
Reversible Rack (some models)
Racks separates food for more storage space.
Remove rack by releasing rack from shelf wires. Pull
down if located under shelf or lift up if located above
shelf.
Replace rack by positioning on top or underneath shelf
wires. Slide rack until rack locks in place.
Freezing Guide
Wrapping
Use moisture-vapor-proof materials and seal tightly.
When lids are furnished, follow manufacturer's
directions for best results.
Choose materials which are labeled for freezer use.
Ordinary waxed paper or butcher paper does not
provide proper protection for frozen food. Materials not
designed for freezer use may give off odors.
Freezing Guidelines
Item Recommended storage
times at 0° F. (Months)
Meat
Beef roast or steak
(fresh)
Meat casserole
(cooked)
Hamburger 3–4
Pork (cured) 1–3
Pork chop or roast
(fresh)
Roast (fresh) 4–8
Sausage 1–3
Veal 8–9
Lamb
Poultry
Chicken (fresh) 9–12
Chicken (cooked) 1–3
Duck 6
Goose 6
Turkey (fresh) 6–12
Turkey (cooked) 1–3
Fish
Vegetables
Fruits
Bread and Pastries
Bread 1–3
Yeast Rolls 1–3
Layer Cake 2–4
Fruit Pie (unbaked) 8
Ice Cream, Sherbert
9–12
3–6
4–8
9–12
3–6
8
12
1–2
9 RS1500000 Rev. 2

Care and Cleaning
WARNING
!
To avoid electrical shock which can cause severe
personal injury or death, disconnect power to freezer
before cleaning. After cleaning, restore power.
CAUTION
!
To avoid personal injury or property damage, read and
follow all cleaning product manufacturer's directions.
General
1. Wash surfaces with four tablespoons baking soda
dissolved in one quart warm water and a soft, clean
cloth.
2. Rinse surfaces with warm water. Dry surfaces
with a soft, clean cloth.
NOTE:
Do not use the following items:
abrasive or harsh cleaners, ammonia,
chlorine bleach, etc.
concentrated detergents or solvents
metal scouring pads
These items can scratch, crack and discolor
surfaces.
Do not place shelves or accessories in dish-
washer.
Odor Removal
1. Remove all food.
2. Wash all interior surfaces including door, floor and
walls according to "General" instructions. Pay special
attention to corners, crevices and grooves. Include all
accessories, shelves and gaskets.
3. Rinse and dry thoroughly.
4. Wrap foods in tightly sealed wrap or containers to
prevent further odor. After 24 hours, check if odor
was eliminated.
If odor was not eliminated, do the following:
1. Complete procedures in steps 13 above.
2. Pack freezer with crumpled sheets of black and white
newspaper.
3. Place charcoal briquettes randomly throughout
newspaper.
4. Close door and let stand 2448 hours.
5. Remove charcoal briquettes and newspapers.
Wash all interior surfaces including door, floor and
walls according to "General" instructions. Pay special
attention to corners, crevices and grooves. Include all
accessories, shelves and gaskets.
6. Wrap foods in tightly sealed wrap or containers to
prevent further odor. After 24 hours, check if odor
was eliminated.
If odor was still not eliminated, contact Consumer Affairs
Department at 1-800-843-0304.
Adhesives
Remove glue residue by dabbing toothpaste over
adhesive. Rub toothpaste into adhesive with fingers until
adhesive loosens. Rinse surface with warm water. Dry
surface with a soft, clean cloth.
Door Gaskets
1. Clean door gaskets every three months or more
frequently if necessary.
2. Rinse and dry gaskets thoroughly.
3. Apply a light film of petroleum jelly on cabinet hinge
side to keep gaskets pliable.
RS1500000 Rev. 2 10
Care and Cleaning
Defrosting
WARNING
!
To avoid electrical shock which can cause severe
personal injury or death, disconnect power to freezer
before defrosting. After defrosting, restore power.
Defrost freezer when frost has accumulated to 1/4".
Upper section of freezer will normally have more frost
than lower section.
1. Transfer food to an alternate cooling source.
2. Remove toe grille by pulling forward.
3. Remove interior drain plug from freezer.
4. Verify drain pan is beneath drain opening to catch
defrost water.
5. Place pans of hot water in freezer.
6. Wash all interior surfaces including door, floor and
walls.
7. Replace inside drain plug. Drain plug must be
properly installed for efficient operation.
Light Bulb (some models)
WARNING
!
To avoid electrical shock which can cause severe
personal injury or death, disconnect power to freezer
before replacing light bulb. After replacing light bulb,
restore power.
CAUTION
!
To avoid personal injury or property damage, observe
the following:
Allow light bulb to cool.
Wear gloves when replacing light bulb.
Remove light bulb cover by pressing front and back of
light bulb cover together. Replace light bulb with 15-watt
appliance bulb, Amana part # A3073101.
11 RS1500000 Rev. 2

General Tips
Energy Tips
This freezer is designed to be one of the most
energy efficient freezers available. Reduce energy
use by doing the following:
Operate in normal room temperatures away from heat
sources and direct sunlight.
Set controls no colder than necessary.
Keep freezer full.
Keep door gaskets clean and pliable. Replace gaskets
if worn.
Vacation Tips
For long vacations, do the following:
1. Empty freezer.
2. Unplug freezer.
3. Clean freezer including door gaskets.
4. Prop doors open, so air can circulate inside.
Normal Operating Sounds
Todays freezers have new features and are more energy
efficient. As a result, certain sounds may be unfamiliar.
These sounds are normal and will soon become familiar.
These sounds also indicate freezer is operating and
performing as designed.
1. Temperature Control
Temperature control clicks when starting or
stopping compressor.
2. Evaporator
Evaporator refrigerant flow gurgles, pops or sounds
like boiling water.
3. Evaporator Fan Motor
Makes a whirring noise or sounds like rushing air.
4. Compressor
Compressor has a high pitched hum or pulsating
sound.
5. Defrost Heater
Sizzling, hissing, or popping sounds are caused by
water dropping on the defrost heater during the
defrost cycle.
6. Defrost Drain Pan
Dripping sounds is defrost water falling onto drain
pan.
7. Defrost Timer
Automatic timer sounds like an electronic clock that
snaps in and out of the defrost cycle.
8. Insulation
Foam insulation is very energy efficient and has
excellent insulating capabilities. However, foam
insulation is not as sound absorbent as previously
used fiberglass insulation.
Before Calling For Service
Freezer does not operate.
Confirm temperature control is on.
Confirm freezer is plugged in.
Check fuse or circuit breaker. Plug in another
item at that wall outlet.
Wait 20 minutes to see if freezer restarts. If
freezer control is on, freezer may be in defrost
cycle.
Freezer still wont operate.
Unplug freezer. Transfer food to another unit or
place dry ice in freezer to preserve food.
Call 1-800-NATLSVC (628-5782) inside U.S.A.
and 319-622-5511 outside U.S.A. to locate an
authorized servicer.
Food temperature appears too warm.
See above sections.
Allow time for recently added food to reach
freezer temperature.
Check gasket for proper seal.
Adjust temperature control.
Freezer runs too frequently.
It may be normal to maintain an even temperature.
Doors may have been opened frequently or for
an extended period of time.
Adjust temperature control.
Check gaskets for proper seal.
Confirm freezer has proper clearance on each side.
Water droplets form on outside of freezer.
Check door gaskets for proper seal.
Water is on floor beneath freezer.
Confirm drain plugs are properly positioned.
Empty drain pan .
Freezer has an odor.
See "Odor Removal" instructions in "Care and Cleaning"
section.
Freezer makes unfamiliar sounds or seems too loud.
It may be normal. See "Normal Operating Sounds"
section, this page.
RS1500000 Rev. 2 12
General Tips
Operating Sounds
Todays freezers are designed for economical operation and energy efficiency. New features and designs may create
sounds which are different. Following is normal operating sounds which may be encountered, no service call is
required.
Defrost heater:*
Sizzling, hissing, or popping sounds are cause d by water
dropping on the defrost heater during the defrost cycle.
Temperature control:
Clicks when the compressor
starts or stops.
Defrost timer:*
Automatic timer sounds like an
electric clock that snaps in and
out of the defrost cycle.
Evaporator:
Gurgling sound, like boiling
water, when refrigerent flows
through the freezer cooling
coil.
Insulation:
High-efficiency foam is used for
its excellent energy insulation
capacity, even though it does not
offer the same level of sound
insulation as less energy-efficient
fiberglass insulation once foun d
in freezers.
* Frost-free models only
Freezer fan:*
Makes a whirring noise
or sounds like rushing
air as cold air ciculates in
the freezer compartment.
Compressor:
Runs faster for higher
efficiency and has
a higher pi tched hum
or pulsating sound.
Defrost drain pan:*
Dripping sound is defrost
water fa lling ont o dr a in pan.
13 RS1500000 Rev. 2

Component Testing
To avoid risk electrical shock, personal injury, or death,
WARNING
!
power to be connected. When removing any wiring from terminals they must be replaced on the same terminals.
Ensure all ground wires are connected before certifying unit as repaired and/or operational.
Refrigeration System Test Procedures
Careful testing of the refrigeration system is essential in determining if a malfunction is present.
Temperature testing is accomplished by using a three lead thermocouple temperature tester in specific locations.
1. Test point 1, is attached to inlet on the evaporator coil
2. Test point 2, is attached to outlet on the evaporator coil.
3. Test point 3, is approximately 68 inches from suction port of compressor on the suction line.
4. Thermocouple tips should be attached securely to the locations specified.
5. Do not test during initial pull down, Allow one complete OFF cycle or a balanced temperature condition to
occur before proceeding.
6. Unit must operate a minimum of 20 minutes after thermocouples are installed.
NOTE: It may be necessary to turn control colder to maintain required operating time.
7. Wattage reading must be recorded with temperature test to confirm proper operation.
8. Suction and Head pressures are listed in the specification chart.
always disconnect electrical power source to the freezer
before attempting to service, unless test procedures require
Evaporator
Heat
exchanger
Compressor
Refrigerant Flow Diagram
Condenser
Manual Defrost
Dryer
Discharge
line
Suction
line
Condenser
Heat
exchanger
Suction
line
Drier
Discharge
line
Compressor
Evaporator
Refrigerant Flow Diagram
Automatic Defrost
RS1500000 Rev. 2 14

Component Testing
To avoid risk electrical shock, personal injury, or death,
WARNING
!
power to be connected. When removing any wiring from terminals they must be replaced on the same terminals.
Ensure all ground wires are connected before certifying unit as repaired and/or operational.
Testing Main Condenser
Before testing condenser, verify no leaks exist
elsewhere.
Condenser loop must be disconnected from the system
and tested separately. The following illustration shows
the tubing as it is routed and fastened in the freezer
cabinet flange.
NOTE: Verify a leak is not present in any external
tubing or joints before performing the following
test.
Following equipment is required to test.
An access fitting
A drum of oil pumped nitrogen.
Pressure regulator.
Two gauges.
Line valve and tubing.
Access fitting should be prepared as follows:
always disconnect electrical power source to the freezer
before attempting to service, unless test procedures require
Condensor
bottom
external
Suction
To
condensor
To
evaporater
Discharge
From
condensor
Gauges
Pressure
regulator
Line
valve
Nitrogen Tank and Fittings
To
condensor
Process From
Discharge
Suction
condensor
Tube
process
Compressor Cutting or Unsoldering
Points No Defrost Models
Prepare equipment as required and test condenser as
follows:
1. Cut tubing at arrow to condenser and from
condenser as shown in the previous illustration.
2. Crimp and solder the end to condenser that enters
into the cabinet.
3. Silver solder access fitting of test equipment to the
end from condenser tube that emerges from the
cabinet.
4. Pressurize the system to 250 pounds with dry
nitrogen. Test all connections for leaks with a soap
solution.
5. Check the pressure gauge. If pressure drops, there is
a leak. However, it may be necessary to allow as
much as 24 hours for test results to verify no leaks
exist. If there are no leaks, reconnect the tubing.
Evacuate and recharge the system.
Tube
process
Compressor Cutting or Unsoldering
Points Refrigerated Shelf Models
15 RS1500000 Rev. 2

Component Testing
To avoid risk electrical shock, personal injury, or death,
WARNING
!
power to be connected. When removing any wiring from terminals they must be replaced on the same terminals.
Ensure all ground wires are connected before certifying unit as repaired and/or operational.
always disconnect electrical power source to the freezer
before attempting to service, unless test procedures require
Testing for Leaks
DANGER
!
Free oxygen will explode on contact with oil.
Acetylene will explode spontaneously when put under
pressure.
To prevent violent explosions that may result in
serious injury or death to persons in or near the
immediate vicinity, NEVER use oxygen or acetylene
for pressure testing or cleanout of refrigeration
systems.
WARNING
!
To avoid severe personal injury or death from fire,
keep system free from contamination due to presence
of air. Follow instructions exactly.
Electrical System
WARNING
!
To avoid possible electric shock, personal injury or
death disconnect power before servicing. Follow
specific steps listed in this manual for testing or
replacement of a suspected failed component.
Compressor Electrical Tests
Compressor terminals on all models can be reached only
from the rear of the cabinet.
If freezer does not operate, do not assume compressor
has failed until all other possibilities are eliminated.
Is current entering the compressor through the power
cord?
Check for low voltage at the compressor terminals, a
minimum of 100 volts is required for compressor to
start.
If the necessary voltage is available, check for failures
in:
Over load protector
Starting relay
Temperature control,
Cabinet wiring harness.
Testing Compressor Direct
To test compressor with no other wiring in the circuit is
called DIRECT TEST. Safest way to check the
compressor is by using a compressor tester.
Run
Common
Start
Switch
All electrical components are grounded to the cabinet.
The green center conductor of three wire lead cord is
also attached to the cabinet to provide a grounding circuit
when the lead cord is plugged into a properly grounded
electrical outlet. After replacing an electrical component,
always verify the ground wire is reconnected.
The electrical outlet from which the appliance is to
receive its power should always be checked to verify it is
properly wired.
RS1500000 Rev. 2 16
Power
cord
Capacitor
connections
Compressor Tester
 Loading...