

Page 1
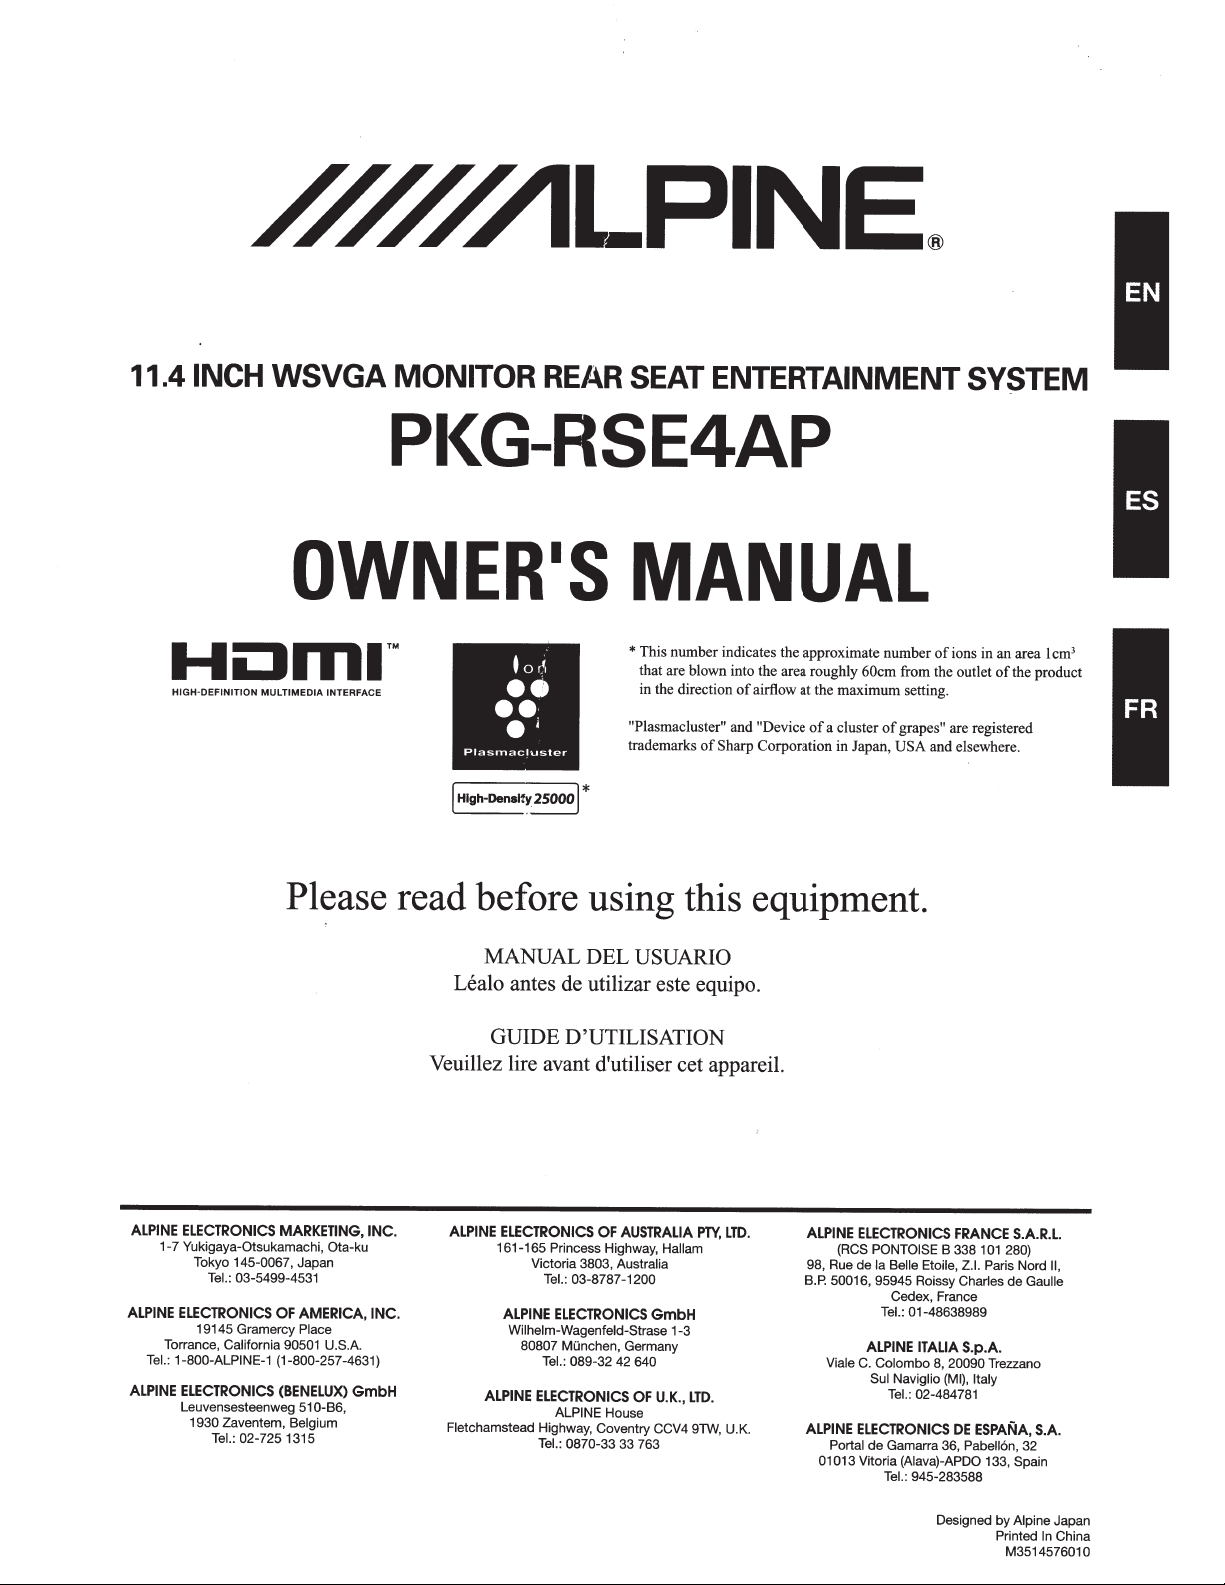
11.41NCH
WSVGA MONITOR
PI<G-RSE4AP
REAR
SEAT
ENTERTAINMENT
SYSTEM
OWNER•s
HIGH-DEFINITION MULTIMEDIA
Please
INTERFACE
MANUAL
•
This number indicates the approximate number
that are blown into the area roughly
in the direction
"Plasmacluster" and
trademarks
of
airflow at the maximum setting.
"Device
of
Sharp Corporation in
read before using this equipment.
MANUAL DEL
Leala
antes de utilizar este equipo.
GUIDE D'UTILISATION
Veuillez lire avant d'utiliser cet appareil.
USUARIO
of
a cluster
60cm
from the outlet
of
grapes"
Japan, USA
of
ions in
an
of
are registered
and elsewhere.
area 1 cm
the product
3
ALPINE
ELECTRONICS
1-7
Yukigaya-Otsukamachi,
Tokyo 145-0067, Japan
ALPINE
ELECTRONICS
19145 Gramercy Place
Torrance,
Te
l.
: 1-800-ALPINE
ALPINE
ELECTRONICS
Leuvensesteenweg
1930 Zaventem,
MARKETING,
Tel.: 03-5499-4531
OF
AMERICA,
California 90501
-1
(1
-800-257-4631)
(BENELUX)
51
Tel.:
Belgium
02-725 1315
Ota-ku
U.S.A.
O-B6,
INC.
INC.
GmbH
ALPINE
ELECTRONICS
161-165 Princess Highway,
Victoria 3803,
Tel
ALPINE
Wilhelm-Wagenfeld -Strase 1-3
80807
Tel.:
ALPINE
ELECTRONICS
Fl
etc
hamstead
Highway, Coventry CCV4 9TW, U.K.
Tel.: 0870-33
OF
AUSTRALIA
Australia
.: 03-8787-1200
ELECTRONICS
Munchen, Germany
089-32 42
ALPINE
House
33
GmbH
640
OF
763
Hallam
U.K.,
PlY,
LTD.
LTD.
ALPINE
ELECTRONICS
(RCS PONTOISE
98, Rue
de
B.P.
ALPINE
Ia Belle Etoile, Z.l. Paris Nord
50016,
95945 Roissy
Cedex, France
Tel.:
01-48638989
ALPINE
Vi
ale
ELECTRONICS
Portal
01
013
ITALIA
C.
Colombo
Sui Naviglio (MI),
Tel.: 02-484781
de
Gamarra 36,
Vitoria (Aiava)-APDO 133, Spain
Tel.
:
945-283588
FRANCE
B 338 1
Charles
S.p.A.
8,
20090
I
DE
ESPANA,
Pabell6n,
Designed
S.A.R.L.
01
280)
de
Tr
ezzano
ta
ly
by
Alpine
Printed
M3514576010
Gaulle
S.A.
32
In China
II
,
J
apa
n
Page 2
use the
Please read this manual thoroughly before use,
product correctly. Sharp is not responsible for any defects that
arise as a result
offailing
to heed instructions in this manual.
and
~WARNING
symbol
This
Failure
or
injury
THE
KEEP
OUTSIDE
HEAR
Failure to
DO
Doing so may result in
USE
(Check with your dealer
result in fire, etc.
KEEP
REACH
Swallowing them may result in serious injury.
consult a physician immediately.
USE
Failure to do
blows more than once, carefully check all electrical connections
for shorted circuitry. Also have your vehicle's voltage regulator
checked.
DO
Doing so may cause heat to build up inside and may result in fire.
USE
Use for other than its designed application may result in fire,
electric shock
DO
Doing so
shock.
KEEP
do
DISASSEMBLE
NOT
ONLY
SMALL
OF
CORRECT
THE
BLOCK
NOT
THIS
DISASSEMBLE
NOT
may
SMALL
SCREWS
swallowed, consult a physician immediately.
If
THE
USE
REPLACING
WHEN
Failure to do so may result in
or fire.
ONLY
USE
GROUND.
Failure to do so may result in
USE
HALT
DEALER
THE
FOREIGN
A
PRODUCT,
IS
SMELL
Failure to
WIPE
NOT
DO
ALCOHOL,
HAIRSPRAY
of
any
If
immediately wipe it
electric shock
means important instructions.
DRIVING.
ALTER.
VOLT
12
A
AS
result
WHERE
or
NEGATIVE
BATIERIES
heed them can
to
death.
LEVEL
A
VOLUME
AT
WHILE
NOISE
so may result in an accident.
OR
accident, fire
an
WITH
CARS
IN
OBJECTS
you are not sure.) Failure
if
SUCH
CHILDREN.
AMPERE
may result in fire
so
RADIATOR
OR
VENTS
MOBILE
PRODUCT
FOR
other injury.
or
OR
result in an accident, fire
OBJECTS
OF
OUT
CORRECT
SUCH
REACH
THE
AMPERE
RATING
ALTER.
WHEN
electric shock.
or
12V
or
BATIERIES
AS
CHILDREN.
OF
RATING
FUSES.
accident
an
NEGATIVE
VDC
12
A
WITH
CARS
IN
accident or fire.
an
CONTACT
IMMEDIATELY
NO
IF
OBJECT
SMOKE
OR
AND
IMAGE
GETS
A
OR
APPEARS,
THE
INSIDE
STRANGE
PRODUCED.
so may result in an accident, fire
do
AN
PRODUCT
THE
or
BUG
off
fire.
OR
SPRAY
BENZINE
OR
such substances get
WITH
THINNER,
ONTO
on
. Failure
to
OR
THE
e product,
th
so may result
do
in serious
STILL
CAN
YOU
electric shock.
GROUND.
so may
do
to
THE
OF
OUT
swallowed,
If
the fuse(s)
If
FUSES.
REPLACING
PANELS.
APPLICATIONS.
electric
Forbidden
AND
<S>O
Forbidden
Mandatory
0
Mandatory
<S>O
Forbidden
or
OIL,
SPRAY
PRODUCT.
Mandatory
electric shock.
<S>
Forbidden
cracks,
in
~CAUTION
symbol
This
Failure
material
IMMEDIATELY
USE
HALT
Failure to do so may cause personal injury
product. Return it to your authorized Alpine dealer or the nearest
Alpine Service Center for repairing.
USE
NOT
DO
INDICATED
aATIERY
Rupture
personal injury.
DO
Doing
injwy.
DO
THE
Doing
&
Product
Use a soft dry cloth for periodic cleaning
severe stains, please dampen the cloth with water only. Anything
else
POLARITY.
or
USE
NOT
may result in electric shock
so
PLACE
NOT
GAPS
may result in personal injury
so
PRECAUTIONS
Cleaning
has•the
Temperature
Do not operate your unit in ambient temperature above
158°F)ior
(+
Moisture
You
condensation.
and wait about an hour for the moisture to evaporate.
Condensation
may notice the disc playback
Maintena
have
you
If
Return it to your Alpine dealer or the nearest Alpine Service
Station for
Characteristics
• After turning the system off, a slig
will remain temporarily. This is an effect peculiar
technology and is normal.
cold temperature conditions, the screen may lose
Under
•
contrast temporarily. After a short warm-up period, it will
return to normal.
The LCD panel
•
precision manufacturing technology. Its effective pixel ratio
is over 99.99%. This means that
either always
Wireless
Using
or
ACC
If
produced through the headphones.
headphones from your ears before you
means important instructions.
injury or
heed them can result
to
property damage.
PROBLEM
A
IF
THAN
ANYTHING
BATIERIES.
chemical leakage from the battery may cause fire
OUTSIDE
FINGERS
THE
OF
chance
below
this happens, remove the disc from the player
If
ce
~
problems, do not attempt to repair the unit yourse
icing.
st~rv
ON
OTHER
INSERT
OF
MOVABLE
dissolving the paint
of
-10°C
LCD
of
manufactured using an extremely high
is
OFF.
or
WITH
VEHICLE.
A
FOREIGN
OR
DISPLAY.
(l4°F).
sound wavering due to
Panel
0.01%
in
APPEARS.
damage
or
THE
CORRECT
THE
personal
or
OBJECTS
accident.
or
the product. For more
of
damaging the plastic.
or
e image
th
of
ghost
ht
the pixels could
of
the
to
ill
Forbidden
IN
Forbidden
70°C
+
LCD
to
J.\
or
lf
be
Headphones
the monitor's power source is turned off, a loud noise is
remove the wireless
to
sure
Be
.
the monitor
tum
off
.
Page 3
DO
NOT
USE
A
MOBILE
NEAR
THE
Doing so may cause noise
telephones and wireless devices away from the product.
MONITOR
•
If
•
For more severe stains, please dampen the cloth with water that
contains a diluted pH-neutral detergent, and ring
before use.
•
Do
discoloration
PRODUCT.
CARE
the monitor becomes dirty, clean it with a soft cloth.
not use a benzine, alcohol or thinner. Doing so may cause
or
TELEPHONE
or
deformation.
OR
malfunction.
WIRELESS
We
DEVICE
recommend using
it
out well
PLASMACLUSTER
• Do not use any cosmetics that contain fiuoropolymers
silicone near the Plasmacluster ion generator.
•
The Plasmacluster unit use
disassemble
or
alter.
an
CAUTIONS
extremely high voltage. Do not
or
Page 4
cOntents
Operating Instructions
WARNING
WARNING
CAUTION
PRECAUTIONS
PLASMACLUSTER
Basic Operations
....
Parts
Remote Control .
Turning the
Operating the Dome Light... ............................
Turning Plasmacluster
Setup
Visual Equalizer
Picture Setup .
Screen
LINK
RSE
Setup
Rest Mode
System Setup
.................................................. 2
................................................... 2
......................................... 2
CAUTIONS ................ 3
...................
..
..........
...............
..
Mode
Day and Night Brightness Levels .....
of
..
............
..
................
..
ON
Power
Setup ..............
.................................................. 7
..
.........
Setup
.................................
..
..
Setup .
..........
..
Setup
................
..
............................
/OFF
..
.....
/OFF
ON
..
..
..
..
................ ......
..
............
..
..
.................................
..
..
..
..
........
..
............
..
.
.......
........
..
..
.....
..
..... 7
..
..
......... 8
..
....... 9
..
... 1
..
Installation
Warning ...................................................
Caution ....................................................
Precautions .............................................
IMPORTANT
Accessories
Overhead Monitor Installation .............
5
..
5
..
6
..
6
..
6
..
9
..
0
10
Final Wiring and Mounting ..
Routing Cables to the
Connecting to Dome Light ........
Connections ..........
and
............................................
..
...
..
..
..
Connections
..........
..
....
..
..
..
....
..
.........
..
..
......
..
........
..
........
..
..
.
..
Source .......................... 16
...
..
........
..
........... 18
............................
..
..
..
. 15
..
..
..... 17
..
13
13
13
13
14
16
Wireless
Headphone Receivers ........
Ope
Adjusting the Volume ....
Battery
Note ..
Headphones
tion ................................................
ra
stallation ....
In
......... ........
..
Specifications
Specifi
ca
............................................
..
tions
Plasmacluster
P1asmacluster. .......
ut
Abo
at is Plasmacluster Tec
Wh
......................
..
...
..
...
..
.....
..
re
Ca
the Plasmacluster Ion
acement
pl
Re
Generation unit .......................................... 12
of
.....
....
..............................
..
..
............................
..
....
..
..............................
..
....
..
........................... 12
..
.
..
ology? ........
hn
........
..
..........
..
.....
..
..
..
.....
..
..
..
..
..
...... .. 12
..
..
11
11
11
11
..
.... 11
11
..
..
12
..
..
Page 5
Basic
Operation
Remote
Control
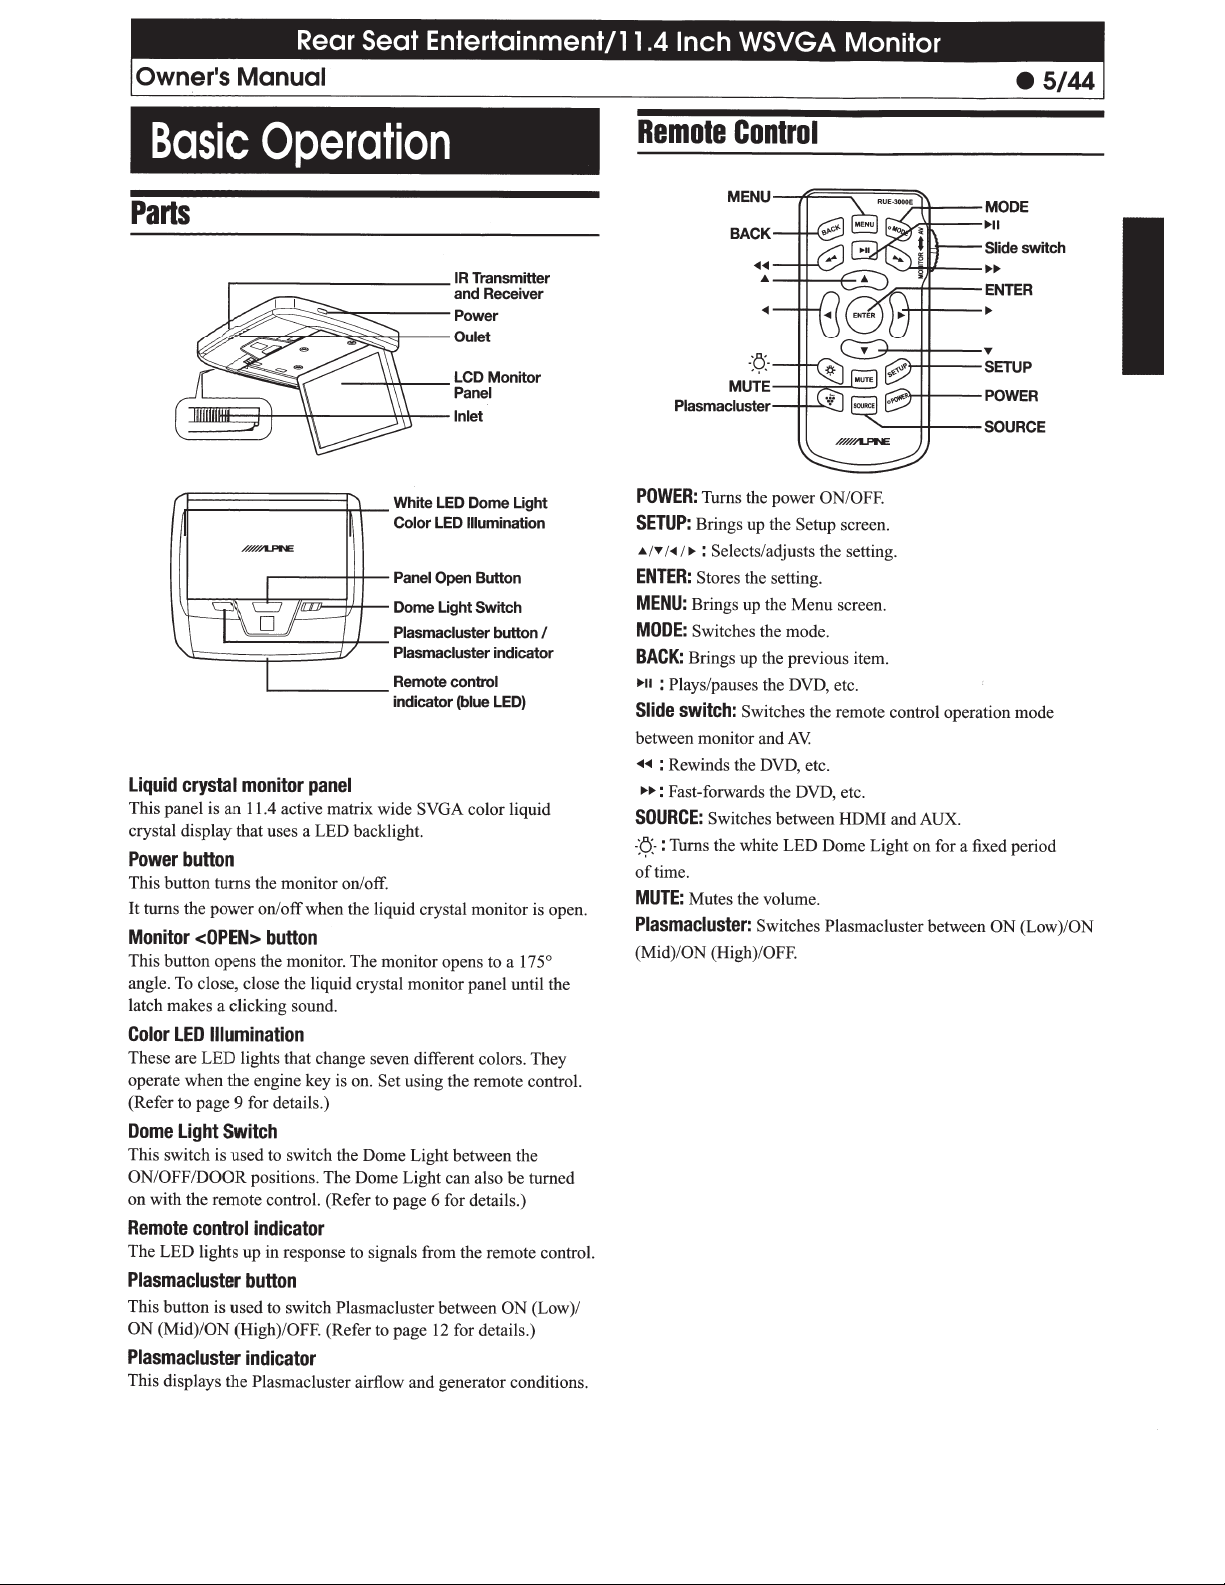
Parts
.------------IR
~~
~
~~~----Power
u
~"""'o:::Z;,.....::;-=~~::.,f---
(J=:=:=:=:=:=:=:~-
.-----+1+--
rc:rc5"""71ii~=tf-t---
L------+.f---
.___
_____
Liquid
crystal
This panel is an 11.4 active matrix wide
crystal display that uses a LED backlight.
monitor
panel
White LED Dome Light
Color LED
Panel
Dome Light Switch
Plasmacluster button
Plasmacluster indicator
Remote control
indicator (blue LED)
PowerbuHon
This button turns the monitor on/off.
It turns the pow
Monitor
This button
angle. To close, close the liquid crystal monitor panel until the
latch makes a clicking sound.
Color
LED
These are
operate when the engine key is on.
(Refer to page 9 for details.)
Dome
Light
This switch is used to switch the Dome Light between the
ON/OFF/DOOR
on with the remote control. (Refer to page 6 for details.)
Remote
The LED lights up in response to signals from
Plasmacluster
This button is used to switch
ON (Mid)/
Plasmacluster
This displays the
er
on/off when the liquid crystal monitor is open.
<OPEN>
buHon
opens
the monitor. The monitor opens to a
Illumination
LED
lights that change seven different colors. They
Set
using the remote control.
Switch
positions. The Dome Light can also
control
indicator
buHon
Plasmacluster
ON
(High)/OFF. (Refer to page
indicator
Plasmacluster
airflow and generator conditions.
Transmitter
and Receiver
Oulet
Illumination
Open Button
SVGA
color liquid
th
e remote control.
between
12
for details.)
be
ON
I
175
turned
(Low)/
°
MENU
BACK
......
..
...
-:f;.·
MUTE
Plasmacluster
POWER:
SETUP:
&/
ENTER:
MENU:
MODE:
BACK:
10-11
Slide
between monitor andAV.
..,...,.
~~:
SOURCE:
-:f;.
of
MUTE:
Plasmacluster:
(Mid)/ON
Turns the power
Brings up the
"'
/
<11
/
"'
:
Selects/adjusts the setting.
Stores
the setting .
Brings up the Menu screen.
Switches the mode.
Brings up the previous item .
:
Plays/pauses
switch:
: Rewinds the DVD, etc.
Fast-forwards the DVD, etc.
-
:Turns the white LED Dome Light
time.
Switches the remote control operation mode
Switches between HDMI and
Mutes the volume.
Switches Plasmacluster between
(High)/OFF.
ON
Setup
screen.
the DVD, etc.
/
OFF.
MODE
~II
Slide switch
"'"'
ENTER
~
...
SETUP
POWER
SOURCE
AUX.
on
for a fixed period
ON (Low)/
ON
Page 6
Turning
the
Monitor
Power
ON/OFF
Dome
Operating
The Dome Light can
function is used when the Dome Light Switch is set to
the
be
turned
Light
with the remote
on
control.
This
DOOR
.
The power
1
monitor
automatically
<OPEN>
opens.
automatically turns off when the
power
The
The power can be turned
2
is open by pressing
monitor.
the
Press
•
Control
POWER
Remote
turns on when
button is pressed and
ON/OFF when the
on
)
6
to
turn
POWER
ON
(
and
OFF.
the
the
panel
the
panel
is
side
ed.
os
cl
panel
of
On/Off
remote control.
the
on
-:f;.-
Press
1
turn on.
The Dome Light w
Dome Light will
The
time.
of
The illumination
"LED AUTO OFF"
to
Refer
The Dome Light cann
•
the following situations.
-When the engine key is
-When the Dome Light Switch is set to DOOR
open
-When the Dome Light power so
the engine key is turned
•If
Dome Light will turn
AUTO OFF"
is pressed on the remote control when the Dome Light
•!f-fj.-
Switch is set to anything other than
Switch will switch to
and
above,
time has elapsed.
one hour elapses when the engine key is
if
•
Light Switch is set to
due to a built-in protection function.
off
turn
ill
automatically
can be selected
time
page 9
on
operated with the remote control
be
ot
OFF
when the Dome Light is on, the
OFF
after the period
off
has elapsed.
the Dome Light will turn
DOOR within the fixed period
the Dome Light will automatically
DOOR,
turn off after a fixed period
LINK
RSE
in the
details
for
the door is
and
ce is not connected
ur
"LED
in
set
time
of
the Dome Light
DOOR,
after the
off
OFF
fixed
and
time set
of
period
the Dome
setup.
in
of
Turning
Plasmacluster can
(High) and
ON
the remote
Plasmacluster
switched between
be
using the button
OFF
control.
Monitor and Remote
Plasmacluster.
Press
1
h time it is pressed, it will
ac
E
(High) a
ON
(Mid),
ON
Plasmacluster
setting.
Plasmaclus
(Low): Green
ON
(Mid): Blue
ON
(High):
ON
OFF: Off
indicator wi
indica
ter
Orange
Good Use
A high concentration
the vehicle's air conditioning.
by making use
e unit may make a bu
Th
•
Plasmacluster ions
sound may change.)
e sound
Th
•
environme
effectiveness will
of
get loud
may
the operating mode, but the Plasmaclu
and
nt
not
ON/OFF
ON
(Low),
ON
the button
or
the unit
on
Control
ON
een
tw
itch be
sw
equency
fr
co
in that order. The
OFF
nd
change depending on the
ll
lors:
co
tor
ions can be more effectively achieved
of
, but this is not unusual when
und
ing so
zz
nerated. (The
ge
e being
ar
or quieter depending on the usage
er
change.
(Mid),
(Low),
of
or
l
airfl
of
er ion
st
on
the
ow
the
Page 7
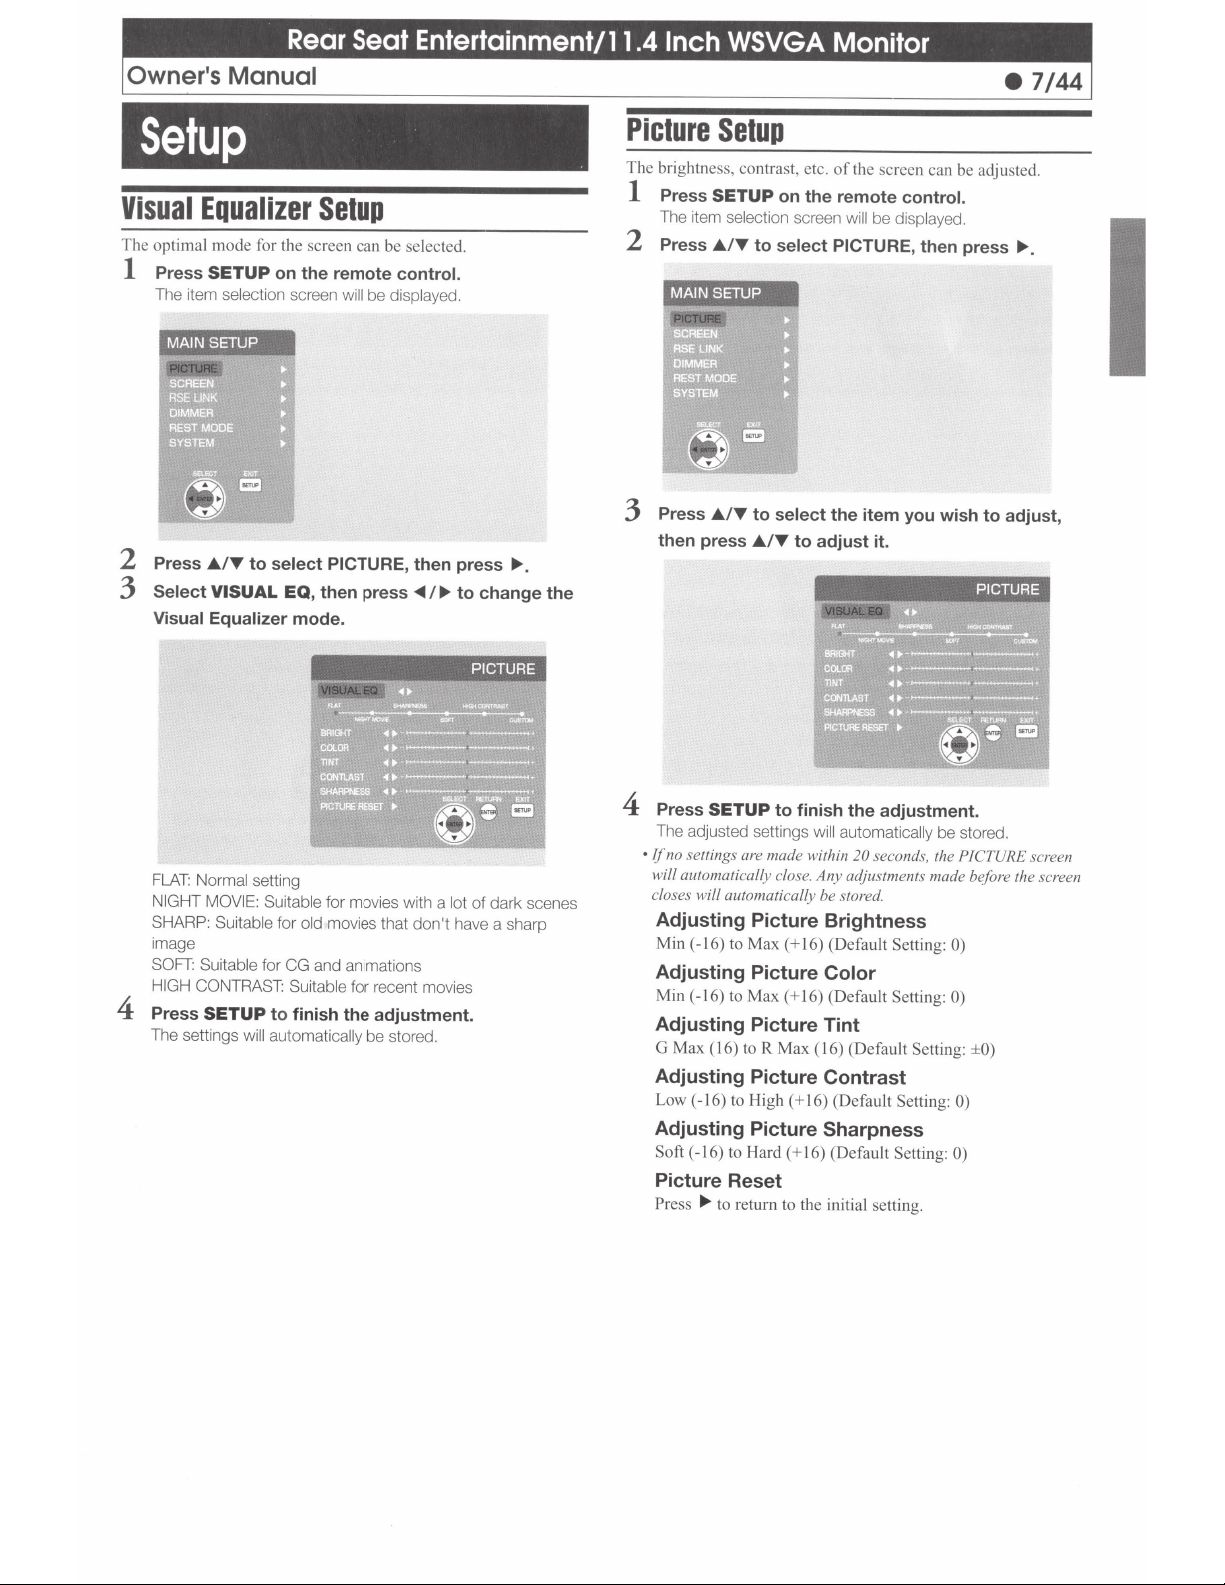
Setup
Visual
The optimal mode for the screen can be selected.
1
2
3
Equalizer
Press
SETUP
The item
Press
Select VISUAL EQ, then press
Visual
selection
MAIN SETUP
Ji../~
to select
Equalizer mode.
Setup
on the remote control.
screen will
be
displayed.
PICTURE,
then press
~I.,..
.,..
.
to change the
Picture
The brightness, contrast, etc.
1
2
3
Setup
Press
SETUP
The item selection screen
Press
Ji../~
MAIN SETUP
Press
Ji../~
then press
on the remote control.
to select
to select the item you wish to adjust,
Ji../~
to adjust it.
of
the screen can
will
be
displayed.
PICTURE,
be
adjusted.
then press
.....
FLAT:
Normal
setting
NIGHT MOVIE: Suitable
SHARP:
image
SOFT:
HIGH CONTRAST: Suitable for recent movies
4
Press
The settings
Suitable
Suitable
for CG and animations
SETUP
will automatically
for movies with a
for
old
movies that
to finish the adjustment.
be stored.
don't
lot
of
dark scenes
have a sharp
4
Press
SETUP
The adjusted settings
•
If
no settings are made within 20
will automatically close.
closes will automatically be stored.
to
finish the adjustment.
will automatically be stored.
Any
adjustments made before the screen
Adjusting Picture Brightness
Min ( -16)
Adjusting Picture
Min ( -16) to Max (
to
Max (
+
16) (Default Setting: 0)
Color
+
16) (Default Setting: 0)
Adjusting Picture Tint
G Max ( 16)
to
R Max ( 16) (Default Setting: ±0)
Adjusting Picture Contrast
Low ( -16)
to
High (
+
16) (Default Setting:
Adjusting Picture Sharpness
Soft
( -16) to Hard (
+
16) (Default Setting:
Picture Reset
Press
....
to return to the initial setting.
seconds, the
PICTURE screen
0)
0)
Page 8

e!!iN·Ilft.ilifilf§l!il·i••&Udllii•tailtafi~l·l•lil·l
Owner's Manual •
normal size (4:3).
in
to finish the setup.
automatically be stored.
Screen
FULL,
disp lay mode.
• Independent settings are stored
display modes.
1
2
3
Mode
WIDE
SETUP
Press
The item selection screen
Ji../T
Press
Ji../T
Press
Setup
and
2
WrDE
I,
the remote
on
select SCREEN,
to
to change the screen mode.
NORMAL
HDMI and
for
be displayed.
will
be
can
control.
then press
set
AUX
for the
screen
.
.,..
screen
NORMAL:
Press
4
The settings
Displays
SETUP
will
~
8/44
FULL {initial
and
etc.)
TV,
Optimizes and displays
1:
WIDE
Optimizes and displays
2:
WIDE
setting):
navigation screen on the full screen region.
Displays the image source (DVD,
16:9.
in
letterbox size.
in
Page 9

RSE
LINK
This function is set up when
Alpine
Head
1
Press
The item selection screen
2
Press
3
Press
press
Setup
Unit
to handle
SETUP
Af''f
A/T
-<1111/..,.
on
the remote control.
to select RSE
to select the item
to select the setting.
combining
RSE
LINK.
will
be
displayed.
LINK, then press
the product
you
with
wish to set, then
RSE LINK
.....
an
Setup
ol
Day
and
Levels
The
brightness
panel can be switched to
1
Press
The
2
Press
3
Press
press
of
the backlight
SETUP
item selection screen
Al"f
Al"f
-<1111/..,.
on
to select
to select the item
to adjust it.
Night
make
the remote control.
DIMMER,
Brightness
(LED)
built into the liquid crystal
the screen easier to see.
will
be
displayed.
then press
you
wish to set, then
.....
Plasmacluster Control:
Set the Plasmaclusterfan speed controlled
Head Unit
FRONT*: Switch between
REAR: Switch between
*
This can only be set when connected
compatible Alpine Head
Illumination
Set the
Rear
FRONT*:
REAR:
*
This can only be set when connected
compatible Alpine Head
Illumination Color:
Set the
(Color options: White, Blue, Green, Amber, Red, Purple,
Sky blue and
This setting
Control
LED Auto
Set the duration
is
turned on by the remote control.
30sec: Automatically turns off after
i
min: Automatically turns off after
3min: Automatically turns off after 3 minutes.
4
Press
The settings
or
Rear Mon i
ON
(High) and
Front Head Unit
ON
(High) and
remote control
Color Control:
Illumination Color controlled
Monitor
(Default:
Set the Illuminat
Set the
Illumination Color
OFF)
is
only available when the Illumination Color
is
set
to
Off
Control:
SETUP
to finish the setup.
will
tor
OFF
OFF
(RUE-3000E)
Unit
FRONT)
ion
Illuminat
ion
Unit
(Default: BLUE)
REAR
of
auto turn off the Dome Light when it
automatically be stored.
(Default:
ON
(Low),
for Plasmaclusteron the
ON
(Low),
for Plasmaclusteron the
to
by
Color on the Front Head Unit
Color
on
to
by
FRONT)
ON
(Mid),
ON
(Mid),
the
RSE
Link
Front Head Unit or
this
Rear
the
RSE Link
(Default: 30sec)
30 seconds.
i
minute.
Front
Monitor
Dimmer Mode settings:
Set the Dimmer
AUTO: Automatically adjusts the brightness
screen
the vehicle.
DAY:
The brightness
set
NIGHT:
The brightness of the screen
set
Day brightness:
The
DAY
Setting range:
Night brightness:
The
NIGHT
Setting range:
4
Press
SETUP
The settings
Mode
(Default:
in
connection with the brightness inside
of
the screen
in
DAY
LEVEL.
in
NIGHT
LEVEL.
LEVEL can be adjusted
i
6-3"1
(MIN-MAX)
LEVEL can be adjusted
0-
i
5
(MIN-MAX)
to finish the setup.
will
automatically be stored.
AUTO)
in
is
the brightness
is
the brightness
"16
steps .
in
i
6 steps.
of
the
(Default: 31)
(Default:
7)
Page 10

!!!!l·ll.f4·iliffltjiM!.!
.t§btiiiii.Qif4iW®1·li!il.j
.
~
Owner's Manual •
0/44
1
Mode
Rest
The screen automatically turns
elapsed.
Press
1
item
The
Press
2
Press
3
press
REST MODE:
ON:
OFF:
TIME TO
30min,
REST TIME:
Sets
(Default: 5min)
n,
5mi
REST
Restores the Rest Mode settings to the initial settings.
Rest Mode
If
•
Head Unit,
again when the Rest Mode is disabled.
• Rest Mode
turned
Press
4
The
Setup
after a set period
off
the remote control.
SETUP
Ji.J'f
J;.f'f
~I...,.
The monitor automatically turns off after a set
period of time has elapsed
The monitor does not automatically turn off.
(Default)
the period of time until returning from Rest Mode.
1
MODE
off
SETUP
settings
on
displayed.
be
will
selection
hr
1
Omin,
is
screen
to select REST
to select the item
to select the setting.
REST:
2hr can be selected.
or
15min or
RESET:
enabled while a DVD is playing on the Alpine
is
the DVD will stop playing.
canceled once the monitor power
to finish the setup.
automatically
will
MODE,
30min can be selected.
be
then press
wish to set , then
you
REST
(Default:
DVD will resume
The
stored.
or
time has
of
.
...,.
MODE
30min)
the engine is
System
The displayed source name, splash screen, etc. can
1
2
3
Setup
the remote control.
SETUP
Press
item
The
Ji..l'f
Press
Ji..I'Y
Press
~I...,.
press
SOURCE NAME:
This sets the source name that
screen together with the product connected to PKGRSE4AP.
HDMI: RSE LINKIHDMI
PHONE/TV/OFF
RSE LINKIAV INPUT
AUX:
TV
SPLASH
Whether
can be set
CHANNEL:
IR
Switches the headphone frequency channel.
*Compatible headphones are
SYSTEM
Resets
returns them to the initial settings.
ALL RESET:
Returns
settings.
Select YES
on
displayed.
be
selection screen
to select SYSTEM,
to select the item you wish to set, then
to select the setting.
(Default:
/OFF
SCREEN:
not the
or
(Default:
RESET:
items on the SYSTEM Setup
all
settings and adjusted values to the factory
all
or NO
will
(initial
(Default: HOM!)
AV
ALPINE
ON)
SHS-Nl06
/
Ji..
with
then press
displayed on the
is
setting)/DVD/GAMEI
setting)/DVD/GAMEI
(initial
INPUT)
displayed at startup
is
logo
SHS-N206.
and
screen and
press
en
th
,
'Y
adjusted.
be
.
...,.
SYSTEM
(Default: A)
to confirm.
...,.
YES: Returns
factory se
O:
N
Press
4
he
T
settings and adjusted values to the
all
ings.
tt
turns to the previous screen.
Re
SETUP
settings
to finish the setup.
l automatically
wil
be
SYSTEM
stored.
Page 11

I
Wireless
Headphone
Headphones
Receivers
1)
Battery Cover
2) Volume Control
3)
Power Switch
4)
Power
Indicator LED
Operation
Read
carefully
your ears:
WARNING: Before turning on the power, remove headphones and turn
the volume down as low as possible.
1)
Be sure the batteries are
headphones.
2)
Turn the headphones volume completely
placing
3)
Turn on the headphone
headphone
increase the audio source volume
Adjusting
Volwne can be controlled from the headphone or your own radio
volume function.
to prevent
it on your ears and turning on the power.
volume
the
damage to the headphone or
properly installed
power
and adjust the
to
a
comfortable level
if
needed).
Volume
in
the
down
(You
before
can
Specifications
Specifications
DISPLAY
Screen
Image quality:
Resolution:
Pixels:
Effective pixels:
Illumination
GENERAL
Power
Grounding method:
Operating temperature range:
Width:
Height
Monitor opening
Depth:
External
SCREEN
size
:
method:
source:
(when
open):
dimensions
I
I
angle:
346 2
mm
11.4
wide
WSVGA
1,024
X
1,843,200
At
least 99.9%
LED
14.4
VDC
(operating range:
Ground
-20°C- +60°C
346.2
mm
37.5
mm
*With the monitor
175°
299.3
mm
600
11
(192.6 mm*)
I
I
J
E
E
1.()
r...:
C')
at
co
N
Ol
E
E
- 16
a
goo
V)
angle
1
Turn
on
POWER
2
Adjust the volume level
louder
and counter-clockwise for lower
headphone.
Banerv
1
2
Installation
Press and
shown
Place two
compartment of the headphone(s), making sure
that the battery
in
the diagram.
on
the headphone.
by turning
slide
open the battery compartment as
AAA
batteries into the battery
polarity
is
correct.
clockwise
on
for
the
Note
If
ACC or the monitor's power source
may be produced through the headphones. Be sure to remove the
wireless headphones from your ears before you turn the monitor
off.
is
turned off, a loud noise
~/ILPINE
E
E
C')
cri
Ol
N
Page 12

!!!!l·llN.!IifflMI!§!.!
Owner's
Manual •
.t§ijtJIIII@itMW&I.l.!it·l-.
.
12/44
Plasmacluster
About
What
Plasmacluster
High-concentration
This number indicates the approximate number of ions
*
3
1 cm
of the product
is
Plasmacluster technology
emission
that
ions
plasma
suppresses
removes airborne
Product
0
0
0
blown
are
that
Plasmacluster
the
of
exist in
discharge. This unique
the
in operation
0
0
0
0
Plasmacluster
High-Density
I
•
into the
the direction of
in
same
natural world,
the
action
mold,
0
0
0
0
0
-
I*
25000
roughly 60cm
area
airflow at the maximum setting.
Technology?
the
is
(positive) and - (negative)
+
Sharp
airborne viruses and
of
bacteria, etc. from the air.
0
0
0
0
0
0
ions purify
from the
creation and
means
by
technology
0
the
in
of
air.
area
an
outlet
Replacement
Generation
Plasmacluster
The
replaced
be
operation. (The replacement
of
depending on
is operated every
it
replaced
be
to
months.)
Plasmacluster
The
*
same
the
high setting.
or
indicator
The
approximately
19,000
After
alternately flashing
begin
each, and
Please replace
this time.
olthe
unit
approximately 19,000 hours
after
the
after
regardless
will
18,970 hours
hours
unit
the
the
usage conditions. For
ion generation
start
will
Plasmacluster
ion generation unit must
differ
will
time
example,
8 hours a day,
for
day
approximately
unit
flashing
of
Flas hes green
ashes blue
Fl
green and
operating.
stop
the
green
operation.
whether
of
Low:
Mid:
operation,
of
Plasmacluster
unit
the
generation unit at
it
6 years and 6
replacement
is operated on
blue
or
indicator
blue,
lon
will need
time
after
will
twice
if
is
low
Care
Regularly clean
outlet
the
swab
dusty.
please clean
the intake on
front
the
on
brush, since they can
soft
or
maintain
to
order
In
unit
the
the
of
the
once a month.
about
Inlet
the
of
side
the
cotton
unit with a
ion concentration,
dry
become
unit
dirty
or
or
contact
Please
assistance, when
for
generation unit.
your authorized
replacing
ALPINE dealer
Plasmacluster
the
Page 13

Installation
and
Connections
Before installing or connecting the unit,
following thoroughly
it
Warning
MAKE
THE
CORRECT
Failure to make the proper connections may result in fire
product damage.
BEFORE
NEGATIVE
Failure to do so may result in electric shock
electrical
DO
NOT
WIRING,
BAnERY
shorts.
ALLOW
SURROUNDING
Arrange wiring and cables in compliance with the manual to
prevent obstructions when driving. Cables or wiring that obstruct
or
hang up
pedals, etc., can be extremely hazardous.
DO
Never cut away cable insulation to supply power to other
equipment. Doing so will exceed the current carrying capacity
the wire
DO
When drilling holes in the chassis for installation, take
precautions so as not to contact, damage or obstruct pipes, fuel
lines, tanks
may result in fire.
DO
SYSTEMS
Bolts
other safety-related system),
for installations
disable control
DO
VEHICLE
SHIFT
Doing so may obstruct forward vision
and resu
on
places such as the steering wheel, gear lever, brake
NOT
SPLICE
and
result in fire
NOT
DAMAGE
or
electrical wiring. Failure to take such precautions
NOT
USE
BOLTS
TO
MAKE
or
nuts used for the brake
or
of
NOT
INSTALL
OPERATION,
LEVER.
lt
in a
·serious accident.
for
proper use.
CONNECTIONS.
DISCONNECT
THE
TERMINAL.
CABLES
OBJECTS.
INTO
the vehicle and cause fire, etc.
TO
BECOME
ELECTRICAL
or
electric shock.
PIPE
OR
WIRING
OR
NUTS
GROUND
or
ground connections. Using such parts could
IN
LOCATIONS
SUCH
CABLES.
WHEN
IN
THE
CONNECTIONS.
or
steering systems (or any
tanks should NE
WHICH
AS
THE
STEERING
or
please
read the
or
CABLE
FROM
THE
or
injury due to
ENTANGLED
DRILLING
BRAKE
MIGHT
hamper movement, etc.,
IN
OR
STEERING
VER
be
HINDER
WHEEL
HOLES.
used
OR
of
it
Caution
HAVE
THE
WIRING
AND
INSTALLATION
DONE
BY
EXPERTS.
The wiring and installation
skill and experience.
where you purchased this product to have the work done.
USE
SPECIFIED
ACCESSORY
of
this unit requires special technical
To
ensure safety, always contact the dealer
PARTS
AND
INSTALL
THEM
SECURELY.
Be sure to use only the specified accessory parts. Use
than designated parts may damage this unit internally
securely install the unit in place. This may cause parts to become
loose resulting in hazards
ARRANGE
PINCHED
Route the cables and wiring away from moving parts (like the seat
rails)
damage to the wiring.
use a rubber grommet to prevent the wires insulation from being
cut by the metal edge
DO
THE
WIRING
BY
A
SHARP
or
sharp or pointed edges. This will prevent crimping and
NOT
INSTALL
or
product failure.
SO
IT
IS
NOT
CRIMPED
METAL
EDGE.
If
wiring passes through a hole in metal,
of
the hole.
IN
LOCATIONS
WITH
HIGH
of
other
or
ma
y not
OR
MOISTURE
OR
DUST.
Avoid installing the unit in locations with high incidence
moisture or dust. Moisture
may result in product failure.
or
dust that penetrates into this unit
of
Precautions
•
Be sure to disconnect the cable from the
installing your
damage to the unit in case
•
Be sure to connect the color coded leads according to
the diagram. Incorrect connections may cause the unit to
malfunction
•
When making connections to the vehicle's electrical system,
be aware
computer).
this unit. When connecting the
box, make
RSE4AP
result in damage
consult your
•
The
PKG-RSE4AP
to other units (e.g.
may need an adaptor to connect other units.
your authorized
PKG-RSE4AP.
or
damage to the vehicle's electrical system.
of
the factory installed components (e.g. on-board
Do
not tap into these leads to provide power for
sure the fuse for the intended circuit
has the appropriate amperage. Failure
to
the unit and/
ALPINE dealer.
uses female RCA-type jacks for connection
AV
ALPINE
This will reduce any chance
of
a short-circuit.
PKG-RSE4AP
or
head unit) having RCA connectors.
dealer for assistance.
(-) battery post before
of
to the fuse
of
the
PKG-
to
do so may
the vehicle. When in doubt,
You
If
so, please contact
IMPORTANT
Please
record the serial number
provided below and keep it as a permanent record. The serial
number plate is located
SERIAL
INSTALLATION
INSTALLATION
PLACE
NUMBER:
DATE:
TECHNICIAN:
OF
PURCHASE:
----
on
the bottom
of
your unit in the space
of
the unit.
--
- -
----
Page 14

Accessories
PKG-RSE4AP (Screen) x 1
Universal Remote Control
1
(RUE-3000E)
X
Main Harness
5m
x 1
Foam Pad Wrap
80
(
x 1
)
80
x
Dome Light Harness
Battery
Control
Remote
X
)
25
(CR20
G
ac
Mounting
Br
x 1 Foam Pad Wrap
3m
1
d-
ol
F
SHS-N1
ket
Owner
In
at
Fl
's
Manual x 1
ll
sta
06
ess
Wirel
(80
Manual
Single
ea
H
x 1
)
120
x
I
ce
ur
So
dphone x 2
Input
AV
HDMI
5m
Connector cover
M3
Connector
HDMI
Extension
x 1
sc
p)
a
(t
x8)
cov
Cable
rews
er
(2
Covers x
Hole
Black
0
g
Monitor Mount
screws (M4 x 16) x 5
in
Trim Ring
18
x 12
Grey x6
chine
Ma
Page 15

Overhead
In most installations the overhead monitor will mount in place
the dome light.
Attaching
1
Remove
attach
Monitor
the
mounting
the
dome
the
bracket
Installation
bracket
light,
and
use
the
G)
.
screw
holes
6caution
•
Ifthere
is
a gap between the dome light frame and the r
lining, use a spacer, etc. to ensure
screw
ed
in.
•
If
using store-bought screws, do not use screws that exceed
the length
damage to the vehicle. Do not use
the screw holes. Doing so may cause the mo
Fr6?t
*Please
of
the bracket and
Bracket
~
\
..,
I
~'P-'~
,~
f
\
M4x
pay attention to the len
Structure
=
=
'
16
th
at the screws are
roof
panel. Doing so may cause
sc
rews that are smaller than
ni
Rib
Spacers Structure Rib
/"-....~
a-'
'§~
~
M
4
gt
h of the screws.
x
\Headliner
16
tor to drop.
Bracket
fi
G)
oof
rmly
of
to
6caution
•
Do not use an electric
•
Do not pinch the
•
Do not overtighten the screws.
Please connect all
way in.
~·;
""""'
~
ushion (for monitor
cable joint)
(Attached to Rear Vision)
ca
the
ble
drill.
s.
Doing
Fe::?
u:
rn
'
'·
o
o~
cb~
'
0
so may cause damage.
Screw order
PKG-RSE4AP
1
__.....-----
Attachment screws:
'8
Washer(M4x16)(5)
Rubber cap
(5)
Trim
ring
If
there
overhead
the
shape
1
Use
roof
2
Process
cutter,
Attaching
1
If
using
to
the
2
Connect
the
overhead
processing
is
a
gap
monitor,
of
the
masking
lining.
along
etc.
the
overhead
a
trim
trim
ring
the
monitor
between
use
roof
tape,
etc.
the
marked
monitor
ring
~
.
~
.
monitor.
the
a
trim
lining.
to
attach
cable
roof
ring
mark
area
the
and
lining
~
.
Process
the
shape
with
an
overhead
dome
light
and
of
air
saw, P
monitor
cable
the
along
the
to
protect
Secure
Refer
them.
the
to
overhead
the
diagram
monitor
to
the
left
to
the
for
bracket
the
screw
G)
.
order.
Page 16

Mounting
Final
The
DVD playable head unit or any other video sources with HDMI
or RCA composite ca
1
2
Wiring
G-RSE
PK
Group
harness
w
These
monitor,
the
At
connector
HDMI
connector
HDMI
and
with
Dome
wiring
HDMI
Please
the
Light
has no on-bo ard sources.
4AP
es.
bl
HDMI cable along
the
cable.
need to run to head unit or DVD Sourc
ill
and
the
the
main
connect
.
HDMf.IN
Cable orientation
conne
main
connector,
harness
cable
0
0
0 0 0
wiring
e.
source
to
0
ct
to
Routing
Continue
1
harness
It
connections.
Connect
2
unit.
M
or head unit as
Complete
3
(ACC) 12
Sys
Cables
may be necessary
sure to connect Composite video to the vi
ake
co
m
te
Source
the
to
HDMI cable and main
route
to
dashboard.
HDMI
well.
remaining
the
switched
the
remove the radio to fina
to
source
Video
the
to
connections
lead.
or
for
towards
the
volt
nnections diagram below for reference.
wiring
ze the
li
head
deo
power
so
urce
--~
HDMI
Put
3
8)
(M3 x
cables
Tuck
4
squeeze
Determine
5
attach
that
re
u
ns
E
leted
omp
c
Attach
6
bracket
rib.
M3··~)l,r~
....
HOMicoverplate~
screws
tap
(2)
the
using
in
lock
cover
is
to
the
the
kit.
screws
needed
mounting
ceiling
don't
and
ng it is
ri
structure
included
in
hit
or
mounting
if
monitor
to
if any
this
at
machine
(5)
the
previously
hardware
the
with
mounting
the
that
so
harness.
the
of
any
ring
trim
needed.
as
imming is needed to the trim
tr
t.
in
po
screws
attached
to
Page 17

Connecting
to
Dome
Light
The dome light wire connects to the cable from the vehicle's
dome light switch.
Polarity change switch is located on the top surface that mounts
into the headliner.
Vehicle door
polarity
switch. (Default:
polarity
depends on the
can be changed by the
Negative Switched System)
Polarity+: When door open, door
Polarity
-: When door open, door
Polarity+
Vehicle
When the door
the door
signal
Vehicle
(o~~ck>~.;-d-:
~~I
~~~~-O_P~~-J
12V
Ysllow
GND
Bl
ack.
II
From pads are
connectors
supplied
for wrapping the
1lll
is
is
Door
·=
"Door
open
1 2
SW
~
T
fDoor
II
vehicle
SW
polarity"
signal is 12V
sig
nal
->
r---
"""
type. The
is GND
Polarity-
When the door is open
the door
Vehicle
~~
12V
Ye
ll
ow
GND
~
""
is
GND
Door
->
SW
signal
Vehicle
(DOorCk,;;d-:
1
Door
Open
=
!111
r
Door
J
f------"
•·-
'--------
II II
Th
e foam tape is used
the connectors are
cover the
co
nnector
to
wrap the connection once
co
nnected, wrap tape
to
fully
B
ef
or
e you install the monitor
of
the dome light tri
ground trigger.
Room
li
ght
pola
~
~~
gg
e
r(
+) for
rity
cha
n
ge
switch
®~
@_
yo
u
will
need
pos
itive
to
select the polarity
trigger
or(
-)
for
negative/
Page 18

Connections
PKG-RSE4AP
light
Dome
in harness
Ma
harness
~
tEl
1)
2} GND
3)
4)
Connect
diagram
See
N/C
DOOR
BATI
the
to
above.
Black •
Green
Yellow •
vehicle's
GND
Connect this
vehicle's
Door
•
Connect t
vehicle's
selectabl
Battery
Connect this
tive(
battery.
dome
to t
line
e.
in
l
ground
to
lead
s
hi
tc
i
sw
door
see page 1
e,
Lead
to
lead
post of th e vehicle's
+)
sed 5 amps.
Fu
light.
he
the
(polarity
h.
5)
the
pos
i-
Fuse
.5
(7
R
A)
emote
Remo
GND
ac
Bl
n
Co
own
Br
Co
te
rown
B
AUX-IN
ow
ll
Ye
X-IN
AU
Red
AUX-IN
White
line.
input
output
other
ACC
ignition)
ground
on
video
source
on
line.
the
the
and
unit.
head
head
audio
unit
unit.
output
or
vehicle's
the
source
the
to
12V
to
to
to
to
head
accessory,
vehicle's
the
remote
the
unit.
remote
the
composite
the
or
unit
Connect
(Switched
k
OUT
ct
ne
@
Connect
Connect
other
IN
t
ec
nn
Connect
Connect
on
Page 19

de
appeler
de
garantie.
Ia
et
produits
des
aux
tempetes
aux
morale
ou
le
aux
l'entremise
reparations
me
me
revise, le
service
de
de
le
utilisation;
ou
son engagement
a
Fidele
vous offrir
de
e
communiquer avec l'
ePRODUITS
garantie couvre les
Cette
produit
le
(«
produits
eDUREE
garantie
Cette
d'achat
date
cette
COUVERT$
Ellene
»).
dans
que
LA
DE
est
par
ePERSONNES
Seul l'acheteur original du produit, s'il reside aux Etats-Unis,
Porto Rico
a
QUI
eCE
garantie couvre
Cette
fabrication (pieces
de
QUI
eCE
garantie
Cette
dommages
Les
G)
renvoyes
adressees au transporteur);
etre
degats
Les
~
Tout
®
mauvaise utilisation ou
indiquees
dommages
Les
@
tremblements
aux autres cataclysmes naturels, ainsi que les frais
ou
depenses relatifs
produit;
du
Les services rendus
@
non autorisee;
produits dont
Les
®
produits
Les
(f)
consentement d'Aipine;
produits
@ Les
Etats-Unis,
Les
®
d'un
eCOMMENT
VOUS
II
G)
un centre
assumer les frais
produit
le
sans frais
garantie et si
Alpine
produit
au
ou
COUVERT
EST
N'EST
ne
Alpine
a
provoques par un accident ou une mauvaise
provoque
degat
dans
qui
qui
a
produits
concessionnaire
SE
remettre
faut
service autorise Alpine ou
de
le
ou
pour
Alpine, le
a
ou
incombe
de
garantie. Nous vous suggerons
un
couvre les
pays
le
concessionnaires ou
nos
de
LA
PAR
ou
its
audio
ont
produits
GARANTIE
de
achetes.
ete
GARANTIE
an
en vigueur pendant
client initial.
le
PROTEGEES
Canada,
PAS
couvre
survenus durant
le
dus
de
Porto
qui
peut
les defauts
tous
main
et
COUVERT
ce
pas
etre repares
pour
negligence, usage inapproprie;
par
par
de
manuel
force majeure, notamment
Ia
a
terre, au feu, aux inondations,
l'enlevement ou
a
une personne, physique
par
numero de
le
ad
ete
ont
sont pas distribues
ne
Rico ou au Canada;
pas
n'ont
Alpine
PREVALOIR
produit
le
transport. Alpine a le
de
remplacer
vous.
produit
le
Alpine.
par
les reparations sont couvertes
Si
ete
a
paiement
un
GARANTIE
LA
PAR
se prevaloir
materiaux
de
d'reuvre)
le
a
du
suit:
qui
transport
le
(les
non-respect des instructions
l'utilisateur;
Ia reinstallation
a
a ete
rie
se
ou modifies sans
ptes
achetes
ete
autorise.
GARANTIE
LA
DE
necessitant
un produit neuf ou
a
envoye
frais de reexpedition
des
voiture
compter
a
de
produit.
reclamations doivent
efface, modifie ou retire;
Alpine
par
par
des
Alpine
a
choix entre reparer
un centre
produits
des
que
fournir
ne
ALPINE ELECTRONICS OF AMERICA, INC. («Alpine
qualite,
lire attentivement
directement Alpine
Vous devez donner une
~
qui
Vous devez joindre
®
Vous devez
@
tout
Ia
paquet,
un
eUMITATION
DUREE
LA
GARANTIE D'ADAPTATION
LA
DE QUALITE
GARANTIE EXPRESSE DETERMINEE CI-DESSUS. PERSONNE
LA
N'EST AUTORISE
D'ALPINE DANS
eEXCLUSIONS
ALPINE STIPULE EXPRESSEMENT
RESPONSABLE DES DOMMAGES ACCESSOIRES
PROVOQUES
SONT LES FRAtS
UN CENTRE DE SERVICE ALPINE,
L'ACHETEUR ORIGINAL,
LES BILLETS D'AUTOBUS,
LES AUTRES FRAtS LIES
DOMMAGES INDIRECTS SONT LES FRAtS
REMPLACEMENT
MAUVAIS FONCTIONNEMENT
LES RECOURS PREVUS
les
REMPLACENT
ellEN
La garantie vous donne
jouir
aussi
!'autre.
limiter
accessoires ou indirects. Dans
garantie peuvent
Ia
eCLAUSE
que
Pour
rise
auto
qu'il
et
a
en
et
par
eNUMEROS
vous avez besoin
Si
tout
numeros ci-dessous
Ia
plus
du
SERVICE
ASSISTANCE TECHNIQUE 1-800-TECH-
Ou
proche.
consultez notre site Web
moindre question,
vous avez
en entier.
et
aux
sont
dommage durant son transport. Pour eviter
il
service
DE
ENTRE
d'autres droits,
outre, certains
En
Ia duree
Si
numeros
de
l'origine
a
Ia
emballer soigneusement le
conseille
est
MARCHANDE,
des
suivi
de
GARANTIES
DES
TOUTES LES GARANTIES TACITES, Y COMPRIS
ENGAGER AUTREMENT LA
A
CADRE DE LA VENTE D'UN
LE
LA
DE
PRODUIT. LES DOMMAGES ACCESSOIRES
LE
PAR
TRANSPORT
DE
D'AUTRES BIENS ENDOMMAGES SUITE
PAR
AUTRE
TOUTE
GARANTIE
LA
des
des garanties
pas
ne
APPLICABLE
Ia
ait
ait
ensuite
garantie
installe le
soit
systeme
appos
e
D'APPEL
nos
de
pour
CLIENTELE 1-800-421-2284,
LA
A
Ia
listes ci-dessous.
description
votre demande
preuve
choisir
de
envois.
detaillee
de
achat
votre
de
un transporteur
reparation.
produit
TACITES
L'UTILISATION
A
EST LIMITEE
CELLE
A
GARANTIE
QU'ELLE N'EST
PRODUIT VERS
DU
LA PEATE
LA PEATE
LA
A
qui
Etat
s'appliquer
AU
valable,
son
DU
services,
le
D'UTILISATION
LOCATION
GARDE
LA
PRODUIT.
DU
LES PRESENTES
FORME
LA
ET
specifiques, mais vous pouvez
droits
d'un
varient
certaines provinces interdisent
et
ou d'exclure les dommages
tacites
cas, les limites
ce
CANADA
taut
il
Alpine
audio
cachet
SERVICE
veuillez
de
centre
esse
dr
a
l'
a
DE TEMPS
VOITURES
DE
PRODUIT. LES
DU
DE
RECOURS.
DE
LOI
Etat
vous.
a
SEULEMENT
centre d'installation
qu'un
dans
garantie.
Ia
sur
LA
A
appeler Alpine aux
service autorise Alpine
101
http://www
heureus
est
••)
veuillez
problemes
des
produit.
du
eviter
pour
perte du
Ia
propose
qui
GARANTIE
ET LA
DE
RESPONSABILITE
PRODUIT.
PAS
DIRECTS
IN
ET
DE
PRODUIT,
DU
TOUS
ET
REPARATION
EXCLUENT ET
d'une
ou
et
votre
AU
province
les exclusions
vehicule
CLIENTELE
860304
ext.
(1-800-832-
4101)
lpine-usa.com
.a
OU
le
DE
a
de
de
ALPINE ELECTRONIQU E DE
N'envoyez
Appelez notre numero gratuit
pas
de
produits
INC., 19145
L'AMERIQU
cette
a
visitez notre site Web si
ou
E,
adresse.
amercy Plac
Gr
recherchez un centre
vous
Torrance, Californi a
e,
de
90501, U.S.A.
service.
Page 20

ALPINE ELECTRONICS OF AMERICA, INC.
Warranty. We suggest
Alpine
at
one
of
that
the
you read
telephone numbers listed below.
it
thoroughly.
("Alpine"},
Should
is
dedicated
you have any questions, please
to
quality craftsmanship and is pleased
contact
your
to
Dealer
offer this
or
contact
ePRODUCTS
This
Warranty
Products
in
covered
eLENGTH
This
first
eWHO
This
product,
Rico
eWHAT
This
(parts
eWHAT
This
G)
(lJ
@
@
@
®
(J)
@
®
eHOW
G)
(lJ
@
purchased
the
Canada.
only
Warranty
consumer
IS
COVERED:
Warranty
who
or
Canada.
IS
Warranty
and
labor) in
IS
Warranty
Damage
Alpine
for
carrier).
Damage
Damage
operation
the
Owner's
Damage
limitation,
of
nature.
or
reinstallation
Service
company
Any
altered
Any
modified
Any
States,
Any
Alpine
performed
product
or
product
product
Puerto
product
Dealer.
TO
You are
Authorized
and
will,
new
repairs are
was
Alpine,
You
problem(s)
You
product
responsible
for
payment
at
its
or
reconditioned
shipped
Alpine
should
must
.
OF
COVERED:
NOT
occurring
caused
caused
caused
without
OBTAIN
COVERED:
covers
Car
in
the
the
U.S.A.
Products
in
WARRANTY:
is
in
effect
purchase
only
must
covers
.
covers
reside
defects
the
product.
COVERED:
does
not
cover
repair (claims
or
earthquake
Any
or
removed.
during
by
accident
by
negligence,
failure
to
manual.
by
act
cost
or
of
the
by
association.
which
has
which
has
Alpine's
not
distributed
Rico
or
not
purchased
WARRANTY
to
an
will
which
for
Service
of
any
repair
by
Authorized
pay
a
detailed
service
proof
Alpine
option,
covered
provide
for
supply
Audio
Accessories
Canada
purchased
for
one
year
the
original
in
the
United
in
materials
the
shipment
must
be
or
follow
instructions
of
God,
, fire,
flood,
expense
product.
an
unauthorized
the
serial
been
adjusted,
consent.
by
Canada.
delivery
Center
initial
shipping
or
replace
product
the
the
of
return
your
without
warranty,
description
is
are
covered
in
the
from
purchaser
States,
following:
of
presented
abuse.
misuse,
including
storms
related
number
Alpine
within
from
an
SERVICE:
of
the
product
or
Alpine
the
product
charge.
and
Alpine
Service
shipping
required.
purchase
("the
product"}.
only
U.S.A.
are
the
date
of
Puerto
or
workmanship
the
product
to
the
improper
contained
without
or
other
to
the
removal
person,
defaced,
altered
or
the
Authorized
to
for
charges.
repair
If
if
the
product
Center
charges.
of
the
of
the
with
of
the
the
to
in
acts
United
an
Alpine
a
the
or
@ You
must
damage
it
is
tracking
eHOW
ANY
IMPLIED WARRANTIES INCLUDING FITNESS FOR
USE
AND
DURATION
WARRANTY SET FORTH ABOVE
AUTHORIZED
LIABILITY IN CONNECTION WITH
PRODUCT.
eHOW
ALPINE EXPRESSLY DISCLAIMS LIABILITY FOR
INCIDENTAL
CAUSED
DAMAGES" REFERS
TRANSPORTING
SERVICE CENTER, LOSS
PURCHASER'S TIME, LOSS OF THE
PRODUCT,
COSTS RELATING
THE
PRODUCT.
DAMAGES" REFERS
REPLACING OTHER PROPERTY WHICH IS
WHEN
THE
REMEDIES PROVIDED
ARE EXCLUSIVE
eHOW
package
during
recommended
service.
WE
LIMIT
MERCHANTABILITY
TO
TO
WE
EXCLUDE
AND
BY
THE
BUS
THIS PRODUCT DOES
STATE/PROVINCIAL
the
product
shipment.
to
use
IMPLIED
THE
PERIOD OF
ASSUME
CERTAIN
CONSEQUENTIAL DAMAGES
PRODUCT.
TO
THE
FARES,
THE TERM
AND
EXPENSES
PRODUCT TO
OF
CAR
TO
THE CARE
TO
THE
IN LIEU
securely
To
prevent
a
carrier
lost
that
WARRANTIES:
ARE
LIMITED IN
THE
EXPRESS
AND
FOR ALPINE
NO PERSON IS
THE
SALE OF
DAMAGES:
THE TERM
OF
THE
"CONSEQUENTIAL
UNDER
THE
ORIGINAL
USE OF
RENTALS OR OTHERS
AND
CUSTODY OF
COST
OF
REPAIRING OR
NOT
WORK
THIS
OF
ALL
OTHERS.
LAW
RELATES
to
avo
packages
provides
ANY
OTHER
"INCIDENTAL
ALPINE
THE
DAMAGED
PROPERLY.
WARRANTY
TO
WARRANTY:
This
Warranty
may
also
state
and
provinces
warranty
or
limitation
Accordingly,
herein
may
eiN
CANADA
This
Warranty
audio
product
Authorized
upon
installation
eHOW
Should
following
Service
CUSTOMER SERVICE
TECH
SUPPORT 1-800-TECH-101 (1-800-832-4101}
Or
visit
have
province
do
lasts,
of
limitations
not
Installation
TO
CONTACT
the
product
number
Center.
our
website
gives
you
other
rights
to
not
allow
and
some
incidental
apply
ONLY:
is
not
valid
has
been
by
the
require service,
for
at;
specific
province.
limitations
or
as
to
you.
installed in
Center,
installation
CUSTOMER
your
1-800-421-2284, ext.
http://www.alpine
legal
which
vary
In
addition,
do
to
unless
nearest
on
not
allow
consequential
these
matters
your
your
and
this
center.
please
Authorized
how
Alpine
SERVICE:
rights
,
from
state
some
long
the
exclusion
damages.
contained
car
vehicle
warranty
call
860304
-
usa.com
and
Alpine
id
a
THE
THE
you
to
states/
an
implied
by
an
stamped
the
ALPINE
Do
not
Call
the
ELECTRONICS
send
products
toll
free
telephone
OF
AMERICA,
to
this
number
address.
or
visit
INC.,
the
19145
website
Gramercy
to
locate
Place, Torrance,
a
service
center.
California
90501, U.S.A.
Page 21

•
 Loading...