

Page 1
SpeedTouch™
605/608/608WL/620
(Wireless) Business DSL Routers
Installation and Setup Guide
Release R5.3.1
SpeedTouch™608WL and
SpeedTouch™620 only
Page 2

Page 3

SpeedTouch™
605/608
608WL/620
Installation and Setup Guide
R5.3.1
Page 4

Copyright
Copyright ©1999-2005 THOMSON. All rights reserved.
Passing on, and copying of this document, use and communication of its contents is not permitted without written authorization
from THOMSON. The content of this document is furnished for informational use only, may be subject to change without notice,
and should not be construed as a commitment by THOMSON. THOMSON assumes no responsibility or liability for any errors or
inaccuracies that may appear in this document.
Thomson Telecom Belgium
Prins Boudewijnlaan, 47
B-2650 Edegem
Belgium
www.speedtouch.com
Trademarks
The following trademarks are used in this document:
SpeedTouch™ is a trademark of THOMSON.
Microsoft®, MS-DOS®, Windows® and Windows NT® are either registered trademarks or trademarks of Microsoft Corpora-
tion in the United States and/or other countries.
UNIX® is a registered trademark of UNIX System Laboratories, Incorporated.
Apple® and Mac OS® are registered trademarks of Apple Computer, Incorporated, registered in the United States and other
countries.
Adobe, the Adobe logo, Acrobat and Acrobat Reader are trademarks or registered trademarks of Adobe Systems, Incorpo-
rated, registered in the United States and/or other countries.
Netscape® and Netscape Navigator® are registered trademarks of Netscape Communications Corporation.
Ethernet™ is a trademark of Xerox Corporation.
UPnP™ is a certification mark of the UPnP™ Implementers Corporation.
Wi-Fi® and the Wi-Fi logo are registered trademarks of the Wi-Fi Alliance. "Wi-Fi CERTIFIED", "Wi-Fi ZONE", "Wi-Fi Alli-
ance", their respective logos and "Wi-Fi Protected Access" are trademarks of the Wi-Fi Alliance.
Other products may be trademarks or registered trademarks of their respective manufacturers.
Document Information
Status: v1.0 (May 2005)
Reference: E-DOC-CTC-20050429-0086 (DSL35921860)
Short Title: Installation and Setup Guide ST605/608/608WL/620 R5.3.1 (en)
Page 5

EN Quick Installation Guide
FR Guide d'installation rapide
DE Schnellinstallationsanleitung
ES Guía de instalación rápida
PT Guia de instalação rápida
IT Guida all'installazione rapida
NL Gids voor snelle installatie
SV Snabb installationsguide
Page 6

Page 7
1
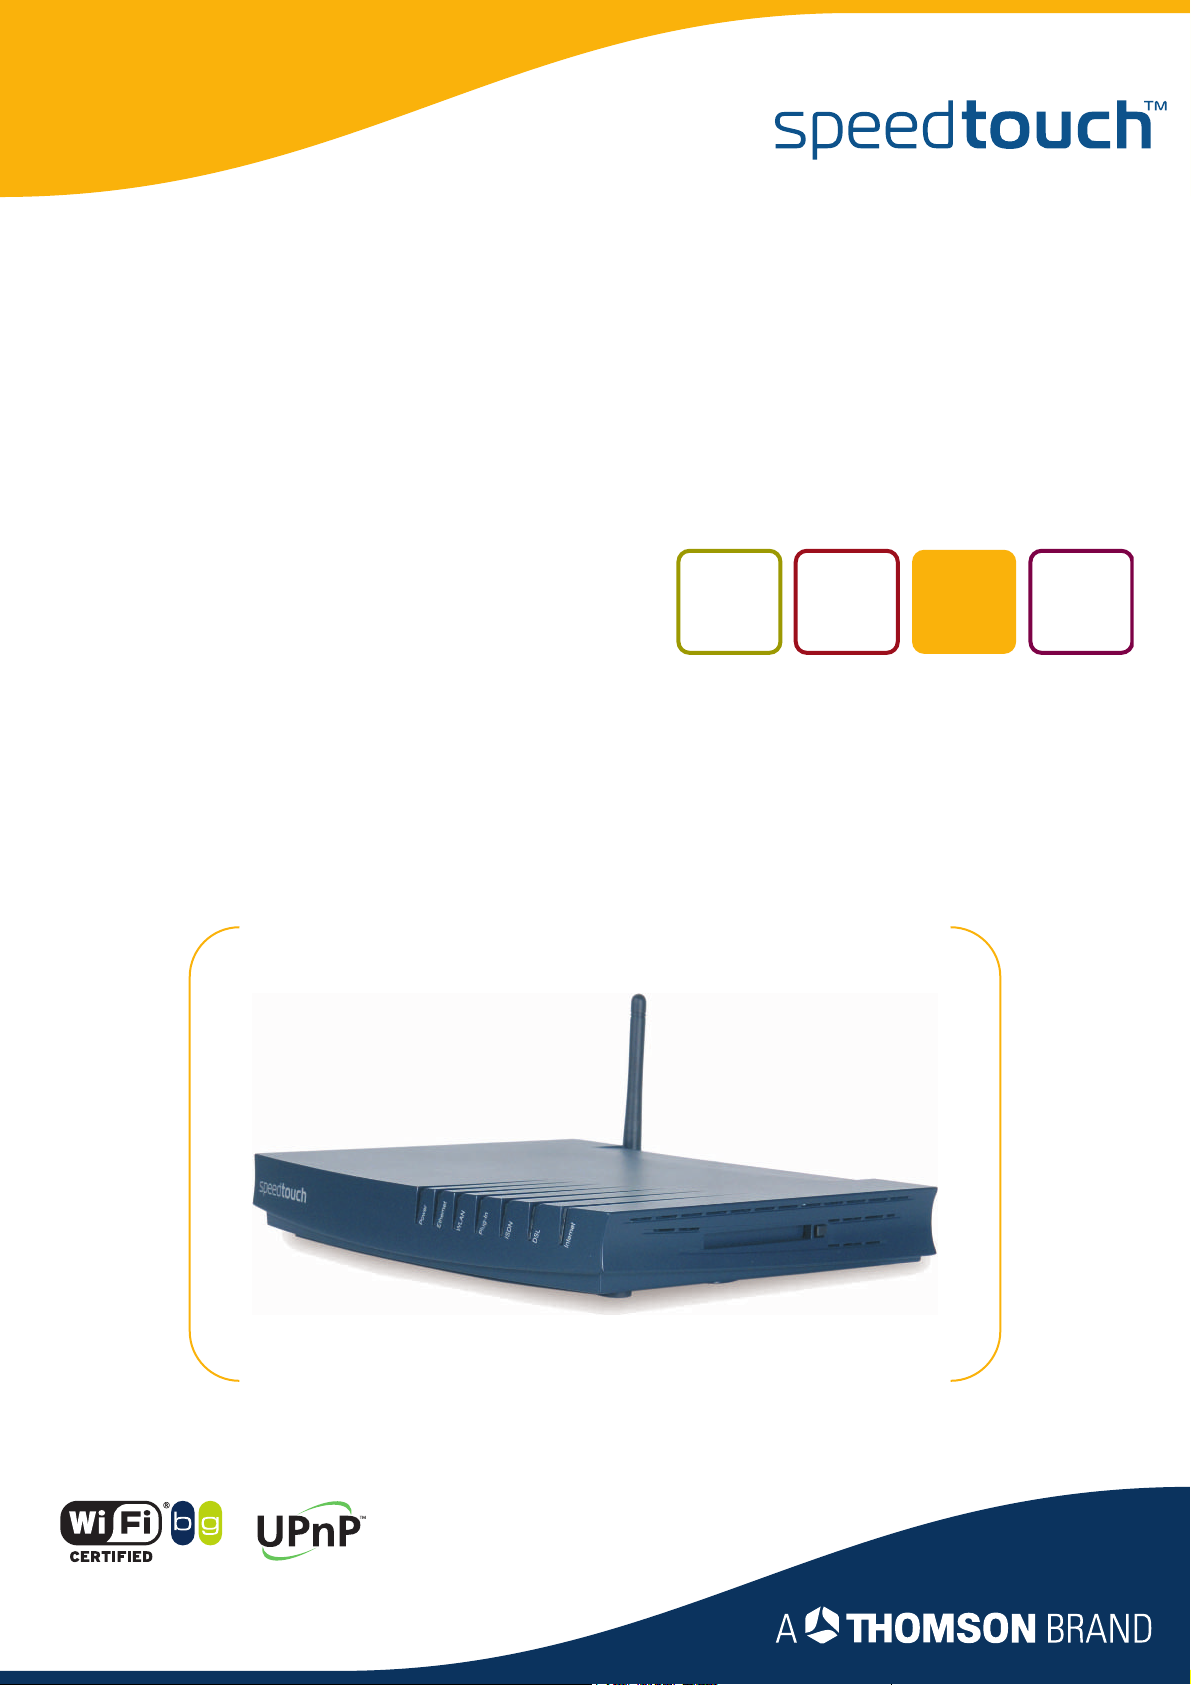
EN Check the content of your box:
SpeedTouch™ Gateway
Yellow Ethernet cable (RJ-45)
Grey DSL cable (RJ-11)
Power adapter
Power cord lock
SpeedTouch™ Setup CD
Safety Instructions & Regulatory Notices booklet (optional)
Quick Installation Guide booklet (optional)
Installation & Setup Guide (optional)
Wall-mount drilling leaflet, screws and dowels (optional)
DSL filter(s) (optional)
SpeedTouch™ wireless networking product(s) (optional)
Quick Installation Guide
FR Vérifiez le contenu de l'emballage.
Passerelle SpeedTouch™
Câble Ethernet jaune (RJ-45)
Câble DSL gris (RJ-11)
Adaptateur secteur
Dispositif de fixation du cordon d'alimentation
CD d'installation du SpeedTouch™
Consignes de sécurité et informations réglementaires (brochure facultative)
Guide d'installation rapide
Guide d'installation (facultatif)
Base pour combiné (en option)
Instructions, vis et chevilles pour montage mural (en option)
Filtre(s) DSL (en option)
Produit(s) de mise en réseau sans fil SpeedTouch™ (en option)
DE Überprüfen Sie den Lieferumfang:
ES Compruebe el contenido de la caja.
SpeedTouch™ Gateway
Gelbes Ethernet-Kabel (RJ-45)
Graues DSL-Kabel (RJ-11)
Netzteil
Netzkabelschloss
SpeedTouch™ Setup-CD
Broschüre mit Sicherheitshinweisen und Zulassungsbestimmungen (optional)
Broschüre mit Schnellinstallationsanleitung
Installations- und Konfigurationshandbuch (optional)
Standfuß (optional)
Anleitung für Wandmontage, Schrauben und Dübel (optional)
DSL-Filter (optional)
SpeedTouch™ Wireless Netzwerkkomponenten (optional)
SpeedTouch™Puerta de enlace
Cable Ethernet amarillo (RJ-45)
Cable DSL gris (RJ-11)
Adaptador de corriente
Bloqueo para cable de corriente
CD de instalación deSpeedTouch™
Folleto de instrucciones de seguridad e Información sobre regulaciones (opcional)
Guía de instalación rápida
Guía de instalación y configuración (opcional)
Horquilla de sujeción (opcional)
Folleto para montaje en pared, tornillos y clavijas (opcional)
Filtro(s) DSL (opcional)
Producto(s) SpeedTouch™ para redes inalámbricas (opcional)
Page 8

Quick Installation Guide
PT Verifique o conteúdo da caixa.
IT Controllare il contenuto della confezione.
NL Controleer de inhoud van uw doos.
SV Kontrollera innehållet i lådan.
Gateway do SpeedTouch™
Cabo Ethernet amarelo (RJ-45)
Cabo DSL cinza (RJ-11)
Adaptador de energia
Trava do cabo de energia
CD de instalação do SpeedTouch™
Folheto Instruções de segurança e Informações sobre normas (opcional)
Folheto Guia de instalação rápida
Guia de instalação e de configuração (opcional)
Gancho vertical (opcional)
Folheto, parafusos e pregos de perfuração montados na parede (opcional)
Filtro(s) DSL (opcional)
Produto(s) da rede sem fio do SpeedTouch™ (opcional)
SpeedTouch™Gateway
Cavo Ethernet giallo (RJ-45)
Cavo DSL grigio (RJ-11)
Adattatore di alimentazione
Blocco del cavo di alimentazione
CD di installazione di SpeedTouch™
Opuscolo Precauzioni di sicurezza e informazioni sulla normativa (facoltativo)
Opuscolo Guida all'installazione rapida
Installation & Setup Guide (Guida all'installazione e alla configurazione) (facoltativo)
Alloggiamento a fondo piatto (facoltativo)
Volantino di riferimento per montaggio a parete, viti e perni (facoltativo)
Filtro DSL (facoltativo)
Prodotti di rete wireless SpeedTouch™ (facoltativo)
SpeedTouch™Gateway
Gele Ethernet-kabel (RJ-45)
Grijze DSL-kabel (RJ-11)
Netvoedingsadapter
Stroomkabelvergrendeling
SpeedTouch™ Installatie-cd
Veiligheidsvoorschriften & Regelgevingsbrochure (optioneel)
Gids voor snelle installatie
Installatiegids (optioneel)
Standaard (optioneel)
Folder met boorinstructies voor wandmontage, schroeven en pluggen (optional)
DSL-filter(s) (optioneel)
SpeedTouch™ draadloze netwerkproducten (optioneel)
SpeedTouch™Gateway
Gul Ethernet-kabel (RJ-45)
Grå DSL-kabel (RJ-11)
Strömadapter
Lås till strömkabel
SpeedTouch™ Installations-CD
Häfte med säkerhetsinstruktioner och föreskrifter (valfritt)
Häftet Snabb installationsguide
Installationsguide (valfri)
Stående hållare (valfri)
Broschyr om borrning för väggmontering, skruvar och dymlingar (valfritt)
DSL-filter (valfritt)
SpeedTouch™ produkter för trådlösa nätverk (valfritt)
Page 9
Quick Installation Guide
a
D
i
r
t
S
s
L
u
3
A
5
n
i
8
e
4
d
a
9
8
M
7
0
2
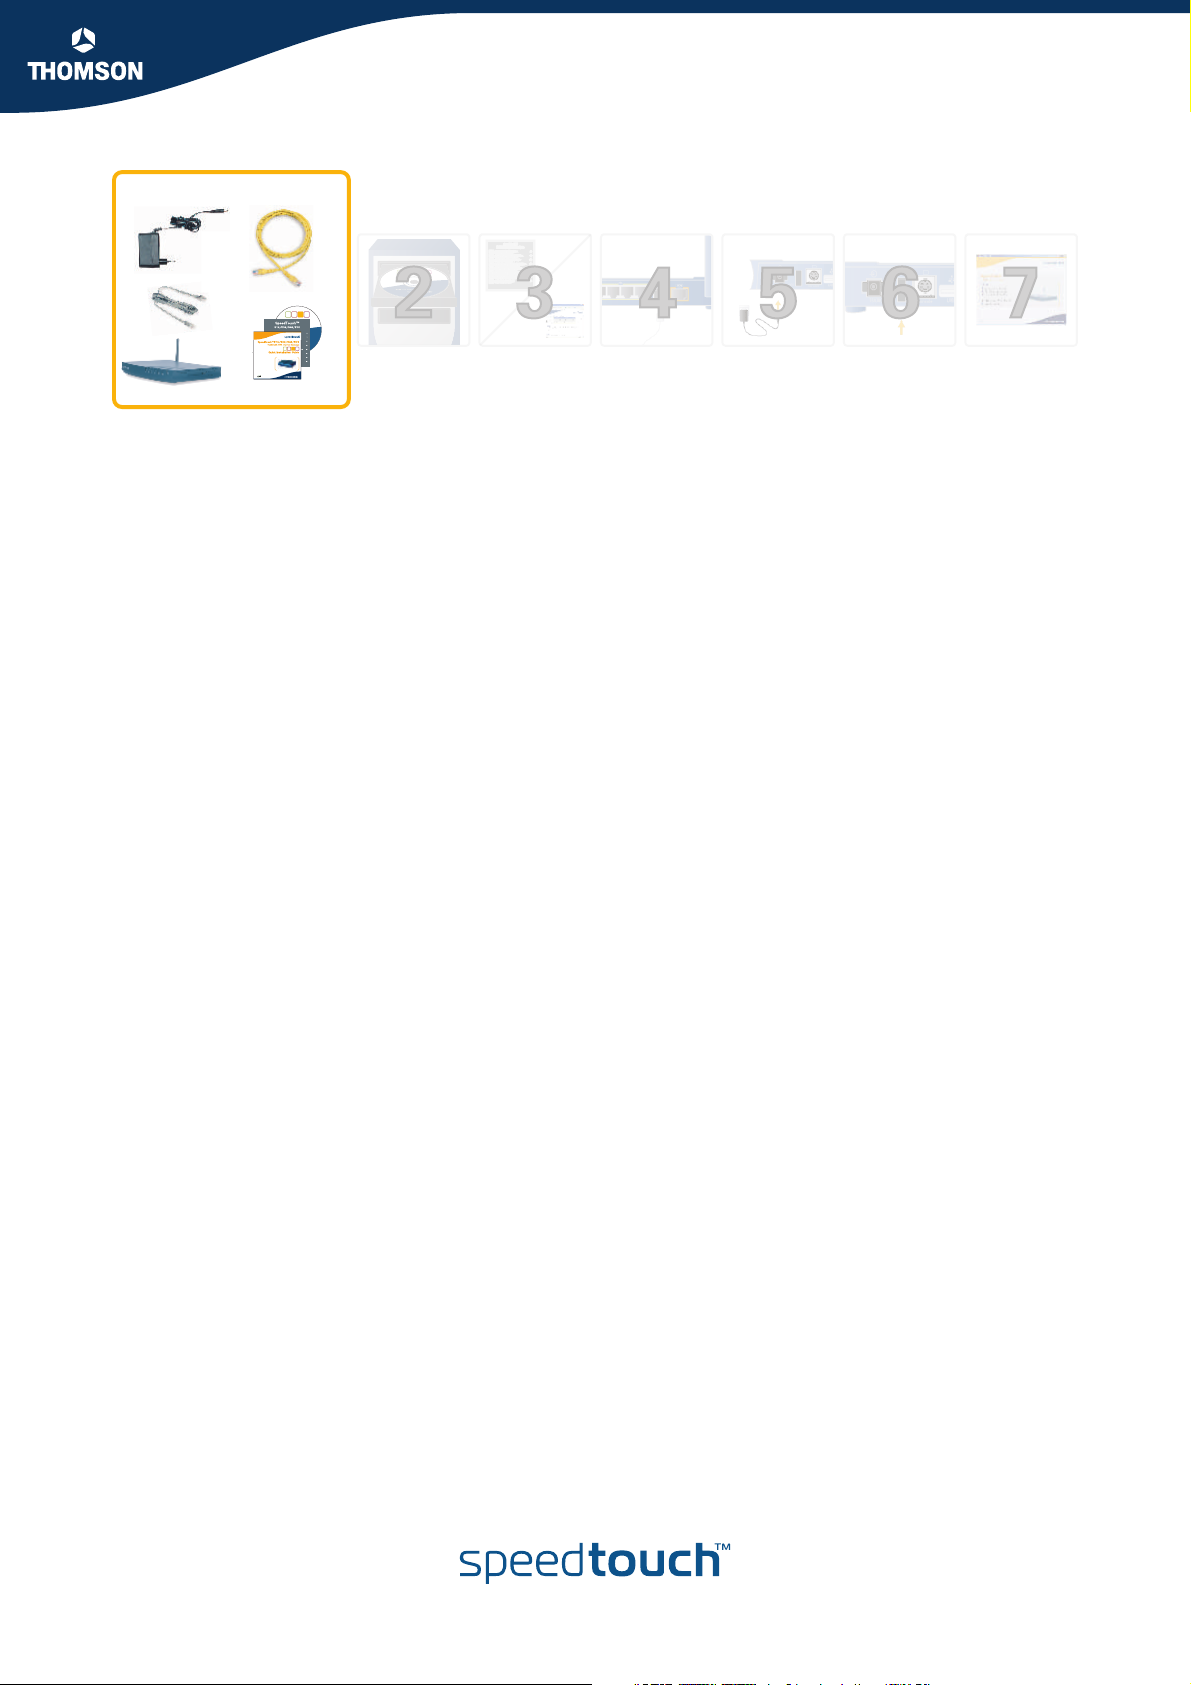
EN Insert the SpeedTouch™ Setup CD in your computer’s CD-ROM or DVD-ROM drive.
If the Choose language window appears, select your language and click OK.
If the Choose language window does not start automatically:
1 Click Run on the Start menu.
2 In the Open box, type D:\Setup.exe where D:\ represents the drive letter of your CD-ROM or DVD-ROM drive.
FR Insérez le CD-ROM d'installation du SpeedTouch™ dans le lecteur de CD-ROM ou de DVD-ROM de votre ordinateur.
DE Legen Sie die Setup-CD des SpeedTouch™ in das CD-ROM- oder DVD-ROM-Laufwerk des Computers ein.
ES Inserte el CD de instalación de SpeedTouch™ en la unidad de CD-ROM o DVD-ROM de su equipo.
PT Insira o CD de instalação do SpeedTouch™ na unidade de CD-ROM ou DVD-ROM do computador.
IT Inserire il CD di installazione di SpeedTouch™ nell'unità CD-ROM o DVD-ROM del computer.
NL Plaats de SpeedTouch™ installatie-cd in het cd-rom- of dvd-rom-station van uw computer.
SV Sätt in installations-CD:n för SpeedTouch™ i datorns CD-ROM- eller DVD-ROM-enhet.
Si la fenêtre Sélectionner la langue s'affiche, sélectionnez votre langue et cliquez sur OK.
Si la fenêtre Sélectionner la langue ne s'ouvre pas automatiquement :
1 Dans le menu Démarrer, cliquez sur Exécuter.
2 Dans la boîte de dialogue Ouvrir, tapez D:\Setup.exe où D:\ représente la lettre d'unité de votre lecteur de CD ou DVD-ROM.
Wählen Sie im eingeblendeten Fenster Sprache wählen Ihre Sprache aus und klicken Sie auf OK.
Falls das Fenster Sprache wählen nicht automatisch eingeblendet wird,
1 klicken Sie auf Run (Ausführen) im Menü Start.
2 Geben Sie im Feld Öffnen D:\Setup.exe ein; D:\ steht für die Laufwerksbezeichnung Ihres CD-ROM- bzw. DVD-ROM-Laufwerks.
Si aparece la ventana Elegir idioma, seleccione su idioma y haga clic en Aceptar.
Si la ventana Elegir idioma no aparece automáticamente:
1 haga clic en Ejecutar en el menú Inicio.
2 En el cuadro de texto Abrir escriba D:\Setup.exe donde D:\ representa la letra de su unidad de CD-ROM o DVD-ROM.
Se a janela Selecionar idioma aparecer, selecione o idioma e clique em OK.
Se a janela Selecionar idioma não for iniciada automaticamente:
1 Clique em Executar no menu Iniciar.
2 Na caixa Abrir, digite D:\Setup.exe, em que D:\ representa a letra da sua unidade de CD-ROM ou DVD-ROM.
Se viene visualizzata la finestra Scegli lingua, selezionare la lingua desiderata e scegliere OK.
Se la finestra Scegli lingua non viene visualizzata automaticamente:
1 Scegliere Esegui dal menu Start di Windows.
2 Nella casella Apri digitare D:\Setup.exe in cui D:\ rappresenta la lettera dell'unità CD-ROM o DVD-ROM.
Als het venster Taal kiezen verschijnt, selecteert u uw taal en klikt u op OK.
Als het venster Taal kiezen niet automatisch geopend wordt:
1 Klik opUitvoerenin het menu Start.
2 In het vakOpenenvoert u D:\Setup.exe in. D:\ is daarbij gelijk aan de letter van uw cd-rom- of dvd-rom-station.
Om fönstret Välj språk visas markerar du ett språk och klickar på OK.
Gör så här om inte fönstret Välj språk visas automatiskt:
1 Klicka på Kör på menyn Start.
2 I fältet Öppna skriver du D:\Setup.exe, där D:\ är enhetsbokstaven för CD-ROM- eller DVD-ROM-enheten.
Page 10

Quick Installation Guide
EN Carefully read the Safety Instructions & Regulatory Notices.
Proceed as follows:
1 If you want to view this page in another language, click the language of your choice under the SpeedTouch™ logo in the upper right
corner.
2 Read the Safety Instructions and Regulatory Notices carefully.
3 Close the Safety Instructions and Regulatory Notices window.
4 Select I have read and fully understand the Safety Instructions and Regulatory Notices.
5 Click Continue.
6 The SpeedTouch™ CD Menu appears.
FR Lisez attentivement les consignes de sécurité et informations réglementaires.
Procédez comme suit :
1 Pour afficher cette page dans une autre langue, cliquez sur la langue de votre choix sous le logo SpeedTouch™ dans le coin supérieur
droit.
2 Lisez attentivement les consignes de sécurité et informations réglementaires.
3 Fermez la fenêtre des consignes de sécurité et informations réglementaires.
4 Sélectionnez J'ai entièrement lu et compris les consignes de sécurité et les informations réglementaires.
5 Cliquez sur Continuer.
6 Le menu CD du SpeedTouch™ apparaît :
DE Lesen Sie die Sicherheitshinweise und Zulassungsbestimmungen aufmerksam durch.
Gehen Sie wie folgt vor:
1 Wenn Sie diese Seite in einer anderen Sprache anzeigen möchten, klicken Sie auf die gewünschte Sprache unter dem SpeedTouch™
Logo oben rechts.
2 Beachten Sie die Sicherheitshinweise und Zulassungsbestimmungen genau.
3 Schließen Sie das Fenster mit Sicherheitshinweisen und Zulassungsbestimmungen.
4 Bestätigen Sie, dass Sie alle Zulassungsbestimmungen und Sicherheitshinweise gelesen und verstanden haben.
5 Klicken Sie auf Fortsetzen.
6 Das Menü SpeedTouch™ CD wird angezeigt.
ES Lea atentamente las Instrucciones de seguridad y la Información sobre regulaciones.
Efectúe el siguiente procedimiento:
1 Si quiere consultar esta página en otro idioma, haga clic en el idioma de su elección bajo el logotipo de SpeedTouch™ en la esquina
superior derecha.
2 Lea atentamente las Instrucciones de seguridad y la Información sobre regulaciones.
3 Cierre la ventana de Instrucciones de seguridad e Información sobre regulaciones.
4 Seleccione
5 Haga clic en Continuar.
6 Aparecerá el menú del CD de SpeedTouch™:
PT Leia atentamente as Instruções de segurança e Informações sobre normas.
Faça o seguinte:
1 Se quiser visualizar esta página em outro idioma, clique no idioma de sua escolha embaixo do logotipo do SpeedTouch™, no canto
superior direito.
2 Leia atentamente as Instruções de segurança e Informações sobre normas.
3 Feche a janela das Instruções de segurança e Informações sobre normas.
4 Selecione Eu li e entendi as Instruções de segurança e Informações sobre normas.
5 Clique em Avançar.
6 O menu do CD do SpeedTouch™ é exibido.
3
He leido y entiendo totalmente las Instrucciones de seguridad y la Información sobre regulaciones.
Page 11

Quick Installation Guide
IT Leggere attentamente le Precauzioni di sicurezza e informazioni sulla normativa.
NL Lees zorgvuldig de Veiligheidsvoorschriften & Regelgevingsinformatie.
SV Läs häftet med säkerhetsinstruktioner och föreskrifter noggrant.
Procedere come segue:
1 Per visualizzare la pagina in un'altra lingua, fare clic sulla lingua desiderata sotto il logo SpeedTouch™ nell'angolo superiore destro.
2 Leggere attentamente le Precauzioni di sicurezza e informazioni sulla normativa.
3 Chiudere la finestra Precauzioni di sicurezza e informazioni sulla normativa.
4 Selezionare I have read and fully understand the Safety Instructions and Regulatory Notices (Dichiaro di aver letto e compreso
pienamente le Precauzioni di sicurezza e informazioni sulla normativa).
5 Fare clic su Continua.
6 Verrà visualizzato il menu del CD di SpeedTouch™.
Ga als volgt te werk:
1 Als u deze pagina in een andere taal wilt bekijken, klikt u op de gewenste taal onder het SpeedTouch™ logo in de rechterbovenhoek.
2 Lees zorgvuldig de Veiligheidsvoorschriften en Regelgevingsinformatie.
3 Sluit het venster Veiligheidsvoorschriften en Regelgevingsinformatie.
4 Selecteer Ik heb de Veiligheidsvoorschriften en Regelgevingsinformatie gelezen en volledig begrepen.
5 Klik op Doorgaan.
6 Het SpeedTouch™ menu van de cd verschijnt.
Gör så här:
1 Om du vill visa den här sidan på ett annat språk klickar du på språket under logotypen SpeedTouch™ i det övre högra hörnet.
2 Läs säkerhetsinstruktionerna och föreskrifterna noggrant.
3 Stäng fönstret med säkerhetsinstruktioner och föreskrifter.
4 Välj Jag har läst och förstått säkerhetsinstruktionerna och föreskrifterna.
5 Klicka på Fortsätt.
6 CD-menyn för SpeedTouch™ visas.
Page 12
Quick Installation Guide
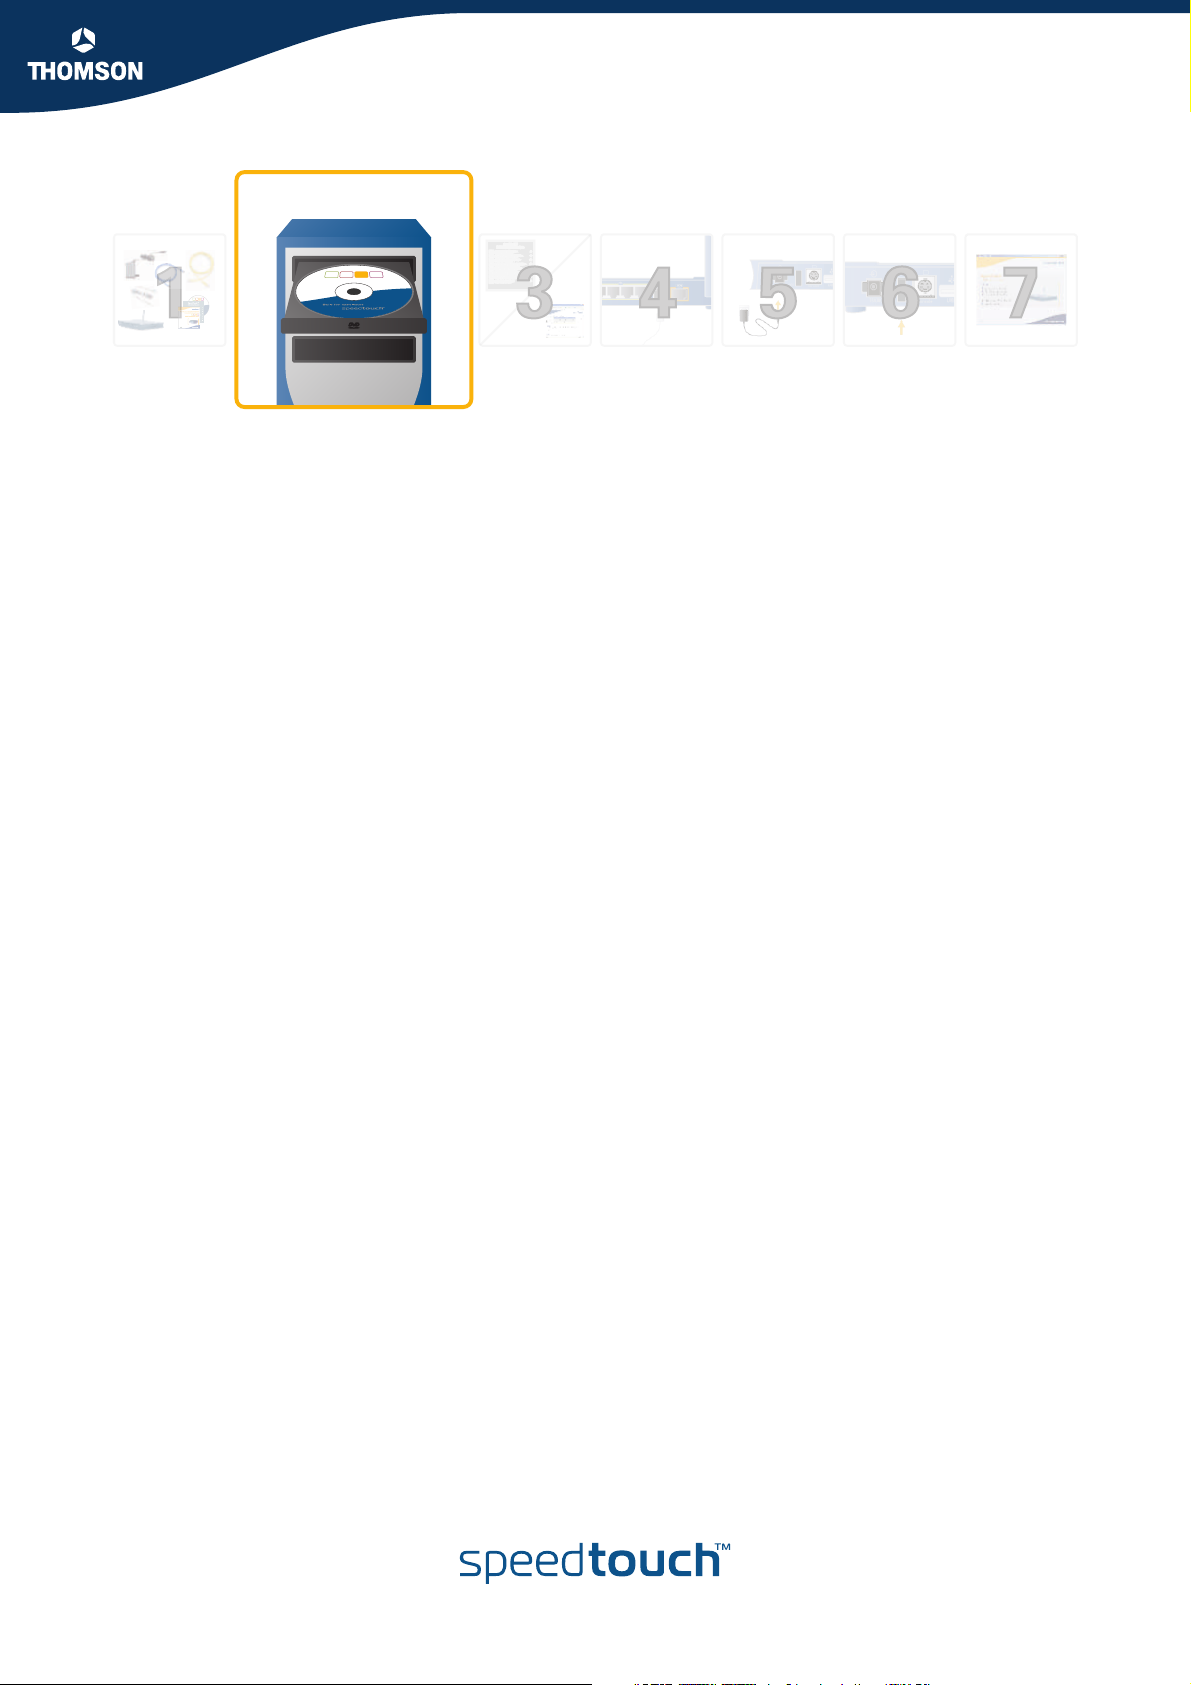
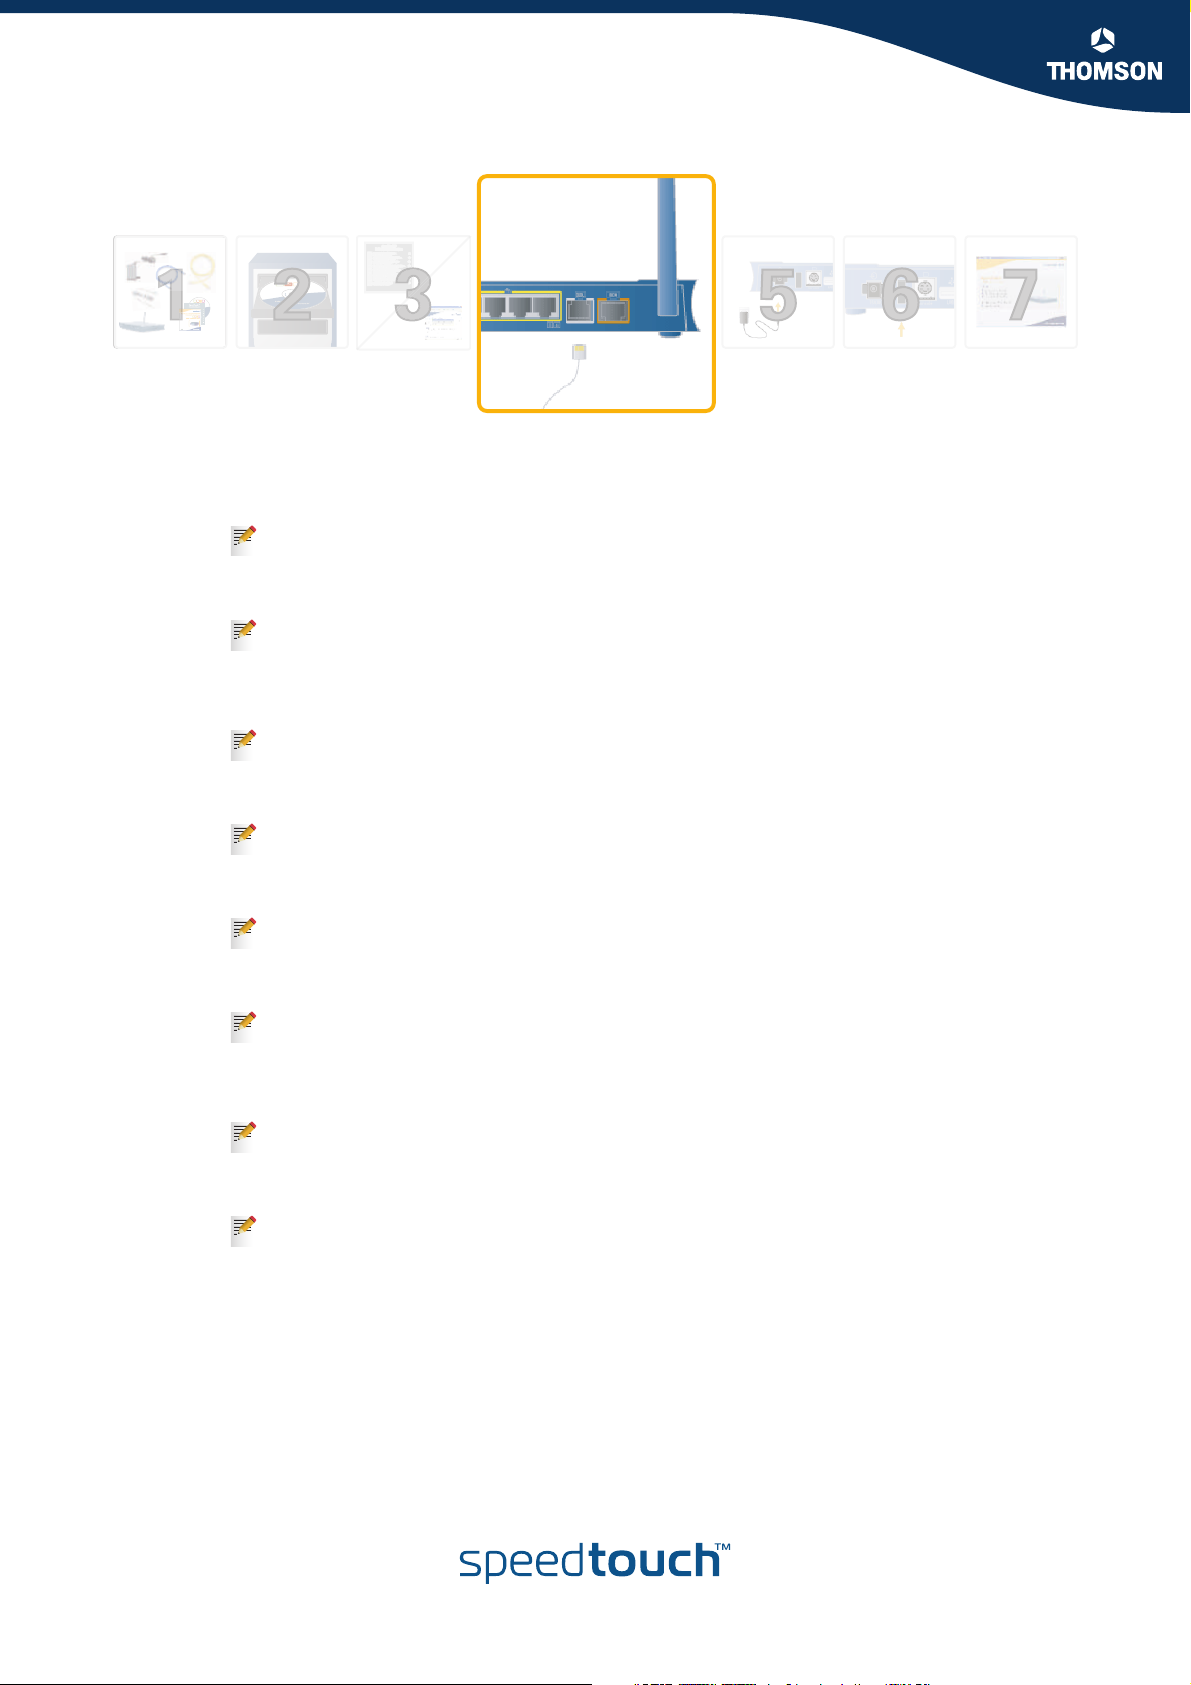
EN Connect the DSL Cable.
Use the grey DSL cable to wire the SpeedTouch™ DSL port to your telephone wall outlet or distributed filter.
You will need to plug a DSL filter into any telephone socket where you intend to use a phone line for telephone calls, fax data or a
dial-up modem.
FR Connexion du câble DSL.
Utilisez le câble DSL gris pour raccorder le port DSL du SpeedTouch™ à la prise murale ou au filtre distribué de votre téléphone.
Un filtre DSL doit être placé sur chaque prise téléphonique dont une ligne sera utilisée pour des appels téléphoniques, des
données de télécopie ou un modem à composition automatique.
DE Schließen Sie das DSL-Kabel an.
Verwenden Sie das graue DSL-Kabel, um den DSL-Anschluss des SpeedTouch™ mit der Telefonsteckdose bzw. dem verteilten Filter zu
verbinden.
An jeder Telefonsteckdose, die für eine Telefon-, Fax- oder Modemverbindung genutzt werden soll, muss ein DSL-Filter
angebracht werden.
ES Conecte el cable DSL.
PT Conecte o cabo DSL.
IT Collegare il cavo DSL.
NL Sluit de DSL-kabel aan.
SV Anslut DSL-kabeln.
Utilice el cable DSL gris incluido para conectar el puerto DSL del SpeedTouch™ a la toma de pared del teléfono o al filtro distribuido.
Necesitará conectar un filtro DSL en cualquier toma de pared del teléfono donde tenga la intención de utilizar la línea telefónica
para efectuar llamadas, utilizar un fax o conectar un módem de Acceso telefónico.
Utilize o cabo DSL cinza para conectar a porta DSL do SpeedTouch™ à tomada do telefone ou ao filtro distribuído.
Será necessário conectar um filtro DSL à tomada de telefone na qual você pretende usar uma linha telefônica para ligações
telefônicas, dados de fax ou um modem de discagem.
Utilizzare il cavo DSL grigio per collegare la porta DSL di SpeedTouch™ alla presa a muro del telefono o al filtro distribuito.
È necessario inserire un filtro DSL in tutte le prese del telefono che si intende utilizzare per una linea telefonica per le chiamate, i
dati fax o i modem per l'accesso remoto.
Gebruik de grijze DSL-kabel om de DSL-poort van de SpeedTouch™ aan te sluiten op de wandcontactdoos van uw telefoon of een van de
filters.
U zult een DSL-filter moeten aansluiten op elke telefooncontactdoos waar u een telefoonlijn wilt gebruiken voor
telefoongesprekken, faxgegevens of een inbelmodem.
Använd den grå DSL-kabeln för att koppla DSL-porten för SpeedTouch™ till ditt telefonjack eller distribuerade filter.
Du måste ansluta ett DSL-filter till alla telefonjack där du tänker använda en telefonlinje för telefonsamtal, faxdata eller ett uppringt
modem.
4
Page 13
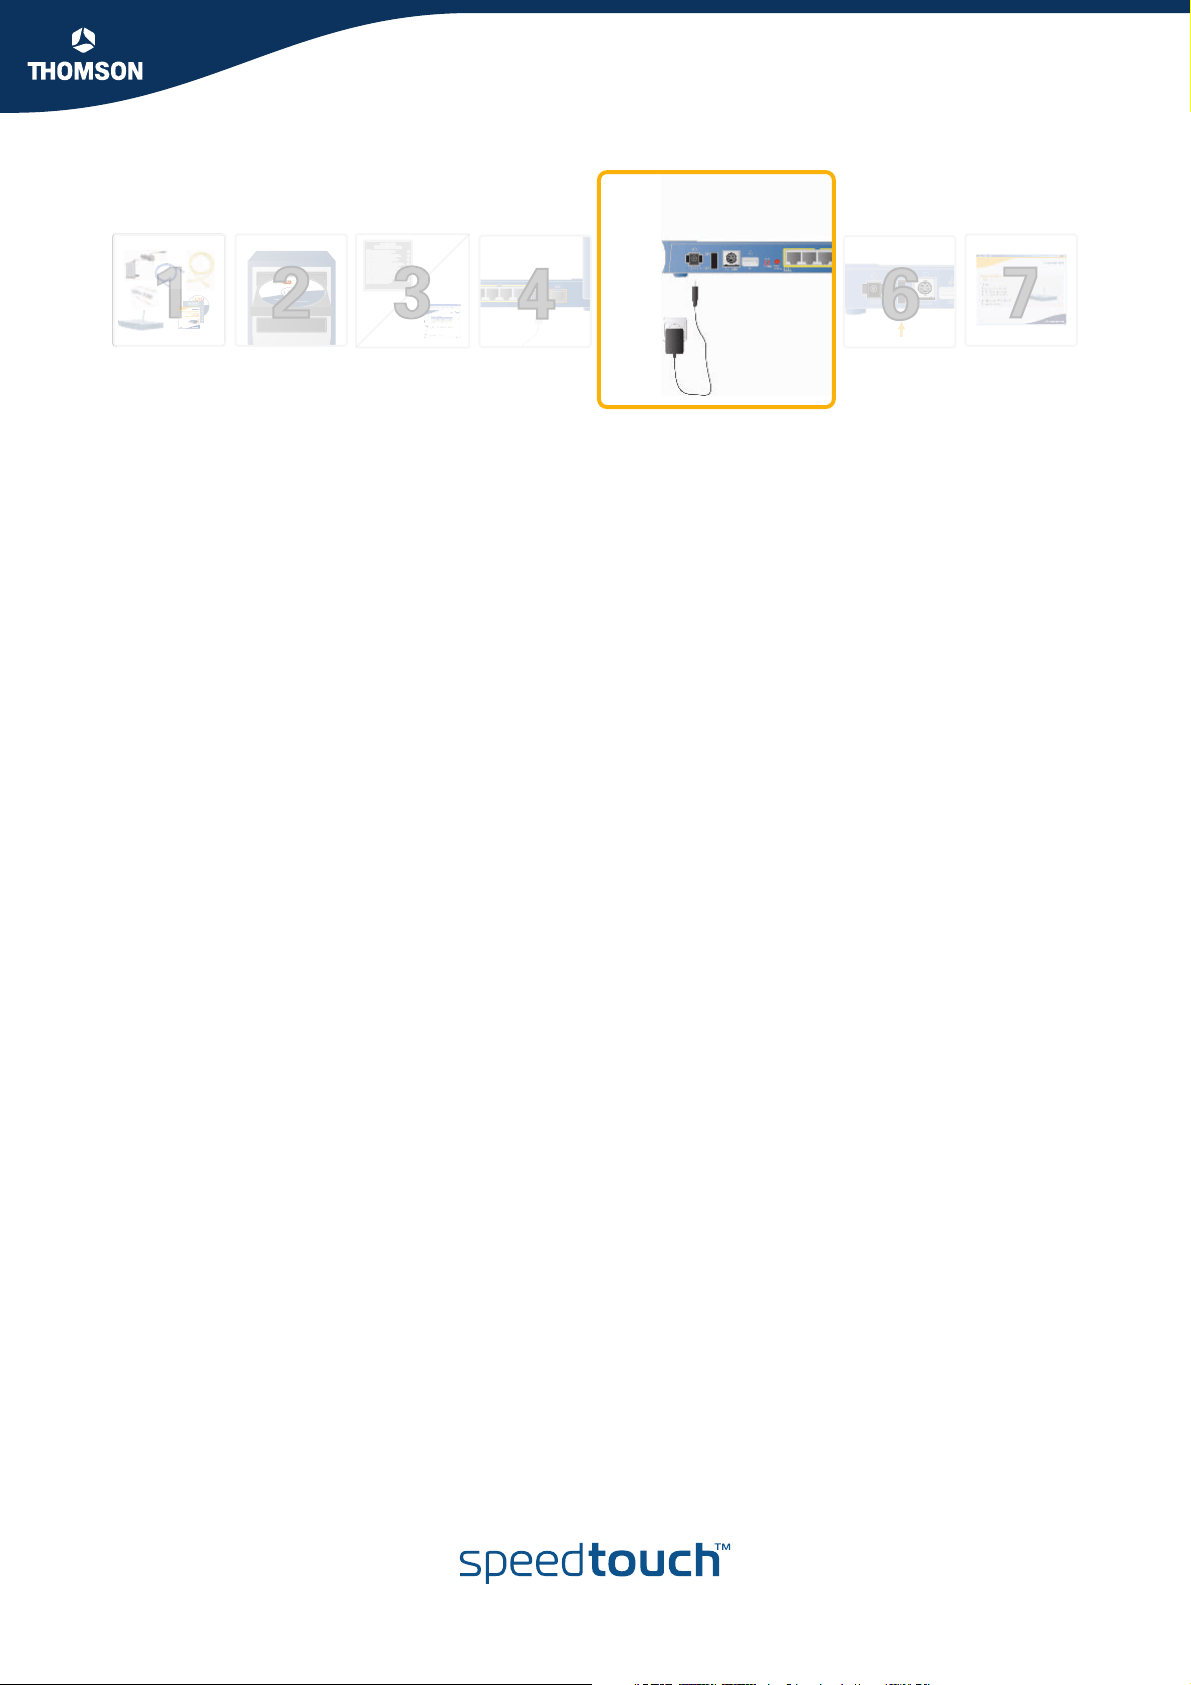
EN Connect the Power Supply.
Proceed as follows:
1 Plug in the coaxial jack from the electric power supply adapter into the SpeedTouch™ “18V AC” port.
2 Plug the other end in the wall outlet.
FR Connexion de l'alimentation
Procédez comme suit :
1 Branchez la prise coaxiale de l'adaptateur d'alimentation électrique dans le port « 18V AC » du SpeedTouch™.
2 Branchez l'autre extrémité à la prise murale.
DE Anschluss des Netzteils
Gehen Sie wie folgt vor:
1 Schließen Sie den Koaxialstecker des Netzteils an die Stromversorgungsbuchse „18V AC“ des SpeedTouch™ an.
2 Schließen Sie das andere Kabelende an die Wandsteckdose an.
ES Conexión de la fuente de alimentación.
Efectúe el siguiente procedimiento:
1 Enchufe el conector del cable coaxial del adaptador de la entrada de alimentación en el puerto “18V AC” del SpeedTouch™.
2 Enchufe el otro extremo en la toma de red.
PT Conecte a fonte de energia.
Faça o seguinte:
1 Ligue o conector coaxial do adaptador elétrico para fonte de energia na porta “18V AC” do SpeedTouch™.
2 Conecte a outra extremidade à tomada.
IT Collegare l'alimentatore.
Procedere come segue:
1 Inserire lo spinotto coassiale dell'adattatore di alimentazione nella porta "CA 18 V" di SpeedTouch™.
2 Collegare l'altra estremità alla presa a muro.
NL Sluit de voeding aan.
Ga als volgt te werk:
1 Steek de coaxstekker van de adapter van de elektrische voeding in de poort “18V AC” van de SpeedTouch™.
2 Steek het andere uiteinde in het stopcontact op de muur.
SV Anslut strömmen.
Gör så här:
1 Sätt in den elektriska strömadapterns koaxialjack i 18 V AC-porten på SpeedTouch™.
2 Sätt in den andra änden i vägguttaget.
Quick Installation Guide
5
Page 14
Quick Installation Guide
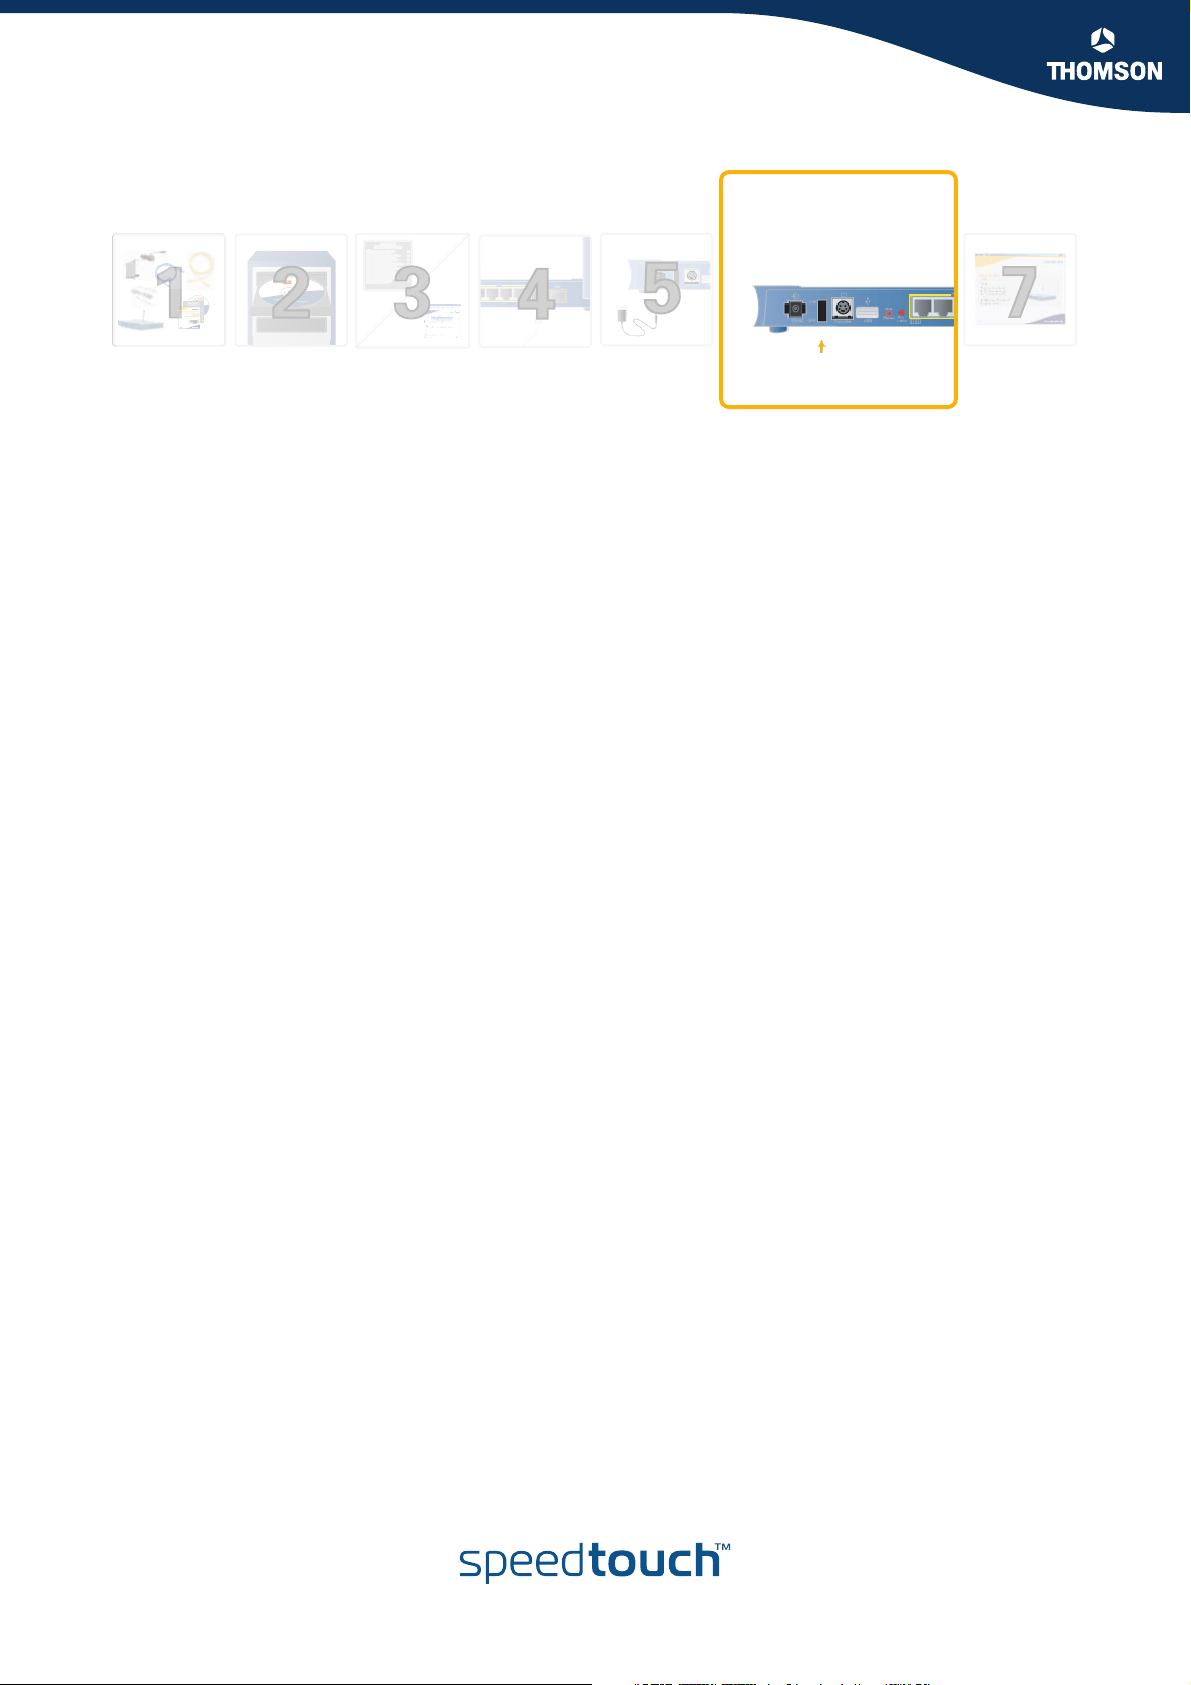
EN Power on the SpeedTouch™.
Push the “ON/OFF” button to turn on the SpeedTouch™.
FR Mettez le SpeedTouch™ sous tension.
Appuyez sur le bouton « ON/OFF » pour mettre le SpeedTouch™ sous tension.
DE Einschalten des SpeedTouch™
Schalten Sie das SpeedTouch™ über den Schalter „Ein/Aus“ ein.
ES Encendido del SpeedTouch™
Pulse el botón de alimentación para encender el SpeedTouch™.
PT Ligue o SpeedTouch™.
Aperte o botão “ON/OFF” (Liga/desliga) para ligar o SpeedTouch™.
IT Accendere SpeedTouch™.
Premere il pulsante di accensione/spegnimento per accendere SpeedTouch™.
NL Schakel de SpeedTouch™ in.
Druk op de knop “AAN/UIT” om de SpeedTouch™ aan te zetten.
SV Slå på SpeedTouch™.
Tryck på PÅ/AV-knappen för att slå på SpeedTouch™.
6
Page 15
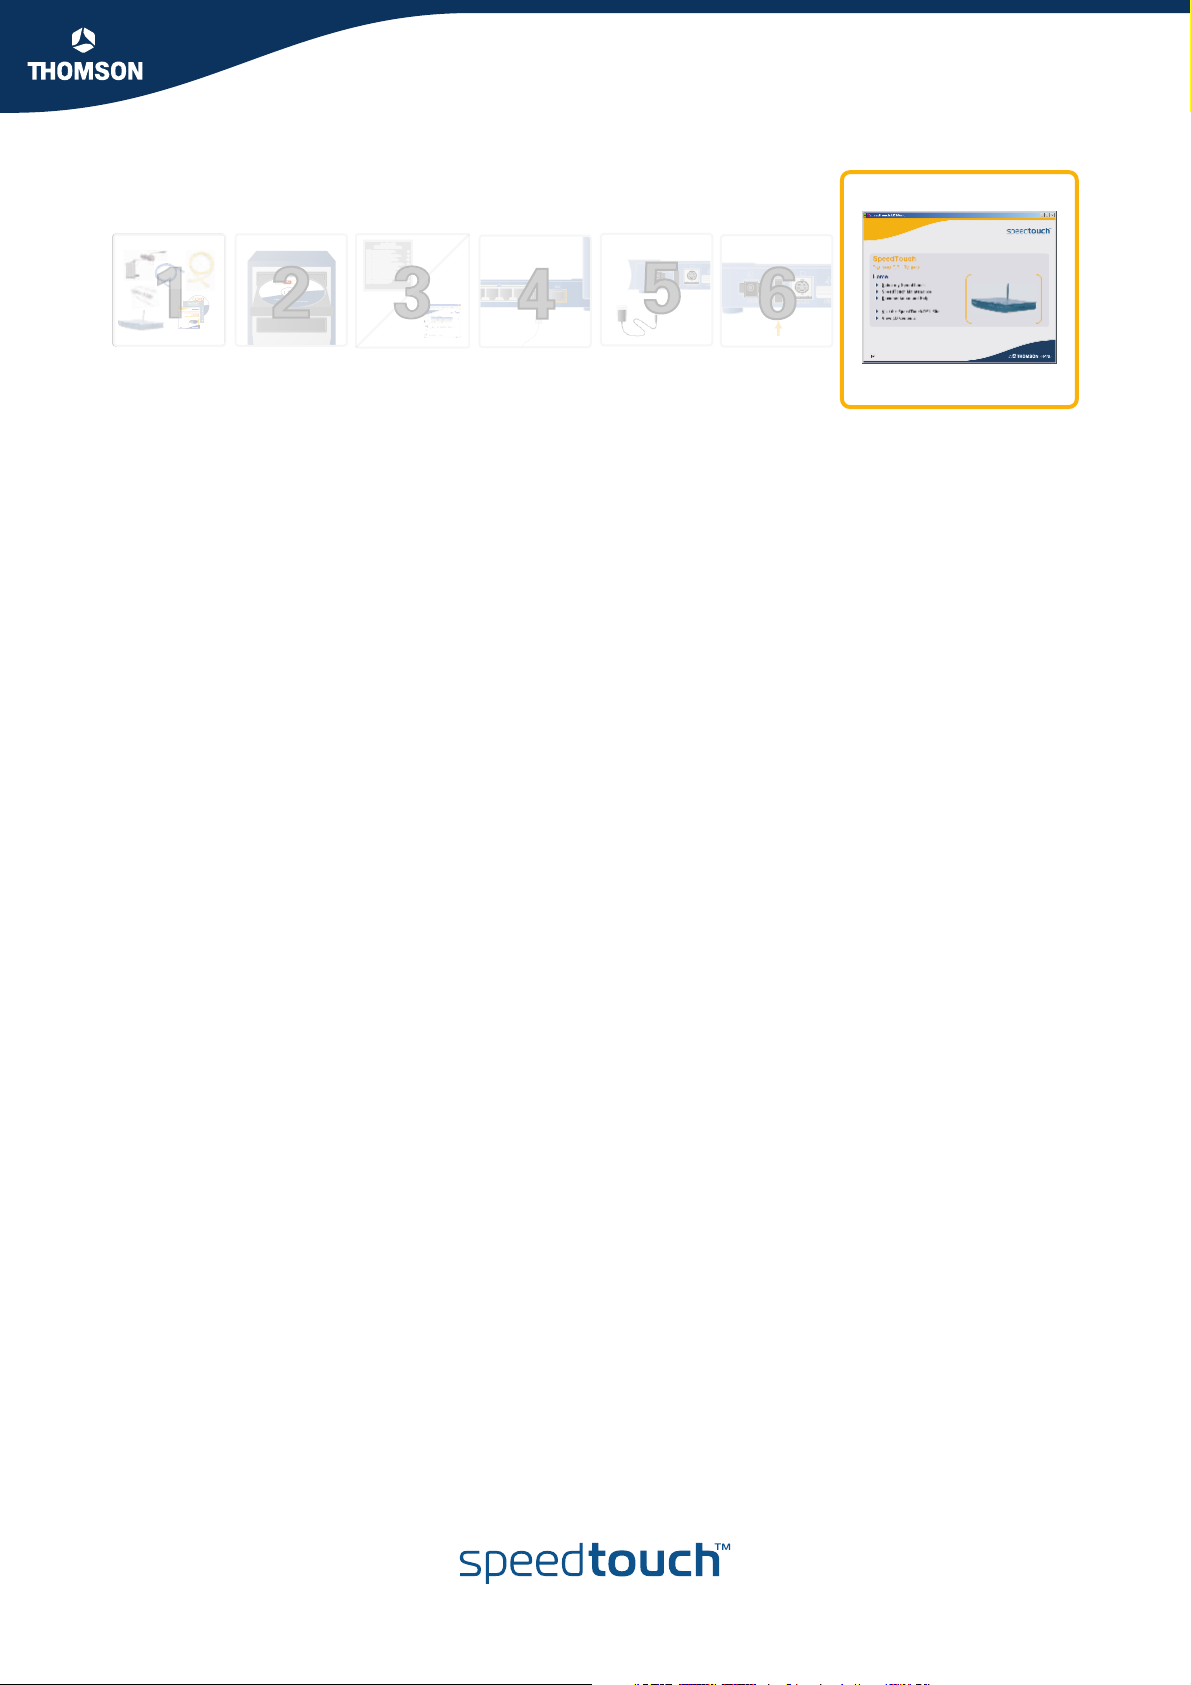
EN Configure your SpeedTouch™ network.
1 On the SpeedTouch CD Menu, click Setup my SpeedTouch.
2 The SpeedTouch Home Install Wizard appears. This wizard will guide you through the configuration of your SpeedTouch™ (wireless)
network and, if applicable, the installation of your SpeedTouch™ wireless networking product(s).
3 Follow the instructions provided by the SpeedTouch Home Install Wizard.
FR Configurez votre réseau SpeedTouch™.
DE Konfigurieren Sie Ihr SpeedTouch™ Netzwerk.
ES Configure su red de SpeedTouch™.
PT Configure a rede do SpeedTouch™.
IT Configurare la rete di SpeedTouch™.
NL Configureer uw SpeedTouch™ netwerk.
SV Konfigurera nätverket för SpeedTouch™.
1 Dans le menu CD du SpeedTouch™, cliquez sur Configurer mon SpeedTouch.
2 L’ Assistant d'installation domotique de SpeedTouch apparaît. Cet Assistant vous guidera tout au long de la configuration de votre
réseau SpeedTouch™ (sans fil) et, le cas échéant, de l'installation de votre/vos produit(s) de mise en réseau sans fil SpeedTouch™.
3 Suivez les instructions fournies par l’ Assistant d'installation domotique de SpeedTouch.
1 Im Menü CD des SpeedTouch™ klicken Sie auf Mein SpeedTouch installieren.
2 Der SpeedTouch Assistent für Home-Installation wird eingeblendet. Dieser Assistent führt Sie durch die Konfiguration Ihres
SpeedTouch™ (Wireless-)Netzwerks und ggf. durch die Installation IhrerSpeedTouch™ Wireless-Netzwerkkomponente(n).
3 Folgen Sie den Anweisungen des SpeedTouch Assistenten für Home-Installation.
1 En el menú del CD SpeedTouch™ , haga clic en Configurar SpeedTouch.
2 Aparece el Asistente de Instalación en casa SpeedTouch. Este asistente le guiará durante la configuración de su red (inalámbrica)
SpeedTouch™, y si es aplicable, de los producto(s) de redes inalámbricas de SpeedTouch™.
3 Siga las instrucciones facilitadas por el Asistente de Instalación en casa SpeedTouch.
1 No menu do CD do SpeedTouch™, clique em Instalar meu SpeedTouch.
2 O Assistente de instalação inicial do SpeedTouch é exibido. Esse assistente o orientará durante o processo de configuração da
rede (sem fio) do SpeedTouch™ e, se aplicável, durante o processo de instalação dos produto(s) da rede sem fio do SpeedTouch™.
3 Siga as instruções fornecidas pelo Assistente de instalação inicial do SpeedTouch.
1 Nel menu del CD di SpeedTouch™ fare clic su Installa SpeedTouch.
2 Verrà visualizzata la Installazione guidata rete domestica. La procedura guidata assisterà l'utente durante il processo di
configurazione della rete (wireless) di SpeedTouch™ e, se applicabile, di installazione dei prodotti di rete wireless SpeedTouch™.
3 Seguire le istruzioni fornite dalla Installazione guidata rete domestica.
1 In het SpeedTouch™ cd-menu klikt u op Setup my SpeedTouch (Mijn SpeedTouch instellen).
2 De wizard SpeedTouch Thuisinstallatie verschijnt. Deze wizard zal u helpen uw SpeedTouch™ (draadloze) netwerk te configureren,
en zal desgevallend helpen uw SpeedTouch™ draadloze netwerkproduct(en) te installeren.
3 Volg de instructies van de SpeedTouch Thuisinstallatie wizard.
1 På menyn SpeedTouch™ CD klickar du på Installera min SpeedTouch.
2 SpeedTouch heminstallationsguide visas. Den vägleder dig genom konfigurationen av SpeedTouch™ (det trådlösa) nätverket och, i
förekommande fall, installationen av SpeedTouch™ produkterna för trådlöst nätverk.
3 Följ instruktionerna i SpeedTouch heminstallationsguiden.
Quick Installation Guide
7
Page 16

Quick Installation Guide
Page 17

Installation
and
Setup Guide
Page 18

Page 19

Contents
Contents
About this Installation and Setup Guide ................... 1
1 Introducing the SpeedTouch™.................................... 3
2 Basic Installation...........................................................5
2.1 Installing your SpeedTouch™......................................................... 6
2.2 Connecting the Hardware .............................................................. 7
2.3 The SpeedTouch™ Setup CD.......................................................... 9
3 Internet Access in No Time........................................11
3.1 SpeedTouch™ Home Install Wizard.............................................. 12
3.1.1 Wireless Setup............................................................................................. 18
3.1.2 Connecting Multiple Computers...................................................................... 19
3.2 Web-Based Easy Setup ................................................................. 20
3.3 Testing your Internet Connection ................................................ 22
3.4 Basic Security .............................................................................. 23
E-DOC-CTC-20050429-0086 v1.0
4 Web-Based User Interface..........................................25
i
Page 20

Contents
5 Internet Connection Troubleshooting....................... 27
5.1 Checking the Hardware................................................................ 28
5.2 LED Diagnostics ........................................................................... 29
5.3 Web Diagnostics .......................................................................... 31
5.4 SpeedTouch™ Setup CD Troubleshooting ................................... 32
5.5 Wireless Setup Troubleshooting .................................................. 35
5.6 Easy Setup Troubleshooting ........................................................ 36
ii
E-DOC-CTC-20050429-0086 v1.0
Page 21

Used symbols
About this Installation and Setup Guide
About this Installation and Setup Guide
A note provides additional information about a topic.
A tip provides an alternative method or shortcut to perform an action.
A caution warns you about potential problems or specific precautions that
!
need to be taken.
Terminology
Documentation and
software updates
Generally, the SpeedTouch™605(i), SpeedTouch™608(i), SpeedTouch™608(i)WL and
SpeedTouch™620(i) will be referred to as SpeedTouch™ in this Installation and Setup
Guide.
THOMSON continuously develops new solutions, but is also committed to improve
its existing products.
For suggestions regarding this document, please contact
documentation.speedtouch@thomson.net
For more information on THOMSON's latest technological innovations, documents
and software releases, visit us at:
www.speedtouch.com
.
E-DOC-CTC-20050429-0086 v1.0
1
Page 22

About this Installation and Setup Guide
2
E-DOC-CTC-20050429-0086 v1.0
Page 23

Chapter 1
Introducing the SpeedTouch™
1 Introducing the SpeedTouch™
Introduction In a minute you will be able to access the Internet using your SpeedTouch™605/608
Business DSL Router or your SpeedTouch™608WL/620 Wireless Business DSL
Router.
This Installation and Setup Guide will show you how to set up your SpeedTouch™
and how to connect a computer or a local area network (LAN) to the Internet.
Identifying your
SpeedTouch™
Variants The SpeedTouch™ comes in two ADSL flavours:
The label on the bottom side of your SpeedTouch™, informs you on the
SpeedTouch™’s:
Product name
Model number
Serial number
Do not remove, nor cover the marking label.
!
The ADSL POTS variant: The SpeedTouch™605/608/608WL/620 connects to
an analogue Plain Old Telephone Service (POTS) line.
The ADSL ISDN variant: The SpeedTouch™605/608/608WL/620i connects to
an Integrated Service Digital Network (ISDN) line, enabling residences with an
ISDN line to use the ADSL service.
The POTS variant supports ADSL, ADSL2, ADSL2+, and RE-ADSL. The ISDN variant
supports ADSL and ADSL2.
You can easily identify your variant by checking the product name printed on the
identification label on the bottom of your SpeedTouch™.
Use only the SpeedTouch™ variant which is appropriate for the DSL service
!
provided to your premises.
Delivery check In case items are missing or damaged, please contact your local distributor. Your box
E-DOC-CTC-20050429-0086 v1.0
should contain:
SpeedTouch™ Gateway
Yellow Ethernet cable (RJ-45)
Grey DSL cable (RJ-11)
Power adapter
Power cord lock
SpeedTouch™ Setup CD
Safety Instructions & Regulatory Notices booklet (optional)
Quick Installation Guide booklet (optional)
Installation & Setup Guide (optional)
Wall-mount drilling leaflet, screws and dowels (optional)
DSL filter(s) (optional)
SpeedTouch™ wireless networking product(s) (optional)
3
Page 24

Chapter 1
Introducing the SpeedTouch™
SpeedTouch™ Setup
CD
Your SpeedTouch™ is delivered with a Setup CD.
If you insert the CD on a Microsoft Windows PC or Mac OS X computer, an intuitive
CD Menu guides you through the features and contents of the Setup CD.
See “2.3 The SpeedTouch™ Setup CD” on page 9 for more information.
In case of another operating system a set of subdirectories allows you to easily
browse for user documentation, SpeedTouch™ system software, service templates,
SNMP MIBs, etcetera.
4
E-DOC-CTC-20050429-0086 v1.0
Page 25

Chapter 2
Basic Installation
2 Basic Installation
Before you begin Make sure to read the safety instructions and regulatory notices first. The safety
instructions can be found on the Setup CD and/or may also be provided as printed
booklet.
DSL service The DSL service must be up and running on your telephone or ISDN line.
If both telephone and DSL service are simultaneously available from the same copper
pair, you will need a central splitter or distributed filters for decoupling DSL and
telephone signals.
Public telephone lines carry voltages that can cause electric shock. Only try
!
to set up splitter/filters that have been designed to be installed by unqualified
personnel. For further assistance, contact your service provider.
Computer requirements To connect computer(s) via Ethernet, make sure your computer is equipped with an
Ethernet network interface card (NIC).
For wireless networking, you will need a wireless 802.11 b/g compatible client
adapter for each computer you intend to connect wirelessly.
As wireless client adapter, you can:
Use a provided SpeedTouch™110g CardBus.
Use a provided SpeedTouch™120g USB adapter (with cable).
Plug a provided SpeedTouch™121g adapter directly into your computer’s USB
port (without cable).
Use any other Wi-Fi certified WLAN client.
E-DOC-CTC-20050429-0086 v1.0
5
Page 26

Chapter 2
Basic Installation
SpeedTouch™ housing The SpeedTouch™ can be mounted on a wall or simply be placed as a desktop.
2.1 Installing your SpeedTouch™
Wall mount To mount the SpeedTouch™ on a wall or other vertical surface:
1 Drill two holes in the wall or other vertical surface where you want to place the
SpeedTouch™. Keep a space of 215 millimetres between the two holes.
2 Fasten two screws in the wall holes. The screws should protrude five
millimetres from the surface of the wall.
3 Attach your SpeedTouch™ on the wall using the two mounting slots on the
bottom side.
215 mm
If you install the SpeedTouch™ onto plasterboard, use dowels to secure
the screws. Otherwise the strain of the cables connected to the
SpeedTouch™ rear panel connectors could pull the SpeedTouch™ from
the wall.
6
E-DOC-CTC-20050429-0086 v1.0
Page 27

Basic Installation
2.2 Connecting the Hardware
Wiring The figure below shows all possible types of connection to the SpeedTouch™620.
Chapter 2
ISDN
18VAC
ON
Asso-
Reset
OFF
Console
ciation
2 3 4
1
ISDN
Internet
The colour coded printing on the backpanel of your SpeedTouch™ will
facilitate matching the colour coded cables.
Proceed as follows:
1 Use the grey DSL cable to wire the SpeedTouch™ DSL port to your telephone
wall outlet or distributed filter.
2 You can use the orange ISDN cable to wire the SpeedTouch™ ISDN port to your
ISDN wall outlet.
The SpeedTouch™608WL/620 is provided with an integrated ISDN
modem, that can be activated in case the main link fails.
For more information, see the SpeedTouch™ User’s Guide.
For US/Canada: Do not use the ISDN port; do not attempt to connect
!
this port to the network at anytime.
E-DOC-CTC-20050429-0086 v1.0
3 Plug in the coaxial jack from the electric power supply adapter into the
SpeedTouch™‘18VAC’ port and the other end to the wall outlet.
7
Page 28

Chapter 2
Basic Installation
4 During the SpeedTouch™ Home Install Wizard, you will be asked to make one of
following connections:
Connect the yellow RJ-45 Ethernet cable to the yellow Ethernet port on
your SpeedTouch™ and the other end to the computer’s Ethernet port.
For wireless networking, plug a wireless card or adapter in your computer.
If you will run the SpeedTouch™ Home Install Wizard, as described in
“3.1 SpeedTouch™ Home Install Wizard” on page 12, it is
recommended to wait to make these connections until the wizard will
ask you to do so.
Powering the
SpeedTouch™
To power on the SpeedTouch™, press the powerrocker button on the SpeedTouch™
rear panel.
During the start-up procedure, the power LED on the front panel is lit red for some
seconds. As soon as the power LED is solidly lit green, your SpeedTouch™ is ready
for service. After another couple of seconds, also the DSL LED will light green.
If these LEDs do not light, please refer to ”Checking the LEDs” on page 29. A
comprehensive LED overview can be found in the SpeedTouch™ User’s Guide.
To power off your SpeedTouch™, press the same button.
8
E-DOC-CTC-20050429-0086 v1.0
Page 29

2.3 The SpeedTouch™ Setup CD
Introduction Your SpeedTouch™ is delivered with a Setup CD.
If you insert the CD on a Microsoft Windows PC or Mac OS X computer, an intuitive
CD Menu guides you through the features and contents of the Setup CD.
To be able to run the applications on the Setup CD on an MS Windows
!
2000, an MS Windows XP operating system, or Mac OS X computer, you
need administrative rights.
In case of another operating system a set of subdirectories allows you to easily
browse for user documentation, SpeedTouch™ system software, service templates,
SNMP MIBs, etcetera.
Chapter 2
Basic Installation
Launching the CD on
MS Windows or Mac
OS X
To launch the SpeedTouch™ Setup CD Menu:
1 Insert the Setup CD in your computer's CD-ROM or DVD-ROM drive.
On MS Windows: The CD should autostart.
If not, refer to ”The SpeedTouch™ CD does not start
automatically” on page 32.
On Mac OS X: If the CD does not autostart, double-click Menu in the
window with the content of the CD.
2 In the Choose Language window, select the language of your choice and click
OK.
3 The SpeedTouch™ Safety Instructions and Regulatory Notices will be displayed
in your default web browser.
If you accepted the Safety Instructions and Regulatory Notices
agreement on this computer before, the instructions are not shown;
instead the CD menu pops up.
4 Read all the instructions carefully. If needed you can select another language to
read the instructions in the language bar available at the top right corner of the
web browser window.
Your SpeedTouch™ product is designed and tested to meet the latest
!
safety standards. However, to ensure safe use of this product, it is
important that the Safety Instructions and Regulatory Notices shown
and/or available in the Safety and Regulatory booklet are read, and
complied with carefully, before installing the SpeedTouch™ product.
5 If you have carefully read these Safety Instructions and Regulatory Notices,
please close the browser window to proceed. You should see the Safety
Instructions and Regulatory Notices window inviting you to confirm your
reading:
E-DOC-CTC-20050429-0086 v1.0
6 Select I have read and I fully understand the Safety Instructions and
Regulatory Information and click Continue.
As a result the SpeedTouch™ CD menu pops up.
9
Page 30

Chapter 2
Basic Installation
SpeedTouch™ CD menu The SpeedTouch™ CD menu will pop up automatically each time you insert the CD:
Select:
Setup my SpeedTouch to start the SpeedTouch™ Home Install Wizard allowing
you to prepare your SpeedTouch™ and network for WAN connectivity.
See “3.1 SpeedTouch™ Home Install Wizard” on page 12 for more
information.
SpeedTouch Maintenance to:
Reconfigure your SpeedTouch™ via the Home Install Wizard.
Upgrade the software version on your SpeedTouch™.
Check for SpeedTouch™ upgrades on the Internet.
Open a new window to view a list of SNMP MIBs available on the Setup
CD that have been updated to optimally meet the SpeedTouch™620
management capabilities.
Documentation and Help to:
Consult documentation for your SpeedTouch™ DSL Router, such as:
user documentation for basic operation of your device
configuration guides for advanced configurations
scenario-orientated application notes.
Consult user documentation for SpeedTouch™ networking products.
See more information on the SpeedTouch™ product portfolio.
Visit the online support sections on www.speedtouch.com.
In case you experience problems when viewing the SpeedTouch™
documentation, see “ SpeedTouch™ documentation cannot be viewed”
on page 33.
Open a new window to view the Setup CD contents.
10
E-DOC-CTC-20050429-0086 v1.0
Page 31

3 Internet Access in No Time
Chapter 3
Internet Access in No Time
What you need from
your ISP
Internet connectivity
setup
Following configuration parameters are provided by your ISP:
Your ISP’s connection service model (for example PPPoE, IPoA)
VPI/VCI (for example 8/35) and encapsulation type
Your user name and password to connect to the Internet for PPP connections
Your IP settings in case of static configurations
Optionally your ISP may indicate the Service Profile to use in the
SpeedTouch™ Home Install Wizard or Easy Setup.
There are different ways of setting up Internet connectivity on your SpeedTouch™.
The best way depends on your operating system.
If you use following
operating system
MS Windows (98 SE,
Millennium, 2000 or XP)
Mac OS X, provided you will
use a wired connection to your
SpeedTouch™
Any operating system
(provided you have IP
connectivity)
Mac OS X, wirelessly
connected to your
SpeedTouch™
the recommended way to setup your
SpeedTouch™ is
the Home Install Wizard, as described in
“3.1 SpeedTouch™ Home Install Wizard” on
page 12.
the Easy Setup, as described in “3.2 Web-Based
Easy Setup” on page 20: Open your web
browser, the SpeedTouch™ HTTP intercept will
do the rest.
If you are using MS Windows XP, it is also be possible to use the MS
Windows XP Internet Gateway Device (IGD) Control Agent for UPnP, as
described in the SpeedTouch™ User’s Guide.
E-DOC-CTC-20050429-0086 v1.0
11
Page 32

Chapter 3
Internet Access in No Time
3.1 SpeedTouch™ Home Install Wizard
Internet connection
setup
Preconditions Make sure that:
Launching the Home
Install Wizard
With the help of the SpeedTouch™ Home Install Wizard you will be on the Internet in
a flash.
First, the wizard will try to detect your SpeedTouch™. After connecting your
computer, the wizard will configure your SpeedTouch™ and - if necessary - your
computer.
The Home Install Wizard was designed for Microsoft Windows operating systems
and Mac OS X - in the latter case provided you will use a wired connection to your
SpeedTouch™.
Your SpeedTouch™ is only connected to a DSL-enabled phone line and to an
electrical outlet.
Your SpeedTouch™ is correctly set up and powered on.
To launch the SpeedTouch™ Home Install Wizard:
1 Launch the SpeedTouch™ Setup CD.
See “2.3 The SpeedTouch™ Setup CD” on page 9 for more information.
2 The SpeedTouch™ CD menu pops up.
If not, refer to ”The SpeedTouch™ CD does not start automatically” on
page 32.
In the SpeedTouch™ CD menu, click Setup my SpeedTouch to start the
SpeedTouch™ Home Install Wizard.
3 On the Welcome page, click Next to continue.
4 The Software License Agreement window appears.
You must accept before continuing. Click Yes to accept.
If you accepted this License Agreement in a previous configuration
setup, this window will not be shown.
12
E-DOC-CTC-20050429-0086 v1.0
Page 33

Chapter 3
Internet Access in No Time
Connecting your
computer
The SpeedTouch™ Home Install Wizard will check your system and will invite you to
connect the SpeedTouch™ to your computer.
The next step will depend on the connection type you will use. In case of:
Wireless (only possible on a SpeedTouch™608WL/620): Go to “3.1.1 Wireless
Setup” on page 18.
Ethernet: After you have plugged in the Ethernet cable to both the computer
and the SpeedTouch™, proceed with “ Configuring the SpeedTouch™ (and your
computer)” on page 14.
If the wizard does not detect a connection, an error message will be
displayed. Refer to ”The wizard does not detect a connection” on page 32.
E-DOC-CTC-20050429-0086 v1.0
13
Page 34

Chapter 3
Internet Access in No Time
Configuring the
SpeedTouch™ (and your
computer)
Once the hardware is installed successfully and you are connected to the
SpeedTouch™, the wizard will continue with the configuration of your SpeedTouch™.
Proceed as follows:
1 If prompted, enter the User name and Password for your SpeedTouch™
security settings and click OK.
The factory default user is ‘Administrator’. Its password is blank,
meaning you do not have to enter anything in the password field. It is
advisable to specify another user name and password to protect your
SpeedTouch™ from security violation during the configuration
procedure (see “ Access Control” on page 15), or as described in
“3.4 Basic Security” on page 23.
2 Select the appropriate Region, Provider and Service for your Internet
connection as specified by your service provider and click Next.
If the service provider has included a separate disk with a dedicated
service profile, click Have Disk... to browse to the location of the
appropriate service profile template file.
From here on the procedure might differ from the description below.
!
The requested information will depend on the selected service profile
and should be provided by your Service Provider. Subsequent screens
will guide you through the configuration setup of both the
SpeedTouch™ and your computer. Enter the requested information and
click Next whenever requested.
3 Select the VPI/VCI - and, if required, the Connection Type - as specified by
your service provider and click Next.
4 Enter the User Name and Password for your Internet account settings as
specified by your service provider and click Next.
14
E-DOC-CTC-20050429-0086 v1.0
Page 35

Chapter 3
Internet Access in No Time
Advanced configuration Depending on your ISP, additional settings may be requested to be filled in during the
Home Install Wizard, like Dynamic Service, Time Configuration, DMZ Port
Assignment or other. Enter the information provided by your ISP and click Next
whenever requested.
SNMP settings Your ISP might ask you to specify Simple Network Management Protocol (SNMP)
community settings. SNMP is a protocol to monitor and deliver reports on SLA
performance. With the help of SNMP, your ISP can be pro-actively aware of network
problems, even before you are.
A community name serves as password and authentication. The community name
you specify is associated with a specific MIB view (which MIB objects are to be seen
by the ISP) and access policy: read-only or read-write (in case your ISP needs to be
able to modify values of the MIB). It is advisable not to leave these fields blank.
Access Control To protect your SpeedTouch™ from unauthorised access, you must provide a user
name and password. Each time a user wants to access a SpeedTouch™ management
interface, or Command Line Interface, the user will be prompted to provide this user
name and password before access is granted.
E-DOC-CTC-20050429-0086 v1.0
15
Page 36

Chapter 3
Internet Access in No Time
Wireless Security To protect the wireless connections to your SpeedTouch™608WL/620, move the
slide control to the desired security mode.
Following security modes to secure traffic between the SpeedTouch™ and connected
wireless stations are available:
Low, which implies in fact that no security measures are taken at all
Medium, implying that traffic is encrypted by means of a static encryption key
(WEP).
High, providing the highest security standard available (WPA) for encrypting all
wireless traffic.
For an overview on all SpeedTouch™608WL/620 wireless security features, see
“ Securing your wireless network” on page 23.
16
E-DOC-CTC-20050429-0086 v1.0
Page 37

Chapter 3
Internet Access in No Time
Term ina ti n g t h e H om e
Install Wizard
1 The SpeedTouch™ Home Install Wizard will configure the SpeedTouch™ and
your computer according to the service profile. You can follow the
configuration progress in following window:
2 Finally, click Finish to close the wizard. After some seconds, the Internet LED
will be lit green. If not, refer to “5.2 LED Diagnostics” on page 29.
3 You will be redirected to the embedded SpeedTouch™ pages automatically
(unless you cleared the http://speedtouch.lan check box in the previous
window).
These pages allow you to configure your firewall, device settings, your
wireless access point settings, and so on. More information can be
found in the SpeedTouch™ User’s Guide.
You can test your Internet connection as described in “3.3 Testing your
Internet Connection” on page 22.
IP settings The SpeedTouch™ DHCP server is enabled by default. Therefore, the computer’s
networking interface, used during the Home Install Wizard procedure, is configured
for obtaining its IP configuration dynamically.
For fixed IP configurations, please follow the instructions of your ISP.
E-DOC-CTC-20050429-0086 v1.0
17
Page 38

Chapter 3
Internet Access in No Time
3.1.1 Wireless Setup
Wireless client
adapters
Installing your wireless
client adapter
For a wireless connection to your Wi-Fi certified SpeedTouch™, you will need a
wireless 802.11 b/g compatible client adapter.
As wireless client adapter, you can use a provided SpeedTouch™110g CardBus, a
provided SpeedTouch™120g USB adapter (with cable), you can plug a provided
SpeedTouch™121g adapter directly into your computer’s USB port (without cable) or
any other Wi-Fi certified WLAN client.
To be able to install hardware on a MS Windows 2000 or a MS Windows XP
operating system, you need administrative rights on your computer.
The Home Install Wizard will invite you to plug in the wireless client adapter.
Proceed as follows:
1 Plug in the wireless client adapter. The hardware is being installed.
If you use a SpeedTouch™110g/120g/121g adapter, the SpeedTouch™
Wireless Client Manager, an alternative to the Wireless Zero
Configuration (WZC) in Windows XP, will be installed. If you’re working
on Windows XP and prefer to work with the WZC, see ”Restoring
Windows Zero Configuration” on page 35 to switch back to WZC.
With the provided SpeedTouch™110g/120g/121g adapter, the client
manager will be configured correctly for secure WLAN connectivity to
the SpeedTouch™. Also for a third party WLAN client on MS Windows
XP with Service Pack 2, the WLAN configuration will be correctly done
via the WZC. In other cases you will need to configure the client
manager of your WLAN client without help of the wizard.
2 Enter your SpeedTouch™’s serial number. This 13 digit key is printed on the
bottom label of your SpeedTouch™. Then click Next.
18
3 In a progress window you can follow the setup of the wireless connection to
your SpeedTouch™.
4 Continue with ”Configuring the SpeedTouch™ (and your computer)” on
page 14.
E-DOC-CTC-20050429-0086 v1.0
Page 39

Internet Access in No Time
3.1.2 Connecting Multiple Computers
Multi-user When multiple computers are used with a single SpeedTouch™, you can run the
Home Install Wizard on each computer to ensure correct TCP/IP settings on the
computers to connect to the SpeedTouch™.
The Home Install Wizard will detect your SpeedTouch™ device and sense that the
SpeedTouch™ has already been configured. You will be given the choice to
reconfigure the SpeedTouch™ or not.
Chapter 3
1 Select No, if you only want to configure the computer, and click Next.
2 Select Assign IP address automatically.
For fixed IP configuration, proceed as follows:
1 Select Use these IP settings.
2 Enter the IP address and subnet mask off your computer and your
SpeedTouch™. Make sure they are in the same subnet.
Click Next.
3 To close the wizard, click Finish.
E-DOC-CTC-20050429-0086 v1.0
19
Page 40

Chapter 3
Internet Access in No Time
Easy Setup With help of the Easy Setup, your Internet connection is set up in a few clicks.
Preconditions Make sure that:
3.2 Web-Based Easy Setup
The Easy Setup is operating system independent.
Your SpeedTouch™ is correctly set up and powered on.
Your computer is connected to the SpeedTouch™. In case of a wireless
connection, a wireless client adapter has to be installed on your computer and
correctly configured to connect to your SpeedTouch™.
Your host computer is configured as DHCP client or is configured with a valid
fixed IP address.
in case of problems, you can give the host computer a fixed IP address
in the same subnet as your SpeedTouch™ (If the SpeedTouch™ is in its
default settings, that is an address between 192.168.1.1 and
192.168.1.253). In case you use fixed IP addresses, the SpeedTouch™
has to be configured as DNS server (default).
Your web browser is not using a proxy server. For more information, see
“ Disable proxy server” on page 36.
HTTP intercept Proceed as follows:
1 Open a web browser. Browse to an arbitrary web site, for instance http://
www.speedtouch.com. As long as no Internet connection has been set up, you
will be automatically redirected to the SpeedTouch™ Welcome page.
If you’re not redirected automatically, go to “ Launching the Easy Setup
wizard” on page 21
2 Click on Setup my SpeedTouch to launch the Easy Setup wizard.
3 Continue with “ Setting up Internet connection” on page 21.
20
E-DOC-CTC-20050429-0086 v1.0
Page 41

Chapter 3
Internet Access in No Time
Launching the Easy
Setup wizard
Setting up Internet
connection
It is always possible to launch the Easy Setup wizard from within the embedded web
pages. Proceed as follows:
1 Browse to the SpeedTouch™ pages on http://speedtouch.lan or on its IP
address, its default being 192.168.1.254.
2 In the menu click SpeedTouch.
3 In the Pick a task... list click Set Up.
In the Easy Setup wizard:
1 Click Next to proceed. If for some reason you want to abort the wizard, click
Cancel.
2 Choose the Service provided by your ISP (IPoA for instance); then click Next.
3 Select the appropriate VPI/VCI - and, if required, the Connection Type -
provided by your ISP; then click Next.
4 For a Router Service, for a PPP connection, fill in the Internet Account settings
(PPP user name and password or - in case you use IPoA - the Local and
Remote IP address) provided by your ISP. Click Next.
5 Fill in the SpeedTouch™ Security user name and Password.
The factory default user is ‘Administrator’. Its password is blank,
meaning you do not need to enter anything in the password field. It is
advisable to specify another Administrator user name and password to
protect your SpeedTouch™ from security violation, as described in
“3.4 Basic Security” on page 23.
6 In the next screen you can review your settings, before to start the
configuration of your SpeedTouch™. If something is missing or incorrect, click
Back. To confirm the settings, click Start.
7 Please wait until the configuration has been done, and then click Finish. After a
while you will be returned automatically to the Welcome page. Click on the
bottom link to go to the SpeedTouch™ pages or select Don’t show this page to
access the Internet via your default home page.
E-DOC-CTC-20050429-0086 v1.0
21
Page 42

Chapter 3
Internet Access in No Time
Connectivity check After setting up the Internet connection, there is a simple way to check whether your
3.3 Testing your Internet Connection
configuration is fine.
1 Go to the SpeedTouch™ home page (http://speedtouch.lan or 192.168.1.254).
2 On the left navigation pane, select SpeedTouch.
3 In the Pick a task... list, click Check connectivity to the Internet.
4 Select an Internet Service to Check.
5 Click Check Connectivity.
6 If the test is successful, you will get a list of green check marks as in the
example below:
22
In case of problems, please refer to “5.3 Web Diagnostics” on page 31.
E-DOC-CTC-20050429-0086 v1.0
Page 43

3.4 Basic Security
Chapter 3
Internet Access in No Time
Default user name and
password
Changing your
password
Default wireless
security settings
The SpeedTouch™ comes with a default user; its user name is ‘Administrator’ and
the default password is blank.
For security reasons, it is recommended to set a password to access the
SpeedTouch™.
1 Go to the SpeedTouch™ home page (http://speedtouch.lan or 192.168.1.254).
2 In the left pane select Toolbox > User Management.
3 In the Pick a task... list, click Change my password.
4 Enter a new password and confirm.
Do not forget this login information. In case you forget, you will be forced to
reset the SpeedTouch™ back to its default configuration.
Also for wireless connections to your SpeedTouch™, by default there are no security
settings, so the SpeedTouch™ is initially accessible to all wireless devices:
The Access Control List (ACL) is open and empty; new stations are
automatically allowed to access the SpeedTouch™.
The Network Name (SSID) is broadcasted.
The security level is initially set to Low (that is: no encryption is used).
It is recommended to change these SpeedTouch™ wireless access point settings
either automatically via the SpeedTouch™ Home Install Wizard, either manually as
described in the SpeedTouch™ User’s Guide.
Securing your wireless
network
To secure your wireless network, you can:
1 Allow or deny access based on the MAC address of the wireless client(s).
Known MAC addresses are kept in the Access Control List (ACL). If the
SpeedTouch™ is configured to allow new stations via registration, unknown
computers will have to register before they can connect.
For the ACL you have following options: New stations are:
Allowed (automatically): All new stations can access the
SpeedTouch™.
Allowed (via registration): Only allowed stations in the ACL have
access. You can add new stations via the Association /
Registration button.
Not allowed: Only allowed stations in the ACL have access.
2 Turn off the broadcast of the wireless Network Name (SSID). New wireless
clients that are scanning for available networks will not see your network
appear in their list.
3 Encrypt the data that will be sent over the wireless network. You can choose
different encryption methods or levels of security:
High: Wi-Fi Protected Access Pre-Shared Key (WPA-PSK) encryption, the
highest form of security available, but can only be used if your wireless
client and client manager support it
Medium: Wired-Equivalent Privacy (WEP) encryption
Low: no encryption, no security
For more information, see the SpeedTouch™ User’s Guide.
E-DOC-CTC-20050429-0086 v1.0
23
Page 44

Chapter 3
Internet Access in No Time
24
E-DOC-CTC-20050429-0086 v1.0
Page 45

Chapter 4
Web-Based User Interface
4 Web-Based User Interface
Embedded pages The SpeedTouch™ comes with embedded web pages, providing an interface to the
software installed on the device. It allows easy setup and management of the
SpeedTouch™ via your web browser from any PC connected to the SpeedTouch™.
Access To access the pages:
1 Open your web browser.
The recommended screen resolution is 1024 by 768 pixels.
2 In the address bar type http://speedtouch.lan or your SpeedTouch™’s IP
address, by default that is 192.168.1.254
3 Enter your SpeedTouch™ security user name and password.
The default user name is Administrator and the default password is
blank.
, and press Enter.
4 The SpeedTouch™’s home page will be displayed in your browser window.
From here - depending on the rights of your user account - you have access to
the other pages.
Task s Amongst others you can:
View the SpeedTouch™’s current settings and status.
Configure the SpeedTouch™ to connect to your Service Provider with the
settings provided.
Set the SpeedTouch™’s firewall to work with specific applications.
Set up security features.
Enable remote management access.
Back up your configuration settings.
Reset the SpeedTouch™’s default settings.
Update the SpeedTouch™’s firmware.
Using the web pages The pages are grouped in:
Basic Mode: offering the main configuration tasks.
Expert Mode: adding advanced features to the basic mode and presenting the
Command Line Interface (CLI) commands in a graphical user interface.
When making changes to the SpeedTouch™ configuration via basic mode, the
configuration is stored automatically whenever you click the Apply button. When
using the expert mode, you must explicitly save the configuration by clicking the
Save button in the top navigation bar.
For more information on the embedded pages, go to the Help link in the upper right
side of the notification and navigation area or refer to the SpeedTouch™ User’s
Guide.
E-DOC-CTC-20050429-0086 v1.0
25
Page 46

Chapter 4
Web-Based User Interface
Site Map The following Site Map gives you an overview of the main pages:
SpeedTouch
Information
Configuration
Event Logs
Update
Broadband Connection
DSL Connection
Internet Services
Toolbox
Game & Application Sharing
Remote Assistance
Web Site Filtering
Intrusion Detection
Firewall
Dynamic DNS
User Management
Office Network
Devices
Interfaces
Expert Mode
SpeedTouch
System Information
SpeedTouch Services
Easy Setup
Connections
Diagnostics
System Update
Syslog
SNTP
SLA
Add-on
IP Router
IP Addresses
Expressions
Classification
IP Routing
RIP
NAT
IP QoS
Connections
Routed PPPoE
Routed PPPoA
Routed PPPoI
Bridged Ethernet
Routed Ethernet
Routed IPoA
PPTP-to-PPP-Relay
ATM
Virtual LAN
Local Networking
DHCP
Managed Switch
DNS
Wireless
Firewall
Expressions
Policy
VPN
LAN to LAN
VPN Client
VPN Server
Certificates
Advanced
Debug
SIP PBX
Location Service
General
Call Logging
Call Screening
Back to Basic...
Log
26
E-DOC-CTC-20050429-0086 v1.0
Page 47

Internet Connection Troubleshooting
5 Internet Connection Troubleshooting
What to check The first things to check if you cannot access the Internet, are:
Power
Hardware connections
LEDs
If the suggestions in this chapter do not resolve the Internet connection problem,
please contact your Service Provider.
For other problems (Wireless, Security, Management,....), refer to the SpeedTouch™
User’s Guide.
Chapter 5
E-DOC-CTC-20050429-0086 v1.0
27
Page 48

Chapter 5
Internet Connection Troubleshooting
5.1 Checking the Hardware
Check the wiring Plug in properly all cables you need. Ensure that the cables between your
Test the telephone line To eliminate the possibility of a fault with the telephone line itself, check for a dial-
SpeedTouch™, computers and telephone socket are plugged in firmly. Loose
connections can affect your Internet connection.
Damaged cables can interfere with your Internet connection. Check for damage along
the cables and loose connections at the end of the cable. Replace any damaged
cables.
tone by using a telephone connected to the telephone master socket.
If you are using ADSL, check whether a splitter has been installed or that microfilters have been correctly fitted.
If there is no dial tone, contact your telephone company.
Reboot your computer Loss of Internet or network connectivity can be caused by the computer. Often a
reboot will rectify the problem.
Power-cycle the
SpeedTouch™
To reboot your SpeedTouch™, simply turn off your SpeedTouch™. Wait five seconds
and turn it back on.
28
E-DOC-CTC-20050429-0086 v1.0
Page 49

Chapter 5
Internet Connection Troubleshooting
5.2 LED Diagnostics
Checking the LEDs After establishing Internet connectivity, at least following LEDs should solidly light
green: Power, DSL, Internet.
LED status Possible solutions
No LEDs are lit or
flashing
DSL LED is flashing
green or no DSL
LED
No Ethernet LED
No Ethernet’s Link
Integrity/Activity
LED
Make sure the SpeedTouch™ is plugged into an
electrical outlet.
Make sure you are using the correct power supply for
your SpeedTouch™ device, that is a 18V AC power
adapter, like the one provided.
Make the SpeedTouch™ is powered on.
Unplug the SpeedTouch™, reboot your computer and
then plug the SpeedTouch™ back in.
Your DSL service is unable to synchronise.
Ensure the SpeedTouch™ is plugged into the DSL-
enabled phone line.
Ensure micro-filters have been correctly fitted (if not,
there is a big chance you also have a bad regular
telephone service).
Make sure you use the right power supply (18V AC).
Make sure that the correct SpeedTouch™ variant is
used for your DSL service (ISDN/POTS).
If you have previously had a working connection, call
your ISP to check for service outages.
No Ethernet connectivity:
Make sure the Ethernet cable(s) are firmly connected
to the 10/100Base-T port.
Make sure you are using the correct cable type for
your Ethernet equipment.
Make sure the Ethernet NIC driver is correctly installed
and enabled on your computer. Power safe options for
the Ethernet NIC should preferably be disabled.
E-DOC-CTC-20050429-0086 v1.0
29
Page 50

Chapter 5
Internet Connection Troubleshooting
LED status Possible solutions
WLAN LED is
flashing or not lit
The WLAN LED flashes if there is wireless LAN
activity and can have different colours:
Green: The SpeedTouch™ wireless access point
is operating in highest security mode (WPA).
Make sure to use the same WPA encryption on
the WLAN client.
Amber: The SpeedTouch™ wireless access point
is operating in medium security mode (WEP).
Make sure to use the same WEP encryption on
the WLAN client.
Red: The SpeedTouch™ wireless access point
uses no security.
The WLAN LED is not lit if the SpeedTouch™ wireless
access point is disabled. For wireless networking,
ensure the WLAN is enabled on the SpeedTouch™:
1 Go to the SpeedTouch™ web pages.
2 In the menu select Office Network > Interfaces.
3 Click the WLAN.
4 Click Configure.
5 Select Interface Enabled.
- OR -
Press and hold the Association / Registration button
until the WLAN LED is lit (green, amber or red).
The WLAN LED is toggling between red and green: If
new stations are only allowed via registration and if
you pressed the Association / Registration button, the
ACL will be unlocked for 30 seconds during which you
can connect new wireless clients.
Red Internet LED or
No Internet LED
There was an authentication failure. This will usually
present itself as an error message regarding an
incorrect password.
Check that your user name is correct. For ADSL
connections, the user name is normally in the
form of username@ISP.
Check that your password is correctly entered.
The password is case sensitive.
If you continue to get password failures, contact your
ISP.
The wrong service profile was selected. Restart the
setup of your SpeedTouch™, and make sure to select
the correct service profile.
A comprehensive LED overview can be found in the SpeedTouch™ User’s Guide.
30
E-DOC-CTC-20050429-0086 v1.0
Page 51

Internet Connection Troubleshooting
5.3 Web Diagnostics
Connectivity check How to do a simple connectivity check on the web pages, is described in
“3.3 Testing your Internet Connection” on page 22.
If the test is successful, you will get a list of green check marks in the test results.
Otherwise a red cross will help you to diagnose the problem.
Test result Explanation
Your DSL line is not synchronised.
Check if your telephone line is correctly
connected to your SpeedTouch™.
Check the DSL LED, as described in “ Checking
the LEDs” on page 29.
No ATM activity detected on your DSL line.
Chapter 5
No Ethernet activity.
In case you are connected through a protocol other
than PPPoE, this check is not applicable; the result
will always be ‘No Ethernet activity’.
Authentication failed: check your user name
and password. The user name is in most cases
in the form of username@ISP.
Your connection is disconnected.
Could not bring up link.
No IP No IP address or no DNS server has been configured.
During IP address negotiation, there was an IPCP
error or a DHCP error.
No Internet This test sends 1 ping to each address of a
configured list of IP addresses. The test succeeds if
all addresses can be reached. If your primary and
secondary DNS server are part of the list, reaching
one of both is enough.
No DNS If this step fails, it may be because the DNS service
provided by your ISP has a problem.
E-DOC-CTC-20050429-0086 v1.0
31
Page 52

Chapter 5
Internet Connection Troubleshooting
5.4 SpeedTouch™ Setup CD Troubleshooting
The SpeedTouch™ CD
does not start
automatically
The wizard does not
detect a connection
In MS Windows:
1 In the Windows task bar, click the Start button.
2 Select Run...
3 In the Open field, enter the following path: D:\Setup.exe, where D stands for
the drive letter of your CD-ROM drive.
In Mac OS X:
1 On your desktop double-click the CD icon.
2 Double-click Setup.
If the Home Install Wizard does not detect a connection to your SpeedTouch™, an
error window appears.
32
In this case check that:
The SpeedTouch™ is turned on and fully initialised.
Your computer has a valid IP address, that is any address but 0.0.0.0.
In MS Windows:
1 In the task bar, click the Start button.
2 Select Run...
3 Type cmd in the Open field.
4 Click OK. A black window will appear with a flashing cursor.
5 Type ipconfig /all and then press Enter.
In MS Windows 98 or MS Windows Millennium, type winipcfg and
then press Enter.
6 Your IP address is displayed.
E-DOC-CTC-20050429-0086 v1.0
Page 53

Chapter 5
Internet Connection Troubleshooting
In Mac OS X:
1 Go to Dock > System References.
2 Click Network.
3 On the TCP/IP tab, your IP address is displayed.
No dedicated firewall device or router is placed between your computer and the
SpeedTouch™.
No personal firewall software is running on your computer.
Your computer is correctly connected to the SpeedTouch™, in other words,
check whether the WLAN client is correctly associated with the SpeedTouch™:
1 In the Windows XP notification area, click the Wireless Network
Connection icon .
If you’re not connected, this icon will have a red cross:
2 Check whether the displayed network has your SpeedTouch™ network
name (SSID).
To repeat the search for your SpeedTouch™, click Back or restart the wizard. As soon
as the wizard finds your SpeedTouch™, you can continue with ”Configuring the
SpeedTouch™ (and your computer)” on page 14.
The SpeedTouch™ is
not responding
SpeedTouch™
documentation cannot
be viewed
If after running the SpeedTouch™ Home Install Wizard, the completing window does
not appear. Instead, you will get a message, the SpeedTouch™ is not responding.
There are two possibilities:
This might be due to the reconfiguration of the SpeedTouch™’s IP settings or
wireless access point settings. In this case, the last window of the Home Install
Wizard will not be shown. Your SpeedTouch™ is correctly set up though and
you will be able to surf the Internet.
If you did not reconfigure the SpeedTouch™’s IP settings or wireless access
point settings, restart the wizard.
If the setup fails over a wireless connection, try - if possible - to setup your
SpeedTouch™ using a wired connection.
If the problem persists, refer to the Service Provider’s instructions for more
information.
To be able to view the SpeedTouch™ documentation pages on the Setup CD,
Javascript must be enabled in your web browser. For more information, see the help
file of your web browser.
To allow active content on an MS Windows XP system, see “ Active content in
Internet Explorer” on page 34.
E-DOC-CTC-20050429-0086 v1.0
33
Page 54

Chapter 5
Internet Connection Troubleshooting
Active content in Internet Explorer
When opening documentation pages from the Setup CD a warning might be
displayed; this is for instance the case if the pages are opened in Internet Explorer
and you are using MS Windows XP with Service Pack 2.
To be able to view the documentation, proceed as follows:
1 In Internet Explorer following message will appear in the Information Bar:
2 Click the Information Bar (with the warning).
3 Select Allow Blocked Content.
4 A security warning will be displayed:
5 Click Yes.
Now you can view or print the SpeedTouch™ documentation pages.
This warning will be displayed every time you consult the documentation. If
you do not want this message to be shown in the future, you must allow
CDs to run active content on your computer:
1 In the Internet Explorer menu select Tools > Internet Options.
2 Under Security select Allow active content from CDs to run on My
Computer.
34
E-DOC-CTC-20050429-0086 v1.0
Page 55

5.5 Wireless Setup Troubleshooting
Chapter 5
Internet Connection Troubleshooting
Restoring Windows
Zero Configuration
Uninstalling the
SpeedTouch™ Wireless
Client Manager
When installing a SpeedTouch™110g/120g/121g, the SpeedTouch™ Client Manager
will be installed. The SpeedTouch™ Client Manager is an alternative to the Windows
Zero Configuration (WZC) in Windows XP. In many cases the SpeedTouch™ Client
Manager will disable the WZC.
You need administrative privileges on your computer to restore the WZC
service.
For information about starting the WZC service, visit the Microsoft knowledge base
on http://support.microsoft.com
Every time you reconnect to a WLAN the SpeedTouch™ Wireless Client Manager will
start itself up again though, forcing the WZC to go down.
Therefore, you might want to uninstall the SpeedTouch™ Wireless Client Manager.
Proceed as follows:
.
1 In the Windows XP task bar, click the Start button
2 Select (All) Programs > SpeedTouch 110g/120g/121g Wireless Monitor >
Uninstall SpeedTouch 110g/120g/121g Wireless Monitor.
3 The Uninstall wizard will start running. Click OK to confirm you want to
uninstall.
4 The Install Shield Wizard will appear and will notify the SpeedTouch ST110g/
120g/121g Monitor is successfully unistalled. Click Finish to close the wizard.
5 After uninstalling the SpeedTouch™ Wireless Client Manager, you can restore
the WZC.
E-DOC-CTC-20050429-0086 v1.0
35
Page 56

Chapter 5
Internet Connection Troubleshooting
5.6 Easy Setup Troubleshooting
Prerequisites Before to run the Easy Setup on the embedded SpeedTouch™ pages, check following:
The necessary connections are made.
The SpeedTouch™ is powered on.
Your host computer is configured as DHCP client or is configured with a valid
fixed IP address.
In case of problems, you can give the host computer a fixed IP address
in the same subnet as your SpeedTouch™ (If the SpeedTouch™ is in its
default settings, that is an address between 192.168.1.1 and
192.168.1.253).
In case you use fixed IP addresses, the SpeedTouch™ has to be
configured as DNS server (default).
Supported web
browsers
Your web browser must be able to run Javascript. Following browsers are supported:
Internet Explorer (5.0 and later)
Netscape Navigator (4.7 and later)
Mozilla Firefox (1.2 and later)
Opera (5 and later)
Safari (1.0 and later)
Konqueror (2.2 and later)
Disable proxy server The Easy Setup will only work if the proxy server is disabled or if the proxy server is
bypassed for local addresses. For more information, see the help file of your web
browser.
To disable a proxy server in Internet Explorer:
1 In Internet Explorer, select Tools > Internet Options from the menu.
2 Select the Connections tab.
3 Click the Lan settings... button.
4 Clear the Use proxy server box and the Use automatic script box.
It is recommended first to disable all other network connections on your
!
computer, except the one connecting to your SpeedTouch™.
To disable a network connection:
1 In the Windows XP task bar, click the Start button
2 Select (All) Programs > Control Panel > (Network and Internet
Connections >) Network Connections.
3 Right-click on the network interface icon you want to disable and
choose Disable.
36
E-DOC-CTC-20050429-0086 v1.0
Page 57

Page 58

© THOMSON 2005. All rights reserved. E-DOC-CT
C-20050429-0086 v1.0
Need more help?
Additional help is available online at www.speedtouch.com
PAP
*DSL35921860*
DSL35921860
 Loading...