


LED-B13TU19H
LED-B13TU22H
LED-B13TDU22H
LED-B13HU22H
LED-B13TU24F
LED-B13HU24F
LED-B13HU32H
LED-B13HU42F


1 PREFACE
SAFETY
2
PRECAUTIONS
3IN THE CARTON
FRONT BACK
4CONNECTIONS OF LED
5
BASIC
INSTALLATION
6 REMOTE CONTROL
MENU
7
OPERATION
8 DVD OPERATION
|
3 |
|
|
|
|
|
3 |
|
|
|
|
|
5 |
|
|
|
|
|
6 |
|
|
|
|
Power Cord Connection |
7 |
Antennas Connection |
7 |
SCART Connection |
8 |
VGA(PC) Connection |
8 |
AV Connection |
9 |
YPbPr Connection |
9 |
HDMI Connection |
10 |
COAX Connection |
10 |
USB Connection |
10 |
|
|
|
|
Remote control instructions in TV mode |
11 |
Remote control instructions in DTV/USB mode |
12 |
Remote control instructions in TELETEXT mode |
13 |
Remote control instructions in DVD mode |
14 |
Remote control setup |
15 |
|
|
|
|
INPUT SOURCE |
16 |
CHANNEL MENU |
16 |
PICTURE MENU |
19 |
SOUND MENU |
20 |
TIME MENU |
21 |
LOCK MENU |
22 |
SETUP MENU |
23 |
SCREEN MENU |
24 |
MEDIA(USB) MENU |
26 |
PVR MENU |
29 |
EPG MENU |
33 |
|
|
|
|
General Setup |
34 |
Audio Setup |
36 |
Preference Setup |
37 |
1

9 |
TROUBLESHOOTING |
41 |
|
AND ADVICE |
|||
|
|
||
10 |
SPECIFICATIONS |
|
|
|
|||
42 |
2

1.PREFACE
Thank you for buying this TV ! Please read this manual thoroughly before operating the TV. Make sure the TV was not damaged in transit. Should the TV is damaged, do no install it and contact your dealer. Check that you have all the accessories according to the model.
2.SAFETY PRECAUTIONS
Put the TV on a stable surface.
Do not place any material on the TV.
Minimum distances
10cm |
10cm 5cm |
Do not use the TV with fixtures other than those provided or
20cm
suggested by the manufacturer.
Do not block or cover the ventilation openings on the TV.
If you have a wall mount, check that it is steady.
Power cord and cables must be properly routed and protected to prevent people from stepping on them and causing the TV to fall.
3

Keep the TV dry and away from humidity.
Keep the TV away from heat sources.
Unplug the TV before cleaning it. Do not use solvent or liquid to clean the TV.
Only clean the TV with a soft and dry cloth.
In case of troubleshooting, do not use spare parts other than those suggested by the manufacturer. Using inadequate spare parts can lead to electric shocks, short-circuits fire or other incidents.
Unplug the TV during lightening storms or when unused for long periods of time.
1.where the MAINS plug or an appliance coupler is used as the disconnect device, the disconnect device shall remain readily operable;
2.A warning that batteries (battery pack or batteries installed) shall not be exposed to excessive heat such as sunshine, fire or the like.
3.A warning that an apparatus with CLASS I construction shall be connected to a MAINS socket outlet with a protective earthing connection.
4
3 . IN THE CARTON
R.LIS T |
T.LIST |
LED TV SET |
Remote Control |
1.5V
1.5V
Adapter &Power Cord |
AAA Batteries |
USER'S MANUAL
User Manual
5

4. FRONT , BACK , CONNECTIONS OF LED
Front View
|
|
|
|
|
|
|
|
|
1 |
1. |
OPEN/CLOSE in DVD mode; |
|
|
|
|
|
|
2 |
2. PLAY/PAUSE in DVD mode; |
||||
|
|
|
|
|
|||||||
|
|
+VOL |
|
|
|
|
|
3 |
3. |
Press "VOL+" or "VOL-" to increase or decrease |
|
|
|
-VOL |
|
|
|
|
the sound level. |
||||
|
|
|
|
||||||||
|
|
|
|
|
|
|
|
|
|||
|
|
|
|
|
|
|
|
|
|||
|
|
CH+ |
|
|
|
|
4 |
4. |
Press "CH+" or "CH-" to scan through channels. |
||
|
|
|
|
|
|
||||||
|
|
-CH |
|
|
|
|
5. Press "MENU" to bring up the main menu on |
||||
|
|
|
|||||||||
|
|
|
|
|
|
|
|
||||
|
|
|
|
|
|
|
|
||||
|
|
MENU |
|
|
|
5 |
|
the screen. |
|||
|
|
|
|
|
|
||||||
|
|
SOURCE |
|
|
|
6 |
6. |
Press "SOURCE" to select the input source. |
|||
|
|
|
|
||||||||
|
|
POWER |
|
|
|
|
7 |
7. Press "POWER” button to turn the TV on or off. |
|||
|
|
|
|
|
|
||||||
9 |
|
8 |
|
|
|
|
|
|
|
|
|
|
|
|
|
|
|
|
|
|
|||
8. POWER INDICATOR: When the TV will display in standby or turn Green or blue.
9. REMOTE SENSOR: infrared sensor for the remote control.
Back View and Control Connections
1. USB: Connect to the External drive.
2. HDMI: Connect the HDMI output jack of DVD.
3. SCART: Connect the SCART jack of VCR or DVD.
4. PC AUDIO : Connect the right Audio out put jack of PC.
5. VGA(PC): Connect the PC-RGB output jack of PC. 6. COAX: Connect the SPDIF receiver.
7. PHONE: Connect the headphone.
8. YPbPr: Connect the YPbPr output jack of DVD or VCR. 9. VIDEO/AUDIO: Connect the Video/Audio output jack of
DVD or VCR.
10. RF IN: Connect the antenna.
11. CI PORT: Connect to the CI card.
USB |
1 |
2 |
SCART |
PC |
COAX PHONE YPbPr |
AUDIO VGA(PC) |
VIDEO
R |
L RF IN |
CI PORT |
1 |
2 |
3 |
4 |
5 |
6 |
7 |
8 |
9 |
10 |
11 |
USB |
1 |
2 |
SCART |
PC |
YPbPr |
AUDIO VGA(PC) |
VIDEO
R |
L RF IN COAX CI PORT |
PHONE |
LED-B13HU32H LED-B13HU42F
6

5. BASIC INSTALLATION
Power Cord Connection
-Connect the power cord correctly as shown.
-Press the POWER button of your LED TV to switch on the LED TV. The power indicator on the front panel lights up in Green or Blue.
Antennas Connection
VHF ANTENNA |
UHF ANTENNA |
OUTDOOR
ANTENNA
AMPLIFIER
INDOOR
RF IN
ANTENNA
AMPLIFIER
75 OHM
ANTENNA
PLUG
POWER PLUG OF
ANTENNA
AMPLIFIER
To ensure good picture and sound, TV antenna system needs to be instalLED. The antenna system as shown can be sourced from TV equipment shops, which will provide service for correct installation and connection. After installation, insert the 75-ohm antenna plug into the antenna jack as shown.
7

SCART Connection
TV Back
USB |
1 |
2 |
SCART |
PC |
VGA(PC) |
AUDIO |
Scart cable
DVD or VCR Back
DVD or VCR
Connect the SCART connector to the external video item and the SCART connector on the tv. The SCART lead operates as an Input/Output connection. If the tv does not select the SCART input automatically, select SCART using the SOURCE button on the remote control or TV.
VGA(PC) Connection
TV Back
USB |
1 |
2 |
SCART |
PC VGA(PC) |
|
|
|
|
AUDIO |
Audio Cable
Connect the RGB output of the PC to the VGA jack on the TV set. Connect the AUDIO output of the PC to the PC AUDIO jack on the TV set . Select the VGA input source via the SOURCE button on the remote control.
8

AV Connection
COAX
PHONE YPbPr
VIDEO
TV Back
R |
L RF IN |
CI PORT |
||
|
|
|
|
|
|
|
|
|
|
Video cable
DVD or VCR back
DVD or VCR
Connect the VIDEO and AUDIO output jack of the DVD or VCR to the VIDEO jacks on the TV set using the RCA cable. Match the jack colors: Video is yellow, Audio left is white, and Audio right is red. Select the AV input source via the SOURCE button on the remote control.
YPbPr Connection
COAX
PHONE YPbPr
VIDEO
TV Back
R |
L RF IN |
CI PORT |
Video input connector
Y
Audio and video cable (RCA)
Pb
Pr
Mini audio and video transfer cable
Y Pb Pr
Channel
DVD or VCR back
DVD or VCR
Connect the YPbPr output of the DVD or VCR to the YPbPr input on the TV set. Connect the Audio output of the DVD or VCR to the Audio input jacks on the TV set using the RCA cable.
Match the jacks colors : Y is green, Pb is blue, Pr is red, Audio left is white and Audio right in red.
Select YPbPr input source via the SOURCE button on the remote control.
9

HDMI Connection
TV Back
USB |
1 |
2 |
SCART |
PC |
VGA(PC) |
AUDIO |
HDMI cable
DVD or VCR back
DVD or VCR
The HDMI input connection enables the digital transfer of audio/video/control signals through one cable only.
COAX Connection
COAX
PHONE YPbPr
VIDEO
R |
L RF IN |
CI PORT |
Coax Cable
SPDIF INPUT
Audio Amplifier Back
Audio Amplifier
Connect to Audio Amplifier device to the COAX output jack on the TV.
USB PORT FUNCTION
USB Port
TV Back
USB |
1 |
2 |
SCART |
PC |
VGA(PC) |
AUDIO |
Insert the USB flash drive to the USB port. Select USB channel source via the SOURCE button
on the remote control.
10

6.REMOTE CONTROL
Remote control instructions in TV mode
POWER |
|
MUTE |
PROGRAM |
10 |
+10 |
|
|
LIST |
|
DISPLAY |
|
|
INFO |
|
|
ASPECT |
|
|
ZOOM |
|
MENU |
|
EXIT |
|
OK |
|
|
ENTER |
|
SLEEP |
|
SOURCE |
D.SETUP |
D.MENU |
TITLE |
D.DISPLAY |
|
R.LIST |
T.LIST |
|
TTX |
INDEX |
HOLD |
AUDIO |
|
A-B |
GOTO |
I/II |
REPEAT |
REVEAL |
SIZE |
SUBTITLE |
REC |
|
|
|
SUBPAGE TV/RADIO |
EPG |
FAV |
|
POWER
Turn the LED TV ON or OFF.
MUTE
Press to mute the sound. Press again or press VOL+ to un-mute the TV.
NUMBER BUTTONS
Press 0-9 to select a TV channel directly when you are watching TV. The channel change after 2 seconds.
Return to the previous channel viewed.
LIST
Press to display the TV program list.
DISPLAY
Press to display the source and channel's information.
ASPECT
Selects screen display ratio.
VOL+/VOL-
Press to increase / decrease the sound level.
CH+/CH-
Press to scan through channels.
MENU
Brings up the main TV menu to the screen.
SOURCE
Press SOURCE to display the OSD input source,
Press▲▼to select an input source,and then press
OK to confirm.
THUMBSTICK( ▲/ ▼/◄ / ►/ OK ENTER )
Allows you to navigate the on-screen menus and adjust the system settings to your preference.
SLEEP
Lets you select amount of time before your TV turn itself off automatically.
EXIT
Exit the main TV menu to the screen.
AUDIO(I/II)
Press to search the NICAM modes.
11

Remote control instructions in DTV/USB mode
POWER |
MUTE |
PROGRAM |
10 |
|
+10 |
|
|
|
LIST |
|
DISPLAY |
|
|
|
INFO |
|
|
|
ASPECT |
|
|
|
ZOOM |
|
|
MENU |
|
|
EXIT |
|
OK |
|
|
|
ENTER |
|
|
SLEEP |
|
|
SOURCE |
D.SETUP |
D.MENU |
TITLE |
D.DISPLAY |
|
R.LIST |
T.LIST |
|
TTX |
INDEX |
HOLD |
AUDIO |
|
A-B |
GOTO |
I/II |
REPEAT |
REVEAL |
SIZE |
SUBTITLE |
REC |
|
|
|
SUBPAGE TV/RADIO |
EPG |
FAV |
|
NUMBER BUTTONS
Press 0-9 to select a channel.
INFO
Press to display the source and channel's information.
CH+/CH-
When watching a channel, changes the channel.
COLOR BUTTONS
Color buttons (respectively red, green, yellow and blue) used in a few sub-menus.
T.LIST
Press to display the Record Timer Schedule List.
R.LIST
Display the recorded file list.
SUBTITLE
To display subtitle in DTV mode.
FAV
Favorite program list.
REC
Press to record the TV program in DTV mode.
EPG
Launches the EPG(Electronic Program Guide)in DTV mode.
AUDIO
To display audio menu.
TV/RADIO
When watching a channel,allows you switch between TV and Radio modes.

 (Timeshift)
Play or pause.
Press to enter Timeshift, the image paused and it start record from the paused position.
Stop playing or stop recording.
Fast reverse and Fast forward.
Previous / next chapter in USB mode,or play the Previous
/next scene of the recorded programs, jump by 30 seconds.
REPEAT
Press to select the repeat mode in USB mode.
12

Remote control instructions in TELETEXT mode
POWER |
MUTE |
PROGRAM |
10 |
|
+10 |
|
|
|
LIST |
|
DISPLAY |
|
|
|
INFO |
|
|
|
ASPECT |
|
|
|
ZOOM |
|
|
MENU |
|
|
EXIT |
|
OK |
|
|
|
ENTER |
|
|
SLEEP |
|
|
SOURCE |
D.SETUP |
D.MENU |
TITLE |
D.DISPLAY |
|
R.LIST |
T.LIST |
|
TTX |
INDEX |
HOLD |
AUDIO |
|
A-B |
GOTO |
I/II |
REPEAT |
REVEAL |
SIZE |
SUBTITLE |
REC |
|
|
|
SUBPAGE TV/RADIO |
EPG |
FAV |
|
NUMBER BUTTONS
Press 0-9 to select a teletext page.
CH+/CH-
Page up and Page down.
TTX
Press to switch between TV and Teletext mode.
COLOR BUTTONS
Select 4 Preferred TELETEXT page.
SUBTITLE
To display subtitle.
HOLD
Freeze the current page.
SIZE
Change the picture size.
REVEAL
Reveal or hide the hidden words.
INDEX
Request index page when index link is valid.
SUBPAGE
TELETEXT Subpage.
13

Remote control instructions in DVD mode
Note: Please ensure that the TV you have bought with DVD loader, otherwise, all these parts
with no effect.
POWER |
MUTE |
PROGRAM |
10 |
|
+10 |
|
|
|
LIST |
|
DISPLAY |
|
|
|
INFO |
|
|
|
ASPECT |
|
|
|
ZOOM |
|
|
MENU |
|
|
EXIT |
|
OK |
|
|
|
ENTER |
|
|
SLEEP |
|
|
SOURCE |
D.SETUP |
D.MENU |
TITLE |
D.DISPLAY |
|
R.LIST |
T.LIST |
|
TTX |
INDEX |
HOLD |
AUDIO |
|
A-B |
GOTO |
I/II |
REPEAT |
REVEAL |
SIZE |
SUBTITLE |
REC |
|
|
|
SUBPAGE TV/RADIO |
EPG |
FAV |
|
NUMBER BUTTONS
Numerical buttons for various data.
PROGRAM
Program a disc playing in a desired sequence.
ZOOM
In play state, press ZOOM, the player will zoom in the picture one time.
THUMBSTICK( ▲/ ▼/◄ / ►/ OK ENTER )
Allows you to navigate the on-screen menus and adjust the system settings to your preference.
D.SETUP
Used for selecting programs. It may also be used to execute commands.
D.MENU
DVD disc menu Access to menu.
D.DISPLAY
Press to display the DVD information of DVD mode.
TITLE
When DVD is playing, brings up the Title Menu.
A-B
This button enables you to repeat a selected section from the disc.
GOTO
It is possible to get access to any point on the directly using the "GOTO" menu.
Press GOTO to access the "GOTO" menu.
AUDIO(I/II)
AUDIO selection buttons in DVD mode.
REPEAT
Press REPEAT to cycle through the repeat play options.
SUBTITLE
Select a different subtitle language(the DVD disc must have the subtitle you selected.
To eject the disc.
DVD STOP.
PLAY/PAUSE in DVD mode.
Fast backward and forward key.
Jump to previous and next track.
14
Remote control setup
1.Open the cover.
2.AAA size batteries, When inserting the batteries, make sure correct polarities as per“+”and “-” marks on the batteries and within the battery compartment .
3.Replace the battery cover.
To prevent battery leakage which may result in bodily injury or damage to the remote:
1.Install all batteries correctly, and as marked on the remote control.
2.Do not mix batteries:(OLD and NEW or CARBON and ALKALINE, etc)
3.Remove batteries when the remote is not used for a long time.
15

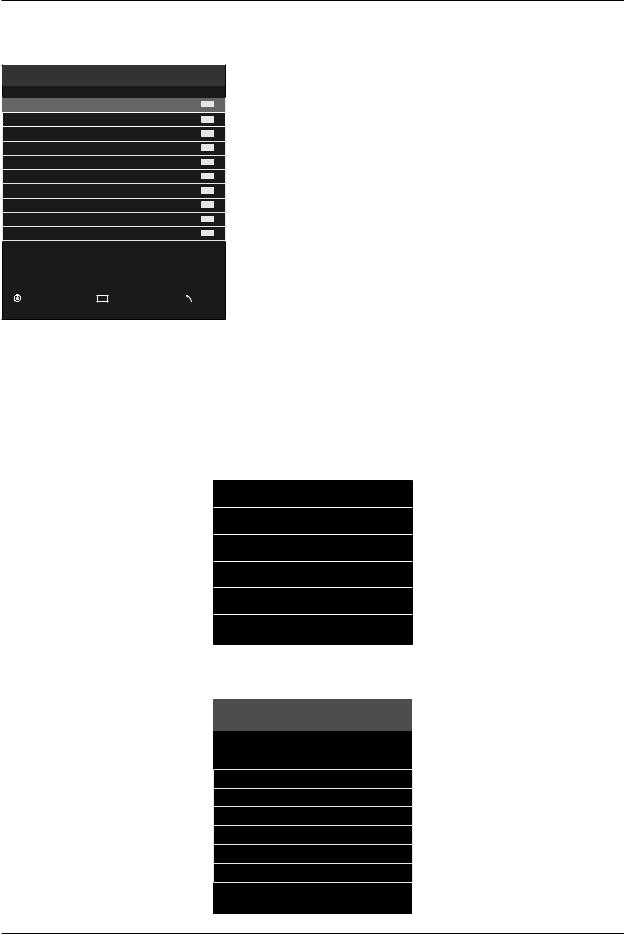
7.MENU OPERATION
|
INPUT SOURCE |
||
|
|
|
|
Iuput Source |
|
|
Iuput Source |
ATV |
|
|
ATV |
DTV |
|
|
DTV |
USB |
|
|
USB |
AV |
|
|
AV |
VGA |
|
|
VGA |
YPbPr |
|
|
YPbPr |
DVD |
|
|
SCART |
SCART |
|
|
HDMI1 |
HDMI1 |
|
|
HDMI2 |
HDMI2 |
|
|
HDMI3 |
|
|
|
|
Enter |
|
|
Enter |
Press SOURCE button to display the input source list;
Press ▼ / ▲ or SOURCE button to select the input source you want to watch; Press OK button to enter the input source;
Press EXIT button to quit;
CHANNEL MENU
Press MENU button to display the main menu.
Press ◄ / ► button to select CHANNEL in the main menu, it will highlight the first option.
Auto Tuning
ATV Manual Tuning
DTV Manual Tuning
Programme Edit
Signal Information
CHANNEL
CI Information
Move |
MENU Return |
Enter Select |
EX IT Exit |
1.Press ▼ / ▲ button to select the option that you want to adjust in the CHANNEL menu.
2.Press OK button to adjust.
16

Auto Tuning
Press ▼ / ▲ button to select Auto Tuning, then press OK button to start auto search.
Tune Type |
|
|
ATV+DTV |
|
|
|
|
|
▲ |
|
|
Other |
Italy |
|
Portugal |
|
|
|
|
▲ |
|
|
▼ |
France |
Germany |
|
Spain |
|
▼ |
|
|
|
Menu |
Enter |
|
|
|
|
|
Channel Tuning
TV |
: |
0 programme |
|
DTV |
: |
0 programme |
|
Radio |
: |
0 programme |
|
Data |
: |
0 programme |
|
1% |
67.30mHz |
(TV) |
|
Please press MENU key to skip
DTV Manual Tuning
Press ▼/▲ button to select DTV Manual Tuning, then press OK button to enter Sub-menu.
DTV Manual Tuning
◄- UHF CH 21 +►
NO SIGNAL
Bad |
Freq: |
177.50 mHz |
Good |
Press ◄ / ► button to select channel, then press OK button to search program.
ATV Manual Tuning
Press ▼ / ▲ button to select ATV Manual Tuning, then press OK button to enter Sub-menu.
ATV Manual Tuning
◄ - Current CH |
1 +► |
|
Colour System |
PAL |
|
Sound System |
DK |
|
Fine-Tune |
49.75MHz |
|
|
|
|
AFC |
On |
|
Search |
|
|
Menu |
|
|
Press ◄ / ► button to select channel number you want to store.
Press ◄ / ► button to select colour system.
Press ◄ / ► button to select audio system.
Press ◄ / ► button to select search, then press OK button to start tuning. Press ◄ / ► button to select Fine-Tune.
Press ◄ / ► to ON or OFF automatic frequency control.
17
Programme Edit
Press ▼ / ▲ button to select Program Edit, then press OK button to enter sub-menu.
Programme Edit
► ►
1 C-01
2 S-42
3 S-09
4 S-05
5 C-11
6 S-30
7 S-37
8 C-26
9 C-44
10 C-56
ATV
ATV
ATV
ATV
ATV
ATV
ATV
ATV
ATV
ATV
 Delete
  Rename
  Move
Move  Skip
Skip
Enter |
FAV |
Fav |
Menu |
·Use Red button to delete the current channel.
·Use Green button to set the current channel to Rename.
·Use Yellow button and the ▲/▼arrow button to move the current channel. ·Use Blue button to skip the current channel.
Signal Information
Press ▼ / ▲ button to select Signal Information, then press OK button to display signal details, Including Channel, Frequency, Quality and Strength.
Signal Information
Channel 32
Frequency 562.00MHZ
Quality 0
Strength 62
CI Information
Press ▼ / ▲ button to select CI Information, then press OK button to display details if you has inserted the CI card.
Cl Information
Viaccess Conditional Access
Mian Menu
▲
Consultation
Settings
Upgrade
▼
Press OK to confirm,Exit to quit
18

PICTURE MENU
Press MENU button to display the main menu.
Press ◄ / ► button to select PICTURE in the main menu, it will highlight the second option.
1.Press ▼ / ▲ button to select the option that you want to adjust in the PICTURE menu.
2.Press OK button to adjust.
|
|
|
|
|
|
|
Picture Mode |
|
|
|
|
|
|
|
|
|
|
|
|
|
|
|
|
|
Dynamic |
|
|
|
Picture Mode |
Standard |
|
|
Standard |
|
|
|
|
Contrast |
50 |
|
|
|
||
|
|
Brightness |
50 |
|
|
Mild |
|
|
|
|
Colour |
|
50 |
|
|
Personal |
|
|
|
Tint |
|
50 |
|
|
|
|
|
|
Sharpness |
30 |
|
|
|
|
|
|
PICTURE |
|
|
|
|
|
|
|
|
|
Colour Temp |
Normal |
|
|
|
|
|
|
|
|
|
|
|
|||
|
|
Noise Reduction |
Middle |
|
|
|
|
|
|
|
|
|
|
|
|
|
|
|
|
|
|
|
|
|
Enter |
Menu |
Move |
MENU Return |
Enter Select |
EX IT Exit |
|
|
|||
|
|
|
|
|||||
Picture Mode
Press ▼/▲ button to select Picture Mode, then press OK button to enter sub-menu.Press▼/▲ button to select.
You can change the value of contrast, brightness, colour and sharpness when the picture is in Personal mode.
Contrast
Press ▼/▲ button to select Contrast, then press OK button to enter sub-menu.Press◄/►button to adjust.
Brightness
Press ▼/▲ button to select Brightness, then press OK button to enter sub-menu.Press◄/►button to adjust.
Colour
Press ▼/▲ button to select Colour, then press OK button to enter sub-menu.Press◄/► button to adjust.
Tint
Press ▼ / ▲ button to select Tint, then press OK button to enter sub-menu. Press◄/► button to adjust. (Only available in NTSC mode.)
Sharpness |
Cold |
|
|
|||
Press ▼/▲ button to select Sharpness, then press ◄/► button to adjust. |
|
|
|
|
|
|
|
|
|
Normal |
|
|
|
Colour Temp |
|
|
Warm |
|
|
|
Press ▼ / ▲ button to select Colour Temp, then press OK button to select. |
|
|
|
|
|
|
|
|
|
|
|
||
|
|
|
|
|
|
|
|
|
|
|
|||
Noise Reduction |
Enter |
Menu |
||||
|
|
|
|
|
|
|
Press ▼ / ▲ button to select Noise Reduction, then press OK button to select. |
|
|
|
|||
Noise Reduction
Off
Low
Middle
High
Enter |
Menu |
19

SOUND MENU
Press MENU button to display the main menu.
Press ◄ / ► button to select Sound in the main menu, it will highlight the third option.
|
|
Sound Mode |
|
Standard |
|
|
|
Treble |
|
50 |
|
|
|
Bass |
|
50 |
|
|
|
Balance |
|
0 |
|
|
|
Auto Volume |
|
Off |
|
SOUND |
|
Surround Sound |
Off |
|
|
|
SPDIF Mode |
|
PCM |
|
|
|
|
|
|
||
|
|
|
|
|
|
Move |
MENU Return |
Enter Select |
EXIT Exit |
|
|
1.Press ▼ / ▲ button to select the option that you want to adjust in the SOUND menu.
2.Press ◄ / ► button to adjust.
Sound Mode
Press ▼/▲ button to select Sound Mode, then press OK button to enter sub-menu. Press ▼/▲ button to select.
You can change the value of Treble and Bass when the sound is in Personal mode.
SPDIF Mode
Press ▼/▲ button to select SPDIF MODE,then press OK button to select Off/PCM/Auto.
Sound Mode
Standard
Music
Movie
Sports
Personal
 Enter
Enter  Menu
Menu
Treble
Press ▼/▲ button to select Treble, then press OK button to enter sub-menu.Press ◄/► button to adjust.
Bass
Press ▼/▲ button to select Bass, then press OK button to enter sub-menu.Press ◄/► button to adjust.
Balance
Press ▼/▲ button to select Balance, then press OK button to enter sub-menu.Press ◄/► button to adjust.
Auto Volume
Press ▼/▲ button to select Auto Volume, then press OK button to select On of Off.
Surround Sound
Surround Sound settings, Press ◄ / ► to set ON/OFF.
20

TIME MENU
Press MENU button to display the main menu.
Press ◄ / ► button to select TIME in the main menu, it will highlight the fourth option.
|
|
Clock |
|
01/Jan 04:28 |
||
|
|
Off Time |
|
|
Off |
|
|
|
On Time |
|
|
Off |
|
|
|
Time Zone |
|
GMT+1 |
||
|
|
Sleep Timer |
|
Off |
||
TIME |
|
Auto Standby |
4H |
|||
|
|
OSD Timer |
|
10s |
||
|
|
|
|
|
|
|
Move |
MENU Return |
Enter |
Select |
EX IT Exit |
||
1.Press ▼ / ▲ button to select the option that you want to adjust in the TIME menu.
2.Press ◄ / ► button to adjust.
Clock
Display the current system time.It’s not available.
Time Zone
Press ▼/▲ button to select Time Zone, then press OK button to enter sub-menu.
Sleep Timer
Press ▼/▲ button to select Sleep Timer, then press OK button to enter sub-menu.Press ▼/▲ button to select.
Auto Standby
Press ▼/▲ button to select Auto standby, then press OK button to enter sub-menu.Press ▼/▲ button to select.
Sleep Timer
|
Off |
|
|
10min |
|
|
20min |
|
|
30min |
|
|
60min |
|
|
90min |
|
Enter |
Menu |
|
Auto Standby
Off
3H
4H
5H
Enter |
Menu |
OSD Timer
Press ▼/▲ button to select OSD Timer, then press OK button to enter sub-menu.Press ▼/▲ button to select.
OSD Timer
|
5S |
||
|
10S |
|
|
|
15S |
||
|
20S |
|
|
|
25S |
|
|
|
30S |
|
|
Enter |
Menu |
||
21

LOCK MENU
Press MENU button to display the main menu.
Press ◄ / ► button to select LOCK in the main menu, it will highlight the fifth option.
|
|
Lock System |
Off |
|
|
|
|
|
|
|
|
|
|
Set Password |
|
|
|
|
|
Block Program |
|
|
|
|
|
Parental Guidance |
Off |
||
LOCK |
|
Key lock |
|
Off |
|
|
|
|
|
|
|
|
|
|
|
|
|
Move |
MENU Return |
Enter Select |
EX IT Exit |
||
1.Press ▼ / ▲ button to select the option that you want to adjust in the LOCK menu.
2.Press ◄ / ► button to adjust.
Lock System
Press ▼ / ▲ button to select Lock System, then press OK button To make the following options valid.(Default password is ‘0000’.)
Please enter password
◄Clear Cancel ►
Set Password
Press ▼ / ▲ button to select Set Password, then press OK button to enter sub-menu to set new password.
Block Program
Please enter old password
Please enter new password
Confirm new password
◄Clear Cancel ►
Press ▼ / ▲ button to select Block Program, then press OK button to enter sub-menu.
Press ▼ / ▲ button to select the program you want to lock, then press green button on your remote control. (To unlock program,input the password you set.)
Press OK button to save setting and menu button to back to the previous menu.
Parental Guidance
Press ▼ / ▲ button to select Parental Guidance,then press OK button to enter sub-menu to select. (Available options are:Off, 4-18)
Key Lock
Press ▼ / ▲ button to select Key Lock, then press OK button to select on or off.
22

SETUP MENU
Press MENU button to display the main menu.
Press ▼ / ▲ button to select Setup in the main menu, it will highlight the sixth option.
|
|
OSD Language |
English |
|
|
|
|
TTX Language |
West |
||
|
|
Audio Language |
English |
||
|
|
Subtitle Language |
English |
||
|
|
PVR File System |
|
|
|
|
|
Recorder |
|
|
|
|
|
Schedule List |
|
|
|
|
|
Aspect Ratio |
16:9 |
|
|
SETUP |
|
Blue Screen |
On |
||
|
|
First Time Installation |
|
|
|
|
|
Reset |
|
|
|
|
|
|
|
|
|
Move |
MENU Return |
Enter Select |
EX IT Exit |
||
1.Press ▼/▲ button to select the option that you want to adjust in the SETUP menu.
2.Press ◄/► button to adjust.
OSD Language/Audio Language/Subtitle Language
Press ▼/▲ button to select OSD/Audio/Subtitle Language, then press OK button to enter sub-menu. Press ▼/▲/◄/► button to select OSD language,default setting is English.
TTX Language
Press ▼/▲ button to select TTX Language, then press OK button to enter sub-menu. Press ▼/▲ button to select TTX Language
TTX Language |
|
|
|
|
|
|
Aspect Ratio |
|
|
|
|
|
|
|
|
|
|
West |
|
|
Select Disk |
|
C: |
|
|
AUTO |
East |
|
|
Check PVR File System |
|
Start |
|
|
4:3 |
Russian |
|
|
USB Disk |
|
|
|
|
16:9 |
|
|
Format |
|
|
|
|
||
Arabic |
|
|
|
|
|
Zoom1 |
||
|
|
Time Shift Size |
|
|
|
|||
Farsi |
|
|
|
|
|
Zoom2 |
||
|
|
Speed |
|
|
|
|||
|
|
|
|
|
|
|
|
|
|
|
|
Free Record Limit |
|
6Hr. |
|
|
|
Enter |
Menu |
|
Enter |
Menu |
|
|
Enter |
Menu |
|
|
|
|
|
|
|
|
|
PVR File System
Press ▼ / ▲ button to select PVR File System, then press OK button to enter sub-menu.
Schedule List
Press ▼ / ▲ button to select Schedule List, then press OK button to enter sub-menu.
Schedule List |
14:27 31th May |
Delete |
Menu |
|||||
|
|
|
|
|
|
|
|
|
|
Time |
|
Date |
Program Title |
|
Channel Name |
|
|
|
13:30-15:30 |
Thurs.31 May |
Before Winter Comes |
5 Five |
|
|
||
|
|
|
|
|
|
|
|
|
|
|
|
|
|
|
|
|
|
23

Recorder
Press MENU button on the remote control to display the main menu; Use ◄/►button to select SETUP, and use ▼/▲ button to select Recorder. Then press OK button enter the sub-menu.
Aspect Ratio
Press ▼ / ▲ button to select Aspect Ratio, then press OK button to enter sub-menu.
Blue Screen
Press ▼ / ▲ button to select Blue Screen, then press ◄/► button to select on or off.
First Time Installation
Press ▼ / ▲ button to select First Time Installation, then press OK button to set relevant options including OSD language, country and tuning.
Reset
Press ▼ / ▲ button to select Reset, then press OK button to enter a dialogue.Press ◄/► button selecting Yes or No.
SCREEN MENU
Press MENU button to display the main menu.
Press ◄/► button to select Screen in the main menu, it will highlight the first option.(Only available when inputting PC-RGB signal)
|
|
Auto Adjust |
|
|
|
|
|
Horizontal pos. |
50 |
|
|
|
|
Vertical pos. |
50 |
|
|
|
|
Size |
|
50 |
|
SCREEN |
|
Phase |
|
99 |
|
|
Position Reset |
|
|
||
|
|
|
|
|
|
Move |
MENU Return |
Enter Select |
EX IT Exit |
|
|
1.Press ▼/▲ button to select the option that you want to adjust in the SCREEN menu.
2.Press OK button to adjust.
Auto Adjust
Press ▼/▲ button to select Auto Adjust, then press OK button to start adjusting automatically.
Horizontal Pos.
Press ▼/▲ button to select Horizontal Pos. , then press OK button to enter sub-menu.Press ◄/► button to adjust.
24
 Loading...