

Akira LED-B13HU22H, LED-B13HU32H, LED-B13TU24F, LED-B13TU22H, LED-B13TDU22H User Manual [it]
Page 1
LED-B13TU19H
LED-B13TU22H
LED-B13TDU22H
LED-B13HU22H
LED-B13TU24F
LED-B13HU24F
LED-B13HU32H
LED-B13HU42F
Page 2

Page 3
Page 4
Page 5
Page 6
Page 7

1
PREFACE
3
2
3
SAFETY
PRECAUTIONS
IN THE CARTON
FRONT BACK
4
CONNECTIONS
OF LED
5
6
BASIC
INSTALL TION
REMOTE CONTROL
3
5
6
Power Cord Connection
Antennas Connection
SCART Connection
VGA(PC) Connection
A
AV Connection
YPbPr Connection
HDMI Connection
COAX Connection
USB Connection
Remote control instructions in TV mode
Remote control instructions in DTV/USB mode
Remote control instructions in TELETEXT mode
Remote control instructions in DVD mode
Remote control setup
7
7
8
8
9
9
10
10
10
11
12
13
14
15
MENU
7
OPERATION
8
DVD OPERATION
INPUT SOURCE
CHANNEL MENU
PICTURE MENU
SOUND MENU
TIME MENU
LOCK MENU
SETUP MENU
SCREEN MENU
MEDIA(USB) MENU
PVR MENU
EPG MENU
General Setup
Audio Setup
Preference Setup
1
16
16
19
20
21
22
23
24
26
29
33
34
36
37
Page 8

9
TROUBLESHOOTING
AND ADVICE
41
10
SPECIFICATIONS
42
2
Page 9
1.PREFACE
Thank you for buying this TV ! Please read this manual thoroughly before operating the TV. Make
sure the TV was not damaged in transit. Should the TV is damaged, do no install it and contact
your dealer. Check that you have all the accessories according to the model.
2.SAFETY PRECAUTIONS
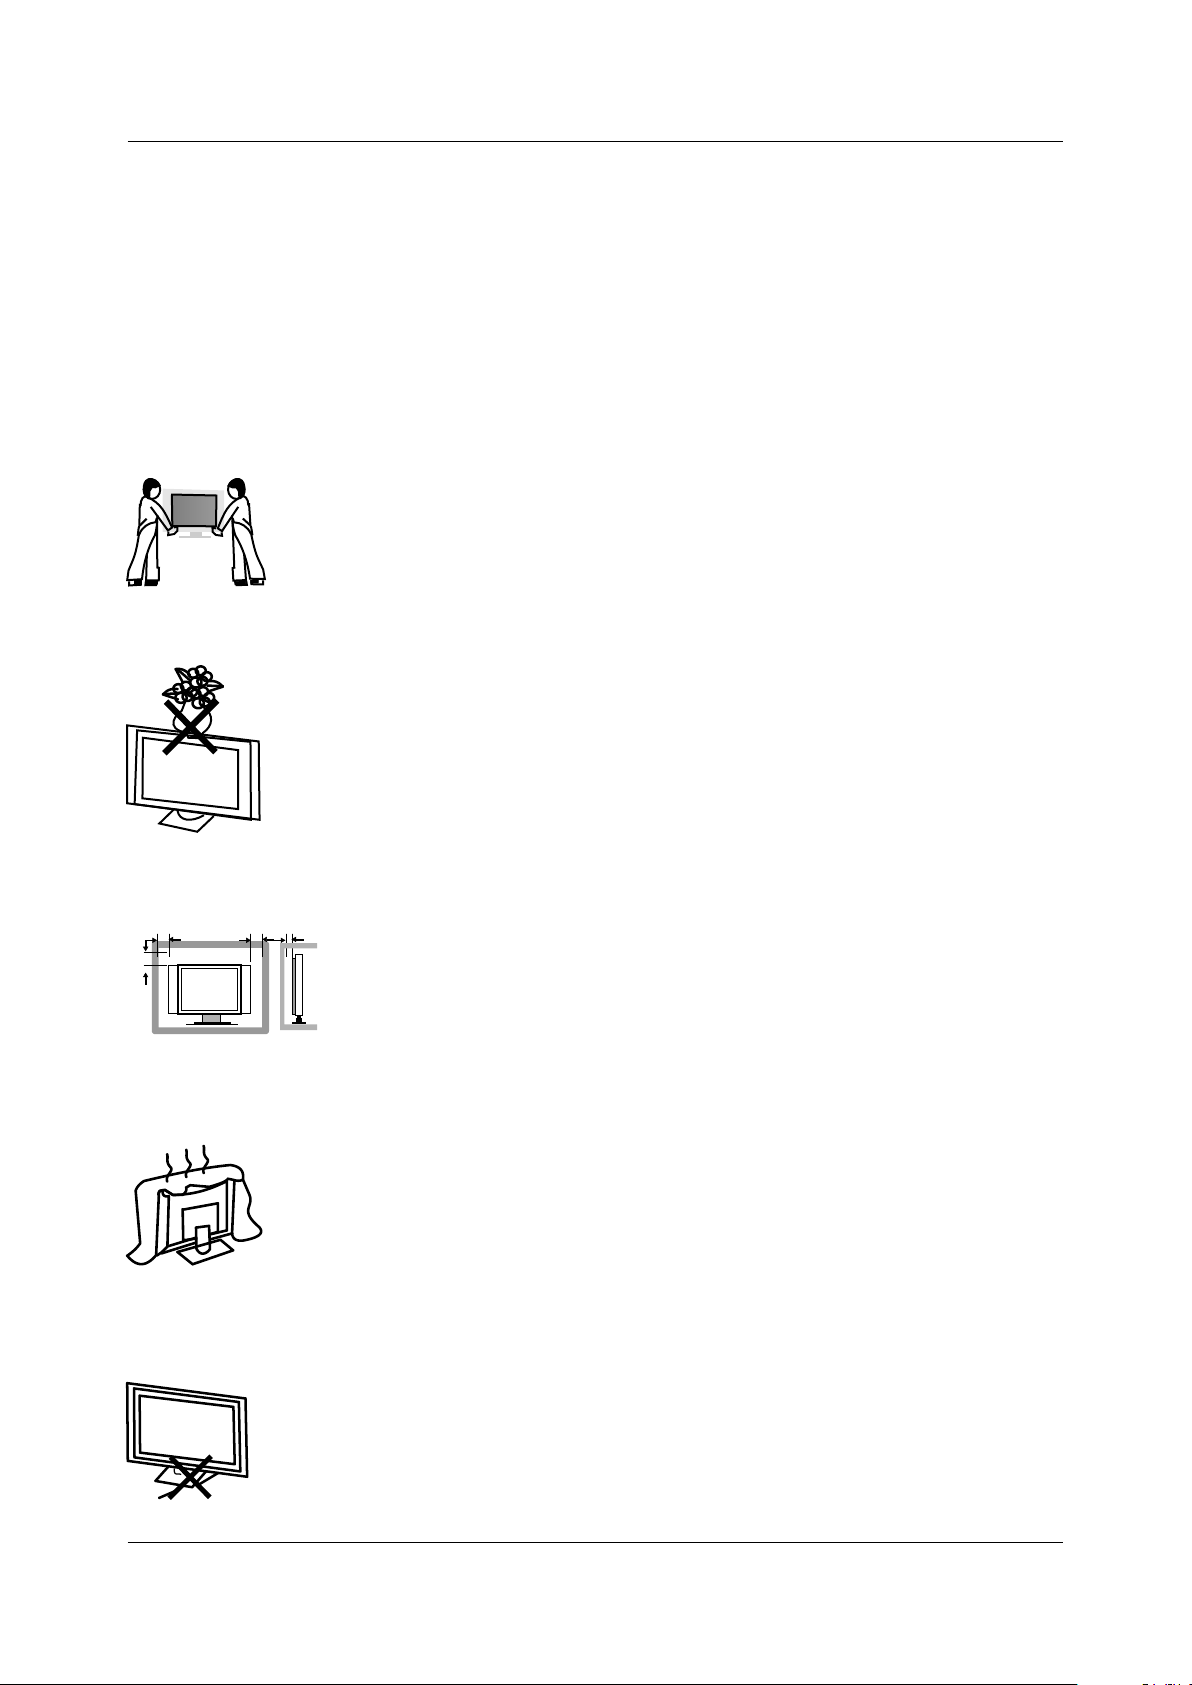
Put the TV on a stable surface.
Do not place any material on the TV.
Min imum dis tance s
10c m
20c m
10c m 5cm
Do not use the TV with fixtures other than those provided or
suggested by the manufacturer.
Do not block or cover the ventilation openings on the TV.
If you have a wall mount, check that it is steady.
Power cord and cables must be properly routed and protected to prevent
people from stepping on them and causing the TV to fall.
3
Page 10
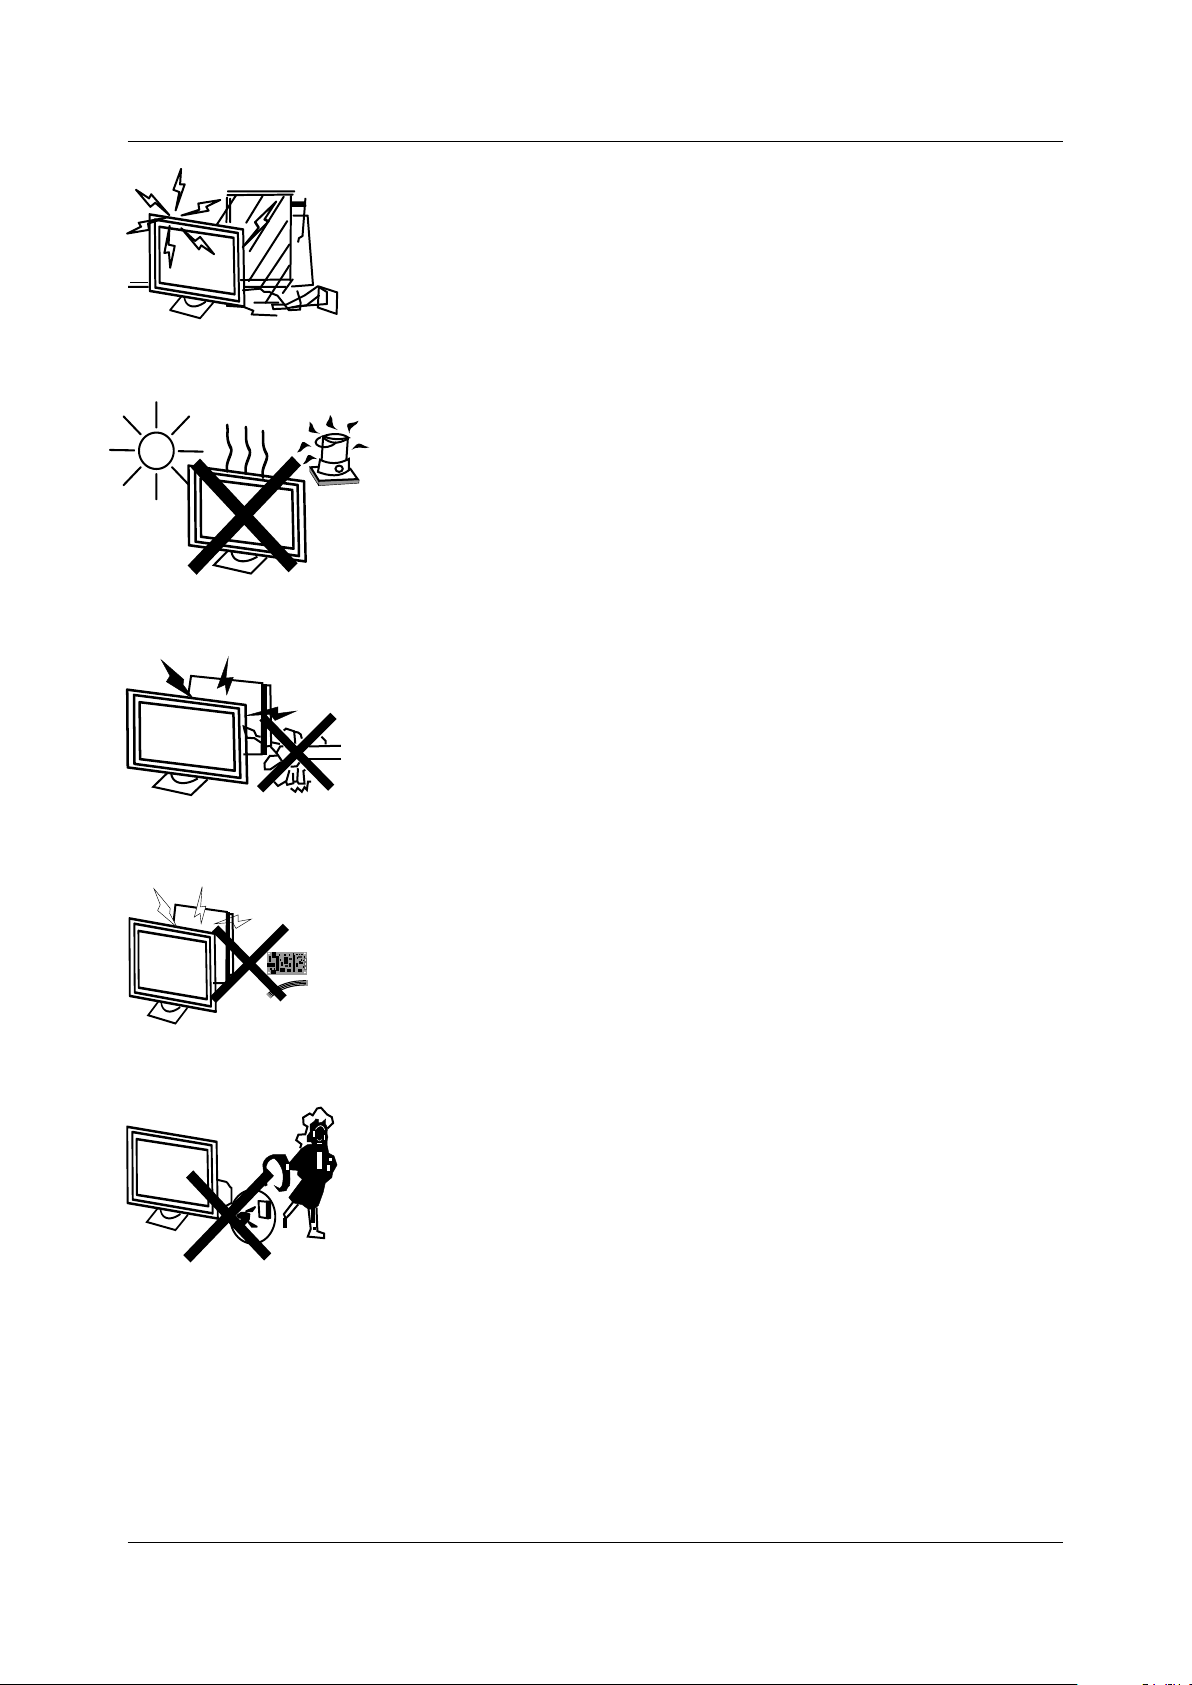
Keep the TV dry and away from humidity.
Keep the TV away from heat sources.
Unplug the TV before cleaning it. Do not use solvent or liquid to
clean the TV.
Only clean the TV with a soft and dry cloth.
In case of troubleshooting, do not use spare parts other than
those suggested by the manufacturer. Using inadequate spare
parts can lead to electric shocks, short-circuits fire or other
incidents.
Unplug the TV during lightening storms or when unused for long
periods of time.
1.where the MAINS plug or an appliance coupler is used as the disconnect device, the disconnect
device shall remain readily operable;
2.A warning that batteries (battery pack or batteries installed) shall not be exposed to excessive
heat such as sunshine, fire or the like.
3.A warning that an apparatus with CLASS I construction shall be connected to a MAINS socket
outlet with a protective earthing connection.
4
Page 11
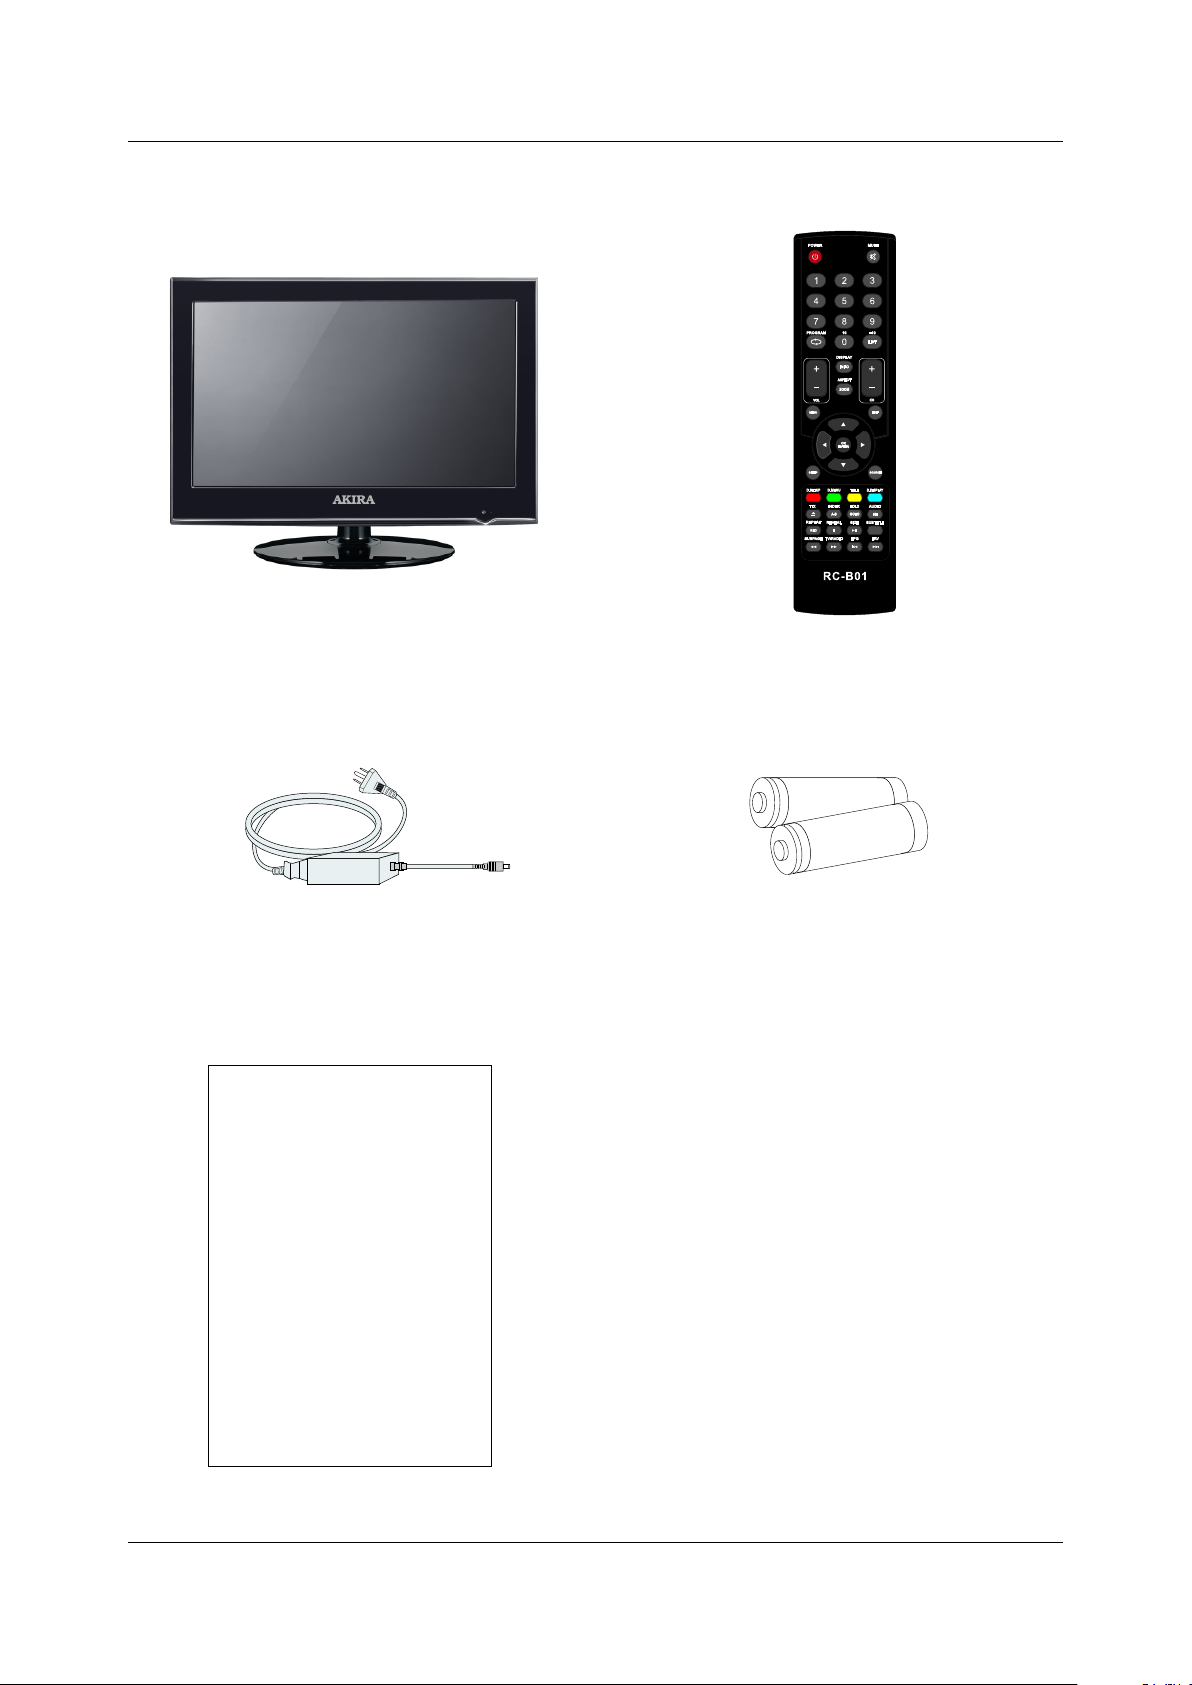
3 . IN THE CARTON. IN THE CARTON
R.LIST
T.LIST
LED TV SETLED TV SET
Adapter &Power Cord
Remote ControlRemote Control
1.5V
1.5V
AAA Batteries
USE R'S M ANUAL
User Manual
5
Page 12
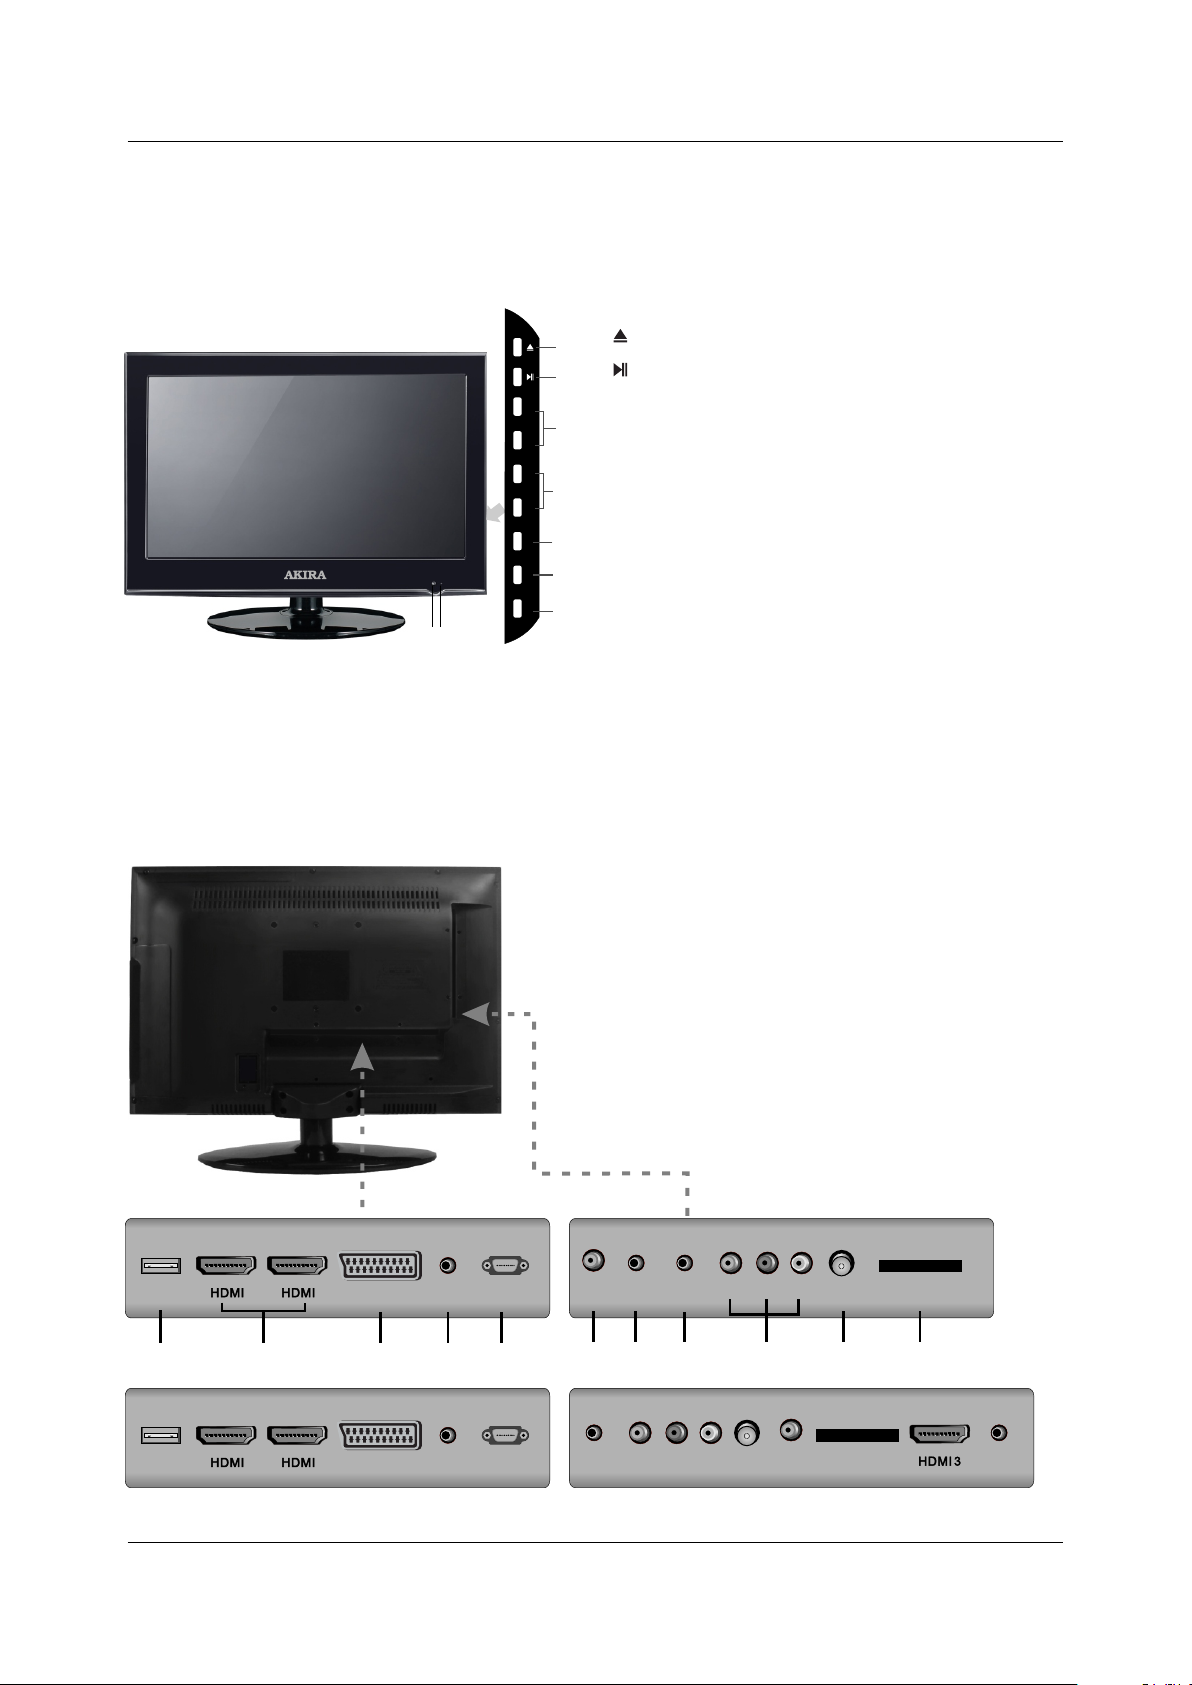
4 FRONT , BACK , CONNECTIONS OF LED.
Front View
VOL+
VOL-
CH+
CH-
MENU
SOURCE
POWER
9 8
Back View and Control Connections
1. OPEN/CLOSE in DVD mode;
1
2. PLAY/PAUSE in DVD mode;
2
3. Press "VOL+" or "VOL-" to increase or decrease
3
the sound level.
4. Press "CH+" or "CH-" to scan through channels.
4
5. Press "MENU" to bring up the main menu on
the screen.
5
6. Press "SOURCE" to select the input source.
6
7. Press " ” button to turn the TV on or off.
7
POWER INDICATOR:
8.
standby or turn Green or blue.
9
. REMOTE SENSOR: infrared sensor for the
POWER
When the TV will display in
remote control.
USB
1
11 22
2
SCARTSCART
3
PC
AUDIOPCAUDIO
4
VGA (PC )VGA (PC )
5
. USB: Connect to the External drive.
1
. HDMI: Connect the HDMI output jack of DVD.
2
. SCART: Connect the SCART jack of VCR or DVD.
3
. PC AUDIO : Connect the right Audio out put jack of PC.
4
. VGA(PC): Connect the PC-RGB output jack of PC.
5
. COAX: Connect the SPDIF receiver.
6
. PHONE: Connect the headphone.
7
. YPbPr: Connect the YPbPr output jack of DVD or VCR.
8
. VIDEO/AUDIO: Connect the Video/Audio output jack of
9
DVD or VCR.
1 . RF IN: Connect the antenna.
0
1 . CI PORT: Connect to the CI card.
1
YPbPrYPb Pr
PHONEPHONE
COA XCOAX
6
RR LL
DE
DE
I
I
V O
V O
7
98
RF IN RF IN
10
CI PORTCI PORT
11
USB
11 22
SCARTSCART
PC
VGA (PC )VGA (PC )
AUDIOPCAUDIO
LE D-B13 HU3 2H L ED-B1 3HU 42 F
YPbPrYPb Pr
6
RR LL
OI EV
O
D
D
I EV
CI PORTCI PORT
COAXCOAX
RF IN RF IN
PHONEPHONE
Page 13
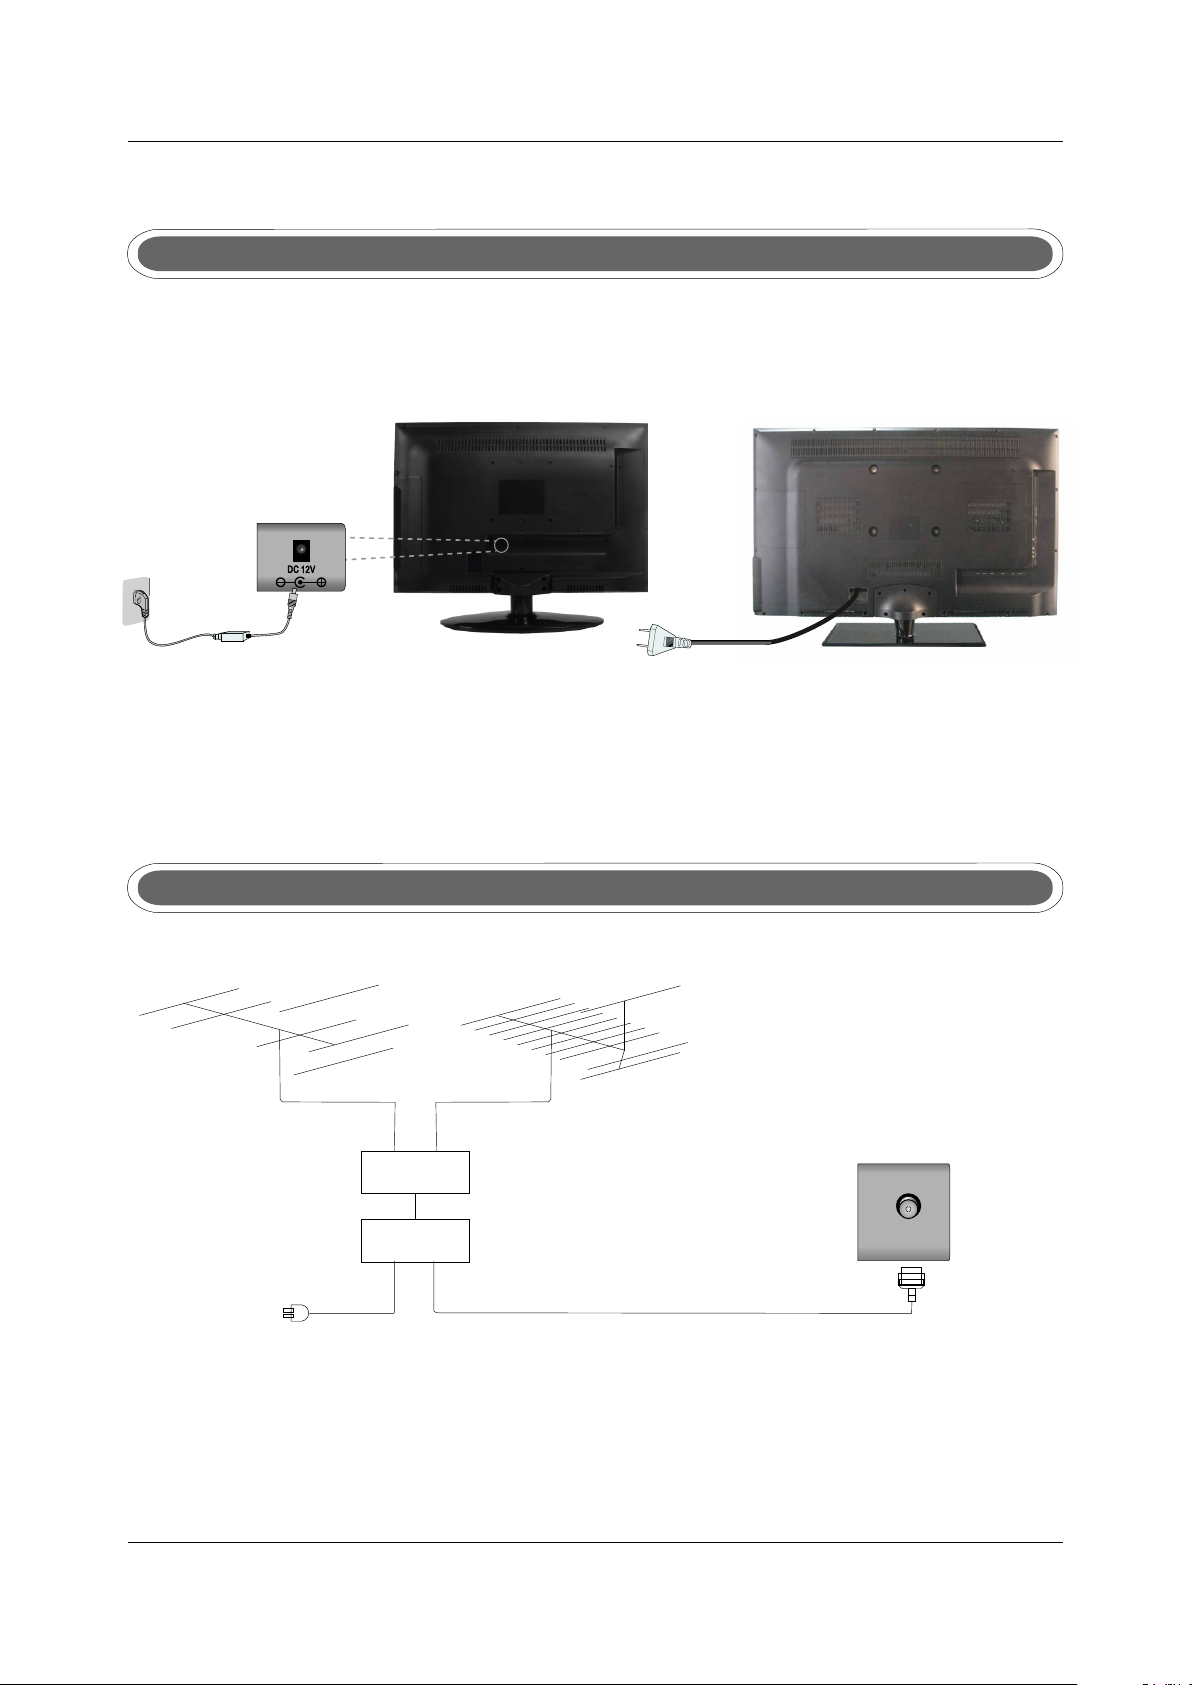
5. BASIC A INSTALL TION
Power Cord Connection
- Connect the power cord correctly as shown.
- Press the POWER button of your LED TV to switch on the LED TV. The power indicator
on the front panel lights up in Green or Blue.
Antennas Connection
VHF ANTENNA UHF ANTENNA
OUTDOOR
ANTENNA
AMPLIFIER
INDOOR
ANTENNA
AMPLIFIER
POWER PLUG OF
ANTENNA
AMPLIFIER
RF IN
75 OHM
ANTENNA
PLUG
To ensure good picture and sound, TV antenna system needs to be instalLED. The antenna system
as shown can be sourced from TV equipment shops, which will provide service for correct installation
and connection. After installation, insert the 75-ohm antenna plug into the antenna jack as shown.
7
Page 14
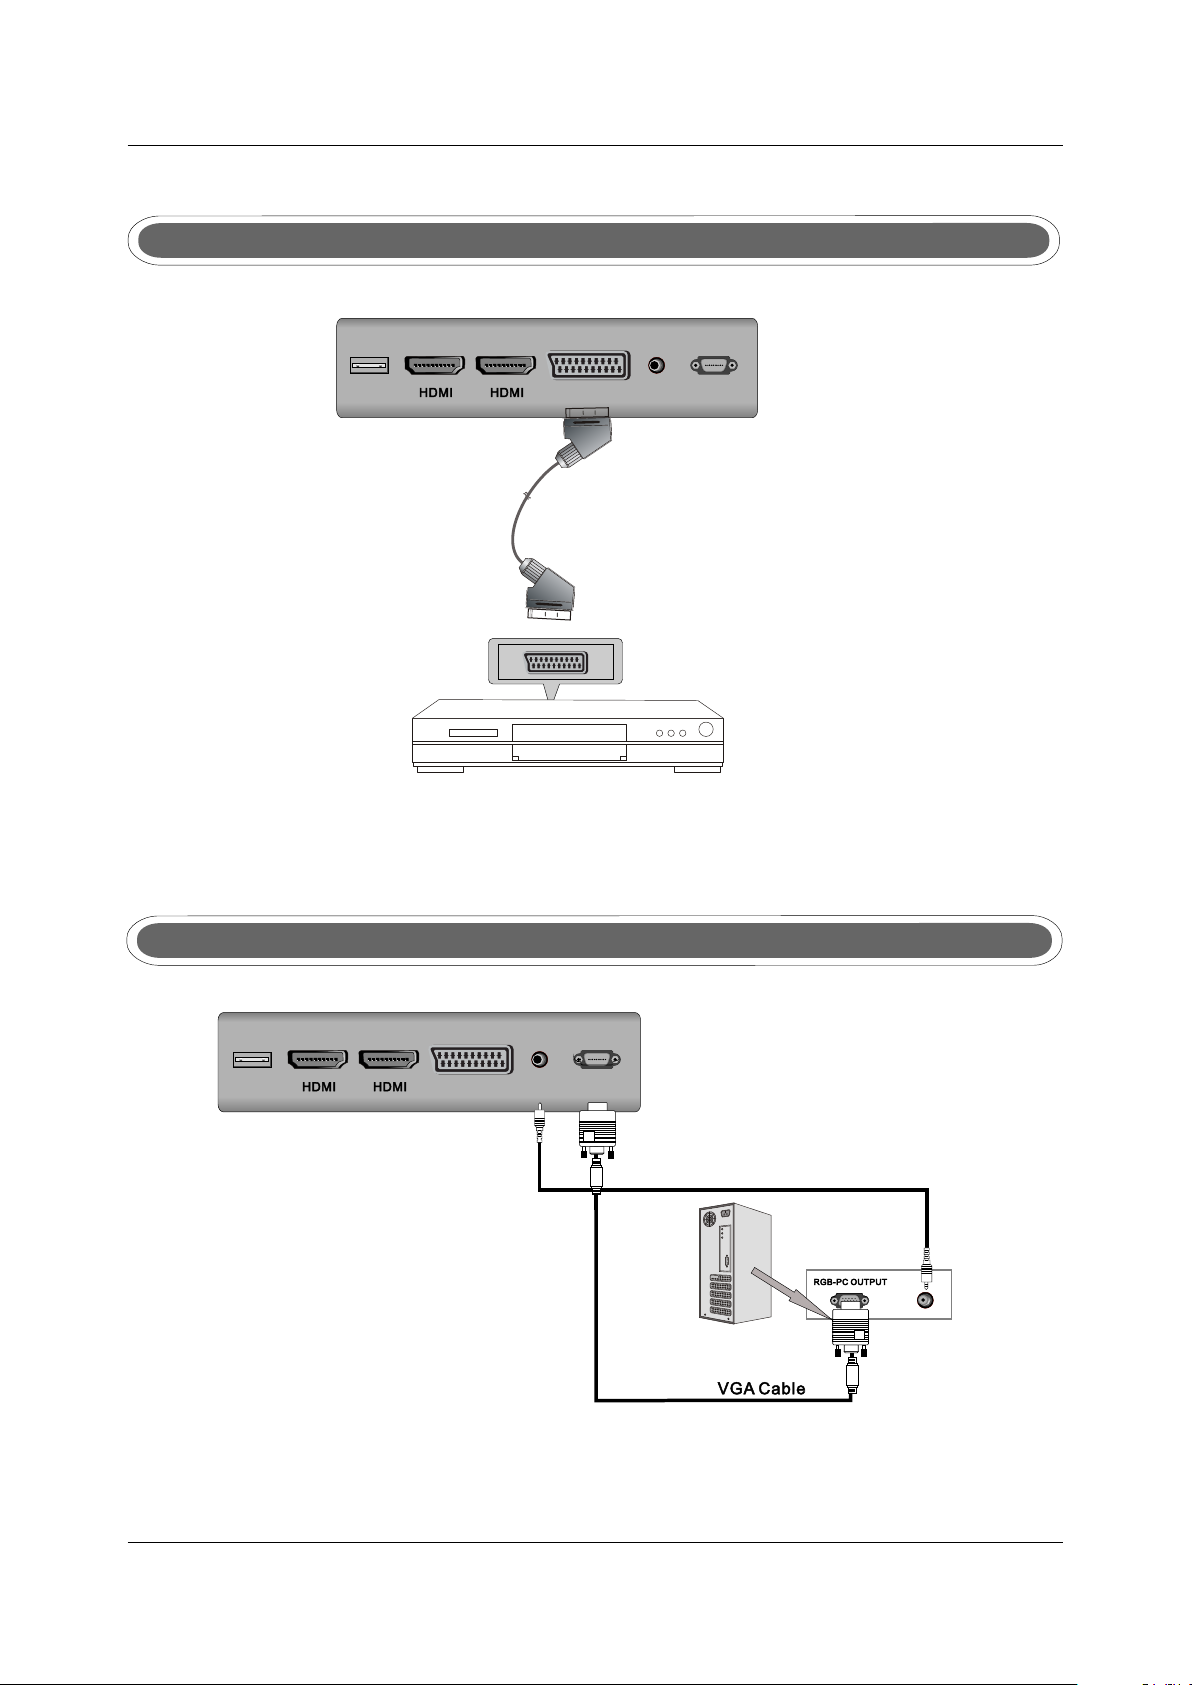
SCART Connection
PC
PC
USB
11 22
SCARTSCART
Scart cableScart cable
AUDIO
AUDIO
VGA (PC )VGA(PC )
DVD or VCR BackDVD or VCR Back
TV BackTV Back
DVD or VCR DVD or VCR
Connect the SCART connector to the external video item and the SCART connector on the tv.
The SCART lead operates as an Input/Output connection. If the tv does not select the SCART
input automatically, select SCART using the SOURCE button on the remote control or TV.
VGA(PC) Connection
PC
PC
USB
11 22
SCARTSCART
AU DIO
AU DIO
VGA (PC )VGA (PC )
Audio CableAudio Cable
Connect the RGB output of the PC to the VGA jack on the TV set. Connect the AUDIO output of
the PC to the PC AUDIO jack on the TV set . Select the VGA input source via the SOURCE
button on the remote control.
8
TV BackTV Back
Page 15
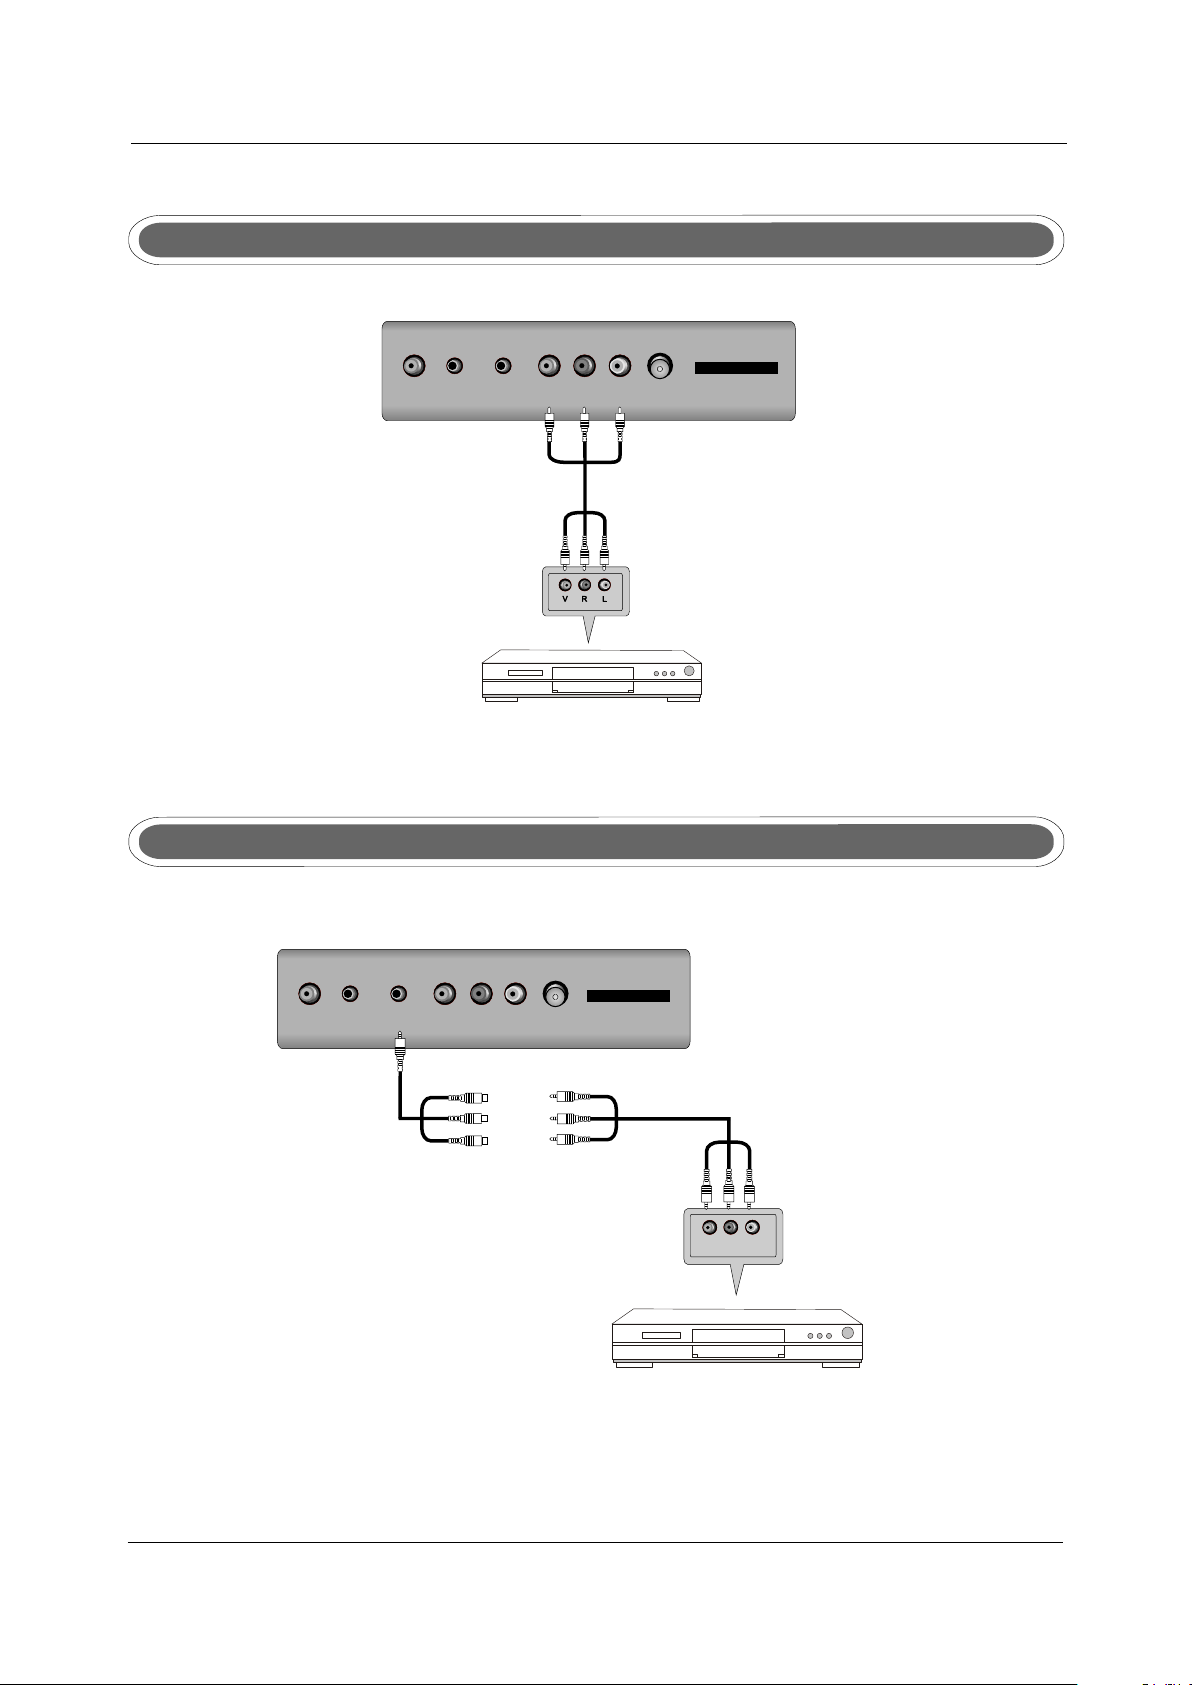
AV Connection
C AOXC A
O
X
PHONEPHONE
Video cableVideo cable
YPbPrYPb Pr
OVI
O
DE
DE
VI
DVD or VCRDVD or VCR
RR LL
RF IN RF IN
DVD or VCR backDVD or VCR back
CI PORTCI PORT
Connect the VIDEO and AUDIO output jack of the DVD or VCR to the VIDEO jacks on the TV set
using the RCA cable. Match the jack colors: Video is yellow, Audio left is white, and Audio right is red.
Select the AV input source via the SOURCE button on the remote control.
YPbPr Connection
TV BackTV Back
TV Back
COAXCO AX
PHONEPHONE
YPbPrYPb Pr
RR LL
O
O
E
E
D
D
VI
VI
RF IN RF IN
CI PORTCI PORT
Video input connector
Y
Pb
Pr
Audio and video cable (RCA)
Mini audio and video transfer cable
Pr
Pb
Y
Cha nnel
DVD or VCR backDVD or VCR back
DVD or VCRDVD or VCR
Connect the YPbPr output of the DVD or VCR to the YPbPr input on the TV set. Connect the Audio
output of the DVD or VCR to the Audio input jacks on the TV set using the RCA cable.
Match the jacks colors : Y is green, Pb is blue, Pr is red, Audio left is white and Audio right in red.
Select YPbPr input source via the SOURCE button on the remote control.
9
Page 16
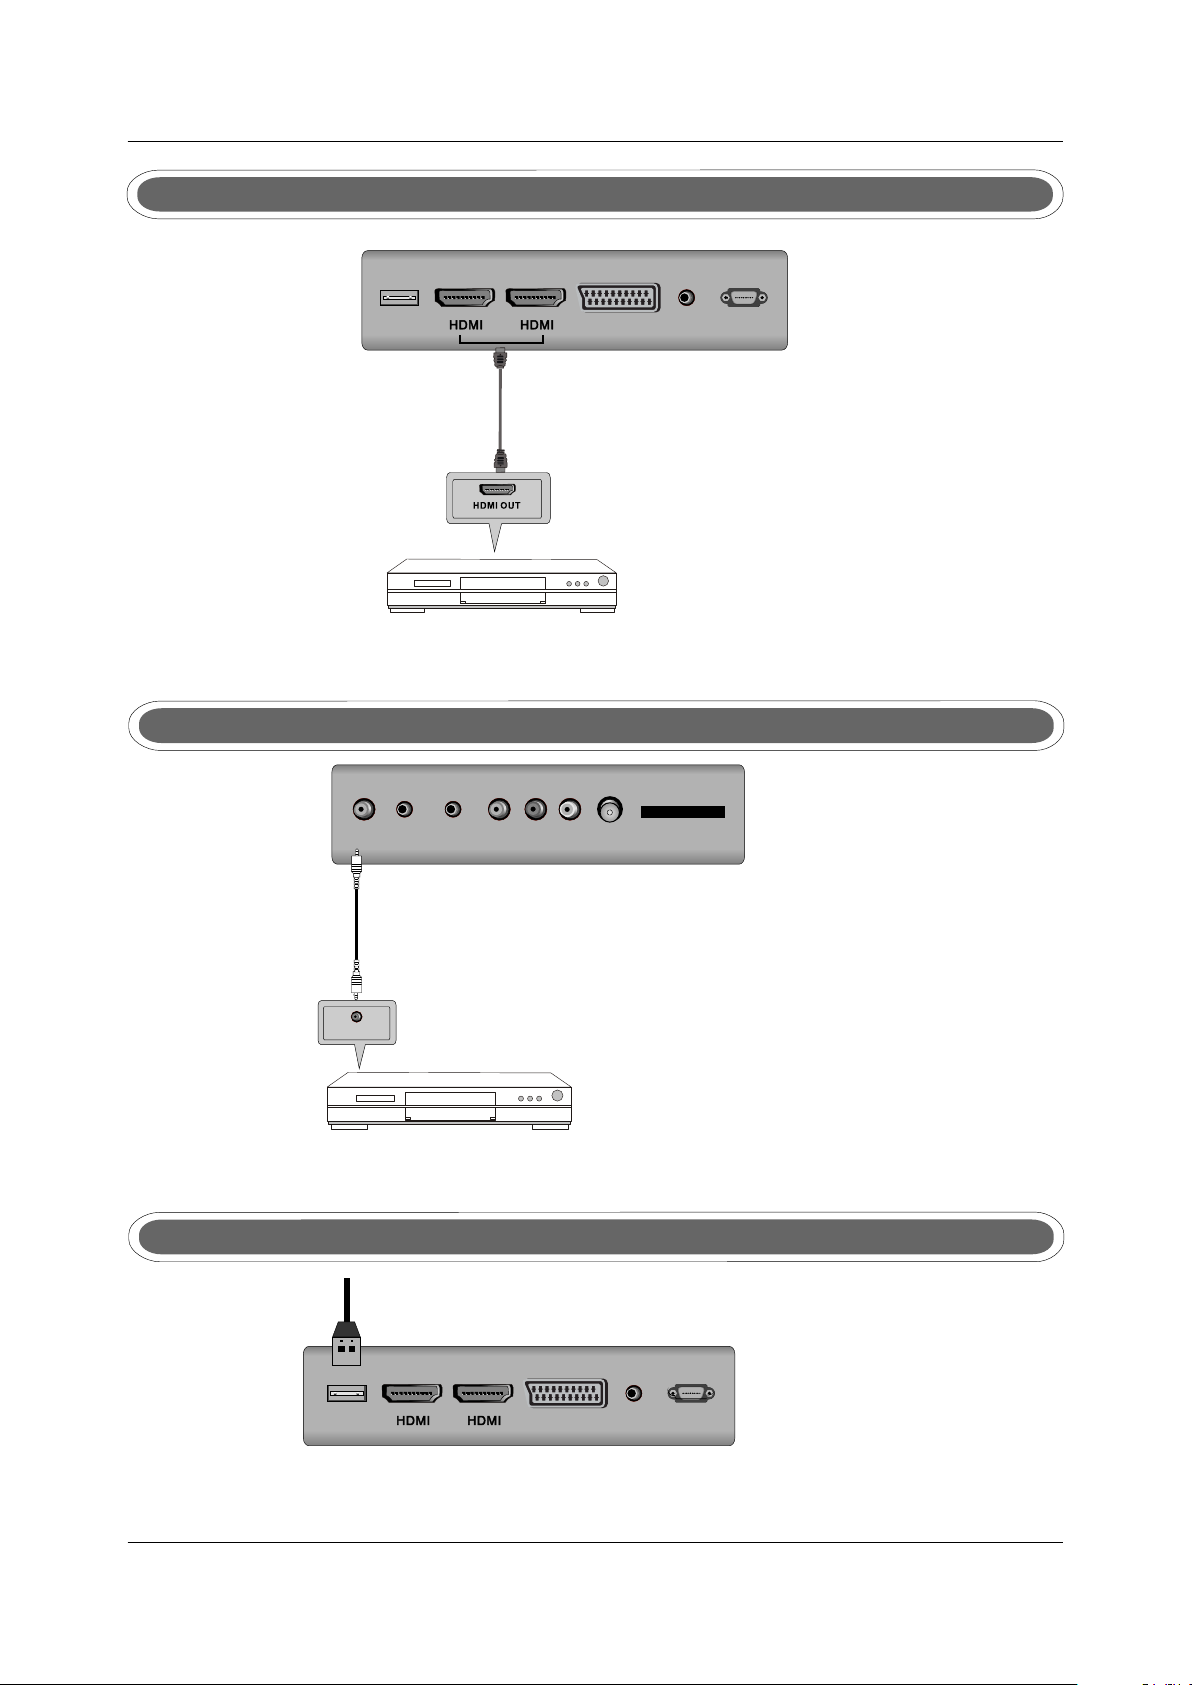
HDMI Connection
PC
USB
11 22
SCARTSCART
AUDIOPCAUDIO
VGA (PC )VGA(PC )
HDMI cableHDMI cable
DVD or VCR backDVD or VCR back
DVD or VCRDVD or VCR
The HDMI input connection enables the digital transfer of audio/video/control signals through one
cable only.
COAX Connection
TV BackTV Back
PHONEPHONE
YPbPrYPb Pr
RR LL
O
O
IDEV
IDEV
RF IN RF IN
X
X
A
A
O
O
C
C
CI PORTCI PORT
Coax CableCoax Cable
SPD IF INPU T
Audio Amplifier BackAudio Amplifier Back
Audio Am plifierAudio Amp lifier
Connect to Audio Amplifier device to the COAX output jack on the TV.
USB PORT FUNCTION
USB PortUSB Port
PC
USB
11 22
SCARTSCART
AUDIOPCAUDIO
VGA (PC )VGA (PC )
Insert the USB flash drive to the USB port. Select USB channel source via the SOURCE button
on the remote control.
TV BackTV Back
10
Page 17
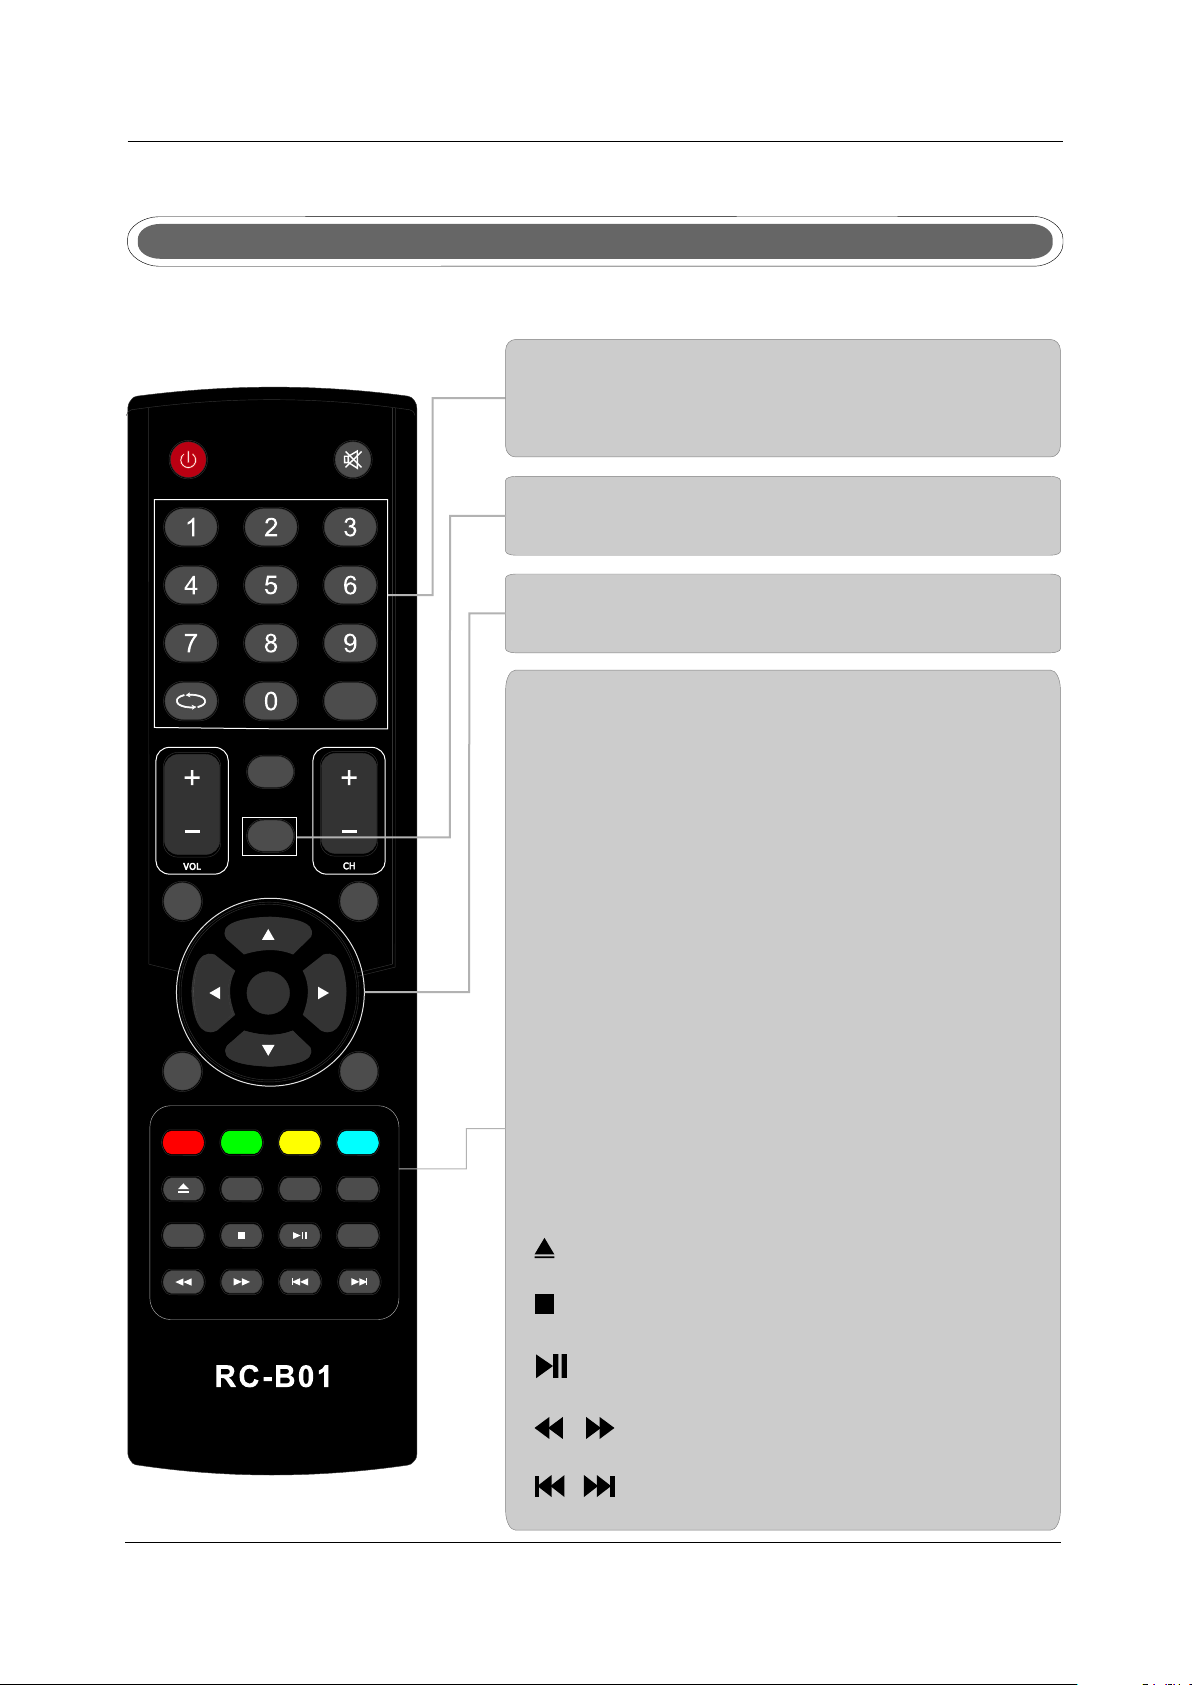
6 REMOTE CONTROL.
Remote control instructions in TV mode
POW ERPOWE R
DIS PLAYDIS PLAY
D.M ENUD .MENU
R.L ISTR .LIST
IND EXINDE X
A-BA -B
REV EALREVEAL
TV/ RADIOTV/ RADIO
1010 +10+1 0
INF OINF O
ASP ECTASPECT
ZOO MZOO M
OK
OK
ENT ER
ENT ER
TIT LETITLE
T.LIS TT.LIS T
HOL DH OLD
GOT OGO TO
SIZ ESIZE
PRO GRAMPRO GRAM
MENUMENU
SLEE PSLEE P
D.S ETUPD.SET UP
TTXTTX
REP EATREPEAT
RECR EC
SUB PAGESUB PAGE EPGEPG
MUT EMU TE
LIS TLI ST
EXITEXIT
SOUR CESOURC E
D.D ISPLAYD.DIS PLAY
AUD IOAU DIO
I/I II/I I
SUB TITLESU BTITL E
FAVFAV
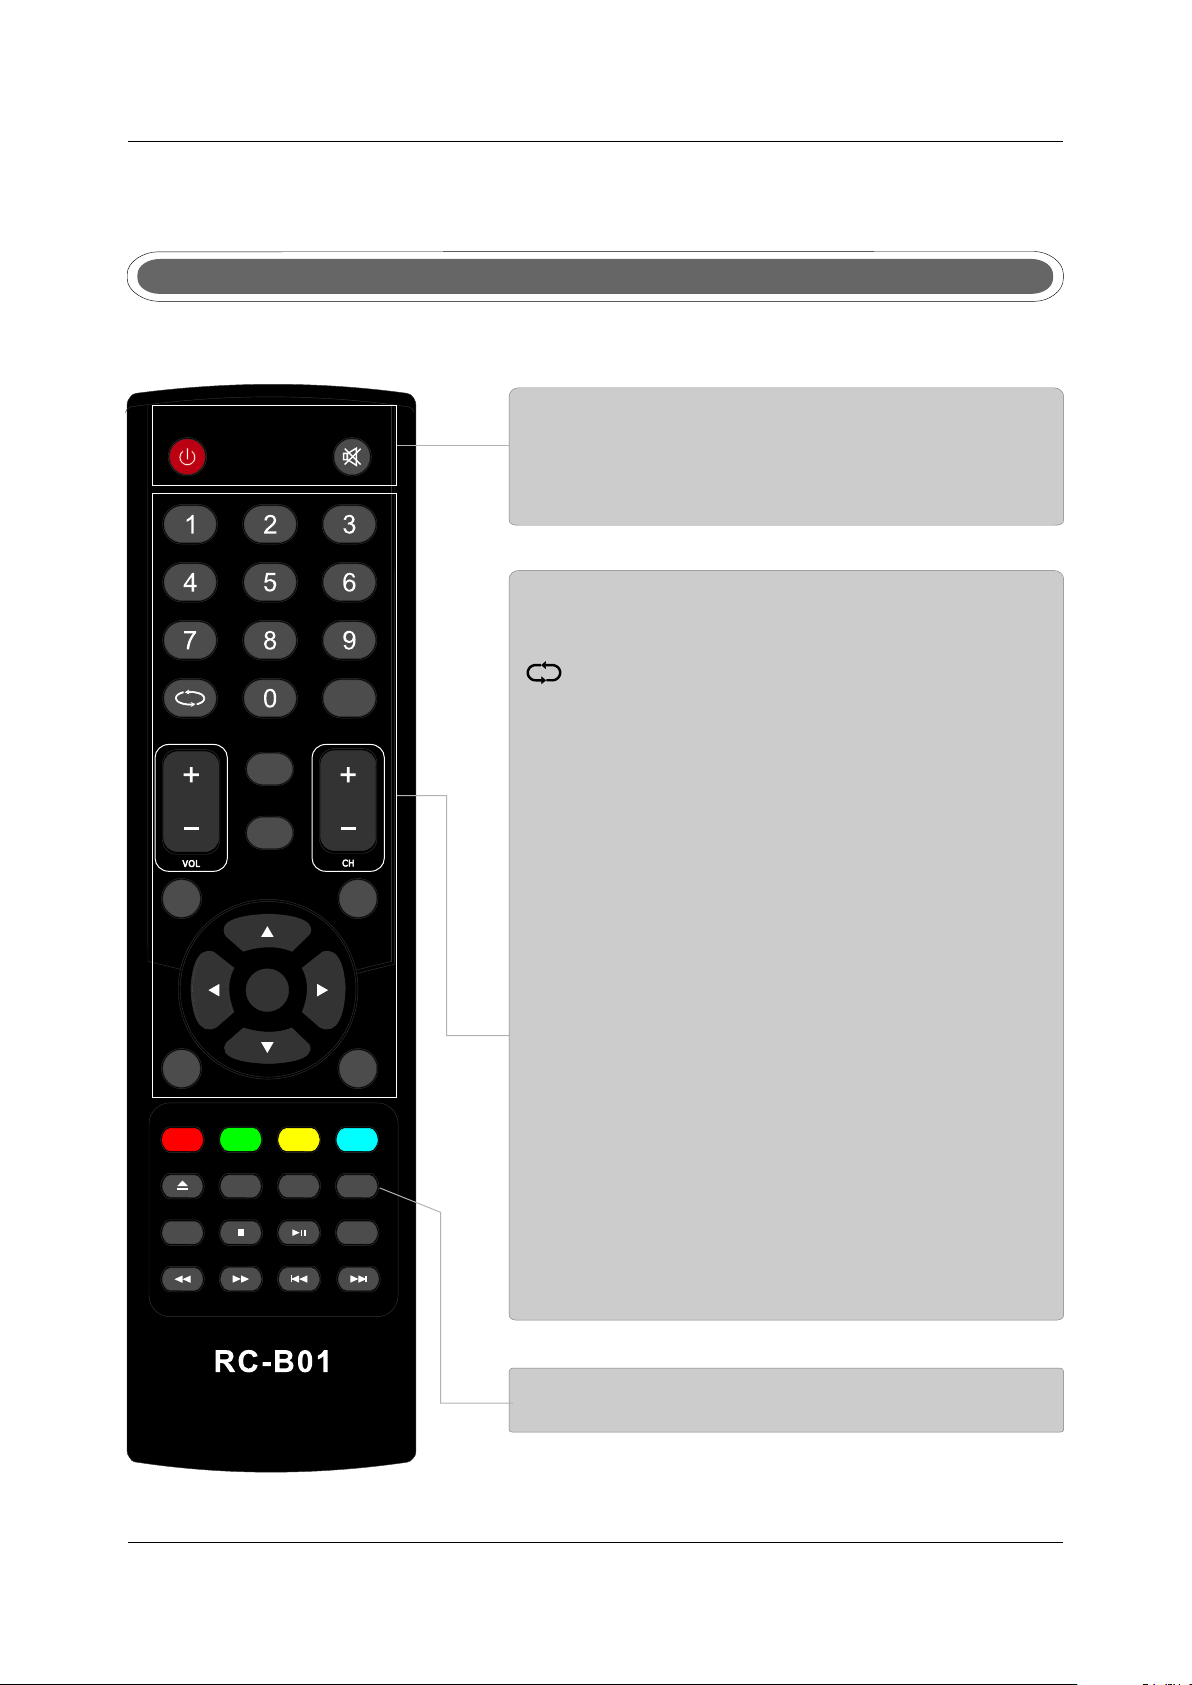
POWER
Turn the LED TV ON or OFF.
MUTE
Press to mute the sound. Press again or press VOL+ to
un-mute the TV.
NUMBER BUTTONS
Press 0-9 to select a TV channel directly when you are
watching TV. The channel change after 2 seconds.
Return to the previous channel viewed.
LIST
Press to display the TV program list.
DISPLAY
Press to display the source and channel's information.
ASPECT
Selects screen display ratio.
VOL+/VOL-
Press to increase / decrease the sound level.
CH+/CH-
Press to scan through channels.
MENU
Brings up the main TV menu to the screen.
SOURCE
Press SOURCE to display the OSD input source,
Press▲▼to select an input source,and then press
OK to confirm.
THUMBSTICK( ▲/ ▼/◄ / ►/ OK ENTER )
Allows you to navigate the on-screen menus and
adjust the system settings to your preference.
SLEEP
Lets you select amount of time before your TV turn itself
off automatically.
EXIT
Exit the main TV menu to the screen.
AUDIO(I/II)
Press to search the NICAM modes.
11
Page 18
POW ERPOWE R
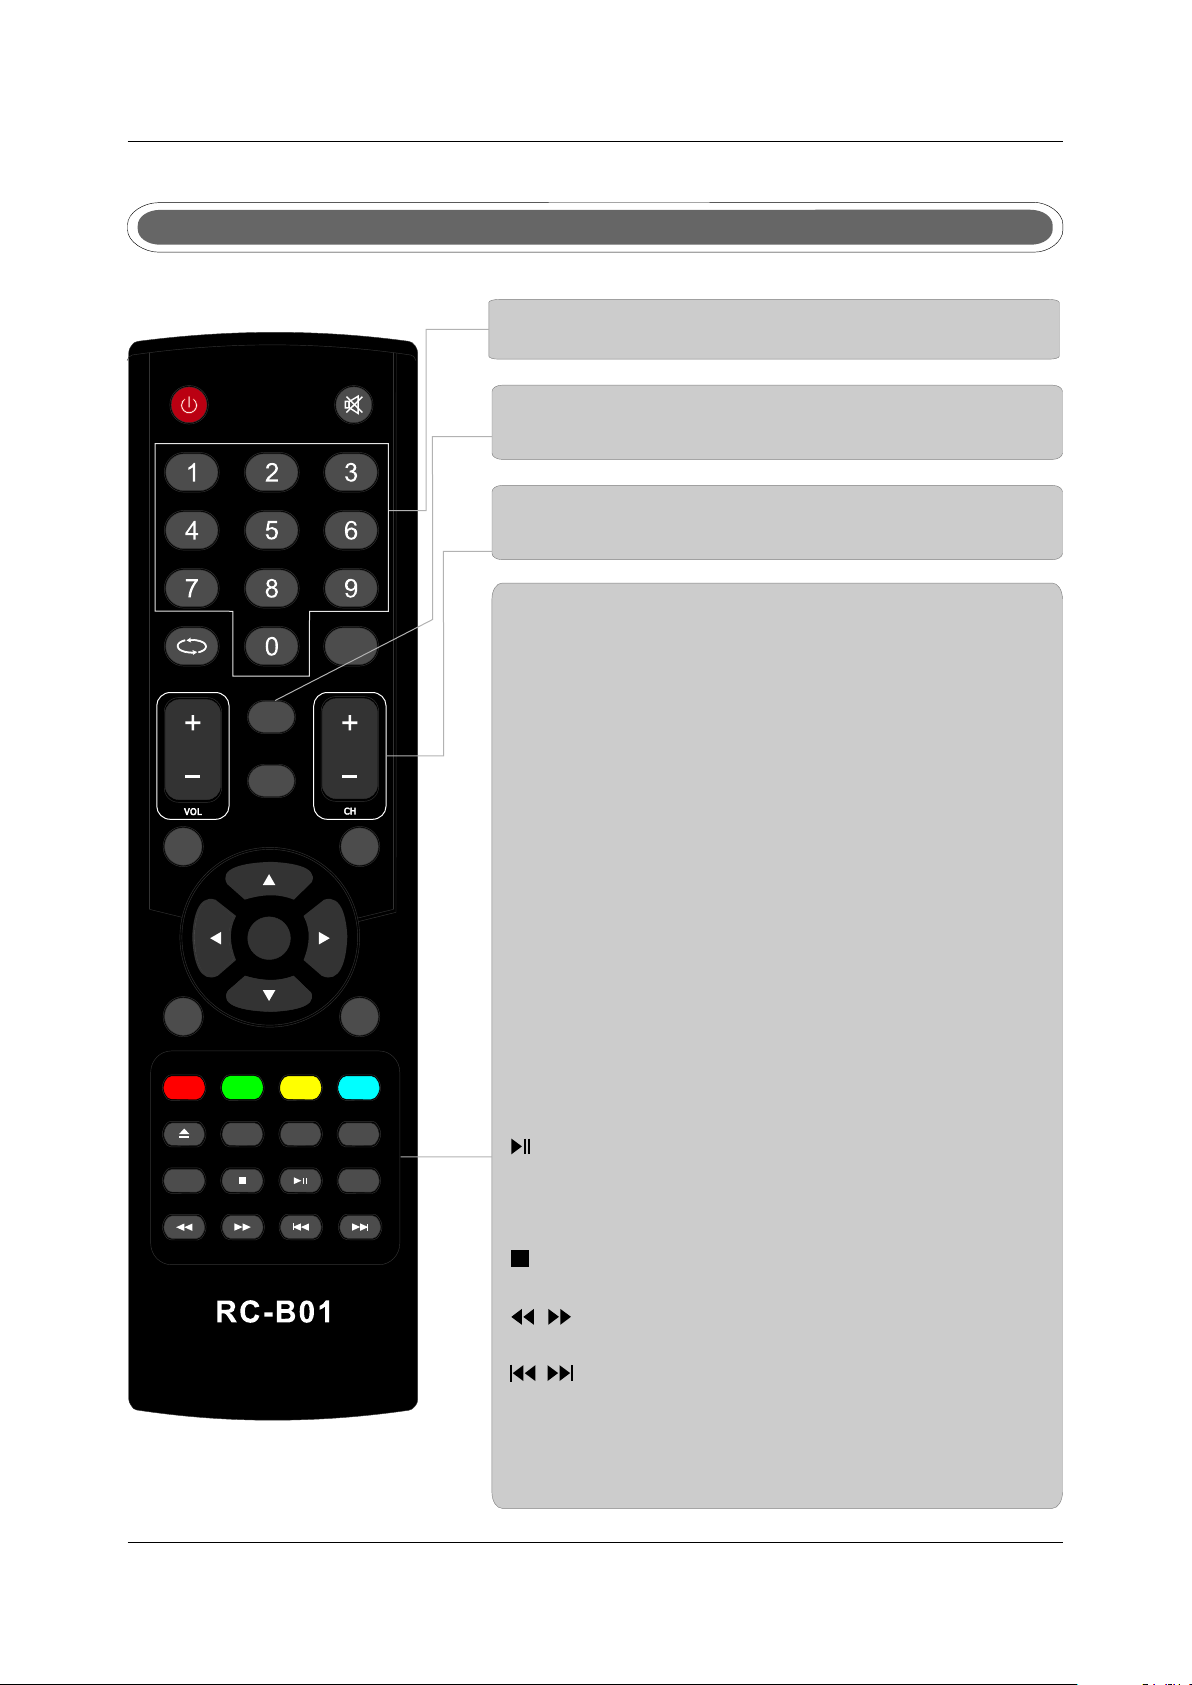
Remote control instructions in DTV/USB mode
NUMBER BUTTONS
Press 0-9 to select a channel.
MUT EMU TE
INFO
Press to display the source and channel's information.
CH+/CH-
When watching a channel, changes the channel.
DIS PLAYDIS PLAY
D.M ENUD .MENU
R.L ISTR .LIST
IND EXINDE X
A-BA -B
REV EALREVEAL
TV/ RADIOTV/ RADIO
1010 +10+1 0
INF OINF O
ASP ECTASPECT
ZOO MZOO M
OK
OK
ENT ER
ENT ER
TIT LETITLE
T.LIS TT.LIS T
HOL DH OLD
GOT OGO TO
SIZ ESIZE
PRO GRAMPRO GRAM
MENUMENU
SLEE PSLEE P
D.S ETUPD.SET UP
TTXTTX
REP EATREPEAT
RECR EC
SUB PAGESUB PAGE EPGEPG
LIS TLI ST
EXITEXIT
SOUR CESO URCE
D.D ISPLAYD.DIS PLAY
AUD IOAU DIO
I/I II/I I
SUB TITLESU BTITL E
FAVFAV
COLOR BUTTONS
Color buttons (respectively red, green, yellow and blue)
used in a few sub-menus.
T.LIST
Press to display the Record Timer Schedule List.
R.LIST
Display the recorded file list.
SUBTITLE
To display subtitle in DTV mode.
FAV
Favorite program list.
REC
Press to record the TV program in DTV mode.
EPG
Launches the EPG(Electronic Program Guide)in DTV
mode.
AUDIO
To display audio menu.
TV/RADIO
When watching a channel,allows you switch between
TV and Radio modes.
(Timeshift)
Play or pause.
Press to enter Timeshift, the image paused and it start
record from the paused position.
Stop playing or stop recording.
Fast reverse and Fast forward.
Previous / next chapter in USB mode,or play the Previous
/next scene of the recorded programs, jump by 30 seconds.
REPEAT
Press to select the repeat mode in USB mode.
12
Page 19
Remote control instructions in TELETEXT mode
POW ERPOWE R
DIS PLAYDIS PLAY
ASP ECTASPECT
OK
OK
ENT ER
ENT ER
D.M ENUD .MENU
R.L ISTR .LIST
IND EXINDE X
A-BA -B
REV EALREVEAL
TV/ RADIOTV/ RADIO
1010 +10+1 0
INF OINF O
ZOO MZOO M
TIT LETITLE
T.LIS TT.LIS T
HOL DH OLD
GOT OGO TO
SIZ ESIZE
PRO GRAMPRO GRAM
MENUMENU
SLEE PSLEE P
D.S ETUPD.SET UP
TTXTTX
REP EATREPEAT
RECR EC
SUB PAGESUB PAGE EPGEPG
MUT EMU TE
LIS TLI ST
EXITEXIT
SOUR CESO URCE
D.D ISPLAYD.DIS PLAY
AUD IOAU DIO
I/I II/I I
SUB TITLESU BTITL E
FAVFAV
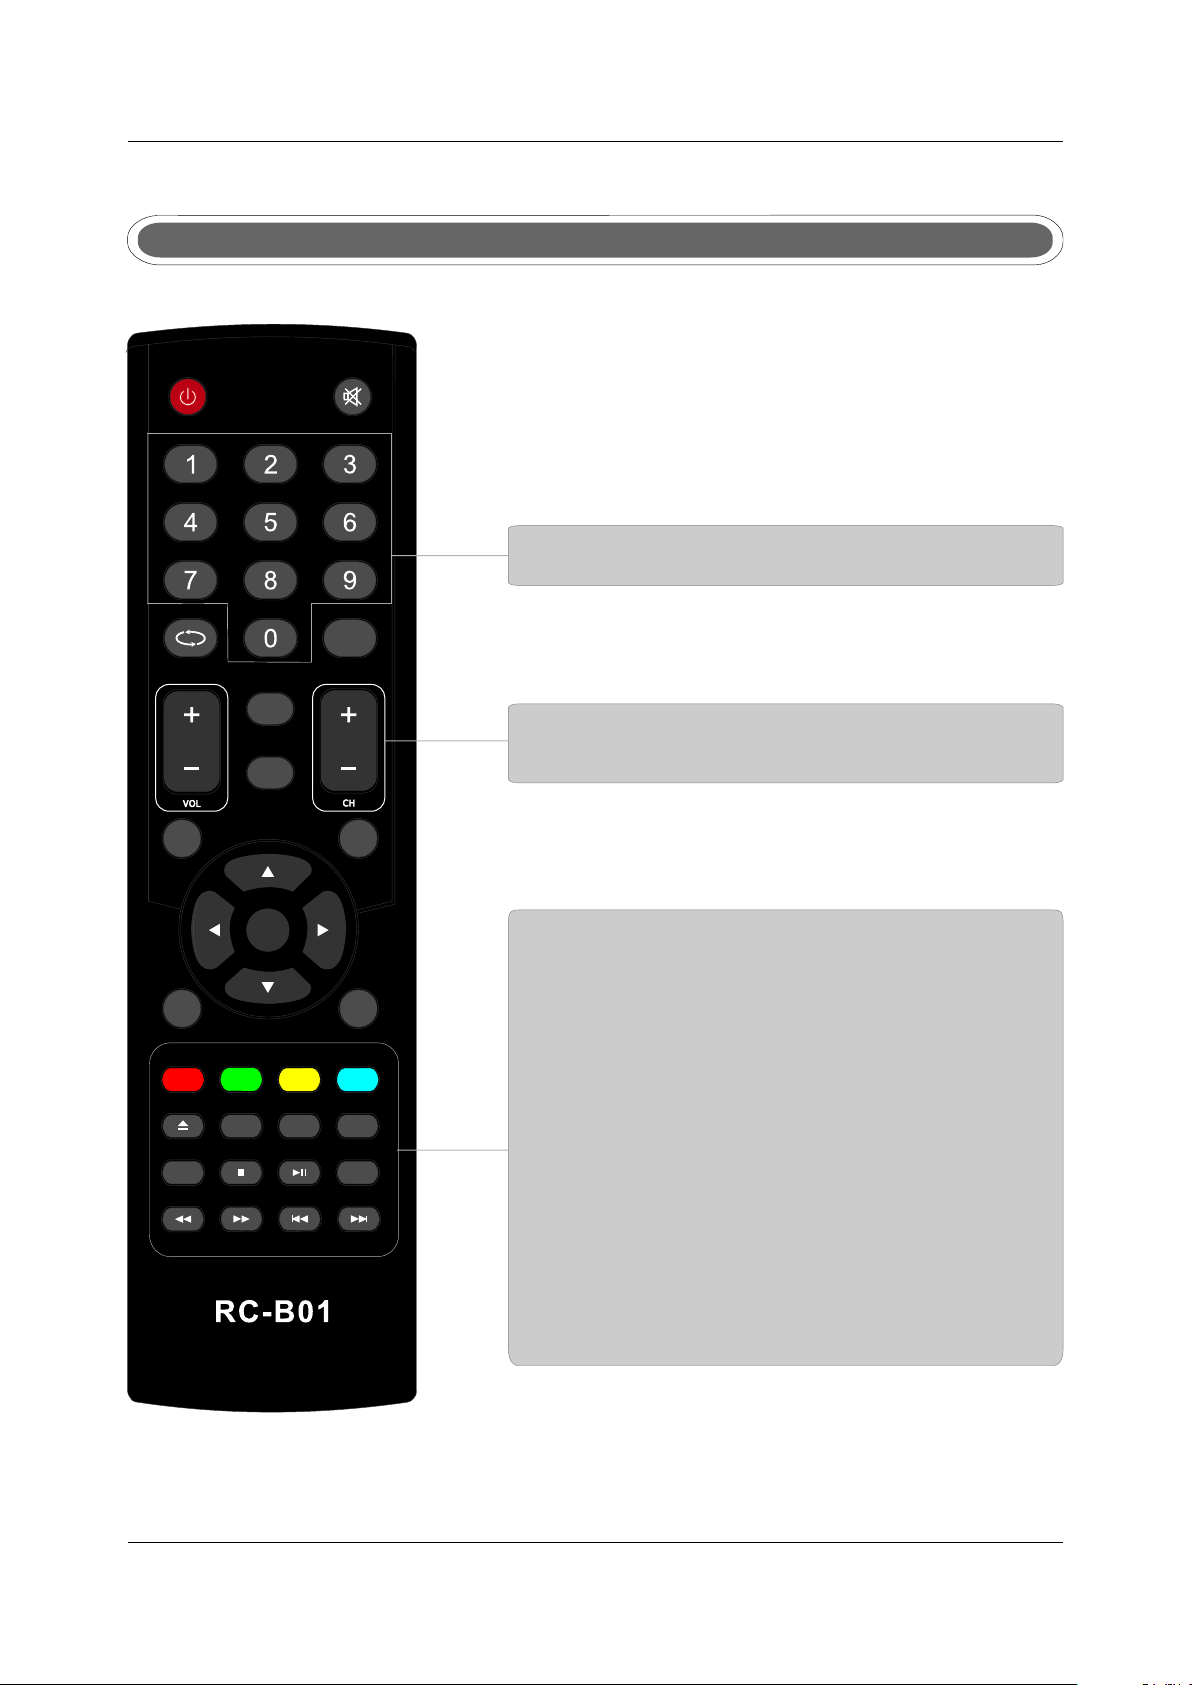
NUMBER BUTTONS
Press 0-9 to select a teletext page.
CH+/CH-
Page up and Page down.
TTX
Press to switch between TV and Teletext mode.
COLOR BUTTONS
Select 4 Preferred TELETEXT page.
SUBTITLE
To display subtitle.
HOLD
Freeze the current page.
SIZE
Change the picture size.
REVEAL
Reveal or hide the hidden words.
INDEX
Request index page when index link is valid.
SUBPAGE
TELETEXT Subpage.
13
Page 20
Remote control instructions in DVD mode
Note: Please ensure that the TV you have bought with DVD loader, otherwise, all these parts
with no effect.
NUMBER BUTTONS
Numerical buttons for various data.
POW ERPOWE R
DIS PLAYDIS PLAY
ASP ECTASPECT
OK
OK
ENT ER
ENT ER
D.M ENUD .MENU
R.L ISTR .LIST
IND EXINDE X
A-BA -B
REV EALREVEAL
TV/ RADIOTV/ RADIO
1010 +10+1 0
INF OINF O
ZOO MZOO M
TIT LETITLE
T.LIS TT.LIS T
HOL DH OLD
GOT OGO TO
SIZ ESIZE
PRO GRAMPRO GRAM
MENUMENU
SLEE PSLEE P
D.S ETUPD.SET UP
TTXTTX
REP EATREPEAT
RECR EC
SUB PAGESUB PAGE EPGEPG
MUT EMU TE
LIS TLI ST
EXITEXIT
SOUR CESO URCE
D.D ISPLAYD.DIS PLAY
AUD IOAU DIO
I/I II/I I
SUB TITLESU BTITL E
FAVFAV
PROGRAM
Program a disc playing in a desired sequence.
ZOOM
In play state, press ZOOM, the player will zoom
in the picture one time.
THUMBSTICK( ▲/ ▼/◄ / ►/ OK ENTER )
Allows you to navigate the on-screen menus and
adjust the system settings to your preference.
D.SETUP
Used for selecting programs. It may also be used to
execute commands.
D.MENU
DVD disc menu Access to menu.
D.DISPLAY
Press to display the DVD information of DVD mode.
TITLE
When DVD is playing, brings up the Title Menu.
A-B
This button enables you to repeat a selected section
from the disc.
GOTO
It is possible to get access to any point on the directly
using the "GOTO" menu.
Press GOTO to access the "GOTO" menu.
AUDIO(I/II)
AUDIO selection buttons in DVD mode.
REPEAT
Press REPEAT to cycle through the repeat play options.
SUBTITLE
Select a different subtitle language(the DVD disc must have
the subtitle you selected.
To eject the disc.
DVD STOP.
PLAY/PAUSE in DVD mode.
Fast backward and forward key.
Jump to previous and next track.
14
Page 21
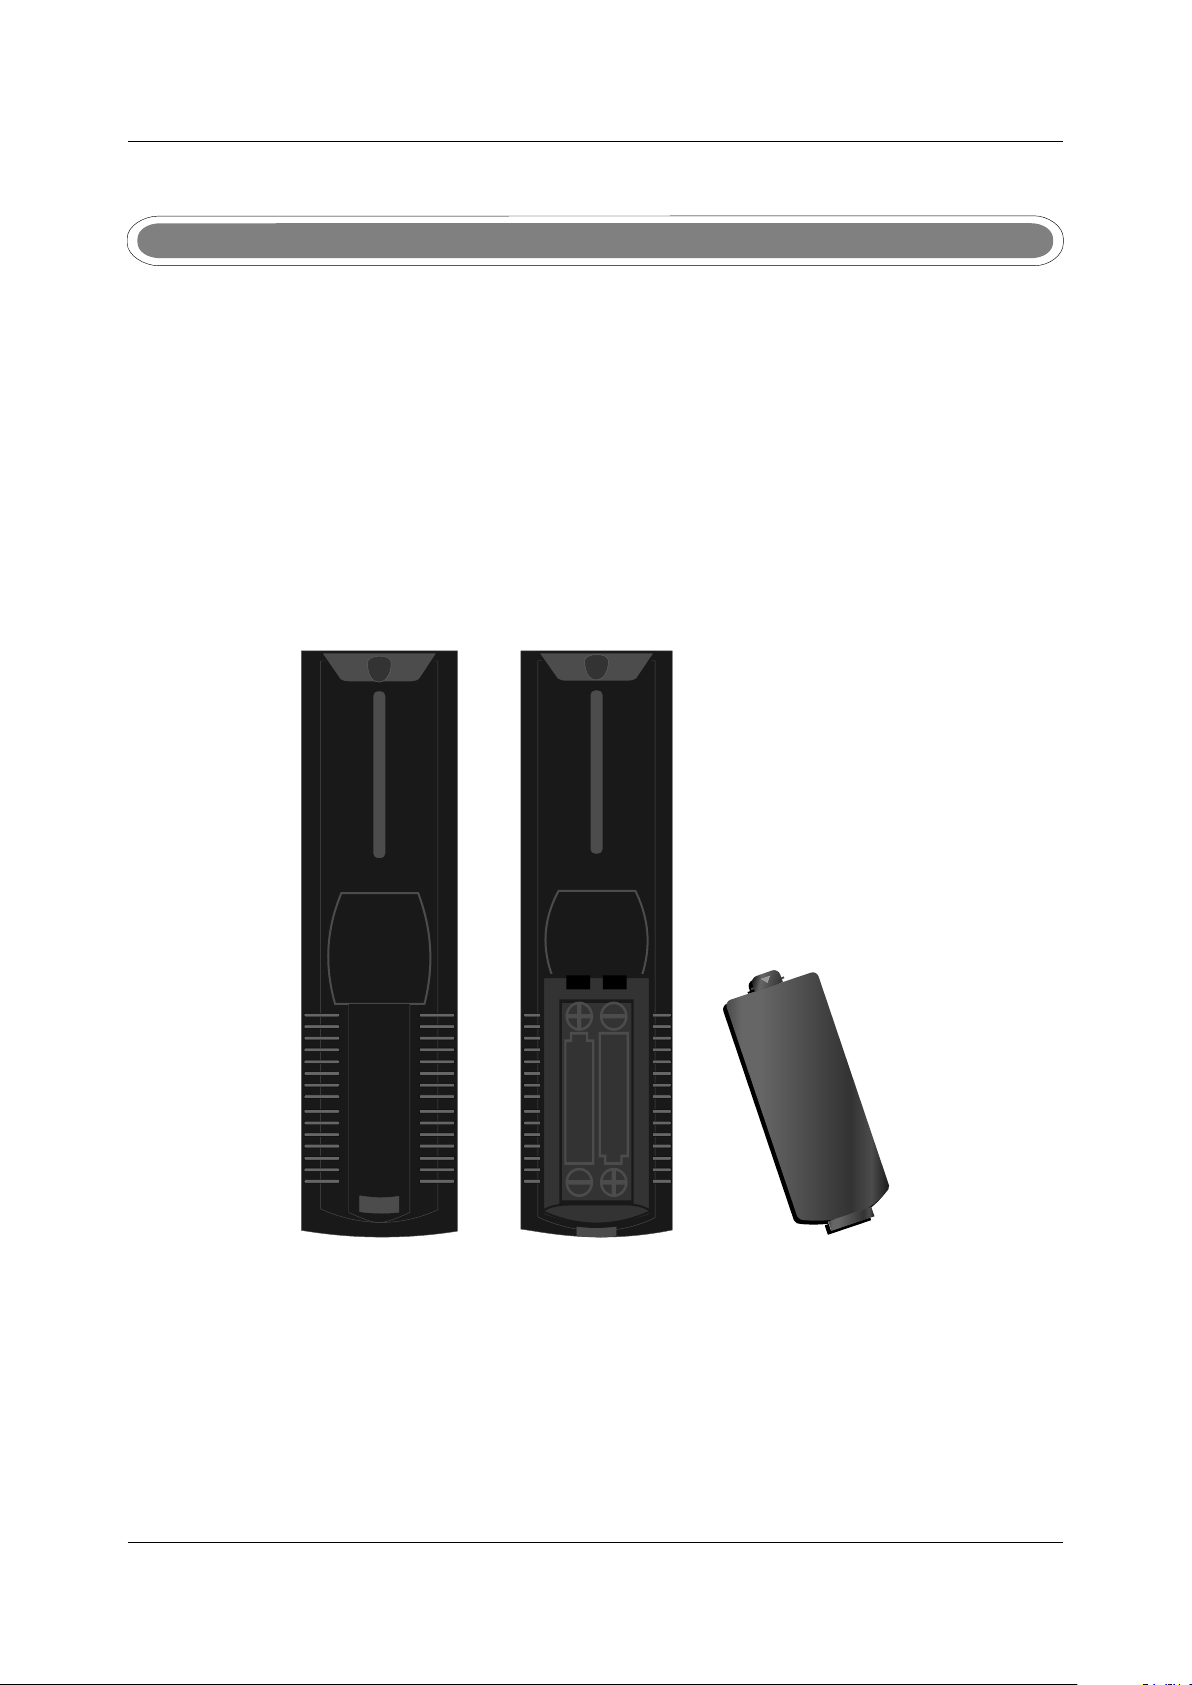
Remote control setup
1. Open the cover.
2. AAA size batteries, When inserting the batteries, make sure correct polarities as per“+”and “-”
marks o n the batteries and within the battery compartment .
3. Replace the battery cover.
To prevent battery leakage which may result in bodily injury or damage to the remote:
1. Install all batteries correctly, and as marked on the remote control.
2. Do not mix batteries:(OLD and NEW or CARBON and ALKALINE, etc)
3. Remove batteries when the remote is not used for a long time.
15
Page 22
7.MENU OPERATION7.MENU OPERATION
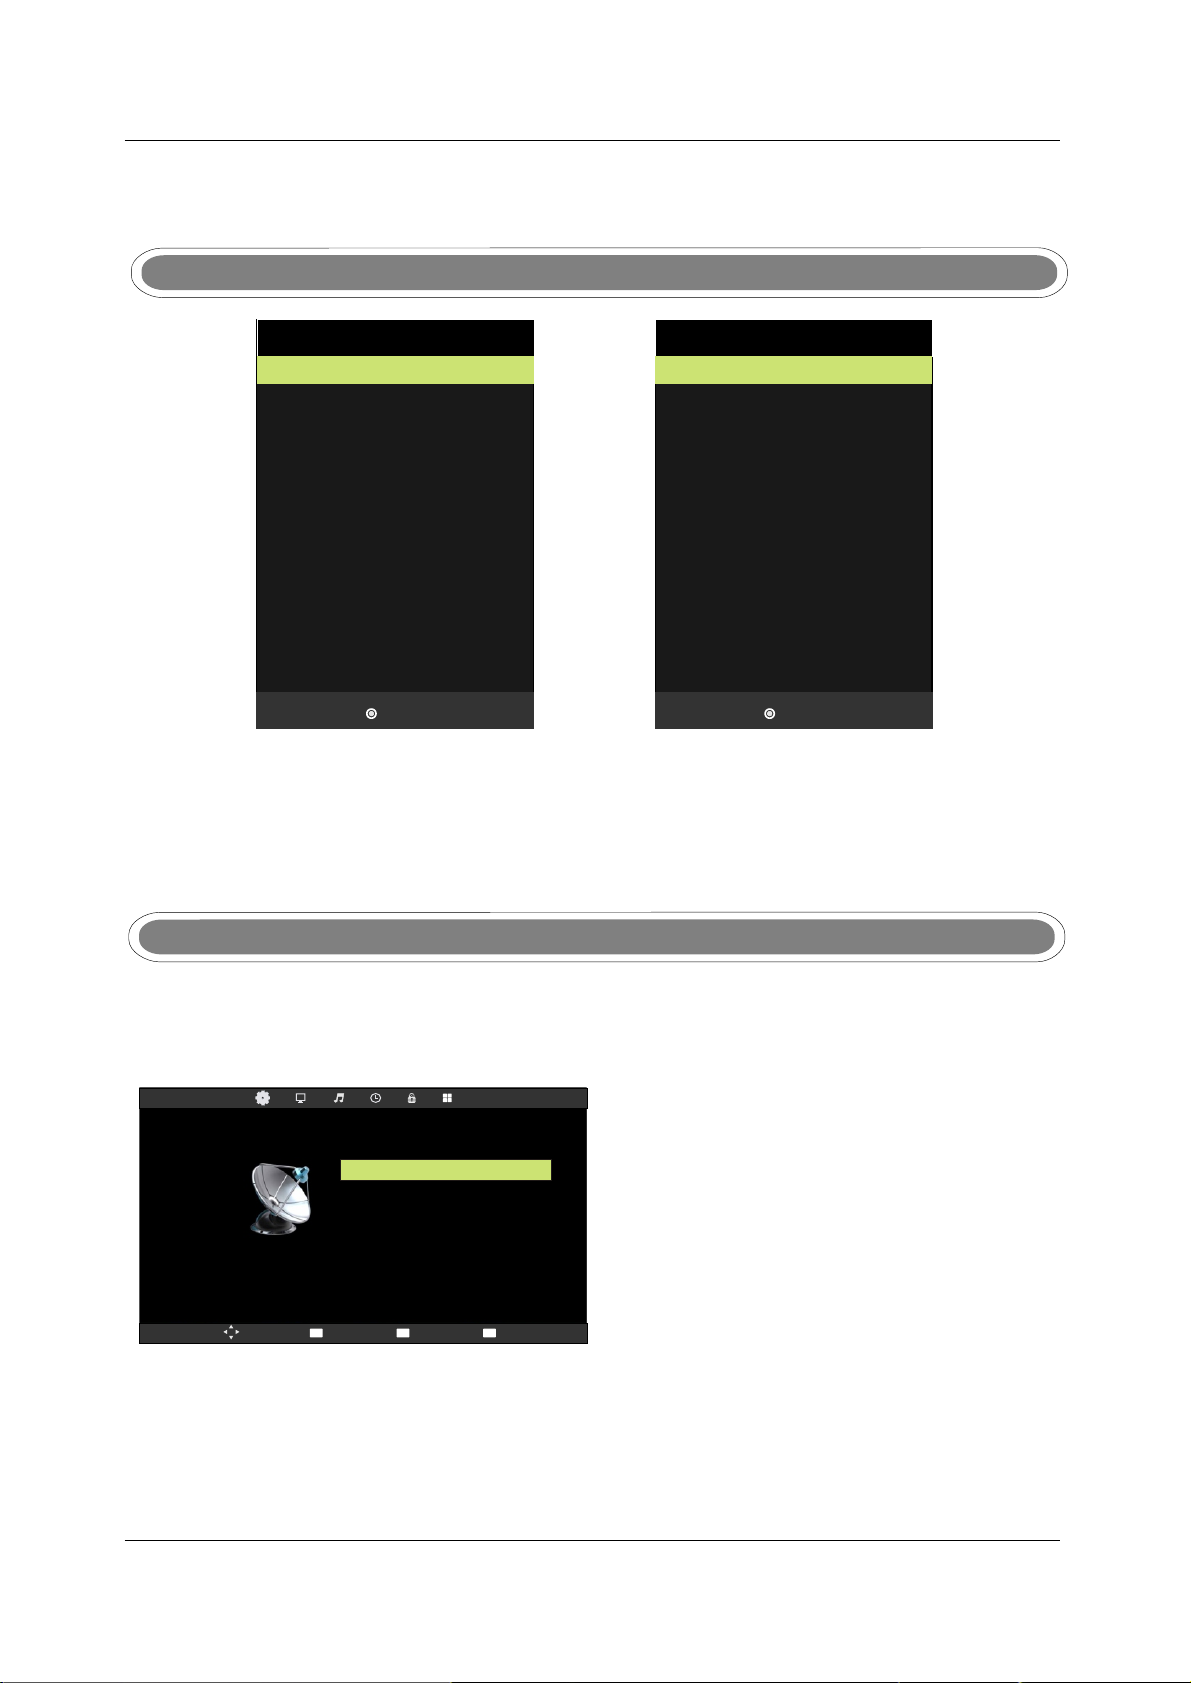
INPUT SOURCE
Iuput Source
ATV
DTV
USB
AV
VGA
YPbPr
DVD
SCART
HDMI1
HDMI2
Enter
Iuput Source
ATV
DTV
USB
AV
VGA
YPbPr
SCART
HDMI1
HDMI2
HDMI3
Enter
Press SOURCE button to display the input source list;
Press ▼ / ▲ or SOURCE button to select the input source you want to watch;
Press OK button to enter the input source;
Press EXIT button to quit;
CHANNEL MENU
Press MENU button to display the main menu.
Press ◄ / ► button to select CHANNEL in the main menu, it will highlight the first option.
Auto Tuning
ATV Manual Tuning
DTV Manual Tuning
Programme Edit
CHANNEL
Mov e
1. Press ▼ / ▲ button to select the option that you want to adjust in the CHANNEL menu.
2. Press OK button to adjust.
Signal Information
CI Information
MENU
Ret urn
Enter
Sel ect
EXIT
Exi t
16
Page 23
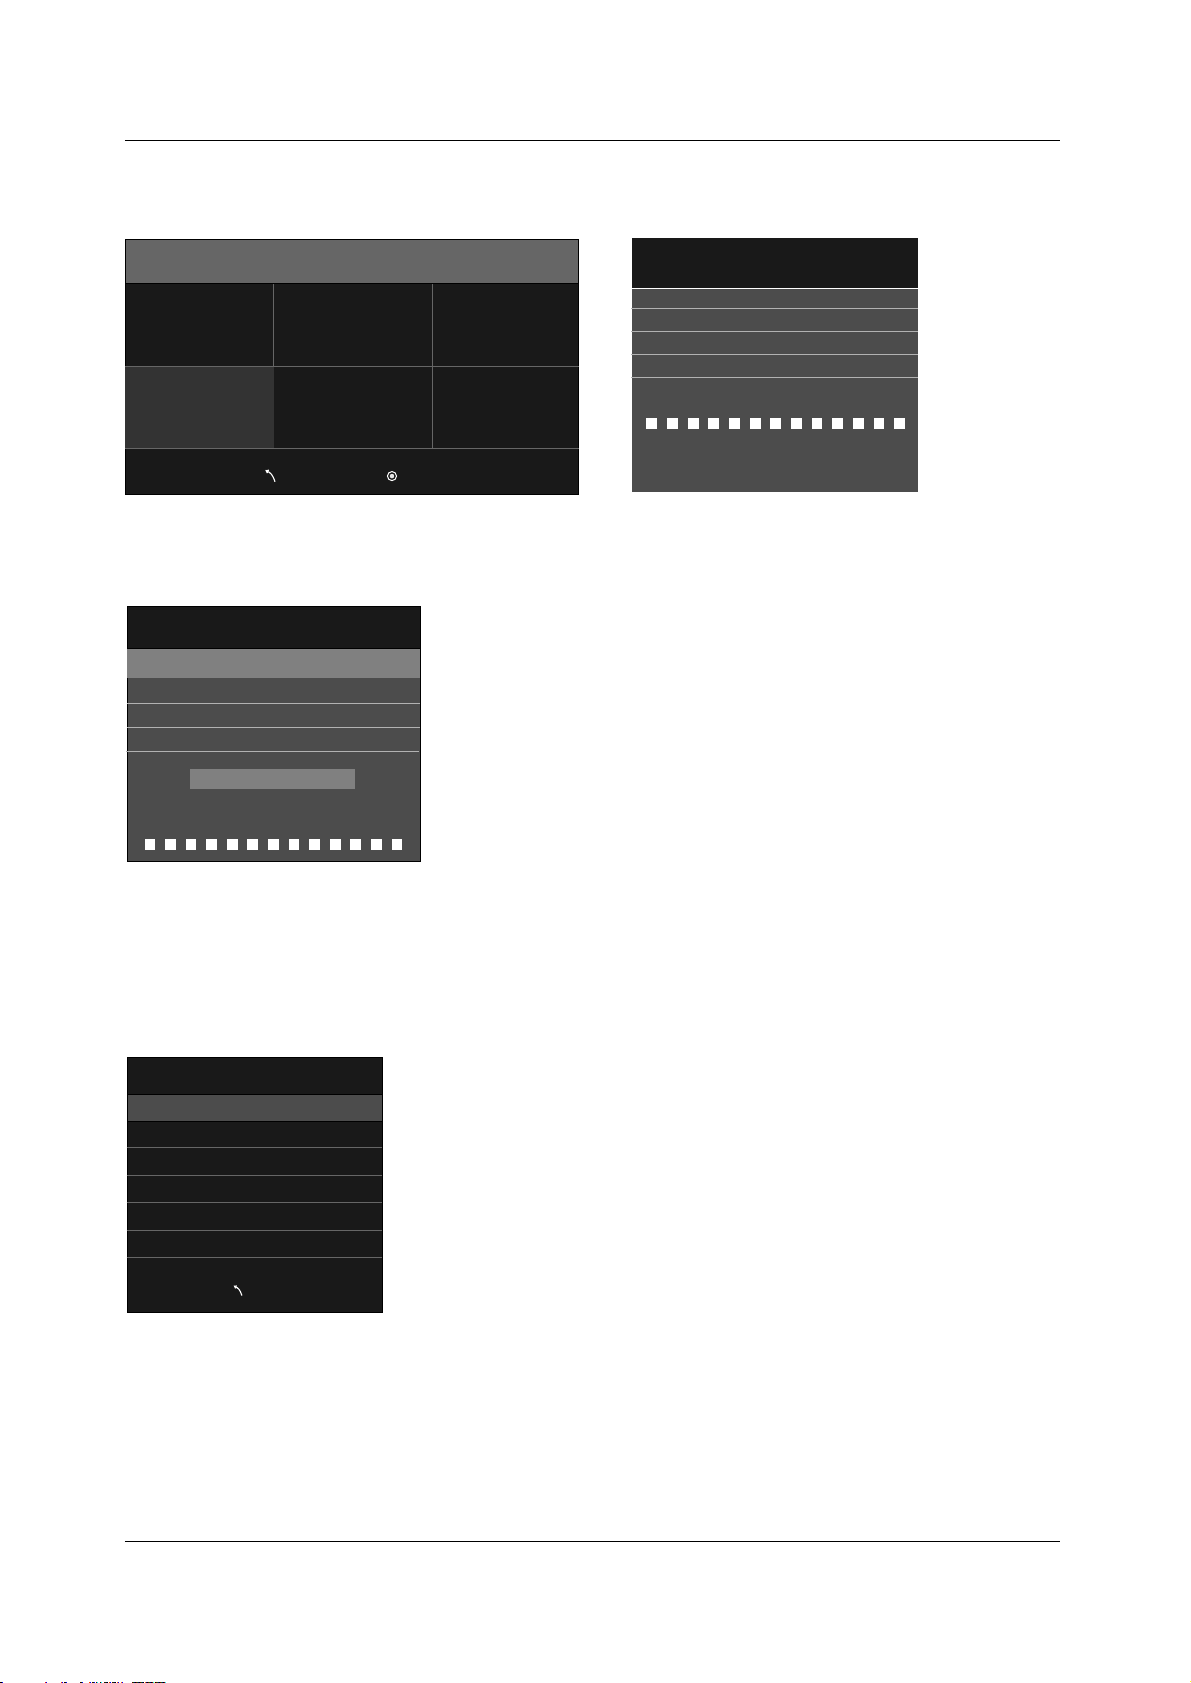
Auto Tuning
Press ▼ / ▲ button to select Auto Tuning, then press OK button to start auto search.
Tune Type
Other
▲
France
▲
Italy
Germany
ATV+DTV
Portugal
Spain
▼
Channel Tuning
0 programme
TV
DTV
Radio
Data
1%
:
0 programme
:
0 programme
:
0 programme
:
67.30m Hz
(TV)
▼
Menu
Enter
Please press MENU key to skip
DTV Manual Tuning
Press ▼/▲ button to select DTV Manual Tuning, then press OK button to enter Sub-menu.
DTV Manual Tuning
-
Freq:
UHF CH 21
NO SIGNAL
177.50 m Hz
+
Good
◄ ►
Bad
Press ◄ / ► button to select channel, then press OK button to search program.
ATV Manual Tuning
Press ▼ / ▲ button to select ATV Manual Tuning, then press OK button to enter Sub-menu.
ATV Manual Tuning
-
Current CH
Colour System
Sound System
Fine- Tune
49.75MHz
AFC
Search
Men u
1
PAL
DK
On
+
►◄
Press ◄ / ► button to select channel number you want to store.
Press ◄ / ► button to select colour system.
Press ◄ / ► button to select audio system.
Press ◄ / ► button to select search, then press OK button to start tuning.
Press ◄ / ► button to select Fine-Tune.
Press ◄ / ► to ON or OFF automatic frequency control.
17
Page 24
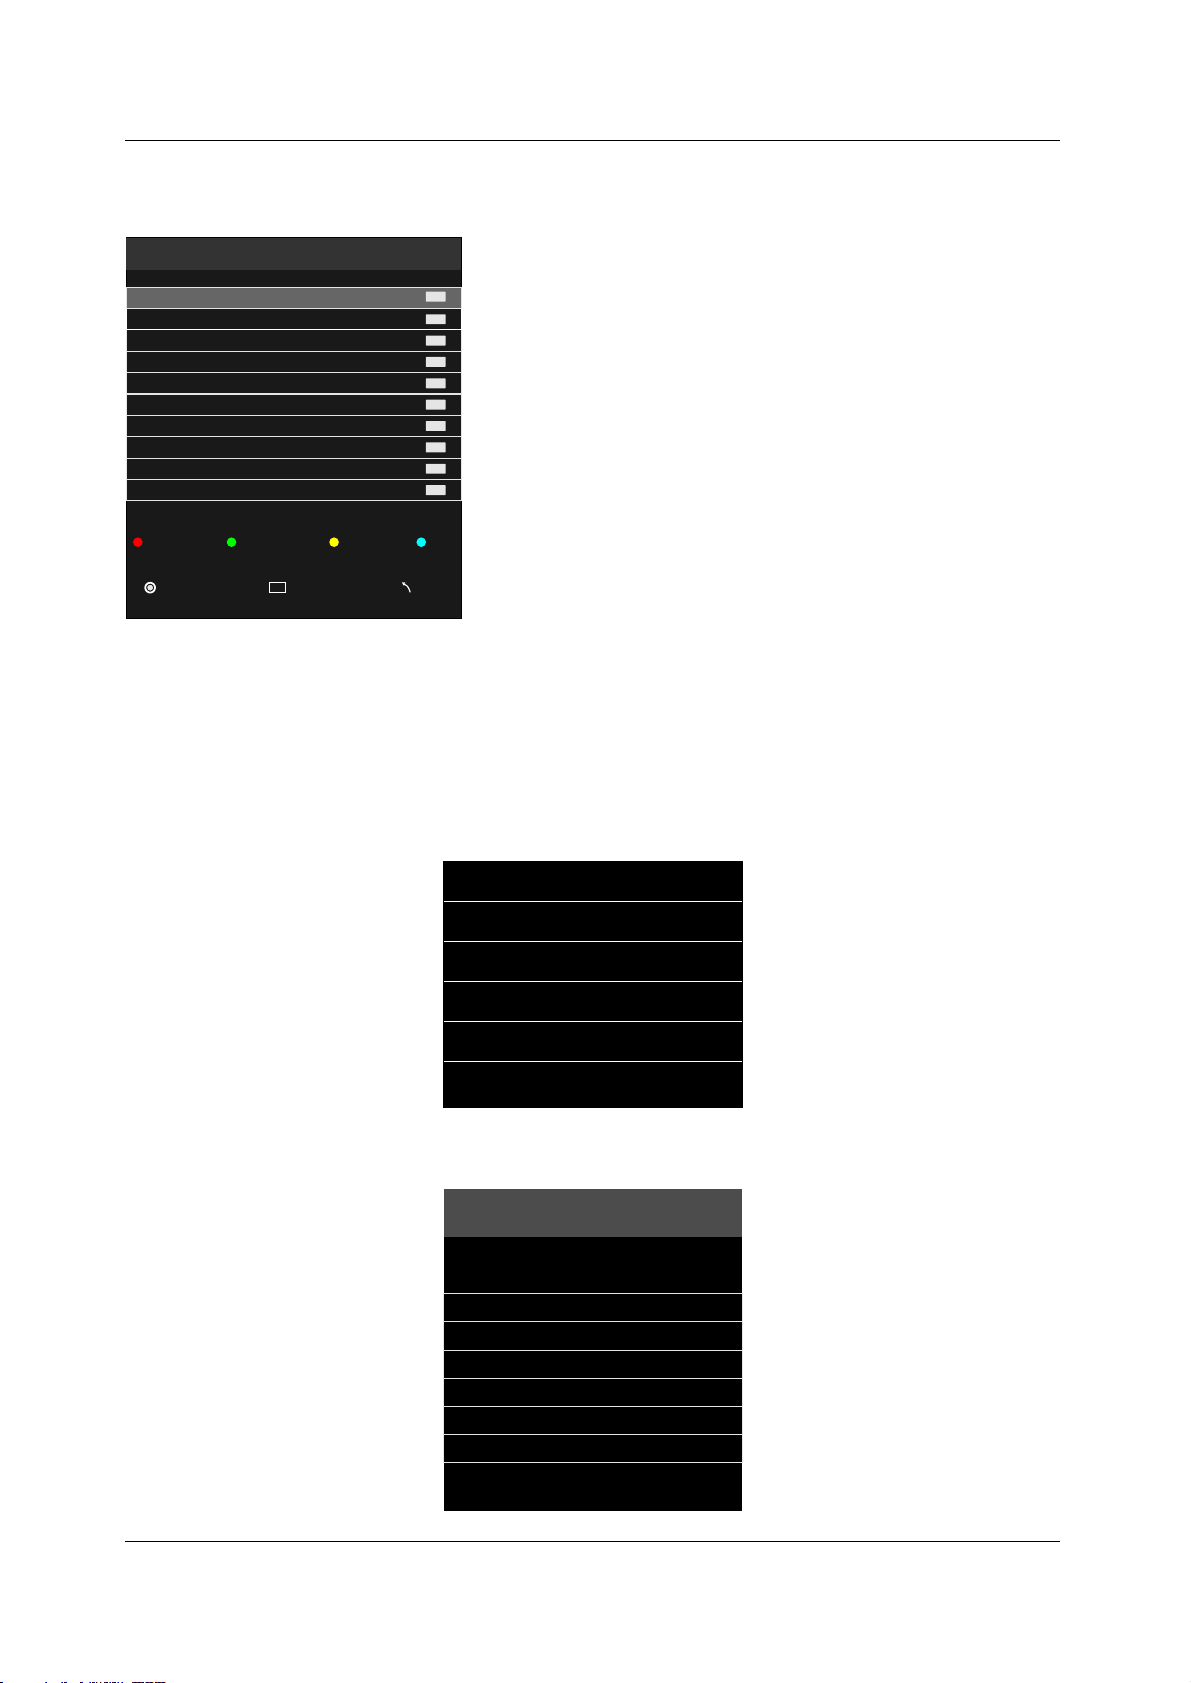
Programme Edit
Press ▼ / ▲ button to select Program Edit, then press OK button to enter sub-menu.
Programme Edit
►
►
1 C-01
2 S-42
3 S-09
4 S-05
5 C-11
6 S-30
7 S-37
8 C-26
9 C-44
10 C-56
ATV
ATV
ATV
ATV
ATV
ATV
ATV
ATV
ATV
ATV
Del ete Ren ame
Enter
FAV
Mov e
Fav
Ski p
Men u
·Use Red button to delete the current channel.
·Use Green button to set the current channel to Rename.
·Use Yellow button and the ▲/▼arrow button to move the current channel.
·Use Blue button to skip the current channel.
Signal Information
Press ▼ / ▲ button to select Signal Information, then press OK button to display signal details, Including
Channel, Frequency, Quality and Strength.
Signal Information
Channel 32
Frequency 562. 00MHZ
Quality 0
Strength 62
CI Information
Press ▼ / ▲ button to select CI Information, then press OK button to display details if you has inserted
the CI card.
Cl Information
Via ccess Con dit ional Acc ess
Mian Men u
Consul tation
Settin gs
Upgrad e
▲
▼
Press OK t o confirm ,Exit to quit
18
Page 25
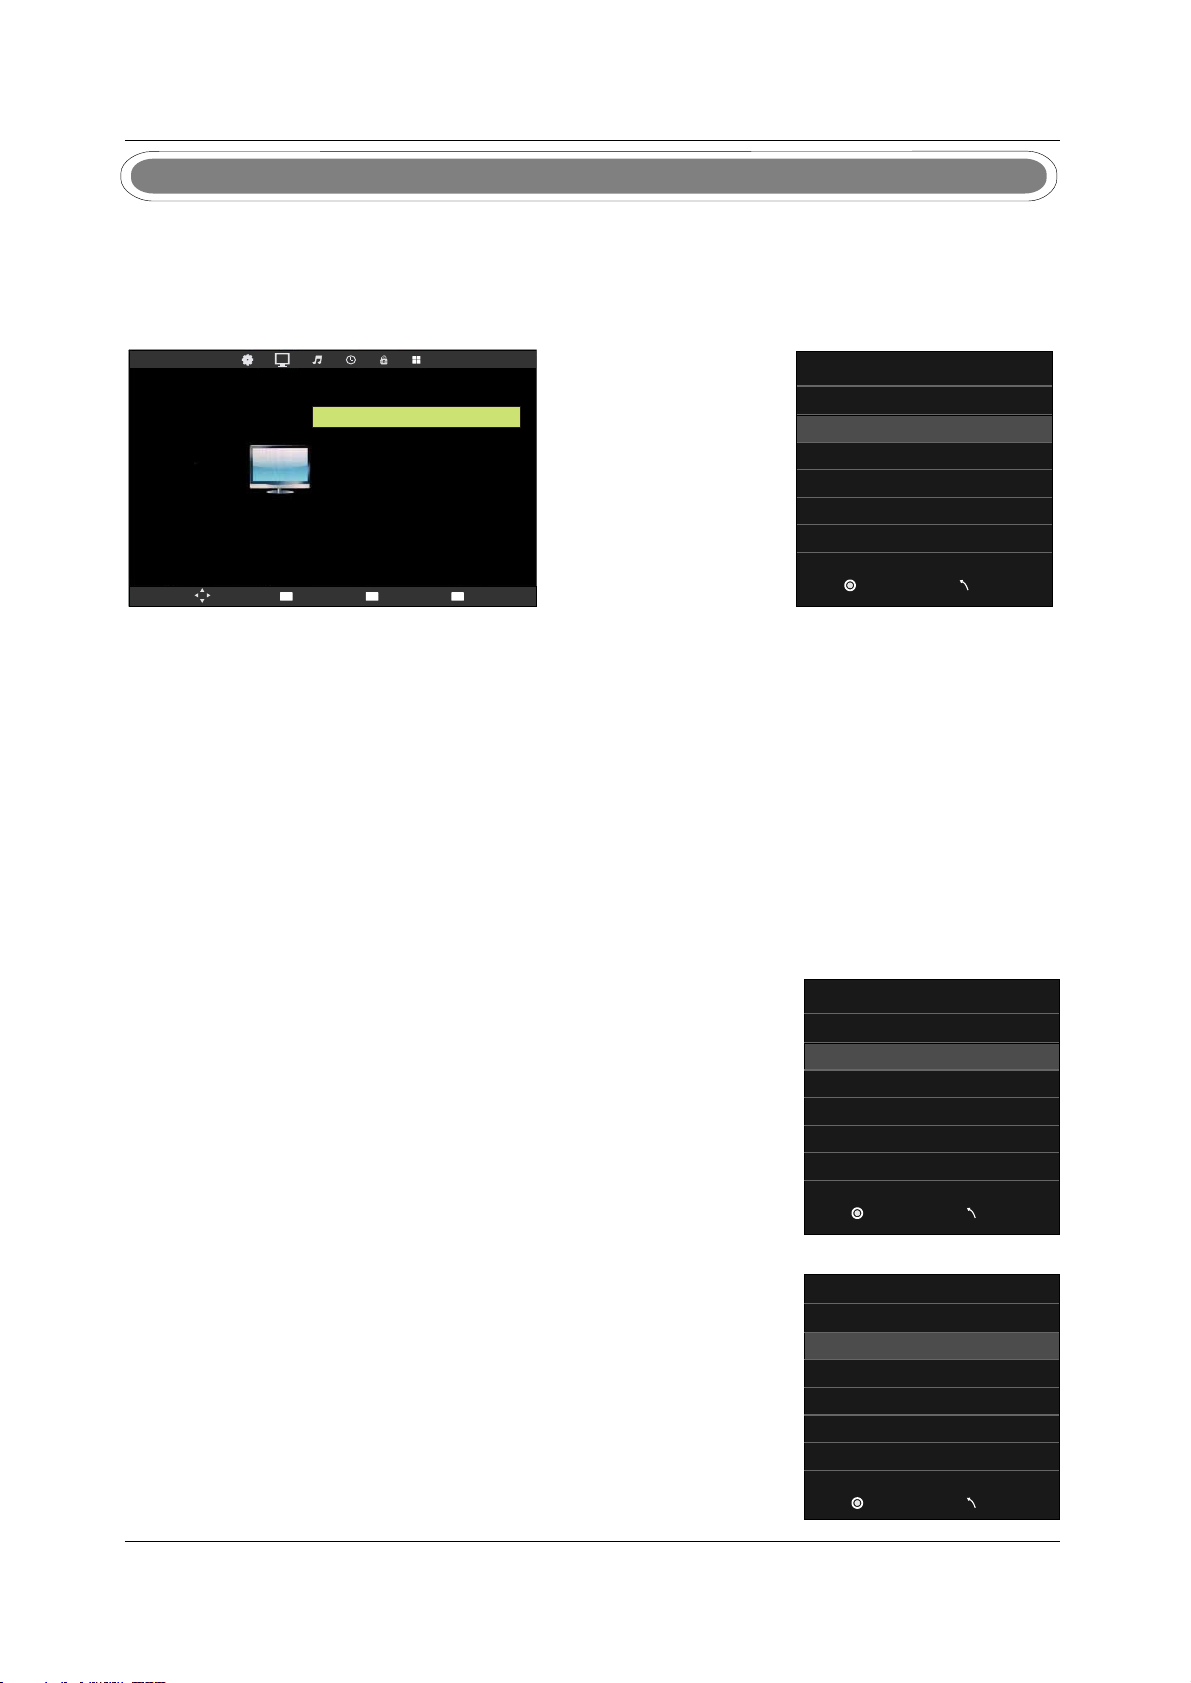
PICTURE MENU
Press MENU button to display the main menu.
Press ◄ / ► button to select PICTURE in the main menu, it will highlight the second option.
1. Press ▼ / ▲ button to select the option that you want to adjust in the PICTURE menu.
2. Press OK button to adjust.
Picture Mode
Dynamic
Standard
Mild
Personal
PICTURE
Picture Mode Standard
Contrast 50
Brightness 50
Colour 50
Tint 50
Sharpness
Colour Temp Normal
Noise Reduction Middle
30
Mov e
MENU
Ret urn
Enter
Sel ect
EXIT
Exi t
Enter
Men u
Picture Mode
Press ▼/▲ button to select Picture Mode, then press OK button to enter sub-menu.Press▼/▲ button to
select.
You can change the value of contrast, brightness, colour and sharpness when the picture is in Personal mode.
Contrast
Press ▼/▲ button to select Contrast, then press OK button to enter sub-menu.Press◄/►button to adjust.
Brightness
Press ▼/▲ button to select Brightness, then press OK button to enter sub-menu.Press◄/►button to adjust.
Colour
Press ▼/▲ button to select Colour, then press OK button to enter sub-menu.Press◄/► button to adjust.
Tint
Press ▼ / ▲ button to select Tint, then press OK button to enter sub-menu. Press◄/► button to adjust.
(Only available in NTSC mode.)
Sharpness
Press ▼/▲ button to select Sharpness, then press ◄/► button to adjust.
Colour Temp
Press ▼ / ▲ button to select Colour Temp, then press OK button to select.
Colour Temp
Cold
Normal
Warm
Noise Reduction
Press ▼ / ▲ button to select Noise Reduction, then press OK button to select.
19
Enter
Noise Reduction
Off
Low
Middle
High
Enter
Men u
Men u
Page 26
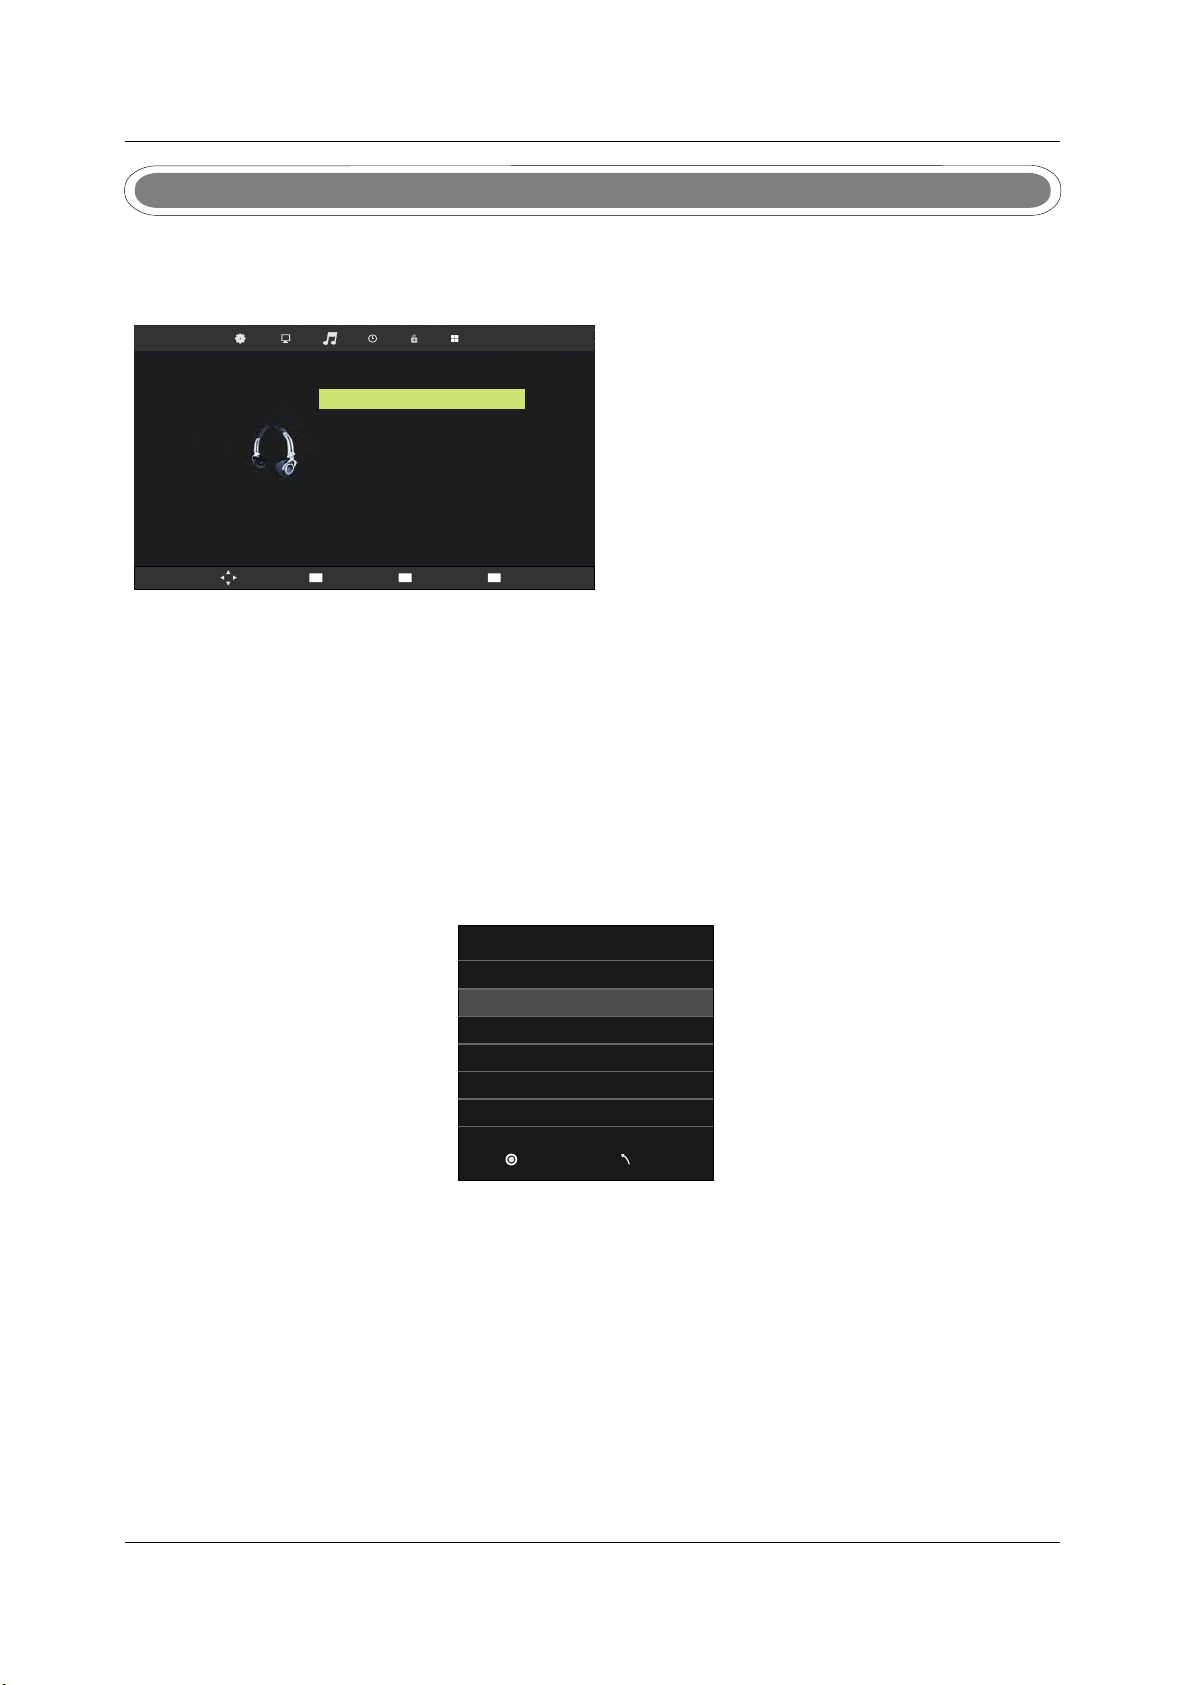
SOUND MENU
Select
Back Adjust
Press MENU button to display the main menu.
Press ◄ / ► button to select Sound in the main menu, it will highlight the third option.
SOUND
Mov e
Sound Mode
Treble
Bass
Balance
Auto Volume
Surround Sound
SPDIF Mode
MENU
Ret urn
Enter
Sel ect
Standard
50
50
0
Off
Off
PCM
EXIT
Exi t
1. Press ▼ / ▲ button to select the option that you want to adjust in the SOUND menu.
2. Press ◄ / ► button to adjust.
Sound Mode
Press ▼/▲ button to select Sound Mode, then press OK button to enter sub-menu.
Press ▼/▲ button to select.
You can change the value of Treble and Bass when the sound is in Personal mode.
SPDIF Mode
, / / .Press ▼/▲ button to select SPDIF MODE then press OK button to select Off PCM Auto
Sound Mode
Standard
Music
Movie
Sports
Personal
Enter
Men u
Treble
Press ▼/▲ button to select Treble, then press OK button to enter sub-menu.Press ◄/► button to adjust.
Bass
Press ▼/▲ button to select Bass, then press OK button to enter sub-menu.Press ◄/► button to adjust.
Balance
Press ▼/▲ button to select Balance, then press OK button to enter sub-menu.Press ◄/► button to adjust.
Auto Volume
Press ▼/▲ button to select Auto Volume, then press OK button to select On of Off.
Surround Sound
Surround Sound settings, Press ◄ / ► to set ON/OFF.
20
Page 27
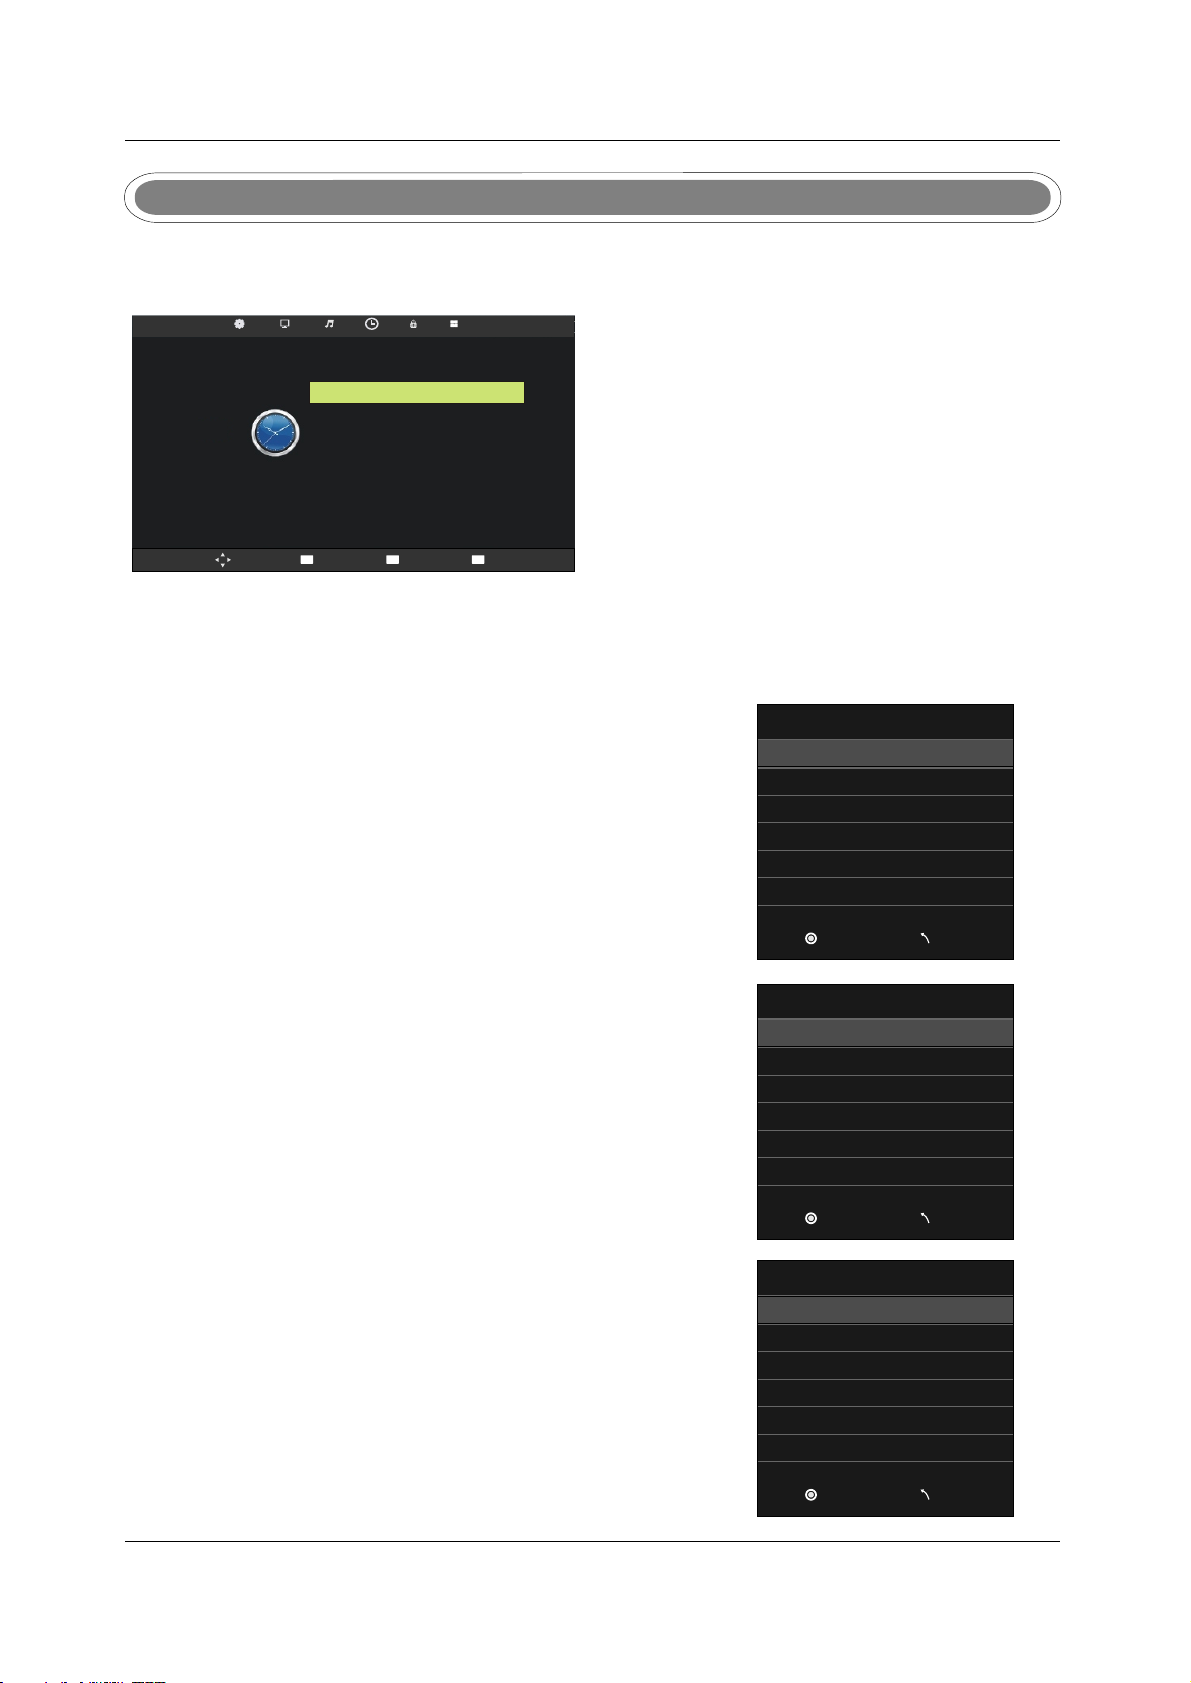
TIME MENU
Select
Back Adjust
Press MENU button to display the main menu.
Press ◄ / ► button to select TIME in the main menu, it will highlight the fourth option.
Mov e
TIM E
Clo ck
Off Ti me
On Tim e
Time Zone G MT+1
Sle ep Timer O ff
Aut o Stand by
OSD Ti mer
MENU
Ret urn
Enter
Sel ect
01/ Jan 04: 28
Off
Off
4H
10s
EXIT
Exi t
1. Press ▼ / ▲ button to select the option that you want to adjust in the TIME menu.
2. Press ◄ / ► button to adjust.
Clock
Display the current system time.It’s not available.
Time Zone
Press ▼/▲ button to select Time Zone, then press OK button
Sleep Timer
to enter sub-menu.
Sleep Timer
Press ▼/▲ button to select Sleep Timer, then press OK button
to enter sub-menu.Press ▼/▲ button to select.
Enter
Off
10min
20min
30min
60min
90min
Men u
Auto Standby
Auto standbyPress ▼/▲ button to select , then press OK button
to enter sub-menu.Press ▼/▲ button to select.
OSD Timer
OSD TimerPress ▼/▲ button to select , then press OK button
to enter sub-menu.Press ▼/▲ button to select.
21
Auto Standby
Off
3H
4H
5H
Enter
OSD Timer
5S
10S
15S
20S
25S
30S
Enter
Men u
Men u
Page 28
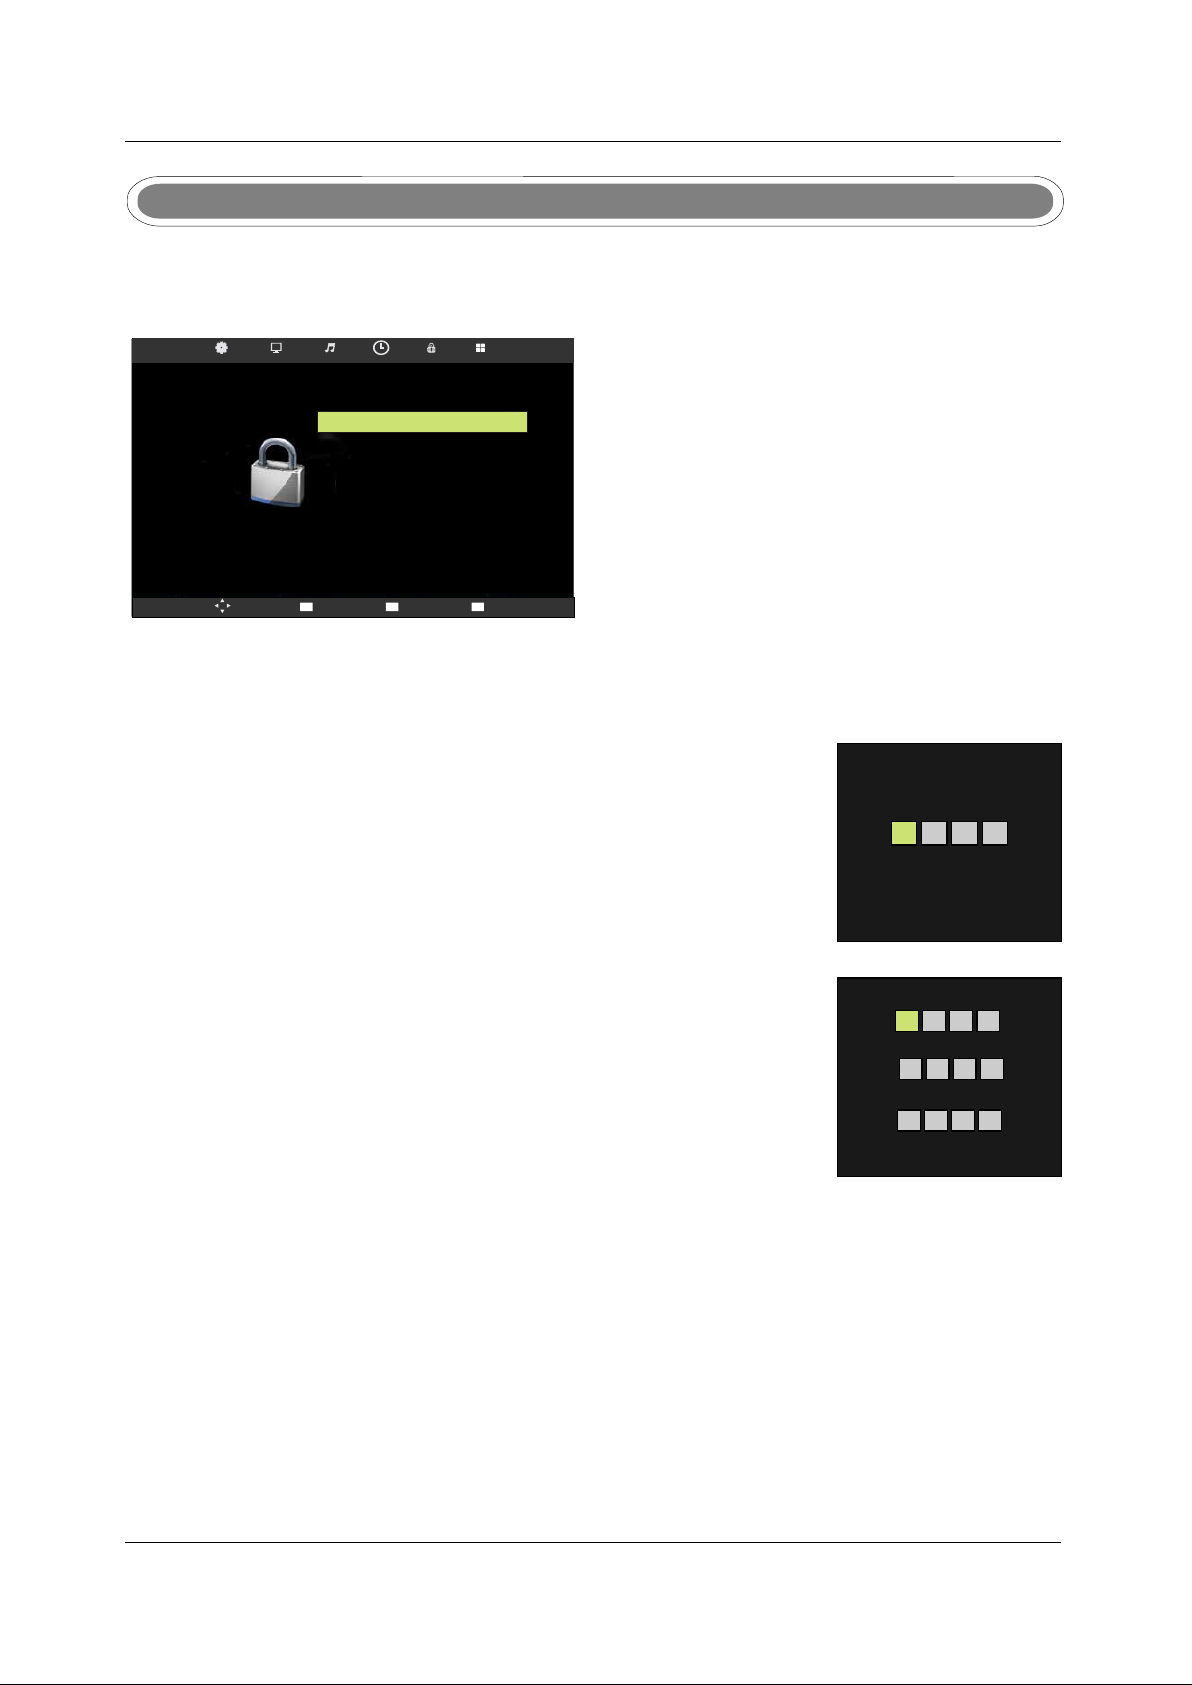
LOCK MENU
Press MENU button to display the main menu.
Press ◄ / ► button to select LOCK in the main menu, it will highlight the fifth option.
Mov e
LOC K
Loc k Syste m
Set P asswo rd
Blo ck Prog ram
Par ental G uidan ce
Key l ock
MENU
Ret urn
Enter
Sel ect
Off
Off
Off
EXIT
Exi t
1. Press ▼ / ▲ button to select the option that you want to adjust in the LOCK menu.
2. Press ◄ / ► button to adjust.
Lock System
Press ▼ / ▲ button to select Lock System, then press OK button
To make the following options valid.(Default password is ‘0000’.)
◄
Set Password
Please enter old password
Press ▼ / ▲ button to select Set Password, then press OK button
to enter sub-menu to set new password.
Please enter new password
Please enter password
CancelClear
►
Confirm new password
CancelClear
►◄
Block Program
Press ▼ / ▲ button to select Block Program, then press OK button to enter sub-menu.
Press ▼ / ▲ button to select the program you want to lock, then press green button on your remote control.
(To unlock program,input the password you set.)
Press OK button to save setting and menu button to back to the previous menu.
Parental Guidance
Press ▼ / ▲ button to select Parental Guidance,then press OK button to enter sub-menu to select.
(Available options are:Off, 4-18)
Key Lock
Press ▼ / ▲ button to select Key Lock, then press OK button to select on or off.
22
Page 29
SETUP MENU
Select
Back Adjust
Press MENU button to display the main menu.
Press ▼ / ▲ button to select Setup in the main menu, it will highlight the sixth option.
Mov e
SETUP
OSD Language
TTX Language
Audio Language
Subtitle Language
PVR File System
Recorder
Schedule List
Aspect Ratio
Blue Screen On
First Time Installation
Reset
MENU
Ret urn
Enter
Sel ect
English
West
English
English
16:9
EXIT
Exi t
1. Press ▼/▲ button to select the option that you want to adjust in the SETUP menu.
2. Press ◄/► button to adjust.
OSD Language/Audio Language/Subtitle Language
Press ▼/▲ button to select OSD/Audio/Subtitle Language, then press OK button to enter sub-menu.
Press ▼/▲/◄/► button to select OSD language,default setting is English.
TTX Language
Press ▼/▲ button to select TTX Language, then press OK button to enter sub-menu.
Press ▼/▲ button to select TTX Language
TTX Language
West
East
Russian
Arabic
Farsi
Select Disk C:
Check PVR Fil e Sys tem
USB Disk
Format
Time Shift Size
Speed
Free Record L imi t
Start
6Hr.
Aspect Ratio
AUTO
4:3
16:9
Zoom1
Zoom2
Enter
Men u
Enter
Men u
Enter
PVR File System
Press ▼ / ▲ button to select PVR File System, then press OK button to enter sub-menu.
Schedule List
Press ▼ / ▲ button to select Schedule List, then press OK button to enter sub-menu.
Schedule List
Time Date
13:30-15:30
14:27 31th May
Program Title
Thurs.31 May
Before Winter Comes
Delete
Channel Name
5 Five
Menu
23
Men u
Page 30
Recorder
Press MENU button on the remote control to display the main menu; Use ◄/►button to select
SETUP, and use ▼/▲ button to select Recorder. Then press OK button enter the sub-menu.
Aspect Ratio
Press ▼ / ▲ button to select Aspect Ratio, then press OK button to enter sub-menu.
Blue Screen
Press ▼ / ▲ button to select Blue Screen, then press ◄/► button to select on or off.
First Time Installation
Press ▼ / ▲ button to select First Time Installation, then press OK button to set relevant options
including OSD language, country and tuning.
Reset
Press ▼ / ▲ button to select Reset, then press OK button to enter a dialogue.Press ◄/► button
selecting Yes or No.
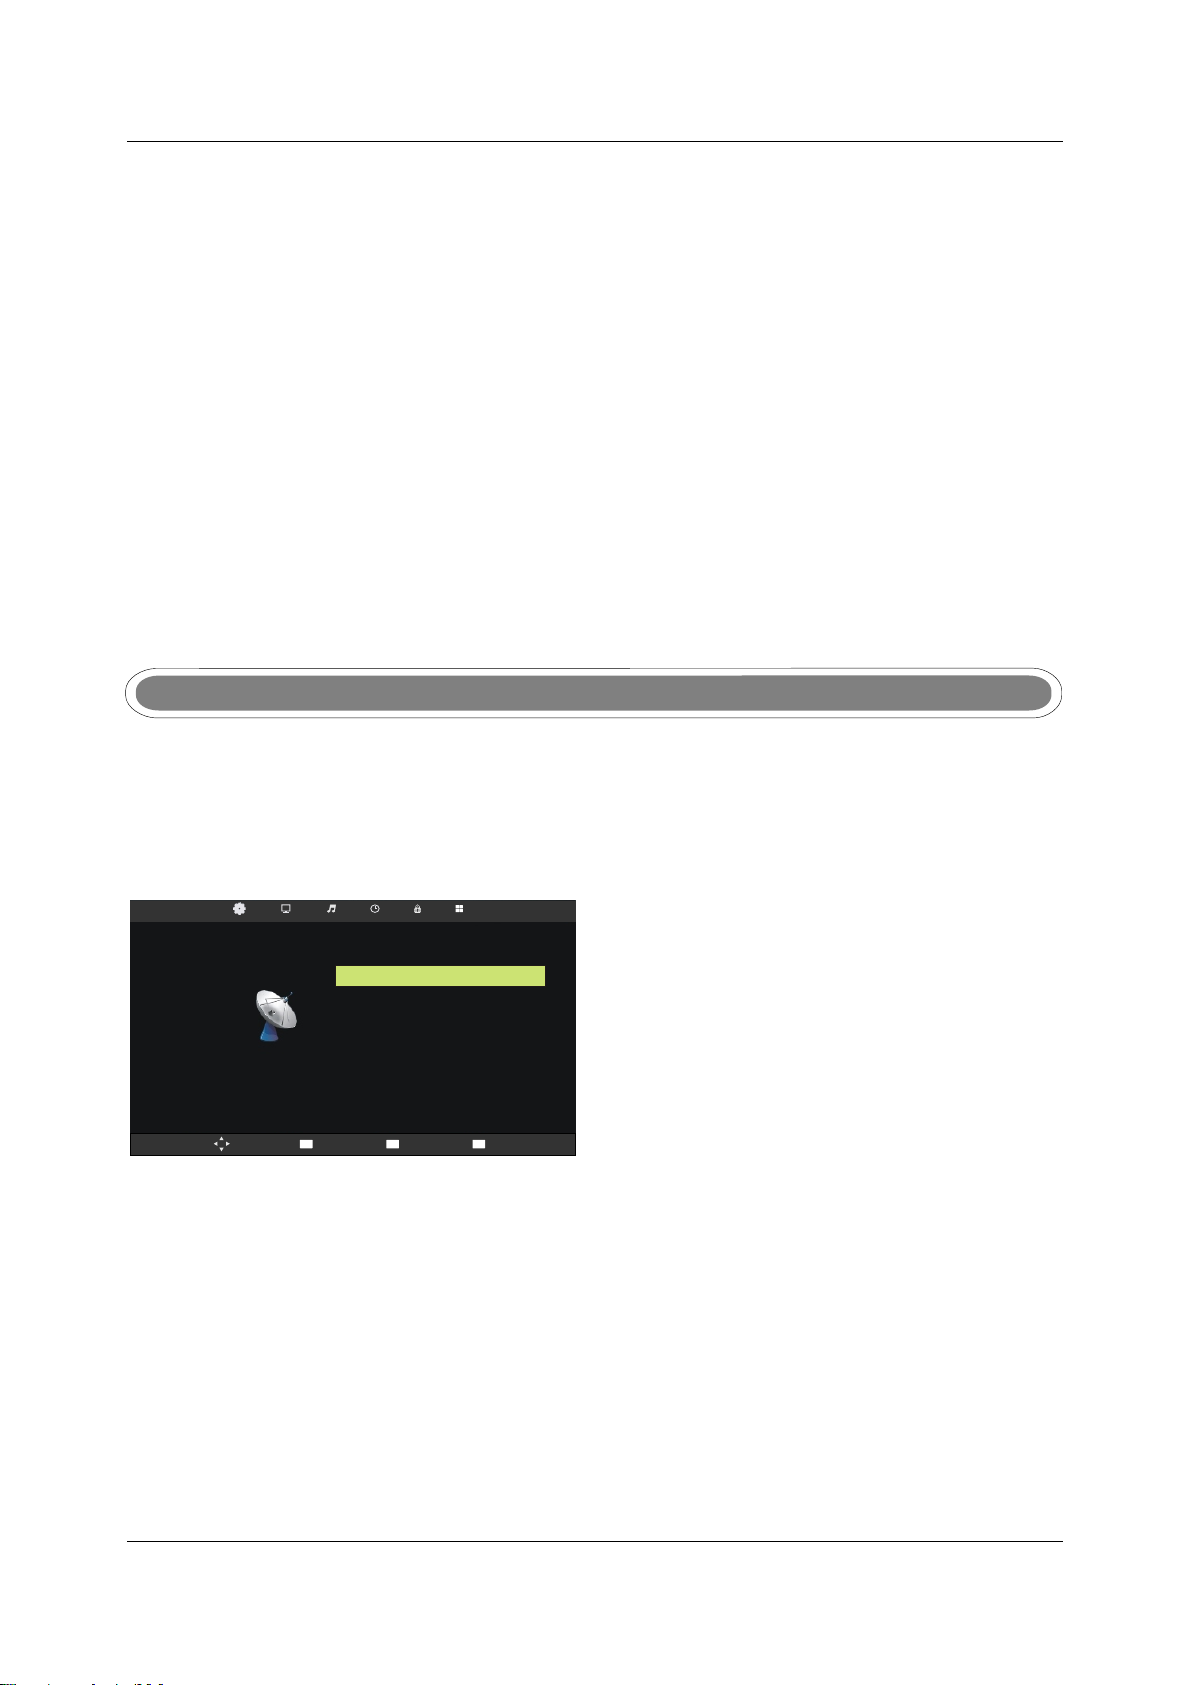
SCREEN MENU
Press MENU button to display the main menu.
Press ◄/► button to select Screen in the main menu, it will highlight the first option.(Only available when
inputting PC-RGB signal)
Auto Adjust
SCREEN
Mov e
Horizontal pos.
Vertical pos.
Size
Phase
Position Reset
MENU
Ret urn
Enter
Sel ect
50
50
50
99
EXIT
Exi t
1. Press ▼/▲ button to select the option that you want to adjust in the SCREEN menu.
2. Press OK button to adjust.
Auto Adjust
Press ▼/▲ button to select Auto Adjust, then press OK button to start adjusting automatically.
Horizontal Pos.
Press ▼/▲ button to select Horizontal Pos. , then press OK button to enter sub-menu.Press ◄/► button
to adjust.
24
Page 31

Vertical Pos.
Press ▼/▲ button to select Vertical Pos. , then press OK Button to enter sub-menu.Press ◄/► button
to adjust.
Size
Press ▼/▲ button to select Size, then press OK button to enter sub-menu.Press ◄/► button to adjust
display size.
Phase
Press ▼/▲ button to select Phase, then press OK button to enter sub-menu.Press ◄/► button to adjust.
VGA(PC)
Notes:
1. Noise Reduction in PICTURE option is invalid.
2. SOUND menu and description are the same as that for DTV mode.
3. LOCK menu and description are the same as that for DTV mode.
4 .PVR File System in SETUP menu is invalid.
AV/SCART/HDMI/YPbPr
Notes:
1. PICTURE menu and description are the same as that for DTV mode.
2. SOUND menu and description are the same as that for DTV mode.
3. LOCK menu and description are the same as that for DTV mode.
4. PVR File System in SETUP menu is invalid.
25
Page 32

MEDIA(USB) MENU
Note:Before operating MEDIA menu,Plug in USB device,then press SOURCE button to set the Input Source
to USB, then press OK button to enter.
USB 2 .0
Press ◄/► button to select the option you want to adjust in the main MEDIA menu, then press OK button
to enter.
PHOTO Menu
Press ◄/► button to select PHOTO in the main menu, then press OK button to enter.
USB 2 .0
Press ◄ / ► button to select drive disk you want to watch, then press OK button to enter.
Press ◄ / ► button to select return option to back to the previous menu.
-MS TPVR
PHOTO
mus ic
1/1
pic ture
EXIT Exit
PHO TO
Ret urn
1/1
C
C:\
Ret un
Delete
Press EXIT button to return back to the previous menu.
Press ◄/► button to select the file you want to watch in the file selecting menu, then press OK button
to display picture. When highlighting the option you select,the file information will appear on the right and
picture will be previewed in the center.
26
Page 33

C:\
PHOTO
1/1
Ret un
Delete
-MS TPVR
mus ic
pic ture
EXIT Exit
Press ◄/► button to select the file folder you want to search in the file selecting menu, then press
OK button on your remote control to enter sub-menu.
Press ◄/► button to select the file you want to delete in the file selecting menu, then press red button
On your remote control to delete files.
MUSIC Menu
Press ◄/► button to select MUSIC in the main menu, then press OK button to enter.
USB 2 .0
Press ◄/► button to select drive disk you want to watch, then press OK button to enter.
Press ◄/► button to select return option to back to the previous menu.
When highlighting the option you select,the file information will appear on the right.
previewed in the center.
MUSIC
C:\
Ret un
Delete
-MS TPVR
mus ic
1/1
pic ture
Press EXIT button to return back to the previous menu.
Press ◄/► button to select the file you want to watch in the file selecting menu, then press OK button to
play the selected music.
27
Page 34

MOVIE Menu
Press ◄/► button to select MOVIE in the main menu, then press OK button to enter.
USB 2 .0
Press ◄ / ► button to select drive disk you want to watch, then press OK button to enter.
Press ◄ / ► button to select return option to back to the previous menu.
MOVIE
C:\
1/1
EXI T
pic ture
Exi t
Ret un
.av l
Delete
-MS TPVR
MPE G4_31 1F_72 0X5-
mus ic
[3. av]
Press EXIT button to return back to the previous menu.
When highlighting the option you select,the file information will appear on the right and movie will be previewed
in the center.
Press OK button to play the selected movie.
TEXT Menu
Press ◄ / ► button to select TEXT in the main menu, then press OK button to enter.
USB 2 .0
Press ◄ / ► button to select drive disk you want to watch, then press OK button to enter.
Press ◄ / ► button to select return option to back to the previous menu.
28
Page 35

C:\
TEXT
1/1
EXI T
pic ture
Exi t
Ret un
Delete
-MS TPVR
mus ic
Press EXIT button to return back to the previous menu.
When highlighting the option you select,the file information will appear on the right and text will be
previewed in the center.
Press OK button to view the selected text.
PVR MENU
Instant RecorderInstant Recorder
Note:Make sure you have insert the USB device to the TV board before you start to do the recording.
Press REC button on your remote control to start record whenever you want to start.
There will be a recording iron on the buttom of the display screen during recording:
[00:00:20]
(0001:57:29)
PlayPlay FBFB FFFF
5 Five
NextNextPrev.Prev.
Before Winter Comes
PausePause
StopStop
14:28
Press REC button to display the control bar or hide it.
Press button to select stop or press stop button on your remote control to stop recording.◄/►
There will be a dialog as follows:
It will stop Recording
◄ YES
29
No►
Page 36

Press button to select stop PVR or not.◄/►
Press button to select to play the recorded program during recording.◄/►
[00:00:20/00:02:13]
PlayPlay FBFB FFFF
NextNextPrev.Prev. StopStopPausePause
14:28
You can press the button on the control bar to play,fastback,fastforward,play previous,play next,
pause or stop playing.
Note: you can also play the recorded program in the file named ” _MSTPVR” under the MOVIE file
in the USB Source.
PVR File SystemPVR File System
Press MENU button on the front of panel or MENU on the remote control to display the main menu.
Press button to select SETUP in the main menu, then press OK button to enter.▼/▲
SETUP
OSD Language
TTX Language
Audio Language
Subtitle Language
PVR File System
Recorder
Schedule List
Aspect Ratio
Blue Screen On
First Time Installation
Reset
English
West
English
English
16:9
Mov e
1. Press button to select PVR File System;
2. Press OK button to enter and press button to edit.
▼/▲
▼/▲
MENU
Ret urn
Enter
Sel ect
EXIT
Exi t
3. After finishing your adjustment, Press Menu button to save and back to the previous menu.
Select Disk C:
Check PVR Fil e Sys tem
USB Disk
Format
Time Shift Size
Speed
Free Record L imi t
Enter
Select Disk
Select Disk
Press button to select Select Disk, then press OK button to enter and press button to
▼/▲ ▼/▲
Start
6Hr.
Men u
select the disk you want to check.
Check PVR File System
Check PVR File System
Press button to select Check PVR File System , then press OK button to check the disk you
▼/▲
have selected.
Format
Format
Press button to select Format, then press OK button to enter the sub menu:▼/▲
30
Page 37

File System Size
PVR File Syst emTy pe
PVR File Syst em Si ze
SD 104 Mins
HD 29 Mins
Enter
FAT32
All
Press button to select PVR File System Type, then press button to select the system type,
▼/▲ ◄/►
press OK button to format the disk, a dialog will be displayed as follows:
Format disk
Format disk
Warning ! All data will be lost.
◄ Start
Exit►
Press button to start format or press button to cancel format and back to the previous menu.◄ ►
RecorderRecorder
Press MENU button on the remote control to display the main menu; Use ◄/►button to select
SETUP, and use ▼/▲ button to select Recorder. Then press OK button enter the sub-menu.
1. Press button to select the item;
2. Press button to adjust .
▼/▲
◄/►
3. After finishing your settings, Press OK button to save .Then there will display a save successful
dialog and a Schedule List which display the recording schedules you just setted,you can press
RED button to cancel you setting.
You can select Mode Auto\Mode Once\Mode Everyday\Mode Weekly for recording.
Start TimeStart Time
Start recording time;
End TimeEnd Time
Recording end time.
RECORDERRECORDER
5 Fiv e5 Five
Mode OnceMode Once
Sta rt Tim eStart Time
May MonthMay Month
31 Date31 Date
13 Hour13 Hour
30 Minute30 Minu te
End TimeEnd Tim e
May MonthMay Month
31 Date31 Date
15 Hour15 Hour
30 Minute30 Minu te
BackBackEnterE nte r
31
Page 38

TimeshiftTimeshift
Press button to start Timeshift,there will be a control bar as follows:
[00:00:20]
(0001:57:29)
14:28
5 Five
S
PlayPlay FBFB FFFF
NextNextPrev.Prev. StopStopPausePause
Before Winter Comes
The program will stop when you start timeshift, you can continue watching the program by press
the PLAY button whenever youwant to watch it within the acquired timeshift time.
You can press the button on the control bar or remote control to play 、fastback 、fastforward 、
play previous 、play next、pause or stop timeshifting.
Note: During Timeshift,you can not callout Input Source, Menu,Text,FAV List and so on unless
you stop it first.During recording,you can’t change the channel unless you stop it first;
Press POWER button will stop the Timeshift;
The Timeshift function doesn’t support Timeshift Radio Channel and locked channel.
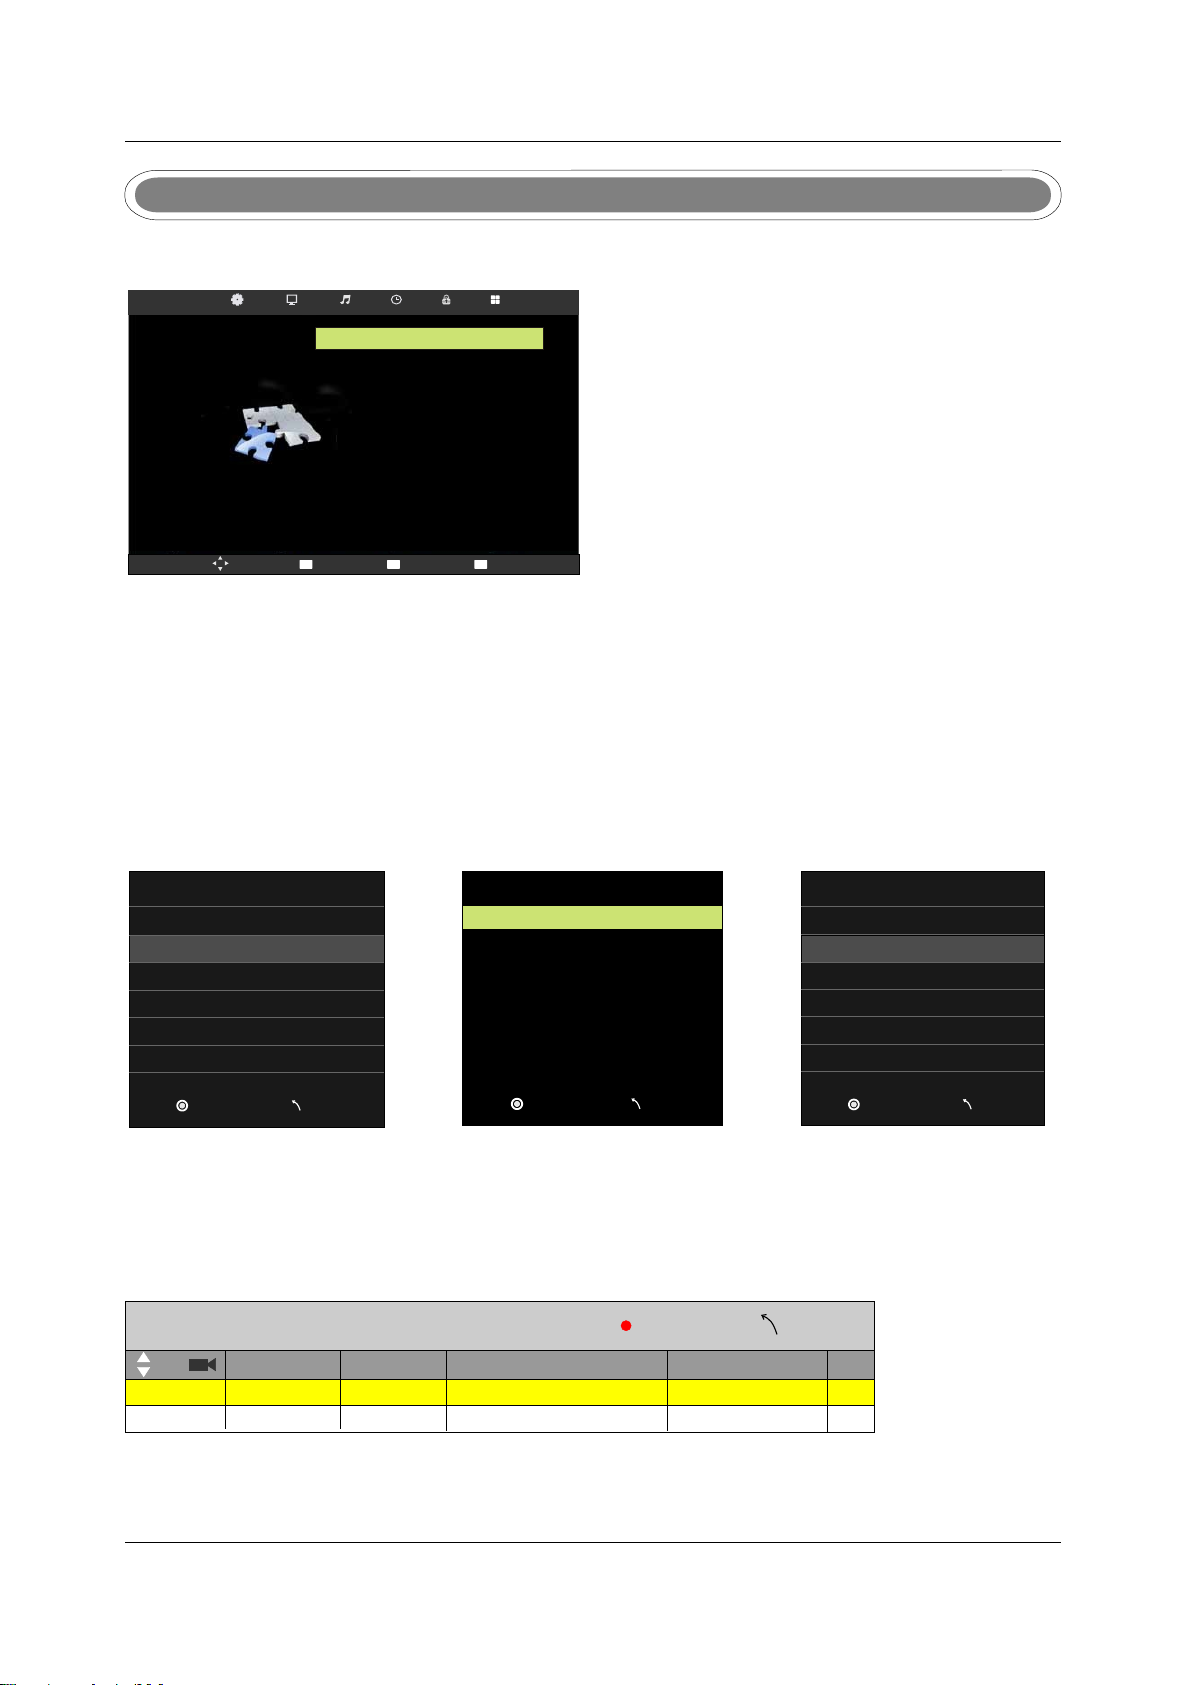
Record List
Record List
Press R.LIST button on the remote control to display the Recorded List.
Recorded List Programme
8 Sim ple Rule s8 Sim ple Rule s
8 Sim ple Rule s8 Sim ple Rule s
Before Winter ComesBefore Winter Comes
DeleteDelete
EnterEnter
INFOIN FO
IndexIndex
32
Page 39

EPG Menu
Press EPG button in the Remote control.
31 Ma y 2007 13 :00- 15:3 0 31 Ma y 2007 14 :38
Com dey dra ma star ring Da vid Niv en .An off icer in c harge o f a displ aced pe rsons ’camp f aces a di lemma w hen a
Rus sian de serte r is orde red bac k.(19 69)[S ]
31 Ma y
1 Fiv e
2 Fiv e Life
3 Fiv e US
13: 30- 15:3 0
15: 30- 17:3 0
17: 30- 18:0 0
PROGRA MME G UID E
Bef ore Win ter Com es
Bat tle of Th e V.1
Fiv e News Fo llowe d By Weat her
Displa y
Next Day Prev Day
Sch edu le
Remild
Enter
Record
Record
Record
Move View
Record programme. It show record mode when selected,check PVR manual details.
Display
Display
Display shows all the information.
Schedule List
Schedule List
pattern for reference the menu is as follows:
Schedule List
Time Date
13:30-15:30
14:27 31th May
Program Title
Thurs.31 May
Before Winter Comes
Delete
Channel Name
5 Five
Back
▲▼
Up and down to move Focus to select programme.
DELETEDELETE
Delete Focused programme.
BACKBACK
Back to EPG menu.
Remind
Remind
Programme reserved. Choose Remind to show the settings menu.
Use up and down to choose setted programme.
33
Page 40

8.DVD Operation
Note : please ensure that the TV you have bought bought is with DVD loader, otherwise all
this part does not apply.
Basic Operation
1. Press Source button on the remote controller to select DVD input source.
2. Press OPEN / CLOSE button to load from into disc tray.
Hold the disc without touching either or its surfaces, insert the DVD with the label toward the
device’s back panel into the DVD slot on the right side of you TV set.
Only push the DVD slightly until the unit feeds it automatically.
DVD Setup Mode
·Setup Mode provides the menu for the configuration of General Setup Page, Audio Setup Page,
and Preference Page .
·Item selection in the Setup Menu is done by using the Navigation Arrows, D.SETUP button and
the OK button.
·Press the D.SETUP button first , enter into SETUP menu, then press the DIRECTION RIGHT
button,you can enter into the next Sub-menu.
·Press the D.SETUP button again to exit the Setup Menu.
General Setup
TV Display
This is used to select the aspect 4: 3/PS, 4:3/LB, 16:9.
- - General Setup Page - -
TV Display
OSD Lang
Screen Saver
Last Memory
16:9 4:3/PS
ENG
On
Off
4: 3/LB
16:9
34
Page 41

OSD Language
This is used to select the OSD language.
·English
·French
·Spanish
German
·
·Portuguese
·Italian
- - General Setup Page - -
TV Display
OSD Lang
Screen Saver
Last Memory
16:9
ENG
On
Off
English
French
Spanish
German
Portuguese
Italian
Screen Saver
Start the screen saver, the screen saver image will appear when the player stops or the picture is
frozen for a few minutes. This saver can keep the screen from being damaged.
·On (Start the screen saver).
·Off (Remove the screen saver).
- - General Setup Page - -
TV Display
OSD Lang
Screen Saver
Last Memory
16:9
ENG
On
Off
On
Off
Last Memory
Can set the items on the last memory, “on”and “off” option.
Select “on”, shutdown the machine before the settings for memory, re-boot the machine setting.
Set near the same time.
Select “off”, every time the machine automatically switched back to the default settings.
·On (Start the Last Memory).
·Off (Remove the Last Memory).
35
Page 42

- - General Setup Page - -
TV Display
OSD Lang
Screen Saver
Last Memory
16:9
ENG
On
Off
On
Off
Audio Setup
·Speaker Setup
In the “Audio Setup page” press “ ” button to select “Speaker Setup” item, press the “OK ENTER”
or “ ” button (play) into the “Speaker Setup Page”.
- - Audio Setup Page - -
Speaker Setup
Dual Mono
Dynamic
Downmix
·LT/RT
A disc recorded multi channel soundtrack, the output signal will be incorporated to left and right
channel.
·Stereo
A disc recorded multi channel soundtrack, The output signal will be incorporated to stereo.
- - Speaker Setup Page - -
Downmix
STR
LT/RT
Stereo
36
Page 43

Dual Mono
This is used to select the Stereo, L-MONO, R-MONO and MIX-MONO.
- - Audio Setup Page - -
Speaker Setup
Dual Mono
Dynamic
Dynamic
This option is used to set the compression ratio in order to control the sound (Volume) contrast.
Stereo
L-Mono
R-Mono
Mix-Mono
- - Audio Setup Page - -
Speaker Setup
Dual Mono
Dynamic
FULL
3/4
1/2
1/4
OFF
Preference Setup
You must sure no disc in the DVD then you can select Preference Page.
TV Type
·PAL
This is selected when the player is connected to an PAL System TV.
·MULTI
The player will set the TV system according to the disc in the tray.
·NTSC
This is selected when the player is connected to a NTSC System TV.
37
Page 44

- - Preference Page - -
TV Type
Audio
Subtitle
Disc Menu
Parental
Password
Default
Audio
If a language listed below is recorded on the disc, you can play the sound in such language.
If not, the language recorded will be used.
·English
·French
·Spanish
·German
·Portuguese
·Italian
- - Preference Page - -
TV Type
Audio
Subtitle
Disc Menu
Parental
Password
Default
Multi
ENG
ENG
ENG
Multi
ENG
ENG
ENG
PAL
Multi
NTSC
English
French
Spanish
German
Portuguese
Italian
Subtitle
If a language listed below is recorded on the disc, you set the subtitle to be displayed in such
language. If not, the language recorded will be used.
·English
·French
·Spanish
·German
·Portuguese
·Italian
·Off
- - Preference Page - -
TV Type
Audio
Subtitle
Disc Menu
Parental
Password
Default
Multi
ENG
ENG
ENG
English
French
Spanish
German
Portuguese
Italian
Off
38
Page 45

Disc Menu
If a language listed below is record on the disc, you can set the Menu to be displayed in such
language. If not, the language recorded will be used.
·English
·French
·Spanish
·German
·Portuguese
·Italian
- - Preference Page - -
TV Type
Audio
Subtitle
Disc Menu
Parental
Password
Default
Multi
ENG
ENG
ENG
English
French
Spanish
German
Portuguese
Italian
Parental
When playing disc with parental lock function, you may select an Age Control Grade according to
grade of disc and your own preference. For example, if PG is selected, DVD Video disc rated higher
than the PG grade cannot be played.
·KID SAFE
·G
·PG
·PG 13
·P GR
·R
·NC 17
·ADULT
- - Preference Page - -
TV Type
Audio
Subtitle
Disc Menu
Parental
Password
Default
Multi
ENG
ENG
ENG
1 KID SAF
2 G
3 PG
4 PG 13
5 PGR
6 R
7 NC17
8 ADULT
39
Page 46

Password
User can change the password that is required when the user wants to change the Age Control
Grade in the Parental Lock function.
NOTE:(Default password is 123456 )
- - Preference Page - -
TV Type
Audio
Subtitle
Disc Menu
Parental
Password
Default
Default
User can load the original factory setting by choose RESET and press OK button.
Multi
ENG
ENG
ENG
Change
- - Preference Page - -
TV Type
Audio
Subtitle
Disc Menu
Parental
Password
Default
Multi
ENG
ENG
ENG
Reset
40
Page 47

9. TROUBLESHOOTING AND ADVICE
Please check if you can solve the issue by yourself.
Troubleshooting
No signal
No color shades
Stain showing
on the screen
Double or multiple
display image
Snow on the screen
The remote control
does not work
No sound
Control
Please check that all cables and cords are correctly plugged in.
Adjust the contrast, the color and the brightness.
Maybe result from a lighting signal from car, motor, neon light and
other electrical devices or appliances.
Maybe the result of an electrical wave disturbance from other TV,
Computer and Game machine or Radio.
The cables of the antenna are not correctly plugged in.
Please check the batteries order and alignment.Check that the IR
of the remote control is not hidden by something.
Make sure that you have not pressed the MUTE button on the panel
or the remote control.
No DVD
DVD player not
working properly
Make sure if the TV Set have been switched to DVD mode
Ensure disc is correctly inserted into the player. Ensure the disc
does not damaged and with correct format. Please wait patiently
as some discs need longer time to play.
41
Page 48

10.SPECIFICATIONS
This manual is only for your reference, any change to the design and specification will not
be advised.
Mode
Screen Size
Display Type
Resolution(Pixel)
Aspect Ratio
Power Supply
Power Consumption
TV System
Video Input Format
Audio Output Power
ANTENNA
AV-IN
YPbPr - IN
HDMI - IN
VGA(PC) - IN
SUPPORT
VGA(PC) AUDIO - IN
SCART - IN
SCART - OUT
EARPHONE - OUT
S-VIDEO - IN
COAXIAL - OUT
LED-B13TU19H
18.5Inch 21.6Inch 21.6Inch
LED-B13TU22H
LED-B13HU22H
21.6Inch
LED-B13TDU22H
TFT LED
1366 X 768
16:9
AC 100-240V 50/60Hz
DC 12V
40W
PAL/SECAM
PAL/NTSC/SECAM
L / R 2X3W
YES
YES
YES
YES
YES
YES
YES
YES
YES
--
YES
48W
DVD
Dimensions
Weight
COMMON INTERFACE
USB
IPOD
Disc Physical Format
DVD Video Output Format
Inc Stand (LxWxHmm)
Exc Sand (LxWxHmm)
Net (Kgs)
Gross (Kgs)
466x182x366
466x49x309
4.0
5.0
42
YES
YES
--
----
----
--
--
534x183x403534x183x403 534x183x403
534x49x349534x49x349 534x49x349
CD/CD±R/RW
DVD/DVD±R/RW
PAL/NTSC
4.8 4.8 5.3
6.4 6.4 6.9
Page 49

Mode
Screen Size
Display Type
Resolution(Pixel)
Aspect Ratio
Power Supply
Power Consumption
TV System
Video Input Format
Audio Output Power
LED-B13TU24F
23Inch
L / R 2X3W L / R 2X8W
LED-B13HU24F
23Inch
AC 100-240V 50/60Hz
48W
PAL/NTSC/SECAM
LED -B13H U32H LED -B13H U42F
31.5Inch
TFT LED
1920 X 1080
16:9
120W 140W
PAL/SECAM
42Inch
SUPPORT
DVD
Dimensions
Weight
ANTENNA
AV-IN
YPbPr - IN
HDMI - IN
VGA(PC) - IN
VGA(PC) AUDIO - IN
SCART - IN
SCART - OUT
EARPHONE - OUT
S-VIDEO - IN
COAXIAL - OUT
COMMON INTERFACE
USB
IPOD
Disc Physical Format
DVD Video Output Format
Inc Stand (LxWxHmm)
Exc Sand (LxWxHmm)
Net (Kgs)
Gross (Kgs)
--
--
587x183x438
587x49x385
5.2
6.8
YES
YES
YES
YES
YES
YES
YES
YES
YES
--
YES
YES
YES
--
-- -- --
-- -- --
587x183x438
587x49x385
5.2
6.8
790x200x564
790x47x499
11.5
12.0
1019x260x697
1019x50x629
17.2
18
43
Page 50

1
2
PRÉFACEPRÉFACE
PRÉCAUTIONS
PRÉCAUTIONS
D’EMPLOI
D’EMPLOI
3
3
3
4
5
6
DANS LE CARTONDANS LE CARTON
CONNEXI ONS À
CONNEXI ONS À
L’AVANT ET À
L’AVANT ET À
L’ARRI ÈRE DE LA TV
L’ARRI ÈRE DE LA TV
INSTALLATION
INSTALLATION
DE BASE
DE BASE
TÉLÉCOMMANDETÉLÉCOMMANDE
Branchement du cordon d'alimentation
Branchement des antennes
Connexion SCART
Connexion VGA(PC)
Connexion de l'équipement AV
Connexion YPbPr
Connexion HDMI
Connexion COAX
Connexion USB
Utilisation de la télécommande en mode TV
Utilisation de la télécommande en mode DTV/USB
Utilisation de la télécommande en mode TELETEXT
Utilisation de la télécommande en mode DVD
Réglage de la télécommande
5
6
7
7
8
8
9
9
10
10
10
11
12
13
14
15
SOURCE D'ENTREE
MENU CHAINE
MENU IMAGE
MENU SON
7
UTILISATION
DU MENU
MENU HEURE
MENU VERROUILLAGE
MENU DE CONFIGURATION
MENU ECRAN
MENU MEDIA (USB)
MENU MN
MENU GEP
Configuration générale
8
UTILISATION
DU DVD
Réglage Audio
Réglage des Préférences
16
16
19
20
21
22
23
24
26
29
33
34
36
37
1
Page 51

AUTO-DÉPANNAGE
9
AUTO-DÉPANNAGE
ET CONSEILS
ET CONSEILS
41
10
CARACTÉRISTIQUESCARACTÉRISTIQUES
42
2
Page 52

1.PREFACE1.PREFACE
Nous vous remercions d'avoir acheté ce téléviseur ! Avant toute utilisation, lire le présent manuel
dans son intégralité. Vérifier l'état de l'appareil. S'il a été endommagé pendant le transport, ne pas
l'installer et contacter votre revendeur.
Vérifier que vous avez tous les accessoires conformément au modèle.
2.CONSIGNES DE SECURITE2.CONSIGNES DE SECURITE
Placer le téléviseur sur une surface stable.
Ne placer aucun objet sur le téléviseur.
Min imum dis tance s
10c m
20c m
10c m 5cm
Ne pas utiliser le téléviseur avec des supports autres que ceux fournis
ou recommandés par le fabricant.
Ne pas obstruer ou couvrir les ouvertures d'aération du téléviseur.
Veiller à ce que le support mural soit stable.
Le cordon d’alimentation et les câbles doivent être correctement
acheminés et protégés de manière à éviter de marcher dessus et de faire
tomber le téléviseur.
3
Page 53

Maintenir le téléviseur au sec et à l’abri de l’humidité.
Maintenir le téléviseur à l’écart des sources de chaleur.
Débrancher le téléviseur avant de le nettoyer.
Ne pas utiliser de solvant ou de liquide pour nettoyer le téléviseur.
Nettoyer uniquement le téléviseur avec un chiffon doux et sec.
En cas de dépannage, ne pas utiliser des pièces de rechange autres
que celles recommandées par le fabricant. L’utilisation de pièces de
rechange inadéquates peut causer des électrocutions, des
courts-circuits, des incendies ou d’autres incidents.
Débrancher l'appareil en cas d'orage ou lorsqu'il n'est pas utilisé
pendant longtemps.
1. La prise SECTEUR ou le connecteur doit permettre un branchement ou un débranchement facile;
2. Les piles (bloc-piles ou piles indépendantes) ne doivent pas être exposées à une chaleur
excessive, telle que soleil, incendie ou source similaire.
3. Les appareils de CLASSE I doivent être raccordés à une prise SECTEUR équipée d'une mise à
la terre de protection.
4
Page 54

3. CONTENU DE L'EMBALLAGE3. CONTENU DE L'EMBALLAGE
Téléviseur LEDTéléviseur LED
Adaptateur et cordon d'alimentation
TélécommandeTélécommande
1.5V
.5V
1
Piles AAAPiles AAA
USE R'S M ANUAL
Manuel de l'utilisateur
5
Page 55

4.CONNEXIONS AVANT ET ARRIÈRE DU TELEVISEUR 4.CONNEXIONS AVANT ET ARRIÈRE DU TELEVISEUR
Vue de faceVue de face
OUVRIR/FERMER ;
1.
LECTURE/PAUSE ;
2.
3. Press "VOL+" or "VOL-" to increase or decrease
1
the sound level.
2
Appuyer sur “ VOL+ ” ou “ VOL- ” pour
4.
VOL+
augmenter ou diminuer le son.
VOL-
3
Appuyer sur “ MENU ” pour afficher le menu
5.
CH+
principal.
4
Appuyer sur “ SOURCE ” pour sélectionner la
6.
CH-
source d'entrée.
MENU
5
Appuyer sur la touche “POWER” pour mettre
7.
SOURCE
6
le téléviseur en service ou en mode veille.
POWER
9 8
Vue arrière et connexionsVue arrière et connexions
TEMOIN D'ALIMENTATION : rouge en mode
8.
7
veille, vert ou bleu à la mise en marche du
téléviseur.
9
CAPTEUR INFRAROUGE : capteur infrarouge
.
de la télécommande.
. USB: P
1
. HDMI: P
2
ermet de raccorder l'unité externe.
ermet de raccorder la fiche de sortie HDMI du
lecteur DVD.
. SCART:
3
Permet de raccorder la fiche de sortie SCART
du magnétoscope ou du lecteur DVD.
. PC AUDIO :
4
Permet de raccorder la fiche de sortie
Audio du PC.
. VGA(PC):
5
Permet de raccorder la fiche de sortie
PC-RVB du PC.
. COAX: Connectez le récepteur SPDIF.
6
. PHONE: P
7
. YPbPr: P
8
ermet de raccorder le casque.
ermet de raccorder la fiche de sortie YPbPr
du lecteur DVD ou du magnétoscope.
. VIDEO/AUDIO: Connecter la Vidéo / sortie audio de
9
DVD ou un magnétoscope.
1 . RF IN:
0
Permet de raccorder l'antenne. Supporte
l'entrée du signal analogique et TV numérique HD DVB-T.
1 . CI PORT: P
1
ermet de raccorder la carte CI.
USB
1
USB
11 22
2
11 22
SCARTSCART
3
SCARTSCART
PC
PC
VGA (PC )VGA (PC )
AUDIO
AUDIO
5
4
PC
VGA (PC )VGA (PC )
AUDIOPCAUDIO
LE D-B13 HU3 2H L ED-B1 3HU 42 F
COA XCOAX
6
YPbPrYPb Pr
6
PHONEPHONE
7
D
D
I EV
OI EV
O
YPbPrYPb Pr
RR LL
DE
DE
I
I
V O
V O
RF IN RF IN
RR LL
98
COAXCOAX
RF IN RF IN
10
CI PORTCI PORT
CI PORTCI PORT
11
PHONEPHONE
Page 56

5. INSTALLATION DE BASE5. INSTALLATION DE BASE
Branchement du cordon d'alimentationBranchement du cordon d'alimentation
- Brancher le cordon d'alimentation comme indiqué.
- Appuyer sur le bouton POWER pour allumer le téléviseur. Le voyant d’alimentation sur le panneau
avant s’allume en vert ou bleu.
Branchement des antennesBranchement des antennes
ANTENNE VHFANTENNE VHF
AMPLIFICATEUR
AMPLIFICATEUR
D’ANTENNE
D’ANTENNE
EXTÉRIEURE
EXTÉRIEURE
AMPLIFICATEUR
AMPLIFICATEUR
D’ANTENNE
D’ANTENNE
INTÉRIEURE
INTÉRIEURE
PRISE D’ALIMENTATION
PRISE D’ALIMENTATION
D’AMPLIFICATEUR D’ANTENNE
D’AMPLIFICATEUR D’ANTENNE
Un système d’antenne TV doit être installé afin d’assurer une bonne qualité d’image et de son, afin
qu'un technicien installe et raccorde de manière appropriée l'antenne, Après l’installation, insérez
la fiche d’antenne de 75 ohms dans la prise d’antenne comme indiqué.
ANTENNE UHFANTENNE UHF
RF IN
PRISE
PRISE
D’ANTENNE
D’ANTENNE
75 OHMS
75 OHMS
7
Page 57

Connexion SCARTConnexion SCART
Arrière du
Arrière du
téléviseur
PC
USB
11 22
Lecteu r DVD ou magnét oscopeLecteu r DVD o u magnétosc ope
SCARTSCART
Câble ScartCâble Scart
Arrière du lecteur DVD ou du magnétoscopeArrière du lecteur DVD ou du magnétoscope
AUDIOPCAUDIO
VGA (PC )VGA(PC )
Raccorder le câble Péritel à l’appareil vidéo externe et au connecteur Péritel sur le téléviseur.
Le port Péritel sert de connexion d’entrée-sortie. Si le téléviseur ne sélectionne pas automatiquement
l’entrée Péritel, sélectionnez-la à l’aide de la touche SOURCE sur la télécommande ou le téléviseur.
téléviseur
Connexion VGA(PC)Connexion VGA(PC)
Arrière du
Arrière du
téléviseur
PC
PC
USB
11 22
SCARTSCART
AU DIO
AU DIO
VGA (PC )VGA (PC )
Raccorder la sortie RVB du PC au connecteur d’entrée VGA sur le téléviseur.
Raccorder la sortie AUDIO du PC au connecteur PC AUDIO sur le téléviseur.
Sélectionner la source d’entrée PC à l’aide de la touche SOURCE sur la télécommande.
téléviseur
Câble AudioCâble Audio
Câble VGACâble VGA
8
Page 58

Connexion de l'équipement AVConnexion de l'équipement AV
Arrière du
Arrière du
téléviseur
PHONEPHONE
YPbPrYPb Pr
V
IDEOV
IDEO
RR LL
RF IN RF IN
X
X
AC
A
O
O
C
CI PORTCI PORT
Câble VideoCâble Video
Arrière du lecteur DVD
Arrière du lecteur DVD
ou du magnétoscope
ou du magnétoscope
Lecteu r DVD ou magnét oscopeLecteu r DVD o u magnétosc ope
Raccorder les fiches de sortie VIDEO et AUDIO du lecteur DVD ou du magnétoscope aux fiches
AV du téléviseur, à l'aide du câble RCA.
Bien faire correspondre les couleurs:vidéo, jaune, Audio gauche, blanc, et Audio droit, rouge.
Sélectionner la source d'entrée AV à l'aide du bouton SOURCE de la télécommande.
téléviseur
Connexion YPbPrConnexion YPbPr
Arrière du
Arrière du
téléviseur
COAXCO AX
PHONEPHONE
YPbPrYPb Pr
D
D
I
V OI
V O
RR LL
E
E
RF IN RF IN
Y
Pb
Pr
CI PORTCI PORT
Audio et vidéo (RCA)
Mini câble de transfert audio et vidéo
Raccorder la sortie YPbPr du lecteur DVD ou du magnétoscope à l'entrée YPbPr du téléviseur.
Raccorder la sortie Audio du lecteur DVD ou du magnétoscope aux fiches d'entrée Audio du
téléviseur, à l'aide du câble RCA.
Bien faire correspondre les couleurs: Y, vert, Pb, bleue, Pr, rouge, Audio gauche, blanc et Audio
droit, rouge. Sélectionner la source d'entrée YPbPr à l'aide du bouton SOURCE de la télécommande.
téléviseur
Pr
Pb
Y
Cha nnel
Arrière du lecteur DVD
Arrière du lecteur DVD
ou du magnétoscope
ou du magnétoscope
Lecteu r DVD ou magnét oscopeLecteu r DVD o u magnétosc ope
9
Page 59

Connexion HDMIConnexion HDMI
Arrière du
Arrière du
téléviseur
USB
11 22
SCARTSCART
PC
AUDIOPCAUDIO
VGA (PC )VGA (PC )
téléviseur
Câble HDMICâble HDMI
Arrière du lecteur DVD ou du magnétoscopeArrière du lecteur DVD ou du magnétoscope
Lecteu r DVD ou magnét oscopeLecteu r DVD o u magnétosc ope
La connexion d’entrée HDMI permet d’effectuer le transfert numérique des signaux audio/video/de
commande via un câble uniquement.
Connexion COAXConnexion
Arrière du
Arrière du
téléviseur
COAXCO AX
PHONEPHONE
YPbPrYPb Pr
DE
DE
I
I
V O
V O
RR LL
RF IN RF IN
CI PORTCI PORT
téléviseur
Câble coaxialCâble coaxial
SPD IF INPU T
Amplificateur audio RetourAmplificateur audio Retour
Amplif icateur a udioAmplif icateur audi o
Connectez-vous à Amplificateur audio appareil à la prise de sortie COAX sur le téléviseur.
Connexion USBConnexion USB
Câble USBCâble USB
Arrière du
Arrière du
téléviseur
USB
11 22
SCARTSCART
PC
AUDIOPCAUDIO
VGA (PC )VGA(PC )
téléviseur
Insérer la clé USB à mémoire flash dans le port USB. Sélectionner la source de canal USB à l'aide
du bouton SOURCE de la télécommande.
10
Page 60

6. TELECOMMANDE6. TELECOMMANDE
Instructions d’utilisation de la télécommande en mode TVInstructions d’utilisation de la télécommande en mode TV
POWER
POWER
Pour mettre en marche ou arrêter le téléviseur LED.
MUTE
MUTE
Appuyer sur cette touche pour désactiver le son.
Appuyer de nouveau sur la touche ou sur VOL+ pour
restaurer la sortie du son.
TOUCHES NUMERIQUES
TOUCHES NUMERIQUES
Appuyer sur les touches 0-9 pour sélectionner une
chaîne TV. Le changement de chaîne s'effectue en 2 s.
Permet de revenir à la chaîne précédente.
LIST
LIST
Appuyer pour afficher la liste des programmes TV.
DISPLAY
DISPLAY
Appuyer pour obtenir des informations sur la source et
la chaîne.
ASPECT
ASPECT
Pour sélectionner le format d'écran.
VOL+/VOL-
VOL+/VOL-
Pour augmenter / diminuer le son.
CH+/CH-
CH+/CH-
Pour choisir les chaînes.
MENU
MENU
Pour afficher le menu principal à l'écran.
SOURCE
SOURCE
Appuyer sur SOURCE pour afficher la source d’entrée
OSD, appuyer sur ▲▼ pour sélectionner une source
d’entrée, puis appuyer sur OK pour confirmer.
CURSEUR( ▲/ ▼/◄ / ►/ OK ENTER )
CURSEUR( OK ENTER )
Pour naviguer dans les menus affichés à l'écran et
régler les paramètres du système à votre convenance.
SLEEP
SLEEP
Cette touche permet de sélectionner le délai avant que
votre téléviseur s’éteigne automatiquement.
EXIT
EXIT
Pour quitter le menu principal à l'écran.
AUDIO (I/II)
AUDIO (I/II)
Pour rechercher les modes NICAM.
11
Page 61

Instructions d’utilisation de la télécommande en mode DTV/USBInstructions d’utilisation de la télécommande en mode DTV/USB
TOUCHES NUMERIQUES
TOUCHES NUMERIQUES
Appuyer sur les touches 0-9 pour sélectionner une chaîne.
INFO
INFO
Appuyer pour obtenir des informations sur la source et la
chaîne.
CH+/CH-
CH+/CH-
Permet de changer de chaîne.
TOUCHES COULEURS
TOUCHES COULEURS
Touches de couleur (respectivement rouge, verte, jaune
et bleu) utilisées dans certains sous-menus.
T. LIST
T. LIST
Pour afficher la Grille des programmes enregistrés.
R. LIST
R. LIST
Pour afficher la liste des fichiers enregistrés.
SUBTITLE
SUBTITLE
Pour afficher le sous-titrage en mode DTV.
FAV
FAV
Liste des favoris.
ENR
ENR
Enregistre le programme en mode DTV.
EPG
EPG
Lance la fonction Guide électronique des programmes en
mode DTV.
AUDIO
AUDIO
Pour afficher le menu audio.
TV/RADIO
TV/RADIO
Lorsque vous regardez une chaîne, cette touche vous
permet de basculer entre les modes TV et radio.
(Décalage temporel)
Lecture ou pause.
Pour entrer la fonction Décalage temporel: gel de l'image
et redémarrage à partir de cette position.
Arrête la lecture ou l'enregistrement.
Retour et avance rapide.
Chapitre précédent / suivant en mode USB ou lecture de
la scène précédente/suivante des programmes
enregistrés, saut de 30secondes.
REPEAT
REPEAT
Appuyer pour sélectionner le mode répétition en mode
USB.
12
Page 62

Instructions d'utilisation de la télécommande en mode TELETEXTEInstructions d'utilisation de la télécommande en mode TELETEXTE
TOUCHES NUMERIQUES
TOUCHES NUMERIQUES
Appuyer sur les touches 0-9 pour sélectionner une
page télétexte.
CH+/CH-
CH+/CH-
Chaîne suivante/Chaîne précédente
TTX
TTX
Appuyer sur cette touche pour basculer entre les
modes TV et télétexte.
TOUCHES COULEURS
TOUCHES COULEURS
Pour sélectionner 4 pages télétextes favorites.
SUBTITLE
SUBTITLE
Pour afficher les sous-titres.
HOLD
HOLD
Arrêt sur la page en cours.
SIZE
SIZE
Modifie la taille de l'image.
REVEAL
REVEAL
Affiche ou masque les sous-titres.
INDEX
INDEX
Appelle la page d'index lorsque le lien correspondant
est activé.
SUBPAGE
SUBPAGE
Sous-page TELETEXTE.
13
Page 63

Instructions d’utilisation de la télécommande en mode DVDInstructions d’utilisation de la télécommande en mode DVD
Note: Vérifier que le téléviseur que vous venez d'acquérir est équipé d'un lecteur DVD.
TOUCHES NUMERIQUES
TOUCHES NUMERIQUES
Touches numériques utilisées pour sélectionner les
données.
PROGRAM
PROGRAM
Programme la lecture d'un disque à l'endroit souhaité.
ZOOM
ZOOM
En mode de lecture, appuyez sur ZOOM, le joueur
effectue un zoom avant dans l'image une seule fois.
CURSEUR( ▲/ ▼/◄ / ►/ OK ENTER )
CURSEUR( ▲/ ▼/◄ / ►/ OK ENTER )
Pour naviguer dans les menus affichés à l'écran et
régler les paramètres du système à votre convenance.
D. SETUP
D. SETUP
Permet de sélectionner les programmes. Peut
également être utilisé pour exécuter les commandes.
D. MENU
D. MENU
Permet d'accéder au menu disque DVD.
D. DISPLAY
D. DISPLAY
Permet d'afficher les informations DVD en mode DVD.
TITLE
Lorsque la lecture du DVD, fait apparaître le menu du titre.
Permet d'éjecter le disque.
A-B
A-B
Cette touche permet de répéter une partie du disque.
GOTO
GOTO
Permet d'accéder directement à un endroit du disque à
l'aide du menu GOTO.
Appuyer sur GOTO pour accéder au menu "GOTO".
AUDIO (I/II)
AUDIO (I/II)
Touches de sélection audio en mode DVD.
REPEAT
REPEAT
Appuyer sur REPETER pour répéter en boucle les
options de lecture.
ARRET DVD.
SUBTITLE
SUBTITLE
Permet de sélectionner une langue de sous-titrage
différente (selon les sous-titrages disponibles sur le DVD).
LECTURE/PAUSE en mode DVD ;
Touches de retour et d'avance rapide.
Permet d'accéder à la piste suivante/précédente.
14
Page 64

Configuration de la télécommandeConfiguration de la télécommande
1. Ouvrir le boîtier.
2. Piles AAA. Lors de l’insertion des piles, veiller à respecter la polarité correcte conformément
aux marques «+» et «_» sur les piles et dans le compartiment de piles.
3. Remettre en place le couvercle.
Pour éviter d'éventuelles fuites des piles, qui peuvent endommager la télécommande, veiller à
Pour éviter d'éventuelles fuites des piles, qui peuvent endommager la télécommande, veiller à
respecter les consignes suivantes:
respecter les consignes suivantes:
1. Insérer les piles comme indiqué sur la télécommande.
2. Ne pas mélanger les piles: usagées et nouvelles ou alcaline ou saline, etc.)
3. Retirer les piles si la télécommande ne sert pas pendant un certain temps.
15
Page 65

7. UTILISATION DU MENU7. UTILISATION DU MENU
SOURCE D'ENTREESOURCE D'ENTREE
Iuput Source
ATV
DTV
USB
AV
VGA
YPbPr
DVD
SCART
HDMI1
HDMI2
Enter
Iuput Source
ATV
DTV
USB
AV
VGA
YPbPr
SCART
HDMI1
HDMI2
HDMI3
Enter
Appuyer sur la touche SOURCE pour afficher la liste des sources disponibles;
Appuyez sur la touche ou SOURCE pour sélectionner la source d’entrée souhaitée ;
▼ / ▲
Appuyez sur la touche OK pour entrer la source d’entrée ;
Appuyer sur la touche QUITTER pour quitter;
MENU CHAÎNE
Appuyer sur la touche MENU pour afficher le menu principal.
Appuyer sur la touche pour sélectionner CHAINE dans le menu principal (la première option
s'affiche en surbrillance).
CHANNEL
Mov e
1. Appuyer sur la touche ▼/▲ pour sélectionner l'option que vous souhaitez modifier dans le menu
CHAINE.
2. Appuyer sur la touche OK pour régler.
◄/►
Auto Tuning
ATV Manual Tuning
DTV Manual Tuning
Programme Edit
Signal Information
CI Information
MENU
Ret urn
Enter
Sel ect
EXIT
Exi t
16
Page 66

Réglage Auto
Réglage Auto
Appuyer sur la touche pour sélectionner Réglage Auto, puis sur la touche OK pour lancer la
▼/▲
recherche automatique.
Tune Type
Other
▲
Belgium
▲
France
Germany
ATV+DTV
Italy
Portugal
▼
Channel Tuning
0 programme
TV
DTV
Radio
Data
1%
:
0 programme
:
0 programme
:
0 programme
:
67.30m Hz
(TV)
▼
Menu
Réglage manuel DTV
Réglage manuel DTV
Appuyer sur la touche ▼/ ▲ pour sélectionner Réglage Manuel DTV, puis sur la touche OK pour
Enter
Please press MENU key to skip
entrer dans le sous-menu.
DTV Manual Tuning
-
Freq:
UHF CH 21
NO SIGNAL
177.50 m Hz
+
Good
◄ ►
Bad
Appuyer sur la touche ◄/► pour sélectionner la chaîne, puis sur la touche OK pour rechercher les
programmes.
Réglage manuel ATV
Réglage manuel ATV
Appuyer sur la touche ▼/▲ pour sélectionner Réglage Manuel ATV, puis sur la touche OK pour
entrer dans le sous-menu.
ATV Manual Tuning
-
Current CH
Colour System
Sound System
Fine- Tune
49.75MHz
AFC
Search
Men u
1
PAL
DK
On
+
►◄
Appuyer sur la touche ◄/► pour sélectionner le numéro de la chaîne que vous souhaitez enregistrer.
Appuyer sur la touche ◄/► pour sélectionner le système de couleurs.
Appuyer sur la touche ◄/► pour sélectionner le système audio.
Appuyer sur la touche ◄/► pour sélectionner la recherche, puis sur la touche OK pour commencer
le réglage.
Appuyer sur la touche ◄/► pour sélectionner Réglage Fin.
Appuyer sur la touche ◄/► pour activer ou désactiver le contrôle de fréquence automatique.
17
Page 67

Edition du programme
Edition du programme
Appuyer sur la touche pour sélectionner Edition Programme, puis sur la touche OK pour
▼/▲
entrer dans le sous-menu.
Programme Edit
►
►
1 C-01
2 S-42
3 S-09
4 S-05
5 C-11
6 S-30
7 S-37
8 C-26
9 C-44
10 C-56
ATV
ATV
ATV
ATV
ATV
ATV
ATV
ATV
ATV
ATV
Del ete Ren ame
Enter
FAV
Mov e
Fav
Ski p
Men u
-Appuyer sur la touche rouge pour supprimer la chaîne actuelle.
-Appuyer sur la touche verte pour Renommer la chaîne actuelle.
-Appuyer sur la touche jaune et sur la touche ▼/▲ pour changer de chaîne.
-Appuyer sur la touche bleue pour ignorer la chaîne actuelle.
Informations signal
Informations signal
Appuyer sur la touche pour sélectionner Informations Signal, puis sur la touche OK pour
▼/▲
afficher les détails: la Chaîne, la Fréquence, la Qualité et la Force.
Signal Information
Channel 32
Frequency 562. 00MHZ
Quality 0
Strength 62
Informations CI
Informations CI
Appuyer sur la touche ▼/▲ pour sélectionner Informations CI, puis sur la touche OK pour afficher les
détails sur la carte CI.
Cl Information
Via ccess Con dit ional Acc ess
Mian Men u
Consul tation
Settin gs
Upgrad e
▲
▼
Press OK t o confirm ,Exit to quit
18
Page 68

MENU IMAGEMENU IMAGE
Appuyer sur la touche MENU pour afficher le menu principal.
Appuyer sur la touche pour sélectionner IMAGE dans le menu principal (la deuxième option
s'affiche en surbrillance).
1.Appuyer sur la touche pour sélectionner l'option que vous souhaitez régler dans le menu IMAGE.
2.Appuyer sur la touche OK pour régler.
PICTURE
◄/►
▼/▲
Picture Mode Standard
Contrast 50
Brightness 50
Colour 50
Tint 50
Sharpness
Colour Temp Normal
Noise Reduction Middle
30
Picture Mode
Dynamic
Standard
Mild
Personal
Mov e
Mode image
Mode image
MENU
Ret urn
Appuyer sur la touche pour sélectionner Mode Image, puis sur la touche OK pour entrer dans
Enter
▼/▲
Sel ect
le sous-menu. Appuyer sur la touche pour sélectionner.
EXIT
Exi t
▼/▲
Enter
Men u
Vous pouvez changer la valeur du contraste, de la luminosité, de la couleur et de la netteté, lorsque
l'image est en mode Personnel.
Contraste
Contraste
Appuyer sur la touche pour sélectionner Teinte, puis sur la touche OK pour entrer dans le
sous-menu. Appuyer sur la touche pour régler.
Luminosité
Luminosité
Appuyer sur la touche pour sélectionner Luminosité, puis sur la touche OK pour entrer dans le
sous-menu. Appuyer sur la touche pour régler.
Couleur
Couleur
Appuyer sur la touche pour sélectionner Couleur, puis sur la
touche OK pour entrer dans le sous-menu.
Appuyer sur la touche pour régler.
Teinte
Teinte
Appuyer sur la touche pour sélectionner Teinte, puis sur la
▼/▲
▼/▲
▼/▲
◄/►
▼/▲
◄/►
◄/►
Colour Temp
Cold
Normal
Warm
touche OK pour entrer dans le sous-menu. Appuyer sur la
touche pour régler. (Uniquement disponible en mode NTSC.)
Netteté
Netteté
Appuyer sur la touche pour sélectionner Netteté, puis sur
◄/►
▼/▲ ◄/►
pour régler.
Température de couleur
Température de couleur
Appuyer sur la touche pour sélectionner Température Couleur,
◄/►
puis sur la touche OK pour régler.
Réduction du bruit
Réduction du bruit
Appuyer sur la touche pour sélectionner Réduction Bruit,
◄/►
Enter
Noise Reduction
Off
Low
Middle
High
Men u
puis sur la touche OK pour régler.
Enter
Men u
19
Page 69

MENU SONMENU SON
Select
Back Adjust
Appuyer sur la touche MENU pour afficher le menu principal.
Appuyer sur la touche ◄/► pour sélectionner Son dans le menu principal (l’option s'affiche en surbrillance).
Sound Mode
Treble
Bass
Balance
Auto Volume
SOUND
Mov e
1.Appuyer sur la touche pour sélectionner l'option que vous souhaitez régler dans le menu SON.
2.Appuyer sur la touche pour régler.
Mode Son
Mode Son
Appuyer sur la touche pour sélectionner Mode Son, puis sur la touche OK pour entrer dans le
Surround Sound
MENU
Ret urn
▼/▲
Enter
▼/▲
◄/►
Sel ect
Standard
50
50
0
Off
Off
EXIT
Exi t
sous-menu.
Appuyer sur la touche pour régler.
◄/►
Vous pouvez modifier la valeur des Aigus et des Graves lorsque le son est en mode Personnalisé.
Sound Mode
Standard
Music
Movie
Sports
Personal
Enter
Aigus
Aigus
Appuyer sur la touche pour sélectionner Aigus, puis sur la touche OK pour entrer dans le
sous-menu. Appuyer sur la touche pour régler.
Graves
Graves
Appuyer sur la touche pour sélectionner Graves, puis sur la touche OK pour entrer dans le
sous-menu. Appuyer sur la touche pour régler.
Balance
Balance
Appuyer sur la touche pour sélectionner Balance, puis sur la touche OK pour entrer dans le
sous-menu. Appuyer sur la touche pour régler.
Volume Auto
Volume Auto
Appuyer sur la touche pour sélectionner Volume Auto, puis sur la touche OK pour sélectionner
▼/▲
◄/►
▼/▲
◄/►
▼/▲
◄/►
◄/►
Men u
Marche ou Arrêt.
Son Surround
Son Surround
Paramètres de Son Surround. Appuyer sur pour le mettre en Marche/Arrêt.
◄/►
20
Page 70

MENU HEUREMENU HEURE
Select
Back Adjust
Appuyer sur la touche MENU pour afficher le menu principal.
Appuyer sur la touche pour régler l’HEURE dans le menu principal. Cela met en surbrillance la
quatrième option.
◄/►
Enter
Sel ect
01/ Jan 04: 28
Off
Off
4H
10s
EXIT
Exi t
Clo ck
Off Ti me
On Tim e
Time Zone G MT+1
Sle ep Timer O ff
MENU
Ret urn
Aut o Stand by
OSD Ti mer
▼/▲
TIM E
Mov e
1.Appuyer sur la touche pour sélectionner l'option que vous souhaitez modifier dans le menu
HEURE.
2.Appuyer sur la touche pour régler.
Horloge
Horloge
Affiche l’heure système en cours. Non disponible.
Fuseau horaire
Fuseau horaire
Appuyer sur la touche pour sélectionner Fuseau horaire,
puis sur la touche OK pour entrer dans le sous-menu.
Minuterie
Minuterie
Appuyer sur la touche pour sélectionner Minuterie, puis
◄/►
▼/▲
▼/▲
Sleep Timer
Off
10min
20min
30min
60min
90min
sur la touche OK pour entrer dans le sous-menu.
Appuyer sur la touche pour régler.
◄/►
Enter
Men u
Attente Auto
Attente Auto
Appuyer sur la touche pour sélectionner Attente Auto,
▼/▲
puis sur la touche OK pour entrer dans le sous-menu.
Appuyer sur la touche pour régler.
Temps OSD
Temps OSD
Appuyer sur la touche pour sélectionner Temps OSD,
◄/►
▼/▲
puis sur la touche OK pour entrer dans le sous-menu.
Appuyer sur la touche pour régler.
◄/►
21
Auto Standby
Off
3H
4H
5H
Enter
OSD Timer
5S
10S
15S
20S
25S
30S
Enter
Men u
Men u
Page 71

MENU VERROUILLAGEMENU VERROUILLAGE
Appuyer sur la touche MENU pour afficher le menu principal.
Appuyer sur la touche pour sélectionner VERROUILLAGE dans le menu principal (la cinquième
option s'affiche en surbrillance).
◄/►
Loc k Syste m
Set P asswo rd
Blo ck Prog ram
Par ental G uidan ce
LOC K
Mov e
1. Appuyer sur la touche pour sélectionner l'option que vous souhaitez modifier dans le menu
Key l ock
MENU
Ret urn
Enter
Sel ect
▼/▲
Off
Off
Off
EXIT
Exi t
VERROUILLAGE.
2. Appuyer sur la touche pour régler.
Système de Verrouillage
Système de Verrouillage
Appuyer sur la touche pour sélectionner Système de Verrouillage,
◄/►
◄/►
Please enter password
puis sur la touche OK. Rendre les options suivantes valides.
Le mot de passe par défaut est 0000.
CancelClear
►
Réglage Mot de passe
Réglage Mot de passe
Appuyer sur la touche pour sélectionner Réglage Mot de passe,
▼/▲
puis sur la touche OK pour entrer dans le sous-menu.
◄
Please enter old password
Please enter new password
Confirm new password
CancelClear
►◄
Programme Bloqué
Programme Bloqué
Appuyer sur la touche pour sélectionner Programme Bloqué, puis sur la touche OK pour
▼/▲
entrer dans le sous-menu.
Appuyer sur la touche pour sélectionner le programme à verrouiller, puis appuyer sur la touche
▼/▲
verte de votre télécommande. (Pour déverrouiller le programme, entrez le mot de passe que vous
avez défini)
Appuyer sur la touche OK pour sauvegarder le réglage et sur la touche de menu pour revenir au
menu précédent.
Contrôle Parental
Contrôle Parental
Appuyer sur la touche pour sélectionner Contrôle Parental, puis sur la touche OK pour entrer
▼/▲
dans le sous-menu.
(Les options disponibles sont : Arrêt, 4-18)
Verrouillage touches
Verrouillage touches
Appuyer sur la touche pour sélectionner Verrouillage Touches, puis sur la touche OK pour
◄/►
sélectionner Marche ou Arrêt.
22
Page 72

MENU DE CONFIGURATIONMENU DE CONFIGURATION
Select
Back Adjust
Appuyer sur la touche MENU pour afficher le menu principal.
Appuyer sur la touche pour sélectionner Configuration dans le menu principal (la sixième
option s'affiche en surbrillance).
◄/►
OSD Language
TTX Language
Audio Language
Subtitle Language
PVR File System
Recorder
Schedule List
SETUP
Mov e
1. Appuyer sur la touche pour sélectionner l'option que vous souhaitez régler dans le menu
Aspect Ratio
Blue Screen On
First Time Installation
Reset
MENU
Ret urn
Enter
Sel ect
▼/▲
English
West
English
English
16:9
EXIT
Exi t
CONFIGURATION.
2. Appuyer sur la touche pour régler.
Langue OSD/Langue Audio/Langue Sous-titres
Langue OSD/Langue Audio/Langue Sous-titres
Appuyez sur pour sélectionner OSD / Audio / Subtitle Language, puis appuyez sur le bouton
▼/▲
◄/►
OK pour accéder au sous-menu.
Appuyez sur pour sélectionner la langue OSD, réglage par défaut est l'anglais.
Langue TTX
Langue TTX
Appuyer sur la touche pour sélectionner Langue TTX, puis sur la touche OK pour entrer dans
le sous-menu. Appuyer sur la touche pour sélectionner Langue TTX.
TTX Language
▼/▲/◄/►
West
East
Russian
Arabic
Farsi
▼/▲
◄/►
Select Disk C:
Check PVR Fil e Sys tem
USB Disk
Format
Time Shift Size
Speed
Free Record L imi t
Start
6Hr.
Aspect Ratio
AUTO
4:3
16:9
Zoom1
Zoom2
Enter
Système Fichier MN
Système Fichier MN
Appuyer sur la touche pour sélectionner Système Fichier MN, puis sur la touche OK pour
Men u
▼/▲
Enter
Men u
Enter
Men u
entrer dans le sous-menu.
Liste des Programmes
Liste des Programmes
Appuyer sur la touche pour sélectionner Liste des programmes, puis sur la touche OK pour
▼/▲
entrer dans le sous-menu.
Schedule List
Time Date
13:30-15:30
14:27 31th May
Program Title
Thurs.31 May
Before Winter Comes
Delete
Channel Name
5 Five
Menu
23
Page 73

Enregistreur
Enregistreur
Appuyer sur la touche MENU de la télécommande pour afficher le menu principal ; utiliser la touche
◄/► ◄/►
pour sélectionner CONFIGURATION et la touche pour sélectionner Enregistreur.
Appuyer sur la touche OK pour entrer dans le sous-menu.
Format d'écran
Format d'écran
Appuyer sur la touche pour sélectionner Format d'écran, puis sur la touche OK pour entrer
▼/▲
dans le sous-menu.
Ecran Bleu
Ecran Bleu
Appuyer sur la touche pour sélectionner Ecran Bleu, puis sur la touche pour sélectionner
◄/► ◄/►
Marche ou Arrêt.
Installation Initiale
Installation Initiale
Appuyer sur la touche pour sélectionner Installation Initiale, puis sur la touche OK pour définir
▼/▲
les options correspondantes, notamment Langue OSD, pays et réglage.
Réinitialisation
Réinitialisation
Appuyer sur la touche pour sélectionner Réinitialisation, puis sur la touche OK pour entrer dans
une boîte de dialogue. Appuyer sur la touche en sélectionnant Oui ou Non.
◄/►
◄/►
MENU ECRANMENU ECRAN
Appuyer sur la touche MENU pour afficher le menu principal.
Appuyer sur la touche pour sélectionner Ecran dans le menu principal (la première option
◄/►
s'affiche en surbrillance). (Disponible uniquement lors de l’entrée du signal PC-RGB)
Auto Adjust
Horizontal pos.
Vertical pos.
Size
SCREEN
Mov e
1.Appuyer sur la touche pour sélectionner l'option que vous souhaitez régler dans le menu
Phase
Position Reset
MENU
Ret urn
Enter
Sel ect
▼/▲
50
50
50
99
EXIT
Exi t
ECRAN.
2.Appuyer sur la touche OK pour régler.
Réglage Auto
Réglage Auto
▼/▲
Appuyer sur la touche pour sélectionner Réglage Auto, puis sur la touche OK pour lancer la
▼/▲
recherche automatique.
Pos. Horizontale
Pos. Horizontale
◄/►
Appuyer sur la touche pour sélectionner Pos. Horizontale, puis sur la touche OK pour entrer
dans le sous-menu. Appuyer sur la touche pour régler.
◄/►
◄/►
◄/►
24
Page 74

Pos. Verticale
Pos. Verticale
Appuyer sur la touche ◄/► pour sélectionner Pos. Verticale, puis sur la touche OK pour entrer dans
le sous-menu. Appuyer sur la touche ◄/► pour régler.
Taille
Taille
Appuyer sur la touche ◄/► pour sélectionner la Taille, puis sur la touche OK pour entrer dans le
sous-menu. Appuyer sur la touche ◄/► pour régler la taille d’affichage.
Phase
Phase
Appuyer sur la touche ▼/▲ pour sélectionner Phase, puis sur la touche OK pour entrer dans le
sous-menu. Appuyer sur la touche ◄/► pour régler
VGA(PC)VGA(PC)
Notes:
1.Réduction Bruit dans l'option IMAGE est inactive.
2.Le menu et la description SON sont identiques au mode DTV.
3.Le menu et la description VERROUILLAGE sont identiques au mode DTV.
4. Système Fichier MN dans le menu CONFIGURATION est inactif.
Equipement AV/Péritel/HDMI/YPbPrEquipement AV/Péritel/HDMI/YPbPr
Notes:
1.Le menu et la description IMAGE sont identiques au mode DTV.
2.Le menu et la description SON sont identiques au mode DTV.
3.Le menu et la description VERROUILLAGE sont identiques au mode DTV.
4. Système Fichier MN dans le menu CONFIGURATION est inactif.
25
Page 75

MENU MEDIA(USB)MENU MEDIA(USB)
Remarque:Avant d’utiliser le menu MEDIA, brancher le périphérique USB, puis appuyer sur la
touche SOURCE pour configurer l’entrée en USB, et appuyer sur la touche OK pour entrer
USB 2 .0
Appuyer sur la touche pour sélectionner l'option que vous souhaitez régler dans le menu MEDIA,
◄/►
puis sur la touche OK pour entrer.
MENU PHOTOMENU PHOTO
Appuyer sur la touche pour sélectionner PHOTO dans le menu principal, puis appuyer sur la
touche OK pour entrer.
USB 2 .0
Appuyer sur la touche pour sélectionner le disque que vous souhaitez visualiser, puis sur la
touche OK pour entrer.
Appuyer sur la touche pour sélectionner l'option retour et revenir au menu précédent.
PHO TO
◄/►
◄/►
◄/►
1/1
C:\
PHOTO
1/1
pic ture
EXIT Exit
Ret urn
Ret un
C
Delete
-MS TPVR
mus ic
Appuyer sur la touche QUITTER pour revenir au menu précédent.
Appuyer sur la touche pour sélectionner le fichier que vous souhaitez visionner dans le menu
◄/►
de sélection de fichiers, puis sur la touche OK Lorsque l'option sélectionnée est en surbrillance,
les informations du fichier apparaissent à droite de l'écran et le texte est prévisualisé au centre.
26
Page 76

C:\
PHOTO
1/1
Ret un
Delete
-MS TPVR
Appuyer sur la touche pour sélectionner le dossier dans lequel effectuer la recherche dans le
mus ic
◄/►
pic ture
EXIT Exit
menu de sélection de fichiers puis sur la touche OK de la télécommande pour entrer dans le sous-menu.
Appuyer sur la touche pour sélectionner le fichier que vous souhaitez supprimer dans le menu
◄/►
de sélection de fichiers, puis appuyer sur la touche rouge de votre télécommande pour le supprimer.
MENU MUSIQUEMENU MUSIQUE
Appuyer sur la touche pour sélectionner MUSIQUE dans le menu principal, puis sur la touche
OK pour entrer.
USB 2 .0
▼/▲
Appuyer sur la touche pour sélectionner le disque que vous souhaitez visualiser, puis sur la
◄/►
touche OK pour entrer.
Appuyer sur la touche pour sélectionner l'option retour et revenir au menu précédent.
◄/►
Lorsque l'option sélectionnée est en surbrillance, les informations du fichier apparaissent à droite
de l'écran et le texte est prévisualisé au centre.
MUSIC
C:\
Ret un
Delete
-MS TPVR
mus ic
1/1
pic ture
Appuyer sur la touche QUITTER pour revenir au menu précédent.
Appuyer sur la touche pour sélectionner le fichier que vous souhaitez lire dans le menu de
◄/►
sélection de fichiers puis sur la touche OK pour lire la musique sélectionnée.
27
Page 77

MENU FILMMENU FILM
Appuyer sur la touche pour sélectionner FILM dans le menu principal, puis sur la touche OK
pour entrer.
USB 2 .0
◄/►
Appuyer sur la touche pour sélectionner le disque que vous souhaitez visualiser, puis sur la
◄/►
touche OK pour entrer.
MOVIE
◄/►
mus ic
[3. av]
EXI T
1/1
pic ture
Exi t
Appuyer sur la touche pour sélectionner l'option retour et revenir au menu précédent.
C:\
Ret un
.av l
Delete
-MS TPVR
MPE G4_31 1F_72 0X5-
Appuyer sur la touche QUITTER pour revenir au menu précédent.
Lorsque l'option sélectionnée est en surbrillance, les informations du fichier apparaissent à droite
de l'écran et le film est prévisualisé au centre.
Appuyer sur la touche OK pour lire le film sélectionné.
MENU TEXTEMENU TEXTE
Appuyer sur la touche ◄/► pour sélectionner TEXTE dans le menu principal, puis sur la touche
OK pour entrer.
USB 2 .0
Appuyer sur la touche pour sélectionner le disque que vous souhaitez visualiser, puis sur la touche
◄/►
OK pour entrer.
Appuyer sur la touche pour sélectionner l'option retour et revenir au menu précédent.
◄/►
28
Page 78

C:\
TEXT
1/1
EXI T
pic ture
Exi t
Ret un
Delete
-MS TPVR
mus ic
Appuyer sur la touche QUITTER pour revenir au menu précédent.
Lorsque l'option sélectionnée est en surbrillance, les informations du fichier apparaissent à droite
de l'écran et le texte est prévisualisé au centre.
Appuyer sur la touche OK pour lire le texte sélectionné.
MENU MNMENU MN
Enregistrement immédiat
Enregistrement immédiat
Remarque: Vérifier que le périphérique USB est bien inséré dans la carte TV avant de commencer
l'enregistrement. Appuyer sur la touche ENR de votre télécommande pour commencer
l'enregistrement. Une icône d'enregistrement apparaît en bas de l'écran pendant l'opération:
[00:00:20]
(0001:57:29)
PlayPlay FBFB FFFF
5 Five
NextNextPrev.Prev.
Before Winter Comes
PausePause
StopStop
14:28
Appuyer sur la touche ENR pour afficher la barre de commande ou la masquer.
Appuyer sur la touche pour sélectionner l'arrêt ou sur la touche arrêt de votre télécommande
◄/►
pour arrêter l'enregistrement.
La boîte de dialogue suivante s'ouvre:
It will stop Recording
◄ YES
No►
29
Page 79

Appuyer sur la touche pour sélectionner d’arrêter PVR ou non.
Appuyer sur la touche pour sélectionner de lire le programme enregistré durant l’enregistrement.
◄/►
◄/►
[00:00:20/00:02:13]
PlayPlay FBFB FFFF
NextNextPrev.Prev. StopStopPausePause
14:28
Vous pouvez appuyer sur les touches de la barre de commande pour lire, faire défiler en avance
et retour rapide, lire le précédent, lire le suivant, passer en mode pause ou arrêter la lecture.
Remarque: vous pouvez également lire le programme enregistré dans le fichier nommé ” _MSTPVR”
du fichier FILM de la source USB.
Système Fichier MN
Système Fichier MN
Appuyer sur la touche MENU du panneau avant ou de la télécommande pour afficher le menu principal.
Appuyer sur la touche pour sélectionner CONFIGURATION dans le menu principal, puis sur la
▼/▲
touche OK pour entrer.
Mov e
SETUP
OSD Language
TTX Language
Audio Language
Subtitle Language
PVR File System
Recorder
Schedule List
Aspect Ratio
Blue Screen On
First Time Installation
Reset
MENU
Ret urn
Enter
Sel ect
English
West
English
English
16:9
EXIT
Exi t
1. Appuyer sur la touche pour sélectionner Système Fichier MN;
2. Appuyer sur la touche OK pour entrer et sur la touche pour éditer.
▼/▲
◄/►
3. Une fois le réglage effectué, appuyer sur la touche Menu pour sauvegarder et revenir au menu
précédent.
Select Disk C:
Check PVR Fil e Sys tem
USB Disk
Format
Time Shift Size
Speed
Free Record L imi t
Enter
Sélection Disque
Sélection Disque
Appuyer sur la touche pour sélectionner Sélection Disque, puis sur OK pour entrer ; appuyer
sur la touche pour sélectionner le disque à vérifier.
Vérification Système Fichier MN
Vérification Système Fichier MN
◄/►
Appuyer sur la touche pour sélectionner Vérification Système Fichier MN, puis sur la touche
◄/►
▼/▲
Start
6Hr.
Men u
OK pour vérifier le disque que vous avez sélectionné.
Format
Format
Appuyer sur la touche pour sélectionner Format, puis sur la touche OK pour entrer dans le
▼/▲
sous-menu:
30
Page 80

File System Size
PVR File Syst emTy pe
PVR File Syst em Si ze
SD 104 Mins
HD 29 Mins
Enter
FAT32
All
Appuyer sur la touche pour sélectionner Type Système Fichier MN, puis sur la touche
▼/▲ ◄/►
pour sélectionner le type système; appuyer sur la touche OK pour formater le disque.
Une boîte de dialogue s'ouvre comme illustré ci-dessous:
Format disk
Format disk
Warning ! All data will be lost.
◄ Start
Exit►
Appuyer sur la touche ◄ pour commencer le formatage ou sur la touche ► pour l'annuler et revenir
au menu précédent.
Enregistreur
Enregistreur
Appuyer sur la touche MENU de la télécommande pour afficher le menu principal ; utiliser la touche
◄/► ◄/►
pour sélectionner CONFIGURATION et la touche pour sélectionner Enregistreur.
Appuyer sur la touche OK pour entrer dans le sous-menu.
1. Appuyer sur la touche pour sélectionner l'option;
Appuyer sur la touche pour régler.
▼/▲
◄/►
Une fois les réglages effectués, appuyer sur la touche OK pour enregistrer. Une boîte de dialogue
d'enregistrement correct s'affiche suivie d'une Liste des programmes enregistrés.
Appuyer sur la touche ROUGE pour annuler les réglages.
Vous pouvez sélectionner Mode Auto\Mode Une fois\Mode Quotidien\Mode Hebdomadaire pour
l'enregistrement.
Heure de début
Heure de début
Heure de début d'enregistrement;
Heure d'arrêt
Heure d'arrêt
Heure d'arrêt d'enregistrement.
RECORDERRECORDER
5 Fiv e5 Five
Mode OnceMode Once
Sta rt Tim eStart Time
May MonthMay Month
31 Date31 Date
13 Hour13 Hour
30 Minute30 Minu te
End TimeEnd Tim e
May MonthMay Month
31 Date31 Date
15 Hour15 Hour
30 Minute30 Minu te
BackBackEnterE nte r
31
Page 81

Décalage temporel
Décalage temporel
Appuyer sur la touche pour lancer le Décalage temporel ; une barre de commande apparaît
comme suit:
[00:00:20]
(0001:57:29)
14:28
5 Five
S
PlayPlay FBFB FFFF
NextNextPrev.Prev. StopStopPausePause
Before Winter Comes
Le programme s’arrête puis vous démarrez le décalage temporel ; vous pouvez continuer à lire le
programme en appuyant sur la touche LECTURE dès que vous souhaitez le lire dans le décalage
temporel défini.
Vous pouvez appuyer sur les touches de la barre de commande et de la télécommande pour lire,
faire défiler en avance et retour rapide, lire le précédent, lire le suivant, passer en mode pause ou
arrêter le décalage temporel.
Remarque: Durant le Décalage Temporel, vous ne pouvez pas appeler la Source d’entrée, le Menu,
le texte, la liste des favoris, etc. à moins de l’arrêter d’abord. Durant l’enregistrement, vous ne
pouvez pas modifier la chaîne à mois de l’enregistrer d’abord ; appuyer sur le bouton MARCHE/
ARRETpour arrêter le Décalage temporel ;
La fonction Décalage Temporel ne supporte pas le Décalage Temporel Chaîne Radio et Chaîne
verrouillée.
Liste Enregistrée
Liste Enregistrée
Appuyer sur la touche R.LIST de la télécommande pour afficher la Liste Enregistrée.
Recorded List Programme
8 Sim ple Rule s8 Sim ple Rule s
8 Sim ple Rule s8 Sim ple Rule s
Before Winter ComesBefore Winter Comes
DeleteDelete
EnterEnter
INFOIN FO
IndexIndex
32
Page 82

Menu GEPMenu GEP
Appuyer sur la touche GEP de la télécommande.
PROGRA MME G UID E
31 Ma y 2007 13 :00- 15:3 0 31 Ma y 2007 14 :38
Com dey dra ma star ring Da vid Niv en .An off icer in c harge o f a displ aced pe rsons ’camp f aces a di lemma w hen a
Rus sian de serte r is orde red bac k.(19 69)[S ]
31 Ma y
1 Fiv e
2 Fiv e Life
3 Fiv e US
13: 30- 15:3 0
15: 30- 17:3 0
17: 30- 18:0 0
Bef ore Win ter Com es
Bat tle of Th e V.1
Fiv e News Fo llowe d By Weat her
Displa y
Next Day P rev Day
Sch edu le
Remild
Enter
Enregistrer
Enregistrer
Record
Move View
Enregistrer programme.
Affiche le mode d'enregistrement lorsqu'il est sélectionné, et vérifie les paramètres MN.
Afficher
Afficher
Affiche toutes les informations.
Liste des Programmes
Liste des Programmes
Le schéma de référence du menu se présente comme suit:
Schedule List
Time Date
13:30-15:30
14:27 31th May
Program Title
Thurs.31 May
Before Winter Comes
Delete
Channel Name
5 Five
Back
▲▼
A l'aide des touches Haut et Bas, déplacez-vous sur Focus pour sélectionner le programme.
SUPPRIMER
SUPPRIMER
Permet de supprimer le programme sélectionné.
Back
Retour au menu EPG.
Rappel
Rappel
Programme réservé. Permet d'afficher le menu de réglages suivant.
A l'aide des touches Haut et Bas, choisir le programme défini.
33
Page 83

8. UTILISATION DU DVD8. UTILISATION DU DVD
Note: s'il vous plaît faire en sorte que le téléviseur que vous avez acheté est acheté avec le
chargeur de DVD, autrement toute cette partie ne s'applique pas.
Fonctionnement de baseFonctionnement de base
1.Appuyer sur le bouton Source de la télécommande pour sélectionner le canal du DVD.
2.Appuyer sur la touche OPEN / CLOSE pour insérer le disque.
Tenir le disque par le bord, sans toucher la surface, insérer le DVD avec l’étiquette tournée vers
l’arrière de l’appareil dans le lecteur DVD sur la droite de votre téléviseur.
Pousser légèrement le DVD jusqu’à ce qu’il soit avalé automatiquement.
Configuration du DVDConfiguration du DVD
Le Mode configuration permet de configurer la page principale, les haut-parleurs, la vidéo et les
préférences.
Sélectionner dans le menu Configuration à l’aide des flèches de navigation et des touches
D.SETUP et OK.
Appuyer tout d’abord sur la touche D.SETUP, entrer dans le menu de configuration, puis appuyer
sur la touche de DIRECTION DROITE pour passer au sous-menu suivant.
Appuyer sur la touche D.SETUP à nouveau pour quitter le Menu.
Configuration généraleConfiguration générale
TV Display
TV Display
S’utilise pour sélectionner les aspects 4: 3/PS, 4: 3/LB, 16: 9.
- - General Setup Page - -
TV Display
OSD Lang
Screen Saver
Last Memory
16:9 4:3/PS
ENG
On
Off
4: 3/LB
16:9
34
Page 84

Langue OSD
Langue OSD
Pour sélectionner la langue.
·English
·French
·Spanish
·German
·Portuguese
·Italian
- - General Setup Page - -
TV Display
OSD Lang
Screen Saver
Last Memory
16:9
ENG
On
Off
English
French
Spanish
German
Portuguese
Italian
Fond d’écran
Fond d’écran
Lancer le fond d’écran et l’image apparaîtra lorsque le lecteur s’arrête ou lorsque l’image est figée
pendant quelques minutes. Ce fond d’écran permet à l’écran de ne pas s’abîmer.
On (Lance le fond d’écran).
·
Off (Arrête le fond d’écran).
·
- - General Setup Page - -
TV Display
OSD Lang
Screen Saver
Last Memory
Dernière donnée en mémoire
Dernière donnée en mémoire
Permet de configurer les objets sur la dernière mémoire utilisée, avec les options «on» et «off».
Si vous sélectionnez «on», éteignez l’appareil avant de configurer la mémoire, puis redémarrez
l’appareil. Configurer une durée proche.
Si vous sélectionnez «off», l’appareil reviendra automatiquement aux réglages par défaut.
On (Lance le Dernière donnée en mémoire).
·
Off (Arrête le Dernière donnée en mémoire).
·
16:9
ENG
On
Off
On
Off
35
Page 85

- - General Setup Page - -
TV Display
OSD Lang
Screen Saver
Last Memory
16:9
ENG
On
Off
On
Off
Réglage AudioRéglage Audio
Réglage des haut-parleurs
Réglage des haut-parleurs
Dans la page «Page de configuration audio», appuyer sur « » et sélectionner «Réglage audio»,
appuyer ensuite sur la touche«OK enter»,
ou sur la touche Play « » dans la«Page de configuration audio».
►
- - Audio Setup Page - -
Speaker Setup
Dual Mono
Dynamic
▼
Downmix
Downmix
·
LT/RT
·
LT/RT
Dans un disque enregistré en multipistes, le signal de sortie sera divisé entre les canaux gauche
et droit.
·
Stéréo
·
Stéréo
Dans un disque enregistré en multipistes, le signal de sortie sera émis en stéréo.
- - Speaker Setup Page - -
Downmix
STR
LT/RT
Stereo
36
Page 86

Dual Mono
Dual Mono
Permet de sélectionner la Stéréo, L-MONO, R-MONO et MIX-MONO.
- - Audio Setup Page - -
Speaker Setup
Dual Mono
Dynamic
Dynamique
Dynamique
Permet de régler le ratio de compression afin de contrôler les contrastes du son (Volume).
Stereo
L-Mono
R-Mono
Mix-Mono
- - Audio Setup Page - -
Speaker Setup
Dual Mono
Dynamic
FULL
3/4
1/2
1/4
OFF
Configuration des préférencesConfiguration des préférences
Assurez-vous qu’il n’y ait aucun disque dans le lecteur DVD avant de sélectionner la
page «Préférences».
TV Type
TV Type
- PAL
Sélectionner PAL si le lecteur est connecté à un système TV PAL.
- MULTI
Le lecteur choisira le système TV en fonction du disque inséré dans le lecteur.
- NTSC
Sélectionner NTSC si le lecteur est connecté à un système TV NTSC.
37
Page 87

- - Preference Page - -
TV Type
Audio
Subtitle
Disc Menu
Parental
Password
Default
Audio
Audio
Si l’une des langues ci-dessous est enregistrée sur le disque, vous pourrez écouter le disque dans
l’une de ces langues. Sinon, vous ne pourrez l’écouter que dans la ou les langue(s) enregistrée(s).
·English
·French
·Spanish
·German
·Portuguese
·Italian
- - Preference Page - -
TV Type
Audio
Subtitle
Disc Menu
Parental
Password
Default
Multi
ENG
ENG
ENG
Multi
ENG
ENG
ENG
PAL
Multi
NTSC
English
French
Spanish
German
Portuguese
Italian
Sous-titres
Sous-titres
Si l’une des langues ci-dessous est enregistrée sur le disque, vous pourrez sélectionner cette
langue pour les sous-titres. Sinon, vous ne pourrez les afficher dans que la ou les langue(s)
enregistrée(s).
·English
·French
·Spanish
·German
·Portuguese
·Italian
·Off
- - Preference Page - -
TV Type
Audio
Subtitle
Disc Menu
Parental
Password
Default
Multi
ENG
ENG
ENG
English
French
Spanish
German
Portuguese
Italian
Off
38
Page 88

Menu du disque
Menu du disque
Si l’une des langues ci-dessous est enregistrée sur le disque, vous pouvez choisir cette langue
pour le Menu. Sinon, le Menu sera affiché dans l’une des langues enregistrées sur le disque.
·English
·French
·Spanish
·German
·Portuguese
·Italian
- - Preference Page - -
TV Type
Audio
Subtitle
Disc Menu
Parental
Password
Default
Multi
ENG
ENG
ENG
English
French
Spanish
German
Portuguese
Italian
Contrôle parental
Contrôle parental
Lorsque vous lisez un disque avec la fonction de contrôle parental, vous pouvez sélectionner un
âge limite en fonction du disque et de vos préférences. Par exemple, si vous avez sélectionné PG,
un DVD dont le ratio serait supérieur ne pourra être lu.
·
KID SAFE - Convient aux enfants
·
G - Tous publics
·
PG - Accord parental souhaité
·
PG-13 - Interdit aux moins de 12 ans
·
PGR - Interdit aux moins de 16 ans
·
R – Accord parental obligatoire
·
NC 17 – Interdit aux moins de 18 ans
·
ADULT – Pour adultes
- - Preference Page - -
TV Type
Audio
Subtitle
Disc Menu
Parental
Password
Default
Multi
ENG
ENG
ENG
1 KID SAF
2 G
3 PG
4 PG 13
5 PGR
6 R
7 NC17
8 ADULT
39
Page 89

Mot de passe
Mot de passe
Permet de modifier le mot de passe requis pour changer les paramètres de contrôle d’âge de la
fonction Contrôle parental.
NOTE : (Le mot de passe par défaut est 123456 )
- - Preference Page - -
TV Type
Audio
Subtitle
Disc Menu
Parental
Password
Default
Paramètres par défaut
Paramètres par défaut
L’utilisateur peut revenir aux paramètres par défaut prévus lors de la fabrication en appuyant sur la
touche RESET puis sur OK.
Multi
ENG
ENG
ENG
Change
- - Preference Page - -
TV Type
Audio
Subtitle
Disc Menu
Parental
Password
Default
Multi
ENG
ENG
ENG
Reset
40
Page 90

9. AUTO-DÉPANNAGE ET CONSEILS9. AUTO-DÉPANNAGE ET CONSEILS
Merci de vérifier si vous pouvez résoudre le problème par vous-même.
ProblèmeProblème ContrôleContrôle
Absence de signal
Absence de couleurs
Tâche sur l’écran
Image double ou multiple
Neige sur l’écran
La télécommande
ne fonctionne pas
Pas de son
Pas deDVD
Vérifier que tous les câbles sont correctement branchés.
Ajuster le contraste, la couleur et la luminosité.
Peut provenir du signal lumineux d’une voiture, d’un moteur, d’un
néon ou autres appareils ou installations électriques.
Peut résulter de perturbations de courant électrique provenant d’un
autre téléviseur, d’un ordinateur, d’une console de jeux ou d’une radio.
Les câbles de l’antenne ne sont pas correctement branchés.
Vérifier l’état des piles et leur installation. Vérifier que le capteur
infrarouge n’est pas caché.
Vérifier que vous n’avez pas appuyé sur la touche MUTE sur le
téléviseur ou la télécommande.
Vérifier que la TV soit bien en mode DVD.
Le lecteur DVD ne
fonctionne pas
correctement
Assurez-vous que le disque est correctement inséré dans le lecteur.
Vérifiez que le disque ne soit pas endommagé et au bon format.
Merci de patienter, certains disques sont plus longs que d’autres à
se mettre en route.
41
Page 91

10. CARACTÉRISTIQUES 10. CARACTÉRISTIQUES
Ce manuel est pour référence uniquement, tout changement dans la conception ou les
caractéristiques ne sera pas détaillé.
Mode
Screen Size
Display Type
Resolution(Pixel)
Aspect Ratio
Power Supply
Power Consumption
TV System
Video Input Format
Audio Output Power
ANTENNA
AV-IN
YPbPr - IN
HDMI - IN
VGA(PC) - IN
SUPPORT
VGA(PC) AUDIO - IN
SCART - IN
SCART - OUT
EARPHONE - OUT
S-VIDEO - IN
COAXIAL - OUT
LED-B13TU19H
18.5Inch 21.6Inch 21.6Inch
LED-B13TU22H
LED-B13HU22H
21.6Inch
LED-B13TDU22H
TFT LED
1366 X 768
16:9
AC 100-240V 50/60Hz
DC 12V
40W
PAL/SECAM
PAL/NTSC/SECAM
L / R 2X3W
OUI
OUI
OUI
OUI
OUI
OUI
OUI
OUI
OUI
--
OUI
48W
DVD
Dimensions
Weight
COMMON INTERFACE
USB
IPOD
Disc Physical Format
DVD Video Output Format
Inc Stand (LxWxHmm)
Exc Stand (LxWxHmm)
Net (Kgs)
Gross (Kgs)
466x182x366
466x49x309
4.0
5.0
42
OUI
OUI
--
----
----
--
--
534x183x403534x183x403 534x183x403
534x49x349534x49x349 534x49x349
CD/CD±R/RW
DVD/DVD±R/RW
PAL/NTSC
4.8 4.8 5.3
6.4 6.4 6.9
Page 92

Mode
Taille de l’écran
Type d’affichage
Résolution (Pixel)
Ratio d’aspect
LED-B13TU24F
23Inch
LED-B13HU24F
23Inch
TFT LED
1920 X 1080
LED -B13H U32H LED -B13H U42F
31.5Inch
16:9
42Inch
Courant
Consommation électrique
Système TV
Format d’entrée Vidéo
Sortie Audio
ANTENNA
AV-IN
YPbPr - IN
HDMI - IN
VGA(PC) - IN
SUPPORT
VGA(PC) AUDIO - IN
SCART - IN
SCART - OUT
EARPHONE - OUT
S-VIDEO - IN
COAXIAL - OUT
COMMON INTERFACE
USB
IPOD
Disc Physical Format
DVD
Format de sortie DVD Vidéo
Inc Stand (LxWxHmm)
Dimensions
Exc Stand (LxWxHmm)
Net (kg)
Poids
Brut (kg)
L / R 2X3W L / R 2X8W
--
--
587x183x438
587x49x385
5.2
6.8
48W
587x183x438
AC 100-240V 50/60Hz
120W 140W
PAL/SECAM
PAL/NTSC/SECAM
OUI
OUI
OUI
OUI
OUI
OUI
OUI
OUI
OUI
--
OUI
OUI
OUI
--
-- -- --
-- -- --
790x200x564
587x49x385
5.2
6.8
790x47x499
11.5
12.0
1019x260x697
1019x50x629
17.2
18
43
Page 93

1
PREÁMBULO
3
2
3
4
5
PRECAUCIONES
DE SEGURIDAD
CONTENIDO
DE LA CAJA
PARTE DELANTERA,
TRASERA Y
CONEXIONES
DEL LED
INSTALACIÓN
BÁSICA
6
MAN DO A
DISTAN CI A
Conexión del cable de alimentación
Conexión de la antena
Conexión del SCART
Conexión de VGA(PC)
Conexión de AV
Conexión de YPbPr
Conexión HDMI
Conexión COAX
Conexión USB
Instrucciones del mando a distancia en modo TV
Instrucciones del mando a distancia en modo DTV/USB
Instrucciones del mando a distancia en modo TELETEXTO
Instrucciones del mando a distancia en modo DVD
Instalación del mando a distancia
3
5
6
7
7
8
8
9
9
10
10
10
11
12
13
14
15
FUENTE DE ENTRADA
MENÚ DE CANALES
MENÚ IMAGEN
MENÚ SONIDO
7
MANEJO DEL
MENÚ
MENÚ TIEMPO
MENÚ BLOQUEO
MENÚ CONFIGURACIÓN
MENÚ PANTALLA
MEDIOS (USB) MENÚ
MENÚ PVR
MENÚ EPG
Configuración general
8
MANEJO DEL
DVD
Configuración del audio
Configuración de Preferencias
16
16
19
20
21
22
23
24
26
29
33
34
36
37
1
Page 94

CONSEJOS Y
9
RESOLUCIÓN DE
41
PROBLEMAS
10
ESPECIFICACIONES
42
2
Page 95

1.PRÓLOGO
¡Gracias por comprar este TV! Lea atentamente este manual antes de utilizar el TV. Asegúrese
de que el TV no ha sufrido ningún daño durante el transporte. Si el TV esté averiado, no lo instale
y póngase en contacto con el vendedor. Compruebe que tienen todos los accesorios según el modelo.
2.PRECAUCIONES DE SEGURIDAD
Ponga el TV sobre una superficie estable.
No coloque ningún material encima del TV.
Min imum dis tance s
10c m
20c m
10c m 5cm
No utilice el TV con accesorios distintos de los suministrados o
sugeridos por el fabricante.
No obstruya ni cobra las aberturas de ventilación del TV.
Si dispone de algún soporte mural, compruebe que es firme.
El cable de alimentación y los demás cables deben dirigirse y protegerse
adecuadamente de forma que se evite que las personas los pisen y
provoquen que el TV se caíga.
3
Page 96

Mantenga el TV seco y alejado de la humedad.
Mantenga el TV alejado de fuentes de calor.
Desenchufe el TV antes de limpiarlo. No utilice disolvente ni líquido
para limpiar el TV.
Para limpiar el TV, utilice solamente un paño suave y seco.
En caso de que experimente algún problema, no use piezas de
repuesto distintas de las recomendadas por el fabricante.
El uso de piezas de repuesto inapropiadas puede tener como
consecuencia descargas eléctricas, incendios por cortocircuitos
u otros incidentes.
Desenchufe el TV durante tormentas con aparato eléctrico o
cuando no lo vaya a usar durante largos periodos de tiempo.
1. Cuando el enchufe a la RED ELÉCTRICA o un acoplador de aparatos se usan como dispositivo
de desconexión, permanecerán disponibles en todo momento para su uso previsto.
2. Las pilas (pack de pilas o pilas instaladas) no se expondrán a una fuente de calor excesivo
como los rayos del sol, el fuego o similar.
3. Un aparato con construcción de CLASE I se conectará a una toma de RED ELÉCTRICA con una
conexión a tierra de protección.
4
Page 97

3. CONTENIDO DE LA CAJA.
R.LISTR.LIST
T.LISTT.LIST
LED TVLED TV
Adaptador y cable de alimentación
Mando a distanciaMando a distancia
1.5V
1.5V
Pilas AAAPilas AAA
MA NUAL DEL USU ARIO
Manual del usuario
5
Page 98

4. PARTE DELA NTERA, TRASERA, CONEXIONES DEL TV LED
Vista delantera
ABRIR/CERRAR in modo DVD;
1.
9 8
1
2
VOL+
VOL-
3
CH+
4
CH-
MENU
5
SOURCE
6
POWER
7
REPRODUCIR/PAUSA en modo DVD;
2.
Pulse “VOL+ ” o “VOL- ”para aumentar o reducir
3.
el volumen del sonido.
Pulse “CH+ ” o “CH- ” para pasar los canales.
4.
Pulse "MENU" para presentar el menú principal
5.
en la pantalla.
Pulse "SOURCE" de nuevo para seleccionar la
6.
fuente de entrada.
Pulse el botón “POWER” para encender o
7.
apagar el TV.
Indicador POWER: En rojo en modo standby,
8.
en v erde o azul cuando su TV se enciende.
9
MANDO A DISTANCIA: Sensor infrarrojo para
.
el mando a distancia.
Vista trasera y conexiones de Control
. USB:
1
. HDMI:
2
. SCART:
3
Conectar a disco externo.
Conectar al conector de salida HDMI del DVD.
Conectar el conector de salida SCART
(EUROCONECTOR) del VCR o DVD.
. PC AUDIO :
4
Audio del PC.
. VGA(PC):
5
. COAX: Conecte el receptor SPDIF.
6
. PHONE:
7
. YPbPr:
8
Conectar al conector de salida de
Conectar al conector de salida PC-RGB del PC.
Conectar los auriculares.
Conectar al conector de salida YPbPr
del DVD o VCR.
. VIDEO/AUDIO:
9
prise de DVD.
1 . RF IN:
0
Conectar la antena. Admite entrada de
Connectez la sortie vidéo / audio
señal de TV analógica y HD DVB-T digital.
1 . CI PORT:
1
Conectar la tarjeta CI.
USB
1
USB
11 22
2
11 22
SCARTSCART
3
SCARTSCART
PC
VGA (PC )VGA (PC )
AUDIOPCAUDIO
5
4
PC
VGA (PC )VGA (PC )
AUDIOPCAUDIO
LE D-B13 HU3 2H L ED-B1 3HU 42 F
COA XCOAX
6
YPbPrYPb Pr
6
PHONEPHONE
7
DE
DE
VI
OVI
O
YPbPrYPb Pr
RR LL
IDEV
RF IN RF IN
OIDEV
O
RR LL
98
COAXCOAX
RF IN RF IN
10
CI PORTCI PORT
CI PORTCI PORT
11
PHONEPHONE
Page 99

5. INSTALACIÓN BÁSICA
Conexión del cable de alimentación
- Conectar el cable de alimentación correctamente como se indica.
- Pulsar el botón POWER de su TV LED para encenderlo. El indicador de alimentación situado
en el panel delantero se enciende de color Verde o Azul.
Conexión de las antenas
VHF ANTENNA UHF ANTENNA
OUTDOOR
ANTENNA
AMPLIFIER
INDOOR
ANTENNA
AMPLIFIER
POWER PLUG OF
ANTENNA
AMPLIFIER
Para asegurar una buena imagen y sonido, tiene que instalarse el sistema de antena del TV.
El sistema de antena puede adquirirse en tiendas de equipos para TV, donde también se puede
obtener servicio técnico para una correcta instalación y conexión. Después de la instalación,
inserte el conector de antena de 75 ohmios en el conector jack de antena como se indica.
RF IN
75 OHM
ANTENNA
PLUG
7
Page 100

Conexión de EUROCONECTOR (SCART)
PC
PC
USB
11 22
SCARTSCART
AUDIO
AUDIO
VGA (PC )VGA (PC )
Cable euroconector
TV Volver
DVD o VCR Volver
DVD o VCR
Conectar el Euroconector (SCART) del dispositivo de vídeo externo en el conector situado en el
aparato con un cable EUROCONECTOR. Seleccionar la fuente de entrada SCART
(EUROCONECTOR) con el botón SOURCE.
Conexión VGA(PC)
PC
PC
USB
11 22
SCARTSCART
AU DIO
AU DIO
VGA (PC )VGA (PC )
Cable de audio
Cable VGA
Conectar la salida RGB del PC al conector jack VGA situado en el TV. Conectar la salida de
AUDIO del PC al conector jack AUDIO del PC situado en el TV. Seleccionar la fuente de entrada
VGA con el botón SOURCE del mando a distancia.
8
TV Volver
 Loading...