

Page 1

User Guide
Adobe
®
Premiere
®
5.0
Page 2

© 1998 Adobe Systems Incorporated. All Rights Reserved. Patent pending.
All PhotoDisc images: © 1997 PhotoDisc, Inc.
This manual, as well as the software described in it, is furnished under lic ense and ma y only be used or copied in ac co rdanc e
with the terms of such license. The information in this manual is furnished for informational use only, is subject to change
without notice, and should not be construed as a commitment by A dobe Syst ems Incorporated. Adobe S ystems Inco rporated
assumes no responsibility or liability for any errors or inaccuracies that may appear in this book.
Except as permitted by such license, no part of this publication may be reproduc ed, stored in a retrieval system, or transmitted, in any form or by any means, electronic, mechanical, recording, or otherwise, without the prior written permission of
Adobe Systems Incorporated.
Please remember that existing movies, sounds, or images that you may want to use in your project may be protected under
copyright law. The unauthorized incorporation of such material into your new work could be a violation of the rights of the
copyright owner. Please be sure to obtain any permission required from such authors.
Adobe, the Adobe Logo, Adobe Premiere, After Effects, Classroom in a Book, Illustrator, PageMaker, Photoshop, and PostScript are trademarks of Adobe Systems Incorporated, registered in certain jurisdictions. Apple, Macintosh, Power Macintosh, Mac OS, Fir eWire, and QuickTime are registered trademarks of Apple Comput er, Inc., registered in the U.S. and other
countries. QuickTime and the QuickTime logo ar e trademarks used under license. PowerPC is a trademark of International
Business Machines Corporation. DirectShow is a trademark of and DirectX, Microsoft, MS-DOS, Video for Windows,
Windows, and W indows NT are r egistered trademarks of Microsoft Corporation in the U.S. and/or other countries. All other
trademarks are the property of their respective owners.
Contains implementation of the LZW algorithm licensed under U.S. Patent No. 4,558,302.
QuickHelp™ is licensed from Altura Software, Inc. End-User is prohibited from taking any action to derive a source code
equivalent of QuickHelp, including reverse assembly or reverse compilation.
Adobe Systems Incorporated, 345 Park Avenue, San Jose, CA 95110-2704
Adobe Systems Europe B.V., Europlaza, Hoogoorddreef 54a, 1101 BE Amsterdam Z-O, The Netherlands
Adobe Systems Japan, Swiss Bank House 4-1-8 Toranomon, Minato-Ku, Tokyo 105, Japan
For defense agencies: Restricted Rights Legend. Use, reproduction or disclosure is subject to restrictions set forth in subpara-
graph (c)(1)(ii) of the Rights in Technical Data and Computer Software clause at 252.227-7013.
For Civilian agencies: Restricted Rights Legend. U se, r eproduction or disclosure is subject t o restrictions set forth in subpara-
graphs (a) through (d) of the commercial Computer Software Restricted Rights clause at 52.227-19 and the limitations set
forth in Adobe’ s standar d c o mmercial agreement for this softwar e. Unpublished rights reserved under the copyright laws of
the United States.
Printed in the USA.
Part number: 90011307 (4/98)
Page 3

Contents
iii
Getting Started with
Adobe Premiere 5.0
A Tour of
Adobe Premiere
About this guide . . . . . . . . . . . . . . . . . . . . . . . . . . . . . . . . . . . . 1
Windows 95/Windows NT 4.0 systems requirements . . . . . . . . . 2
Power Macintosh system requirements . . . . . . . . . . . . . . . . . . . . 3
Registration . . . . . . . . . . . . . . . . . . . . . . . . . . . . . . . . . . . . . . . . 3
The Premiere package contents . . . . . . . . . . . . . . . . . . . . . . . . . 4
Contents of the Premiere discs . . . . . . . . . . . . . . . . . . . . . . . . . . 4
About Adobe products and services . . . . . . . . . . . . . . . . . . . . . . 6
Using Online Help . . . . . . . . . . . . . . . . . . . . . . . . . . . . . . . . . . . 6
Installing Adobe Premiere . . . . . . . . . . . . . . . . . . . . . . . . . . . . . 6
What’s New in Adobe Premiere 5.0 . . . . . . . . . . . . . . . . . . . . . . 7
Creating the bicycle advertisement: first steps . . . . . . . . . . . . . . 15
Specifying project settings . . . . . . . . . . . . . . . . . . . . . . . . . . . . 17
Importing the clips . . . . . . . . . . . . . . . . . . . . . . . . . . . . . . . . . . 18
Creating a rough cut . . . . . . . . . . . . . . . . . . . . . . . . . . . . . . . . 20
Previewing in the Monitor window . . . . . . . . . . . . . . . . . . . . . . 23
Trimming clips in the Monitor window . . . . . . . . . . . . . . . . . . . 24
Adding audio . . . . . . . . . . . . . . . . . . . . . . . . . . . . . . . . . . . . . . 28
Trimming clips in the Timeline window . . . . . . . . . . . . . . . . . . . 29
Adding a transition . . . . . . . . . . . . . . . . . . . . . . . . . . . . . . . . . 32
Previewing transitions and other effects . . . . . . . . . . . . . . . . . . 34
Splitting a clip . . . . . . . . . . . . . . . . . . . . . . . . . . . . . . . . . . . . . 36
Changing the speed of a clip . . . . . . . . . . . . . . . . . . . . . . . . . . 38
Changing a clip’s opacity . . . . . . . . . . . . . . . . . . . . . . . . . . . . . 40
Adding special effects to a video clip . . . . . . . . . . . . . . . . . . . . 42
Superimposing an image . . . . . . . . . . . . . . . . . . . . . . . . . . . . . 45
Animating a clip . . . . . . . . . . . . . . . . . . . . . . . . . . . . . . . . . . . 48
Exporting the movie . . . . . . . . . . . . . . . . . . . . . . . . . . . . . . . . . 52
Page 4

iv
CONTENTS
Working with Projects
Preparing and Importing
Source Clips
Starting a project . . . . . . . . . . . . . . . . . . . . . . . . . . . . . . . . . . . 57
Specifying project settings . . . . . . . . . . . . . . . . . . . . . . . . . . . . 58
Saving and autosaving a project . . . . . . . . . . . . . . . . . . . . . . . . 66
Opening a project . . . . . . . . . . . . . . . . . . . . . . . . . . . . . . . . . . 68
Removing unused frames from source clips . . . . . . . . . . . . . . . . 69
Using a Premiere project on another platform . . . . . . . . . . . . . . 70
Setting up Premiere’s scratch disks . . . . . . . . . . . . . . . . . . . . . . 71
Correcting mistakes . . . . . . . . . . . . . . . . . . . . . . . . . . . . . . . . . 73
Working with windows in Premiere . . . . . . . . . . . . . . . . . . . . . 74
Setting up windows that resemble earlier Premiere versions . . . 74
Saving window positions (Mac OS only) . . . . . . . . . . . . . . . . . . 76
Organizing clips using bins . . . . . . . . . . . . . . . . . . . . . . . . . . . . 77
Storing clips and bins in libraries . . . . . . . . . . . . . . . . . . . . . . . 78
Customizing a Project, Bin, or Library window display . . . . . . . . 79
Naming, finding, and deleting items . . . . . . . . . . . . . . . . . . . . . 82
Printing window contents . . . . . . . . . . . . . . . . . . . . . . . . . . . . . 83
Creating a text list of project or library files . . . . . . . . . . . . . . . . 83
Changing the startup window . . . . . . . . . . . . . . . . . . . . . . . . . 84
Working with palettes . . . . . . . . . . . . . . . . . . . . . . . . . . . . . . . 84
Capturing video for offline and online editing . . . . . . . . . . . . . . 92
Preparing for video capture . . . . . . . . . . . . . . . . . . . . . . . . . . . 93
Capturing video without device control . . . . . . . . . . . . . . . . . . . 96
Capturing video with device control . . . . . . . . . . . . . . . . . . . . . 97
Batch-capturing video . . . . . . . . . . . . . . . . . . . . . . . . . . . . . . . 99
Reading timecode from source video . . . . . . . . . . . . . . . . . . . 105
Capturing stop-motion animation . . . . . . . . . . . . . . . . . . . . . . 111
Capturing analog audio . . . . . . . . . . . . . . . . . . . . . . . . . . . . . 115
Capturing digital video . . . . . . . . . . . . . . . . . . . . . . . . . . . . . . 117
Importing digital audio . . . . . . . . . . . . . . . . . . . . . . . . . . . . . . 119
Importing clips . . . . . . . . . . . . . . . . . . . . . . . . . . . . . . . . . . . . 120
Importing another project . . . . . . . . . . . . . . . . . . . . . . . . . . . . 125
Using offline files . . . . . . . . . . . . . . . . . . . . . . . . . . . . . . . . . . 126
Creating a counting leader . . . . . . . . . . . . . . . . . . . . . . . . . . . 127
Analyzing clip properties and data rate . . . . . . . . . . . . . . . . . . 127
Page 5

v
Editing Video
Adding Transitions
Mixing Audio
Using the Monitor window . . . . . . . . . . . . . . . . . . . . . . . . . . . 131
Using the Timeline window . . . . . . . . . . . . . . . . . . . . . . . . . . . 138
Editing In and Out points . . . . . . . . . . . . . . . . . . . . . . . . . . . . 148
Using named subclips and unnamed instances of clips . . . . . . 152
Using markers . . . . . . . . . . . . . . . . . . . . . . . . . . . . . . . . . . . . 153
Editing clips . . . . . . . . . . . . . . . . . . . . . . . . . . . . . . . . . . . . . . 156
Editing a video program . . . . . . . . . . . . . . . . . . . . . . . . . . . . . 167
Previewing a video program . . . . . . . . . . . . . . . . . . . . . . . . . . 192
About transitions . . . . . . . . . . . . . . . . . . . . . . . . . . . . . . . . . . 203
Using the Transitions palette . . . . . . . . . . . . . . . . . . . . . . . . . . 204
Creating transitions . . . . . . . . . . . . . . . . . . . . . . . . . . . . . . . . 205
Changing transition settings . . . . . . . . . . . . . . . . . . . . . . . . . . 210
Creating Custom Transitions . . . . . . . . . . . . . . . . . . . . . . . . . . 214
Understanding how Premiere processes audio . . . . . . . . . . . . 217
Adjusting gain . . . . . . . . . . . . . . . . . . . . . . . . . . . . . . . . . . . . 218
Fading and cross-fading . . . . . . . . . . . . . . . . . . . . . . . . . . . . . 218
Panning a clip . . . . . . . . . . . . . . . . . . . . . . . . . . . . . . . . . . . . 225
Viewing audio clips . . . . . . . . . . . . . . . . . . . . . . . . . . . . . . . . 227
Applying audio filters . . . . . . . . . . . . . . . . . . . . . . . . . . . . . . . 228
Audio filters included with Premiere . . . . . . . . . . . . . . . . . . . . 229
Creating Titles
Creating a new title . . . . . . . . . . . . . . . . . . . . . . . . . . . . . . . . 233
Setting up the Title window . . . . . . . . . . . . . . . . . . . . . . . . . . 234
Creating rolling and crawling text . . . . . . . . . . . . . . . . . . . . . . 242
Creating graphic objects . . . . . . . . . . . . . . . . . . . . . . . . . . . . . 244
Adding a shadow . . . . . . . . . . . . . . . . . . . . . . . . . . . . . . . . . . 248
Using color, transparency, and gradients . . . . . . . . . . . . . . . . . 249
Using the Color Picker . . . . . . . . . . . . . . . . . . . . . . . . . . . . . . 253
Setting default text and graphic attributes . . . . . . . . . . . . . . . 253
Arranging text and graphic objects . . . . . . . . . . . . . . . . . . . . . 254
Adding a title to a project . . . . . . . . . . . . . . . . . . . . . . . . . . . 255
Page 6

vi
CONTENTS
Superimposing and
Compositing with
Transparency
Animating a Clip
Applying Video Filters
Producing Final Video
About transparency . . . . . . . . . . . . . . . . . . . . . . . . . . . . . . . . 259
Using the Fade control . . . . . . . . . . . . . . . . . . . . . . . . . . . . . . 261
Using keys for composites and superimposing . . . . . . . . . . . . . 263
Superimposing two or more clips . . . . . . . . . . . . . . . . . . . . . . 273
Adding a background matte . . . . . . . . . . . . . . . . . . . . . . . . . . 273
Creating garbage mattes . . . . . . . . . . . . . . . . . . . . . . . . . . . . 274
Creating split screens . . . . . . . . . . . . . . . . . . . . . . . . . . . . . . . 275
Moving a clip across the frame . . . . . . . . . . . . . . . . . . . . . . . . 279
Rotating, zooming, delaying, and distorting . . . . . . . . . . . . . . 284
Specifying an exact time for motion . . . . . . . . . . . . . . . . . . . . 286
Saving, loading, and deleting motion settings . . . . . . . . . . . . . 288
About video filters and keyframes . . . . . . . . . . . . . . . . . . . . . . 291
Applying video filters to a clip . . . . . . . . . . . . . . . . . . . . . . . . 292
Applying multiple filters . . . . . . . . . . . . . . . . . . . . . . . . . . . . . 293
About output settings . . . . . . . . . . . . . . . . . . . . . . . . . . . . . . 297
Specifying compression for final video . . . . . . . . . . . . . . . . . . 298
File types available for exporting . . . . . . . . . . . . . . . . . . . . . . 303
Exporting video files . . . . . . . . . . . . . . . . . . . . . . . . . . . . . . . . 304
Creating a videotape . . . . . . . . . . . . . . . . . . . . . . . . . . . . . . . 311
About creating a video file for CD-ROM playback . . . . . . . . . . 313
About creating a video file for the Internet . . . . . . . . . . . . . . . 314
About creating a video file for use in other software . . . . . . . . 316
Exporting an edit decision list . . . . . . . . . . . . . . . . . . . . . . . . . 317
Creating a sequence of still images . . . . . . . . . . . . . . . . . . . . . 325
Creating a filmstrip file for editing in Photoshop . . . . . . . . . . . 326
Exporting a still image . . . . . . . . . . . . . . . . . . . . . . . . . . . . . . 328
Creating a sequence of video files . . . . . . . . . . . . . . . . . . . . . 329
About creating motion-picture film . . . . . . . . . . . . . . . . . . . . . 330
Processing a batch of projects . . . . . . . . . . . . . . . . . . . . . . . . 331
Page 7

vii
Measuring
Time and Frame Size
Compressing
Video and Audio
Maximizing Performance
Troubleshooting
Measuring time . . . . . . . . . . . . . . . . . . . . . . . . . . . . . . . . . . . 335
Understanding timecode and time display options . . . . . . . . . 339
Comparing interlaced and non-interlaced video . . . . . . . . . . . 341
Measuring frame size and resolution . . . . . . . . . . . . . . . . . . . 344
Understanding scenarios that affect compression . . . . . . . . . . 347
About video compression . . . . . . . . . . . . . . . . . . . . . . . . . . . . 348
Finding an appropriate codec . . . . . . . . . . . . . . . . . . . . . . . . . 352
Preserving quality and performance during video capture . . . . 359
Techniques for faster editing . . . . . . . . . . . . . . . . . . . . . . . . . . 362
Maintaining edited projects . . . . . . . . . . . . . . . . . . . . . . . . . . 364
General problems when capturing video . . . . . . . . . . . . . . . . . 365
General operating problems . . . . . . . . . . . . . . . . . . . . . . . . . . 366
Common problems . . . . . . . . . . . . . . . . . . . . . . . . . . . . . . . . . 369
Index
. . . . . . . . . . . . . . . . . . . . . . . . . . . . . . . . . . . . . . . . . 377
Page 8

Page 9

Getting Started with Adobe
Premiere 5.0
elcome to Adobe Premiere—software that brings the world of digital movie
making to the desktop. Premiere lets you record, create, and play video programs
using video, sound, animations, photographs, drawings, text, and other material
on your Windows
or Power Macintosh computer.
ADOBE PREMIERE 5.0
User Guide
1
Y ou can pla y movies created in P remiere in any application that s upports the Apple QuickT ime
format or (in Windows only) the DirectShow
a number of ways, including to videotape, to an Edit Decision List (EDL), or to MPEG or
Animated GIF format.
™
format, or you can output video programs in
About this guide
The
Adobe Premiere User Guide
designed to be used as a reference tool in your everyday work with Premiere. This manual
provides instructions for using Premiere on both Windows and Mac
differences in Premiere procedures between operating systems are noted in the text.
This book assumes you have a wo rking kno wledge of your operating system and its c onventions, including how to use a mouse and standar d menus and dialog bo x es and how to o pen,
save, and close files. For help with any of these techniques, please see your Windows or
Mac OS documentation.
provides detailed information about using Premiere. It is
OS systems. Any
Page 10

2
Getting Started with Adobe Premiere 5.0
Windows 95/Windows NT 4.0 systems requirements
The following hardware and software are required to run Adobe Premiere:
Intel Pentium processor or 100% compatible
•
Microsoft Windows 95 or Windows NT 4.0 (or later versions) operating system
•
32 MB of RAM installed
•
60 MB of available hard-disk space for installation (30 MB for application)
•
256-color display adapter and compatible monitor
•
CD-ROM drive
•
We recommend the following:
Multi-processor system (Windows NT only)
•
64 MB or more of RAM
•
Large capacity hard drive or hard-disk array
•
24-bit color display adapter
•
Microsoft Video for Windows-compatible or Apple QuickTime for Windows-compatible
•
video capture card
Apple QuickTime for Windows 3.0 (optionally installed with Premiere), Microsoft
•
DirectX
supported by your video-capture hardware
•
sound circuitry)
Media 5.1 (optionally installed with Premiere), or other video software
Sound card (recommended if your video capture card does not contain on-board
Page 11

Power Macintosh system requirements
The following hardware and software are required to run Premiere:
PowerPC processor
•
System Software 7.5.5 or greater (or 7.5.1 with Radius VideoVision only)
•
16 MB of application RAM
•
30 MB of disk space for installation
•
CD-ROM drive
•
We recommend the following:
Multiprocessor system
•
QuickTime 3.0 (installed with Premiere)
•
48 MB or more of application RAM
•
Large capacity hard disk or hard-disk array
•
QuickTime-compatible video capture card
•
24-bit color display adapter
•
ADOBE PREMIERE 5.0
User Guide
3
Registration
We are confident you will find that the Premiere program greatly increases your productivity.
So that we can offer technical support and keep you informed about new Premiere software
developments, please register y our c op y b y r eturning the enclosed r egistration card. If you are
upgrading from a previous version of Premiere, the original registration card with your serial
number is still valid and you do not need to reregister the product.
Page 12

4
Getting Started with Adobe Premiere 5.0
The Premiere package contents
The Premiere package includes the following software and documentation:
Two Adobe Premiere CD-ROM discs, described in the following section.
•
Adobe Premiere User Guide.
•
Adobe Premiere Quick Reference Card.
•
Registration card.
•
A card or brochure that details Adobe technical support policies and describes the ways
•
you can obtain technical support.
Adobe Acr obat Reader software, which allows you to view the online documentation and
•
third-party reference materials that have been sa ved as PDF (P ortable Document F ormat) files.
Contents of the Premiere discs
The Adobe Premiere Application CD-ROM disc contains the following:
The installer program
Installs the Adobe Premiere program and the video system software.
Other software included on the discs use their own installers.
Adobe Premiere
Video system software
Lets you capture, edit, and play back video.
Includes QuickTime (Windows and Macintosh) and DirectShow™
software (Windows only) to act as editing modes in Premiere.
Software from other manufacturers
Includes filters, special effects, compressors/decompr essors,
and device control modules.
Page 13

ADOBE PREMIERE 5.0
User Guide
5
Adobe Premiere Software Developer’s Kit
Supplies complete support for developers interested
in writing plug-ins, filters, and other custom solutions for Premiere.
Adobe Type Library
Includes a number of T ype 1 fonts for your use. The fonts are not installed
automatically when you install Premiere.
Adobe Type Manager
Improves font displays on-screen, lets you print PostScript fonts on
non-PostScript printers, and lets you create customized instances of multiple master fonts.
You can install this utility separately.
Adobe Photoshop LE and tryout versions of other Adobe Systems applications
Let you explore
other Adobe software at no additional cost. Photoshop LE offers many of the features found
in the full retail version of Adobe Photoshop; you can install Photoshop LE and register the
product online or with the registration card you use for Premiere. Additional tryout versions
of Adobe products on the discs include Adobe After Effects
PageMaker
Tour movie and online tutorials
, and more.
Provide additional guides to help you learn Premiere. The tour
, Adobe Illustrator, Adobe
movie, which requires that you install the QuickTime software, demonstrates the key benefits
and new features of this version of Premiere. A subset of chapters from the
Classroom in a Book
publication features step-by-step instructions for creating video
Adobe Premiere
programs using sample audio and video clips, which are also available on the disc.
The Media Content CD-ROM disc contains:
Stock clips
Adobe Acrobat Reader software
Including professional images, clip media, and sound files from a variety of sources.
Lets you view the online documentation and third-party
reference material that have been saved as PDF (Portable Document Format) files.
Page 14

6
Getting Started with Adobe Premiere 5.0
About Adobe products and services
For information about Adobe products and services, you can visit the Adobe site on the
World-Wide Web (http://www.adobe.com) if you have Internet access. You can also open
the Adobe Web site from within Premiere (provided you are connected to the Internet)
by choosing File > Adobe Online and clicking a link in the window that appears.
Note
: Your Premiere package includes printed instructions for obtaining technical support.
Adobe Systems training opportunities
Classroom in a Book is the official training series for Adobe graphics and publishing softwar e
developed by experts at Adobe and pub lished by Adobe Press. For information on purchasing
Adobe Premiere Classroom in a Book
800-428-5331 or http://mcp.com, or contact your local book distributor.
The Adobe Certification program offers end-users, instructors, and training c enters the oppor -
tunity to demonstrate their product proficiency and promote their software skills as Adobe
Certified Experts, Adobe Certified Instructors, or Adobe Authorized Learning Providers. Visit
the U.S. Web site at http://www.adobe.com to learn how you can become certified.
, contact Macmillan Computer Publishing in the U.S. at
Using online Help
The Premiere Help system contains all the information in this user guide, and more,
optimized for use online. The Help system also provides sections on keyboard shortcuts.
To get online Help:
Choose Help > Contents (Windows) or Help > Help Topics (Mac OS). You can also choose
a specific section of Help from the Help menu.
Installing Adobe Premiere
Use the following procedure to install the Premiere program files from the Adobe Premiere
Application CD-ROM. You cannot run Premiere from the CD-ROM; you must install the
program files onto your hard disk.
If you are upgrading from Premiere 4.2 or earlier, the installer creates a new folder for the
Premiere 5.0 files. Your current Premiere files are not affected. However, items such as
QuickTime and DirectShow may be updated unless you are using versions of these items
more recent than those on the Adobe Premiere Application CD-ROM disc.
Page 15

ADOBE PREMIERE 5.0
To install Premiere:
1
Insert the Adobe Premiere Application CD-ROM disc into your CD-ROM drive.
2
Depending on your system, do one of the following:
(Windows) If a startup screen appears, choose Install Adobe Premiere. Otherwise,
•
use Explorer to locate and open the Premiere folder on the CD-ROM, and double-click
the Setup.exe file to begin the setup procedure.
(Mac OS) Double-click the Install Adobe Premiere icon to begin the installation process.
•
3
Follow the on-screen instructions until installation are complete.
Installing plug-in software modules
You can purchase or otherwise obtain updated or additional plug-in software from Adobe
or other manufacturers. Some plug-ins come with an installer you can run. If the plug-in
does not have an installer, you can install it easily by dragging.
To install additional plug-in software:
Make sure Pr emiere is not running, and drag the plug-in softwar e from its original location
to the Plug-ins folder inside the folder in which you installed Premiere.
User Guide
7
What’s new in Adobe Premiere 5.0
Premiere 5.0 includes dozens of new and improved features for creating and editing video
programs from your desktop. This version of Premiere also includes enhancements that
improve both quality and performance speed in such areas of the program as editing,
previewing, capturing, and outputting.
Timeline window
The new Timeline window replaces the Construction window of earlier versions of Premiere.
The Timeline provides a more intuitive and fluid interface for adding, displaying, and editing
the tracks in a project. Enhancements include the following:
Page 16

8
Getting Started with Adobe Premiere 5.0
Powerful and flexible track layout
Hide and more easily lock tracks, target tracks for editing,
and even collapse subtracks (Video 1A, Video 1B and the transitions between them) into a
single track using new controls on the left side of the window. The new shy track feature lets
you hide a track while still including its clips in the final output. Many of these new concepts
and interface elements are modeled on those in the Lay ers palett e found in Adobe Photoshop,
Illustrator, and PageMaker.
Adding and deleting tracks
Use the Track Options dialog box (available from the Timeline
window menu) to add, delete, and rename tracks.
Moving to next and previous edits, and moving the edit line
Use buttons in the Monitor
window to move to previously established edit positions, or accomplish the same tasks using
the following shortcuts in the Timeline window: Control (Windows) or Command (Mac
OS) + Shift + the Left or Right arrow keys moves t o the next or previous edit points. Deselect
clips in the Timeline (by clicking any selected clip) and then press the Left or Right arrow
keys to move the edit line itself.
Rendered scrubs and alpha scrubs
Perform a rendered scrub (displaying frames with
applied effects and filters) by pressing Alt (W indo ws) or Option (M ac OS) while dragging
in the time ruler. If you also press the Shift key while scrubbing in this fashion, you can
preview effects involving alpha channels. Drag the edit line to display frames without
applied effects or filters.
Other interface improvements
See more clearly where filter and motion settings are applied
to clips, and see the name of any applied transparency type: This information is now
displayed on the clip representations in the Timeline window. All video tracks above the
Video 1 tracks are superimpose tracks—the topmost track in the window is foremost in
the video program.
Page 17

ADOBE PREMIERE 5.0
Monitor window
The new Monitor window in effect combines the C lip, Preview , and Trimming windows of past
versions into a single window , better replicating a p rofessional video-editing suite. The window
includes two views: Source view for playing and editing individual clips, and P rogram view for
displaying the contents of the Timeline. The Monitor window has two modes, edit and trim.
Importantly, many of the essential editing tasks can now be accomplished with keyboard
shortcuts. Other related changes include:
User Guide
9
More precise and accessible trimming
Easily enter trim mode by pressing Control (Windows)
or Command (Mac OS) + T (or choose Trim Mode from the Monitor window menu).
Ganging, or synchronized playback
Preview how a source clip fits into the video program—
before adding it to the Timeline—by using the gang button in the Monitor window. This
synchronizes the source and program controllers and previews.
Insert, Overlay, Lift, and Extract buttons
Click buttons (or use keyboard equivalents) to accom-
plish these key editing tasks rather than dragging clips into the Timeline.
Flexible viewing options
T ake advantage of NTSC or P AL monit ors by collapsing (detaching the
controllers from the M onitor window). You can switch to single view mode which displays only
the selected view in the center of the window, and switch among acti v e c lips b y choosing their
names from a conv enient pop-up menu. Optionally, you can hav e clips open each in their o wn
separate clip window, just as in earlier versions of Premiere.
New project management and media management features
The Project window supports many new database fields you can use to categorize clips for
sorting and searching; Premiere now also provides user-defined fields. Display options in the
Project window have been improved, and you can now display text-only information about
your source material. Other organizational capabilities include a cleaner and more straightforward handling of source clips (to avoid display of duplicate source clips for each instance
used in the Timeline), an auto-loading featur e (so that clips added t o the T imeline or M onitor
window become listed in the Project window), and the improved use of storage bins in the
Project window.
Page 18

10
Getting Started with Adobe Premiere 5.0
A related improvement is project archiving: You can specify how often project files are saved
and whether to create separate files. Creating separate files lets you go back to different stages
of a project for reference, for back-up purposes, or to “undo” a stage of work in the project.
Improved titling
Premiere now supports two popular title effects: rolls (which move on-screen vertically) and
crawls (which move on-screen horizontally). You can set ease-in and ease-out points for both
effects, control their duration in seco nds and frames, and use masking t o make the type appear
or disappear at a specified location. For an y title, y ou no w can apply font, size, c olor, and other
type attributes to any range of characters within a text block.
Multiple keyframes for filters
Previously you had to split clips to apply a filter to a portion of a clip. But now you can easily
create multiple keyframes in a clip and apply different filter settings t o each one. The filter effect
can change over time within a single clip or be limited to a specific portion of the clip.
Long-format support
Premiere supports long-format editing capabilities with true 29.97 timebase support, the
ability to hold up to three hours of footage, new Slip and Slide editing tools, and a Navigator
palette (for quickly moving around in the Timeline without losing sight of the bigger picture).
New audio features
Improved sound editing and mixing provide the kinds of audio control available in an audio
studio. New and enhanced audio capabilities include:
Better audio processing
quality, thanks to the new Enhanced rate conversion settings. When you output audio, an
improved downsampling method delivers high-quality, low-data-rate playback. For Web
distribution, you can downsample certain sound files to 2 or 3 kHz.
Convert from one audio sample rate t o another without a loss in audio
Page 19

ADOBE PREMIERE 5.0
User Guide
11
More audio filters
Enhance sound clips using any of Premiere’s 11 new filters, including
Reverb, Bass and Treble, Flanger, Multitap delay, and Chorus filters.
Panning and fading
Specify panning and fading using new controls added to Audio tracks
in the Timeline. The improved Timeline interface lets you show or hide the waveform
associated with audio clips.
New palettes and palette enhancements
Premiere now presents the Transitions and Info windows as floating int eractive palettes and
adds the Navigator palette t o the pr oduct. Palettes quickly display information and options
on-screen without interrupting the creative process and allo w for easy opening, closing, and
resizing. You can even group and dock palettes for more efficient handling.
The Navigator palette, modeled on the Adobe Photoshop feature, lets you see at a glance
where you are within a project by showing a miniature of the entire length of the project,
and a small display window highlighting the area currently visible in the Timeline. Simply
drag the highlighted area in the palette to move to a different portion of the Timeline.
The Windows version of Premiere now includes the Commands palette (introduced in the
Macintosh version of Premiere 4.2), which lets you turn the menu commands you use most
often into buttons you can click quickly in a floating palette; you can even load and save
custom sets of command buttons.
Better hardware and system software compatibility
As improvements in hardware and software throughout the industry make video-editing
ever more powerful and efficient, P remiere ’s capabilities lead the way. C apture card pr ofiles
are now included with Premiere project presets, so you can load them as needed for video
or audio capturing. Support for the Hardware Abstraction Layer (HAL) standard enables
developers to create or modify hardwar e drivers to accelerate features in P remiere, including
support for real-time effects (before rendering). Support for the latest versions of
QuickTime and DirectShow ensures that your work relies on the most prevalent
industry standards.
Page 20

12
Getting Started with Adobe Premiere 5.0
Miscellaneous enhancements
Many of the new features in Premiere don’t get the visibility of other features used day in
and day out, but can greatly enhance your efficiency nonetheless. The following are just a
few of these other areas improved in this release:
Improved capturing
Crop at capture time (pro vided your capture board supports this) and view
important capture settings in the Info palette. Batch capturing now supports specified
timecode offset and trim handles in frames.
Cross-platform compatibility
Move projects and related files from one platform to another
with ease now that Mac OS and Windows versions of Premiere share the same code base.
Premiere includes cross-platform support for titles, pr ofiles, motion graphics, filters, storyboards, batch lists, libraries, and most system settings.
Integration with Adobe product family
Get up to speed fast thanks to an interface consist ent
with other Adobe products. If you’re familiar with software such as Photoshop, you’ll
appreciate the common look and feel, shared keyboard shortcuts, and features such as
tabbed palettes, support for Photoshop filters, and the ability to import Photoshop layers
individually. Also, EPS files from Adobe Illustrator are automatically rasterized when you
import them, just as they are in Photoshop. Premiere also anti-aliases Illustrator files
automatically at 2000x2000 pixels.
Page 21
1
Page 22

Page 23

ADOBE PREMIERE 5.0
Chapter 1: A Tour of
Adobe Premiere
he tour in this chapter helps you understand and w ork with basic concepts and f eatures
of the Adobe Premiere program. You’ll run through a typical series of steps for creating
T
a video piece, including basic editing techniques, adding transitions, motion, and trans-
parency. Completing the video piece should take approximately one hour.
Y ou can pr eview the complete movie before you begin this lesson, or at any point along the way:
from the Explorer (Windo ws) or Finder (Mac OS), double-click the Tour.mov file in the Tour
folder in your Premiere folder (if you installed the Tour with Premiere) or on the Adobe
Premiere Application CD-ROM disc (if you did not install the Tour).
Note
: T o complete the tour or t o view the Tour.mov file, QuickT ime 2.5 or later must be installed
on your system. You can install QuickTime 3.0 with Premiere: For installation instructions,
see “Installing Adobe Premiere” on page 6.
User Guide
15
Creating the bicycle advertisement: First steps
Over the course of this chapter, you ’ll creat e a promotional television spot for a fictional bicycle
company using video and audio clips provided on the CD-ROM. You’ll be working with clips
that have already been digitized as QuickT ime files. If you wer e actually producing this pr oject
from the start, you would likely capture clips from the original video tapes and digitize them
yourself, using Premiere.
Page 24

CHAPTER 1
16
A Tour of Adobe Premiere
Deleting custom preference settings
The procedures in this chapter assume you are using the program settings initially provided
with Premiere, as specified in the Pr emier e prefer ences file. The following steps ensure you are
clearing away any modified preference settings which might conflict with the instructions in
this chapter.
1
Make sure that Premiere is not running. If it is, choose File > Exit (Windows) or File >
Quit (Mac OS).
2
Depending on your system, do one of the following:
•
(Windows) Use the Explorer to locate the Prem50.prf file inside the Windows folder and
move it to another folder.
•
(Mac OS) Use the Finder to locate the Premiere 5.0 Prefs file in the Preferences folder in
your System folder and move it to another folder.
By moving the preferences file temporarily , you ensure that P remiere starts with fresh settings
for the current project. At the completion of the project, you can then restore the custom
settings specified in the Preferences file currently on y our system. To do so, mo ve the file back
to its original location, allowing it to overwrite the existing file when prompted.
Copying files from the Adobe Premiere CD-ROM
You’ll create the video piece described in this chapter using optionally installed files. If
Premiere was installed on your system without the “Tour” option selected, you’ll need to
manually copy the files from the Application CD-R OM disc. (F or efficiency and best performance, we recommend that you copy the files onto your hard drive, and work with the
copies rather than the originals on the CD-ROM disc.)
Note
: If the Premiere folder on your hard drive includes a Tour folder, then the Tour files were
installed with the program, and you can skip the following procedure.
Page 25
ADOBE PREMIERE 5.0
1
Insert the Adobe Premiere Application CD-ROM disc into your CD-ROM drive. (In
Windows only, a startup screen appears on most systems if the Windows autoplay feature
is enabled. When the screen appears, click the Explore this CD-ROM button.)
2
Use the Explorer (W indows) or Finder (M ac OS) to copy the Tour folder from the CD-ROM
disc onto your hard drive. You’ll need approximately 15 MB of space available on your
hard drive.
Specifying project settings
To start any project, you first need to import the clips you’ll be using for your video program.
A clip can be digitized film, video, audio, a still image, or sequence of still images; a video or
audio clip might be only a few seconds long.
1
Start Adobe Premiere.
2
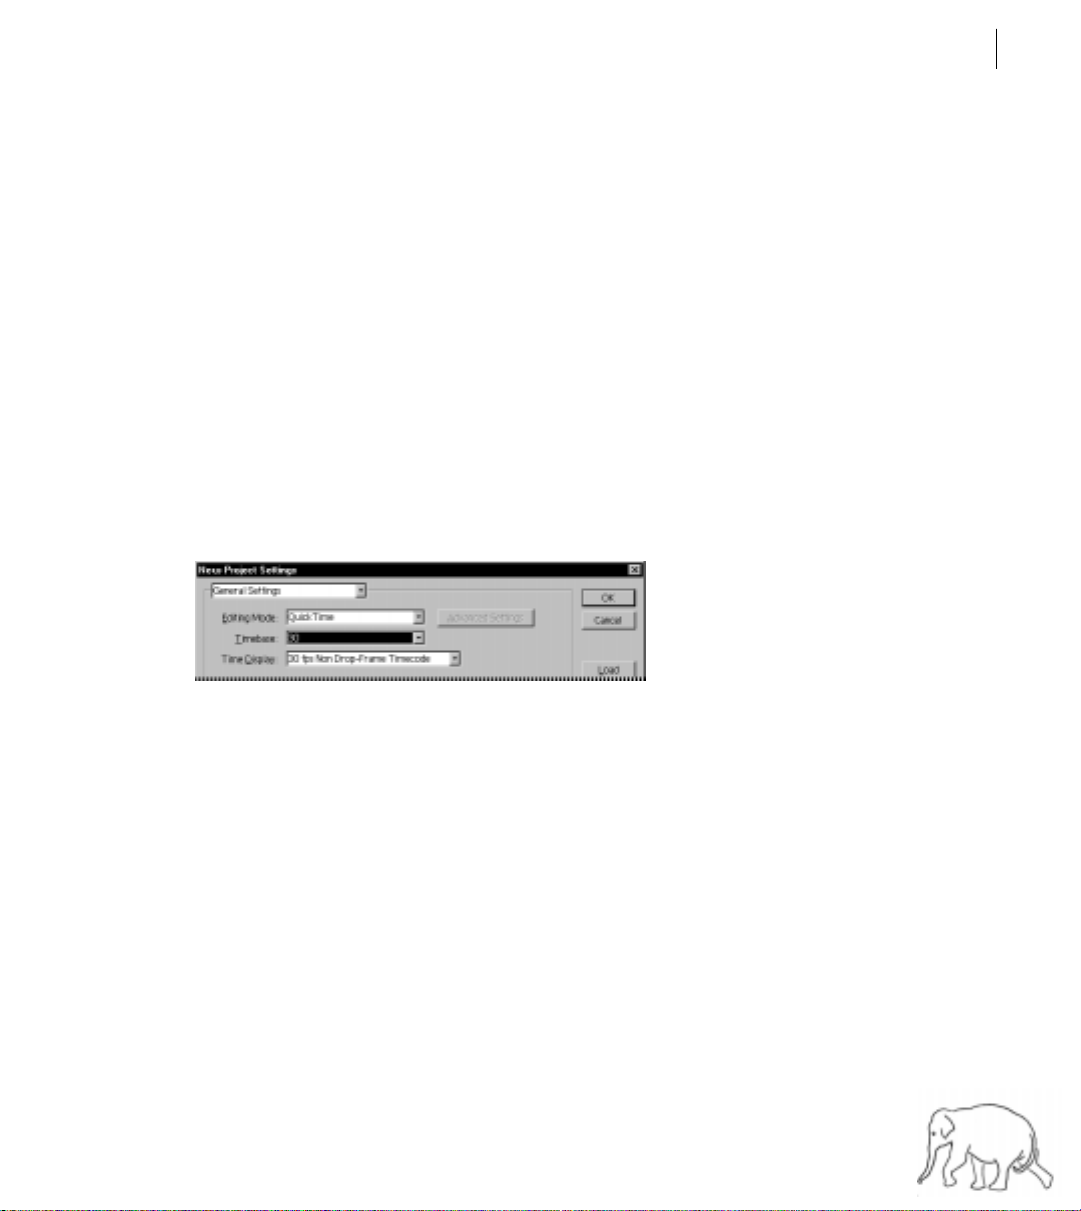
In the New Project Settings dialog box, choose QuickTime for the Editing Mode.
3
Choose 30 for the Timebase.
User Guide
17
The Timebase menu specifies the frames per second for your project. If you were producing
the final version of your video program for broadcast, you w ould c hoose 29.97, which is the
National Television Standards Commission (NTSC) standard for television, or 25, for the
PAL (Phased Alternating Line) standard, depending on the part of the world in which you
were broadcasting.
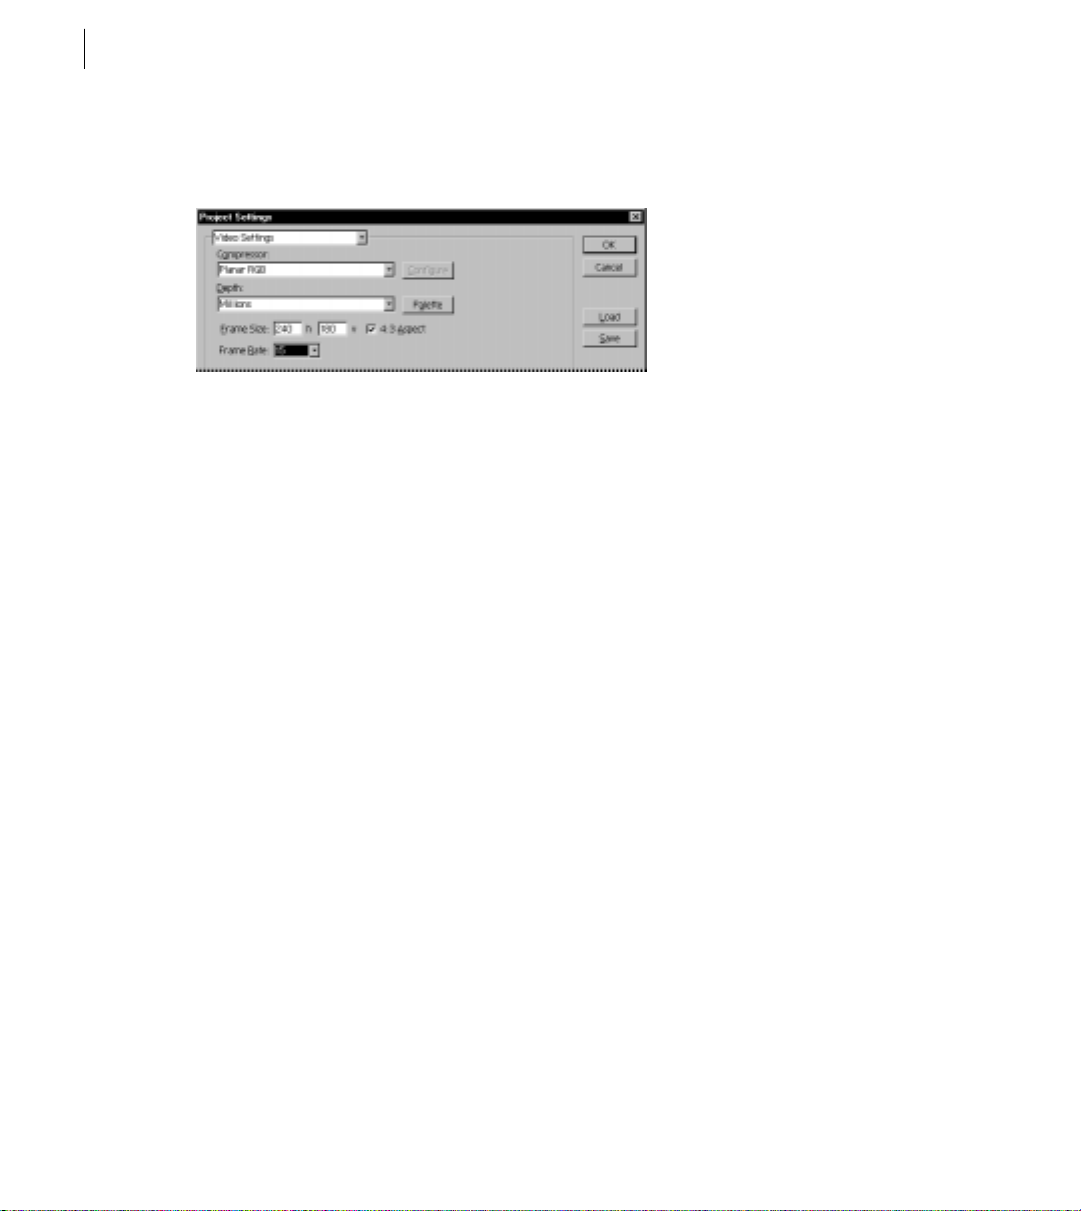
4
Click Next to open the Video Settings section of the New Project Settings dialog box.
5
For Frame Size, type
240
in the leftmost box to set the width of the preview.
Page 26
CHAPTER 1
18
A Tour of Adobe Premiere
Because the 4:3 Aspect option is checked, 180 appears automatically for the height of the
preview frame. This setting controls how the project is previewed on your monitor.
6
For Frame Rate, specify 15, and then click OK.
Many of the project settings you just defined determine ho w the video program will be built
and exported. Before you create your own videos, read Chapter 2, “Working with projects,”
for a better understanding of the available settings and their importance to the success of
your work.
Now Premiere is set to work with clips you import.
Importing the clips
There are several ways to bring clips into a project. In this chapter you’ll import clips directly
into the Project Window, the one plac e where P r emiere lists eac h clip associated with a pr oject.
1
Depending on your platform, do one of the following:
•
In Windows, Choose File > Import > File, and then open the Tour folder you copied or
installed from the Premiere Application CD-ROM disc. Select the Boys.mov file, hold down the
Shift key , and then select the Finale.mo v file. This selects the first four movie files in the folder.
Then click Open.
Page 27
ADOBE PREMIERE 5.0
•
In Mac OS, choose File > Import > Multiple, open the Tour folder you copied or installed
from the Premiere Application CD-ROM disc, and then open the Clips folder. Then select
Boys.mov and click Import. Do the same for the Cyclers.mov, Fastslo w.mov, and Finale.mo v
files, and then click Done.
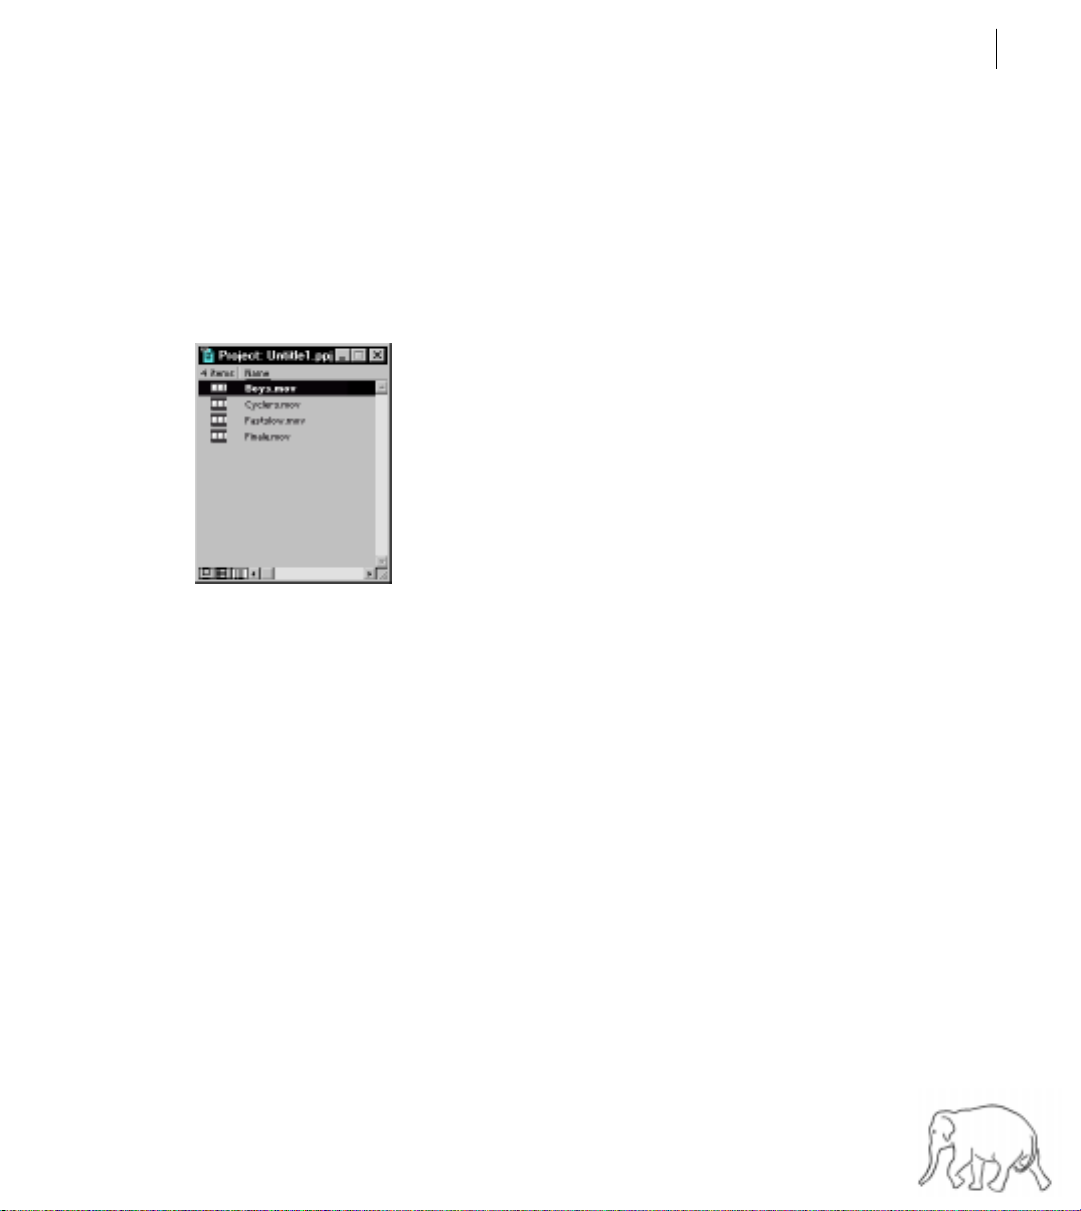
The files appear in the Project window. For each file that you import, the Project window
lists its name, type, and duration. Other columns let you add your own descriptions or
labels. You can scroll or enlarge the window if necessary.
User Guide
19
Before you continue, save the project and give it a name.
2
Choose File > Save.
3
In the Save File dialog box, type
Cycling.ppj
for the file name, and specify a location
on your hard drive. Click Save.
Premiere saves the project file to your hard disk.
Page 28

CHAPTER 1
20
A Tour of Adobe Premiere
Creating a rough cut
For many projects, you may want to begin by creating a
A rough cut is simply a sequence of clips assembled in the general sequence you want, with
little or no editing. A rough cut can quickly give y ou some sense of your video program’ s effectiveness, letting y ou start making decisions about where to cut, trim, and add transitions and
special effects.
1
If the Timeline window is not open, choose Window > Timeline.
The clips you imported do not become part of the video program until you place them into
the Timeline. The Timeline window is where you’ll construct and edit your video program—
adding, copying, and moving clips, adjusting their lengths, and so on. The Timeline provides
an overview of your work by showing where in time each clip begins and ends, as well as the
relationships between clips.
It’s important to understand that just as there are different ways to import a clip, there is
more than one approach to editing a video in Premiere. Experienced video-editors, for
example, might prefer to rely on the Monitor window (described later in this chapter)
rather than the Timeline. The method of editing described in this tour is appropriate for
novice users creating a relatively simple pr oject. Chapter 4, “Editing V ideo,” describes more
advanced approaches to editing in Premiere, such as 3-point editing.
rough cut
of your video program.
tracks
When you first open the Timeline window, it displays seven separate rows, called
,
underneath the time ruler. The tracks act as containers for the clips; by involving multiple
tracks and arranging clips within the tracks, you create sequences and effects that become
the video program you are making. This chapter introduces you to each kind of track and
to the kinds of controls available for all tracks.
2
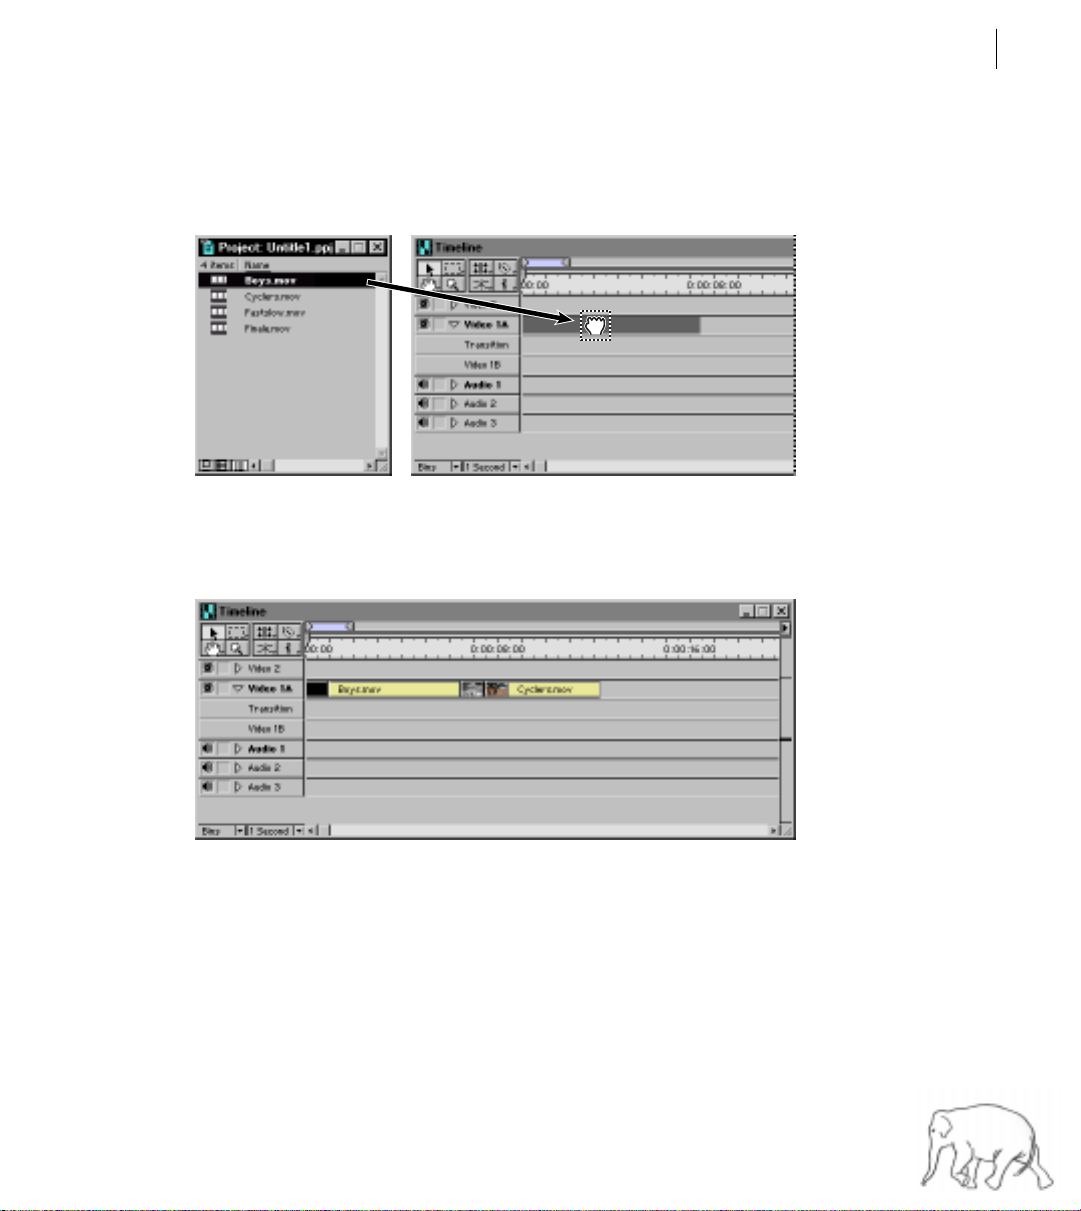
In the Project window, select the Boys.mov clip and drag it into the Video 1A track. As you
drag into the Video 1A track, the clip appears as a darkened box. Before releasing the mouse,
make sure that the left end of the box is up against the left side of the Video 1A track.
Page 29
ADOBE PREMIERE 5.0
Note
: If the Video 1A track is not expanded (that is, set to show the Transition track and the V ideo
1B track with which it is associated), click the arrow to the left of the track label so that the tracks
appear as they do in the following illustration.
3
Select the Cyclers.mov clip and drag it into the Video 1A track, this time positioning it
just after the Boys.mov clip, so that the beginning of the Cyclers clip is up against the end
of the Boys clip.
User Guide
21
4
Select the Fastslow.mov clip, drag it into the Video 1A track, and position it after the
Cyclers.mov clip . Do the same with Finale.mov clip, dragging it just after the Fastslo w .mov clip .
Page 30
CHAPTER 1
22
A Tour of Adobe Premiere
Now you ha v e four clips in y our Video 1A track, forming a video program about 32 seconds
in length. This is a rough cut, giving you some idea of how your sequence works and what
needs to be trimmed, edited, and modified. In the ne xt section, y ou’ll preview this sequence.
Before moving on, though, you’ll change how the clips are represented in the Timeline.
5
Click the Timeline window title bar to make sure the window is active, and choose
Window > Timeline Window Options.
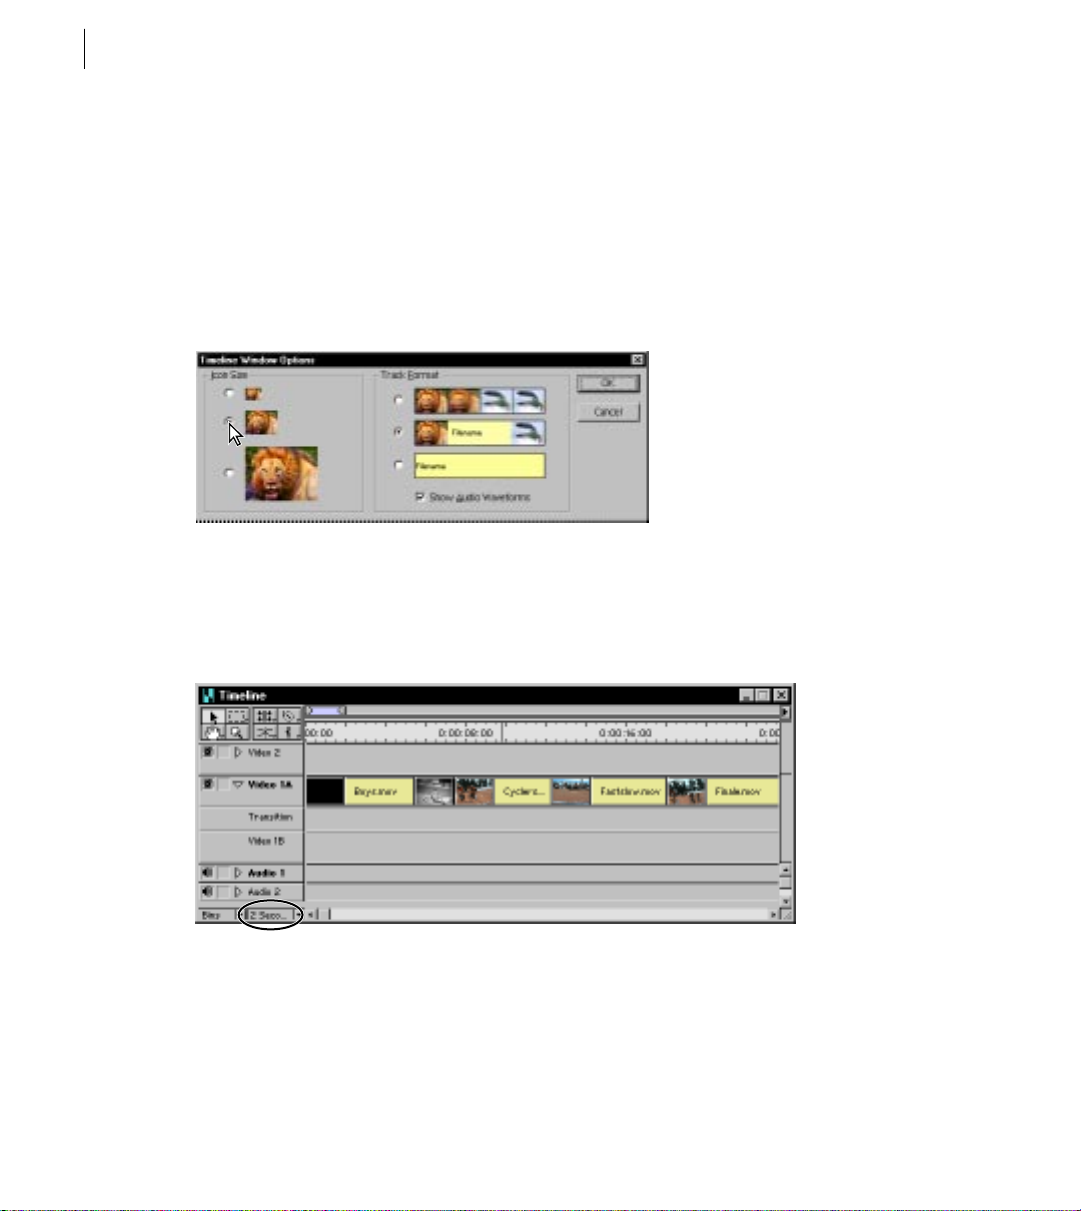
6
For Icon Size, select the middle option, and then click OK.
The clip representations in the Timeline change siz e acc or dingly. Now change the unit o f time
displayed throughout the Timeline.
7
From the Time Units pop-up menu in the lower left of the Timeline window, choose
2 Seconds.
Page 31

The clips now take up less horizontal space, since you’re now displaying the Timeline
contents in a time unit requiring less detail.
Now it’s time to play the sequence of clips you’ve imported.
Previewing in the Monitor window
To see how your work is progressing, you can preview one or more clips in the
Monitor window.
1
If the Monitor window is not already open, choose Window > Monitor.
The Monitor window displays two views:
Source view (on the left side of the window) lets you preview a clip, trim it, and then
•
insert it into the Timeline window. This view can store many clips at a time, but you can
view and trim only one clip at a time.
Program view (on the right) lets you preview your entire video program, at any time.
•
This view displays the sequence of clips currently in the Timeline window . You can also use
the Program view to edit your video program.
2
In the Monitor window, click the Play button underneath the Program view, or press
the spacebar.
ADOBE PREMIERE 5.0
User Guide
23
Page 32

CHAPTER 1
24
A Tour of Adobe Premiere
The rough cut of your video program plays until the end.
Note that the edit line in the Timeline moves in tandem with the preview. This edit line
indicates the active frame—the frame being edited or previewed.
3
To replay it, click the Play button again, or click the Loop button ( )to play the video
program in a continuous loop. To stop the action, click the Stop button ( )
or press the
spacebar.
Now that you’ve got a general idea of the video program, you’ll trim the video clips and add
audio, transitions, special effects, and superimposing to create the finished version.
Trimming clips in the Monitor window
When you shoot footage with your camera, you almost always produce much more material
than you’ll actually use in your video program. To create scenes, cuts, and transitions, you’ll
need to trim your clips, re mo ving the parts that you don’t need. Trimming clips is an essential
part of creating a video program, something you’ll do man y times. P remiere provides a number
of different ways to trim clips, including quick rough-cut tools and more precise frame-byframe views.
You’ll start editing the bicycle video by trimming the Boys.mov clip, the first clip in the
video program.
1
Make sure that both the Timeline window and the Monitor window are visible and that
they don’t overlap one another. Then click the Timeline window title bar to make the
Timeline active.
Page 33

2
In the Video 1A track of the Timeline window, double-click the Boys.mov clip.
The first frame of the Boys.mov clip appears in the Source view of the Monitor window.
Before you trim, first play the clip.
3
Click the Play button ( ) underneath the Source view, or press the spacebar.
As it is, the clip is a little long, so you’ll trim it somewhat. Trimming a clip involves setting
In point, Out point
a new
, or both. An In point is the frame at which a clip begins; an Out
point is the last frame of the clip. You’ll change the Out point for the Boys.mov clip.
ADOBE PREMIERE 5.0
User Guide
25
4
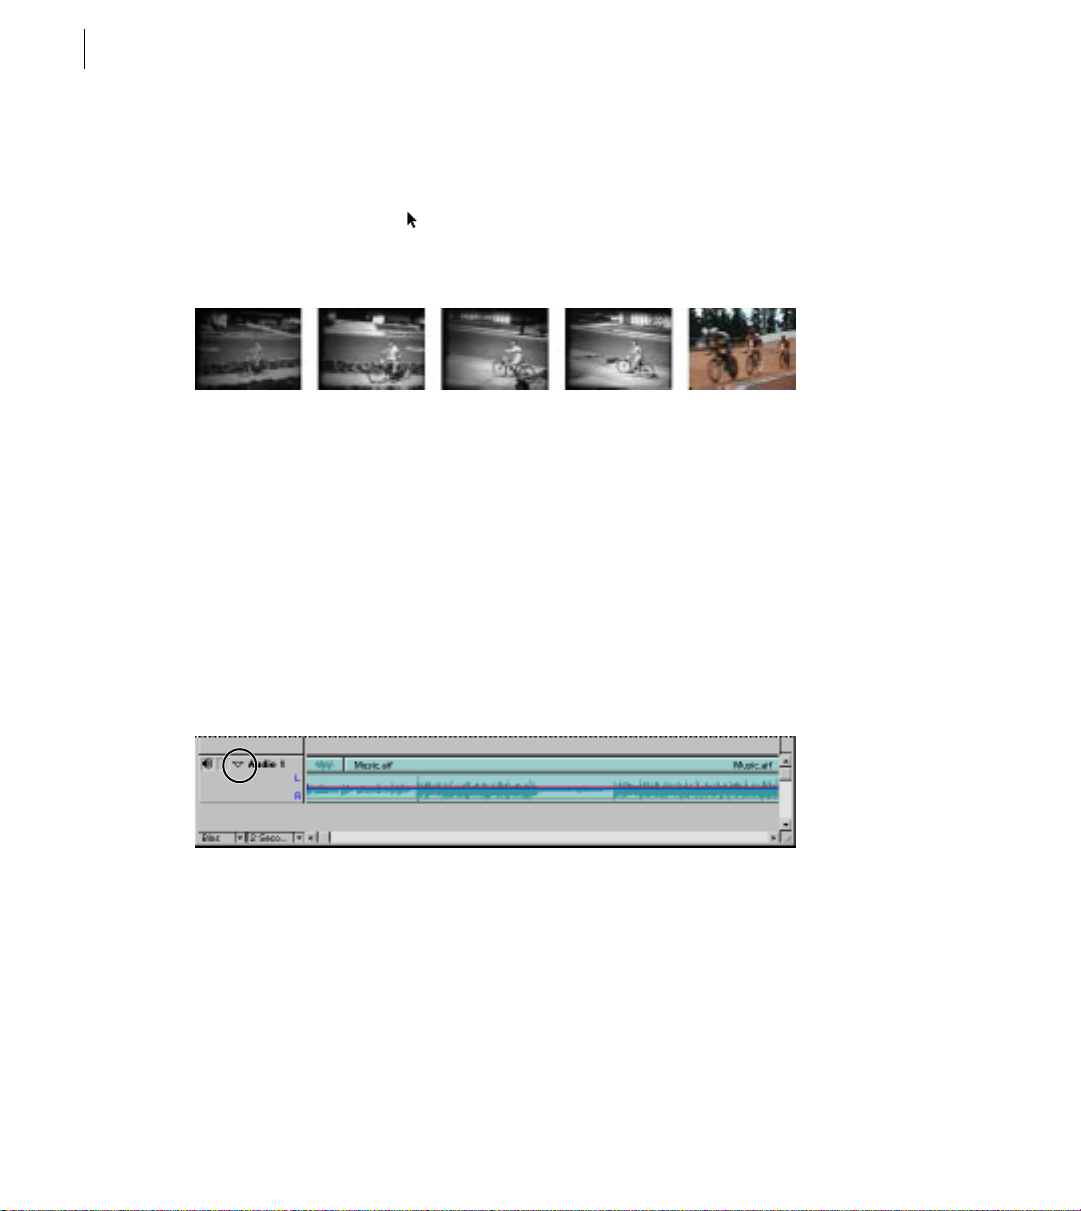
To get an idea of exactly where you’ll trim the clip , click the Play button and look for the
point at which the first bike rider stops moving forward (just over 4 seconds into the clip):
That is where you’ll set the Out point.
The controls for both views in the Monitor window also c ontain a sh uttle slider, which lets
scrub
you
clips. Scrubbing—advancing or reversing a clip manually—lets you precisely
identify and mark events.
Page 34

CHAPTER 1
26
A Tour of Adobe Premiere
5
Under the Source view, drag the shuttle slider until you see the first bike rider at the end
of his ride. (The time below the shuttle slider should read between 4:20 and 5:00 seconds.)
6
Click the Mark Out point button ( ).
After you’ve positioned the Out point correctly, you need to apply the change to the clip in
the Timeline. N ot e that the A pply butt on is no w visible abov e the Sour c e view . This button
appears whenever you mark a new In or Out point for a clip in the Timeline.
7
To apply the trim, click the Apply button.
Page 35
ADOBE PREMIERE 5.0
Premiere trims the end of the clip to give the clip a new Out point. It’ s important to understand
that the trimmed area has not been deleted; Premiere has merely hidden the trimmed frames
so that they don’t appear in the Timeline and will not appear when you preview or export the
video program. You can easily rest ore any trimmed frames by r esetting the Out point using any
trimming method.
Because you set a new Out point, there is now a gap in the Timeline between the first and
second clips. To preserve a contin uous flow from one clip t o the next, you need to close this gap
by moving the other clips to the left. To do this, you’ll use the track selection tool ( ). This tool
selects all the clips in a track to the right of where you click. (Later in the lesson y ou ’ll learn how
to automatically close gaps when you trim.)
User Guide
27
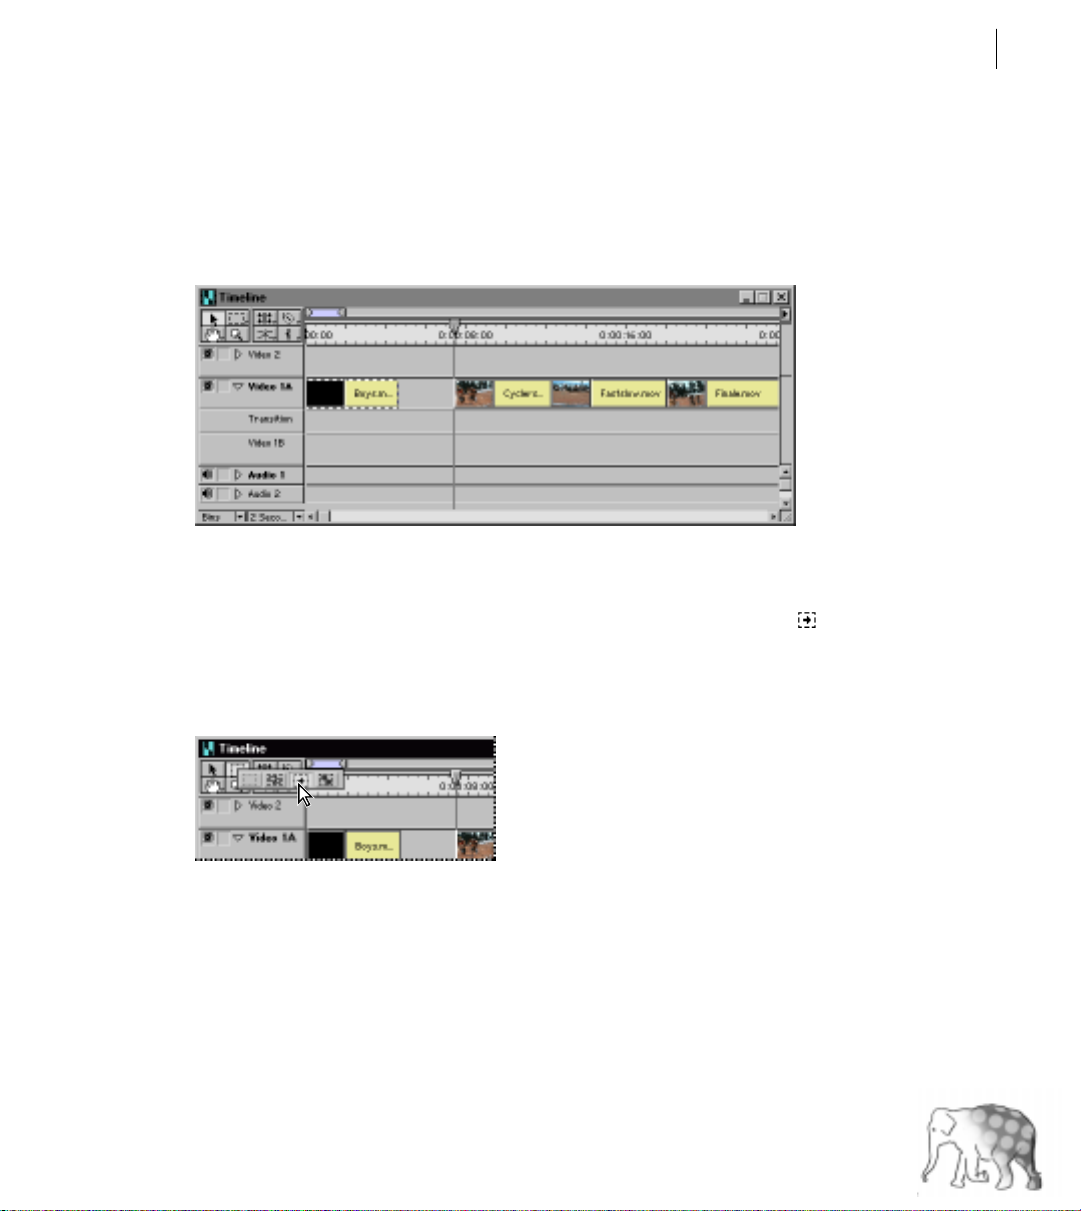
8
In the Timeline window, select the track selection tool.
Page 36
CHAPTER 1
28
A Tour of Adobe Premiere
9
Click the Cyclers.mov clip in track 1A. This clip, and the clips to the right, are selected.
10
Drag the selection to the left, until it is up against the Boys.mov clip.
11
Click the selection tool ( ), since you are through with the track selection for now.
12
In the Monitor window, click the Program view Play button to preview the changes
you’ve made.
13
Save the project.
Adding audio
Now you’ll add some music to the project by importing and placing an audio file in the first
audio track. The music in the audio file was recor ded in a studio, digitized, and then assembled
and rendered in Premiere.
1
Choose File > Import > File, and double-click the M usic.aif file in the Clips folder within
the Tour folder. The file appears in the Project window.
2
Drag the Music.aif icon from the Project window to the Audio 1 track.
3
Click the arrow to the left of the track to expand it.
Page 37

ADOBE PREMIERE 5.0
The expanded view shows the waveform of the clip. The waveform displays the volume of the
audio over time. Higher peaks in the waveform indicate greater volume. In the next section,
you’ll c ome back to the audio track to synchr onize events in the video with the music. F or now ,
you’ll lock the track so it doesn’t get repositioned later.
4
Click in the box next to the speaker icon to lock the audio track.
5
Click the Program view Play button in the Monitor window to preview the video and the
audio together.
Trimming clips in the Timeline window
In addition to trimming clips in the Monitor window, you can trim clips in the Timeline
window using a number of different methods. To edit more precisely in the T imeline window,
it’s often easier to view a wider range of frames. By default, the Timeline window displays the
frame at each second.
User Guide
29
1
From the Time Units pop-up menu in the lower left of the Timeline window, choose
8 Frames.
Page 38

CHAPTER 1
30
A Tour of Adobe Premiere
The Timeline window now displays every eighth frame.
First, you ’ll adjust the trim you made t o the Boys.mov clip so that its Out point is synchronized
with the first spike in the audio track.
2
Select the ripple edit tool ( ) in the Timeline window.
ripple edit
A
trims the specified clip, but keeps the duration of all other clips the same.
The trim, however , “ ripples” thr ough the project; other clips ar e pulled in or pushed out,
depending on whether you shorten or lengthen the clip. The duration of the entire video
program, therefore, changes.
3
Move the pointer across the line where the first two clips join. Notice how the pointer
changes into the icon representing a ripple edit.
4
Drag the ripple edit tool until it is positioned over the first spike in the audio track,
and then release the mouse button
.
Page 39

ADOBE PREMIERE 5.0
Now you’ll trim the Cyclers.mov clip so that its endpoint corresponds with an exact point
in the Timeline. To trim the Cyclers.mov clip to this time, you’ll use the Info palette.
5
Select the Cyclers.mov clip and choose Window > Show Info.
The Info palette displays the name, duration, and the starting and ending points of the selected
clip. In addition, it displays the current location of the pointer; you’ll use the pointer information to help you trim.
6
With the ripple edit tool still selected, move the pointer across the line where the
Cyclers.mov and Fastslow.mov clips join.
7
Drag the ripple edit tool to the left, until the position of the pointer in the Info palette
reads 0:00:08:01, and then release the mouse button.
User Guide
31
Page 40

CHAPTER 1
32
A Tour of Adobe Premiere
You have trimmed the Out point of the Cyclers.mov clip. Since you trimmed the clip using
a ripple edit, the subsequent clips have followed suit, shifting to the left
8
Select the selection tool ( ), since you are done with ripple editing.
.
Now you’ll move on to applying a transition between clips.
Adding a transition
A
transition
transition is the
next. By placing the first two clips together—Boys.mov and Cyclers.mov—you created a cut
between them.
To add texture, nuanc e, or att ention-getting special effects between sc enes, y ou can use special
transitions available in Premiere 5.0, such as dissolv es, wipes, and zooms. I n this tour , you ’ll use
the Cross Dissolve transition.
1
Choose Window > Show Transitions.
The Transitions palette appears, displaying the available transitions. Each icon graphically
represents how the transition works. You can also animate these ic ons to see a dynamic view
of each transition. Do that now.
is a change from one scene to the next, or from one clip to another. The simplest
cut
, where the last frame of one clip leads directly into the first frame of the
2
Click the small black arrow ( ) in the upper right corner of the Transitions palette,
and then choose Animate.
Page 41

ADOBE PREMIERE 5.0
If you find the animation distracting, you can turn it off by once again choosing Animate
from the Transitions palette menu to deselect the option.
3 If the Video 1 track is not expanded, click the arrow to the left of the track.
To create a transition, you first need to overlap two clips in the Video 1A and Video 1B tracks.
The overlapping portion of the clips are used in the transition. Typically, the overlapping
portions of the clips are not essential to your project, since the transition will obscure them
both somewhat.
4 In the time ruler, drag the edit line to one second before the Out point of the Cyclers.mov
clip (0:00:07:01); you’ll use this as a kind of guide for repositioning the Fastslow clip in the
next step.
5 Now drag the Fastslow.mov clip down to the Video 1B track, snapping its In point to the
edit line.
User Guide
33
The two clips are now overlapping for a one-second duration.
6 In the Transitions palette, find the Cross Dissolve transition, scrolling if necessary.
This transition, frequently used in video and film, “dissolves” one scene into another,
over a brief duration.
Page 42

CHAPTER 1
34
A Tour of Adobe Premiere
7 Drag the Cross Dissolve transition into the Timeline window , placing it in the Transition
track (the area where the two clips overlap).
When you release the mouse, the transition is auto matically sized to the o verlap and displa yed
as an icon. This Cross Dissol ve begins one second prior to the end of the Cy clers.mov clip and
ends one second into the Fastslow.mov clip.
Previewing transitions and other effects
The Program view play button previews only the video clips in the V ideo 1 track and the audio
clips but does not play transitions, filters, or superimposed clips (ones placed on the Video 2
track) unless a preview file has been created. Once the preview file has been created, the
Program view shows the additional effects.
1 Hold down the Alt key (Windows) or the Option key (Macintosh) and move the pointer
into the time ruler within the Timeline window. The pointer changes into a small downward
arrow ( ).
Page 43

ADOBE PREMIERE 5.0
2 Drag the pointer in the time ruler over the transition, keeping the Alt or Option key
held down.
The Cyclers.mov clip dissolves into the Fastslow.mov clip, over a duration of one second.
Dragging in this fashion provides a quick method for previewing your video program
but cannot give you a precise frame rate, since you’re moving it by hand. To preview
effects at a specified frame rate, you need to generate a Preview file.
Before you generate it, ho wev er, you need to adjust the work area bar—the topmost section
of the Timeline window—to cover the area y ou want to pr eview. The w ork area bar specifies
the portion of your project that you want to preview (with transitions, filters, and other
effects) or output. In this case, you’d like to preview the first three clips of your project,
including the transition effect you just added.
3 To view the first three clips in their entirety, choose 1 Second from the Time Units pop-up
menu. Now it will be easy to extend the work area by the correct amount.
User Guide
35
Note: Depending on the size and resolution of your monitor, the 1 Second setting might not make
the first three clips entirely visible; in that case, choose another setting from the Time Units pop-up
menu. Doing so will not affect your ability to follow the remaining procedures in this chapter,
although the illustrations may not exactly match what you see on your screen.
Page 44

CHAPTER 1
36
A Tour of Adobe Premiere
4 Drag the right end of the work area bar so that it extends the length of the first three
clips and aligns with the end of the Finale.mov clip.
5 Choose Project > Preview or press Enter (Windows) or Return (Mac OS) on the
keyboard.
Premiere displays a status bar as it generates a preview file. When complete, the preview
of your video program plays in the Program view of the Monitor window.
Splitting a clip
Sometimes you may want to superimpose a portion of a clip. To do this, you need to split
the clip to create two or more separate clips. Here you’ll split the Fastslow.mov clip so that
you can make a particular portion of it change speed and fade out.
Page 45

ADOBE PREMIERE 5.0
1 In the Timeline window, mo ve the edit line acr oss the Fastslo w.mov clip until you see the
shot of the unobstructed bleachers (11:18). Leave the edit line positioned at this point.
2 In the Timeline window, select the razor tool ( ).
3 Position the pointer over the Fastslow.mov clip at the current edit line, and click.
User Guide
37
Premiere cuts the Fastslow.mov clip at the point where you clicked, creating two
separate clips.
Page 46

CHAPTER 1
38
A Tour of Adobe Premiere
Changing the speed of a clip
You can change the playback speed of a clip to make it play slower or faster. Changing the
speed changes its duration without adding or removing any frames. To make the bike
sequence more interesting and attention-getting, you’ll slow down the second portion of
the clip you just cut, increasing its duration.
Since you also want to fade out the same clip, which requires it to be placed in a superimpose
track, you’ll place it there now.
1 Collapse the Video 1 track by clicking the downward pointing arrow to the left of the track.
2 Click the selection tool ( ) to select it, and then drag the sec ond portion of the Fastslow clip
upward into the Video 2 track.
Make sure to keep the position of the clip at exactly the same point in time; the edges of
the clip snap to its same location in the Video 2 track.
Now you’ll change its speed.
3 Select the clip you just moved (if it is not already selected), and choose Clip > Speed.
Page 47

ADOBE PREMIERE 5.0
4 In the dialog box, type 30 in the New Rate box. Click OK.
The playback speed of the clip is now at 30% of its original speed. Accordingly, the duration
of the clip has increased proportionally, approximately tripling in length.
Note that this clip now overlaps some of the Finale.mov clip. Because you want the
slowed-down clip to fade to black, you need to move the Finale.mov clip to the right.
5 Drag the Finale.mov clip to the right until its left edge snaps to the Out point of the
slowed-down clip.
User Guide
39
Page 48

CHAPTER 1
40
A Tour of Adobe Premiere
Now let’s generate another preview.
6 Drag the right end of the work area bar to the right so that it extends to the end of the
Fastslow clip in the Video 2 track.
7 Choose Project > Preview or press Enter (Windows) or Return (Mac OS) on the keyboard.
To preview more than once, just repeat this step.
8 Save the project.
Changing a clip’s opacity
If a clip is on Video 2 track or higher, you can make it partially transparent by changing its
opacity. The opacity option lets you fade into or out of a clip and superimpose one or more
clips on top of others, so that two or more clips are visible at the same time. You ’ll superimpose
clips later in the tour . For now, you’ll use the superimpose track to fade out a clip by manually
adjusting its opacity over time.
By default, Premier e includes one superimpose track, V ideo 2, abo ve the Video 1 track. You
can add others, as needed. Once a clip has been placed in a superimpose track, an opacity
control bar, or a “rubber band,” becomes available. To see the bar, you need to expand the
Video 2 track.
1 Click the arrow to the left of the Video 2 track.
The opacity bar shows the clip’s opacity. Right now, the opacity is at 100%.
2 Now move the pointer onto the opacity bar (where the pointer changes into a pointing
finger), and click about three-quarters of the way into the clip to create a small box called
a handle.
Page 49

ADOBE PREMIERE 5.0
The handle divides the control bar into sections that you can adjust b y dragging. A contr ol bar
includes a handle at each end to define the beginning and ending opacity settings.
3 In the Video 2 track of the Timeline window, click the rightmost handle. Keep the mouse
button depressed throughout the next step.
4 Press Shift, and then drag the selected opacity handle down until the value beside the handle
displays 20%.
User Guide
41
This creates a downward slope in the control bar, starting at the first handle you created.
A downward slope decreases opacity. In this case, the opacity of the clip begins at 100% and
decreases to 20%. (Make sure you press the Shift key after you select the handle, otherwise
the change applies starting with the leftmost handle in the control bar.)
Note: You can also drag handles without holding down Shift, but that limits you to 5-percent
increments and does not produce a pop-up display. You can, however, use the Info palette to
view the opacity setting if you drag without holding down the Shift key.
Preview what you’ve done.
Page 50

CHAPTER 1
42
A Tour of Adobe Premiere
5 Hold down the Alt key (Windows) or the Option key (Macintosh) and slowly drag in the
time ruler above the clip you just adjusted. The pr eview plays in the M onitor windo w . Because
this clip is the only one playing in the Timeline, it fades into the background color, which
is black.
6 Save the project.
Adding special effects to a video clip
Premiere 5.0 lets you create many different kinds of special effects using video filters. For the
last clip in the video program, you ’ll add the C amera Blur effect, which blurs a clip as if it were
leaving the focal range of the camera.
1 Select the Finale.mov clip in the Timeline window.
2 Choose Clip > Filters.
3 Move the Filters window so that you can see both it and the Monitor window.
4 In the Filters window, select Camera Blur from the Available column, and then click the
Add button.
The Camera Blur control window appears, displaying the first frame of the Finale.mov clip.
5 Drag the slider bar to zero, and then click OK.
Page 51

ADOBE PREMIERE 5.0
The Camera Blur filter appears in the Current column of the Filters window. Filters listed in
this column are applied to the currently selected clip.
To create an effect of changing focus, you can vary the Camera Blur effect over time. To do this,
you set keyframes. A keyframe specifies a control value at a specific point in time.
The lower portion of the Filters window now displays a timeline, representing the duration
of the Finale.mov clip. The triangular keyframes at each end of the timeline control when the
effect begins and ends, and with what amount of blurring. Since you ’ d lik e the blurring to start
about midway through the Finale.mov clip, you move the first keyframe. Moving a keyframe
scrubs the clip in the Program view of the Monitor window.
6 Arrange the Filters window so that the program view in the Monitor window is visible. Then
drag the first keyframe (the triangle on the left) to the right until you reach the point in the clip
where the bikes are perpendicular to the camera.
User Guide
43
7 Click the Edit button.
8 Make sure the slider is set at zero. Click OK.
Now you’ll create a new keyframe and increase the amount of blurring.
9 In the Filters window, click in the middle of the two keyframes.
A new keyframe is created and selected, and the Camera Blur Settings edit box appears.
Page 52

CHAPTER 1
44
A Tour of Adobe Premiere
10 Drag the slider bar until the Blur is at 80%, and then click OK.
Now you’ll position this keyframe at an exact time.
11 Drag the keyframe you just created until the timecode reads 00:00:25:00 (25 seconds).
12 Now select the last keyframe (the triangle at the far right) and click Edit.
13 Once again, drag the slider bar until the Blur is at 80%. Click OK.
14 In the Filters window, click OK.
Let’s briefly review what you’ve just done. By setting three keyframes—the first at 0%, the
second at 80%, and the third at 80%—y ou ha v e specified that the Camera Blur effect begins at
0% at the point in time you specified, increases t o 80% at 25 seconds, and then r emains at 80%
for the duration of the clip.
Page 53

ADOBE PREMIERE 5.0
Why not just use two keyframes—the first at 0% and the last at 80%? Premiere always creates
a linear change between keyframes. Therefore, if you used only two keyframes, the blurring
would gradually increase over the duration of the clip. This is not the effect you want; rather,
you want the blur to happen fairly quickly, and then remain at that level for its duration.
Preview your work again.
15 Press Enter (Windows) or Return (Mac OS).
It’s starting to look like something now!
16 Save the project.
Superimposing an image
In the previous section, you used the Camera Blur filter t o blur the second half of the final clip.
Now you’ll superimpose a company logo on top of this clip, making it ap pear as if the camera
is now focusing on the image.
User Guide
45
1 Choose File > Import > File. Then locate and select the Veloman.eps file in the Clips folder
within the Tour folder. Click Open.
2 From the Project window, drag the Veloman.eps image into the Video 2 track.
3 Choose Window > Show Info if the palette is not already o pen, and adjust the image so that
its In point is set to 0:00:25:00.
By default, the duration of a still image is set in the General Preferences at 30 frames. Because
the frame rate of your video program is 15 frames per second, the duration of the image is 2
seconds. To keep the image visible until the end of the video program, you’ll need to extend its
duration. Unlike a motion clip, a still image duration can be specified by stretching the clip
representation in the Timeline.
Page 54

CHAPTER 1
46
A Tour of Adobe Premiere
4 In the Timeline window, select the selection tool.
5 Drag the right edge of the Veloman.eps image to the right until it snaps to the end of the
Finale.mov clip.
The image now overlaps the Finale.mov clip in the Timeline window. The overlapping
area is where the logo will be superimposed on the bike race.
Note: Hold down the Alt key (Windows) or the Option key (Mac OS) and drag in the time
ruler over the area where the two clips overlap.
As expected, all you see is the Veloman.eps image; you don’t see the Finale.mov clip at all.
That’ s because the Veloman.eps image is still fully opaque. No w you ’ll mak e the background
of the Veloman.eps image transparent.
Page 55

ADOBE PREMIERE 5.0
T o specify that certain areas of a clip become transparent and othe r areas remain opaque, you
need to use a transparency key. A transparency key (often referred to simply as a key) mak es
designated colors (or a range of colors) in a clip transparent or partially transparent. A blue
screen key , for example, makes a shade of blue transparent; in this way , an actor can be filmed
in the studio against a blue screen, and then superimposed on an outdoor action scene.
Creating transparency with a particular color is called keying out that color. To superimpose
the Veloman.eps image, you need to key out the white background.
6 Select the Veloman.eps image in the Timeline window, and then choose
Clip > Video > Transparency.
The Transparency Settings dialog box shows the selected clip in the Sample area. The key you
choose is applied to the clip, and the resulting effect is displayed in this area.
7 Select the Page Peel icon, which displays the actual clips in the Sample area.
User Guide
47
8 In the Transparency Settings dialog box, choose White Alpha Matte for the Key Type.
The White Alpha Matte k ey will key out any areas of alpha white in an image that contains
an alpha channel.
Page 56

CHAPTER 1
48
A Tour of Adobe Premiere
In the Sample area of the dialog box, the white areas of the Veloman.eps image are now
transparent, letting the underlying image—the Finale.mov clip—show through.
9 Click OK.
10 To preview the effect, hold down the Alt key (Windows) or the Option key (Macintosh)
and drag in the time ruler over the area where the superimposition occurs.
11 Save the project.
Animating a clip
For additional special effects, Premiere lets you move, rotate, or zoom a clip within the area
bounded by the video program’s frame. You cannot add motion to elements within the clip;
you can add motion only to the clip itself.
To add more visual interest to the Veloman.eps image, you’ll make it zoom into the frame,
from the left.
1 If the Veloman.eps image is not still selected in the Timeline window, select it now.
Page 57

2 Choose Clip > Video > Motion.
In the middle of the dialog box is the motion path for the clip. By default, the path is a
straight line, starting outside the frame on the left, and ending outside the frame on the
right. The area on the left half of the dialog box previews the motion for you.
You’ll now define a new motion path.
3 In the Motion path area, drag the Start point to the right, so that approximately half
of the image overlaps the Visible Area.
ADOBE PREMIERE 5.0
User Guide
49
Page 58

CHAPTER 1
50
A Tour of Adobe Premiere
You can also specify the position of the image by entering coordinates. You’ll do that now.
4 Select the End point, and then enter 26 and -8 in the two text box es below the line that r eads
“Click on a point above.” Then press Tab on your keyboard.
The End point moves to the specified location.
By default, the Motion Area provides two motion points, Start and End, which you have just
modified for position. You can also specify zooming, rotation, and distortion at these points,
and you can create other motion points, each with particular animation values. Like k eyframes
for filters, motion points let you specify a particular value at a point in time.
In order to manipulate the Veloman.eps image in an eye-catching way, you ’ll add a new motion
point, specify new zoom values for the start and end points, and, finally, apply a rotation value
so that the logo spins as it appears to recede into the distance.
5 In the Motion Path area, click on the path approximately halfway between the Start and
End points.
A new motion point is created.
6 Move the new motion point down and to the right as shown below.
Page 59

ADOBE PREMIERE 5.0
Now you’ll specify zoom values for the start and end points.
7 In the Motion Path area, select the Start point.
8 In the Zoom box at the bottom of the dialog box, type 0, and then press Tab.
9 Select the end point, type 0 in the Zoom edit box, and press Tab.
The settings you just entered make the logo appear t o zoom in from the left side of the frame
and then recede into the distance.
10 With the end point still selected, type 720 in the Rotation text box near the bottom
of the dialog box, and press Tab.
User Guide
51
Rotation values are specified in degrees. The value of 720 (360 x 2) defines two complete
circles or rotations from one point to the next.
The image now follows the motion you defined earlier as it zooms and r otates across the screen.
11 Click OK to close the Motion Settings dialog box.
Let’s preview the end of the video program to see the superimposed image moving through
the frame.
Page 60

CHAPTER 1
52
A Tour of Adobe Premiere
12 Move the work area bar to cover the last portion of your video program, where the
image begins.
13 Press Enter (Windows) or Return (Mac OS) and watch the preview.
14 Save the project.
All you need to do now is make the QuickTime movie.
Exporting the movie
To complete the tour, you’ll make the project into a QuickTime movie. The QuickTime
format is a standard format for both Windows and Mac OS systems.
1 Choose File > Export > Movie.
2 Click the Settings button.
3 Make sure QuickTime is selected for File Type, and Entire Project is selected for Range.
4 Also make sure that the Export Video and Export Audio options are selected. The default
values for other settings, including those for compression, are fine for this project.
5 Click OK to close the Export Movie Settings dialog box.
Page 61

ADOBE PREMIERE 5.0
6 In the Export Movie dialog box, specify a filename (be sure to add the .MOV file extension
to the end) and a folder in which to store the movie.
7 Click Save.
Premiere starts making the movie, displaying a status bar that provides an estimate for the
amount of time it will take to render or output the movie. The output time alwa ys depends on
the capabilities of your computer . On most systems, Premiere should finish making the mo vie
within 7 minutes. You can cancel the output process by pressing the Esc key.
8 When the movie is complete, you can open and pla y it from within Premiere: choose File >
Open, and double-click the file you just exported.
User Guide
53
9 Click the Play button to watch the show.
Congratulations on completing the Tour!
If you found this tour helpful, you can continue on with similar step-by-step instructions for
achieving effects in Premiere. Three chapters and source clips from the Adobe Premiere 5.0
Classroom in a Book publication are provided on the Adobe Premiere Application CD-ROM
disc. To find out more, open the Tutorial folder in the Training folder on the CD-ROM disc,
and double-click the Contents.pdf file.
Page 62

Page 63

2
Page 64

Page 65

ADOBE PREMIERE 5.0
Chapter 2: Working with Projects
project
is a single Premiere file that describes a video program. It stores references
to all the clips in that file and contains information about how you arranged the clips.
It also includes details of any transitions or effects you applied. You can add and
remove clips, organize clips into bins within the project and clip libraries outside the project,
and substitute placeholders for clips.
Starting a project
You start a new project by specifying project settings. It’s a good idea to save the project
immediately. See “Saving and autosaving a project” on page 66.
To start a new project:
1
Start Premiere and choose File > New > Project.
2
Do one of the following:
Specify project settings. See “Specifying project settings” on page 58.
•
If you want to apply preset project settings, click Load, select an item from the Available
•
Project Settings, and then click OK.
3
Click OK to close the Project Settings dialog box.
User Guide
57
Page 66

CHAPTER 2
58
Working with Projects
Specifying project settings
When you start a project, review the project settings, which are organized into five categories:
General Settings
Control the fundamental characteristics of the video program, including
the methods Premiere uses to process video, count time, and position edits.
Video Settings
Control the frame size, pictur e quality, and compression settings Pr emiere uses
when you play back video from the Timeline, the window where you edit your video program.
Audio Settings
Keyframe and Rendering Options
Control the characteristics of audio you play back from the Timeline.
Control frame-related characteristics when you play back
video from the Timeline. They work in combination with the Video settings.
Capture Settings
Control how Premiere transfers video and audio directly from a deck
or camera. Other Project Settings panels do not affect capturing.
The settings in these categories are described in more detail later in this chapter, except
for Capture Settings. For more information about capture settings, see “Preparing for video
capture” on page 93.
The appropriate settings for your project are usually determined by the current stage of your
project. Keep the following guidelines in mind as you progress through your project:
•
When setting up or editing a project, specify settings that will provide the quality you want
when you play back the Timeline. For example, you can specify project settings that match
the requirements of the final program, or you can specify settings that temporarily lower
the picture quality so that your computer can process edits faster.
•
If you are about to use a videotape deck to record dir ectly fr om the T imeline, specify pr oject
settings that represent the final picture quality you want.
Page 67

ADOBE PREMIERE 5.0
•
If you are about to export the video program to a file and you want to specify different
settings than you did for editing, you must also specify export settings, which are available
through the File > Export command, not in the Project Settings dialog box. This lets you use
separate settings for previewing and exporting. It also lets you maintain a set of preview settings
that stays constant while changing export settings when repurposing a program for multiple
distribution media such as television and the World Wide Web. When you specify project
settings for the first time, the settings are copied to the export settings, making your export
settings the same as your project settings unless you change the project or export later.
See “Exporting video files” on page 304.
Premiere generates preview files based on the Project Settings. If you plan to export
your final cut to a file, specify project settings that match the export settings you want.
If project settings match export settings, Premiere can use existing preview files in the export
process, saving processing time.
General settings
When you choose Project > Settings > General, you can specify the following options:
User Guide
59
Page 68

CHAPTER 2
60
Working with Projects
Editing Mode
Determines which video method is used to play video back from the Timeline
and which compression methods are listed in the Video Settings panel. The QuickTime
and DPS Perception editing modes are installed with Premiere. In Windows, the Video
for Windows editing mode is also installed with Premiere. Manufacturers of video-capture
cards or other video hardware may provide plug-in software that adds editing modes for
maximum compatibility and quality with their hardware.
Note:
The Editing Mode does not necessarily specify the export format. For more information,
see “Exporting video files” on page 304.
Advanced Settings
This button is not available for the Video for Windows or QuickTime
editing modes, but it may be available for plug-in editing modes provided by other
manufacturers. If you choose an editing mode other than V ideo for W indows or Quic kTime
and this button is available, see the documentation provided by the manufacturer of the
plug-in editing mode.
Timebase
Specifies the time divisions Premiere uses to calculate the time position of each
edit. In general, c hoose 24 for editing motion-picture film, 25 for editing PAL and SECAM
video, 29.97 for editing NTSC video, or 30 for other video types. Timebase is not to be
confused with the frame rate of the video you play back or export from the Timeline,
although timebase and frame rate often use the same value. For more information on
the relationship between timebase and frame rate, see “Timebase” on page 335 and
“Understanding frame rates in relation to the timebase” on page 336.
Time Display
Specifies the way time is displayed throughout the project. The time display
options correspond to standards for editing video and motion-picture film. For NTSC video ,
choose 30 fps Drop-Frame Timecode if that was the time display used by the original video.
For video to be played back from the Web or CD-ROM, choose 30 fps Non Drop-Frame
Timecode. For PAL and SECAM video, choose 25 fps Timecode. For motion-picture film,
choose Feet + Frames 16mm or Feet + F rames 35mm. To count indi vidual frames and audio
samples instead of timecode, choose Frames/Samples. For more information about timecode,
see “Understanding timecode and time display options” on page 339.
Current Settings
Displays a summary of the settings you specified in all Project Settings panels.
Page 69
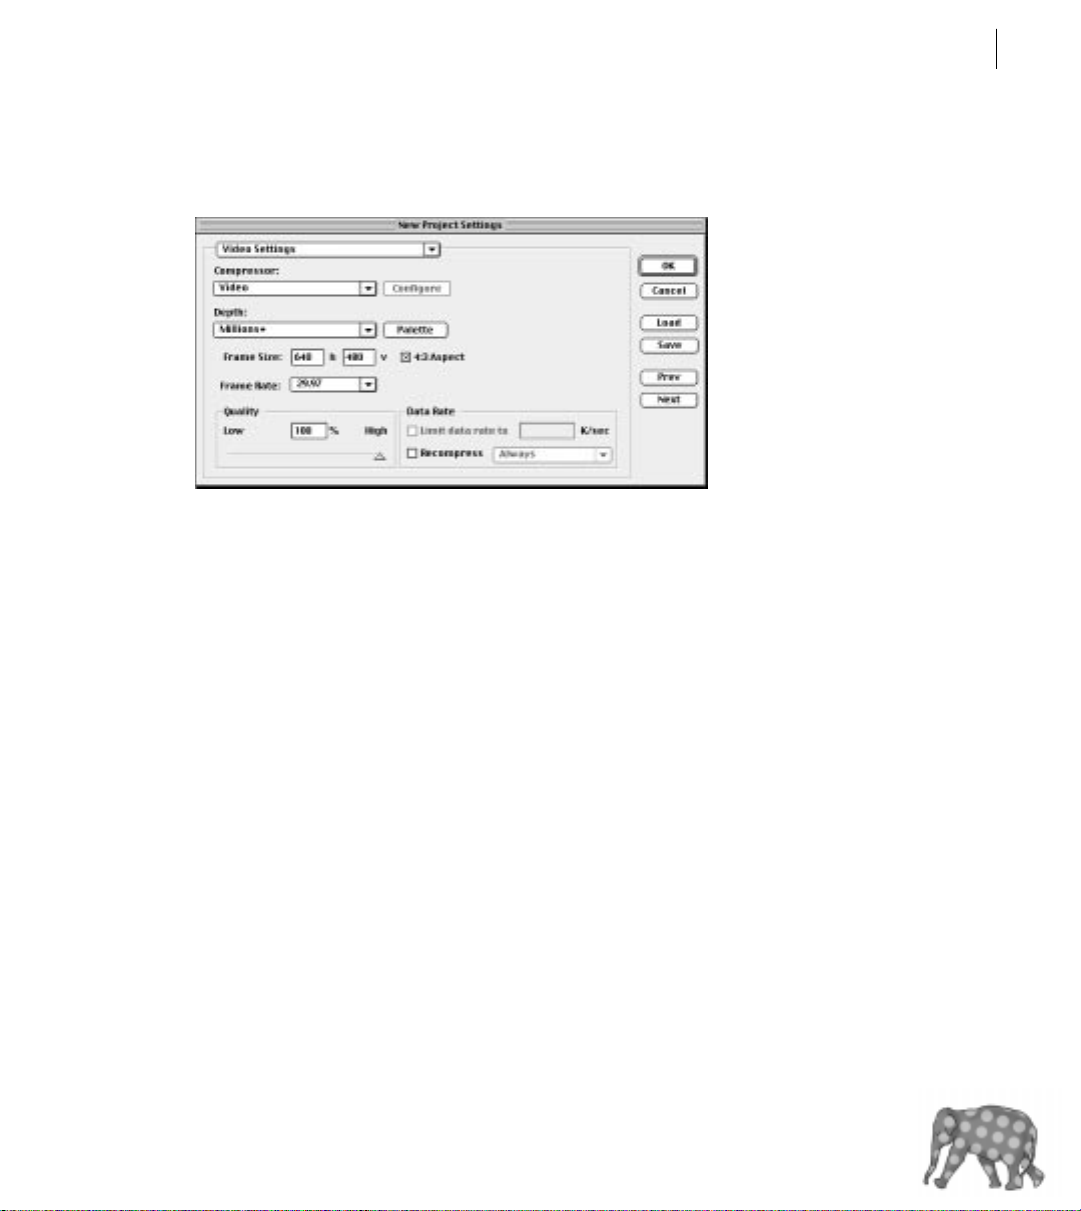
Video settings
When you choose Project > Settings > Video, you can specify the following options:
ADOBE PREMIERE 5.0
User Guide
61
Compressor
Specifies the
codec
(compressor/decompressor) for Premiere to apply when
playing video back from the Timeline. The codecs available depend on the Editing Mode
you chose in the General Settings panel. Click C onfigure (if available) to set options specific
to the selected codec. I f you chose an editing mode pro vided by a man ufactur er of a videocapture card or other hardware, see the documentation for the hardware because it may
recommend a particular codec for editing with that hardware. Otherwise, consider
choosing a fast codec so that edits are processed quickly. For more information, see
“Finding an appropriate codec” on page 352.
Note:
If you use a clip in your video program without applying effects or changing frame or time
characteristics, Premiere uses the clip’s original codec for playback. If you make changes that
require recalculation of each frame, Premiere applies the codec you choose here.
Depth
Indicates the color bit depth, or number of colors to include in video play ed back from
the Timeline. This button may not be available if the selected compressor provides only one
option for bit depth. You can also specify an 8-bit (256 color) palette when preparing a video
program for 8-bit color playback, such as for the Web or for some presentation software.
The Palette button may be a vailable when 256 C olors is c hosen, if the selected Editing Mode
Page 70

CHAPTER 2
62
Working with Projects
and Compressor support 256 colors. W hen available, click Palett e and then either select Make
Palette From Movie to derive a color palette from the frames used in the video program, or
select Load Palette Now to import a color palette you prepared and saved previously. You
can load color palettes stored in the .ACO (Photoshop c olor swatch), .ACT (Phot oshop color
palette), or .PAL (Windows palette—Windows only) format.
Frame Size
Specifies the dimensions, in pixels, for frames when you play back video from
the Timeline. Select 4:3 Aspect to constrain the frame size to the 4:3 aspect ratio used by
conventional television. A larger frame size lets you see more detail but requires more
processing. If playback is slow, try reducing the frame size. For more information, see
“About output settings” on page 297.
For more information about standard frame sizes and aspect ratios, see “Measuring frame
size and resolution” on page 344.
Frame Rate
Indicates the number of frames per second to play back video from the Timeline.
In general, type a value that matches the frame rate of the final video, or type a lower value
to process previews faster. In many cases this value should match the timebase. For more
information about specifying standard frame rates, see “Understanding frame rates in
relation to the timebase” on page 336.
Quality
Affects the picture quality and disk space used when you play back video from the
Timeline. Low quality usually plays faster and uses less disk space, and may be preferable
for editing. High quality provides the best-looking image the selected compressor can
provide, but requires more disk space and may not play smoothly on slower computers.
Data Rate
If available for the selected compressor , places an up per limit on the amount of video
data that Premiere is allowed to transfer for previews so that the video does not overwhelm
the data transfer capacity of your system. Select Limit Data Rate to _ K/Sec and type the data
rate required. If previews do not play smoothly, reduce this value. Select R eco mpress t o ensure
that Premiere processes a video preview that stays under the data rate you specified. Select
Always from the menu to compress every frame even if it is already within the data rate, or
select Maintain Data Rate to preserve quality by compressing only the frames that are above
the specified data rate.
Page 71

ADOBE PREMIERE 5.0
Audio settings
When you choose Project > Settings > Audio, you can specify the following options:.
Rate
Higher rates provide better audio quality when you play audio back from the Timeline
but require more disk space and processing. Resampling, or setting a different rate than the
original audio, also requires additional processing time; try to capture audio at the final rate.
User Guide
63
Format
Higher bit depths and stereo provide better quality but require more disk space
and processing.
Type
Specifies the codec for Premiere to apply when pla ying audio back from the Timeline.
The codecs available depend on the Editing Mode y ou specified in the General panel in the
Project Settings dialog box. For more information about each codec, see “Finding an
appropriate codec” on page 352.
Interleave
Specifies how often audio information is inserted among the video frames in the
preview file created when you play audio back from the T imeline. A value of 1 frame means that
when Premiere plays back a frame, the audio for the duration of that frame is loaded into RAM
so that it can play until the next frame appears. I f the audio breaks up when pla ying, the interleave value may be causing the c omput er t o pr oc ess audio mo r e fr equently than it can handle.
Increasing the value lets Premiere store longer audio segments that need to be processed less
often, but higher interleave values require more RAM.
Page 72

CHAPTER 2
64
Working with Projects
Enhanced Rate Conversion
When playing audio back from the Timeline, specifies a level of
quality for converting the sample rates of clips in the Timeline to the sample rate y ou specified
in the Rate option. Enhanced Rate Conversion controls both rate upsampling and downsampling. Off resamples audio most quickly but produces moderate quality. Better balances
quality with processing time. Best resamples audio for the highest possible quality but requires
the most processing time.
Logarithmic Audio Fades
Controls how audio gain increases or decreases are perceived during
playback in Premiere. Select this option to process gain levels using the logarithmic scale used
by the human ear and by conventional volume controls. Deselect this option to process gain
changes using a linear curve. Selecting this option creates more natural-sounding changes
as sounds become louder or softer, but increases audio processing time. Audio faders in the
Timeline are not changed except as a result of this option processing the overall gain level.
Keyframe and rendering options
When you choose Project > Settings > Keyframe and Rendering Options, you can specify
the following Rendering Options:
Page 73

ADOBE PREMIERE 5.0
User Guide
65
Ignore Audio Filters
Ignore Video Filters
Ignore Audio Rubber Bands
Select to play back audio from the Timeline without applied audio filters.
Select to play back video from the Timeline without applied video filters.
Select to play audio from the Timeline excluding changes made
using the rubber-band controls for audio fading and audio panning in the Timeline.
Optimize Stills
Select to use still images efficiently when playing back video from the Timeline.
For example, if a still image has a duration of 2 seconds in a project set to 30 frames per second,
Premiere will create one 2-second frame inst ead of 60 frames at 1/30 of a second. Deselect this
option if the exported video file exhibits playback problems when displaying the still images.
Field settings
Select an option that matches the playback display. No Fields is the default and is
the equivalent of progressive scan, the correct setting for previewing on a computer display.
Select Upper Field First or Lower Field First when playing back video on a television monitor
using an interlaced standard such as NTSC, PAL, or SECAM; the option you actually choose
depends on the specific video hardware you use. For more information on fields, see
“Comparing interlaced and non-interlaced video” on page 341.
Keyframes can increase the effectiveness of compression (see “Temporal compression” on
page 349). If the codec you specified supports compression keyframes, the following K eyframe
Options are available:
Keyframe Every _ Frames
Select and type an interval of frames after which the codec will create
a keyframe when exporting video.
Frames Only at Markers
Select when you want to play back only the frames at which you have
added a marker in the Timeline. This option does not affect keyframes.
Add Keyframes
Select At Markers to create a keyframe at each marker. Select At Edits to also
create a keyframe between each clip.
Page 74

CHAPTER 2
66
Working with Projects
Saving and loading project settings
The Save and Load buttons in the Project Settings dialog box let you save all project settings
into a file and later load them into any project. For example, after completing a television
program, you can load a different pr oject settings file that pr epares the same p rogram for Web
video. Premier e c o mes equipped with settings files preset for typical programs, which y ou can
adapt and save for your own projects. Some video-capture cards may include settings files for
Premiere. For information about loading saved settings, see “Starting a project” on page 57.
Save and name your project settings even if you use only one set. This creates a backup
copy of the settings in case someone accidentally alters the current project settings.
Saving and autosaving a project
Saving a project saves your editing decisions, references to source files, and the most recent
arrangement of the program’s windows. Protect your work by saving often. If you prefer,
Premiere can save your project automatically at a specified interval. Premiere can either save
the project to the same file each time or to a new file. For e xample, y ou can set P remiere t o sav e
a new archive of your project every 15 minutes, producing a series of files that represent the
state of your project at each interval. In this way, automatic archi ving can serve as an alternate
form of the Undo command, depending on ho w much the pr oject changed between eac h sav e.
Because project files are quite small compared to source video files, archiving many iterations
of a project consumes relatively little disk space. Ar chived files are sa ved in the Pr oject-Archiv es
folder inside the Adobe Premiere 5.0 folder. For information about other wa ys of returning to
earlier versions of a project, see “Correcting mistakes” on page 73.
Page 75

ADOBE PREMIERE 5.0
To save a project:
Do one of the following:
Choose File > Save. If necessary, specify a location and filename, and click OK.
•
To save a copy of a project under a new name or location and continue working in the new
•
copy of the project, choose File > Save As, specify a location and filename, and click OK.
T o sa ve a copy of a project under a new name or location but contin ue working in the original
•
project, choose File > Save a Copy, specify a location and filename, and click OK.
To automatically save a project or series of projects:
1
Choose File > Preferences > Auto Save/Undo.
2
Do any of the following and then click OK:
In the A uto Sav e section, select Automatically Save Projects, and type the number of minutes
•
after which Premiere will save the project.
In the Project Archive section, type a number for Maximum Files in Archive to specify how
•
many copies of project files from all projects will be saved into the Project-Archives folder.
When the limit is reached, P remier e deletes the oldest pr oject file to mak e r oom for the newest
one. Type a number for the Maximum Project Versions to specify how many versions of each
project file you want to sav e. F or example, to sav e the last five v ersions of each project you work
with, type 5.
User Guide
67
To open an autosaved project file:
1
If a project is currently open, close it.
2
Choose File > Open.
3
Locate and double-click the Project-Archive folder in the folder containing Premiere.
4
Select a project file, and click OK. If no files are available, the autosa ve featur e may be turned
off; see the previous procedure.
Page 76

CHAPTER 2
68
Working with Projects
Opening a project
You can open one project at a time. Premiere recognizes Premiere project files created using
versions 4.2 to 5.0 on Windows or Mac OS. You can also open many kinds of clips created
on other computer platforms; see “Using a Premiere pr oject on another platform ” on page 70.
To open an existing Premiere project:
Choose File > Open. Locate and select the file, and then click Open.
Premiere doesn ’t c opy an original clip into the project—it stor es only a reference t o the original
clip based on its filename and location at the time you imported it. If you move, rename, or
delete a clip after you import it, P r emiere displa ys the L ocate File dialog box the next time you
open the project. You can resolve this situation using the Locate File options explained below.
The Locate File dialog box appears when a source clip
or preview file is missing.
OK (Windows) or Select (Mac OS)
Replaces the missing file if you first use this dialog box
to locate and select the original file or its replacement, and then click this button.
Skip
Removes all refer enc es to the missing fi le throughout the pr oject. All instances of the clip
will disappear from the Project and Timeline window s. Do this only when y ou ar e certain that
you want to rework all the instances where the file is used in the project.
Page 77

ADOBE PREMIERE 5.0
User Guide
69
Skip All
Removes all references to the missing file throughout the project, without stopping
to ask you for confirmation.
Offline
Replaces the missing file with an
offline file
, a blank placeholder that preserves all
references to the missing file throughout the project until you replace the offline file with
the original file.
All Offline
Replaces any additional missing files with offline files, without stopping to ask
you for confirmation.
Import Numbered Stills
Select when you have selected the first of a consecutively numbered
sequence of still images. Deselect if you selected a still image that you intend to import as an
individual still frame.
When you want to replace an offline file after the project is open, you don’t have to close the
project and then open it again. Inst ead, use the R eplace Files c ommand. F or more information,
see “Using offline files” on page 126.
Note:
Because a clip is only a reference to its source file, do not delete source files while you are using
them as clips in a Premiere project. After you deliver the final movie, you can delete source files if
you do not plan to edit the project or use the source files again.
Removing unused frames from source clips
Editing a video program means putting the best segments of the original clips into the
program. Sometimes, the clips you use in the final program are only small portions of the
original clips. Because video clips can take up large amounts of hard disk space, you can trim
the project so that unused frames are removed. Project trimming is especially useful before
archiving a completed project.
When you trim a project, Adobe Premiere first creates a copy of the project. In the new
project, each clip’s original In and Out points become the new beginning and ending of the
clip, respectively. Clips that weren’t used in the original project aren’t copied into the new
project. Premiere can also create trimmed copies of the source clips. You can preserve extra
frames before the In point and after the Out point of each trimmed clip.
Page 78

CHAPTER 2
70
Working with Projects
To trim a project:
1
With a project open, choose File > Utilities > Project Trimmer.
2
Select Create Trimmed Batch List to create a batch list that can be used to redigitize the
trimmed versions of the clips. For more information, see “Creating a batch list to redigitize
project clips” on page 104.
3
Select Copy Trimmed Source Files to make new copies of existing source files that include
only the frames used in the Timeline plus handles as specified below.
4
If you want, select Keep _ Frame Handles and type the number of frames to retain before
the In point and after the Out point of each clip so that edits can still be adjusted later.
5
Click Create Project.
6
When asked, specify the location and name of the new project based on the trimmed clips;
make sure it’s a different folder than the original location. Click Save.
7
Close the original project. Choose File > Open, locate the trimmed version, and click OK.
8
Examine the trimmed version of the project. If it’s satisfactory, you can delete the original
project and its source clips or move them to an archive disk.
Using a Premiere project on another platform
Premiere project files are designed to be usable across computer platforms. You can open
and work with a Premiere project on any other platform on which Premiere 5.0 is available.
Transferring a Premiere project to another platform is similar to moving a Premiere project
to another computer: You must move not only the project file, but all of the source clips used
in the project. In addition, follow these guidelines:
All of the source files must be in a format supported by the destination platform. For
•
example, if you plan to transfer a project to Mac OS for editing, don’t use Windows PCX files.
For more information about filename extensions and platform support for various file formats,
see “Importing clips” on page 120.
Page 79

ADOBE PREMIERE 5.0
•
All files must conform to the destination platform’s filename conventions. For best results,
use the 8.3 filename convention (eight characters and a three-character filename extension).
For example, a Premiere project uses the extension .PPJ.
For best results, mak e sure sour ce clips are sa ved using cross-platform c odecs such as Motion
•
JPEG A or Motion JPEG B, provided by QuickTime.
Any fonts used in titles must be available on the destination platform.
•
When you open the project on the other platform, you’ll be asked to locate each source clip
•
(see “Opening a project” on page 68). You might want to remove unused clips (see “Naming,
finding, and deleting items” on page 82) or run the Project Trimmer (see “Removing unused
frames from source clips” on page 69) so that you don’t have to transfer any more clips
than necessary.
Many Premiere settings files can be transferred across platforms, including batch capture lists
(Windows filename extension: .PBL), batch processing lists (.HBP), edit decision lists (.EDL),
exported file lists (.TXT), filmstrip files (.FLM), libraries (.PLB), Motion settings (.PMT),
Project files (.PPJ), project settings (.PRS), sequences (.PSQ), and titles (.PTL).
The following settings files cannot be transferred across platforms: Filter Factory and
Transition Factory settings (.PFF), command sets (.PFN), transition sets (.PFX), convolution
kernel settings (.CVL), and Level filter settings (.LVL).
User Guide
71
If you have trouble opening a project file from another platform by double-clicking,
try using the File > Open command from within Premiere 5.0.
Setting up Premiere’s scratch disks
When you edit a project, Premiere processes your changes in RAM. When the available RAM
isn’t enough, Premiere can use har d disk space as an additional work area. Also , P remiere stor es
some project information, such as preview files, on your hard disk. The files Premiere creates
for this use are called
temp files
would use a paper scratch pad. If your system has access to multiple
partitions), you can specify which one Premiere uses as a
scratch disk space Premiere uses increases as a program becomes longer or more complex.
For maximum performance, follow these tips:
, or temporary files. Premier e uses temp files the same way you
volumes
(disks or disk
scratch disk
for its temp files. The
Page 80

CHAPTER 2
72
Working with Projects
•
Store Premiere and the operating system on one har d disk, and capture video to an additional
AV-certified hard disk on which nothing else is stored.
• To enhance performance further, specify an additional, separate AV hard disk for video
preview files and another for audio preview files.
• Specify only disks attached to your computer—a hard disk located on a network is usually
too slow. Removable media may be acceptable if they are fast enough.
To specify scratch disks:
1 Choose File > Preferences > Scratch Disks.
2 For Temp/Captured Movies, select the volume where Premiere will store video and audio
files you digitize using Premiere.
3 For Video Preview Temps, select the volume where Premiere will store files generated when
previewing video clips.
4 For Audio Preview Temps, select the v olume wher e P r emier e will stor e files generated when
previewing audio clips.
5 Click OK.
Premiere can warn you when a scratch disk you specified is running out of space. You can
specify when the point at which the warning appears.
To specify the warning level for low disk space:
1 Choose File > Preferences > General / Still Image.
2 For Low Disk Space Warning Level, indicate in kilobytes the amount of unused scratch disk
space that will trigger the warning. Click OK.
For more information about working with memory, see “Preserving quality and performance
during video capture” on page 359.
Page 81

ADOBE PREMIERE 5.0
Correcting mistakes
If you change your mind or make a mistak e, Pr emiere provides several wa ys to undo your work.
You can undo only those actions that alter the video program; for example, you can undo an
edit, but you cannot undo scrolling a window.
To correct mistakes:
Do one of the following:
• To undo the most recent change, c hoose Edit > U ndo. You can undo up to the 32 most r ecent
changes made to the program through the Timeline or Program view. In other views and
windows, you can undo only the most recent change.
• To undo all changes made since the last time you saved the project, choose File > Revert.
• To undo changes made before the last time you saved a project, try opening a previous
version of your project which may be stor ed in the Pr oject Ar chiv e folder. The degree to which
you can go back depends on the settings you specified for automatic project ar chiving and how
often you saved. See “Saving and autosaving a project” on page 66.
• T o st op a change that Pr emiere isn ’t finished proc essing (for example, you see a progress bar),
press the Esc key.
• To close a dialog box without applying changes, click Cancel.
User Guide
73
You can specify the number of steps that can be undone in the Timeline. Specifying more steps
increases memory requirements, but does not affect performance.
To set the number of undo levels for the Timeline:
1 Choose File > Preferences > Auto Save/Undo.
2 In the Undo Levels section, type a number for Levels to Undo (1 to 32) and click OK.
3 Exit and restart Premiere. You do not have to restart the computer.
Page 82

CHAPTER 2
74
Working with Projects
Working with windows in Premiere
Three named windows form the main work area in Premiere:
• The Project window lets you import, organiz e, and store references to clips. I t lists all sour c e
clips you import into a project, though you don’t have to use every clip you import.
• The Monitor window includes the Sourc e and P r ogram views. Use the Source view to see an
individual video clip and the Program view to see the current state of the video program being
edited in the Timeline.
• The Timeline window provides a schematic view of your program, including all video, audio,
and superimposed video tracks. Changes you make appear in the Program view.
For a tour of these windows, see Chapter 1, “A Tour of Adobe Premiere.” For more infor-
mation about using and customizing the Monitor and Timeline windows, see Chapter 4,
“Editing Video.”
The rest of this chapter describes how to use the Project window, bins, libraries, and palettes.
Premiere also provides specialized windows for tasks such as capturing video and creating
titles; those windows are described with their tasks elsewhere in this user guide.
When you exit P remiere, the positions of windows and palettes are sav ed. I n addition,
on Mac OS you can create and save named window layouts. For more information,
see “Saving window positions (Mac OS only)” on page 76.
Setting up windows that resemble earlier Premiere versions
You can set up the window layout to represent the wa y you prefer t o edit. B y default, P remiere ’ s
window layout resembles the monitor la yout in a con ventional edit bay where monit ors display
source clips and the edited program side by side. If you have used previous versions of
Premiere, you might prefer the window layout of those versions, where each clip is displayed
in its own window and the edited program appears in a preview window. You can alter the
window layout to resemble previous versions of Premier e. H owever , the procedur es in this user
guide are written for the default window layout for this version of Premiere.
Page 83

ADOBE PREMIERE 5.0
To set up a window layout that resembles earlier versions of Premiere:
1 Choose File > Preferences > General/Still Image, select Open Movies in Clip Window,
and click OK. This opens each source clip in its own window instead of in the Monitor windo w
source view.
2 Select Single View from the Monitor window menu. This displays only the monitor repre-
senting the active controller (Source or Program). When editing the program, make sure the
Program controller on the right is active, because in Single view, activating the left controller
switches the display to the Source view. Premiere indicates the active controller with green
timecode numbers.
User Guide
75
Page 84

CHAPTER 2
76
Working with Projects
3 If you are viewing the program on a separately connected television monitor, click the
Collapse button in the Monitors window. This removes the monitor display from the
controllers, simulating the separate Controller palette in previous versions of Premiere.
Click the Collapse button to remove the Source and Program views from the controllers.
Note: If you’re using a video-capture card to play clips on a television monitor, a clip may not
appear on the separate monitor if it wasn’t compressed with the video-capture card’s codec.
For more information on using the Monitor window, see “Using the Monitor window”
on page 131.
Saving window positions (Mac OS only)
Adobe Premiere lets you save your favorite window layouts and apply them to any project.
In this way , different editors working on the same computer can each use a preferred lay out
without manually rearranging windows and palettes.
Saving a layout preserves the locations and settings of Project, Monitor , and Timeline windows.
Other windows, such as the Clip window, are not saved. Saving a layout also saves each open
window’s settings, such as the Timeline window icon mode and icon size.
To save a window layout:
1 Arrange the windows the way you want them.
2 Choose Window > Arrange > Layouts, and click Add.
3 Type a name for the layout, and click OK. The name is added to the list, and a r epresentation
of the layout appears in the Window Layouts dialog box.
Page 85

ADOBE PREMIERE 5.0
To manage other window layouts:
1 Choose Window > Arrange > Layouts.
2 Do one of the following:
• To preview a layout, select the name of a layout.
• To switch layouts, select the name of a layout and click OK.
• To delete a window layout, select a name and click Delete.
• T o sa ve a la yout as a file for use with other projects, clic k Save. Specify a location and filename
for the layout file, click Save, and click OK.
• To use a saved layout file, click Load. Locate and select the layout file, and then click Open.
To switch layouts without opening the dialog box, choose Window > Arrange and select
the layout name you want. Because new layouts become commands on the Window >
Arrange submenu, you can also add a layout to the Commands palette. See “Using the
Commands palette” on page 87.
Organizing clips using bins
Clips in a project or library can be arranged in bins (with bins inside of bins), just as files are
arranged in folders on your hard drive. Bins are particularly useful for organizing a complex
project containing a large number of clips.
User Guide
77
Note: If you want to keep references to a set of clips together in a container independent of any
project, use a library instead. For more information about libraries, see “Storing clips and bins
in libraries” on page 78.
To manage clips using a bin:
Do any of the following:
• To create a bin, Choose Project > Create > Bin. Type a name for the bin, and then click OK.
• To move a clip into a bin, drag the clip ont o the bin ic on. I f the bin window is open, drag the
clip into the bin window. In the same way, you can store a bin inside another bin.
Page 86

CHAPTER 2
78
Working with Projects
• To view the contents of a bin, double-click the bin. If the bin window you want is open but
hidden, choose the name of the bin from the Window menu, or from the menu at the bottom
of the Timeline.
Selecting an open project or bin window from the bins menu (left) brings its window
to the front (right).
Storing clips and bins in libraries
A Premiere library stores clips from one or several projects. A library is stored as a separate file
apart from any project, unlike a bin, which is stored inside one specific project. For example,
you can use a library to store a set of clips that you want to have available for several projects.
Once you have created and saved a library, you can open it while you’re using any project. All
attributes, such as markers and In and Ou t points, ar e saved with the clips y ou place in a library.
Like the Project window, a library stores only references to original clips, not the clips
themselves. You can create several libraries that all include references to the same clip, while
storing only one copy of that clip on disk.
To create a library:
1 Choose File > New > Library. An untitled Library window appears.
2 Choose File > Save As. Select a location and type a filename for the library, and click OK.
Page 87

ADOBE PREMIERE 5.0
To add clips or bins to a library:
Activate a Library window and do one of the following:
• Drag a clip or bin from another Project, Bin, or Library window to the Library window.
• Import a file or folder from disk. For more information, see “Importing clips” on page 120.
Customizing a Project, Bin, or Library window display
Each clip appears in a Project, Bin, or Library window with its filename, file type, and duration.
You can customize the kind of information that a Project, Bin, or Library window displays. You
can apply different display options to each individual window.
User Guide
79
Click the Icon View, Thumbnail View, or List View icons at the bottom left of a Project, Bin,
or Library window to change its view (Bin window shown).
Page 88

CHAPTER 2
80
Working with Projects
To change a Project, Bin, or Library window view:
Click the Icon View, Thumbnail View, or List View button at the bottom of the window.
To sort items in the Thumbnail or List views:
Do one of the following:
• Click the column heading by which you want to sort the items.
• To reverse the sort order of column items, click the same column heading until the items sort
in the order you want.
• To rearrange columns in List View, drag column headings left or right as needed.
To customize Icon View, Thumbnail View, or List View:
1 Choose Window > Project Window Options or Window > Library Window Options,
depending on the active window.
2 At the top of the dialog box, choose Icon V iew, Thumbnail V iew, or List View . The remaining
options depend on which view you choose. Select from these options (if available) and then
click OK:
• Select a Size for the icon that will represent each file in the Project, Bin, or Library window.
• Select Snap to Grid to make window icons line up according to an invisible grid.
• Select Draw Icons to make icons visible. Deselect this option to make the Project window
display faster by preventing icon display.
• Type labels for the four Fields that you can define.
• Select a sorting method for items in the window.
• Select the Fields you want to display in the List View.
Page 89

ADOBE PREMIERE 5.0
To rearrange a Project, Bin, or Library window in the Icon View when icons obscure other icons:
With the Icon View active, choose Project > Clean Up.
The following fields are available in the List view:
Name By default, displa ys the clip name on disk. You can change the name the clip uses inside
the project. For more information, see “Naming, finding, and deleting items” on page 82.
Date The most recent modification date of the source file.
File Path Location of the file on disk, expressed as a folder path.
Log Comment The text typed into the Comment field when the clip was logged during capture,
if it was captured using Premiere.
Media Type The kind of media, such as Movie or Still Image.
Video Info The clip’s video characteristics, such as the frame size.
Audio Info The clip’s audio characteristics, such as sample rate and bit depth.
Video Usage The number of times the video component of a clip is used in the Timeline.
Audio Usage The number of times the audio component of a clip is used in the Timeline.
User Guide
81
Duration Length of the clip, expressed in the currently specified Time Display option (see
“General settings” on page 59).
Timecode The timecode of the first frame, for source video that was captured from tape.
Reel Name The reel name typed in when the clip was logged during batch capture, if it was
captured using Premiere.
In Icon view, you can arr ange the icons by dragging them. If you select and drag multiple
icons to the Timeline at once, they will appear in the Timeline in the same or der as in the
Project Window.
Page 90

CHAPTER 2
82
Working with Projects
Naming, finding, and deleting items
Premiere helps you manage the clips and other items in your project by giving you tools
to rename, find, and delete items.
To manage project items:
Do any of the following:
• To rename a clip or bin, select the item, choose Clip > Alias, type the new name, and then
click OK. In List View, you can also select the name and type a new one.
• To view a clip’ s original name or change its alias, select the it em in the Project, Bin, or Library
window and choose Clip > Alias. Type a new name or click None to remove the alias.
• To rename an original file on disk, exit Premiere and rename the file using the Explorer
(Windows) or Finder (Mac OS). The next time you open the project that uses the renamed
file, Premiere will ask you to locate the file (see “Opening a project” on page 68).
• To delete an item from a Project, Bin, or Library window, select the item, and then press
the Delete key.
• To delete all clips in a project that are not currently used in the Timeline, choose Project >
Remove Unused (see “Removing unused frames from source clips” on page 69).
Note: Because Premiere stores references to clips and not the originals, deleting a clip from a project,
bin, or library removes it from the project and T imeline (if it was included there) but does not delete
the corresponding original source clip from your hard disk.
• To rename or delete a library, first close its window if it is open. Switch to Explorer
(Windows) or Finder (Mac OS), and rename or delete the library from there.
• To find any item in a project, bin, or library, based on the contents of any column in the
Thumbnail or List View, select the window you want to search and choose Project > Search.
Specify options as needed and click Find.
Page 91

ADOBE PREMIERE 5.0
Printing window contents
You can print the contents of the Project window, Timeline, or Clip windows for use in a
storyboard or to document your project. You can also print the Movie Analysis and Data Rate
Graph windows.
To print the contents of a window:
1 Click the Project, Timeline, or a Clip window to activate it.
2 If necessary, choose File > Page Setup, specify page options, and click OK.
3 Choose File > Print, specify printing options, and then click OK.
Note: The options in the Page Setup and Print dialog boxes come from the driver software
for the currently selected printer, not from Premiere. For information about printing
options, see the documentation for your printer software.
To save paper when printing a wide window, such as the Timeline, choose File > Page
Setup and set the paper orientation to Wide or Landscape.
Creating a text list of project or library files
To document the contents of a project or library, you can export a text file that lists all the
clips used in a project. The list displa ys the original filenames of clips, bins, and bin contents
in the order in which they appear in a Project or Library window . If a Bin window is active
when you export, Premiere exports a file list for the project that includes the bin and its
contents. In Windows, the file list contains the pathname to the file. In Mac OS, you can
choose whether you want to include the full pathname.
User Guide
83
To export a file list:
1 Activate a Project or Library window.
2 Choose File > Export > File List.
3 Specify a location and type a name for the file list.
Page 92

CHAPTER 2
84
Working with Projects
4 (Mac OS only) Select Include Full Path N ames if you want to include a co mplete folder path
for each file in the list.
5 Click Save.
Changing the startup window
When you start Premier e, it displays the palett es y ou left open the last time you used P remier e.
You can also make the Open or New Project dialog box appear automatically at startup.
To change the startup window:
1 Choose File > Preferences > General/Still Image.
2 Choose an option from the Window at Startup menu and click OK:
• None starts Premiere with the palettes from the previous session.
• New Project opens the New Project dialog box when you start Premiere.
• Open Dialog opens the Open dialog box when you start Premiere.
Working with palettes
Adobe Premiere includes several palettes that display information and let you modify clips.
You can display, hide, or recombine palettes as you work.
Changing the palette display
You can change the arrangement and display of palettes and palette groups to make the best
use of space on your monitor.
To show and hide palettes:
Do one of the following:
• To show or hide a palette, choose the name of the palette from the Window menu.
• To hide or display all open palettes, press the Tab key.
Page 93

To move a palette to another group:
Drag a palette tab to that group.
To dock a palette to another palette group:
Drag a palette tab to the bottom of another palette until the bottom of the destination
palette is highlighted. Then release the mouse.
ADOBE PREMIERE 5.0
User Guide
85
You can dock a palette by dragging its tab to the bottom of another palette.
Page 94

CHAPTER 2
86
Working with Projects
To separate a palette from other palettes to which it is grouped or docked:
Drag a palette tab away from the other palettes.
If you have more than one monitor connected to your system and your operating system
supports a multiple-monitor desktop, you can drag palettes to any monitor.
Using the Info palette
The Info palette displays information about a selected clip or transition. If you drag a clip in
the Timeline, you can watch the starting and ending time change in the Info palette. The
information displayed in the palette may vary depending on factors such as the media type
and the current window. For instance, an empty space in the Timeline, a rectangle in the
Title window, and a clip in the Project window display information unique to each item
when selected.
Info palette for a clip selected
in the Timeline
Page 95

ADOBE PREMIERE 5.0
Using the Navigator palette
The Navigator palette lets y ou quickly change your view of the Timeline by dragging a view box
within a miniature representation of the Timeline. You can also change the level of detail
displayed in the Timeline view.
E
F
G
BACD
A. Click, type a time to position the edit line, and press Enter (Windows) or Return (Mac OS).
B. Click to reduce the Timeline, making more of it visible at once.
C. Drag left to reduce or right to magnify the Timeline, to see finer increments of time.
D. Click to magnify the Timeline.
E. Drag to see hidden areas of the Timeline.
F. Press Shift and drag to move the edit line, indicated in red.
G. The blue area indicates the current work area, which will play back during a preview.
User Guide
87
Using the Commands palette
The Commands palette comes with a list of preset commands, which you can modify to
suit your needs. You can create a custom set of buttons for fast access to y our favorite menu
commands, and assign a function key to each button for instant keyboard access.
Page 96
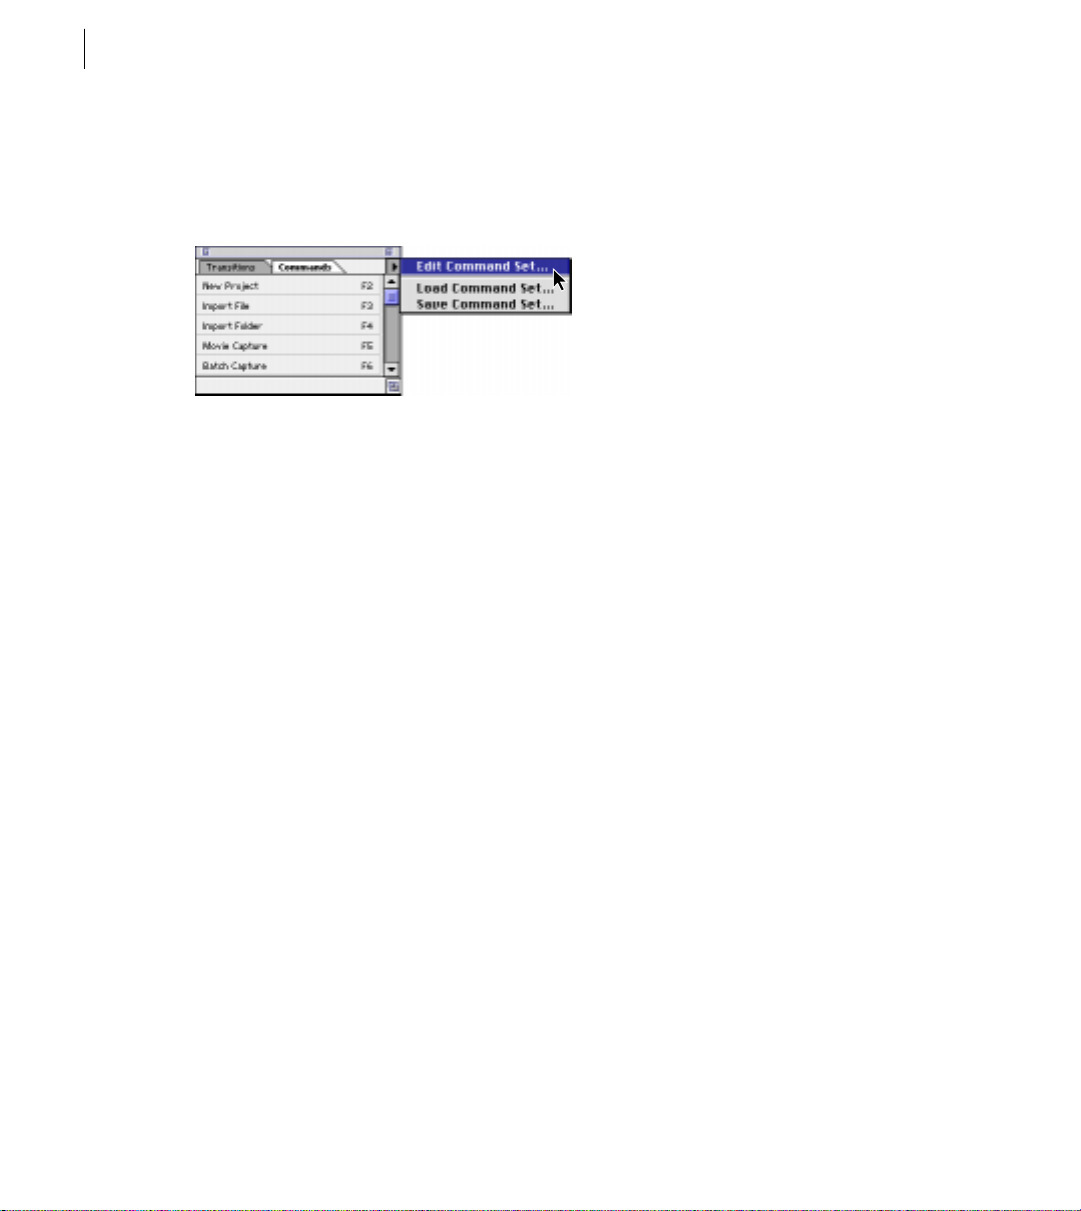
CHAPTER 2
88
Working with Projects
To add a command to the palette:
1 If the Commands palette is not visible, click its tab or choose Window > Show Commands.
2 Choose Edit Command Set from the palette menu.
3 Click Add. A new, unassigned button labeled “None” (Windows) or “Undefined” (Mac OS)
appears above the selected command.
4 Select the new None button and then choose the command for that button from the
menu bar.
5 For Label, type the text you want to appear on the button (optional).
6 For Key, choose the keyboard shortcut you want for the button (optional). The menu
displays only keys that are not already assigned to other commands (Windows) or dims keys
that are already assigned to other commands (Mac OS). Then click OK.
To manage command sets:
Choose any of the following commands on the Commands palette menu:
Edit Command Set Modifies or removes command buttons. Select the button you want to
change and select options as explained in the previous procedure; or select the button you want
to remove, and click Delete.
Save Command Set Preserves your commands in a file. This is useful for creating custom
command sets for different purposes, such as one for video capture.
Load Command Set Replaces the existing buttons with a set saved on disk.
Page 97

3
Page 98

Page 99

ADOBE PREMIERE 5.0
Chapter 3: Preparing and
Importing Source Clips
ou can import clips from any source—videotapes, motion-picture film, audio, still
images—as long as they exist as digital files stored on disk. The topics in this section
describe how to import clips and describe requirements for converting other media
Y
types before they can be used digitally in your project.
Source material exists in two main forms:
Digital
•
newer video and audio recorders and still cameras can save images and sound in a digital
format. Digital media stored on tape must be transferred to disk before P r emiere can use it
in a project. You can use Premiere to capture digital video from tape and save it to disk as
clips you can then add to your project.
•
process it. Some examples of analog media are motion-picture film, conventional audio tape,
and slides. You can use Premiere to digitize analog videotape such as Hi-8 and save it to disk
as clips you can then add to your project.
media is stored in a file format that a computer can read and p rocess directly . Many
Analog
media must be
digitized
, or converted to digital form, before a computer can st ore and
User Guide
91
Although digital media equipment is becoming increasingly common, a great amount of video
and audio continues to be recorded and stored using analog equipment. For this reason you
may need to capture analog video and audio as part of your workflow . You can digitize analog
video directly into Premiere if you use digitizing hardware to connect an analog video player
or camera to your computer . Video-digitizing har dware is built into some personal c omputers,
but usually must be added to a system by installing a hardware expansion card. The first part
of this chapter describes procedures for digitizing analog source clips, and the second part
describes importing clips that are already digital.
Page 100

CHAPTER 3
92
Preparing and Importing Source Clips
Capturing video for offline and online editing
Depending on the level of quality you require and the capabilities of your equipment, you
can use Premiere for either online or offline editing. The settings you specify for capture are
affected by whether you will edit the program offline or online.
About online editing
Online editing
computer that will produce the final cut. Previously, online editing had to be done on
expensive high-end workstations designed to meet the picture quality and data processing
requirements of broadcast-quality video. Editors with high-end requirements who could not
afford a suitable online system had to rent time at a production facility that owned one.
As personal computers have become faster, online editing has become practical for a wider
range of productions. With high-end personal computers, online editing is practical for
broadcast television or motion-picture film productions.
For online editing, you’ll capture clips once at the highest level of quality your computer
and peripherals can handle.
Note:
When you edit Digital Video (DV) format clips, all editing is online. At the time this guide
was written, the DV format did not allow creation of a low-resolution version at import time.
However, DV compression makes standard DV manageable on many systems.
is the practice of doing all editing (including the rough cut) on the same
About offline editing
In
offline editing
produce the final version on a high-end system. Offline editing was developed to save
money by editing in a less expensive facility. Although offline editing can be as simple as
writing down time points for scenes while watching them on a V CR, it is increasingly done
using personal computers and Premiere. Once you have completed the offline edit in
Premiere, y ou create a table of scene sequences called an
move the EDL to an
worked out in Premiere to the original high-quality clips. In this way, the editing work
done on the less-expensive workstation is used to create the final cut on the more
expensive, higher-quality workstation.
, you edit video using lower-quality copies of the original clips and
edit controller
edit decision list,
on a high-end system, which applies the sequence
or EDL. You then
 Loading...