


 Loading...
TravelMate
2400/3210/3220/3230 Series
User's Guide
Copyright © 2005. Acer Incorporated.
All Rights Reserved.
TravelMate 2400/3210/3220/3230 Series User's Guide
Original Issue: Sep 2005
Changes may be made periodically to the information in this publication without obligation to notify any person of such revisions or changes. Such changes will be incorporated in new editions of this manual or supplementary documents and publications. This company makes no representations or warranties, either expressed or implied, with respect to the contents hereof and specifically disclaims the implied warranties of merchantability or fitness for a particular purpose.
Record the model number, serial number, purchase date, and place of purchase information in the space provided below. The serial number and model number are recorded on the label affixed to your computer. All correspondence concerning your unit should include the serial number, model number, and purchase information.
No part of this publication may be reproduced, stored in a retrieval system, or transmitted, in any form or by any means, electronically, mechanically, by photocopy, recording, or otherwise, without the prior written permission of Acer Incorporated.
TravelMate 2400/3210/3220/3230 Series Notebook Computer
Model number: __________________________________
Serial number: ___________________________________
Purchase date: ___________________________________
Place of purchase: ________________________________
Acer and the Acer logo are registered trademarks of Acer Incorporated. Other companies' product names or trademarks are used herein for identification purposes only and belong to their respective companies.
iii
Disposal instructions
Do not throw this electronic device into the trash when discarding. To minimize pollution and ensure utmost protection of the global environment, please recycle.
USA
for electronic products containing an LCD/CRT monitor or display:
lamp(s) inside this product contain mercury and must be recycled or disposed of according to local, state or federal laws. for more information, contact the Electronic Industries Alliance at www.eiae.org. for lamp-specific disposal information, check www.lamprecycle.org.

iv
First things first
We would like to thank you for making the TravelMate series of notebook computers your choice for meeting your mobile computing needs.
Your guides
To help you use your TravelMate, we have designed a set of guides:
First off, the Just for Starters... poster helps you get started with setting up your computer.
The printed User's Guide introduces you to the basic features and functions of your new computer. For more on how your computer can help you to be more productive, please refer to the AcerSystem User's Guide. This guide contains detailed information on such subjects as system utilities, data recovery, expansion options, and troubleshooting. In addition it contains warranty information and the general regulations and safety notices for your notebook. It is available in Portable Document Format (PDF) and comes preloaded on your notebook. Follow these steps to access it:
1Click on Start, All Programs, AcerSystem.
2Click on AcerSystem User's Guide.
Note: Viewing the file requires Adobe Acrobat Reader. If Adobe Acrobat Reader is not installed on your computer, clicking on AcerSystem User's Guide will run the Acrobat Reader setup program first. Follow the instructions on the screen to complete the installation. For instructions on how to use Adobe Acrobat Reader, access the Help and Support menu.
Basic care and tips for using your computer
Turning your computer on and off
To turn on the computer, simply press and release the power button below the LCD screen beside the Easy-launch buttons. See "Front view" on page 1 for the location of the power button.
To turn the power off, do any of the following:
•Use the Windows shutdown command
Click on Start, Turn Off Computer, then click on Turn Off.

v
•Use the power button
You can also shut down the computer by closing the display cover, or by pressing the sleep hotkey <Fn> + <F4>.
Note: If you cannot power off the computer normally, press and hold the power button for more than four seconds to shut down the computer. If you turn off the computer and want to turn it on again, wait at least two seconds before powering up.
Taking care of your computer
Your computer will serve you well if you take care of it.
•Do not expose the computer to direct sunlight. Do not place it near sources of heat, such as a radiator.
•Do not expose the computer to temperatures below 0 ºC (32 ºF) or above 50 ºC (122 ºF).
•Do not subject the computer to magnetic fields.
•Do not expose the computer to rain or moisture.
•Do not spill water or any liquid on the computer.
•Do not subject the computer to heavy shock or vibration.
•Do not expose the computer to dust or dirt.
•Never place objects on top of the computer.
•Do not slam the computer display when you close it.
•Never place the computer on uneven surfaces.
Taking care of your AC adaptor
Here are some ways to take care of your AC adaptor:
•Do not connect the adaptor to any other device.
•Do not step on the power cord or place heavy objects on top of it. Carefully route the power cord and any cables away from foot traffic.
•When unplugging the power cord, do not pull on the cord itself but pull on the plug.
vi
•The total ampere ratings of the equipment plugged in should not exceed the ampere rating of the cord if you are using an extension cord. Also, the total current rating of all equipment plugged into a single wall outlet should not exceed the fuse rating.
Taking care of your battery pack
Here are some ways to take care of your battery pack:
•Use only batteries of the same kind as replacements. Turn the power off before removing or replacing batteries.
•Do not tamper with batteries. Keep them away from children.
•Dispose of used batteries according to local regulations. Recycle if possible.
Cleaning and servicing
When cleaning the computer, follow these steps:
1Turn off the computer and remove the battery pack.
2Disconnect the AC adaptor.
3Use a soft, moist cloth. Do not use liquid or aerosol cleaners.
If either of the following occurs:
•the computer has been dropped or the body has been damaged;
•the computer does not operate normally
please refer to "Frequently asked questions" on page 24.
Caution
Changes or modifications not expressly approved by the manufacturer could void the user's authority, which is granted by the Federal Communications Commission, to operate this computer.
Operation conditions
This device complies with Part 15 of the FCC Rules. Operation is subject to the following two conditions: (1) This device may not cause harmful interference, and (2) This device must accept any interference received, including interference that may cause undesired operation.
Users are requested to follow the RF safety instructions for wireless option devices that are included in the user's manual of each RF option device.
An improper installation or unauthorized use may cause harmful interference to radio communications. Also, any tampering of the internal antenna will void the FCC certification and your warranty.
To prevent radio interference to the licensed service, this device is intended to be operated indoors, and installation outdoors is subject to licensing.
For more information about our products, services, and support information, please visit our website: http://global.acer.com.
Disposal instructions |
iii |
First things first |
iv |
Your guides |
iv |
Basic care and tips for using your computer |
iv |
Turning your computer on and off |
iv |
Taking care of your computer |
v |
Taking care of your AC adaptor |
v |
Taking care of your battery pack |
vi |
Cleaning and servicing |
vi |
A TravelMate tour |
1 |
Front view |
1 |
Closed front view |
2 |
Left view |
3 |
Right view |
4 |
Rear view |
4 |
Base view |
5 |
Specifications |
6 |
Indicators |
10 |
Easy-launch buttons |
11 |
Touchpad |
12 |
Touchpad basics |
12 |
Using the keyboard |
14 |
Lock keys and embedded numeric keypad |
14 |
Windows keys |
15 |
Hotkeys |
15 |
Special keys |
17 |
Ejecting the optical (CD or DVD) drive tray |
18 |
Using a computer security lock |
18 |
Audio |
19 |
Adjusting the volume |
19 |
Using the system utilities |
20 |
Acer eManager |
20 |
Acer GridVista (dual-display compatible) |
21 |
Launch Manager |
22 |
Norton AntiVirus |
23 |
Contents
Frequently asked questions |
24 |
Requesting service |
27 |
International Travelers Warranty (ITW) |
27 |
Before you call |
27 |
Taking your notebook PC with you |
28 |
Disconnecting from the desktop |
28 |
Moving around |
28 |
Preparing the computer |
28 |
What to take to short meetings |
29 |
Taking the computer home |
29 |
Preparing the computer |
29 |
What to take with you |
30 |
Special considerations |
30 |
Setting up a home office |
30 |
Traveling with the computer |
30 |
Preparing the computer |
30 |
What to take with you |
31 |
Special considerations |
31 |
Traveling internationally with the computer31 |
|
Preparing the computer |
31 |
What to bring with you |
31 |
Special considerations |
32 |
Securing your computer |
32 |
Using a computer security lock |
32 |
Using passwords |
32 |
Entering passwords |
33 |
Setting passwords |
33 |
Expanding through options |
34 |
Connectivity options |
34 |
Fax/data modem |
34 |
Built-in network feature |
35 |
Fast Infrared (on selected models) |
35 |
Universal Serial Bus (USB) |
36 |
IEEE 1394 port (on selected models) |
36 |
PC Card slot |
37 |
BIOS utility |
38 |
Boot sequence |
38 |
Enable disk-to-disk recovery |
39 |
Password |
39 |
Using software |
39 |
Playing DVD movies |
39 |
Power management |
40 |
Acer eRecovery |
41 |
Create backup |
41 |
Restore from backup |
42 |
Create factory default image CD |
42 |
Re-install bundled software without CD |
42 |
Change password |
43 |
Troubleshooting |
44 |
Troubleshooting tips |
44 |
Error messages |
44 |
Regulations and safety notices |
46 |
ENERGY STAR guidelines compliance |
46 |
FCC notice |
46 |
Modem notices |
48 |
Important safety instructions |
51 |

English
1
A TravelMate tour
After setting up your computer as illustrated in the Just for Starters... poster, let us show you around your new TravelMate computer.
Front view
# |
Item |
Description |
1 |
Display screen |
Also called Liquid-Crystal Display (LCD), displays |
|
|
computer output. |
|
|
|
2 |
Power button |
Turns the computer on and off. |
|
|
|
3 |
Easy-launch |
Buttons for launching frequently used programs. |
|
buttons |
See "Easy-launch buttons" on page 11 for more details. |
|
|
|
4 |
Microphone |
Internal microphone for sound recording. |
|
|
|
2
# |
Item |
Description |
5 |
Status |
Light-Emitting Diodes (LEDs) that turn on and off to |
|
indicators |
show the status of the computer's functions and |
|
|
components. |
|
|
|
6 |
Palmrest |
Comfortable support area for your hands when you use |
|
|
the computer. |
|
|
|
7 |
Click buttons |
The left and right buttons function like the left and |
|
(left, center |
right mouse buttons; the center button serves as a 4-way |
|
and right) |
scroll button. |
|
|
|
8 |
Touchpad |
Touch-sensitive pointing device which functions like a |
|
|
computer mouse. |
|
|
|
9 |
Keyboard |
For entering data into your computer. |
|
|
|
Closed front view
English
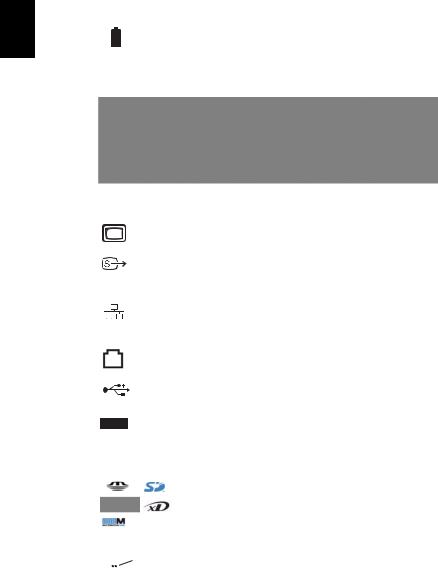
# |
Icon |
Item |
Description |
1 |
|
Speaker-out/line- |
Connects to audio line-out devices |
|
|
out/Headphone jack |
(e.g., speakers, headphones). |
|
|
|
|
2 |
|
Mic-in jack |
Accepts inputs from external microphone. |
|
|
|
|
3 |
|
Speakers |
Left and right speakers deliver stereo |
|
|
|
audio output. |
|
|
|
|
4 |
|
Bluetooth |
Press to enable/disable Bluetooth |
|
|
communication |
function. Lights to indicate the status of |
|
|
button/indicator |
Bluetooth communications (option only |
|
|
|
available for TravelMate 3210/3220/3230). |
|
|
|
|
5 |
|
Wireless |
Press to enable/disable the wireless |
|
|
communication |
function. Indicates the status of wireless |
|
|
button/indicator |
LAN communication. |
|
|
|
|
6 |
|
Power indicator |
Lights when the computer is on. |
|
|
|
|
English
3
# |
Icon |
Item |
Description |
||
7 |
|
|
|
Battery indicator |
Lights when the battery is being charged. |
|
|
|
|
|
|
|
|
|
|
|
|
Left view
# Icon |
|
Item |
Description |
|||
1 |
|
|
|
|
External display |
Connects to a display device (e.g., |
|
|
|
|
|
port |
external monitor, LCD projector). |
|
|
|
|
|
|
|
2 |
|
|
|
|
S-video out port |
Connects to a television or display |
|
|
|
|
|
|
device with S-video input. (on |
|
|
|
|
|
|
selected models) |
|
|
|
|
|
|
|
3 |
|
|
|
|
Network jack |
Connects to an Ethernet 10/100/ |
|
|
|
|
|
(RJ-45) |
1000-based network (depends on |
|
|
|
|
|
|
model). |
|
|
|
|
|
|
|
4 |
|
|
|
|
Modem jack |
Connects to a phone line. |
|
|
|
|
|
(RJ-11) |
|
|
|
|
|
|
|
|
5 |
|
|
|
|
Two USB 2.0 ports |
Connect to USB 2.0 devices (e.g., USB |
|
|
|
|
|
|
mouse, USB camera). |
|
|
|
|
|
|
|
6 |
|
|
|
|
IEEE 1394 port |
Connects to IEEE 1394 devices. |
|
|
|
|
|
|
(on selected models) |
|
|
|
|
|
|
|
7 |
|
|
|
|
PC Card slot |
Accepts one Type II PC Card. |
|
|
|
|
|
|
|
|
|
|
|
|
|
|
8 |
|
|
|
|
5-in-1 card reader |
Accepts an MS, MS PRO, MMC, SD, |
|
|
|
|
|
|
xD-Picture card |
|
|
|
|
|
|
(on selected models). |
|
|
|
|
|
|
Note: Only one card can operate at |
|
|
|
|
|
|
any given time. |
|
|
|
|
|
|
|
9 |
|
|
|
|
Infrared port |
Interfaces with infrared devices (e.g., |
|
|
|
|
|
|
infrared printer and IR-aware |
|
|
|
|
|
|
|
|
|
|
|
|
|
computer) (on selected models). |
|
|
|
|
|
|
|
10 |
|
|
|
|
PC Card slot eject |
Ejects the PC Card from the slot. |
|
|
|
|
|
button |
|
|
|
|
|
|
|
|

4
Right view
# |
Icon |
Item |
Description |
1 |
|
Optical drive |
Internal optical drive; accepts CDs or DVDs |
|
|
|
depending on the optical drive type. |
|
|
|
|
2 |
|
LED indicator |
Lights up when the optical drive is active. |
|
|
|
|
3 |
|
Optical drive |
Ejects the optical drive tray from the |
|
|
eject button |
drive. |
|
|
|
|
4 |
|
Emergency |
Ejects the optical drive tray when the |
|
|
eject hole |
computer is turned off. |
|
|
|
|
5 |
|
Ventilation |
Enable the computer to stay cool, even |
|
|
slots |
after prolonged use. |
|
|
|
|
6 |
|
Security |
Connects to a Kensington-compatible |
|
|
keylock |
computer security lock. |
|
|
|
|
Note: The position of items 2, 3 and 4 may vary depending on model.
Rear view
English
# |
Icon Item |
Description |
|||||
1 |
|
|
|
|
|
Battery bay |
Houses the computer's battery pack. |
|
|
|
|
|
|
|
|
2 |
|
|
|
|
|
Power jack |
Connects to an AC adaptor. |
|
|
|
|
|
|||
|
|
|
|
|
|
|
|
|
|
|
|
|
|
|
|

English
5
# |
Icon Item |
Description |
3 |
USB 2.0 ports |
Connect to USB 2.0 devices (e.g., USB |
|
|
mouse, USB camera). |
|
|
|
4 |
Acer ezDock port |
Connects to the Acer ezDock (TravelMate |
|
|
3220 only) |
|
|
|
Base view
# |
Item |
Description |
1 |
Battery bay |
Houses the computer's battery pack. |
|
|
|
2 |
Battery lock |
Locks the battery in place. |
|
|
|
3 |
Cooling fan |
Helps keep the computer cool. |
|
|
Note: Do not cover or obstruct the opening of the fan. |
|
|
|
4 |
Memory |
Houses the computer's main memory. |
|
compartment |
|
|
|
|
5 |
Hard disk bay |
Houses the computer's hard disk (secured by screws). |
|
|
|
6 |
Battery release |
Releases the battery for removal. |
|
latch |
|
|
|
|

6
Specifications
Operating |
Microsoft® Windows® XP Home Edition (Service Pack 2) |
system |
Microsoft® Windows® XP Professional (Service Pack 2) |
Platform |
TravelMate 3210/3220/3230: |
|
Intel® Centrino™ Mobile Technology, featuring: |
|
• Intel® Pentium® M Processor 730/740/750/760/770/ |
|
780 (2 MB L2 cache, 1.60/1.73/1.86/2/2.13/2.36 GHz, |
|
533 MHz FSB) |
|
• Intel® Pentium® M Processor 725 (2 MB L2 cache, 1.60 |
|
GHz, 400 MHz FSB) |
|
• Mobile Intel® 915GM/PM Express chipset |
|
• Intel® PRO/Wireless 2200BG network connection |
|
(dual-mode 802.11b/g) Wi-Fi CERTIFIED™ solution, |
|
supporting Acer SignalUp™ wireless technology |
|
TravelMate 2400: |
|
• Intel® Pentium® M Processor 725 (2 MB L2 |
|
cache, 1.60 GHz, 400 MHz FSB) |
|
• Intel® Celeron® M Processor 350/360/370 (1 MB |
|
L2 cache, 1.30/1.40/1.50 GHz, 400 MHz FSB) |
|
• Mobile Intel® 910GML Express chipset |
|
• Integrated 802.11b/g Wi-Fi CERTIFIED™ |
|
solution, supporting Acer SignalUp™ wireless |
|
technology |
|
|
System memory |
256/512 MB of DDR2 400/533 MHz memory, upgradeable |
|
to 2 GB using two soDIMM modules (dual-channel |
|
support) |
|
|
English

English
7
Display and |
14.1" WXGA color TFT LCD, 1280 x 800 resolution; 16:10 |
graphics |
viewing ratio, supporting simultaneous multi-window |
|
viewing on dual displays via Acer GridVista |
|
16.7 million colors |
|
Intel® 915GM (TravelMate 3210/3230)/ Intel® 910GML |
|
(TravelMate 2400) integrated 3D graphics, featuring |
|
Intel® Graphics Media Accelerator 900 and up to 128 MB |
|
of VRAM, supporting Microsoft® DirectX® 9.0 and dual |
|
independent display |
|
ATI MOBILITY™ RADEON® X700 with 64 MB of dedicated |
|
VRAM, supporting ATI POWERPLAY™ 5.0, PCI Express™, |
|
Microsoft® DirectX® 9.0 and DualView™ (TravelMate |
|
3210/3220/3230 only) |
|
MPEG-2/DVD hardware-assisted capability |
|
S-video/TV-out (NTSC/PAL) support (TravelMate |
|
3210/3220/3230 only) |
|
|
Storage |
40/60/80/100 GB ATA/100 hard disk drive |
subsystem |
Optical drive options: |
|
• DVD-Super Multi double layer (TravelMate |
|
3210/3220/3230) |
|
• DVD-Dual double layer (TravelMate 2400) |
|
• DVD/CD-RW combo |
|
5-in-1 card reader supporting Secure Digital (SD), |
|
MultiMediaCard (MMC), xD-Picture Card™ (XD), Memory |
|
Stick® (MS) and Memory Stick PRO™ (MS-Pro) |
Dimensions |
335 (W) x 240 (D) x 31.9/34.1 (H) mm |
and weight |
(13.2 x 9.45 x 1.26/1.34 inches) |
|
TravelMate 3220: 2.6 kg (5.73 lbs) |
|
TravelMate 2400/3210: 2.25 kg (4.96 lbs) |
|
TravelMate 3230: 2.0 kg (4.4 lbs)* |
|
* Weight may vary based on configuration |
|
|
Power |
ACPI 1.0b power management standard: supports Standby |
subsystem |
and Hibernation power-saving modes |
|
2.5-hour rapid charge system-off; 3.5-hour charge-in-use |
|
3-pin 65 W AC adaptor |
|
|

8
Input devices |
84-/85-key Acer FineTouch™ keyboard |
|
Built-in touchpad with 4-way scroll button |
|
Four easy-launch buttons |
|
Two front-access LED-buttons: WLAN and Bluetooth® |
Audio |
Audio system with built-in speakers and microphone |
|
Intel® AC’97 audio support |
|
Sound Blaster Pro™ and MS-Sound compatible |
|
S/PDIF (Sony/Philips Digital Interface) support for digital |
|
speakers |
|
|
Communication |
Modem: 56K ITU V.92 with PTT approval; Wake-on-Ring |
|
ready |
|
LAN: 10/100 Mbps (TravelMate 2400) or gigabit |
|
(TravelMate 3210/3220/3230) Ethernet; Wake-on-LAN |
|
ready |
|
WLAN: integrated 802.11b/g Wi-Fi CERTIFIED™ solution |
|
(TravelMate 2400) or Intel® PRO/Wireless 2200BG network |
|
connection (dual-mode 802.11b/g) Wi-Fi CERTIFIED™ |
|
solution (TravelMate 3210/3220/3230) |
|
Acer SignalUp™ wireless technology support |
|
WPAN: integrated Bluetooth® |
I/O interface |
Acer ezDock (TravelMate 3220 only) |
|
Three USB 2.0 ports |
|
5-in-1 card reader (MS/MS-PRO/MMC/SD/XD) |
|
PC Card slot (one Type II) |
|
IEEE 1394 port (TravelMate 3210/3220/3230 only) |
|
Fast infrared (FIR) port (TravelMate 3210/3220/3230 only) |
|
External display (VGA) port |
|
S-video/TV-out (NTSC/PAL) port (TravelMate 3210/3220/ |
|
3230 only) |
|
Headphones/speaker/line-out port |
|
Microphone/line-in jack |
|
Ethernet (RJ-45) port |
|
Modem (RJ-11) port |
|
DC-in jack for AC adaptor |
|
|
Security |
Kensington lock slot |
|
BIOS user and supervisor passwords |
|
|
English

English
9
Software |
Acer eManager |
|
(ePowerManagement/ePresentation/eRecovery/eSettings) |
|
Acer GridVista |
|
Acer Launch Manager |
|
Acer System Recovery CD |
|
Norton AntiVirus™ |
|
Adobe® Reader® |
|
CyberLink® PowerDVD™ |
|
NTI CD-Maker™ |
Options and |
512 MB or 1 GB DDR2 533 MHz soDIMM memory modules |
accessories |
External USB floppy disk drive |
|
9-cell Li-ion battery pack |
|
3-pin 65 W AC adaptor |
|
|
Environment |
Temperature: |
|
• Operating: 5° C to 35° C |
|
• Non-operating: -20° C to 65° C |
|
Humidity (non-condensing): |
|
• Operating: 20% to 80% |
|
• Non-operating: 20% to 80% |
|
|
System |
Cisco Compatible Extensions (CCX) |
compliance |
Wi-Fi® |
|
Mobile PC 2001 |
|
ACPI 1.0b |
|
DMI 2.0 |
|
|
Warranty |
One-year International Travelers Warranty (ITW) |
|
|
Note: The specifications listed above are for reference only. The exact configuration of your PC depends on the model purchased.

10
Indicators
The computer has three easy-to-read status indicators on the upper-left above the keyboard, and four on the front panel.
The power, battery, and wireless communication status indicators are visible even when the LCD display is closed.
Icon |
Function |
Description |
|
|
|
Caps Lock |
Lights up when Caps Lock is activated. |
|
|
|
|
|
|
|
|
|
|
Num Lock |
Lights up when Num Lock is activated. |
|
|
|
|
|
|
Media activity |
Indicates when the hard disk or optical drive is active. |
|
|
|
|
|
|
Bluetooth |
Indicates the status of Bluetooth communication. |
|
|
|
|
|
|
Wireless LAN |
Indicates the status of wireless LAN communication. |
|
|
|
|
|
|
Power |
Lights up when the computer is on. |
|
|
|
|
|
|
Battery |
Lights up when the battery is being charged. |
|
|
|
|
|
|
|
|
English
1.Charging: The light shows amber when the battery is charging.
2.Fully charged: The light shows green when in AC mode.

English
11
Easy-launch buttons
Located at the upper-left, above the keyboard are four buttons. These buttons are called Easy-launch buttons. They are: mail, Web browser, Acer Empowering
Key "  " and one user-programmable button.
Press "  " to run the Acer eManager. Please see "Acer eManager" on page 20.
The mail and Web buttons are pre-set to email and Internet programs, but can be reset by users. To set the Web browser, mail and programmable keys, run the Acer Launch Manager. See "Launch Manager" on page 22.
Easy-launch button |
Default application |
Email application (user-programmable) |
|
|
|
Web browser |
Internet browser (user-programmable) |
|
|
|
Acer eManager (user-programmable) |
P
User-programmable
12
Touchpad
The built-in touchpad is a pointing device that senses movement on its surface. This means the cursor responds as you move your finger across the surface of the touchpad. The central location on the palmrest provides optimum comfort and support.
Touchpad basics
The following items show you how to use the touchpad:
•Move your finger across the touchpad (2) to move the cursor.
•Press the left (1) and right (4) buttons located beneath the touchpad to perform selection and execution functions. These two buttons are similar to the left and right buttons on a mouse. Tapping on the touchpad is the same as clicking the left button.
•Use the 4-way scroll (3) button to scroll up or down and move left or right a page. This button mimics your cursor pressing on the right scroll bar of Windows applications.
English
Loading...