

Page 1

IP Messaging Module
User Guide - Traditional
Interface
3Com® Convergence Applications Suite
IP Messaging Module Release 7.1
VCX System Release 7.1
NBX System Release 6.0
Part Number 900-0370-01 Rev. AA
Published August 2006
http://www.3com.com/
Page 2

3Com Corporation
350 Campus Drive
Marlborough, MA
01752-3064
Copyright © 2002–2006, 3Com Corporation. All Rights Reserved.
No part of this documentation may be reproduced in any form or by any means or
used to make any derivative work (such as translation, transformation, or adaptation)
without written permission from 3Com Corporation.
3Com Corporation reserves the right to revise this documentation and to make
changes in content from time to time without obligation on the part of 3Com
Corporation to provide notification of such revision or change.
3Com Corporation provides this documentation without warranty, term, or condition
of any kind, either implied or expressed, including, but not limited to, the implied
warranties, terms, or conditions of merchantability, satisfactory quality, and fitness
for a particular purpose. 3Com may make improvements or changes in the product(s)
and/or the program(s) described in this documentation at any time.
If there is any software on removable media described in this documentation, it is
furnished under a license agreement included with the product as a separate
document, in the hardcopy documentation, or on the removable media in a directory
file named LICENSE.TXT or !LICENSE.TXT. If you are unable to locate a copy, please
contact 3Com and a copy will be provided to you.
UNITED STATES GOVERNMENT LEGENDS:
If you are a United States government agency, then this documentation and the
software described herein are provided to you subject to the following:
United States Government Legend: All technical data and computer software is
commercial in nature and developed solely at private expense. Software is delivered
as Commercial Computer Software as defined in DFARS 252.227-7014 (June 1995)
or as a commercial item as defined in FAR
such rights as are provided in 3Com’s standard commercial license for the Software.
Technical data is provided with limited rights only as provided in DFAR 252.227-7015
(Nov 1995) or FAR
remove or deface any portion of any legend provided on any licensed program or
documentation contained in, or delivered to you in conjunction with guide.
Unless otherwise indicated, 3Com registered trademarks are registered in the United
States and may or may not be registered in other countries.
3Com ,the 3Com logo, and NBX are registered trademarks of 3Com Corporation.
VCX is a trademark of 3Com Corporation.
Other brand and product names may be registered trademarks or trademarks of their
respective holders.
52.227-14 (June 1987), whichever is applicable. You agree not to
2.101(a) and as such is provided with only
Page 3

CONTENTS
ABOUT THIS GUIDE
Conventions 8
Notices 8
Text 8
Figures 8
Related Documentation 9
Your Comments 10
1 GETTING STARTED
IP Messaging Overview 11
Accessing the Telephone User Interface 12
Initializing Your Mailbox 12
Entering the System 13
Accessing Your Mailbox 13
Accessing the Web Provisioning Interface 14
Replacing a Forgotten Password 15
2 SETTING UP MESSAGING FEATURES
Using the TUI Personal Options Menu 19
Notification Options 20
Administrative Options 20
General Options 21
Fax Options 23
Greetings 24
Recording Personal Greetings 24
Page 4

Scheduling Personal Greetings 24
Recording an Extended Absence or a Busy Greeting 25
Notification Schedule 26
Weekday Notification Scheduling 26
Weekend Notification Scheduling 27
Temporary Notification Scheduling 27
Message Forwarding 28
Security Options 28
Multiuser Mailbox Administration 28
Creating Multiuser Mailboxes 29
Restarting and Exiting a Session 29
Using the Web Provisioning Interface 30
Main Menu 31
Mailbox Preferences 32
Scheduled Greetings 33
Notification 34
Notification Filters 35
Notification Procedures 36
Notification Schedule 39
Personal Address Book 41
Distribution Lists 43
Family Mailboxes 46
Delivery Options 48
Logout 50
3 USING MESSAGING FEATURES
Listening to Messages 51
Fax Options 52
End of Messages Options 52
Print Options 53
Send Copy 53
Alternate Destination 53
Delivery Options 53
Playback Key Functions 54
Sending Messages 55
Send Messages 55
Page 5

Replay Message 55
Destination Options 55
Delivery Options 56
Confirmation Options 56
Locating Messages 57
Locate Messages 57
Message Sent Options 57
Message Received Options 57
Forwarding a Message with an Introduction Message 59
INDEX
Page 6

Page 7

ABOUT THIS GUIDE
This guide describes how to use the messaging features of the IP
Messaging Module of the 3Com
This guide is intended for subscribers who want to set up and use IP
Messaging messaging features on supported 3Com telephones. No
special knowledge is required or assumed.
This guide describes the voice prompt menu system provided by the
Traditional (Octel) Telephone User Interface (TUI). If your administrator has
enabled the 3Com Native voice prompt menu system, see the IP
Messaging User Guide - 3Com Native Interface.
This guide also describes how to set up messaging features in the IP
Messaging Web Provisioning interface.
The Octel TUI does not support External E-mail, Message Play Order, Send
Message Order, or Find Me Follow Me.
Features that are supported only on VCX systems are noted throughout
this User Guide.
If Release Notes are shipped with your product and the information there
differs from the information in this guide, follow the instructions in the
release notes.
®
Convergence Applications Suite.
Page 8
8 ABOUT THIS GUIDE
Conventions This section describes notice, text, and figure conventions.
Notices Tab le 1 describes the notice icons.
Ta bl e 1 Notice Icons
Icon Notice Type Description
Information note Information that describes important features or
instructions
Caution Information that alerts you to potential loss of data or
Warning
Te xt Ta bl e 2 describes text conventions.
Ta bl e 2 Text Conventions
Convention Description
Screen displays This typeface represents information as it appears on the
Keyboard key names If you must press two or more keys simultaneously, the key
Words in italics Italics are used to:
potential damage to an application, system, or device
Information that alerts you to potential personal injury
screen.
names are linked with a plus sign (+). Example:
Press Ctrl+Alt+Del
■ Emphasize a point.
■ Denote a new term at the place where it is defined in the
text.
■ Identify menu names, menu commands, and software
button names. Examples:
From the Help menu, select Contents.
Click OK.
Figures This guide provides figures and screen captures that contain sample data.
This data may vary from the data on an installed system.
Page 9

Related Documentation 9
Related Documentation
These 3Com documents contain additional information about the
products in this release that are a part of or support the 3Com
Convergence Applications Suite.
The following documents are a part of the IP Messaging Module:
■ IP Messaging Module Quick Reference Guide - 3Com Native Interface
■ IP Messaging Module User Guide - 3Com Native Interface
■ IP Messaging Module Quick Reference Guide - Traditional Interface
■ IP Messaging Module User Guide - Traditional Interface
■ IP Messaging Module Operations and System Administration Guide
■ IP Messaging Module Installation Guide for NBX
■ E-Mail Reader Application Quick Start Guide
The following documents are a part of the IP Conferencing Module:
■ IP Conferencing Module Installation Guide
■ IP Conferencing Module User Guide
■ IP Conferencing Module Administration Guide
■ Convergence Center Client User and Administration Guide
The following documents provide information on products that support
this release:
Enterprise Management Suite
■ Enterprise Management Suite Getting Started Guide, Version 2.3
■ Enterprise Management Suite User Guide, Version 2.3
■ Enterprise Management Suite 2.3 for VCX 7.1 User Guide
Digital Gateways
■ V7122 and V6100 Digital User Guide, Version 4.8
■ V6100 Digital Fast Track Installation Guide, Version 4.8
■ V7122 Digital Fast Track Installation Guide, Version 4.8
Page 10

10 ABOUT THIS GUIDE
Analog Gateways
■ V7111 Analog Fast Track Installation Guide, Version 4.8
■ V7111 Analog User Guide, Version 4.8
■ V6000 Analog Fast Track Installation Guide, Version 4.8
■ V6000 Analog User Guide, Version 4.8
Your Comments Send e-mail comments about this guide or about any Voice product
documentation to:
Voice_Techcomm_comments@3com.com
Include the following information with your comments:
■ Document title
■ Document part number (found on the front page)
■ Page number
■ Your name and organization (optional)
Example:
IP Messaging Module User Guide - Traditional Interface
System Release 7.1
Part Number 900-0370-01 Rev. AA
Page 25
Please address all questions regarding the 3Com software to your
authorized 3Com representative.
Page 11

1
GETTING STARTED
This chapter covers these topics:
■ IP Messaging Overview
■ Accessing the Telephone User Interface
■ Accessing the Web Provisioning Interface
This guide describes the TUI (voice prompt menu system) provided by the
Traditional (Octel) interface. Your administrator specifies the TUI available
on your telephone during IP Messaging configuration. If your
administrator has enabled the 3Com
Module User Guide - 3Com Native Interface.
The Octel TUI does not support External E-mail, Message Play Order, Send
Message Order, or Find Me Follow Me.
®
Native TUI, see the IP Messaging
IP Messaging Overview
Features that are supported only on VCX systems are noted throughout
this User Guide.
The IP Messaging (IPM) Module is part of the 3Com Convergence
Applications Suite. IP Messaging centralizes and integrates voice mail,
e-mail, and fax mail so users can combine communications modes and
take advantage of powerful message handling and distribution features.
The IP Messaging Module provides services that enable users to contact
each other and access information in a customized way. This product is
used primarily for:
Facsimile is supported only on VCX systems.
■ Voice mail
■ Unified messaging (the integration of voice, facsimile, and e-mail into
a single inbox for message retrieval and management)
Page 12

12 CHAPTER 1: GETTING STARTED
IP Messaging enables users to see their voice and fax mail as e-mail and
hear e-mail messages over the phone. Users can also schedule message
delivery and send voice mails to an individual or group of fellow users,
which is aided by extensive, easily maintained distribution list capabilities.
IP Messaging uses the Session Initiation Protocol (SIP) standard for
signaling. The IP Messaging architecture enables service providers to
deploy applications in basic, small-scale systems or in complex, fully
redundant, large-scale distributed or centralized systems. IP Messaging
communicates with external IP network resources by using a SIP gateway
or directly connected SIP endpoints.
Accessing the Telephone User Interface
Initializing Your
Mailbox
This section describes how to initialize and access your IPM mailbox
through your phone’s Telephone User Interface (TUI).
The System Administrator provides the telephone number or internal
extension number for first-time users. To initialize your mailbox:
1 Dial the IP Messaging access number or press MSG.
2 At the password prompt, enter the default password. You can set your
own password by following the voice instructions.
The default password is the last 4 digits of the mailbox number. If the
mailbox number is only 3 digits, then the password is the mailbox
number.
The voice prompt describes the initialization process and introduces the
Setup Assistant function.
3 Follow the voice prompts:
a To enter a password (from 4 to 15 digits)
b To record a name announcement
c To record a personal greeting
Next, the voice prompt system presents the Main menu. For a description
of Main menu options, see Tab le 4
announcement and personal greeting, the 3Com IP Messaging mailbox is
ready to use. To customize your mailbox settings, see Chapter 2
. After you have recorded your name
.
Page 13

Accessing the Telephone User Interface 13
Entering the System To enter the system, dial the IP Messaging access number or press MSG.
The Auto-Attendant greets you and prompts you to select from the
available options.
Ta bl e 3 Standard Keys
Key Function Description
[0] HELP Provides information about the options in the
[*] CANCEL Cancels the current function and returns to the
[#]
ACCEPT/SKIP Accepts the current operation or skips to the next
Ta bl e 3 lists the standard keys used on the TUI.
current menu.
previous menu.
step.
Accessing Your
Mailbox
You can access your mailbox from your own phone or from any other
phone that can access the IP Messaging system (for example, from a
phone in another office).
To access your mailbox:
1 Press the Voicemail (MSG) button (on your own phone) or dial the 3Com
IP Messaging access (pilot) number (on a different phone).
The Voicemail button is a purple button on some phones. Other phones
such as the 3103 have a software tab (Messages) on the phone’s display.
Pressing the black button below this tab is equivalent to pressing the
Purple button.
2 You hear the prompt, “Please enter your password,” and have the
following options:
■ Enter your password to access your mailbox and listen to message
options, or,
■ Press * to access a different mailbox. The system then asks you to
enter the mailbox number and press #. At that point, you are
prompted to enter the password for the other mailbox and then listen
to message options.
3 The system prompts you to select options from the Main menu. Tab le 4
lists the Main menu options.
Ta bl e 4 Main Menu
Key Function Description
[1] Review Listen to messages in your mailbox.
Page 14
14 CHAPTER 1: GETTING STARTED
Table 4 Main Menu (continued)
Key Function Description
[2] Send Send messages to other mailboxes.
[3] Locate Locate messages that have already been
[4] Personal Options Access options for personal greetings,
[5] Restart Send messages to another mailbox or
[6] Place Call Place calls to another user.
[*] Exit Exit from your mailbox.
sent or received.
notification, and administrative
functions.
access your own mailbox.
Accessing the Web Provisioning Interface
Use the IP Messaging Web Provisioning interface to access mailbox
options through a web browser.
Your browser must have cookies and Java script support enabled to start
a provisioning session.
To access the IP Messaging web interface:
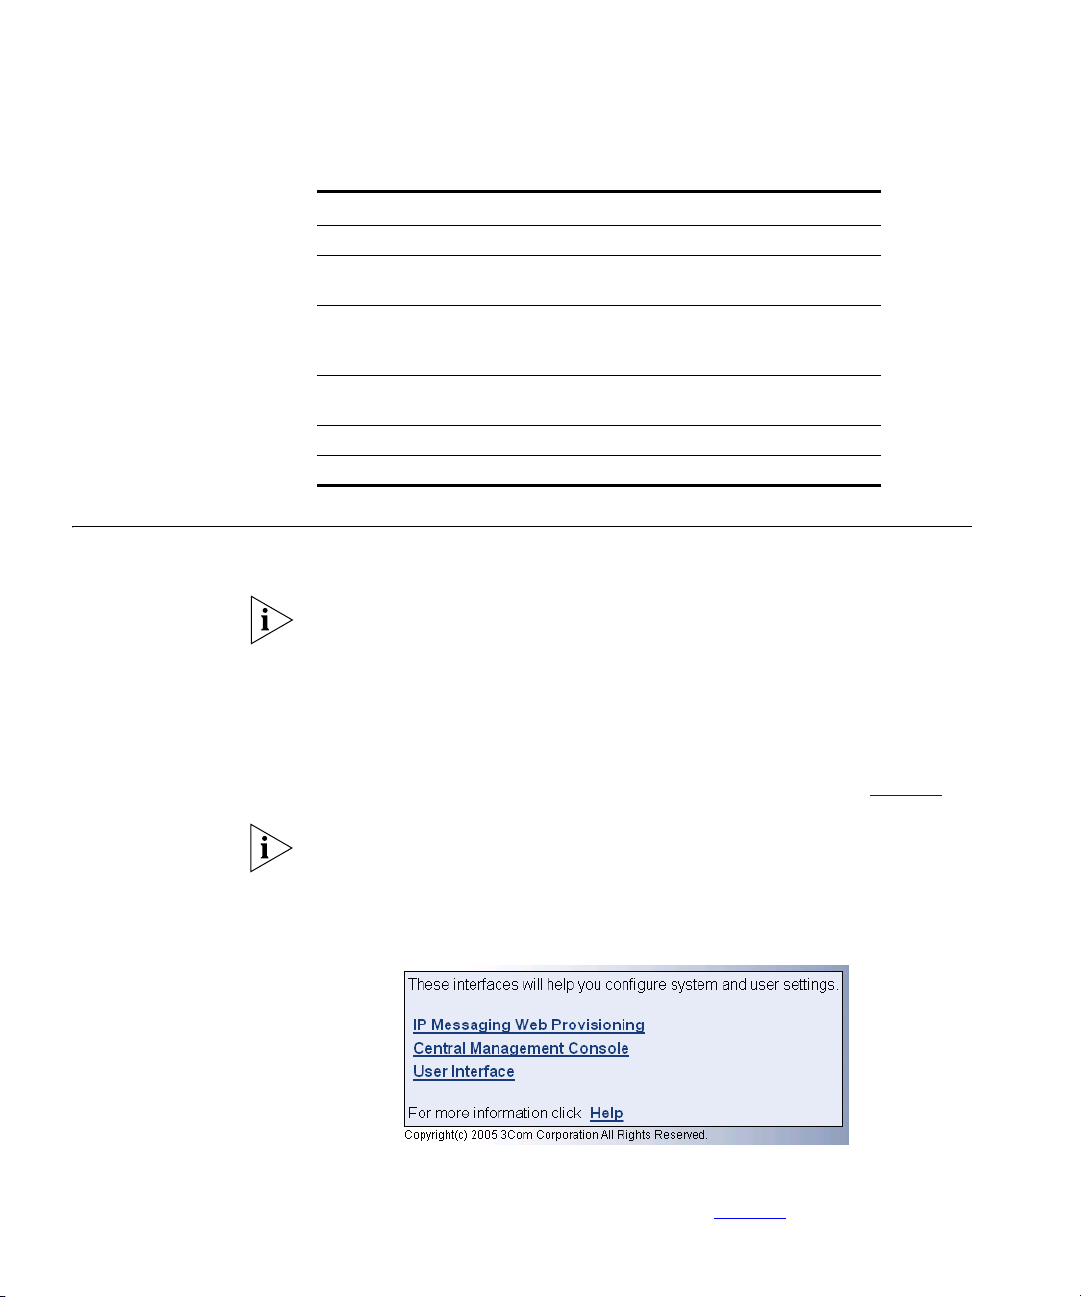
1 In your web browser’s Address text box, enter the URL address provided
by your administrator.
The system displays the IP Messaging Web Provisioning page (Figure 1).
Depending on how IPM and telephony services have been installed, you
may also see an option for the User Interface or the Central Management
Console.
Figure 1 IP Messaging Web Provisioning Welcome Page
2 Click IP Messaging Web Provisioning.
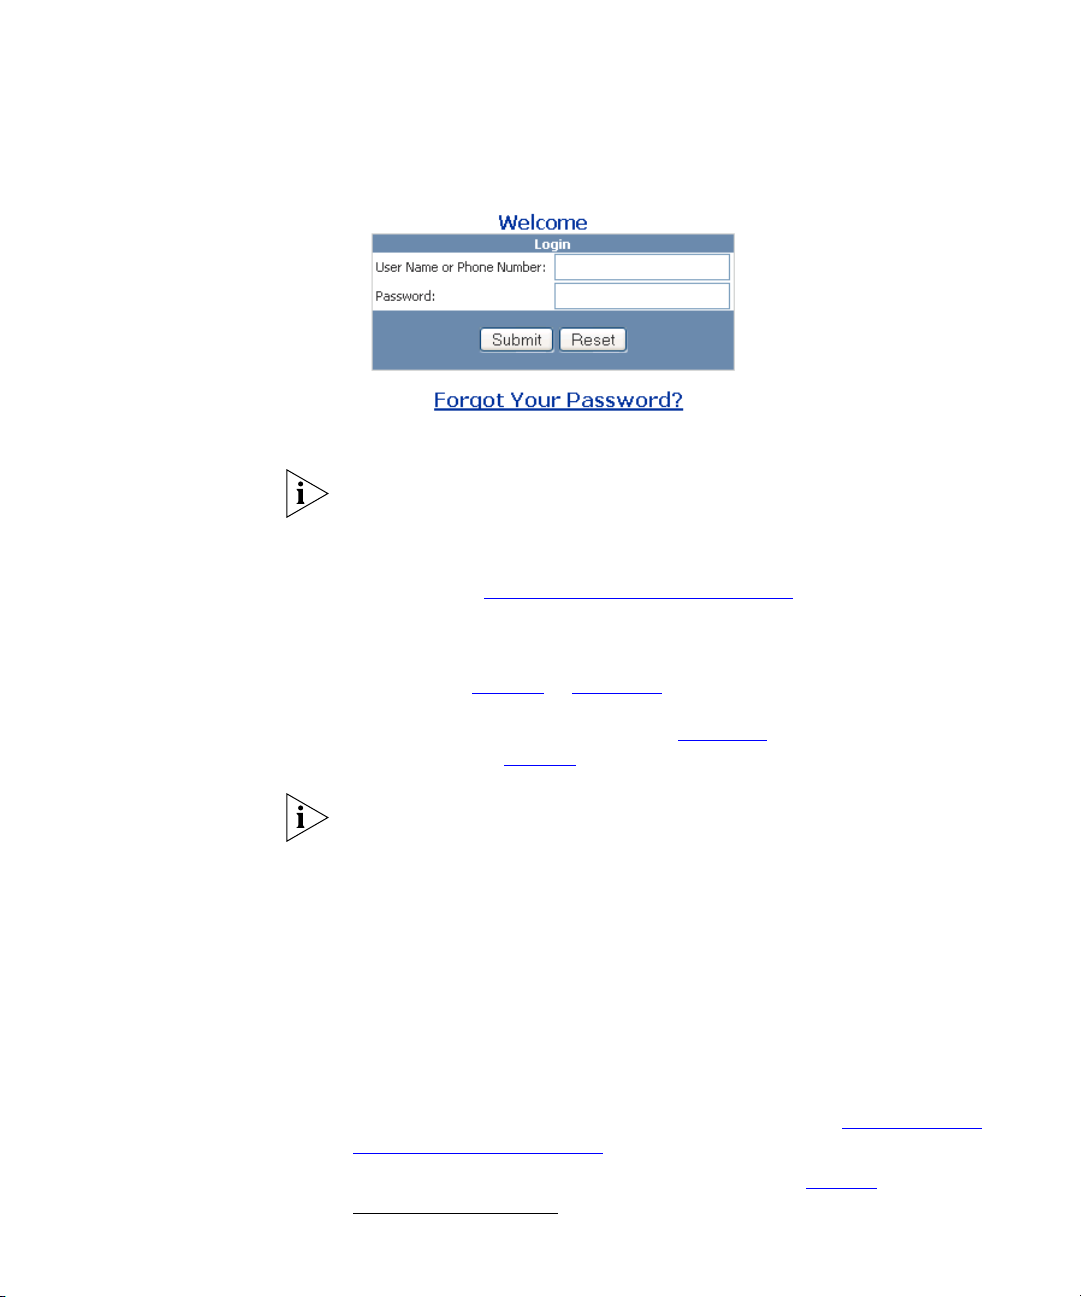
The IP Messaging Login dialog box appears (Figure 2).
Page 15
Accessing the Web Provisioning Interface 15
Figure 2 Login Screen
3 Enter your user name (or telephone extension) and password.
The password is either the default password (your telephone extension)
or the password that you set up from the TUI.
If you make a mistake when you enter your user name or password, the
next screen prompts you to enter them again. If you have forgotten your
password, see
“Replacing a Forgotten Password”.
4 Click Submit.
The default page for the IP Messaging Web Provisioning interface
appears. See
Figure 5 in Chapter 2.
Replacing a Forgotten
Password
You can now set up messaging (see Chapter 2) and view message
information (see Figure 5
).
The interface has an inactivity timer. If the IP Messaging Web Provisioning
interface detects no activity for 15 minutes (900 seconds), the interface
automatically logs you out. You must log in again and start a new
session.
If you forget your IP Messaging login password, IP Messaging can e-mail
you a temporary password. This feature must be configured by your
administrator. If you enter the required information and the system
responds with
No Email for User, your administrator has not
configured the password replacement feature.
To retrieve a temporary IP Messaging password:
1 Access the IP Messaging web interface as described in “Accessing the
Web Provisioning Interface”.
2 When the IP Messaging Login dialog box appears (Figure 2), click the
Forgot Your Password? link.
Page 16
16 CHAPTER 1: GETTING STARTED
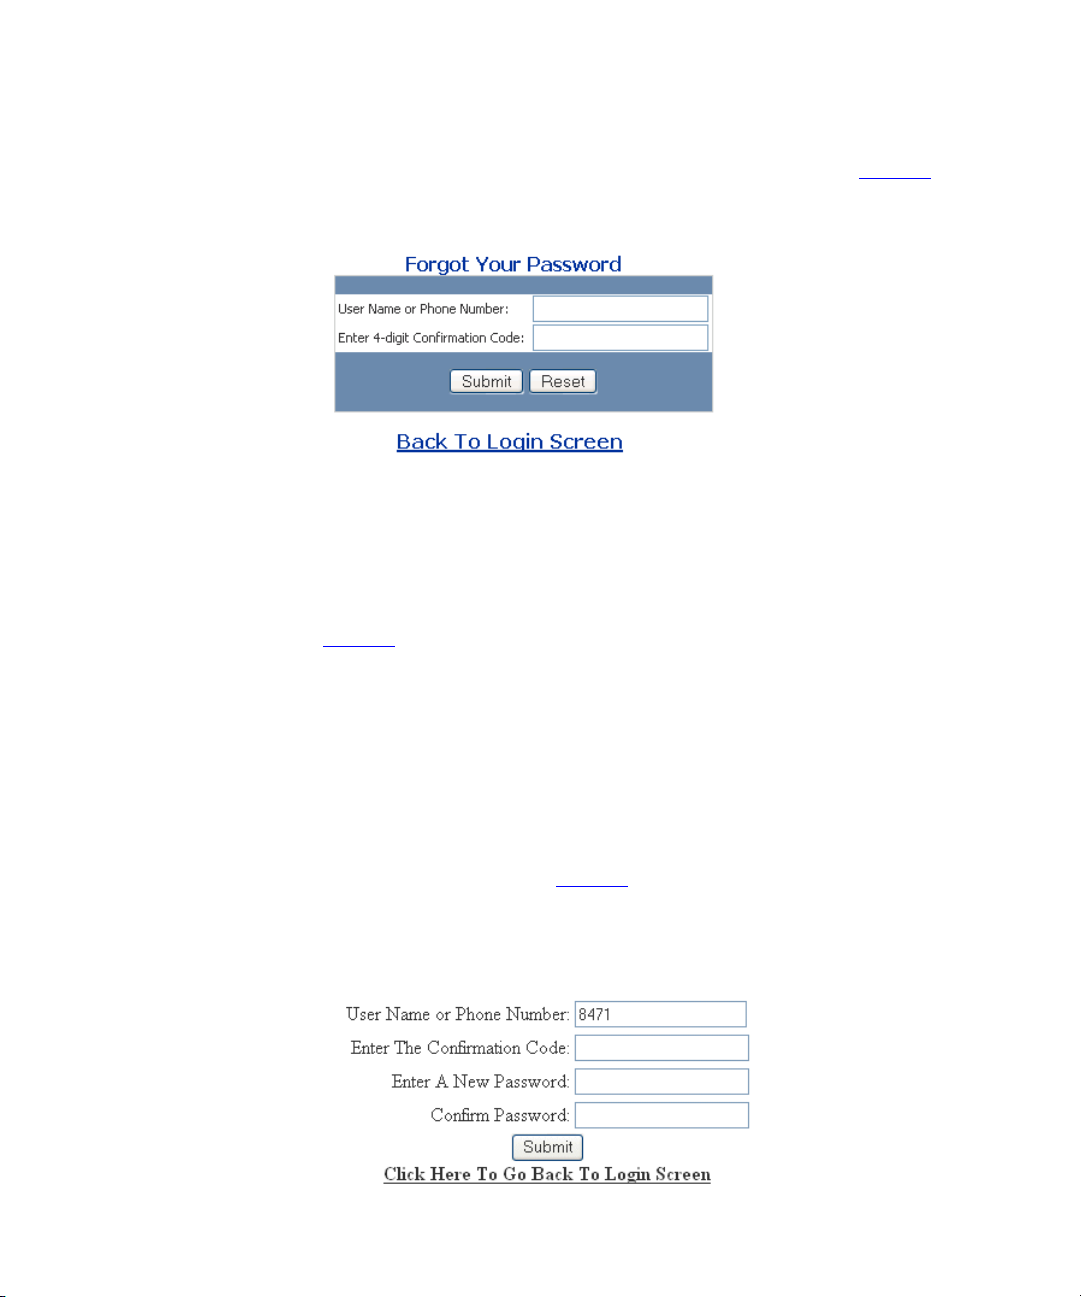
The IP Messaging Forgot Your Password dialog box appears (Figure 3).
Figure 3 IP Messaging Forgot Your Password Dialog Box
3 Enter your mailbox number or username in the User Name or Phone
Number field.
4 Enter any 4-digit number in the Enter 4-digit Confirmation Code field.
Remember this number as you will be required to reenter it later.
5 Click Submit. IP Messaging displays the Login dialog box again
Figure 2).
(
IP Messaging generates a temporary password and e-mails it to you at
the e-mail address configured by your administrator. The Subject: line of
the e-mail message is
Forgot Password.
6 Enter your mailbox number (or username) in the User Name or Phone
Number field.
7 Enter the temporary password in the Password field.
8 Click Submit. IP Messaging displays a screen that prompts you to change
your temporary password (
Figure 4). Your mailbox number (or username)
is already entered.
Figure 4 IP Messaging Change Password Screen
Page 17

Accessing the Web Provisioning Interface 17
9 Enter the 4-digit number specified in step 4 in the Enter The
Confirmation Code text box.
10 Enter and confirm a new password.
11 Click Submit. IP Messaging changes your password and logs you into the
IP Messaging Web Provisioning interface.
The password used to access the IP Messaging Web Provisioning interface
is also the password you use to access your mailbox through your
telephone. If you use the password replacement feature described above,
you must enter the new password in response to the telephone voice
prompt to access messages.
Page 18

18 CHAPTER 1: GETTING STARTED
Page 19

2
SETTING UP MESSAGING FEATURES
This chapter covers these topics:
■ Using the TUI Personal Options Menu
■ Using the Web Provisioning Interface
The Octel TUI does not support External E-mail, Message Play Order, Send
Message Order, or Find Me Follow Me.
Features that are supported only on VCX systems are noted throughout
this User Guide.
Using the TUI Personal Options Menu
Use the Personal Options menu to set up IP Messaging (IPM) features
such as password management, personal greetings, message forwarding,
and security. To access the Personal Options menu, log onto the
Telephone User Interface (TUI) (see
Interface”) and press [4] on the Main menu.
The following personal options are available through the TUI:
■ Notification Options
■ Administrative Options
■ Greetings
■ Notification Schedule
■ Message Forwarding
■ Security Options
■ Multiuser Mailbox Administration
■ Restarting and Exiting a Session
Some features must be enabled by your administrator. If disabled, you
will not hear a voice prompt for that feature.
“Accessing the Telephone User
Page 20

20 CHAPTER 2: SETTING UP MESSAGING FEATURES
Notification Options There are two types of Message Notification you can enable or disable. By
default, when a new message arrives, the following notification options
are enabled:
■ The voice prompt system announces the availability of a new message
when the subscriber accesses the mailbox.
■ The display panel on the phone indicates the number of new
messages in the mailbox and the Message Waiting Indicator (MWI) on
the phone is lit
You can control which of these notification methods is active.
■ Press [1] to enable Message Notification if it has been disabled. In this
case, the voice prompt system announces the availability of a new
message when the subscriber accesses the mailbox.
■ Press [2] to disable Message Notification if it has been enabled. In this
case, there is no voice prompt announcement of new message
availability.
■ Press [3] to enable Message Waiting Indicator (MWI) Notification if it
has been disabled. In this case, the display panel on the phone
indicates the number of new messages in the mailbox and the
Message Waiting Indicator (MWI) on the phone is lit.
Administrative
Options
■ Press [4] to disable MWI Notification if it has been enabled. In this
case, neither the display panel or the Message Waiting Indicator
(MWI) indicate new message availability.
This section describes the mailbox management options available when
you select [2] (Administrative Options) from the Personal Options menu.
The following administrative options are available:
■ For General options, press [1] and continue with “General Options”.
Facsimile is supported only on VCX systems.
■ For Fax options, press [3] and continue with “Fax Options”.
Page 21

Using the TUI Personal Options Menu 21
General Options
This section describes the General options available when [1] is selected
from the Administrative Option menu.
The options described below are available from the General options
menu.
Changing Passwords To change the mailbox access password, press
[1].
1 Enter the new password and press [#]. The password length limit is set by
the System Administrator.
2 Enter the same password again and press [#] to confirm.
3 The system announces that your password is changed.
Group Lists To create, edit, delete, or list the names of a message
group list, press [2].
The Group List option enables you to send messages to a pre-defined
group of mailboxes.
■ To create a new list, press [1] and continue with “Creating Group
Lists”.
■ To edit a list, press [2].
■ To delete a list, press [3].
■ To list the names of an existing list, press [4].
Enter the number of the list to be reviewed, and then press [#].
Creating Group Lists To create a group list:
1 From the Main menu, press [4].
2 From the Personal Options menu, press [2].
3 From the Administrative Options menu, press [1].
4 From the General Options menu, press [2] to create a group list.
5 To create a new group list, press [1].
6 Enter a number (1–4 digit) to assign a number to this list and then press
[#].
Page 22

22 CHAPTER 2: SETTING UP MESSAGING FEATURES
7 To accept the voiced number, press [#] or to reject it and start again, press
[*].
8 Enter a voice tag (title) for the list, and then press [#].
a To accept the tag, press [#].
b To replay the tag, press [1].
c To record the tag again, press [2].
9 Enter a destination number, and then press [#].
The system prompts you to enter a destination number or allows you to
search the subscriber directory.
Destinations can include mailbox numbers, telephone numbers, and
VPIM destination addresses.
The Voice Profile for Internet Mail (VPIM) is a protocol that allows
subscribers to exchange messages between different voice mail systems.
By entering VPIM destinations in a distribution list, subscribers in different
locations can be members of a group distribution list that spans multiple
sites.
The VPIM option appears only if configured by your administrator.
For VPIM addresses, use the format <prefix><mailbox_number>. For
example, if the VPIM destination prefix is 888 and mailbox number is
1234, you would enter 8881234.
Prompt Level To change the system prompt level to a standard prompt
or extended prompt or rapid prompt, press [3].
System prompts are the system auto attendant instructions for you to
respond to one of the menu functions.
Standard prompts provide a brief instruction, extended prompts provide
more details, and rapid prompts provide simple word instruction.
■ To change the prompt level to a standard prompt, press [1].
■ To change the prompt level to an extended prompt, press [2].
■ To change the prompt level to a rapid prompt, press [3].
Date and Time Announcements To toggle the date and time
announcement on or off at the beginning of each message reviewed,
press [4].
Page 23

Using the TUI Personal Options Menu 23
The system prompts: “If you would like to hear the date and time
information while reviewing messages, press [1]. If not, press [2]”.
Call Back Numbers To obtain the call back number from the caller on
or off, press [5] and then press [4].
The call back number option prompts the caller to leave a call back
number.
Auto Play To enable or disable the Auto Play option, press [6].
When Auto Play feature is enabled, IP Messaging plays unreviewed
messages automatically (without any prompt).
■ To enable Auto Play, press [1].
■ To disable Auto Play, press [2].
■ To cancel this operation, press [*].
Fax Options
(This section describes the fax options available when [3] is selected from
the Administrative Options menu.
Facsimile is supported only on VCX systems.
These fax options are available:
■ To set up or change the primary fax number, press [1].
Enter a new fax number, and then press [#]. This is the primary fax
number to which all the fax messages are sent for printing.
■ To enable or disable automatic printing of new fax messages, press
[2].
The auto printing option prints all the new fax messages on the
primary printer location.
■ To enable or disable cover sheets, press [3].
The cover sheet option prints a pre-defined header information on all
outgoing faxes.
Page 24

24 CHAPTER 2: SETTING UP MESSAGING FEATURES
Greetings This section describes the Greetings options available when [3] is selected
from the Personal Option menu.
Recording Personal Greetings
To record a personal greeting:
1 From the Main menu, press [4].
2 From the Personal Options menu, press [3].
3 From the Greetings menu, press [1] for personal greetings and press [1]
to change a greeting.
■ To record an Open greeting, press [1].
■ To record a Closed greeting, press [2].
The open greeting and close greeting features enables you to record
two separate greeting messages for playing at different times of the
day.
4 Record the greeting message, and then press [#].
a To accept this recording, press [#].
b To replay this recording, press [1].
c To re-record this message, press [2].
d To mark the greeting as extended absence, press [3].
e To cancel, press [*].
Scheduling Personal Greetings
To schedule when IP Messaging plays an open or closed personal
greeting:
1 From the Main menu, press [4].
2 From the Personal Options menu, press [3].
3 From the Greetings menu, press [1] for personal greetings and press [2]
to schedule a greeting.
4 From the Record Greeting menu, press [1] to schedule an open greeting
or press [2] to schedule a closed greeting.
5 Enter the time for the greeting to begin play on week days, then enter [1]
for AM or [2] for PM.
6 Enter the time for the greeting to end play on week days, then enter [1]
for AM or [2] for PM.
Page 25

Using the TUI Personal Options Menu 25
7 Enter the time for the greeting to begin play on weekend days, then
enter [1] for AM or [2] for PM.
8 Enter the time for the greeting to end play on weekend days, then enter
[1] for AM or [2] for PM.
Recording an Extended Absence or a Busy Greeting
IP Messaging can play a recorded message when you do not answer a call
or you are on another call (busy). You can record an extended absence
greeting or a busy greeting or both.
■ IP Messaging plays an extended absence greeting (if recorded and
activated) when a call forward reason is no reply or busy (if no busy
personal greeting is recorded). The extended absence greeting
overrides a personal greeting scheduled for the current date or time.
■ IP Messaging plays a busy personal greeting (if recorded) when the call
forward reason is busy, even if an extended absence greeting is active.
Recording an Extended Absence Greeting To record an extended
absence greeting:
1 From the Main menu, press [4].
2 From the Personal Options menu, press [3].
3 From the Greeting menu, press [2].
4 Record your extended absence greeting, then press [#].
a To accept this recording, press [#].
b To replay this recording, press [1].
c To re-record this message, press [2].
d To cancel, press [*].
Recording a Busy Greeting To record a busy greeting:
1 From the Main menu, press [4].
2 From the Personal Options menu, press [3].
3 From the Greeting menu, press [4].
4 Record your busy greeting, then press [#].
a To accept this recording, press [#].
b To replay this recording, press [1].
c To re-record this message, press [2].
Page 26

26 CHAPTER 2: SETTING UP MESSAGING FEATURES
d To cancel, press [*].
Recording a Name To record a busy greeting:
1 From the Main menu, press [4].
2 From the Personal Options menu, press [3].
3 From the Greeting menu, press [3].
a To review your name announcement, press [1].
b To record your name announcement, press [2].
c To cancel, press [*].
Notification Schedule This section describes the notification schedule options available when [4]
is selected from the Personal Options menu.
This feature is only available if the system administrator has enabled this
option.
You can set up the following notification schedules:
■ Weekday Notification Scheduling.
■ Weekend Notification Scheduling.
■ Temporary Notification Scheduling.
Weekday Notification Scheduling
To create a weekday notification schedule:
1 From the Main menu, press [4].
2 From the Personal Options menu, press [4].
3 From the Notification Schedule menu, press [1].
4 Enter the telephone number where you would like to be notified and
press [#].
5 Enter the time you want message notification to begin on weekdays.
6 Enter [1] for AM or [2] for PM.
7 Enter the time you want message notification to end on weekdays.
8 Enter [1] for AM or [2] for PM.
9 Enter [1] to be notified of all messages or [2] to be notified of urgent
messages only.
Page 27

Using the TUI Personal Options Menu 27
Weekend Notification Scheduling
To create a weekend notification schedule:
1 From the Main menu, press [4].
2 From the Personal Options menu, press [4].
3 From the Notification Schedule menu, press [2].
4 Enter the telephone number where you would like to be notified and
follow the prompts.
5 Enter the time you want message notification to begin on weekends.
6 Enter [1] for AM or [2] for PM.
7 Enter the time you want message notification to end on weekends.
8 Enter [1] for AM or [2] for PM.
9 Enter [1] to be notified of all messages or [2] to be notified of urgent
messages only.
Temporary Notification Scheduling
To create a temporary notification schedule that overrides all other
schedules:
1 From the Main menu, press [4].
2 From the Personal Options menu, press [4].
3 From the Notification Schedule menu, press [3].
4 Enter the number of days you would like this schedule to be active.
5 Enter the telephone number where you would like to be notified.
6 Enter the time you want message notification to begin.
7 Enter [1] for AM or [2] for PM.
8 Enter the time you want message notification to end.
9 Enter [1] for AM or [2] for PM.
10 Enter [1] to be notified of all messages or [2] to be notified of urgent
messages only.
Page 28

28 CHAPTER 2: SETTING UP MESSAGING FEATURES
Message Forwarding This section describes the message forwarding options available when [5]
is selected from the Personal Options menu.
These message forwarding options are available:
■ To establish or change the message forwarding destination, press [1].
Enter the number for new messages to be forwarded to, and then
press [#].
■ To disable message forwarding, press [2].
Security Options This section describes the security options available when [6] is selected
from the Personal Options menu.
These security options are available:
■ If Access Security is disabled, press [1] to enable it.
■ If Access Security is enabled, press [2] to disable it.
This feature prompts you to record a name each time the mailbox
accessed. The name, date, and time of the previous mailbox access is
played at every access to the mailbox so you can identify if another
person has accessed your mailbox.
Multiuser Mailbox
Administration
This section describes the multiuser mailbox options available when [9] is
selected from the Personal Options menu.
Multiuser mailboxes must be enabled by the system administrator.
A multiuser mailbox allows several mailboxes to be accessed by the same
phone number. A multiuser mailbox consists of a main mailbox and from
zero to 99 sub-mailboxes.
The following options are available from the Multiuser Mailbox
Administration menu:
■ To create a new sub-mailbox, press [1] and continue with Creating
Multiuser Mailboxes on page 29.
■ To disable active sub-mailboxes, press [2].
■ Enter the number of the sub-mailbox to be disabled, and then
press [#].
■ To cancel, press [*].
Page 29

Using the TUI Personal Options Menu 29
■ To turn new message announcements on or off, press [3].
This option enables or disables new message announcements, which
announces the number of new messages in each sub-mailbox.
Creating Multiuser Mailboxes
To create a multiuser mailbox:
1 From the Main menu, press [4].
2 From the Personal Options menu, press [9].
3 From the Multiuser Mailbox menu, press [1].
4 Enter the number of the sub-mailbox to be created.
■ The number should not be larger than two digits.
■ For the next available sub-mailbox number, press [#].
■ To cancel, press [*].
The system prompts: “Sub-mailbox has been successfully created”.
5 To specify a new password for this sub-mailbox, press [1] or to accept the
default password, press [#].
Restarting and
Exiting a Session
6 Record the name announcement and then press [#], or to skip the name
announcement, press [*].
This section describes how to restart a session and exit a TUI session.
■ To restart a session from the Main menu, press [5]. This option logs
you out of your current session and prompts you to enter a mailbox
number and password to start a new session.
■ To exit a session from the Main menu, press [*]. This option logs you
out of your current session and disconnects you from the TUI. You
must press MSG to access a mailbox.
Page 30

30 CHAPTER 2: SETTING UP MESSAGING FEATURES
Using the Web Provisioning Interface
You can use the IP Messaging Web Provisioning interface to manage
messaging options through a web browser.
The following setup options are available through the web provisioning
interface:
■ Main Menu
■ Mailbox Preferences
■ Scheduled Greetings
■ Notification Filters
■ Notification Procedures
■ Notification Schedule
■ Personal Address Book
■ Distribution Lists
■ Family Mailboxes
■ Delivery Options
■ Logout
Page 31

Using the Web Provisioning Interface 31
Main Menu Log into IP Web provisioning (see “Accessing the Web Provisioning
Interface”).
The Message Information screen appears (Figure 5), which shows
information about received messages.
The Main menu is available from all screens and shows all possible menu
options.
Some menu options such as Family Mailboxes only appear if your
administrator has enabled that feature.
Figure 5 Main Menu on the Web Interface
Page 32

32 CHAPTER 2: SETTING UP MESSAGING FEATURES
Mailbox Preferences To edit mailbox settings, use the Mailbox Preferences option.
Find Me Follow Me, Message Play Order, Send Message Order, and
External E-mail are not available with your configured Traditional (Octel)
TUI. These options are not described and should not be configured.
1 Select Mailbox Preferences from the Main menu. The Mailbox
Preferences screen appears (
Figure 6 Mailbox Preferences Screen
Figure 6).
2 To change your password:
a Type a new password in the Change Password field.
b Type the new password in the Confirm Password field.
c Click Save.
3 If required, enter an operator extension number to be associated with
your mailbox.
4 Set your mailbox Auto Login feature to ON (so that you do not have to
enter your password) or to OFF (so that you must enter your password).
5 Set the Prompt for your Mailbox Number to ON or OFF.
Page 33

Using the Web Provisioning Interface 33
6 The Virtual Calling Card is a service that allows you to make outgoing
calls from your mailbox. The Time Left field display the remaining virtual
calling card minutes (enabled Maximum Time minus used minutes).This
feature is configured by your administrator.
7 Click Save to save your settings.
Scheduled Greetings To set the time or day for your greetings:
1 From the Main menu, click Scheduled Greetings. The Schedule
Greetings screen appears (
■ If there is no recorded greeting, this message appears in the Greeting
Figure 7).
Number text box: “No Greetings Recorded”. Record greetings through
the TUI.
■ You cannot schedule the default greeting because it is the first
greeting recorded for the mailbox and must act as a default setting.
■ You must set up additional greetings through the TUI before
scheduling them through Web provisioning.
Figure 7 Scheduled Greetings Screen
2 To set up a new daily greeting schedule:
a Select the start and end time or select YES from the All Day
drop-down list.
Page 34

34 CHAPTER 2: SETTING UP MESSAGING FEATURES
b Select the day of the week or Everyday from the Day Of Week
drop-down list.
c Select the Greeting from the Greeting Number drop-down list.
The default greeting does not appear on the drop-down list.
d Click Add New.
3 To schedule a greeting by date:
a Select the start and end time or select YES from the All Day
drop-down list.
b Select the Greeting from the Greeting Number drop-down list.
The default greeting does not appear on the drop-down list.
c Select the month, day, and year for the greeting to begin from the
Month, Day, and Year drop-down lists.
d You can set the Start Time and End Time for any day of the year
starting from today’s date through the next 4
e Click Add New.
years.
Notification The Notification option enables you to set the medium that the system
will use to notify users when messages are deposited into or retrieved
from their mailboxes. IP Messaging supports many notification methods,
including NBX MWI (Message Waiting Indication) Voice, E-mail,Socket
Connection (SIP Notify), Auto-Forward and Pager notification methods.
You must perform three general steps to set up a notification method:
1 Create a notification filter.
2 Create a notification procedure by assigning a filter to a notification
method.
3 Enable a notification schedule for a filter, which automatically assigns the
schedule to any method that uses the filter.
These tasks are described in the next three sections.
The three Notification options appear on the Mailbox Options menu only
if your administrator has enabled notification for your mailbox.
Page 35

Using the Web Provisioning Interface 35
Notification Filters
To create a Notification Filter:
1 From the Main menu, click Notification Filters. The Notification Filter
screen appears (
Figure 8 Notification Filter Screen
Figure 8).
In Figure 8, no filters have been created. If your administrator has
preconfigured notification filters, they will be listed on this screen.
2 Click Add New to create a Notification Filter. The Add Filters screen
appears (
Figure 9 Add Notification Filter Screen
Figure 9).
3 Enter a string in the Name field to identify the filter.
4 Click the Status drop-down list to enable (Active) or disable (Inactive) the
filter. By default, a filter is created in the Active state, but you can disable
a filter at any time.
5 Click the Message Type drop-down list and select whether this filter will
apply to all messages (the default), to messages marked normal, or to
messages marked urgent.
Page 36

36 CHAPTER 2: SETTING UP MESSAGING FEATURES
6 Enter values in the Sender, Recipient, Media, and Subject fields as
required. The entered values are applied according to the selected
Operator to restrict message notification according to the specified
values. The Operator options function as follows:
■ Field is empty (null value) and corresponding Operator is ALL — No
filtration. For example, if the Sender field is empty and Sender
Operator is ALL, messages from any sender result in user notification.
■ Field has a value and corresponding Operator is == — Messages
must include the specified field value for user notification to occur. For
example, if the Subject field value is “Status report” and the Subject
Operator is ==, only messages that include the string “Status report”
in the subject line result in user notification.
■ Field has a value and corresponding Operator is <> — Messages with
the specified field value are ignored. For example, if the Media field
value is Fax and the Media Operator is <>, all message types except
faxes result in user notification.
7 Click Save.
Notification Procedures
To create a Notification procedure:
1 From the Main menu, click Notification Procedures. The Notification
Procedure screen appears
Figure 10 Notification Procedures Screen
Figure 10).
2 Click Add New.
Click Edit to edit an existing procedure or click Delete to delete an
existing procedure. The Add Notification Procedure screen appears
Figure 11).
(
Page 37

Using the Web Provisioning Interface 37
Figure 11 Add Notification Procedures Screen
3 Enter a name for the procedure in the Procedure Name field.
4 Select Enabled from the Status drop-down list.
5 Select the Notification Filter to use in the Filter drop-down list.
6 Enter the number of times IP Messaging will attempt to send the message
notification in the Tri es text box.
7 Enter the time in seconds that IP Messaging will wait between
notification attempts in the Interval text box.
8 Enable (On) or disable (Off) in the Queue selection box.
■ If enabled and the system receives a notification outside its configured
schedule, the notification is queued until the schedule becomes active
again.
■ If disabled and the system receives a notification outside its configured
schedule, the notification is not queued and is not delivered
9 The Chain selection box allows you to select and link another notification
procedure to the one you are configuring. The linked procedure is
executed if the current procedure fails. If you do not want to link
procedures, accept the default value of None.
10 Select the notification method in the Ty pe field. The method you select
determines the remaining fields on the screen. The following examples
describe the fields you see in you select Voice (the default), E-mail,
Page 38

38 CHAPTER 2: SETTING UP MESSAGING FEATURES
Auto-Forward, Pager, Inband MWI, Blind Notify, and NBX MWI from
the drop-down list.
■ If you select Voice:
a Enter a phone number in the Phone Number field.
b Click Save.
■ If you select Email:
a Enter an e-mail address in the Email Address field.
The Template File field allows you to specify a file that contains e-mail
customization information for items such as the e-mail headers. This
feature is not supported.
b Click Save.
■ If you select Auto-Forward:
a Enter an e-mail address in the Email Address field.
b Click Save.
■ If you select Pager:
a Enter a pager number in the Pager Number field.
b Enter a pager template file name in the Pager Template field.
c Enter a pager PIN number in the Pager PIN field.
d Click Save.
■ If you select Inband MWI:
a Enter a phone number in the Phone Number field.
b Enter an On code in the On Code field.
c Enter an Off code in the Off Code field.
d Enter a prefix in the Prefix field.
e Click Save.
■ If you select Blind Notify:
a Enter a PID Name in the PID Name field.
b Enter a PID User ID in the PID User ID field.
c Click Save.
■ If you select NBX MWI:
a Enter a phone number in the NBX Extension field.
Page 39

Using the Web Provisioning Interface 39
b Select a server from the NBX Server drop-down list.
c Enter a password in the Password field.
d Click Save.
Notification Schedule
To create a Notification schedule:
1 From the Main menu, click Notification Schedule. The Notification
Schedule screen appears (
Figure 12 Notification Schedule Screen
Figure 12).
Page 40

40 CHAPTER 2: SETTING UP MESSAGING FEATURES
2 Select a Notification Filter from the drop-down list.
3 The Notification Schedule screen allows you to create one or more
schedules for a filter and then enable one of them.
You have three scheduling options:
Schedule Daily Notification — This section allows you to schedule filter
operation (message notification) for a time range and either one
particular day or every day of the week regardless of the date.
4 To schedule a notification for a particular day of the week:
a Select a start and end time or select YES from the All Day drop-down
list.
b Select the day of the week the notification will be sent from the Day
Of Week drop-down lists, or select Everyday.
c Click Save Schedule.
Schedule Notification By Date — This section allows you to schedule
filter operation (message notification) for a particular date.
5 To schedule a notification by date:
a Select a start and end time or select YES from the All Day drop-down
list.
b Select the month, day, and year the notification will be sent from the
Month, Day, and Year drop-down lists.
c Click Save Schedule.
Schedule Notification By Range — This section allows you to schedule
filter operation (message notification) between a range of dates.
6 To schedule a notification by date range:
a Select a start and end time or select YES from the All Day drop-down
list.
b Select the month, day, and year the filter will become operational
from the Start Date drop-down lists. Select the month, day, and year
the filter will cease to be operational from the End Date drop-down
lists.
c Click Save Schedule.
Page 41

Using the Web Provisioning Interface 41
You can create schedules for any existing notification schedule by
repeating steps 2 through 6. Each saved schedule is listed in the top
section (titled Select a Notification Filter to Schedule). To enable a
notification schedule, click the check box next to the schedule
description. By default, schedules are created in a disabled state.
Personal Address
Book
To access your personal address book and to add, edit, and delete entries:
1 From the Main menu, select Personal Address Book. The Personal
Address Book Main screen appears (
Figure 13 Personal Address Book
Figure 13).
2 To add a new entry to your personal address book, click Add New. The
Personal Address Book screen appears (
Figure 14).
Page 42

42 CHAPTER 2: SETTING UP MESSAGING FEATURES
Figure 14 Fields on the Personal Address Book Screen
3 Enter data in the Required Fields section.
4 Enter data in the General Information and Work Information
sections.
5 Click Save. The Personal Address Book Main screen appears (Figure 15).
Page 43

Using the Web Provisioning Interface 43
Figure 15 Personal Address Book Main Screen
6 To delete an entry, select it from the drop-down list and then click
Delete.
7 To display address book entries, click View.
8 To add more entries, click Add New.
Distribution Lists Use the Distribution Lists option to create distribution lists:
1 From the Main menu, click Distribution Lists. The Distribution Lists
Screen appears (
Figure 16 Create New List Screen
s
Figure 16).
2 To create a new distribution list:
a Type the name of the list (a number between 1 and 9999) in the New
List text box and then click Create New List. The Create New List
screen appears (
Figure 17).
Page 44

44 CHAPTER 2: SETTING UP MESSAGING FEATURES
Figure 17 Create New List Entry Screen
b Type an entry into the New Entry text box.
c Select the type of entry from the drop-down list:
■ List — Another distribution list number
■ Mailbox Entry —The mailbox number of a subscriber
■ Phone Number —The phone number of a subscriber
■ E-mail —The e-mail address of a subscriber
■ VPIM — Indicates the entry is the Voice Profile for Internet Mail
(VPIM) destination address of a subscriber. Use the format
<prefix><mailbox_number>. For example, if the VPIM destination
prefix is 888 and mailbox number is 1234, you would enter
8881234 in the New Entry text box.
VPIM is a protocol that allows subscribers to exchange messages
between different voice mail systems. By entering VPIM
destinations in a distribution list, subscribers in different locations
can be members of a group distribution list that spans multiple
sites.
The VPIM option appears only if configured by your administrator.
d Click Create New Entry. The New Entry Confirmation screen appears
Figure 18).
(
Page 45

Using the Web Provisioning Interface 45
Figure 18 New Entry Confirmation Screen
e Repeat steps b, c, and d to add more new entries.
f Click View All Lists. The Distribution Lists Edit screen appears
Figure 19).
(
Figure 19 Distribution List Edit Screen
3 To display and edit a distribution list, select it from the drop-down list and
then click View/Edit.
4 To delete a distribution list, select it and then click Delete List. The
system confirms the deletion.
Page 46

46 CHAPTER 2: SETTING UP MESSAGING FEATURES
Family Mailboxes Use the Family (or Multiuser) Mailboxes option to create sub-mailboxes
under a main mailbox that can be used by a group. For example,
members of a family can populate sub-mailboxes as branches off the
main mailbox.
The administrator must enable multi-user mailboxes in Appmon before
Family Mailboxes will appear as a menu option. See the IP Messaging
Module Operations and System Administration Guide for more
information.
1 From the Main menu, select Family Mailboxes. The Family Mailboxes
Main screen appears (
Figure 20 Family Mailboxes
Figure 20).
2 Enter a number in the field or leave it blank. If you leave it blank, IP
Messaging assigns the next available family mailbox number.
3 Click Add Mailbox.
Figure 21 shows the new family mailbox 661000_1 under
mailbox 661000.
Page 47

Using the Web Provisioning Interface 47
Figure 21 Add Family Mailbox
4 To add another family mailbox, click Add Mailbox again.
5 To reset all passwords for all mailboxes, click Reset All Passwords.
6 To reset a password for one specific mailbox, click Reset Password.
7 On the next screen, select a family mailbox and type the new password.
8 Type the new password again to confirm.
9 Click Save.
Page 48

48 CHAPTER 2: SETTING UP MESSAGING FEATURES
Delivery Options Use the Delivery Options feature to set up how you want your messages
delivered to you.
1 From the Main menu, click Delivery Options. The Auto Delivery screen
appears (
Figure 22 Auto-delivery Screen
Figure 22).
2 Type information in the text fields or select from the drop-down lists.
Maximum Retries — Specifies the maximum number of times IP
Messaging attempts to deliver a voice or fax message before declaring
the delivery unsuccessful.
Page 49

Using the Web Provisioning Interface 49
Retry Interval (Seconds) — Specifies the time in seconds between
delivery attempts.
Voice Auto Delivery — Specifies that voice messages are automatically
delivered to the voice mailbox number entered in the Voice Number
field. Voice messages will also be sent to your mailbox.
Facsimile is supported only on VCX systems.
Fax Auto Delivery — Specifies that fax messages are automatically
delivered to the fax number entered in the Fax Number field. Fax
®
messages will also be sent to your m
ailbox.
Email is supported only on the 3Com Native TUI.
Email Auto Delivery — Specifies that e-mail messages are automatically
delivered to the e-mail address entered in the Email Address field. E-mail
messages will also be sent to your mailbox.
CNG Tone — Enabling this option turns on the automatic detection of a
fax send tone (Comfort Noise Generator), therefore allowing receipt of
the fax.
Line Turnaround — Enabling this option turns on detection of a fax
receive tone, enabling sending of faxes that have not already been sent to
be printed.
After Delivery — Specifies the action taken on auto-delivered messages.
The options are:
Leave New — A voice message will be delivered to the voice number
listed on the Delivery Options screen and placed in the new messages
folder.
Save — A voice message will be delivered to the voice number listed
on the Delivery Options screen and placed in the saved message
folder.
Delete — A voice message will be delivered to the voice number
listed on the Delivery Options screen and placed in the deleted
messages folder.
Digits Allowed — Specifies the maximum number of digits allowed for
either the voice or fax Auto Delivery number for any outbound dial.
Voice Number — Specifies the number to which voice messages are
sent.
Fax Number — Specifies the number to which fax messages are sent.
Page 50

50 CHAPTER 2: SETTING UP MESSAGING FEATURES
Email is supported on the 3Com Native TUI only.
Email Address — Specifies the e-mail address to which e-mail messages
are sent.
Line Group — Designates a specific line or lines to which messages are
sent.
Urgent Voice Msg Only — Enables the auto delivery feature only for
the messages marked urgent.
Facsimile is supported only on VCX systems.
3 Enter text in the Cover Sheet field, if required.
4 Enter text in the Forward Insertion Text field, if required.
5 Click Save.
Logout To log out of the system, from the Main menu, click Logout. The Login
screen appears with this message:
You Have Been Logged Out.
Page 51

3
USING MESSAGING FEATURES
This chapter covers these topics:
■ Listening to Messages
■ Sending Messages
■ Locating Messages
The Octel Telephone User Interface (TUI) does not support External E-mail,
Message Play Order, Send Message Order, or Find Me Follow Me.
Features that are supported only on VCX systems are noted throughout
this User Guide.
Listening to Messages
This section outlines the options available for listening to your messages.
To use the listen to message options, you need to access your mailbox
and press [1].
The following options are available once a message has been played
back:
■ To listen to unheard voice messages, press [1].
■ To listen to all voice messages including heard voice messages and
skipped voice messages, press [2].
Facsimile is supported only on VCX systems.
■ To listen to fax messages, press [3]. See “Fax Options” for more
information.
■ To listen to deleted messages, press [9].
Continue with “End of Messages Options”.
Page 52

52 CHAPTER 3: USING MESSAGING FEATURES
Fax Options (Fax options are only available if this option was chosen when listening to
messages in the previous section. These fax options are available:
Facsimile is supported only on VCX systems.
■ To listen to all new or un-reviewed fax messages, press [1].
■ To listen to all archived fax messages in the mailbox, press [2].
■ To listen to all fax messages in the mailbox which were not printed
before, press [4].
End of Messages
Options
These end of message options are available:
■ To replay the message, press [4].
■ To play message envelope information, press [5]. Envelope
information includes the message sender name, location, date, and
time the message was sent.
■ If a caller leaves a voice message, you can forward that message to
one or more mailboxes. The destination mailbox (or mailboxes) can be
at your site or, in a multi-site environment, mailboxes at another
location in your company.
■ To forward the message to another destination and add a recorded
comment, press [6].
■ To forward the message to another destination without adding a
recorded comment, press [66].
■ To delete the message that was reviewed previously, press [7].
■ If a caller leaves a voice message, you can reply to that caller by either
sending a voice message or returning the call.
■ To reply by sending a voice message to the caller’s mailbox, the
caller must be an internal caller on the same site or, in a multi-site
environment, an internal caller at another company site.
To reply to a voice message by sending a voice message to the
caller’s mailbox, press [8].
This option prompts you to record a voice message and then press
[#] after recording. Press [3] to confirm this recording or press [*]
to cancel and re-record. After confirmation, press [#] to send this
recorded message as reply.
■ To reply by placing a return call, the called party can be at the same
site, at a different site within the company, or an external caller.
Page 53

Listening to Messages 53
IP Messaging stores the calling party's number when a message is
left in a subscriber mailbox, and uses this number to return a call.
Note that your calling system may be configured to prevent calls to
external parties. Ask your administrator for the calling rules at your
site.
To reply to a voice message by placing a return call, press [88].
Follow the prompts to place the call.
■ To save the message that was reviewed previously to the subscriber’s
mailbox, press [9].
Print Options There are three options to select the printer location:
■ To select a primary destination, press [1].
■ To select an alternate destination, press [2].
■ To s el e ct th e c ur rent location, press [3].
Send Copy To send a copy of a message with an introduction:
■ Record the introduction message at the prompt and press [#] when
you have finished recording the introduction message.
■ Enter the destination number to which this message is being sent.
■ Press [#] to send this message, or press 0 for delivery options.
Alternate Destination (To choose an alternate fax destination:
Facsimile is supported only on VCX systems.
■ Enter the fax destination number and wait for the confirmation
prompt.
■ If correct, press [#].
■ If incorrect, press [*] and re-enter the fax destination number again on
prompt.
Delivery Options These options are available:
■ To mark this message as Private, press [1].
Messages marked Private cannot be forwarded to another destination
by the receiver.
■ To mark this message as Urgent, press [2].
Page 54

54 CHAPTER 3: USING MESSAGING FEATURES
Messages marked Urgent will be moved to the top of the message
received list on the receiver’s mailbox.
■ To receive a confirmation report for the delivery of this message, press
[3].
This will prompt you to press [1] to receive the message delivered
report by voice mail or to press [2] to receive the message delivered
report by fax. Selecting the message delivery report by voice or fax will
provide more options.
■ For Future Delivery that allows the message to be sent at another
selected date and time, press [4].
■ To select the System options, where the message will be sent to a
group of mailboxes defined by the System Administrator in the Send
User Group option, press [5].
■ To send the copy of the message with the introduction after recording
the introduction, press [#].
Playback Key
Functions
Playback keys are available while the message is still playing.
These options are available:
■ To rewind the message playback, press [1].
■ To pause the message playback, press [2]. To continue message
playback, press [2] again.
■ To forward the message playback, press [3].
■ To reduce the message playback speed, press [4].
■ To play the envelope contents of the playback message, press [5].
The envelope contents include the message sender’s name, location,
date, and the time the message was received.
■ For help, press [0].
■ To cancel, press [*].
■ To accept the current operation or present the next step, press [#].
Page 55

Sending Messages 55
Sending Messages To use the send message options, you need to access your mailbox and
press [2].
Send Messages To send a message:
1 Record a message.
For new messages and replies to messages, the recording is the body of
the message. For forwarded messages, the recording is an introduction to
the forwarded message.
2 The system prompts you to record the message and press [#] after
recording.
■ To replay the recorded message, press [1] and continue with “Replay
Message”.
■ To enter the destination for the message, continue with “Destination
Options”.
Replay Message Replaying the recorded message provides more options:
■ To s el e ct th e Finish function, which indicates acceptance of the
recorded message, press [1].
■ To s el e ct th e Append function, which enables the user to add to the
recorded message, press [5].
■ To s el e ct th e Erase function, which deletes the recorded message and
prompts the user to re-record, press [*].
Once the message is correctly recorded, enter the destination of the
message. Continue with “
Destination Options” for more information.
Destination Options To select a destination, enter the destination number and then press [#].
You can also press [#] first to spell the name of the person to whom the
message should be sent. The directory search by name process is used to
identify the mailbox number to whom the message is sent.
The administrator can configure calling restrictions for some, one, or all
the phones at a site. These restrictions may limit the outbound calls a
phone can make and apply to calls made within the IP Messaging voice
mail menu system. Ask your administrator if any calling restrictions have
been implemented on your phone system.
Page 56

56 CHAPTER 3: USING MESSAGING FEATURES
These options are available:
■ To send the recorded message, press [#].
Enter the next destination to send this recorded message and then
press [#].
■ To return to the Main menu options, press [*].
■ For more message delivery options, press [0]. See “Delivery Options”
for more information.
Delivery Options These delivery options are available:
■ To mark this message as Private, press [1]. Messages marked private
cannot be forwarded to another destination by the receiver.
■ To mark this message as Urgent, press [2]. Messages marked urgent
are moved to the top of the message received list on the receiver’s
mailbox.
■ To receive a confirmation report for the delivery of this message, press
[3]. Continue with
“Confirmation Options” to complete sending your
message.
■ For Future Delivery, press [4]. This feature allows the message to be
sent at another selected date and time.
■ To select the System options, where the message is sent to a group of
mailboxes defined by the System Administrator in the Send User
Group option, press [5].
■ To send the copy of the message with the introduction after recording
the introduction, press [#].
Confirmation Options The confirmation options are available when you request a confirmation
report from the delivery options. These are the confirmation options
available:
■ To receive the confirmation report by voice mail, press [1].
Facsimile is supported only on VCX systems.
■ To receive the confirmation report by fax, press [2].
■ To Confirm Receipt, which confirms on the delivery report that the
message has been listened to by the receiver, press [1].
Page 57

Locating Messages 57
■ To Notify of non-receipt, which indicates on the delivery report that
the message has been received, but not listened to by the receiver,
press [2].
Locating Messages To use the locate message options, you need to access your mailbox and
press [3].
Locate Messages These locate message options are available:
■ To locate a message in the mailbox that was sent, press [1]. This
directs you to the message sent options. For more information,
continue with
■ To locate a message in the mailbox that was received, press [2]. This
directs you to the message received options. For more information,
continue with the
“Message Sent Options”.
“Message Received Options”.
Message Sent
Options
Message Received
Options
The message sent option is available when you locate a message that was
sent. First, you need to enter the destination number and then press [#].
You can also press [#] first to spell the name of the person to whom the
message was sent. The directory searches by name to identify the mailbox
number.
These message sent options are available:
■ To replay the located message, press [4].
■ To p la y t h e envelope information of the located message, press [5].
Envelope information contains the message sender name, location,
date, and time the message was received or sent.
■ To skip to the next located message, press [#].
The message received option is available when you locate a message that
was received. You can locate the following received messages:
■ To locate messages from any internal caller, press [1].
■ To locate messages from any external caller, press [2].
■ To locate messages from a specific external caller, press [3].
Once you have selected the type of received message, follow the prompts
to locate the message by destination number and then press [#]. You can
also press [#] first to spell the name of the person to whom the message
Page 58

58 CHAPTER 3: USING MESSAGING FEATURES
was received. The directory searches by name to identify the mailbox
number.
These message received options are available:
■ To replay a reviewed message, press [4].
■ To play the envelope information of a reviewed message, press [5].
Envelope information includes the message sender name, location,
date, and time the message was sent.
■ To forward a reviewed message to one or more mailboxes with an
introduction, press [6]. The destination mailbox (or mailboxes) can be
at your site or, in a multi-site environment, mailboxes at another
location in your company. For instructions on how to create an
introduction message, continue with the
an Introduction Message”.
■ To forward a reviewed message to another destination without an
introduction, press [66]. The process for selecting the destination is
the same as described in the
Introduction Message”, with the exception of the option for recording
an introduction.
“Forwarding a Message with
“Forwarding a Message with an
■ To delete a reviewed message, press [7].
■ To reply to a reviewed message by sending a voicemail message, press
[8].
This option prompts you to record a voice message. After recording,
press [#]. To confirm this recording, press [3]. To cancel and re-record,
press [*]. After confirmation, press [#] to send this recorded message
as reply.
To reply by sending a voice message to the caller’s mailbox, the caller
must be an internal caller on the same site or, in a multi-site
environment, an internal caller at another company site.
■ To reply to a reviewed message by dialing the message sender’s
telephone number, press [88].
To reply by placing a return call, the called party can be at the same
site, at a different site within the company, or an external caller.
IP Messaging stores the calling party's number when a message is left
in a subscriber mailbox, and uses this number to return a call. Note
that your calling system may be configured to prevent calls to external
parties. Ask your administrator for the calling rules at your site.
Page 59

Locating Messages 59
■ To save a reviewed message to the your mailbox, press [9].
Facsimile is supported only on VCX systems.
■ To print the fax message, press [2].
This option will be offered only if the message being reviewed is a fax
message.
Forwarding a
Message with an
Introduction Message
This section describes how to forward a message with an introduction
message and is used for when [6] is selected.
The process for selecting the destination and recording an introduction
message to be appended to the original message is as follows:
1 Record the introduction message on prompt.
2 Press [#] when finished recording the introduction message.
3 Enter the destination number to which this message is being sent.
4 Press [#] to send this message or press [0] for more message delivery
options as follows:
■ Press [1] to mark this message as Private. Messages marked Private
cannot be forwarded to another destination by the receiver.
■ Press [2] to mark this message as Urgent. Messages marked Urgent
are moved to the top of the message received list on the receiver’s
mailbox.
Facsimile is supported only on VCX systems.
■ Press [3] to receive a confirmation report for the delivery of this
message. This prompts the user to press [1] to receive the message
delivered report by voice mail or press [2] to receive the message
delivered report by fax.
Selecting the message delivery report by voice or fax provides more
options.
■ Press [1] to Confirm Receipt, which confirms in the delivery report
that the message has been listened to by the receiver.
■ Press [2] to Notify of non-receipt, which indicates in the delivery
report that the message has been received but not listened to by
the receiver.
Page 60

60 CHAPTER 3: USING MESSAGING FEATURES
■ Press [4] for Future Delivery. This feature allows the message to be
sent at another selected date and time.
■ Press [#] for delivery within 24 hours or enter the date in MMDDYY
format.
■ Enter the time in HHMM format.
■ If the date and time entered is correct, confirm by pressing [#].
Otherwise, press [*] to cancel and re-enter the date and time for
future delivery.
■ Press [5] to select the System options, where the message is sent to a
group of mailboxes defined by the System Administrator in the Send
User Group option.
Refer to the IP Messaging Module Operations and System Administration
Guide for more details on the Send User Group feature. This option is
available to the subscriber only if the System Privileges option is enabled
by the System Administrator for this mailbox.
■ Press [#] to send a copy of the message with the introduction after
recording the introduction.
Page 61

INDEX
A
accessing a mailbox 13
accessing the IP Messaging web interface 14
accessing the IP Messaging web provisioning
interface 30
administration
multiuser mailbox 28
administrative
options 20
B
busy greeting
recording 25
C
confirmation options 56
creating
group lists 21
multiuser mailboxes 29
notification filters 35
notification procedures 36
notification schedules 39
D
delivery options 53, 56
delivery options (web interface) 48
destination options 55
distribution lists
creating (web interface) 43
E
el 24
end of messages options 52
extended absence greeting
recording 25
F
family mailboxes (web interface) 46
fax messages
listening to 52
fax options 23
forwarding
messages 28
forwarding a message
with an introduction 59
G
general options 21
greetings 24
scheduling (web interface) 33
group lists
creating 21
I
IP Messaging
accessing the web provisioning interface 30
L
listening to messages 51
locating messages 57
logout (web interface) 50
M
mailbox
accessing 13
setting preferences 32
message
received options 57
Page 62

62 INDEX
sent options 57
message forwarding 28
messages
alternate destination 53
delivery options 53
forwarding with an introduction 59
listening to 51
locating 57
replaying 55
sending 55
sending a copy 53
multiuser mailboxes
administration 28
creating 29
multiuser mailboxes (web interface) 46
N
notification
filters, creating 35
procedure, creating 36
schedule 26, 39
web interface 34
notification options 20
O
options
administrative 20
fax 23
general 21
notification 20
printing 53
security 28
restarting and exiting a session 29
S
scheduled greetings (web interface) 33
scheduling
personal greetings 24
temporary notification 27
weekday notification 26
weekend notification 27
security options 28
sending messages 55
setup options
TUI 19
T
temporary notification scheduling 27
TUI
setup menu 19
W
web interface
accessing 14
web provisioning interface
accessing 30
weekday notification scheduling 26
weekend notification scheduling 27
P
password
replacing a forgotten password 15
Personal Address Book (PAB) 41
personal greetings
recording 24
scheduling 24
playback key functions 54
print options 53
R
recording
busy greetings 25
extended absence greetings 25
personal greetings 24
replay message 55
 Loading...