

Page 1

3Com® IP Contact Center
Desktop Installation Instructions
System Release 7
http://www.3com.com
Part Number: 900-0359-01 Rev AA
Published May 2006
Page 2

3Com Corporation, 350 Campus Drive, Marlborough, MA 01752-3064
Copyright © 2006, 3Com Corporation. All Rights Reserved. No part of this documentation may be reproduced in any form or by any
means or used to make any derivative work (such as translation, transformation, or adaptation) without written permission from 3Com
Corporation.
3Com Corporation reserves the right to revise this documentation and to make changes in content from time to time without obligation
on the part of 3Com Corporation to provide notification of such revision or change.
3Com Corporation provides this documentation without warranty, term, or condition of any kind, either implied or expressed,
including, but not limited to, the implied warranties, terms, or conditions of merchantability, satisfactory quality, and fitness for a
particular purpose. 3Com may make improvements or changes in the product(s) and/or the program(s) described in this
documentation at any time.
If there is any software on removable media described in this documentation, it is furnished under a license agreement included with
the product as a separate document, in the hardcopy documentation, or on the removable media in a directory file named
LICENSE.TXT or !LICENSE.TXT. If you are unable to locate a copy, plea se contact 3Com and a copy will be provided to you.
UNITED STATES GOVERNMENT LEGEND
If you are a United States government agency, then this documentation and the software described herein are provided to you
subject to the following:
All technical data and computer software are commercial in nature and developed solely at private expense. Software is delivered as
“Commercial Computer Software” as defined in DFARS 252.227-7014 (June 1995) or as a “commercial item” as defined in
FAR 2.101(a) and as such is provided with only such rights as are provided in 3Com’s standard commercial license for the Software.
Technical data is provided with limited rights only as provided in DFAR 252.227-7015 (Nov 1995) or FAR 52.227-14 (June 1987),
whichever is applicable. You agree not to remove or deface any portion of any legend provided on any licensed program or
documentation contained in, or delivered to you in conjunction with, this guide.
Unless otherwise indicated, 3Com registered trademarks are registered in the United States and may or may not be registered in
other countries.
3Com, the 3Com logo, and VCX are registered trademarks of 3Com Corporation.
All other company and product names may be trademarks of the respective companies with which they are associated.
Page 3

Contents
Overview .............................................................................................................4
Getting Started ...................................................................................................4
Installing the Software for 3Com IPCC Desktop ......................................10
Removing 3Com IPCC Desktop Software Components
from the Client Computer .............................................................................. 19
Prerequisites.................................................................................................. 4
Configuration Tasks.....................................................................................5
Logging on to 3Com IPCC Desktop ........................................................10
Installing Java 2 Runtime Environment 1.4.2_09 ................................... 11
Installing Java Web Start 1.2 ..................................................................... 11
Installing 3Com IPCC Desktop ................................................................ 12
Setting Up Outlook Express...................................................................... 12
Installing Microsoft Virtual Machine ...................................................... 13
Configuring Internet Explorer for Microsoft VM ..................................14
Configuring Windows Firewall Exceptions ...........................................15
Verifying Installation, and Logging Off
the 3Com IPCC Desktop............................................................................ 17
Deleting the 3Com Directory.................................................................... 19
Removing Java 2 Runtime Environment 1.4.2_09.................................. 20
Removing Java Web Start.......................................................................... 20
Removing the 3Com IPCC Desktop Icon
from Windows Desktop ............................................................................20
Removing Microsoft Virtual Machine..................................................... 21
3Com IP Contact Center Desktop Installation Instructions 3
Page 4

Overview
This guide provides instructions for configuring a client computer
that will be used to access the 3Com IP Contact Center (IPCC)
Desktop. It also provides instructions for installing the 3Com IPCC
Desktop software components and describes how to remove the
software that is installed as part of the 3Com IPCC Desktop
installation.
Important: These instructions are written for a client computer
installed with Windows XP and Service Pack 2 and with Microsoft
Internet Explorer 6.0. These instructions apply whether or not the
Windows Firewall is enabled.
If your client computers have a different authorized configuration,
contact your 3Com IPCC administrator for specific instructions.
Perform the tasks described in the following sections on each of the
client computers that will be used to access the 3Com IPCC Desktop:
“ ,” on page Getting Started 4
“ ,” on page Installing the Software for 3Com IPCC Desktop 10
You can find the instructions for removing the 3Com IPCC Desktop
and its associated software from a client computer in the following
section:
the Client Computer
Getting Started
Before the 3Com IPCC Desktop is accessed from a client computer for
the first time, make sure the configuration tasks described in this
section are performed on the user’s client system.
Prerequisites
Before starting the installation, locate the following information:
“
Removing 3Com IPCC Desktop Software Components from
,” on page
19.
The access URL for the 3Com IPCC Desktop.
If you do not know the access URL, contact the 3Com Support
Center for assistance.
4 3Com IP Contact Center Desktop Installation Instructions
Page 5
Getting Started
User logon information.
You will need an authorized logon name and password to access
the 3Com IPCC Desktop.
Configuration Tasks
To ensure optimal performance of the 3Com IPCC Desktop, configure
the client computer as described in the following sections before you
begin the installation:
“ ” on page Turning Off System Sounds 5
“ ” on page Configuring the Network Interface Card 6
“ ” on page Configuring Desktop Performance Settings 6
“ ” on page Setting the Screen Resolution 8
“ ” on page Configuring Microsoft Internet Explorer 9
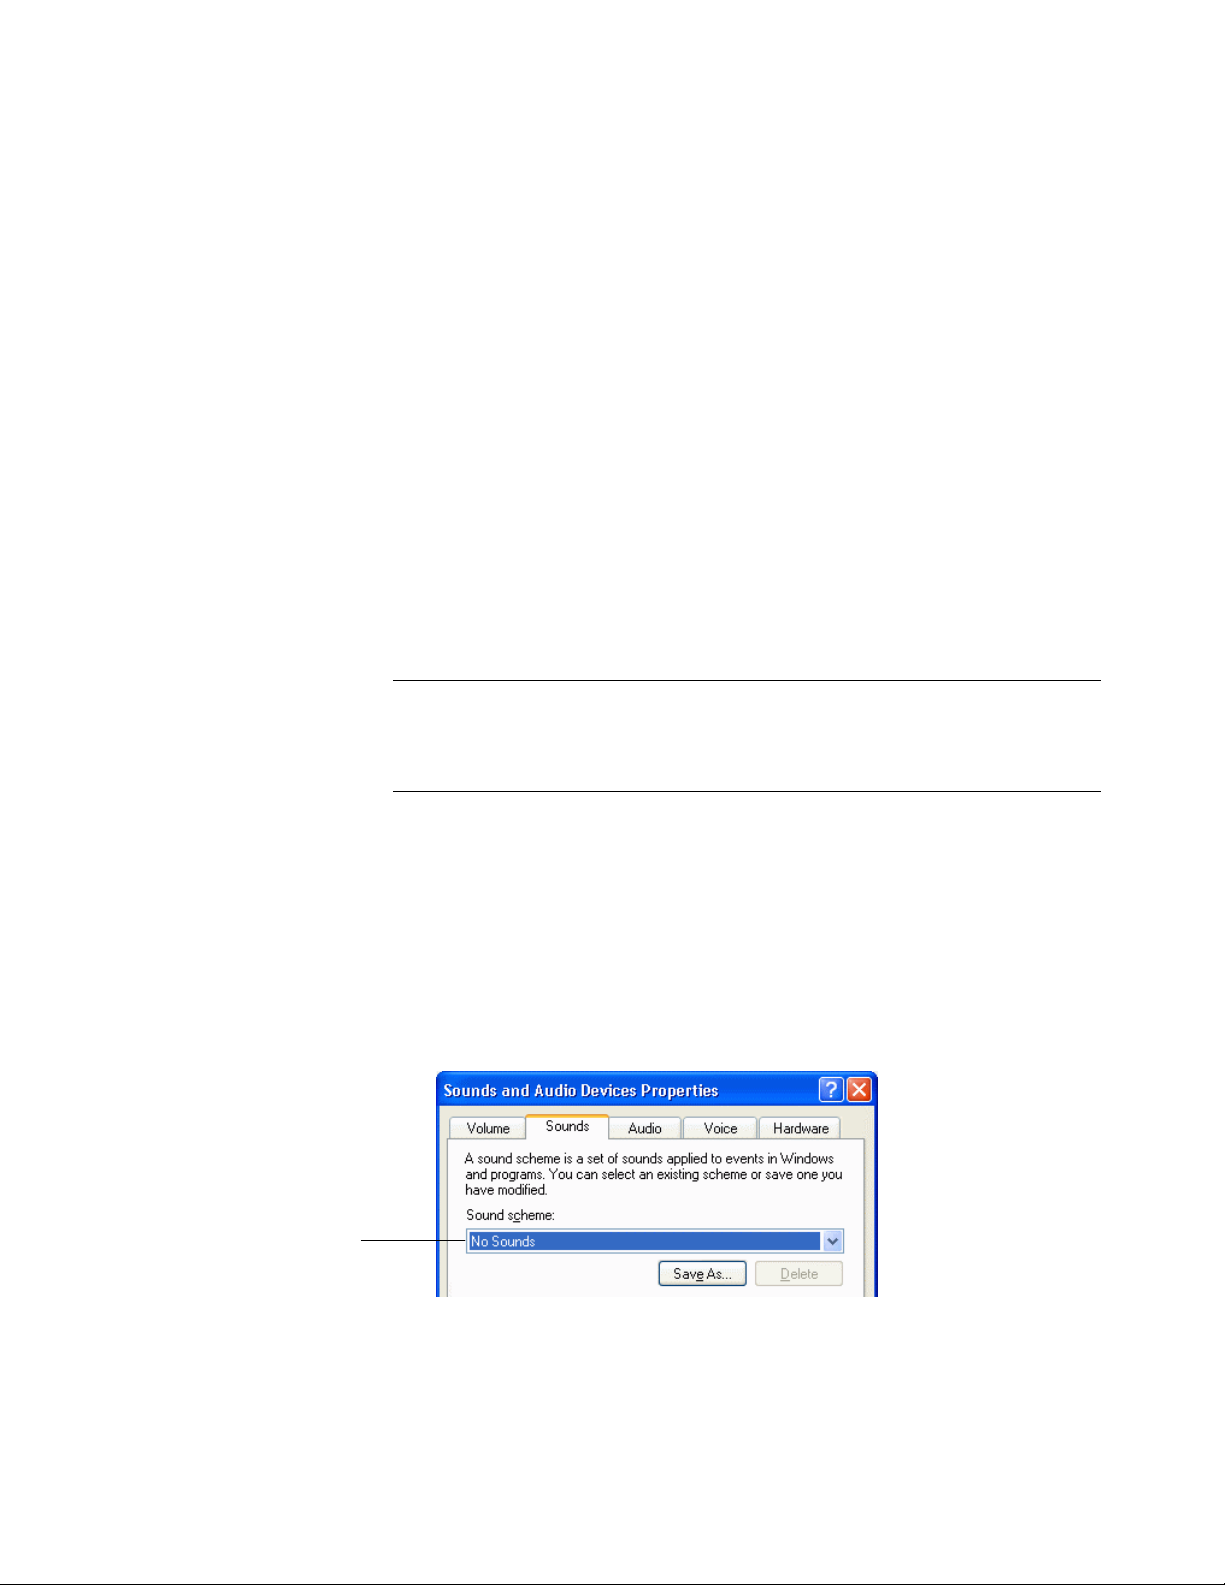
Select No Sounds from
the Sound scheme dropdown list.
Note: If the Windows firewall is enabled on the client computer, you
must configure exceptions to the firewall at the end of the installation.
For more information, see “ ”
on page
15.
Configuring Windows Firewall Exceptions
Turning Off System Sounds
Turn off system sounds as follows:
1. From the Control Panel, open Sounds and Audio Devices.
2. Click the Sounds tab.
3. From the Sound scheme drop-down list, select No Sounds.
4. If you are asked if you want to save the previous scheme, click
Yes or No, depending on your need.
3Com IP Contact Center Desktop Installation Instructions 5
Page 6

5. On the Sounds tab, click OK to save the changes and exit.
6. Continue with the next section, “.”Configuring the Network
Interface Card
Configuring the Network Interface Card
To configure the Network Interface Card, make sure the desktop NIC
settings match the settings of the switch. For example, both the
desktop NIC and switch settings can be set to autonegotiate. with the
link speed set to at least 100MB/Fulluplex.
Note 1: You can configure the network interface card (NIC) settings
from the Microsoft Windows Control Panel or with NIC management
software—such as Intel PROSet—if it is installed on the client
computer.
Note 2: For information about changing the configuration settings
using NIC management software, refer to the manufacturer’s
documentation.
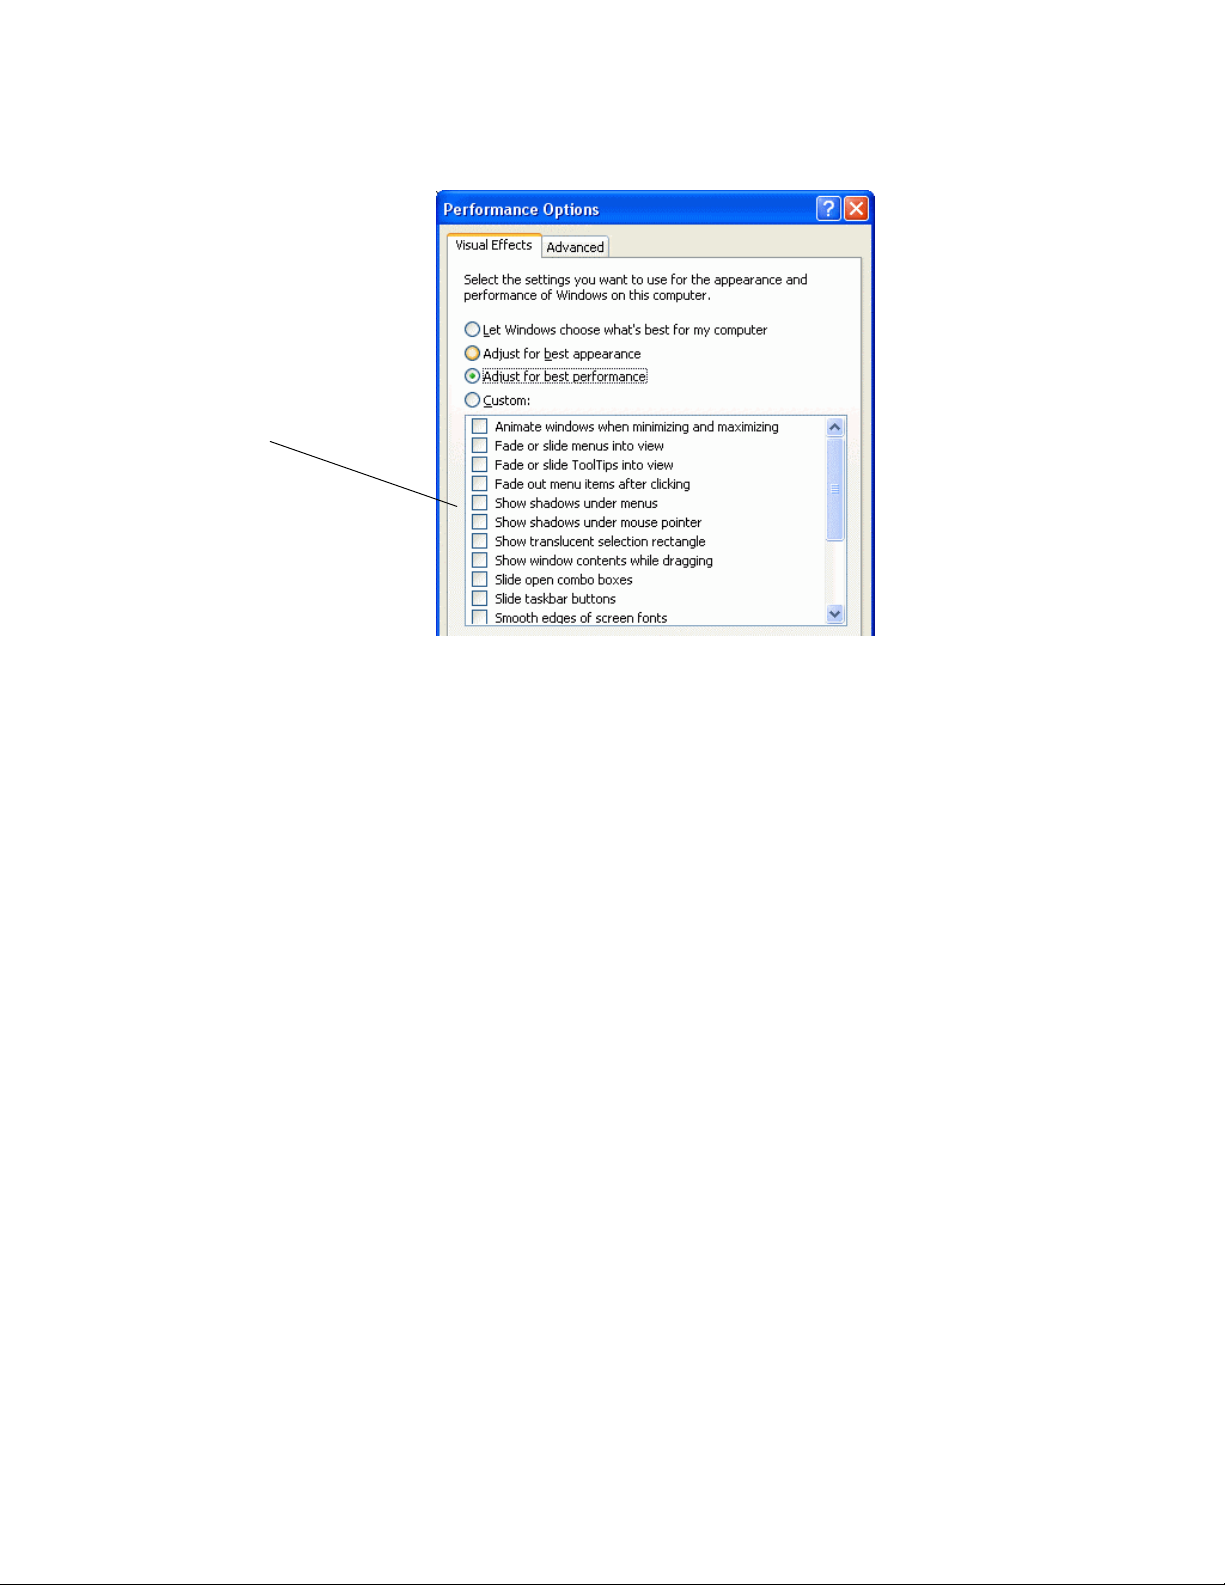
Configuring Desktop Performance Settings
Configure the desktop performance settings as follows:
1. From the Control Panel, open System.
2. Click the Advanced tab.
3. In the Performance area, click Settings.
4. In the Performance Options dialog box, click the Visual Effects
tab.
6 3Com IP Contact Center Desktop Installation Instructions
Page 7
Getting Started
W
5. Select the Adjust for best performance option.
hen you select
best performance
boxes in the Custom area are
cleared.
Adjust for
, the check
6. Click Apply.
The monitor might appear dimmed for a few moments. When the
screen has adjusted its settings, the screen components are
enabled again. You might see a difference in the interface—the
change is cosmetic and does not affect the functionality.
7. Click OK to close the Performance Options dialog box.
8. Click OK to close the System Properties dialog box and exit.
9. Continue with the next section,
“ .” Setting the Screen Resolution
3Com IP Contact Center Desktop Installation Instructions 7
Page 8

Setting the Screen Resolution
Set the screen resolution as follows:
1. From the Control Panel, open Display.
2. Click the Settings tab.
3. From the Color quality drop-down list, select High color (24 bit).
4. In the Screen resolution box, drag the slider until the resolution is
set to 1280 x 1024 pixels, and then click Apply.
Note: If this is a flat panel monitor, set it to its native resolution.
The Screen resolution area
displays the screen resolution
for the monitor whose video
adapter appears in the
Display field.
The monitor screen turns black for a few moments.
Note: After the screen resolution changes, you have 15 seconds to
confirm the change or to return it to its original configuration.
5. Click Yes to confirm the change.
6. Click OK to exit.
7. Close the Control Panel.
8. Continue with then next section,
“.”Configuring Microsoft Internet
Explorer
8 3Com IP Contact Center Desktop Installation Instructions
Page 9

Getting Started
Configuring Microsoft Internet Explorer
Follow the instructions in this section to make the following
configuration changes to Microsoft Internet Explorer:
Enable cookies
Enable JavaScript
Disable the “Reuse windows for launching shortcuts” option
Note: You configure additional areas of Internet Explorer later in this
document in the “ ”
section on page
Configure Internet Explorer as follows:
1. Open an Internet Explorer browser window.
2. From the Tools menu, select Internet Options and click the
Privacy tab.
Configuring Internet Explorer for Microsoft VM
14.
3. To enable cookies, move the slider until the Medium privacy
selection is displayed.
4. Click Apply to save the change.
5. Click the Security tab
6. Make sure the Internet icon is selected, and click Custom Level.
7. In the Security Settings dialog box, locate the Scripting folder.
8. To enable JavaScript, select Enable for all three Scripting settings:
Active scripting
Allow paste operations via script
Scripting of Java applets
9. Click OK to save the changes and close the Security Settings
dialog box.
10. Click the Advanced tab.
11. In the Browsing folder, clear the Reuse windows for launching
shortcuts check box.
12. Click OK to save the changes and exit.
13. Close the browser window.
14. Continue with the next section,
“.”Installing the Software for 3Com
IPCC Desktop
3Com IP Contact Center Desktop Installation Instructions 9
Page 10

Installing the Software for 3Com IPCC Desktop
When the 3Com IPCC Desktop is accessed for the first time, you are
prompted to install several types of software, as described in the
following sections:
“ ” on page Logging on to 3Com IPCC Desktop 10
“ ” on page Installing Java 2 Runtime Environment 11
“ ” on page Installing Java Web Start 1.2 11
“ ” on page Installing 3Com IPCC Desktop 12
“ ” on page Setting Up Outlook Express 12
“ ” on page Installing Microsoft Virtual Machine 13
“ ” on page Configuring Internet Explorer for Microsoft VM 14
“ ” on page Configuring Windows Firewall Exceptions 15
“
Verifying Installation, and Logging Off the 3Com IPCC
Desktop
” on page
17
Logging on to 3Com IPCC Desktop
This section describes how to launch the 3Com IPCC Desktop for first
time users.
Using the access URL (provided by your support personnel) in
Internet Explorer, bring up the 3Com IPCC Desktop logon window.
Log on using the authorized logon name and password log on.
The Missing Software Components page is displayed. Depending on
the software already installed on this computer, you will need to
install one or both of the following applications:
Java 2 Runtime Environment 1.4.2_09
Java Web Start 1.2
10 3Com IP Contact Center Desktop Installation Instructions
Page 11

Installing the Software for 3Com IPCC Desktop
Installing Java 2 Runtime Environment 1.4.2_09
Install the Java 2 Runtime Environment (JRE) as follows:
1. Read the information on the Missing Software Components page,
and then click Continue.
2. On the Install Software Components page, scroll to the bottom
and click Install Java Software.
3. Follow the prompts on the screen to perform a typical installation
of the Java 2 Runtime Environment 1.4.2_09.
Important: If you are asked to restart the computer, click No. You
will be instructed to restart the computer later in the installation
process.
4. When the installation is complete, close the browser window, and
continue with the next section,
“ .”Installing Java Web Start 1.2
Installing Java Web Start 1.2
Install Java Web Start (JWS) 1.2 as follows:
1. Log on to the system following the instructions in “
3Com IPCC Desktop
2. On the Missing Software Components page, click Continue.
3. On the Install Software Components page, scroll to the bottom
and click Install Java Software.
4. Follow the prompts on the screen to install Java Web Start 1.2.
5. When the installation is complete, at the bottom of the Install
Software Component page, click Log On.
After the system uses Java Web Start to prepare the Desktop
Installer, a security warning is displayed. You are asked if you
want to install and run the 3Com IPCC Desktop Installer.
6. Continue with the next section,
” on page
Logging on to
10.
“ .”Installing 3Com IPCC Desktop
3Com IP Contact Center Desktop Installation Instructions 11
Page 12

Installing 3Com IPCC Desktop
Install the 3Com IPCC Desktop as follows:
1. In the Security Warning dialog box, click Start.
The 3Com IPCC Desktop is initialized and installed, a shortcut
icon for the 3Com IPCC Desktop Logon
desktop, and you are told to restart your system.
2. Click OK.
You are asked if you want to close the window.
3. Click Yes.
4. Restart the computer.
is added to the
5. Continue with the next section,
Setting Up Outlook Express
Set up Outlook Express as follows:
1. Log on to the system following the instructions in “
3Com IPCC Desktop
2. When the Internet Connection Wizard appears, click Cancel so
you do not create an account.
You are asked if you are sure you want to exit the wizard.
3. Click Yes.
4. On the Windows taskbar at the bottom of the screen, right-click
the MUA Assistant icon
displayed.
Outlook Express restarts automatically and asks if you want to
view a list of folders.
” on page
, and select Exit from the menu that is
“ .”Setting Up Outlook Express
Logging on to
10.
5. Click Yes.
You are prompted for a password.
6. Enter your logon password and click OK.
7. In the Show/Hide IMAP Folders dialog box, click OK.
8. Minimize the Outlook Express window.
12 3Com IP Contact Center Desktop Installation Instructions
Page 13

Installing the Software for 3Com IPCC Desktop
9. Do one of the following:
If 3Com IPCC Web Collaboration is part of your 3Com IPCC
“
Center system, continue with the next section,
Microsoft Virtual Machine
If 3Com IPCC Web Collaboration is not part of your 3Com
.”
Installing
IPCC Center system, the 3Com IPCC Desktop installation is
“
complete. Go to
3Com IPCC Desktop
Verifying Installation, and Logging Off the
” on page
17.
Installing Microsoft Virtual Machine
If 3Com IPCC Web Collaboration is part of you 3Com IPCC Center
system, complete the instructions in this section to install Microsoft
Virtual Machine (VM).
Important: The prompts that are displayed during this installation
timeout quickly. If necessary, return to the first step of this section to
restart the installation and display a closed prompt. If the Web
collaboration icon disappears, restart the 3Com IPCC Desktop.
1. On the shutter bar, click the Web collaboration icon.
Click the Web collaboration
icon on the shutter bar.
The 3Com IPCC Web Collaboration window opens and a
message is displayed in the information bar at the top. The
message is similar to the message shown in the following
illustration:
Note: If you are also asked whether you noticed the information
bar, click OK.
3Com IP Contact Center Desktop Installation Instructions 13
Page 14

2. Click the message that is displayed in the information bar.
A menu is displayed.
3. Select Install ActiveX Control.
A security warning is displayed, and you are asked if you want to
install Microsoft(R) VM.
4. Click Install.
You are asked if you would like to install Microsoft VM.
5. Click Yes.
The license agreement is displayed.
6. Click Yes.
Microsoft VM is installed. When the installation is complete, a
message is displayed.
7. Click OK.
You are asked if you want to restart the computer.
8. Click Yes.
The computer is restarted.
9. Continue with the next section,
for Microsoft VM
“.”Configuring Internet Explorer
Configuring Internet Explorer for Microsoft VM
Complete the Microsoft VM installation by configuring Internet
Explorer as follows:
1. Open an Internet Explorer browser window.
2. From the Tools menu, select Internet Options and click the
Security tab.
3. Make sure the Internet icon is selected and click Custom Level.
4. In the Security Settings dialog box, locate the Java VM folder.
5. In the Java Permissions subfolder, select High safety.
6. Click OK to return to the Internet Options dialog box.
14 3Com IP Contact Center Desktop Installation Instructions
Page 15

Installing the Software for 3Com IPCC Desktop
7. Click the Advanced tab.
8. In the Microsoft VM folder, select the following check boxes:
Java logging enabled
JIT compiler for virtual machine enabled (requires restart)
9. Click OK to exit.
10. Close the browser window.
11. Do one of the following:
If you needed to enable the JIT compiler for virtual machine
enabled (requires restart) option in step 8, restart the
computer. When the computer is restarted, go to step 12.
If the JIT compiler for virtual machine enabled (requires
restart) option was already enabled, go to step 12.
12. The 3Com IPCC Desktop installation is complete. Continue with
the next section,
“ .”Configuring Windows Firewall Exceptions
Configuring Windows Firewall Exceptions
If the Windows firewall is enabled on the client computer, you must
configure exceptions to the firewall for Java, IPCC Soft Phone, MUA
Assistant, and Outlook Express as follows:
1. From the Control Panel, open Windows Firewall.
The Windows Firewall dialog box is displayed.
2. On the General tab, do the following:
Confirm that the firewall is enabled (the On (recommended)
option is selected).
Clear the check box for Don’t allow exceptions if it is
selected.
3. Select the Exceptions tab.
The following applications must be included in the Programs and
Services list of firewall exceptions:
java (or java.exe)
IPCC SoftPhone Application (or softphone.exe)
MUAAssistant (or MUAAssistant.exe)
3Com IP Contact Center Desktop Installation Instructions 15
Page 16

Outlook Express
Do one of the following:
If all of the applications listed above are included in the
Programs and Services list, go to step
If any of the applications listed above are not included in the
5.
Programs and Services list, go to the next step.
4. Locate and add each of the programs you are missing (from the
list given in step
3) as follows:
a. Click Add Program.
b. In the Add a Program dialog box, click Browse to locate the
directory for the application you need to add.
To add the Java exception, go to the following directory
and select java.exe:
C:\Program Files\Java\j2re1.4.2_09\bin
To add the Outlook Express exception, go to the
following directory and select msimn.exe:
C:\Program Files\Outlook Express
Note: If Outlook Express is already listed in the Add a
Program dialog box, you can select and add it to the
exception list from there.
To add the IPCC Softphone exception, go to the following
directory and select softphone.exe:
C:\3Com
To add the MUA Assistant exception, go to the following
directory and select MUAAssistant.exe:
C:\3Com
c. After selecting the designated file, click Open, and then click
OK to return to the Exceptions tab.
d. Repeat steps a–c until you have added all the exceptions, then
go to step
5.
5. On the Exceptions tab, make sure the check boxes are selected for
the four applications listed in step 3.
16 3Com IP Contact Center Desktop Installation Instructions
Page 17

Installing the Software for 3Com IPCC Desktop
6. Click Add Port.
Note: Changes to the Add a Port dialog box open a port through
the Windows Firewall.
7. In the Name field, type Desktop Manager Client Server.
8. In the Port number field, type 12200.
9. Select the TCP option button.
10. Click OK to save your changes and return to the Exceptions tab.
11. Click OK to exit.
12. Continue with the next section,
Logging Off the 3Com IPCC Desktop
“.”Verifying Installation, and
Verifying Installation, and Logging Off the 3Com IPCC Desktop
When the installation is complete, make sure that media-type icons
are displayed in the Personal Status panel of the 3Com IPCC Desktop
for each media type to be handled by the user you logged in as. Media
types include voice, e-mail, Web, voice message, and callback.
Note: For descriptions of the different media types and their icons,
click the Help button on the 3Com IPCC Desktop toolbar or refer to
the 3Com IP Contact Center Desktop User’s Guide.
1. Log on to the system following the instructions in “
3Com IPCC Desktop
The 3Com IPCC Desktop is displayed.
Outlook Express asks if you want to view a list of folders.
2. Click Yes.
” on page
10.
Logging on to
You are prompted for a password.
3. Enter your logon password and click OK.
4. In the Show/Hide IMAP Folders dialog box, click OK.
5. In the Personal Status panel, make sure the media-type icons for
the media to be handled by the logged-on user are visible and
enabled.
Note: An icon is disabled when it is covered with a red X. When
an icon is disabled, it means that, although the user is configured
3Com IP Contact Center Desktop Installation Instructions 17
Page 18

to handle the media type, there is a problem with the
configuration, installation, or server.
Make sure the
correct media-type
icons for the user
are displayed and
enabled.
Note the following:
If the logged-on user is enabled for Web collaboration but the
Web icon
Microsoft Virtual Machine
is disabled, repeat step 1 from “,”Installing
and follow the prompts that are
displayed. If the icon is still not enabled, contact the 3Com
Support Center for assistance.
If a media-type icon for a media type required by the logged-
on user is not displayed or enabled, contact the 3Com
Support Center for assistance.
6. Log off the 3Com IPCC Desktop by clicking
.
You are asked if you are sure you want to log off the desktop.
7. Click Yes.
The 3Com IPCC desktop closes.
18 3Com IP Contact Center Desktop Installation Instructions
Page 19

Removing 3Com IPCC Desktop Software Components from the Client Computer
Removing 3Com IPCC Desktop Software Components from the Client Computer
If you need to remove the 3Com IPCC Desktop software from a client
computer, complete the tasks described in the following sections:
“ ” on page Deleting the 3Com Directory 19
“ 9” on page Removing Java 2 Runtime Environment 1.4.2_0 20
“ ” on page Removing Java Web Start 20
“
Removing the 3Com IPCC Desktop Icon from Windows
Desktop
“ ” on page Removing Microsoft Virtual Machine 21
Caution: If the client computer is running other applications that use Java 2
Runtime Environment 1.4.2_09 or the Java Web Start application, do not
remove the Java applications when you uninstall the 3Com IPCC Desktop.
” on page
20
Deleting the 3Com Directory
Delete the 3Com directory as follows:
1. Use Windows Explorer to navigate to the directory in which the
3Com IPCC Desktop software is installed. Typically, this is
C:\3Com.
2. Select and delete the entire directory.
3. Continue with the next section, “
Environment 1.4.2_09
Removing Java 2 Runtime
.”
3Com IP Contact Center Desktop Installation Instructions 19
Page 20

Removing Java 2 Runtime Environment 1.4.2_09
Do one of the following:
If Java 2 Runtime Environment 1.4.2_09 is not being used by
another application on the client computer, use Add/Remove
Programs to remove Java 2 Runtime Environment 1.4.2_09. Then
continue with the next section,
If Java 2 Runtime Environment 1.4.2_09 is being used by another
application, do not remove it. Continue with the next section,
“ .”Removing Java Web Start
“ .”Removing Java Web Start
Removing Java Web Start
Do one of the following:
If Java Web Start is not being used by another application on the
client computer, use Add/Remove Programs to remove it. Then
continue with the next section,
Desktop Icon from Windows Desktop
“.”Removing the 3Com IPCC
If Java Web Start 1.2 is being used by another application on the
client computer, instead of removing the application, empty the
cache as follows:
1. Navigate to the directory that contains the Java Web Start
cache files. If these files are saved in the default location,
navigate to the following directory, substituting your
Microsoft Windows logon name for <username>:
C:\Documents and Settings\<username>\.javaws\cache
2. Delete only the contents of the cache directory.
3. Continue with the next section,
Desktop Icon from Windows Desktop
“.”Removing the 3Com IPCC
Removing the 3Com IPCC Desktop Icon from Windows Desktop
To remove the 3Com IPCC Desktop icon from the Windows desktop,
do the following:
1. Right-click the 3Com IPCC Desktop icon
.
2. Select Delete from the menu that is displayed.
20 3Com IP Contact Center Desktop Installation Instructions
Page 21

Removing 3Com IPCC Desktop Software Components from the Client Computer
Removing Microsoft Virtual Machine
If the Microsoft Virtual Machine is not used by other applications on
the client computer, remove it with the JVM Removal Tool. For
information about this tool, see Microsoft Knowledge Base article
826878.
3Com IP Contact Center Desktop Installation Instructions 21
 Loading...