

Page 1
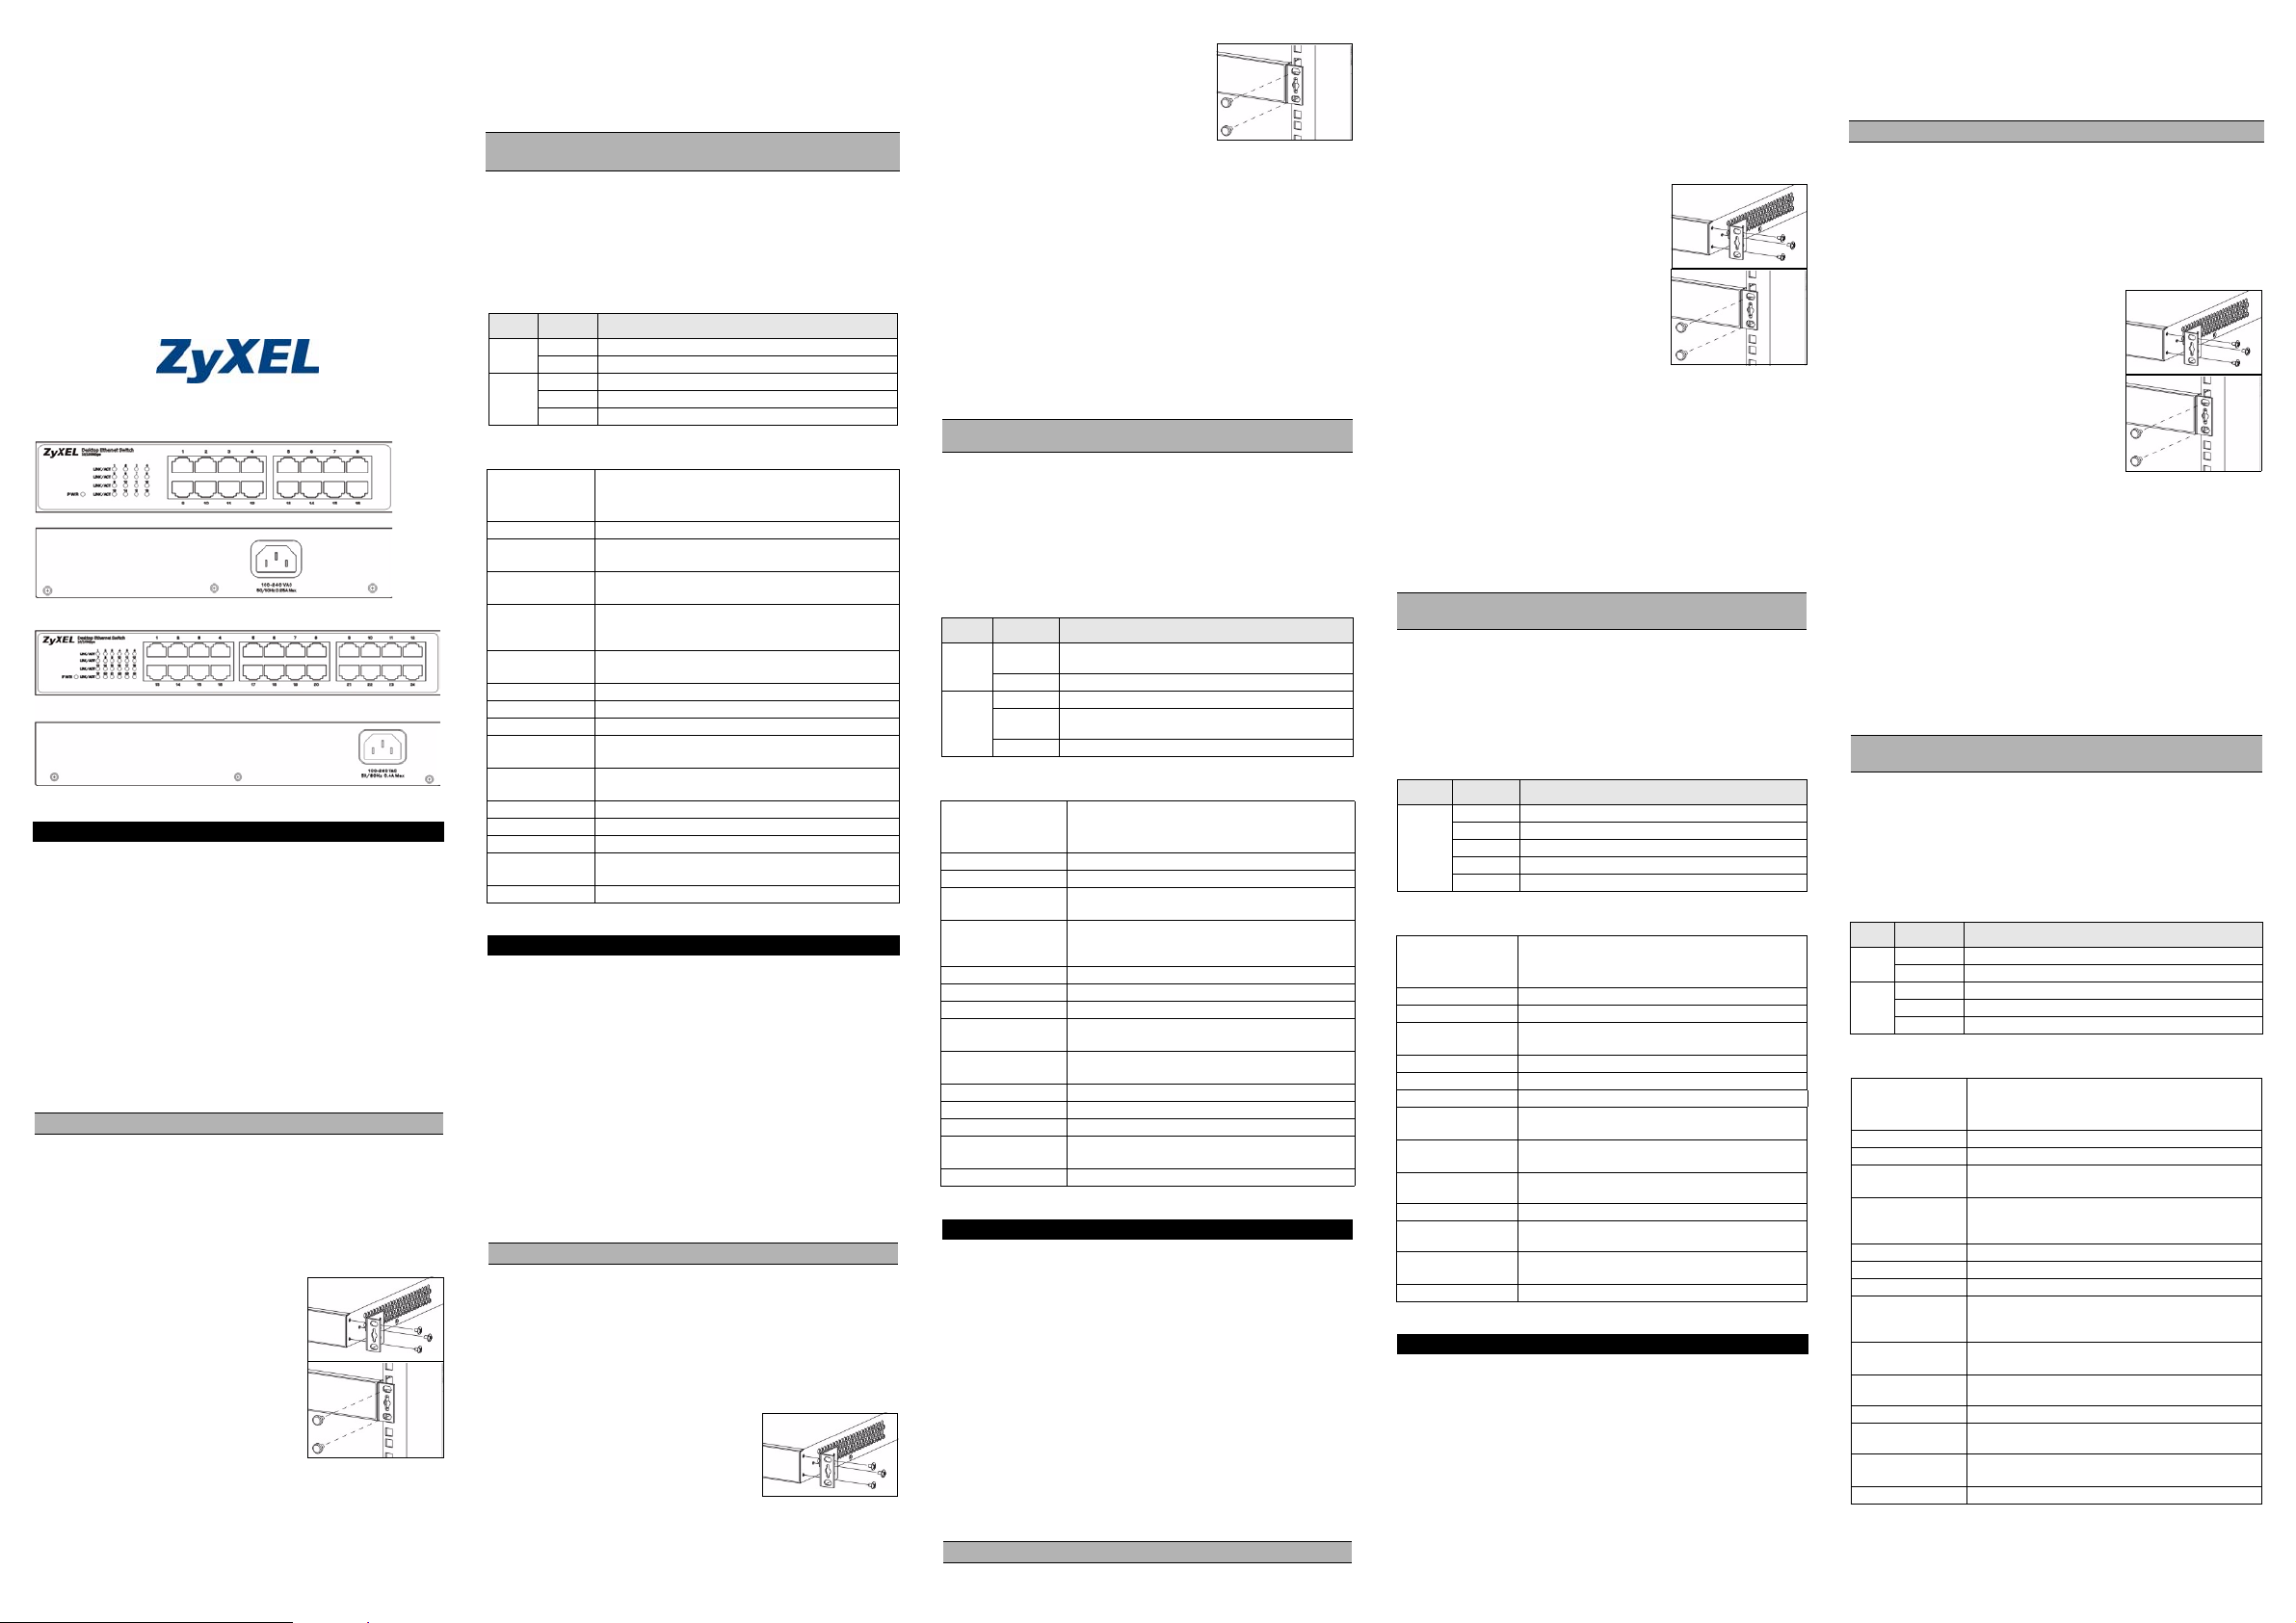
ES-116P/124P
Ethernet Switch
User’s Guide
Version 1.00
6/2005
ENGLISH
Introduction
The switch is a multi-port switch that can be used to build highperformance switched networks. The switch is a store-and-forward
device that offers low latency for high-speed networking.
Standalone Workgroup Application
The switch can be used as a standalone switch to which computers,
servers and a printer are directly connected to form a small
workgroup.
Hardware Installation
The switch is suitable for an office environment where it can be rack
mounted on standard 19-inch EIA racks (with the included rackmounting kit) or as a standalone.
Do NOT block the ventilation holes.
Desktop Installation
1 Make sure the switch is clean and dry.
2 Set the switch on a smooth and sturdy space strong enough to
support the weight of the switch and the connected cables. Make
sure there is a power outlet nearby.
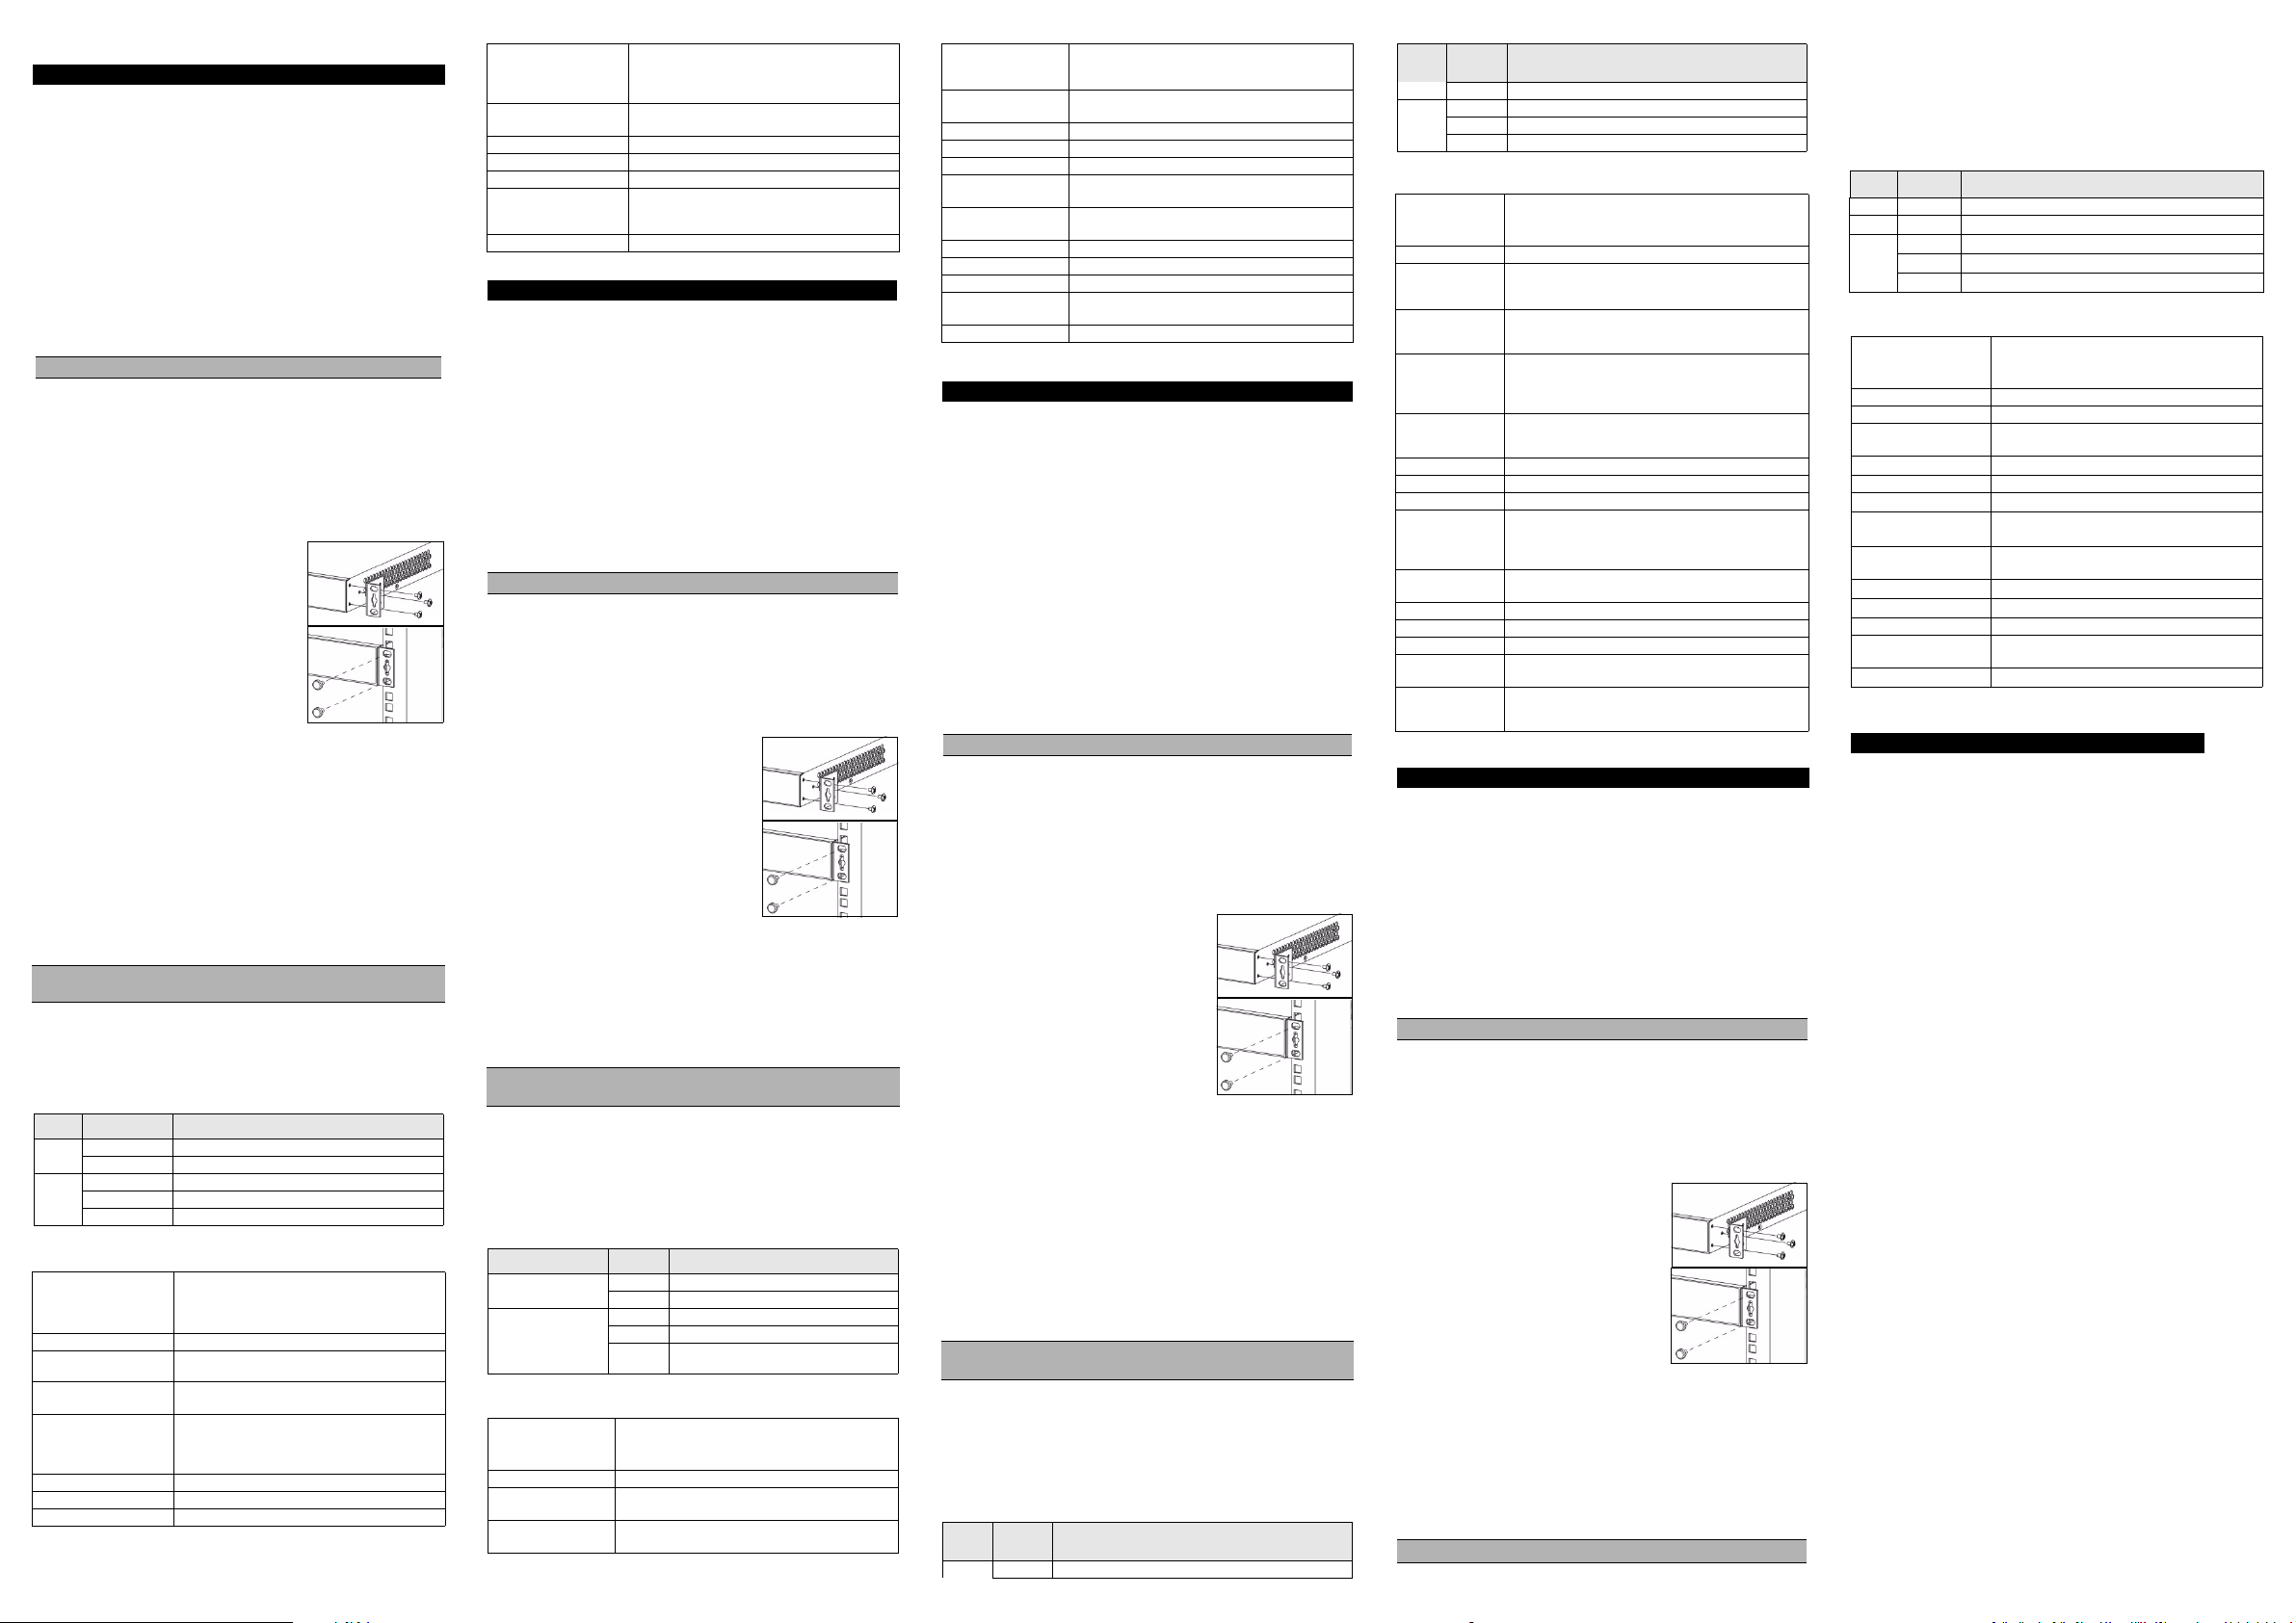
Rack Mount Installation
1 Align one bracket with the holes on one
side of the switch and secure it with the
bracket screws. Similarly, attach the
other brackets.
2 After attaching both mounting brackets,
position the switch in the rack by lining
up the holes in the brackets with the
appropriate holes on the rack. Secure
the switch to the rack with the rackmounting screws.
RJ-45 Auto-negotiating Ports
The 10Base-T/100Base-TX RJ-45 ports are auto-negotiating and
auto-crossover.
An auto-negotiating port can detect and adjust to the optimum
Ethernet speed (10/100Mpbs) and duplex mode (full duplex or half
duplex) of the connected device.
An auto-crossover (auto-MDI/MDI-X) port automatically works with a
straight-through or crossover Ethernet cable.
Make sure the cable length between connections does not exceed
100 meters (328 feet).
Power
Use the supplied power cable to connect your switch to a power
source.
LEDs
The following table describes the LEDs.
LED STATUS DESCRIPTION
PWR On The switch is on and receiving power.
Off The switch is not receiving power.
LINK/
On The port is connected to an Ethernet network.
ACT
Blinking The port is receiving or transmitting data.
Off The port is not connected to an Ethernet network.
Product Specifications
Standard IEEE802.3 10BASE-T Ethernet
Protocol CSMA/CD
Technology Store-and-Forward switching architecture
Non-blocking Wire
Spee d
Transfer Rate Ethernet: 10Mbps (half duplex), 20Mbps (full duplex)
Data Forwarding
Rate
Connector RJ-45; Auto-MDIX on all ports
MAC Address 8K MAC address table
Memory Buffer 1.25 Mb
Network Cable 10BASE-T: 100Ω 2-pair UTP/STP Cat. 3, 4, 5
LED Per port: LINK/ACT
Power Supply Internal; 3.3V 4A (100-240V/ 50-60Hz)
Temperature Operating: 0º C~ 50º C (32º F ~ 122º F)
Humidity Operating: 10% ~ 90% (Non-condensing)
Dimension
L x W x H (mm)
EMI & Safety FCC Class A, CE, C-Tick
IEEE802.3u 100BASE-TX Fast Ethernet
IEEE802.3x Flow Control
Supports broadcast storm control
ES-116P: 3.2 Gb
ES-124P: 4.8 Gb
Fast Ethernet: 100 Mbps (half duplex), 200Mbps (full
duplex)
14880 pps for 10Base-T (Ethernet)
148800 pps for 100Base-T (Fast Ethernet)
100BASE-TX: 100Ω 2-pair UTP/STP Cat. 5
Per unit: PWR
ES-116P: 215 x 133 x 42
ES-124P: 267 x 152.5 x 42
DEUTSCH
Einführung
Der ES-116P/124P ist ein Multi – Port Switch, für den Aufbau eines
Netzwerkes mit hoher Performance. Er ist ein Speicher- und
Übermittlungsgerät mit niedriger Verzögerungszeit für High – Speed
Netzwerke. Dieser Switch wurde für das Kleinbüro, bzw. Heimbüro
entwickelt.
Standalone Workgroup Anwendung
Dieser Switch kann als allein stehendes Gerät direkt mit mehreren
Computern, Servern und Printservern zu einer kleinen Arbeitsgruppe
verbunden werden.
Installation der Hardware
Dieser Switch eignet sich für die Büroumgebung, wo er z.B. auf
einem Schreibtisch platziert werden kann.
Verdecken Sie nicht die Ventilationsöffnungen
Dieser Switch eignet sich für die Büroumgebung, wo er z.B. auf
einem Schreibtisch platziert werden kann.
1 Der Standort des Switch muss sauber und trocken sein.
2 Stellen Sie den Switch auf eine ebene und stabile Fläche, die
das Gewicht des Switch und der Verbindungskabel tragen kann.
Sorgen Sie dafür, dass ein Stromanschluss in der Nähe ist.
Rackmontage
1 Richten Sie eine Montagehalterung an
den Schraublöchern des Switch aus
und schrauben Sie sie mit den
dazugehörigen Schrauben fest.
Befestigen Sie die andere Halterung
auf die gleiche Weise.
2 Wenn Sie beide Montagehalterungen
befestigt haben, richten Sie den Switch
im so im Rack aus, dass die
entsprechenden Schraublöcher
¸bereinander stehen. Befestigen Sie
den Switch mit den
Befestigungsschrauben am Rack.
Rückwand Anschlüsse
Die RJ-45 Ports und die Stromanschlussbuchse befinden sich auf der
Rückwand des Switchs.
RJ-45 Auto-Negotiating Ports
Der ES-116P enthält sechzehn 10Base-T/100Base-TX RJ-45 Ports.
Der ES-124P enthält vierundzwanzig 10Base-T/100Base-TX RJ-45
Ports.
Diese Ports unterstützen Auto-MDI/MDX, welches eine Verwendung
von Cross-Over Kabeln überflüssig macht.
Die Auto-Sensing Funktion erkennt und justiert die optimale
Geschwindigkeit (10/100 Mbps) und den Duplex Modus des
angeschlossenen Netzwerkgerätes automatisch. Dies erleichtert die
Installation des Switches erheblich.
Vergewissern Sie sich, dass die Kabellängen zwischen den
Verbindungen nicht mehr als 100 Meter betragen.
Stromanschluss
Verwenden Sie den mitgelieferten Stromadapter / Stromkabel, um
den Switch mit dem Stromnetz zu verbinden. Zusätzliche
Informationen finden Sie auf dem Etikett des Stromadapters.
Frontplatten-LEDs
Die LEDs an der Frontplatte zeigen den Echtzeit-Staus des Switchs
an.
LED STATUS DESCRIPTION
PWR An Der Switch ist am Strom angeschlossen und
Aus Der Switch ist nicht am Strom angeschlossen.
LINK/
An Der Port ist mit dem Ethernet-Netzwerk verbunden.
ACT
Aus Der Port ist nicht mit dem Ethernet-Netzwerk
Blinkend Der Port empfängt/sendet Daten.
eingeschaltet
verbunden.
Produktspezifikationen
Standard IEEE 802.3 10BASE-T Ethernet,
Protokoll CSMA/CD
Technologie Store-and-Forward switching-Architektur
Transferrate 14.880 pps bei 10 Mbps
Übertragungsrate Ethernet: 10 Mbps (Halbduplex), 20 Mbps (Vollduplex)
Anschluss RJ-45; Auto-MDIX an allen Ports
MAC-Adresse 1K Mac-Adresstabelle
Speicherpuffer 1.25 Mb
Netzwerkkabel
(bis 100 m)
LED Pro Port: LINK/ACT
Stromversorgung 3.3V 4A (100-240V/ 50-60Hz)
Betriebstemperatur 0º C~ 50º C (32º F ~ 122º F)
Betriebsluftfeuchtigkeit 10 % ~ 90 % (nicht kondensierend)
Abmessungen
L x B x H (mm)
EMI & Sicherheit FCC Class A, CE, C-Tick
IEEE 802.3u 100BASE-TX Fast Ethernet
IEEE802.3x Flow Control und Back-pressure
148.800 pps bei 100 Mbps
Fast Ethernet: 100 Mbps (Halbduplex), 200 Mbps
(Vollduplex)
10BASE-T: 100 Ω 2-adrig UTP / STP Cat. 3, 4, 5
100BASE-TX: 100 Ω 2-adrig UTP / STP Cat. 5
Pro Gerät: PWR
ES-116P: 215 x 133 x 42
ES-124P: 267 x 152.5 x 42
ESPAÑOL
Familiarización con el Switch
El switch es un conmutador multi puerto que se puede usar para
construir redes conmutadas de alto rendimiento. El switch es un
dispositivo store-and-forward que ofrece una baja latencia para redes
de alta velocidad. El switch está diseñado para empresas SOHO
(Small Office Home Office).
Aplicaciones para un solo grupo de trabajo
El switch puede usarse para un solo grupo de trabajo, al cual se
conectan directamente estaciones de trabajo, servidores y servidores
de impresión.
Instalación del Hardware
El switch es apropiado para un entorno de oficina donde puede
montarse sobre estantes EIA de 19 pulgadas (con el kit para montaje
en estante incluido) o de forma independiente.
No obstaculice los agujeros de ventilación.
Instalación de sobremesa
1 Asegúrese de que el switch está limpio y seco.
2 Coloque el switch en un espacio liso, nivelado y firme, lo
suficientemente fuerto como para aguantar el peso del switch y
los cables que conecte. Asegúrese de que tiene una toma de
corriente no muy lejos.
Instalaciûn para el montaje en estante
1 Alinee un soporte con los agujeros de
un lado del switch y fìjejo con los
tornillos del soporte. Igualmente, fije el
otro soporte.
2 Tras fijar ambos soportes de montaje,
coloque el switch en el estante
alineando los agujeros de los soportes
con los agujeros del estante. Fije el
switch al estante con los tornillos para
montaje en estante.
Conexiones del panel trasero
Los puertos 10Base-T/100Base-TX RJ-45 son de negociaciûn y
cruce automóticos.
Autonegociación en puertos RJ-45
El switch dispone de ocho puertos RJ-45 10Base-T/100Base-TX.
Estos puertos soportan tanto autonegociación como auto-crossover.
Un puerto con autonegociación puede detectar y ajustarse a la
velocidad Ethernet (10/100Mbps) y al modo de transferencia (full
dúplex o half dúplex) del dispositivo conectado. Un puerto con
soporte de auto-crossover (auto-MDI/MDI-X) va a funcionar
correctamente tanto con un cable Ethernet recto como cruzado.
Asegúrese de que la longitud de sus cables no supera los 100
metros entre sus dos extremos.
Conexión de alimentación
Use el adaptador de corriente sumnistrado para conectar su switch a
la toma de corriente.
LEDs de Panel Frontal
Los LEDs del panel frontal indican el estado del switch en tiempo
real.
LED ESTADO DESCRIPCIÓN
PWR On El switch está encendido y recibiendo alimentación.
Off El switch no recibe alimentación.
LINK/
On El puerto está conectado a la red Ethernet.
ACT
Off El puerto no está conectado a la red Ethernet.
Parpadea El puerto está recibiendo o enviando datos.
Especificaciones de producto
Estándar IEEE 802.3 10BASE-T Ethernet,
Protocolo CSMA/CD
Tecnología Arquitectura Store-and-Forward
Velocidad de
transferencia
Conector RJ-45 ; Auto-MDIX en todos los puertos
Dirección MAC Tabla de direcciones Mac de 1K
Búfer de memoria 1.25 Mb
Cable de red (Hasta
100m o 328ft)
LED Por puerto: LINK/ACT
Fuente de
alimentación
Temperatura de funcionamiento: 0º C~ 50º C (32º F ~ 122º F)
Humedad (Sin
condensación)
Dimensiones
L x A x H (mm)
EMI y Seguridad FCC Class A, CE, C-Tick
IEEE 802.3u 100BASE-TX Fast Ethernet
IEEE 802.3x Control de flujo y presión posterior
14,880 pps para 10Mbps
148,800 pps para 100Mbps
10BASE-T: 100Ω 2 pares UTP/STP. 3, 4, 5
100BASE-TX: 100Ω 2 pares UTP/STP. 5
Por unidad: PWR
3.3V 4A (100-240V/ 50-60Hz)
de funcionamiento: 10% ~ 90%
ES-116P: 215 x 133 x 42
ES-124P: 267 x 152.5 x 42
FRANÇAIS
Introduction
Ce Switch multi port est utilisé pour augmenter les performances du
réseau. Le switch a un dispositif d’enregistrement des transferts qui
permet des temps de réponses faibles pour les réseaux à grandes
vitesses.
Application pour groupe de travail autonome
Le Switch est utilisé pour connecter des stations de travail, des
serveurs, et des serveurs d’impression entre eux pour former un
groupe de travail.
Installation
Le commutateur convient á un environnement de bureau o il peut ítre
montè en rack, sur des racks EIA 19 pouces standard (avec le kit de
montage en rack fourni) ou de façon autonome.
NE PAS OBSTRUER LES GRILLES DE VENTILATION
Le switch est approprié pour un environnement de bureau, il peut
être posé sur un bureau ou une étagère.
1 Installez le switch sur un endroit propre et sec..
2 Placez le switch sur un endroit suffisamment solide pour
supporter le poids du Switch et des câbles connectés. Assurezvous qu’il y ait une prise électrique à proximité.
Installation avec montage en rack
1 Alignez un support avec les trous sur
un cùtè du commutateur et fixez-le
avec les vis du support. De míme, fixez
les autres supports.
2 Aprës avoir fixè les supports de
montage, mettez en place le
commutateur dans le rack en alignant
les trous des supports avec les trous
appropriès sur le rack. Fixez le
commutateur sur le rack avec les vis de
montage de rack.
Connexion du panneau arrière
Les ports RJ-45 et le connecteur “Power” se trouvent sur la face
arrière du switch.
Ports RJ-45 à négociation automatique
Votre switch est équipé de huit ports RJ-45 10Base-T/100Base-TX.
Ces ports sont à négociation et croisement automatiques.
Un port à négociation automatique peut détecter et ajuster sa vitesse
à la vitesse Ethernet optimale (10/100Mbps) et au mode duplex (full
duplex ou half duplex) de l'appareil connecté.
Un port auto-crossover ou à croisement automatique (auto MDI/MDIX) fonctionne automatiquement avec un câble Ehternet droit ou un
câble croisé.
ASSUREZ VOUS QUE LA LONGUEUR DES CABLES N’EXCEDE
PAS 100 METRES
Connexion de l'alimentation
Utilisez le transformateur fourni pour relier votre switch au réseau
électrique.
Voyants DEL du panneau avant
Les voyants DEL sur le panneau avant indiquent l'état en temps réel
du commutateur.
LED ETAT DESCRIPTION
PWR On Le switch est démarré et correctement alimenté
Off Le switch est éteint ou n’est pas alimenté
LINK/
On Le port est connecté au réseau Ethernet
ACT
Off Le port n’est pas connecté au réseau Ethernet
Clignotant Le port reçoit ou transmet des données
Spécifications du produit
Norme IEEE 802.3 10BASE-T Ethernet,
Protocole CSMA/CD
Technologie Architecture de commutation stockage et retransmission
Taux de transfert 14,880 pps pour 10Mbps
Vitesse de transfert Ethernet : 10Mbps (half duplex), 20Mbps (full duplex)
Connecteur RJ-45 ; Auto-MDIX sur tous les ports
Adresse MAC Table d'adresses 1K Mac
Tampon mémoire 1.25 Mb
Câble réseau
(Jusqu'à 100m ou
328 pieds)
Voyant DEL Par port: LINK/ACT
Alimentation
électrique
Température De fonctionnement: 0º C~ 50º C (32º F ~ 122º F)
Humidité (Sans
condensation)
Dimensions (mm)
Long x Larg x Haut
EMI & Sécurité FCC Class A, CE, C-Tick
IEEE 802.3u 100BASE-TX Fast Ethernet
IEEE 802.3x Flow Control and Back-pressure
148,800 pps pour 100Mbps
Fast Ethernet : 100 Mbps (half duplex), 200Mbps (full
duplex)
10BASE-T : 100Ω 2-paires UTP/STP Cat. 3, 4, 5
100BASE-TX : 100Ω 2-paires UTP/STP Cat. 5
Par unité: PWR
3.3V 4A (100-240V/ 50-60Hz)
En fonctionnement: 10% ~ 90%
ES-116P: 215 x 133 x 42
ES-124P: 267 x 152.5 x 42
Page 2
ITALIANO
Introduzione
ES-108P sono switch a 8 porte sviluppati per realizzare reti ad alte
performance. Si tratta di periferiche store and forward che offrono
uno scambio dati molto veloce con un tempo di ritardo minimo.
Applicazioni per Workgroup
Lo Switch può essere usato come concentratore fra computer, server
e print server connessi fra loro e facenti quindi parte di una piccola
rete.
Hardware Installazione
Lo switch ë adatto a un ambiente di ufficio dove può essere montato
su rack standard EIA da 19 pollici (mediante il kit di montaggio a rack
incluso) oppure come unità a sè stante.
Non ostruire i fori per la ventilazione.
Le dimensioni dello switch lo rendono adatto all’installazione in
ambienti domestici o in uffici.
1 Assicurarsi che sullo switch non vi siano tracce d’umidità.
2 Posizionare lo switch su uno spazio piano regolare, livellato e
robusto, abbastanza solido da sostenere il peso dello switch
stesso e dei cavi collegati. Assicurarsi che ci sia una presa di
corrente nelle vicinanze.
Installazione con montaggio a rack
1 Allineare una staffa con i fori su un lato
dello switch e fissarla con le apposite
viti. In modo simile, fissare le staffe
rimanenti.
2 Dopo aver fissato entrambe le staffe di
montaggio, posizionare lo switch nel
rack allineando i fori nelle staffe con i
fori corrispondenti sul rack. Fissare lo
switch al rack con le viti di montaggio
apposite.
Connessioni del pannello posteriore
Le porte RJ-45 e la porta dell’alimentazione sono situate sul pannello
posteriore dello switch.
Porte Auto-negozianti RJ-45
Il vostro switch è fornito di otto porte RJ-45 10Base-T/100Base-TX.
Tutte le porte sono auto-negozianti e auto-crossover.
Una porta auto-negoziante permette di rilevare sia la velocità
ottimale in standard Ethernet (10/100Mbps), sia la modalità duplex
(full duplex o half duplex) del dispositivo collegato alla porta stessa.
Una porta auto-crossover (autoMDI/MDI-X) permette il collegamento
dei dispositivi sia con cavi Ethernet dritti (straight) che incrociati
(crossover).
Assicurarsi che la lunghezza del cavo fra le connessioni non superi i
100 metri.
Collegamento dell’alimentazione
Usare l’ alimentatore fornito per connettere lo switch alla presa di
corrente.
LED del pannello frontale
LED STATO DESCRIZIONE
PWR On Lo switch è acceso e alimentato.
Off Lo switch non è alimentato.
LINK/
On La porta è collegata ad una rete Ethernet.
ACT
Off La porta non è collegata ad una rete Ethernet.
Lampeggiante La porta sta ricevendo o trasmettendo dati.
Specifiche del prodotto
Standard Ethernet 10BASE-T IEEE 802.3
Protocollo CSMA/CD
Tecnologia Architettura di commutazione a memorizzazione e
Velocità di trasferimento 14.880 pps per 10Mbps
Velocità di trasmissione Ethernet: 10Mbps (half-duplex), 20Mbps (full-
Connettore RJ-45; Auto-MDIX su tutte le porte
Indirizzo MAC Tavola indirizzo Mac 1K
Buffer di memoria 1.25 Mb
Fast Ethernet IEEE 802.3u 100BASE-TX
Controllo del flusso e della congestione IEEE
802.3x
ritrasmissione
148.800 pps per 100Mbps
duplex)
Fast Ethernet: 100 Mbps (half-duplex), 200Mbps
(full-duplex)
Cavo di rete (fino a 100m
o 328 piedi)
LED Per le porte: LINK/ACT
Alimentazione 3.3V 4A (100-240V/ 50-60Hz)
Temperatura Operativa: da 0º C~ 50º C (32º F ~ 122º F)
Umidità (senza condensa) Operativa: dal 10% ~ 90%
Dimensioni (mm)
larghezza x profondità x
altezza
EMI e Sicurezza FCC Class A, CE, C-Tick
10BASE-T: 100Ω 2 coppie UTP/STP; categoria 3,
4, 5
100BASE-TX: 100Ω 2 coppie UTP/STP; categoria
5
Per l’unità: PWR
ES-116P: 215 x 133 x 42
ES-124P: 267 x 152.5 x 42
SVENSKA
Introduktion
Switchen är en flerportars switch som kan användas för att bygga
högpresterande switch-nätverk. Switchen är en lagrings-ochvidarebefordringsenhet som erbjuder låg latens för
höghastighetsnätverk.
Fristående arbetsgrupptillämpning
Switchen kan användas som en fristående switch till dator, server
och skrivare för att skapa en arbetsgrupp.
Maskinvaruinstallation
Switchen lämpar sig för en kontorsmiljö där den kan rackmonteras på
standard 19-tums EIA-rack (med den medföljande
rackmonteringssatsen) eller som en fristående enhet.
Ventilationshålen får INTE blockeras.
Skrivbordsinstallation
3 Kontrollera att switchen är ren och torr.
4 Placera switchen på ett slätt och stadigt underlag som är
tillräckligt bärkraftigt för att hålla uppe vikten av switchen och de
anslutna sladdarna. Se till att det finns eluttag i närheten.
Rackmonteringsinstallation
1 Rikta in en hållare med hålen på ena
sidan av switchen och fäst den med
hållarskruvarna. Fäst de andra
hållarna på samma sätt.
2 När båda monteringshållarna sitter på
plats, placera switchen i racket genom
att rikta in hålen i hållarna med lämpliga
håll på racket. Fäst switchen vid racket
med rackmonteringsskruvarna.
RJ-45 autoförhandlande portar
10Base-T/100Base-TX RJ-45-portarna är autoförhandlande och
auto-crossover.
En autoförhandlande port kan detektera och justera till optimal
Ethernet-hastighet (10/100Mpbs) och duplex-läge (full duplex eller
halv duplex) för den anslutna enheten.
En auto-crossover (auto-MDI/MDI-X) port fungerar automatiskt med
en rak (straight-through) eller korsad (crossover) Ethernet-sladd.
Se till att sladdlängden mellan anslutningarna inte överstiger 100
meter.
Ström
Använd den medföljande strömsladden för att ansluta switchen till en
strömkälla.
Indikatorlampor
Följande tabell beskriver indikatorlamporna.
INDIKATORLAMPA STATUS BESKRIVNING
PWR På Switchen är påslagen och tar emot ström.
LINK/ ACT På Porten är ansluten till ett Ethernetnätverk.
Av Switch tar inte emot ström.
Blinkar Porten tar emot eller överför data.
Av Porten är inte ansluten till ett Ethernet-
nätverk.
Produktspecifikationer
Standard IEEE802.3 10BASE-T Ethernet
Protokoll CSMA/CD
Teknologi Lagrings-och-vidarebefordings-switcharkitektur
Icke-blockerande
kabelhastighet
IEEE802.3u 100BASE-TX Fast Ethernet
IEEE802.3x flödeskontroll
Stöder Broadcast Storm Control
ES-116P: 3,2 Gb
ES-124P: 4,8 Gb
Överföringshastighet Ethernet: 10Mbps (halv duplex), 20Mbps (full duplex)
Datavidarebefordrings
hastighet
Anslutning RJ-45; Auto-MDIX på alla portar
MAC-adress 8K MAC-adresstabell
Minnesbuffert 1,25 Mbps
Nätverkssladd 10BASE-T: 100Ω 2-parig UTP/STP kat. 3, 4, 5
Indikatorlampa Per port: LINK/ACT
Strömkälla Intern; 3,3 V 4 A (100-240 V/ 50-60 Hz)
Temperatur Drift: 0º C~ 50º C
Luftfuktighet Drift: 10 % ~ 90 % (icke-kondens)
Mått
L x B x H (mm)
EMI & Säkerhet FCC-klass A, CE, C-Tick
Fast Ethernet: 100 Mbps (halv duplex), 200Mbps (full
duplex)
14880 pps för 10Base-T (Ethernet)
148800 pps för 100Base-T (Fast Ethernet)
100BASE-TX: 100Ω 2-parig UTP/STP kat. 5
Per enhet: PWR
ES-116P: 215 x 133 x 42
ES-124P: 267 x 152,5 x 42
Русский
Введение
Уст рой ств о представляет собой многопортовый коммутатор,
предназначенный для создания высокопроизводительных
коммутируемых сетей. Коммутатор является устройством с
промежуточным хранением данных, что обеспечивает малую
величину задержки при организации высокоскоростных сетей.
Применение в качестве автономного устройства для
организации рабочей группы
Коммутатор может использоваться как автономный модуль, к
которому непосредственно подключаются компьютеры, серверы
и принтер с целью организации небольшой рабочей группы.
Уст анов ка оборудования
Коммутатор является подходящим решением для офисов и
устанавливается в стандартную 19-дюймовую стойку EIA
(поставка включает набор для монтажа) или как отдельный
модуль.
Не закрывайте вентиляционные отверстия.
Уст ан овк а на столе
1 Убедитесь, что коммутатор чистый и сухой.
2 Уст ан о ви т е коммутатор на ровную поверхность, достаточно
прочную, чтобы выдержать вес коммутатора и
подключенных к нему кабелей. Убедитесь, что розетка
питания находится в пределах досягаемости.
Уст ан овк а в стойку
1 Совместите отверстия в кронштейне
с отверстиями на боковой стороне
коммутатора и закрепите кронштейн
винтами. Таким же образом
прикрепите второй кронштейн.
2 После закрепления монтажных
кронштейнов установите коммутатор
в стойку, совместив отверстия в
кронштейнах с соответствующими
отверстиями в стойке. Закрепите
коммутатор в стойке с помощью
крепежных винтов
Порты RJ-45 с автоматическим выбором скорости
передачи
Порты 10Base-T/ 100Base-TX с разъемом RJ-45, автоматическим
выбором скорости передачи и автоматическим распознаванием
типа кабеля "витая пара".
Порт с автоматическим выбором скорости передачи позволяет
определить и установить оптимальную скорость передачи
Ethernet (10/100 Мбит/с) и режим передачи (дуплексный или
полудуплексный) для подключенного устройства.
Порт с автоматическим распознаванием типа кабеля "витая
пара" (auto-MDI/MDI-X) автоматически переключается на работу
с прямым и перекрестным кабелем Ethernet.
Убедитесь, что длина кабеля между точками подключения не
превышает 100 метров.
Питание
Для подключения коммутатора к источнику питания используется
прилагаемый шнур питания.
Светодиоды
Описание светодиодов представлено в следующей таблице.
СВЕТО
СТАТУС ОПИСАНИЕ
ДИОД
PWR Горит Коммутатор включен и питание подается.
СВЕТО
СТАТУС ОПИСАНИЕ
ДИОД
Не горит Питание на коммутатор не подается.
LINK/
Гор ит По рт подключен к сети Ethernet.
ACT
Мигает Порт принимает или передает данные.
Не горит Порт не подключен к сети Ethernet.
Техн ичес кие характеристики устройства
Стандарт Ethernet IEEE802.3 10BASE-T
Протокол CSMA/CD
Технология Схема коммутации с промежуточным хранением
Скорость
передачи в кабеле
без блок ировк и
Скорость
передачи данных
Скорость
передачи пакетов
данных
Разъем RJ-45; Auto-MDIX для всех портов
MAC-адрес Таблица MAC-адресов на 8000 адресов
Буфер памяти 1,25 Мб
Сетевой кабель 10Base-T: 2-парный кабель UTP/STP 100 Ω категории
Светодиод На каждый порт: LINK/ACT
Источник питания Внутренний; 3,3 В; 4 А (100-240 В/50-60 Гц)
Темп ер ату ра Ра боч ая : 0º C – 50º C
Влажность Раб очая : 10 % – 90 % (без конденсации)
Габа рит ы
Д x Ш x В (мм)
Электромагнитны
е помехи и
безопасность
Fast Ethernet IEEE802.3u 100BASE-TX
Упра вле ние потоком IEEE802.3x
данных
Поддержка управления широковещательным штормом
ES-116P: 3,2 Гб
ES-124P: 4,8 Гб
Ethernet: 10 Мбит/с (полудуплексный режим), 20 Мбит/
с (дуплексный режим)
Fast Ethernet: 100 Мбит/с (полудуплексный режим),
200 Мбит/с (дуплексный режим)
14880 пакетов в секунду для Ethernet 10Base-T
148800 пакетов в секунду для Fast Ethernet 100Base-T
3, 4, 5
100Base-TX: 2-парный кабель UTP/STP 100 Ω
категории 5
На модуль: PWR
ES-116P: 215 x 133 x 42
ES-124P: 267 x 152.5 x 42
Класс A FCC, CE, C-Tick
中文
介紹
此為可被用來建立高效能網路之多埠數交換器,為一儲存及轉寄的
設備,可對高速網路可提供低 latency,專為小型公司及家庭用戶之
需求所設計。
使用示意圖
此交換器可被直接連接個人電腦、伺服器及網路印表機,並形成小
型工作網路。
安裝硬體
此交換器適合組裝在有 19 英吋之機架上,或單獨使用之。
千萬不可阻隔散熱孔,當堆疊放置時,交換器間應留一定空間。
獨立安裝
1 確定交換器是乾淨並是乾燥的。
2 將交換器放置於平緩、平坦並足夠堅固可支撐設備及連接線材
的平台 ,且確定附近有電源插座。確定交換器周圍有足夠的空
氣流動空隙,且可來放置連接線及電源線。
機架安裝
1 將耳翼上的錐孔和交換器的錐孔對齊,
再將其所鎖上。
2 鎖上耳翼後,確定交換器和機架的螺絲
孔已對齊並用機架螺絲將交換器鎖緊上
機架。
後背板之連接
RJ-45 網路埠及電源輸入孔位於交換器之背
板。
RJ-45 自動偵測連接埠
交換器上的 10Base-T/100Base-TX RJ-45 接埠。這些連接埠支援自
動偵測 (auto-negotiating) 和自動天橋 (auto-crossover)。
自動偵測功能使您的連接埠隨時連線在最佳的乙太網路速度 (10/
100Mpbs), 同時自動調整雙工方式 ( 全雙工或半雙工 )。每埠都支援
自動偵測直跳線 (auto MDI/MDIX),可直接或經由跳線的乙太網路纜
線來連接。
請確定網路連接線不可超過 100 公尺 (328 英呎)
電源埠
請將所附屬之變壓器連接至電源插座來啟動你的交換器,並可由變
壓器上標籤內容獲得更多資訊。
前面板燈號
你可由前面板上燈號之指示,得知交換器現況。 下表列出各燈號之
定義。
燈號 狀態 定義
PWR 恆亮 交換器是啟動的且正在接收資料
不亮 交換器電源未開
LINK/
恆亮 此埠有連接乙太網路
ACT
不亮 此埠未連接乙太網路
爍亮 此埠正在接收或傳送資料
產品規格
標準
通信協定 CSMA/CD
Technology Store-and-Forward switching architecture
傳輸速率
接頭
MAC Address 1K Mac address table
緩衝記憶體
網路線 ( 最長可至
100公尺或 328英呎 )
燈號
電源供應
溫度
濕度 運作 : 10% ~ 90% (Non-condensing)
外觀尺寸
長 x 寬 x 高 (mm)
安規
IEEE 802.3 10BASE-T Ethernet,
IEEE 802.3u 100BASE-TX Fast Ethernet
IEEE802.3x Flow Control and Back-pressure
14,880 pps for 10Mbps
148,800 pps for 100Mbps
RJ-45; 所有的埠均支援 Auto-MDIX
1.25 Mb
10BASE-T: 100Ω 2-pair UTP/STP Cat. 3, 4, 5
100BASE-TX: 100Ω 2-pair UTP/STP Cat. 5
Per port: LINK/ACT
Per unit: PWR
3.3V 4A (100-240V/ 50-60Hz)
: 0º C ~ 50º C (32º F ~ 122º F)
運作
ES-116P: 215 x 133 x 42
ES-124P: 267 x 152.5 x 42
FCC Class A, CE, C-Tick
Warnings and Warranty
Interference Statement
This device complies with Part 15 of the FCC rules. Operation is
subject to the following two conditions:
1 This device may not cause harmful interference.
2 This device must accept any interference received, including
interference that may cause undesired operations.
FCC Warning
This equipment has been tested and found to comply with the limits
for a Class B digital device, pursuant to Part 15 of the FCC Rules.
These limits are designed to provide reasonable protection against
harmful interference in a commercial environment. This equipment
generates, uses, and can radiate radio frequency energy and, if not
installed and used in accordance with the instruction manual, may
cause harmful interference to radio communications. Operation of
this equipment in a residential area is likely to cause harmful
interference in which case the user will be required to correct the
interference at his own expense.
CE Mark Warning
This is a class B product. In a domestic environment this product may
cause radio interference in which case the user may be required to
take adequate measures.
Certifications
Refer to the product page at www.zyxel.com.
ZyXEL Limited Warranty
ZyXEL warrants to the original end user (purchaser) that this product
is free from any defects in materials or workmanship for a period of
up to two (2) years from the date of purchase. During the warranty
period and upon proof of purchase, should the product have
indications of failure due to faulty workmanship and/or materials,
ZyXEL will, at its discretion, repair or replace the defective products
or components without charge for either parts or labor and to
whatever extent it shall deem necessary to restore the product or
components to proper operating condition. Any replacement will
consist of a new or re-manufactured functionally equivalent product
of equal value, and will be solely at the discretion of ZyXEL. This
warranty shall not apply if the product is modified, misused, tampered
with, damaged by an act of God, or subjected to abnormal working
conditions.
Page 3

Note
Repair or replacement, as provided under this warranty, is the
exclusive remedy of the purchaser. This warranty is in lieu of all other
warranties, express or implied, including any implied warranty of
merchantability or fitness for a particular use or purpose. ZyXEL shall
in no event be held liable for indirect or consequential damages of
any kind of character to the purchaser.
To obtain the services of this warranty, contact ZyXEL's Service
Center for your Return Material Authorization number (RMA).
Products must be returned Postage Prepaid. It is recommended that
the unit be insured when shipped. Any returned products without
proof of purchase or those with an out-dated warranty will be repaired
or replaced (at the discretion of ZyXEL) and the customer will be
billed for parts and labor. All repaired or replaced products will be
shipped by ZyXEL to the corresponding return address, Postage
Paid. This warranty gives you specific legal rights, and you may also
have other rights that vary from country to country.
 Loading...