

Page 1
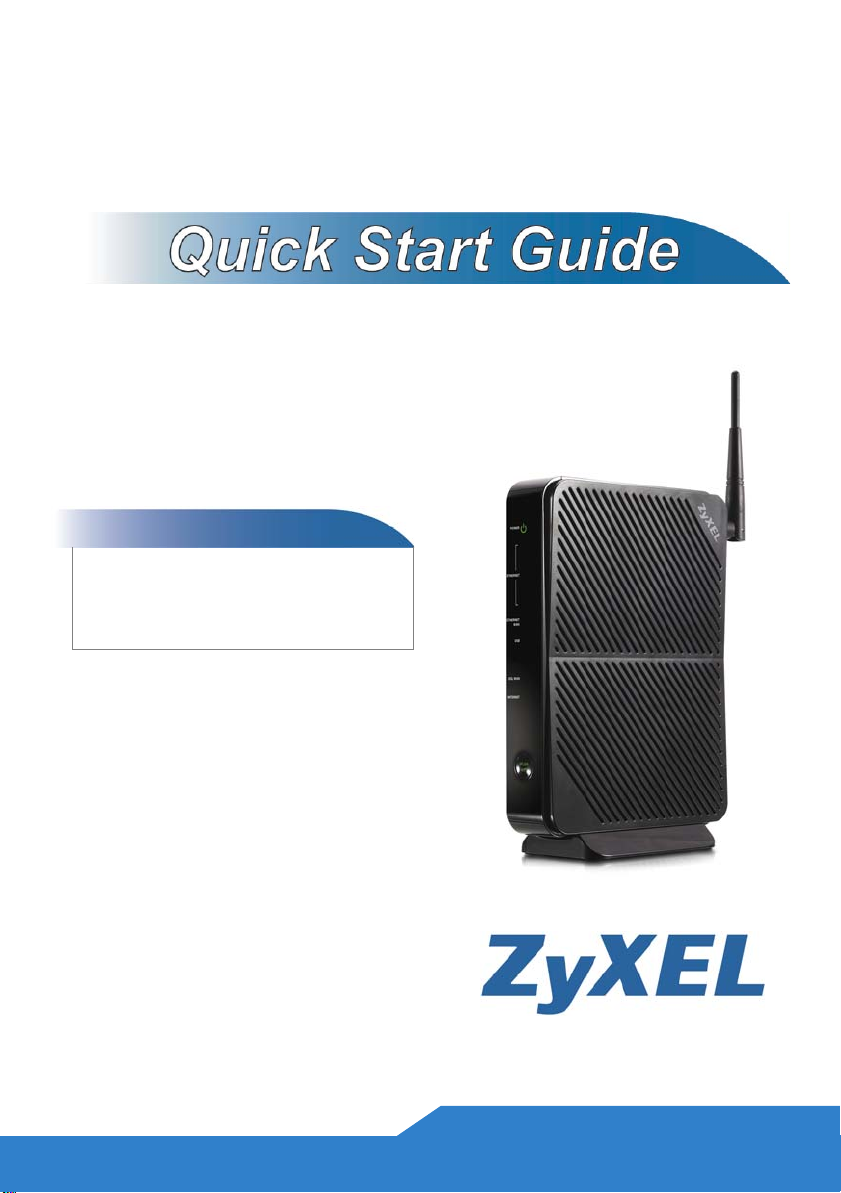
VSG1432-B101 Series
802.11n Wireless VDSL2 4-port
Gateway
Firmware Version 1.10
Edition 1, 9/2010
DEFAULT LOGIN DETAILS
IP Address: http://192.168.1.1
User Name: admin
Password: 1234
www.zyxel.com
Copyright 2010
ZyXEL Communications Corporation
Page 2

Device Panels
POWER
ETHERNET 1-4
ETHERNET WAN
USB
DSL WAN
INTERNET
WLAN/WPS
POWER
RESET
USB
ETHERNET WAN
ETHERNET 1-4
DSL WAN
2
Page 3

VSG1432-B101 Series
Overview
The VSG1432-B101 is a VDSL2 router and Gigabit Ethernet gateway
with a four-port built-in Ethernet switch and IEEE 802.11n wireless. The
VSG1432-B101 allows wired and wireless clients to safely access the
Internet. The built-in firewall blocks unauthorized access to your network.
The USB port allows you to connect USB memory stick or USB hard
drive for storing or sharing files through the network. Other helpful
features include Quality of Service (QoS) which allows time-sensitive
services and applications to flow more smoothly.
Safety Warnings
• Do NOT use this product near water, for example, in a wet
basement or near a swimming pool.
• Do NOT expose your device to dampness, dust or corrosive liquids.
• Do NOT store things on the device.
• Do NOT install, use, or service this device during a thunderstorm.
There is a remote risk of electric shock from lightning.
• Connect ONLY suitable accessories to the device.
• Do NOT open the device or unit. Opening or removing covers can
expose you to dangerous high voltage points or other risks. ONLY
qualified service personnel should service or disassemble this
device. Please contact your vendor for further information.
• Make sure to connect the cables to the correct ports.
• Place connecting cables carefully so that no one will step on them
or stumble over them.
3
Page 4

• Always disconnect all cables from this device before servicing or
disassembling.
• Use ONLY an appropriate power adaptor or cord for your device.
• Connect the power adaptor or cord to the right supply voltage (for
example, 110V AC in North America or 230V AC in Europe).
• Do NOT allow anything to rest on the power adaptor or cord and do
NOT place the product where anyone can walk on the power
adaptor or cord.
• Do NOT use the device if the power adaptor or cord is damaged as
it might cause electrocution.
• If the power adaptor or cord is damaged, remove it from the device
and the power source.
• Do NOT attempt to repair the power adaptor or cord. Contact your
local vendor to order a new one.
• Do not use the device outside, and make sure all the connections
are indoors. There is a remote risk of electric shock from lightning.
• Do NOT obstruct the device ventilation slots, as insufficient airflow
may harm your device.
• Use only No. 26 AWG (American Wire Gauge) or larger
telecommunication line cord.
• Antenna Warning! This device meets ETSI and FCC certification
requirements when using the included antenna(s). Only use the
included antenna(s).
4
Page 5

VSG1432-B101 Series
Hardware Setup
Place the VSG1432-B101 flat on a desk or table or on the stand for a
vertical installation.
Remove the VSG1432-B101’s clear plastic covers before
using it.
To connect the stand, line up the arrow on the stand with the arrow on
the bottom of the device as shown.
5
Page 6
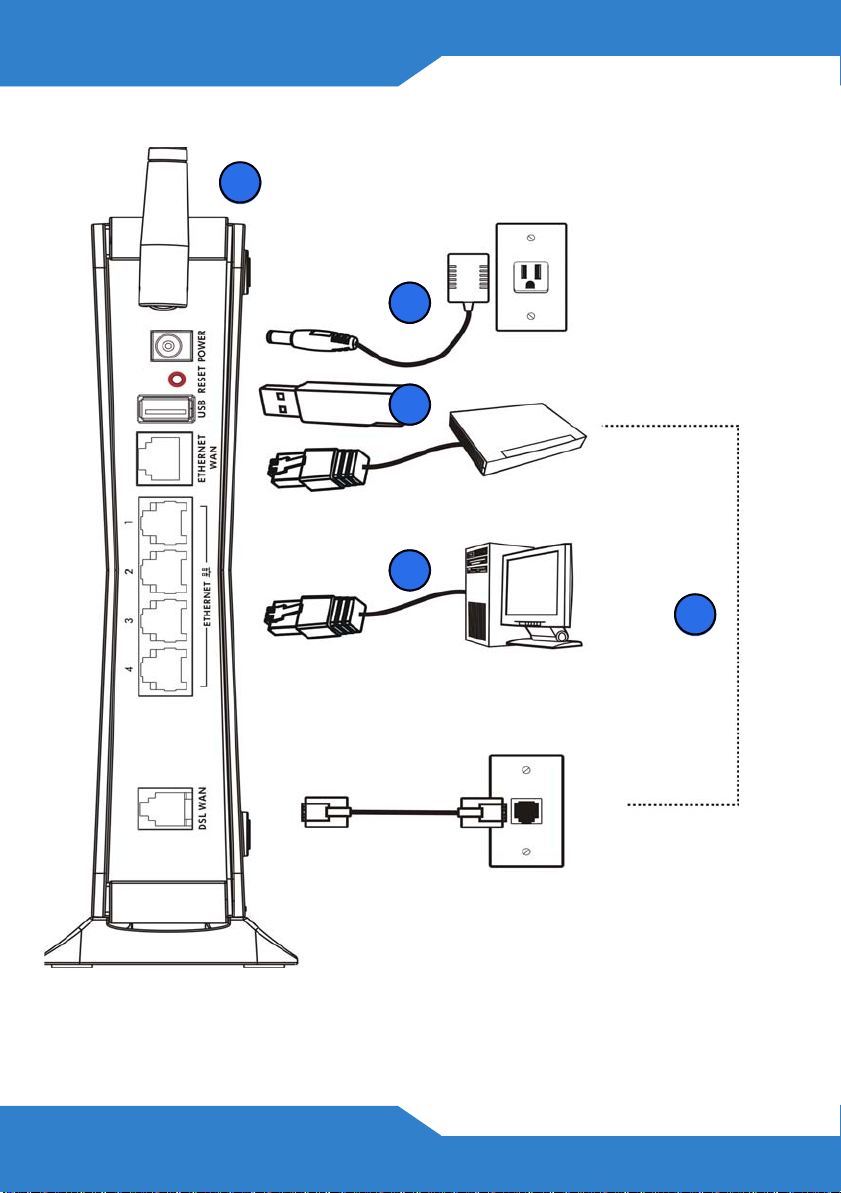
To connect your VSG1432-B101:
1
5
4
3
2
1. Attach the antenna and point it up.
6
Page 7

VSG1432-B101 Series
2. Do one of the following for your Internet connection:
a. DSL WAN: Use a telephone cable to connect your VSG1432-
B101’s DSL port to a telephone jack (or the DSL or modem jack on
a splitter if you have one).
b. ETHERNET WAN: If you already have a broadband router or
modem, use an Ethernet cable to connect the ETHERNET WAN
port to it for Internet access.
3. LAN: Use an Ethernet cable to connect a computer to a LAN port for
initial configuration and/or Internet access.
4. USB: Connect a USB (version 2.0 or lower) memory stick or a USB
hard drive for file sharing. Use a USB extension cable if the stick is
too big to fit.
5. POWER: Use the provided power adaptor to connect the POWER
socket to an appropriate power source. Make sure the power at the
outlet is on. After connecting the power adaptor, look at the lights on
the front panel.
• The POWER light blinks while your VSG1432-B101 starts up and
then stays on once it is ready.
• Each LAN light stays on if the corresponding LAN port is properly
connected and blinks when there is traffic.
• The ETHERNET WAN light stays on if the ETHERNET WAN port is
properly connected and blinks when there is traffic.
• The USB light turns on when your VSG1432-B101 detects a
connected USB device.
• The DSL W AN light turns on when your VSG1432-B101 has a DSL
connection.
7
Page 8

• The WLAN / WPS light flashes green and orange while WPS is in
process. It stays on green when the wireless LAN is ready and
blinks when there is traffic.
• The INTERNET light turns on when the gateway is able to access
the Internet and will blink when your VSG1432-B101 is sending or
receiving data.
If the lights do not come on, check your connections and inspect your
cables for damage. If the lights are still off, contact technical support.
8
Page 9
VSG1432-B101 Series
Set Up a Wireless Network
You can set up a wireless network using the following methods:
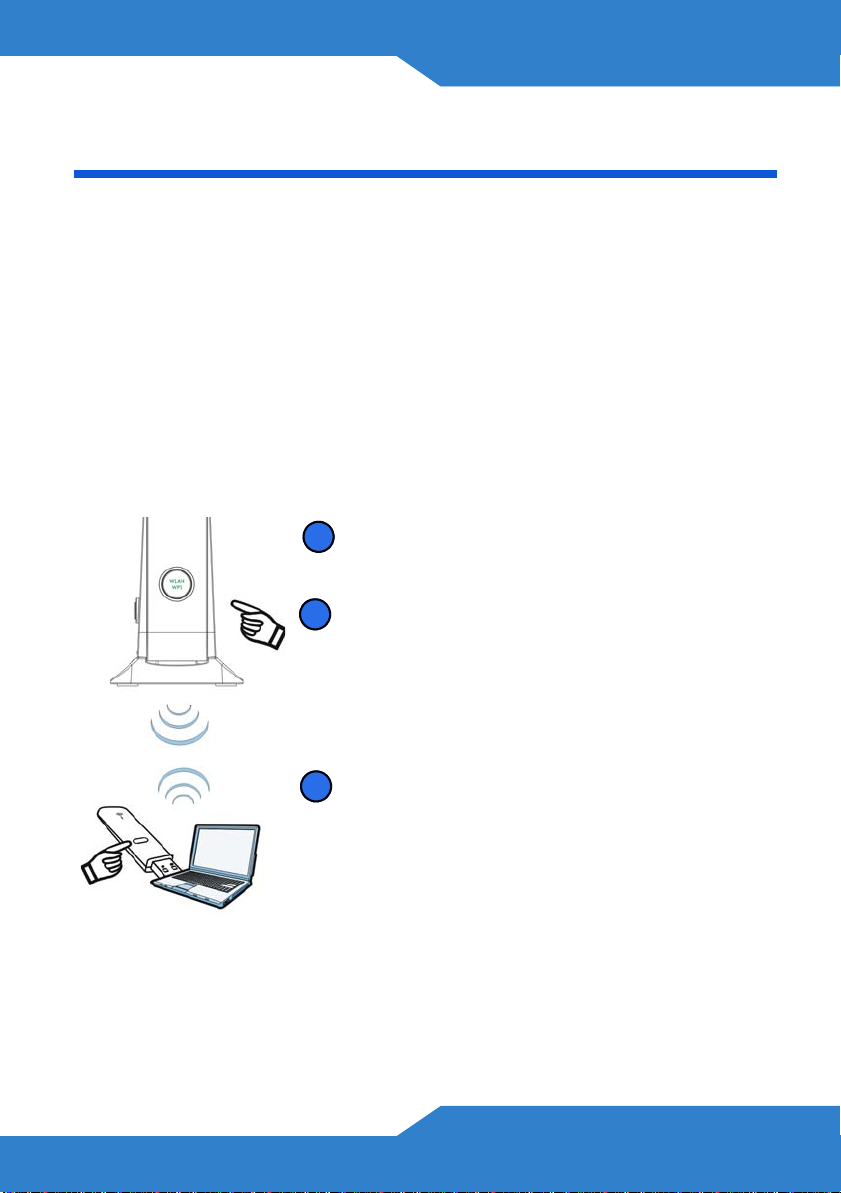
Using Wireless Protected Setup (WPS)
Press the WPS button on the VSG1432-B101’s front p anel for more than
5 seconds to turn the WPS function on.
Follow these steps to add a WPS-enabled device to the wireless network
using the WPS/WLAN button.
Place the devices you want to connect near
1
one another .
1
Press the WPS button on the VSG1432-
2
B101.
The WPS light blinks green and orange.
Press the WPS button on a compatible
3
device within 2 minutes of pressing the
button on the VSG1432-B101.
The WPS light on the VSG1432-B101
shines steadily when connected.
9
Page 10

Set Up a Wireless Network Manually
The wireless LAN on your VSG1432-B101 is enabled by default. To add
a wireless client to the network, use the settings found on the bottom
panel of your VSG1432-B101, which will look similar to the following
example:
SSID: ZyXEL00561
Security Mode: WPA-PSK
Pre-Shared Key: FB373BD356
Configure wireless devices that you want to connect to the wireless
network to use the same wireless settings as the VSG1432-B101.
The default wireless settings vary for each VSG1432-B101. Refer to the
bottom panel of your device and use the provided information.
Log into the Web Configurator
Your device may already be set up for Internet access. However, you
may want or need to log on to the VSG1432-B101 Web Configurator to
perform tasks:
• Configure your Internet access settings manually
• Customize the Quality of Service (QoS) and routing features
• Create firewall and web filter rules
• Edit remote management, as well as other features
10
Page 11
VSG1432-B101 Series
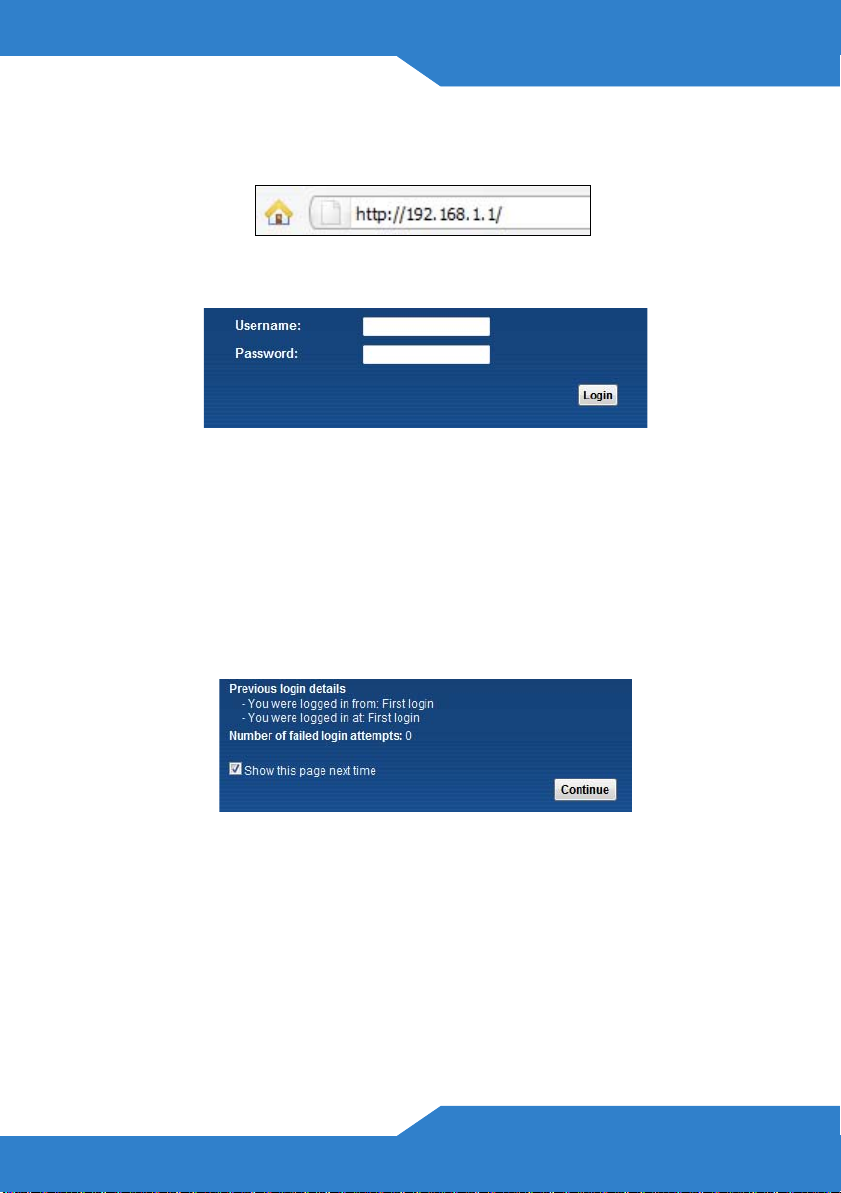
1. In your browser, if the VSG1432-B101 does not automatically re-
direct you to the login screen, go to http://192.168.1.1.
2. Enter the default user name admin and password 1234. Click Login.
If the login screen does not open, make sure you allow web
browser pop-up windows, JavaScripts and Java
permissions. Your computer should be also set to get an IP
address automatically from a DHCP server. See the
appendices in your User’s Guide for more information.
3. A welcome screen appears with details about your last login. Select
Show this page next time to see the welcome screen on your next
login. Otherwise, clear it. Click Continue.
11
Page 12

4. In the next screen, you can change the login password. This is
recommended. Enter your new password in the New Password field.
Re-type your new password in the second field and then click Apply.
If you prefer not to change the password, leave the two fields blank
and click Skip.
You can write down your new password in the following space.
New Password:
_________________________
12
Page 13

VSG1432-B101 Series
5. The Network Map page appears. This shows whether the VSG1432-
B101 and computers/devices connected to it have Internet access.
6. Click Status to display the following screen, where you can view the
VSG1432-B101’s device, interface, and system information.
13
Page 14

7. Click Quick Start and configure the VSG1432-B101’s time zone
Internet access, and wireless settings.
See your User’s Guide for how to use the rest of the Web Configurator
screens. You will need to refer to the section on how to setup the
Broadband connection if the INTERNET LED (light) remains off.
Viewing Certifications
• Go to www.zyxel.com.
• Select your product from the drop-down list box on the ZyXEL home
page to go to that product's page.
• Select the certification you wish to view from this page or click on
the Specifications tab to see the certifications list.
14
Page 15

VSG1432-B101 Series
FCC Statement
This device complies with part 15 of the FCC Rules. Operation is subject to the following
two conditions: (1) This device may not cause harmful interference, and (2) this device
must accept any interference received, including interference that may cause undesired
operation.
For a Class B digital device or peripheral, the instructions furnished the user shall include
the following or similar statement, placed in a prominent location in the text of the
manual:
NOTE: This equipment has been tested and found to comply with the limits for a Class B
digital device, pursuant to Part 15 of the FCC Rules. These limits are designed to provide
reasonable protection against harmful interference in a residential installation. This
equipment generates, uses and can radiate radio frequency energy and, if not installed
and used in accordance with the instructions, may cause harmful interference to radio
communications. However, there is no guarantee that interference will not occur in a
particular installation.
If this equipment does cause harmful interference to radio or television reception, which
can be determined by turning the equipment off and on, the user is encouraged to try to
correct the interference by one or more of the following measures:
• Reorient or relocate the receiving antenna.
• Increase the separation between the equipment and receiver.
• Connect the equipment into an outlet on a circuit different from that to which the
receiver is connected.
• Consult the dealer or an experienced radio/TV technician for help.
RF exposure warning
This equipment must be installed and operated in accordance with provided instructions
and the antenna(s) used for this transmitter must be installed to provide a separation
distance of at least 20 cm from all persons and must not be co-located or operating in
conjunction with any other antenna or transmitter. End-users and installers must be
provide with antenna installation instructions and transmitter operating conditions for
satisfying RF exposure compliance.
15
Page 16
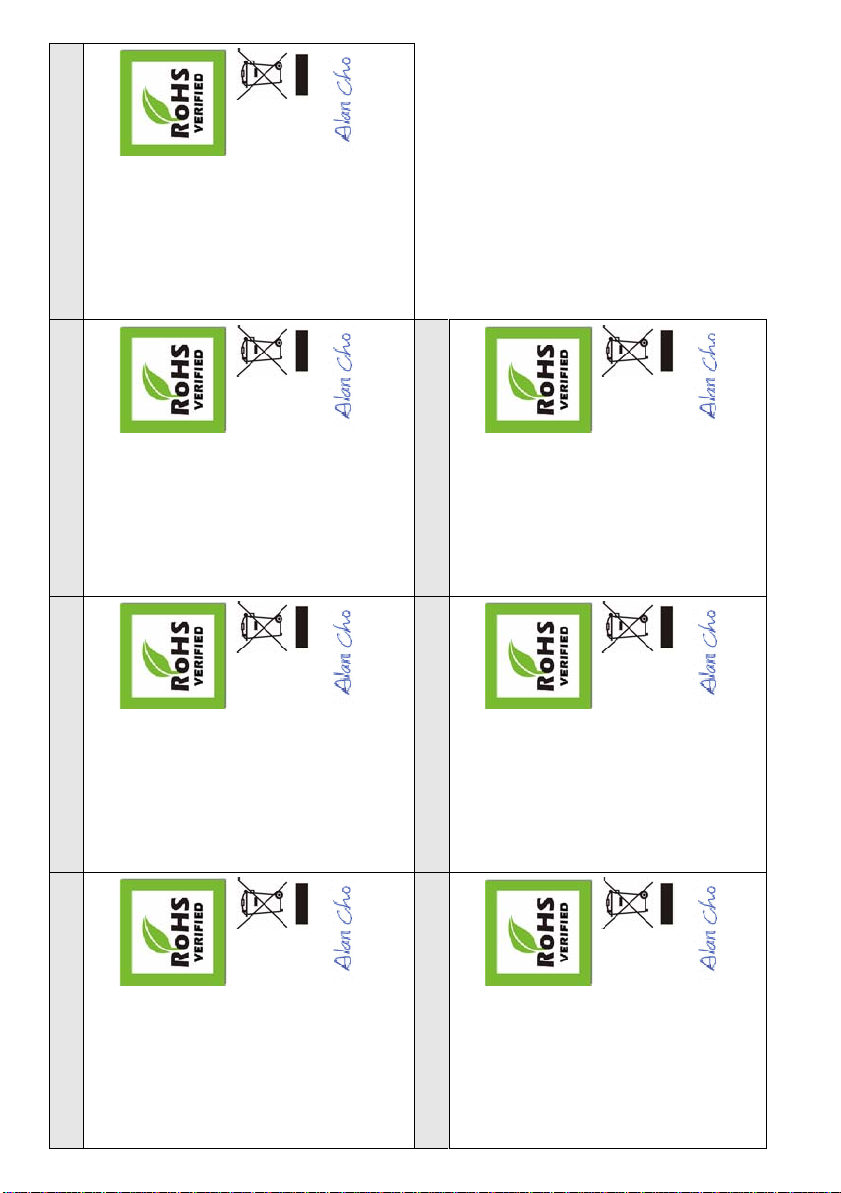
Déclaration de Produit Green
Declaración de Producto Ecológico
Green Product Declaration
Directive RoHS 2002/95/EC
Directive DEEE 2002/96/EC
(DEEE : Déchets des Equipements
Electriques et Electroniques )
2003/108/EC
Signature de la déclaration :
Nom/Titre : Alan Cho / Quality Assurance Director
Date (aaaa/mm/jj) : 2009/3/24
Miljödeklaration
Directiva RoHS 2002/95/EC
Directiva REEE 2002/96/EC
(REEE : Residuos de Equipos
Eléctricos y Electrónicos)
2003/108/EC
Firma de declaración:
Nombre/Título: Alan Cho / Quality Assurance
Director
Fecha (aaaa/mm/dd): 2009/3/24
RoHS Direktiv 2002/95/EC
WEEE Direktiv 2002/96/EC
(WEEE: hantering av elektriskt och
elektroniskt avfall)
2003/108/EC
Deklaration undertecknad av:
Namn/Titel: Alan Cho / Quality Assurance Director
Datum (åååå/mm/dd): 2009/3/24
Productmilieuverklaring
RoHS Directive 2002/95/EC
WEEE Directive 2002/96/EC
(WEEE: Waste Electrical an d Electron ic
Equipment)
2003/108/EC
Unterschrift des Erklärenden:
Name/Titel: Alan Cho / Quality Assurance Director
Datum (JJJJ/MM/TT): 2009/3/24
RoHS-richtlijn 2002/95/EC
AEEA-richtlijn 2002/96/EC
(AEEA: Afgedankte Elektrische en
Elektronische Apparaten)
2003/108/EC
Verklaringshandtekening:
Naam/titel: Alan Cho / Quality Assurance Director
Datum(jjjj/mm/dd): 2009/3/24
ENGLISH DEUTSCH ESPAÑOL FRANÇAIS
Green Product Declaration
RoHS Directive 2002/95/EC
ITALIANO NEDERLANDS SVENSKA
Dichiarazione Green Product
WEEE Directive 2002/96/EC
(WEEE: Waste Electrical and Electronic
Equipment)
2003/108/EC
Declaration Signature:
Name/Title: Alan Cho / Quality Assurance Director
Date (yyyy/mm/dd): 2009/3/24
Direttiva RoHS 2002/95/CE
Direttiva RAEE 2002/96/CE
(RAEE: Rifiuti di Apparecchiature
Elettriche ed Elettroniche)
2003/108/CE
Firma dichiarazione:
Nome/titolo: Alan Cho / Quality Assurance Director
Data (aaaa/mm/gg): 2009/3/24
 Loading...