

Page 1

NWD2105
Wireless N-lite USB Adapter
Version 1.0
Edition 1, 05/2010
www.zyxel.com
www.zyxel.com
Copyright © 2010
ZyXEL Communications Corporation
Page 2

Page 3

About This User's Guide
About This User's Guide
Intended Audience
This manual is intended for people who want to configure the NWD2105 using the
ZyXEL utility.
Tips for Reading User’s Guides On-Screen
When reading a ZyXEL User’s Guide On-Screen, keep the following in mind:
• If you don’t already have the latest version of Adobe Reader, you can download
it from http://www.adobe.com.
• Use the PDF’s bookmarks to quickly navigate to the areas that interest you.
Adobe Reader’s bookmarks pane opens by default in all ZyXEL User ’s Guide
PDFs.
• If you know the page number or know vaguely which page-range you want to
view, you can enter a number in the toolbar in Reader, then press [ENTER] to
jump directly to that page.
• Type [CTRL]+[F] to open the Adobe Reader search utility and enter a word or
phrase. This can help you quickly pinpoint the information you require. You can
also enter text directly into the toolbar in Reader.
• To quickly move around within a page, press the [SP ACE] bar. This turns your
cursor into a “hand” with which you can grab the page and move i t around freely
on your screen.
• Embedded hyperlinks are actually cross-references to related text. Click them to
jump to the corresponding section of the User’s Guide PDF.
Related Documentation
•Quick Start Guide
The Quick Start Guide is designed to help you get up and running right away. It
contains information on setting up your network and configuring for Internet
access.
• Online Help
Embedded web help for descriptions of individual screens and supplementary
information.
• Support Disc
Refer to the included CD for support documents.
Documentation Feedback
Send your comments, questions or suggestions to: techwriters@zyxel.com.tw
NWD2105 User’s Guide
3
Page 4
About This User's Guide
Thank you!
The Technical Writing Team, ZyXEL Communications Corp.,
6 Innovation Road II, Science-Based Industrial Park, Hsinchu, 30099, Taiwan.
Need More Help?
More help is available at www.zyx el.com.
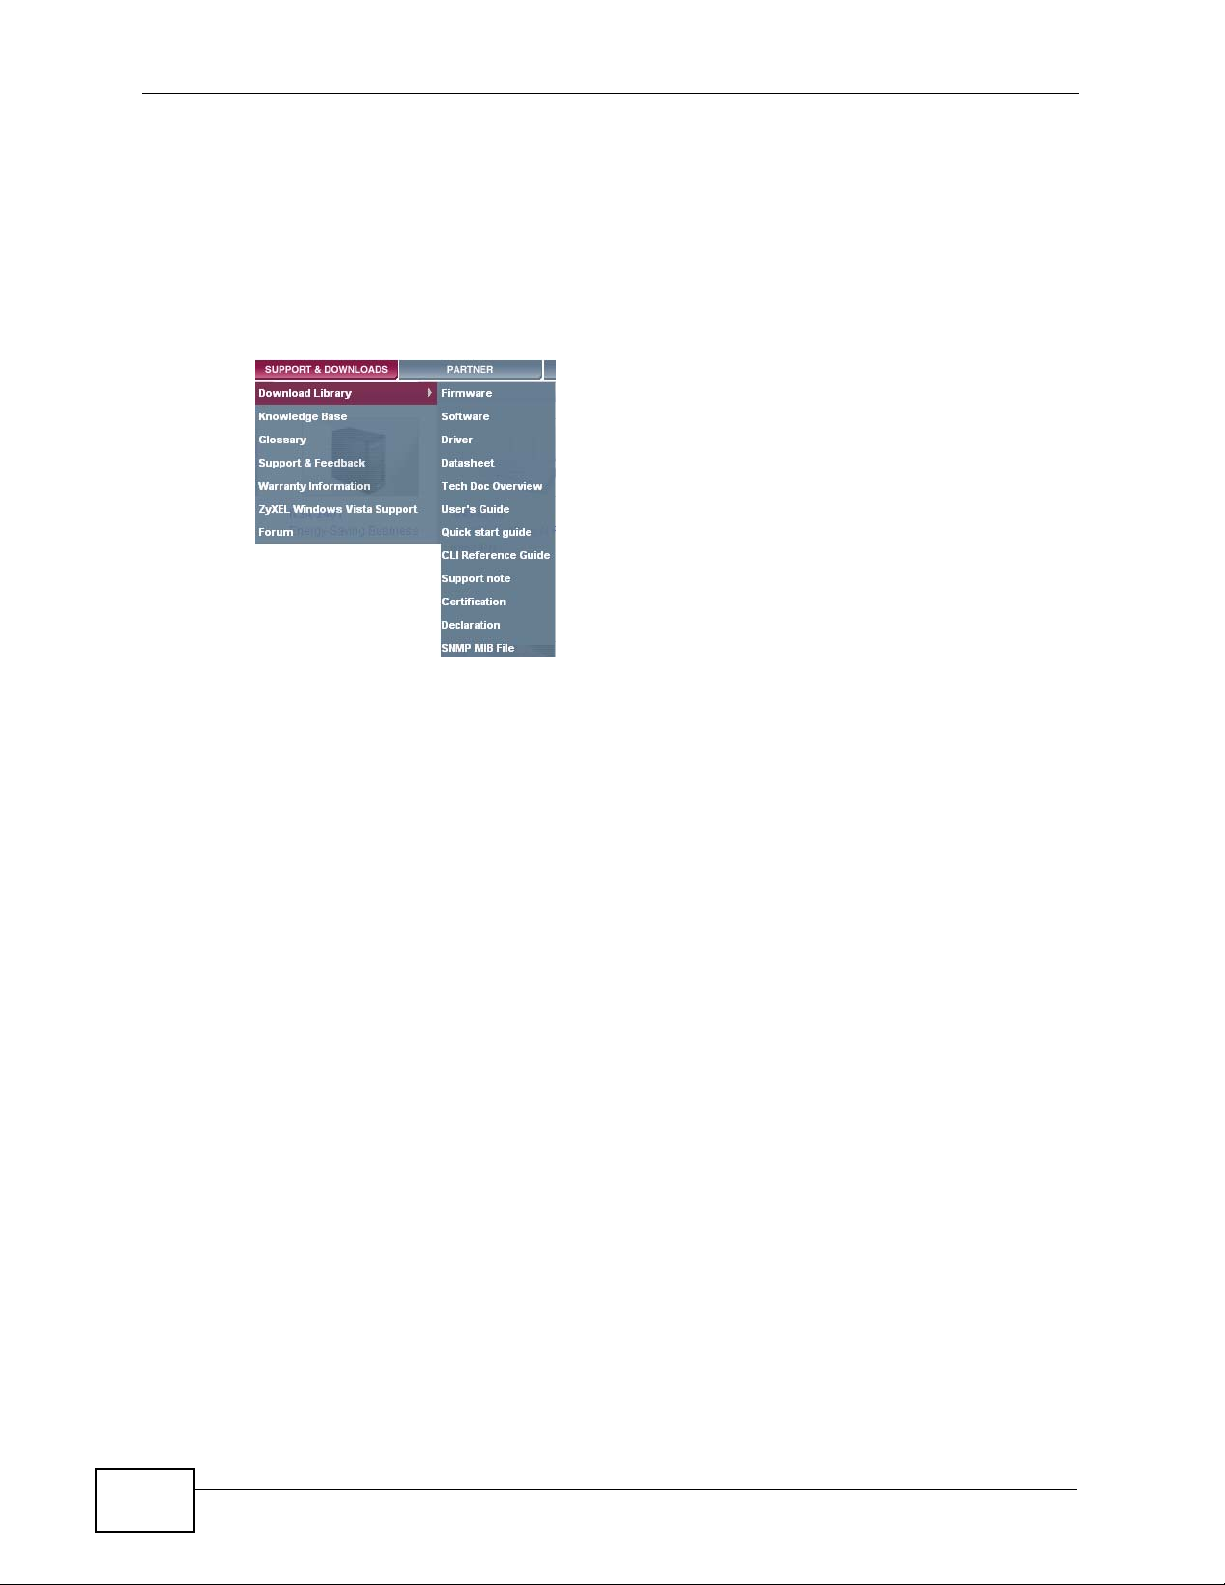
• Download Library
Search for the latest product updates and documentation from this link. Read
the Tech Doc Overview to find out how to efficiently use the documentation in
order to better understand how to use your product.
• Knowledge Base
If you have a specific question about your product, the answer may be here.
This is a collection of answers to previously asked questions about ZyXEL
products.
•Forum
This contains discussions on ZyXEL prod ucts. Learn from others who use ZyXEL
products and share your experiences as well.
Customer Support
Should problems arise that cannot be solved by the methods listed above, you
should conta ct your vendor. If you cann ot contact your vendor, then contact a
ZyXEL office for the region in which you bought the device.
See http://www.zyxel.com/web/contact_us.php for contact information. Please
have the following informatio n ready when you contact an office.
4
• Product model and serial number.
•Warranty Information.
• Date that you received your device.
• Brief description of the problem and the steps you took to solve it.
NWD2105 User’s Guide
Page 5

Document Conventions
Document Conventions
Warnings and Notes
These are how warnings and notes are shown in this User’s Guide.
Warnings tell you about things that could harm you or your
NWD2105.
Note: Notes tell you other important information (for example, other things you may
need to configure or helpful tips) or recommendations.
Syntax Conventions
• The NWD2105 may be referred to as the “NWD2105”, the “device” , the “system”
or the “product” in this User’s Guide.
• Product labels, screen names, field labels and field choices are all in bold font.
• A key stroke is denoted by square brackets and uppercase text, for example,
[ENTER] means the “enter” or “return” key on your keyboard.
• “Enter” means for you to type one or more characters and then press the
[ENTER] key. “Select” or “choose” means for you to use one of the predefined
choices.
• A right angle bracket ( > ) within a screen name denotes a mouse click. For
example, Maintenance > Log > Log Setting means you first click
Maintenance in the navigation panel, then the Log sub menu and finally the
Log Setting tab to get to that screen.
• Units of measurement may denote the “metric” value or the “scientific” value.
For example, “k” for kilo may denote “1000” or “1024”, “M” for mega may
denote “1000000” or “1048576” and so on.
• “e.g.,” is a shorthand for “for instance”, and “i.e.,” means “that is” or “in other
words”.
NWD2105 User’s Guide
5
Page 6
Document Conventions
Icons Used in Figures
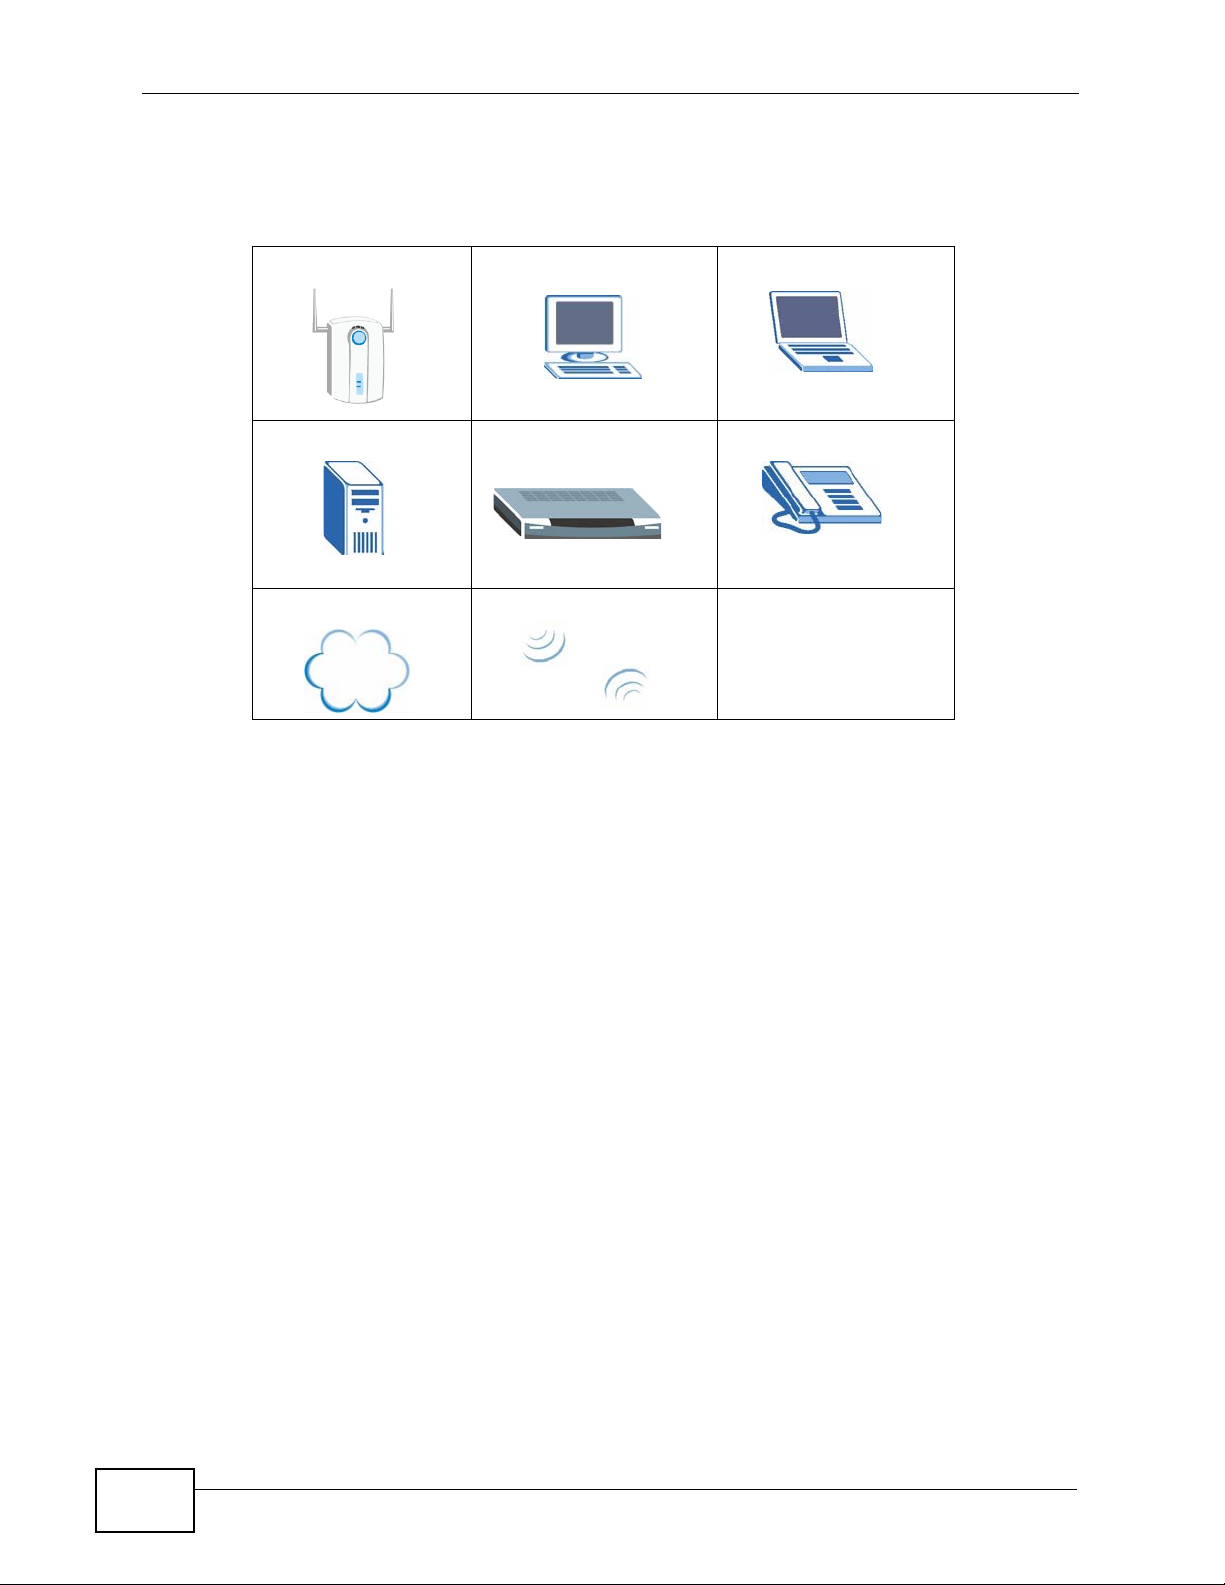
Figures in this User’s Guide may use the following generic icons.
Wireless Access Point Computer Notebook computer
Server Modem Telephone
Internet Wireless Signal
6
NWD2105 User’s Guide
Page 7
Safety Warnings
Safety Warnings
• Do NOT use this product near water, for example, in a wet basement or near a swimming
pool.
• Do NOT expose your device to dampness, dust or corrosive liquids.
• Do NOT store things on the device.
• Do NOT install, use, or service this device during a thunderstorm. There is a remote risk
of electric shock from lightning.
• Connect ONLY suitable accessories to the device.
• Ground yourself (by properly using an anti-static wrist strap, for example) whenever
working with the device’s hardware or connections.
• ONLY qualified service personnel should service or disassemble this device.
• Antenna Warning! This device meets ETSI and FCC certification requirements when using
the included antenna(s). Only use the included antenna(s).
Your product is marked with this symbol, which is known as the WEEE mark.
WEEE stands for Waste Electronics and Electrical Equipment. It means that
used electrical and electronic products should not be mixed with general waste.
Used electrical and electronic equipment should be treated separately.
NWD2105 User’s Guide
7
Page 8

Safety Warnings
8
NWD2105 User’s Guide
Page 9

Contents Overview
Contents Overview
Introduction and Configuration ............................................................................................17
Getting Started ...........................................................................................................................19
Wireless LANs ............. ... .... ... ... ... .... ... ................................................................ .... ... ................27
ZyXEL Utility .............................................................................................................................. 39
Troubleshooting and Specifications ....................................................................................53
Troubleshooting ..................................................... .................................................................... 55
Product Specifications ............................................................................................................... 59
Appendices and Index ...........................................................................................................63
NWD2105 User’s Guide
9
Page 10

Contents Overview
10
NWD2105 User’s Guide
Page 11

Table of Contents
Table of Contents
About This User's Guide..........................................................................................................3
Document Conventions............................................................................................................5
Safety Warnings ........................................................................................................................7
Contents Overview ...................................................................................................................9
Table of Contents....................................................................................................................11
Chapter 1
Getting Started........................................................................................................................13
1.1 Overview ............. ................................................................. ... ... .......................................... 13
1.1.1 What You Need to Know .................. ... ... ... .... ... ... ... .... ... ... .......................................... 13
1.1.2 Before You Begin ............................. ... ... ... .... ... ... ... .... ... ............................................. 13
1.2 Features ............................................. ... .... ... ....................................................................... 14
1.3 Hardware Installation ....................................... ............................................................. .......15
1.4 Software Installation ............................................................................................................15
1.4.1 Minimum System Requirements ................................................................................ 15
1.4.2 Installing the ZyXEL Utility ..... ... .................................................................................16
1.5 Device Applications ................................................................................... ... .... ... ... ... ... ....... 19
Chapter 2
Wireless LANs.........................................................................................................................21
2.1 Overview ............. ................................................................. ... ... .......................................... 21
2.1.1 What Yo u Can Do in This Section .............................................................................. 21
2.1.2 What You Need to Know .................. ... ... ... .... ... ... ... .... ... ... .......................................... 21
2.1.3 Before You Begin ............................. ... ... ... .... ... ... ... .... ... ............................................. 22
2.2 Wireless LAN Overview ............................................ ... ... .................................................... 22
2.3 Wireless LAN Security ........................................... ... ... ....................................................... 23
2.3.1 User Authentication and Encryption ................................................. ... .... ... ................23
2.4 WiFi Protected Setup ........................................................................................................... 25
2.4.1 Push Button Configuration ............................ ... ... ... .... ................................................ 26
2.4.2 PIN Configuration ....................................................... ... ... ... ... .... ... ... ..........................26
2.4.3 How WPS Works ........................................................................................................ 28
2.4.4 Limitations of WPS ................................................. .... ... ... ... ....................................... 31
Chapter 3
ZyXEL Utility - Mac OS X........................................................................................................33
3.1 Overview ............. ................................................................. ... ... .......................................... 33
NWD2105 User’s Guide
11
Page 12

Table of Contents
3.1.1 What You Can Do in This Chapter .............................................................................33
3.1.2 What You Need to Know .................. ... ... ... .... ... ... ... .... ... ... .......................................... 33
3.1.3 Before You Begin ............................. ... ... ... .... ... ... ... .... ... ............................................. 34
3.2 ZyXEL Utility Screen Summary ...........................................................................................34
3.3 The Profile Screen ...............................................................................................................35
3.4 The Profile - System Configuration Screen ......................................................................... 37
3.5 The Profile - Authentication and Security Screen ................................................................ 38
3.6 The Link Status Screen ....................................................................................................... 40
3.7 The Site Survey Screen ....................................................................................................... 41
3.8 The Statistics Screen ........................................................................................................... 43
3.9 The Advanced Screen ......................................................................................................... 45
3.10 The WPS Screen ...............................................................................................................46
3.10.1 The Information Screen ..................... .......... ......... .......... .......... ......... ....... ......... ....... 48
3.10.2 The Profile Details Screen ....................................................................................... 49
3.11 The About Screen ..............................................................................................................51
Chapter 4
Troubleshooting......................................................................................................................53
4.1 Overview ............. ................................................................. ... ... .......................................... 53
4.2 Power, Hardware Connections, and LEDs .......................................................................... 53
4.3 Accessing the ZyXEL Utility ................................................................................................. 54
4.4 Link Quality ............................................ .... ... ....................................................................... 54
4.5 Problems Communicating with Other Computers ............................................................... 55
Chapter 5
Product Specifications...........................................................................................................57
Appendix A Wireless LANs ....................................................................................................61
Appendix B Legal Information ................................................................................................77
Index.........................................................................................................................................83
12
NWD2105 User’s Guide
Page 13

CHAPTER 1
Getting Started
1.1 Overview
The ZyXEL NWD2105 Wireless N-lite USB Adapter brings you a better Internet
experience over existing IEEE 802.11 b/g/n networks. With data rates of up to
150 Mbps, you can enjoy a breathtaking high-speed connection at home or in the
office. It is an excellent solution for daily activities such as file transfers, music
downloading, video streaming and online gaming.
1.1.1 What You Need to Know
The following terms and concepts may help as you read through this section, and
subsequently as you read through the rest of the User’s Guide.
Access Point
An Access Point (AP) is a network device that acts as a bridge between a wired
and a wireless network. Outside of the home or office, APs can most often be
found in coffee shops, bookstores and other businesses that offer wireless
Internet connectivity to their customers.
Infrastructure
An infrastructure network is one that seamlessly combines both wireless and
wired components. One or more APs often serve as the bridge between wireless
and wired LANs.
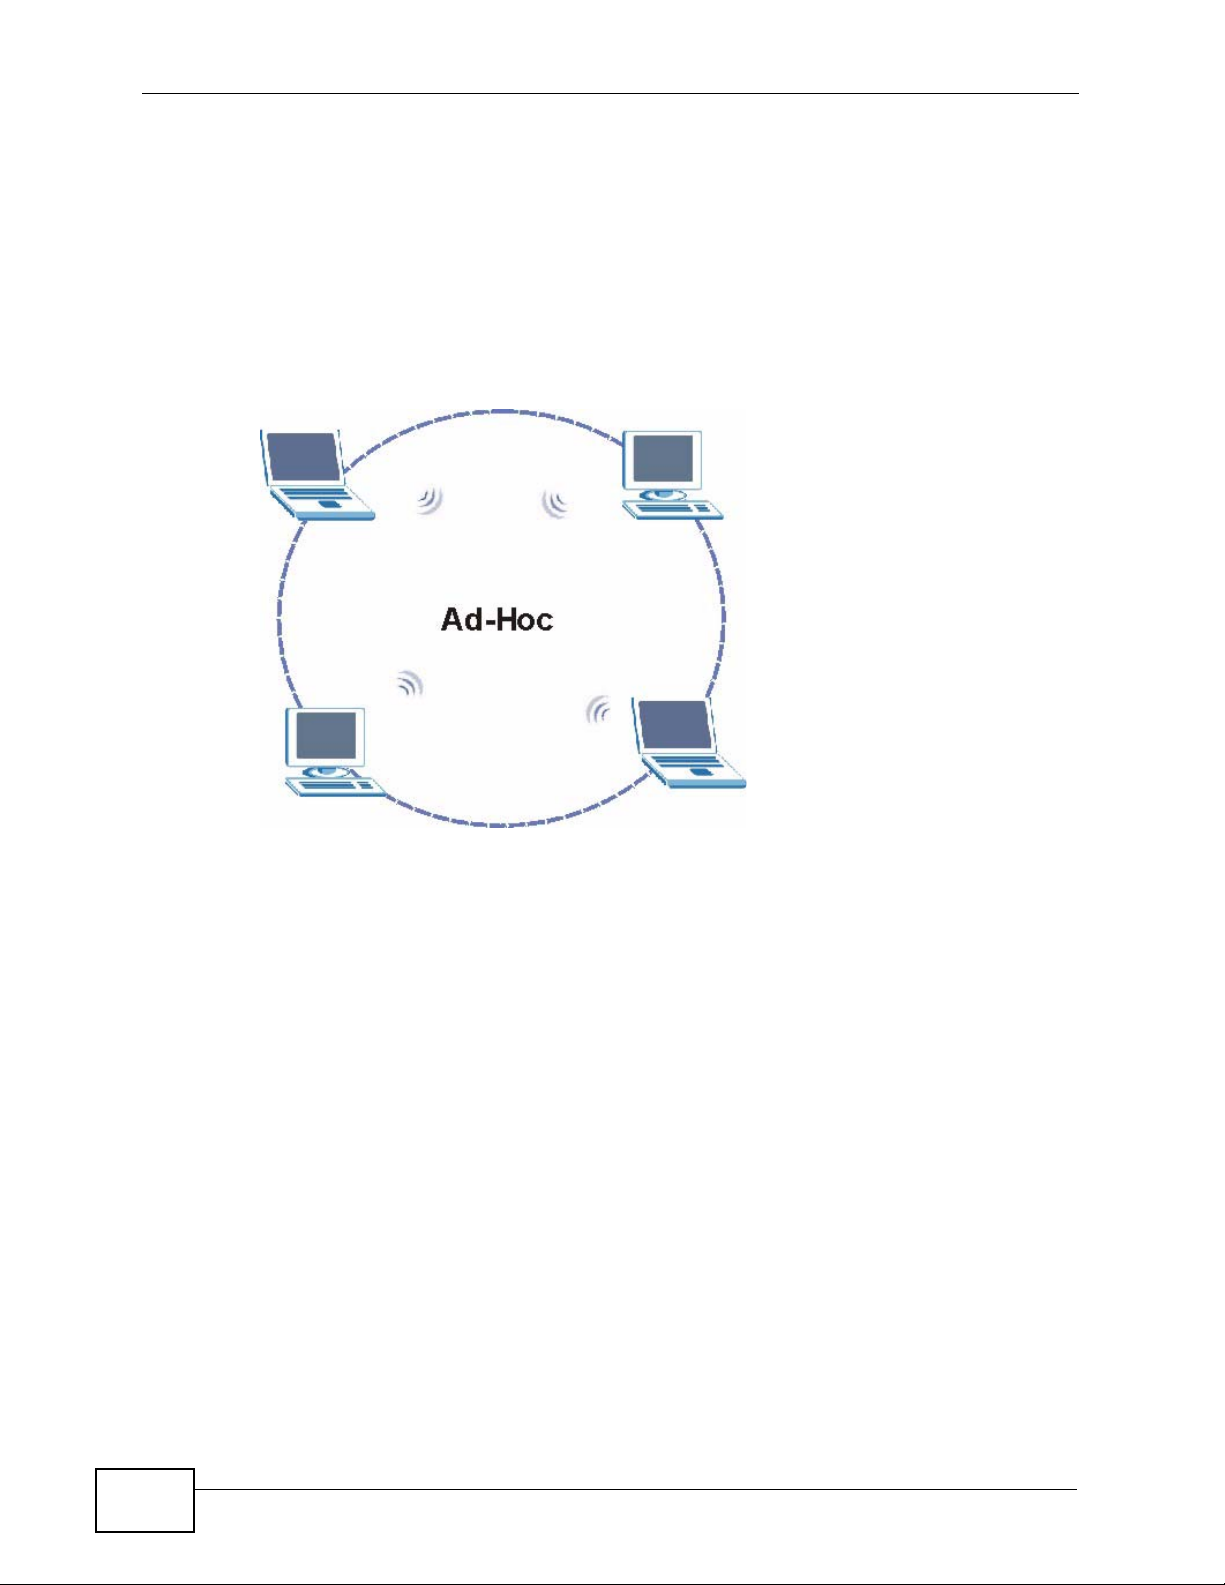
Ad-Hoc
An Ad-Hoc wireless LAN is a self-contained group of computers connected
wirelessly and which is independent of any other networks and Access Points.
1.1.2 Before You Begin
Read the Quick Start Guide for information on making hardware connections and
using the ZyXEL utility to connect your NWD2105 to a network.
NWD2105 User’s Guide
13
Page 14
Chapter 1 Getting Started
1.2 Features
Your NWD2105 is an IEEE 802.11n draft 2.0 compliant wireless LAN adapter. It
can also connect to IEEE 802.11b/g wireless networks. The NWD2105 is WPS (Wi Fi Protected Setup) compliant. WPS allows you to easily set up a secure
connection with another WPS-enabled device.
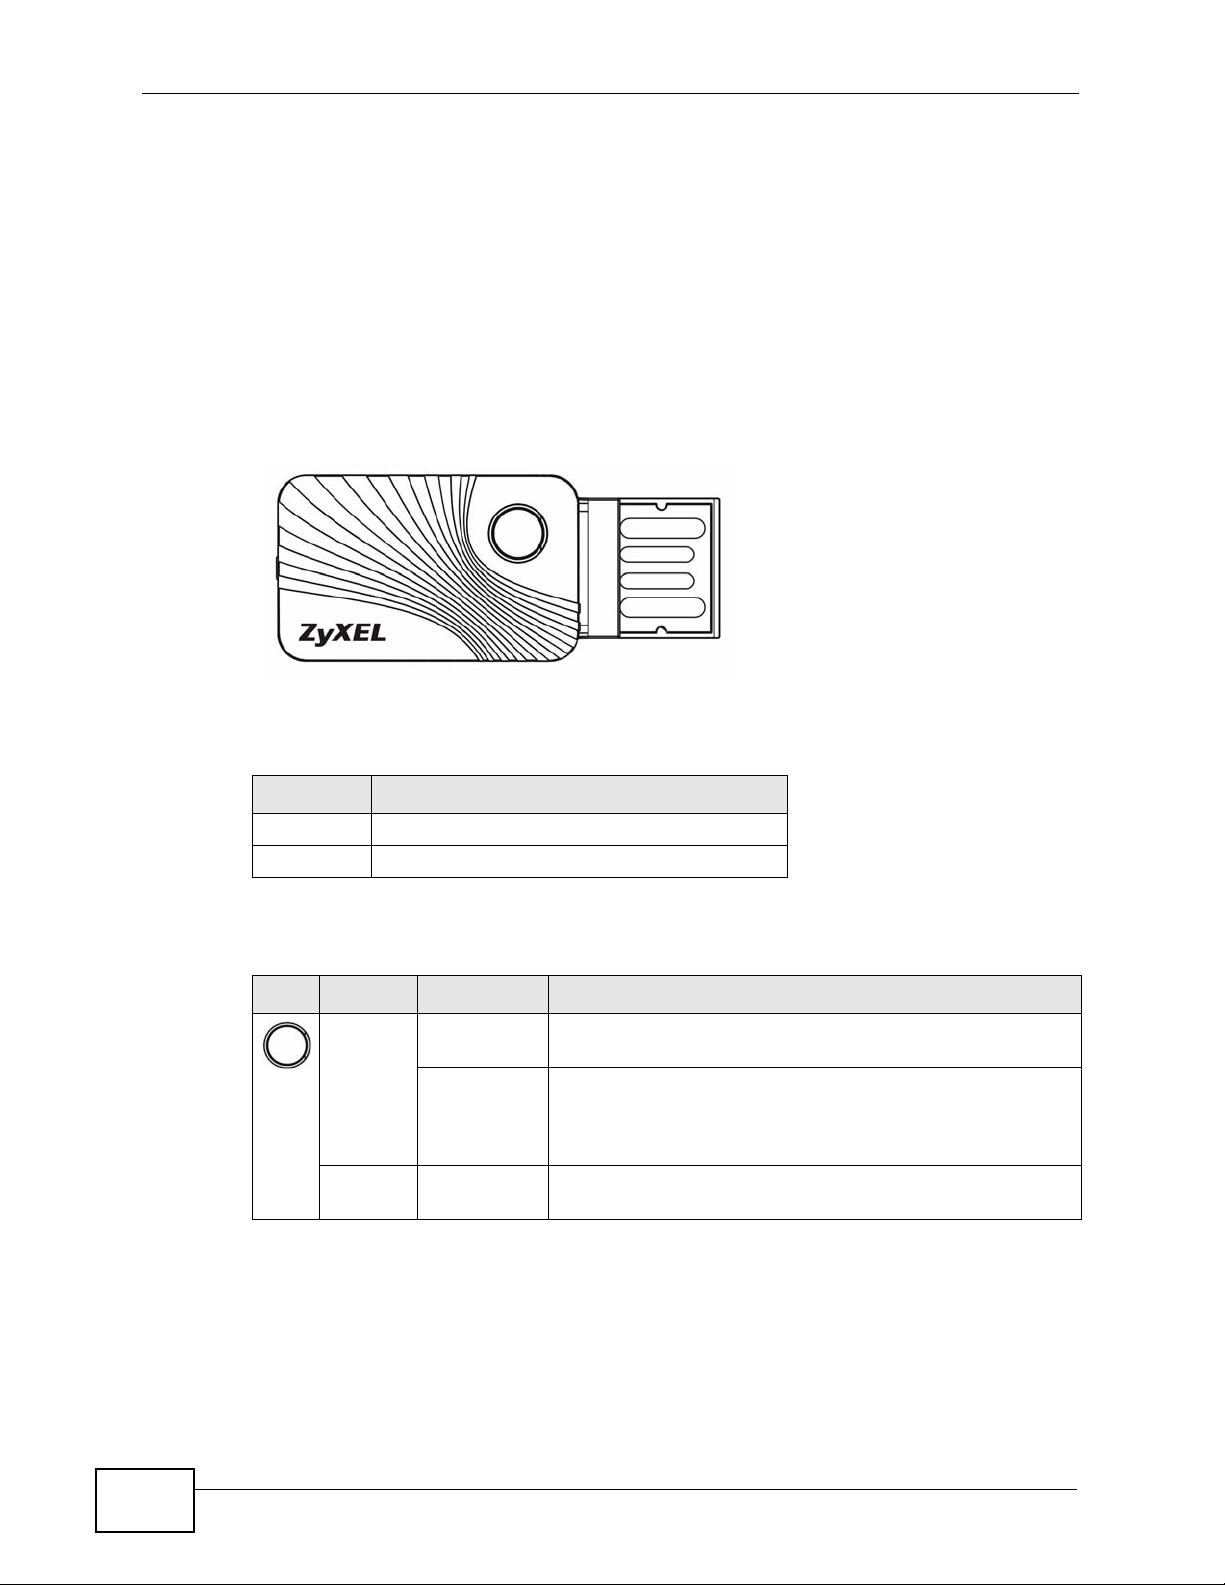
The NWD2105 is a USB adapter which connects to an empty USB port on your
computer.
Figure 1 The NWD2105
A
B
The following table describes the NWD2105.
Table 1 NWD2105 External View
LABEL DESCRIPTION
A LED and also a WPS button
BUSB connector
The following table describes the operation of the NWD2105’s LEDs.
Table 2 NWD2105 LEDs
LED COLOR STATUS DESCRIPTION
Orange Slow
Blinking
Rapid
Blinking
Off The NWD2105 is either not connected or the device to
The NWD2105 is turned on, connected to an AP, and is
not transmitting or receiving data.
The NWD2105 is turned on, connected to an AP, and is
transmitting or receiving data. It also blinks when the
WPS feature is being used or a WPS connection is being
initiated.
which it is connected is turned off.
14
NWD2105 User’s Guide
Page 15
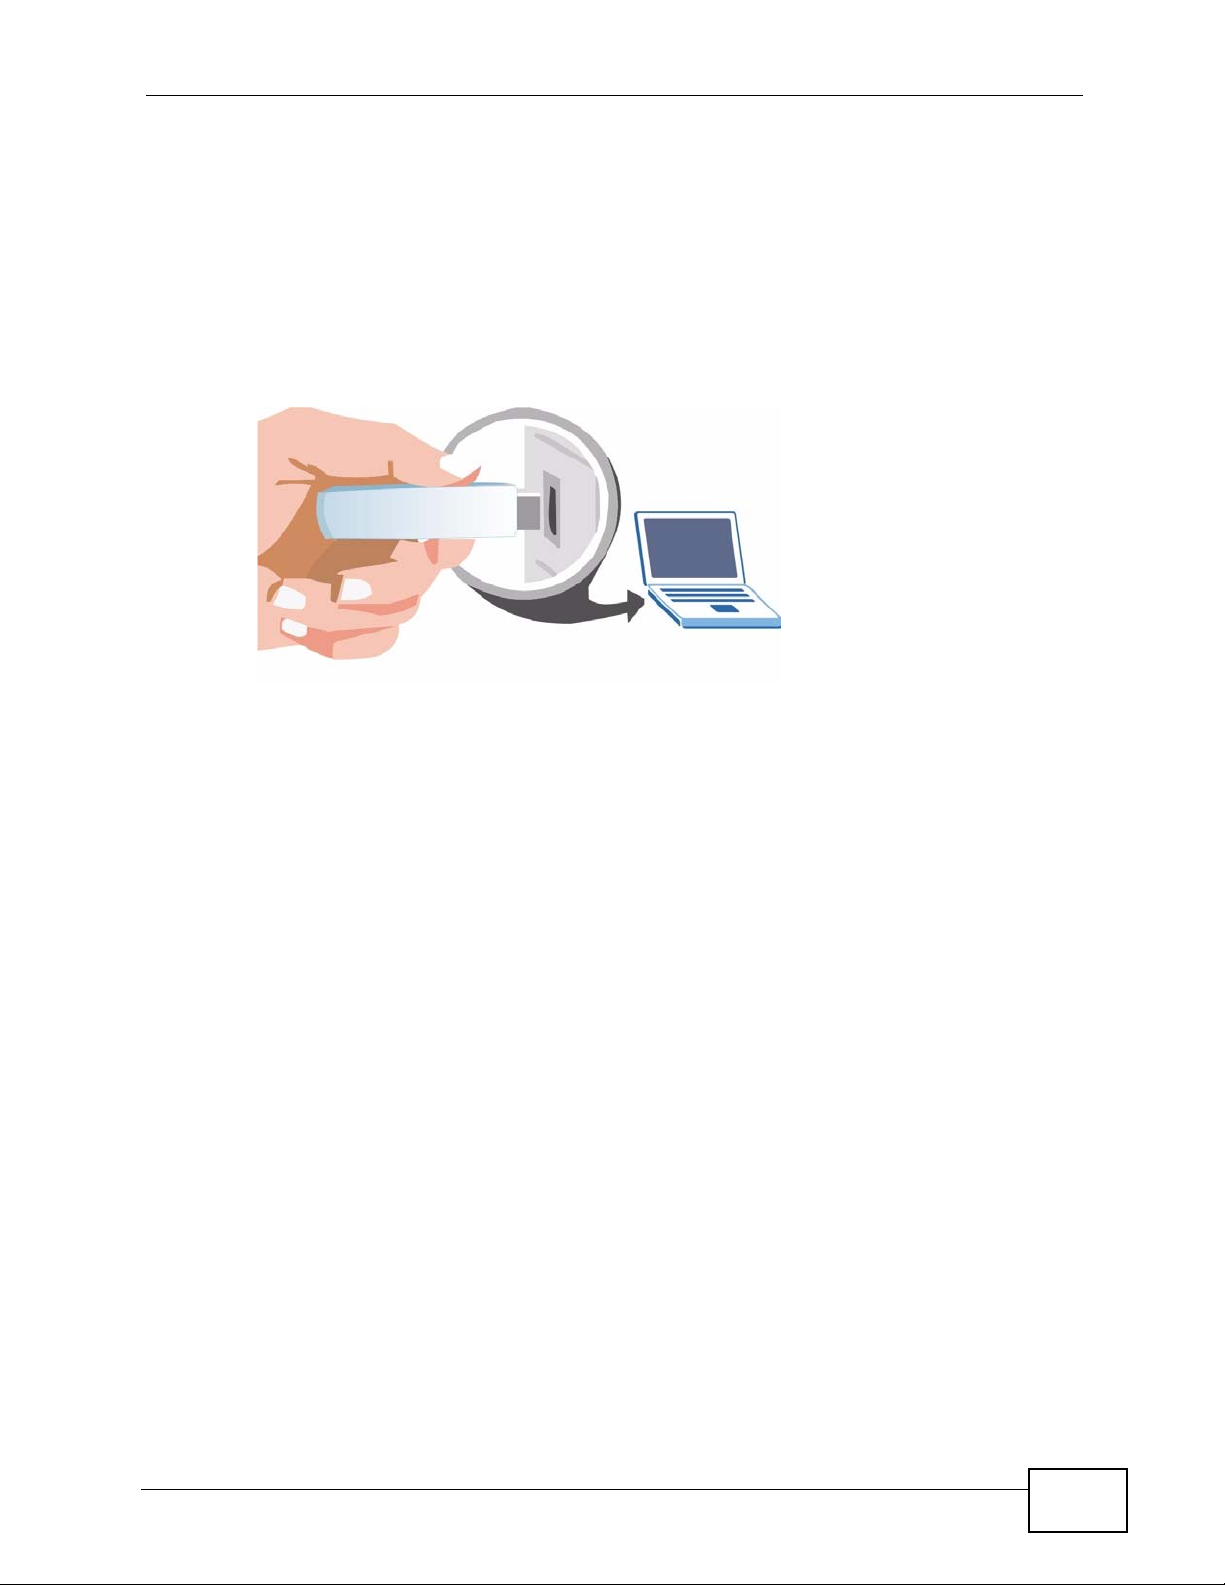
1.3 Hardware Installation
This sections shows you how to install your NWD2105.
1 Locate an available USB port on the computer.
2 R emove the protectiv e cap to expose the USB connector. Insert the NWD2105 into
an available USB port on the computer.
Chapter 1 Getting Started
The NWD2105’s LED (light) turns on if it is properly inserted.
Note: Never bend, twist or force the NWD2105 into the port. If there is not enough
space to attach the NWD2105, use the included USB cable.
1.4 Software Installation
This section shows you how to install the Mac OS X version of the ZyXEL Utility.
For detailed information on using it, see Chapter 3 on page 33.
1.4.1 Minimum System Requirements
In order to install the ZyXEL Utility for Mac OS X, your computer must meet the
following minimum system requirements:
• 20 MB of free hard drive space
• 128 MB RAM
• Mac OS X 10.3 and higher
NWD2105 User’s Guide
15
Page 16

Chapter 1 Getting Started
1.4.2 Installing the ZyXEL Utility
To install the ZyXEL Utility:
1 Make sure the NWD2105 is dis connected from your computer before you begin the
installation process.
2 Open the ZyXEL_USB.dmg file on the included disc.
3 Inside the ZyXEL_USB.dmg, open the folder for your version of Mac OS X. For
example, if you are using 10.5 then open the USBWireless-10.5 folder.
16
NWD2105 User’s Guide
Page 17
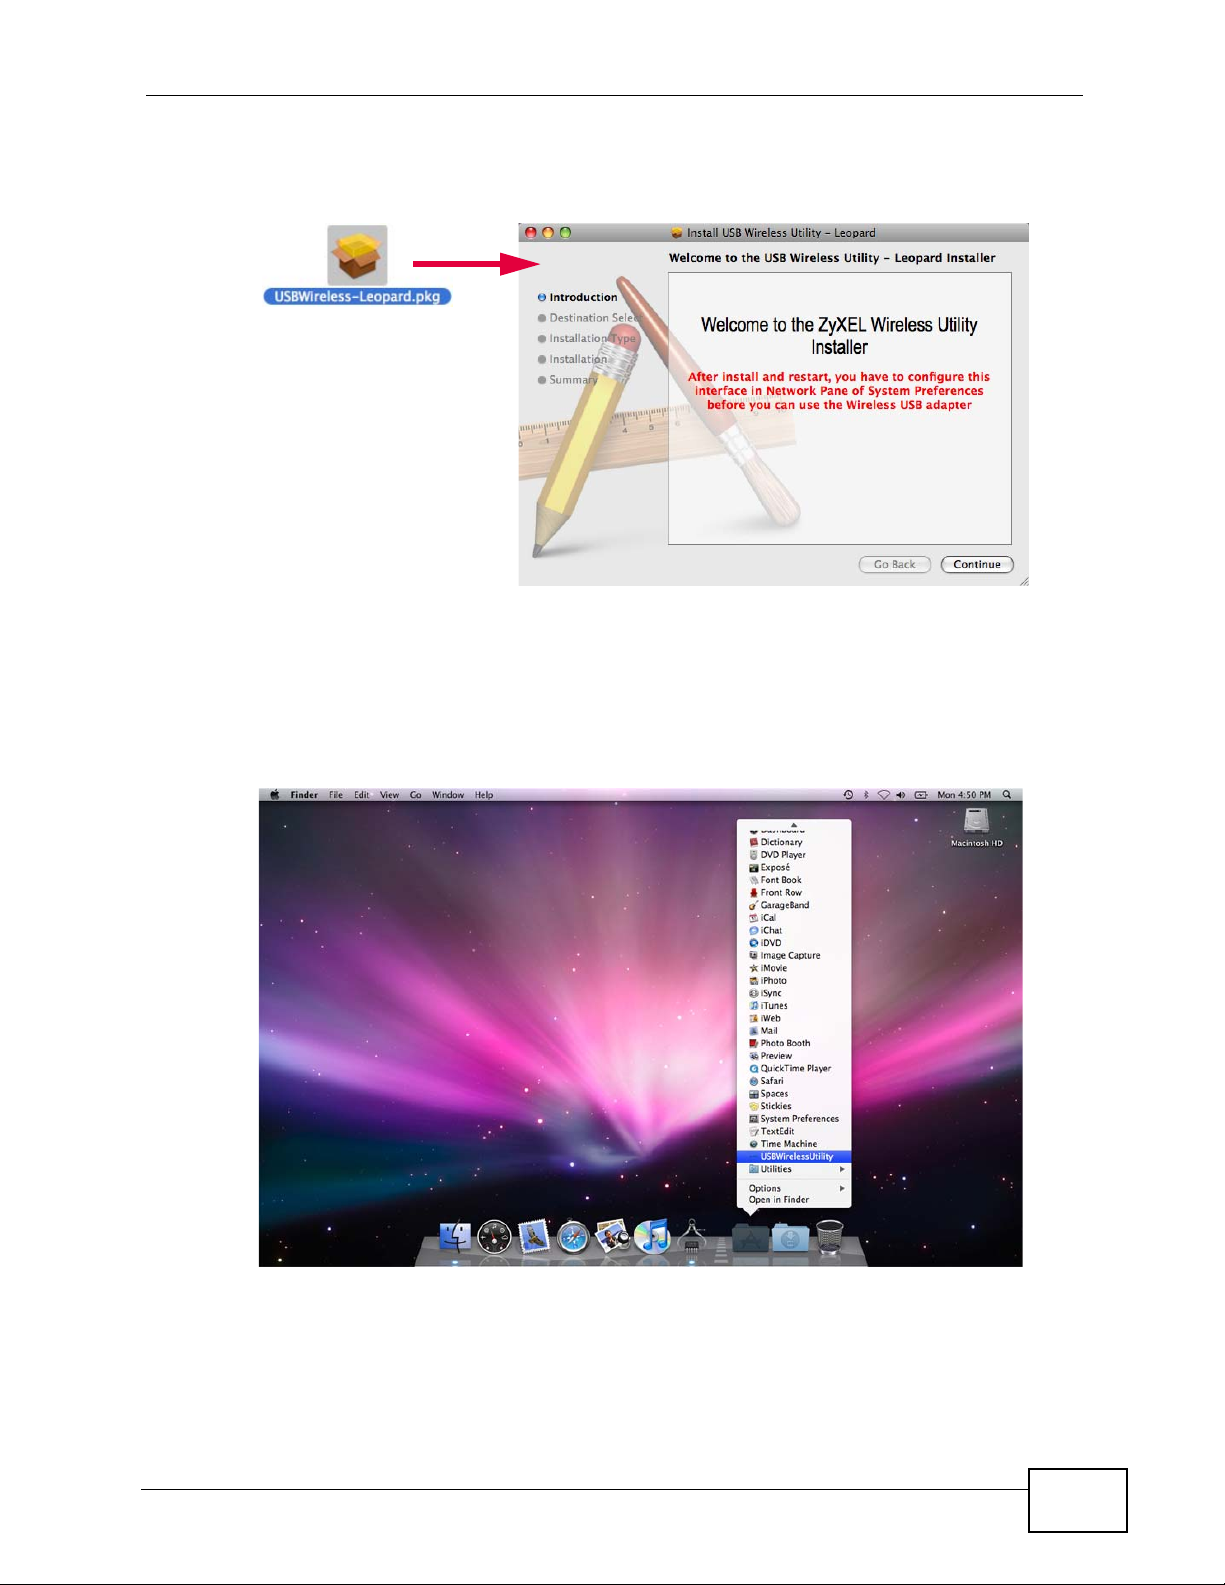
Chapter 1 Getting Started
4 Double-click the USBWireless-Leopard.pkg to run the installation program.
When it opens, follow the on-screen instructions.
5 After installing the ZyXEL Utility and device driver, you must restart your
computer.
6 Once your c omputer restart s, you can fi nd the ZyXEL Utility in your Applications
folder under the name USBWirelessUtility.
Note: A second application called the AwakeZyXELUI.app is placed in your
Applications folder and a link to it is created in your System Preferences >
Accounts > [Admin Account] > Login Items. This is a monitoring application
that detects the NWD2105 whenever you connect it to your computer and
which then automatically opens the ZyXEL Utility.
NWD2105 User’s Guide
17
Page 18
Chapter 1 Getting Started
1.4.2.1 Uninstalling the ZyXEL Utility
While you can drag the ZyXEL Utility from your Applications folder directly to the
Trash and remove it that way, the best and safest course of action is to run the
uninstallation program bundled on the included disc. This ensures that all
components of the application are properly removed, especially the device driver.
To uninstall the ZyXEL Utility:
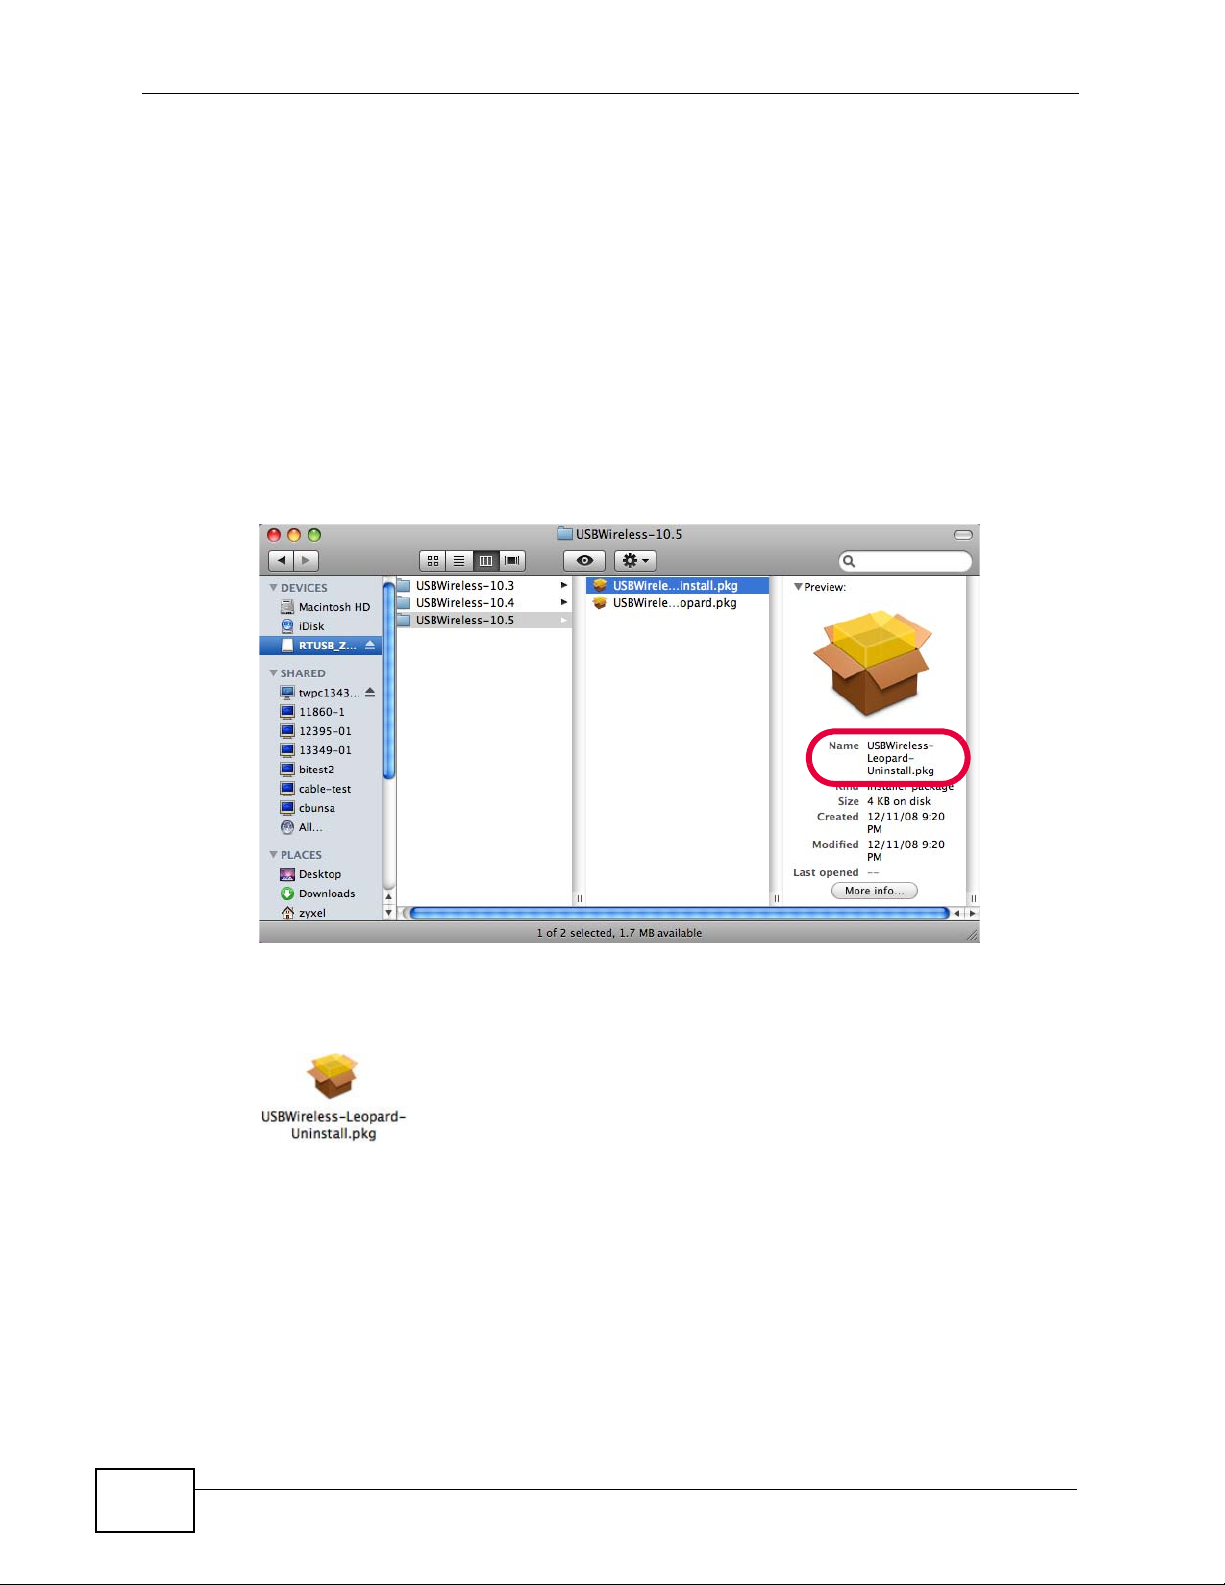
1 Open the ZyXEL_USB.dmg file on the included disc.
2 Open the folder that corresponds to your version of Mac OS X. For example, if you
are using 10.5, then you want to open the USBWireless-10.5 folder.
.
18
3 Double-click the USBWireless-Leopard-Uninstall.pkg to run the installation
program and follow the on-screen instructions.
4 After uninstalling the ZyXEL Utility and device driver, you must restart your
computer.
NWD2105 User’s Guide
Page 19
1.5 Device Applications
This section describes some network applications for the NWD2105. Y ou can either
set the network type to Infrastructure and connect to an AP or use Ad-Hoc
mode and connect to a peer computer (another wireless device in Ad-Hoc mode).
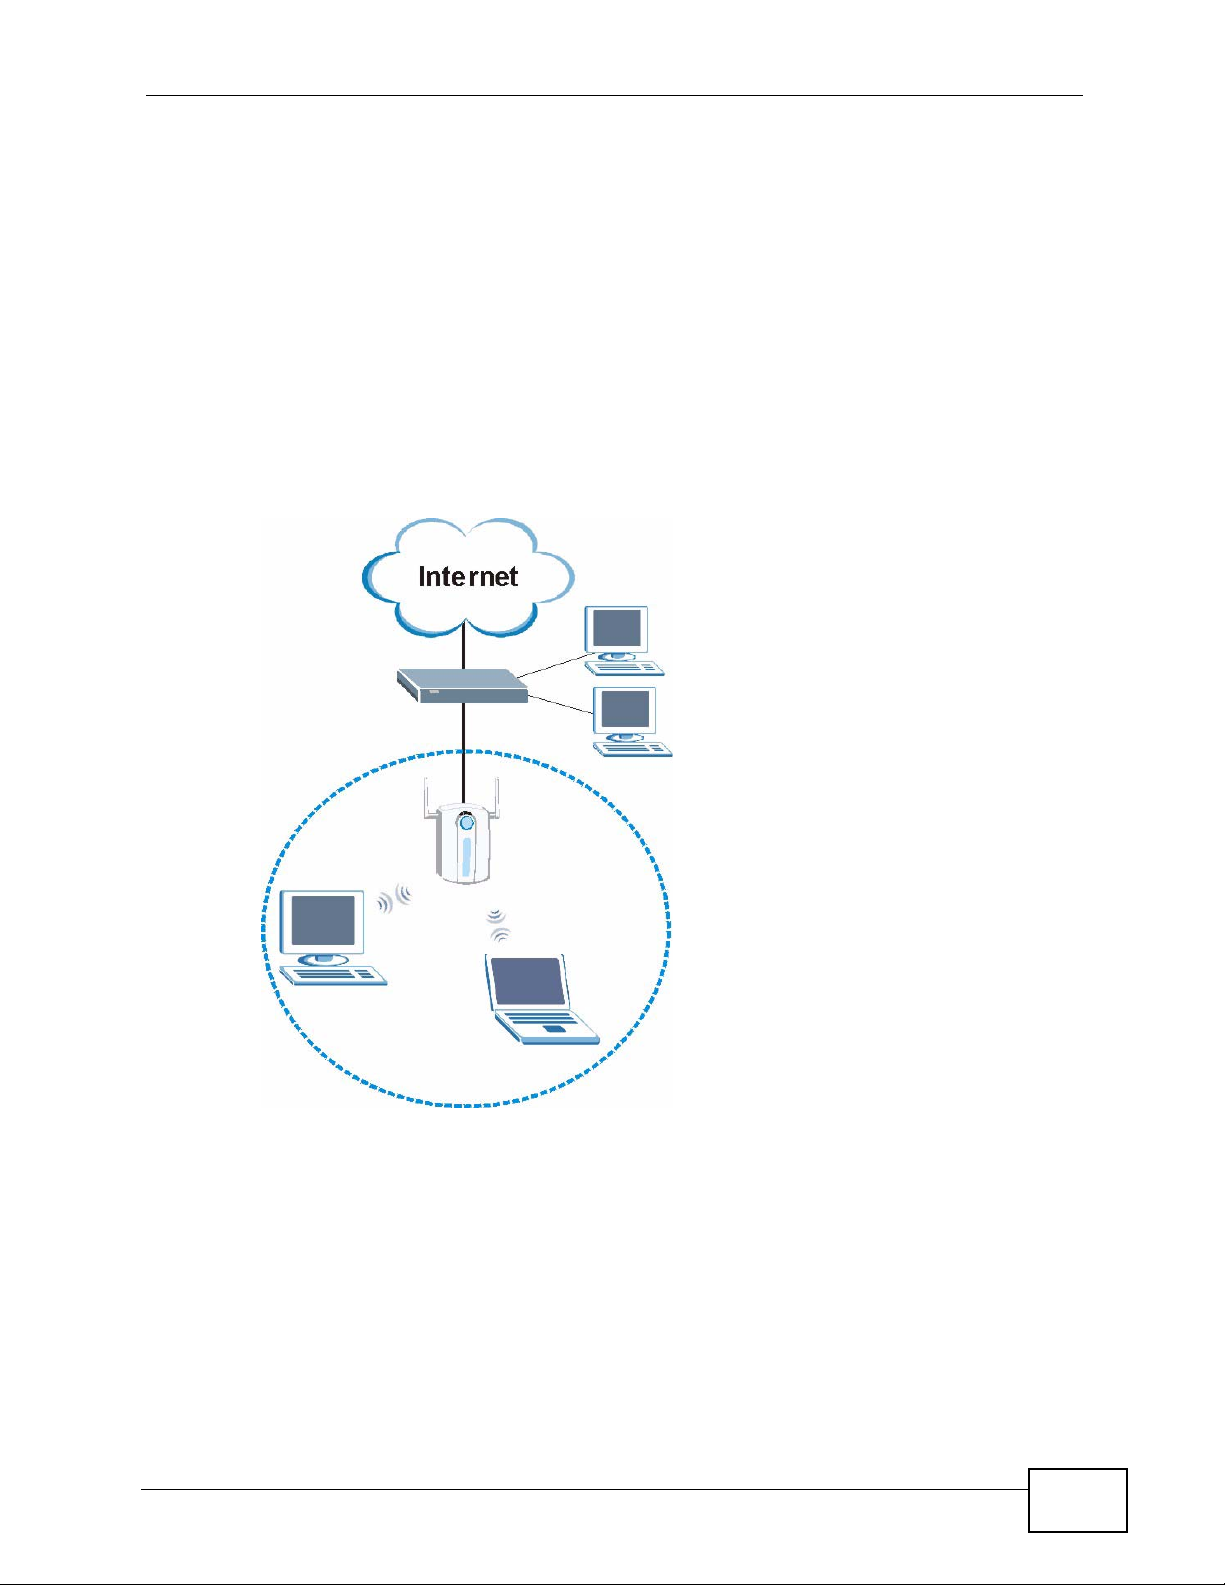
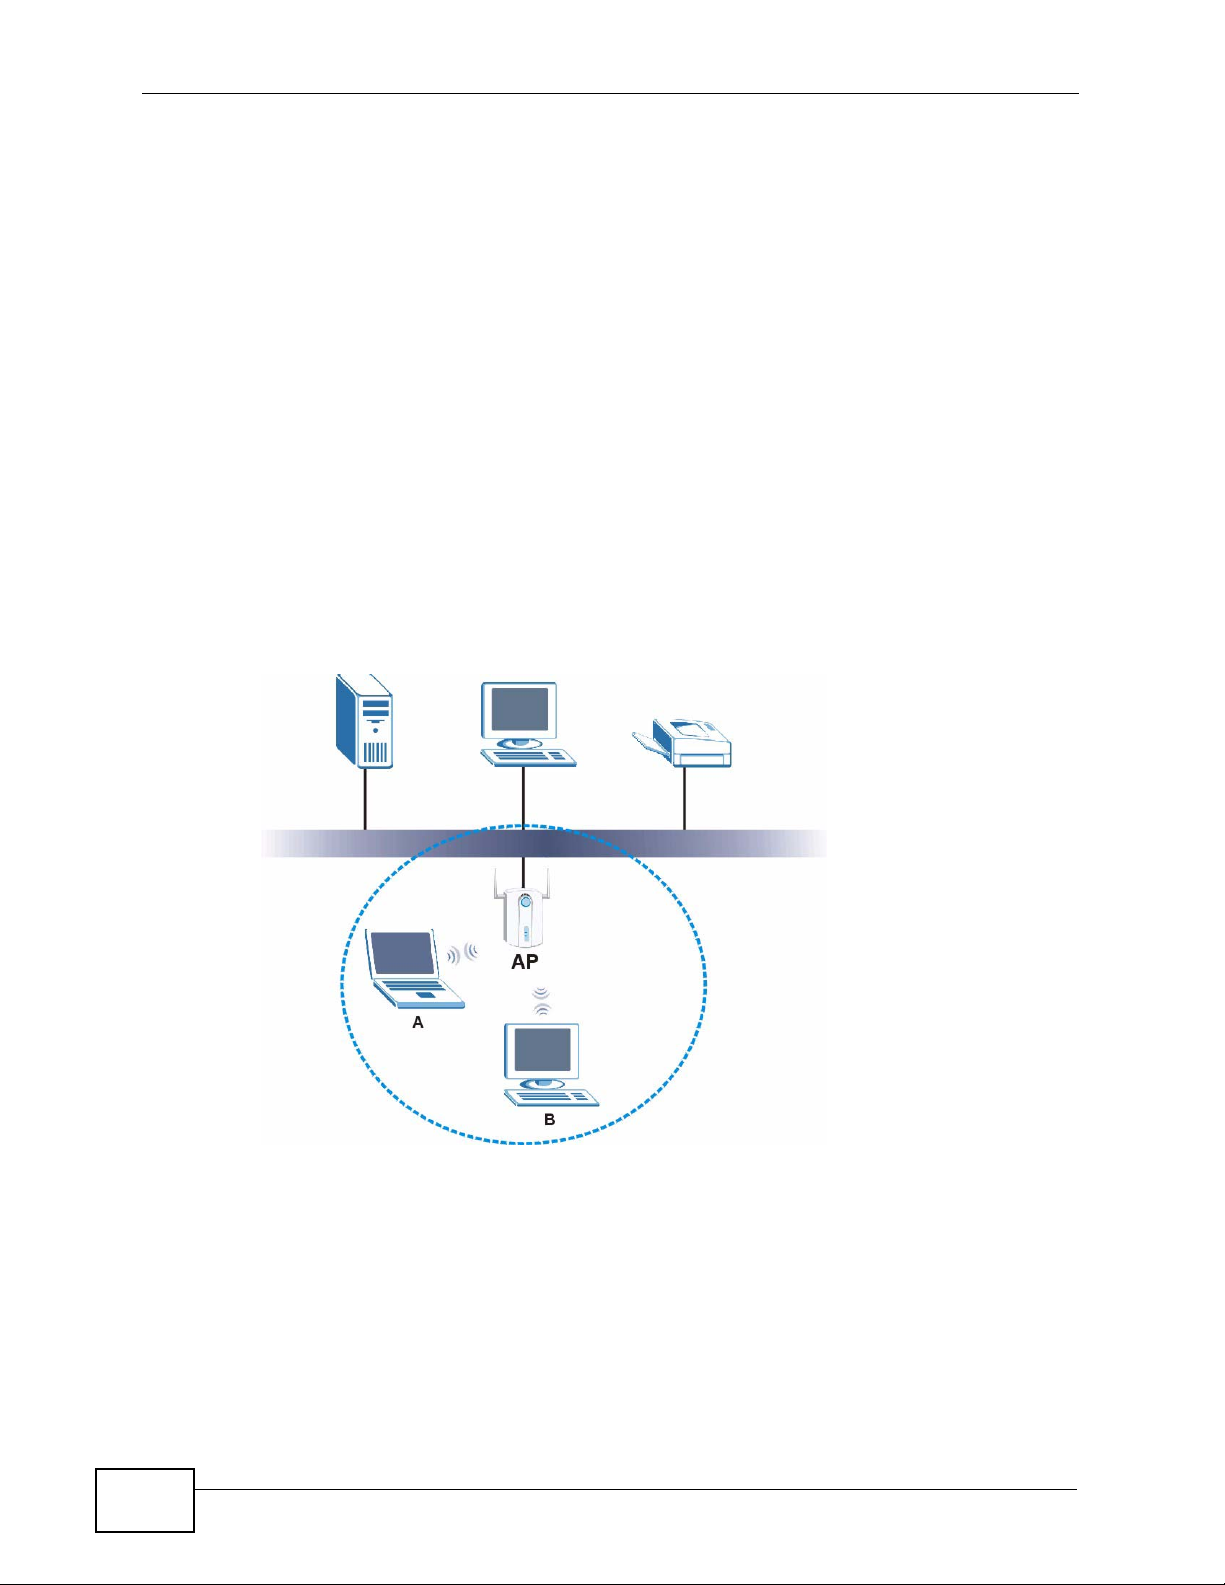
Infrastructure
To connect to a network via an access point (AP), set the NWD2105 network type
to Infrastructure. Through the AP, you can access the Internet or the wired
network behind it.
Figure 2 Application: Infrastructure
Chapter 1 Getting Started
NWD2105 User’s Guide
19
Page 20
Chapter 1 Getting Started
Ad-Hoc
To set up a small independent wireless workgroup without an AP, use Ad-Hoc.
Ad-Hoc does not require an AP or a wired network. Two or more wireless clients
communicate directly with each other.
Note: Wi-Fi Protected Setup (WPS) is not available in ad-hoc mode.
Figure 3 Application: Ad-Hoc
20
NWD2105 User’s Guide
Page 21

CHAPTER 2
Wireless LANs
2.1 Overview
This section provides background information on wireless Local Area Networks.
2.1.1 What You Can Do in This Section
• Connect securely to an AP using many of the strongest and most common
encryption protocols. See Section 2.3 on page 23 for details.
• Connect securely either to an AP or computer-to-computer using WPS. See
Section 2.4 on page 25 for details.
2.1.2 What You Need to Know
The following terms and concepts may help as you read through this section.
Server
When two or more devices are connected digitally to form a network, the one that
distributes data to the other devices is known as the “server”. A RADIUS (Remote
Authentication Dial-In User Service) is a kind of server that manages logins and
logout, among other things, for the network to which it is connected.
Client
When two or more devices are connected digitally to form a network, the one that
contacts and obtains data from a server is known as the “client”. Each client is
designed to work with one or more specific kinds of servers, and each server
requires a specific kind of client . Wireless adapters are clients that connect to a
network server through an AP.
Authentication
Authentication is the process of confirming a client’s or user’ s digital identit y when
they connect to a network. Turning off authentication means disabling all security
protocols and opening your network to anyone with the means to connect to it.
NWD2105 User’s Guide
21
Page 22
Chapter 2 Wireless LANs
Encryption
The process of taking data and encoding it, usually using a mathematical formula,
so that it becomes unreadable unless decrypted with the proper code or pass
phrase.
2.1.3 Before You Begin
• You should have valid login information for an existing network Access Point,
otherwise you may not be able to make a network connection right away.
2.2 Wireless LAN Overview
The following figure provides an example of a wireless network with an AP. See
Figure 3 on page 20 for an Ad Hoc network example.
Figure 4 Example of a Wireless Network
22
The wireless network is the part in the blue circle. In this wireless network,
devices A and B are called wireless clients. The wireless clients use the access
point (AP) to interact with other devices (such as the printer) or with the Internet
Every wireless network must follow these basic guidelines.
• Every device in the same wireless network must use the same SSID.
The SSID is the name of the wireless network. It stands for Service Set IDentity.
NWD2105 User’s Guide
Page 23

• If two wireless networks overlap, they should use a different channel.
Like radio stations or television channels, each wireless network uses a specific
channel, or frequency, to send and receive information.
• Every device in the same wireless network must use security compatible with
the AP or peer computer.
Security stops unauthorized devices from using the wireless net work. It can also
protect the information that is sent in the wireless network.
2.3 Wireless LAN Security
Wireless LAN security is vital to your network to protect wireless communications.
If you do not enable any wireless security on your NWD2105, the NWD2105’s
wireless communications are accessible to any wireless networking device that is
in the coverage area.
Chapter 2 Wireless LANs
Note: You can use only WEP encryption if you set the NWD2105 to Ad-hoc mode.
See the appendices for more detailed information about wireless security.
2.3.1 User Authentication and Encryption
You can make every user log in to the wireless network before they can use it.
This is called user authentication. However, every wireless client in the wireless
network has to support IEEE 802.1x to do this.
Wireless networks can use encryption to protect the informat ion that is sent in the
wireless network. Encryption is like a secret code. If you do not know the secret
code, you cannot understand the message.
2.3.1.1 WEP
2.3.1.1.1 Data Encryption
WEP (Wired Equivalent Privacy) encryption scr ambles all data packets tr ansmitted
between the NWD2105 and the AP or other wireless stations to keep network
communications private. Both the wireless stations and the access points must
use the same WEP key for data encryption and decryption.
There are two ways to create WEP keys in your NWD2105.
NWD2105 User’s Guide
23
Page 24

Chapter 2 Wireless LANs
• Automatic WEP key generation based on a “password phrase” called a
passphrase. The passphrase is case sensitive. You must use the same
passphrase for all WLAN adapters with this feature in the same WLAN.
For WLAN adapters without the passphrase feature, you can still take advantage
of this feature by writing down the four automatically generated WEP keys from
the Security Settings screen of the ZyXEL utility and entering them manually
as the WEP keys in the other WLAN adapter(s).
•Enter the WEP keys manually.
Your NWD2105 allows you to configure up to four 64-bit or 128-bit WEP keys.
Only one key is used as the default key at any one time.
2.3.1.1.2 Authentication Type
The IEEE 802.11b/g standard describes a simple authentication method between
the wireless stations and AP. Three authentication types are defined: Auto, Open
and Shared.
• Open mode is implemented for ease-of-use and when security is not an issue.
The wireless station and the AP or peer computer do not share a secret key.
Thus the wireless stations can associate with any AP or peer computer and listen
to any transmitted data that is not encrypted.
• Shared mode involves a shared secret key to authenticate the wireless station
to the AP or peer computer. This requires you to enable the wireless LAN
security and use same settings on both the wireless station and the AP or peer
computer.
• Auto authentication mode allows the NWD2105 to switch between the open
system and shared key modes automatically. Use the auto mode if you do not
know the authentication mode of the other wireless stations.
2.3.1.2 IEEE 802.1x
The IEEE 802.1x standard outlines enhanced security methods for both the
authentication of wireless stations and encryption key management.
Authentication can be done using an external RADIUS server.
2.3.1.2.1 EAP Authentication
EAP (Extensible Authentication Protocol) is an authentication protocol that runs on
top of the IEEE 802.1x transport mechanism in order to support multiple types of
user authentication. By using EAP to in teract with an EAP-compatible RADIUS
server, an access point helps a wireless station and a RADIUS server perform
authentication.
24
The type of authentication you use depends on the RADIUS server and an
intermediary AP(s) that supports IEEE 802.1x. The NWD2105 supports EAP-TLS,
EAP-TTLS (at the time of writing, TTLS is not available in Windows Vista) and EAPPEAP. Refer to Appendix A on page 61 for descriptions.
NWD2105 User’s Guide
Page 25

For EAP-TLS authentication type, you must first have a wired connection to the
network and obtain the certificate(s) from a certificate authority (CA). Certificates
(also called digital IDs) can be used to authenticate users and a CA issues
certificates and guarantees the identity of each certificate owner.
2.3.1.3 WPA and WPA2
Wi-Fi Protected Access (WPA) is a subset of the IEEE 802.11i standard. WPA2
(IEEE 802.11i) is a wireless security standard that defines stronger encryption,
authentication and key management than WPA.
Key differences between WPA(2) and WEP are improved data encryption and user
authentication.
Both WPA and WPA2 improve data encryption by using Temporal Key Integrity
Protocol (TKIP), Message Integrity Check (MIC) and IEEE 802.1x. WPA and WPA2
use Advanced Encryption Standard (AES) in the Counter mode with Cipher block
chaining Message authentication code Protocol (CCMP) to offer stronger
encryption than TKIP.
Chapter 2 Wireless LANs
If both an AP and the wireless clients support WPA2 and you have an external
RADIUS server, use WPA2 for stronger data encryption. If you don't have an
external RADIUS server, you should use WPA2-PSK (WPA2-Pre-Shared Key) that
only requires a single (identical) password entered into each access point, wireless
gateway and wireless client. As long as the passwords match, a wireless client will
be granted access to a WLAN.
If the AP or the wireless clients do not support WPA2, just use WPA or WPA-PSK
depending on whether you have an external RADIUS server or not.
Select WEP only when the AP and/or wireless clients do not support WP A or WPA2.
WEP is less secure than WPA or WPA2.
2.4 WiFi Protected Setup
Your NWD2 105 s upport s WiFi Protect ed Setu p (WPS), which is an easy w ay to set
up a secure wireless network. WPS is an industry standard specification, defined
by the WiFi Alliance.
WPS allows you to quickly set up a wireless network with strong security, without
having to configure security settings manually. Each WPS connection works
between two devices. Both devices must support WPS (check each device’s
documentation to make sure).
NWD2105 User’s Guide
25
Page 26

Chapter 2 Wireless LANs
Depending on the devices you have, you can either press a button (on the device
itself , or in its configuration utility) or enter a PIN (a unique P ersonal Identification
Number that allows one device to authenticate the other) in each of the two
devices. When WPS is activated on a device, it has two minutes to find another
device that also has WPS activated. Then, the two devices connect and set up a
secure network by themselves.
2.4.1 Push Button Configuration
WPS Push Button Configuration (PBC) is in itiated by pressing a button on each
WPS-enabled device, and allowing them to connect automatically. You do not need
to enter any information.
Not every WPS-enabled device has a physical WPS button. Some may have a WPS
PBC button in their configuration utilities instead of or in addition to the physical
button.
Take the following steps to set up WPS using the button.
1 Ensure that the two devices you want to set up are within wireless range of one
another.
2 Look for a WPS button on each device. If the device does not have one, log into its
configuration utility and locate the button.
3 Press the button on one of the devices (it doesn’t matter which).
4 Within two minutes, press the but ton on the other device. The regist rar sends t he
network name (SSID) and security key throug h an secure connection to the
enrollee.
If you need to make sure that WPS worked, check the list of associated wireless
clients in the AP’s configuration utility. If you see the wireless client in the list,
WPS was successful.
2.4.2 PIN Configuration
Each WPS-enabled device has its own PIN (Personal Identification Number). This
may either be static (it cannot be changed) or dynamic (in some devices you can
generate a new PIN by clicking on a button in the configuration interface).
26
Use the PIN method instead of the push-button configuration (PBC) method if you
want to ensure that the connection is esta blished between the devices you specify,
not just the first two devices to activate WPS in r ange of each other. However, y ou
need to log into the configuration interfaces of both devices to use the PIN
method.
NWD2105 User’s Guide
Page 27

Chapter 2 Wireless LANs
When you use the PIN method, you must enter the PIN from one device (usually
the wireless client) into the second device (usually the Access Point or wireless
router). Then, when WPS is activated on the first device, it presents its PIN to the
second device. If the PIN matches, one device sends the network and security
information to the other, allowing it to joi n th e network.
Take the following steps to set up a WPS connection between an access point or
wireless router (referred to here as the AP) and a client device using the PIN
method.
1 Ensure WPS is enabled on both devices.
2 Access the WPS section of the AP’s configuration interface. See the device’s User’ s
Guide for how to do this.
3 Look for the client’s WPS PIN; it will be displayed either on the device, or in the
WPS section of the client’s configuration interface.
4 Enter the client’s PIN in the AP’s configur ation interface.
Note: If the client device’s configuration interface has an area for entering another
device’s PIN, you can either enter the client’s PIN in the AP, or enter the AP’s
PIN in the client - it does not matter which.
5 Start WPS on both devices within two minutes.
Note: Use the configuration utility to activate WPS, not the push-button on the device
itself.
6 On a computer connected to the wireless client, try to connect to the Internet. If
you can connect, WPS was successful.
If you cannot connect, check the list of associated wireless clients in the AP’s
configuration utility. If you see the wireless client in the list, WPS was successful.
NWD2105 User’s Guide
27
Page 28

Chapter 2 Wireless LANs
The following figure shows a WPS-enabled wireless client (installed in a notebook
computer) connecting to the WPS-enabled AP via the PIN method.
Figure 5 Example WPS Process: PIN Method
ENROLLEE
REGISTRAR
WPS
This device’s
WPS PIN: 123456
WPS
Enter WPS PIN
from other device:
2.4.3 How WPS Works
WPS
START
WITHIN 2 MINUTES
SECURE EAP TUNNEL
SSID
WPA(2)-PSK
COMMUNICATION
WPS
START
28
When two WPS-enabled devices connect, each device must assume a specific role.
One device acts as the Registrar (the device that supplies network and security
settings) and the other device acts as the Enrollee (the device that receives
network and security settings. The registrar creates a secure EAP (Extensible
Authentication Protocol) tunnel and sends the network name (SSID) and the WPAPSK or WPA2-PSK pre-shared key to the enrollee. Whether WPA-PSK or WP A2-PSK
is used depends on the standards supported by the devices. If the registrar is
NWD2105 User’s Guide
Page 29

Chapter 2 Wireless LANs
already part of a network, it sends the existing information. If not, it generates
the SSID and WPA(2)-PSK randomly.
The following figure shows a WPS-enabled client (installed in a notebook
computer) connecting to a WPS-enabled access point.
Figure 6 How WPS works
ACTIVATE
WPS
WITHIN 2 MINUTES
WPS HANDSHAKE
SECURE TUNNEL
SECURITY INFO
COMMUNICATION
ACTIVATE
WPS
REGISTRARENROLLEE
The roles of registrar and enrollee last only as long as the WPS setup process is
active (two minutes). The next time you use WPS, a different device can be the
registrar if necessary.
The WPS connection process is like a handshake; only two devices participate in
each WPS transaction. If you want to add more devices you should repeat the
process with one of the existing networked devices and the new device.
Note that the access point (AP) is not always the registrar, and the wireless client
is not always the enrollee. All WPS-certified APs can be a registrar, and so can
some WPS-enabled wireless clients.
By default, a WPS devices is “unconfigured”. This means that it is not part of an
existing network and can act as either enrollee or registrar (if it supports both
functions). If the registrar is unconfigured, the security settings it transmits to the
enrollee are randomly-generated. Once a WPS-enabled device has connected to
another device using WPS, it becomes “configured”. A configured wireless client
can still act as enrollee or registrar in subsequent WPS connections, but a
configured access point can no longer act as enrollee. It will be the registrar in all
NWD2105 User’s Guide
29
Page 30

Chapter 2 Wireless LANs
subsequent WPS connections in which it is involved. If you want a configured AP to
act as an enrollee, you must reset it to its factory defaults.
2.4.3.1 Example WPS Network Setup
This section shows how security settings are distributed in an example WPS setup.
The following figure shows an example network. In step 1, both AP1 and Client 1
are unconfigured. When WPS is activated on both, they perform the handshake. In
this example, AP1 is the registrar, and Client 1 is the enrollee. The registrar
randomly generates the security information to set up the network, since it is
unconfigured and has no existing information.
Figure 7 WPS: Example Network Step 1
SECURITY INFO
CLIENT 1
REGISTRARENROLLEE
AP1
In step 2, you add another wireless client to the network. You know that Client 1
supports registrar mode, but it is better to use AP1 for the WPS handshake with
the new client since you must connect to the access point anyway in order to use
the network. In this case, AP1 must be the registrar, since it is configured (it
already has security information for the network). AP1 supplies the existing
security information to Client 2.
Figure 8 WPS: Example Network Step 2
REGISTRAR
EXISTING CONNECTION
CLIENT 1
ENROLLEE
O
F
N
I
Y
T
I
R
U
C
E
S
AP1
30
CLIENT 2
NWD2105 User’s Guide
Page 31

Chapter 2 Wireless LANs
In step 3, you add another access point (AP2) to your network. AP2 is out of
range of AP1, so you cannot use AP1 for the WPS handshake with the new access
point. However, you know that Client 2 supports the registrar function, so you use
it to perform the WPS handshake instead.
Figure 9 WPS: Example Network Step 3
EXISTING CONNECTION
N
O
I
CLIENT 1
REGISTRAR
T
C
E
N
N
O
C
G
N
I
T
S
I
X
E
AP1
CLIENT 2
2.4.4 Limitations of WPS
WPS has some limitations of which you should be aware.
• WPS works in Infrastructure networks only (where an AP and a wireless client
communicate). It does not work in Ad-Hoc networks (where there is no AP).
• When you use WPS, it works between two devices only. You cannot enroll
multiple devices simultaneously, you must enroll one after the other.
For instance, if you have two enrollees and one registrar you must set up the
first enrollee (by pressing the WPS button on the registr ar and the first enrollee,
for example), then check that it successfully enroll ed , then set up the second
device in the same way.
S
E
C
U
R
I
T
Y
I
N
F
O
ENROLLEE
AP1
NWD2105 User’s Guide
31
Page 32

Chapter 2 Wireless LANs
• WPS works only with other WPS-enabled devices. However, you can still add
non-WPS devices to a network you already set up using WPS.
WPS works by automatically issuing a randomly-generated WPA-PSK or WPA2PSK pre-shared key from the registrar device to the enrollee devices. Whether
the network uses WPA- PSK or WP A2-PSK depends on the device. You can check
the configuration interface of the registrar device to discover the key the
network is using (if the device supports this feature). Then, you can enter the
key into the non-WPS device and join the network as normal (the non-WPS
device must also support WPA-PSK or WPA2-PSK).
• When you use the PBC method, there is a short period (from the moment you
press the button on one device to the moment you press the button on the
other device) when any WPS-enabled device could join the network. This is
because the registrar has no way of identifying the “correct” enrollee, and
cannot differentiate between your enrollee and a rogue device. This is a possible
way for a hacker to gain access to a network.
You can easily check to see if this has happened. WPS works between only two
devices simultaneously, so if another device has enrolled your device will be
unable to enroll, and will not have access to the network. If this happens, open
the access point’s configuration interface and look at the list of associated
clients (usually displayed by MAC address). It does not matter if the access
point is the WPS registrar, the enrollee, or was not involved in the WPS
handshake; a rogue device must still associate with the access point to gain
access to the network. Check the MAC addresses of your wireless clients
(usually printed on a label on the bottom of the device). If there is an unknown
MAC address you can remove it or reset the AP.
32
NWD2105 User’s Guide
Page 33

CHAPTER 3
ZyXEL Utility - Mac OS X
3.1 Overview
This chapter shows you how to use the ZyXEL utility to configure your NWD2105
using the Macintosh operating system, Mac OS X.
3.1.1 What You Can Do in This Chapter
•The Profile screen (Section 3.3 on page 35) lets you create, delete and manage
your wireless network profiles.
•The Link Status screen (Section 3.6 on page 40) lets you see your current
connection details, monitor signal strength and quality, and more.
•The Site Survey screen (Section 3.7 on page 41) lets you connect to any
available unsecured wireless network in range of the NWD2105, or open the
security settings screen for any secured wireless network in range.
•The Statistics screen (Section 3.8 on page 43) lets you view network traffic
statistics between the NWD2105 and the AP or peer to which it is connected.
•The Advanced screen (Section 3.9 on page 45) lets you configure your
NWD2105 with advanced hardware options.
•The WPS screen (Section 3.10 on page 46) lets you configure your NWD2105’s
Wi-Fi Protected Setup (WPS) options as well as establish and manage WPS
connections.
•The About screen (Section 3.11 on page 51) lets you view the information
about which version of the driver and utility you are currently using.
3.1.2 What You Need to Know
The following terms and concepts may help as you read through this chapter.
Wired Equivalent Privacy (WEP)
Although one of the original wireless encryption protocols, WEP is also the
weakest. Many people use it strictly to deter unintentional usage of their wireless
network by outsiders.
NWD2105 User’s Guide
33
Page 34

Chapter 3 ZyXEL Utility - Mac OS X
Wi-Fi Protected Access (WPA)
The WPA protocol affords users with vastly stronger security than WEP. It comes in
two different varieties: WPA and WPA2. Always try to use WPA2 as it implements
the full version of the security standar d and WPA does not.
Pre-Shared Key (PSK)
A pre-shared key is a password shared between the server and the client that
unlocks the algorithm used to encrypt the data traffic between them. Without the
proper password, the client and the server cannot communicate.
Extensible Authentication Protocol (EAP)
An enhanced security framework designed to improve an existing security
protocol, such as WPA-PSK or WPA2-PSK.
3.1.3 Before You Begin
• Make sure the Mac OS X version of the ZyXEL utility is already installed on your
computer. See Section 1.4 on page 15 for more information.
• After installation, make sure you repair permissions on your installation drive.
Click Applications > Utilities > Disk Utility or do a Spotlight search for the
key words “Disk Utility” and select it from the search results list. When the Disk
Utility application opens, select your installation drive and then click the Repair
Permissions button.
3.2 ZyXEL Utility Screen Summary
This section describes the ZyXEL utility screens in Mac OS X.
Figure 10 ZyXEL Utility: ZyXEL Utility Menu Summary
The following table describes the menus.
Table 3 ZyXEL Utility: Menu Summary
TAB DESCRIPTION
Profile Use this screen to add, delete, edit or activate a profile with a set of
wireless and security settings.
Link Status Use this screen to see your current connection status, configuration and
data rate statistics.
34
NWD2105 User’s Guide
Page 35

Table 3 ZyXEL Utility: Menu Summary
TAB DESCRIPTION
Site Survey Use this screen to:
• scan for a wireless network
• configure wireless security (if activated on the selected network)
• connect to a wireless network
Statistics Use this screen to view advanced information on wireless network
traffic.
Advanced Use this screen to configure advanced settings on your NWD2105.
WPS Use this screen to configure the WPS (Wi-Fi Protected Security) settings
on your NWD2105.
About Use this screen to find the utility and driver version.
3.3 The Profile Screen
This screen allows you to configure and manage wireless profiles.
Chapter 3 ZyXEL Utility - Mac OS X
Figure 11 ZyXEL Utility: Profile
NWD2105 User’s Guide
35
Page 36

Chapter 3 ZyXEL Utility - Mac OS X
The following table describes the labels in this screen.
Table 4 ZyXEL Utility: Profile
LABEL DESCRIPTION
This icon indicates the currently active profile.
Profile This is the name of the pre-configured profile.
SSID This is the SSID of the wireless network to which the selected profile
associates.
Channel This field displays the channel number used by the profile.
Authentication This field displays the type of authentication used by the profile (Open,
Shared, WPA-PSK or WPA2-PSK).
Encryption This field displays the encryption protocol used by the profile.
• When WEP security is used, WEP displays.
• When WPA-PSK or WPA2-PSK security is used, TKIP or AES
Network Type This field displays Infrastructure when the profile is configured to
connect to an access point, or Ad Hoc when the profile is configured to
connect to another computer.
Add Click this to create a new profile.
Edit Click this to alter the settings of a selected profile.
Delete Click this to remove a selected profile from the list.
Activate Click this to select the profile to use. Alternatively, double-click the
profile’s name in the list.
displays.
36
NWD2105 User’s Guide
Page 37

Chapter 3 ZyXEL Utility - Mac OS X
3.4 The Profile - System Configuration Screen
This screen allows you to configure system and network settings for your
NWD2105.
Figure 12 ZyXEL Utility: Profile - System Configuration
The following table describes the labels in this screen.
Table 5 ZyXEL Utility: Profile - System Configuration
LABEL DESCRIPTION
Profile Name Enter a descriptive name in this field, or alternatively keep the name
assigned by the utility.
SSID Select an available wireless device from the list, or enter the SSID of
the wireless device to which you want to associate.
CAM
(Constantly
Awake Mode)
Power Saving
Mode
Network Type Select Infrastructure to connect to a wireless access point, or select
Tx Power This field controls the transmission power of the NWD2105. When using
Select this to have the NWD2105 never go into sleep mode.
Select this to have the NWD2105 go into sleep mode when it is not
transmitting data.
802.11 Ad Hoc to connect to another wireless-enabled computer.
the NWD2105 with a notebook computer, select a lower transmission
power level when you are close to the AP in order to conserve battery
power.
NWD2105 User’s Guide
37
Page 38

Chapter 3 ZyXEL Utility - Mac OS X
Table 5 ZyXEL Utility: Profile - System Configuration (continued)
LABEL DESCRIPTION
Channel In ad-hoc mode, choose the radio channel to use for the wireless
network. If there are other networks in the area, choose a channel as
far away as possible, in order to minimize the risk of interference.
In Infrastructure mode, this field is not configurable; the NWD2105 uses
whichever channel the AP uses.
RTS Threshold Select the packet size above which the NWD2105 transmits an RTS
(Request To Send) message.
Fragment
Threshold
OK Click this to save your changes and return to the Profile List screen.
Cancel Click this to return to the Profile List screen without saving your
Select the packet size above which the NWD2105 fragments (breaks
up) the packet into smaller pieces.
changes.
3.5 The Profile - Authentication and Security Screen
This screen allows you to configure security settings on your NWD2105.
Figure 13 ZyXEL Utility: Profile - Authentication and Security
38
NWD2105 User’s Guide
Page 39

Chapter 3 ZyXEL Utility - Mac OS X
The following table describes the labels in this screen.
Table 6 ZyXEL Utility: Profile - Authentication and Security
LABEL DESCRIPTION
Authentication
Type
Encryption Type • When you select Open in the Authentication Ty pe field, either
WPA PreShared Key
Key #1~4 When you select WEP in the Encryption Type field, you must enter the
Select the security standard you want to use. All the other wireless
devices on your network must be able to use the same standard you
select.
• Open mode is used when security is not an issue. No authentication
is required, and any wireless device can join the network.
• Shared mode security is used with WEP (Wired Equivalent Privacy).
• WPA-PSK security uses a pre-shared key. All the wireless devices
on the network use the same key to access the network. This option
is not available in ad-hoc mode.
• WPA2-PSK is an improved version of WPA-PSK security. This option
is not available in ad-hoc mode.
select NONE to use no security (Open), or select WEP to use Wired
Equivalent Privacy security (Shared) for data encryption.
• When you select Shared in the Authentication Type field, this
displays WEP and the NWD2105 uses Wired Equivalent Privacy
security for data encryption.
• When you select WPA-PSK or WPA2-PSK in the Authentication
Type field, select TKIP to use the Temporal Key Integrity Protocol.
Alternatively, select AES to use the Advanced Encryption Standard.
When you select WPA-PSK or WPA2-PSK in the Authentication
Type field, enter the network’s pre-shared key (8~64 uppercase or
lowercase letters and numbers).
network’s WEP key. Check with your network’s administrator for the
correct settings.
Select the key number (1~4), select the key type (Hexadecimal or
ASCII), and enter the WEP key in the field to the right.
Hexadecimal keys use numerals and the letters a~f only , whereas ASCII
keys use numerals and all letters.
OK Click this to save your settings and return to the previous screen.
Cancel Click this to return to the previous screen without saving your settings.
NWD2105 User’s Guide
39
Page 40

Chapter 3 ZyXEL Utility - Mac OS X
3.6 The Link Status Screen
This screen allows you to view the status of the NWD2105’s wireless connection
with an AP or peer computer.
Figure 14 ZyXEL Utility: Link Status
The following table describes the labels in this screen.
Table 7 ZyXEL Utility: Link Status
LABEL DESCRIPTION
Status This displays the SSID (Service Set IDentifier) and MAC (Media Access
Control) address of the access point or peer device to which the
NWD2105 is connected.
Current
Channel
Link Speed
(Mbps)
Throughput
(Kbps)
Link Quality This shows the quality of the wireless connection. This refers to the
dBm format Select this option to display the Link Quality as a power ratio in decibels
This displays the channel number of the current wireless connection, as
well as the radio frequency of the channel in megahertz.
This displays the maximum possible data transmission (Tx) and
reception (Rx) speeds of the current connection in megabits per
second.
This displays the actual data transmission (Tx) and reception (Rx)
speeds of the current connection in kilobits per second.
percentage of packets transmitted successfully. If there are too many
wireless stations in a wireless network, collisions may occur which could
result in a loss of messages even though you have high signal strength.
(dBm) rather than as a percentage.
40
NWD2105 User’s Guide
Page 41

Table 7 ZyXEL Utility: Link Status (continued)
LABEL DESCRIPTION
Signal Strength 1This shows the strength of the antenna’s signal.
The signal strength depends mainly on the antenna output power and
the distance between your NWD2105 and the AP or peer computer.
Noise Level This indicates the relative interfence from other nearby wireless devices
as a percentage. The higher the percentage, the greater the
interference.
HT Info This section displays wireless technical data, such Bandwidth (BW)
frequency, Guard Interval (GI), and Modulation and Coding Scheme
(MCS). It is not user configurable and is only used for customer service
troubleshooting.
3.7 The Site Survey Screen
This screen allows you to view available networks and connect to a network.
Chapter 3 ZyXEL Utility - Mac OS X
Figure 15 ZyXEL Utility: Site Survey
NWD2105 User’s Guide
41
Page 42

Chapter 3 ZyXEL Utility - Mac OS X
The following table describes the labels in this screen.
Table 8 ZyXEL Utility: Site Survey
LABEL DESCRIPTION
This indicates a connection to the associated AP.
SSID This displays the network’s Service Set IDentifier. The SSID is the name
of the network.
BSSID This displays the Basic Service Set IDentifier. The BSSID is the MAC
(Media Access Control) address of the access point or peer wireless
device. Every networking device has a unique MAC address, which
identifies it on the network.
Signal This displays the received radio signal strength of the network. The
higher the value, the better the connection.
Channel This displays the wireless channel on which the network is operating.
Authentication This displays whether WPA, WPA2, WPA-PSK or WPA2-PSK is used
on the network. If the network uses no security or WEP, Unknown
displays.
Encryption • When WPA, WPA2, WPA-PSK or WPA2-PSK is used, this displays the
• When WEP is used, WEP displays.
• When no security is used, None displays.
Network Type This field displays the network type (Infrastructure or Ad Hoc) of the
wireless device.
RESCAN Click this to update the list.
CONNECT Click this to connect to the highlighted wireless network.
ADD PROFILE Click this to go to the Add Profile: System Configuration screen.
encryption protocol used (TKIP or AES).
42
NWD2105 User’s Guide
Page 43

3.8 The Statistics Screen
This screen allows you to view statistics on network traffic bet ween the NWD2105
and the associated AP or peer computer. This sc reen is primarily for
troubleshooting purposes.
Figure 16 ZyXEL Utility: Statistics
Chapter 3 ZyXEL Utility - Mac OS X
The following table describes the labels in this screen.
Table 9 ZyXEL Utility: Statistics
LABEL DESCRIPTION
Transmit
Statistics
Frames
Transmitted
Successfully
Frames
Transmitted
Successfully
Without
Retry
Frames
Transmitted
Successfully
After
Retry(s)
NWD2105 User’s Guide
This section displays statistics about the data frames sent by the
NWD2105.
This displays the total number of frames transmitted by the NWD2105.
This displays the number of frames successfully transmitted by the
NWD2105 on the first attempt.
This displays the number of frames transmitted by the NWD2105 after a
second or subsequent attempt.
43
Page 44

Chapter 3 ZyXEL Utility - Mac OS X
Table 9 ZyXEL Utility: Statistics (continued)
LABEL DESCRIPTION
Frames
Failed to
Receive ACK
After All
Retries
RTS Frames
Successfully
Received
CTS
RTS Frames
Failed to
Receive CTS
Receive
Statistics
Frames
Received
Successfully
Frames
Received
with CRC
Error
Frames
Dropped
Due To Outof-Resource
Duplicate
Frames
Received
RESET
COUNTERS
This displays the number of frames transmitted by the NWD2105 that
did not receive an acknowledgement response from the other wireless
device.
This displays the number of frames, large enough to require the sending
of a “Request to Send” message, that then received a “Clear to Send”
message from the other wireless device.
This displays the number of frames, large enough to require the sending
of a “Request to Send” message, that did not receive a “Clear to Send”
message from the other wireless device.
This section displays statistics about the data frames received by the
NWD2105.
This displays the number of frames received by the NWD2105 without
error.
This displays the number of frames received by the NWD2105 that
contained a Cyclic Redundancy Check error. Cyclic Redundancy Checks
are used to determine whether received data has been altered in transit
(by radio interference, for example).
This displays the number of frames that were not processed because
the NWD2105 did not have the necessary memory.
This shows the number of received frames that were identical to other
received frames.
Click this to turn all the counters back to zero.
44
NWD2105 User’s Guide
Page 45

3.9 The Advanced Screen
This screen allows you to configure advanced network settings on your NWD2105.
Figure 17 ZyXEL Utility: Advanced
Chapter 3 ZyXEL Utility - Mac OS X
The following table describes the labels in this screen.
Table 10 ZyXEL Utility: Advanced
LABEL DESCRIPTION
Wireless Mode This indicates the NWD2105’s wireless network mode.
TX Rate This field displays the maximum rate at which data is sent by the
NWD2105 over the wireless network. Auto indicates that the network
speed is chosen automatically by the NWD2105 based on its current
connection.
Enable TX Burst Select this to turn burst transmission on. Deselect it to turn burst
transmission off.
Enable PSP
XLink
Radio On/Off A green icon ( ) displays when the NWD2105’s radio is enabled. A red
Apply Click this to save your settings.
Select this to allow ad-hoc network building with the PSP KAI game
server.
icon ( ) displays when the NWD2105’s radio is disabled.
Click Radio Off to disable the NWD2105’s wireless functions.
Click Radio On to enable the NWD2105’s wireless functions.
NWD2105 User’s Guide
45
Page 46

Chapter 3 ZyXEL Utility - Mac OS X
3.10 The WPS Screen
This screen allows you to configure the NWD2105’s Wi-Fi Protected Security
(WPS).
Figure 18 ZyXEL Utility: WPS
46
The following table describes the labels in this screen.
Table 11 ZyXEL Utility: WPS
LABEL DESCRIPTION
WPS AP List This displays a list of WPS-compatible devices within range of the
NWD2105.
ID This field indicates the AP’s identication number, if it has one.
SSID This field indicates the AP’s Service Set Identification (SSID)
BSSID This field indicates the AP’s Basic Service Set Identification (BSSID)
Channel This field indicates the channel on which the AP is broadcasting.
AuthenticationThis field indicates the type of authentication required by the AP.
Encryption This field indicates the type of encryption used by the AP.
WPS Profile List This section displays a profile created explicitly for use with WPS in
Registrar mode. The NWD2105 creates the profile on the fly as it is
needed.
When in Enrollee mode, this section displays connection profile
settings.
NWD2105 User’s Guide
Page 47

Chapter 3 ZyXEL Utility - Mac OS X
Table 11 ZyXEL Utility: WPS (continued)
LABEL DESCRIPTION
Profile This field indicates the profile name. Profiles created on the fly are
named Profile# where # is a number. For example, Profile1.
SSID This field indicates your profile’s unique SSID.
AuthenticationThis field indicates the authentication type required by your NWD2105
while using WPS.
Encryption This field indicates the encryption required by your NWD2105 while
using WPS.
Rescan Click this button to rescan the local area for WPS-compatible devices.
Information Select an AP from the WPS AP List and then click this button to display
detailed information on it.
See Section 3.10.1 on page 48 for more details.
PIN Code This field displays a randomly generated 8-digit personal identification
code for your NWD2105. In Enrollee mode it is not editable but it can
be renewed; in Registrar mode it can be edited. Click the Renew
button to randomly generate a new PIN code.
Config Mode Select either Enrollee or Registrar.
As a WPS enrollee, your device can make basic WPS connections with
minimal configuration. As a WPS registrar you can set your device to
store all your connection information as a profile, which you can later
use again by activating it on the Profile screen.
By default, we suggest that you keep the device in Enrollee mode.
Profile Detail Select a profile from the WPS Profile List, then click this button to
view detailed information about it.
See Section 3.10.2 on page 49 for more information.
Connect Select a profile from the WPS Profile List, then click this button to
make a connection using the previously saved settings associated with
the profile.
Rotate At the time of writing, this feature is not enabled.
Disconnect Press this button to disconnect from the network represented by the
currently active profile.
Import Profile Click this button to save any profile that has been created on the fly for
the purposes of making a WPS connection. Your profile is saved in the
Profile screen.
Delete At the time of writing, this feature is not enabled.
PIN Click this button to make a PIN-based WPS connection.
For details, see Section 2.4.2 on page 26.
NWD2105 User’s Guide
Note: For most WPS connections, this button or the PBC button
are all you need.
47
Page 48

Chapter 3 ZyXEL Utility - Mac OS X
Table 11 ZyXEL Utility: WPS (continued)
LABEL DESCRIPTION
PBC Click this button to make a PBC-based WPS connection.
For details, see Section 2.4.1 on page 26.
Note: For most WPS connections, this button or the PIN button are
WPS associate IESends the association request with WPS IE during WPS.
Note: Leave this option selected at all times to ensure a stable
WPS probe IE Sends the probe request with WPS IE during WPS.
Note: Leave this option selected at all times to ensure a stable
Automatically
select the AP
Select this option to have the NWD2105 automatically scan for and then
select a WPS-compatible AP while making a WPS connection.
all you need.
connection.
connection.
3.10.1 The Information Screen
While in the WPS screen, you can view information about any AP in the WPS AP
List. Click the Information button. The following screen displays.
Figure 19 ZyXEL Utility: WPS - Information
48
NWD2105 User’s Guide
Page 49

Chapter 3 ZyXEL Utility - Mac OS X
The following table describes the labels in this screen.
Table 12 Mac OS X: WPS - Information
LABEL DESCRIPTION
State This field indicates whether the selected AP is configured or not.
Version This field indicates the selected AP’s WPS version.
Authentication
Type
Encryption Type This field indicates the type of encryption used by the AP.
Config Methods This field indicates whether the AP is functioning as a WPS Enrollee,
Device
Password ID
AP Setup
Locked
UUID-E This field indicates the Universally Unique IDentifier (UUID) element of
Selected
Register
RF Bands This field indicates which RF band(s) the AP is using.
This field indicates the type of authentication that is required by the AP.
Registrar, or if its configuration status is unknown.
This field indicates whether device requires PBC or PIN for its method of
password registration.
This field indicates whether the AP has entered a setup locked state or
not.
the AP if it is operating as an Enrollee.
This field indicates the AP’s selected register.
3.10.2 The Profile Details Screen
While in the WPS screen, you can view information about any profile in the WPS
Profile List. Click the Profile Details button. The following screen displays.
Figure 20 ZyXEL Utility: WPS - Profile Details
NWD2105 User’s Guide
49
Page 50

Chapter 3 ZyXEL Utility - Mac OS X
The following table describes the labels in this screen.
Table 13 Mac OS X: WPS - Profile Details
LABEL DESCRIPTION
SSID This field indicates the automatically generated SSID used for your
current WPS session. You can also edit it. Enter up to 32 standard
English alphanumeric characters. Spaces, underscores and punctuation
marks are allowed.
BSSID This field indicates your WPS profile’s BSSID.
Authentication
Type
Encryption T ype Select an encryption type to use for creating secure connections, or use
Key Length This field indicates the length of the encryption key to use for creating
Key Index This field indicates key index value to use for creating secure
Key Material This is the random string of letters and numbers used as the encryption
OK Click this button to save your settings and return to the previous
CANCEL Click this button to close this dialoge without saving and return to the
Select an authentication type to use for creating secure connections, or
use the default as selected by the NWD2105.
the default as selected by the NWD2105.
secure connections. For WPS connections it is always 64-bit.
connections. For WPS connections it is always 1.
key seed. An encryption key seed helps your NWD2105 generate
mathmatically random numbers than cannot be second guessed easily
by would be malefactors
screen.
previous screen.
50
NWD2105 User’s Guide
Page 51

3.11 The About Screen
This screen shows you the driver, utility version, and MAC address of your
NWD2105.
Figure 21 ZyXEL Utility: About
Chapter 3 ZyXEL Utility - Mac OS X
The following table describes the labels in this screen.
Table 14 Mac OS X: About
LABEL DESCRIPTION
Wireless Utility This section displays the version number and release date of the
NIC Driver This section displays the version number and release date of the
MAC Address This field displays the NWD2105 Media Access Control (MAC) address.
EEPROM This field displays the Electrically Erasable Programmable Read-Only
NWD2105 User’s Guide
NWD2105’s wireless utility application.
NWD2105’s device driver.
Memory (EEPROM) version currently in use by the NWD2105.
51
Page 52

Chapter 3 ZyXEL Utility - Mac OS X
52
NWD2105 User’s Guide
Page 53

CHAPTER 4
Troubleshooting
4.1 Overview
This chapter offers some suggestions to solve problems you might encounter. The
potential problems are divided into the following categories.
• Power, Hardware Connections, and LEDs
• Accessing the ZyXEL Utility
• Link Quality
• Problems Communicating with Other Computers
4.2 Power, Hardware Connections, and LEDs
The NWD2105 does not turn on. None of the LEDs turn on.
1 Make sure the NWD2105 is correctly installed.
2 Restart the computer to which the NWD2105 is attached.
3 If the problem continues, contact the vendor.
One of the LEDs does not behave as expected.
1 Make sure you understand the normal behavior of the LED. See Section 1.2 on
page 14.
2 Check the hardware connection.
3 Restart the computer to which the NWD2105 is attached.
NWD2105 User’s Guide
53
Page 54

Chapter 4 Troubleshooting
4 If the problem continues, contact the vendor.
4.3 Accessing the ZyXEL Utility
I cannot access the ZyXEL Utility
1 Make sure the NWD2105 is properly inserted and the LEDs are on.
2 Install the NWD2105 on another computer.
3 If the error persists, you may have a hardware problem. In this case, you should
contact your vendor.
4.4 Link Quality
The link quality and/or signal strength is poor.
1 Scan for and connect to another AP with a better link quality using the Site
Survey screen.
2 Move your computer close r to the AP or the peer computer(s) within the
transmission range.
3 There may be too much radio interference (for example from a microwave oven,
or another AP using the same channel) around your wireless network. Lower the
output power of each AP.
4 Make sure there are not too many wireless stations connected to a wireless
network.
54
NWD2105 User’s Guide
Page 55

Chapter 4 Troubleshooting
4.5 Problems Communicating with Other Computers
The computer with the NWD2105 installed cannot communicate with the other
computer(s).
In Infrastructure Mode
• Make sure that the AP and the associated computers are turned on and working
properly.
• Make sure the NWD2105 computer and the associated AP use the same SSID.
• Change the AP and the associated wireless clients to use another radio channel
if interference is high.
• Make sure that the computer and the AP share the same security option and
key. Verify the settings in the Profile Authentication & Security screen.
• If you are using WPA(2) or WPA(2)-PSK security, try changing your encryption
type from TKIP to AES or vice versa.
In Ad-Hoc Mode
• Verif y that the peer computer(s) is turned on.
• Make sure the NWD2105 computer and the peer computer(s) are using the
same SSID and channel.
• Make sure that the computer and the peer computer(s) share the same security
settings.
• Change the wireless clients to use another radio channel if interference is high.
NWD2105 User’s Guide
55
Page 56

Chapter 4 Troubleshooting
56
NWD2105 User’s Guide
Page 57

CHAPTER 5
Product Specifications
Table 15 Product Specifications
PHYSICAL AND ENVIRONMENTAL
Product Name NWD2105 Wireless N-lite USB Adapter
Interface USB 2.0
Standards IEEE 802.11b
IEEE 802.11g
IEEE 802.11n
Operating Frequency 2.4GHZ
Antenna Type Chip
Operating Temperature 0 - 50 degrees Celsius
Storage Temperature -30 - 70 degrees Celsius
Operating Humidity 20 - 90% (non-condensing)
Storage Humidity 10 - 90% (non-condensing)
Voltage 5V
Power Saving Mode Yes
Current Consumption Transmit: <300 mA
Receive: <160 mA
Device Weight 3 g
Device Dimensions 18 mm (L) x 6 mm (W) x 36 mm (H)
RADIO SPECIFICATIONS
NWD2105 User’s Guide
57
Page 58

Chapter 5 Product Specifications
Table 15 Product Specifications (continued)
Transmit Power
802.11b:
(+/- 1.5 dB)
Receiver Sensitivity 802.11b: 11Mbps at -82dBm
1/2/5.5/11M: 18.5 dBm
802.11g:
54/48M: 15dBm
24/36M: 15dBm
12/18M: 16dBm
6/9M: 16.5 dBm
802.11n:
@ HT20
MCS0~MCS07: 15.5 dBm
@ HT40
MCS0~MCS07: 15.5 dBm
802.11g: 54Mbps at -68dBm
802.11n: HT20 at -64dBm
HT40 at -62dBm
WIRELESS STANDARDS
IEEE 802.11b Dynamically shifts between 11, 5.5, 2, and 1 Mbps network
speed.
Operation Frequency 2.412GHz~2.472GHz
Operation Channels N. America &Taiwan
2.412GHz~ 2.462GHz 1-11
Euro ETSI
2.412GHz~ 2.472GHz 1-13
IEEE 802.11g Dynamically shifts between 54, 48, 36, 24, 18, 12, 9 and 6
Mbps network speed.
Operation Frequency 2.412GHz~2.472GHz
Operation Channels N. America &Taiwan
2.412GHz~ 2.462GHz 1-11
Euro ETSI
2.412GHz~ 2.472GHz 1-13
IEEE 802.11n
Downstream data rate 150 Mbps
Upstream data rate 150 Mbps
Operation Frequency 2.412GHz~ 2.472GHz 1-13
58
NWD2105 User’s Guide
Page 59

Chapter 5 Product Specifications
Table 15 Product Specifications (continued)
Operation Channels N. America & Taiwan HT20
2.412GHz~ 2.462GHz 1-11
N. America & Taiwan HT40
2.422GHz~ 2.452GHz 3-9
Euro ETSI HT20
2.412GHz~ 2.472GHz 1-13
Euro ETSI HT40
2.422GHz~ 2.462GHz 3-11
Networking Mode Infrastructure, Ad-Hoc, SoftAP Support
Approvals Safety
European Union: EN60950-1 (CE-LVD)
EMI
United States: FCC Part 15B Class B
Canada: ICES-003
European Union: CE EN 55022 Class B
Australia: C-Tick
EMS
European Union: CE EN55024
RF
United States: FCC Part 15C
Canada: RSS-210
European Union: CE EN 300 328
Taiwan: NCC LP0002
Wi-Fi Certification
11 b/g/n WPA/WPA2/WPS
Microsoft Certification
WHQL: Windows 7 (32- and 64-bit), Windows Vista (32and 64-bit), Windows XP (32- and 64-bit), Windows
2000
SOFTWARE SPECIFICATIONS
Device Drivers Windows 7 (32- and 64-bit)
Windows Vista (32- and 64-bit)
Windows XP (32- and 64-bit)
Windows 2000
Mac OS X (10.3/10.4/10.5)
WIRELESS FEATURES
Wireless Security WEP 64bit, 128bit, WPA, WPA-PSK, WPA2, WPA2-PSK
802.1x (EAP-TLS, EAP-TTLS, EAP-PEAP), WPS.
NWD2105 User’s Guide
Note: EAP-TTLS is not supported in Windows Vista
59
Page 60

Chapter 5 Product Specifications
Table 15 Product Specifications (continued)
Wireless QoS Wi-Fi Multi Media (WMM)
Wi-Fi Protected Setup
(WPS)
Other WMM power-saving support
Push button configuration
Use device's PIN
Use AP or Router's PIN
Compatible with Windows Zero Configuration
60
NWD2105 User’s Guide
Page 61

APPENDIX A
Wireless LANs
This appendix discusses ad-hoc and infrastructure wireless LAN topologies.
Ad-hoc Wireless LAN Configuration
The simplest WLAN configuration is an independent (Ad-hoc) WLAN that connects
a set of computers with wireless adapters (A, B, C) . Any time two or more wireless
adapters are within range of each other, they can set up an independent network,
which is commonly referred to as an ad-hoc network or Independent Basic Service
Set (IBSS). The following diagram shows an example of notebook computers
using wireless adapters to form an ad-hoc wireless LAN.
Figure 22 Peer-to-Peer Communication in an Ad-hoc Network
NWD2105 User’s Guide
61
Page 62

Appendix A Wireless LANs
BSS
A Basic Service Set (BSS) exists when all communications between wireless
clients or between a wireless client and a wired network client go through one
access point (AP).
Intra-BSS traffic is traffic between wireless clients in the BSS. When Intra-BSS is
enabled, wireless client A and B can access the wired network and communicate
with each other. When Intra-BSS is disabled, wireless client A and B can still
access the wired network but cannot communicate with each other.
Figure 23 Basic Service Set
62
NWD2105 User’s Guide
Page 63

ESS
Appendix A Wireless LANs
An Extended Service Set (ESS) consists of a series of overlapping BSSs, each
containing an access point, with each access point connected together by a wired
network. This wired connection between APs is called a Distribution S ystem (DS).
This type of wireless LAN topology is called an Infrastructure WLAN. The Access
Points not only provide communication with the wired network but also mediate
wireless network traffic in the immediate neighborhood.
An ESSID (ESS IDentification) uniquely identifies each ESS. All access points and
their associated wireless clients within the same ESS must have the same ESSID
in order to communicate.
Figure 24 Infrastructure WLAN
Channel
A channel is the radio frequency(ies) used by wireless devices to transmit and
receive data. Channels available depend on your geogr aphical area. You may have
a choice of channels (for your region) so you should use a channel different from
an adjacent AP (access point) to reduce interference. Interference occurs when
radio signals from different access points overlap causing interference and
degrading performance.
Adjacent channels partially overlap however. To avoid interference due to overlap,
your AP should be on a channel at least five channels away from a channel that an
NWD2105 User’s Guide
63
Page 64

Appendix A Wireless LANs
adjacent AP is using. For example, if yo ur region has 11 channels and an adjacent
AP is using channel 1, then you need to select a channel between 6 or 11.
RTS/CTS
A hidden node occurs when two stations are within range of the same access
point, but are not within range of each other. The following figure illustrates a
hidden node. Both stations (STA) are within range of the access point (AP) or
wireless gateway, but out-of-range of each other, so they cannot "hear" each
other, that is they do not know if the channel is currently being used. Therefore,
they are considered hidden from each other.
Figure 25 RTS/CTS
When station A sends data to the AP, it might not know that the station B is
already using the channel. If these two stations send data at the same time,
collisions may occur when both sets of data arrive at the AP at the same time,
resulting in a loss of messages for both stations.
RTS/CTS is designed to prevent collisions due to hidden nodes. An RTS/CTS
defines the biggest size data frame you can send before an RTS (Request To
Send)/CTS (Clear to Send) handshake is invoked.
When a data frame exceeds the RTS/CTS value you set (between 0 to 2432
bytes), the station that wants to transmit th is frame mus t fi rs t s end an RTS
(Request To Send) message to the AP for permission to send it. The AP then
responds with a CTS (Clear to Send) message to all other stations within its range
to notify them to defer their transmission. It also reserves and confirms with the
requesting station the time frame for the requested transmission.
Stations can send frames smaller than the specified RTS/CTS directly to the AP
without the RTS (Request To Send)/CTS (Clear to Send) handshake.
You should only configure RTS/CTS if the possibility of hidden nodes exists on
your network and the "cost" of resending large frames is more than the extra
network overhead involved in the RTS (Request To Send)/CTS (Clear to Send)
handshake.
64
NWD2105 User’s Guide
Page 65

If the RTS/CTS value is greater than the Fragmentation Threshold value (see
next), then the RTS (Request To Send)/CTS (Clear to Send) handshake will never
occur as data frames will be fragmented before they reach RTS/CTS size.
Note: Enabling the RTS Threshold causes redundant network overhead that could
negatively affect the throughput performance instead of providing a remedy.
Fragmentation Threshold
A Fragmentation Threshold is the maximum data fragment size (between 256
and 2432 bytes) that can be sent in the wireless network before the AP will
fragment the packet into smaller data frames.
A large Fragmentation Threshold is recommended for networks not prone to
interference while you should set a smaller threshold for busy networks or
networks that are prone to interference.
If the Fragmentation Threshold value is smaller than the RTS/CTS value (see
previously) you set then the RTS (Request To Send)/CTS (Clear to Send)
handshake will never occur as data frames will be fragmented before they reach
RTS/CTS size.
Appendix A Wireless LANs
Preamble Type
Preamble is used to signal that data is coming to the receiver. Short and long refer
to the length of the synchronization field in a packet.
Short preamble increases performance as less time sending preamble means
more time for sending data. All IEEE 802.11 compliant wireless adapters support
long preamble, but not all support short preamble.
Use long preamble if you are unsure what preamble mode other wireless devices
on the network support, and to provide more reliable communications in busy
wireless networks.
Use short preamble if you are sure all wireless devices on the network support it,
and to provide more efficient communications.
Use the dynamic setting to automatically use short preamble when all wireless
devices on the network support it, otherwise the NWD2105 uses long preamble.
Note: The wireless devices MUST use the same preamble mode in order to
communicate.
NWD2105 User’s Guide
65
Page 66

Appendix A Wireless LANs
IEEE 802.11g Wireless LAN
IEEE 802.11g is fully compatible with the IEEE 802.11b standard. This means an
IEEE 802.11b adapter can interface directly with an IEEE 802.11g access point
(and vice versa) at 11 Mbps or lower depending on range. IEEE 802.11g has
several intermediate rate steps between the maximum and minimum data rates.
The IEEE 802.11g data rate and modulation are as follows:
Table 16 IEEE 802.11g
DATA RATE
(MBPS)
1 DBPSK (Differential Binary Phase Shift Keyed)
2 DQPSK (Differential Quadrature Phase Shift Keying)
5.5 / 11 CCK (Complementary Code Keying)
6/9/12/18/24/36/
48/54
MODULATION
OFDM (Orthogonal Frequency Division Multiplexing)
Wireless Security Overview
Wireless security is vital to your network to protect wireless communication
between wireless clients, access points and the wired network.
Wireless security methods available on the NWD2105 are data encryption,
wireless client authentication, restricting access by device MAC address and hiding
the NWD2105 identity.
The following figure shows the relative effectiveness of these wireless security
methods available on your NWD2105.
Table 17 Wireless Security Levels
SECURITY
LEVEL
Least
Secure
SECURITY TYPE
Unique SSID (Default)
Unique SSID with Hide SSID Enabled
MAC Address Filtering
WEP Encryption
IEEE802.1x EAP with RADIUS Server
Authentication
Wi-Fi Protected Access (WPA)
WPA2
66
Most Secure
NWD2105 User’s Guide
Page 67

Note: You must enable the same wireless security settings on the NWD2105 and on
IEEE 802.1x
In June 2001, the IEEE 802.1x standard was designed to extend the features of
IEEE 802.11 to support extended authentication as well as providing additional
accounting and control features. It is supported by Windows XP and a number of
network devices. Some advantages of IEEE 802.1x are:
• User based identification that allows for roaming.
• Support for RADIUS (Remote Authentication Dial In User Service, RFC 2138,
2139) for centralized user profile and accounting management on a network
RADIUS server.
• Support for EAP (Extensible Authentication Protocol, RFC 2486) that allows
additional authentication methods to be deployed with no changes to the access
point or the wireless clients.
Appendix A Wireless LANs
all wireless clients that you want to associate with it.
RADIUS
RADIUS is based on a client-server model that supports authentication,
authorization and accounting. The access point is the client and the server is the
RADIUS server. The RADIUS server handles the following tasks:
• Authentication
Determines the identity of the users.
• Authorization
Determines the network services available to authenticated users once they are
connected to the network.
•Accounting
Keeps track of the client’s network activity.
RADIUS is a simple package exchange in which your AP acts as a message relay
between the wireless client and the network RADIUS server.
Types of RADIUS Messages
The following types of RADIUS messages are exchanged between the access point
and the RADIUS server for user authentication:
• Access-Request
Sent by an access point requ es ti ng authentication.
NWD2105 User’s Guide
67
Page 68

Appendix A Wireless LANs
• Access-Reject
Sent by a RADIUS server rejecting access.
• Access-Accept
Sent by a RADIUS server allowing access.
• Access-Challenge
Sent by a RADIUS server requesting more information in order to allow access.
The access point sends a proper response from the user and then sends another
Access-Request message.
The following types of RADIUS messages are exchanged between the access point
and the RADIUS server for user accounting:
•Accounting-Request
Sent by the access point requesting accounting.
• Accounting-Response
Sent by the RADIUS server to indicate that it has started or stopped accounting.
In order to ensure network security, the access point and the RADIUS server use a
shared secret key, which is a password, they both know. The key is not sent over
the network. In addition to the shared key, password information exchanged is
also encrypted to protect the network from unauthorized access.
Types of EAP Authentication
This section discusses some popular authentication types: EAP-MD5, EAP-TLS,
EAP-TTLS, PEAP and LEAP. Your wireless LAN device may not support all
authentication types.
EAP (Extensible Authentication Protocol) is an authentication protocol that runs on
top of the IEEE 802.1x transport mechanism in order to support multiple types of
user authentication. By using EAP to in teract with an EAP-compatible RADIUS
server, an access point helps a wireless station and a RADIUS server perform
authentication.
The type of authentication you use depends on the RADIUS server and an
intermediary AP(s) that supports IEEE 802.1x. .
68
For EAP-TLS authentication type, you must first have a wired connection to the
network and obtain the certificate(s) from a certificate authority (CA). A certificate
(also called digital IDs) can be used to authenticate users and a CA issues
certificates and guarantees the identity of each certificate owner.
NWD2105 User’s Guide
Page 69

EAP-MD5 (Message-Digest Algorithm 5)
MD5 authentication is the simplest one-way authentication method. The
authentication server sends a challenge to the wireless client. The wireless client
‘proves’ that it knows the password by encrypting the password with the challenge
and sends back the information. Password is not sent in plain text.
However, MD5 authentication has some weaknesses. Since the authentication
server needs to get the plaintext passwords, the passwords must be stored. Thus
someone other than the authentication server may access the password file. In
addition, it is possible to impersonate an authentication server as MD5
authentication method does not perform mutual authentication. Finally, MD5
authentication method does not support data encryption with dynamic session
key. You must configure WEP encryption keys for data encryption.
EAP-TLS (Transport Layer Security)
With EAP- TLS, digi tal certifications are needed by both the server and the wireless
clients for mutual authentication. T he s erver presents a certificate to the client.
After validating the identity of the server, the client sends a different certificate to
the server. The exchange of certificates is done in the open before a secured
tunnel is created. This makes user identity vulnerable to passive attacks. A digital
certificate is an electronic ID card that authenticates the sender’s identity.
However, to implement EAP-TLS, you need a Certificate Authority (CA) to handle
certificates, which imposes a management overhead.
Appendix A Wireless LANs
EAP-TTLS (Tunneled Transport Layer Service)
EAP-TTLS is an extension of the EAP-TLS authentication that uses certificates for
only the server-side authentications to establish a secure connection. Client
authentication is then done by sending username and password through the
secure connection, thus client identity is protected. For client authentication, EAPTTLS supports EAP methods and legacy authentication methods such as PAP,
CHAP, MS-CHAP and MS-CHAP v2.
PEAP (Protected EAP)
Like EAP-TTLS, server-side certificate authentication is used to establish a secure
connection, then use simple username and password methods through the
secured connection to authenticate the clients, thus hiding client identity.
However, PEAP only supports EAP methods, such as EAP-MD5, EAP-MSCHAPv2
and EAP-GTC (EAP-Generic Token Card), for client authentication. EAP-GTC is
implemented only by Cisco.
NWD2105 User’s Guide
69
Page 70

Appendix A Wireless LANs
LEAP
LEAP (Lightweight Extensible Authentication Protocol) is a Cisco implementation of
IEEE 802.1x.
Dynamic WEP Key Exchange
The AP maps a unique key that is generated with the RADIUS server. This key
expires when the wireless connection times out, disconnects or reauthentication
times out. A new WEP key is generated each time reauthentication is performed.
If this feature is enabled, it is not necessary to configure a default encryption key
in the wireless security configuration screen. You may still configure and store
keys, but they will not be used while dynamic WEP is enabled.
Note: EAP-MD5 cannot be used with Dynamic WEP Key Exchange
For added security, certificate-based authentications (EAP-TLS, EAP-TTLS and
PEAP) use dynamic keys for data encryption. They are often deployed in corporate
environments, but for public deployment, a simple user name and password pair
is more practical. The following table is a comparison of the features of
authentication types.
Table 18 Comparison of EAP Authentication Types
Mutual Authentication No Yes Yes Yes Yes
Certificate – Client No Yes Optional Optional No
Certificate – Server No Yes Yes Yes No
Dynamic Key Exchange No Yes Yes Yes Yes
Credential Integrity None Strong Strong Strong Moderate
Deployment Difficulty Easy Hard Moderate Moderate Moderate
Client Identity
Protection
WPA and WPA2
Wi-Fi Protected Access (WPA) is a subset of the IEEE 802.11i standard. WPA2
(IEEE 802.11i) is a wireless security standard that defines stronger encryption,
authentication and key management than WPA.
Key differences between WP A or WPA2 and WEP are improved data encryption and
user authentication.
EAP-MD5 EAP-TLS EAP-TTLS PEAP LEAP
No No Yes Yes No
70
NWD2105 User’s Guide
Page 71

If both an AP and the wireless clients support WPA2 and you have an external
RADIUS server, use WPA2 for stronger data encryption. If you don't have an
external RADIUS server, you should use WPA2-PSK (WPA2-Pre-Shared Key) that
only requires a single (identical) password entered into each access point, wireless
gateway and wireless client. As long as the passwords match, a wireless client will
be granted access to a WLAN.
If the AP or the wireless clients do not support WPA2, just use WPA or WPA-PSK
depending on whether you have an external RADIUS server or not.
Select WEP only when the AP and/or wireless clients do not support WP A or WPA2.
WEP is less secure than WPA or WPA2.
Encryption
Both WPA and WPA2 improve data encryption by using Temporal Key Integrity
Protocol (TKIP), Message Integrity Check (MIC) and IEEE 802.1x. WPA and WPA2
use Advanced Encryption Standard (AES) in the Counter mode with Cipher block
chaining Message authentication code Protocol (CCMP) to offer stronger
encryption than TKIP.
Appendix A Wireless LANs
TKIP uses 128-bit keys that are dynamically generated and distributed by the
authentication server. AES (Advanced Encryption Standard) is a block cipher that
uses a 256-bit mathematical algorithm called Rijndael. They both include a perpacket key mixing function, a Message Integrity Check (MIC) named Michael, an
extended initialization vect or (IV) with sequencing rules, and a re-keying
mechanism.
WPA and WPA2 regularly change and rotate the encryption keys so that the same
encryption key is never used twice.
The RADIUS server distributes a Pairwise Master Key (PMK) key to the AP that
then sets up a key hierarchy and management system, using the PMK to
dynamically generate unique data encryption keys to encrypt every data packet
that is wirelessly communicated between the AP and the wireless clients. This all
happens in the background automatically.
The Message Integrity Check (MIC) is designed to prevent an attacker from
capturing data packets, altering them and resending them. The MIC provides a
strong mathematical function in which the receiver and the transmitter each
compute and then compare the MIC. If they do not match, it is assumed that the
data has been tampered with and the packet is dropped.
By generating unique data encryption keys for ev ery data pack et and by creating
an integrity checking mechanism (MIC), with TKIP and AES it is more difficult to
decrypt data on a Wi-Fi network than WEP and difficult for an intruder to break
into the network.
NWD2105 User’s Guide
71
Page 72

Appendix A Wireless LANs
The encryption mechanisms used for WPA(2) and WPA(2)-PSK are the same. The
only difference between the two is that WPA(2)-PSK uses a simple common
password, instead of user-specific credentials. The common-password approach
makes WPA(2)-PSK susceptible to brute-force password-guessing attacks but it’s
still an improvement over WEP as it employs a consistent, single, alphanumeric
password to derive a PMK which is used to generate unique temporal encryption
keys. This prevent all wireless devices sharing the same encryption keys. (a
weakness of WEP)
User Authentication
WPA and WPA2 apply IEEE 802.1x and Extens ible Authentication Protocol (EAP) to
authenticate wireless clients using an external RADIUS database. WPA2 reduces
the number of key exchange messages from six to four (CCMP 4- w a y handsh ak e)
and shortens the time required to connect to a network. Other WPA2
authentication features that are different from WPA include key caching and preauthentication. These two features are optional and may not be supported in all
wireless devices.
Key caching allows a wireless client to store the PMK it derived thr ough a
successful authentication with an AP. The wireless client uses the PMK when it tries
to connect to the same AP and does not need to go with the authentication
process again.
Pre-authentication enables fast roaming by allowing the wireless client (already
connecting to an AP) to perform IEEE 802.1x authentication with another AP
before connecting to it.
Wireless Client WPA Supplicants
A wireless client supplicant is the software that runs on an operating system
instructing the wireless client how to use WPA. At the time of writing, the most
widely available supplicant is the WPA patch for Windows XP, Funk Software's
Odyssey client.
The Windows XP patch is a free download that adds WPA capability to Windows
XP's built-in "Zero Configur ation" wireless client . However, you must run Windows
XP to use it.
WPA(2) with RADIUS Application Example
72
To set up WPA(2), you need the IP address of the RADIUS server, its port number
(default is 1812), and the RADIUS shared secret. A WPA(2) application example
with an external RADIUS server looks as follows. "A" is the RADIUS server. "DS" is
the distribution system.
1 The AP passes the wireless client's authentication request to the RADIUS server.
NWD2105 User’s Guide
Page 73

Appendix A Wireless LANs
2 The RADIUS server then checks the user's identification against its database and
grants or denies network access accordingly.
3 A 256-bit P airwise Master K ey (PMK) is derived from the aut hentication process by
the RADIUS server and the client.
4 The RADIUS server distributes the PMK to the AP. The AP then sets up a key
hierarchy and management system, using the PMK to dynamically generate
unique data encryption keys. The keys are used to encrypt every data packet that
is wirelessly communicated between the AP and the wireless clients.
Figure 26 WPA(2) with RADIUS Application Example
WPA(2)-PSK Application Example
A WPA(2)-PSK application looks as follows.
1 First enter identi cal passwords into the AP and all wireless clients. The Pre- Shared
Key (PSK) must consist of between 8 and 63 ASCII characters or 64 hexadecimal
characters (including spaces and symbols).
2 The AP checks each wireless client's password and allows it to join the network
only if the password matches.
3 The AP and wireless clients generate a common PMK (Pairwise Master Key). The
key itself is not sent over the network, but is derived from the PSK and the SSID.
NWD2105 User’s Guide
73
Page 74

Appendix A Wireless LANs
4 The AP and wireless clients use the TKIP or AES encryption process, the PMK and
information exchanged in a handshake to create temporal encryption keys. They
use these keys to encrypt data exchanged between them.
Figure 27 WPA(2)-PSK Authentication
Security Parameters Summary
Refer to this table to see what other security parameters you should configure for
each authentication method or key management protocol type. MAC address
filters are not dependent on how you configure these security features.
Table 19 Wireless Security Relational Matrix
AUTHENTICATION
METHOD/ KEY
MANAGEMENT
PROTOCOL
Open None No Disable
Open WEP No Enable with Dynamic WEP Key
Shared WEP No Enable with Dynamic WEP Key
WPA TKIP/AES No Enable
WPA-PSK TKIP/AES Yes Disable
WPA2 TKIP/AES No Enable
WPA2-PSK TKIP/AES Yes Disable
ENCRYPTIO
N METHOD
ENTER
MANUAL KEY
Yes Enable without Dynamic WEP
Yes Disable
Yes Enable without Dynamic WEP
Yes Disable
IEEE 802.1X
Enable without Dynamic WEP
Key
Key
Key
74
NWD2105 User’s Guide
Page 75

Antenna Overview
An antenna couples RF signals onto air. A transmitter within a wireless device
sends an RF signal to the antenna, which propagates the signal through the air.
The antenna also operates in reverse by capturing RF signals from the air.
Positioning the antennas properly increases the range and coverage area of a
wireless LAN.
Antenna Characteristics
Frequency
An antenna in the frequency of 2.4GHz (IEEE 802.11b and IEEE 802.11g) or 5GHz
(IEEE 802.11a) is needed to communicate efficiently in a wireless LAN
Radiation Pattern
Appendix A Wireless LANs
A radiation pattern is a diagram that allows you to visualize the shape of the
antenna’s coverage area.
Antenna Gain
Antenna gain, measured in dB (decibel), is the increase in coverage within the RF
beam width. Higher antenna gain improves the range of the signal for better
communications.
For an indoor site, each 1 dB increase in a nt e nna gain results in a range increase
of approximately 2.5%. For an unobstructed outdoor site, each 1dB increase in
gain results in a range increase of approximately 5%. Actual results may vary
depending on the network environment.
Antenna gain is sometimes specified in dBi, which is how much the antenna
increases the signal power compared to using an isotropic antenna. An isotropic
antenna is a theoretical perfect antenna that sends out radio signals equally well
in all directions. dBi represents the true gain that the antenna provides.
Types of Antennas for WLAN
There are two types of antennas used for wireless LAN applications.
NWD2105 User’s Guide
75
Page 76

Appendix A Wireless LANs
• Omni-directional antennas send the RF signal out in all directions on a horizontal
plane. The coverage area is torus-shaped (like a donut) which makes these
antennas ideal for a room environment. With a wide coverage area, it is possible
to make circular overlapping coverage areas with multiple access points.
• Directional antennas concentrate the RF signal in a beam, like a flashlight does
with the light from its bulb. The angle of the beam determines the width of the
coverage pattern. Angles typically range from 20 degrees (very directional) to
120 degrees (less directional). Directional antennas are ideal for hallways and
outdoor point-to-point applications.
Positioning Antennas
In general, antennas should be mounted as high as practically possible and free of
obstructions. In point-to–point application, position both antennas at the same
height and in a direct line of sight to each other to attain the best performance.
For omni-directional antennas mounted on a table, desk, and so on, point the
antenna up. For omni-directional antennas mounted on a wal l or ceiling, point the
antenna down. For a single AP application, place omni-directional antennas as
close to the center of the coverage area as possible.
For directional antennas, point the antenna in the direction of the desired
coverage area.
76
NWD2105 User’s Guide
Page 77

APPENDIX B
Legal Information
Copyright
Copyright © 2010 by ZyXEL Communications Corporation.
The contents of this publication may not be reproduced in any part or as a whole,
transcribed, stored in a retrieval system, translated into any language, or
transmitted in any form or by any means, electronic, mechanical, magnetic,
optical, chemical, photocopying, manual, or otherwise, without the prior written
permission of ZyXEL Communications Corporation.
Published by ZyXEL Communications Corporation. All rights reserved.
Disclaimers
ZyXEL does not assume any liability arising out of the application or use of any
products, or software described herein. Neither does it convey any license under
its patent rights nor the patent rights of others. ZyXEL further reserves the right
to make changes in any products described herein without notice. This publication
is subject to change without notice.
Trademarks
Trademarks mentioned in this publication are used for identification purposes only
and may be properties of their respective owners.
Certifications
Federal Communications Commission (FCC) Interference Statement
The device complies with Part 15 of FCC rules. Operation is subject to the
following two conditions:
• This device may not cause harmful interference.
• This device must accept any in terference received, including interference that
may cause undesired operations.
NWD2105 User’s Guide
77
Page 78

Appendix B Legal Information
This device has been tested and found to comply with the limits for a Class B
digital device pursuant to Part 15 of the FCC Rules. These limits are designed to
provide reasonable protection against harmful interference in a residential
installation. This device generates, uses, and can radiate radio frequency energy,
and if not installed and used in accordance with the instructions, may cause
harmful interference to radio communications. However, there is no guarantee
that interference will not occur in a particular installation.
If this device does cause harmful interference to radio/televisi on reception, which
can be determined by turning the device off and on, the user is encouraged to try
to correct the interference by one or more of the following measures:
1 Reorient or relocate the receiving antenna.
2 Increase the separation between the equipment and the receiver.
3 Connect the equipment into an outlet on a circuit different from that to which the
receiver is connected.
4 Consult the dealer or an experienced radio/TV technician for help.
FCC Radiation Exposure Statement
• This device has been tested to the FCC exposure requirements (Specific
Absorption Rate).
• This device complies with the requirements of Health Canada Safety Code 6 for
Canada.
• Testing was performed on laptop computers with antennas at 5mm spacing. The
maximum SAR value is: 0.77 W/kg. The device must not be collocated with an y
other antennas or transmitters.
• This equipment has been SAR -evaluated for use in laptops (notebooks) with side
slot configuration.
• The device complies with FCC RF radiation exposure limits set forth for an
uncontrolled environment, under 47 CFR 2.1093 paragraph (d)(2). End users
must follow the specific operating instructions for satisfying RF exposure
compliance. To maintain compliance with FCC RF exposure compliance
requirements, please follow operation instruction as documented in this manual.
78
• This transmitter must not be co-located or operating in conjunction with any
other antenna or transmitter.
• IEEE 802.11b or 802.11g operation of this product in the U.S.A. is firmwarelimited to channels 1 through 11.
NWD2105 User’s Guide
Page 79

Appendix B Legal Information
Industry Canada Statement
This device complies with RSS-210 of the Industry Canada Rules. Operation is
subject to the following two conditions:
1) this device may not cause interference and
2) this device must accept any interference, including interference that may cause
undesired operation of the device
This device has been designed to operate with an antenna having a maximum
gain of 3dBi.
Antenna having a higher gain is strictly prohibited per regulations of Industry
Canada. The required antenna impedance is 50 ohms.
T o reduce potential r adio interference to other users, the antenna type and its gain
should be so chosen that the EIRP is not more than required for successful
communication.
IC Radiation Exposure Statement
This equipment complies with IC radiation exposure limits set forth fo r an
uncontrolled environment. End users must follow the specific operating
instructions for satisfying RF exposure compliance.
注意 !
依據 低功率電波輻射性電機管理辦法
第十二條 經型式認證合格之低功率射頻電機,非經許可,公司、商號或使用
者均不得擅自變更頻率、加大功率或變更原設計之特性及功能。
第十四條 低功率射頻電機之使用不得影響飛航安全及干擾合法通信;經發現
有干擾現象時,應立即停用,並改善至無干擾時方得繼續使用。
前項合法通信,指依電信規定作業之無線電信。低功率射頻電機須忍
受合法通信或工業、科學及醫療用電波輻射性電機設備之干擾。
本機限在不干擾合法電臺與不受被干擾保障條件下於室內使用。
減少電磁波影響,請妥適使用。
Notices
Changes or modifications not expressly approved by the party responsible for
compliance could void the user's authority to operate the equipment.
This device has been designed for the WLAN 2.4 GHz network throughout the EC
region and Switzerland, with restrictions in France.
NWD2105 User’s Guide
79
Page 80

Appendix B Legal Information
This Class B digital apparatus complies with Canadian ICES-003. Operation is
subject to the following two conditions: (1) this device may not cause
interference, and (2) this device must accept any interference, including
interference that may cause undesired operation of the device.
Cet appareil numérique de la classe B est conforme à la norme NMB-003 du
Canada.
Viewing Certifications
1 Go to http://www.zyxel.com.
2 Select your product on the ZyXEL home page to go to that product's page.
3 Select the certification you wish to view from this page.
ZyXEL Limited Warranty
ZyXEL warrants to the original end user (purchaser) that this product is free from
any defects in material or workmanship for a specific period (the Warranty Period)
from the date of purchase. The W arr anty Period varies by region. Check with your
vendor and/or the authorized ZyXEL local distributor for details about the
Warranty Period of this product. During the warranty period, and upon proof of
purchase, should the product have indications of failure due to faulty workmanship
and/or materials, ZyXEL will, at its discretion, repair or replace the defective
products or components without charge for either parts or labor, and to whatever
extent it shall deem necessary to restore the product or components to proper
operating condition. Any replacement will consist of a new or re-manufactured
functionally equivalent product of equal or higher value, and will be solely at the
discretion of ZyXEL. This warranty shall not apply if the product has been
modified, misused, tampered with, damaged by an act of God, or subjected to
abnormal working conditions.
Note
Repair or replacement, as provided under this warr anty, is the exclusive remedy of
the purchaser. This warranty is in lieu of all other warranties, express or implied,
including any implied warranty of merchantability or fitness for a particul ar use or
purpose. ZyXEL shall in no event be held liable for indirect or consequential
damages of any kind to the purchaser.
80
To obtain the services of this warranty, contact your vendor. You may also refer to
the warranty policy for the region in which you bought the device at htt p://
www.zyxel.com/web/support_warranty_info.php.
NWD2105 User’s Guide
Page 81

Appendix B Legal Information
Registration
Register your product online to receive e-mail notices of firmware upgrades and
information at www.zyxel.com.
NWD2105 User’s Guide
81
Page 82

Appendix B Legal Information
82
NWD2105 User’s Guide
Page 83

Index
Index
A
about your ZyXEL Device 14
Access Point (AP) 22
Access point (AP) 22
Access Point. See also AP.
ACT LED 14
Ad-Hoc 20
Advanced Encryption Standard 25
See AES.
AES 71
antenna
directional 76
gain 75
omni-directional 76
AP 63
See also access point.
authentication type 24
auto 24
open system 24
shared key 24
auto authentication 24
B
Basic Service Set, See BSS 62
BSS 62
interference 63
copyright 77
CTS (Clear to Send) 64
D
digital ID 25
dimensions 57
disclaimer 77
dynamic WEP key exchange 70
E
EAP (Extensible Authentication Protocol) 24
EAP Authentication 68
EAP authentication 25
EAP-PEAP 24
EAP-TLS 24
EAP-TTLS 24
encryption 71
encryption type 24
environmental specifications 57
ESS 63
Extended Service Set, See ESS 63
C
CA 25, 69
CCMP 25
Certificate Authority
See CA.
certifications 77
notices 79
viewing 80
channel 23, 63
NWD2105 User’s Guide
F
FCC interference statement 77
fragmentation threshold 65
frequency 23, 58
G
getting started 13
83
Page 84

Index
H
hidden node 64
humidity 57
I
IBSS 61
IEEE 802.11g 66
IEEE 802.1x 24
Independent Basic Service Set
See IBSS 61
infrastructure 19
Initialization Vector (IV) 71
interface 57
Internet access 19
L
preamble mode 65
product registration 81
product specifications 57
PSK 72
R
radio interference 54
radio specifications 57, 58
RADIUS 24, 25, 67
message types 67
messages 67
shared secret key 68
registration
product 81
related documentation 3
RTS (Request To Send) 64
threshold 64, 65
LEDs 14
lights 14
LINK LED 14
M
Message Integrity Check (MIC) 25, 71
N
network overlap 23
P
Pairwise Master Key (PMK) 71, 73
passphrase 24
password 24
peer computer 19
physical specifications 57
S
safety warnings 7
security 23, 59
data encryption 23
sensitivity 58
Service Set Identity (SSID) 22
SSID 22, 55
syntax conventions 5
T
temperature 57
Temporal Key Integrity Protocol (TKIP) 25, 71
trademarks 77
U
user authentication 23
84
NWD2105 User’s Guide
Page 85

W
warranty 80
note 80
weight 57
WEP 23
automatic setup 24
manual setup 24
passphrase 24
WEP (Wired Equivalent Privacy) 23
WEP key generation 24
Wi-Fi Protected Access 25, 70
wireless client 22
wireless client WPA supplicants 72
wireless LAN
introduction 21
security 23
wireless LAN (WLAN) 21
wireless network 22
wireless security 66
wireless standard 57
WLAN
interference 63
security parameters 74
WPA 25, 70
key caching 72
pre-authentication 72
user authentication 72
vs WPA-PSK 72
wireless client supplicant 72
with RADIUS application example 72
WPA2 25, 70
user authentication 72
vs WPA2-PSK 72
wireless client supplicant 72
with RADIUS application example 72
WPA2-Pre-Shared Key 25, 71
WPA2-PSK 25, 71, 72
application example 73
WPA-PSK 25, 71, 72
application example 73
Index
NWD2105 User’s Guide
85
Page 86

Index
86
NWD2105 User’s Guide
 Loading...