

Page 1
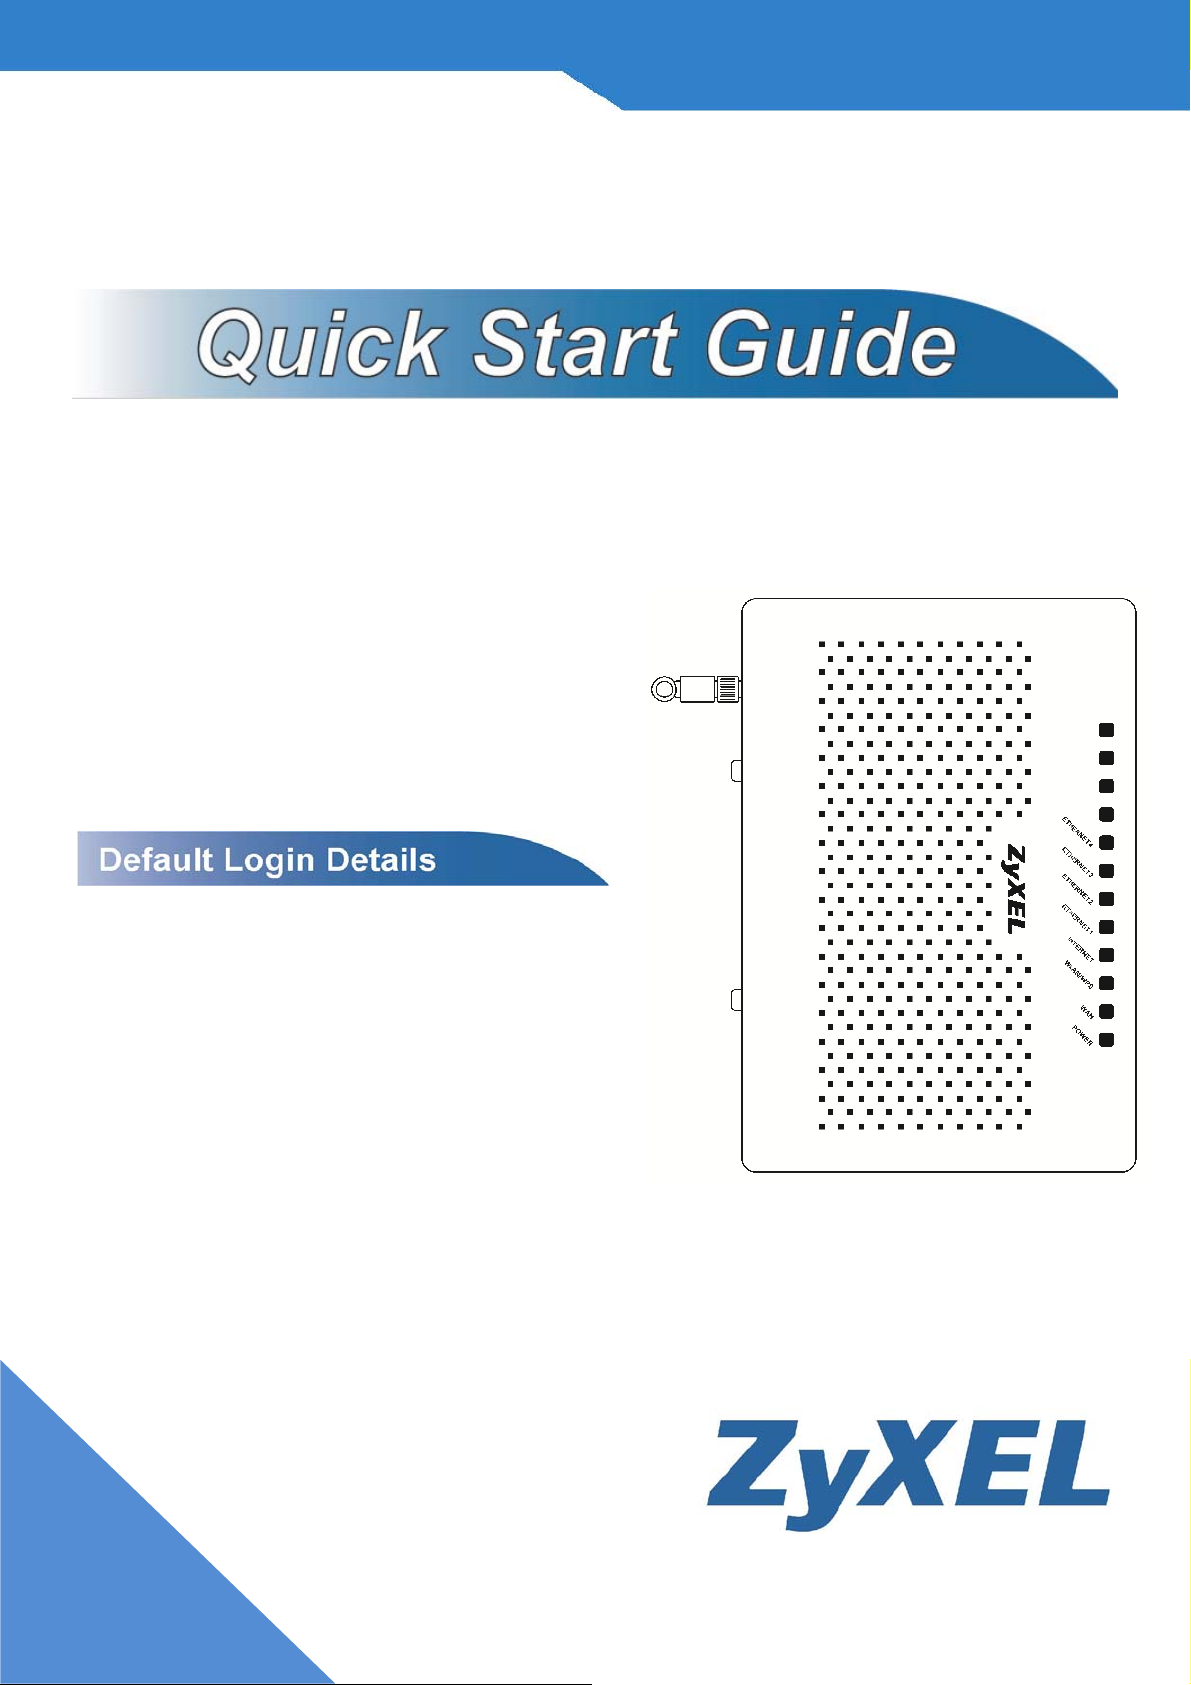
FSG1100HN
Wireless Active Fiber Router
Firmware V1.00
Edition 3/15/2010
IP Address:
User Login:
Password: 1234
http://192.168.1.1
User Name: admin
1
Page 2
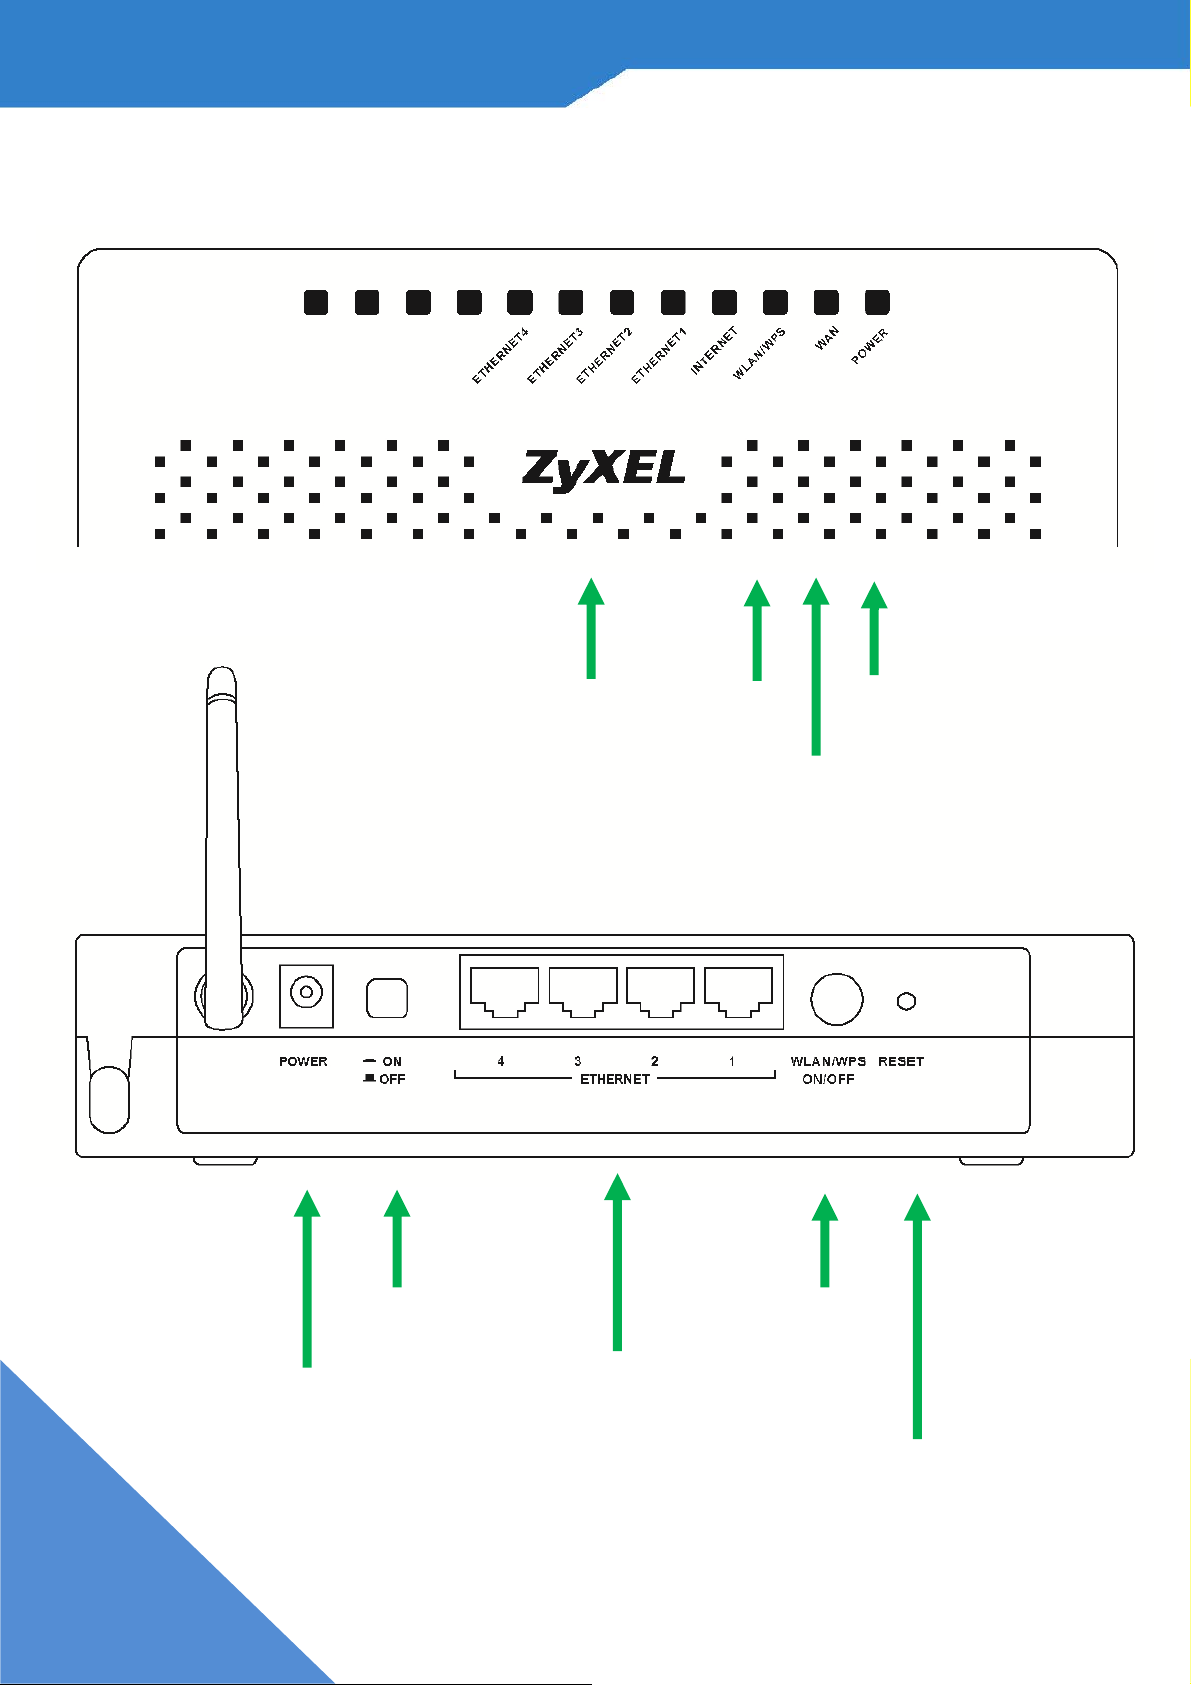
LED and Rear Panel
r
Ethernet
1 ~ 4
LED
WLAN/
WPS
LED
WAN
LED
Power
ON/OFF
Ethernet
Powe
Port
WLAN/
WPS
ON/OFF
Reset
2
Page 3
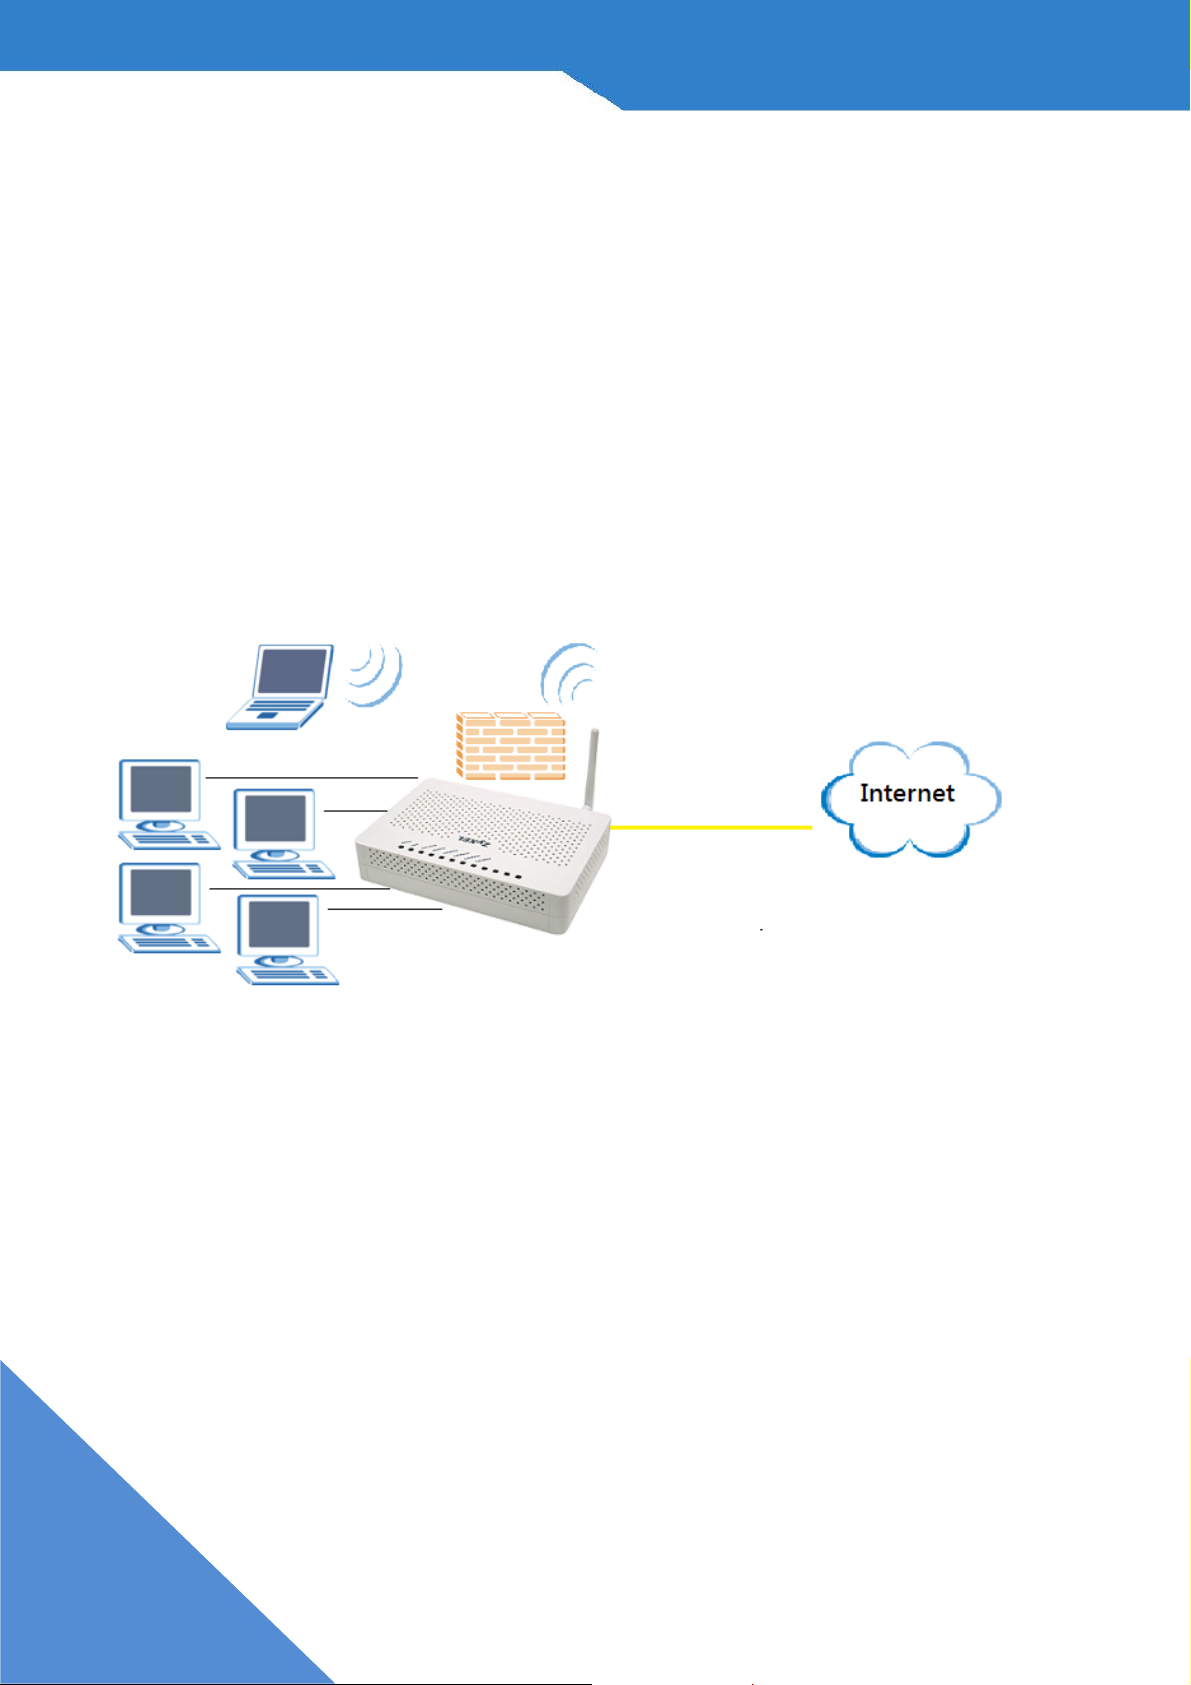
Overview
The FSG1100HN is a wireless router that lets you set up
both wired and wireless networks. Its built-in firewall is
enabled by default to protect your network.
The Quick Start Guide show you how to:
• Mount the FSG1100HN on the Wall
• Set Up a Wired Network with Internet Access
• Set Up a Wireless Network with WPS
3
Page 4
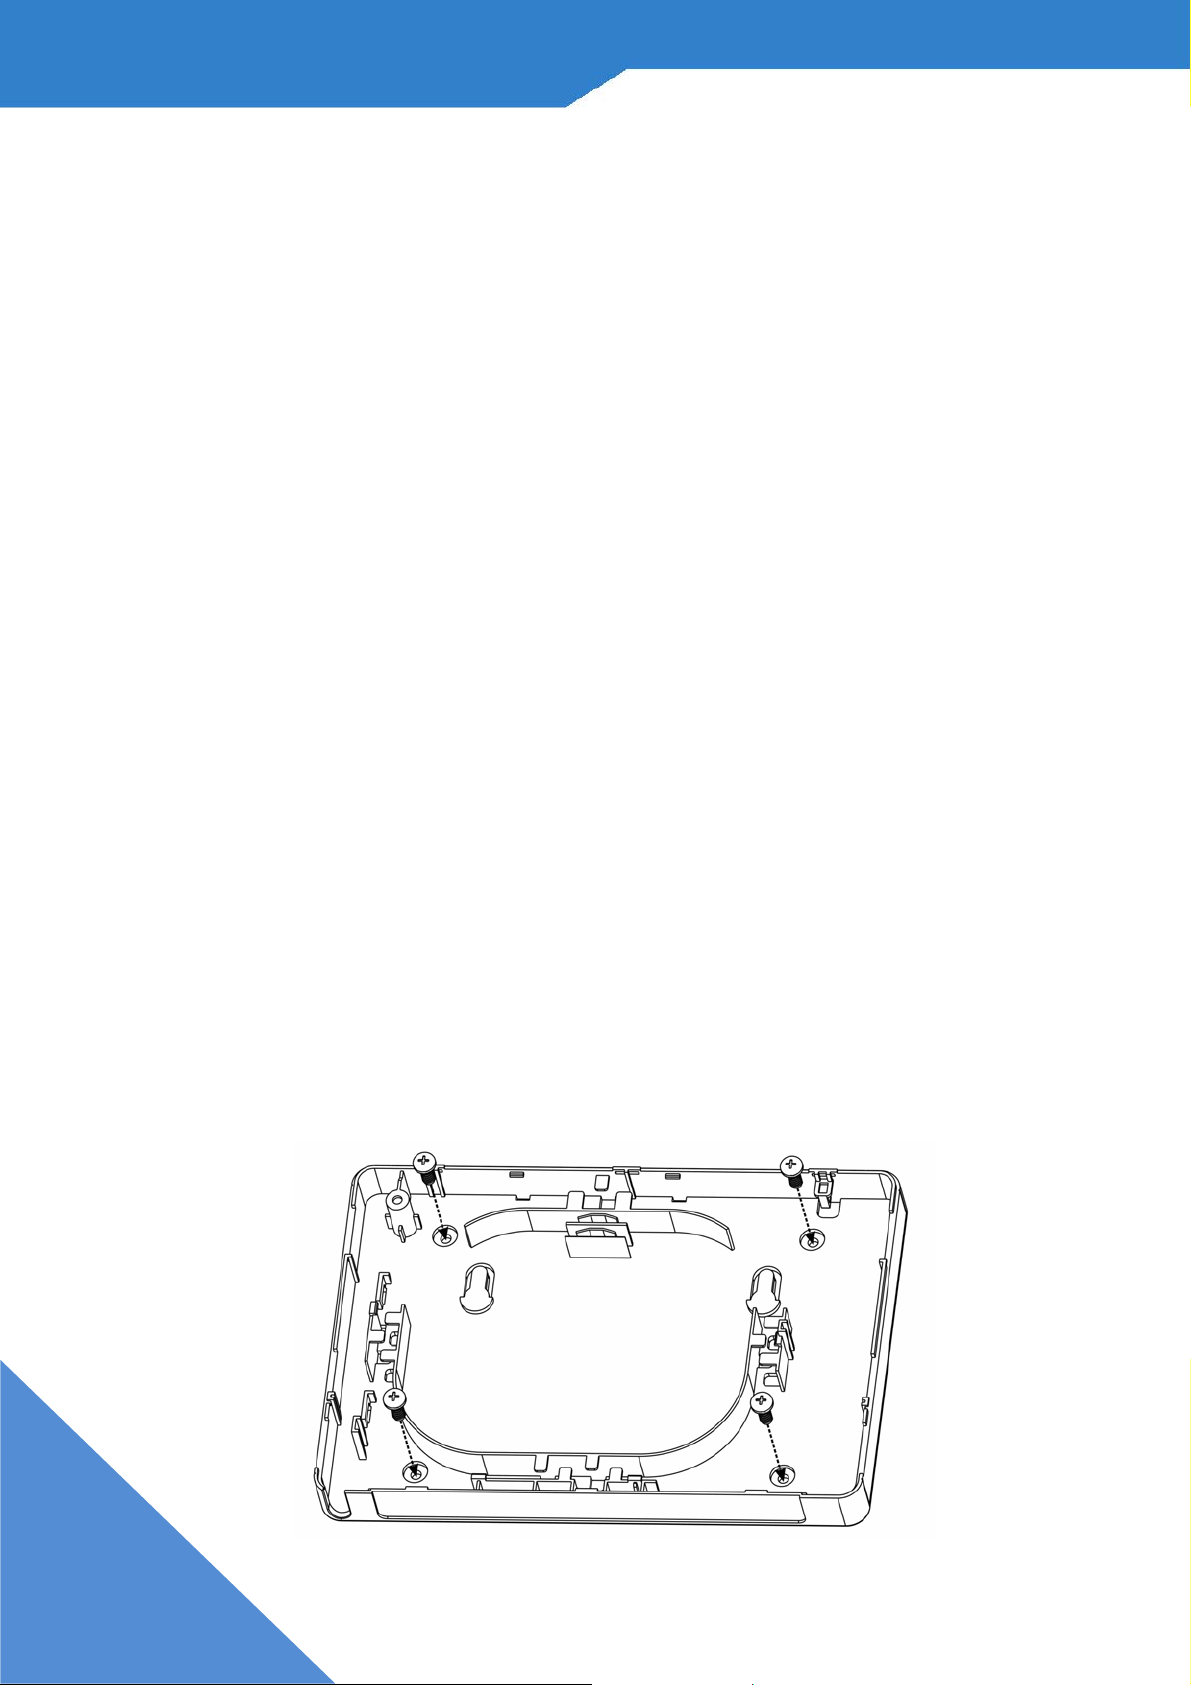
Wall-Mounting Instructions
There are two ways to install the FSG1100HN on a wall
a.) Wall-mount attachment
b.) Wall-mount hanging
To attach your FSG1100HN to a wall:
1. Locate a high position on a wall that is free of
obstructions. Be sure to use a sturdy wall.
2. Drill four holes for the screws. Make sure the distance
between the centers of the holes is the same as the
four holes in the FSG1100HN.
3. Drive in the screws in the lower part of the casing on
the wall:
4
Page 5
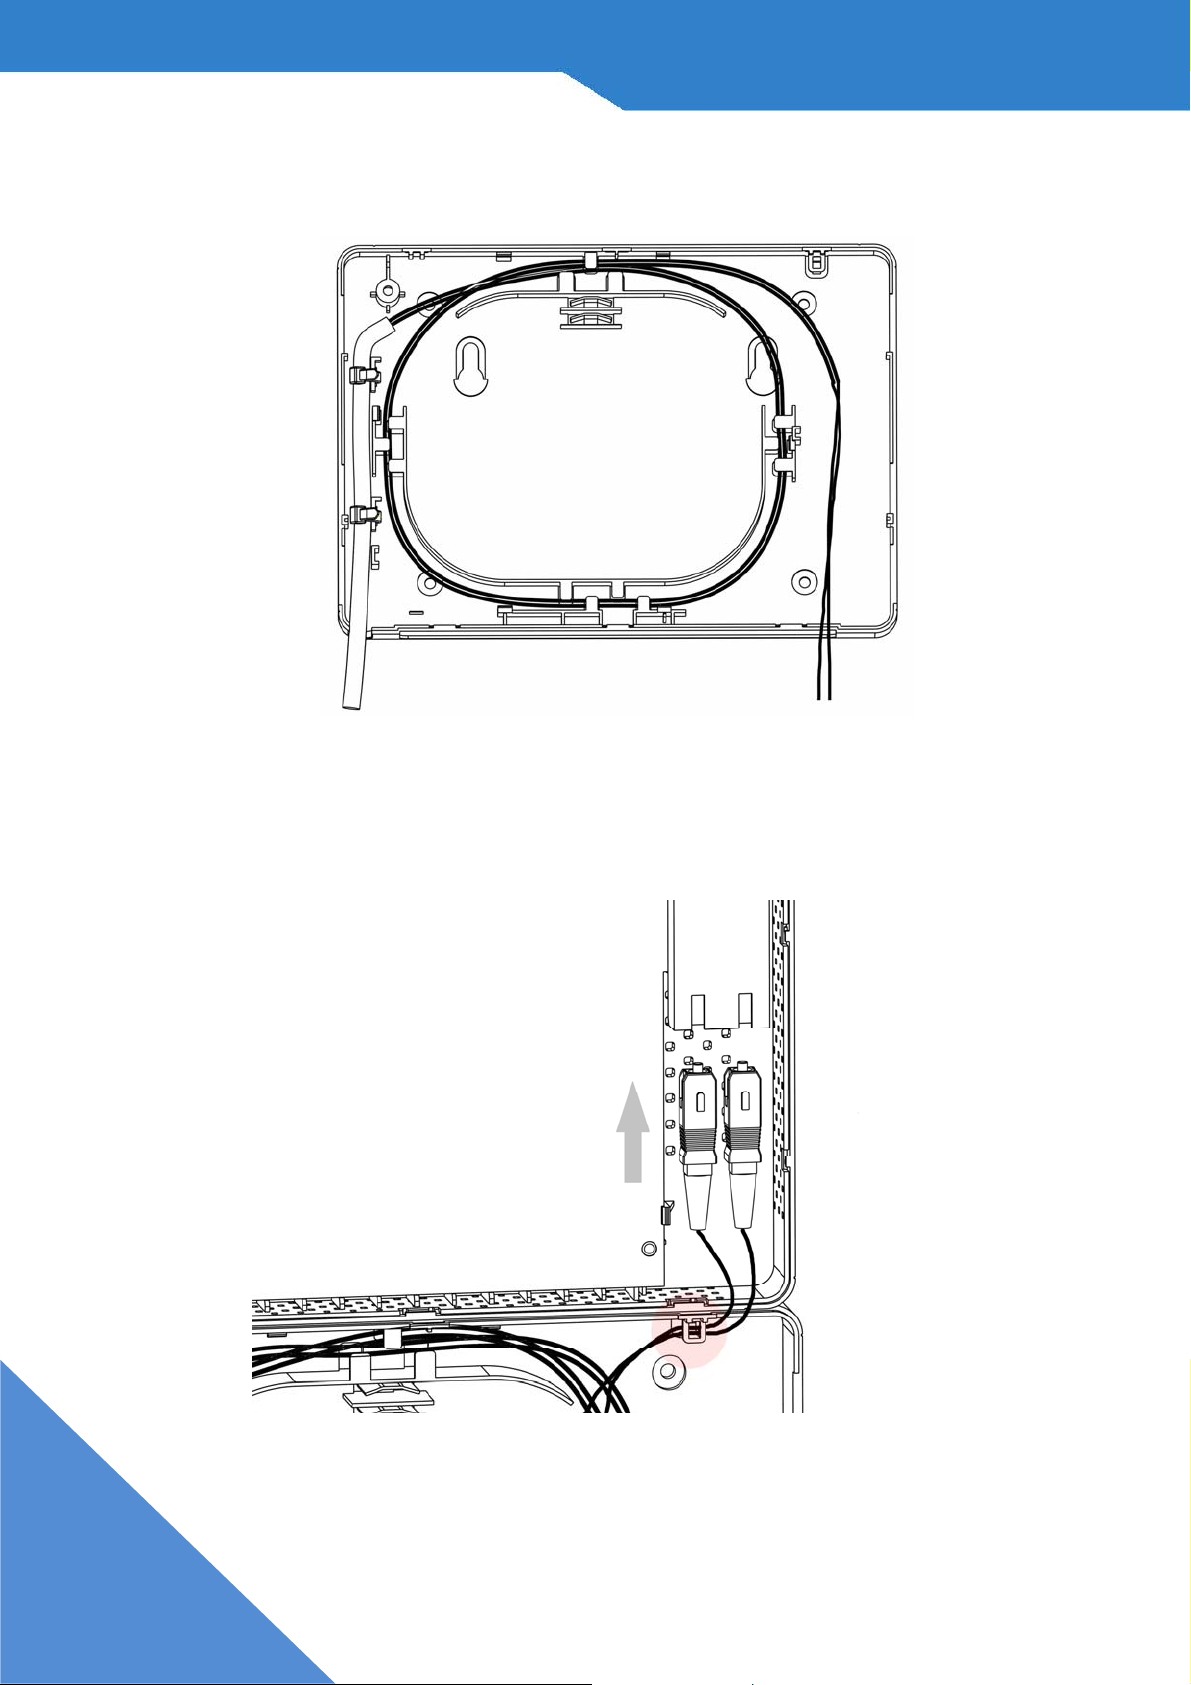
4. Coil the fiber cables within the FSG1100HN:
5. Plug the fiber cable into the module. Make sure the
fiber cable has coiled properly into the hole:
FSG1100HN Duplex SC model.
5
Page 6
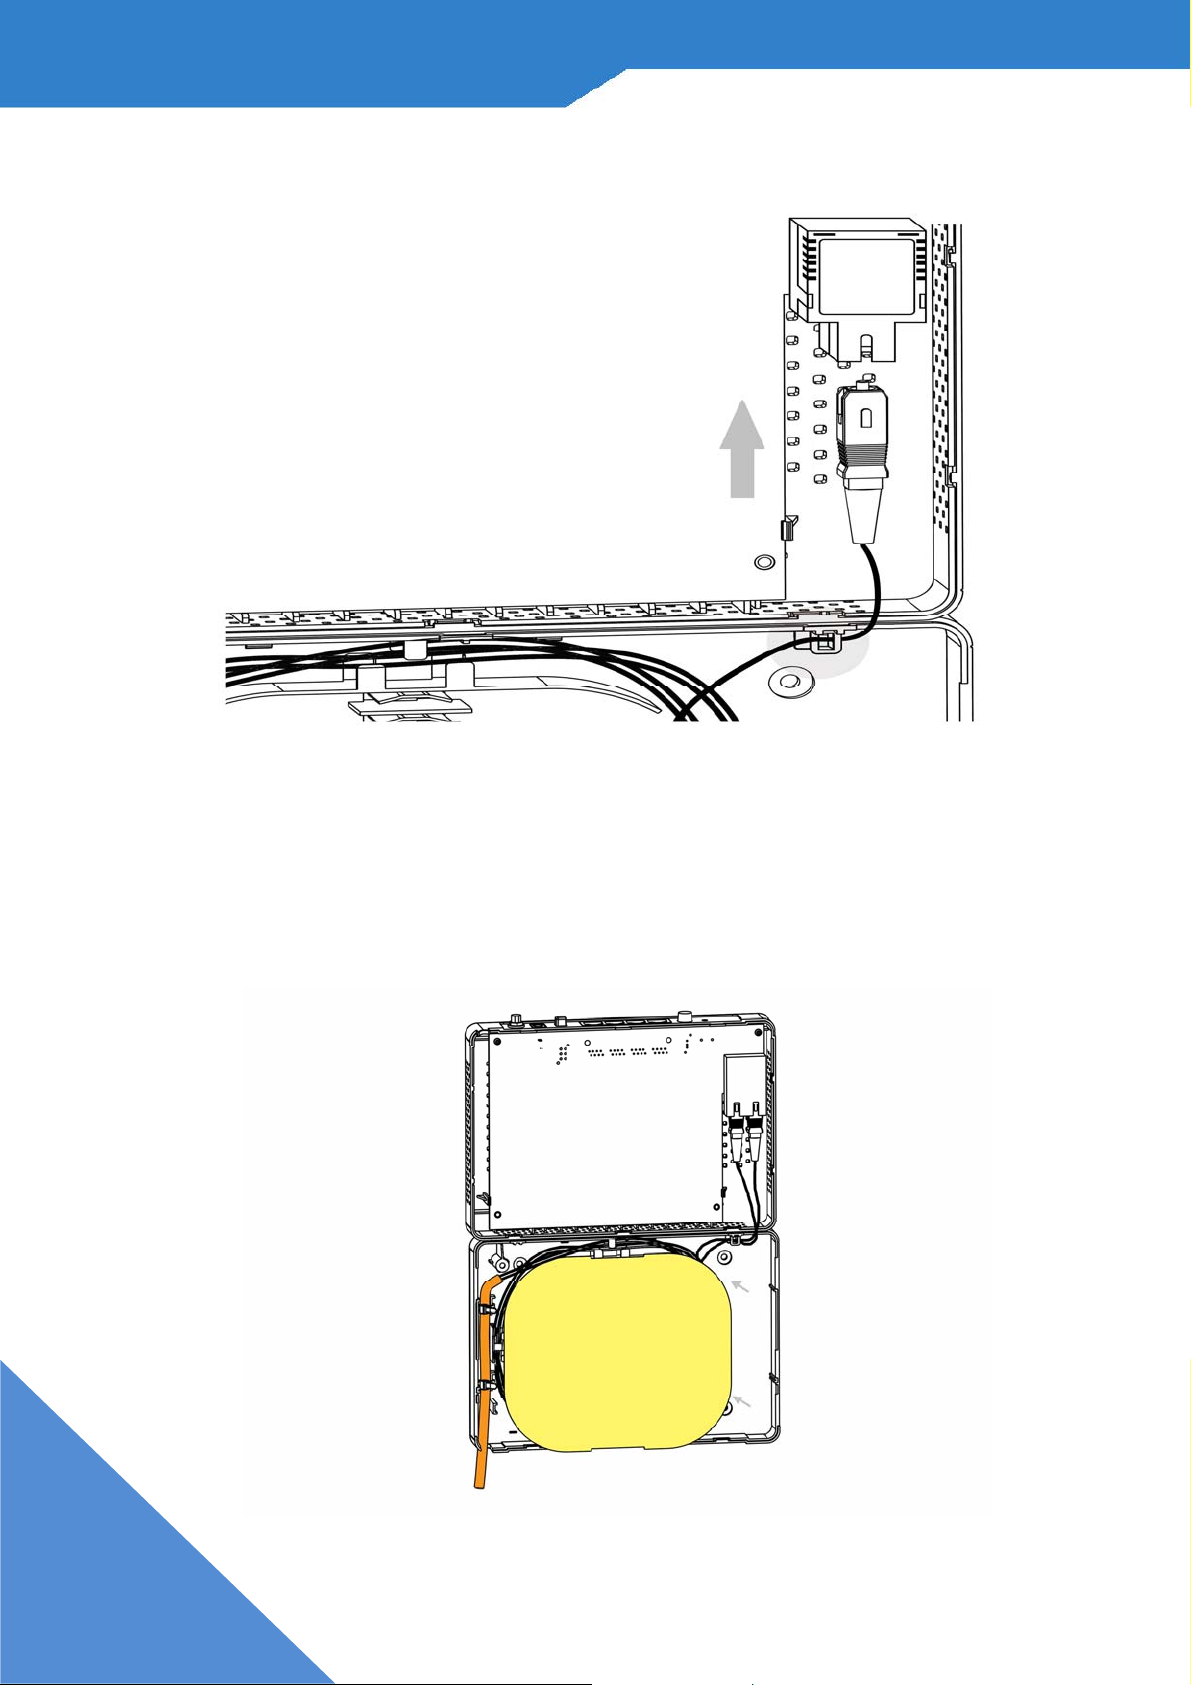
FSG1100HN Simplex SC model.
6. Place the plastic cover on the fiber tray to prevent
fiber coil derailment.
6
Page 7

7. Slide on the upper part of the casing:
8. For wall mount hanging, leave a small gap of about
0.5cm between the heads of the screws and the wall.
Make sure the screws are securely fastened to the
wall. They need to hold the weight of the
FSG1100HN with connection cables.
7
Page 8

The following dimensions of an M4 tap screw and
masonry plug are used for wall mounting. All
measurements are in millimeters (mm).
Screws are not enclosed in the packaging of the product.
8
Page 9

Hardware Connctions
1. Make the following hardware connections to your
FSG1100HN:
• Connect the antennas (A) to the antenna sockets,
ensuring they are screwed in firmly and angled
upwards.
• Connect the WAN port (B) on your FSG1100HN to the
Fiber port on the device with which you are accessing
9
Page 10

• Connect the Ethernet port on your computer to a LAN
port (C) on the FSG1100HN using an Ethernet cable.
• Use the power adapter (D) from the package to
connect the POWER socket to an appropriate power
source.
2. Check your Internet connection. Open a web browser
on your computer and enter www.zyxel.com in the
address bar.
If you cannot access the Internet, restart your
FSG1100HN.
10
Page 11

Log into the Web Configurator
1. Open your browser and enter http://192.168.1.1 (the
FSG1100HN’s default IP address) as the address
2. For administrator login, enter username admin and
passwrod 1234 (default). For user login, enter user
as the username and user as the password. Click
Login
If the login screen does not open, make sure
you allow web browser pop-up windows,
11
JavaScripts and Java permissions. You computer
should be also set to get an IP address
automatically
Set Up a Wireless Network
Page 12

To set up a wireless network you need at least one
wireless network card/adapter.
z If you have a desktop computer, use either a
wireless USB adapter or a wireless PCI adapter.
z If you have a laptop, use either a wireless USB
adapter or a wireless CardBus card. These are
built into many laptops.
Setting Up a Wireless Network with WPS.
If your wireless devices display the WPS
logo, you can use Wi-Fi Protected Setup
(WPS) to add wireless devices to your
wireless netwodk. If your wireless devices
do not display the WPS logo, go to Set Up a Wireless
Network Manually on page 15 to manually set up a
wireless network.
The FSG1100HN supports two WPS methods for
creating a secure connection.
z Push Button Configuation – create a secure
wireless network simply by pressing the
12
FSG1100HN’s physical WPS button. See Push
Button Configuration on page 12
z PIN Configuration – create a secure wireless
network by entering your wireless device’s PIN
Page 13

(Personal Identification Numer) into the
configuration screen of the FSG1100HN. See
PIN Configuration on page 13
You must use the same method on the FSG1100HN and
the wireless client.
Push Button Configuration
1. Place a WPS-enabled device that is installed in your
system and supports the WPS Push Button method
within range of the FSG1100HN.
2. Press the WLAN button on the FSG1100HN’s front for
five seconds.
3. Use the WPS-enabled device’s WPS button to enable
wireless security. It can be either a button in the utility
or a physical button. You must press the button on the
13
Page 14

second device within two minutes of pressing the one
firston the first. It doesn’t metter which button is
pressed first.
4. The FSG1100HN and the wireless device establish a
secure connection. This can take up to two minutes.
5. Congratulations! Your computer is now ready to
connect to the internet wirelessly through your
FSG1100HN.
PIN Configuration
1. Place a WPS-enabled device that is installed in your
computer and supports the WPS PIN configuration
method within range of the FSG1100HN.
2. Log into the FSG1100HN’s web configuration at
http://192.168.1.1 (see Log into Web Configuration on
page 10 for more details on this).
3. In the Staus screen click Network in the left panel
then click Wireless LAN. In the Wireless LAN screen
click the WPS Station tab.
4. Enter the PIN of the other WPS-enabled device into
the Input Station’s PIN number text box and click Start.
You can locate this PIN number in the other device’s
utility or on the device itself. See the other device’s
documentation if you cannot locate the PIN.
14
Page 15

5. Click Start or Apply in the other device’s utility screen
within two minutes of clicking Start in the FSG1100HN
web configurator screen.
6. The FSG1100HN and the other WPS-enabled device
establish a secure connection. This can take up to two
minutes.
7. Congratulations! Your computer is now ready to
connect to the Internet wirelessly through your
FSG1100HN.
15
Page 16

Viewing Your Product's
Certifications
16
Page 17

17
Page 18

18
 Loading...