

Page 1

Wireless-G
AP
U S E R’S G U I D E
+
2
Page 2

2 Zoom AP+2 User’s Guide
Page 3

Contents
Package Contents............................................................ 5
Overview…………………………………………………..5
Chapter 1: Installing the AP+2 as an Access Point ........ 7
Chapter 2: Installing the AP+2 as an Ethernet Client...13
Chapter 3: Installing the AP+2 as a Repeater................17
Chapter 4: Setting Security.............................................21
Chapter 5: Advanced Options........................................31
Viewing the System Status Page..................................................34
Using the Password Settings Page..............................................36
Using the Operating Mode Page.................................................37
Using the LAN Settings Page......................................................39
Using the Wireless Settings Page................................................41
Accessing the WEP/WPA Configuration Pages......................43
Viewing the Client List Page........................................................43
Using the MAC Address Filtering Page.....................................44
Using the Site Survey Page...........................................................45
Using the Repeater Settings Page................................................46
Using the Configuration Tools Page..........................................47
Using the Firmware Upgrade Page.............................................49
Using the Reset Page.....................................................................50
Appendix A: Troubleshooting .......................................53
Appendix B: Specifying TCP/IP Settings.....................55
Appendix C: LED Description ......................................63
Appendix D: Zoom Technical Support Services ...........65
Appendix E: Regulatory Information............................71
Contents 3
Page 4

Page 5

Package Contents
The AP+2 package contains the following:
• AP+2 Device
• Ethernet Cable
If anything is missing or damaged, please contact Zoom Customer
Support or whoever sold you the AP+2.
• Power Cube
• CD for Windows, Macintosh, and Linux
Overview
Depending on your needs, the Zoom AP+2 can be used in any of
the following ways:
•
Access Point.
modem/router, switch, or hub to allow wireless devices (for
example, computers or gaming devices) to make a wireless
connection to your network. Setting the AP+2 up as an access
point is explained in
Access Point
•
Ethernet Client.
port of a gaming device or computer so that device can have
wireless access to a wireless network. This is also known as a
“client bridge.” Setting the AP+2 up as an Ethernet client is
explained in
on page 13.
Client
You can plug the AP+2 into a router,
Chapter 1: Installing the AP+2 as an
on page 7.
You can plug the AP+2 into the Ethernet
Chapter 2: Installing the AP+2 as an Ethernet
•
Repeater.
network’s area of coverage to extend the area of coverage.
Setting the AP+2 up as a repeater is explained in
Installing the AP+2 as a Repeater
This User’s Guide provides instructions for setting up your AP+2
for each of the above scenarios. It also includes details about
setting up security, advanced settings, and specific information for
Windows, Macintosh, and Linux users.
If we update information about the AP+2, we provide the updated
information at this Zoom Web site:
http://www.zoom.com/techsupport/index.html
Zoom AP+2 User’s Guide 5
You can install the AP+2 near the edge of a wireless
Chapter 3:
on page 17.
Page 6

6 Zoom AP+2 User’s Guide
Page 7

1
Installing the AP+2 as an
Access Point
This chapter provides detailed instructions about installing the
AP+2 as an access point. If you have already done this using
the printed Quick Start booklet, you do not have to perform the
steps in this chapter. Instead, you should now set up security
for your wireless network. To do this, please continue with
Chapter 4: Setting Security on page 21.
Installing the Hardware
1111 Connect the AP+2 to your router, combination
modem/router, switch, or hub. To do this, plug one end of the
included Ethernet cable into the
AP+2 and plug the other end into an available Ethernet port
on the router, modem/router, switch, or hub. The AP+2
works with both 100 and 10 Mbps Ethernet port speeds.
port on the back of the
RJ-45
2222 Plug the included power cube into a power strip or wall outlet
and then plug its other end into the
the access point.
Important!
power cubes may damage the device.
Chapter 1: Installing the AP+2 as a n Access Po int 7
Only use the power cube shipped with the AP+2. Other
jack on the back of
Power
Page 8

The
TX/RX, LINK/ACT
, and
lights on the top of
Power
the device should blink while the AP+2 boots up and
configures itself. When a valid connection has been made, the
LINK/ACT
light will be solid green (for a 100 Mbps Ethernet
link) or solid orange (for a 10 Mbps Ethernet link).
You may want to try to position the unit’s antennas to improve
3333
wireless speed and coverage. Typically the antennas should not
be parallel. For example, try making one vertical and the other
horizontal.
Adding Devices to Your Wireless Network
Each device that you plan to use on your wireless network must
have wireless capabilities. Some newer desktop and notebook
computers have this capability built-in, while other Windows,
Macintosh, or Linux computers require the installation of a wireless
network adapter.
Gaming devices typically need to use an Ethernet cli ent (such as another
Note:
AP+2 in Client Bridge-Infrastructure mode) to access your wireless network.
Once you have a wireless network establ ished, see Chapter 2 to learn how to use a
second AP+2 as an Ethernet client with a gaming device.
If you are using a Windows XP desktop or notebook computer
that has built-in wireless capabilities, continue with
XP Computer Has Built-In Wireless Capabilities
My Windows
on page 9. If
it does not, or if you are using a Macintosh or Linux computer,
continue with
Adapter
To see if your Windows notebook has built-i n wireless capabilities: On the
Tip!
Windows desktop, click
Network Connection
Wireless Network Connection
wireless capabilities. If you need help, ref er to the documentation that came with
your Windows notebook.
8 Zoom AP+2 User’s Guide
My Computer Requires a Wireless Network
on page 10.
, click
Start
option. If
Connect to
Connect to
option, then your notebook does not have
, and then locate the
does not appear, or if there is no
Wireless
Page 9

My Windows XP Computer Has
Built-In Wireless Capabilities
1111 On your Windows desktop, click the
Control Panel
Double-click the
2222
3333 Right-click the
select
Properties
4444 On the
box, select the
automatically scan for available wireless networks in your area.
Its findings will appear in the
should find the wireless network of your new access point—
named
Windows to configure my wireless network settings
box is selected by default.)
5555 Select
Configure
The notebook will try to connect to the Internet using the
wireless networks listed here, in the order in which they
appear. (If you already have networks listed here, we
recommend you either remove them or use the
button to move
Wireless Network Connection Properties
zoom
zoom
.
Network Connections
Wireless Network Connec tion
.
Wireless Networks
Available networks
. (The scan is done automatically because the
from the
button to add it to the
Available networks
to the top of the list.)
zoom
Preferred networks
button, then click
Start
icon.
icon, then
tab. Windows XP will
list. It
list, then click the
Move up
dialog
Use
check
list.
6666 Click
Chapter 1: Installing the AP+2 as a n Access Po int 9
OK
.
Page 10

7777 If you are like most users, you set up the AP+2 as an access
point to provide wireless access to the Internet. If this is the
case, test your wireless connection by opening a Web browser
on the computer you just set up and trying to connect to a
familiar Web address. (If you do not connect, see
A: Troubleshooting
on page 53)
Appendix
Congratulations!
network. If you do not have any other computers to add to the
network, you can optionally add security to your network by
following the instructions in
page 21.
This computer has been added to your wireless
Chapter 4: Setting Security
on
My Computer Requires a Wireless
Network Adapter
If your computer does not have built-in wireless capabilities, you
need to install a wireless network adapter, such as the Zoom
Wireless-G PC Card or Zoom Wireless-G USB Adapter.
Although we recommend that you use a Zoom adapter, the Zoom
AP+2 is compatible with most USB adapters, PC card adapters, or
PCI adapters on the market. However, you will typically experience
better performance if you use Zoom wireless adapters.
Install the adapter and ensure that it is set to
1111
access point mode
you need help installing the adapter or setting its mode, refer to
the documentation that came with it.
(NOT
ad-hoc
or
infrastructure
peer to peer
mode). If
or
2222 Access the adapter’s software and perform a “site search” to
scan for available wireless networks in your area. For most
wireless adapters, you will use its wireless configuration
manager software and click a
Scan, Scan Networks
site search. If you need help, refer to the documentation that
came with your wireless adapter.
10 Zoom AP+2 User’s Guide
(or other similarly named) tab to do a
button or select a
Scan
Site
Page 11

If your computer is running Windows XP, your operating system may
Tip!
try to configure the AP+2 (rather than let you use the software provided with
the wireless adapter). You will know this is happening because you are
prompted with a message about one or more wireless networks being
available and you will be able to click a link to o pen the
Connection Properties
the
Use Windows to configure my wireless network settings
to disable it, then click OK. You can then use the software provided with
your wireless adapter without interruption from Windows XP.
dialog box. If this happens, click the link and clear
Wireless Network
check box
3333 When a list of available wireless networks appears, you will see
a Service Set Identifier (SSID) of
network you want to use to connect to the Internet.
. Select it as the
zoom
4444 If you are like most users, you set up the AP+2 as an access
point to provide wireless access to the Internet. If this is the
case, test your wireless connection by opening a Web browser
on the computer you just set up and trying to connect to a
familiar Web address. (If you do not connect, see
A: Troubleshooting
on page 53.)
Appendix
Congratulations!
This computer has been added to your wireless
network. If you do not have any other computers to add to the
network, you can optionally add security to your network by
following the instructions in
Chapter 4: Setting Security
on
page 21.
Chapter 1: Installing the AP+2 as a n Access Po int 11
Page 12

12 Zoom AP+2 User’s Guide
Page 13

2
Installing the AP+2 as an
Ethernet Client
The AP+2 can be connected to a gaming device (for example,
an Xbox or Playstation) or computer so that device can have
wireless access to a wireless network. This chapter explains
how to do this.
Sony PlayStation
Tip!
enable a Sony PlayStation using t he AP+2, you must purchase an Ethernet adapter
from Sony. The AP+2 can plug into this adapt er.
1111 Access the AP+2’s
into the device, as explained below.
Directly connect the AP+2 to an Ethernet-equipped
aaaa
computer that has a Web browser. To do this, plug one
end of the included Ethernet cable into the
the back of the AP+2 and plug the other end into the
Ethernet port on the computer.
Plug the included power cube into a power strip or wall
bbbb
outlet and then plug its other end into the
the back of the AP+2.
Important!
power cubes may damage the device.
®
devices do not have an Ethernet port. To wirelessly
Web Management Interface
Only use the power cube shipped with the AP+2. Other
by logging
RJ-45
Power
port on
jack on
Chapter 2: Installing the AP+2 a s an Ether n et Client 13
Page 14
Change the TCP/IP Settings on the computer so that it
cccc
uses static IP addressing and the IP address and subnet
mask below. Be sure to make note of what the settings are
prior to changing them, since you will need to restore
these settings later.
IP Address:
Subnet Mask:
If you do not know how to access and specify TCP/ IP settings on
Tip!
your computer, see
page 55.
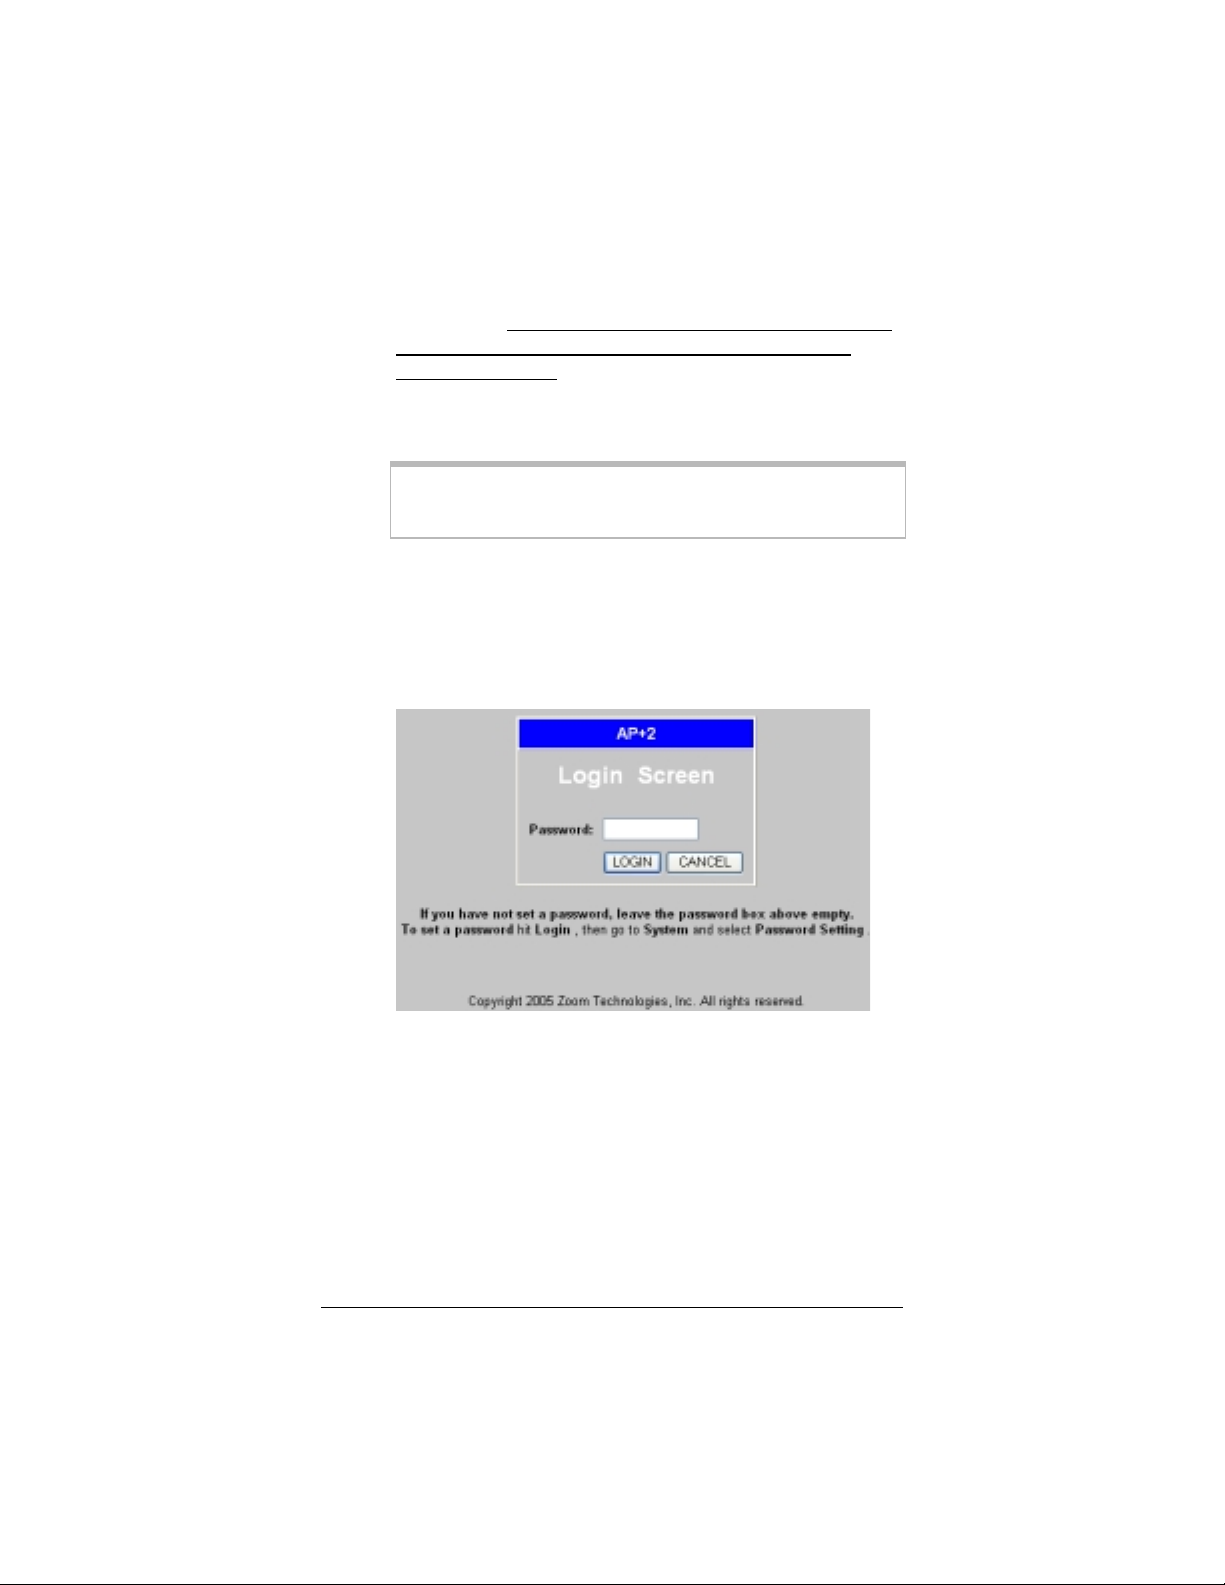
Open a Web browser, type
dddd
then press
When the
eeee
Click the
Interface
10.0.0.100
255.255.255.0
Appendix B: Specifying TCP/IP Settings
. (This is the IP address of the AP+2.)
Enter
Login Screen
button to access the
Login
for the AP+2.
on
10.0.0.200
opens, do not enter a password.
in the address bar,
Web Management
2222 Click
14 Zoom AP+2 User’s Guide
System
Operation Mode
in the left navigational menu, then click
to open the
Operating Mode
page.
Page 15

3333 From the
Client Bridge (Infrastructure)
If you are using the AP+2 with a gaming device, select the
Infrastructure option.
Operating Mode
drop-down list, select either
or
Client Bridge (AdHoc)
.
Click the
4444
When a confirmation message appears, click OK to change the
5555
operating mode. Another message will appear letting you know
that it may take a few moments while the unit resets itself and
changes mode. Click OK. (Once the AP+2 reboots itself, you
will be prompted to log into the
again.)
6666 Click
Survey
detected by the AP+2. Click the SSID of the network you
want to be a part of, then click OK when asked to confirm this
choice.
Save Changes
Wireless
. The page that opens lists the wireless networks
in the left navigational menu, then click
button.
Web Management Interface
Site
7777 If the wireless network you just selected has security applied,
click
WPA Configuration
(depending on the security used for that network) in the left
navigational menu. Specify the
network, then click the
your AP+2 to access the wireless network. (If you need help
specifying security on the AP+2, refer to
Security
on page 21.)
or
WEP Configuration
same
Save Changes
security settings as the
button. This will allow
Chapter 4: Setting
8888 Click the
your Web browser.
Logout
icon at the top right of the screen, then close
9999 Reset the computer’s TCP/IP settings to what they were
before you changed them.
Chapter 2: Installing the AP+2 a s a n Ether net Client 15
Page 16

10
10 Connect the AP+2 to the device you want to wirelessly
1010
enable:
! If the computer you used to access the
Management Interface
enable, leave the Ethernet cable and power cube plugged
in and continue with step 11.
! If you want to wirelessly enable a gaming device or a
different computer, move the AP+2 to that gaming device
or computer. First, unplug the AP+2’s power cube from
the power strip or wall outlet and disconnect the AP+2’s
Ethernet cable from the Ethernet port of the computer
you used to configure it. Then, connect the AP+2 to the
Ethernet port of the gaming device or different computer
and plug the AP+2’s power cube into a strip or wall outlet
near this gaming device or computer.
11
11 You may want to try to position the unit’s antennas to
1111
improve wireless speed and coverage. Typically the antennas
should not be parallel. For example, try making one vertical
and the other horizontal.
Congratulations!
your gaming device or computer should be able to wirelessly
connect to the wireless network you specified.
Your AP+2 is installed as an Ethernet client and
is the one you want to wirelessly
Web
16 Zoom AP+2 User’s Guide
Page 17

3
Installing the AP+2 as a
Repeater
The AP+2 can be used as a repeater to extend the range of
your wireless network. For example, you may have purchased
two AP+2 devices so that you can ensure wireless coverage
throughout a large home or office. This chapter explains how
to do this.
When installed as a repeater, the AP+2 is able to wirelessly
communicate with other access points and wireless gateways via
Wireless Distribution System (WDS) links.
Important!
must support WDS in order to communicate with the A P+2.
Access the AP+2’s
1111
into the device, as explained below.
aaaa
Chapter 3: Installing th e AP+2 as a Repeater 17
Any access point you plan to use with the AP+2 in repeater mod e
Web Management Interface
Directly connect the AP+2 to an Ethernet-equipped
computer that has a Web browser. To do this, plug one
end of the included Ethernet cable into the
the back of the AP+2 and plug the other end into the
Ethernet port on the computer.
by logging
RJ-45
port on
Page 18
Plug the included power cube into a power strip or wall
bbbb
outlet and then plug its other end into the
Power
the back of the AP+2.
jack on
Important!
power cubes may damage the device.
Change the TCP/IP Settings on your computer so that it
cccc
Only use the power cube shipped with the AP+2. Other
uses static IP addressing and the IP address and subnet
mask below. Be sure to make note of what the settings are
prior to changing them, since you will need to restore
these settings later.
IP Address:
Subnet Mask:
If you do not know how to access and specify TCP/ IP settings on
Tip!
your computer, see
page 55.
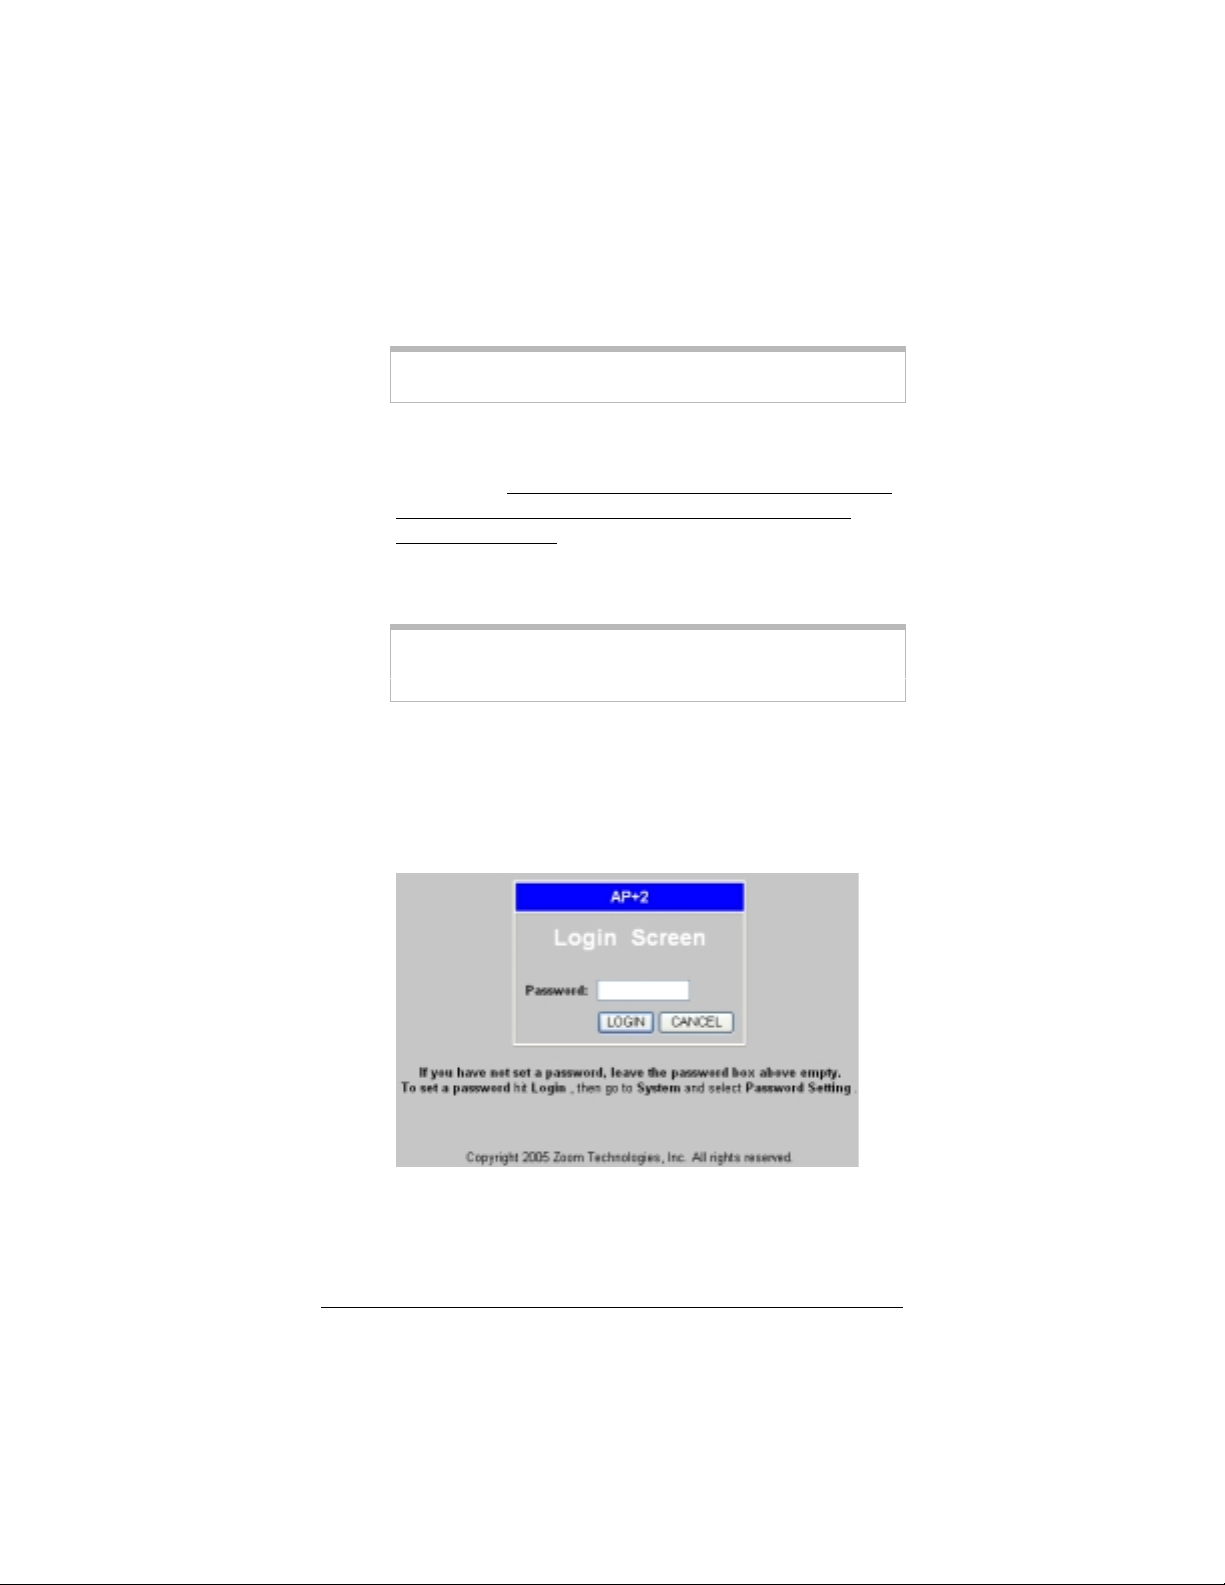
Open a Web browser, type
dddd
then press
When the
eeee
Click the
Interface
10.0.0.100
255.255.255.0
Appendix B: Specifying TCP/IP Settings
10.0.0.200
. (This is the IP address of the AP+2.)
Enter
Login Screen
button to access the
Login
opens, do not enter a password.
Web Management
for the AP+2.
in the address bar,
on
18 Zoom AP+2 User’s Guide
Page 19

2222 Click System in the left navigational menu, then click
Operation Mode
to open the
Operating Mode
page.
3333 From the
Click the
4444
When a confirmation message appears, click OK to change the
5555
operating mode. Another message will appear letting you know
that it may take a few moments while the unit resets itself and
changes mode. Click OK. (Once the AP+2 reboots itself, you
will be prompted to log into the
again.)
6666 Click
Repeater Settings
the wireless networks and gateways detected by the AP+2.
(Each link is defined by the MAC address of the other
repeater-capable access point. This is because WDS
communicates using only MAC addresses at the Data Link
Layer. SSIDs are not used to communicate.)
Select a check box for each WDS link to which you want your
7777
repeater to associate. You can select up to six WDS links.
Operating Mode
Save Changes
Wireless
in the left navigational menu, then click
. The page that opens lists the WDS links of
drop-down list, select
button.
Web Management Interface
Repeater
.
Important!
repeater settings for that access point or wirele ss gateway and specify the
Zoom AP+2 as a WDS link.
For every WDS link you select here, you must access the
8888 If any of the wireless networks or gateways you just selected
has security applied, click
navigational menu. (WDS only supports WEP.) Specify the
same WEP security settings as the network, then click the
Changes
wireless network/gateway. (If you need help specifying WEP
security on the AP+2, refer to
WEP
Chapter 3: Installing th e AP +2 as a Repeater 19
button. This will allow your AP+2 to access the
on page 24.)
WEP Configuration
Setting Up Security Using
in the left
Save
Page 20

9999 Click the
your Web browser.
10
10 Reset the computer’s TCP/IP settings to what they were
1010
before you changed them.
11
11 Unplug the power cube from the strip or wall outlet and
1111
disconnect the Ethernet cable from the Ethernet port of the
computer.
12
12 Move the AP+2 to a location at the edge of the access
1212
point’s or wireless gateway’s coverage area that you want to
extend.
13
13 Plug the included power cube into a power strip or wall
1313
outlet and then plug its other end into the
back of the access point.
Logout
icon at the top right of the screen, then close
jack on the
Power
Important!
power cubes may damage the device.
The
the device should blink while the AP+2 boots up and
configures itself. When a valid connection has been made, the
LINK/ACT
14
14
1414
Congratulations!
20 Zoom AP+2 User’s Guide
You may want to try to position the unit’s antennas to
improve wireless speed and coverage. Typically, the antennas
should not be parallel. For example, try making one vertical
and the other horizontal.
Only use the power cube shipped with the access point. Other
TX/RX, LINK/ACT
light will become solid.
Your AP+2 is installed as a repeater.
, and
lights on the top of
Power
Page 21

4
Setting Security
This chapter explains how to enable security for the AP+2 using
WPA and WEP.
When you first set up your Zoom AP+2, security is turned off by
default. This means that your wireless signal is not encrypted and
that anyone with compatible wireless technology can access your
network.
You can select one of two ways to configure and implement
security for your wireless network:
•
•
Before you proceed with the instructions in this section, you must
decide whether you want to use WPA or WEP security. If all of
your wireless devices support WPA or WPA Shared Key, we
recommend you use WPA. You can check a device by checking the
manual that came with that device or by checking the configuration
software for that device. Look under
Setup
If you have to use WEP, go to
on page 24. Otherwise, continue below.
Chapter 4: Setting Security 21
– WiFi Protected Access, sometimes called WPA Shared
WPA
Key. This is more secure and easier to install than WEP, but
you can only use it if all of your wireless devices support WPA.
– Wired Equivalent Privacy. This uses static keys and is
WEP
less secure than WPA. WEP security allows you to specify
whether you want 64-bit or 128-bit encryption.
or
Advanced Features
Security
.
Setting Up Security Using WEP
or
Encryption
or
Page 22

Setting Up Security Using WPA/WPA Shared Key
Access the AP+2’s
1111
Web Management Interface
into the device, as explained below.
Directly connect the AP+2 to an Ethernet-equipped
aaaa
computer that has a Web browser. To do this, plug one
end of the included Ethernet cable into the
the back of the AP+2 and plug the other end into the
Ethernet port on the computer. (If your AP+2 is already
connected to another device, such as a router or gaming
device, do not worry; simply plug it back in after you have
used an Ethernet-equipped computer to specify the
settings you need.)
Plug the included power cube into a power strip or wall
bbbb
outlet and then plug its other end into the
the back of the AP+2.
Important!
power cubes may damage the device.
Change the TCP/IP Settings on your computer so that it
cccc
Only use the power cube shipped with the AP+2. Other
uses static IP addressing and the IP address and subnet
mask below. Be sure to make note of what the settings are
prior to changing them, since you will need to restore
these settings later.
by logging
RJ-45
Power
port on
jack on
IP Address:
Subnet Mask:
If you do not know how to access and specify TCP/ IP settings on
Tip!
your computer, see
page 55.
Open a Web browser, type
dddd
then press
22 Zoom AP+2 User’s Guide
10.0.0.100
255.255.255.0
Appendix B: Specifying TCP/IP Settings
10.0.0.200
. (This is the IP address of the AP+2.)
Enter
in the address bar,
on
Page 23
When the
eeee
Click the
Interface
Login Screen
button to access the
Login
for the AP+2.
opens, do not enter a password.
Web Management
2222 Click
Wireless
Configuration
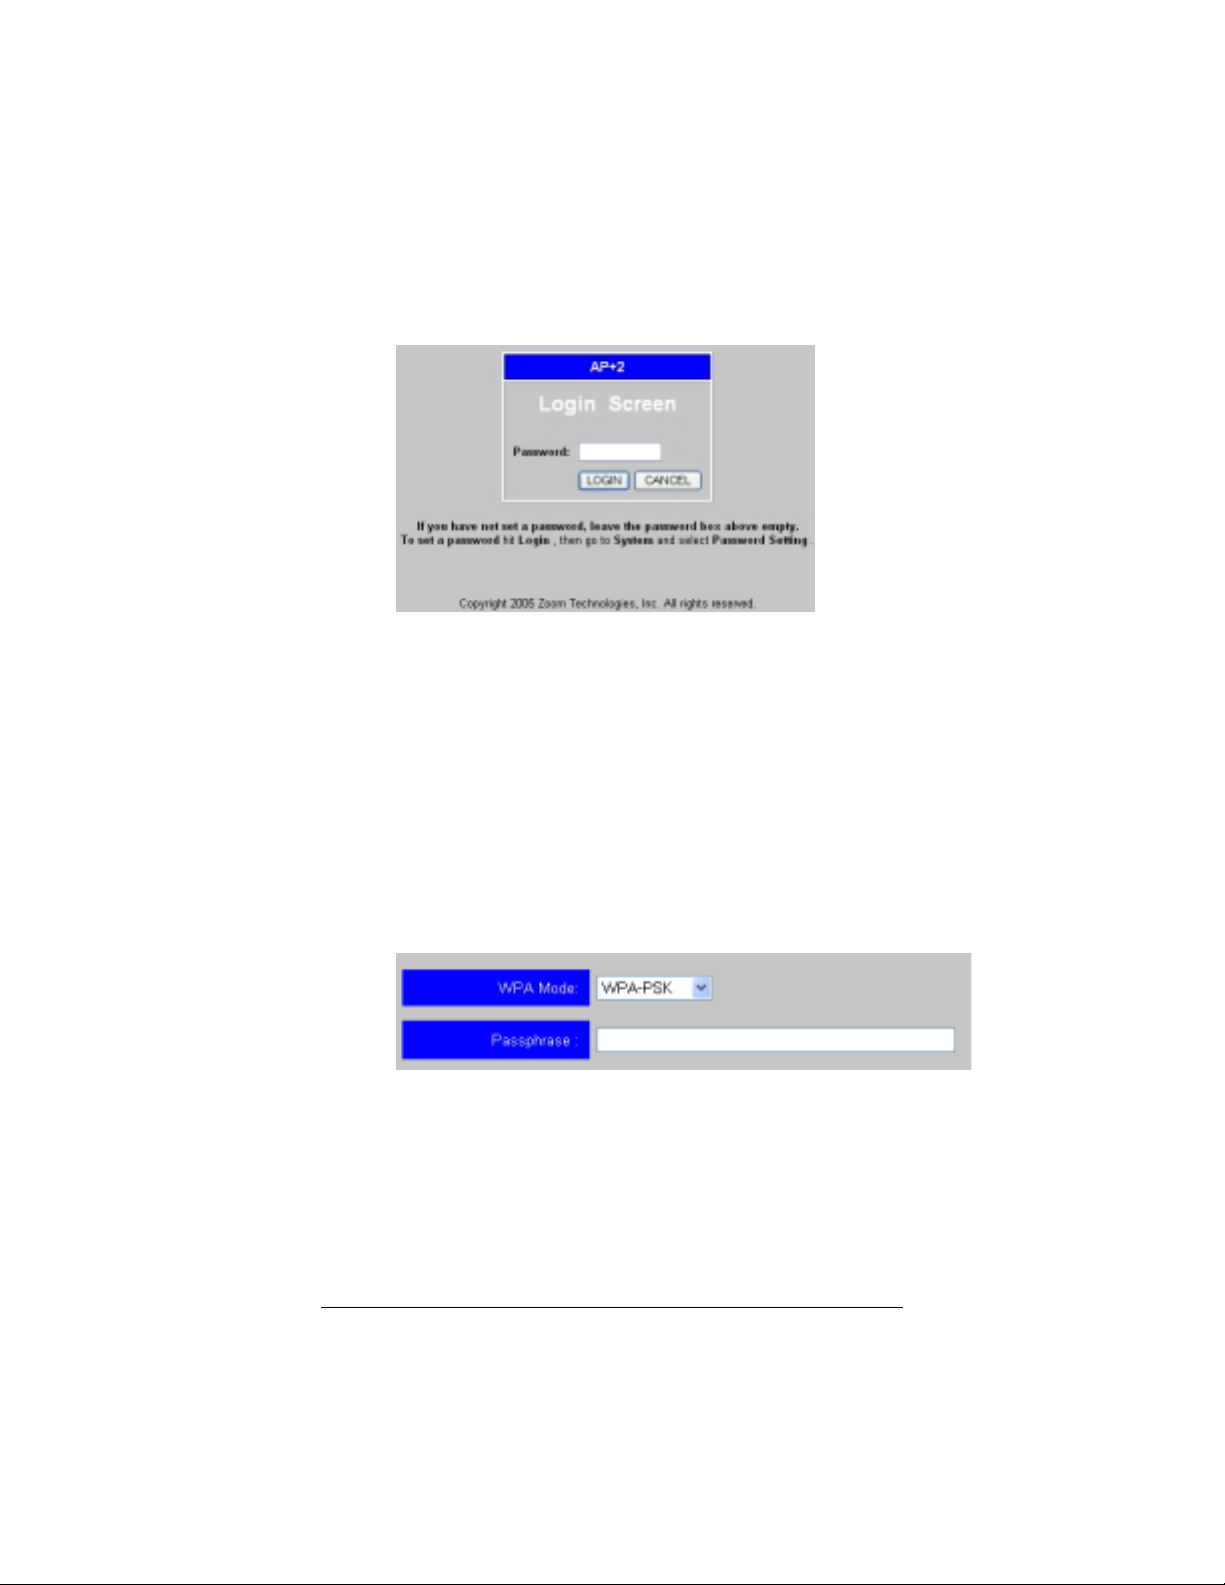
3333 From the
following:
!
WPA-PSK
key.” When you select this option, a
appears so you can enter a passphrase (password). The
passphrase can be between eight and 63 characters. You
can use upper- and lower-case letters and numbers. Once
you enter it, click
!
WPA-802.1x
server that supports 802.1x installed via a wired
connection. When you select this option, several boxes
appear so that you can enter settings specific to your
RADIUS server. Once you enter the appropriate
information, click
in the left navigational menu, then click
to open the WPA Configuration page.
WPA Mode
– This option is for WPA with a “pre-shared
drop-down list, select one of the
Passphrase
Save Changes
– Select this option if you have a RADIUS
Save Changes
.
.
WPA
box
Chapter 4: Setting Security 23
Page 24

If you do not know what a RADIUS server is, you most likely do
Tip!
not have one and should select
WPA-PSK
.
4444 Click the
then close your Web browser.
Reset the computer’s TCP/IP settings to what they were
5555
before you changed them.
Disconnect the AP+2 from the computer and plug it back in
6666
where it was before you set security.
Logout
icon at the top right corner of the screen,
7777 If you are using the AP+2 as an access point, locate the
security settings on each device that will use your wireless
network and enter the same WPA settings as the AP+2. This
will allow each device to access your
you need help doing this, refer to the documentation that came
with the device.
Congratulations!
wireless network. Your AP+2 installation should be complete.
You have specified WPA security for your
Setting Up Security Using WEP
Remember that you should only use WEP security if you cannot
use WPA security.
wireless network. If
zoom
1111 Access the AP+2’s
into the device, as explained below.
Directly connect the AP+2 to an Ethernet-equipped computer
aaaa
that has a Web browser. To do this, plug one end of the
included Ethernet cable into the
AP+2 and plug the other end into the Ethernet port on the
computer. (If your AP+2 is already connected to another
device, such as a router or gaming device, do not worry; simply
plug it back in after you have used an Ethernet-equipped
computer to specify the settings you need.)
24 Zoom AP+2 User’s Guide
Web Management Interface
port on the back of the
RJ-45
by logging
Page 25

Plug the included power cube into a power strip or wall
bbbb
outlet and then plug its other end into the
Power
the back of the AP+2.
jack on
Important!
power cubes may damage the device.
Change the TCP/IP Settings on your computer so that it
cccc
Only use the power cube shipped with the AP+2. Other
uses static IP addressing and the IP address and subnet
mask below. Be sure to make note of what the settings are
prior to changing them, since you will need to restore
these settings later.
IP Address:
Subnet Mask:
If you do not know how to access and specify TCP/ IP settings on
Tip!
your computer, see
page 55.
Open a Web browser, type
dddd
then press
When the
eeee
Click the
Interface
10.0.0.100
255.255.255.0
Appendix B: Specifying TCP/IP Settings
10.0.0.200
. (This is the IP address of the AP+2.)
Enter
Login Screen
button to access the
Login
opens, do not enter a password.
Web Management
for the AP+2.
in the address bar,
on
Chapter 4: Setting Security 25
Page 26
2222 From the AP+2
in the left navigational menu, then click
to open the WEP Configuration page.
Web Management Interface
, click
Wireless
WEP Configuration
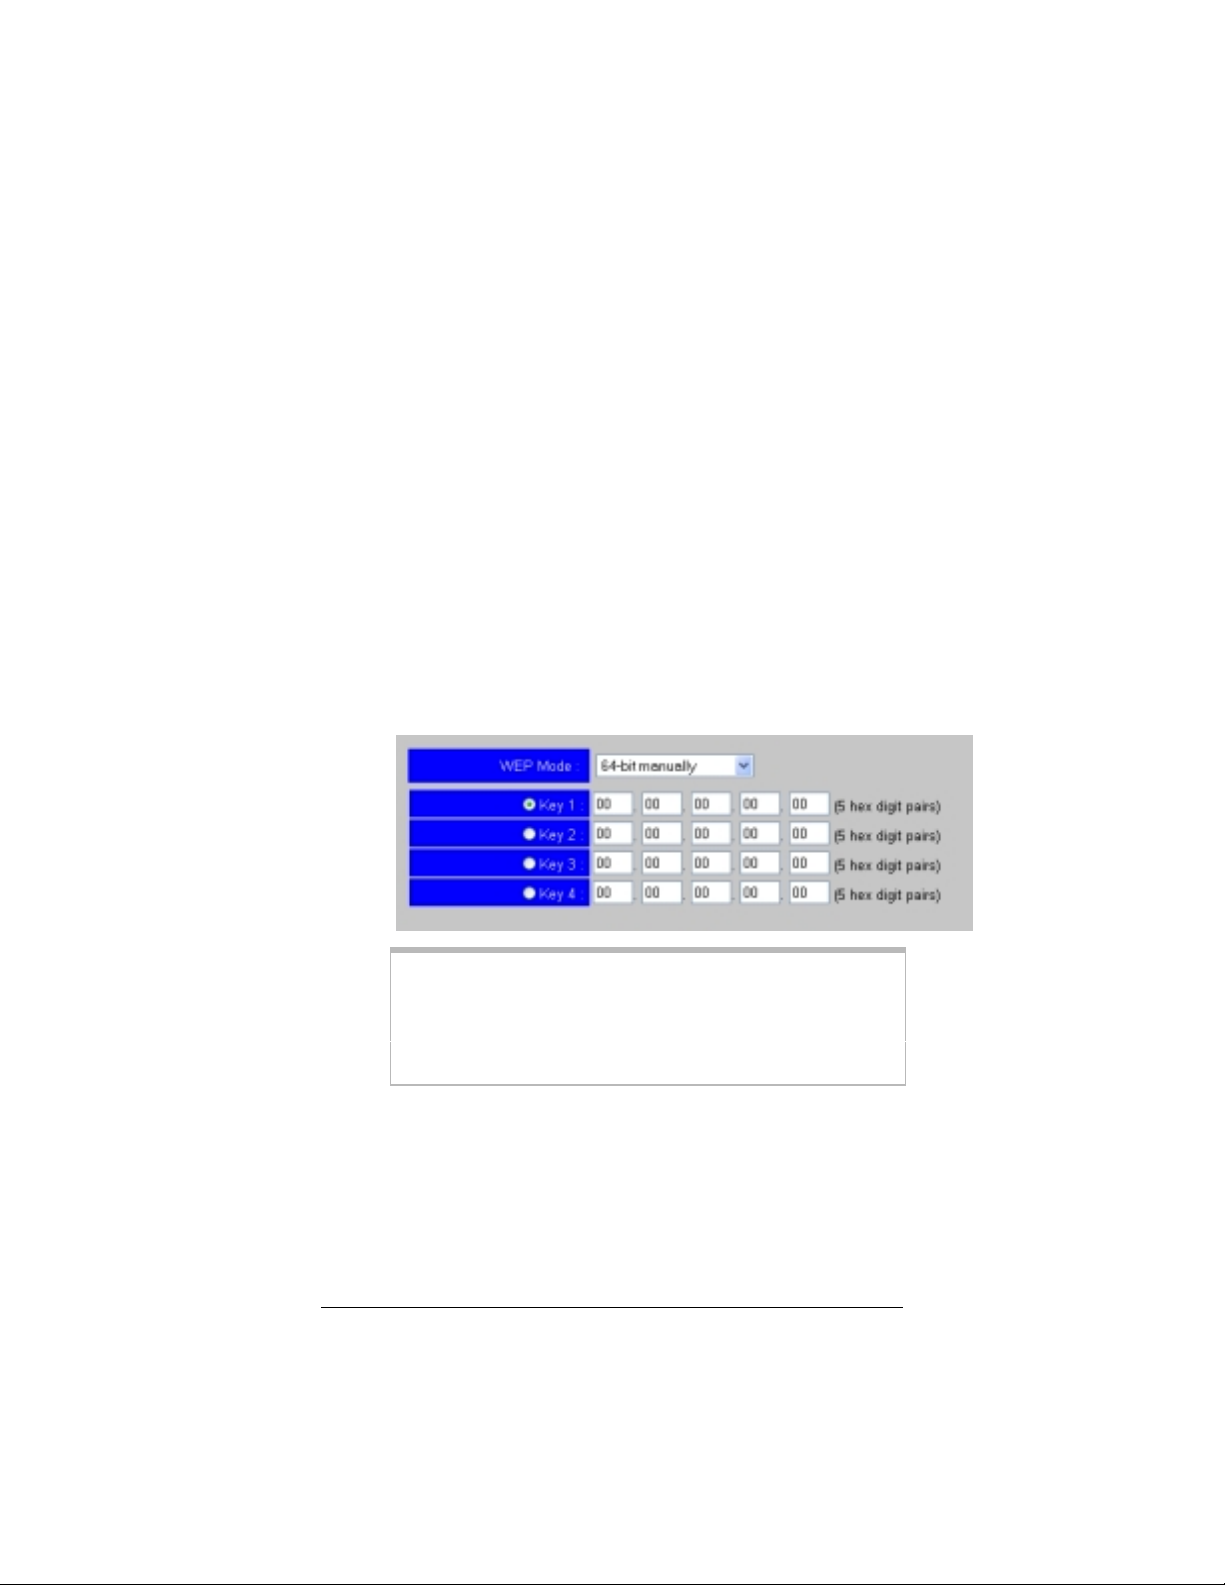
3333 Use the
want to use 64-bit or 128-bit encryption and whether you want
to manually enter hexadecimal keys or have them automatically
generated based on a passphrase. (Note that 128-bit encryption
is more secure, but 64-bit can be faster, depending on the
devices on your network.)
!
WEP Mode
64-bit manually
changes so you can enter up to four WEP keys manually.
Select the option button for the key you want to enter (for
example,
boxes provided. The range for hexadecimal characters is
0-9 and A-F. Once you have entered the keys you want,
click the
Note:
data and the receiving device will use the same key to decrypt it. This
means that all devices must have the exact same keys in the exact same
order. However, each device can specify which key it wants to use for
encryption so that all devices are not using the same keys. All four keys
should be filled in.
Key1
Save Changes
The 64-bit manually options uses only one key to encrypt the
drop-town list to specify whether you
– When you select this option, the screen
), then enter five hexadecimal pairs in the
button
26 Zoom AP+2 User’s Guide
Page 27
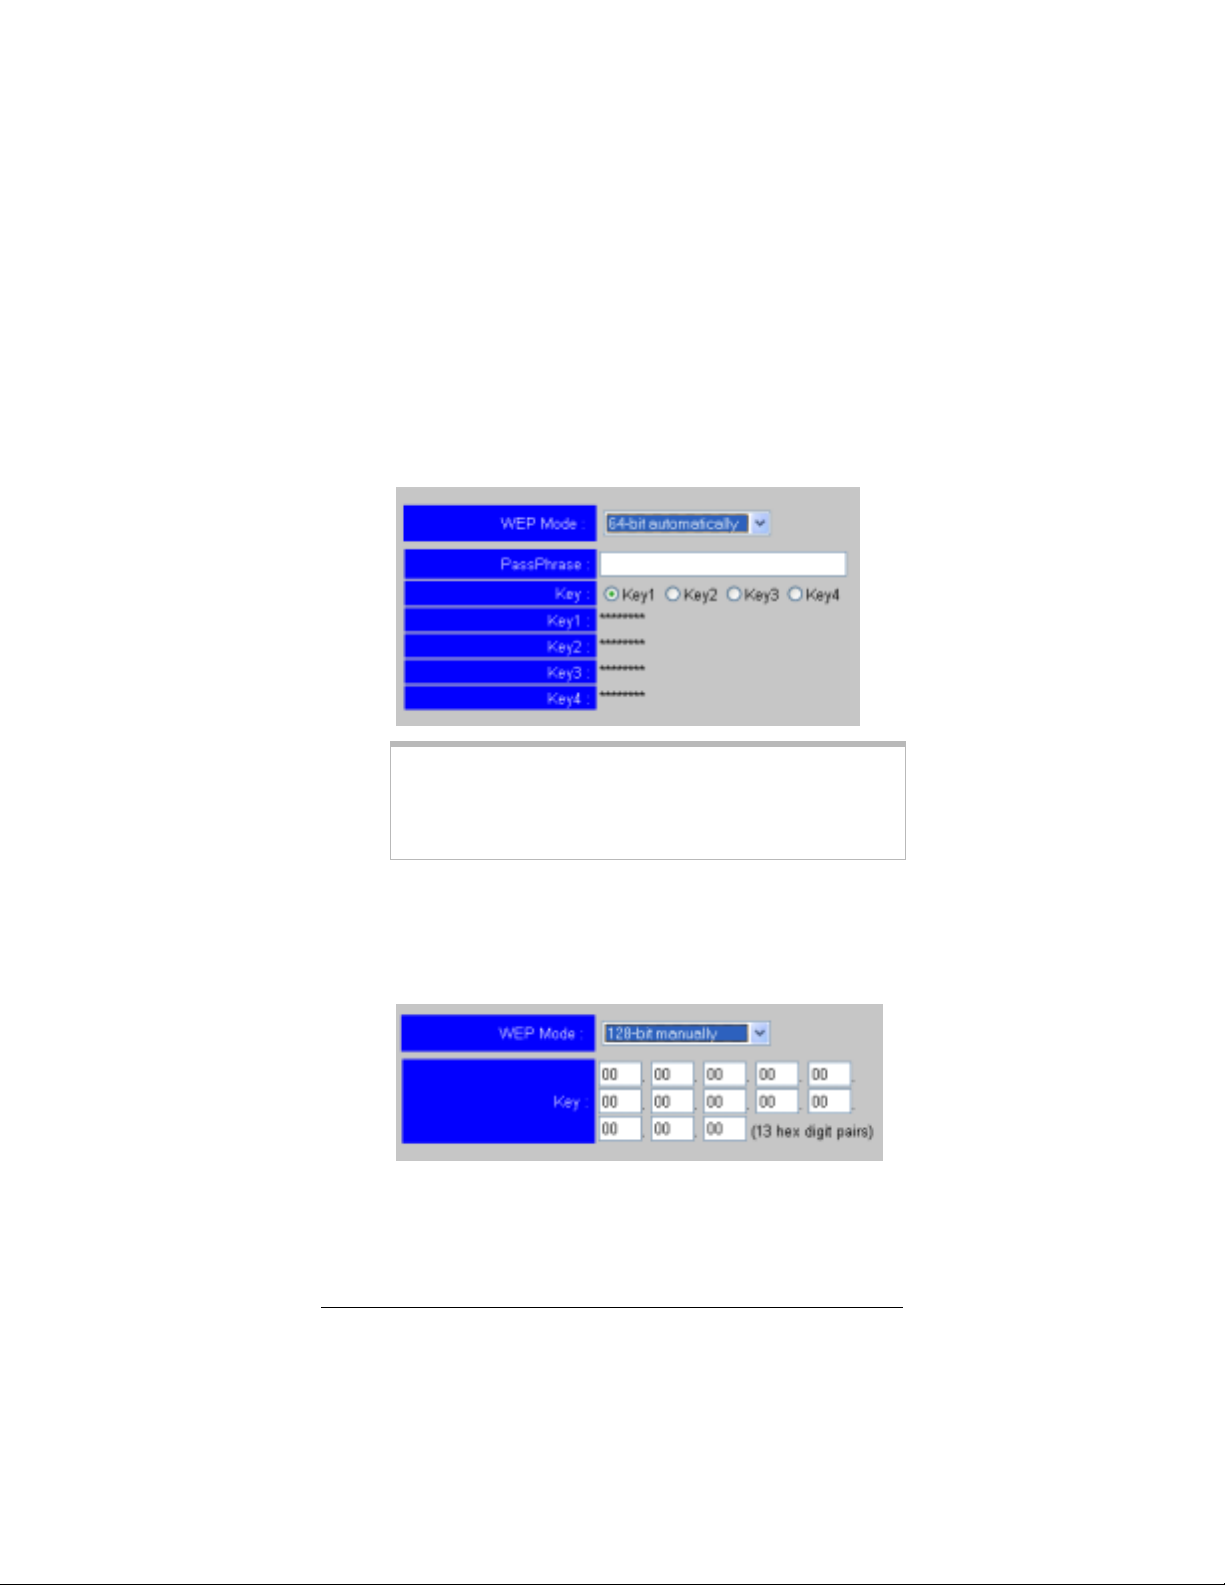
!
64-bit automatically
– Select this option if you want to
use a passphrase (password) to define the hexadecimal
keys. When you select this option, the screen changes so
you can specify a passphrase. The passphrase can be
greater or less than five characters (it cannot be exactly
five). When complete, click the
Save Changes
button. All
four hexadecimal keys are generated automatically and
appear on the screen. (Be sure to write down the
hexadecimal keys—you may need them later.)
If you are using the AP+2 with a device that does not allow you to
Tip!
use a passphrase for WEP key definition, or if that device’s passphrase
does not generate the same hexadecimal cha r acters for the keys, copy
the hexadecimal keys generated by the AP+2 an enter them in the
appropriate fields on the other device.
!
128-bit manually
– When you select this option, the
screen changes so you can enter a WEP key manually.
Enter 13 hexadecimal pairs in the boxes provided. The
range for hexadecimal characters is 0-9 and A-F. Once you
have entered the key, click
Chapter 4: Setting Security 27
Save Changes
.
Page 28

!
128-bit automatically
use a passphrase (password) to represent the 13
hexadecimal pairs in the key. When you select this option,
the screen changes so you can enter a passphrase. The
passphrase can be greater or less than 13 characters (it
cannot be exactly 13). Enter a passphrase in the
PassPhrase
The hexadecimal key generated by the passphrase appears
on the screen. (Be sure to write down the hexadecimal key
that is generated by the passphrase—you may need it
later.)
box, then click the
– Select this option if you want to
Save Changes
button.
4444 Click the
then close your Web browser.
Logout
icon at the top right corner of the screen,
5555 Reset the computer’s TCP/IP settings to what they were
before you changed them.
6666 Disconnect the AP+2 from the computer and plug it back in
where it was before you set security.
7777 If you are using the AP+2 as an access point, locate the
security settings on each device that will use your wireless
network and enter the same WEP settings as the AP+2. This
will allow each device to access your
you need help doing this, refer to the documentation that came
with the device.
Important!
hexadecimal keys generated by your passphrase, not the passphrase itself.
This is because devices by other vendors may not translate the passphrase
the same way.
Congratulations!
wireless network. Your AP+2 installation should be complete.
28 Zoom AP+2 User’s Guide
If your client devices are not Zoom devices, enter the
You have specified WEP security for your
wireless network. If
zoom
Page 29

Chapter 4: Setting Security 29
Page 30

Page 31

5
Advanced Options
Once your AP+2 is installed and running, you may want to
specify some advanced settings for the device. These advanced
options are not required and many users may not need or want
to use them. However, for those advanced users that do, this
chapter provides details about these options and how to apply
them to your wireless network.
To specify advanced options, you must log into the AP+2’s
Management Interface
, as explained below.
Web
1111 Directly connect the AP+2 to an Ethernet-equipped computer
that has a Web browser. To do this, plug one end of the
included Ethernet cable into the
AP+2 and plug the other end into the Ethernet port on the
computer. (If your AP+2 is already connected to another
device, such as a router or gaming device, do not worry; simply
plug it back in after you have used an Ethernet-equipped
computer to specify the settings you need.)
port on the back of the
RJ-45
2222 Plug the included power cube into a power strip or wall outlet
and then plug its other end into the
the AP+2.
Important!
power cubes may damage the device.
Only use the power cube shipped with the AP+2. Other
jack on the back of
Power
Chapter 5: Advanced Options 31
Page 32

3333 Change the TCP/IP Settings on your computer so that it uses
static IP addressing and the IP address and subnet mask below.
Be sure to make note of what the settings are prior to changing
them, since you will need to restore these settings later.
IP Address:
Subnet Mask:
If you do not know how to access and specify TCP/ IP settings on your
Tip!
computer, see
10.0.0.100
255.255.255.0
Appendix B: Specifying TCP/IP Settings
4444 Open a Web browser, type
press
5555 When the
the
Login
for the AP+2.
. (This is the IP address of the AP+2.)
Enter
Login Screen
button to access the
opens, do not enter a password. Click
on page 55.
10.0.0.200
in the address bar, then
Web Management Interface
One you are logged in, a navigational menu appears on the left side
of the
Web Management Interface
menu, a list of pages on which settings can be specified appears.
32 Zoom AP+2 User’s Guide
. If you click an item in the
Page 33

The following table lists each page that you can access from the
Web Management Interface
. Each page is described in detail
later in this chapter.
Menu Item Page Use this Page to...
System
LAN LAN Settings Specify whether you want the AP+2 to act
Wireless
Password
Setting
Operation
Mode
Settings Specify wireless settings, such as SSID
WEP
Configuration
WPA
Configuration
Client List View a list of the devices that are currently
Site Survey Have the AP+2 search for and display
Specify a password to restrict access to the
AP+2’s
Specify whether to use the AP+2 as an
access point, Ethernet client/client bridge,
or repeater. (Access point is the default.)
as a DHCP Client or DHCP Server. In
DHCP Client mode, the AP+2 will receive
IP addresses from a router and pass them
through to the devices on your wireless
network. In DHCP Server mode, the AP+2
will assign IP addresses to devices on your
network.
By default, the AP+2 is set to DHCP Client
mode.
and channel information. The settings you
can specify on this page depend on the
operation mode of the AP+2.
Specify WEP encryption settings for the
AP+2 to protect the wireless network from
unauthorized use. By default, no security is
applied.
Specify WPA encryption settings for the
AP+2 to protect the wireless network from
unauthorized use. By default, no security is
applied.
connected to your wireless network.
available wireless access points. This page
is only accessible when the
Mode
(Infrastructure)
Web Management Interface
Operating
is set to
Client Bridge
.
.
Table continued on next page...
Chapter 5: Advanced Options
33
Page 34

Wireless
(cont.)
Page Use this Page to...
Repeater
Settings
Specify the MAC addresses of the wireless
gateways whose coverage area you want
to connect via Wireless Distribution System
(WDS) links. This page is only accessibl e
when the
Repeater
Operating Mode
.
is set to
Tools
Connection
Control
Configuration
Tool
Firmware
Upgrade
Reset Reset the AP+2, but retain the current
Status View the current status of the AP+2, the
Enable MAC filtering and specify which
devices you want to be able to access the
wireless network. By default, all devices
within range can access the network.
Backup the AP+2’s current configuration,
restore the unit to a saved configuration, or
reset it to its factory defaults.
If Zoom releases updated software for the
AP+2, upgrade the firmware.
configuration.
wireless network, or the local area network.
Viewing the System Status Page
The System Status page opens when you first log into the
Management Interface
in the left navigational menu, then clicking
This page shows you the current settings of the following:
•
Device Status.
including the version of firmware currently installed on it and
its serial number.
. (You can also access it by clicking
.)
Status
Provides information about the AP+2,
Web
Tools
•
Wireless Status.
Shows the current wireless settings for the
AP+2, including the SSID of the wireless network to which it
is connected, the channel on which it is broadcasting, its mode
(Access Point/Wireless Client/Repeater), and the type of
encryption (if any) applied for security (WPA/WEP).
34 Zoom AP+2 User’s Guide
Page 35

•
LAN Status.
Shows the current settings for your local area
network, including the IP address of the AP+2, subnet mask,
configuration, and MAC address.
Chapter 5: Advanced Options
35
Page 36

Using the Password Settings Page
Use the Password Settings page to change the password needed to
access the
you want to prohibit other users from logging in to the AP+2’s
interface.
You can also use this page to specify how long the interface can
remain idle before it times out. (If it times out, a user will have to
log in again to continue using the interface.)
Web Management Interface
. This is typically done if
To open the Password Settings page, click
navigational menu, then click
To change the password
Password Settings
1111 Enter the current password in the
default, there is not password, so if you are adding a password
for the first time, leave this box blank.)
System
Current Password
in the left
.
2222 Type the password that you now want to use in the
Password
characters and is not case sensitive.
box. The password can be up to 12 alphanumeric
box. (By
New
3333 Type the new password again in the
Verification
4444 Click the
36 Zoom AP+2 User’s Guide
box.
Save Changes
button.
Re-Enter Password for
Page 37

To change the idle time out
In the
1111
2222 Click the
Idle Time Out
which the
current computer will time out (if the connection is idle for
that period of time). You can enter a value between 1 and 99.
Web Management Interface
Save Changes
box, enter the number of minutes after
connection with the
button.
Using the Operating Mode Page
Use the Operating Mode page to specify whether you want to use
the Zoom AP+2 as an access point, wireless client, or repeater.
By default, the AP+2 is set up as an access point. You only need to
change this setting if you are using the AP+2 as an Ethernet client
(also called a client bridge) or a repeater.
To open the Operating Mode page, click
left-navigational menu, then click
Operation Mode
System
in the
.
Chapter 5: Advanced Options
37
Page 38

To specify the operation mode for the AP+2
From the
1111
plan to use the unit:
!
Access Point.
if you plan to plug the AP+2 into a router, modem/router,
switch, or hub to allow wireless devices (for example,
computers) to make a wireless connection to your
network.
!
Client Bridge (Infrastructure).
want to connect to an existing wireless network through an
access point (for example, to wirelessly enable a gaming
device). If you know you want to use the AP+2 as an
Ethernet client/bridge, but are unsure of which option to
choose, select Infrastructure.
!
Client Bridge (AdHoc).
connect wirelessly without an access point to another
computer or gaming device in a “peer-to-peer” setup.
!
Repeater.
AP+2 near the edge of a wireless network’s area of
coverage to extend the area of coverage.
Click the
2222
Save Changes
Operating Mode
This is the default option. Select this option
Select this option if you plan to install the
drop-down list, select how you
Select this option if you
Select this option if you want to
button.
When a confirmation message appears, click OK to change the
3333
operating mode. Another message will appear letting you know
that it may take a few moments while the unit resets itself and
changes mode. Click OK. (Once the unit reboots itself, you
will be prompted to log into the
again.)
38 Zoom AP+2 User’s Guide
Web Management Interface
Page 39

Using the LAN Settings Page
Use the LAN Settings page to specify local area network settings
for your AP+2.
By default, the AP+2 is set up to use a static IP address
(
10.0.0.200
requests from LAN devices for DHCP information will be passed
through to a router/DHCP server, which will send IP address
information through the AP+2 back to the LAN device.
) to access its
Web Management Interface
. Any
To open the LAN Settings page, click
menu, then click
LAN Settings
.
in the left-navigational
LAN
To specify LAN settings
1111 [Optional] Enter a name for the AP+2. By default, it is named
Zoom AP
.
2222 Specify whether you want to use dynamic or static IP
addressing by selecting one of the following option buttons:
!
Configure a Static IP Address.
if you want to use a static IP address to access the
Management Interface
setting. With this option selected, wireless devices will
receive their IP addresses from a DHCP server on your
network (for example, a router). If you want the AP+2 to
assign the IP addresses to the wireless devices, select the
next option.
of the AP+2. This is the default
Select this option button
Web
Chapter 5: Advanced Options
39
Page 40

!
Obtain an IP Address Automatically [DHCP].
this option button if you have a DHCP server on the
network and want to use dynamic addressing to acquire an
IP address for accessing the
Interface
IP address when booted. The AP+2 will also assign an IP
address to any wireless device that requests one. If you
select this option, you do not have to specify any other
information on this page; click the
. The AP+2 will automatically be assigned a new
Web Management
Save Changes
Select
button.
If you selected
3333
fields appear so you can specify more information. Specify the
following:
Specify the IP address for the
aaaa
Interface
provided. By default, the unit’s IP address is 10.0.0.200.
Specify the subnet mask for the unit by entering it in the
bbbb
boxes provided. By default, it is 255.255.255.0.
Select or clear the
cccc
Server
this option, the AP+2 will provide DHCP information to
any devices requesting it. When filling in the settings that
appear when this option is selected, ensure that the range
of IP addresses is in the same subnet as the IP address of
the AP+2. If you are plugging the AP+2 into a router, you
should allow the DHCP server in that router assign the IP
addresses to the wireless devices on your network.
Click the
dddd
Configure a Static IP Address
Web Management
of the AP+2 by entering it in the boxes
The Access Point acts as a DHCP
check box, depending on your needs. If you select
Save Changes
button.
, the additional
40 Zoom AP+2 User’s Guide
Page 41

Using the Wireless Settings Page
Use the Wireless Settings page to specify the SSID and channel
information for AP+2.
Once this information is set, all devices that you want to access
your wireless network must use these settings.
To open the Wireless Settings page, click
left-navigational menu, then click
Settings
Wireless
.
in the
To specify wireless settings
The following steps assume that you want to set up a wireless
network.
Select the
1111
you clear this, wireless networking will be disabled and the
other options on this page will disappear).
2222 From the
channel you want to use. If you are using the AP+2 as an
Ethernet client in Infrastructure mode, you do not have to
specify this because it is controlled by the access point you are
using with the device.
Enable Wireless Network
Wireless Channel
drop-down list, select the radio
check box. (Note that if
Chapter 5: Advanced Options
41
Page 42

3333 In the
broadcast (when in access point or repeater mode). This is the
name of the wireless network that will appear to other devices
on your network. By default, this is set to
be up to 32 alphanumeric characters and is case sensitive.
box, enter the SSID you want the AP+2 to
SSID
zoom
. The SSID can
4444 Select the
you entered in step 3 so other devices within range can
connect to your wireless network. (This check box should be
selected by default.) For security reasons, we recommend that
you clear this check box after you have connected all the
devices that you want to access your wireless network. This
will ensure that other devices in your area—for example, those
of your neighbors—do not see your network when they search
for available networks.
5555 From the
which you want data sent over your wireless network. We
recommend you keep the default value of
Auto
decrease depending on the strength and quality of the radio
signal. (If you want to change the default option, note that the
higher the rate, the better the signal.)
6666 From the
your AP+2 to only allow 802.11g devices to access the wireless
network or if both 802.11g and 802.11b devices will be granted
access. We recommend you select
only select
of devices on your network.
Broadcast SSID
Transmit Rate
, the rate of transmission will automatically increase or
Basic Rate
802.11g +802.11b (mixed)
check box to broadcast the name
drop-down list, select the rate at
. When set to
Auto
drop-down list, select whether you want
802.11g only
if you have both types
. You should
7777 Enable or disable
Enabled
feature, your wireless connectivity will be boosted up to 125
Mbps.)
8888 Click the
42 Zoom AP+2 User’s Guide
or
Save Changes
Turbo Mode
Disabled
option button. (If you enable this
button.
by selecting either the
Page 43

Accessing the WEP/WPA Configuration Pages
Use these two pages to specify security for your AP+2.
To open these pages, click
then click
appropriate.
Details about specifying security are covered in
Security
WEP Configuration
on page 21.
Wireless
in the left-navigational menu,
or
WPA Configuration
Chapter 4: Setting
, as
Viewing the Client List Page
Use the Client List page to view the devices that are currently
connected to your wireless network.
To open the Client List page, click
menu, then click
Each device is listed with its MAC address and type. You cannot
configure any settings on this page. However, you can click the
Refresh
button to update the list.
Client List
Wireless
.
in the left-navigational
Chapter 5: Advanced Options
43
Page 44

Using the MAC Address Filtering Page
If you want to add more security to your network, use the MAC
Address Filtering page to restrict access to your wireless network
based on a device’s unique MAC address. If you do this, only
devices with the MAC addresses you specify can access the
network.
By default, the MAC address filter is disabled.
To open the MAC Address Filtering page, click
left-navigational menu, then click
To filter devices based on MAC address
1111 Select the
Enable Mac Address Filtering
Connection Control
Wireless
check box.
in the
.
2222 Type the MAC address for a device you want to be able to
access your wireless network, then click the
device will appear on the screen in the MAC Address Filtering
List.)
button. (The
Add
3333 Repeat step 2 for each device that you want to grant access to
your wireless network
4444 Click the
44 Zoom AP+2 User’s Guide
Save Changes
button.
Page 45

Using the Site Survey Page
This page is only accessible when the AP+2’s
set to
Client Bridge (Infrastructure)
Use the Site Survey page to have the AP+2 detect the available
wireless networks in the area. For example, you would use the Site
Survey page if you plan to plug the AP+2 into a gaming device to
wirelessly enable it so it can connect to an existing network.
To open the Site Survey page, click
left-navigational menu, then click
.
Wireless
Site Survey
Operating Mode
in the
.
is
To perform a Site Survey
1111 Click the
available wireless networks. Each one detected will appear in a
list showing its SSID, signal strength, and other information.
Refresh
button to have the AP+2 search for
2222 Click the SSID for network you want.
Chapter 5: Advanced Options
45
Page 46

Using the Repeater Settings Page
This page is only accessible when the AP+2’s
set to
Repeater
Use the Repeater Settings page to specify the MAC addresses of
the access points and/or wireless gateways whose coverage you
want the AP+2 to be able to extend.
When in repeater mode, the AP+2 is able to wirelessly
communicate with the access points and gateways of these other
networks via Wireless Distribution System (WDS) links.
To open the Repeater Settings page, click
left-navigational menu, then click
.
Repeater Settings
Operating Mode
Wireless
in the
.
To specify repeater settings
Click the
1111
available wireless networks or gateways in the area. (Each link
is defined by the MAC address of the other repeater-capable
device.)
Refresh
button to have the AP+2 search for
2222 Select a check box for each WDS link that you want your
repeater to associate. You can select up to six WDS links.
is
Important!
repeater settings for that access point or wirele ss gateway and specify the
Zoom AP+2 as a WDS link.
3333 Click the
46 Zoom AP+2 User’s Guide
For every WDS link you select here, you must access the
Save Changes
button.
Page 47

Using the Configuration Tools Page
Use the Configuration Tools page to save the AP+2’s current
configuration to a backup file, to restore the unit to a saved backup
file, or to restore it to its factory defaults.
To open the Configuration Tools page, click
left-navigational menu, then click
Configuration Tools
Tools
in the
.
To backup the current settings
Click the
1111
When asked if you really want to save this file, click
2222
Backup
button.
Save
.
3333 On the Save As dialog box, navigate to the location on your
computer where you want to save this file. By default, the file
is named
need it should you ever want to restore the AP+2 to this
configuration.
backup.bin
. Be sure to note this location, you will
4444 Click
Chapter 5: Advanced Options
Save
.
47
Page 48

To restore to a saved configuration
1111 Click the
backup file. Select the file, then click
is automatically entered in the
2222 Click the
that the AP+2 is being reset, click OK.
Browse
Restore
button and navigate to the location of the
. The path to the file
Save
Restore Settings
button. A message appears to let you know
box.
3333 Wait while the unit is reset using the saved configuration. You
will be prompted to log in to the
Interface
after the process is complete.
To restore to factory defaults
Click the
1111
that the AP+2 is being reset to factory defaults, click OK.
Default
button. A message appears to let you know
Web Management
2222 Wait while the unit is reset to its factory defaults. You will be
prompted to log in to the
the process is complete.
An alternative
If you do not want to log into the AP+2 to restore the factory
defaults, you can do the following. Unplug the AP+2 from the wall
outlet or power strip, insert a paper clip into the
on the bottom of the unit and depress the button. While the button
is depressed, plug the unit back in and continue depressing the
button for five seconds. All of the LEDs on the AP+2 will go out
and then turn back on. (If you do not keep the button depressed
for at least five seconds, the AP+2 will be reset to its current
configuration, NOT the factory defaults.
Web Management Interface
Reload
after
pinhole
48 Zoom AP+2 User’s Guide
Page 49

Using the Firmware Upgrade Page
From time to time, Zoom may release updated software for your
AP+2. Use the Firmware Upgrade page to install the new software
onto the unit. To see if there is a firmware update, periodically visit
the Zoom Web site (www.zoom.com).
To open the Firmware Update page, click
left-navigational menu, then click
Firmware Update
Tools
in the
.
To update the firmware
Ether the path and name of the upgrade file, or click
1111
and navigate to the file. (Typically, you would have
downloaded the file to your computer from the Zoom Web
site.)
2222 Click the
upgrade.
You can verify whether the upgrade was successful by checking the
System Status page (click
clicking
Upload
Status
button. You will be prompted to confirm the
in the left navigational menu, then
Tools
).
Browse
Chapter 5: Advanced Options
49
Page 50

Using the Reset Page
Use the Reset page to reset the AP+2, but maintain the current
settings.
To open the Reset page, click
then click
To reset the AP+2
1111 Click the
Reset
Reset
.
button.
2222 When prompted to confirm the reset click
in the left-navigational menu,
Tools
.
OK
3333 When message appears to let you know that the unit is being
reset, click OK. You will be prompted to log into the AP+2
again once the reset is complete.
50 Zoom AP+2 User’s Guide
Page 51

Chapter 5: Advanced Options
51
Page 52

Page 53

Appendix A
Troubleshooting
Problem
I set up my AP+2 as an access point, but the computers I set up on
my
Solution
Verify that a “wired” computer can access the Internet.
• If it cannot, then the problem appears to be with your cable or
• If it can, reboot the computer(s) on your wireless network and
wireless network cannot access the Internet.
zoom
DSL Internet connection. Contact your Internet Service
Provider.
try to access the Web again. If you still cannot connect to the
Internet wirelessly, try the following:
! Verify that security is not set on the AP+2. If it is, ensure
that the wireless computers are using the same settings. If
you accessed the AP+2’s
you should ensure that you reset the computer’s TCP/IP
settings.
Web Management Interface
,
! Verify that the computer is connected to the correct
wireless network and that the signal strength is adequate.
(Try repositioning the device if the signal strength is not
active.)
"
If you are using a Windows XP operating system
with built-in wireless access:
On your Windows desktop, click the
aaaa
then click
Double-click the
bbbb
Appendix A: Troubleshooting 53
Control Panel
Network Connections
.
Start
button,
icon.
Page 54

Click the
cccc
Look at the details that appear on the left side of
dddd
the screen. If the signal strength is low, try
repositioning the antennas of the AP+2. You can
also try moving the wireless computer closer to
the AP+2. You should also verify that
selected as the wireless network. If it is not, then
you are connected to the wrong network.
"
If you are using a computer with a wireless
network card installed
software and verify that it is connected to the
network and that the signal strength is adequate. Refer
to the documentation that came with the adapter if
you need help doing this.
Wireless Network Connection
zoom
, access the network card’s
icon.
is
zoom
54 Zoom AP+2 User’s Guide
Page 55

Appendix B
Specifying TCP/IP Settings
Accessing the AP+2’s
you plug the unit directly into the Ethernet port of a computer. It
also requires that the computer’s TCP/IP settings be set for static
IP addressing and the following IP address and subnet mask:
IP Address:
Subnet Mask:
This Appendix details how to access and set the TCP/IP settings
for Windows, Macintosh, and Linux operating systems. Depending
on your operating system, follow the steps in the appropriate
section to ensure your TCP/IP settings are correct.
• If you are using Windows, see
page 56.
• If you are using Macintosh, see
on page 59.
• If you are using Linux, see
page 61.
10.0.0.100
Web Management Interface
255.255.255.0
Windows TCP/IP Settings
Macintosh TCP/IP Setting
Linux TCP/IP Settings
requires that
on
on
Appendix B: Specifying TCP/IP Setting s 55
Page 56

Windows TCP/IP Settings
How you configure your Windows computer’s network settings
differs, depending on your operating system.
Windows XP
Open the
1111
box.
aaaa
bbbb
cccc
dddd
2222 Select
255.255.255.0
respectively.
Click OK, then click
3333
Internet Protocol (TCP/IP) Propert ies
From the desktop, click the
, and then click
Panel
Connections
Click
Network Connections
Right-click the
Properties
Select the Internet Protocol (TCP/IP) entry (it should
include “TCP/IP” in it, but not “AOL,” “Dial-up,” or
“Adapter”) and click the
Use the following IP address
Network and Internet
.
Local Area Connection
.
Properties
as the
IP address
.
Close
button, point to
Start
.
button.
and enter
and
Subnet mask
dialog
Control
icon, and select
10.0.0.100
,
and
56 Zoom AP+2 User’s Guide
Page 57

Windows 2000
Open the
1111
box.
From the desktop, click the
aaaa
Settings
Right-click the
bbbb
Properties
Select the Internet Protocol (TCP/IP) entry (it should
cccc
include “TCP/IP” in it, but not “AOL,” “Dial-up,” or
“Adapter”) and click the
2222 Ensure that
enter
10.0.0.100
Subnet mask
3333 Click
, then click OK again.
OK
Internet Protocol (TCP/IP) Propert ies
button, point to
Start
, then
Network and Dial-up Connections
Local Area Connection
.
Properties
Use the following IP address
and
255.255.255.0
, respectively.
as the
icon, and select
button.
is selected and
IP address
dialog
.
and
Appendix B: Specifying TCP IP Settings
57
Page 58

Windows 98/Me
Open the
1111
box.
aaaa
bbbb
cccc
Internet Protocol (TCP/IP) Propert ies
From the desktop, click the
Settings
Double-click the
dialog box.
Select your NIC card’s TCP/IP entry (it should include
“TCP/IP” in it, but not “AOL,” “Dial-up,” or “Adapter”)
and click the
, then
Control Panel
Properties
Network
Start
icon to display the
button and then click
2222 On the IP Address tab, ensure that
selected and enter
Address
3333 Click
OK
10.0.0.100
and
Subnet Mask
, then click OK again.
and
, respectively.
dialog
button, point to
.
Network
OK
Specify an IP address
255.255.255.0
as the
is
IP
58 Zoom AP+2 User’s Guide
Page 59

Macintosh TCP/IP Settings
How you configure your Macintosh computer’s network settings
differs, depending on your Mac OS. For OS X, follow the
instructions below. Otherwise, go to page 60.
Mac OS X
From the
1111
Network
have to click the
Ensure that
2222
3333 Under the
4444 Under the
addressing and enter
address
5555 Click
Network
Dock
to display the
Show
TCP/IP
and
Apply Now
pane.
, choose
Configure
Automatic
drop-down tab, choose
Subnet mask
System Preferences
Network
button.)
is selected from the
tab, specify that you want to use static IP
10.0.0.100
, respectively.
(or
if prompted) and close the
Save
and then
pane. (For OS X 3, you also
list box.
as the
and
255.255.255.0
Location
Built-in Ethernet
.
IP
Appendix B: Specifying TCP IP Settings
59
Page 60

Mac OS 7.6.1 - 9.2.2
From the
1111
TCP/IP
Under Connect via:, select
2222
to display the
menu, choose
Apple
Control Panels
TCP/IP
Window.
Ethernet built-in
and then
.
3333 Under Configure:, specify that you want to use static IP
addressing and enter
address
4444 Close the
save the changes. Click
and
Subnet mask
TCP/IP
10.0.0.100
Window. You will be asked if you want to
Save
and
255.255.255.0
, respectively.
.
as the
IP
60 Zoom AP+2 User’s Guide
Page 61

Linux TCP/IP Settings
The instructions for setting up static IP addressing vary
dramatically by distribution, so you may want to refer to your
particular version’s documentation.
If you have more than one network card installed, you will need to pick
Note:
distinct Ethernet identifiers for each (eth0, eth1, eth2, and so forth). If you select
an identifier other than eth0 for your AP+2, use that identifier throughout.
RedHat
Edit or create
/etc/sysconfig/network-scripts/ifcfg-eth0
that it contains the following lines:
DEVICE=eth0
BOOTPROTO=static
ONBOOT=yes
IPADDR=10.0.0.100
NETMASK=255.255.255.0
USERCTL=no
PEERDNS=no
GATEWAY=10.0.0.200
TYPE=ethernet
NETWORK=10.0.0.0
BROADCAST=10.0.0.255
so
Once you have modified this file and saved the changes, issue the
following commands to have the changes applied:
ifdown eth0
ifup eth0
Appendix B: Specifying TCP IP Settings
61
Page 62

SuSE
Edit the file
10.0.0.100. The settings you need to specify will be similar to the
Red Hat example above.
/etc/rc.config
and specify a static IP address of
Reboot with this command:
/sbin/shutdown -r now
.
Debian
Locate
of 10.0.0.100. The settings you need to specify will be similar to the
Red Hat example above.
Reboot with this command:
/etc/network/interfaces
and specify a static IP address
/sbin/shutdown -r now
.
62 Zoom AP+2 User’s Guide
Page 63

Appendix C
LED Description
The following table describes each of the LEDs on the top of the
AP+2 and what each light means when it is flashing and/or steady.
LED What it does Flashing/Steady Status
TX/RX Shows the
status of the
AP+2’s wireless
link
LINK/ACT Shows the
status of the
AP+2’s Ethernet
LAN connection
When flashing green, the AP+2 is
sending or receiving data wirelessly.
•
If it flashes green and then
becomes steady green, the AP+2
has established a valid 100 Mbps
Ethernet connection.
•
If it flashes orange and then
becomes steady orange, the
AP+2 has established a valid 10
Mbps Ethernet connection.
•
When flashing (regardless of
color), the AP+2 is sending or
receiving data over the Ethernet
LAN.
PWR Shows whether
the AP+2 is
powered on.
Appendix C: LED Description 63
When steady green, the AP+2 is
powered on.
Page 64

64 Zoom AP+2 User’s Guide
Page 65

Appendix D
Zoom Technical Support
Services
Zoom has a variety of technical support services available to our
customers. We strive to provide convenient, professional support
responsive to our customers’ needs and capabilities. If you find
yourself unable to get your Zoom product to operate, and you have
thoroughly reviewed your owner’s manual and all relevant
documentation, please feel free to contact us for help.
For your records, and to facilitate Technical Support from either
your equipment supplier or Zoom, please record the following
information when you receive your Zoom product.
Product Information
Product Name
__________________________________
Product Model Number
__________________________________
Product Serial Number
__________________________________
Date Installed
_______________________
The Serial Number is located on the bottom of the unit below the
barcode. Once you have located the Serial Number, please be sure
to write it down. This will greatly speed up your service and insure
that the service representative is addressing the proper model of
the product.
Calls to Zoom’s voice technical support staff are the most time
consuming, and at times you may find it difficult to get through.
We do not want you left on hold for long periods of time, so we
limit the queue length. We recommend that you take the time to
familiarize yourself with the other services described in this section
Appendix D: Zoom Technical Supp ort Services 65
Page 66

before calling. Many questions can be answered more quickly using
e-mail or our World Wide Web Home page.
66 Zoom AP+2 User’s Guide
Page 67

World Wide Web
Zoom’s Web page lets you send e-mail for assistance, register
on-line, access product reviews and descriptions, and do a whole
lot more. Visit the Zoom Technical Support area for the latest
Flash Files and Drivers for your Zoom Product. To access Zoom’s
Web page, please log onto your local Internet Service Provider,
then go to the Web browser and select:
From Zoom’s Homepage you can easily go to Technical Support
or many other useful areas.
Smart Facts™
Smart Facts™ is an automated intelligent database of Frequently
Asked Questions (FAQ’s) about Zoom Products. It allows you to
search for solutions to your Technical Support questions, by
product or via a powerful Keyword Search Engine. If you still
cannot find a solution to your question, SmartFacts lets you access
our Technicians via e-mail for a personalized response. SmartFacts
provides you with a way to track the history of your problem and
to add or change the description without having to enter any facts
that were previously sent. SmartFacts can even contact you
automatically if there is an update to your modem or software that
helps to address the question you had. You can access SmartFacts
from
www.zoom.com/techsupport
Q&A Search Engine (English Only)
www.zoom.com
Appendix D: Zoom Technical Supp ort Services 67
Page 68

Contact Zoom by E-mail
You can e-mail Zoom with any tech support questions you might
have and one of our Technical Support Engineers will respond by
e-mail within 2 business days. You may request personal assistance
via e-mail at www.zoom.com/techmail. When e-mailing Zoom, be
sure to include the following:
• Serial Number
• Your full name and address
• A detailed description of your problem
Contact Zoom by Phone
The U.S.A. Technical Support phone lines are available:
Monday to Friday 9:00 AM to 11:00 PM Eastern Time and
Saturday 9:00 AM to 5:00 PM Eastern Time.
Please call
Our European Technical Support is available:
Monday to Friday 9:00 AM to 11:00 PM GMT.
In the UK, please call
44 (0)1276 704440
(561) 997-9683
.
.
0870 720 0090
. Outside the UK, please call
68 Zoom AP+2 User’s Guide
Page 69

Return of Defective Units
Please contact your local distributor or reseller for Factory
Authorized Repair or Replacement of your
Product
contact the Zoom Factory Customer Service by calling:
. If you are unable to reach your distributor, you can
US: (561) 241-7712
UK: 0870 720 0090
Europe: 44 (0)1276 704440
Please note that the customer is responsible for any charges
(including brokerage or customs and duties) associated with
shipping the defective unit to Zoom for repair. During the first
year Zoom will pay return shipping to the customer by common
carrier. After the first year the customer may be required to pay a
shipping and handling fee. Any applicable customs, duties and
brokerage charges to import the product are the responsibility of
the customer. Zoom encourages all customers to return defective
units to their respective reseller whenever possible
In Warranty Defective
Appendix D: Zoom Technical Supp ort Services 69
Page 70

Page 71

Appendix E
Regulatory Information
U.S. FCC Part 15 Emissi on s Statement
This equipment has been tested and found to comply with the limits for a Class B
digital device, pursuant to part 15 of the FCC Rules. These lim its are designed to
provide reasonable protection ag ainst harmful interference in a residential
installation. This equipm ent generates, uses and can radiate radio frequency and, if
not installed and used in accordance with the instructions, may cause harmful
interference to radio communications. However, there is no guarantee that
interference will not occur in a particular installation. If this equipment does cause
harmful interference to radio or television reception, which can be determined by
turning the equipment off and on, the user is encour aged to try to correct the
interference by one or more of the following measures:
Reorient or relocate the receiving antenna.
•
Increase the separation between the equipment and receiver.
•
Connect the equipment into an out l et on a circuit different from that to
•
which the receiver is connected.
Consult the dealer or an experienced rad io/TV technician for help.
•
This device complies with Part 15 of the FCC Rules. Operation is subject to the
following two conditions: (1) This d evice may not cause harmful interference, and
(2) this device must accept any interference received , inclu ding interference that
may cause undesired operation.
FCC Caution: Any changes or modifications not expressly approved by the party
responsible for compliance could void the user's authority to operate this
equipment.
IMPORTANT NOTE:
IEEE 802.11b or 802.11g operation of this product in the U.S.A. is firmwarelimited to channels 1 through 11.
Industry Canada Emissions Statement
This Class B digital apparatus meets all requirements of the Canadian
Interference-Causing Equipment Regulations. Cet appareil numérique de la classe
B respecte toutes les exigences du Règlement sur le matériel brouilleur du Canada.
Operation is subject to the following t w o conditions:
1) this device may not cause interference and
2) this device must accept any interference, inclu ding interference that may cause
undesired operation of the device.
Appendix E: Regulatory Information 71
Page 72

European Declaration of Conformity
The manufacturer declares under sole responsibility that this equipment is
compliant to Directive 1999/5/EC (R&TTE Directive) via the following. This
product is CE Marked.
Directive Standard Test Report
73/23/EEC-Low
Voltage
89/336/EEC-EMC EN55022 :1998+A1/2000+A2
89/336/EEC-EMC EN 301 489-1, 489-17 EMC
99/5/EC EN 300 328 V1.4.1 : 2003-04 Technical
EN 60950-1: 2001 electrical safety
:2003, Class B
EN61000-3-2 :2000, Class A
EN61000-3-3 :1995+A1:2001
EN61000-42 :1995+A1/1998+A2/2001
EN61000-43 :1996+A1/1998+A2/2001
EN61000-44 :1995+A1/2001+A2/2001
EN61000-4-5 :1995+A1/2001
EN61000-4-6 :1996+A1/2001
EN61000-411 :1994+A1/2001
EMC
Requirements
for Emissions
and Immunity
Requirements
for Radio
Equipment
Requirements
for 2.4GHz
Radio
Equipment
72 Zoom AP+2 User’s Guide
Page 73

Countries of Operation & Conditions of Use in the European
Community
This device is intended to be operated in all countries of the European
Community.
Requirements for indoor vs. outdoor operation, license requirements and allowed
channels of operation apply in some countries as described below:
Note: The user must use the configuration utility provided with this product to
ensure the channels of operation are in conformance with the spectrum usage
rules for European Community countries as described below.
• This device requires that the user or installer properly enter the current country
of operation in the command line interface as described in the user guide, before
operating this device.
• This device will automatically limit the allowable channels determined by the
current country of operation. Incorrectly entering the cou ntry of operation may
result in illegal operation and may cause harmful interference to other system. The
user is obligated to ensure the device is operati ng according to the channel
limitations, indoor/outdoor restrictions and license requirements for each
European Community country as d escribed in this document.
• This device may be operated
Community
using the 2.4 GHz band: Channels 1 - 13, ex cept where noted below.
- In Italy the end-user must apply for a license from the national spectrum
authority to
operate this device outdoors.
- In Belgium outdoor operation is only permitted using the 2.46 - 2.4835 GHz
band:
Channel 13.
- In France outdoor operation is only permitted using the 2.4 - 2.454 GHz band:
Channels 1 - 7.
indoors or outdoors
in all countries of the European
Electrostatic Discharge Statement
The unit may require resetting after a severe electrostatic discharge event.
Additional compliance information is located on the CD.
Appendix E: Regulatory Information 73
Page 74

NOTICE
NOTICE
NOTICENOTICE
This document contains proprietary information protected by
copyright, and this Manual and all the accompanying hardware,
software, and documentation are copyrighted. No part of this
document may be p hotocopied or reproduced b y mechanical,
electronic, or other means in any form.
The manufacturer does not warrant that the hardware will work
properly in all environments and applications, and makes no
warranty or representation, either expressed or implied, with respect
to the quality, performance, merchantability, or fitness for a
particular purpose of the software or documentation. The
manufacturer reserves the right to make changes to the hardware,
software, and documentation without obligation to notify any person
or organization of the revision or change.
All brand and product names are the trademarks of their respective
owners.
© Copyright 2005
All rights reserved.
2085-A 27355 ©2005
 Loading...