

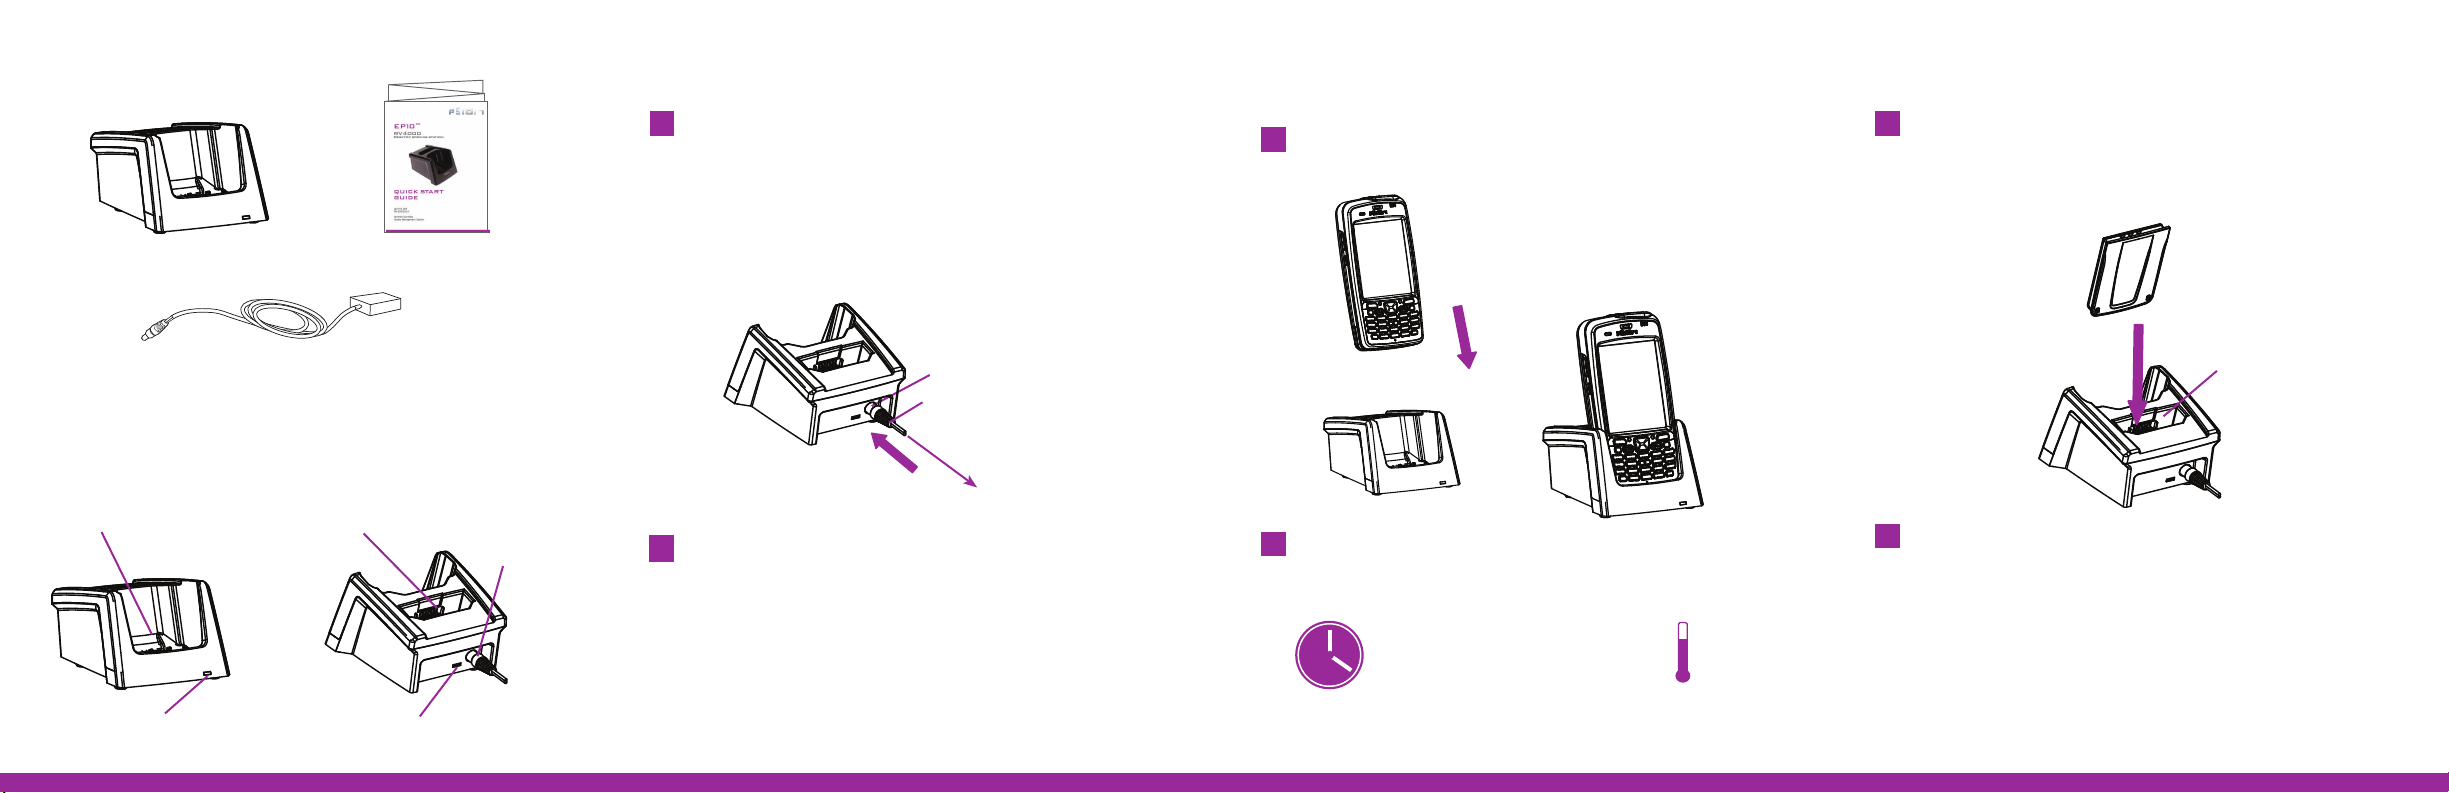
CONTENTS OF THE BOX
Desktop docking station
This guide
CONNECT TO AN EXTERNAL
POWER SUPPLY
Connect the power supply to the desktop
1
docking station.
Insert the DC plug from the power supply into the socket
on the back of the desktop charger.
Insert the country-compatible power cord (ordered
separately) into the power supply.
REAR VIEW
CHARGING THE EP10 BATTERY
TO CHARGE THE BATTERY INSTALLED IN
THE EP10:
1
Slide the EP10 into the charge well.
Press down to firmly seat the hand-held in the charge well.
TO CHARGE A SPARE BATTERY:
1
Slide the battery into the spare battery charge well
at the back of the docking station.
Press down firmly. Make certain that the contacts on the
spare battery and those in the charge well meet.
Power supply with cable and DC plug
Note: A USB cable is also included with the desktop dock.
FEATURES
FRONT VIEW
Dock/charge well
Spare battery charge LED
REAR VIEW
Spare battery charge well
Micro USB port
DC socket
DC socket
DC plug
To power source
Plug the power cord into an external power
2
source.
2
Charge the EP10 for at least 4 hours.
Allow the battery to charge for at least 4 hours
before use.
Note: Full battery performance is only
reached after the first few full
charge/discharge cycles.
0 – 40° C
32 - 104° F
Spare battery charge well
2
Charge the new battery for at least 4 hours
before use.
Note: You can charge a spare battery while the EP10 is docked
and charging in the docking station.
OVER
>

BATTERY CHARGE INDICATOR
The desktop docking station has a single LED at the front of
the unit that monitors the spare battery charge progress.
LED behaviour is as follows:
Charge LED Behaviour Description
Off No battery detected.
Solid Green Battery charging complete.
Flashing Green Charge in progress.
Flashing Yellow Battery is not charging due
to out-of-temperature range conditions.
Solid Red Unable to read battery or non Psion battery.
Note: The EP10 hand-held is also equipped with a charge LED - the
left-most LED. This LED monitors the charge progress of the
battery installed in the docked EP10. LED behaviour is identical
to the description above.
LINKING THE EP10 TO A PC
The desktop docking station is equipped with a micro USB port
so that you can link the EP10 with your PC and exchange files.
1
If not present on your PC, install and configure
data transfer software.
Use ActiveSync® (Windows® XP® or earlier) or Mobile
Device Center® (Windows Vista® or Windows 7®) to
establish a connection between the EP10 and the PC and
synchronize your e-mail, contacts, and so on.
For either ActiveSync or Mobile Device Center, go to the
following website:
http://go.microsoft.com/fwlink/?LinkId=147001
2
Use the USB cable included to link the desktop
docking station to the PC.
Insert the micro USB connector into the micro USB port
on the desktop docking station.
Attach the other end of the USB cable to a USB port on
the PC.
EP10
™
RV4000
DOCKING STATION
Micro USB port
Micro USB connector
To PC
© Copyright 2011 by Psion Inc.
Psion, Psion Teklogix, and EP10 are trademarks of Psion Inc. Other product names
mentioned in this document are trademarks or registered trademarks of other hardware,
software, or service providers and are used herein for identification purposes only.
8 0 0 0 2 3 1
QUICK START
GUIDE
April 20, 2011
PN 8000231.A
ISO 9001 Certified
Quality Management System
 Loading...