

Page 1
YELLOW JACKET
Anemometer/Thermometer
FPM, CFM and temperature readings with one hand-held instrument
®
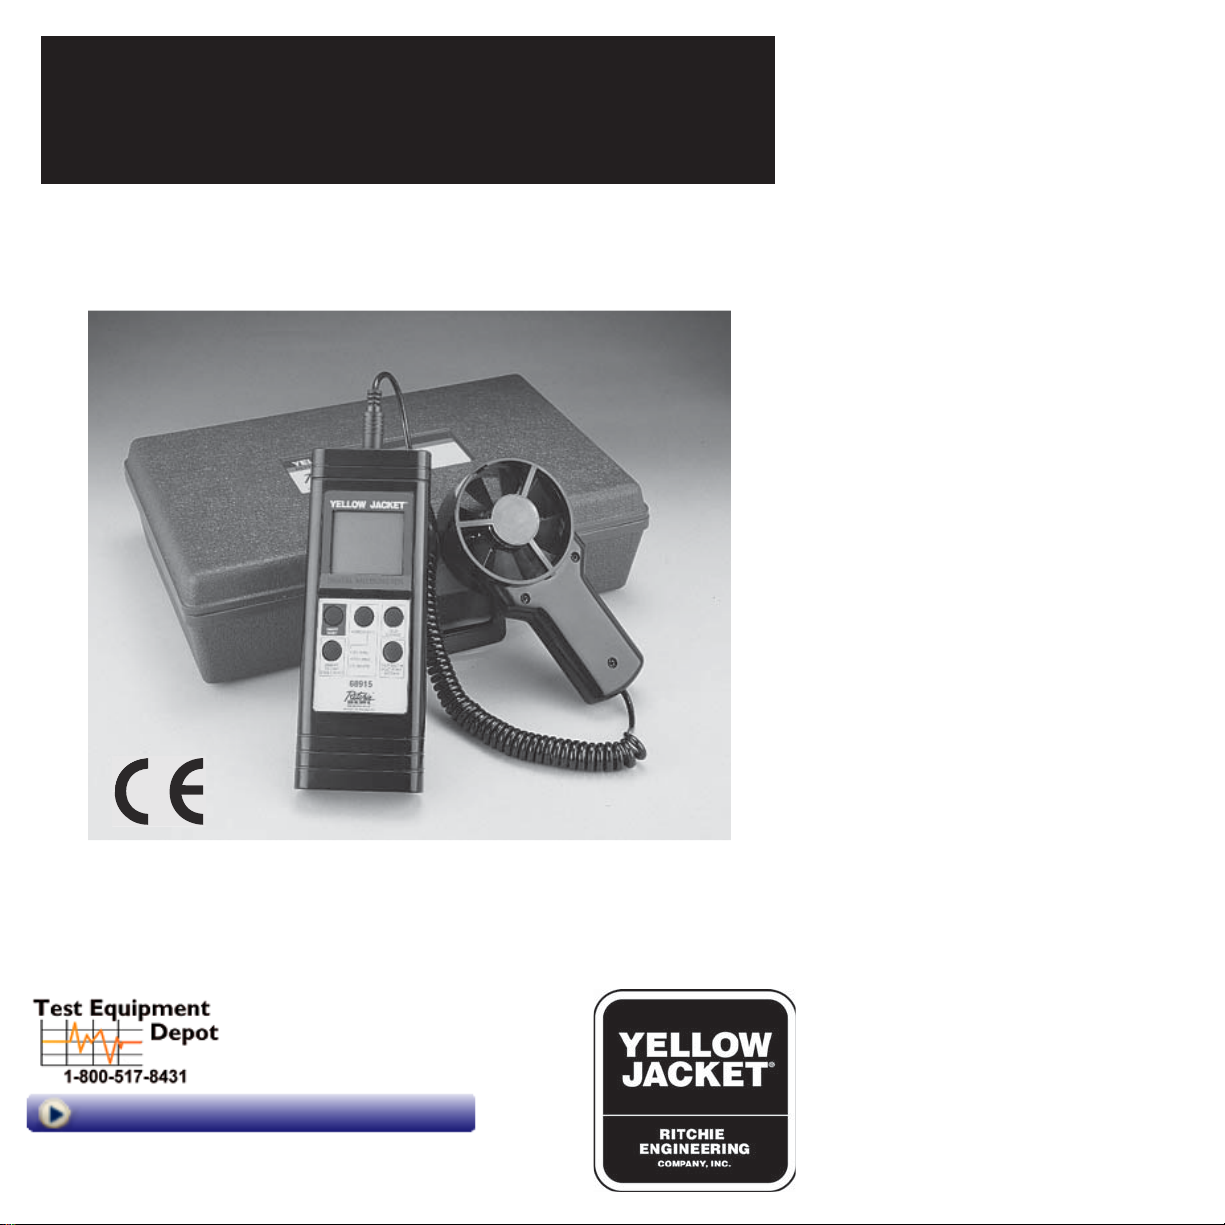
The YELLOW JACKET Anememoter
/ Thermometer 68915 is a versatile
instrument that measures air velocity
(FPM - feet per minute; or MPS meters per second), air flow volume
(CFM - cubic feet per minute; or CMS
- cubic meters per second) and
temperature. Temperature is read at
the same time as velocity or flow
measurements in your choice of °F or
°C. The unit eliminates analog charts
that are hard to read and calculate.
Features include:
•
Microprocessor controller
•
Minimum and maximum
recordings
•
Averaging of FPM, MPS or CMS
multipoint readings
•
“Hold” button to freeze LCD
reading
•
Switchable imperial to metric
•
Automatic power shut-off after 20
minutes unless set for continuous
operation in non-sleep mode
•
RS-232 output
Operation
and Maintenance
99 Washington Street
Melrose, MA 02176
Phone 781-665-1400
Toll Free 1-800-517-8431
Visit us at www.TestEquipmentDepot.com
UPC No.
686800
Specific applications in the HVAC
industry include environmental paint
booths, air balancing, and many others
where measurement of air velocity,
flow and temperature are essential.
68915
Check for damage immediately.
Carton contents include:
1 pc. hand-held instrument
1 pc. vane type probe head with cable
1 pc. 9-volt alkaline battery
1 pc. maintenance & operation
instructions
1 pc. carrying case
Page 2
Before starting
1. Remove battery compartment
screw and lid. Insert 9 volt
alkaline battery.
2. Make sure the unit is off before
attaching the probe. Align the
probe connector key to the
keyway in the unit and insert
the connector.
NOTE: The unit must be off before
replacing the battery.
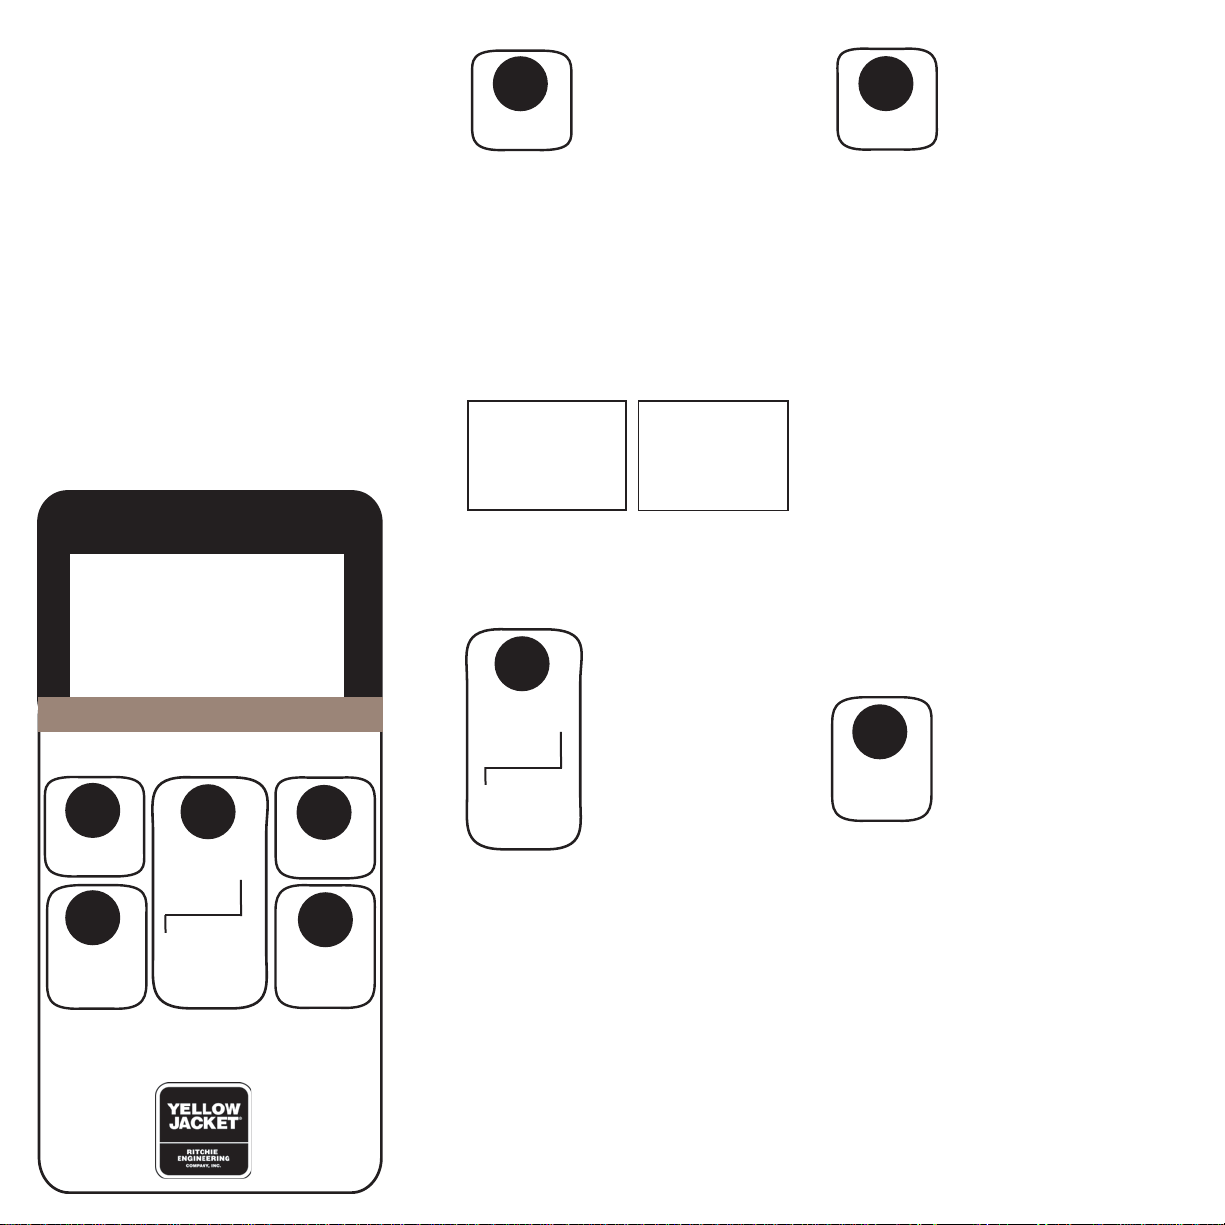
Button functions
YELLOW JACKET
DIGIT AL ANEMOMETER
ON/OFF
RESET
MIN/MAX-
RECORD
SINGLE POINT
MODE(SELECT)
• VEL (FPM)
• FREE AREA
• FLOW (CFM)
HOLD
ADVANCE
NEXT DIGIT→
MULTI-POINT
AVERAGE
68915
When you turn on the
unit, an “all functions”
display (fig. 1) will
ON/OFF
RESET
appear on the LCD,
and then automatically
change to the air velocity/ temperature display (fig. 2). Turning off the
unit will erase any air velocity
(FPM) or flow volume (CFM)
readings. The unit will reset to 0000
velocity or flow volume. The “Free
Area” number (see below) will not
change from the four digit number
you’ve entered and saved.
vel FLOW AREA Hold Ph Knots
8.8.8.8
MIN REC
MAX AVG
-1.8.8.8.
ft/m ft²
m/s m²
mil/h clm
km/h cms
Fig. 1 Fig. 2
vel
0000
°C
°F
ft/m
70.2
°F
Pressing this button changes the
display from air velocity (FPM) to
“Free Area”
number to flow
volume (CFM),
and back to
MODE(SELECT)
velocity (FPM).
Air velocity is the
speed of air
• VEL (FPM)
• FREE AREA
• FLOW (CFM)
movement in
FPM (ft/m) or
MPS (m/s). Air
flow is the volume of air in CFM
(ft³) or CMS (cm³). “Free Area”
number is the open area in the duct
or grill in square feet. When measuring through a diffuser you must
subtract the amount of diffuser
blockage. The “Free Area” default is
1.111 (ft²) which is equivalent to a
10” x 16” duct. You can change this
number (see page 5) to different
dimensions if necessary.
This button provides
several functions:
HOLD
ADVANCE
•
Freezes a reading in
the LCD.
Stores readings for minimum,
•
maximum, and minimum/
maximum averages for FPM.
Increases the numerical value of
•
each individual digit in the “Free
Area” number. For example,
pressing the button will change the
number from 1.111 to 2.111;
pressing again, 3.111. Each digit
can be increased up to 9 before
returning to “0.” To increase the
value of the second or other digit,
use the Record Single Point button
(see below) to select the digit you
want to change.
Changes Baud Rate for RS-232
•
output.
MIN/MAX-
RECORD
SINGLE POINT
•
Displays continuous moving
This button provides
several functions:
average in FPM.
•
Displays average, minimum, and
maximum FPM readings for singe
and multipoint measurements.
Saves changes made to “Free Area”
•
number, imperial to metric switching, and Baud Rate.
2
Page 3
NEXT DIGIT→
MULTI-POINT
AVERAGE
This button provides
several functions:
•
Selects individual
digits in the “Free Area”
number for which you want to
change the value. For example, in
1.111, with this button you can
select the second “1.” Using the
HOLD / ADVANCE button, you
can then change the second digit to
1.211 or higher (see HOLD /
ADVANCE above).
•
Displays multipoint averages for
FPM, and the number of points
measured.
Specifications
Air flow ranges: 125 - 4900 ft/min
(0.7 - 25 m/sec)
Flow resolution: 1 (0.01)
Flow accuracy: ±2%
Temperature: 14 to 122°F
(-10 to 50°C)
Temp. resolution: .01 (0.1)
Temp. accuracy: ±1.0°F (±0.6°C)
Power: 9 volt/100 hour
Fan diameter: 2-7/8” (70mm)
Measuring Air Velocity (FPM)
(See changing to metric on page 6)
SINGLE POINT FPM
Auto Power Off
If powered and unused, the unit will
turn off after 20 minutes to save the
battery. Auto shut-off wull be
proceeded by three beeps. To restart,
simply press the ON button.
Non-Sleep Mode
To bypass “Auto Power Off” for
continuous operation follow these
steps whn turning the unit on:
1. Press the ON and HOLD buttons
at the same time.
2. Release only the ON button.
3. After an “n” appears on the LCD,
release the HOLD button.
The 68915 will remain on until the
OFF button is pressed.
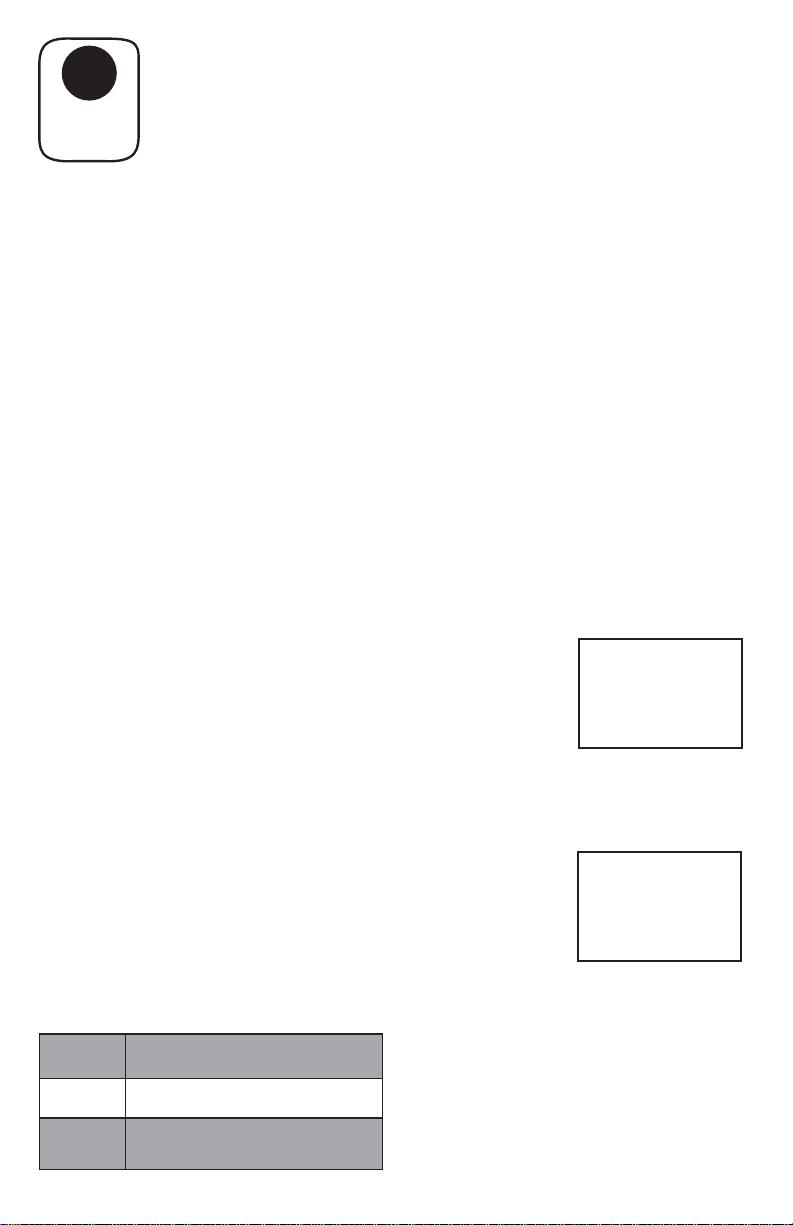
UPC# Description
68915 Anemometer
1. Turn unit on by pressing ON/OFF
button.
2. Unit is ready when LCD
shows “vel” in upper left and
temperature
at lower right
(fig. 2).
vel
0000
70.2
ft/m
°F
3. Hold vane probe head in
front of the air source for a
measurement
in FPM
(fig. 3).
vel
0080
Fig. 3
ft/m
72.3
°F
68916 Replacement 2.75 (70mm)
probe assembly
3
Page 4

Continuous Moving Average
1. Turn unit on.
2. Place vane probe head in front of
air flow source.
3. Press MIN/MAX RECORD button.
The unit makes a reading once a
second and displays a moving
average for up to two hours.
MIN/MAX/AVG
1. Turn unit on.
2. Place vane probe head in front of
air flow source.
3. Press MIN/MAX button and the
unit will begin recording.
4. Press HOLD button to store
readings before moving the vane
probe head away from the air
flow source.
5. Press MIN/MAX once to see
velocity readings.
6. Press MIN/MAX again to see MIN
velocity readings.
7. Press MIN/MAX again to see MAX
velocity readings.
8. Press MIN/MAX again to return to
the velocity reading you stored with
the HOLD button.
9. Press ON/OFF RESET to clear the
MIN/MAX average readings.
NOTE: At any time you can use
MODE (SELECT) to switch from
FPM velocity to CFM flow readings.
Before switching, be sure the “Free
Area” number matches the open square
footage of the grill or duct you are
measuring (see page 5 for “Setting
Free Area Number”).
AVG
Multipoint FPM
1. Turn unit on.
2. Place vane probe head at first point
to be measured.
3.
After you see the reading in the
LCD, press HOLD/ADVANCE.
Release the button when you hear
a single beep. The LCD will show
HOLD above
the reading
(fig. 4).
Fig. 4
vel Hold
0075
72.3
ft/m
°F
4. Press MIN/MAX RECORD.
Release the button when you hear
a single beep. The LCD will show
a number from 1-8 representing the
reading point that was saved
(fig. 5). The unit will return
automatically to the “vel” display
ready for the
next reading.
vel Hold
ft/m
0075
°F
Fig. 5
1
5. Repeat steps 2-4 until you’ve
measured and recorded all desired
points up to 8.
6. Press NEXT DIGIT/MULTIPOINT
button to view the average air
velocity and the number of points
measured
(fig. 6).
vel Hold
ft/m
0068
Fig. 6
AVG
8
4
Page 5
Measuring air flow (CFM)
SETTING “FREE AREA”
NUMBER
To measure CFM, the “Free Area”
number in the unit is equal to the
amount of open area in the duct or
grill you are taking readings from.
To calculate this number, go to
Appendix A.
7. When the flashing stops, press the
HOLD button to save the changed
“Free Area” number. The unit will
go to the CFM measurement mode
(fig. 9).
FLOW
clm
Fig. 9
0000
68.9
°F
If you do not need to change the
number, press MODE/(SELECT) to
go into the CFM measurement mode
(fig. 7).
Fig. 7
FLOW
0000
68.9
clm
°F
To change the number, take the following steps:
1. Turn the unit on.
2. Press MODE SELECT once. You
will hear one beep and see AREA
and 1.111 with
AREA
a flashing digit
(fig. 8).
Fig. 8
↓
1.111
↑
ft²
3. To increase the value of the flashing
digit from 1 to 2 or higher (up to 9),
press HOLD/ADVANCE. Press
once for each increase.
4. To make the next digit to the right
flash, press the NEXT DIGIT
button. When the next digit is
flashing, repeat step 3.
5. Repeat steps 3 and 4 until all digits
match the desired number.
6. Press MIN/MAX RECORD button.
APPENDIX A
VOLUME AIRFLOW
CALCULATIONS
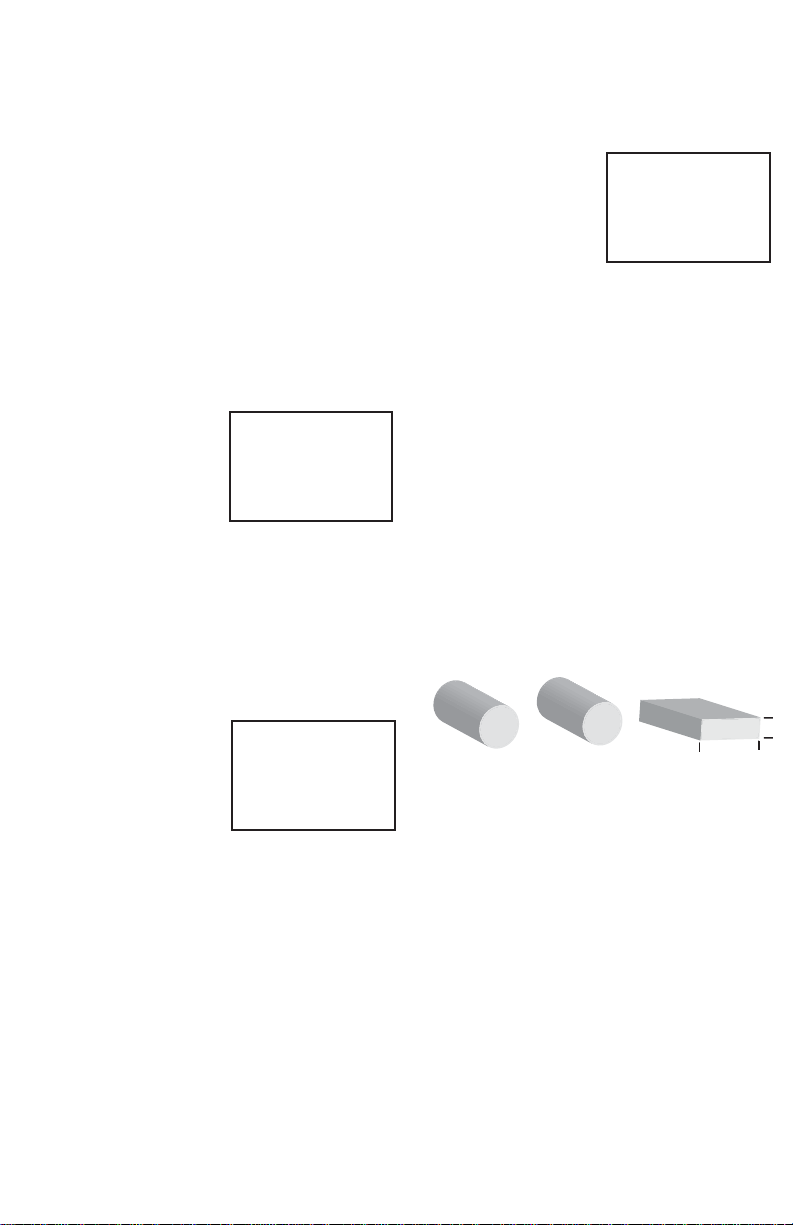
The “Free Area” is equal to the cross
sectional area of the duct or diffuser,
minus the amount of blockage. In
rectangular duct work, this cross
sectional area is the length times the
width. In a round duct, the area is the
radius squared times (3.14).
i.e. (LxW=Area), (RxRx3.14=Area)
↑
↓
To convert square inches to square
feet, divide by 144 inches / ft².
EXAMPLE:
If an air duct is rectangular and the
height is 24 inches with a length of 12
inches, the air velocity reading in the
duct was 450 FPM.
A (ft²) x FPM = CFM
24 inches x 12 inches = 288 sq. in.
288 sq. in. ÷144 in. / ft² =
2 square feet (ft²)
↓
H x L =A
5
Page 6

If grill blockage is 20%, then multiply
2 ft² times .9 to get a “FREE AREA”
of 1.8 (ft²).
450 FPM x 1.8 “FREE AREA” =
810 CFM
EXAMPLE: An air duct is round
and the diameter is 12 inches. The
air velocity reading in the duct is
450 FPM:
R x R x 3.14 = A
A (ft²) x FPM = CFM
6 inches x 6 inches x 3.14 = 113 sq. in.
113 sq. in. ÷ 144 inches / ft² =
0.785 sq. ft. (ft²)
If grill blockage is 35%, then multiply
0.785 ft² times .65 to get a “FREE
AREA” of .510 (ft²).
450 FPM x .510 “FREE AREA” =
229.5 CFM
Efficiency Tip
You do not need the correct “Free
Area” number in the 68915 to
measure air velocity (FPM). But
by setting the “Free Area”
number before measuring (FPM),
you can increase efficiency. With
the number set as the first step in
the measurent process, you can
change back and forth from FPM
to CFM by simply press the
MODE (SELECT) button during
any function.
SINGLE AND
MULTIPOINT CFM
With the unit in CFM mode, operation
for single and multipoint readings and
averages is the same as for FPM (see
page 4).
Changing from Imperial to
Metric
To change unit readings from feet/min
and °F to meters/sec and °C, follow
these steps:
1. Turn the unit on by pressing the
ON/OFF and NEXT DIGIT /
AVERAGE buttons at the same
time.
2. Release the ON button first.
3. When the LCD shows a small
ft/m, m/s, °F and °C, release the
AVERAGE button. A small ft/m
and °F will remain on the LCD.
4. Press HOLD to change to m/s
and °C.
5. Press RECORD button and a “5”
will appear on the LCD.
6. Press HOLD/ADVANCE and a
Baud Rate of 1200 or 2400 will
appear (see section for
changing Baud Rate).
7. Press RECORD and a “5” will
appear on the LCD.
8. Press HOLD to save setting and
hold until the “vel” display appears
and the unit is ready for m/s and
°C reading.
6
Page 7

Changing from
Metric
to Imperial
To change unit readings from
meters/sec and ˚C to feet/min and ˚F,
follow these steps:
1. Turn the unit on by pressing the
ON/OFF and NEXT DIGIT/
AVERAGE buttons at the
same time.
2. Release the ON button first.
3. When the LCD shows a small
ft/m, m/s, ˚F and ˚C, release the
NEXT DIGIT/ AVERAGE button.
A small m/s and ˚C will remain on
the LCD.
4. Press the NEXT DIGIT to change
to ft/m and ˚F.
5. Press RECORD button and a “5”
will appear on the LCD.
6. Press HOLD/ADVANCE and a
Baud Rate of 1200 or 2400 will
appear (see section for
changing Baud Rate.)
7. Press RECORD and a “5” will
appear on the LCD.
8. Press HOLD to save settings and
hold until the “vel” display
appears and the unit is ready for
ft/m and ˚F reading.
Changing Baud Rate for
RS-232 Output
1. Turn the unit on by pressing the
ON/OFF and NEXT DIGIT/
AVERAGE buttons at the
same time.
2. Release the ON button first.
3. When the LCD shows a small
ft/m, m/s, ˚F and ˚C, release the
NEXT DIGIT/AVERAGE button.
A small fm/s and ˚C or ft/m and
˚F will remain on the LCD.
4. Press RECORD button and a “5”
will appear on the LCD.
5. Press HOLD/ADVANCE and a
Baud Rate of 1200 or 2400 will
appear. To change from 1200 to
2400, press NEXT DIGIT. To
change from 2400 to 1200 press
HOLD/ADVANCE.
6. Press RECORD and a “5” will
appear on the LCD.
7. Press HOLD to save settings and
hold until the “vel” display
appears and the unit is ready for
a reading.
8. Press NEXT DIGIT to return to
the “vel” display ready for
a reading.
Troubleshooting
LOW BATTERY
When you see the low battery indicator,
turn off the unit and replace the 9 volt
alkaline battery. Do not replace the
batter when the unit is on.
E6
When you see E6 in the LCD, the probe
cable is improperly connected or disconnected from the meter body.
B
7
Page 8

Warranty
YELLOW JACKET® products from
Ritchie Engineering Company, Inc.
are guaranteed to be free from material and workmanship defects for a
period of one year. This guarantee
does not cover products that have
been altered, abused, misused or
improperly maintained.
All returns MUST have an RGA
number and proof of purchase/copy of
invoice. Please obtain an RGA
number from Ritchie Engineering
Customer Service by calling
(800)769-8370. All electronic products must be returned to Ritchie
Engineering prepaid.
Some specialty products are not
stocked and thus not eligible for
return. If the product is found to be
defective, Ritchie Engineering will
repair, replace or issue a credit at our
discretion.
Test Equipment Depot - 800.517.8431 - 99 Washington Street Melrose, MA 02176
TestEquipmentDepot.com
P/N 405926_A
 Loading...