

Page 1
99 Washington Street
Melrose, MA 02176
Phone 781-665-1400
Toll Free 1-800-517-8431
Visit us at www.TestEquipmentDepot.com
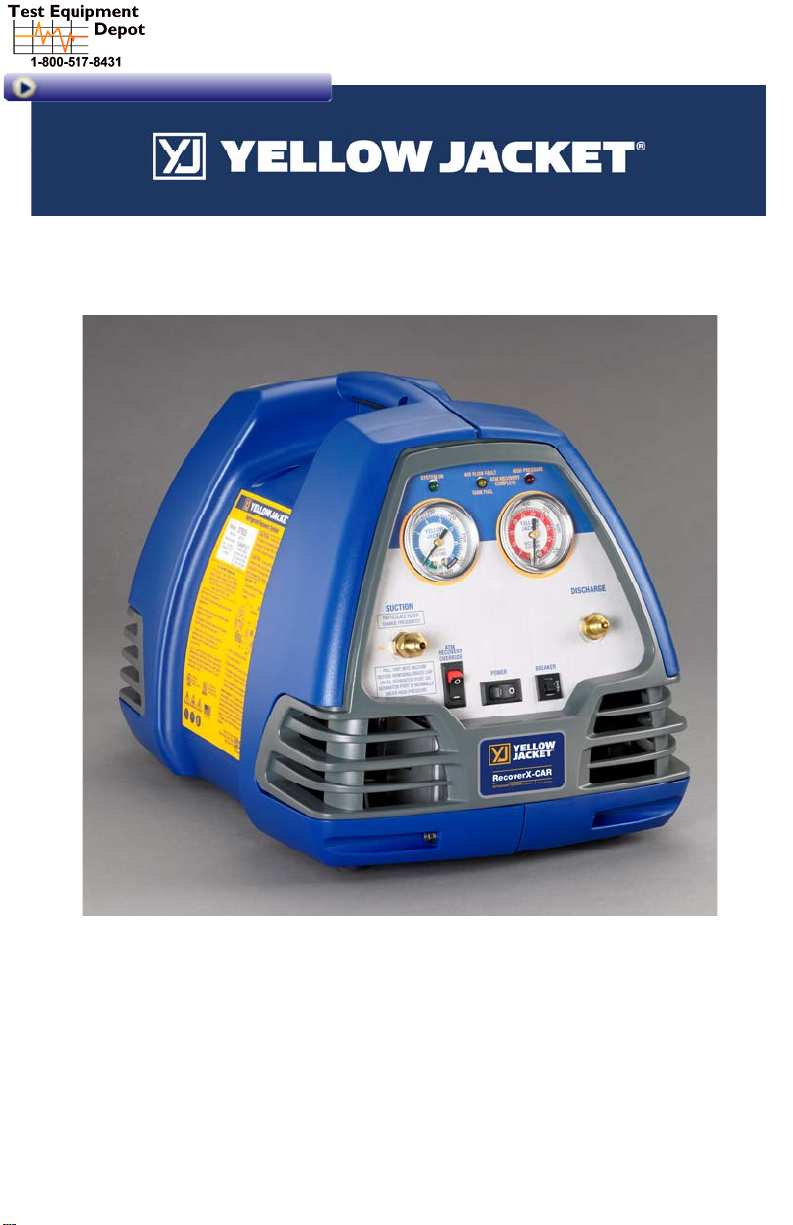
RecoverX-CAR™ Contaminated
Automotive Refrigerant Recovery System
Operation and Maintenance
Manual
(English)
Page 2

Table of Contents Page
General Safety Instructions…………… …………………………………...2
System Overview…………………………………………………………...3
RecoverX-CAR Operation Guide………………………………………..4, 5
Liquid/Vapor Recovery Diagram…………………………………………..5
RecoverX-CAR Wiring Diagram…………………………………………..5
LED Light Meanings……………………………………………………….6
TOS Install Diagram………………………………………………………..6
Suction Filter………………………………………………………………..6
Troubleshooting Guide……………………………………………………..7
Technical Data/Specification……………………………………………….7
Important Notice to Purchaser……………………………………………...8
Warranty Information………………………………………………………8
General Safety Instructions
1. Know your equipment. Read and
understand the operation manual and
the labels affixed to the unit. Learn
its applications and limitations, as
well as the specific potential hazards
o
f your equipment.
2. CAUTION – Should be operated by
certified personnel.
3. Use the correct hoses. This equip-
ment is to be used with the included
37827 hose kit, designed for recovery
of contaminated R-134a and
R-1234YF refrigerant from Motor
Vehicle Air Conditioning (MVAC)
systems.
4.
Use properly marked recovery cylinder. This equipment is to be used
with the included 37826 recove
cylinder, which is labeled for use
with contaminated refrigerant only.
5. Ground all equipment. Plug the
RecoverX-CAR into pr op er ly
grounded receptacle with an appropriate plug.
6. Do not pressure test with compressed air. Some mixtures of air
and refrigerant have been shown to
be combustible at elevated pressures.
7. Avoid breathing A/C refrigerant
and lubricant vapor or mist. Expo-
sure may irritate eyes, nose and
throat. To remove refrigerant from
the A/C system, use only equipment
certified for the type of refrigerant
ry
2
being removed. Additional health and
safety information may be obtained
from refrigerant and lubricant manu-
facturers.
8. Avoid dangerous environments.
To keep operator exposure to a mini-
mum, use the RecoverX-CAR with
sufficient ventilation.
Always perform recovery in wellventilated areas. Use this equip-
ment only in locations with mechanical ventilation, providin
air exchanges per hour, or the equipment should be placed 18” above the
floor. This equipment should not be
used near open containers of gasoline
or any other flammable liquid.
Do not allow refrigerants to contact
open flame. Refrigerant decomposition in flame results in phosgene ga
Breathing phosgene gas can be fatal.
9. Always wear safety goggles and
gloves. Personal protective equip-
ment should be worn to protect operator from frostbite.
10. Use caution when connecting or
disconnecting. Improper usage
may result in refrigerant burns
(frostbite). If a major leak occurs,
proceed immediately to a wellventilated area.
11. Disconnect recovery machine from
power before servicing. An electri-
cal shock hazard is present when the
g at least four
s.
Page 3

it is disassembled.
un
12. Repair damaged parts. Do n ot
operate the RecoverX-CAR with a
defective part. Repair unit to proper
operating conditions.
13. Use recommended accessories. Fol-
low the instructions that accompany
all accessories. Improper use of accessories may damage equipment or
create a hazard.
14. Use the RecoverX-CAR only wi
the proper refrigerants. (See speci-
fications for a complete list of compatible refrigerants).
15. Operate the RecoverX-CAR within
the design parameters. The
RecoverX-CAR was d esigned to
operate in a temperature range from
40°F (4°C) to 120°F (49°C). Do not
operate in a wet location.
CAUTION - Refrigerant may be
16.
contaminated with hydrocarbons and
leak sealants
17. To minimize sparking potential, it is
recommended that electrical equipment startup first by turning on
switch, then plug power cord into
th
outlet at least 3 meters away.
Locate vacuum pump outside of
building.
18. Use an area fan to vent/diffuse an
leakage during service
Caution: All refrigeran t hoses, r e-
covery tanks, refrigerant lines, the
RecoverX-CAR, and other vessels
containing refrigerants should be handled as if under high pressure. Tanks
containing refrigerant may have damaged valves. Always
slowly to prevent release of refrigerant should this be the case.
Caution: To avoid poten tial leakage
to the atmosphere, the proper hoses
and fittings should be used and
checked for damage.
Caution: To avoid over fillin g th e
refrigerant cylinder, read and follow
the manufacturer recommended filling
instructions for the refrigerant being
recovered.
To prevent the risk of fire, DO NOT
use and extension cord sm
16 AWG (1.276mm²) and longer
than 25 ft (7.6m).
open valves
aller than
y
System Overview
The RecoverX-CAR offers significant
flexibility to meet
R-134a and R-1234YF handling needs.
Careful handling of these refrigerants is
an important part of servicing Motor
Vehicle Air Conditioning (MVAC) equipment. Specific regulations apply to refrigerant handling. Familiarize yourself with
these regulations.
The RecoverX-CAR is used to recover
contaminated refrigerant from MVAC
systems. The refrigerant is transferred to
a holding tank. For field service, this
tank is normally a portable refrigerant
recovery cylinder.
Because the refrigerants are contaminated, they must be reclaimed and are not to
be re-used.
Use care when recovering refrigerant into
a portable tank. As stated in the warnings, overfilling a tank can be extremely
contaminated
dangerous. The best method for monitoring tank level is a scale that continually
monitors the weight of the tank.
Your RecoverX-CAR has an umbilical
cord to connect to the Tank Overfill
Switch (TOS) located on your recovery
tank. When connected to the recovery
cylinder, this switch will automatically
turn off the recovery machine when the
tank has reached its recommended
maximum fill level.
The RecoverX-CAR is designed for
recovery of both liquid and vapor refrigerant from MVAC systems. During the
refrigerant recovery process, there is
often system oil that is recovered with
the refrigerant. You can determine how
much oil was removed from a system by
measuring the amount of oil in the Oil
Separator Drain. If oil was removed,
replace with the appropriate type and
amount into the MVAC system.
3
Page 4
RecoverX-CAR Operating Guide
Direct Liquid/Vapor Recovery
The RecoverX-CAR can recover vapor
and liquid contaminated refrigerant. Use
your RecoverX-CAR to pull refrigerant
directly out of the MVAC system and
transfer it into your 37826 recovery cylinder for contaminated refrigerant.
MVAC system recovery can be done by
connecting to both the low side and high
side of the MVAC system using hose
assembly 37827. See diagram on the following page.
Ensure you have the capacity to recover
all of the refrigerant in the system being
serviced. In the USA, the recovery cylinders can only be filled to 80% capacity.
Follow the steps below and refer to the
“LED Light Meanings” table on page 6:
Ensure the RecoverX-CAR unit
Power Switch is off (○) and the
MVAC system is not running.
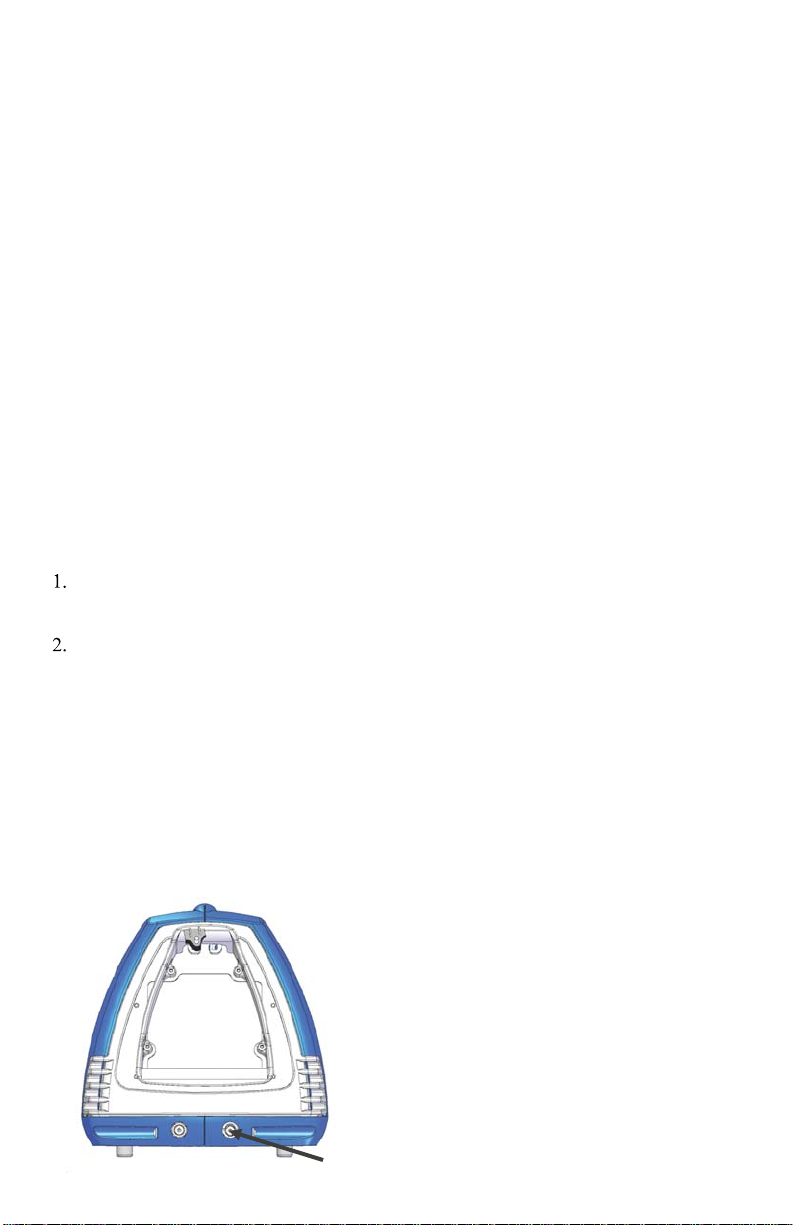
Check the Oil Separator Drain and
empty the reservoir if there is any oil
present. **Note”” Pull the
RecoverX-CAR unit into vacuum
before removing the brass cap on the
Oil Separator Drain. The Oil Separator Drain is normally under high
pressure. Tilt the RecoverX-CAR
unit back about 10 degrees to ensure
that all of the oil is drained from the
reservoir. Reattach the brass cap once
the oil has been drained.
4
Oil
Separator
Drain
Plug the RecoverX-CAR into a 110V
3.
power supply.
4. Set the ambient pressure override
switch as needed for the MVAC system being recovered. If the system
has a known leak, turn the override
switch off (○). This will shut off the
Recover
tion pressure has reached a pressure
slightly above atmospheric pressure
(3-5 psig) and will prevent air from
being recovered into the recovery
cylinder. If the system is not leakin
turn the override switch on (׀) .This
will allow a full recovery to the desired vacuum level.
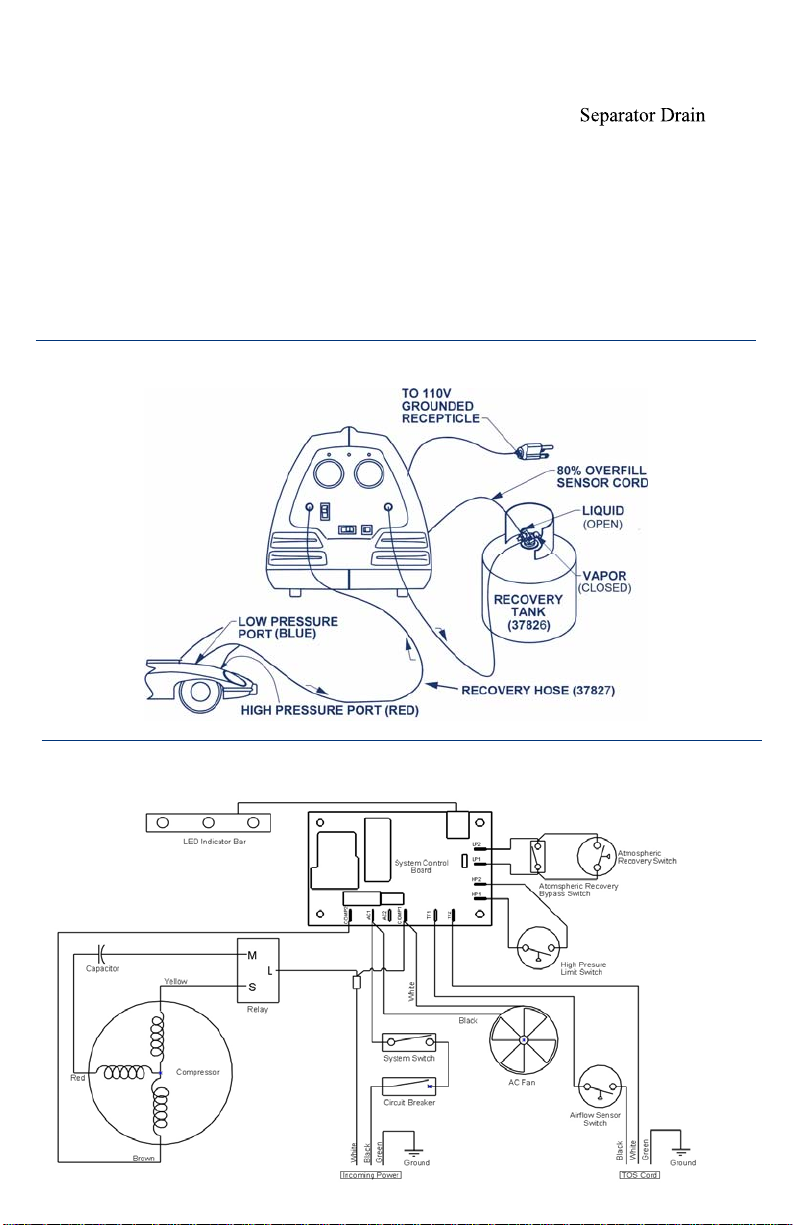
5. Connect the recovery unit to the
MV
Refrigerant Recovery diagram on
page 5.
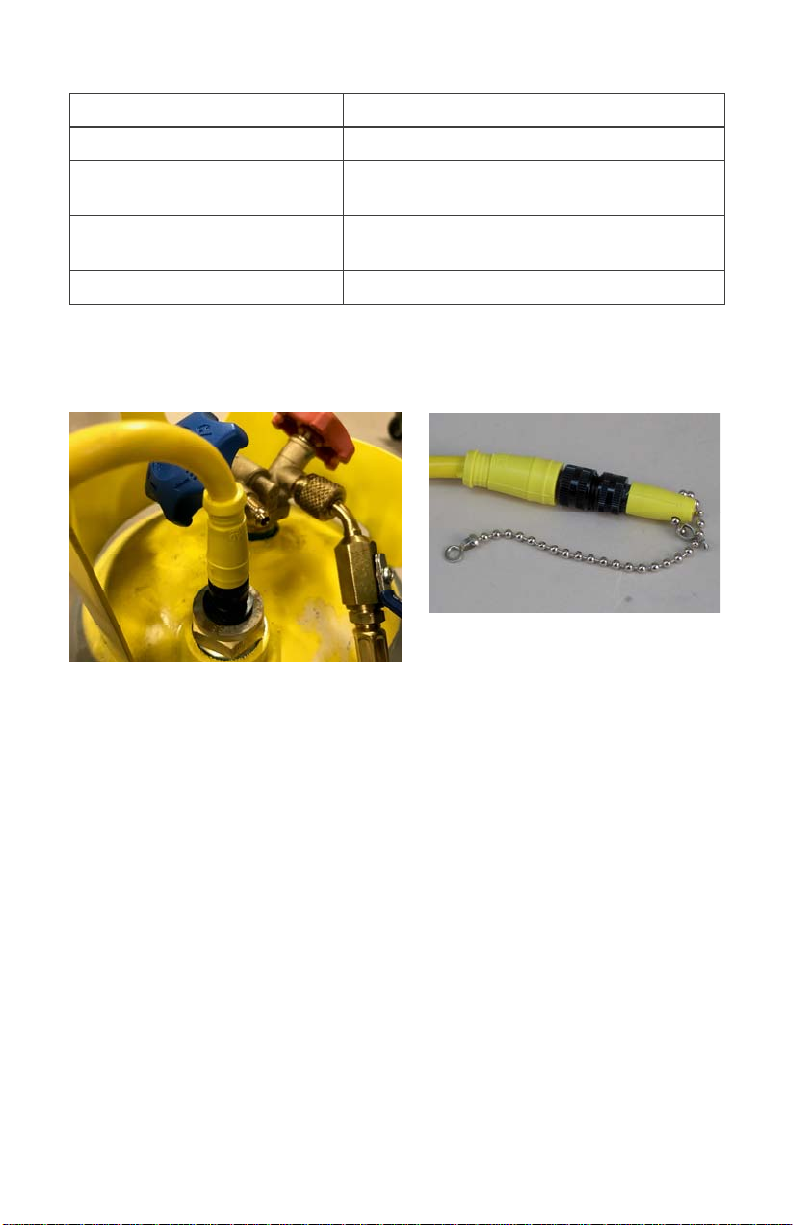
6. Connect the Tank Overfill Sensor
(TOS) cord as shown in the TOS
Install diagram on page 6.
7. Connect the discharge hose between
the RecoverX-CAR discharge fitting
and the liquid port on the recovery
cylinder. Open the liquid valve on the
recovery
8. Turn the Power Switch on (׀).
** Note** Upon power up, the
machine fan will run for six seconds
before the compressor startup to ventilate its enclosure and to help prevent the buildup of potentially flammable mixtures of gasses.
9. If the ambient pressure override
switch is turned on, monitor the lowside pressure until the desired vacuum level is achieved. If the ambien
pressure override switch is turned off,
the yellow and red lamps will flash
alternately when the system has
reached 3-5 psig and the compressor
will be stopped.
10. Turn the Power Switch off (○)
once the recovery is complete.
X-CAR unit when the suc-
AC system as shown in th
cylin
der.
e
g,
t
Page 5
10. Wait five (5) minutes to ensure the
pressure does not rise above zero.
11. If the pressure rises above the
required vacuum level, continue
the recovery Steps 8-11.
12. If the pressure remains belo
required level, close the valve on
the recovery tank.
13. Disconnect the hoses from the
MVAC system and the recovery
cylinder. **Note** Ensure that
all valves are cl
LIQUID OR VAPOR RECOVERY DIAGRAM
osed.
w the
14. Because oil can be removed
15. If oil was removed, replace with
rom the MVAC system durin
f
recovery, the Oil
port
should be drained after every usage. Drain this oil into the
included oil fill bottle to determine how much refrigerant oil
was removed from the MVAC
system.
the appropriate type and amount
into the MVAC system.
g
WIRING DIAGRAM
5
Page 6
LED LIGHT MEANINGS
Green Light Flashing System startup ventilation.
Solid Green Light System Recovering
Solid Yellow Light System loss in airflow detected or recovery
tank full. Check system fan and tank weight.
Alternating Red and Yellow
Lights
Solid Red Light High pressure cutout reached.
Atmospheric recovery complete.
TOS INSTALL DIAGRAM
Umbilical Mounted to Tank Umbilical with Shorting Cap
SUCTION FILTER
The RecoverX-CAR is equipped with
a built-in particulate strainer located
behind the suction port. Unscrew the
suction port by using a 11/16 wrench
to unscrew the hex head port to remove. This prevents contaminants,
copper shavings, carbon, and other
foreign objects from making their way
to the RecoverX-CAR compressor
and causing permanent damage.
Like a filter drier, this strainer MUST
be cleaned or replaced often. Failure to
do this can cause the strainer to become too clogged for refrigerant to
6
flow freely. A sure sign that the straining device is clogged is the freezing of
the suction port and the filter cover.
Before replacing, check the condition
of the o-ring. Replace if necessary.
Note: Make sure to use a strainer in
the RecoverX-CAR for every job!
Filter strainers and o-rings are available from your supplier.
Filter Strainer and O-Ring - Part
#95457
Page 7
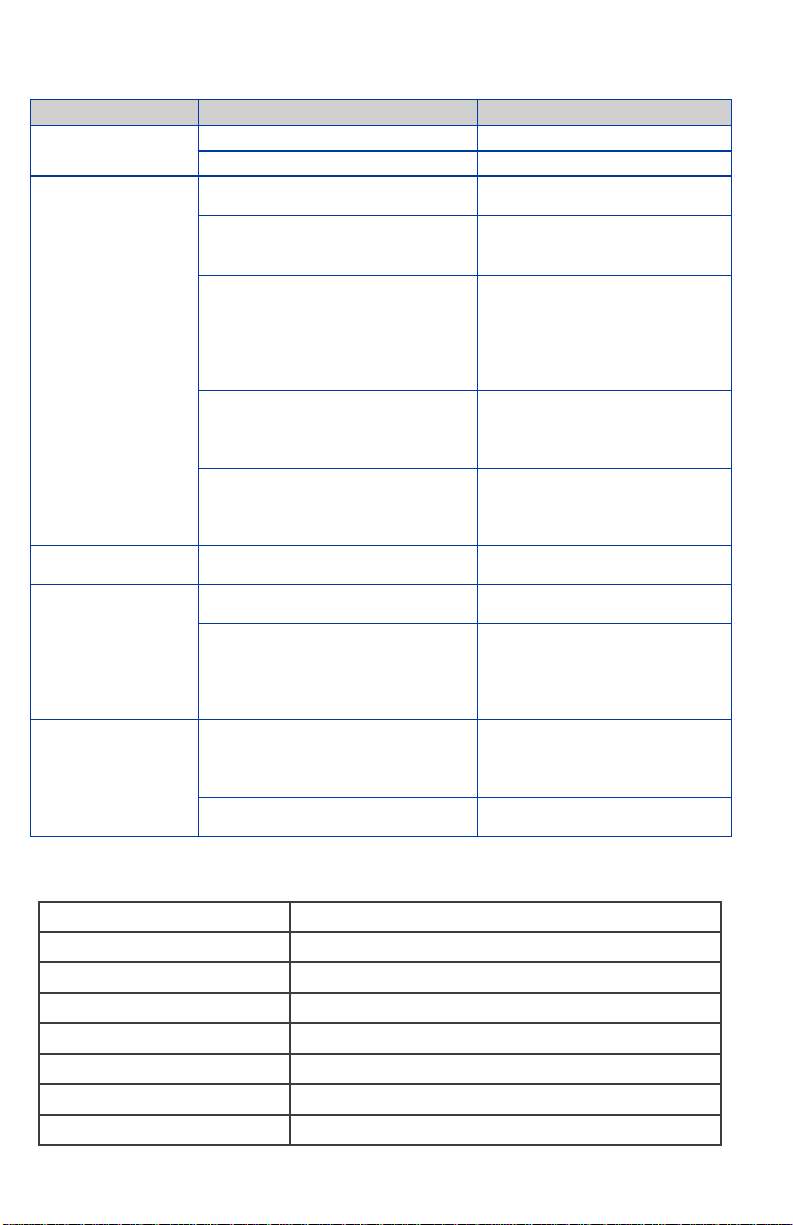
TROUBLESHOOTING GUIDE
Condition Possible Problem Possible Solution
No power to unit Power cord not plugged in Plug in power cord
Outlet not energized Reset outlet breaker
Compressor will not
start
Unit trips breaker
upon start up
Unit runs but does not
recover refrigerant
Unit will not pull a
vacuum
Compressor thermal overload is
tripped
ATM Recovery switch is tripped
(yellow and red alternating lights)
Allow compressor to cool down
until thermal overload resets
Atmospheric recovery is complete,
re-pressurize the suction side to
above 20 psi to reset switch
Unit has not completed cabinet ventilation (flashing green light)
The RecoverX-CAR internal fan
will run for approximately 6 seconds before the compressor starts
up to clear any potentially flammable gasses from building up
inside cabinet
Unit is shut down on tank full or loss
of airflow (solid yellow light)
Check shorting cap or TOS con-
nection to tank, if connections are
good, there may be a problem with
the airflow sensor or unit fan
Unit is shut down on high pressure
(solid red light)
Check discharge pressure gauge,
unit will trip around 500 psi dis-
charge, check for restrictions in-
cluding closed valves
Compressor is in a locked-rotor condition
Contact customer service for re-
pair
Suction filter clogged Contact customer service for re-
pair
Restriction in suction hose set or
system
Check coupler connections, make
sure the couplers are fully engaged
on the service ports and the knobs
on the couplers are turned clock-
wise until they stop
ATM recovery switch is tripped Use the ATM Recovery Override
switch to bypass the ATM Recov-
ery switch if it is desired to pull
the system into a vacuum
Leak in MVAC system Locate and repair and leak(s) in
the system
TECHNICAL DATA
Compressor: ½ HP Reciprocating Oil-Less Twin Cylinder
Power Source:
Size: Height: 12.50”
dth: 12.50”
Wi
Depth: 19.25”
Weight: 29.
Approved Refrigerants: Contaminated R-134a & R-1234YF
Certifications: SAE J2851 & UL 1963
115V AC 50/60 H
9 lb
z 1 Phase
7
Page 8

IMPORTANT NOTICE TO PURCHASER
Check for damage immediately. Prior to
shipment, all YELLOW JACKET
RecoverX-CAR Refriger ant Recovery Systems
are completely tested and inspected to assure compliance with Ritchie Engineering factory specifications.
If the recovery system carton is damaged, check
contents immediately. Note damage on shipper’s
Bill of Lading and have shipper sign statement.
Notify carrier immediately of the damage to
arrange inspection of the recovery system and
packaging. The CARRIER ALONE is responsible
for handling and settling your claim. Ritchie
Engineering will cooperate in assessing damage if
the recovery system is returned to the factory
prepaid.
WARRANTY INFORMATION
Ritchie Engineering guarantees YELLOW
JACKET products to be free of defective material
and workmanship which could affect the life of the
product when used for the purpose for which it
was designed. Warranty does not cover items that
have been altered, abused or returned solely in
need of field service maintenance.
The RecoverX-CAR Contaminated Automotive
Recovery Machine (UPC 37825) is covered by a
one year warranty for parts and labor.
The following exceptions will not be covered
under this warranty: Recovery products that have
been altered, misused, or improperly maintained.
The following must be done before returning
unit:
Carton contents include:
• RecoverX-CAR Contaminated Automo-
tive Recovery Machine
• Warranty Registration Card
• 37826 Contaminated Refrigerant Recovery
Cylinder with TOS
• 37827 Hose Kit with R-134a & R-1234YF
Couplings
• Oil Fill Bottle (for Measurement of Recov-
ered System Oil)
To validate warranty, mail registration card
within 10 days.
1) Call our technical service pers
(800) 769-8370 to assess if the problem can
be resolved over the phone.
2) Obtain an RGA number from Ritchie
Engineering for the return of the product.
3) Fax a copy of the original invoice to
(800) 322-8684.
If at any time after the warranty period you
have problems with your YELLOW JACKET
recovery unit, call our technical service department for help in selecting the correct replacement parts, or to arrange for its repair at reasonable costs.
onnel at
Test Equipment Depot - 800.517.8431 - 99 Washington Street Melrose, MA 02176
TestEquipmentDepot.com
8
 Loading...