


Yamaha VC7SG, VA5S, VA7SG, VC5S, Viola Owner's Manual
...
Viola/Cello Owner’s Manual
Thank you for purchasing this fine Yamaha instrument.
In order to maximize performance, and to ensure safety at all times, we recommend
you read through this manual thoroughly before playing your instrument.
Cautions Before Using the Instrument…
Please follow the rules below to obtain maximum life and provide safe use of the instrument.
• Do not subject the instrument to rough treatment like
bumping it against other objects, dropping it, etc.
• Exposing the instrument to certain environments, particularly sudden changes of temperature, may cause
severe damage. Please take the necessary precautions
to protect your instrument against the following:
•Direct sunlight.
• Excessively high or low temperatures.
• Excessively high or low humidity.
• Excessive dust or strong vibration.
•Avoid leaving the instrument in a car for any extended period of time. Extreme temperatures, such
as during the summer and winter months, can be
harmful to both the instrument and bow.
• To clean the instrument, wipe with a soft, dry cloth.
Also, never use spray insecticides in the vicinity of
the instrument. Doing so may result in damage to,
or a change in the condition of the instrument.
• Prior to shipping the instrument has been adjusted
and is ready for use. However, should you feel that
additional adjustments are needed please contact
your local Yamaha dealer, as some alterations require specialist skills.
• The bow’s shape can make it a danger to persons
and objects close by. When playing the instrument
make sure sufficient space is provided between you
and the next person or object, etc. Never treat the
bow in a rough manner, such as swinging or throwing the bow.
•Make sure that the bow hair is sufficiently loosened
before placing the bow in the case.
● Tuning the Instrument
•When tuning or changing the strings, never hold the
instrument close to your face. If the string breaks
unexpectedly, it may result in injury to the eyes or
face.
•Always change the strings one at a time, never all at
once. The removal of all four strings from the instrument will result in the bridge collapsing, and the
tailpiece falling off. Other problems may occur.
•When tuning the strings, do not over loosen or over
tighten the fine tuner. Doing so may result in damage to the instrument, or cause noise disturbances
during performance.
■ About the bow
• Using the supplied rosin, apply rosin to the bow hair before use.
Make sure that the rosin is applied evenly over the entire length
of the bow.
• Always loosen the hair on the bow when the bow is not used.
■ About end pin (Cello only)
• The end pin is pointed. Please be careful when using the exposed
end pin.
•Make sure the end pin stopper is secured firmly to prevent the
instrument from falling while you play.
■
About the Case (15/15.5/16/16.5 viola sizes only)
•The case is equipped with an adjustable divider that adapts to the
size of your viola for better storing. To adjust, loosen screw “A”
and reposition the divider. Once adjusted, firmly tighten the
screw. Do not force the divider when repositioning.
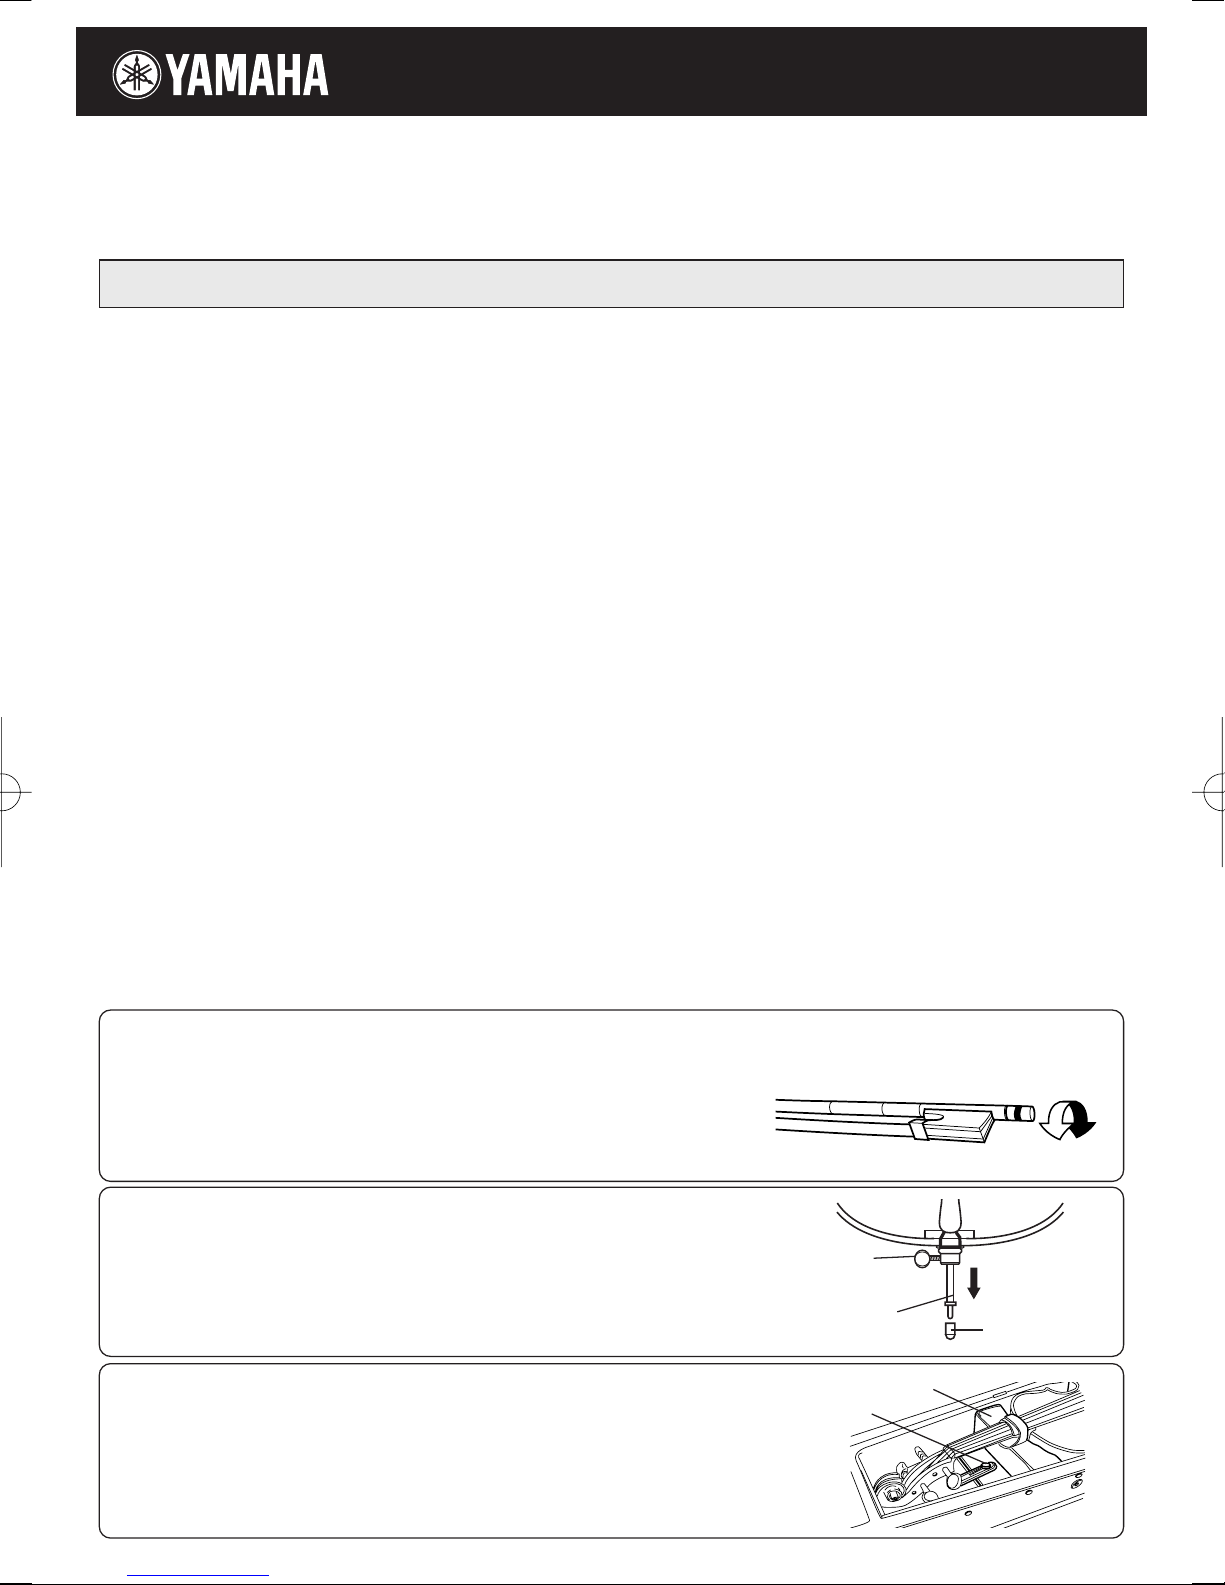
Rotate the button to adjust
the bow hair tension.
End Pin
Stopper
End Pin
Divider
Screw A
Rubber Foot
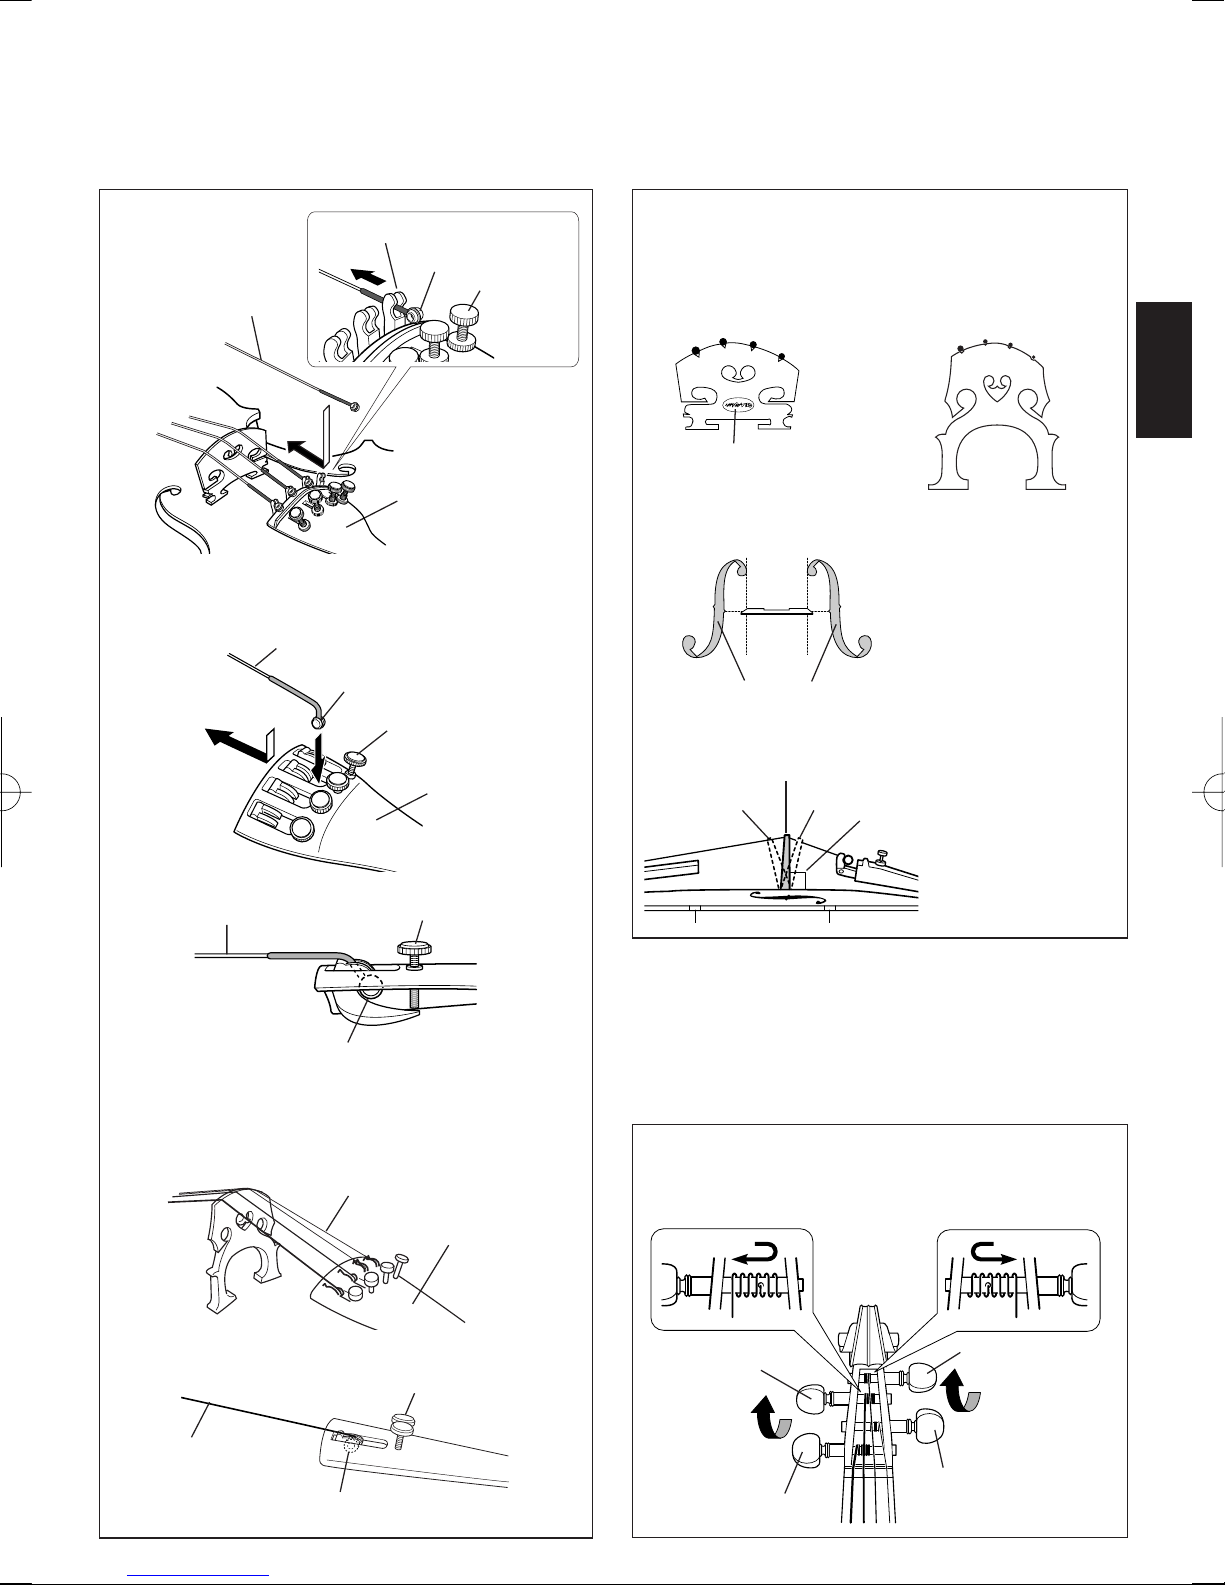
■ Stringing the strings on
■ Checking the Bridge’s
the tailpiece
At the tailpiece, hook the string’s ball end onto the fine
tuner’s notch.
[Viola]
String
Fine Tuner’s notch
Ball End
Fine tuner
Tailpiece
String
Ball End
Fine tuner
Position
While tuning or changing the strings, check the position
and angle of the bridge.
[Viola] [Cello]
Make sure the strings are
seated in their corresponding notches on the bridge.
G3
C4
Make sure the side of
the bridge with the logo
is facing the tailpiece.
D2
A1
“f” holes
Make sure the strings are
seated in their corresponding notches on the bridge.
G3
D2
C4
[Tailpiece side]
Make sure the bridge
is positioned between
the notches in the “f ”
holes as shown below.
A1
[Cello]
String
Ball End
String
Tailpiece
Fine tuner
Tailpiece
Bad
Correct
Bad
Right
Angle
The side of the
bridge facing the
tailpiece should be
at a right angle compared to the body.
■ Winding the strings
Insert the string into the hole on its corresponding tuning
peg and wind the string onto the peg as shown below. Apply some pressure (push in) to the peg as you turn it.
Make two winds toward the end of the peg and
the remaining winds toward the peg handle.
3rd & 4th strings 1st & 2nd strings
Fine tuner
String
Ball End
3rd string (G3)
Rotate the
peg as
shown
4th string (C4)
2nd string (D2)
Rotate the
peg as
shown
1st string (A1)
 Loading...