

Yamaha EL-27 Owner's Manual
Panel Controls
M. 1234 5
UPPER
(KNEE)
LOWER
(KNEE)
PEDAL
SUSTAIN
MAX
MIN
REVERB
MARCH WALTZ SWING BOUNCE SLOW
ROCK
MAX
MIN
TANGO LATIN1LATIN28 BEAT 16 BEAT
RHYTHM
LOWER
PEDAL
KEYBOARD
PERCUSSION
SYNCHRO
START
START
RHYTHM
FILL IN
INTRO.
ENDING
BAR/BEAT
BAR
BEAT
BASIC
REGIST.
DATA CONTROL
TEMPO
CONTRA
BASS
ELEC.
BASS
MAX
MIN
ORGAN
BASS
TUBA TO
LOWER
LOWER KEYBOARD VOICE PEDAL VOICE
STRINGS BRASS CLARI-
NET
SAXOPHONE
CHORUS HARMO-
NICA
MAX
MIN
ORGAN PIANO GUITAR VIBRA-
PHONE
COSMIC TUTTI
VIOLIN FLUTE
MAX
MIN
OBOE TRUM-
PETTOLOWER
UPPER KEYBOARD VOICE LEAD VOICE
1
2
1
STRINGS BRASS CLARI-
NET
SAXOPHONE
CHORUS HORN
MAX
MIN
ORGAN PIANO GUITAR VIBRA-
PHONE
COSMIC TUTTI
1
2
1
1
2
DATA CONTROL PAGE
SEQ.
SEQ.
1
3
SEQ.
SEQ.
2
4
1
2
3
4
5
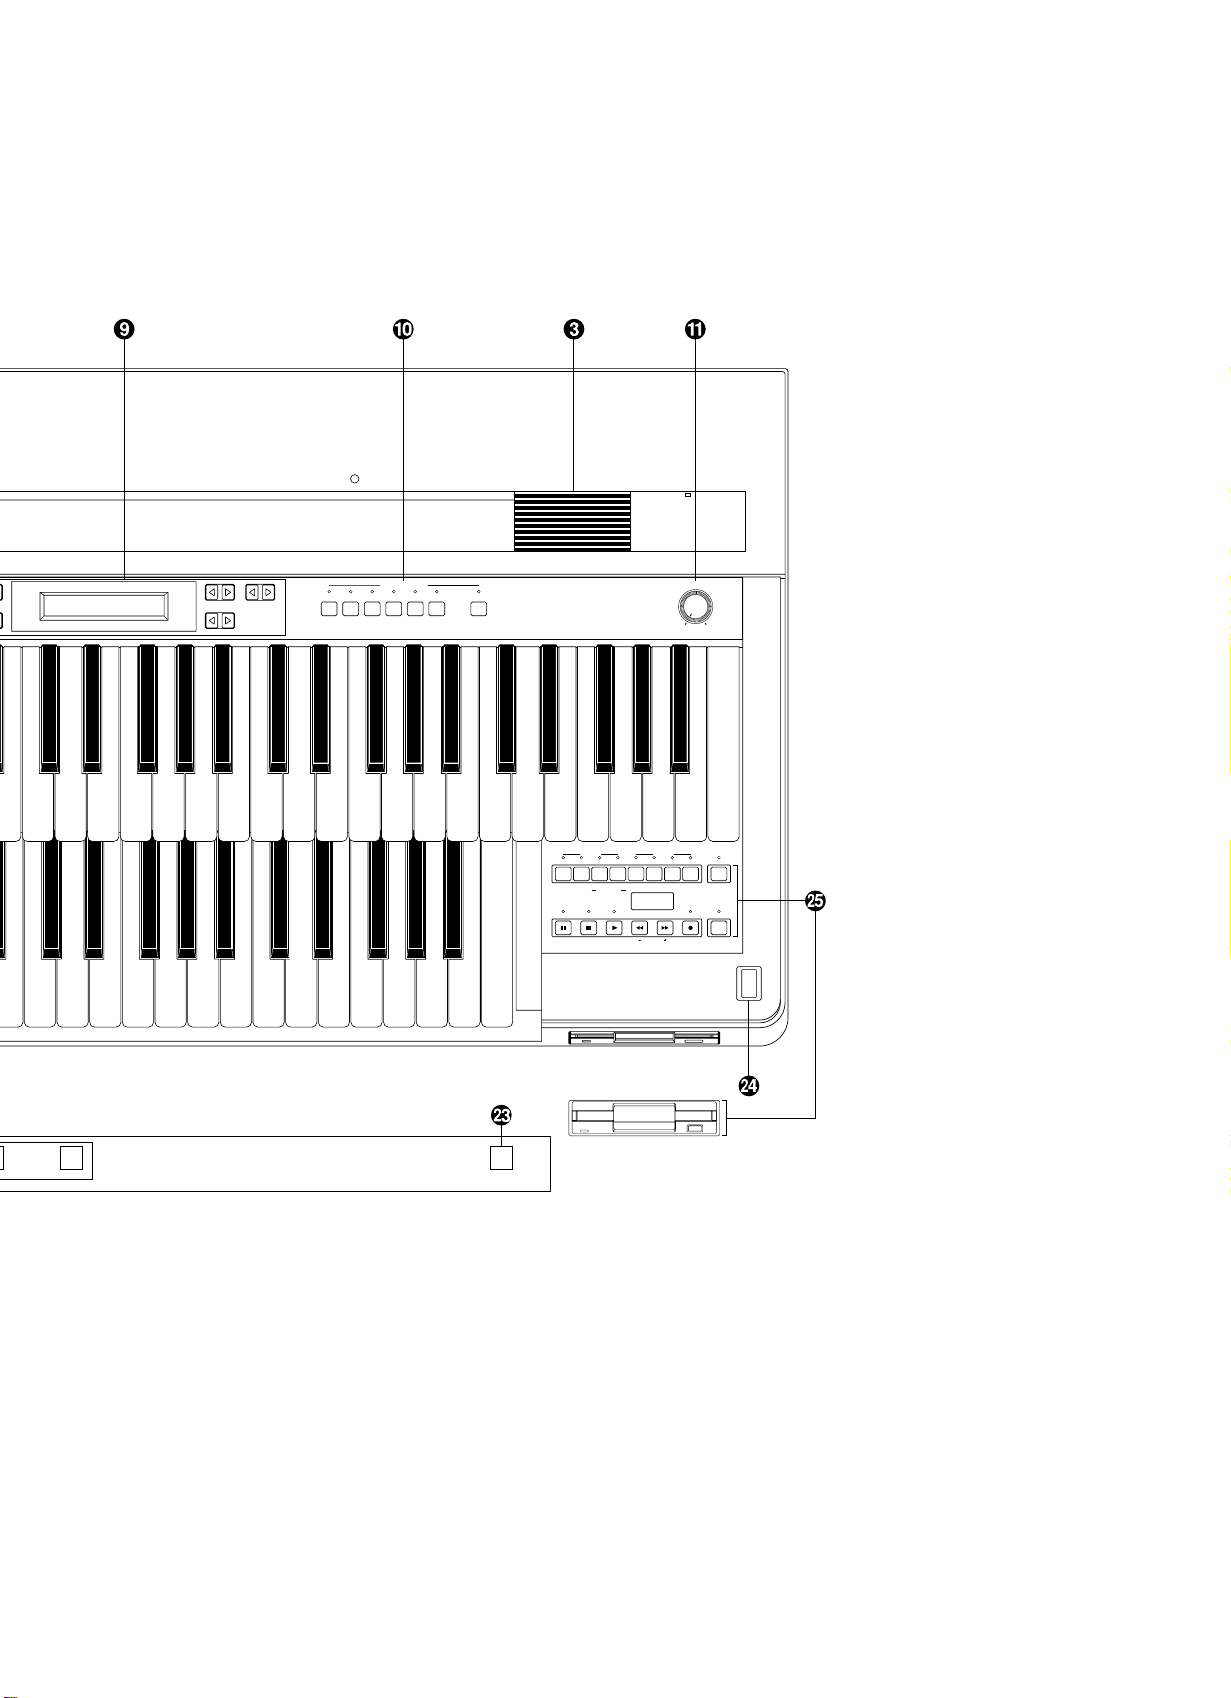
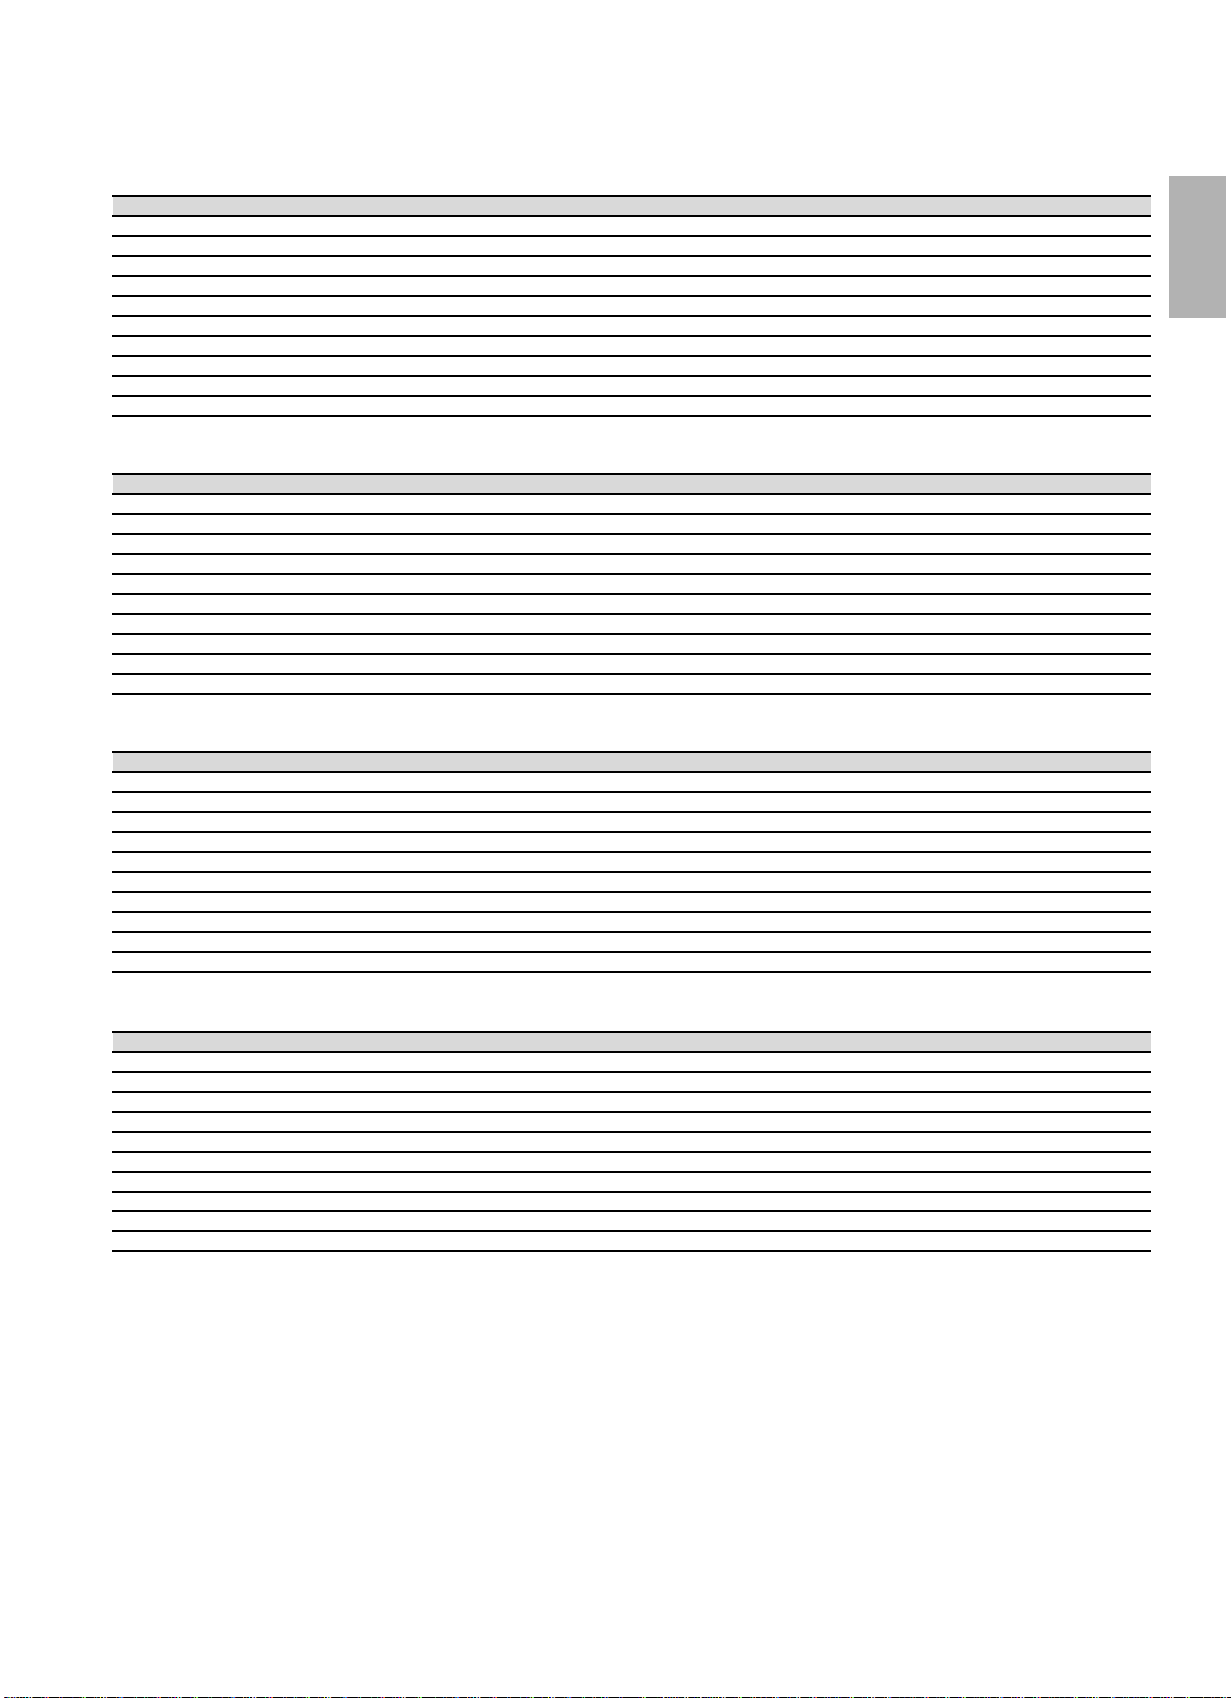
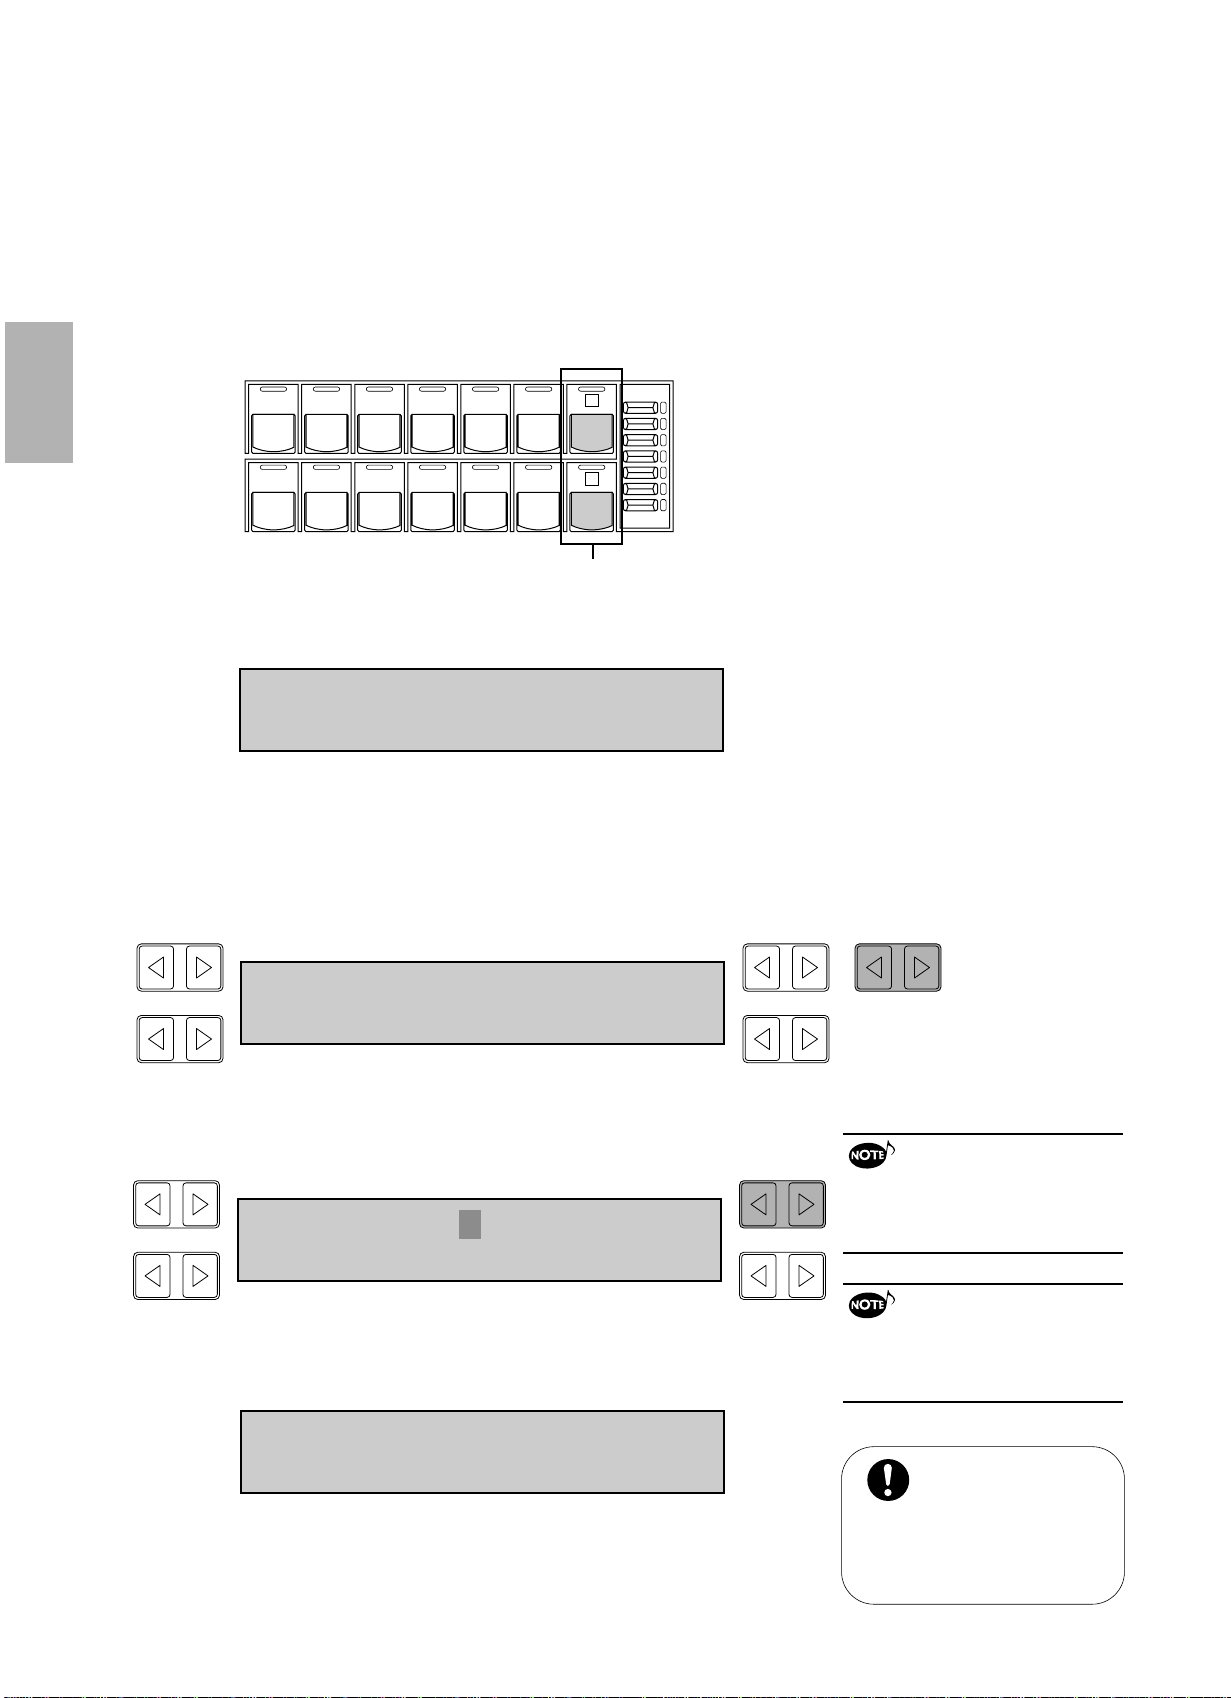
Front Panel
! REVERB (See page 30.)
" SUSTAIN Buttons (See page 30.)
# Monitor Speakers
Adjusts the Reverb effect for the entire sound.
Adds the Sustain effects each to Upper/Lower Keyboard and
Pedalboard.
Built-in speakers for your monitoring.
$ UPPER KEYBOARD VOICE (See page 18.)
Selects the Upper Keyboard voices and adjusts the volume.
% LOWER KEYBOARD V OICE (See page 18.)
Selects the Lower Keyboard voices and adjusts the volume.
& LEAD VOICE (See page 18.)
Selects the voices and adjusts the volume.
' PEDAL VOICE (See page 18.)
Selects the voices and adjusts the volume.
2
( BASIC REGIST. (Basic Registration) Buttons
(See page 8.)
Selects the Basic Registrations.
) LCD DISPLAY & D ATA CONTROL Buttons
(See page 4.)
* DISPLAY SELECT Section (See page 4.)
Selects the various functions.
+ MASTER VOLUME (See page 8.)
Adjusts the entire volume.
, RHYTHM Section (See page 31.)
Selects the rhythm patterns and adjusts the volume.
- BAR/BEAT/ TEMPO Display (See page 32.)
Displays the rhythm tempo or bar/beat.
FOOT
SW.
REGIST.
MENU
VOICE
DISPLAY
A. B. C.
M. O. C.
REGIST.
SHIFT
PITCH
MIDI
POWER
DISPLAY SELECT
MASTER VOLUME
DATA CONTROL PAGE
SYMPHO-
NIC
UPPER LOWER PEDAL
CONTROL
UPPER LOWER PEDAL
CONTROL SHIFT
SONG
REPEAT
FROM
SONG DEL.
TO
PAUSE RECORD CUSTOM PLAY
FORMAT
STOP PLAY SONG SELECT
RECORD
PLAY
SONG COPY
TEMPO
MUSIC DISK RECORDER
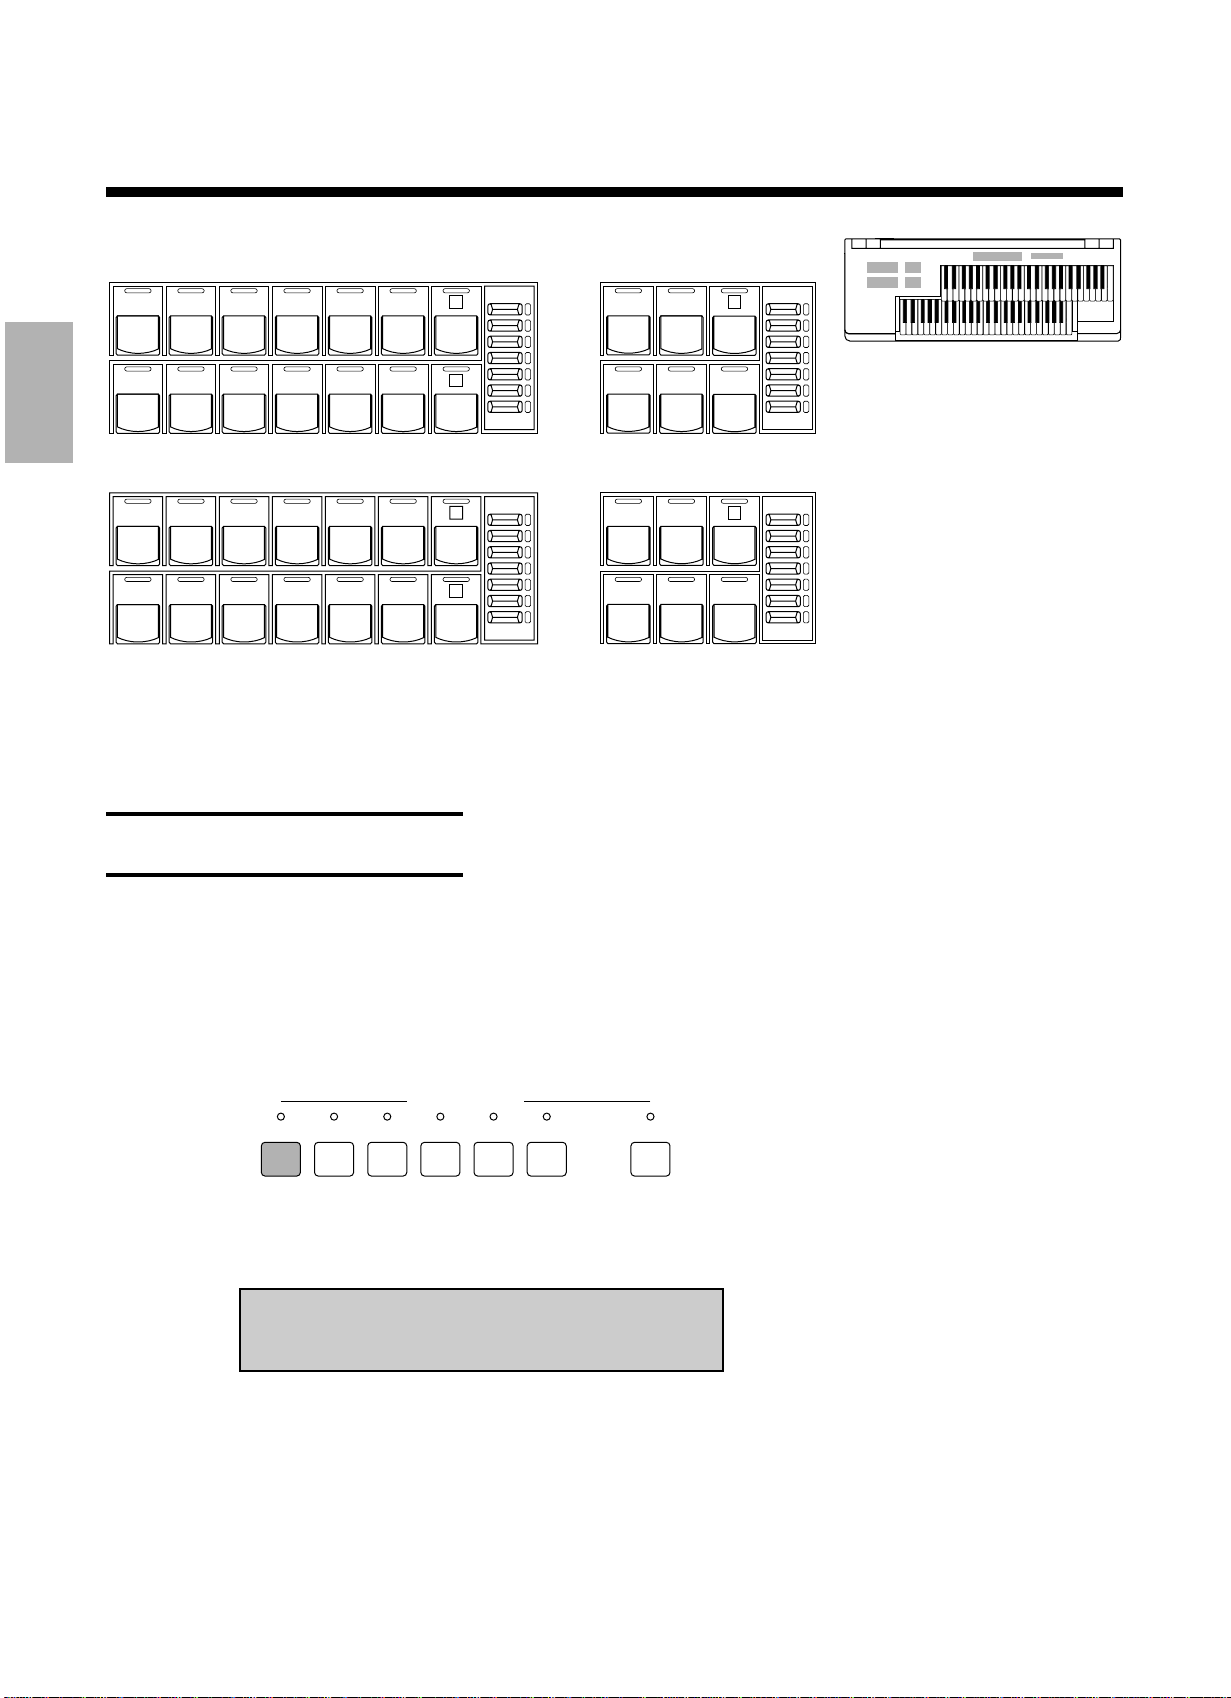
. KEYBOARD PERCUSSION Buttons
(See page 43.)
Used to play the percussion sounds on the Lower Keyboard or
Pedalboard.
/ TEMPO Dial (See page 33.)
Adjusts the rhythm tempo.
0 BAR /BEAT Indicator (See page 33.)
Flashes to the first beat of every measure (or every beat).
1 INTRO. ENDING Button (See page 32.)
Used to add a short introduction before starting actual rhythm
pattern or an ending pattern before stopping the rhythm.
2 SYNCHRO START Button (See page 32.)
Puts the rhythm pattern in "stand-by" and enables the Lower
keyboard or Pedalboard to start the rhythm.
3 FILL IN Button (See page 34.)
Used to add a FIll-In pattern in the middle of rhythm playback.
4 START Button (See page 32.)
Used to start or stop the rhythm pattern.
5 M. (Memory) Button (See page 47.)
Used to store a Registration to the Registration Memory buttons.
6 Registration Memory Buttons (See page 47.)
Used to store a Registration to or call up the stored Registration
from.
7 D. (Disable) Button (See page 47.)
Used to keep the same rhythm and accompaniment patterns
throughout the registration changes.
8 POWER Switch (See page 7.)
Turns the EL-27 on/off.
9 Music Disk Recorder (M.D.R.) (See page 55.)
Used to record/play back your performance and save/load the
registration data.
3
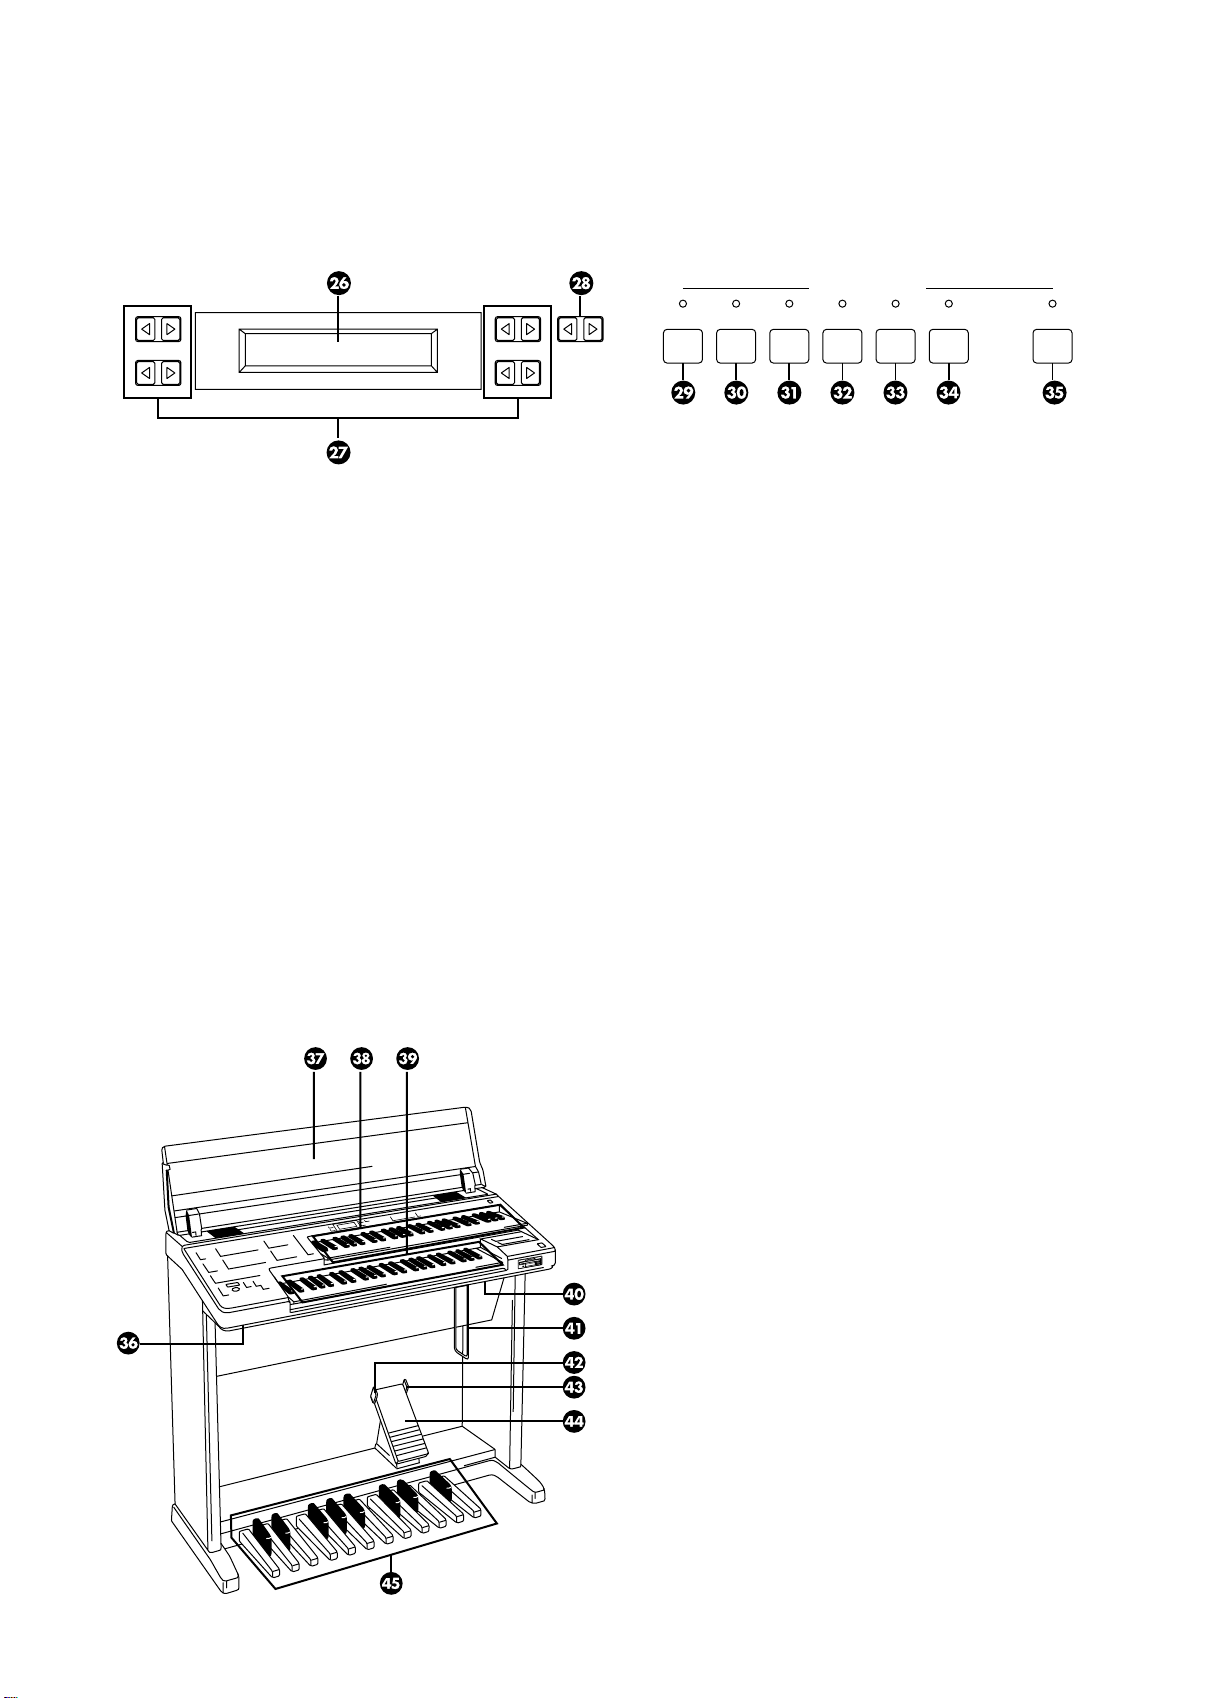
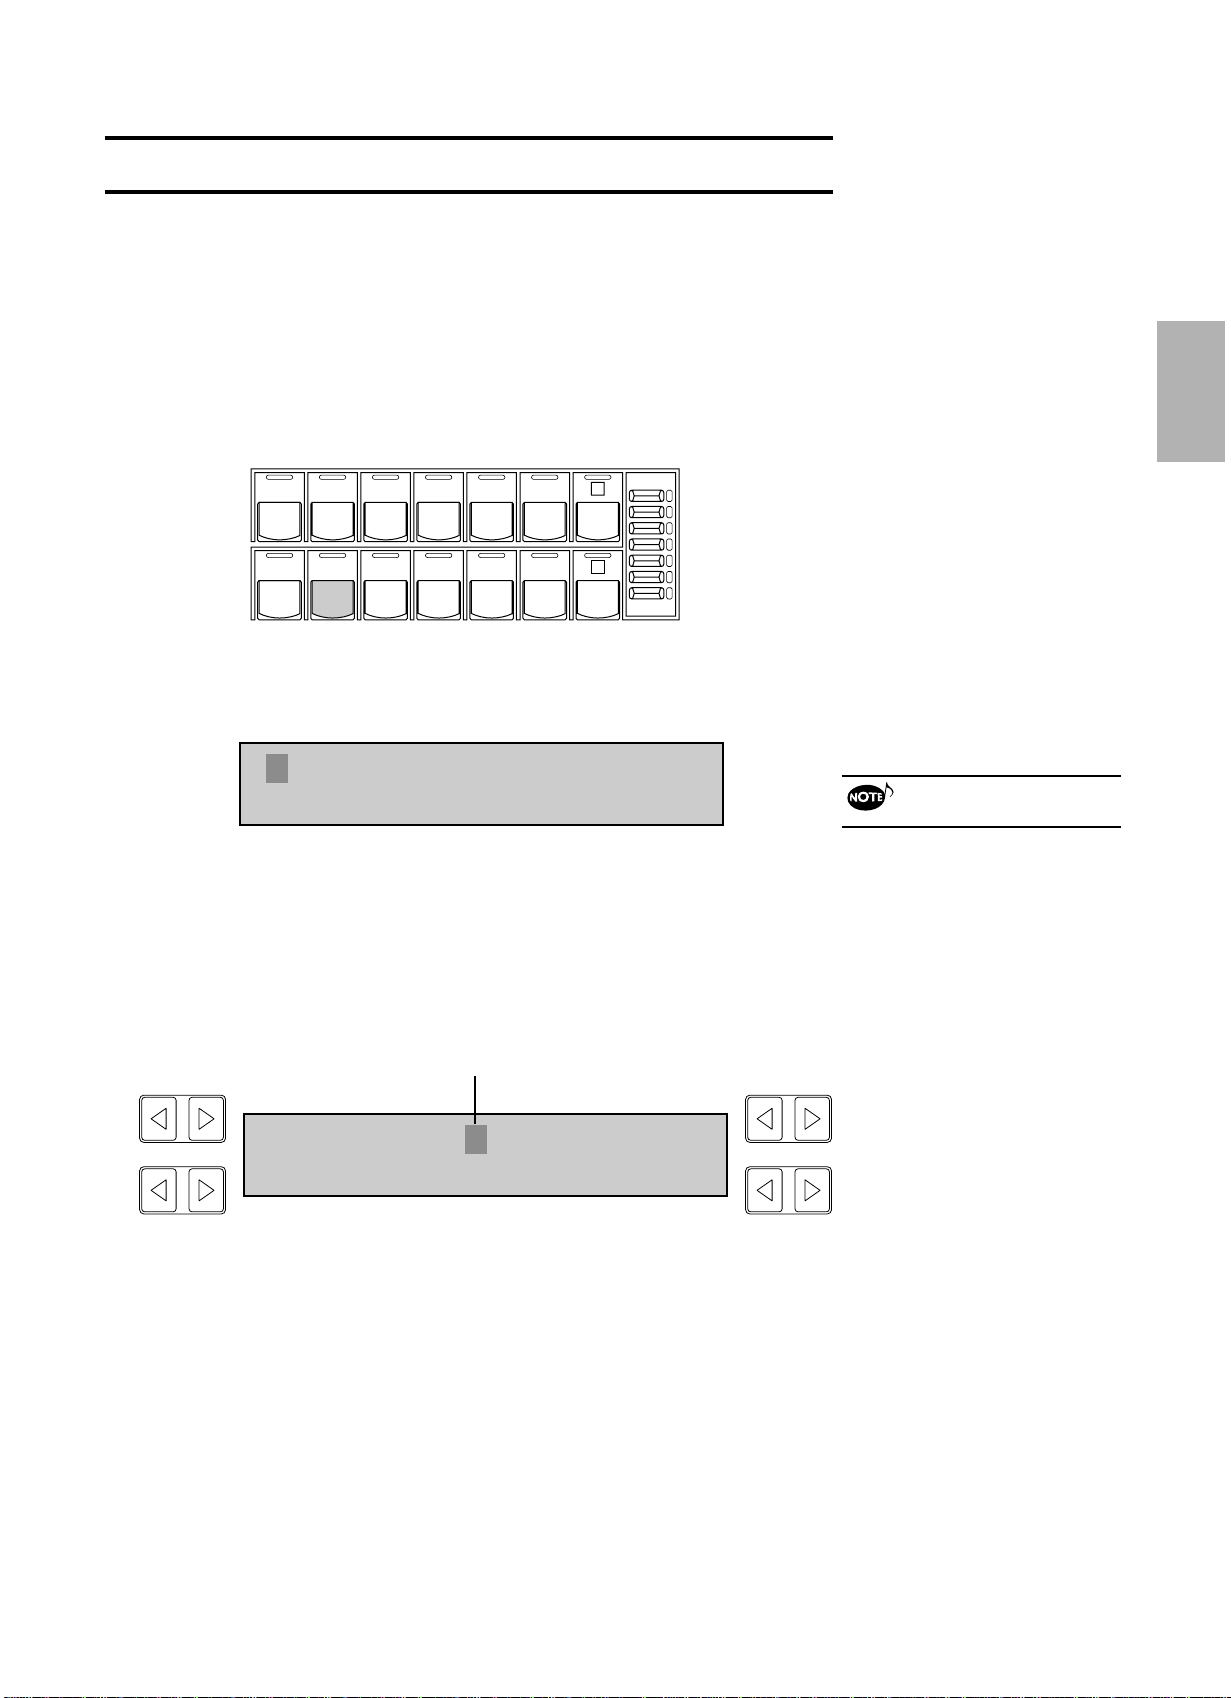
LCD Display/DISPLAY SELECT Section
DATA CONTROL DATA CONTROL PAGE
FOOT
SW.
REGIST.
MENU
VOICE
DISPLAY
A. B. C.
M. O. C.
REGIST.
SHIFT
PITCH
MIDI
DISPLAY SELECT
SYMPHO-
NIC
: LCD Display
Displays various information for you to play EL-27.
; DAT A CONTROL Buttons (See page 11.)
Selects the functions or sets the values.
< PAGE Buttons (See page 10.)
Changes pages when a function has more than two pages.
= VOICE DISPLAY Button (See page 18.)
Displays the currently assigned voices to each keyboard.
> SYMPHONIC Button (See page 27.)
DIsplays the Symphonic page.
? A.B.C./M.O.C. Button (See pages 40, 45.)
Selects the Auto Bass Chord page or Melody On Chord page.
@ FOOT SW. (Footswitch) Button (See page 51.)
Selects the (Left) Footswitch page.
A REGIST. SHIFT (Registration Shift) Button
(See page 48.)
Selects the Registration Shift function.
B PITCH/MIDI Button (See pages 54, 75.)
Displays Transport/Pitch page or MIDI page.
C REGIST. MENU Button (See page 10.)
Selects the Registration Menu pages.
Other Parts, Controls and Terminals
D Accessory Jacks and Controls (See page 77.)
E Keyboard Cover/Music Stand
F Upper Keyboard
G Lower Keyboard
H MIDI Jacks (See page 75.)
I Knee Lever (See page 52.)
Turns on and off the Sustain or M.O.C. effect with your right knee
even while you are playing.
J Left Footswitch (See page 51.)
Allows you to control the rhythm in the middle of performance.
K Right Footswitch (See page 48.)
Allows you to control the Registration Shift function.
L Expression Pedal (See page 8.)
Used to adjust the entire volume level in the middle of
performance.
M Pedalboard
4
Table of Contents
1 Quick Introductory Guide
2 Voice Sections
3 Voice Controls and
Effects
4 Rhythm, Accompaniment
and Percussion
5 Registration Memory
6 Footswitches and
Knee Lever
7 Pitch Controls
8 Music Disk Recorder
9 MIDI Controls
10 Accessory Jacks and
Controls
Main Features . . . . . . . . . . . . . . . . . . . . . . . . . . . . . . . . . . . . . . 6
1 Quick Introductory Guide . . . . . . . . . . . . . . . . . . . . . . . . . . 7
1. Getting Started . . . . . . . . . . . . . . . . . . . . . . . . . . . . . . . . . . . . . . . . . . . . . . 7
2. Playing Your Electone . . . . . . . . . . . . . . . . . . . . . . . . . . . . . . . . . . . . . . . . . 8
3. Registration Menu . . . . . . . . . . . . . . . . . . . . . . . . . . . . . . . . . . . . . . . . . . . 10
4. Registration Menu List . . . . . . . . . . . . . . . . . . . . . . . . . . . . . . . . . . . . . . .15
2 Voice Sections . . . . . . . . . . . . . . . . . . . . . . . . . . . . . . . . . . 18
1. Voice Display . . . . . . . . . . . . . . . . . . . . . . . . . . . . . . . . . . . . . . . . . . . . . . 18
2. Selecting Voices from the Panel . . . . . . . . . . . . . . . . . . . . . . . . . . . . . . . . 19
3. Selecting Additional Voices – Dotted Buttons and User Voices . . . . . . . . 21
4. Voice Menus . . . . . . . . . . . . . . . . . . . . . . . . . . . . . . . . . . . . . . . . . . . . . . .23
3 Voice Controls and Effects . . . . . . . . . . . . . . . . . . . . . . . 24
1. Selecting from the Voice Condition Pages . . . . . . . . . . . . . . . . . . . . . . . .24
Touch Tone . . . . . . . . . . . . . . . . . . . . . . . . . . . . . . . . . . . . . . . . . . . . . . 26
Feet . . . . . . . . . . . . . . . . . . . . . . . . . . . . . . . . . . . . . . . . . . . . . . . . . . . .26
Symphonic/Celeste . . . . . . . . . . . . . . . . . . . . . . . . . . . . . . . . . . . . . . . .27
Vibrato . . . . . . . . . . . . . . . . . . . . . . . . . . . . . . . . . . . . . . . . . . . . . . . . . . 28
2. Selecting from the Panel Buttons . . . . . . . . . . . . . . . . . . . . . . . . . . . . . . . 30
Reverb . . . . . . . . . . . . . . . . . . . . . . . . . . . . . . . . . . . . . . . . . . . . . . . . . .30
Sustain . . . . . . . . . . . . . . . . . . . . . . . . . . . . . . . . . . . . . . . . . . . . . . . . . 30
4 Rhythm, Accompaniment and Percussion . . . . . . . . . . . 31
1. Selecting Rhythm Patterns from the Panel . . . . . . . . . . . . . . . . . . . . . . . . 31
2. Auto Variation and Rhythm Volume . . . . . . . . . . . . . . . . . . . . . . . . . . . . . 35
3. Selecting Rhythms from the Dotted Buttons . . . . . . . . . . . . . . . . . . . . . . . 36
4. Rhythm Menus . . . . . . . . . . . . . . . . . . . . . . . . . . . . . . . . . . . . . . . . . . . . . 38
5. Accompaniment Controls . . . . . . . . . . . . . . . . . . . . . . . . . . . . . . . . . . . . . 39
6. Automatic Accompaniment – Auto Bass Chord . . . . . . . . . . . . . . . . . . . . 40
7. Keyboard Percussion . . . . . . . . . . . . . . . . . . . . . . . . . . . . . . . . . . . . . . . . 43
8. Melody On Chord . . . . . . . . . . . . . . . . . . . . . . . . . . . . . . . . . . . . . . . . . . . 45
5 Registration Memory . . . . . . . . . . . . . . . . . . . . . . . . . . . . 47
1. Storing Registrations . . . . . . . . . . . . . . . . . . . . . . . . . . . . . . . . . . . . . . . . . 47
2. Registration Shift . . . . . . . . . . . . . . . . . . . . . . . . . . . . . . . . . . . . . . . . . . . . 48
6 Footswitches and Knee Lever . . . . . . . . . . . . . . . . . . . . . 51
1. Footswitch Control . . . . . . . . . . . . . . . . . . . . . . . . . . . . . . . . . . . . . . . . . . 51
2. Knee Lever . . . . . . . . . . . . . . . . . . . . . . . . . . . . . . . . . . . . . . . . . . . . . . . . 52
7 Pitch Controls . . . . . . . . . . . . . . . . . . . . . . . . . . . . . . . . . . 54
8 Music Disk Recorder . . . . . . . . . . . . . . . . . . . . . . . . . . . . . 55
Precautions . . . . . . . . . . . . . . . . . . . . . . . . . . . . . . . . . . . . . . . . . . . . . . . . . . 55
Formatting a Disk . . . . . . . . . . . . . . . . . . . . . . . . . . . . . . . . . . . . . . . . . . . . . 57
Recording . . . . . . . . . . . . . . . . . . . . . . . . . . . . . . . . . . . . . . . . . . . . . . . . . . .58
Recording Registrations (and Bulk Data) . . . . . . . . . . . . . . . . . . . . . . . . . . . 63
Recalling Recorded Registrations (and Bulk Data) . . . . . . . . . . . . . . . . . . . 64
Replacing Registrations . . . . . . . . . . . . . . . . . . . . . . . . . . . . . . . . . . . . . . . . 64
Playback . . . . . . . . . . . . . . . . . . . . . . . . . . . . . . . . . . . . . . . . . . . . . . . . . . . . 65
Other Functoins . . . . . . . . . . . . . . . . . . . . . . . . . . . . . . . . . . . . . . . . . . . . . . . 68
9 MIDI Controls . . . . . . . . . . . . . . . . . . . . . . . . . . . . . . . . . . . 75
10 Accessory Jacks and Controls . . . . . . . . . . . . . . . . . . . . 77
Troubleshooting . . . . . . . . . . . . . . . . . . . . . . . . . . . . . . . . . . . 78
Specifications . . . . . . . . . . . . . . . . . . . . . . . . . . . . . . . . . . . . . 80
MIDI Messages . . . . . . . . . . . . . . . . . . . . . . . . . . . . . . . . . . . . 81
MIDI Implementation Chart . . . . . . . . . . . . . . . . . . . . . . . . . . 84
Index . . . . . . . . . . . . . . . . . . . . . . . . . . . . . . . . . . . . . . . . . . . . 85
5

Main Features
Your Yamaha Electone is pac ked with many sophisticated functions. Yet it is amazingly easy to
use. The main features are described here so that you can quickly understand the capabilities of
your Electone.
Included among the main features are:
Astoundingly True-to-life Sounds
The new AWM (Advanced Wave Memory) and FM (Frequency Modulation)
tone generation technologies, combined with authentic tone function, make
the EL-27 a truly expressive musical instrument.
Wide Range of Voice Controls and Effects
Electone voices can also be enhanced with a variety of v oice controls and
effects, including octa ve settings, Touch Tone, Symphonic/Celesta, Vibrato,
Reverb, and Sustain. (See page 24.)
Dynamic Rhythm Patterns
The Rhythm section of the EL-27 f eatures authentic drum and percussion
sounds, accompanied with conv enient Accompaniment functions. (See
page 31.)
A Keyboard Percussion function is also provided for playing the realistic
percussion sounds from the Lower keyboard and Pedalboard. (See page
43.)
Wide Variety of Registration Menus
Your Electone also has convenient Registration Men us that allow you to
instantly change all settings for the entire instrument in real time, as you
play. (See page 10.)
Recording of Performances with the Music Disk Recorder
The Electone also features a Music Disk Recorder f or recording your
performances. The recording is completely digital and is stored to disk,
which means that no matter how many times you play back the recording, it
will always sound exactly the same as the original performance. (See page
55.)
6
1 Quick Introductory Guide
£Strings ¢™Violin
¢Strings ¡ContBass
YAMAHA Electone
POWER
1 Quick Introductory Guide
POWER
No matter what your level of pla ying experience, we recommend that you take the time to go
through this basic section. It shows y ou in the simplest possible manner how to start playing your
Electone. The basic operations and functions that you learn in this section will also be important
when you later use the Electone's more adv anced features.
1. Getting Started
Once you've set up y our Electone and plugged the power cord into an
electrical outlet, you're ready to get started and play.
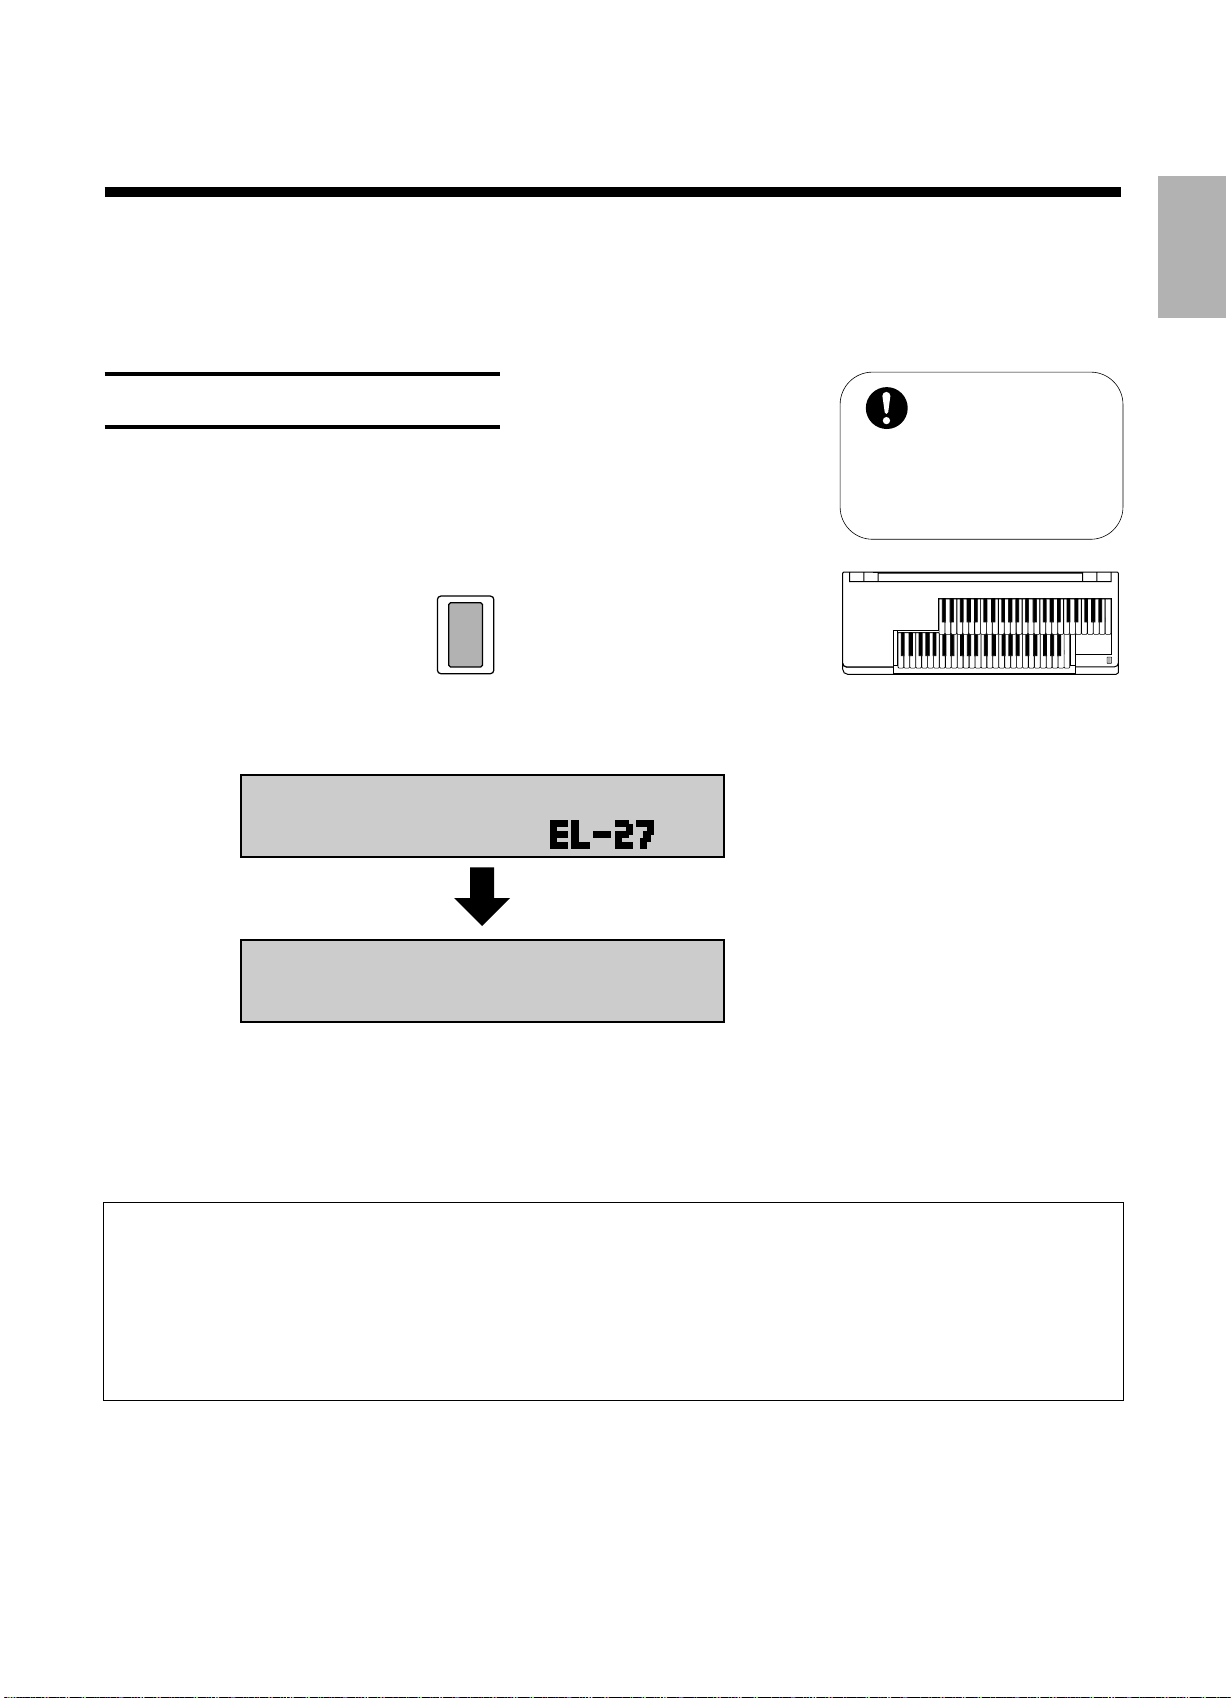
1. Turn on the Electone by pressing the POWER switch.
When you turn on the Electone, the following displays will appear in
succession on the LCD:
Yamaha products are
manufactured specifically
for the supply voltage in the
area where they are to be sold. If
you should move, or if any doubt
exists about the supply voltage,
please consult with a qualified
technician.
This last display (Voice Display) shows the currently assigned voice settings
for each voice section of the instrument, with the abbreviation for each voice
section beside the voice name: Upper (£), Lower (¢), Lead (¢™), and
Pedalboard (¡).
Turning the Electone off erases all panel settings you have made. When the Electone is turned on, Basic
Registration 1 is automatically selected. If you have made panel settings you wish to keep, save them to
Registration Memory (see page 47.) before turning the Electone off. You can, however, restore the panel
settings that were made before the Electone was last turned off. In doing this, first be careful NOT to press
any panel buttons (excepting those in Basic Registration) after you turn the Electone back on. Then, to
restore the previous settings, hold down the M. (Memory) button and press the D. (Disable) button.
7
1 Quick Introductory Guide
2.
Maximum volume Minimum volume
MASTER VOLUME
1
2
3
4
5
BASIC
REGIST.
Set the MASTER VOLUME control.
The MASTER VOLUME control is an overall control which affects the
volume of the entire instrument.
3. Press the Expression pedal down with your foot.
The Expression pedal also controls the entire volume of the Electone. Once
you hav e set the MASTER VOLUME control to a suitable level, you can use
the Expression pedal to change the volume with your foot as you play.
For now, press the pedal down slightly beyond the halfwa y point.
2. Playing Your Electone
The Electone includes convenient Registrations that let you completely and instantly change the voices
and other settings for all of the keyboards, ev en as you play. Each registration is pre-programmed to be
used for a specific music style or instrumental combination.
●Basic Registrations
The Basic Registration section has five factory preset registrations, each
with a different set of voices for the Upper/Lower keyboards and Pedalboard
and each specially suited for pla ying in a different music style.
When you turn the Electone on, the Electone automatically selects Basic
Registration 1. If another registration has been selected (the lamp on the
button will be lit), press the button for Basic Registration 1.
8
1 Quick Introductory Guide
Now, try out the five Basic Registrations with the following music examples. Press the appr opriate
Page 3 [13: Waltz-A]
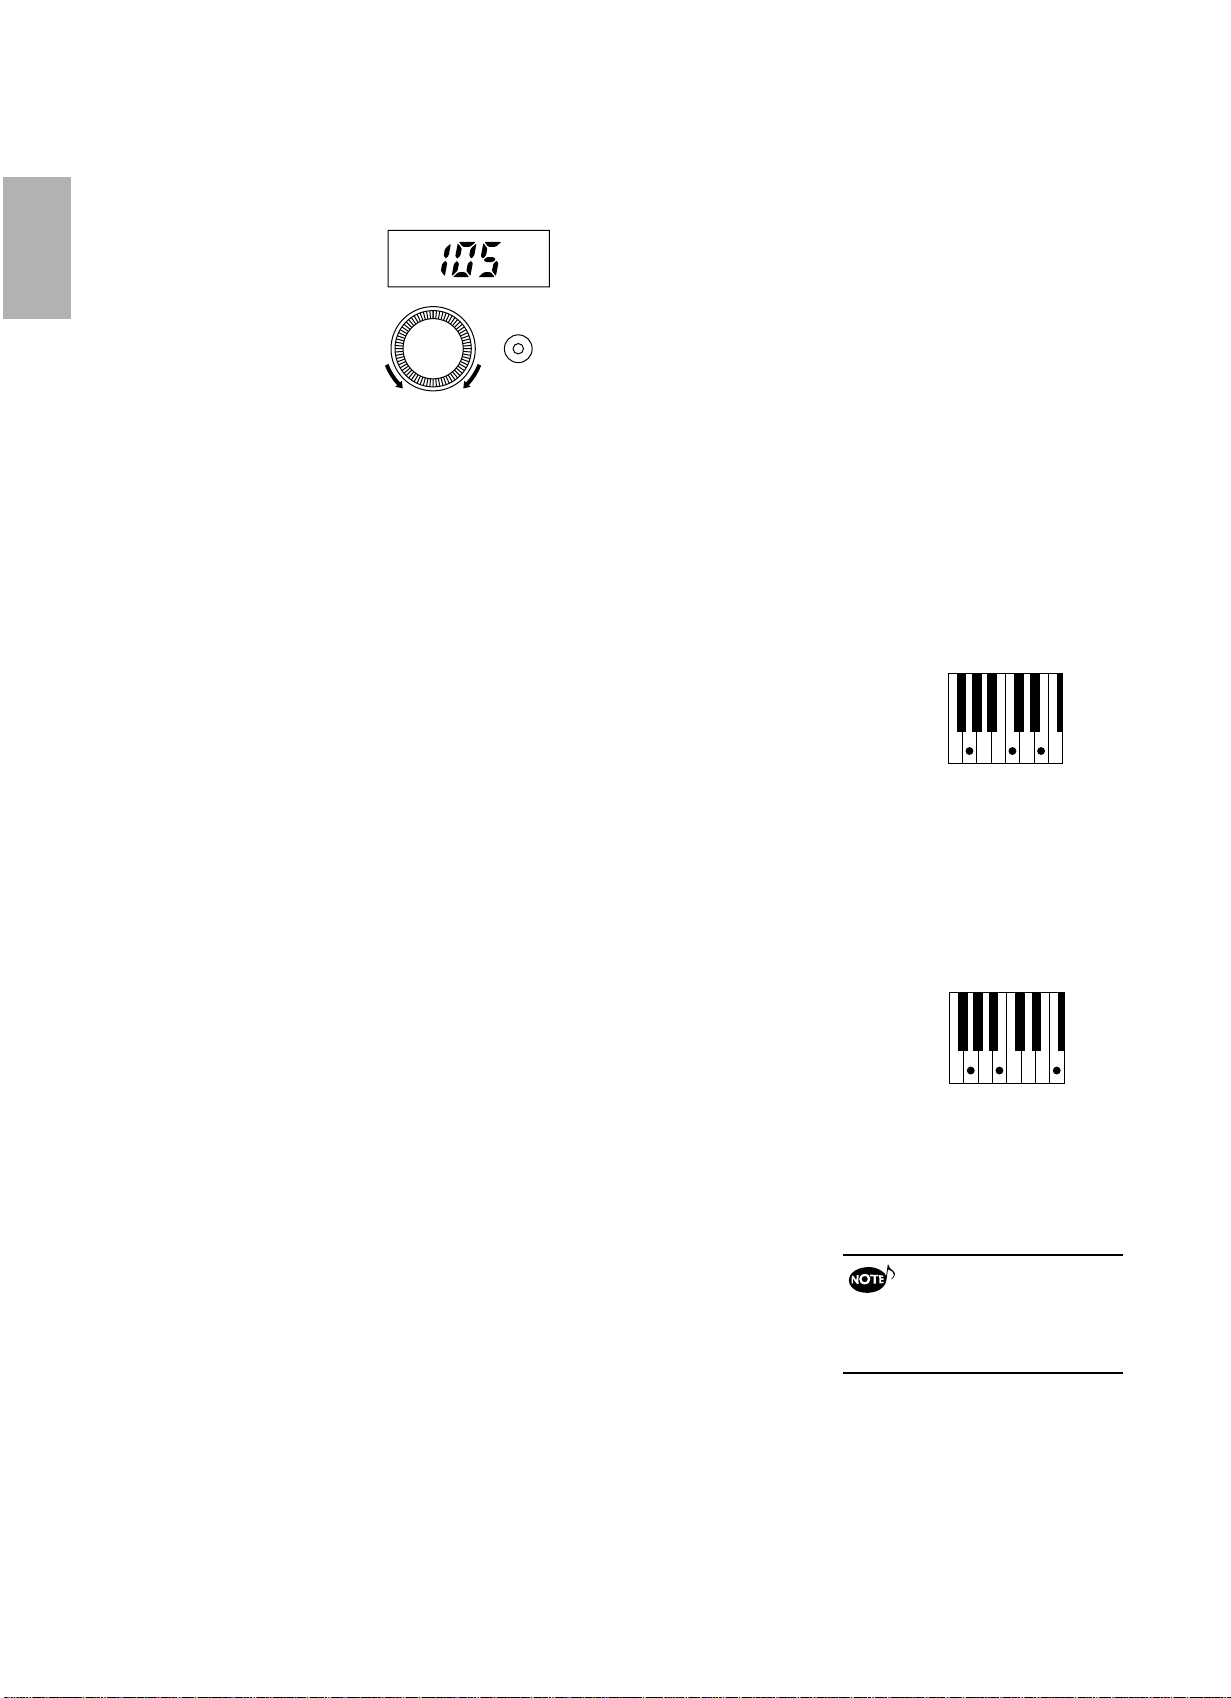
Tempo=105
Page 4 [1: Swing-B]
Tempo=160
Page 5 [11: 16 Beat-A]
Tempo=74
Page 5 [7: 8Beat-A]
Tempo=100
Page 3 [9: March-A]
Tempo=120
E
G
A A
F
A
B B
A
B
G
F
E
C
G
F
E
C
G
G
E
C
F
E
C
G
D
E
C
D
C
A
B
G
D
G
E
A
C
B
A
D
E
G
F
D
F
E
G G
A A
CC
G
F F
E E
D D
C
D
E
F
G
A
B
C
C
D
E
F
DDD
F
E
A
GGG
D
E
F
D
C
Basic Registration 1
Basic Registration 2
Basic Registration 3
Basic Registration 4
Basic Registration 5
Skaters Waltzes E. Waldteuful
When the Saints Go Marchin' in American Traditional Folk Song
Ave Maria Gnauld
Twinkle, Twinkle Little Star French Traditional Folk Song
Overture "Orphee aux enfers" J. Offenbach
C
C CC
C
CG7
G7
G7
G7
GDm Am D7
C C
G7C G7C
G7C
C C
G7F
C
C
CDm C G C
CFC C C
CC C
Am
G
7
G7
G7
G7 G7 G7
G7
D7
G7
C
buttons to select the registrations. Each music example has been chosen to best suit its
companion registration.
9
1 Quick Introductory Guide
The chart below lists the voices that have been set for the Upper/Lower keyboards and Pedalboard in
DATA CONTROLDATA CONTROL PAGE
DATA CONTROLDATA CONTROL
FOOT
SW.
REGIST.
MENU
VOICE
DISPLAY
A. B. C.
M. O. C.
REGIST.
SHIFT
PITCH
MIDI
DISPLAY SELECT
SYMPHO-
NIC
Basic Registration 1 Basic Registration 2 Basic Registration 3 Basic Registration 4
Strings
Upper Keyboard
voice
Lower Keyboard
voice
Pedal voice
Strings
Contrabass
Brass
Horn
Tuba Contrabass
Piano
Flute Cosmic 1
Cosmic 2
Cosmic 2
Basic Registration 5
Synth. Brass
Cosmic 3
Synth. Bass
each of the five Basic Registrations.
3. Registration Menu
In addition to the Basic Registrations, many more registrations are available on y our Electone. Some of
the registrations include voice and rhythm/accompaniment selections. With the variety of registrations
availab le, you're certain to find the right registration that perfectly suits any style of music you play.
The EL-27 is equipped with a total of 80 specially programmed registrations, selected with the built-in
Registration Menu button on the panel, as well as the 40 registr ations selected from the included
Registration Menu disk. Refer to the Registr ation Menu List on page 15.
To select a registration from the built-in Registration Menu:
For e xample, let's select an appropriate registration (Waltz-A) f or the "Skaters Waltzes" (Basic
Regisatrtion 1).
1. Press the REGIST. MENU button in the DISPLAY SELECT
section.
2. From the display that appears, select the desired
page. (In this case, select page 3.)
The top right PAGE buttons select the next or previous page.
10
Some of the functions have more than two pages. Each press of the PAGE buttons (1q) increases the page
number found in the top right in the display.
3. Press the bottom left DATA CONTROL buttons to select
SYNCHRO
START
START
RHYTHM
FILL IN
INTRO.
ENDING
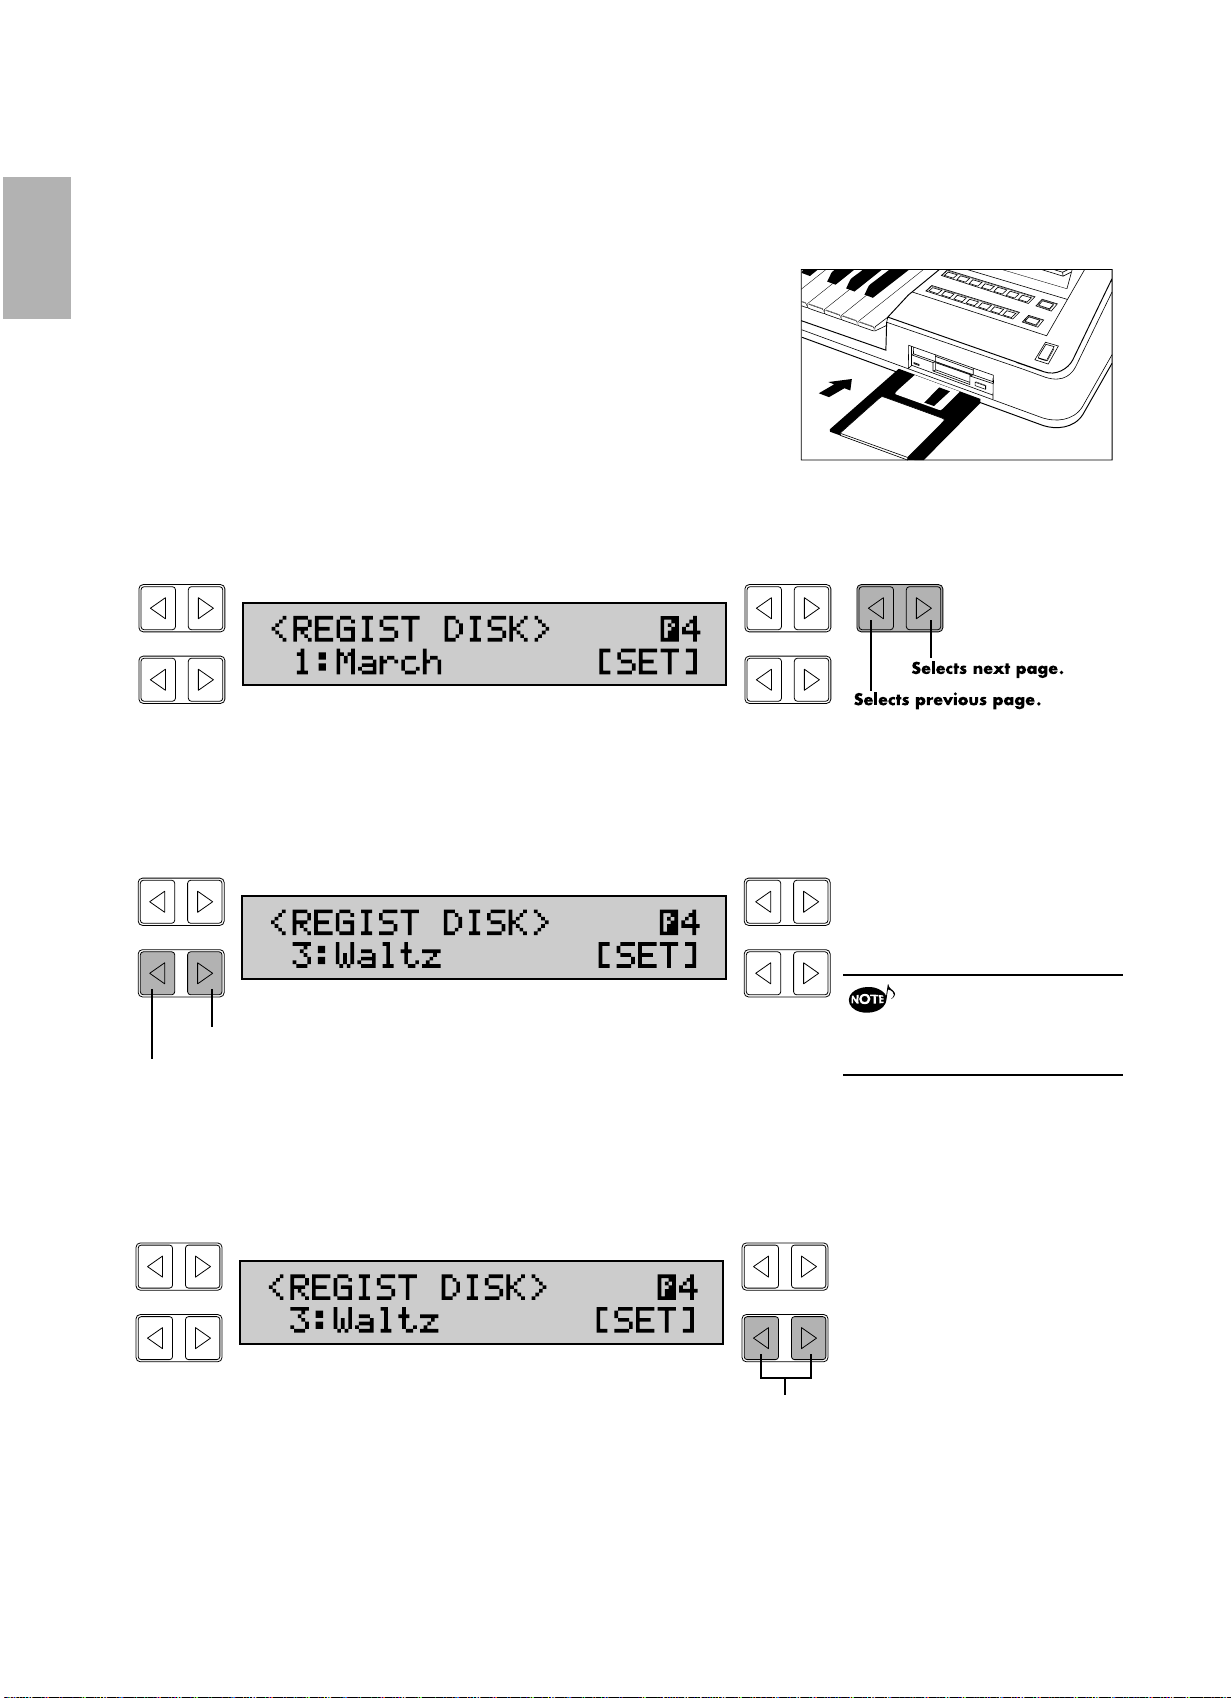
<REGIST DISK> ¡3
13:Waltz-A [SET]
Any button can be
used to actually select
the setting.
Selects next number.
Selects previous number.
Jumps ahead ten numbers.
Jumps back ten numbers.
1 Quick Introductory Guide
the registration you want to use. (In this case, select
Waltz-A [No.13].)
The bottom left DAT A CONTROL buttons step through the various
selections, while the top left DATA CONTROL buttons are used to jump
ahead or back by ten selections.
4.
Finally, call up the selected registration by pressing
the right DATA CONTROL buttons, selecting SET (Waltz-A
[No.13] here, for example.).
The message "Completed...!!" will be instantly indicated in the display,
meaning that the registration menu indicated in the display has been set.
The DATA CONTROL buttons are generally used to select voice and rhythms, and are also used as
described above. The left button of a DATA CONTROL button pair is usually used in a "negative" fashion –
for instance, to decrease a value, or select a previous setting or position. The right button is used in a
"positive" fashion – to increase a value, or select the next setting or position.
To Start the Rhythm:
5. Once you've selected a registration, press the START
button in the RHYTHM section.
This step starts up a rhythm pattern appropriate to the music style you have
selected. (To turn the pattern off, press the START button again.)
Some of the registrations in
the Registration Menu section
may not have assigned rhythm and
automatic accompaniment patterns.
See a chart included with this manual
that provides a list of all the available
music styles, along with the rhythm
patterns used. (See page 15.)
11
1 Quick Introductory Guide
You can also adjust the tempo of the rhythm to your liking by turning the
BAR/BEAT
BAR
BEAT
TEMPO
Slower Faster
C
G
7
TEMPO dial, as indicated in the illustration below. T urning the dial clockwise
makes the tempo faster and counterclockwise makes slower.
To use Auto Bass Chord function:
The A.B.C. (Auto Bass Chord) automatic accompaniment feature of the Electone also plays an important
role and is used in conjunction with the registrations and rhythm patterns. Like the rhythm patterns, A.B.C.
patterns have been programmed to best match the selected registration in pages 3, 4 and 5 of the
Registration Menu. They allow you to add sophisticated bass and chord accompaniment patterns that suit
the music, simply by playing chords on the Lower keyboard.
6. Press the chord "C"on the Lower keyboard. (Try the
chord shown in the illustration on the right.)
This function provides automatic accompaniment specially tailored for the
music style in which you pla y. Notice that ev en after you release your fingers
from the keyboard, the chord and accompaniment patterns continue to
sound. For more details on A.B.C., see page 41.
Now return to the first five written music examples in the Basic Registrations
section above (see page 9). Select the registration indicated at the top right
of the score (for e xample, "13: Waltz-A" in the first song). Refer back to the
steps on selecting registrations above (see page 10.) if necessary.
7. Play the melody line as you did before with your
right hand on the Upper keyboard. This time, however,
use the A.B.C. automatic accompaniment by pressing the
chords with your left hand. The keys you should press
are indicated by the small diagrams just below the
melody in the score.
Now that you'v e heard what A.B.C. can do, try selecting other registrations
from the Registration Menu. Use the A.B.C. function with these newly
selected registrations as well, to get a better idea of the wide stylistic range
of your Electone.
See how easy it is? And remember, you don't have to hold the key down to
use the automatic accompaniment. Just press the ke y once and the
automatic accompaniment will continue until you press the ne xt key.
If you have unintentionally
changed the display by
pressing a button on the panel, return
to Step #1 above (pressing the
REGIST. MENU button) to return to the
Registration Menu.
12
To cancel the A.B.C. Automatic Accompaniment:
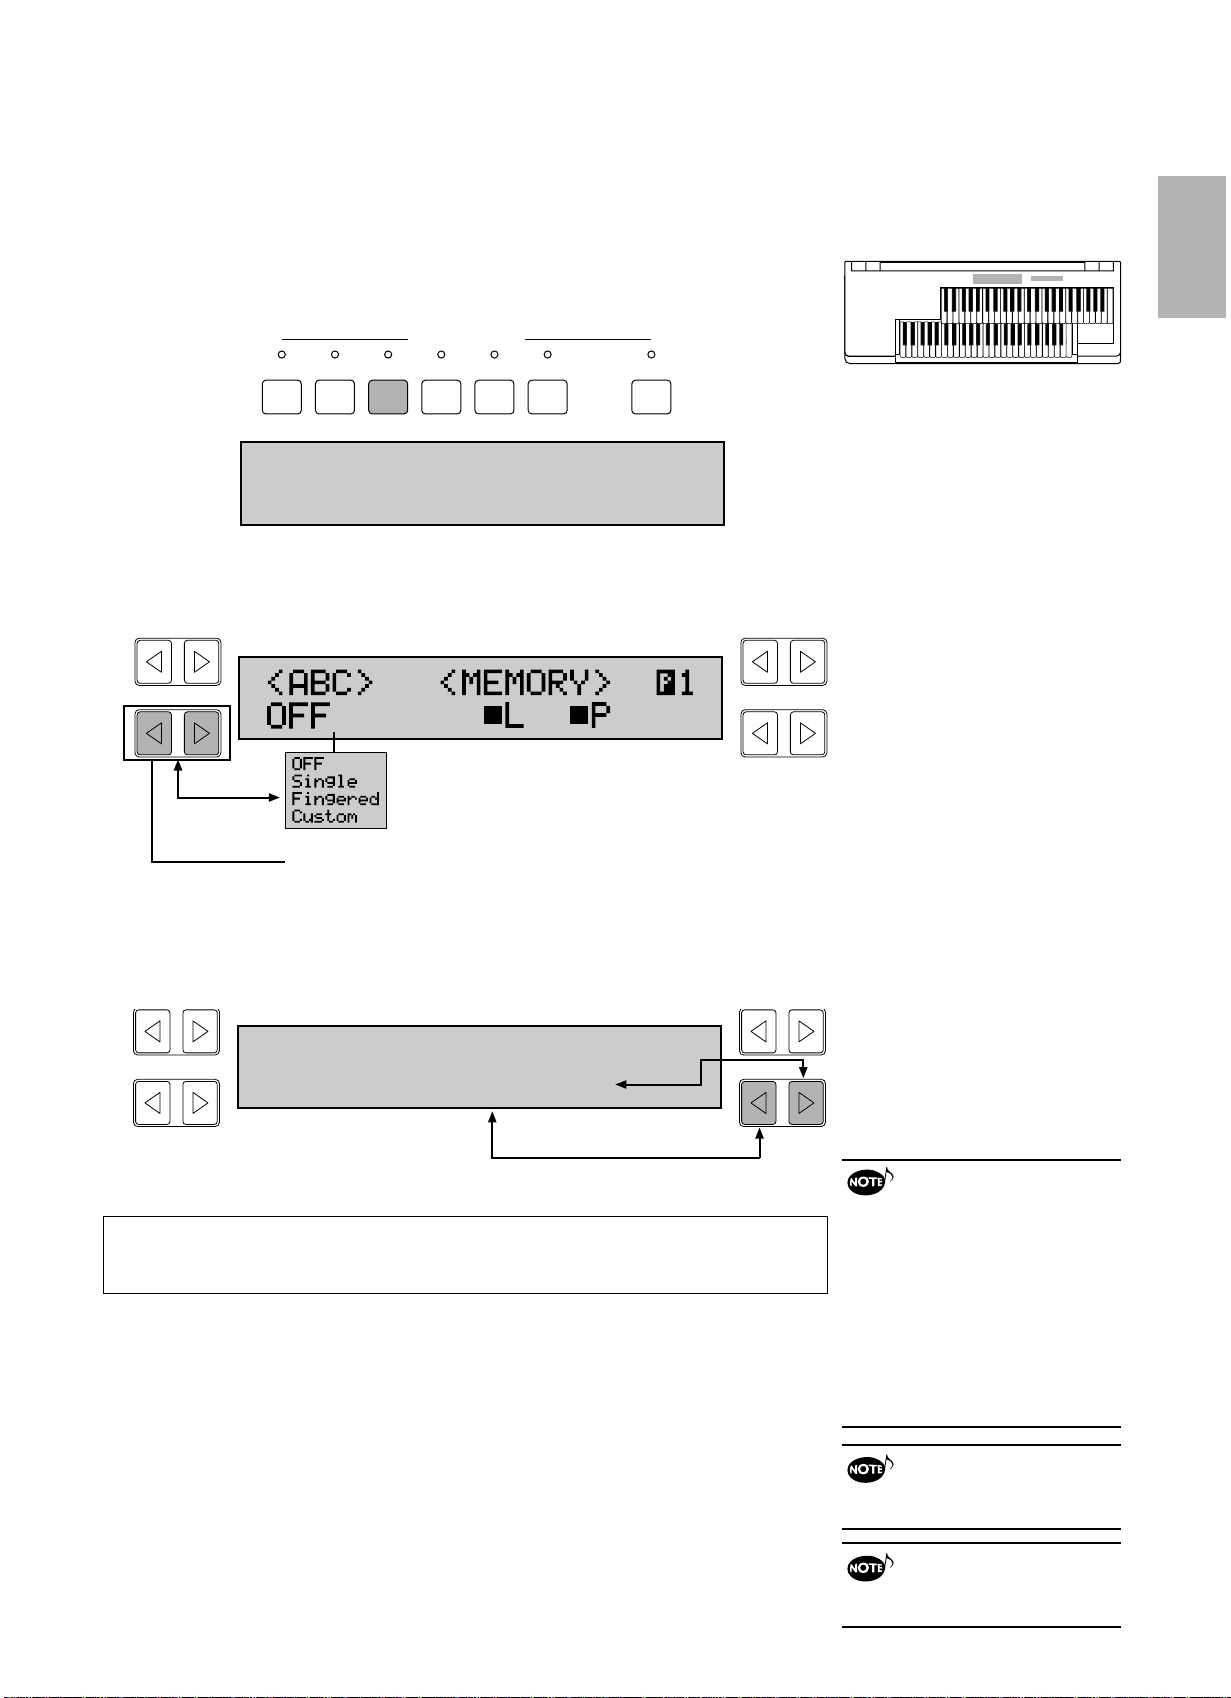
<ABC> <MEMORY> ¡1
OFF ŒL ŒP
Turns the Lower keyboard Memory (L)
on and off.
Turns the Pedalboard
Memory (P) on and off.
These buttons correspond to the bottom left
of the LCD and let you step through the various
A.B.C. modes.
<ABC> <MEMORY> ¡1
Fingered „L „P
FOOT
SW.
REGIST.
MENU
VOICE
DISPLAY
A. B. C.
M. O. C.
REGIST.
SHIFT
PITCH
MIDI
DISPLAY SELECT
SYMPHO-
NIC
1 Quick Introductory Guide
You can, of course, cancel the automatic accompaniment patterns (Fingered mode) if you want to play
the accompaniment by yourself on the Lower keyboard and Pedalboard.
8. Press the A.B.C./M.O.C. button in the DISPLAY SELECT
section, to the right of the LCD Display.
9. Press one of the bottom left DATA CONTROL buttons
repeatedly until "OFF" appears below ABC on the LCD.
10 . Turn the Memory function off as well by using the
bottom right DATA CONTROL buttons.
A solid or dark box on the LCD indicates that the function is on; an empty or
outlined box indicates that the function is off. Make sure the boxes next to L
(Lower) and P (Pedal) are both off, as shown in the example LCD above.
This short introductory section has shown you just a small portion of the
vast potential of your Electone . Now that you know how to select among the
Registrations and use the A.B.C . Automatic Accompaniment, take some
time to explore the other registrations and their rhythm patterns. There's a
great wealth of realistic voices , authentic orchestration and stylistically
varied rhythms – all instantly available from the Registration Menus feature.
Before going on to explore the
remaining sections of this manual, we
suggest that you turn the A.B.C.
automatic accompaniment and
memory functions off. Otherwise,
single notes played on the Lower
keyboard will sound as full chords,
and the Pedal voices will not sound
when playing the Pedalboard. To
keep this from happening, select the
OFF setting in A.B.C. and press the
buttons that correspond to LOWER
and PEDAL in the display to turn
memory off.
As in the operation described
above, the DATA CONTROL
buttons are also used simply to turn
functions on and off.
Press the Registration Menu
buttons in the DISPLAY
SELECT section to display the
registration menu on the LCD.
13
1 Quick Introductory Guide
To select the Registrations from the Registration Menu disk:
Any button can be used to
actually select the setting.
Selects the next number.
Selects the previous number.
PAGE
Included with your Electone is a Registration Menu Disk, containing 40 different menus.
1. Put the included Registration Menu Disk,
facing the label up, into the Disk slot, located just
under the Music Disk Recorder at the right side of
the Electone.
Once you've securely inserted the disk into the slot, the LCD
Display on the panel will automatically change to show the
availab le registration menu.
2. Press the PAGE buttons in the right of the LCD
to select the various menu "pages" of registrations
available on the disk.
3. Select one of the registrations shown on the LCD by
pressing the DATA CONTROL button in the left bottom of
the display.
4. Press the DATA CONTROL buttons in the right of the
LCD to call up the Registration you have selected.
The message "Completed...!!" momentarily appears, indicating that the
menu has been selected.
Up to 10 registration
selections are shown on the
LCD; no data is stored in the
registration numbers from 11 through
16.
14

1 Quick Introductory Guide
4. Registration Menu List
Page1
No. LCD Display Sound Image Upper Keyboard Voice Lead Voice Lower Keyboard Voice Pedal Voice
1 STRINGS1 Orchestra Strings Violin Horn Contrabass
2 STRINGS2 Pop Strings Strings Flute (4') Strings Pizzicato Bass
3 STRINGS3 Chamber Strings Strings Violin Strings Pizzicato Bass
4 STRINGS4 Solo Violin - Violin Strings Contrabass
5 STRINGS5 Pops Orchestra 1 Strings Harpsichord Strings Elec. Bass
6 STRINGS6 Pizzicato Strings Pizzicato Bass Pizzicato Bass (4') Pizzicato Bass Pizzicato Bass
7 STRINGS7 Pops Orchestra 2 Strings Trumpet Brass Pizzicato Bass
8 STRINGS8 Strings Ensemble Strings Strings (16') Strings Contrabass
9 BRASS1 Marching Band Brass Trombone Brass Tuba
10 BRASS2 Solo Trumpet - Trumpet Horn Tuba
11 BRASS3 Big Band 1 Brass Saxophone Trombone Pizzicato Bass
12 BRASS4 Solo Trombone - Trombone Saxophone Pizzicato Bass
13 BRASS5 Big Band 2 (Saxophone Ensemble) Saxophone Saxophone (8') Piano Pizzicato Bass
14 BRASS6 Jazz Combo 1 (Trumpet) - Trumpet Elec. Bass Pizzicato Bass
15 BRASS7 Dixie Jazz - Clarinet Piano Pizzicato Bass
16 BRASS8 Fusion (Saxophone) Saxophone Elec. Piano Elec. Bass
Page 2
No. LCD Display Sound Image Upper Keyboard Voice Lead Voice Lower Keyboard Voice Pedal Voice
1 LEAD1 Woodwind Ensemble Oboe Flute Clarinet Bassoon (8')
2 LEAD2 Solo Flute - Flute Strings Contrabass
3 LEAD3 Solo Oboe - Oboe Strings Contrabass
4 LEAD4 Polka - Clarinet Harmonica Pizzicato Bass
5 LEAD5 Fantasy 1 Cosmic 1 Flute (4') Elec. Piano Elec. Bass
6 LEAD6 Harmonica - Harmonica Strings Contrabass
7 LEAD7 Tango Band Harmonica Harmonica (16') Piano Pizzicato Bass
8 LEAD8 Jazz Organ Jazz Organ Jazz Organ (4') Jazz Organ (8') Organ Bass
9 DECAY1 Piano Piano - Piano Piano
10 DECAY2 Jazz Combo 2 (Vibraphone) Vibraphone - Piano Pizzicato Bass
11 DECAY3 Honky-tonk Piano Piano - Piano Piano
12 DECAY4 Jazz Guitar Elec. Bass Elec. Bass (16') Strings Elec. Bass
13 DECAY5 Marimba Marimba - Piano Pizzicato Bass
14 DECAY6 Fantasy 2 Vibraphone (4') Flute (4') Strings Elec. Bass
15 DECAY7 Guitar Guitar Elec. Bass (16') Strings Contrabass
16 DECAY8 Oriental 1 Harpsichord Harpsichord (16') Strings Elec. Bass
● The numbers in the parentheses indicate that the "feet" settings for the assigned voice are different from the default.
Built-in Registration Menu (80 Menus)
15
1 Quick Introductory Guide
Page 3
No. LCD Display Sound Image Upper Keyboard Voice Lead Voice Lower Keyboard Voice Pedal Voice
1 CONTEMP.1 Wind Synth. 1 - Cosmic 3 Elec. Piano Elec. Bass (16')
2 CONTEMP.2 Synth. Brass Synth. Brass Synth. Bass (8') Harpsichord Elec. Bass (16')
3 CONTEMP.3 Wind Synth. 2 Oboe Saxophone (8') Piano Elec. Bass (16')
4 CONTEMP.4 Synth. Horn Tuba (8') Guitar Elec. Bass
5 CONTEMP.5 Fantasy 3 Cosmic 1 (8') Organ Bass (4') Cosmic 1 (8 ') Contrabass
6 CONTEMP.6 Fantasy 4 Cosmic 2 Cosmic 1 Chorus Organ
7 CONTEMP.7 Piano + Synth. Piano Cosmic 1 (8') Clarinet Synth. Bass
8 CONTEMP.8 Oriental 2 Cosmic 2(16') Marimba Contrabass Horn (16')
No. LCD Display Rhythm (Tempo) Accompaniment Type Upper Keyboard Voice Lead Voice Pedal Voice
9 March-A 120 4 Brass Trumpet Tuba
10 March-B 11 0 1 Bassoon Flute (4') Pizzicato Bass (16')
11 Country 112 1 - Harmonica Pizzicato Bass (16')
12 Broadway 135 4 Trombone (8') Trumpet Pizzicato Bass
13 Waltz-A 10 5 4 Strings Strings (16') Pizzicato Bass (16')
14 Waltz-B 17 0 1 Strings Violin Pizzicato Bass
15 Jazz Waltz 140 4 Elec. Bass (16') Flute (4') Pizzicato Bass (16')
16 Swing-A 16 5 2 Saxophone Saxophone (8') Pizzicato Bass
Page 4
No. LCD Display Rhythm (Tempo) Accompaniment Type Upper Keyboard Voice Lead Voice Pedal Voice
1 Swing-B 16 0 3 Brass Trumpet Pizzicato Bass
2 Swing-C 138 1 - Clarinet Pizzicato Bass
3 Jazz Ballad 60 3 - Trombone Pizzicato Bass
4 Dixieland 108 4 - Trumpet Tuba
5 Bounce-A 123 2 Guitar Elec. Bass (16') Elec. Bass (16')
6 Bounce-B 130 4 - Clarinet Pizzicato Bass (16')
7 Reggae-A 13 2 4 Marimba - Elec. Bass (16')
8 Reggae-B 12 0 3 Elec. Piano Synth. Bass Elec. Bass (16')
9 Slow Rock-A 80 3 Guitar Elec. Bass (16') Elec. Bass (16')
10 Slow Rock-B 74 1 - Trumpet Elec. Bass (16')
11 Slow Rock-C 80 3 - Saxophone Elec. Bass (16')
12 Tango-A 12 0 1 Harmonica Harmonica (16') Pizzicato Bass (16')
13 Tango-B 120 1 Strings Violin Pizzicato Bass (16')
14 Tango-C 1 20 4 - Violin Pizzicato Bass (16')
15 ChaCha 126 4 Piano (16') Piano (4') Elec. Bass (16')
16 Rhumba 115 1 - Trombone (8') Elec. Bass (16')
Page 5
No. LCD Display Rhythm (Tempo) Accompaniment Type Upper Keyboard Voice Lead Voice Pedal Voice
1 Beguine 118 4 Strings Flute (4') Elec. Bass (16')
2 Mambo 100 4 Brass Saxophone Elec. Bass (16')
3 Samba-A 120 1 Saxophone Trumpet Elec. Bass (16')
4 Samba-B 12 0 4 Elec. Bass (16') Flute Elec. Bass (16')
5 Bossanova-A 1 03 1 - Flute Elec. Bass (16')
6 Bossanova-B 1 2 4 1 - Saxophone Elec. Bass (16')
7 8 Beat-A 100 3 Cosmic 2 Vibraphone (4') Elec. Bass (16')
8 8 Beat-B 117 1 Elec. Piano - Elec. Bass (16')
9 8 Beat-C 152 1 Jazz Organ - Elec. Bass (16')
10 DancePop 130 4 Vibraphone (4') Elec. Piano Elec. Bass (16')
11 16 Beat-A 85 4 - Flute Elec. Bass (16')
12 16 Beat-B 124 1 Synth. Brass Synth. Brass (16') Elec. Bass (16')
13 16 Beat-C 112 1 Brass Trumpet Elec. Bass (16')
14 16 Beat Funk 118 4 Synth. Bass Cosmic 3 Elec. Bass (16')
No. LCD Display Sound Image Upper Keyboard Voice Lead Voice Lower Keyboard Voice Pedal Voice
15 Wedding Wedding Organ Organ (4') Organ Organ (16')
16 X'mas X'mas Vibraphone (4') Cosmic 2 Strings Contrabass
● For No.9 through 16 of Page 3, and Pages 4 and 5 above, settings are as follows: A.B.C.: "Fingered", Memory: "ON" to both Lower keyboard and Pedalboard.
● The numbers in the parentheses indicate that the "feet" settings for the assigned voice are different from the default.
16
Registration Menu Disk (40 Menus)
1 Quick Introductory Guide
Page1
No. LCD Display Sound Image Upper Keyboard Voice Lead Voice Lower Keyboard Voice Pedal Voice
1 STRINGS1 Solo Violin - Violin Strings Contrabass
2 STRINGS2 Strings Ensemble Strings Strings Horn Pizzicato Bass
3 STRINGS3 Pop Strings 1 Strings Vibraphone Horn Contrabass
4 STRINGS4 Pop Strings 2 Strings Clarinet Strings Pizzicato Bass
5 STRINGS5 Symphonic Orchestra Tutti 1 Tutti 2 Strings Contrabass
6 BRASS1 Trumpet Ensemble Brass Trumpet Brass Tuba
7 BRASS2 Solo Trumpet - Trumpet Trombone Tuba
8 BRASS3 Solo Trombone - Trombone Trombone Tuba
9 BRASS4 Brass Ensemble Trumpet Trombone Horn Tuba
10 BRASS5 Big Band Brass Trombone Saxophone Pizzicato Bass
Page 2
No. LCD Display Sound Image Upper Keyboard Voice Lead Voice Lower Keyboard Voice Pedal Voice
1 LEAD1 Solo Flute 1 - Flute Strings Contrabass
2 LEAD2 Solo Flute 2 - Flute Clarinet Pizzicato Bass
3 LEAD3 Whistle - Flute Pizzicato Bass Pizzicato Bass
4 LEAD4 Flute Ensemble Flute Flute Bassoon Pizzicato Bass
5 LEAD5 Pop Flute Vibraphone Flute Strings Contrabass
6 LEAD6 Woodwind Ensemble 1 Bassoon Flute Clarinet Pizzicato Bass
7 LEAD7 Solo Oboe - Oboe Bassoon Pizzicato Bass
8 LEAD8 Woodwind Ensemble 2 - Clarinet Bassoon Clarinet
9 LEAD9 Solo Clarinet Clarinet - Horn Pizzicato Bass
10 LEAD10 Solo Saxophone - Saxophone Strings Contrabass
Page 3
No. LCD Display Sound Image Upper Keyboard Voice Lead Voice Lower Keyboard Voice Pedal Voice
1 DECAY1 Piano Piano - Piano Piano
2 DECAY2 Harpsichord Harpsichord - Strings Contrabass
3 DECAY3 Marimba Marimba - Clarinet Pizzicato Bass
4 DECAY4 Music Box Vibraphone - Vibraphone Vibraphone
5 DECAY5 Classical Guitar Guitar - Strings Pizzicato Bass
6 ORGAN1 Organ Organ - Organ Organ Bass
7 ORGAN2 Jazz Organ Jazz Organ - Jazz Organ Organ Bass
8 BANDONEON Bandoneon Harmonica Harmonica Strings Pizzicato Bass
9 SYNTH1 Cosmic Sound 1 Cosmic 2 Cosmic 1 Chorus Contrabass
10 SYNTH2 Cosmic Sound 2 Cosmic 3 Synth. Bass Cosmic 3 Synth. Bass
Page4
No. LCD Display Rhythm (Tempo) Accompaniment Type Upper Keyboard Voice Lead Voice Pedal Voice
1 March 120 4 Brass Trumpet Tuba
2 Broadway 135 4 Trombone Saxophone Pizzicato Bass
3 Waltz 105 4 Strings Strings Pizzicato Bass
4 Swing 160 3 Brass Trumpet Pizzicato Bass
5 SlowRock 80 3 Guitar Elec. Bass Elec. Bass
6 Tango 127 3 Harmonica Harmonica Pizzicato Bass
7 Cha Cha 126 4 Piano Piano Elec. Bass
8 Samba 120 1 Saxophone Trumpet Elec. Bass
9 8 Beat 100 3 Cosmic 2 Vibraphone Elec. Bass
10 16 Beat 74 4 Harmonica Harmonica Elec. Bass
● For Page 4 above, settings are as follows: A.B.C.: "Fingered", Memory: "ON" to both Lower keyboard and Pedalboard.
17
2 Voice Sections
£Strings ¢™Violin
¢Strings ¡ContBass
FOOT
SW.
REGIST.
MENU
VOICE
DISPLAY
A. B. C.
M. O. C.
REGIST.
SHIFT
PITCH
MIDI
DISPLAY SELECT
SYMPHO-
NIC
CONTRA
BASS
ELEC.
BASS
MAX
MIN
ORGAN
BASS
TUBA TO
LOWER
LOWER KEYBOARD VOICE PEDAL VOICE
STRINGS BRASS CLARI-
NET
SAXO-
PHONE
CHORUS HARMO-
NICA
MAX
MIN
ORGAN PIANO GUITAR VIBRA-
PHONE
COSMIC TUTTI
VIOLIN FLUTE
MAX
MIN
OBOE TRUM-
PETTOLOWER
UPPER KEYBOARD VOICE LEAD VOICE
1
2
1
STRINGS BRASS CLARI-
NET
SAXO-
PHONE
CHORUS HORN
MAX
MIN
ORGAN PIANO GUITAR VIBRA-
PHONE
COSMIC TUTTI
1
2
1
2 Voice Sections
The following illustration shows the various available voice sections.
The Electone has four voice sections: Upper Keyboard Voice, Lead Voice, Lower Keyboard Voice,
and Pedal Voice. All voices are playable from the Upper or Lower keyboards or Pedalboard,
allowing you to create richly textured voice layers on a single keyboard.
1. Voice Display
You can see at-a-glance which voices are currently selected for each of the voice sections by calling up
the Voice Display.
Press the VOICE DISPLAY button in the DISPLAY SELECT
section.
The Voice Display is indicated on the LCD.
The Voice Display is automatically shown when the Electone is turned on.
18
2 Voice Sections
2. Selecting Voices from the Panel
Harpsi.
Piano E.Piano
The first character flashes to
indicate the selected voice.
Harpsi.
Piano E.Piano
STRINGS BRASS CLARI-
NET
SAXOPHONE
CHORUS HARMO-
NICA
MAX
MIN
ORGAN PIANO GUITAR VIBRA-
PHONE
COSMIC TUTTI
UPPER KEYBOARD VOICE
1
2
Since selection of panel voices follows the same procedure throughout the various voice sections,
instructions for only the Upper Keyboard Voice section are given here.
1. Select a voice from the UPPER KEYBOARD VOICE
section by pressing one of the Voice buttons in that
section.
If, for example, you have selected the PIANO voice, the following display will
appear:
Notice that several different voice names are sho wn on this display.
These are variations of the basic Piano voice category.
2. Press one of the DATA CONTROL buttons that
corresponds to the voice you wish to select.
Some voice buttons have
only one voice.
19
2 Voice Sections
3. Set the volume for each voice section.
TOUCH=4 VOL.=24
<UPPER> ¡1
Pressing this button decreases the value.
Pressing this button increases the value.
STRINGS BRASS CLARI-
NET
SAXO-
PHONE
CHORUS HARMO-
NICA
MAX
MIN
ORGAN PIANO GUITAR VIBRA-
PHONE
COSMIC TUTTI
UPPER KEYBOARD VOICE
1
2
Maximum
Minimum
CONTRA
BASS
ELEC.
BASS
MAX
MIN
ORGAN
BASS
TUBA TO
LOWER
PEDAL VOICE
VIOLIN FLUTE
MAX
MIN
OBOE TRUM-
PETTOLOWER
LEAD VOICE
1
1
There are two volume controls: Coarse and Fine.
Coarse:
Use the VOLUME controls of each voice section on the panel to set the
desired level for each voice.
The controls have seven volume settings , from a minimum of 0, or no sound,
to a maximum of full volume.
Fine:
Pressing the same panel voice button again calls up the Voice Condition
display.
Use the DAT A CONTROL buttons, in the bottom right of the LCD, that
correspond to the Volume setting to change the lev el of the desired voice.
The relative level is indicated by a numeric value (from 0 – 24).
Pressing a voice button once
calls up that voice's Voice
Menu display. Pressing it a second
time calls up the Voice Condition
display (as shown in the illustration).
Successive presses alternate between
the two displays.
4. Now select voices for the Lower keyboard and
Pedalboard as you did for the Upper keyboard above.
Also set the volumes of the voices.
PLAYING LEAD AND PEDAL VOICES FROM THE LOWER KEYBOARD:
The Electone has a special "To Lower" function that lets you assign Lead
or Pedal voices to the Lower ke yboard. Simply press the TO LOWER
20
button on the voice section you wish to assign, and that voice will be
playable from the Lower keyboard.
●If the effect (vibrato, etc.) is set to the original Pedal Voices, the voices
assigned to the Lower ke yboards are playable with the effects as well.
●The Lead/Pedal Voice cannot be played on the Upper keyboard/
Pedalboard, if the Lead/Pedal Voice is assigned to the Low er keyboard.
The Lead Voice and Pedal
time; when you simultaneously press
two or more keys, only the highest
note will sound.
Voice sounds one note at a

2 Voice Sections
3. Selecting Additional Voices – Dotted Buttons
and User Voices
The EL-27 Electone has a variety of voices from which you can choose – far greater than what is
immediately apparent from the front panel controls. You've already learned in the section above how to
select the different voices that are available in the Voice Menu display of each panel voice . The Electone
also has dotted buttons in each voice section, giving you convenient access to any voice.
Selecting Voices From the Dotted Buttons
Each voice section has one or two dotted buttons, found on the right side of
each voice section. These dotted buttons function as "wild card" Voice Menu
selectors; any internal voices can be selected from these buttons.
The dotted buttons have the following basic uses:
! For playing any voice of the Voice Menus from any of the keyboards
or Pedalboard.
You can play on the Upper ke yboard, for example, voices from the twentytwo Voice Menu pages (including User), and not be limited to only the twelve
buttons (equivalent to twelve Voice Menu pages) that make up the Upper
Voice section. Another advantage to this f eature is that when the normally
monophonic (one note) Lead and Pedal voices are assigned to the Upper or
Lower ke yboard voice sections, they can be played polyphonically. The
opposite is also the case: Upper or Lower voices assigned to the Lead or
Pedal sections will be monophonic.
" For having three different voices from the same Voice Menu page
available f or selection in the same song.
For e xample, you can assign one of the voices to a dotted b utton in the
Upper Keyboard Voice section, the second voice to the other dotted button
in the same section, and the third one on the Voice Menu.
# For storing voices from a Voice Disk.
21
To select a voice from a dotted button:
USER 3 USER 4
USER 1 USER 2 ¡US
Harpsi.
Piano E.Piano ¡17
Piano E.Piano ¡17
Harpsi.
PAGE
Strings ¡1
STRINGS BRASS CLARI-
NET
SAXOPHONE
CHORUS HARMO-
NICA
MAX
MIN
ORGAN PIANO GUITAR VIBRA-
PHONE
COSMIC TUTTI
UPPER KEYBOARD VOICE
1
2
Dotted buttons
2 Voice Sections
1. Press one of the dotted buttons in any of the voice
sections.
For e xample, let's select the E. Piano (Page 17: Piano) using the dotted
button.
Page 1 (Strings) is displayed on the LCD.
2. Select one of the pages with the PAGE buttons found
in the right to the LCD display (Page 17: Piano).
Each voice group appears on the LCD display when the page has been
selected.
3. Select a voice from the display (E. Piano).
Select the USER page in the same manner as above when y ou wish to use
a voice from a Voice Disk. (See page 72.)
You can directly view and
select Voice Menu pages by
holding down one of the dotted
buttons and simultaneously pressing
the desired voice buttons in
succession.
The first character of the
selected voice's name
flashes to indicate that the voice has
been selected. As long as you do not
select a voice, this indication will not
appear.
22
When you turn off and turn
on the Electone again, the
voice is set to the Basic
Registration 1. Be sure to store the
selected voices (registration
setting) to the Registration Memory
before you turn off the Electone
(see page 47).
4.Voice Menus
2 Voice Sections
Strings ¡1
STRINGS (Upper/Lower)
Tutti1 Tutti2 ¡12
TUTTI (Upper/Lower)
Violin ¡2
VIOLIN (Lead)
Chorus ¡13
CHORUS (Upper/Lower)
ContBass PizzBass ¡3
CONTRABASS (Pedal)
Harmonic ¡14
HARMONICA (Upper)
Brass SynBrass ¡4
BRASS (Upper/Lower)
Organ JazzOrgn¡15
ORGAN (Upper/Lower)
Horn ¡5
HORN (Lower)
OrgBass ¡16
ORGAN BASS (Pedal)
Trombone
Trumpet ¡6
TRUMPET (Lead)
Harpsi.
Piano E.Piano ¡17
PIANO (Upper/Lower)
Tuba ¡7
TUBA (Pedal)
Guitar ¡18
GUITAR (Upper/Lower)
Flute ¡8
FLUTE (Lead)
Marimba
Vibrphon ¡19
VIBRAPHONE (Upper/Lower)
Oboe Bassoon ¡9
OBOE (Lead)
SynBass
E.Bass ¡20
ELACTRIC BASS (Pedal)
Clarinet ¡10
CLARINET (Upper/Lower)
Cosmic3
Cosmic1 Cosmic2 ¡21
COSMIC (Upper/Lower)
Saxophon ¡11
SAXOPHONE (Upper/Lower)
USER 3 USER 4
USER 1 USER 2 ¡US
The following chart lists the voices available and their button/page
assignment. The numbers shown in the list correspond to the page numbers
shown in the display and are displayed only when pressing the dotted
buttons.
Some of the voice names are abbreviated: e.g., ContBass for Contrabass .
23
3 Voice Controls and Effects
3 Voice Controls and Effects
<LEAD> ¡1
TOUCH=4 VOL.=24
PAGE
!"
VIOLIN FLUTE
MAX
MIN
OBOE TRUM-
PETTOLOWER
LEAD VOICE
1
The Electone is equipped with two general kinds of functions that can be used to change the
sound of the voices: Voice Controls and Effects.
These are used to change various aspects of the voices, suc h as the volume or octave (footage)
settings, or enhance the sound of the voices, such as with Reverb or Tremolo. They are divided
into two groups: 1) The contr ols/effects selected on the Voice Condition pages. 2) The effects set
by the panel buttons.
Each voice has been given certain factory-preset settings to best enhance its sound. However,
you can also change the settings to suit your pref erences by using the controls described in this
section.
1. Selecting from the Voice Condition Pages
To select the Voice Condition pages for changing the settings:
Choose a voice on the panel, then press that v oice's panel button
twice; If the voice you want to select is already displayed on the LCD
display, press once.
For the Lead Voice example shown below, press the VIOLIN button in the
LEAD VOICE section twice.
Page 1 of the Voice Condition pages is displayed on the LCD display. Each
of the Voice Conditions has page 1 through 4.
Voice Condition – Page 1
Lead Voice
! TOUCH (TOUCH TONE)
See page 24.
" VOL. (VOLUME)
Fine adjustment of the voice volume. See page 20.
24
The Pedal Condition display
Pedal voices do not have the Vibrato
function.
has only two pages: The
3 Voice Controls and Effects
Voice Condition – Page 2
<UPPER>VIB. ¡4
DEPTH=0
PAGE
"
<LEAD>VIB. DELAY=0¡4
DEPTH=0 SPEED=0
PAGE
"#
!
<LEAD> ¡3
„USER VIB.
PAGE
<LEAD> ¡2
FEET=PRE. SYM.=PRE.
PAGE
!"
Press the PAGE buttons to select P age 2.
! FEET
See page 26.
" SYM. (SYMPHONIC)
See page 27.
Voice Condition – Page 3
Press the PAGE buttons to select P age 3.
USER VIB. (User Vibrato)
See page 28.
Voice Condition – Page 4
Press the PAGE buttons to select P age 4.
Lead Voice
Upper Keyboard Voice
(When USER VIB. is ON.)
! DELAY (Lead Voice only)
See page 29.
" DEPTH
See page 29.
# SPEED (Lead Voice only)
See page 29.
The Vibrato function in Page 4
of the Lead Voice is different
from the Upper/Lower Keyboard
Voice.
25
 Loading...