


M a i n F e a t u r e s
Your Yamaha Electone is packed with many sophisticated functions. Yet it is amazingly easy to use. The main features are described here so that you can quickly understand the capabilities of your Electone.
I n c l u d e d a m o n g t h e m a i n f e a t u r e s a r e :
A s t o u n d i n g l y T r u e - t o - l i f e S o u n d s
ThenewAWM(AdvancedWaveMemory)tonegenerationsystemprovidesauthentic,dynamicvoices,making theElectoneatrulyexpressivemusicalinstrument.(Seepage13.)
E x p r e s s i v e T o u c h T o n e
The Touch Tone function provides you with expressive control over the volume and timbre of a voice, making it possible to perfectly reproduce the subtle dynamaic and tonal changes of actual instruments. (See page 15.)
D y n a m i c R h y t h m P a t t e r n s
The Rhythm section of the Electone features authentic drum and percussion sounds, ranging from Waltz to 16 Beatincludingconvenientmetronomefunction.(Seepage16.)TheKeyboardPercussionfunctionisalsoprovided for you to play the realistic percussion sounds from the Lower keyboard and pedalboard. (See page 18 .)
T a b l e o f C o n t e n t s
P a n e l C o n t r o l s ................................................... |
2 |
1 . B a s i c O p e r a t i o n.......................................... |
4 |
Getting Started ......................................................................... |
4 |
Playing Back the Demonstration Songs ................................... |
5 |
Playing Your Electone ................................................................ |
6 |
BasicRegistrations ............................................................ |
6 |
2 . V o i c e S e c t i o n s .......................................... |
1 3 |
Selecting Voices from the Panel ............................................. |
13 |
Setting the volume for the voice sections............................... |
14 |
3 . E f f e c t s ........................................................... |
1 5 |
Touch Tone ............................................................................... |
15 |
Reverb ...................................................................................... |
15 |
Sustain ...................................................................................... |
15 |
4 . R h y t h m s ....................................................... |
1 6 |
Selecting Rhythm Patterns ...................................................... |
16 |
Playing Keyboard Percussion ................................................. |
18 |
PercussionAssignments ................................................... |
19 |
A p p e n d i x .......................................................... |
2 0 |
MIDI ......................................................................................... |
20 |
Troubleshooting ....................................................................... |
23 |
Specifications .......................................................................... |
24 |
MIDI Messages ........................................................................ |
25 |
1. Basic Operation
2 . V o i c e S e c t i o n s
3 . E f f e c t s
4 . R h y t h m s
A p p e n d i x
P a n e l C o n t r o l s
Front
1 REVERB Buttons (See page 15.)
Adjust the Reverb effect for the entire sounds.
2 SUSTAIN Buttons (See page 15.)
Add the Sustain effects to Upper/Lower Keyboard and Pedalboard.
3 Monitor Speakers
Built-in speakers for your monitoring.
4 UPPER KEYBOARD VOICE Section
(See page 13.)
Selects the Upper Keyboard voices and adjusts the volume.
7 PEDAL VOICE Section (See page 13.)
Selects the Pedal voices and adjusts the volume.
8 BASIC REGIST. (Basic Registration)
Buttons (See page 6.)
Select the Basic Registrations.
9 MASTER VOLUME Control (See page 4.)
Adjusts the entire volume.
0 METRONOME/RHYTHM Section
(See page 16.)
Selectsarhythmormetronomepatternandadjustsitsvolume level.
5 LOWER KEYBOARD VOICE Section
(See page13.)
Selects the Lower Keyboard voices and adjust the volume.
6 LEAD VOICE Section (See page 13.)
Selects the LEAD voices and adjusts the volume.
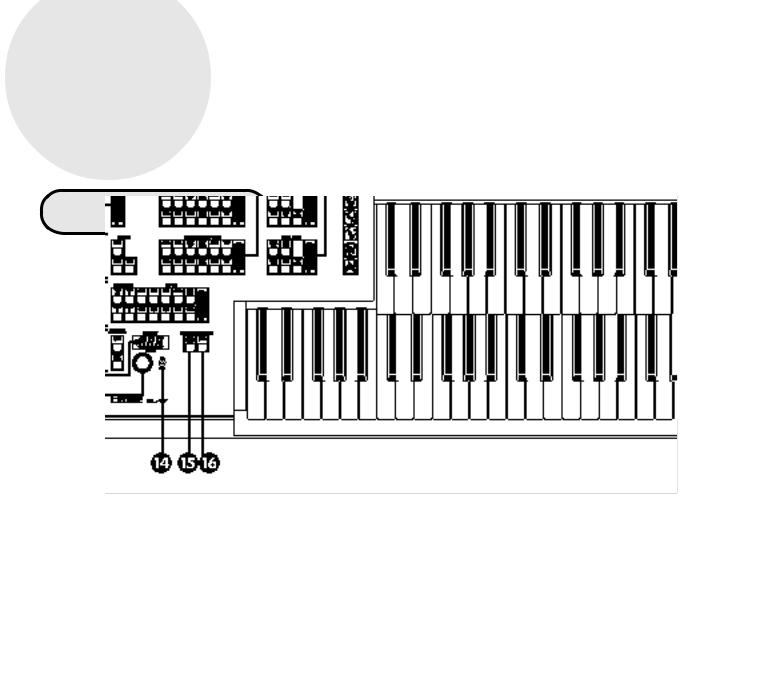
! KEYBOARD PERCUSSION Buttons
(See page 18.)
Used to play the percussion sounds with Lower Keyboard or
Pedalboard.
@ BAR/BEAT TEMPO Display (See page 17.)
Displays the rhythm tempo or bar/beat.
2
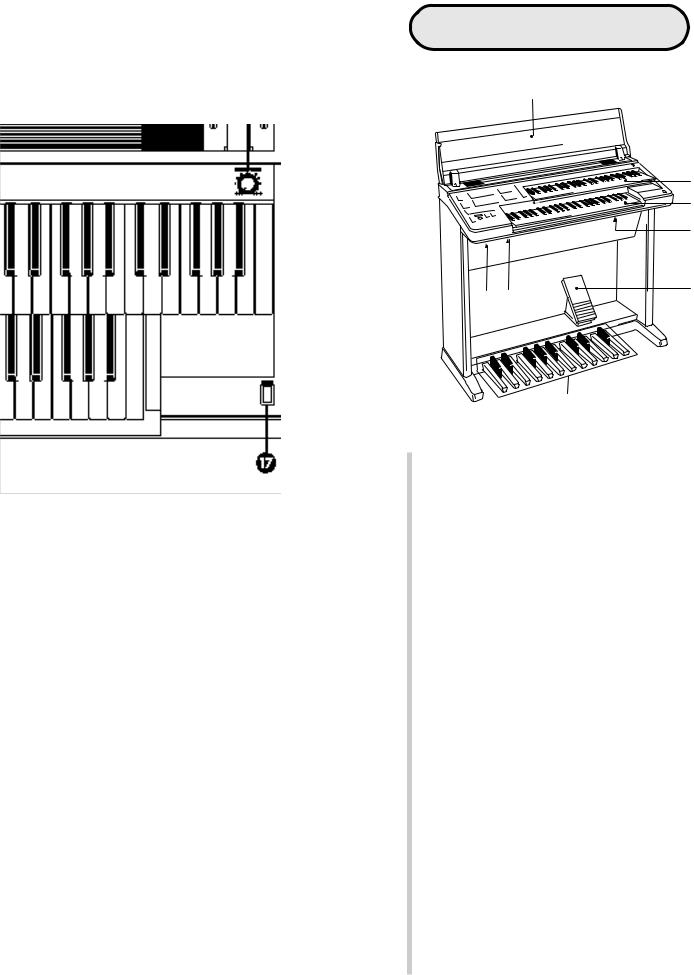
# TEMPO Dial (See page 17.)
Adjusts the rhythm tempo.
$ BAR/BEAT Indicator (See page 17.)
Flashes to the first beat of every measure (or every beat).
% SYNCRO START Button (See page 16.)
Puts the rhythm pattern in "stand-by" and enables the Lower keyboard or Pedalboard to start the rhythm.
^ START Button (See page 16.)
Used to start or stop the rhythm pattern.
& POWER Switch (See page 4.)
TurnstheEL-17on/off.
O t h e r P a r t s ,
C o n t r o l s a n d T e r m i n a l s
18
|
19 |
|
20 |
|
21 |
24 25 |
22 |
|
23
* Key Cover/Music Stand
( Upper Keyboard
) Lower Keyboard
q MIDI Jacks
w Expression Pedal (See page 4.)
Used to adjust the entire volume level during the performance.
e Pedalboard
r AUX. OUT Jack (RCA/Mono)
Thissetofstereooutputs(RCApinjacks)isforconnectionto externalamplification/speakersystems.Typically,theyare for direct connection to a home audio system or cassette deck.
t HEADPHONES Jack
For connection of a stereo or monaural headphone set. Whenheadphonesareconnectedtothisjack,soundtothe Electone'sbuilt-inspeakersystemisautomaticallycutoff, allowing you to play without disturbing others.
3
1 . B a s i c O p e r a t i o n
No matter what your level of playing experience, we rec - ommend that you take the time to go through this basic section. It shows you in the simplest possible manner how t o s t a r t p l a y i n g y o u r E l e c t o n e .
G e t t i n g S t a r t e d
Once you've set up your Electone and plugged the power cord into an electrical outlet, you're ready to get started and play.
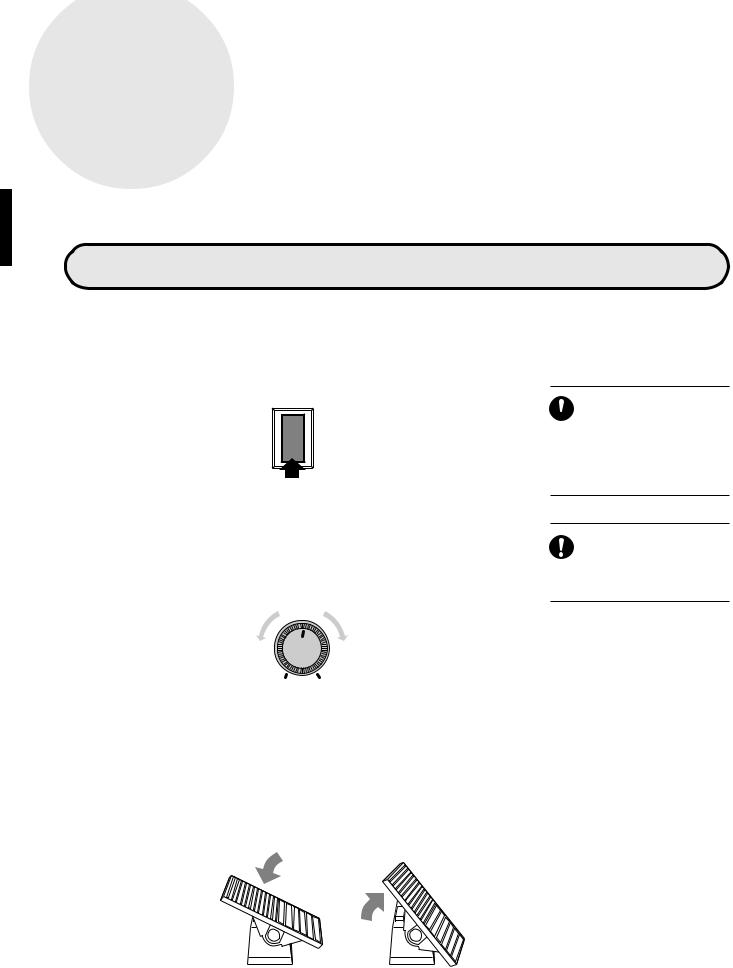
1 Turn on the Electone by pressing the P O W E R s w i t c h .
POWER
Yamaha products are manufac-
 tured specifically for the supply voltageintheareawheretheyaretobesold. If you should move, or if any doubt exists aboutthesupplyvoltage,pleaseconsultwith a qualified technician.
2 Set the MASTER VOLUME control.
TheMASTERVOLUMEcontrolisanoverallcontrolwhichaffectsthevolume of the entire instrument.
MASTER VOLUME
5
4 6
3 7
2 8
1 9 MIN MAX
Turning theElectone offerases all panel settings you have made.
WhentheElectoneisturnedon,BasicRegistration 1 is automatically selected.
P r e s s t h e E x p r e s s i o n p e d a l d o w n w i t h y o u r |
|
3 Thef o oExpressiont . |
pedalalsocontrolstheentirevolumeoftheElectone.Once |
youhavesettheMASTERVOLUMEcontroltoasuitablelevel,youcanusethe Expression pedal to change the volume with your foot as you play.
Louder Smaller
For now, press the pedal down slightly beyond the halfway point.
4
Playing Back the Demonstration Songs
The Electone has five demonstration music pieces for your listening enjoyment. Try playing back the demos
before you start to play.
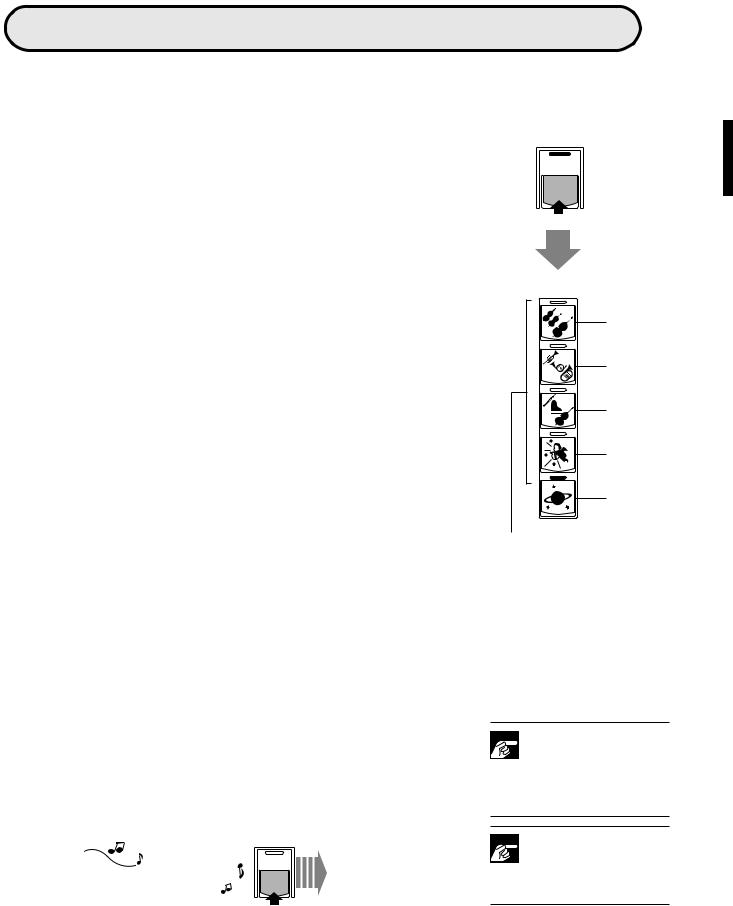
1 Press and hold down the PEDAL/DEMO button.
ThefivelampsintheBASICREGIST.sectionwillstartblinking.
2
Press the Basic Registration button you want |
|||
3 t o p l a y b a c k . |
|
|
|
ThefollowingsarethedemosongsassignedtoeachBasicRegistrationButton: |
|||
|
|
|
|
|
Basic Registration Button 1: |
Eine Kleine Nachtmusik W. A. Mozart |
|
|
Basic Registration Button 2: London Bridge |
English Folk Song |
|
|
Basic Registration Button 3: To a Wild Rose |
E. MacDowell |
|
|
Basic Registration Button 4: |
Twinkle, Twinkle Little Star French Folk Song |
|
|
Basic Registration Button 5: |
Comical Train |
M. Watanabe |
|
|
|
|
PEDAL
DEMO
BASIC
REGIST.
1
1
2
2
3
3
4
4
5
5
These lamps blink in succession.
The demo song you have selected will start.
When playback of the demo song is completed, the lamps will start blinking again, indicating that the Electone is ready to play the demo songs again.
Press the PEDAL/DEMO button again to cancel |
|||||
the stand-by mode. |
|
|
|
|
|
4 Youcanalsocancelthestand-bymodeandstoptheplaybackwhileademo |
|||||
is being played back. |
|
|
|
|
|
|
|
|
|
|
Stand-by mode |
|
|
|
PEDAL |
|
|
|
|
|
|
||
|
During playback |
|
DEMO |
|
|
|
|
|
|
cancelled. |
|
|
|
|
|
|
|
|
|
|
|
|
|
|
|
Stops |
|
||

 During demo playback, only the Basic Registration buttons and
PEDAL/DEMObuttoncanbeused.Allother controls, as well as the keyboard, are temporarily disabled.

 The demo function does not operate while the MDR-4 (the op-
tional Music Disk Recorder), if installed, is played back.
5
P l a y i n g Y o u r E l e c t o n e
As a performance aid, the Electone includes convenient Basic Registrations that let you instantly change the voices and other settings for all of the keyboards, even as you play. Each registration is pre-programmed to be used for a specific music style or instrumental combination.
B a s i c R e g i s t r a t i o n s
TheBasicRegistrationsectionhasfivefactorypresetregistrations,eachwith adifferentsetofvoicesfortheUpper/LowerkeyboardsandPedalboard,and each of which is specially suited for playing in a different music style.
Whenyouturnthepoweron,theElectoneautomaticallyselectsBasicRegistration 1. If another registration has been selected (the lamp on the button willbelit),pressthebuttonforBasicRegistration1.
BASIC
REGIST.
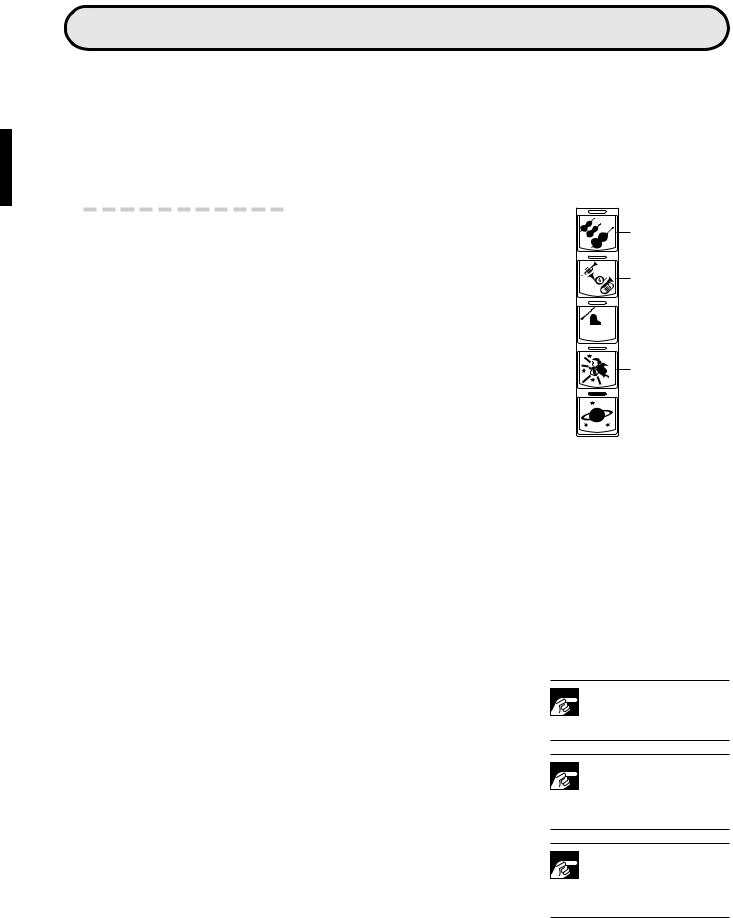
1
Basic Registration 1
2
Basic Registration 2
3

 Basic Registration 3
4
Basic Registration 4
ThechartbelowliststhevoicesthathavebeensetfortheUpper/Lowerkey- |
5 |
|
Basic Registration 5 |
||||||
|
|
||||||||
boards and Pedalboard. |
|
|
|
|
|
||||
|
|
|
|
|
|
|
|
||
|
|
|
|
|
|
|
|
|
|
|
|
Basic Registration 1 |
Basic Registration 2 |
Basic Registration 3 |
Basic Registration 4 |
Basic Registration 5 |
|
||
|
|
|
|
|
|
|
|
|
|
Upper |
Keyboard Voice |
Strings |
Brass |
Flute |
Cosmic(1) |
|
|
Synth.Brass |
|
|
|
|
|
|
|
|
|
|
|
Lower |
Keyboard Voice |
Strings |
Horn |
Piano |
Cosmic2 |
|
|
Cosmic3 |
|
|
|
|
|
|
|
|
|
|
|
Pedal |
Voice |
Contrabass |
Tuba |
Contrabass |
Cosmic2 |
|
|
Synth.Bass |
|
|
|
|
|
|
|
|
|
|
|
Now, try out all five Basic Registrations with the following music examples. Press the appropriate buttons to select the registrations. Each music example has been chosen to best suit its companion registration.

 When the Electone is turned on,
Basic Registration 1 is automatically
selected.

 The voices, Cosmic 2, Cosmic 3,
Synth.BrassandSynth.Bass,usedin
theBasicRegistrationsarenotselectablefrom the panel voice buttons.

 Therhythm(exceptformetronome) volume and tempo will be reset to each default value (volume: 0, tempo: 120)
whenoneoftheBasicRegistrationsisselected.
6
 Loading...