

Page 1

Owner's Guide
Bedienungsanleitung
Manuel de l'utilisateur
Manual de instrucciones
YAMAHA
DIGITAL DRUMS
YAMAHA
Page 2

Contents
Nomenclature-
O
Enjoying Manual Percussion-
O
® How To Use The Auto Rhythm Section0 Taking Advantage Of Percussion Ensemble© Using MIDI Capability
© External Jacks
© Optional Accessories
© Taking Care Of Your Digital Drums--------------------© Specifications
-------------------
-------------------
-------------------15
--------------------
18
13
16
17
10
Table des matières
Nomenclature-
O
Le plaisir de la percussion manuelle-
©
Utilisation de la section de rythmes automatiques-
©
Utilisation des ensembles de percussion
O
Utilisation des fonctions MIDI
Prises externes
Accessoires en option-
o
Mesures de précaution
©
et entretien de la boîte à rythmes numériqueSpécifications----------------18
---------------
-----------------
15
16
-----------------13
10
17
Inhalt
O Bezeichnung der Funktionselemente© Manuelles Percussionsspiel
© Einsatz des automatischen Rhythmusteils—
O Einsatz des Percussion-Ensemblespiels
© Nutzung der MIDI-Kompatibilitat-----------------------© Externe Anschlußbuchsen
© Sonderzubehör
© Pflege des Digital-Schlagzeugs
© Technische Daten
--------------------
-------------------
------------------
-------------------16
--------------------
---------------4
-------------
15 .
17
18
13
10
Indice
O Nomenclatura-
Para disfrutar de percusión manual
Cómo emplear la sección de ritmos automáticosCómo sacar partido al conjunto de percusión—
o
Empleo de la capacidad de MIDI
Tomas externas
Accesorios opcionales---------------
©
Cuidado de su de batería digital-
©
Especificaciones
©
---------------
--------------
-----------------
------------------
15
16
18
4
10
13
17
Page 3

Before Playing
Vor dem Spiel
Avant l’exécution
Antes de tocar
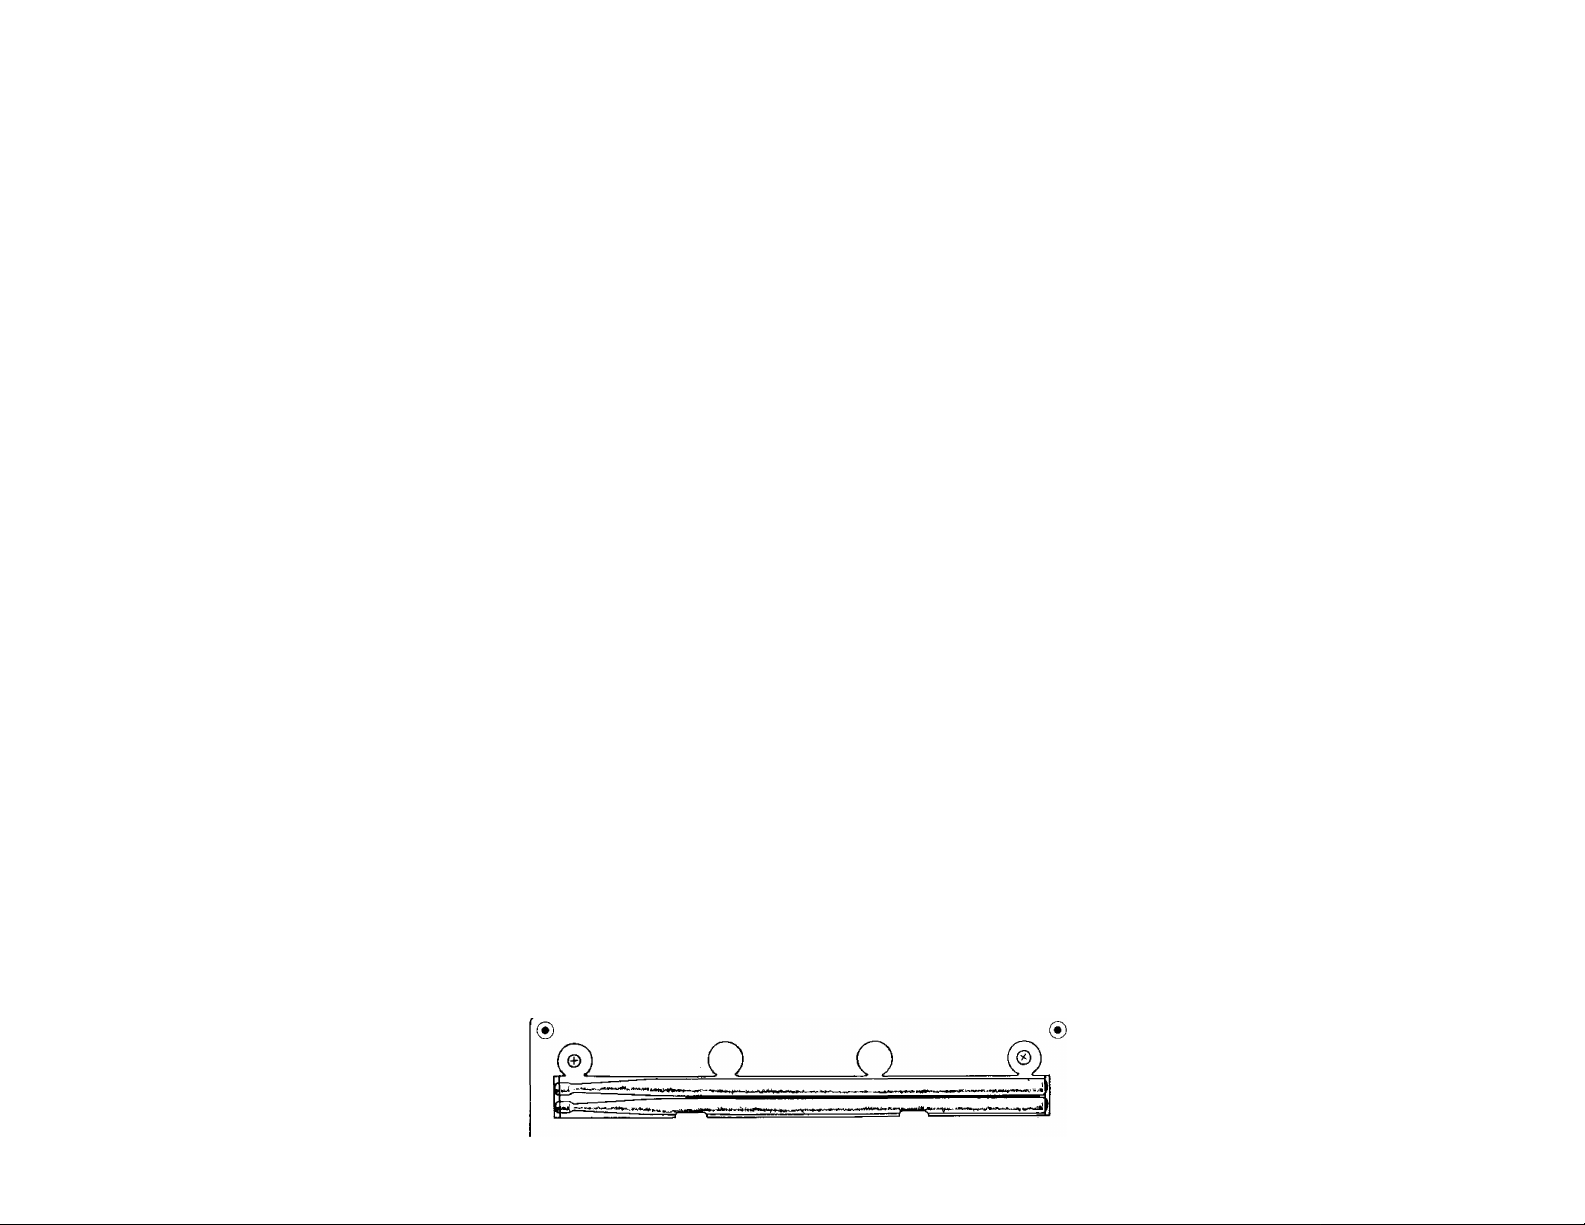
Inserting Batteries
Remove the battery compartment cover on
the bottom of the instrument and insert six
1.5V SUM-2 (AM-2), R-14 (LR-14), X”
size or equivalent batteries (sold
separately), making sure that the polarities
are placed as directed in the compartment
Replace the cover, ensuring that it locks
securely in place.
Optional Power Adaptors
Power Adaptor PA-1 /PA-1 B/PA-3/PA4/PA-40 is available for household
current No other adaptor is usable, so
when you purchase a power adaptor
please ensure that it is model
PA-1 /PA-1 B/PA-3/PA-4/PA-40.
For An Even Bigger Sound
Although you’ll be happy with the sound
from the built-in speaker, you can enhance
and create an even more satisfying sound
if you connect the DD-5 to a bigger
speaker system. Try using your home
stereo or other PA system.
Einlegen der Batterien
Entfernen Sie den Batteriefachdeckel am
Boden des Instruments, und legen Sie
sechs Batterien (nicht mitgeliefert) des
Typs 1,5 V R-14 (LR-14) Größe "C" oder
gleichwertige Batterien ein. Achten Sie
dabei auf die korrekte Ausrichtung der
Plus- und Minuspole wie im Inneren des
Batteriefachs angezeigt. Setzen Sie dann
den Batteriefachdeckel so wieder an, daß
dieser sicher einrastet.
Optionaler Netzadapter
Haushaltsstrom: Der Netzadapter PA1/PA-1B/PA-3/PA-4/PA-40 dient für den
Heimbetrieb des Instruments. Andere
Adaptertypen sind nicht verwendbar.
Achten Sie deshalb beim Kauf eines
Netzadapters unbedingt darauf, daß es
sich um das richtige Modell (PA-1/PA1B/PA-3/PA-4/PA-40) handelt.
Für noch größere Klangfülle
Obwohl Sie der Klang aus dem
eingebauten Lautsprecher wahrscheinlich
vollauf zufriedenstellt, läßt sich die
Klangfülle durch den Anschluß eines
größeren Lautsprechers an das DD-5 noch
zusätzlich steigern. Versuchen Sie es
einmal mit Ihrer Stereoanlage oder
anderen PA-Systemen.
Mise en place des piles
Enlever le couvercle du compartiment des
piles situé à la partie inférieure de
l’instrument et placer six piles de 1,5 V
SUM-2 (AM-2), R-14 (LR-14), format X”
ou des piles équivalentes (vendues
séparément), en prenant soin de respecter
les indications de polarité données sur le
côté du compartiment. Replacer le
couvercle en s’assurant qu’il est
correctement bloqué en place.
Adaptateurs secteur en option
Courant secteur: Seul un adaptateur PA1/PA-1B/PA-3/PA-4/PA-40 convient
dans le cas de courant secteur. Aucun
autre adaptateur n’est utilisable et il est
donc nécessaire, avant d’effectuer son
achat, de vérifier qu’il s’agit bien d’un
modèle PA-1 /PA-1B/PA-3/PA-4/PA-40.
Un son encore plus puissant
Bien qu’il soit certain que le son produit
par les haut-parleurs incorporés donnera
entière satisfaction, il est possible d’obtenir
un son encore plus agréable en
connectant le DD-5 à un haut-parleur plus
puissant. Essayer d’utiliser une chaîne
stéréo ou d’autres équipements PA.
Inserción de las pilas
Extraiga la tapa del compartimiento de las pilas
de la parte inferior del instrumento e inserte seis
pilas de 1,5V SUM-2 (AM-2), R-14 (LR-14),
tamaño ‘X” o equivalentes (opcionales), con la
polaridad indicacla en su compartimiento.
Vuelva a colocar la tapa, asegurándose de que
quede encajada en su lugar.
Adaptadores de alimentación opcionales
Para la corriente de la red está disponible el
adaptador de alimentación PA-l/PA-lB/PA3/PA-4/PA-40. No es posible emplear otro
adaptador, por lo tanto, cuando adquiera uno,
cerciórese de que sea el modelo
PA-1 /РА-1B/PA-3/PA-4/PA-40.
Para conseguir un sonido todavía más potente
Aunque estará satisfecho con el sonido
procedente de los altavoces incorporados, podrá
obtener un sonido todavía más satisfactorio si
conecta el DD-5 a un sistema de altavoces
mayor. Pruebe a emplear su sistema estéreo u
otro sistema de audiodifusión.
Page 4
d>
YAMAHA
RftD ASSIGN[BASS DRUM^SNARE DRUM-*TOM t-*TOM 2-*TOM STRIDE CYMBAL*
I
HAND CLAPS-COWBELL^RIMSHOT- HH CLOSED*-HH OPEN- CONGA-
PAD SSIGN STA
IT/STOP INTRO/FILLIN POWER
VOLUME TEMPO
<>
____________
7^^—.-------------7:
^
-----------
. -.-izr',
----------------------------------------------
Сб)
----------------------------------------------------------------------------------------------------------------------(
©
{
©
©
Cu
O:
D№VTM-OmJMS
Page 5
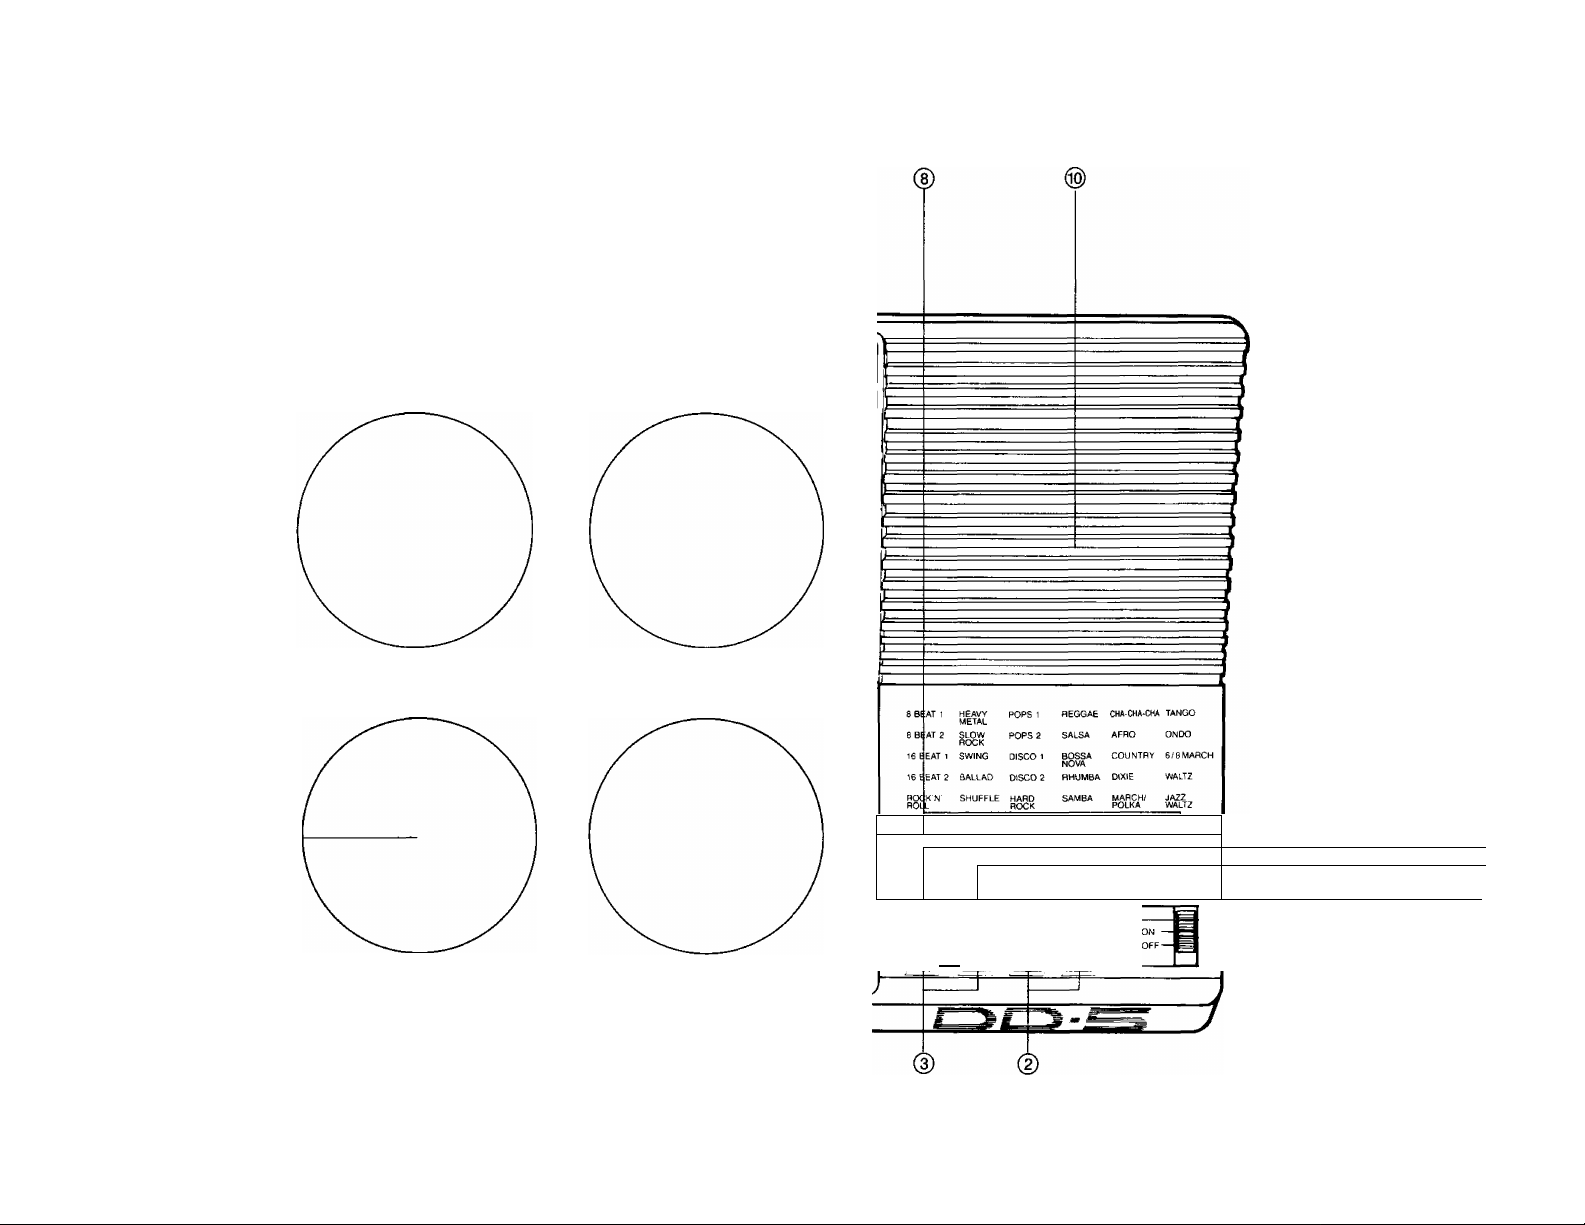
Nomenclature
Bezeichnung der
Funktionselemente
Nomenclature
Nomenclatura
© Power Switch
® Tempo Controls
® Volume Controls
® Power/Tempo Indicator
® Intro/Fill In Selector
® Start/Stop Selector
© Pad Assign Button
® Rhythm Selectors
® Percussion Pads
® Speaker
® Percussion Sticks
Yamaha’s Digital Drums DD-5 comes with
percussion slicks, which are located in a
slot on the bottom of the instrument.
Please do not tap the percussion pads
with any object other than these
percussion sticks.
© Netzschalter
© Temporegler
© Lautstärkeregler
© Netz-/Tempoanzeige
® Einleitung-/Fill-In-Taste
© Start-ZStopptaste
® Schlagflächen-Zuordnungstaste
© Rhythmus-Wahltasten
© Schlagflächen
© Lautsprecher
® Schlagstöcke
Yamahas Digital-Schlagzeug DD-5 wird mit
Schlagstöcken geliefert, die sich in einem
Fach an der Unterseite des Instruments
befinden. Bitte klopfen Sie nicht mit
anderen Gegenständen als diesen
Schlagstöcken auf die Schlagflächen.
© Interrupteur d’alimentation (POWER)
© Commandes de tempo (TEMPO)
© Commandes de réglage du volume
(VOLUME)
© Témoin d’alimentation/tempo
(POWER/TEMPO)
© Sélecteur introduction/fill-in
(INTRO/FILL IN)
© Sélecteur de départ/arrt (START/STOP)
© Touche d’affectation des pads (PAD
ASSIGN)
© Sélecteurs de rythme
© Pads de percussion
© Haut-parleur
© Baguettes de percussion
La boîte à rythmes numérique DD-5 de
Yamaha comprend des baguettes de
percussion qui sont placées dans une
fente à la partie inférieure de l’instrument.
Ne jamais battre les pads de percussion
avec un objet autre que les baguettes
fournies.
© Interruptor de alimentación
© Controles del tempo
© Controles de volumen
© Indicador de alimentación/tempo
© Selector de preludio/relleno
© Selector de inicio/parada
© Botón de asignación de pulsadores
© Selectores de ritmo
© Pulsadores de percusión
© Altavoz
© Palillos de percusión
La batería digital DD-5 Yamaha se suministra
con palillos de percusión, que ^tán situados en
una ranura de la parte inferior del instrumento.
No golpee los pulsadores de percusión con
ningún objeto excepto los palillos de percusión.
Page 6
Enjoying Manual
Manuelles
Le plaisir de la
Para disfrutar de
Percussion
This is the main function of the Digital
Drums DD-5. When the POWER switch 0
is “ON”, it is possible to hear percussion
sounds when tapping the PERCUSSION
PADS 0 with the PERCUSSION STICKS
0. You can have fun playing the DD-5 just
like an acoustic percussion set. Also, the
pads are equipped with a touch-level
sensor, which means you can obtain
different volume levels depending on how
hard you tap the pad.
1. Take the PERCUSSION STICKS 0 out
of the slot on the bottom of the
instrument
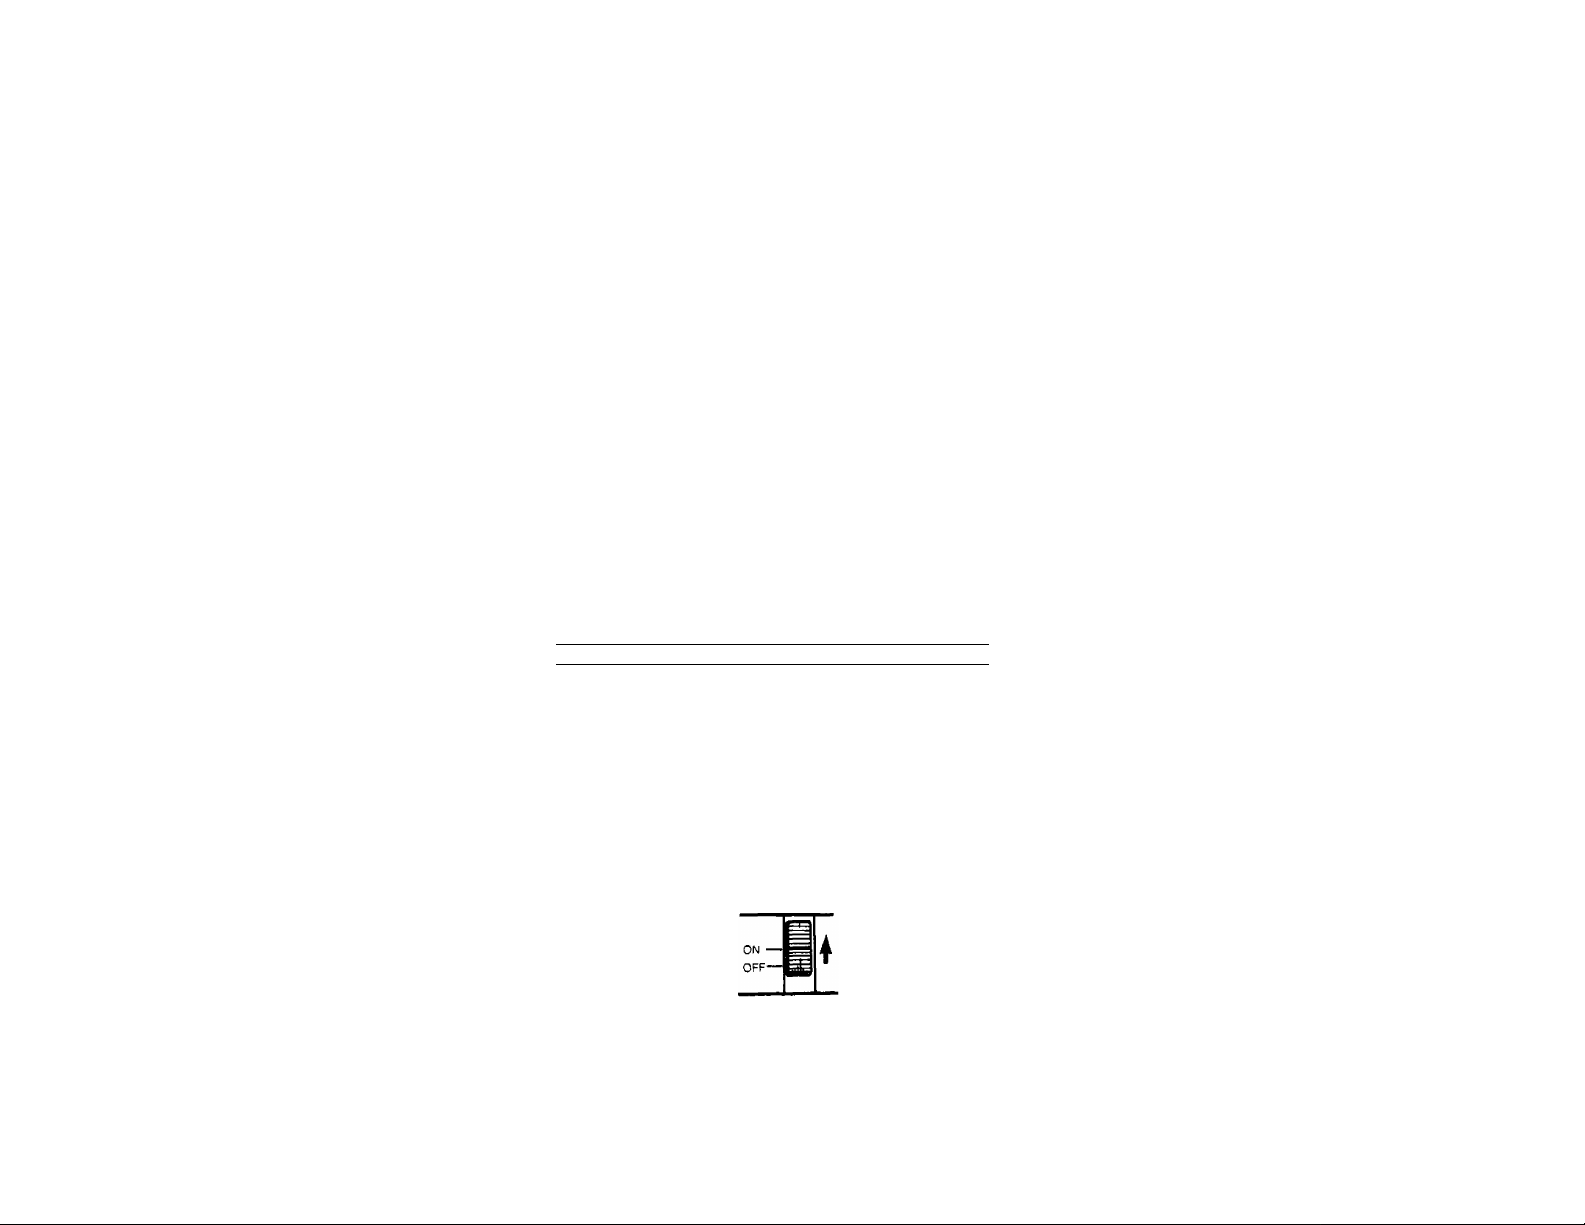
2. Set the POWER switch © to the “ON”
position.
Percussionsspiel
Dies ist die Hauptfunktion des DigitalSchlagzeugs DD-5. Bei Stellung des
Netzschalters (POWER) © auf “ON” wird
durch Trommeln mit den Schlagstöcken
0 auf die Schlagflächen © der
Schlagzeugklang erzeugt. Das DD-5 macht
Spaß, indem Sie es einfach wie ein
akustisches Schlagzeug spielen. Darüber
hinaus sind die Schlagflächen mit einem
schlagstärkenempfindlichen Sensor
ausgerüstet, d.h. daß je nach Schlagstärke
der entsprechende Lautstärkegrad erzielt
wird.
1. Entnehmen Sie die Schlagstöcke 0 aus
dem Fach am Boden des Instruments.
2. Stellen Sie den Netzschalter (POWER)
© auf “ON”.
ON —
OFF—I
percussion manuelle
C’est la fonction principale de la boîte à
rythmes numérique DD-5. Lorsque
l’interrupteur POWER © est mis sur la
position “ON”, il est possible d’entendre un
son de percussion en tapant sur les PADS
DE PERCUSSION © à l’aide des
BAGUETTES DE PERCUSSION 0. On
peut utiliser la boîte DD-5 exactement
comme un ensemble de percussion
acoustique. De plus, les pads sont équipés
d’un capteur de force d’impact, ce qui
signifie que le son obtenu sera différent
suivant la force avec laquelle on bat les
pads.
1. Sortir les BAGUETTES DE
PERCUSSION 0 de la fente à la partie
inférieure de l’instrument.
2. Mettre l’interrupteur POWER © sur la
position “ON”.
POWER
I
percusión manual
Ésta es la principal función de la batería digital
DD-5. Cuanpo ponga el interruptor (POWER)
© en “ON”, podrá escuchar sonidos de
percusión golpeando los pulsadores de percusión
© con los páliUos de percusión 0. Usted podrá
disfrutar tocando el DD-5 al igual que una
batería acústica. Además, los pulsadores
disponen de un sensor de nivel de toque que le
permitirá obtener diferentes niveles de volumen
de acuerdo con la fuerza con la que golpee los
pulsadores.
1. Extraiga los palillos de percusión 0 de la
ranura de la parte inferior del instrumento.
2. Ponga el interruptor POWER © en la
posición “ON”.
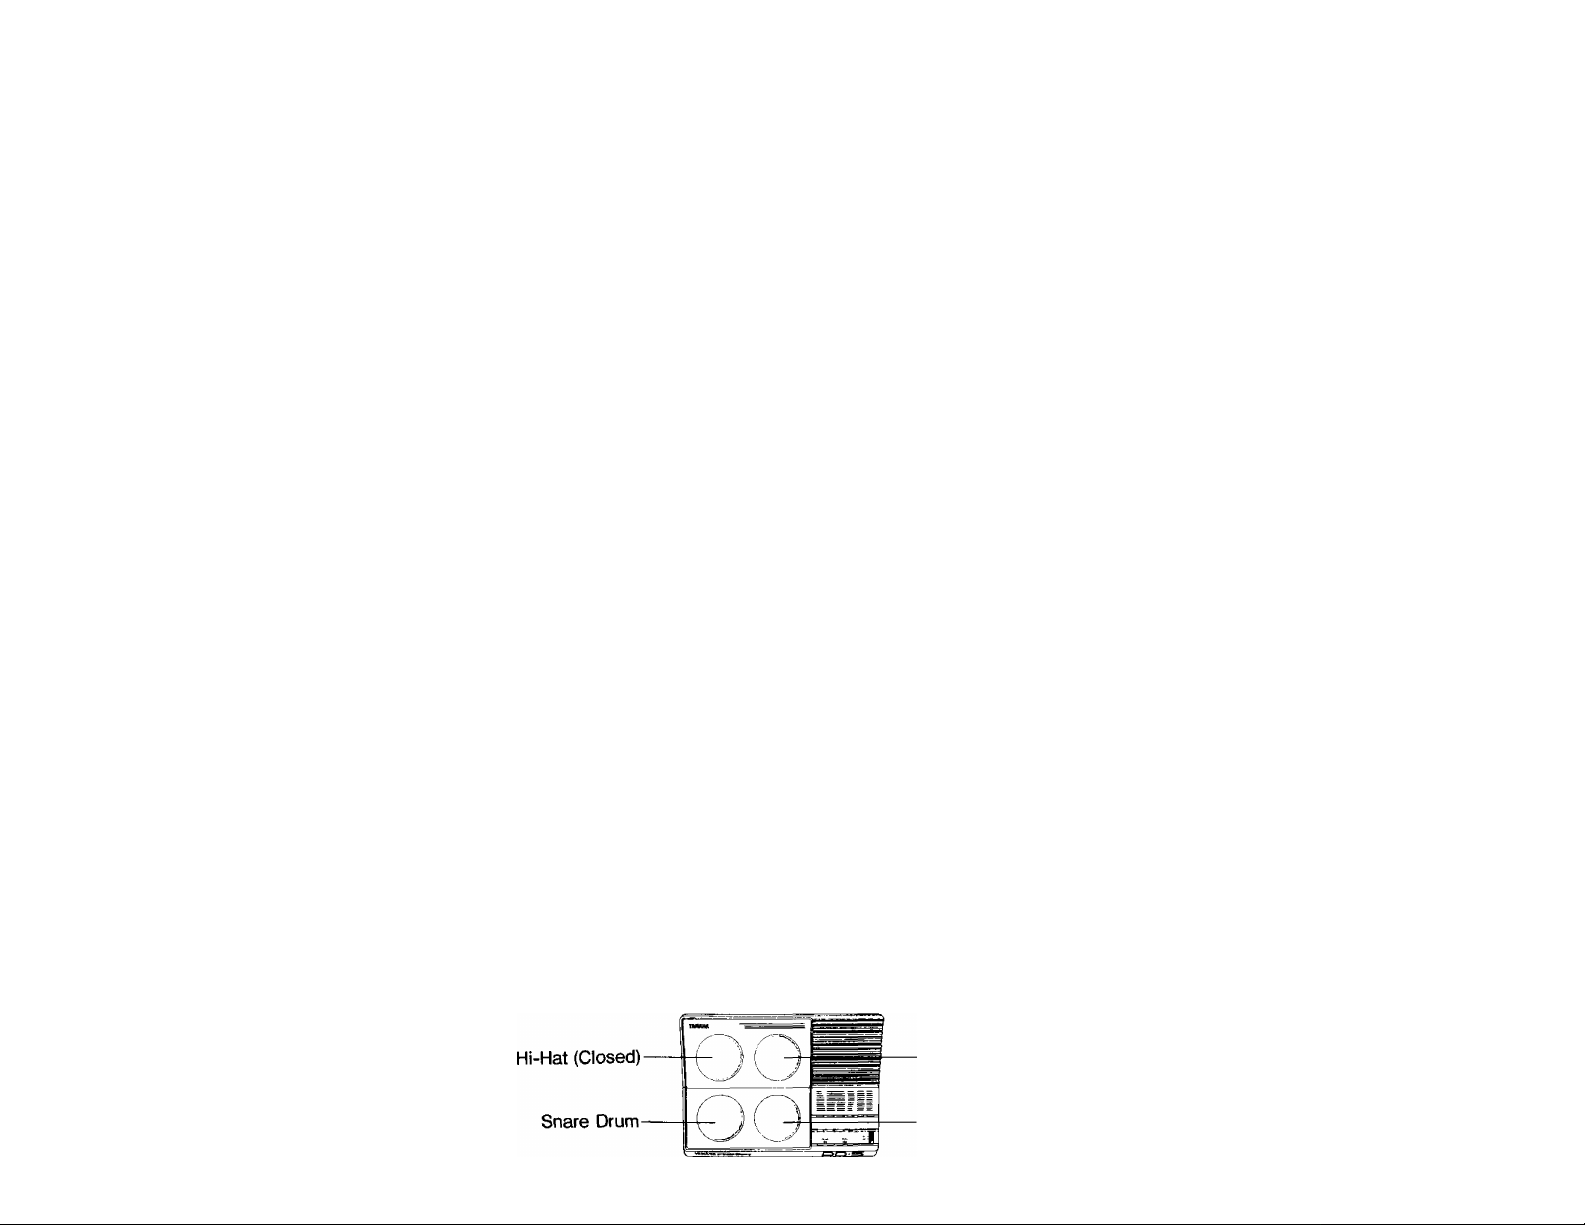
3. Tap any of the PERCUSSION PADS ©
to hear percussion sounds.
• The percussion sounds are preset as
follows.
3. Schlagen Sie dann versuchsweise auf
jede der Schlagflächen ®, und machen
Sie sich mit deren Percussionsklang
vertraut.
• Die Percussionsklänge sind wie folgt
voreingestellt.
3. Battre un des PADS DE PERCUSSION
© pour obtenir des sons de percussion
• Les sons de percussion sont préréglés
de la manière suivante.
Ride Cymbal
Bass Drum
3. Para oír sonidos de percusión, golpee
cualquiera de los pulsadores de percusión ©.
• Los sonidos de percusión han sido
preajustados de la forma siguiente.
Page 7

PAD ASSIGN
This function allows you to assign any
percussion sound Indicated on the panel
above the pads to any percussion pad.
SCHLAGFLÄCHENZUORDNUNG
Über diese Funktion kann jedes beliebige
über den Schlagflächen angegebene
Percussionsklangmuster einer bestimmten
Schlagfläche zugeordnet werden.
AFFECTATION DES PADS
Cette fonction permet d’affecter n’importe
quel son de percussion indiqué sur la face
avant au-dessus des pads à n’importe quel
pad.
Asignación de pulsadores (PAD ASSIGN)
Esta fundón le permitirá asignar cualquier
sonido de percusión indicado en el panel situado
sobre los pulsadores de percusión a cualquiera
de éstos.
1. Press the PAD ASSIGN button ©.
When you tap the pads, the preset
percussion sounds can be heard.
2. To assign other sounds to the pads,
depress and hold the PAD ASSIGN
button ©. With each tap, the percussion
sound will change (percussion sounds
change in the order indicated at the top
of the panel).
3. To assign a particular percussion
sound to a pad, release the PAD
ASSIGN button © after that percussion
sound is heard when the pad is tapped.
PAD ASSIGN
I
DRUM-^SNARE DRUM^TOM 1^TOM 2^TOM 3-^RIDE CYMBAL
I ^ HAND CLAPS^COWBELL^IMSHOT^HH CLOSED^HH OPEN-CONGA*^
1. Drücken Sie die SchiagflächenZuordnungstaste PAD ASSIGN ©. Ein
Anschlägen der Schlagflächen erzeugt
den voreingestellten Percussionsklang,
2. Halten Sie, um den Schlagflächen
weitere Percussionsmuster zuzuordnen,
die PAD ASSIGN-Taste © gedrückt.
Der Percussionsklang ändert sich mit
jedem Schlag (die Percussionklänge
wechseln in der Reihenfolge, in der sie
oben auf der Fronttafel des Geräts
angegeben sind).
3. Um einer Schlagfläche ein bestimmtes
Percussionsmuster zuzuordnen ist die
Taste PAD ASSIGN © bei Erklingen
dieses Klangmusters (nach Anschlägen
der Schlagfläche) freizugeben.
1. Appuyer sur la touche PAD ASSIGN ©.
Lorsqu’on bat les pads, les sons de
percussion préréglés peuvent être
entendus.
PAD ASSIGN
2. Pour affecter d’autres sons aux pads,
appuyer sur la touche PAD ASSIGN ©
et la maintenir enfoncée. Le son de
percussion changera à chaque
battement (les sons de percussion
changent dans l’ordre indiqué sur le
haut du tableau avant.).
3. Pour affecter un son de percussion
particulier à un pad, relâcher la touche
PAD ASSIGN © lorsque le son voulu
est obtenu en battant le pad concerné.
1. Presione el botón PAD ASSIGN ©.
Cuando golpee los pulsadores, podrá oír los
sonidos preajustados.
2. Para asignar otros sonidos a los pulsadores,
mantenga presionado el botón PAD
ASSIGN ©. Cada vez que golpee el
pulsador, el sonido de percusión cambiará
Oos sonidos de percusión cambiarán en el
orden indicado en la parte superior del
panel).
3, Para asignar un sonido de percusión
particular a un pulsador, suelte el botón
PAD ASSIGN © después de haber oído tal
sonido al golpear el pulsador.
Page 8
How To Use The
Einsatz des
Utilisation de la
Cómo emplear la
Auto Rhythm Section
This section offers you an extraordinary
total of 30 different programmed rhythms,
all of which are listed on the panel. PCM
digital technology ensure lifelike
reproduction.
1. Switch On
Slide the POWER switch © to the “ON”
position. The POWER/TEMPO indicator ©
will then illuminate.
automatischen
Rhythmusteils
Der Rhythmusteil bietet eine enorme
Auswahl von 30 verschiedenen,
programmierten Rhythmusmustern, die
komplett an der Fronttafel aufgeführt sind.
PCM-Digltal-Technologie gewährleistet
“lebensechte'' Kiangreproduktion.
8 BEAT 1
8 BEAT 2
16 BEAT 1
16 BEAT 2
ROCK'M'
ROLL
íi—
1. Einschalten
Stellen Sie den POWER-Schalter © zum
Einschalten auf “ON”. Die Anzeige
POWER/TEMPO 0 leuchtet daraufhin auf.
HEAVY
METAL
SLOW
ROCK
SWING
BALLAD
SHUFFLE
POPS 1
POPS 2
DISCO 1
DISCO 2
HARD
ROCK
section de rythmes
automatiques
Cette section offre un total extraordinaire
de 30 rythmes programmés différents, dont
la liste est donnée sur la tableau avant. La
technologie numérique de modulation par
codage d'impulsion (PCM) assure une
reproduction absolument fidèle.
REGGAE
SALSA
BOSSA
NOVA
RHUMBA
SAMBA
Ì ' ■■ )
CHA-CHA-CHA
AFRO
COUNTRY
DIXIE
MARCH/
POLKA
1. Mise sous tension
Faire coulisser l’interrupteur POWER ©
sur la position “ON”. Le témoin
POWER/TEMPO 0 s’allume alors.
-------
J
TANGO
ONDO
6/8 MARCH
WALTZ
JAZZ
WALTZ
Ú
............
j
sección de ritmos
automáticos
Esta sección ofrece un extraordinario total de 30
ritmos programados diferentes, todos los cuales
están indicados en el panel superior. La
tecnología digital de PCM asegura una
reproducción natural.
1. Coneidón de la alimentación
Deslice el interruptor POWER © hasta la
posición “ON”. El indicador de
alimentación/tempo 0 se encenderá.
POWER
Page 9

2. Adjust The Volume
Set the volume level by pressing the
VOLUME controls ©.
• The DD-5 offers four volume levels.
When the POWER switch is first
switched “ON”, the volume level is
preset to third highest position (one
below MAX.).
2. Einstellen der Lautstärke
Stellen Sie den gewünschten
Lautstärkepegel durch Drücken der
VOLUME-Tasten © ein.
• Das DD-5 bietet vier Lautstärkestufen.
Bei Einschalten des Instruments
(POWER-Schalter auf wird der
Lautstärkepegel automatisch auf die
dritthöchste Lautstärkestufe, d.h. eine
Stufe unter dem maximalen (MAX.)
Niveau, eingestellt.
2. Réglage du volume
Régler le volume sonore en appuyant sur
les commandes VOLUME ©.
• La boîte DD-5 permet quatre niveaux
sonore. Lorsque l'interrupteur POWER
© est mis sur “ON”, le volume sonore
est automatiquement réglé au troisième
niveau (un niveau au-dessous du
niveau MAXI.)
VOLUME
2. Ajuste del volumen
Ajuste el nivel del volumen presionando los
controles VOLUME ©.
• El DD-5 ofrece cuatro niveles de volumen.
Cuando ponga el interruptor POWER en
“ON” por primera vez, el nivel del volumen
se preajustará a la tercera posición (una
inferior a MAX.).
3. Start The Rhythm
Press the START/STOP selector ©. The
“8 Beat 1” rhythm will then start and the
POWER/TEMPO indicator © will flash to
indicate the first beat of each bar.
• The POWER/TEMPO indicator will
flash when an auto rhythm is played.
4. Set The Tempo
Adjust the tempo as you like by using the
TEMPO controls ©. ► is for increasing the
tempo and ◄ is for decreasing the tempo.
• The tempo can be set from 32 to J-
280.
• To set the preset tempo {J=120), press
both controls at the same time.
• The POWER/TEMPO indicator will
flash to indicate the first beat of each
bar.
3. Starten des Rhythmus
Drücken Sie die Start-/Stopptaste
(START/STOP) ®. Der ^^8 Beat r~
Rhythmus setzt daraufhin ein, und die
POWER/TEMPO-Anzeige 0 blinkt beim
ersten Taktschlag jedes Takts.
• Die POWER/TEMPO-Anzeige blinkt
ebenfalls während des Spielens eines
automatischen Rhythmusmusters.
START/STOP
4. Tempoeinstellung
Stellen Sie mit den TEMPO-Reglern ® das
gewünschte Tempo ein. Drücken Sie die
Taste ► zur Erhöhung und die Taste ◄ zur
Reduzierung des Tempos.
Das Tempo ist von J = 32 bis J = 280
einstellbar.
Drücken Sie zum Einschalten des
voreingestellten Tempos (J = 120)
beide Tasten gleichzeitig.
Die POWER/TEMPO-Anzeige blinkt
beim ersten Taktschlag jedes Takts.
3. Départ d’un rythme
Appuyer sur le sélecteur START/STOP ®.
Le rythme “8 BEAT 1” commence alors et
le témoin POWER/TEMPO 0 se met à
clignoter pour indiquer le premier temps
de chaque mesure.
• Le témoin POWER/TEMPO 0 clignote
chaque fois qu’un rythme automatique
est joué.
4. Réglage du tempo
Régler le tempo selon ses propres goûts
en utilisant les commandes TEMPO ©. La
touche ◄ permet d’accélérer le tempo,
alors que la touche ► permet de le ralentir.
TEMPO
• Le tempo peut être réglé entre J = 32
et J = 280.
• Pour rétablir le tempo préréglé ( J = 120),
appuyer sur les deux touches en même
temps.
• Le témoin POWER/TEMPO 0 se met à
clignoter pour indiquer le premier temps
de chaque mesure.
3. Inicio del ritmo
Presione el selector START/STOP ®. Se
iniciará el ritmo “8 BEAT 1”, y el indicador de
alimentación/tempo 0 parpadeará para indicar
el primer tiempo de cada compás.
• El indicador de alimentación/tempo
parpadeará cuando se reproduzca un ritmo
automático.
4. Ajuste del tempo
Ajuste el tempo a su gusto empleando los
controles TEMPO ©. ► es para aumentar el
tempo, y 4 para disminuirlo.
EI tempo puede ajustarse de J = 32 a # —
280.
Para establecer el tempo preajustado ( J =
120), presione simultáneamente ambos
controles.
El indicador de alimentación/tempo
parpadeará para indicar el primer tiempo de
cada compás.
Page 10

5. Stop The Rhythm
Press the START/STOP selector 0 again
and the rhythm will stop.
5. Stoppen des Rhythmus
Drücken Sie zum Stoppen des Rhythmus
die START/STOP-Taste 0 noch einmal.
START/STOP
5. Arrêt du rythme
Appuyer à nouveau sur le sélecteur
START/STOP 0 pour arrêter le rythme.
5. Parada del ritmo
Vuelva a presionar el botón START/STOP 0
y el ritmo se pararl
6. Select Another Rhythm Pattern
Select any rhythm pattern you desire by
using the six RHYTHM selectors 0.
The 30 rhythm patterns are divided into
six groups (corresponding to the six
selectors), with five patterns in each
group.
When you press one of the RHYTHM
selectors 0, the rhythm pattern listed at
the top of the column above the
selector you pressed will play.
If you press the same selector again,
the pattern listed immediately below the
previous one will play. (Rhythm patterns
are selected in order from top to bottom
for all groups.)
6. Wahl eines anderen Rhythmusmusters
Durch Drücken der Rhythmus-Wahltasten
(RHYTHM) 0 können Sie jedes beliebige
Rhythmusmuster einstellen.
8 BEAT 1
8 BEAT 2
16 BEAT 1 SWING
16 BEAT 2
ROCK’N'
ROLL ROCK
HEAVY
METAL
SLOW
ROCK
BALLAD
SHUFFLE
POPS 1
POPS 2
DISCO 1
DISCO 2
HARD
Die 30 Rhythmusmuster sind in sechs
Gruppen unterteilt (entsprechend den
sechs Tasten) mit fünf
Rhythmusmustern in jeder Gruppe.
Bei Drücken einer der RHYTHM-Tasten
0 wird das zuoberst angegebene
Rhythmusmuster über der gedrückten
Rhythmus-Wahltaste erzeugt.
Bei erneutem Drücken der gleichen
Taste erklingt das nächste, darunter
aufgeführte Rhythmusmuster usw.
(Rhythmusmuster werden für alle
Gruppen in der Reihenfolge von oben
nach unten gewählt.)
6. Sélection d’un autre rythme
Sélectionner n’importe quel rythme en
utilisant les six sélecteurs de rythme 0.
REGGAE
SALSA AFRO
BOSSA
NOVA
RHUMBA DIXIE
SAMBA MARCH/
CHA-CHA-CHA
COUNTRY
POLKA
TANGO
ONDO
6/8 MARCH
WALTZ
JAZZ
WALTZ
Les 30 motifs rythmiques sont divisés
en six groupes (correspondant aux six
sélecteurs) qui comprennent cinq
rythmes chacun.
Lorsqu’on appuie sur un des sélecteurs
de rythme 0, le premier rythme de la
colonne située au-dessus du sélecteur
sollicité sera joué.
Si on appuie une deuxième fois sur le
même sélecteur, le rythme indiqué
immédiatement au-dessous du
précédent sera joué (Les rythmes de
chaque groupe sont sélectionnés de
haut en bas et dans l’ordre indiqué).
6. Selección de otro patrón rítmico
Elija cualquier patrón rítmico que desee
empleando los seis selectores de ritmo 0.
Los 30 patrones rítmicos se dividen en seis
grupos (correspondientes a los seis
selectores), con cinco patrones en cada
grupo.
Cuando presione uno de los selectores de
ritmo 0, se reproducirá el patrón rítmico
indicado en la parte superior de la columna
situada sobre el selector.
Si vuelve a presionar el mismo selector, se
reproducirá el patrón rítmico situado
inmediatamente debajo del anterior. (Los
patrones rítmicos se seleccionan por orden
de la parte superior a la inferior para todos
los grupos).
Page 11

7. Adding Effects
Press the INTRO/FILL IN selector © when
an auto rhythm is playing to add a fill-in
pattern.
7. Hinzufügen von Effekten
Drücken Sie die Taste INTRO/FILL IN ©,
um dem gerade spielenden,
automatischen Rhythmus ein Fill-InMuster hinzuzufügen.
7. Addition d’effets
Appuyer sur le sélecteur INTRO/FILL IN ©
pendant l’exécution d’un rythme
automatique pour y ajouter du fill-in.
INTRO/FILL
7, Adidón de efectos
Para añadir un patrón de relleno, presione el
selector INTRO/FILL IN © cuando se esté
reproduciendo un ritmo automático.
Fill In
• The fill-in pattern lasts a maximum of
one bar (press the selector at the
beginning of the bar to get the entire
one-bar fill-in).
• When the selector is pressed in the
middle of a bar, the fill-in effect lasts to
the end of the bar.
Intro
• When you press the INTRO/FILL IN
selector © to start the auto rhythm, you
will obtain a one-bar rhythm count and
an interesting one-bar intro effect.
About Auto Rhythm Demonstration
You can obtain an auto rhythm
demonstration (two bars of each rhythm)
by pressing the INTRO/FILL IN selector ©
while at the same time sliding the POWER
switch © to the “ON” position.
Fill-I n-Spielm uster
• Eingefügte Spielmuster dauern maximal
einen Taktschlag. (Drücken Sie die
Taste zu Beginn des Takts, um ein FÜIIn-Muster für den gesamten Takt zu
erhalten.)
• Bei Drücken der Taste in der Mitte
eines Takts, dauert das eingefügte
Spielmuster bis zum Ende dieses Takts.
Einleitungen
• Bei Drücken der INTRO/FILL IN-Taste
© zum Starten eines Rhythmusmusters
wird für die Dauer einer 1-TaktRhythmuszählung ein interessanter
Einleitungseffekt erzeugt.
Automatische Demonstration des
Rhythmusspiels
Durch Drücken der INTRO/FILL IN-Taste
© und gleichzeitiges Einschalten des
Instruments (POWER-Schalter © auf
“ON"’) läuft das RhythmusDemonstrationsspiel (zwei Taktlängen für
jedes Rhythmusmuster) automatisch ab.
POWER
Fill-in
• Un motif de fill-in dure un maximum
d’une mesure (Appuyer sur le sélecteur
au début de la mesure pour obtenir une
mesure entière avec fill-in).
• Lorsqu’on appuie sur le sélecteur au
milieu d’une mesure, le fill-in dure
jusqu’à la fin de cette mesure.
Intro
• Lorsqu’un rythme automatique est lancé
en appuyant sur le sélecteur
INTRO/FILL IN ©, on obtient un
compte de rythme d’une mesure et un
effet intéressant d’intro d’une mesure.
Exécution de démonstration des rythmes automatiques
Il est possible d’obtenir une exécution de
démonstration des rythmes automatiques
(deux mesures de chaque rythme) en
appuyant sur le sélecteur INTRO/FILL IN
(i) tout en faisant coulisser l’interrupteur
POWER ® sur la position “ON”.
Relleno
• El patrón de relleno durará un máximo de
un compás (presione el selector al comienzo
del compás para obtener un patrón de
relleno completo de un compás).
• Si presiona el selector en medio de un
compás, el efecto de relleno durará hasta el
final de dicho compás.
Preludio
• Si presiona el selector INTRO/FILL IN ©
al comienzo del ritmo automático, obtendrá
un patrón rítmico de un compás y un
interesante efecto de preludio de un compás.
Sobre la demostración de ritmo
automático
Usted podrá obtener una demostración de ritmo
automático (dos compases de cada ritmo)
manteniendo pulsado el selector INTRO/FILL
IN © y deslizando el interruptor POWER ©
hasta la posición “ON”.
INTRO/FILL IN
Page 12

Taking Advantage Of
Einsatz des
Utilisation des
Cómo sacar partido al
Percussion Ensemble
It is possible to combine manual
percussion with auto rhythm patterns.
Ensemble With Auto Rhythm
To enjoy a percussion ensemble of your
own, simply tap the PERCUSSION PADS
© while an auto rhythm pattern is playing.
Advanced Ensemble With Auto
Rhythm
It is possible to cancel any auto rhythm
pattern percussion sound, then replace it
as you like by tapping the pads. To do so,
press and hold down the START/STOP
selector ®, then tap the pad or pads
corresponding to the percussion sound or
sounds you want to cancel from the auto
rhythm pattern.
• If you wish to cancel this function,
select the same rhythm again, select
another rhythm, or turn the power
“OFF” then “ON” again.
PercussionEnsemblespiels
Es ist möglich das manuelle
Percussionsspiel mit den automatischen
Rhythmusmustern zu kombinieren.
Ensemble mit Auto-Rhythmus
Schlagen Sie zur Erzeugung Ihres eigenen
Percussion-Ensembles einfach während
des Spielens eines automatischen
Rhythmusmusters die Schlagflächen ® an.
Fortgeschrittenes Ensemblespiel mit
Auto-Rhythmus
Es ist möglich jedes automatische
Percussionsrhythmus-Spielmuster zu
löschen und durch Ihr eigenes
Percussionsspiel auf den Schlagflächen zu
ersetzen. Halten Sie hierzu die
START/STOP-Taste © gedrückt, und
schlagen Sie dann die Schlagfläche(n) an,
die dem Percussionsspiel bzw. den
Percussionsspielklängen entspricht, die sie
aus dem Auto-Rhythmusmuster löschen
möchten.
• Wählen Sie zum Abschalten dieser
Funktion den gleichen Rhythmus noch
einmal, wählen Sie einen anderen
Rhythmus oder schalten Sie den
Netzschalter auf “OFF” und wieder auf
“ON”.
ensembles de
percussion
II est possible de combiner la percussion
manuelle avec les rythmes automatiques.
Ensemble avec rythme automatique
Pour créer un ensemble de percussion
personnel, battre simplement les PADS DE
PERCUSSION © pendant l’exécution d’un
rythme automatique.
Ensemble plus sophistiqué avec rythme automatique
Il est possible d’annuler le son d’un rythme
automatique et de le remplacer par une
création personnelle en battant les pads
de percussion. Pour ce faire, maintenir
enfoncé le sélecteur START/STOP ®,
puis battre le ou les pads correspondants
à chaque son de percussion à annuler du
rythme automatique.
• Pour désactiver cette fonction,
sélectionner à nouveau le même
rythme, ou mettre l’interrupteur
d’alimentation sur “OFF” puis à
nouveau sur “ON”.
conjunto de percusión
Es posible combinar la percusión manual con
patrones rítmicos automáticos.
Conjunto con ritmo automático
Para disfrutar de un conjunto de percusión
propio, simplemente golpee los pulsadores de
percusión © mientras se esté reproduciendo el
patrón rítmico automático.
Conjunto con ritmo automático
avanzado
Usted podrá cancelar cualquier sonido de
percusión del patrón rítmico automático y
después reemplazarlo a su gusto golpeando los
pulsadores. Para ello, mantenga pulsado el
selector START/STOP ®, y después golpee el
pulsador o los pulsadores correspondientes al
sonido o a los sonidos de percusión que desee
cancelar del patrón rítmico.
• Si desea cancelar esta función, vuelva a
seleccionar el mismo ritmo, elija otro ritmo,
o desconecte y vuelva a conectar la
alimentación.
10
Page 13

Pad Start
After the auto rhythm pattern has started,
press and hold the START/STOP selector
© and then tap any PERCUSSION PAD
©: the auto rhythm pattern will stop. The
same pad will now act as a “start”
selector: the first tap will start the auto
rhythm pattern again.
Schlagflächenstart
Drücken Sie nach Spielbeginn des
automatischen Rhythmusmusters die
START/STOP-Taste ©, und klopfen Sie auf
eine der Schlagflächen ®; das
automatische Rhythmusmuster stoppt
daraufhin. Die gleiche Schlagfläche
funktioniert jetzt als ""Startauslöser": Mit
dem ersten Anschlag startet das
automatische Rhythmusmuster erneut.
Départ par les pads
Une fois que l’exécution du rythme
automatique a commencé, appuyer sur le
sélecteur START/STOP © et le maintenir
enfoncé, puis battre ensuite n’importe quel
PAD DE PERCUSSION ©; Le rythme
automatique s’arrête alors. Dès lors, le
même pad agit comme un sélecteur de
départ le premier battement lance à
nouveau l’exécution du rythme
automatique.
START/STOP
Inicio con pulsador
Después de haber iniciado el patrón rítmico,
mantenga pulsado el selector START/STOP
©, y golpee cualquiera de los pulsadores de
percusión ©. El patrón rítmico automático se
parará. El mismo pulsador funcionará ahora
como selector de “inicio“: cuando lo golpee por
primera vez, se volverá a iniciar el ritmo
automático.
• This function also allows you to control
the volume of the auto rh^hm pattern,
depending on how hard or soft you first
tap the pad.
Pad Intro/Fill In
Press and hold the INTRO/FILL IN selecîor
®, then tap any PERCUSSION PAD. The
same pad will now act as an intro/fill in
selector when you tap it
• This function also allows you to control
the volume of the intro/fill in, depending
on how hard or soft you tap the pad.
• Diese Funktion ermöglicht darüber
hinaus die Lautstärkeregelung der
automatischen Rhythmusmuster, je
nachdem wie stark oder wie schwach
die Schlagflächen zuerst angeschlagen
werden.
Schlagflächen-Einleitung/Fill
In-Muster
Halten Sie die Taste INTRO/FILL IN ©
gedrückt, und schlagen Sie eine der
Schlagflächen an. Auf erneuten Anschlag
funktioniert die gleiche Schlagflache jetzt
als ""Auslöser" für eine Einleitung bzw. ein
Fill In-Muster.
• Diese Funktion ermöglicht darüber
hinaus die Lautstärkeregelung des
Einleitungs-/Fill In-Musters je nachdem
wie stark oder wie schwach die
Schlagfiächen zuerst angeschlagen
werden.
• Cette fonction permet également de
régler le volume sonore du rythme
automatique selon la force avec
laquelle on bat le pad la première fois.
Intro/Fill in par les pads
Appuyer sur le sélecteur START/STOP ©
et te maintenir enfoncé, puis battre ensuite
n’importe quel PAD DE PERCUSSION ®;
ce pad agira désormais comme un
sélecteur intro/fill-in chaque fois qu’on le
bat.
INTRO/FILL IN
Cette fonction permet également de
régler le volume sonore de l’intro/fill-in,
selon la force avec laquelle on bat le
pad la première fois.
• Esta función le permitirá también controlar
el volumen del patrón rítmico automático
dependiendo de la fuerza que aplique al
primer golpe del pulsador.
Preludio/relleno con pulsador
Mantenga pulsado el selector INTRO/FILL IN
© y después golpee cualquier pulsador de
percusión. El mismo pulsador funcionará ahora
como selector de preludio/relleno cuando lo
golpee.
Esta fundón le permitirá también controlar
el volumen del preludio/relleno dependiendo
de la fuerza que aplique al primer golpe del
pulsador.
11
Page 14

Free Pad
Press and hold the PAD ASSIGN button ©
as you turn the power “ON”. Now, each
time you tap a pad, the percussion sound
will change (in the order indicated at the
top of the panel).
Freies Schlagflächespiel
Halten Sie die Zuordnungstaste PAD
ASSIGN © gedrückt, und stellen Sie den
Netzschalter auf "'ON”. Mit jedem
Anschlag der Schlagfläche ändert sich jetzt
der Percussionsklang (in der oben an der
Fronttafel aufgeführten Reihenfolge).
POWER
Pads libres
Appuyer sur la touche PAD ASSIGN © et
la maintenir enfoncée pendant la mise
sous tension. Dès lors, à chaque battement
sur un pad, le son de percussion change
(dans l’ordre indiqué en haut de la face
avant).
PAD ASSIGN
Pulsador libre
Mantenga pulsado el botón PAD ASSIGN ©
al conectar la alimentación. Después de esto,
cada vez que golpee un pulsador, el sonido de
percusión cambiará (en el orden indicado en la
parte superior del panel).
12
Page 15

Using MIDI Capability
Nutzung der
Utilisation des
Empleo de la capacidad
The Digital Drums DD-5 is equipped with a
MIDI out jack, thus enabling connection
with other musical instruments equipped
with MIDI for synchronized performances.
MIDI TRANSMISSION OUTPUT
DATA
The DD-5 is equipped with two formats,
each with 15 steps of velocity.
Velocity format selection
VEL1: DEFAULT
VEL 2: Press and hold the volume
down (◄), then Power “ON”.
MIDI-Kompatibilität
Das Digital-Schlagzeug DD-5 ist mit einer
Ml Dl-Ausgangsbuchse ausgerüstet und
kann somit für synchrones Spiel an andere
MIDI-kompatible Musikinstrumente
angeschlossen werden.
MIDI-ÜBERTRACUNGSAUSGANGSDATEN
Das DD-5 ist mit zwei Formaten von
jeweils 15 Geschwindigkeitsstufen (VEL)
ausgerüstet.
PAD : T ouc h-level
Sda gstailienempfncflichen
Cap teu r cJe force
Nivel de to que
VEL OC ITY 1
VEL OC ITY 2
Wahl des Geschwindigkeitsformats
VEL 1: Vorgabegeschwindigkeit(DEFAULT)
VEL 2: Halten Sie Lautstärketaste (◄)
drücken, die Netzschalter auf
1
2
3
OF 17
IF 27
10 18 1C2024
fonctions MIDI
La boîte à rythmes numérique DD-5 est
équipée d’une prise MIDI OUT, ce qui
permet de la raccorder à d’autres
instruments équipés d’une interface MIDI
et d’obtenir des exécutions synchronisées.
DONNEES DE SORTIE DE
TRANSMISSION MIDI
La boîte DD-5 est pourvue de deux
formats, chacun avec 15 paliers de
vélocité.
4
5 6 7
37 3F
2F .
28 2C3034 ,
Sélection des formats de vélocité
VEL 1: PAR DEFAUT
VEL 2: Appuyer le volume sonore
A B C D
8 9
57 5F 67 6F
47 4F
38 3C 40 48
77 7F
50 58
(◄), mise sous tension.
F
E
de MIDI
La batería digital DD-5 dispone de una toma
MIDI OUT que permite la conexión a otros
instrumentos musicales equipados con MIDI
para ejecuciones sincronizadas.
DATOS DE SALIDA DE
TRANSMISIÓN MIDI
El DD-5 dispone de dos formatos, cada uno de
ellos con 15 pasos de velocidad.
Selección del formato de velocidad
VEL 1: Asumido
VEL 2: Mantenga pulsado el control de
disminución del volumen (◄),
conecte la alimentación.
OUTPUT CHANNELS
CHI — CH16 (DEFAULT: CHI)
• Set the channel by using the TEMPO
controls and pressing the PAD ASSIGN
button (TEMPO UP/DOWN: +1/-1). If
you press both TEMPO controls at the
same time, the channel will be set at
CHI.
AUSGANGSKANÄLE
CHI — CH16 (DEFAULT; CHI)
• Stellen Sie den gewünschten Kanal
durch Betätigung der TEMPO-Regler
und durch Drücken der
Zuordnungstaste PAD ASSIGN ein
(TEMPOERHÖHUNG/-SENKUNG:
+1/-1). Durch gleichzeitiges Drücken
beider TEMPO-Regeltasten stellt das
Gerät auf Kanal CHI.
CANAUX DE SORTIE
CH1 — CH16 (PAR DEFAUT: CH1)
• Régler tes canaux à l’aide des
commandes TEMPO et en appuyant sur
la touche PAD ASSIGN (TEMPO
RAPIDE/LENT: +1/-1). Si on appuie
simultanément sur les deux
commandes TEMPO, le canal est réglé
à CH1.
CANALES DE SALIDA
CHl — CH16 (Asumido: CHl)
• Establezca el canal empleando los controles
TEMPO y presionando el botón PAD
ASSIGN (aumento/disminución del tempo:
+1/-1). Si presiona simultáneamente ambos
controles TEMPO, el canal se establecerá a
CHl.
13
Page 16

UNIVERSAL NOTE MODE
Each pad MIDI note is changed to the
universal note mode as follows: set the
MIDI note by using the VOLUME controls
and pressing the PAD ASSIGN button.
If you tap any pad while doing this, the
MIDI note will change to the universal note
mode. After this, set the MIDI note number
by using the VOLUME controls and
tapping the pads as you press the PAD
ASSIGN button; when you release the PAD
ASSIGN button, the note will be set at the
corresponding number.
VOLUME
PAD
UP/DOWN
EACH TAP
Max.: 127
To cancel this mode, press both VOLUME
controls while pressing and holding the
PAD ASSIGN button.
You are now back to the preset status.
+10/-10
-м
UNIVERSAL-NOTENMODUS
jede MIDI-Note wird wie folgt zu einem
Universal-Notenmodus umgewandelt;
Stellen Sie die MIDI-Note durch
Betätigung der Lautstärkeregeltasten
(VOLUME) und Drücken der PAD
ASSIGN-Taste ein. Wenn Sie während
dieses Vorgangs eine der Schlagflächen
anschlagen, wird die MIDI-Note zum
Universal-Notenmodus umgewandelt.
Stellen Sie anschließend durch Drücken
der Lautstärkeregeltasten (VOLUME) und
Klopfen auf die Schlagflächen bei
gleichzeitigem Drücken der
Zuordnungstaste PAD ASSIGN die MIDI-
Notennummer ein. Bei Freigabe der PAD
ASSIGN-Taste ist die Note auf die
entsprechende Nummer eingestellt.
LAUTSTÄRKE ERHÔHUNG/SENKUNG +10/-10
SCHLACFLÄCHE
JEDER SCHLAG +1
Max.; 127
Halten Sie zum Abschalten dieses
Spielmodus die PAD ASSIGN-Taste
gedrückt, und drücken Sie beide
Lautstärkeregler (VOLUME) gleichzeitig.
Sie sind jetzt wieder im voreingestellten
Status.
MODE DE NOTE UNIVERSELLE
Chaque note MIDI de pad peut être
changée en mode de note universelle de
la manière suivante: obtenir la note MIDI
en utilisant les commandes VOLUME et en
appuyant sur la touche PAD ASSIGN. Si
on bat un des pads tout en faisant cela, la
note MIDI passera au mode de note
universelle. Une fois cette opération faites,
régler le numéro de note MIDI en utilisant
les commandes VOLUME et en tapant sur
les pads tout en appuyant sur la touche
PAD ASSIGN; lorsque la touche PAD
ASSIGN est relâchée la note sera réglée
au numéro correspondant.
VOLUME RAPIDE/LENT
PAD CHAQUE BATTEMENT
Max.: 127
Pour désactiver ce mode, appuyer
simultanément sur les deux commandes
VOLUME tout en maintenant la touche
PAD ASSIGN enfoncée.
+10/-10
+1
MODO DE NOTA UNIVERSAL
Cada una de las notas MIDI de los pulsadores
se podrá cambiar al modo de nota universal de
la forma siguiente; establezca el modo de notas
MIDI empleando los controles VOLUME y
presionando el botón PAD ASSIGN. Si golpea
culquier pulsador al realizar esto, las notas
MIDI cambiarán al modo de not universal.
Después de esto, establezca el número de nota
MIDI empleando los controles VOLUME y
golpeando los pulsadores manteniendo pulsado
el botón PAD ASSIGN; cuando suelte el botón
PAD ASSIGN, la nota se ajustará al número
correspondiente.
VOLUME
PULSADOR
Aumento/dismiaución
Cada golpe + 1
Máx.: 127
Para cancelar este modo, presione ambos
controles VOLUME manteniendo pulsado el
botón PAD ASSIGN. De esta forma volverá al
estado preajustado.
-И0/-10
• When using this mode, no sound will
come from DD-5’s speaker.
• START/STOP (FA/FCh). Clock (F8h),
SENSING SIGNAL (FEh), Rhythm Select,
TEMPO, VOLUME. FILL IN, other
ON/OFF signals and KEY ON note
while using the AUTO RHYTHM are not
output by MIDI from the DD-5.
14
• Bei Einstellung dieses Spielmodus
erfolgt keine Klangwiedergabe aus dem
Lautsprecher des DD-5.
• START/STOP (FA/FCh), Clock (F8h),
SENSING SIGNAL (FEh), Rhythmuswahl,
TEMPO, VOLUME, FILL IN, andere
ON/OFF-Signale KEY ON-Noten
werden bei Einsatz des automatischen
Rhythmusspiels von MIDI über das
DD-5 nicht ausgegeben.
VOLUME
• Aucun son ne parvient du haut-parleur
du DD-5 pendant que ce mode est actif.
• Les signaux de départ/arrêt (FA/FCh),
d’horloge (F8h), de détection (FEh), de
sélection de rythme, de tempo, de
volume, de fill-in et autres signaux de
marche/arrêt, de même que les notes
sur touche, ne sont pas transmis par
l'interface MIDI du DD-5 pendant
l’exécution d’un rythme automatique.
• Cuando emplee este modo, el ata voz del
DD-5 no emitirá sonido.
• Mientras emplee el ritmo automático, las
señales de inicio/parada (FA/FCh), reloj
(F8h), detección (FEh), selección de ritmo,
tempo, volumen, relleno, y otras de
activación/desactivación, y la pulsación de
notas no saldrán a través de MIDI del
DD-5.
Page 17

External Jacks
Externe
Prises externes
Tomas externas
You will find three jacks on the side of the
instrument. These jacks are for connecting
optional accessories and other equipment.
1. External Power Source (DCS — 12V IN)
jack
Connect the optional AC power adaptor
PA-1 /PA-1 B/PA-3/PA-4/PA-40 to the
DC9 — 12V IN jack.
2. Phones/AUX OUT jack
Connect a set of headphones to this jack
and you can enjoy playing without
disturbing others. Also for connecting to a
stereo system or other equipment
• Impedance: 100 ohms
3. MIDI OUT
For connection to other MIDI equipment
Anschlußbuchsen
An der Seite des Instruments befinden
sich drei Anschlußbuchsen. Diese Buchsen
dienen zum Anschluß von Zusatzgeräten
und sonstigen Ausrüstungsteilen.
1. Buchse für externen Netzanschluß (DC
9-12V IN)
Der als Sonderzubehör erhältliche
Netzadapter PA-1/PA-1B/PA-3/PA-4/PA-40
ist an die Buchse DC 9 — 12V IN
anzuschließen.
2. Phones/AUX OUT-Buchse
Diese Buchse dient zum Anschluß von
Kopfhörern, so daß Sie in Ruhe üben
können, ohne andere dabei zu stören. Mit
Hilfe dieser Buchse kann die
Klangwiedergabe auch über Ihre
Stereoanlage erfolgen.
• Impedanz: 100 Ohm
3. MIDI OUT
Dient zum Anschluß an andere
MIDI-Instrumente.
L’instrument est équipé de troix prises
situées sur le côté. Ces prises permettent
de connecter les accessoires en option ou
d’autres instruments.
1. Prise d’alimentation externe (DC9 — 12
VIN)
Brancher un adaptateur secteur PA-1/PA1B/PA-3/PA-4/PA-40 en option à la prise
d’entrée DC9 — 12 V IN.
2. Prise de sortie casque/aux
(PHONES/AUX OUT)
Brancher un casque d’écoute à cette prise
afin de pouvoir jouer sans gêner personne.
Elle sert également à connecter
l’instrument à une chaîne stéréo ou à un
autre appareil.
• Impédance: 100 ohms
3. Prise de sortie MIDI (MIDI OUp
Permet de connecter l’instrument à un
autre appareil à interface MIDI.
En la parte posterior del instrumento podrá ver
tres tomas. Estas tomas se emplean para
conectar accesorios opcionales y otros equipos.
1. Toma de alimentación exterior (DC9 —
12V IN)
Conecte el adaptador de alimentación de CA
opcional PA-1/PA-1B/PA-3/PA-4/PA-40 a la
toma DC9 — 12V IN.
2. Toma de auriculares/salida auxiliar (AUX
OUT)
Conecte unos auriculares a esta toma, y podrá
disfrutar tocando sin molestar a quienes se
encuentren perca de usted. Empléela además
para la conexión a un sistema estéreo u otro
equipo.
• Impedancia: 100 ohmios
3. Salida de MIDI (MIDI OUT)
Para conexión a otros equipos MIDI.
OUT
15
Page 18

Optional Accessories
Sonderzubehör Accessoires en option
Accesorios opcionales
• AC Power Adaptor
(PA-1/PA-1 B/PA-3/PA-4/PA-40)
Transforms AC voltage to DC voltage.
• Headphones (HPE-3/HPE-5)
Specially designed lightweight dynamic
headphones with extra-soft ear pads.
• Connecting Cord
For connecting the instnjment to other
equipment
• MIDI Cable
For connecting MIDI jacks.
Availability of some optional accessories
will vary from country to country.
• Netzadapter
(PA-1/PA-1B/PA-3/PA-4/PA-«).
Wandelt Wechselstrom in Gleichstrom
um.
• Kopfhörer (HPE-3/HPC-5)
Leichte, dynamische Kopfhörer in
spezieller Konstruktion mit extraweichen
Ohrmuscheln.
• AnschluBkabel
Zum Anschließen des Instruments an
andere Geräte.
• MIDI-Kabel
Zum Anschließen von MIDI-Buchsen.
Je nach Lieferbereich sind einige
Sonderzubehörposten eventuell nicht
erhältlich.
• Adaptateur secteur
(PA-1 /PA-1B/PA-3/PA-4/PA-40)
Transforme la tension secteur en tension
CC.
• Casque d'écoute (HPE-3/HPE-5)
Casque d’écoute dynamique, léger et avec
des tampons d’oreille extrêmement doux.
• Cordon de raccordement
Pour connecter l’instrument à d’autres
appareils.
• Câble MIDI
Pour le raccordement à une prise MIDI
La disponibilité des accessoires en option
peut varier de pays à pays.
* Adaptador de alimentación de CA
(PA-l/PA-lB/PA-3/PA^/PA-40)
Transforma la tensión de CA en tensión de CC.
• Auriculares (HPE-3/HPE-5)
Auriculares dinámicos y ligeros especialmente
diseñados con almohadillas auriculares
extremadamente suaves.
* Cable conector
Para conectar el instrumaito a otro equipo.
• Cable MIDI
Para conectar tomas MIDI
La disponibilidad de ciertos accesorios
opcionales variará de país a país.
16
Page 19

Taking Care Of Your
Pflege des
Mesures de
Cuidado de su batería
Digital Drums
Your Digital Drums DD-5 will remain in
excellent playing condition if care is taken
concerning the following.
1. When you use AC power, be sure to
use the optional PA-1/PA-1 B/PA3/PA-4/PA-40. Before use, read the
adaptor instructions carefully.
2. Do not set the VOLUME at MAX when
you connect the DD-5 to a stereo
system. Use the stereo system’s volume
control to adjust the sound level.
3. Avoid placing the instrument in
excessively humid areas.
4. Do not tap the percussion pads with
any other object except the percussion
sticks provides with the instrument.
5. Do not subject the unit to physical
shock, and avoid placing anything
heavy on it.
6. Do not place the Instrument near any
heating appliance, or leave it inside a
car in direct sunlight for any length of
time. Direct sunshine can raise the
interior temperature of a car with closed
doors and windows to as high as 80°C
(176°F). Temperatures in excess of
60°C(140°F) can cause physical and/or
electrical damage not covered by the
warranty.
7. Use a dry damp cloth for cleaning.
Digítal-Schiagzeugs
Funktionsfähigkeit und tadelloser Zustand
Ihres Digital-Schlagzeugs DD-5 läßt sich
über längere Zeit nur durch
entsprechende Pflege sicherstellen.
Beachten Sie dazu folgende Hinweise:
1. Vergewissern Sie sich bei Verwendung
eines Netzadapters oder einer
Autobatterie, daß es sich bei dem
Adapter um das optionale
Netzadaptermodell PA-1/PA-1B/PA3/PA-4/PA-40 handelt. Lesen Sie vor
der Verwendung des Adapters dessen
Gebrauchsanweisung aufmerksam
durch.
2. Stellen Sie die Lautstärke bei Anschluß
an eine Stereoanlage nicht auf den
maximalen Wert. Bedienen Sie zur
Einstellung der Lautstärke den
Lautstärkeregler der Stereoanlage.
3. Vermeiden Sie ein Ablegen des
Instruments an Plätzen mit hoher
Feuchtigkeit.
4. Benutzen Sie zum Spielen keine
anderen Gegenstände als die mit dem
Instrument gelieferten Schlagstöcke.
5. Bewahren Sie das Instrument vor
Stößen, und legen Sie keine schweren
Gegenstände darauf ab.
6. Legen Sie das Instrument niemals in
der Nähe von Heizkörpern oder in
einem in der Sonne geparkten
Fahrzeug ab. Die Temperatur im
Innenraum eines Autos kann durch
direkte Sonnenbestrahlung bei
geschlossenes Türen und Fenstern auf
bis zu 80°C ansteigen. Die Einwirkung
von Temperaturen über 60°C kann zu
Schäden im elektrischen System sowie
am Instrument allgemein führen, für
die keine Garantie übernommen wird.
7. Verwenden Sie ein feuchtes Tuch zum
Reinigen des Instruments.
précaution et
entretien de la bolle à
rythmes numérique
La boîte à rythmes numérique DD-5
restera en excellente condition de
fonctionnement en prenant les précautions
suivantes:
1. En cas d’utilisation de tension secteur,
veiller à toujours utiliser un adaptateur
secteur PA-1/PA-1B/PA-3/PA-4/PA-
40. Avant d’utiliser l’adaptateur, lire
attentivement les instructions de son
mode d’emploi.
2. Ne jamais régler le VOLUME au
MAXIMUM lorsque la boîte DD-5 est
connectée à une chaîne stéréo. Utiliser
la commande de réglage du volume de
la chaîne stéréo pour régler le niveau
sonore.
3. Eviter de placer l’instrument dans un
endroit excessivement humide.
4. Ne jamais battre les pads avec un objet
autre que les baguettes de percussion
fournies avec l’instrument
5. Ne pas soumettre l’instrument à des
chocs physiques, et éviter d’y placer un
objet lourd.
6. Ne pas placer l’instrument près d’un
appareil de chauffage, et ne pas le
laisser pendant une période prolongée
dans un véhicule stationné en plein
soleil. La température interne d’un
véhicule stationné en plein soleil avec
les vitres fermées peut atteindre 80°C.
Une température supérieure à 60°C
peut provoquer des endommagements
physiques et/ou électriques qui ne sont
pas couverts par la garantie.
7. Utiliser un chiffon très légèrement
humide pour nettoyer l’instrument
digital
Su batería digital DD-5 estará siempre en
excelentes condiciones de funcionamiento si
tiene cuidado de lo siguiente.
1. Para emplear la aümentaciónde CA,
asegúrese de utilizar el adptador opcional
PA-l/PA-lB/PA-3/PA^/PA-40. Antes de
emplear un adaptador, lea cuidadosamente
su manual de instrucciones.
2. Cuando haya conectado el DD-5 a un
sistema estéreo, no ponga el control
VOLUME en MAX. Para ajustar el nivel
del sonido emplee el control de volumen del
sistema estéreo.
3. Evite colocar el instrumento en lugares
extremadamente húmedos.
4. No golpee los pulsadores de percusión con
ningún objeto excepto los palillos de
percusión suministrados con el instrumento.
5. No someta el instrumento a golpes, y evite
colocar objetos pesados sobre él.
6. No coloque el instrumento cerca de aparatos
calefactores, ni lo deje en un automóvil
aparcado bajo el sol. La luz solar directa
puede hacer que el interior de un automóvil
con las ventanillas cerradas aumente hasta
80°C. Las temperaturas superiores a 60°C
pueden causar daños físicos y/o eléctricos
que no cubre la garantía.
7. Para limpiar el instrumento, emplee un paño
suave ligeramente humedecido.
17
Page 20

Specifications
Percussion Pads
4 pads
Auto Rhythm Patterns
8 Beat 1, 2,16 Beat 1, 2, Rock’n’Roll.
Heavy Metal, Slow Rock, Swing, Ballad,
Shuffle, Pops 1, 2, Disco 1, 2, Hard Rock,
Reggae, Salsa, Bossanova, Rhumba,
Samba, Cha-Cha-Cha, Afro, Country, Dixie,
March/Polka, Tango, Ondo, 6/8 March,
Waltz, Jazz Waltz
Instrument Voices
Bass Drum, Snare Drum, Tom 1, 2, 3, Ride
Cymbal, Conga, Hi-Hat Open, Hi-Hat
Closed, Rim Shot, Cowbell, Hand Claps
Auto Rhythm Only: Conga Low
Controls and Indicators
Power Switch, Volume, Tempo, Start/Stop,
Intro/Fill In, Pad Assign, Power/Tempo
LED Indicator, Rhythm Selectors
Other Functions
Auto Rhythm Demonstration, Touch-Level
Sensitive Pads, MIDI Capability
Auxiliary Jacks
DC 9 — 12 V In, Phones/Aux Out, MIDI
Out
Main Amplifier
2.0 W(RMS)
Speaker
10 cm, 6 ohms
Rated Voltage
DC 9V:
• six 1.5V SUM-2(AM-2), R-14(LR-14),
“C” size or equivalent batteries
• AC Power adaptor (PA-1, PA-1B, PA-3,
PA-4, PA-40)
Dimensions (W X D X H)
380mm X 272mm X 81mm
(15" X 10-3/4" X3-1/8")
Weight
2.4 kg (5.3 lbs.) excluding batteries
Percussion Sticks
Specifications subject to change without
notice.
18
Technische Daten
Schlagflächen
4 Flächen
Automatische Rhythmusmuster
8 Beat 1, 2,16 Beat 2, Rock'n Roll,
Heavy Metal, Slow Rock, Swing, Ballade,
Shuffle, Pop 1, 2, Disco 1, 2, Hard Rock,
Reggae, Salsa, Bossa-Nova, Rumba, Samba,
Cha-Cha-Cha, Afro, Country, Dixie,
Marsch/Polka, Tango, Ondo, 6/8-Marsch,
Walzer, Jazz-Walzer
Instrumentenstimmen
Baßtrommel, Kleine Trommel, Tom 1, 2, 3,
Becken, Conga, Hi-Hat offen, Hi-Hat
geschlossen, Randschlag, Kuhglocke,
Händeklatschen
Nur Auto-Rhythmus: Tiefes Conga
Funktionselemente und -anzeigen
Netzschalter, Lautstärke, Tempo,
Start/Stopp, Einleitung/Fill-In,
Schlagflächenzuordnung, Netz-/TempoLED-Anzeige, Rhythmus-Wahltasten
Sonstige Funktionen
Automatisches RhythmusDemonstrationsspiel,
Schlagstärkenempfindlichkeit,
MIDI-Kompatiblität
Hilfsanschlüsse
DC 9 — 12 V in, Phones/Aux Out, MIDI
Out
Hauptverstärker
2,0 W (RMS)
Lautsprecher
10 cm, 6 Ohm
Betriebsspannung
Gleichstrom 9 V:
• sechs Batterien des Typs 1,5 V R-14 (LR-
14) Größe ''C” oder gleichwertige
Batterien
• Netzstromadapter (PA-1, PA-1B, PA-3,
PA-4, PA-40)
Abmessungen (B X H X T)
380 mm X 272 mm X 81 mm
Gewicht
2,4 kg ohne Batterien
Mitgeliefertes Zubehör
Schlagstöcke
Änderung der technischen Daten ohne
Vorankündigung Vorbehalten.
Spécifications
Pads de percussion
4 pads
Rythmes automatiques
8 Beat 1,2, 16 Beat 1, 2, Rock’n Roll,
Heavy Metal, Slow Rock, Swing, Ballad,
Shuffle, Pops 1, 2, Disco 1, 2, Hard Rock,
Reggae, Salsa, Bossanova, Rhumba,
Samba, Cha-Cha-Cha, Afro, Country, Dixie,
March/Polka, Tango, Ondo, 6/8 March,
Waltz, Jazz Waltz
Voix d’instrument
Grosse caisse. Caisse claire, Torn 1, 2, 3,
Cymbales Ride, Conga, Hi-Hat Ouvert, HiHat Fermé, Rim Shot, Clochette,
Clappement des mains
Rythme automatique uniquement: Conga
bas
Commandes et témoins
Interrupteur d’alimentation. Volume, Tempo,
Start/Stop, Intro/Fill in. Pad Assign,
Témoin à LED Al ¡mentation/Tempo,
Sélecteurs de rythme
Autres fonctions
Exécution de démonstration des rythmes
automatiques. Pads sensible à la force de
battement Interface MIDI
Prises auxiliaires
DC 9 — 12 V IN, Phones/AUX OUT, MIDI
OUT
Amplificateur principal
2,0 W (eff.)
Haut-parleur
10 cm, 6 ohms
Tension nominale
9 VCC:
• six piles de 1.5 V, SUM-2(AM-2),R14(LR-14), dimension “C”, ou
équivalentes
• Adaptateur secteur (PA-1, PA-1 B, PA-3,
PA-4, PA-40)
Dimensions (L X P X H)
380 X 272 X 81 mm
Poids
2,4 kg (Non compris les piles)
Accessoires d’origine
Baguettes de percussion
Les spécifications sont susceptibles d’être
modifiées sans avis préalable.
Especificaciones
Pulsadores de percusión
4 pulsadores
Patrones rítmicos automáticos
8 tiempos 1 y 2, 16 tiempos 1 y 2, Rock’n’Roll,
Metales pesados, Rock lento, Swing, Balada,
Shuffle, Pops 1 y 2, Disco 1 y 2, Rock duro,
Reggae, Salsa, Bossanova, Rumba, Samba, Chacha-cha, Afro, Country, Dixie, Marcha/polca,
Tango, Ondo, Marcha de 6/8, Vals, y Vals de
jazz
Voc^ instrumentales
Bombo, Caja, Tom-tom 1, 2 y 3, Platillo,
Conga, Platillos abiertos, Platillos cerrados.
Golpe en el borde, Cencerro, y Palmas
Ritmo automático solamente: Bajo de conga
Controles e indicadores
Interruptor de alimentación. Controles de
volumen, Tempo, Inicio/parada,
Preludio/relleno, Asignación de pulsadores,
LED indicador de alimentación/tempo, y
Selectores de ritmo.
Otras funciones
Demostración de ritmo automático. Pulsadores
con sensor de nivel de toque, y Capacidad de
MIDI
Tomas auxiliares
Entrada de 9 — 12V CC, Auriculares/salida
auxiliar, y salida de MIDI
Amplificador principal
2,0 W (eficaces)
Altavoz
10 cm, 6 ohmios
Tensión nominal
9V CC:
• Seis pilas de 1,5V SUM-2 (AM-2), R-14
(LR-14), tamaño “C”, o equivalentes
• Adaptador de alimentación de CA (PA-1,
PA-IB, PA-3, PA-4, o PA-40)
Dimensiones (An X Pif X Al)
380 mm X 272 mm X 81 mm
Peso
2,4 kg, excluyendo las pilas
Accesorio originale
Palillos de percusión
Especificaciones sujetas a cambio sin previo
aviso.
Page 21

[ Digital Rhythm Machine ] Model DD5
MIDI Implementation Chart
Date; 1/30,1988
Version: 1.0
Function
Basic Default 1
Channel Changed 1-16
Moue
Note 0-127
Number
Velocity
After
Touch
Pitch Bender X
Control
Default 3
Messages
; True voice
Note ON O 9nH, V = 1-127
Note OFF
Key’s
Ch’s
X
*******
X 9nH, v = 0
X
X
X
Transmitted
Remarks
assigns to each
instrument
Change
Program X
Change : True #
System Exclusive
System
Common
System
Real Time : Commands
Aux Local ON/OFF X
Mes
sages Reset
Notes
: Song Pos
: Song Sel
1 :Tune
: Clock
All Notes OFF
Active Sense
*******
X
X
X
X
X
X
X
X
X
Mode 1 : OMNI ON, POLY Mode 2 : OMNI ON, MONO
Mode 3 : OMNI OFF, POLY
CO
Mode 4 : OMNI OFF. MONO
0:Yes
X : No
Iml
Page 22

Attention users in the U.SA
DIGITAL DRUMS DD-5 is prepared in accordance with FCC rules.
The DIGITAL DRUMS DD-5 users frequencies that appear in the radio
frequency range, and if installed in the immediate proximity (within three
meters) of some types of audio or video devices interference may occur.
The DIGITAL DRUMS DD-5 has been type tested and found to comply
with the specifications set for a Class B computing device in accordance
with those specifications listed in Subpart J of part 15 of the FCC rules.
These rules are designed to provide a measure of protection against
such interference. However, this does not guarantee that interference will
not occur. If your DIGITAL DRUMS DD-5 should be suspected to causing
interference with other electronic devices, verification can be made by
turning your DIGITAL DRUMS DD-5 off and on. If the interference
continues when your Digital Drum Bank DD-10 is off, DIGITAL DRUMS
DD-5 is not the source of the interference. If your DIGITAL DRUMS DD-5
does not appear to be the source following measures:
Relocate either the DIGITAL DRUMS DD-5 or the electronic device
that is being affected by the interference.
Utilize power outlets for the DIGITAL DRUMS DD-5 and the device
being affected that are on different branch (circuit breaker or fuse)
circuits, or install A/C line filters.
In the case of radio-TV interference, relocate the antenna or, if the
antenna lead-in is a 300 ohm ribbon lead, change the lead-in to a co
axial type cable.
If these corrective measures do not produce satisfactory results,
please contact your Yamaha Consumer Products retailer for suggestions
and/or corrective measures. If you cannot locate a Yamaha Consumer
Products retailer in your general area, contact the Electronic Service
Division, Yamaha Music Corporation U.S.A., 6600 Orangethorpe Ave,
Buena Park, CA 90620.
If for any reason you should need additional information relating to
radio or TV interference, you may find a booklet prepared by the Federal
Communications Commission helpful: “How to Identify and Resolve
Radio-TV interference Problems”. The booklet is available from the U.S.
Government Printing Office, Washington D.C. 20402—Stock
#044-000-345-4.
* This applies only to products distributed by Yamaha Music Corp. U.S.A.
* Dies bezieht sich nur auf die von der Yamaha Music Corp. U.S.A.
vertriebenen Produkte.
* Ceci ne s’applique qu’aux produits distribués per Yamaha Music Corp.
U.S.A.
* Esto se apliça solamente a productos distribuidos por Yamaha Music
20
Corp. U.S.A.
Wichtiger Hinweis für die Benutzui^ in der Bunderepublik Deutschland.
Bescheinigung des Hersteflers/Importeurs
Hiermit wird bescheinigt, daß der/die/das
DIGtTAL-SCHLAGZEUG Typ DD-5
(Gerät, Typ, Bezeichnung)
in Übereinstimmung mit den Bestimmungen der
VERFÜGUNG 1046/84
(Amtsblattverfugung)
funkentstört ist.
Der Deutschen Bundespost wurde das Inverkehrbringen dieses Gerätes
und die Berechtigung zur Überprüfung der Serie auf Einhaltui^ der
Bestimmungen eingeräumL
Yamaha Europa GmbH
Name des Importeurs
•This applies only to products distributed by YAMAHA Europe GmbH
•Dies bezieht sich nur auf die von der YAMAHA EUROPE GmbH vertriebenen
Produkte.
•Ced ne s’applique qu’aux produits distribués par Yamaha Europe GmbH.
•Esto se aplica solamente a productos distribuidos por Yamaha Europa GmbH,
Page 23

The serial num ber of this product may be found on the
bottom of the unit You should note this serial number in
the space provided below and retain manual as a
permanent record of your purchase to aid identification in
the event of theft
Die Seriennum mer befindet sich an der Unterseite des
Instrumtes. Wir empfehlen, diese Nummer sicher
heitshalber an der unten vorgesehenen Stelle einzutragen,
um sie auch im Falle eines Diebstahls jederzeit zur Hand
zu haben.
Le numéro de série de ce produit figure sur le fond de
l'appareil, il conviendra de noter ce numéro de série dans
l'espace réservé ci-dessous et de conserver ce manuel:
celui-ci constitve le document perm anent de votre achat
et permet l'identification en cas de vol.
D número de serie de este producto se encuentra en la parte
inferior de la unidad. Sírvase anotar este numero de serie en el
espacio proporcionado debajo y guarde este manual como
comprobante de compra, para ayudar a la identificación en caso de
robo.
Model No. DD-5
Serial No.
Concerning Warranty
This product was made for international distribution, and
since the warranty for this type of product varies from
marketing area to marketing area, please contact the
selling agency for information concerning the applicable
warranty and/or service policies.
Modell-Nr. DD-5
Serien-Nr.
Hinweis zur Garantie
Dieses Produkt wird international vertrieben, und die
Garantiebedingungen sind von Vertriebsland zu
Vertriebsland verschieden. Ihr Händler gibt Ihnen gerne
genauere Informationen zu den in Ihrem Land gültigen
Garantie- und/oder Servicebedingungen.
N“. de modèle OD-5 N.” de modelo DD-5
№. de série №. de serie
Remarque relative à la garantie
Ce modèle est destiné à être distribué à l'échelle
internationale. Etant donné que les conditions de garantie
pour ce type de produit varient en fonction des zones de
commercialisation, prière de prendre contact avec
l’agence chargée des ventes pour tous renseignements
relatifs aux conditions de garantie et de service
après-vente.
Concerniefite a la garantía
Este producto ha sido fabricado para ser distribuido
intemadonalmeote y, como la garantía paa este tipo de producto
varia en reladón a su área de comercialización, sírvase coitsultar al
agente de ventas sobre la informadón en tomo a la garantía
aplicable y/o el de servicio, postventa.
Page 24

YAMAHA
YAMAHA CORPORATION
PO.BoxI, Hamamatsu, Japan
@ m 804 Printed in Japan
 Loading...