

Page 1

;
;
;
;
;
;
;
;
;
;
;
;
;
;
;;;;;;;;;;
;
;;;;;;;;;;
;;;;;;;;;;
;;;;;;;;;;
;;;;;;;;;;
;;;;;;;;;;
;;;;;;;;;;
;;;;;;;;;;
;;;;;;;;;;
;;;;;;;;;;
Check your power supply
Make sure that your local AC mains voltage matches the
voltage specified on the name plate on the bottom panel. In
some areas a voltage selector may be provided on the bottom
panel of the main keyboard unit near the power cord. Make
sure that the voltage selector is set for the voltage in your area.
The voltage selector is set at 240V when the unit is initially
shipped. To change the setting use a “minus” screwdriver to
rotate the selector dial so that the correct voltage appears next
to the pointer on the panel.
WICHTIG
Überprüfung der Stromversorgung
Vergewissern Sie sich vor dem Anschließen an das Stromnetz,
daß die örtliche Netzspannung den Betriebsspannungswerten
auf dem Typenschild an der Unterseite des Instruments
entspricht. In bestimmten Verkaufsgebieten ist das Instrument
mit einem Spannungswähler an der Unterseite neben der
Netzkabeldurchführung ausgestattet. Falls vorhanden, muß der
Spannungswähler auf die örtliche Netzspannung eingestellt
werden. Der Spannungswähler wurde werkseitig auf 240 V
voreingestellt. Zum Verstellen drehen Sie den Spannungsregler
mit einem Schlitzschraubendreher, bis der Zeiger auf den
korrekten Spannungswert weist
IMPORTANT
IMPORTANT
;;;;;;;;;;
;;;;;;;;;;
;;;;;;;;;;
;;;;;;;;;;
;;;;;;;;;;
Contrôler la source d’alimentation
Vérifiez que la tension spécifiée sur le panneau arrière
correspond à la tension du secteur. Dans certaines régions,
l’instrument peut être équipé d’un sélecteur de tension situé sur
le panneau inférieur du clavier à proximité du cordon d’alimentation. Vérifiez que ce sélecteur est bien réglé en fonction de
la tension secteur de votre région. Le sélecteur de tension est
réglé sur 240 V au départ d’usine. Pour modifier ce réglage,
utilisez un tournevis à lame plate pour tourner le sélecteur afin
de mettre l’indication correspondant à la tension de votre
région vis à vis du repère triangulaire situé sur le panneau.
IMPORTANTE
Verifique la alimentación de corriente
Asegúrese de que tensión de alimentación de CA de su área
corresponde con la tensión especificada en la placa de
características del panel inferior de la unidad del teclado
principal, cerca del cable de alimentación. Asegúrese de que
el selector de tensión esté ajustado a la tensión de su área. El
selector de tensión se ajusta a 240V cuando la unidad sale de
fábrica. Para cambiar el ajuste, emplee un destornillador de
cabeza “recta” para girar el selector de modo que aparezca la
tensión correcta al lado del indicador del panel.
Page 2
SPECIAL MESSAGE SECTION
PRODUCT SAFETY MARKINGS: Yamaha electronic
products may have either labels similar to the graphics
shown below or molded/stamped facsimiles of these
graphics on the enclosure. The explanation of these graphics appears on this page. Please observe all cautions indicated on this page and those indicated in the safety instruction section.
CAUTION
RISK OF ELECTRIC SHOCK
DO NOT OPEN
CAUTION: TO REDUCE THE RISK OF ELECTRIC SHOCK.
DO NOT REMOVE COVER (OR BACK).
NO USER-SERVICEABLE PARTS INSIDE.
REFER SERVICING TO QUALIFIED SERVICE PERSONNEL.
See bottom of Keyboard enclosure for graphic symbol markings
The exclamation point within the equilateral triangle is intended to alert the
user to the presence of important operating and maintenance (servicing) instructions in the literature accompanying the product.
ENVIRONMENTAL ISSUES: Yamaha strives to produce products that are both user safe and environmentally
friendly. We sincerely believe that our products and the
production methods used to produce them, meet these
goals. In keeping with both the letter and the spirit of the
law, we want you to be aware of the following:
Battery Notice: This product MAY contain a small nonrechargable battery which (if applicable) is soldered in
place. The average life span of this type of battery is approximately five years. When replacement becomes necessary, contact a qualified service representative to perform the replacement.
Warning: Do not attempt to recharge, disassemble, or
incinerate this type of battery. Keep all batteries away
from children. Dispose of used batteries promptly and as
regulated by applicable laws. Note: In some areas, the
servicer is required by law to return the defective parts.
However, you do have the option of having the servicer
dispose of these parts for you.
Disposal Notice: Should this product become damaged
beyond repair, or for some reason its useful life is considered to be at an end, please observe all local, state, and
federal regulations that relate to the disposal of products
that contain lead, batteries, plastics, etc.
The lightning flash with arrowhead
symbol, within the equilateral triangle,
is intended to alert the user to the presence of uninsulated “dangerous voltage” within the product’s enclosure that
may be of sufficient magnitude to constitute a risk of electrical shock.
IMPORTANT NOTICE: All Yamaha electronic products are tested and approved by an independent safety
testing laboratory in order that you may be sure that when
it is properly installed and used in its normal and customary manner, all foreseeable risks have been eliminated.
DO NOT modify this unit or commission others to do so
unless specifically authorized by Yamaha. Product performance and/or safety standards may be diminished.
Claims filed under the expressed warranty may be denied
if the unit is/has been modified. Implied warranties may
also be affected.
SPECIFICATIONS SUBJECT TO CHANGE: The
information contained in this manual is believed to be
correct at the time of printing. However, Yamaha reserves
the right to change or modify any of the specifications
without notice or obligation to update existing units.
NOTICE: Service charges incurred due to lack of knowledge relating to how a function or effect works (when the
unit is operating as designed) are not covered by the
manufacturer’s warranty, and are therefore the owners
responsibility. Please study this manual carefully and consult your dealer before requesting service.
NAME PLATE LOCATION: The graphic below indicates the location of the name plate. The model number,
serial number, power requirements, etc., are located on
this plate. You should record the model number, serial
number, and the date of purchase in the spaces provided
below and retain this manual as a permanent record of
your purchase.
Model _____________________________________
92-469 1
Serial No. __________________________________
Purchase Date ______________________________
Page 3

IMPORTANT SAFETY INSTRUCTIONS
INFORMATION RELATING TO PERSONAL INJURY, ELECTRICAL SHOCK,
AND FIRE HAZARD POSSIBILITIES HAS BEEN INCLUDED IN THIS LIST.
WARNING- When using any electrical or electronic prod-
uct, basic precautions should always be followed. These precautions include, but are not limited to, the following:
1. Read all Safety Instructions, Installation Instructions,
Special Message Section items, and any Assembly Instructions
found in this manual BEFORE marking any connections, including connection to the main supply.
2. Main Power Supply Verification: Yamaha products are
manufactured specifically for the supply voltage in the area
where they are to be sold. If you should move, or if any doubt
exists about the supply voltage in your area, please contact
your dealer for supply voltage verification and (if applicable)
instructions. The required supply voltage is printed on the
name plate. For name plate location, please refer to the graphic
found in the Special Message Section of this manual.
3. This product may be equipped with a polarized plug
(one blade wider than the other). If you are unable to insert the
plug into the outlet, turn the plug over and try again. If the
problem persists, contact an electrician to have the obsolete
outlet replaced. Do NOT defeat the safety purpose of the plug.
4. Some electronic products utilize external power sup-
plies or adapters. Do NOT connect this type of product to any
power supply or adapter other than one described in the owners
manual, on the name plate, or specifically recommended by
Yamaha.
5. WARNING: Do not place this product or any other
objects on the power cord or place it in a position where anyone could walk on, trip over, or roll anything over power or
connecting cords of any kind. The use of an extension cord is
not recommended! If you must use an extension cord, the
minimum wire size for a 25' cord (or less) is 18 AWG. NOTE:
The smaller the AWG number, the larger the current handling
capacity. For longer extension cords, consult a local electrician.
6. Ventilation: Electronic products, unless specifically
designed for enclosed installations, should be placed in locations that do not interfere with proper ventilation. If instructions for enclosed installations are not provided, it must be
assumed that unobstructed ventilation is required.
7. Temperature considerations: Electronic products
should be installed in locations that do not significantly contribute to their operating temperature. Placement of this product close to heat sources such as; radiators, heat registers and
other devices that produce heat should be avoided.
8. This product was NOT designed for use in wet/damp loca-
tions and should not be used near water or exposed to rain. Examples of wet/damp locations are; near a swimming pool, spa, tub,
sink, or wet basement.
9. This product should be used only with the components
supplied or; a cart, rack, or stand that is recommended by the
manufacturer. If a cart, rack, or stand is used, please observe all
safety markings and instructions that accompany the accessory
product.
10. The power supply cord (plug) should be disconnected from
the outlet when electronic products are to be left unused for extended periods of time. Cords should also be disconnected when
there is a high probability of lightening and/or electrical storm
activity.
11. Care should be taken that objects do not fall and liquids are
not spilled into the enclosure through any openings that may exist.
12. Electrical/electronic products should be serviced by a
qualified service person when:
a. The power supply cord has been damaged; or
b. Objects have fallen, been inserted, or liquids have been
spilled into the enclosure through openings; or
c. The product has been exposed to rain: or
d. The product dose not operate, exhibits a marked change
in performance; or
e. The product has been dropped, or the enclosure of the
product has been damaged.
13. Do not attempt to service this product beyond that de-
scribed in the user-maintenance instructions. All other servicing
should be referred to qualified service personnel.
14. This product, either alone or in combination with an ampli-
fier and headphones or speaker/s, may be capable of producing
sound levels that could cause permanent hearing loss. DO NOT
operate for a long period of time at a high volume level or at a
level that is uncomfortable. If you experience any hearing loss or
ringing in the ears, you should consult an audiologist.
IMPORTANT: The louder the sound, the shorter the time period
before damage occurs.
15. Some Yamaha products may have benches and/or acces-
sory mounting fixtures that are either supplied as a part of the
product or as optional accessories. Some of these items are designed to be dealer assembled or installed Please make sure that
benches are stable and any optional fixtures (where applicable) are
well secured BEFORE using. Benches supplied by Yamaha are
designed for seating only. No other uses are recommended.
92-469-2
vii
PLEASE KEEP THIS MANUAL
Page 4

Introduction
Thank you for choosing a Yamaha CLP-311 Clavinova. Your Clavinova is a fine musical instrument that
employs advanced Yamaha music technology. With the proper care, your Clavinova will give you many
years of musical pleasure.
● Yamaha’s AWM (Advanced Wave Memory) tone
generator system offers rich, realistic voices.
● Piano-like touch response provides extensive
expressive control and outstanding playability.
● Dual play mode allows 2 voices to be played
simultaneously.
● Unique Clavinova Tone voice provides a fresh
sound for new musical expression.
● Metronome feature with variable tempo facilitates
practice.
● Record and play back anything you play on the
keyboard (up to approximately 1,300 notes).
● MIDI compatibility and a range of MIDI functions
make the Clavinova useful in a range of advanced
MIDI music systems.
In order to make the most of your Clavinova’s performance potential and features, we urge you to read
this Owner’s Manual thoroughly, and keep it in a safe place for later reference.
Taking Care Of Your Clavinova
Your Clavinova is a fine musical instrument, and deserves the most careful treatment. Observe the fol-
lowing points and your Clavinova will sound and look great for many years.
1 Never open the case and touch or tamper with the
internal circuitry.
2 Always turn the POWER switch OFF after use,
and cover the keyboard with the dust cover
provided.
3 Clean the cabinet and keys of your Clavinova only
with a clean, slightly damp cloth. A neutral
cleanser may be used if desired. Never use
abrasive cleansers, waxes, solvents or chemical
dust cloths since these can dull or damage the
finish.
4 Never place any vinyl products on your Clavinova.
Contact with vinyl can cause irreversible damage
to the finish.
5 Install your Clavinova in a place that is away from
direct sunlight, excessive humidity or heat.
6 Never apply excessive force to the controls,
connectors or other parts of your Clavinova, and
avoid scratching or bumping it with hard objects.
7 Make sure that your local AC mains voltage
matches the voltage specified on the name plate
on the bottom panel. In some areas a voltage
selector may be provided on the bottom panel of
the main keyboard unit near the power cord.
Make sure that the voltage selector is set for the
voltage in your area. The voltage selector is set at
240V when the unit is initially shipped. To change
the setting use a “minus” screwdriver to rotate the
selector dial so that the correct voltage appears
next to the pointer on the panel.
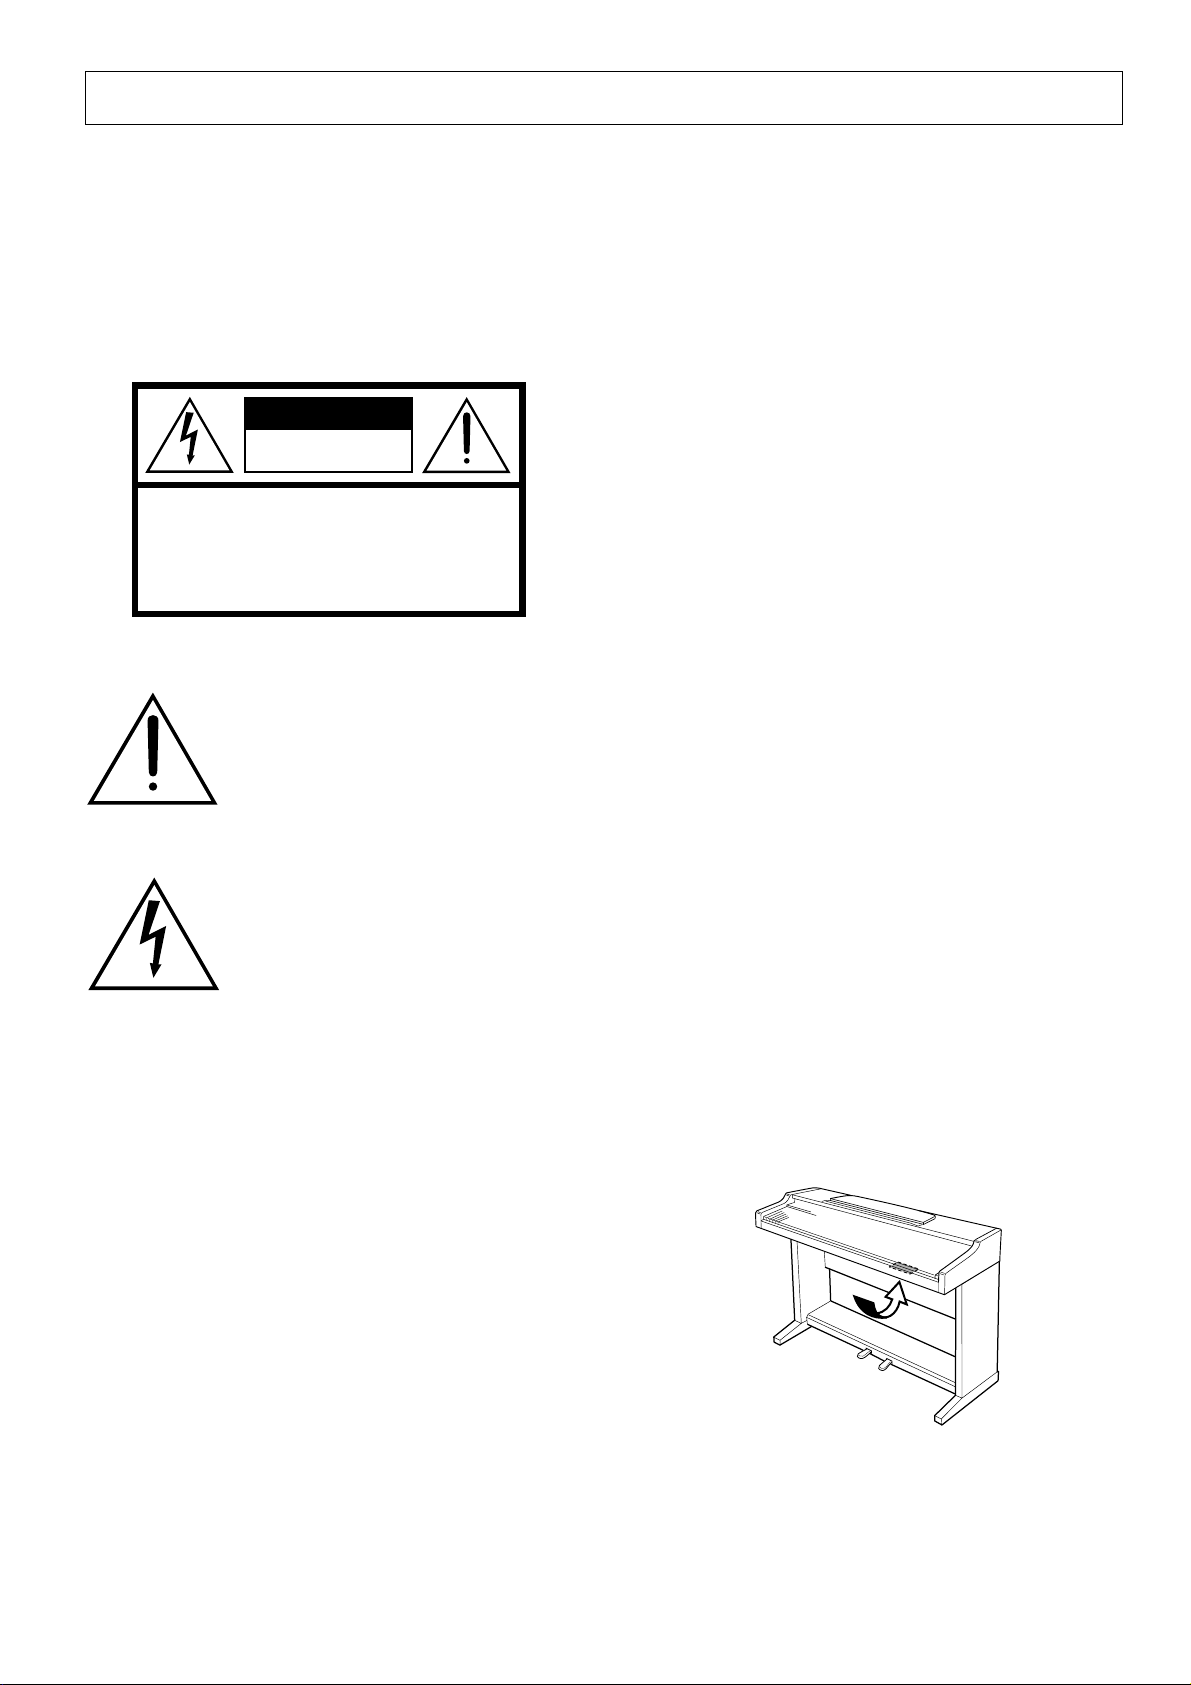
● Name Plate Location
The CLP-311 name plate is located on the
bottom panel.
Page 5

CLP-311
Owner’s Manual
Bedienungsanleitung
English
Deutsch
Mode d’emploi
Manual de instrucciones
Français
Español
Page 6

Contents
The Control Panel............................................................................................2
Connections .....................................................................................................4
Selecting & Playing Voices.............................................................................5
Playing the Demonstration Tunes ..................................................................6
The Dual Mode ................................................................................................7
●
Adjusting the Balance Between the Dual-mode Voices ..................7
●
Shifting a Dual-Mode Voice Up One Octave...................................7
The Pedals .......................................................................................................8
●
Soft/Sostenuto (Left) Pedal .............................................................8
●
Damper (Right) Pedal .....................................................................8
Transposition ...................................................................................................8
Pitch Control....................................................................................................9
●
Tuning Up........................................................................................9
●
Tuning Down ...................................................................................9
●
To Restore Standard Pitch ..............................................................9
The Metronome & Tempo Control ................................................................10
■
The Metronome ..................................................................................10
●
Metronome Volume .......................................................................10
●
Metronome Time Signature...........................................................10
■
Tempo Control ...................................................................................10
Using the Recorder ....................................................................................... 11
■
Recording ........................................................................................... 11
●
Changing the Initial Settings .........................................................12
●
Erasing the recorded data.............................................................12
■
Playback .............................................................................................12
●
Fast Forward Playback .................................................................12
MIDI Functions ..............................................................................................13
●
A Brief Introduction to MIDI ...........................................................13
●
MIDI “Messages” Transmitted & Received by the Clavinova ........13
●
MIDI Transmit & Receive Channel Selection ................................14
●
MIDI Transmit Transpose ..............................................................14
■
Other MIDI Functions ........................................................................14
●
Local Control ON/OFF ..................................................................15
●
Program Change ON/OFF ............................................................15
●
Control Change ON/OFF ..............................................................15
●
The Multi-Timbre Mode .................................................................16
●
The MIDI Split & Left Local OFF Mode .........................................16
●
Bulk Data Dump ............................................................................16
Troubleshooting.............................................................................................17
Options & Expander Modules ......................................................................17
Keyboard Stand Assembly ..............................................................................i
MIDI Data Format...........................................................................................v
Specifications...................................................................................................v
MIDI Implementation Chart........................................................................... vi
1
Page 7

The Control Panel
MASTER VOLUME
MIN
MAX
CLAVI.
PIANO E. PIANOMIDI/TRANSPOSE METRONOME
TONE
HARPSICHORD
PIPE
ORGAN
TEMPO
32 120
280
12 3 4 56
POWER
PHONES Jacks
(Bottom Panel)
Pitch control keys
(See page 9)
Left voice shift up key
MASTER VOLUME
MIN
MAX
C1 D1 E1 F1 G1 A1 B1 C2 D2 E2 F2 G2 A2 B2 C3 D3 E3 F3 G3 A3 B3 C4 D4 E4
B0A0G0F0E0D0C0B-1A-1
CLAVI.
HARPSI-
PIANO E. PIANOMIDI/TRANSPOSE METRONOME
TONE
PIPE
CHORD
ORGAN
Transpose keys
(See page 8)
(See page 7)
Balance keys (See page 7)
32 120
TEMPO
280
1 [POWER] Switch
Press the [POWER] switch once to turn the power
ON, a second time to turn the power OFF. When the
power is initially turned ON, the [PIANO] voice
selector LED will light.
2 [MASTER VOLUME] Control
The [MASTER VOLUME] control adjusts the
volume (level) of sound produced by the Clavinova’s
internal stereo sound system. The [MASTER VOL-
UME] control also adjusts headphone volume when a
pair of headphones is plugged into the PHONES jack
(page 5).
3 [MIDI/TRANSPOSE] Button
The [MIDI/TRANSPOSE] button allows access
to the Clavinova’s TRANSPOSE function (to shift
the pitch of the entire keyboard up or down) and
MIDI functions. For details refer to “TRANSPOSITION” on page 8, and “MIDI FUNCTIONS” on page
13, respectively.
4 Voice Selectors
The CLP-311 has five voice selectors. Simply
press any of the voice selectors to select the corresponding voice. The voice selector LED will light to
indicate which voice is currently selected.
The CLP-311 also has a DUAL mode in which
two voices can be played simultaneously across the
full range of the keyboard — see page 7 for details.
NOTE
• The PIANO voice is automatically selected
whenever the [POWER] switch is initially turned
ON.
5 [TEMPO] Control
This control adjusts the tempo of the CLP-311
metronome function as well as the playback tempo of
the recorder function. The tempo range is from 32 to
280 quarter-note beats per minute.
6 [METRONOME] Button
Turns the metronome sound on and off. The
[TEMPO] control, above, is used to set the tempo of
the metronome sound. More precise tempo settings
○○○○○○○○○○○○○○○○○○○○○○○○○○○○○○○○○○○○○○○○○○○○○○○○○○○○○○○○○○○○
2
Page 8

START/
STOP
RECORDER
REC DEMO
RECORDER
START/
REC DEMO
STOP
78
CLP-
311
The Control Panel
9
F4 G4 A4 B4 C5 D5 E5 F5 G5 A5 B5 C6
Right voice shift up key
(See page 6)
can be achieved by using the [METRONOME]
button and the CLP-311 keyboard as described on
page 10.
7 RECORDER [START/STOP] and [REC]
Buttons
These buttons control the CLP-311 recorder,
letting you record and play back just about anything
you play on the keyboard — up to a maximum of
about 1,300 notes. See page 11 for details.
8 [DEMO] Button
Activates the demo playback mode in which you
can select playback of five pre-programmed demonstration sequences. See page 6 for details.
9 Pedals
The CLP-311’s soft/sostenuto (left) and damper
(right) pedals provide a range of expressive control
capabilities similar to the pedal functions on an
acoustic piano. See page 8 for details.
D6 E6 F6 G6 A6 B6 C7
Soft/Sostenuto
pedal
Damper pedal
● The Music Stand
If you will be using sheet music with your
Clavinova, raise the music stand built into its top
panel by lifting the rear edge of the music stand,
then flip down the music stand braces and engage
them with the corresponding recesses.
The music stand can be lowered after slightly
lifting it and folding the two brackets which
support it against the back of the stand.
○ ○○○○○○○○○○○○○○○○○○○○○○○○○○○○○○○○○○○○○○○○○○○○○○○○○○○○○○○○○○○
3
Page 9

Connections
MIDI
IN OUT
AUX IN
RLRL/L+R
1 23
AUX OUT
AC INLET
DOU-10
AUX OUT
L/L+RR
Stereo System
AUX IN
RL
1 AUX IN L and R Jacks
These jacks are intended for use with an external tone generator
module such as the Yamaha DOU-10 Disk Orchestra Unit. The
stereo outputs from the external tone generator module are connected to the AUX IN L and R jacks, allowing the sound of the tone
generator to be reproduced via the Clavinova’s internal sound
system and speakers.
2 AUX OUT L/L+R and R Jacks
The AUX OUT L/L+R and R jacks deliver the output of the
Clavinova for connection to an instrument amplifier, mixing console, PA system, or recording equipment. If you will be connecting
the Clavinova to a monaural sound system, use only the L/L+R jack.
When a plug is inserted into the L/L+R jack only, the left- and rightchannel signals are combined and delivered via the L/L+R jack so
you don’t lose any of the Clavinova’s sound.
● The Internal Amplifier & Speaker System
The CLP-311 features a high-performance stereo amplifier delivering 20
watts per channel to a pair of 16-cm speaker units.
NOTE
• The AUX OUT jack signal must never be returned to the AUX IN
jacks, either directly or through external equipment.
MIDI
IN OUT
3 MIDI IN and OUT Connectors
The MIDI IN connector receives MIDI data from an external
MIDI device (such as the DOU-10 Disk Orchestra Unit) which can
be used to control the Clavinova. The MIDI OUT connector transmits MIDI data generated by the Clavinova (e.g. note and velocity
data produced by playing the Clavinova keyboard).
DOU-10
More details on MIDI are given in “MIDI FUNCTIONS” on
page 13.
● PHONES Jacks
(Bottom Panel)
Two pairs of standard pair of stereo headphones can be plugged
in here for private practice or late-night playing. The internal
speaker system is automatically shut off when a pair of headphones
is plugged into either of the PHONES jacks.
○○○○○○○○○○○○○○○○○○○○○○○○○○○○○○○○○○○○○○○○○○○○○○○○○○○○○○○○○○○○
4
Page 10

Selecting & Playing Voices
Turn Power On ..................................................................................................
After making sure that the Clavinova’s AC cord is properly plugged
POWER
MASTER VOLUME
MIN
MAX
into the Clavinova itself and plugged into a convenient AC wall outlet,
press the [POWER] switch located to the left of the keyboard to turn
the power ON. In some areas a plug adaptor may be provided to match
the pin configuration of the AC wall outlets in your area.
When the power is turned ON, the [PIANO] voice selector LED
will light (the PIANO voice is automatically selected whenever the
power is turned ON).
Set the Volume..................................................................................................
Initially set the [MASTER VOLUME] control about half way
between the “MIN” and “MAX” settings. Then, when you start playing,
re-adjust the [MASTER VOLUME] control for the most comfortable
listening level.
PIANO E. PIANO
CLAVI.
TONE
HARPSI-
CHORD
PIPE
ORGAN
Select a Voice.....................................................................................................
Select the desired voice by pressing one of the voice selectors.
Play................................................................................................................................
The Clavinova offers keyboard touch response, so the volume and
timbre of notes played can be controlled according to how “hard” you
play the keys. The amount of variation available depends on the selected voice.
○ ○○○○○○○○○○○○○○○○○○○○○○○○○○○○○○○○○○○○○○○○○○○○○○○○○○○○○○○○○○○
5
Page 11

Playing the Demonstration Tunes
The CLP-311 includes five demo tunes that effectively demonstrate its sound
capabilities. Here’s how you can select and play the demo tunes:
DEMO
PIANO E. PIANO
CLAVI.
TONE
HARPSI-
CHORD
PIPE
ORGAN
Engage the Demo Mode .........................................................................
Press the [DEMO] button to engage the demo mode — the voice
selectors will flash in sequence.
Select a Demo Tune ....................................................................................
Press one of the flashing voice selectors to start playback of the
corresponding demo tune — featuring the voice normally selected by
that voice selector button. The demo tunes will play in sequence until
stopped, starting with the selected tune. The voice selector indicator
will flash during demo playback.
● The Demo Tunes
• [PIANO] button:............................ “Mazurka op. 7-1 Bb major” by F. F. Chopin
• [CLAVINOVA TONE] button: ........ “Pavane pour une infante défunte” by J. M.
Ravel
• [HARPSICHORD] button: ............ “The Harmonious Blacksmith” by G. F.
Händel
• [PIPE ORGAN] button: ................ “Prelude No.1 C Major from 8 Short
Prelude and Fugues BWV553 - 560” by J.
S. Bach
* The demonstration pieces listed above are short excerpts from the original composi-
tions. The other demo tune is original (© 1996 by YAMAHA CORPORATION).
MASTER VOLUME
MIN
DEMO
MAX
Set the Volume..................................................................................................
Use the [MASTER VOLUME] control to adjust the volume.
NOTE
• The [TEMPO] control does not affect demo playback.
Play a Different Demo...............................................................................
You can start playback of any other demo tune during playback by
simply pressing the corresponding voice selector. Playback will stop
and the playback-ready mode described in step 2, above, will be reengaged if you press the voice selector of the demo that is currently
playing.
Stop the Demo ..................................................................................................
Press the [DEMO] button when you want to stop demo playback
and return to the normal play mode.
○○○○○○○○○○○○○○○○○○○○○○○○○○○○○○○○○○○○○○○○○○○○○○○○○○○○○○○○○○○○
6
Page 12

The Dual Mode
The DUAL mode makes it possible to play two voices simultaneously across
the entire range of the keyboard. To activate the DUAL mode simply press two
voice selectors at the same time (or press one voice selector while holding
another). The voice indicators of both selected voices will light when the DUAL
mode is active. To return to the normal single-voice play mode, press any single
voice selector.
Adjusting the Balance Between the Dual-mode
Voices
.........................................................................................................................
C
2
Left voice
maximum.
PIANO
HARPSI-
CHORD
C
3
Equal
balance.
PIPE
ORGAN
Right voice
maximum.
The volume levels of the two voices combined in the DUAL mode
are normally set automatically to produce a pleasing balance (see
“Default Settings” below). The balance can be adjusted manually by
using the C2 through C4 keys on the keyboard while pressing the two
voice selectors corresponding to the voices to be combined in the
C
4
DUAL mode.
The C3 key produces equal (50:50) balance between the two voices,
while keys to the left of C3 increase the volume of the left voice in
relation to the right voice, and keys to the right of C3 increase the
volume of the right voice in relation to the left voice. By “left” and
“right” voice we refer to the relative positions of the voice selectors —
i.e. in a HARPSICHORD/PIPE ORGAN combination HARPSICHORD is the left voice and PIPE ORGAN is the right voice.
● Default Settings
Voice Combinations Balance keys
PIANO/PIPE ORGAN.............................. E2
CLAVINOVA TONE/PIPE ORGAN .......... F2
E. PIANO/PIPE ORGAN ......................... E2
HARPSICHORD/PIPE ORGAN .............. G2
* All other voice combinations are set to C3 (equal balance).
PIANO
HARPSI-
CHORD
PIPE
ORGAN
Shifting a Dual-Mode Voice Up One Octave.....................
Depending on which voices you combine using the DUAL mode,
the combination may sound better if one of the voices is shifted up an
octave. To shift the right voice, press the C5 key while pressing the two
voice selectors corresponding to the voices to be combined in the
1
C
5
C
DUAL mode. Press C5 again to shift the voice back to its normal range.
Use the C1 key in the same way to shift the left voice.
All voice combinations are set to the same octave by default.
Left voice
shift up.
○ ○○○○○○○○○○○○○○○○○○○○○○○○○○○○○○○○○○○○○○○○○○○○○○○○○○○○○○○○○○○
Right voice
shift up.
7
Page 13

Soft/Sostenuto
pedal
The Pedals
The CLP-311 has two foot pedals that produce a range of expressive effects
similar to those produced by the pedals on an acoustic piano.
Soft/Sostenuto (Left) Pedal.................................................................
When the power is turned on the left pedal is set for soft pedal
operation. Pressing the soft pedal reduces the volume and slightly
changes the timbre of notes played.
The left pedal can be switched to sostenuto operation by pressing the
pedal while holding the [MIDI/TRANSPOSE] button. If you play a
note or chord on the keyboard and press the sostenuto pedal while the
note(s) are held, those notes will be sustained as long as the pedal is
held (as if the damper pedal had been pressed) but all subsequently
played notes will not be sustained. This makes it possible to sustain a
chord, for example, while other notes are played “staccato.” You can
switch back to soft pedal operation at any time simply by pressing the
Damper pedal
pedal while holding the [MIDI/TRANSPOSE] button again.
Damper (Right) Pedal................................................................................
The damper pedal functions in the same way as a damper pedal on
an acoustic piano. When the damper pedal is pressed notes played have
a long sustain. Releasing the pedal immediately stops (damps) any
sustained notes.
Transposition
The Clavinova’s TRANSPOSE function makes it possible to shift the pitch of
the entire keyboard up or down in semitone intervals up to a maximum of six
semitones. “Transposing” the pitch of the Clavinova keyboard facilitates playing
in difficult key signatures, and you can easily match the pitch of the keyboard to
the range of a singer or other instrumentalist.
The [MIDI/TRANSPOSE] button and keys F#2 through F#3 on the keyboard are used for transposition.
ZPress and hold the [MIDI/TRANSPOSE] button.
3
C
MIDI/TRANSPOSE
F#
2
-6 -4 -2 +1
-5 -3 -1 0 +2 +4 +5
Transpose
down.
Normal
pitch.
F#
+3 +6
Transpose
up.
3
XPress a key between F#2 and F#3 according to the desired amount
of transposition.*
CRelease the [MIDI/TRANSPOSE] button.
* Pressing the C3 key produces normal keyboard pitch. Pressing the
key to the left of C3 (B2) transposes the pitch of the keyboard down
a semitone, the next key to the left (Bb2) transposes down a whole
tone (two semitones), etc., down to the F#2 key which transposes
down 6 semitones. Upward transposition is accomplished in the
same way using the keys to the right of C3, up to F#3 which transposes up 6 semitones.
NOTE
• Notes below and above the A-1 — C7 of the Clavinova sound one octave
higher and lower, respectively.
○○○○○○○○○○○○○○○○○○○○○○○○○○○○○○○○○○○○○○○○○○○○○○○○○○○○○○○○○○○○
8
Page 14

A-1B
Pitch Control
Pitch control makes it possible to tune the Clavinova over a ±50-cent range
(approximate) in approximately 1.6-cent intervals. A hundred “cents” equals one
semitone, so the tuning range provided allows fine tuning of overall pitch over a
range of approximately a semitone. Pitch control is useful for tuning the
Clavinova to match other instruments or recorded music.
Tuning Up ...............................................................................................................
ZTo tune up (raise pitch), hold the A-1 and B-1 keys simultaneously.
-1
3
C
3
B
XPress any key between C3 and B3. Each time a key in this range is
pressed the pitch is increased by approximately 1.6 cents, up to a
maximum of 50 cents above standard pitch.
CRelease the A-1 and B-1 keys.
A#
-1
A
A#
A-1B
Tuning Down.......................................................................................................
-1
3
C
3
B
ZTo tune down (lower pitch), hold the A-1 and A#-1 keys simulta-
neously.
XPress any key between C3 and B3. Each time a key in this range is
pressed the pitch is decreased by approximately 1.6 cents, up to a
maximum of 50 cents below standard pitch.
CRelease the A-1 and A#-1 keys.
To Restore Standard Pitch*................................................................
-1
-1
3
C
3
B
ZTo restore standard pitch (A3 = 440 Hz), hold the A-1, A#-1 and
B-1 keys simultaneously.
XPress any key between C3 and B3.
CRelease the A-1, A#-1 and B-1 keys.
* Standard pitch (A3 = 440 Hz) is set when the [POWER] switch is
initially turned ON.
NOTE
• The PITCH CONTROL function has no effect when LOCAL OFF is
active (see “MIDI FUNCTIONS,” page 13).
○ ○○○○○○○○○○○○○○○○○○○○○○○○○○○○○○○○○○○○○○○○○○○○○○○○○○○○○○○○○○○
9
 Loading...