

Page 1
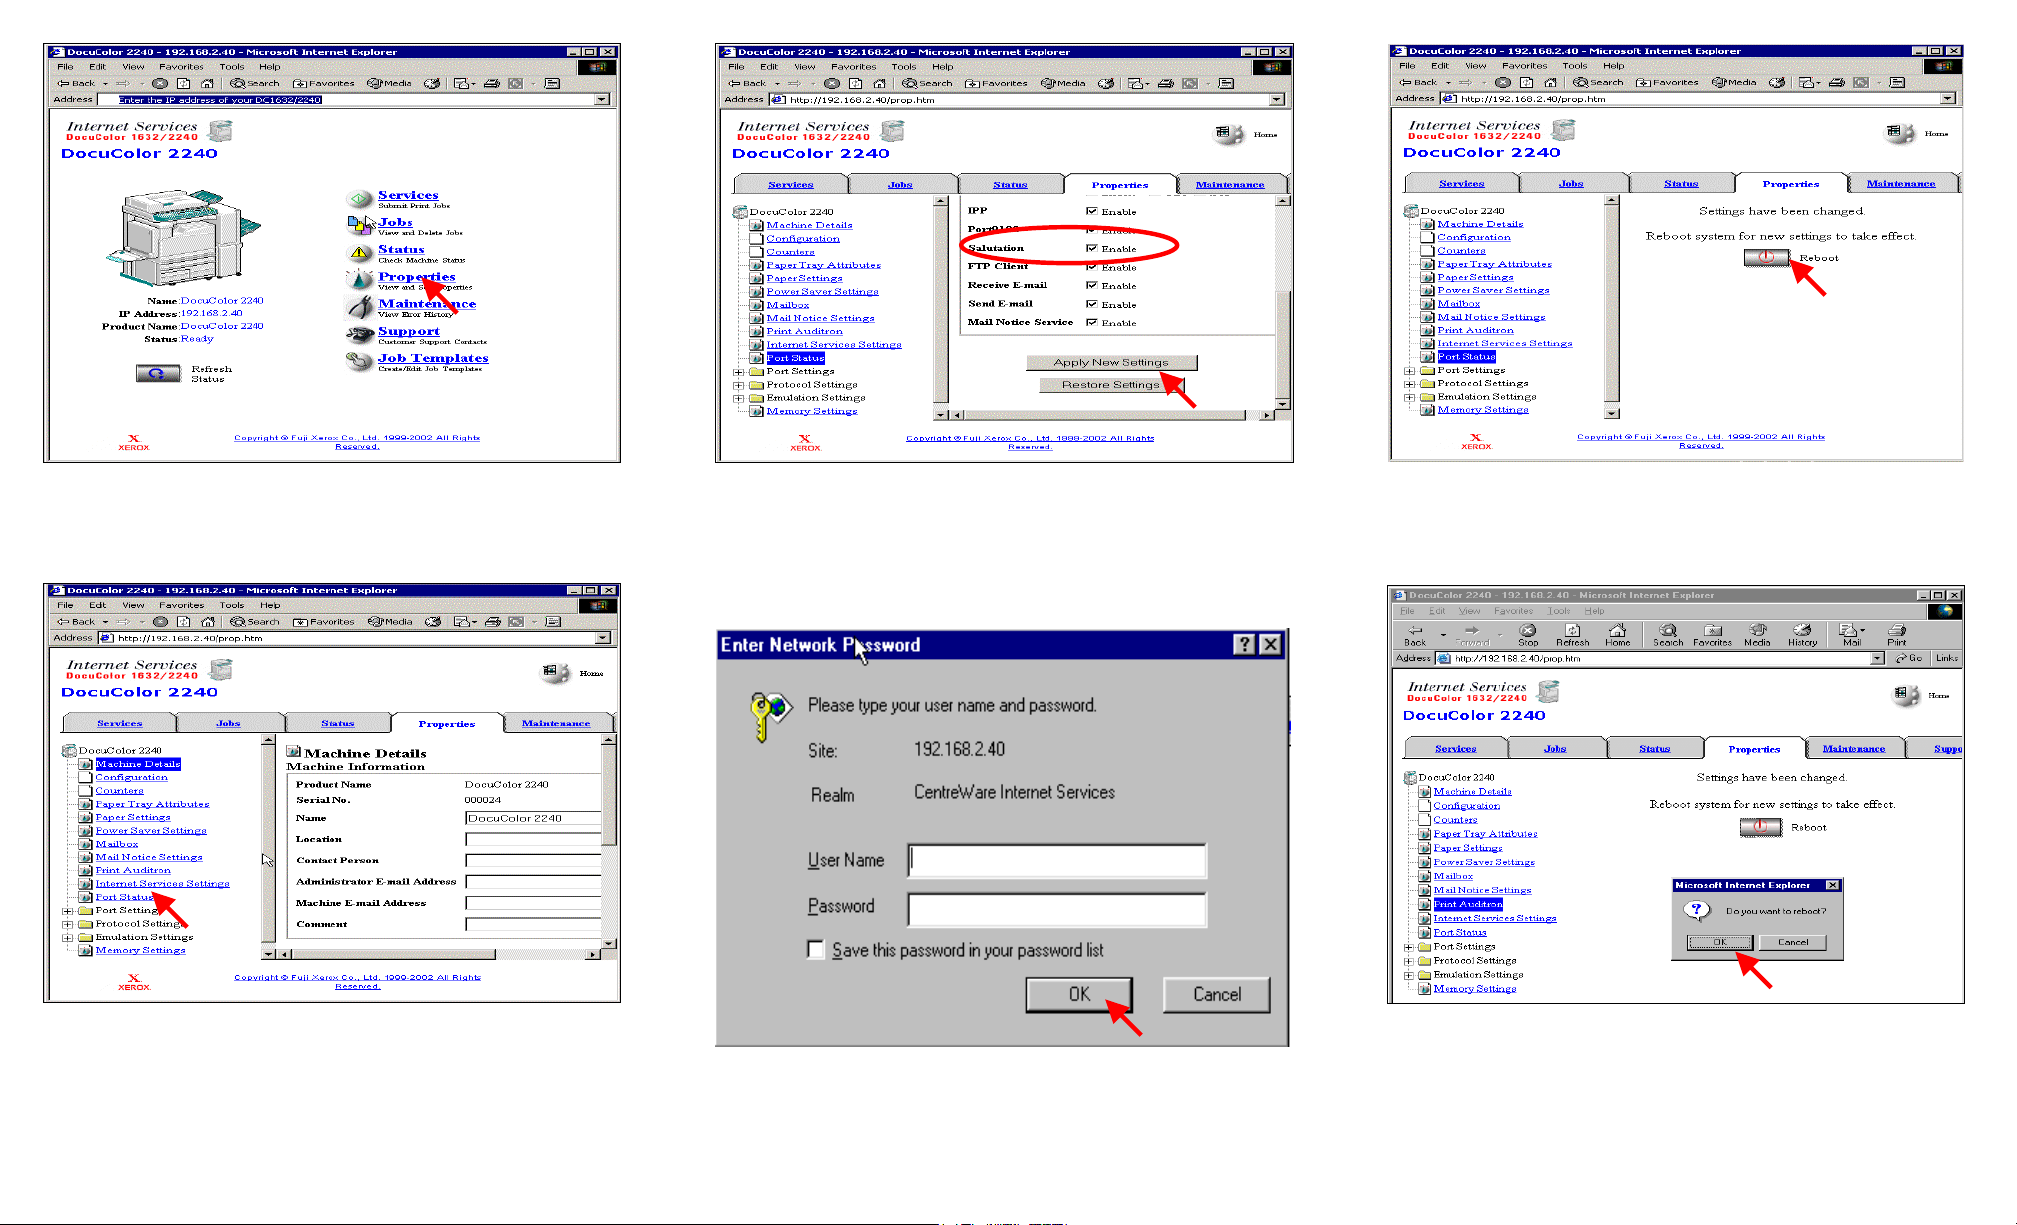
Fig. 1
Select Properties.
Fig. 3
Place a check mark in the “Enable” box next to Salutation. Select
pply New Settings. A
*If a check mark already appears in the “Enable” box next to Salutation
skip the remaining steps in this pamphlet and continue to Retrieving
Scanned Documents Using Scan Driver Part 2 of 2.
Fig. 5
The “Settings have been changed” confirmation screen appears. Click
Reboot.
Fig. 2
Select Port Status.
Fig. 6
Fig. 4
Enter the User Name and Password. Click OK. (See Machine
Administration User Guide for default password)
*This screen might not appear if the username and password have
already been entered.
Retrieving Scanned Documents Using Scan Driver - 1 of 4
Click OK (The DC 1632/2240 will take approximately 2 minutes to
reboot.)
Page 2
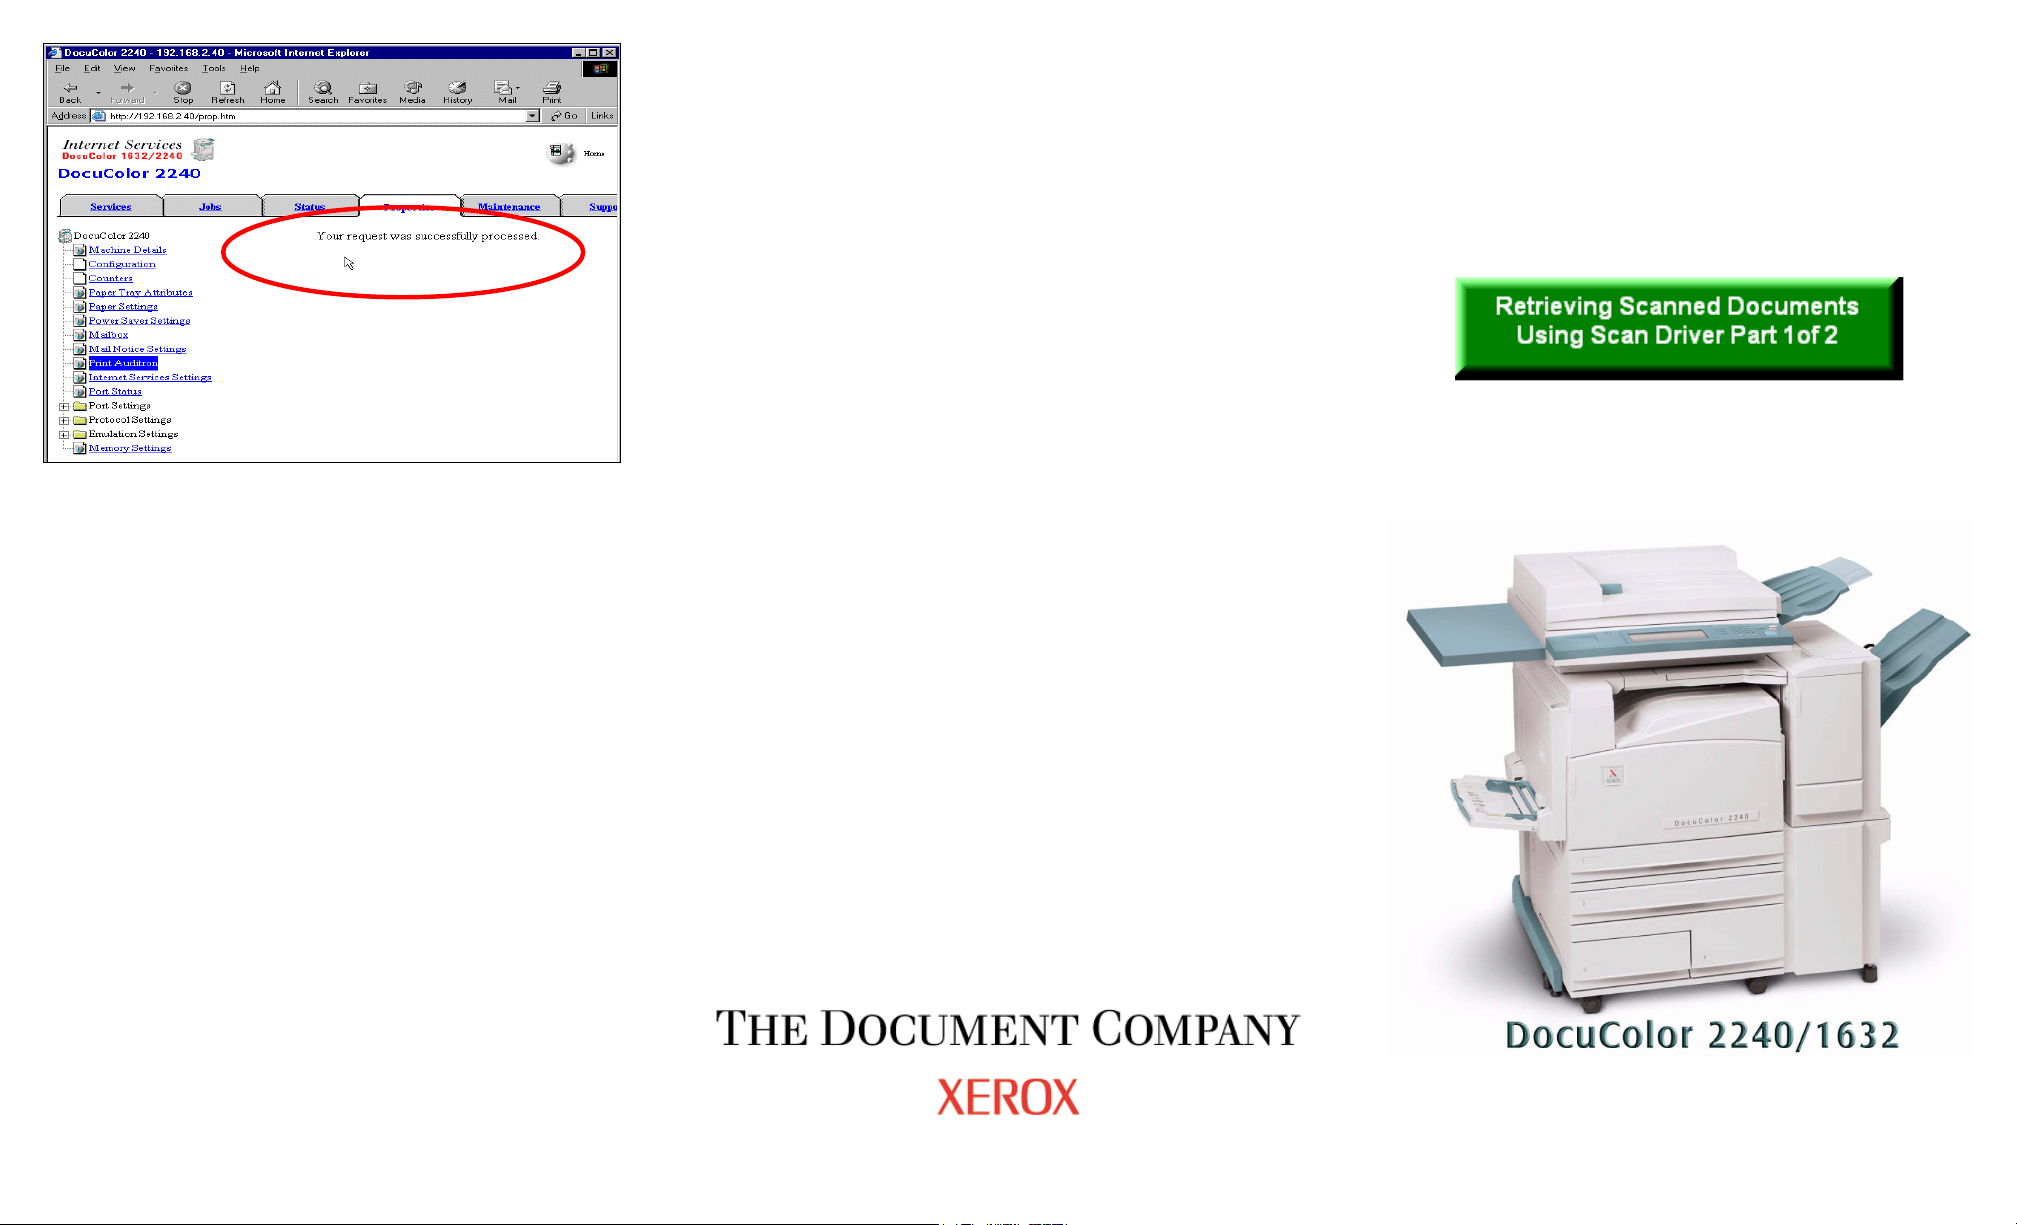
Fig. 7
If the message “Your request was successfully processed” is not
isplayed, repeat the steps in this pamphlet. d
Continue with Retrieving Scanned Documents using
Scan Driver Part 2 of 2.
Quick Start Guide
Retrieving Scanned Documents Using Scan Driver - 2 of 4
Page 3

Fig. 1
From desktop Operating System Select Start | All Programs | Xerox |
Utility | Docucolor 1632/2240 Mailbox Viewer.
* This screen may very depending on the operating system of the
computer.
Fig. 5
Select the scanner and click on Select Scanner.
Fig. 3
Select Change Display. Select Use Network. Make sure Display
other network scanners is checked. Click on Add. Enter IP address
and Scanner Name. Click on OK.
Fig. 2
If the scanner name is displayed click on Select Scanner and continue to
Fig. 6. If it is not go to Fig. 3.
Fig. 6
Enter Mailbox Number and Password. Select Open Mailbox.
Fig. 4
Select Ok.
Retrieving Scanned Documents Using Scan Driver - 3 of 4
Fig. 7
Select Settings.
Page 4

Fig.8
Ensure “Auto Import” box is checked. Select Import Settings.
Quick Start Guide
Fig. 10
Select Ok.
Fig. 9
In the “Save in” box enter the path of the folder in which you want your
scanned images to be saved. Select Ok.
Fig. 11
Select Import.
Retrieving Scanned Documents Using Scan Driver - 4 of 4
 Loading...