

Page 1
Page 2

Page 3

Table of Contents
Overview 1
Printer Environments 2
As a Local Printer 2
As a Network Printer 3
A. Installing the Print Drivers 7
T
ABLE OF CONTENTS
Overview 7
Windows 95/98/Me 8
Installing PostScript or PCL Print Driver 8
Configuring the PostScript Print Driver on Windows 95/98/Me 10
Configuring the PCL Print Driver on Windows 95/98/Me 18
Windows NT 4.0 25
Installing PostScript or PCL Print Driver 25
Configuring PostScript Print Driver on Windows NT 4.0 28
Configuring the PCL Print Driver on Windows NT 4.0 38
Windows 2000 and Windows XP 45
Installing PostScript or PCL Print Driver 45
Configuring the PostScript Print Driver on Windows 2000/XP 47
Configuring the PCL Print Driver on Windows 2000/XP 57
TABLE OF CONTENTS
i
Page 4

T
ABLE OF CONTENTS
Macintosh 64
Installing PostScript Print Driver 64
Setting the Print Driver Properties on Macintosh 66
B. Basic Printing 71
Paper 71
Differences From Copying 71
Prior to Printing 72
Printing Procedure 72
Setting Printing Features 74
Using On Line Help 75
Switching Printer Off-line 76
Cancel Print/Check Print Job Status 77
Cancel Print from the Workstation 77
Canceling a Print Job Using Internet Services 77
Canceling a Print Job From the Printer 77
ii
Page 5

T
ABLE OF CONTENTS
C. Special Printing 80
Specifying Output Color for Printing in a PCL Driver 80
Printing with Black 80
Printing with Auto 85
Adjusting Color for Printing 94
Adjusting Image Settings (Brightness/Chroma/Contrast) 95
Adjusting Color Balance 97
Adjusting Profile Settings 98
Adjusting Detailed Settings 101
Secure Print 106
Setting Secure Print Jobs 106
Printing Secure Print Jobs 107
Delayed Print 109
Setting Delayed Print Jobs 109
Printing Delayed Print Jobs 110
Sample Print 111
Setting Sample Print Jobs 111
Printing Sample Print Jobs 112
TABLE OF CONTENTS
iii
Page 6

T
ABLE OF CONTENTS
D. Internet Services 113
Overview 113
Introduction 113
Screen Structure 114
System Structure 115
Configuring the Browser 116
Netscape Communicator 116
Internet Explorer 117
Proxy Server and Port Number 118
Proxy Server Setting 118
Port Number Setting 118
Accessing Internet Services from the Workstation 119
Internet Services Features 120
Printing Documents Using the Services Feature 121
Printing Documents 122
Viewing/Deleting Jobs Using the Jobs Feature 123
Viewing the Active Jobs List 123
Deleting Jobs 124
iv
Page 7

Overview
2. User Guide (Print)
This chapter describes how to install print drivers for basic and
special printing. It also explains the use of Internet Services,
printing features and all the necessary steps for printing.
Print Drivers The print drivers for this machine are multi-environment drivers
designed to enable printing from the workstation to a DocuColor
2240/1632 on the network. The print drivers contain a variety of
feature options which enable you to customize your print jobs. The
DocuColor 2240/1632 supports Adobe PostScript 3 version
3011.106, and PCL 6/5e Version 4.1.
Print drivers for this machine are included on the CD-ROM that
came with your printer. Print drivers are installed on the user
workstation to enable fast, efficient printing from your connected
workstation.
USER GUIDE (PRINT)
Print driver installation procedures are provided for the following
workstation environments:
• Windows 95, 98, and Windows Me
• Windows NT 4.0
• Windows 2000 and Windows XP
•Macintosh
Basic Printing This section explains how to perform basic printing tasks.
Special Printing The Special Printing section explains how to program special
printing such as printing with special papers, and adjusting colors.
Internet Services When the machine is in TCP/IP environment, Internet Services
allows the user to change or check printer settings via a web
browser.
12
2–1
Page 8
U
SER GUIDE
(P
RINT
)
Printer Environments
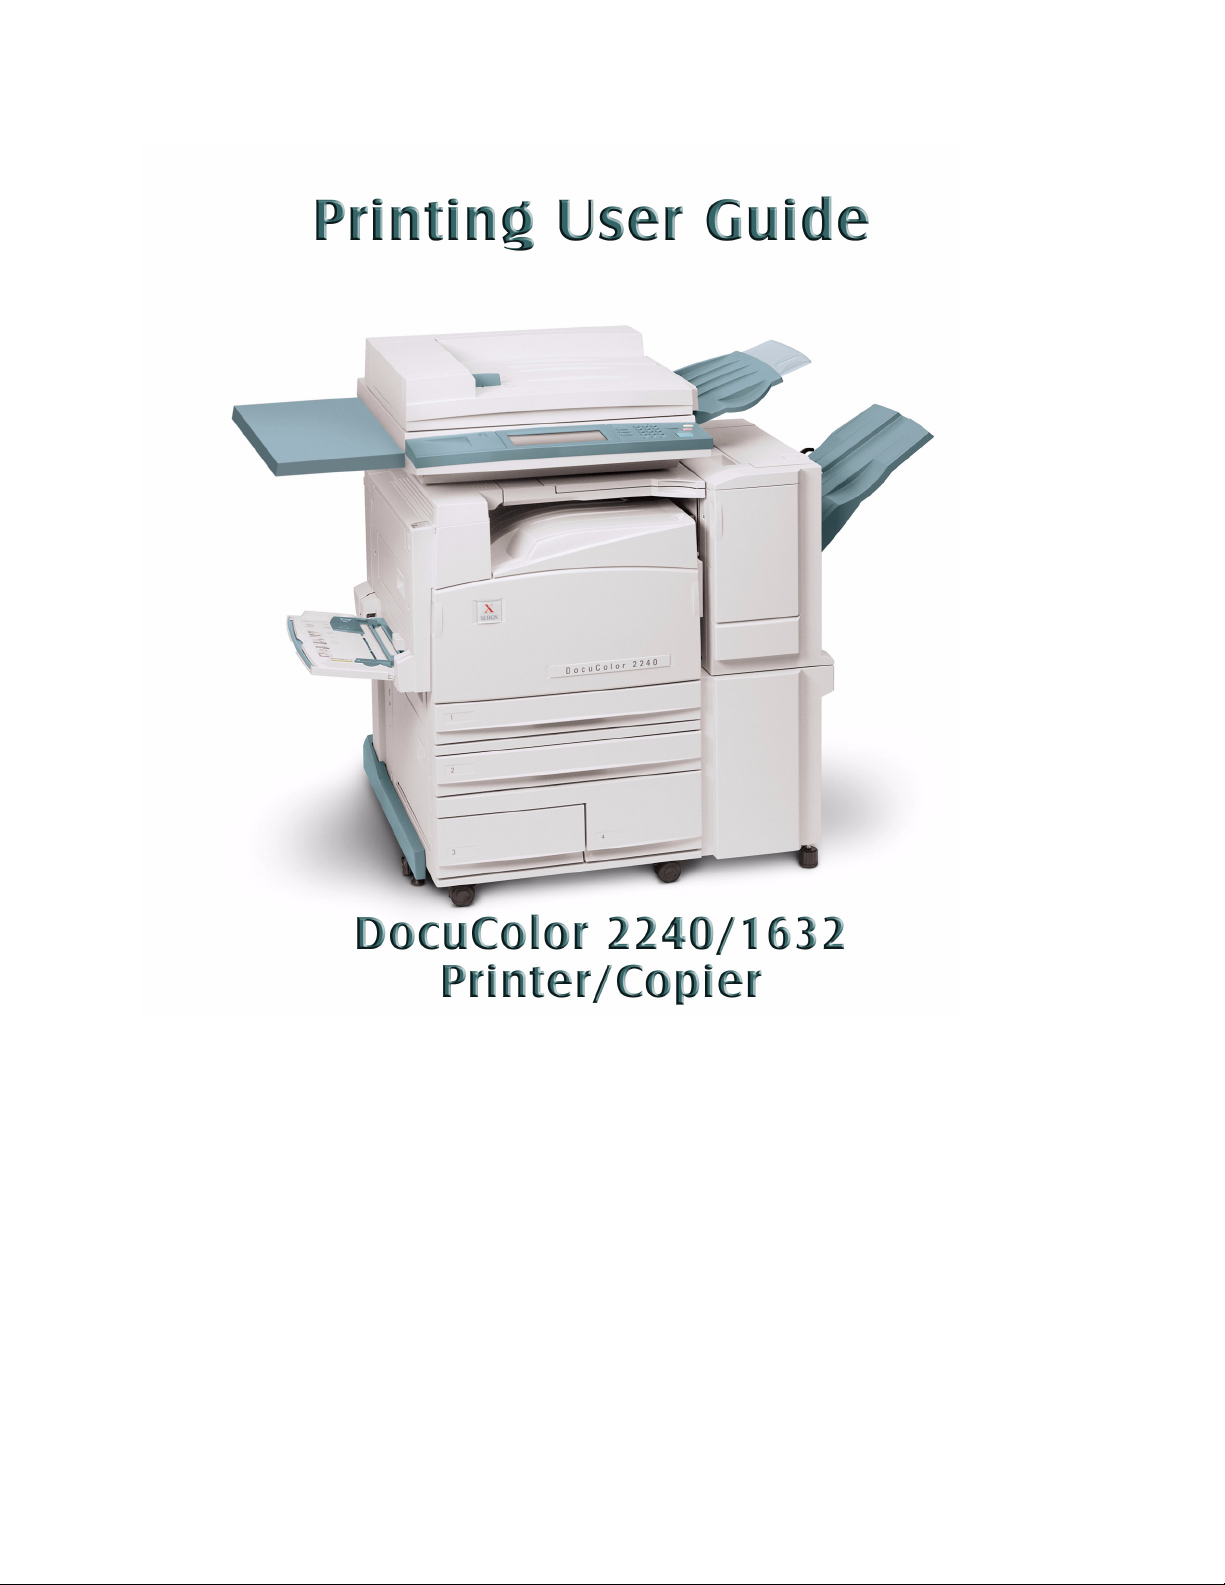
As a Local Printer
This machine can be set up in many different environments.
• When connected to a computer directly, it can be used as
a local printer.
• When connected to a network, it can be used as a network
printer.
This section explains the different printer environments that can
be set up for this machine.
For details on how to connect this machine to a network, refer to
the System Administrator’s Guide.
Using parallel interface connects this machine directly to a
computer.
CAUTION: Use only parallel interface cable provided by our
company. Using a parallel interface cable from another source
may lead to electric wave obstruction.
2–2
Page 9
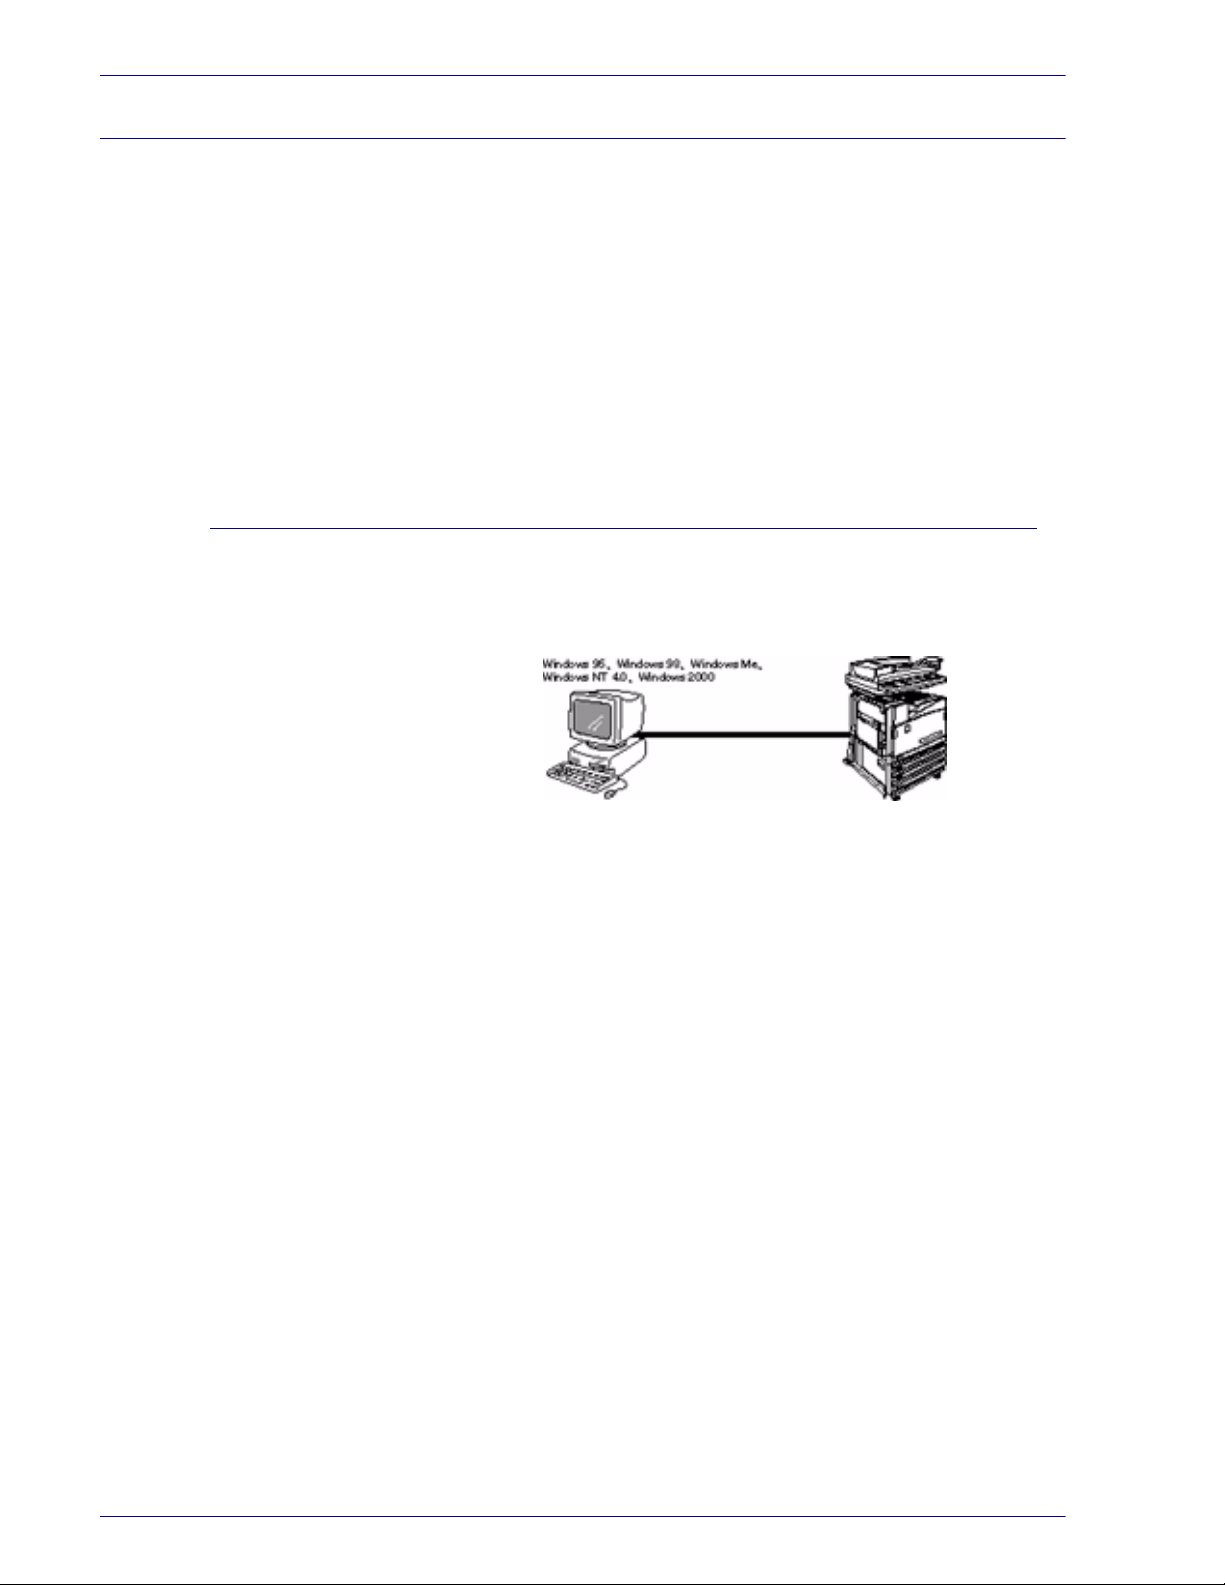
As a Network Printer
Windows Network (SMB)
Server Message Block (SMB) is a protocol for sharing files or a
printer on Windows 95, Windows 98, Windows Me, Windows NT
4.0, Windows 2000, and Windows XP. Using SMB, print data or
settings can be sent directly to a printer on the same network
(Ethernet interface) without going through a server.
For details on how to connect this machine to a Windows network
using SMB, refer to the System’s Administrator’s Guide.
U
SER GUIDE
(P
RINT
)
TCP/IP (LPD)
This machine supports TCP/IP (LPD). The different connections
are briefly explained below.
For details on how to connect this machine to a Windows
computer using TCP/IP, refer to the System’s Administrator’s
Guide.
Windows 95/98/Me Using our TCP/IP Direct Print Utility, print data can be sent directly
to a printer on the same network (Ethernet interface) without going
through a server. TCP/IP Direct Print Utility is installed together
with the print driver.
USER GUIDE (PRINT)
2–3
Page 10
U
SER GUIDE
(P
RINT
)
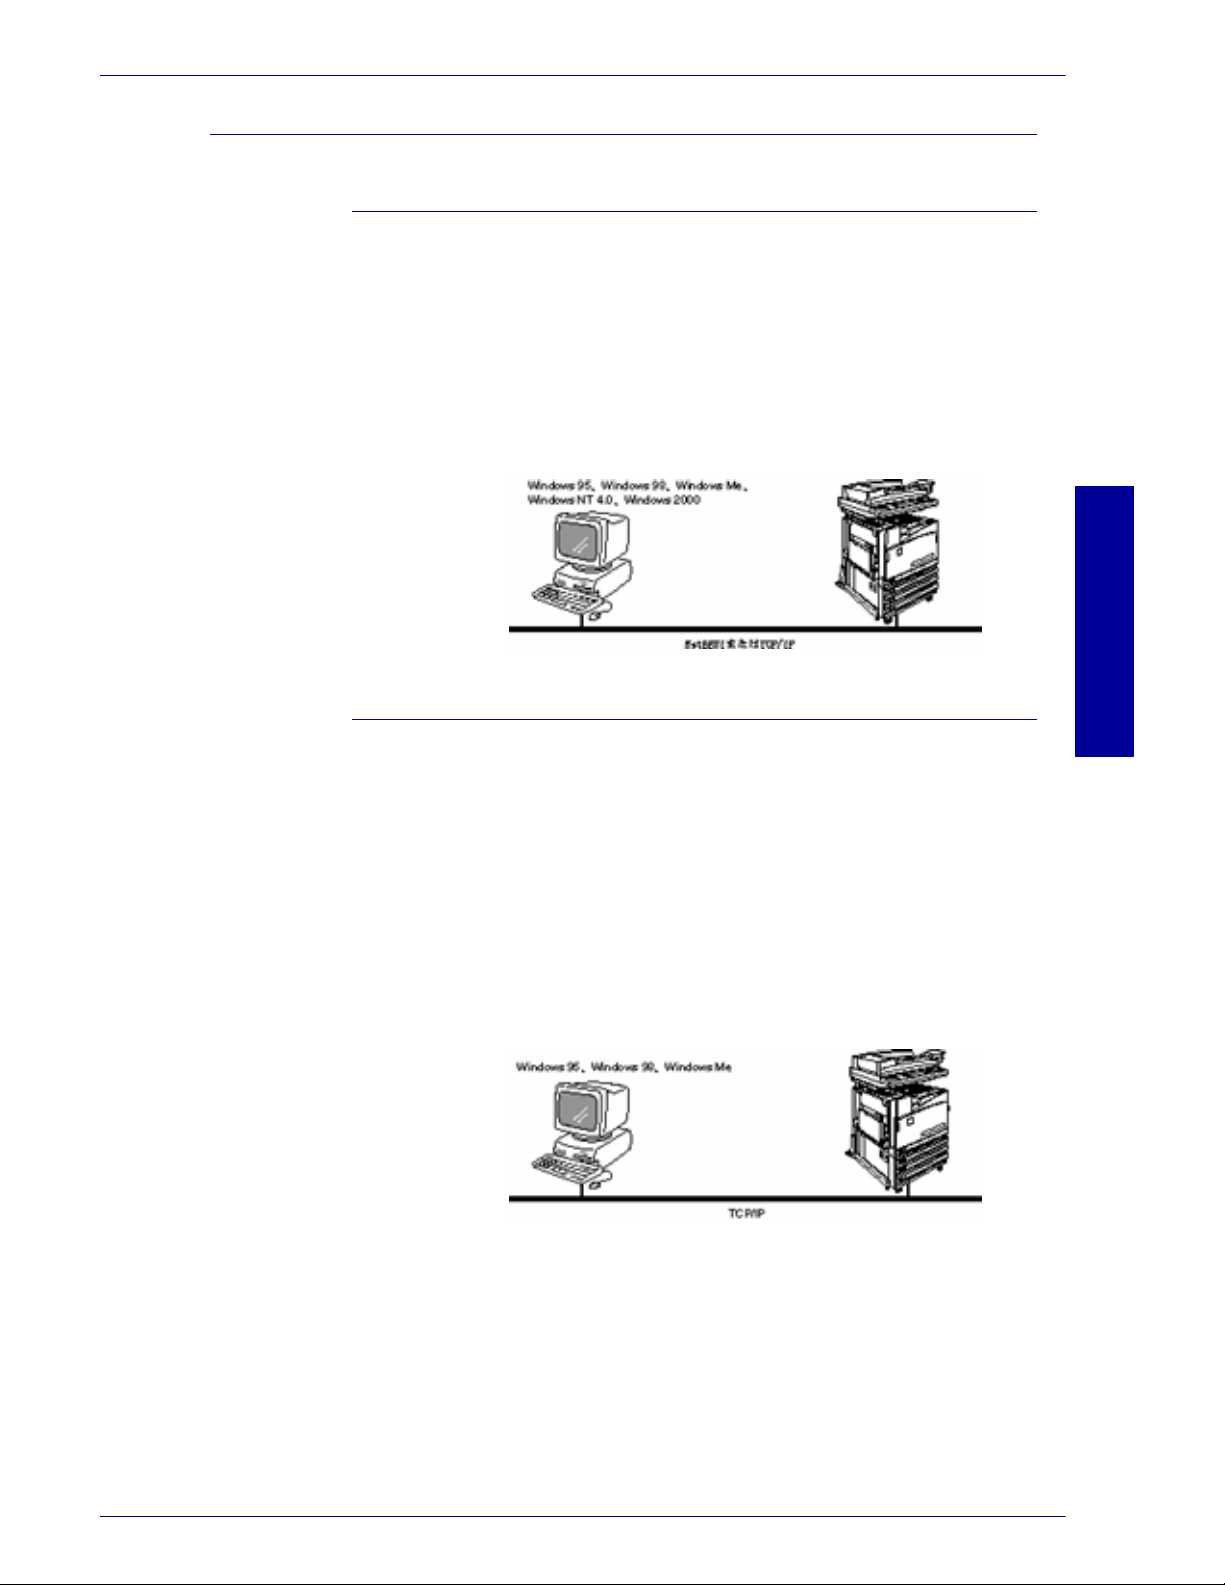
Windows NT 4.0/2000/XP Using the LPR port for the operating system, print data can be
sent directly for printing.
Once the printer registered on a Windows NT 4.0, Windows 2000,
or Windows XP computer is shared, you can also send data from
Windows 95, Windows 98, Windows Me to the shared printer for
printing.
Internet Printing This machine supports Internet Printing Protocol (IPP). Using IPP,
you can print to a remote printer through the internet or intranet.
For details on how to set-up Internet printing from a Windows
2000, Windows XP, or Windows Me through Internet Printing
Protocol, refer to the System Administrator’s Guide.
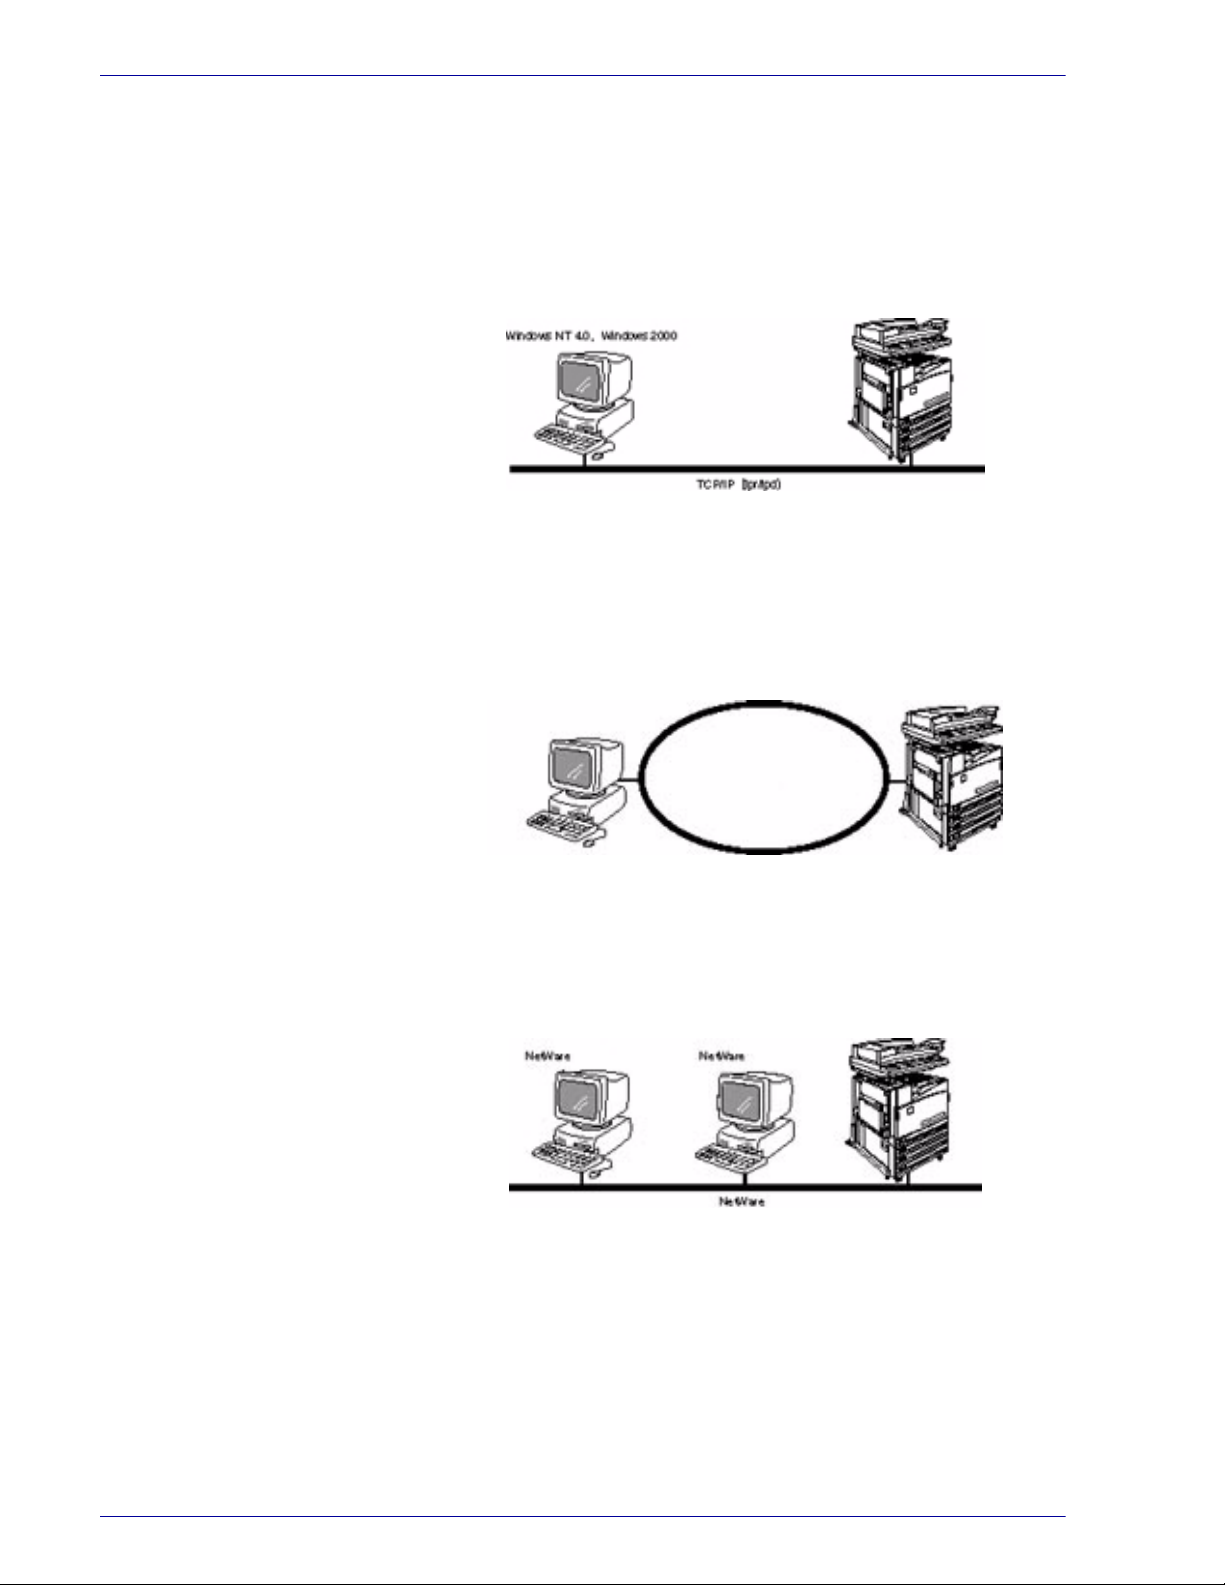
NetWare This machine can be used as a network operating system in an
environment using Novell NetWare.
For details on how to connect this machine to a Novell NetWarenetwork, refer to the System Administrator’s Guide.
2–4
Page 11
U
SER GUIDE
(P
RINT
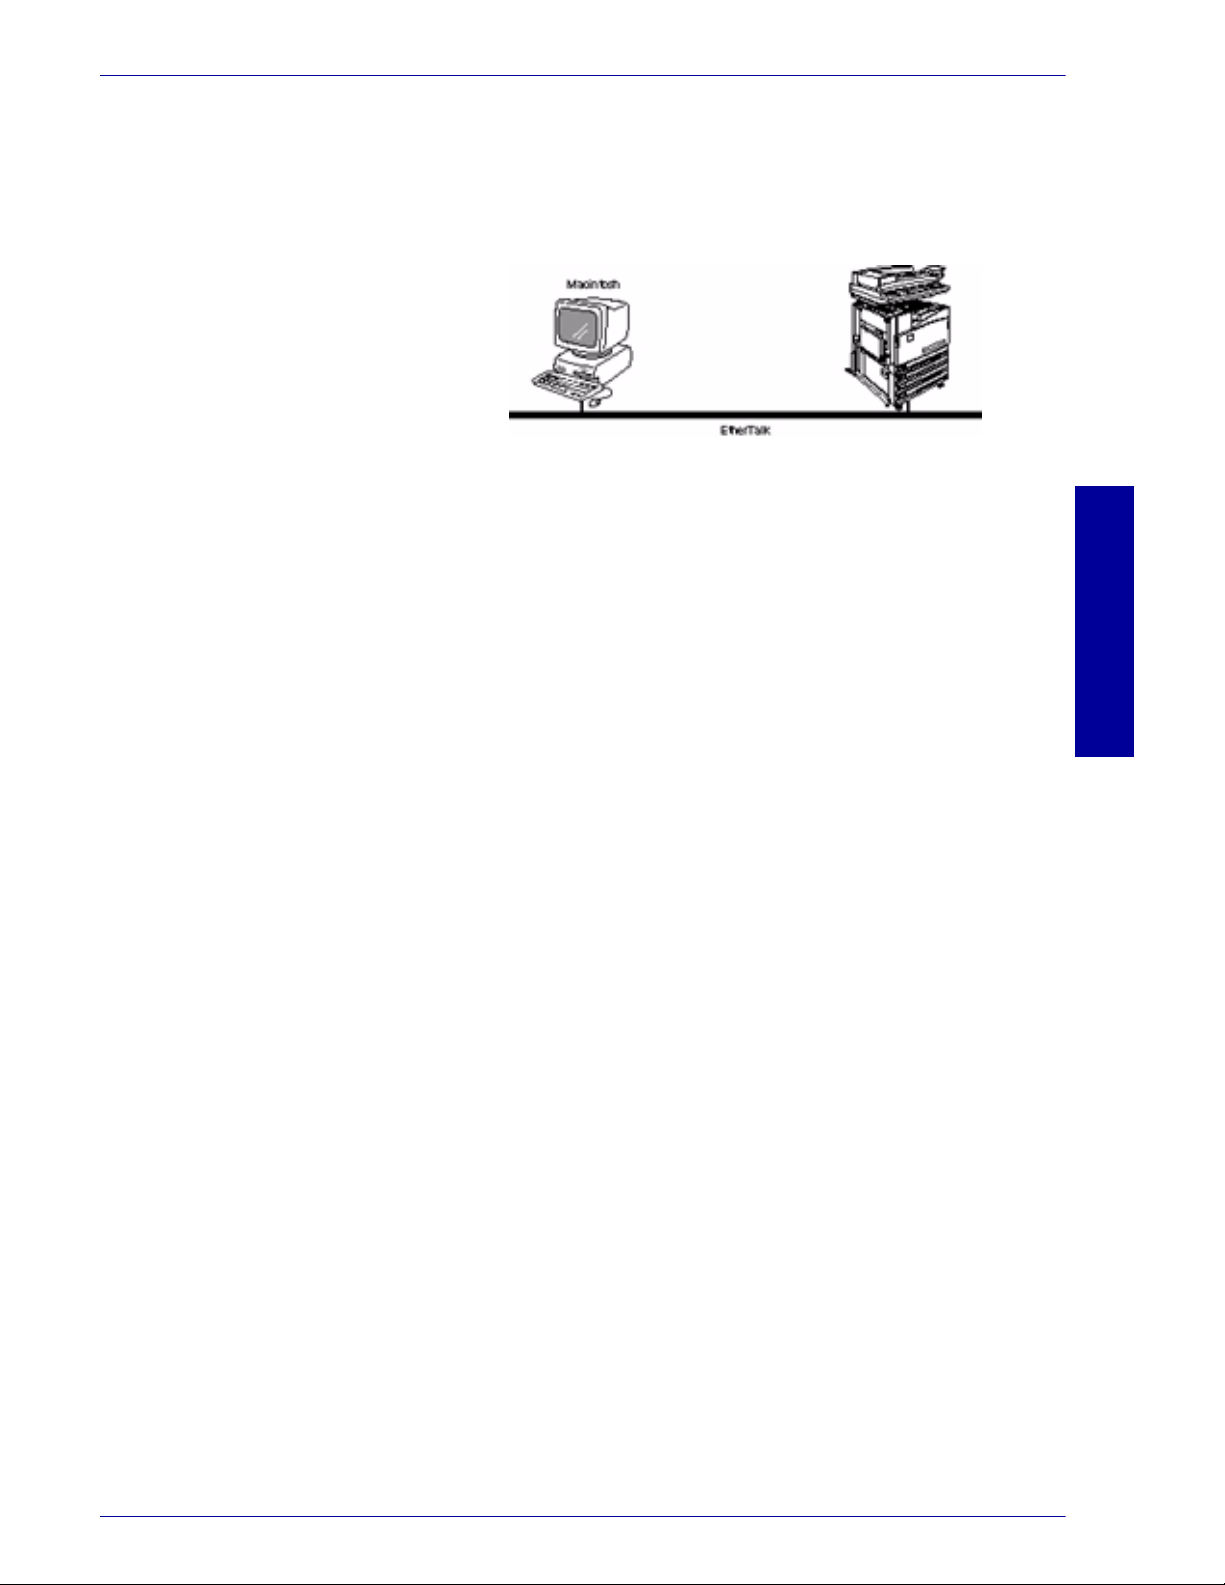
EtherTalk (optional) This machine supports EtherTalk protocol, and enables you to
print from Macintosh.
For details on how to connect this machine to EtherTalk, refer to
the System Administrator’s Guide.
Token Ring (optional) This machine supports Token Ring. And when installed with the
optional interface board for Token Ring, you can use the printer in
a network environment with NetWare or TCP/IP existing alone or
together.
For details on how to connect this machine to a Windows
computer using TCP/IP refer to the System Administrator’s Guide.
)
USER GUIDE (PRINT)
2–5
Page 12

U
SER GUIDE
(P
RINT
)
2–6
Page 13

Overview
U
SER GUIDE
(P
RINT
A. Installing the Print Drivers
This section details the procedures for installing PostScript 3
Version 3011.106, and PCL 6/5 Version 4.1, print drivers onto a
workstation and setting the print driver properties for the following
operating systems.
• Windows 95, Windows 98, or Windows Me
• Windows NT 4.0
• Windows 2000 and Windows XP
•Macintosh
)
USER GUIDE (PRINT)
2–7
Page 14

U
SER GUIDE
(P
RINT
)
Windows 95/98/Me
Installing PostScript or PCL Print Driver
Prior to installing the AdobePS 4.4.X or PCL 6/5e Version 4.1 print
driver perform the following.
• Obtain the Print Driver for your workstation's operating
system. Drivers are available on a CD-ROM that came
with your Printer. They are also typically available for
downloading in self-extracting Zip file format from the
internet at www.xerox.com.
• Obtain the printer’s IP Address by printing a System
Settings List or contacting your System Administrator.
• Check that the machine is physically connected to the
network or to your computer.
For detailed instructions on how to connect the machine to a
network, refer to the System Administrator’s Guide.
From the Start menu on the Windows desktop, select Settings,
1
and then Printers.
In the Printers window, double click Add Printer. The Add Printer
2
Wizard screen is displayed.
Select Next. The Local or Network Printer screen is displayed.
3
Select how the printer is connected to your computer and then
4
select Next.
•Select My Computer or Local Printer if the Printer is
directly cabled to your desktop or you are printing through
a Spooler Utility (Windows 95/98/Me).
•Select Network Printer if you will be printing through a
print queue or a network server.
NOTE: If you select Network printer, specify the path to the printer
in the Network path or queue name.
2–8
Page 15

U
SER GUIDE
Insert the CD-ROM in the CD-ROM drive.
5
When the Manufacturers and Printers window displays, select
6
Have Disk…. The Install From Disk screen is displayed.
Enter the path for your driver files in the “Copy manufacturer’s files
7
from:” box.
NOTE: You can also use the Browse button to specify a folder on
the CD-ROM.
Select OK on the Install From Disk or Open screen.
8
Select your printer model from the Printers list and select Next.
9
(P
RINT
)
10
11
12
13
14
15
16
17
Select the port that you are using from the Available ports list, then
select Next.
When prompted, accept the default printer name, or give your
printer a more descriptive name.
Select either Yes or No to make this printer your default Windows
printer. Choose Yes if you will be printing primarily to this printer
from your Windows applications. Select Next.
Print a Test Page.
Verify that the test page prints at the printer, then select Finish.
Read the End User License Agreement and select Accept.
Confirm that the printer has been added in the Printers window.
Continue to the next page in order to configure the print driver to
complete the installation.
USER GUIDE (PRINT)
2–9
Page 16
U
SER GUIDE
(P
RINT
)
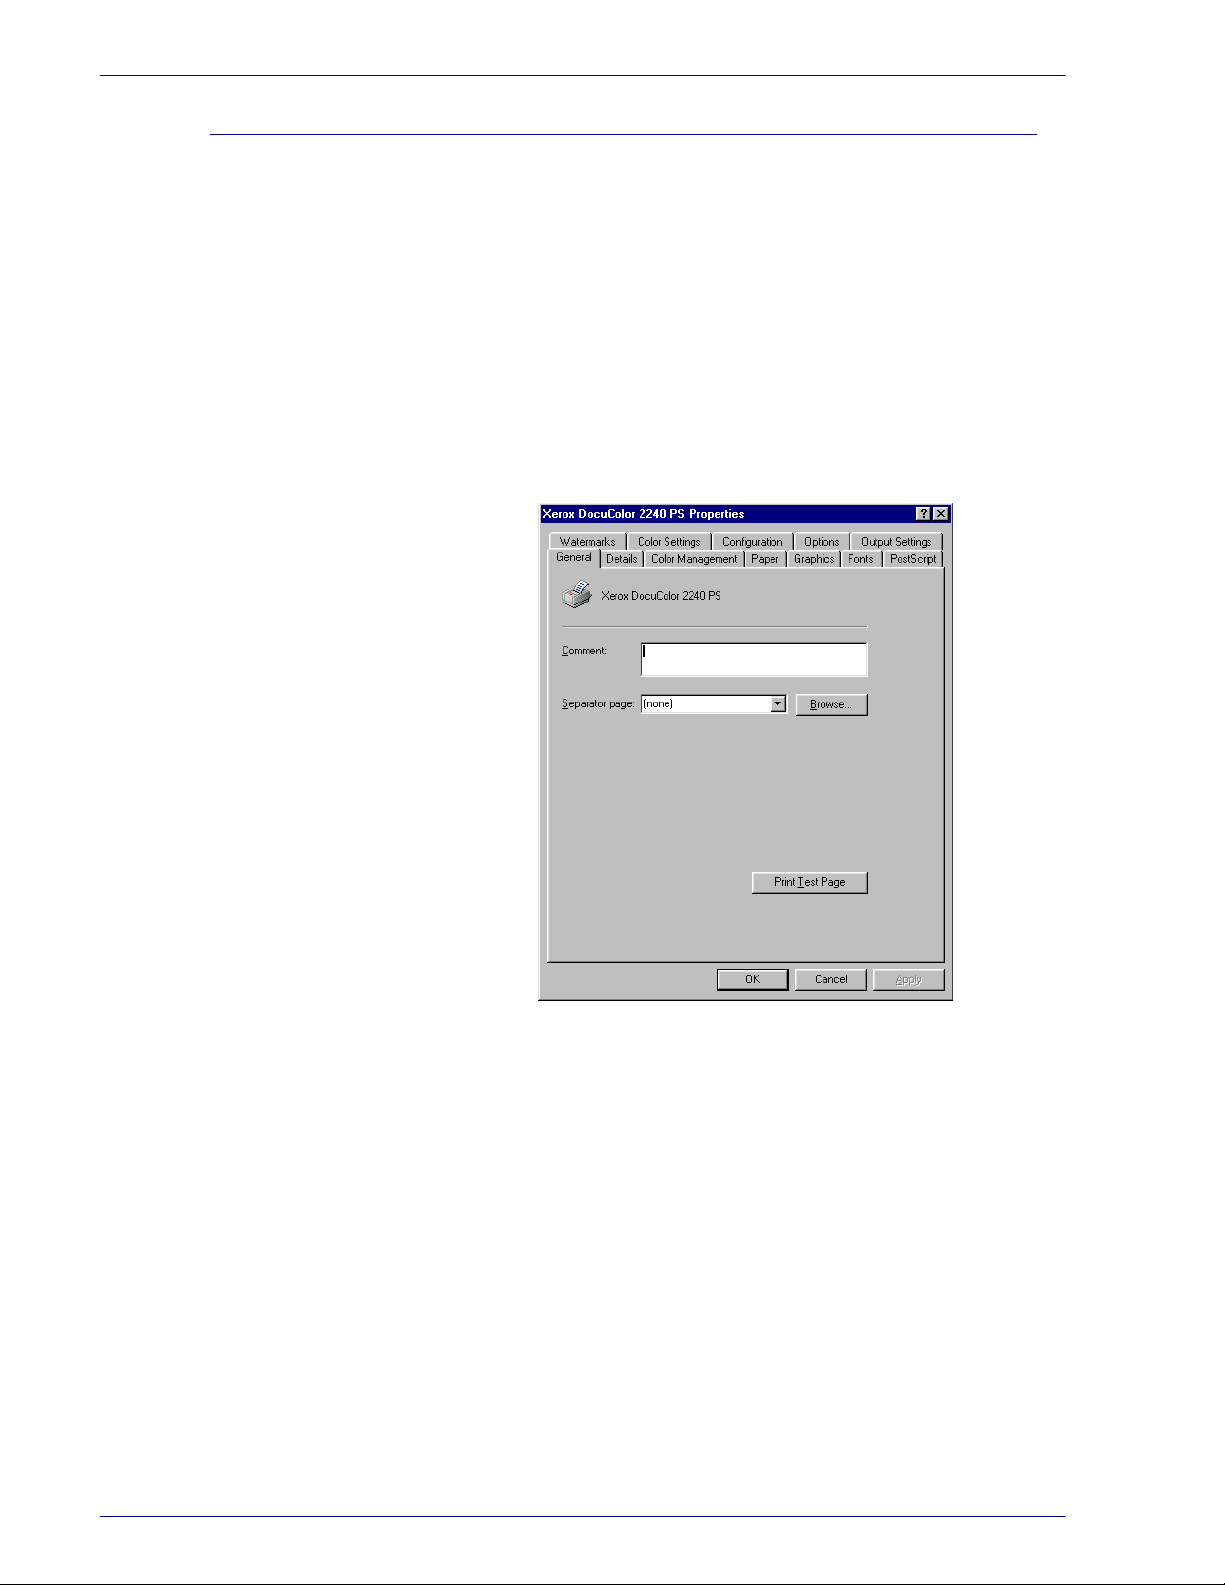
Configuring the PostScript Print Driver on Windows 95/98/Me
This section describes printer specific settings included in the print
driver properties.
• Configuration Tab
•Options Tab
• Output Settings Tab
• Color Settings Tab
To view the print driver properties, select the printer icon in the
Printers window, then select the Properties command on the File
menu.
2–10
Page 17

Configuration Tab Settings
This section describes the settings of the Configuration tab.
Select the function that you want to set in Features List.
1
• The settings that can be selected vary depending on which
options have been installed. Make these settings after
confirming that option settings are complete.
Change the settings in the “Change Setting For” box area.
2
• You can restore defaults by selecting the Restore
Defaults button.
When all setting changes are completed, select OK.
3
U
SER GUIDE
(P
RINT
)
Feature Settings
Image Enhancement Specify whether to use the Image Enhancement function.
Selecting On, smooths out the boundaries between black and
white when printing. This reduces jagged edges, thereby
artificially increasing the resolution of the image. When printing an
image (bitmap) composed of coarse halftone dots, smooth color
gradation is impossible in certain situations. In this case, select
Off.
NOTE: The Image Enhancement feature is available only when
Print Mode is set to High Speed.
Draft Mode Specify whether to reduce the amount of toner used when printing
drafts. When you select On, the overall printed color becomes
lighter. This is best for printing documents when print quality is not
necessary.
USER GUIDE (PRINT)
2–11
Page 18

U
SER GUIDE
(P
RINT
)
Transparency Separators Specify whether to use transparency separators and the source of
the separators.
Select Auto for the paper source to automatically feed from the
paper tray with paper of the same size and in the same orientation
as the transparencies.
NOTE: When using Transparency Separators, be sure to load
paper of the same size and in the same orientation as
transparencies into the paper tray.
NOTE: The Transparency Separators function cannot be used in
the following situations:
• When anything other than Manual feed is selected for
Paper source in the Paper tab.
• When anything other than Transparency is selected for
Paper type in the Paper tab.
• When anything other than Center Output Tray is selected
for Output bin in the Paper tab.
• When the Duplex feature is selected in the Paper tab.
Stapling Specify whether to staple printed documents as well as the
position of the staple.
NOTE: You can staple 2 to 50 sheets.
NOTE: You cannot use staples in the following situations:
• When anything other than Finisher Tray is selected for
Output bin in the Paper tab.
• When Job Offset is selected.
Job Offset Shifting the output positions of adjacent jobs (print command) or
copies (sets) is called Job Offset. The positions of adjacent jobs or
sets of copies are shifted to either sides of the output tray.
Collated Select whether to collate a multi-page file per set when they are
printed.
Custom Paper Image
Rotation
Select whether to correct the paper orientation when printing on
custom paper. When printing on custom paper, select On to
correct the orientation rotated at 90 degrees.
Bypass Feed Orientation Specify the paper orientation when printing from the bypass tray.
When you set the short side of the paper in the bypass tray feed
direction, select Landscape. When you set the long side of the
paper in the bypass tray, select Portrait.
2–12
Page 19

U
SER GUIDE
(P
RINT
Substitute Tray Specify what action to take when the paper size called for is not
loaded in the machine.
Use Printer Settings: The settings can be confirmed on the
printer control panel.
Display message: Display paper supply messages on the printer
control panel. Printer will be unavailable until paper is supplied.
Use Nearest Size (With Zoom): Select the nearest paper size.
Automatically reduces or enlarges images for printing, as
necessary.
Use Nearest Size (No Zoom): Select the nearest paper size
available and prints in equal size.
Use Larger Size (With Zoom): Print in equal size on paper larger
than the original. Automatically reduces images for printing, as
necessary.
Use Larger Size (No Zoom): Print on paper larger than the
original.
Available Printer Memory Enter the amount of usable printer memory (in KB) in the Edit box.
Normally, it is not necessary to change this setting.
)
Available Font Cache Enter the amount of memory available for the font cache (in KB) in
the Edit box. Normally, it is not necessary to change this setting.
USER GUIDE (PRINT)
2–13
Page 20

U
SER GUIDE
(P
Specify Job Owner The following selections are available:
Job Type User ID Enter the User ID for the Job Type, which includes Secure Print,
RINT
)
Use Login Name: Use your Windows Login Name as the Job
Owner Name. The Job Owner Name becomes the “Login User
Name\Host Name”.
Enter Owner name: Select this if you want to specify a custom
Job Owner Name, which is used for all the printer icons.
NOTE: You can enter up to 31 alphanumeric characters for the
Login Name and the Owner Name. If you enter more than 31
characters for either name, only the first 31 characters are used.
Password: Enter the password for the Job Owner Name. The
password can consist of 4 to 12 digits. Each digit entered displays
as an asterisk (*).
Sample Print, and Delayed Print.
Job Type User ID: Enter the User ID for the Job Type. The User
ID can contain a maximum of 24 alphanumeric characters.
Password: Enter the password for the Job Type. You can enter
up to 4 digits. Each digit entered displays as an asterisk (*).
Options Tab Settings
This section describes the settings of the Options tab.
Select the settings that you want to set in Hardware Options.
1
Change the settings in the “Change Settings For” box area.
2
• You can restore defaults by selecting the Restore
Defaults button.
When all setting changes are completed, select OK.
3
2–14
Page 21

U
SER GUIDE
(P
RINT
Settings
Output Tray Specify whether Finisher is installed and the type.
Paper Detect by Tray Specify either Statement Paper Detection, or A5 Paper Detection.
Output Settings Tab Settings
This section describes the settings in the Output Settings tab.
• You can restore defaults by selecting the Restore
Defaults button.
Output Paper
Output Size Select the size of the paper used for output. The output is
automatically enlarged or reduced, depending on the paper size
selected in the Output Size and the paper size selected in the
Paper tab.
Example: When you select 8 1/2 x 11 inches in Paper size
in the Paper tab and 11 x 17 inches is selected in the
Output Size, the output is automatically enlarged and
printed.
When None is selected the job is printed based on the paper size
selected in the application.
)
USER GUIDE (PRINT)
2–15
Page 22

U
SER GUIDE
(P
)
RINT
Job Type
Job Type You can specify the print function from among Secure Print,
Sample Print, and Delayed Print.
Secure Print: A function that temporarily stores print jobs in the
printer, and prints the job when instructed from the printer control
panel.
• If you want to output secure prints, set the User ID and
password for Print Type in the Configuration tab.
Sample Print: A function that outputs only 1 set when multiple
sets are specified. If the job is as specified, the remaining sets are
printed.
Delayed Print: A function that temporarily stores print jobs in the
printer, and prints them at a scheduled time.
Normal Print Select when you do not
want to output secure prints, sample
prints, or delayed prints.
Secure Print Select when you want to output secure prints.
Sample Print Select when you want to output sample prints.
NOTE: The Collated setting must be selected in the Page Setup
tab when using Job Type.
Delayed Print Select when you want to output delayed prints.
User ID Displays the User ID for Job Type. The User ID displayed is the
User ID specified on the Configuration tab. This option can only be
selected when the setting on the Configuration tab has been
completed. This is a display-only item and cannot be changed in
User ID.
Password Displays the Job Type password specified in the Configuration
tab. Each digit entered is displayed as an asterisk (*). This option
can only be selected when the setting on the Configuration tab
has been completed. This is a display-only item and cannot be
changed in Password.
Retrieve Document Name Select the method of specifying the document name. If you have
selected Auto Retrieve, the valid document name can be up to 24
alphanumeric characters.
2–16
Document Name When “Enter Document Name” is selected in the Stored
Document Name list, you can specify a document name with a
maximum of 24 alphanumeric characters.
Start Print Time Set the time that you want Delayed Print to be carried out. Place
the cursor in the hour or minute box and press the up or down
triangle to specify the starting time. You can also set the time by
entering the time directly into the boxes.
• The default setting is 00:00
Page 23

U
SER GUIDE
Color Settings Tab Settings
Settings
Output Color Specify whether to print in color or black.
Print Mode Specify whether to give priority to the print speed or the image
quality. The printer/copier is capable of printing at three different
resolutions:
High Speed: 600 x 600
Standard: 1200 x 600
High Quality: 1200 x 1200
To change resolution settings, use the Print Mode selections.
NOTE: The Image Enhancement feature is not available when
Standard or High Quality is selected.
RGB Color Correction Specify the coloration of the RGB Color Correction.
Normal: This setting is optimized for printing documents that
contain text and graphics, such as business documents.
(P
RINT
)
Photo: This setting is optimized for printing photos or images with
gradations. Select this setting when printing images in RBG.
Web Pages: This setting is optimized for printing web pages.
Presentation: This setting is optimized for printing the color
documents vividly, such as presentation documents.
Screen You can adjust the image quality. Select Gradation to print photos
and gradations clearly. Select Fineness to print the colors in
illustrations, tables, or graphs evenly.
RBG Gamma Correction Specify the brightness of the documents. The higher the value, the
darker the print becomes.
Gray Guaranteed Select On to print grays and black within documents in black toner
only. This prevents neutral grays from exhibiting any kind of color
shading or misregistration. This feature does not apply to images
of the documents.
NOTE: For documents containing sweeps/gradients that include
gray, it may be preferable to set this feature to Off.
USER GUIDE (PRINT)
2–17
Page 24
U
SER GUIDE
(P
RINT
)
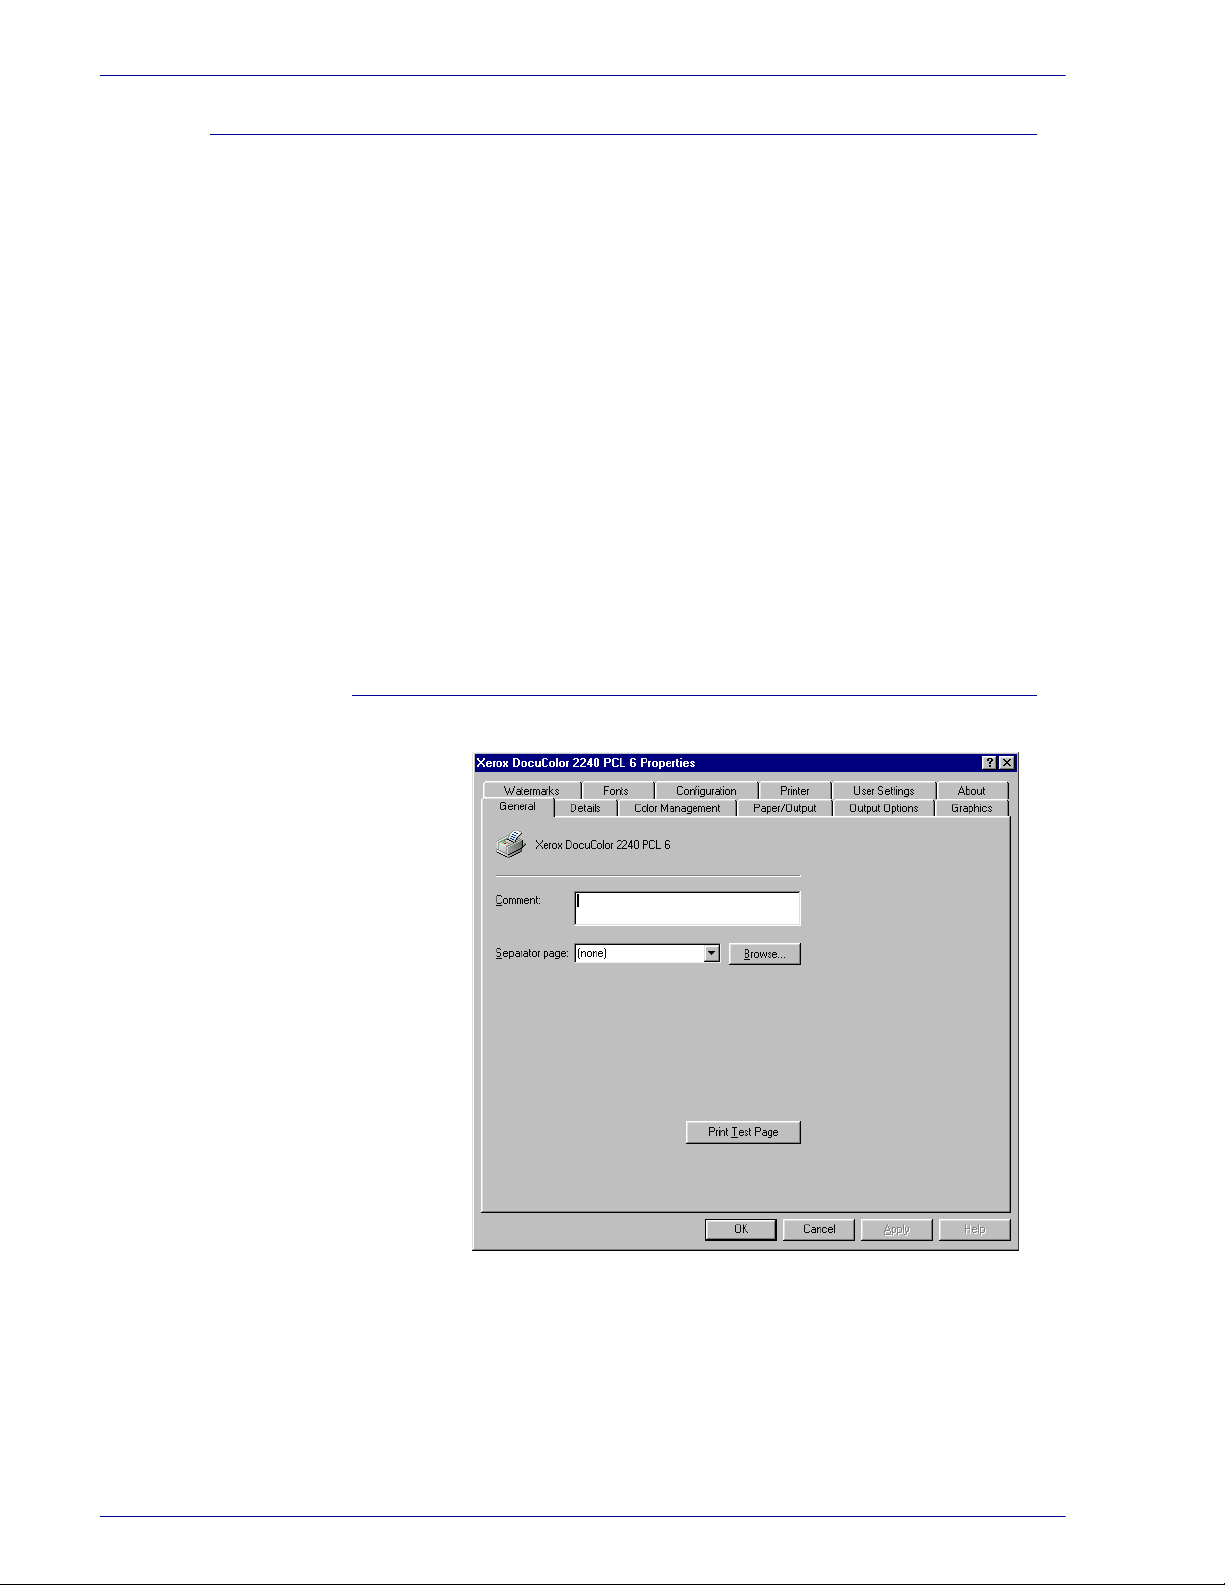
Configuring the PCL Print Driver on Windows 95/98/Me
This section describes the following printer specific settings
included in the PCL 6/5e Version 4.1 Print Driver Properties and
Printing Preferences.
• Print Driver Properties
• Configuration Tab > Print Features
Printer Tab
• Document Default Properties
Watermarks
Fonts
User Settings
Color Management
Paper Output
Output Options
Graphics
Print Driver Properties
2–18
• Configuration Ta b
• Printer Tab
To view the Configuration or Printer tabs, select the printer icon in
the printers window, then select Properties on the File menu.
Page 25

Configuration Tab Settings
This describes Print Features in the Configuration tab.
NOTE: In order to print correctly, it is necessary to make
appropriate settings in this tab.
Select the printer icon in the Printers window, then select
1
Properties from the File menu.
Select the Configuration tab.
2
Select the items in Print Features that you want to set.
3
U
SER GUIDE
(P
RINT
)
Change the settings in the list box that is displayed below the Print
4
Features list.
When all setting changes are completed, select OK.
5
USER GUIDE (PRINT)
2–19
Page 26

U
SER GUIDE
(P
RINT
)
Print Features
Print Page Mode Set Print Page Mode to On to enhance printer performance with
large complex jobs.
Specify Job Owner Use this feature to specify a job owner.
Use Login Name: Use your Windows Login Name as the Job
Owner Name. The Job Owner Name becomes the “Login User
Name\Host Name”.
Enter Owner Name (For Administrator): Select this if you want
to specify a custom Job Owner Name, which is used for all the
printer icons.
Enter Owner Name (For User): Select this if you want to specify
a custom Job Owner Name for each Windows Login user.
NOTE: You can enter up to 31 alphanumeric characters for the
Login Name and the Owner Name. If you enter more than 31
characters for either name, only the first 31 characters are used.
Password: Enter the password for the Job Owner Name. The
password can consist of 4 to 12 digits. Each digit entered displays
as an asterisk (*).
Bypass Feed Orientation Specify the paper orientation when printing from the bypass tray.
When you set the short side of the paper in the bypass tray feed
direction, select Landscape setting. When you set the long side of
the paper in the bypass tray, select Portrait setting.
Substitute Tray Specify what action to take when the paper size called for is not
loaded in the machine.
Use Printer Settings: The settings can be confirmed on the
printer control panel.
Display message: Displays paper supply messages on the
printer control panel. Printer will be unavailable until paper is
supplied.
Use Nearest Size (With Zoom): Selects the nearest paper size.
Automatically reduces or enlarges images for printing, as
necessary.
Use Nearest Size (No Zoom): Selects the nearest paper size
available and prints in equal size.
2–20
Page 27

Printer Tab Settings
This describes the available Printer tab settings.
NOTE: In order to print correctly, it is necessary to make
appropriate settings in this tab.
Select the printer icon in the Printers window, then select
1
Properties from the File menu.
Select the Printer tab.
2
Select the Auto Configuration button or select the items
3
manually in Change Setting For: that you want to set.
U
SER GUIDE
(P
RINT
)
4
Finisher An optional output tray with stapling function that can be added to
A5 & Statement Paper
Detection
When all setting changes are completed, select OK.
USER GUIDE (PRINT)
the side of the printer.
Optional output functions to enable Trays 1 - 4 to detect certain
paper sizes.
2–21
Page 28
U
SER GUIDE
(P
RINT
)
Document Default Properties
This describes the document default properties available in the
Properties dialog box.
NOTE: In order to print correctly, it is necessary to make
appropriate settings in this tab.
2–22
Page 29

U
SER GUIDE
Select the printer icon in the Printers window, then select
1
Properties from the File menu.
Select the appropriate tab to view or change the document default
2
properties for all users of the selected printer. Select your changes
on the following tabs:
• Color Management
• Paper/Output
• Output Options
• Graphics
• Watermarks
(P
RINT
)
• Fonts
• User Settings
When all setting changes are completed, select OK.
3
Specify your printing options from the following:
For additional detail about the contents on the tabs use On-line
Help. For more information, refer to the B. Basic Printing section in
this chapter.
Color Management Allows you to associate color profile (s) with your color printer.
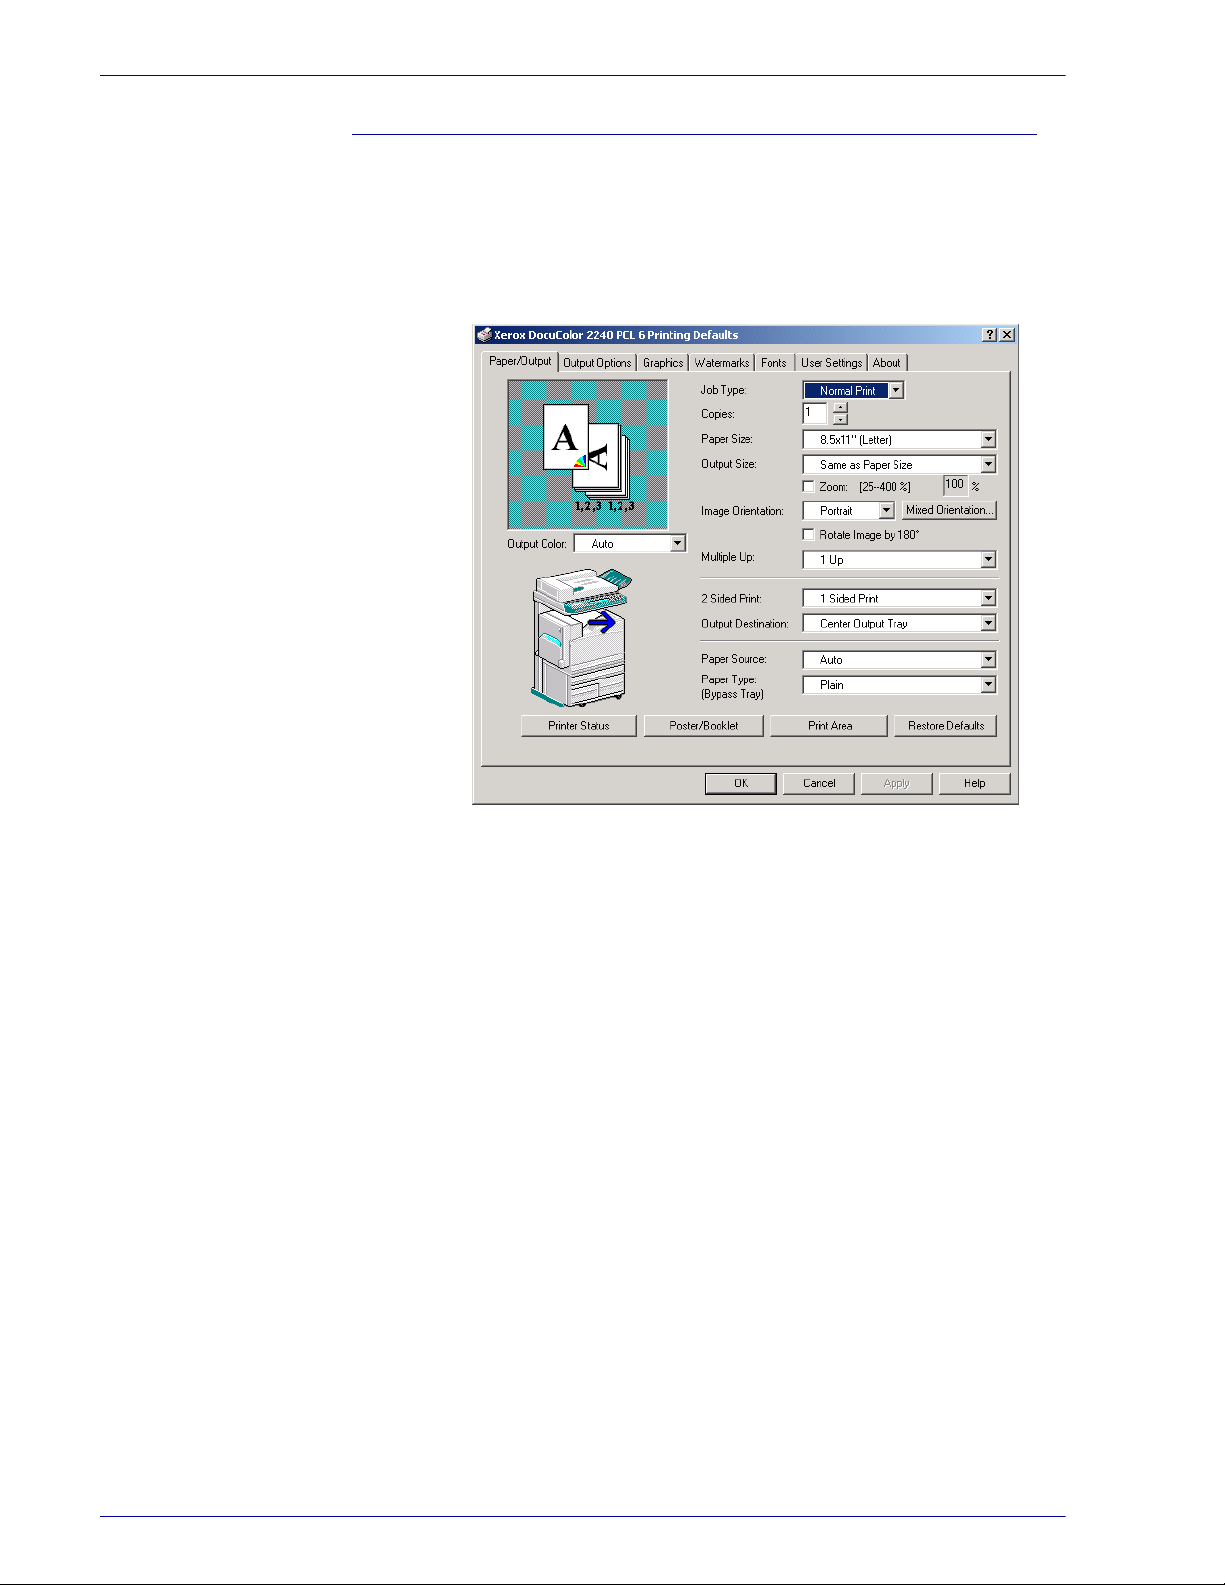
Paper/Output Tab Selections include Job Type, Copies, Paper Size, Output Size,
Image Orientation, Mixed Orientation, Multiple Up, Output Color, 2
Sided Print, Output Destination, Paper Source, Paper Type
(Bypass Tray), or select Printer Status, Poster/Booklet, Print Area,
or Restore Defaults buttons.
USER GUIDE (PRINT)
2–23
Page 30

U
SER GUIDE
(P
RINT
)
Output Options Tab Select from Front Cover, Feed Cover from, Transparency
Separators, Job Offset, Stapling, or select Margin Shift Restore
Defaults buttons.
Graphic Tabs Specify how you want to manipulate graphic images for your print
job. Select from the following options: Output Color, Print Mode,
Image Adjustment Mode, Image Types, Image Auto Correction, or
select the Image Settings, Color Balance, Profile Settings,
Detailed Settings, or Restore Defaults buttons.
For more information on how to set graphic options refer to section
C.) Special Printing in the User Guide (Print).
Watermarks Tab Specify watermark settings. Selections for watermarks include
First Page Only or In Background, Encircle, Text, Position, Angle,
or select the Restore Defaults button.
Fonts Tab Use the TrueType Font control to select how TrueType Fonts will
be processed and printed.
User Settings Tab The User Settings tab dialog provides options for you to save
frequently used print driver settings and then recall these settings
without having to configure again.
2–24
Page 31

Windows NT 4.0
Installing PostScript or PCL Print Driver
U
SER GUIDE
Prior to installing the AdobePS 4.4.X or PCL 6/5e Version 4.1 print
driver perform the following.
• Obtain the Print Driver for your client's operating system.
Print drivers are available on a CD-ROM that came with
your machine. They are also typically available for
downloading in self-extracting Zip file format from the
internet at www.xerox.com.
• Obtain the printer’s IP Address by printing a System
Settings List or contacting your System Administrator.
• Check that the machine is physically connected to the
network or to your computer.
For detailed instructions on how to connect the machine to a
network, refer to the System Administrator’s Guide.
(P
RINT
)
From the Start menu on the Windows desktop, select Settings,
1
and then Printers.
In the Printers window, double click Add Printer. The Add Printer
2
Wizard screen is displayed.
Verify that My Computer is selected, then select Next. The
3
Available ports screen is displayed.
Perform one of the following steps:
4
• Select an existing available port and continue to step 8.
•Select Add Port....
Select LPR Port from the Available Printer Ports list, and then
5
select New Port.... The Add LPR compatible printer screen is
displayed.
USER GUIDE (PRINT)
2–25
Page 32

U
SER GUIDE
(P
RINT
)
In the LPR Compatible Printer screen enter the following
6
information:
• Type in the IP address of the Printer for the “Name or
address of server providing lpd.”
• Type in the case-sensitive name of your Printer, or enter
the word raw for “Name of printer or print queue on that
server.”
•Select OK.
On the Print Ports screen, select Close.
7
• The Wizard will return you to the previous dialog box.
Verify the new IP address you entered is in the list and
correct.
NOTE: In the next step the port check box to the left of the
address must be checked prior to selecting Next.
Verify that the port check box is checked, then select Next. The
8
Manufacturers and Printers lists are displayed.
9
10
11
12
13
14
Insert the CD-ROM in the CD-ROM drive.
Select Have Disk… The Install From Disk screen is displayed.
Enter the path for your driver files in the “Copy manufacturer’s files
from:” box.
NOTE: You can also use the Browse button to specify a folder in
the CD-ROM.
Select the .INF file, then select Open.
When the Install From Disk screen is displayed, verify that the
path and file name are correct and select OK.
Select your printer model from the Printers list, and select Next.
2–26
Page 33

U
SER GUIDE
(P
RINT
)
15
16
17
18
19
20
21
22
When prompted, accept the default printer name, or give your
printer a more descriptive name, then select Yes or No for making
this your Windows default printer.
Select Next.
Select Not shared and select Next.
Select Yes to print a test page, then select Finish.
Read the End User License Agreement and select Accept.
Verify that the test page prints at the printer, then select Yes.
Confirm that the printer has been added in the Printers window.
Continue to the next page in order to configure the print driver to
complete the installation.
USER GUIDE (PRINT)
2–27
Page 34

U
SER GUIDE
(P
RINT
)
Configuring PostScript Print Driver on Windows NT 4.0
This section describes the following Adobe PostScript printer
specific settings included in the AdobePS 4.4.X print driver
properties and document defaults.
Print Driver Properties
• Installation Options in the Device Settings Tab
• Configuration Ta b
To view the Device Settings or Configuration tabs, select the
printer icon in the Printers window, then select Properties from
the File menu.
2–28
Page 35

Installable Options Settings
This section describes Installable Options in the Device Settings
tab.
NOTE: In order to print correctly, it is necessary to make
appropriate settings in this tab.
Select the items you want to set in Installable Options on the
1
Device Settings tab.
Change the settings in the Change Setting box located at the
2
bottom of the tab.
When all setting changes are completed, select OK.
3
U
SER GUIDE
(P
RINT
)
Settings
Output Tray Specify whether Finisher is installed and the type.
Paper Detect by Tray Specify either Statement Paper Detection, or A5 Paper Detection.
USER GUIDE (PRINT)
2–29
Page 36

U
SER GUIDE
(P
RINT
)
Configuration Tab Settings
This section describes the settings of the Configuration tab.
Specify Job Owner
Use Login Name Use your Windows Login Name as the Job Owner Name. The Job
Owner Name becomes the “Login User Name\Host Name”.
Enter Owner Name (For
Administrator)
Enter Owner Name (For
User)
Password Enter the password for the Job Owner Name. The password can
User ID Enter the User ID for Print Type. The User ID can contain up to a
Password Enter the password for the Job Type. You can enter up to 4 digits.
Select this if you want to specify a custom Job Owner Name,
which is used for all the printer icons.
Select this if you want to specify a custom Job Owner Name for
each Windows Login user.
NOTE: You can enter up to 31 alphanumeric characters for the
Login Name and the Owner Name. If you enter more than 31
characters for either name, only the first 31 characters are used.
consist of 4 to 12 digits. Each digit entered displays as an asterisk
(*).
Job Type User Setting
Enter the User ID and password for the Job Type, which includes
Secure Print, Sample Print, and Delayed Print.
maximum of 24 alphanumeric characters.
Each digit entered displays as an asterisk (*).
2–30
Page 37

Print Driver Document Defaults
U
SER GUIDE
(P
RINT
)
• Printer Specific Sections in the Printer Features of the
Advanced Tab
• Output Settings Tab
To view the Advanced or Output Settings tabs, select the printer
icon in the Printers window, then select Document Defaults on
the File menu.
USER GUIDE (PRINT)
2–31
Page 38

U
SER GUIDE
(P
RINT
)
Advanced Tab Settings
This section describes the settings of Printer Features in the
Advanced tab.
NOTE: The settings that can be selected vary depending on which
options have been installed.
Select the items in Printer Features under Document Options
1
located in the on the Advanced tab that you want to set.
Change the settings in the Change Setting box located at the
2
bottom of the tab.
When all setting changes are completed, select OK.
3
2–32
Page 39

U
SER GUIDE
(P
RINT
Printer Features Settings
Output Tray Set the destination for the output.
• The items that can be selected vary according to whether
the Center Tray or Finisher has been installed.
Job Offset Shifting the output positions of adjacent jobs (print command) or
copies (sets) is called Job Offset. The positions of adjacent jobs or
sets of copies are shifted to either sides of the output tray.
Transparency Separators Specify whether to use transparency separators and the source of
the separators.
Select Auto for three paper source to automatically feed from the
paper tray with paper of the same size and in the same orientation
as the transparencies.
NOTE: When using Transparency Separators, be sure to load
paper of the same size and in the same orientation as
transparencies into the paper tray.
NOTE: The Transparency Separators function cannot be used in
the following situations:
)
• When anything other than Manual feed is selected for
Paper source in the Paper tab.
• When anything other than Transparency is selected for
Media type in the Advanced tab.
• When anything other than Center Output Tray is selected
for Output Destination of Printers Features in the
Advanced tab.
Bypass Feed Orientation Specify the paper orientation when printing from the bypass tray.
When you set the short side of the paper in the bypass tray feed
direction, select Landscape. When you set the long side of the
paper in the bypass tray, select Portrait.
Print Mode Specify whether to give priority to the print speed or the image
quality. The printer/copier is capable of printing at three different
resolutions:
High Speed: 600 x 600
Standard: 1200 x 600
High Quality: 1200 x 1200
To change resolution settings, use the Print Mode selections.
NOTE: The Image Enhancement feature is not available when
Standard or High Quality is selected.
USER GUIDE (PRINT)
2–33
Page 40

U
SER GUIDE
(P
RINT
)
Output Color Specify whether to print in color or black.
RBG Color Correction Specify the coloration of the RBG Color Correction.
Normal: This setting is optimized for printing documents that
contain text and graphics, such as business documents.
Photo: This setting is optimized for printing photos or images with
gradations. Select this setting when printing images in RBG.
Web Pages: This setting is optimized for printing web pages.
Presentation: This setting is optimized for printing the color
documents vividly, such as presentation documents.
RBG Gamma Correction Specify the brightness of the documents. The higher the value, the
darker the print becomes.
Screen You can adjust the image quality. Select Gradation to print photos
and gradations clearly. Select Fineness to print the colors in
illustrations, tables, or graphs evenly.
Image Enhancement Specify whether to use Image Enhancement.
Selecting On, smooths out the boundaries between black and
white when printing. This reduces jagged edges, thereby
artificially increasing the resolution of the image. When printing an
image (bitmap) composed of coarse halftone dots, smooth color
gradation is impossible in certain situations. In this case, select
Off.
NOTE: The Image Enhancement feature is available only when
Print Mode is set to High Speed.
Draft Mode Specify whether to reduce the amount of toner used when printing
drafts. When you select On, the overall printed color becomes
lighter. This is best for printing documents when print quality is not
necessary.
Gray Guaranteed Select On to print grays and black within documents in black toner
only. This prevents neutral grays from exhibiting any kind of color
shading or misregistration. This feature does not apply to images
of the documents.
NOTE: For documents containing sweeps/gradients that include
gray, it may be preferable to set this feature to Off.
2–34
Page 41

U
SER GUIDE
(P
RINT
Stapling Select whether to staple printed documents as well as the position
of the staple.
• You can staple 2 to 50 sheets.
• You can only staple when Finisher Tray is selected for
Output Destination in the Advanced tab.
• You cannot use staples when Job Offset is selected.
)
Custom Page Image
Rotation
Select whether to correct the paper orientation when printing on
custom paper. When printing on custom paper, select On to
correct the orientation rotated at 90 degrees.
Substitute Tray Specify what action to take when the paper size called for is not
loaded in the machine.
Use Printer Settings: The settings can be confirmed on the
printer control panel.
Display message: Display paper supply messages on the printer
control panel. Printer will be unavailable until paper is supplied.
Use Nearest Size (With Zoom): Select the nearest paper size.
Automatically reduces or enlarges images for printing, as
necessary.
Use Nearest Size (No Zoom): Select the nearest paper size
available and prints in equal size.
Use Larger Size (With Zoom): Print in equal size on paper larger
than the original. Automatically reduces images for printing, as
necessary.
Use Larger Size (No Zoom): Print on paper larger than the
original.
USER GUIDE (PRINT)
2–35
Page 42

U
SER GUIDE
(P
)
RINT
Output Settings Tab Settings
This section describes the settings in the Output Settings tab.
Job Type
Job Type You can specify the print function from among Secure Print,
Sample Print, and Delayed Print.
Secure Print: A function that temporarily stores print jobs in the
printer, and prints the job when instructed from the printer control
panel.
• If you want to output secure prints, set the User ID and
password for Print Type in the Configuration tab.
Sample Print: A function that outputs only 1 set when multiple
sets are specified. If the job is as specified, the remaining sets are
printed.
Delayed Print: A function that temporarily stores print jobs in the
printer, and prints them at a scheduled time.
Normal Print Select when you do not
want to output secure prints, sample
prints, or delayed prints.
Secure Print Select when you want to output secure prints.
Sample Print Select when you want to output sample prints.
NOTE: The Collated setting must be selected in the Page Setup
tab when using Job Type.
Delayed Print Select when you want to output delayed prints.
User ID Displays the User ID for Job Type. The User ID displayed is the
User ID specified on the Configuration tab. This option can only be
selected when the setting on the Configuration tab has been
completed. This is a display-only item and cannot be changed in
User ID.
2–36
Page 43

U
SER GUIDE
(P
RINT
Password Displays the Job Type password specified in the Configuration
tab. Each digit entered is displayed as an asterisk (*). This option
can only be selected when the setting on the Configuration tab
has been completed. This is a display-only item and cannot be
changed in Password.
Retrieve Document Name Select the method of specifying the document name. If you have
selected Auto Retrieve, the valid document name can be up to 24
alphanumeric characters.
Document Name When Enter Document Name is selected in the Stored Document
Name list, you can specify a document name with a maximum of
24 alphanumeric characters.
Start Print Time Set the time that you want Delayed Print to be carried out. Place
the cursor in the hour or minute box and press the up or down
triangle to specify the starting time. You can also set the time by
entering the time directly into the boxes.
• The default setting is 00:00
)
USER GUIDE (PRINT)
2–37
Page 44

U
SER GUIDE
(P
RINT
)
Configuring the PCL Print Driver on Windows NT 4.0
This section describes the following printer specific settings
included in the PCL 6/5e Version 4.1 Print Driver Properties and
Printing Preferences.
• Print Driver Properties
Configuration Tab > Print Features
Printer Tab
• Document Defaults
Print Driver Properties
2–38
• Configuration Ta b
• Printer Tab
To view the Configuration or Printer tabs, select the printer icon in
the Printers window, then select Properties on the File menu.
Page 45

Configuration Tab Settings
This describes Print Features in the Configuration tab.
NOTE: In order to print correctly, it is necessary to make
appropriate settings in this tab.
Select the printer icon in the Printers window, then select
1
Properties from the File menu.
Select the Configuration tab.
2
Select the items in Print Features that you want to set.
3
U
SER GUIDE
(P
RINT
)
Change the settings in the list box that is displayed below the Print
4
Features list.
When all setting changes are completed, select OK.
5
USER GUIDE (PRINT)
2–39
Page 46

U
SER GUIDE
(P
RINT
)
Print Features
EMF Spooling Select On to specify the spool format of the print data in the hard
drive as RAW format. As it takes time to convert print data, the
processing time is extended.
Print Page Mode Select Print Page Mode to On to enhance printer performance
with large complex jobs.
Specify Job Owner Use this feature to specify a job owner.
Use Login Name: Use your Windows Login Name as the Job
Owner Name. The Job Owner Name becomes the “Login User
Name\Host Name”.
Enter Owner Name (For Administrator): Select this if you want
to specify a custom Job Owner Name, which is used for all the
printer icons.
Enter Owner Name (For User): Select this if you want to specify
a custom Job Owner Name for each Windows Login user.
NOTE: You can enter up to 31 alphanumeric characters for the
Login Name and the Owner Name. If you enter more than 31
characters for either name, only the first 31 characters are used.
Password: Enter the password for the Job Owner Name. The
password can consist of 4 to 12 digits. Each digit entered displays
as an asterisk (*).
Bypass Feed Orientation Specify the paper orientation when printing from the bypass tray.
When you set the short side of the paper in the bypass tray feed
direction, select Landscape. When you set the long side of the
paper in the bypass tray, select Portrait.
Substitute Tray Specify what action to take when the paper size called for is not
loaded in the machine.
Use Printer Settings: The settings can be confirmed on the
printer control panel.
Display message: Display paper supply messages on the printer
control panel. Printer will be unavailable until paper is supplied.
Use Nearest Size (With Zoom): Select the nearest paper size.
Automatically reduces or enlarges images for printing, as
necessary.
Use Nearest Size (No Zoom): Select the nearest paper size
available and prints in equal size.
2–40
Page 47

Printer Tab Settings
This describes Printer tab.
NOTE: In order to print correctly, it is necessary to make
appropriate settings in this tab.
Select the printer icon in the Printers window, then select
1
Properties from the File menu.
Select the Printer tab.
2
Select the Auto Configuration button or select the items
3
manually in Change Setting For: that you want to set.
U
SER GUIDE
(P
RINT
)
4
Finisher An optional output tray with stapling function that can be added to
A5 & Statement Paper
Detection
When all setting changes are completed, select OK.
USER GUIDE (PRINT)
the side of the printer.
Optional output functions to enable Trays 1 - 4 to detect certain
paper sizes.
2–41
Page 48

U
SER GUIDE
(P
RINT
)
Document Defaults
This describes the Document Defaults.
NOTE: In order to print correctly, it is necessary to make
appropriate settings in this tab.
2–42
Page 49

U
Select the printer icon in the Printers window, then select
1
Document Defaults from the File menu.
Select your changes on the following tabs:
2
• Paper/Output
• Output Options
• Graphics
• Watermarks
• Fonts
• User Settings
When all setting changes are completed, select OK.
3
Specify your printing options from the following:
SER GUIDE
(P
RINT
)
NOTE: For additional detail about the contents on the tabs use on-
line help. Refer to the On-line Help procedure in the B.) Basic
Printing section in the User Guide (Print).
Paper/Output Tab Selections include Job Type, Copies, Paper Size, Output Size,
Image Orientation, Mixed Orientation, Multiple Up, Output Color, 2
Sided Print, Output Destination, Paper Source, Paper Type
(Bypass Tray), or select Printer Status, Poster/Booklet, Print Area,
or Restore Defaults buttons.
Output Options Select from Front Cover, Feed Cover from, Transparency
Separators, Job Offset, Stapling, or select Margin Shift or Restore
Defaults buttons.
USER GUIDE (PRINT)
2–43
Page 50

U
SER GUIDE
(P
RINT
)
Graphics Specify how you want to manipulate graphic images for your print
job. Select from the following options: Output Color, Print Mode,
Image Adjustment Mode, Image Types, Image Auto Correction, or
select the Image Settings, Color Balance, Profile Settings,
Detailed Settings, or Restore Defaults buttons.
For more information on how to set graphic options refer to section
C. Special Printing in the User Guide (Print).
Watermarks Specify watermark settings. Selections for watermarks include
First Page Only or In Background, Encircle, Text, Position, Angle,
or select the Restore Defaults button.
Fonts Use the TrueType Font control to select how TrueType Fonts will
be processed and printed.
User Settings The User Settings tab dialog provides options for you to save
frequently used print driver settings and then recall these settings
without having to configure again.
2–44
Page 51

Windows 2000 and Windows XP
Installing PostScript or PCL Print Driver
Prior to installing the AdobePS 4.4.Xor PCL 6/5e Version 4.1 print
driver perform the following.
• Obtain the Print Driver for your workstation's operating
system. Print drivers are available on a CD-ROM that
came with your Printer. They are also typically available for
downloading in self-extracting Zip file format from the
Internet at www.xerox.com.
• Obtain the printer’s IP Address by printing a System
Settings List or contacting your System Administrator.
• Check that the machine is physically connected to the
network or to your computer.
For detailed instructions on how to connect the machine to a
network, refer to the System Administrator’s Guide.
U
SER GUIDE
(P
RINT
)
To begin the print driver installation select one of the following.
1
• Windows 2000: from the Start menu, select Settings, and
then Printers.
• Windows XP: from the Start menu, and then Printers and
Faxes.
In the Printers window select one of the following.
2
• Windows 2000: double click Add Printer.
• Windows XP: from Printer Tasks, select Add a printer.
When the Add Wizard displays, select Next. The Local or Network
3
Printer screen is displayed.
Select either Local Printer or Network Printer.
4
• If Local printer is selected, deselect the “Automatically
detect and install my Plug and Play printer” check box.
• If Network printer is selected, specify the target printer in
the “Connect to printer” dialog box.
USER GUIDE (PRINT)
2–45
Page 52

U
SER GUIDE
(P
RINT
)
Select Next. The Select the Printer Port screen is displayed.
5
Select one of the following and then select Next.
6
• Use the following port.
• Create a new port.
Insert the CD-ROM in the CD-ROM drive.
7
When the Add Printer Wizard window displays Manufacturers and
8
Printers lists, select Have Disk… The Install From Disk screen is
displayed.
Enter the path for your driver files in the “Copy manufacturer’s files
9
from:” box.
NOTE: You can also use the Browse button to specify a folder in
the CD-ROM.
10
11
12
13
14
15
16
17
18
19
Select the .INF file, then select Open.
When the Install From Disk screen is displayed, verify that the
path and file name are correct and select OK.
Select your printer model from the Printers list and select Next.
Enter the printer name, set whether you want to use it as your
default printer, and select Next.
Select Do not share this printer, and select Next
Select Yes to print a test page, then select Next.
Select Finish.
Verify that the test page prints at the printer then select Yes.
Confirm that the printer has been added in the Printers window.
Continue to the next page in order to configure the print driver to
complete the installation.
2–46
Page 53

U
SER GUIDE
Configuring the PostScript Print Driver on Windows 2000/XP
This section describes the following printer specific settings
included in the AdobePS 4.4.X Print Driver Properties and Printing
Preferences.
• Print Driver Properties
Device Settings Tab > Installable Options
Configuration Tab
• Printing Preferences
Advanced Options Dialog Box > Printer Features
Output Setting Tab
Print Driver Properties
(P
RINT
)
• Installable Options in the Device Settings Tab
• Configuration Ta b
USER GUIDE (PRINT)
2–47
Page 54

U
SER GUIDE
(P
RINT
)
Installable Options Settings
This describes Installable Options in the Device Settings tab.
NOTE: In order to print correctly, it is necessary to make
appropriate settings in this tab.
Select the printer icon in the Printers window, then select
1
Properties from the File menu.
Select the Device Settings tab.
2
Select the items you want to set in Installable Options.
3
Change the settings in the underlined menu that is displayed on
4
the right of the option.
When all setting changes are completed, select OK.
5
Settings
Memory Specify the amount of printer memory.
• The default setting is Normal 512MB
Output Tray Specify whether Finisher is installed and the type.
Paper Detect by Tray Specify either Statement Paper Detection, or A5 Paper Detection.
2–48
Page 55

Configuration Tab Settings
This section describes the settings of the Configuration tab.
Select the printer icon in the Printers window, then select
1
Properties from the File menu.
Select the Configuration tab.
2
Change the settings that you want to set.
3
When all setting changes are completed, select OK.
4
Specify Job Owner
U
SER GUIDE
(P
RINT
)
Use Login Name Use your Windows Login Name as the Job Owner Name. The Job
Enter Owner Name (For
Administrator)
Enter Owner Name (For
User)
Password Enter the password for the Job Owner Name. The password can
Owner Name becomes the “Login User Name\Host Name”.
Select this if you want to specify a custom Job Owner Name,
which is used for all the printer icons.
Select this if you want to specify a custom Job Owner Name for
each Windows Login user.
NOTE: You can enter up to 31 alphanumeric characters for the
Login Name and the Owner Name. If you enter more than 31
characters for either name, only the first 31 characters are used.
consist of 4 to 12 digits. Each digit entered displays as an asterisk
(*).
USER GUIDE (PRINT)
2–49
Page 56

U
SER GUIDE
(P
RINT
)
Job Type User Setting
Enter the User ID and password for the Job Type, which includes
Secure Print, Sample Print, and Delayed Print.
User ID Enter the User ID for Print Type. The User ID can contain up to a
maximum of 24 alphanumeric characters.
Password Enter the password for the Job Type. You can enter up to 4 digits.
Each digit entered displays as an asterisk (*).
Printing Preferences
• Sections specific to the printer in Printer Features of the
Advanced Options Dialog Box
• Output Settings Tab
2–50
Page 57

Advanced Options Dialog Box Settings
This section describes the settings of the Advanced Options
dialog box displayed when selecting Advanced in the Layout tab.
Select the printer icon in the Printers window, then select Printing
1
Preferences from the File menu.
On the Layout tab, select Advanced....
2
Select the items in Printer Features.
3
Change the settings on the menu displayed to the right.
4
When all setting changes are completed, select OK.
5
U
SER GUIDE
(P
RINT
)
USER GUIDE (PRINT)
2–51
Page 58

U
SER GUIDE
(P
RINT
)
Printer Features Settings
Output Tray Set the destination for the output.
• The items that can be selected vary according to whether
the Center Tray or Finisher Tray has been installed.
Job Offset Shifting the output positions of adjacent jobs (print command) or
copies (sets) is called Job Offset. The positions of adjacent jobs or
sets of copies are shifted to the front and the next job or set of
copies is shifted to the back.
Transparency Separators Specify whether to use transparency separators and the source of
the separators.
Select Auto for three paper source to automatically feed from the
paper tray with paper of the same size and in the same orientation
as the transparencies.
NOTE: When using Transparency Separators, be sure to load
paper of the same size and in the same orientation as
transparencies into the paper tray.
NOTE: The Transparency Separators function cannot be used in
the following situations:
• When anything other than Manual feed is selected for
Paper source in the Paper/Quality tab.
• When anything other than Transparency is selected for
Media type in the Paper/Quality tab.
• When anything other than Center Output Tray is selected
for Output Destination in the Advanced Options tab.
Bypass Feed Orientation Specify the paper orientation when printing from the bypass tray.
When you set the short side of the paper in the bypass tray feed
direction, select Landscape. When you set the long side of the
paper in the bypass tray, select Portrait.
2–52
Page 59

U
SER GUIDE
Print Mode Specify whether to give priority to the print speed or the image
quality. The printer/copier is capable of printing at three different
resolutions:
High Speed: 600 x 600
Standard: 1200 x 600
High Quality: 1200 x 1200
To change resolution settings, use the Print Mode selections.
NOTE: The Image Enhancement feature is not available when
Standard or High Quality is selected.
Output Color Specify your output printing options select either Color or Black.
RGB Color Correction Specify the coloration of the RBG Color Correction.
Normal: This setting is optimized for printing documents that
contain text and graphics, such as business documents.
Photo: This setting is optimized for printing photos or images with
gradations. Select this setting when printing images in RBG.
Web Pages: This setting is optimized for printing web pages.
(P
RINT
)
Presentation: This setting is optimized for printing the color
documents vividly, such as presentation documents.
RGB Gamma Correction Specify the brightness of the documents. The higher the value, the
darker the print becomes.
Screen You can adjust the image quality. Select Gradation to print photos
and gradations clearly. Select Fineness to print the colors in
illustrations, tables, or graphs evenly.
Image Enhancement Specify whether to use the Image Enhancement function.
Selecting On, smooths out the boundaries between black and
white when printing. This reduces jagged edges, thereby
artificially increasing the resolution of the image. When printing an
image (bitmap) composed of coarse halftone dots, smooth color
gradation is impossible in certain situations. In this case, select
Off.
NOTE: The Image Enhancement feature is available only when
Print Mode is set to High Speed.
USER GUIDE (PRINT)
2–53
Page 60

U
SER GUIDE
(P
RINT
)
Draft Mode Specify whether to reduce the amount of toner used when printing
drafts. When you select On, the overall printed color becomes
lighter. This is best for printing documents when print quality is not
necessary.
Gray Guaranteed Select On to print grays and black within documents in black toner
only. This prevents neutral grays from exhibiting any kind of color
shading or misregistration. This feature does not apply to images
of the documents.
NOTE: For documents containing sweeps/gradients that include
gray, it may be preferable to set this feature to Off.
Stapling Select whether to staple printed documents as well as the position
of the staple.
• You can staple 2 to 50 sheets.
• You can only staple when Finisher Tray is selected for
Output Destination in the Advanced Options tab.
• You cannot use staples when Job Offset is selected.
Custom Paper Image
Rotation
Substitute Tray Specify what action to take when the paper size called for is not
Select whether to correct the paper orientation when printing on
custom paper. When printing on custom paper, select On to
correct the orientation rotated at 90 degrees.
loaded in the machine.
Use Printer Settings: The settings can be confirmed on the
printer control panel.
Display message: Display paper supply messages on the printer
control panel. Printer will be unavailable until paper is supplied.
Use Nearest Size (With Zoom): Select the nearest paper size.
Automatically reduces or enlarges images for printing, as
necessary.
Use Nearest Size (No Zoom): Select the nearest paper size
available and prints in equal size.
Use Larger Size (With Zoom): Print in equal size on paper larger
than the original. Automatically reduces images for printing, as
necessary.
Use Larger Size (No Zoom): Print on paper larger than the
original.
2–54
Page 61

Output Setting Tab Settings
This section describes the settings in the Output Settings tab.
Select the printer icon in the Printers window, then select Printing
1
Preferences from the File menu.
Select the Output Settings tab.
2
Change the settings that you want to set.
3
When all setting changes are completed, select OK.
4
Job Type
U
SER GUIDE
(P
RINT
)
Job Type You can specify the print function from among Secure Print,
Sample Print, and Delayed Print.
Secure Print: A function that temporarily stores print jobs in the
printer, and prints the job when instructed from the printer control
panel.
• If you want to output secure prints, set the User ID and
password for Print Type in the Configuration tab.
Sample Print: A function that outputs only 1 set when multiple
sets are specified. If the job is as specified, the remaining sets are
printed.
Delayed Print: A function that temporarily stores print jobs in the
printer, and prints them at a scheduled time.
Normal Print Select when you do not
prints, or delayed prints.
want to output secure prints, sample
USER GUIDE (PRINT)
2–55
Page 62

U
SER GUIDE
(P
RINT
)
Secure Print Select when you want to output secure prints.
Sample Print Select when you want to output sample prints.
NOTE: The Collated setting must be selected in the Page Setup
tab when using Job Type.
Delayed Print Select when you want to output delayed prints.
User ID Displays the User ID for Job Type. The User ID displayed is the
User ID specified on the Configuration tab. This option can only be
selected when the setting on the Configuration tab has been
completed. This is a display-only item and cannot be changed in
User ID.
Password Displays the Job Type password specified in the Configuration
tab. Each digit entered is displayed as an asterisk (*). This option
can only be selected when the setting on the Configuration tab
has been completed. This is a display-only item and cannot be
changed in Password.
Retrieve Document Name Select the method of specifying the document name. If you have
selected Auto Retrieve, the valid document name can be up to 24
alphanumeric characters.
Document Name When “Enter Document Name” is selected in the Stored
Document Name list, you can specify a document name with a
maximum of 24 alphanumeric characters.
Start Print Time Set the time that you want Delayed Print to be carried out. Place
the cursor in the hour or minute box and press the up or down
triangle to specify the starting time. You can also set the time by
entering the time directly into the boxes.
• The default setting is 00:00
2–56
Page 63

Configuring the PCL Print Driver on Windows 2000/XP
This section describes the following printer specific settings
included in the PCL 6/5e Version 4.1 Print Driver Properties and
Printing Preferences.
• Print Driver Properties
Configuration Tab
Printer Tab
• Printing Defaults
Advanced Tab
Print Driver Properties
U
SER GUIDE
(P
RINT
)
• Configuration Ta b
• Printer Tab
USER GUIDE (PRINT)
2–57
Page 64

U
SER GUIDE
(P
RINT
)
Configuration Tab Settings
This describes Print Features in the Configuration tab.
NOTE: In order to print correctly, it is necessary to make
appropriate settings in this tab.
Select the printer icon in the Printers window, then select
1
Properties from the File menu.
Select the Configuration tab.
2
Select the items in Print Features that you want to set.
3
Change the settings in the list box that is displayed below the Print
4
Features list.
When all setting changes are completed, select OK.
5
2–58
Page 65

U
SER GUIDE
Print Features
EMF Spooling Select On to specify the spool format of the print data in the hard
drive as RAW format. As it takes time to convert print data, the
processing time is extended.
Print Page Mode Select Print Page Mode to On to enhance printer performance
with large complex jobs.
Specify Job Owner Use this feature to specify a job owner.
Use Login Name: Use your Windows Login Name as the Job
Owner Name. The Job Owner Name becomes the “Login User
Name\Host Name”.
Enter Owner Name (For Administrator): Select this if you want
to specify a custom Job Owner Name, which is used for all the
printer icons.
Enter Owner Name (For User): Select this if you want to specify
a custom Job Owner Name for each Windows Login user.
NOTE: You can enter up to 31 alphanumeric characters for the
Login Name and the Owner Name. If you enter more than 31
characters for either name, only the first 31 characters are used.
(P
RINT
)
Password: Enter the password for the Job Owner Name. The
password can consist of 4 to 12 digits. Each digit entered displays
as an asterisk (*).
Bypass Feed Orientation Specify the paper orientation when printing from the bypass tray.
When you set the short side of the paper in the bypass tray feed
direction, select Landscape. When you set the long side of the
paper in the bypass tray, select Portrait.
Substitute Tray Specify what action to take when the paper size called for is not
loaded in the machine.
Use Printer Settings: The settings can be confirmed on the
printer control panel.
Display message: Display paper supply messages on the printer
control panel. Printer will be unavailable until paper is supplied.
Use Nearest Size (With Zoom): Select the nearest paper size.
Automatically reduces or enlarges images for printing, as
necessary.
Use Nearest Size (No Zoom): Select the nearest paper size
available and prints in equal size.
USER GUIDE (PRINT)
2–59
Page 66

U
SER GUIDE
(P
RINT
)
Printer Tab Settings
This describes Printer tab.
NOTE: In order to print correctly, it is necessary to make
appropriate settings in this tab.
Select the printer icon in the Printers window, then select
1
Properties from the File menu.
Select the Printer tab.
2
Select the Auto Configuration button or select the items
3
manually in Change Setting For: that you want to set.
4
Finisher An optional output tray with stapling function that can be added to
A5 & Statement Paper
Detection
When all setting changes are completed, select OK.
the side of the printer.
Optional output functions to enable Trays 1 - 4 to detect certain
paper sizes.
2–60
Page 67

Printing Defaults
This describes the Printing Defaults on the Advanced tab.
NOTE: In order to print correctly, it is necessary to make
appropriate settings in this tab.
U
SER GUIDE
(P
RINT
)
USER GUIDE (PRINT)
2–61
Page 68

U
SER GUIDE
(P
RINT
)
Select the printer icon in the Printers window, then select
1
Properties from the File menu.
Select the Advanced tab.
2
Select the Printing Defaults button to view or change the
3
document default properties for all users of the selected printer.
Select your changes on the following tabs:
• Paper/Output
• Output Options
• Graphics
• Watermarks
• Fonts
• User Settings
• About
When all setting changes are completed, select OK.
4
Specify your printing options from the following:
For additional detail about the contents on the tabs use on-line
help. Refer to the On-line Help procedure in the B. Basic Printing
section in the User Guide (Print).
Paper/Output Tab Selections include Job Type, Copies, Paper Size, Output Size,
Image Orientation, Mixed Orientation, Multiple Up, Output Color, 2
Sided Print, Output Destination, Paper Source, Paper Type
(Bypass Tray), or select Printer Status, Poster/Booklet, Print Area,
or Restore Defaults buttons.
2–62
Page 69

U
SER GUIDE
(P
Output Options Select from Front Cover, Feed Cover from, Transparency
Separators, Job Offset, Stapling, or select Margin Shift Restore
Defaults buttons.
Graphics Specify how you want to manipulate graphic images for your print
job. Select from the following options: Output Color, Print Mode,
Image Adjustment Mode, Image Types, Image Auto Correction, or
select the Image Settings, Color Balance, Profile Settings,
Detailed Settings, or Restore Defaults buttons.
For more information on how to set graphic options refer to section
C.) Special Printing in the User Guide (Print).
Watermarks Specify watermark settings. Selections for watermarks include
First Page Only or In Background, Encircle, Text, Position, Angle,
or select the Restore Defaults button.
Fonts Use the TrueType Font control to select how TrueType Fonts will
be processed and printed.
User Settings The User Settings tab provides options for you to save frequently
used print driver settings and then recall these settings without
having to configure again.
RINT
)
About The About tab displays the name, version, and copyright
information of the print driver.
USER GUIDE (PRINT)
2–63
Page 70

U
SER GUIDE
Macintosh
Installing PostScript Print Driver
(P
RINT
)
There are three steps to install the print driver:
• Use the installer CD-ROM that you received with the
printer to install the printer to the Macintosh.
• Configure the PPD File.
• Configure the print driver.
Prior to installing the AdobePS 4.4.X print driver perform the
following.
Insert the CD-ROM in the CD-ROM drive.
1
Copy the PPD (PostScript Printer Description) file to the System
2
Folder\Extensions\Printer Descriptions folder on your
workstation.
Locate the Adobe PostScript Print Driver file.
3
Double click the Adobe PS Installer icon. The Introduction screen
4
is displayed.
Select Continue on the Introduction screen.
5
On the Licensing screen, select Accept.
6
Review the Read Me file then select Continue.
7
Verify the location for the print driver file and select Install.
8
When the installation completes, select Restart to reboot the
9
workstation.
2–64
Page 71

Configure the PPD File
U
SER GUIDE
(P
RINT
)
10
11
12
13
14
15
16
17
In the Apple Chooser, select the Adobe Postscript or Apple
LaserWriter printer.
Select the appropriate AppleTalk zone (if applicable) and the
printer name.
Select Create (for initial installation) or Setup (for all subsequent
installations) and select the PPD file for the printer. The PPD
screen is displayed.
On the PPD screen, select Select PPD.
If it is not already selected, highlight the Printer’s PPD in the list
and select Select.
Select OK.
Confirm that the printer has been added.
Continue to the next page in order to configure the print driver to
complete the installation.
USER GUIDE (PRINT)
2–65
Page 72

U
SER GUIDE
(P
RINT
)
Setting the Print Driver Properties on Macintosh
This section describes printer specific settings included in the print
driver properties.
NOTE: Typically, Installable Options is automatically set according
to the 1-directional communications with the printer. It is not
necessary to change the setting.
• Installable Options on the Option menu
• Printer Specific Options
Configure Settings
This describes Installable Options.
NOTE: In order to print correctly, it is necessary to make
appropriate settings in this tab.
Select the printer using the Chooser and select Setup. The
1
Current Printer Description File (PPD) Selected screen is
displayed.
Select Configure on the Current Printer File (PPD) Selected
2
screen. The Installable Options list is displayed.
Set the option menu items in Installable Options. Select OK.
3
Settings
Memory Specify the amount of printer memory.
• The default setting is Standard 512MB
Output Tray Set the destination for the output.
• The items that can be selected vary according to whether
Finisher has been installed.
Paper Detect by Tray Specify either Statement Paper Detection, or A5 Paper Detection.
2–66
Page 73

Printer Specific Options Settings
This describes Printer Specific Options, used to set the print
driver.
On the File menu of the application, select Print.
1
Select Printer Specific Options.
2
Select the features you want to set.
3
Settings
This section describes the settings of the Printer Specific Options
list.
U
SER GUIDE
(P
RINT
)
Output Tray Set the destination for the output.
• The items that can be selected vary according to whether
the Side Output Tray or Finisher Tray has been installed.
Job Offset Shifting the output positions of adjacent jobs (print command) or
copies (sets) is called Job Offset. The positions of adjacent jobs or
sets of copies are shifted to the front and the next job or set of
copies is shifted to the back.
Collated Selects whether to collate a multi-page file per set when they are
printed.
USER GUIDE (PRINT)
2–67
Page 74

U
SER GUIDE
(P
RINT
)
Transparency Separators Specify whether to use transparency separators and the source of
the separators.
Select Auto for three paper source to automatically feed from the
paper tray with paper of the same size and in the same orientation
as the transparencies.
NOTE: When using Transparency Separators, be sure to load
paper of the same size and in the same orientation as
transparencies into the paper tray.
NOTE: The Transparency Separators function cannot be used in
the following situations:
• When anything other than Manual feed is selected for
Paper source in the Paper/Quality tab.
• When anything other than Transparency is selected for
Media type in the Paper/Quality tab.
• When anything other than Center Output Tray is selected
for Output Destination in the Advanced Options tab.
• When print on both sides is selected.
Bypass Feed Orientation Specify the paper orientation when printing from the bypass tray.
When you set the short side of the paper in the bypass tray feed
direction, select Landscape. When you set the long side of the
paper in the bypass tray, select Portrait.
Paper Type (Bypass Tray) Select the type of the paper set in the bypass tray.
Print Mode Specify whether to give priority to the print speed or the image
quality. The printer/copier is capable of printing at three different
resolutions:
High Speed: 600 x 600
Standard: 1200 x 600
High Quality: 1200 x 1200
To change resolution settings, use the Print Mode selections.
NOTE: The Image Enhancement feature is not available when
Standard or High Quality is selected.
Output Color Specify your output printing options select either Color or Black.
2–68
Page 75

U
SER GUIDE
(P
RINT
RGB Color Correction Specify the coloration of the RGB Color Correction.
Normal: This setting is optimized for printing documents that
contain text and graphics, such as business documents.
Photo: This setting is optimized for printing photos or images with
gradations. Select this setting when printing images in RGB.
Web Pages: This setting is optimized for printing web pages.
Presentation: This setting is optimized for printing the color
documents vividly, such as presentation documents.
RGB Gamma Correction Specify the brightness of the documents. The higher the value, the
darker the print becomes.
Screen You can adjust the image quality. Select Gradation to print photos
and gradations clearly. Select Fineness to print the colors in
illustrations, tables, or graphs evenly.
Image Enhancement Specify whether to use the Image Enhancement function.
Selecting On, smooths out the boundaries between black and
white when printing. This reduces jagged edges, thereby
artificially increasing the resolution of the image. When printing an
image (bitmap) composed of coarse halftone dots, smooth color
gradation is impossible in certain situations. In this case, select
Off.
NOTE: The Image Enhancement feature is available only when
Print Mode is set to High Speed.
)
USER GUIDE (PRINT)
Draft Mode Specify whether to reduce the amount of toner used when printing
drafts. When you select On, the overall printed color becomes
lighter. This is best for printing documents when print quality is not
necessary.
Gray Guaranteed Select On to print grays and black within documents in black toner
only. This prevents neutral grays from exhibiting any kind of color
shading or misregistration. This feature does not apply to images
of the documents.
NOTE: For documents containing sweeps/gradients that include
gray, it may be preferable to set this feature to Off.
Stapling Select whether to staple printed documents as well as the position
of the staple.
• You can staple 2 to 30 sheets.
• You can only staple when Finisher Tray is selected for
Output Destination in the Advanced Options tab.
• You cannot use staples when Job Offset is selected.
2–69
Page 76

U
SER GUIDE
(P
RINT
)
2–70
Page 77

Paper
B. Basic Printing
This section identifies differences in paper usage as compared to
paper usage when copying. Other than these, there are no
differences between using paper for copying and printing.
For more information on how to load paper, refer to the User
Guide (Copier).
Differences From Copying
U
SER GUIDE
(P
RINT
)
Tray 5 (Bypass) When using Tray 5 (Bypass), there is a restriction on the
orientation of loading paper.
When printing with Tray 5 (Bypass), be sure to select Tray 5
(Bypass) from the Paper Source menu on the Tray/Output tab,
and then select the correct paper type from the Paper Tray
(Bypass) menu on the print driver screen.
Refer to On-line Help of the print driver for details on printing
special papers like transparencies.
For details on loading paper in Tray 5 (Bypass), refer to the User
Guide (Copier).
Caution for Printing If the paper size or type used for printing is different from the
selection on the print driver, or if the paper is loaded in an
unsuitable paper tray, it may cause paper to jam.
Automatic Tray Switching To enable the Auto Tray Switch feature, Auto must be selected
from the Paper Source menu on the Tray/Output tab.
NOTE: The Auto Tray Switch feature is displayed as Disable Auto
Tray Switch in the Common Menu and Internet Services.
Outputting Paper To use the Job Offset feature you must first configure the setting
on the Configuration tab of the print driver.
Refer to the On-line Help of the print driver for details.
USER GUIDE (PRINT)
2–71
Page 78

U
SER GUIDE
(P
RINT
)
Prior to Printing
Printing Procedure
I
In order to print from your computer, you must first install a print
driver. Print drivers are software that convert print data or
instructions from the computer into data that can be interpreted by
the printer.
The printing procedure will differ according to the application
program used. For details, refer to your application program
manual.
Select Print from the application program File menu. The Print
1
screen is displayed.
2–72
Page 79

U
Select the Printer and then select Properties. The Printer
2
Properties screen is displayed.
Select the desired printing options for your print job.
3
SER GUIDE
(P
RINT
)
4
Select OK.
USER GUIDE (PRINT)
2–73
Page 80

U
SER GUIDE
(P
RINT
)
Setting Printing Features
Typically, printing features are set on the printer properties dialog
box that is displayed when entering either printing from the
application program or selecting Properties from the File menu on
the printer icon.
From the Properties screen, select the desired features in each
tab.
NOTE: Refer to the On-line Help of the printer driver for details on
the options of the printer driver and how to select the options.
For more information on how to use On-line Help, refer to Using
On-line Help, on the next page.
NOTE:
• For Windows 95/98/Me, select Properties.
• For Windows NT 4.0, select options from the tabs that are
displayed by selecting Document Defaults and
Properties from the File menu.
• For Windows 2000 and Windows XP, select options from
the tabs that are displayed by selecting Printing
Preferences and Properties from the File menu.
• For Windows 98, Windows Me, Windows 2000 and
Windows XP, options are also displayed on the Color
Management tab.
• For complete settings details, refer to the Driver
Configuration information at the beginning of this chapter.
2–74
Page 81

Using On Line Help
U
SER GUIDE
(P
RINT
On-line Help explains the print driver options and the basic
printing process.
View Details of Each Option
On the active properties dialog box of the print driver, select the
“question mark” button on the top right corner of the window, and
after the cursor has changed to a “question mark”, select the
desired option.
View Basic Printing Process
On the active properties dialog box of the print driver, select the
Help button on the bottom right corner of the window to display a
Help window, which explains the currently displayed screen.
Select the Contents button at the top left corner of the Help
window to display the contents of the printing process.
)
Double-clicking the title of the desired process will display the
explanation.
USER GUIDE (PRINT)
2–75
Page 82

U
SER GUIDE
(P
RINT
)
Switching Printer Off-line
1
2
3
4
When the printer is switched off-line, it cannot receive data.
Receiving data will be interrupted and will not be printed.
On the control panel, press the Machine Status button. The
Machine Status screen is displayed.
Select Print Mode located on the Machine Status tab. The Print
Mode screen is displayed.
Select Off-line.
Select Close.
2–76
Page 83

Cancel Print/Check Print Job Status
Cancel Print from the Workstation
From the Start menu, select Settings and then select Printers.
1
Open the icon of the printer model.
2
In the window displayed, select any document name and then
3
press Delete on the keyboard.
Canceling a Print Job Using Internet Services
U
SER GUIDE
(P
RINT
)
You can cancel printing from your workstation using Internet
Services via a browser.
For more information on Internet Services, refer to the Internet
Services section D in the User Guide (Print).
Canceling a Print Job From the Printer
There are three options available for canceling a print job at the
machine. You can cancel a print job that is in process, one that is
currently being printed or one that is stored for printing at a later
time.
USER GUIDE (PRINT)
2–77
Page 84

U
SER GUIDE
(P
RINT
)
Canceling a Print Job in Process
• Either press the Stop button on the control panel or select
Stop on the following screen.
• The job currently being processed will be discontinued.
Canceling a Print Job During Print
Either press the Stop button on the control panel or select Stop.
1
The job currently being processed will be discontinued.
To stop printing, either press the Stop button on the control panel
2
or select Stop on the following screen.
NOTE: The page that is currently printing will be printed.
2–78
Page 85

Canceling Jobs Stored in the Printer
You can interrupt the printer from receiving data and empty the
buffer using the procedure below.
On the control panel, press Job Status. The Job Status screen is
1
displayed.
On the Job Status screen, select Current/Pending Jobs. A list of
2
jobs in process or waiting is displayed.
Select the job that you want to delete. The job status is displayed.
3
Select Stop. The job processing will be discontinued.
4
Select Close.
5
U
SER GUIDE
(P
RINT
)
USER GUIDE (PRINT)
2–79
Page 86

U
SER GUIDE
(P
RINT
)
C. Special Printing
Specifying Output Color for Printing in a PCL Driver
You can specify the output color for printing.
From the Output Color menu of either the Paper/Output or
Graphics tab, select Black or Auto.
Printing with Black
To print in black and white, select Black from the Output Color
menu.
Print Mode
Specify whether to give priority to the print speed or the image
quality. The printer/copier is capable of printing at three different
resolutions:
High Speed: 600 x 600
Standard: 1200 x 600
High Quality: 1200 x 1200
To change resolution settings, use the Print Mode selections.
NOTE: The Image Enhancement feature is not available when
Standard or High Quality is selected.
Options Contents
High Speed Prints faster but with a loss of image
quality.
Standard The average mode of High Speed and
High Quality.
High Quality Prints with better quality but slower
2–80
NOTE: If printing is slow even when High Speed has been
selected, try setting Print Page Mode on the Configuration tab to
On. The printing time may be shortened.
Page 87

Image Adjustment Mode
Options Contents
Recommended A unique system of our company to
The possible feature combinations of Print Mode and Output Color
and other options of the Graphics tab are as follows:
NOTE: When Black has been selected for Output Color, only
Recommended can be selected for Image Adjustment.
U
SER GUIDE
adjust image quality.
(P
RINT
)
USER GUIDE (PRINT)
2–81
Page 88

U
SER GUIDE
(P
RINT
)
Black & High Speed
The possible feature combinations when Black for Output Color
and High Speed for Print Mode have been selected:
Image
Graphics Options
Image Settings Brightness Available
Color Balance Black Available
Profile Settings Color
Detailed
Settings:
Te xt Change All
Adjustment
Mode
Chroma NA
Contrast Available
Cyan NA
Magenta NA
Yellow NA
Correction
Temperature/
Gamma
ICC Profile Available
Colors to
Black
Recommended
Available
Available
Graphic Change All
Colors to
Black
Thicken Fine
Lines
Paint Only
Enclosed
Areas
Photo Image
Compression
Smoothing Available
High Speed
Image
Processing
All Image
Enhancement
Draft Mode Available
Resolution Available
Available
Available
Available
Available
Available
Available
2–82
Page 89

Black & Standard
The possible feature combinations when Black for Output Color
and Standard for Print Mode have been selected:
U
SER GUIDE
(P
RINT
)
Graphics Options
Image
Adjustment
Recommended
Mode
Image Settings Brightness Available
Chroma NA
Contrast Available
Color Balance Black Available
Cyan NA
Magenta NA
Yellow NA
Profile Settings Color
Available
Correction
Temperature/
Gamma
ICC Profile Available
Detailed
Settings:
Text Change All
Colors to
Available
Black
USER GUIDE (PRINT)
Graphic Change All
Colors to
Black
Thicken Fine
Lines
Paint Only
Enclosed
Areas
Photo Image
Compression
Smoothing Available
High Speed
Image
Processing
All Image
Enhancement
Draft Mode Available
Resolution Available
Available
Available
Available
Available
Available
NA
2–83
Page 90

U
SER GUIDE
(P
RINT
)
Black & High Quality
The possible feature combinations when Black for Output Color
and High Quality for Print Mode have been selected:
Image
Graphics Options
Image Settings Brightness Available
Color Balance Black Available
Profile Settings Color
Detailed
Settings:
Text Change All
Adjustment
Mode
Chroma NA
Contrast Available
Cyan X
Magenta X
Yellow X
Correction
Temperature/
Gamma
ICC Profile Available
Colors to
Black
Recommended
Available
Available
GraphIC Change All
Colors to
Black
Thicken Fine
Lines
Paint Only
Enclosed
Areas
Photo Image
Compression
Smoothing Available
High Speed
Image
Processing
All Image
Enhancement
Draft Mode Available
Resolution Available
Available
Available
Available
Available
Available
NA
2–84
Page 91

U
SER GUIDE
Select Print from the File menu.
1
Check Printer, and then select Properties.
2
Select the Graphics tab.
3
Select Black from the Output Color drop-down list.
4
NOTE: You can also select from Output Color on the Paper/
Output tab.
Select the mode from the Print Mode drop-down list box.
5
Select OK.
6
(P
RINT
)
Printing with Auto
Auto Before printing, the printer can detect the colors on every
document page, and then switch automatically to Color when
colors other than black and white are used, and to Black when
only black and white are used. Select Auto from the Output Color
menu.
Output Color Recognition When this feature is checked, pages with only some degree of
unevenness in color will be detected as black and white. When the
box has not been checked, only pages with even degree of color
will be detected as black and white.
You can also configure the Print Mode, Image Adjustment Mode
and Image Auto Correction settings. However, pages detected as
black and white will be printed with the settings of Black mode.
Display the Graphics tab to configure these settings.
USER GUIDE (PRINT)
2–85
Page 92

U
SER GUIDE
(P
RINT
)
Print Mode
Specify whether to give priority to the print speed or the image
quality. The printer/copier is capable of printing at three different
resolutions:
High Speed: 600 x 600
Standard: 1200 x 600
High Quality: 1200 x 1200
To change resolution settings, use the Print Mode selections.
NOTE: The Image Enhancement feature is not available when
Standard or High Quality is selected.
Options Contents
High Speed Prints faster but with a loss of image
quality.
Standard The average mode of High Speed and
High Quality.
High Quality Prints with better quality but slower
NOTE: If printing is slow even when High Speed has been
selected, try setting Print Page Mode on the Configuration tab to
On. The printing time may be shortened.
2–86
Page 93

U
SER GUIDE
(P
RINT
Image Adjustment Mode
The available options in Image Adjustment mode are:
• Recommended
•ICM (System)
NOTE: The ICM (System) setting is not available for Windows NT
4.0 Operating System.
• CMS (Application)
• Complimentary Color Conversion
Recommended When Recommended has been selected, select the image type
from the Image Types list box.
Options Contents
Normal Prints documents with a mixture of
texts, graphs and photos, fast.
)
Photo Reproduces photos and gradation
more accurately. Suitable for printing
of images in RGB.
Presentation Adjusts colors vividly for printing.
Suitable for presentation materials.
Web Pages Effectively reproduces screen displays
like web pages.
USER GUIDE (PRINT)
2–87
Page 94

U
SER GUIDE
(P
RINT
)
ICM (System) Changes colors using the ICM feature of Windows 98, Windows
Me, Windows 2000, and Windows XP.
When ICM (System) has been selected, select the way of
converting colors from the Indent list box.
NOTE: Prior to using the ICC profile of this machine, register it on
the Color Management tab of the print driver.
Options Contents
Saturation Converts colors to improve the
reproduction of graphics in
presentation materials.
Perceptual Converts colors to improve the
reproduction of images like photos.
Colorimetric Reproduces suitably only colors that
can be reproduced by the printer and
converts others not within the
reproduction range to other colors.
CMS (Application) The print driver does not convert any colors. When printing from
an application program with its own Color Management System
(CSM), the print driver will receive instruction on color data
converted according to the printer characteristics. In this case,
select this item to prevent double color conversion by the print
driver.
Complementary Color
Conversion
Selecting this will enable the Auto Correction for you to select an
option.
2–88
Page 95

Image Auto Correction
When the document to be printed includes photo images, you can
correct the image quality according to the special characteristics
of the photo images. You can perform automatic correction
according to the characteristics of the specified image type.
NOTE: Image Auto Correction cannot be selected when ICM
(System) or CMS (Application) has been selected for Image
Adjustment Mode.
The possible feature combinations of Print Mode, Image
Adjustment Mode and other options of the Graphics tab are as
follows:
Options Contents
Normal Corrects imbalances in photo images
U
SER GUIDE
like too bright or dark, or too greyish.
Images with insufficient contrast and
saturation will be automatically
corrected.
(P
RINT
)
Portrait Automatically corrects the brightness,
contrast and saturation suitable for
images of people.
Landscape Automatically corrects the brightness,
contrast and saturation suitable for
images of scenery.
Map Automatically corrects maps and on-
site photos to reproduce the text and
detailed portions clearly.
NOTE: ICM (System) only will be display in Windows 98, Windows
Me, Windows 2000, and Windows XP.
USER GUIDE (PRINT)
2–89
Page 96

U
SER GUIDE
(P
RINT
)
Auto & High Speed
The possible feature combinations when Auto for Output Color
and High Speed for Print Mode have been selected:
Graphics Options
Image Settings Brightness Available NA NA Available
Color Balance Black Available Available Available Available
Profile Settings Color
Detailed
Settings:
Te xt Change All
Image
Adjustment
Mode
Chroma Available NA NA Available
Contrast Available NA NA Available
Cyan Available Available Available Available
Magenta Available Available Available Available
Yellow Available Available Available Available
Temperature/
Gamma
ICC Profile Available NA NA Available
Colors to
Black
Recommended ICM Adj.
(System)
Available NA NA Available
NA NA NA NA
CMS Adj.
(Application)
Complementary
Conversion
Color
Graphic Change All
Colors to
Black
Thicken Fine
Lines
Paint Only
Enclosed
Areas
Photo Image
Compression
Smoothing Available Available Available Available
High Speed
Image
Processing
All Image
Enhancement
Draft Mode Available Available Available Available
Resolution Available Available Available Available
NA NA NA NA
Available Available Available Available
Available Available Available Available
Available Available Available Available
Available Available Available Available
Available Available Available Available
2–90
Page 97

Auto & Standard
The possible feature combinations when Auto for Output Color
and Standard for Print Mode have been selected:
U
SER GUIDE
(P
RINT
)
Complementary
Conversion
Graphics Options
Image
Adjustment
Mode
Recommended ICM Adj.
(System)
CMS Adj.
(Application)
Image Settings Brightness Available NA NA Available
Chroma Available NA NA Available
Contrast Available NA NA Available
Color Balance Black Available Available Available Available
Cyan Available Available Available Available
Magenta Available Available Available Available
Yellow Available Available Available Available
Profile Settings Color
Available NA NA Available
Temperature/
Gamma
ICC Profile Available NA NA Available
Detailed
Settings:
Te xt Change All
Colors to
NA NA NA NA
Black
Color
USER GUIDE (PRINT)
Graphic Change All
Colors to
Black
Thicken Fine
Lines
Paint Only
Enclosed
Areas
Photo Image
Compression
Smoothing Available Available Available Available
High Speed
Image
Processing
All Image
Enhancement
Draft Mode Available Available Available Available
Resolution Available Available Available Available
NA NA NA NA
Available Available Available Available
Available Available Available Available
Available Available Available Available
Available Available Available Available
NA NA NA NA
2–91
Page 98

U
SER GUIDE
(P
RINT
)
Auto & High Quality
The possible feature combinations when Auto for Output Color
and High Quality for Print Mode have been selected:
Graphics Options
Image Settings Brightness Available NA NA Available
Color Balance Black Available Available Available Available
Profile Settings Color
Detailed
Settings:
Te xt Change All
Image
Adjustment
Mode
Chroma Available NA NA Available
Contrast Available NA NA Available
Cyan Available Available Available Available
Magenta Available Available Available Available
Yellow Available Available Available Available
Temperature/
Gamma
ICC Profile Available NA NA Available
Colors to
Black
Recommended ICM Adj.
(System)
Available NA NA Available
NA NA NA NA
CMS Adj.
(Application)
Complementary
Conversion
Color
GraphIC Change All
Colors to
Black
Thicken Fine
Lines
Paint Only
Enclosed
Areas
Photo Image
Compression
Smoothing Available Available Available Available
High Speed
Image
Processing
All Image
Enhancement
Draft Mode Available Available Available Available
Resolution Available Available Available Available
NA NA NA NA
Available Available Available Available
Available Available Available Available
Available Available Available Available
Available Available Available Available
NA NA NA NA
2–92
Page 99

Printing with Auto
This section describes the possible feature combinations when
Auto for Output Color and High Speed for Print Mode have been
selected.
Select Print from the File menu.
1
Check Printer and then select Properties.
2
Select the Graphics tab.
3
Select Auto from the Output Color drop-down list.
4
NOTE: You can also select from Output Color on the Paper/
Output tab.
U
SER GUIDE
(P
RINT
)
Select the mode from the Print Mode drop-down list.
5
Select the mode from the Image Adjustment Mode drop-down list.
6
When Recommended has been selected, select the image type
7
from the Image Type list.
When ICM (System) has been selected, select the way of
converting colors from the Indent list.
Select OK.
8
USER GUIDE (PRINT)
2–93
Page 100

U
SER GUIDE
(P
RINT
)
Adjusting Color for Printing
This section explains how to configure detailed color settings for
printing. These settings are configured on the Graphics tab. There
are four tabs on the Graphics tab. The options are as follows:
Options Contents
Image Settings Adjusts the brightness, chroma, and
contrast of the whole document or of
each of the elements like text, graphic,
and photos.
Color Balance Fine-tunes the toner density of black,
cyan, magenta, and yellow. Can be
set in low, medium, or high density.
Profile Settings Configures settings like color
temperature/gamma correction and
ICC profile that match the
characteristics of devices (like monitor
and scanner) in order to reproduce
document image faithfully.
Detailed Settings Adjusts the detailed image quality
settings of the whole document or
each of the elements like text, graphic,
and photos.
2–94
 Loading...