

Page 1

Version 1.3
March 2015
702P03534
®
Xerox
ConnectKey®
for SharePoint®
Installation Guide
Page 2

©2015 Xerox Corporation. All rights reserved. Xerox®, Xerox and Design® and ConnectKey® are trademarks of Xerox
Corporation in the United States and/or other countries. BR1005
Microsoft® and Microsoft SharePoint® are registered trademarks of Microsoft Corporation.
All trademarks used herein are the property of their respective owners.
Page 3

Contents
1 Xerox® ConnectKey™ for SharePoint® Installation Prerequisites ......... 1-1
Glossary of Terms ................................................................................................................................................ 1-1
Installation Prerequisites .................................................................................................................................. 1-1
Hardware ..................................................................................................................................................... 1-1
Software ....................................................................................................................................................... 1-2
Loading the .Net Framework Language Pack ............................................................................ 1-2
Network Requirements .......................................................................................................................... 1-2
SharePoint Requirements .................................................................................................................... 1-3
Supported multifunction printers ..................................................................................................... 1-3
Other Considerations ............................................................................................................................. 1-3
Port Requirements ................................................................................................................................... 1-4
Where to Obtain the Software and Documentation .............................................................. 1-5
2 Installing Xerox® ConnectKey™ for SharePoint® ........................................ 2-1
Running ConnectKey Process Designer for the First Time ................................................... 2-8
3 Upgrading ................................................................................................................ 3-1
Before you begin ...................................................................................................................................... 3-1
Removal of previous software ........................................................................................................... 3-1
Installation of ConnectKey for SharePoint software .............................................................. 3-2
Reinstalling ConnectKey Web Services.......................................................................................... 3-2
Licensing ..................................................................................................................................................... 3-2
Loading your existingConfiguration Files .................................................................................... 3-2
4 Licensing .................................................................................................................... 4-1
Upgrading from a Trial License to a Production License ...................................................... 4-1
Completing the licensing process .................................................................................................... 4-2
5 Installing ConnectKey Web Service for SharePoint .................................. 5-1
Connection methods that do not require ConnectKey Web Services ............................. 5-1
Connection methods that require ConnectKey Web Services ............................................ 5-2
Prerequisites ........................................................................................................................................................... 5-3
Installation Steps ................................................................................................................................................. 5-3
6 Next Steps: Deploying ConnectKey for SharePoint .................................. 6-1
Steps to a Successful Deployment ............................................................................................................... 6-1
7 Basic Troubleshooting .......................................................................................... 7-1
Software will not download ............................................................................................................................ 7-1
Software installation will not complete ..................................................................................................... 7-1
Licensing ................................................................................................................................................................... 7-2
Where to go for help ........................................................................................................................................... 7-2
Xerox ConnectKey for SharePoint iii
Installation Guide
Page 4

Contents
iv Xerox ConnectKey for SharePoint
Installation Guide
Page 5
1 Xerox® ConnectKey™
®
for SharePoint
Installation
Prerequisites
Glossary of Terms
3
1
Term/Abbreviation
AutoStore (AS)
User
Server
Impersonation
MFP (Multifunction Printer)
ConnectKey for SharePoint is powered by AutoStore™ imaging
technology from Notable Solutions, Inc.
Refers to the administrative user who will run the installation and license
the server.
Refers to the Windows Operating System Based computer that
ConnectKey for SharePoint is installed on. It does not necessarily refer to
a server class computer.
Refers to the process of storing documents in SharePoint with the user
name of the scanning user stored in the “modified by” column.
Any references to devices, multifunction devices, MFDs, printers, and
MFPs should all be treated synonymously.
Description
Installation Prerequisites
Hardware
• A Windows operating system computer with at least 2 GHz Processor is recommended
• Minimum 2 GB of RAM (4 GB or greater recommended)
• Minimum of 10 GB of (free and available) hard disk space
• Network Interface Card
Xerox ConnectKey for SharePoint 1-1
Installation Guide
Page 6

Xerox ConnectKey for SharePoint Installation Prerequisites
Software
The following Windows Operating Systems are supported:
• Windows 2008 Standard/Enterprise (32 bit only) – with the latest service pack
• Windows 2008 Standard/Enterprise R2 SP1 (64 bit)
• Windows 2012 Foundation/Essentials/Standard/Datacenter
• Windows 7 (32 bit)
• Windows 7 (64 bit)
• Windows 7 Professional (32 bit / 64 bit) SP1
• Windows 8 (32 bit)
• Windows 8 (64 bit)
• Windows 2003 (32 bit only) Standard\Enterprise – with the latest service pack
• Windows 2003 R2 (64 bit) Standard\Enterprise – with the latest service pack
Microsoft.Net Framework 3.51 SP1 and 4.0 are required.
To obtain .Net Framework 3.5.1 and 4.0 for Windows 7 Operating Systems please go to
http://www.microsoft.com, click on Downloads, then click on Download Center, and search for .Net
Framework 3.5.1., and .Net Framework 4.0. Download each of the packages, follow the installation
instructions provided.
Loading the .Net Framework Language Pack
The ConnectKey Process Designer will present the user with various system messages, including
Microsoft .Net Errors. In order for system messages to appear in the correct language, the user will
need to load the respective .Net Framework Language Pack.
For more information, please refer to the following site: http://www.microsoft.com/en-
us/download/details.aspx?id=23067.
Note
The .Net Framework Language Pack is required regardless of the native language of the
Operating System.
Network Requirements
• Communication between all multifunction printers and the ConnectKey for SharePoint server
should be validated in advance of the software installation with a ping test.
• A Microsoft Windows Network is required.
• Internet connectivity is required to download, update, and license your software.
If your ConnectKey for SharePoint server does not have internet access please contact Xerox
Support for alternatives.
• Customer will be responsible to create domain service account (username and password) with
local administration rights to be used to run the ConnectKey for SharePoint service on the
ConnectKey for SharePoint server, with read/write access to any network drives and/or SharePoint
2007/2010/2013 destination locations that may be used for file output, and LDAP (Active
Directory) query permissions.
1-2 Xerox ConnectKey for SharePoint
Installation Guide
Page 7

Xerox ConnectKey for SharePoint Installation Prerequisites
• For non-domain accounts where files will be routed locally to the ConnectKey for SharePoint
server, it is possible to use a local account. However, a domain account with read privileges is
required to query the AD server when Authentication is used.
• ConnectKey for SharePoint is not supported in a Windows Distributed File System (DFS)
environment.
• Windows Domains: Users, ConnectKey Server, MFDs, SharePoint servers, and network shares must
all reside within the same domain for the following features to be supported:
Folder browsing
SharePoint browsing
Impersonation
Routing to My Sites
Enforcement of user permissions for scanning to folders
Scanning to network resources (folders or SharePoint Servers)
SharePoint Requirements
• For the most robust functionality, it is strongly recommended that the ConnectKey Web Services
extension be installed on the production SharePoint Server. This provides the most features when
routing to SharePoint 2007 and SharePoint 2010. Please refer to the “Installing ConnectKey Web
Service for SharePoint” section below for more details.
These options are also referred to as SharePoint 2007 (ConnectKey Web Services) and
SharePoint 2010 (ConnectKey Web Services).
• It is possible to integrate with SharePoint 2010 and SharePoint 2013 without installing the
ConnectKey Web Services on your SharePoint server. This configuration adds limitations when
scanning to SharePoint 2010 and SharePoint 2013. Please refer to the “Installing ConnectKey
Web Service for SharePoint” section below for more details on the limitations.
This option is also referred to as SharePoint 2010 (Microsoft Web Services) and SharePoint
2013 (Microsoft Web Services).
Please refer to the “Installing ConnectKey Web Services for SharePoint” section below for more
information on the SharePoint connectors as well as requirements and limitations for each connector.
Supported multifunction printers
All multifunction printers must be Xerox EIP Capable printers. For exact models, please refer to the
Compatible Products list found at:
http://www.xerox.com/connectkeysharepoint
Other Considerations
• Antivirus software and firewalls must be configured not to auto-scan files on access or to block
communication between the ConnectKey for SharePoint computer and the multifunction printers,
SharePoint, network folders, active directory, LDAP, or email server. If antivirus software or
firewalls are interfering with Xerox ConnectKey for SharePoint software and cannot be configured
for compatibility with ConnectKey for SharePoint, they must be disabled.
Xerox ConnectKey for SharePoint 1-3
Installation Guide
Page 8
Xerox ConnectKey for SharePoint Installation Prerequisites
• As a best practice, it is recommended that whenever possible, MS Windows service packs and
updates should be applied after compatibility with ConnectKey for SharePoint has been
confirmed.
• Xerox ConnectKey for SharePoint cannot be installed on a server that has an installation of
AutoStore or Smart Document Travel.
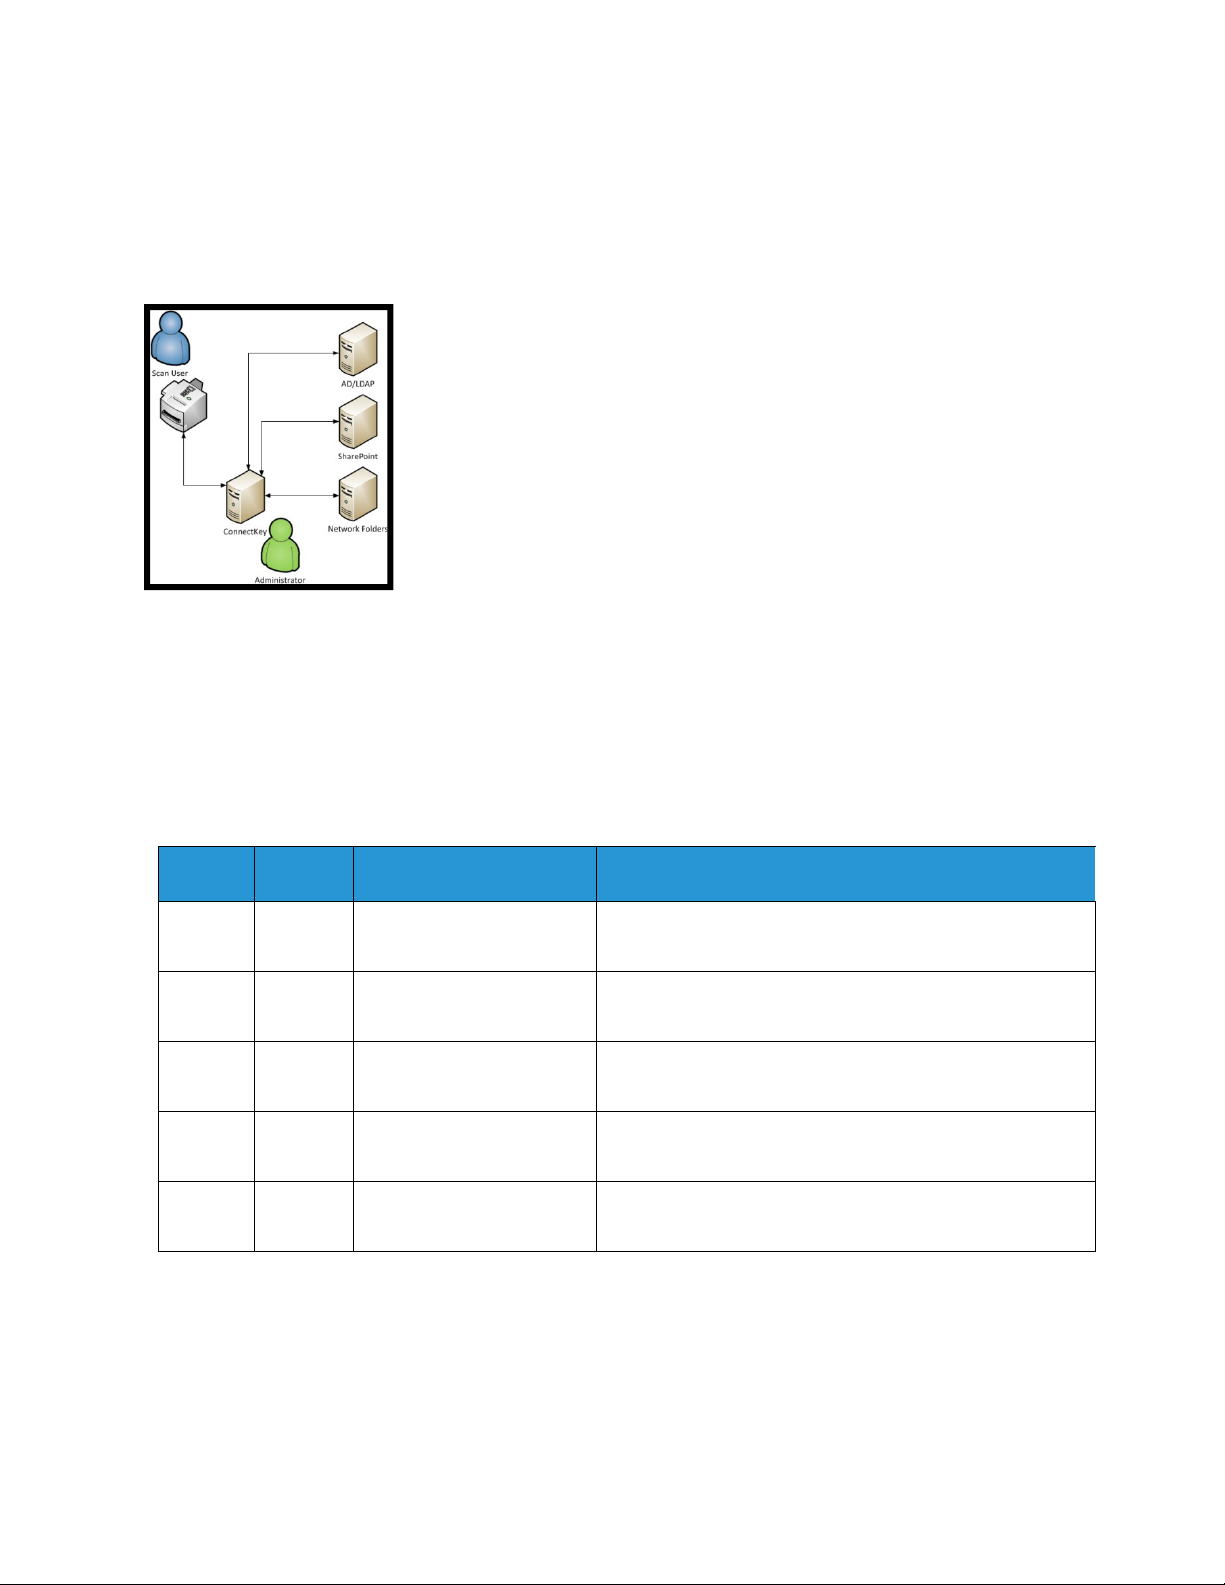
Deployment Architecture
Port Requirements
The following ports are identified for use in the Xerox ConnectKey for SharePoint solution. These ports
are required to be open and available for the effective operation of the software solution. Even
though it is possible to modify some of the services to operate on different ports, please consider
these ports as necessary for any proposed deployments of the Xerox ConnectKey for SharePoint
solution delivery.
Type
TCP 3241* HTTP/HTTPS Communication between multifunction printers and
FTP 3280* FTP Communication between multifunction printers and
TCP 80 SharePoint Default Port Communication between ConnectKey for SharePoint
TCP 25* SMTP Mail Relay Communication between ConnectKey for SharePoint
TCP 389 LDAP Query Port Communication between ConnectKey for SharePoint
Port Communication Type
Description
ConnectKey for SharePoint Server
ConnectKey for SharePoint Server
Server and SharePoint
Server and SMTP Server
Server and LDAP Server
* Configurable
1-4 Xerox ConnectKey for SharePoint
Installation Guide
Page 9

Xerox ConnectKey for SharePoint Installation Prerequisites
Where to Obtain the Software and Documentation
Preparing to install Xerox ConnectKey for SharePoint begins by obtaining the software and associated
documentation.
If you haven’t already downloaded the software, please navigate to the following address to
download the software:
http://www.xerox.com/connectkeysharepointlicense
1. If you don’t already have an account, select the “New User? Create Account” link to Register.
2. After your account has been created, you will receive an email from
Xerox.ConnectKey@nsius.com
required to enter your email and password, and then click on “Login”.
3. After registering, select Product Download.
4. On the Downloads page, select the Xerox ConnectKey for SharePoint product and save the
installation file.
5. In addition to downloading the software, download the following documentation:
• Xerox ConnectKey for SharePoint Administrator Guide
• Xerox ConnectKey for SharePoint Quick Start User Guide
. Please open the email and click on the activation link. You will be
Xerox ConnectKey for SharePoint 1-5
Installation Guide
Page 10

Page 11
2 Installing Xerox®
ConnectKey™ for
®
SharePoint
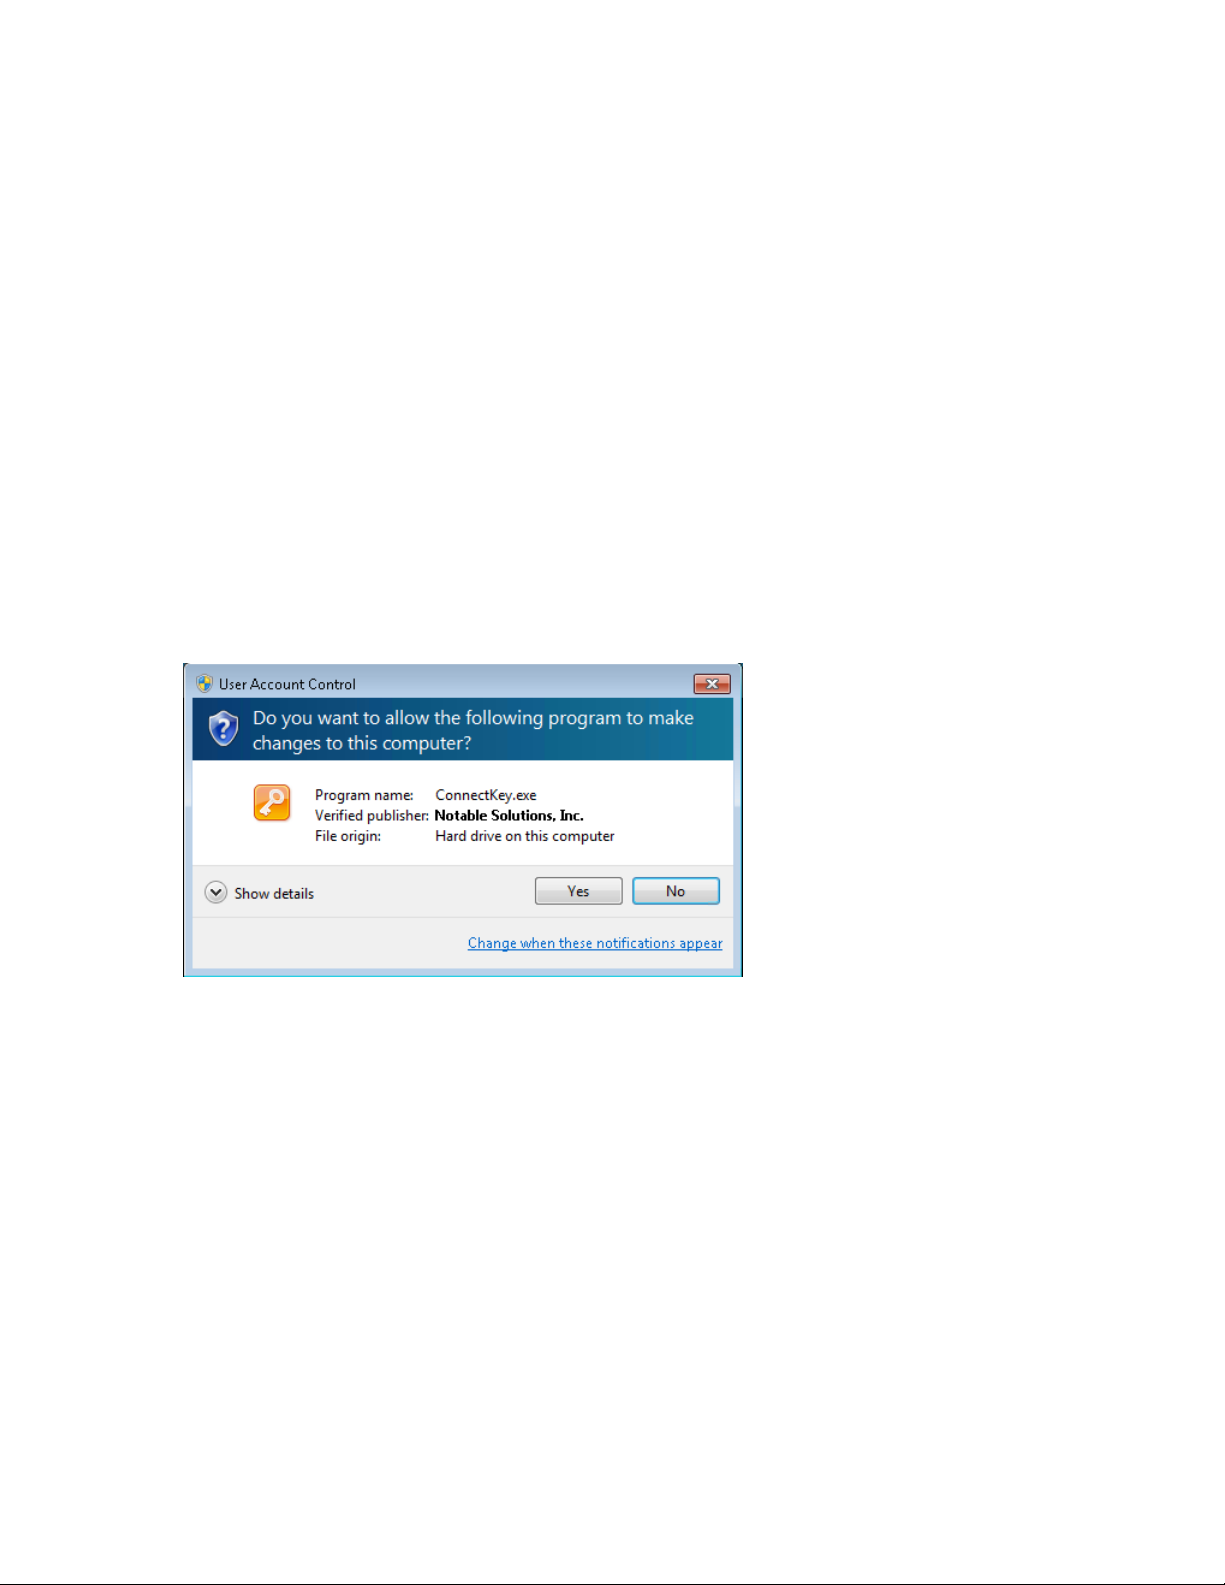
1. Locate the software installation file and run it. Right-click and choose Run as administrator if
you are installing on Windows 2008, Windows 2012, Windows 7, or Windows 8.
Note
A restart may be required during or after the process.
If prompted to allow the program to make changes to the computer, click Yes.
3
2
Xerox ConnectKey for SharePoint 2-1
Installation Guide
Page 12

Installing Xerox ConnectKey for SharePoint
2. Upon installation start, a language selection screen will be presented.
Note
The choice made here will only affect the language of instructions presented during the
installation process. During actual usage of the ConnectKey for SharePoint Application, text
elements are displayed based on the language settings of the operating system
Once a language has been chosen, click OK.
Click Install to begin installing prerequistes.
2-2 Xerox ConnectKey for SharePoint
Installation Guide
Page 13

Installing Xerox ConnectKey for SharePoint
3. Once all prerequisites have been installed, the Xerox ConnectKey for SharePoint core
installation begins.
Xerox ConnectKey for SharePoint 2-3
Installation Guide
Page 14

Installing Xerox ConnectKey for SharePoint
4. Accept the License Agreement terms.
Note
If you do not accept the terms in the License Agreement, the installation will not proceed.
2-4 Xerox ConnectKey for SharePoint
Installation Guide
Page 15

Installing Xerox ConnectKey for SharePoint
5. Provide user and company information.
Xerox ConnectKey for SharePoint 2-5
Installation Guide
Page 16

Installing Xerox ConnectKey for SharePoint
6. You may alter the default installation path by clicking Change or you may click Next to
proceed with the default path.
Note
Installation must be performed on a local drive. Installation to a Network drive is not
supported.
2-6 Xerox ConnectKey for SharePoint
Installation Guide
Page 17

Installing Xerox ConnectKey for SharePoint
7. Click Install to begin the installation.
The installer indicates when it has finished.
Xerox ConnectKey for SharePoint 2-7
Installation Guide
Page 18

Installing Xerox ConnectKey for SharePoint
Running ConnectKey Process Designer for the First Time
The first time the ConnectKey Process Designer runs, you will experience the following:
1. ConnectKey for SharePoint is in an unlicensed state. A dialogue displays the following message:
“The Xerox ConnectKey for SharePoint application does not have a valid license. Would you
like to launch the license manager tool to begin the licensing process?"
Click Yes to license your software.
Please refer to the “Licensing” section below for full details on how to License Xerox ConnectKey
for SharePoint.
2. No serial numbers or Maintenance Contract IDs will be registered on a new install and the
application will prompt you to enter one or more Xerox Serial Numbers and Maintenance
Contract IDs. If you decline to enter any numbers, the prompt will remind you on each
subsequent launch of ConnectKey for SharePoint until one or more serial numbers have been
entered.
Please refer to the Xerox ConnectKey for SharePoint Administrator Guide or online help for more
details on storing your Serial Number.
2-8 Xerox ConnectKey for SharePoint
Installation Guide
Page 19

3 Upgrading
This chapter explains how to upgrade your ConnectKey for SharePoint installation from a prior
version by uninstalling the older version and reinstalling the newer version.
Before you begin
Upgrading/Migrating ConnectKey for SharePoint requires a valid maintenance contract ID. If you do
not have a valid maintenance contract, please do not proceed with this upgrade/migration; if you do
your software will be disabled. Please contact your Xerox Reseller to purchase a new maintenance
contract.
If your contract is current, please ensure that you have your maintenance contract ID ready in case
you need to contact support for any installation issues. It is also recommended to have your serial
number(s) available. Your Serial Number may be listed in the ConnectKey for SharePoint application
under the “Serial Numbers” section if your administrator entered these during the installation process.
Otherwise, please consult the letter obtained with your original purchase of Xerox ConnectKey for
SharePoint.
Removal of previous software
3
Before proceeding with installation of the new version, you must first uninstall your previous software
via the “uninstall” application in the ConnectKey for SharePoint program group. As a best practice, it
is recommended that you ensure your ConnectKey for SharePoint configuration files (CFG files) are
backed up by saving your .cfg files to a repository. Additionally, as with all major changes to a
production server, it is recommended that you backup your server if you have the means to do so.
Some suggested methods are:
• Use Windows Server Backup Utility
• Create a Window System Restore Point
• Take a virtual machine snapshot
• Use 3
You can view which configuration file that you are currently using by selecting the
Xerox>ConnectKey>ConnectKey Service Manager from Windows Start
rd
party backup software
Xerox ConnectKey for SharePoint 3-1
Installation Guide
Page 20

After running the uninstall program, it may be necessary to manually delete the program group from
the Start Menu. You can do this by right-clicking the item and deleting it.
Installation of ConnectKey for SharePoint software
After removal of the previous version of the ConnectKey for SharePoint, run the installation program
for the new version.
Please refer to
• Chapter 1, the section entitled “Where to Obtain the Software and Documentation” for
information on where to download the software, and
• Chapter 2, “Installing ConnectKey for SharePoint” for installation instructions.
Reinstalling ConnectKey Web Services
If you had previously installed the ConnectKey Web Service on your SharePoint Server, you should
uninstall the Web Services installation using Windows Add/Remove Programs, then install the new
version included with the new installation of ConnectKey for SharePoint software. Refer to the
“Installing ConnectKey Web Service for SharePoint” section below.
Licensing
Your existing licenses for ConnectKey for SharePoint will be recognized and accepted by the program.
No changes are necessary to license your ConnectKey for SharePoint software.
To verify the status of your license, launch the Xerox ConnectKey for SharePoint License Manager.
Refer to the “Licensing” section below for more information on Licensing ConnectKey for SharePoint.
Loading your existing Configuration Files
Once installation is complete, you can use the ConnectKey for SharePoint Service Manager to load
your existing CFG files. You should test to ensure that all workflows function correctly.
3-2 Xerox ConnectKey for SharePoint
Installation Guide
Page 21

Licensing
For more information on how to load your configuration files, please refer to section 2, “ConnectKey
for SharePoint Configuration and Administration” of the Xerox ConnectKey for SharePoint
Administrator Guide.
Xerox ConnectKey for SharePoint 3-3
Installation Guide
Page 22

Page 23

4 Licensing
ConnectKey for SharePoint must be licensed in order to create configurations and run them. The
licensing process requires the following sequence of events:
• Create a license request file using the License Manager in the ConnectKey Process Designer.
• Use the License Request File to complete the license registration process using the Xerox
ConnectKey Web License portal. This process allows you to create your license key.
• Use the License Manager in ConnectKey Process Designer to load the license key that is
generated from the Xerox ConnectKey Web License portal.
This process is also required to update your installation with additional MFP connections.
Note
Licenses are machine specific. If you transfer the license to another machine, if you transfer your
virtual machine between hosts, or if you rebuild a server you must contact support as the license is
now invalid. Uninstalling and reinstalling the software on the same machine does not invalidate the
license.
Upgrading from a Trial License to a Production License
4
In order to upgrade from a trial license to a production license follow the same steps outlined below.
You need to create a new Request (see step 4). Do not use the same Request file that you generated
when you licensed your trial.
Xerox ConnectKey for SharePoint 4-1
Installation Guide
Page 24
Completing the licensing process
If you have already installed ConnectKey for SharePoint, follow the instructions below to begin the
licensing process. Skip to step 4 if the License Manager window is already open.
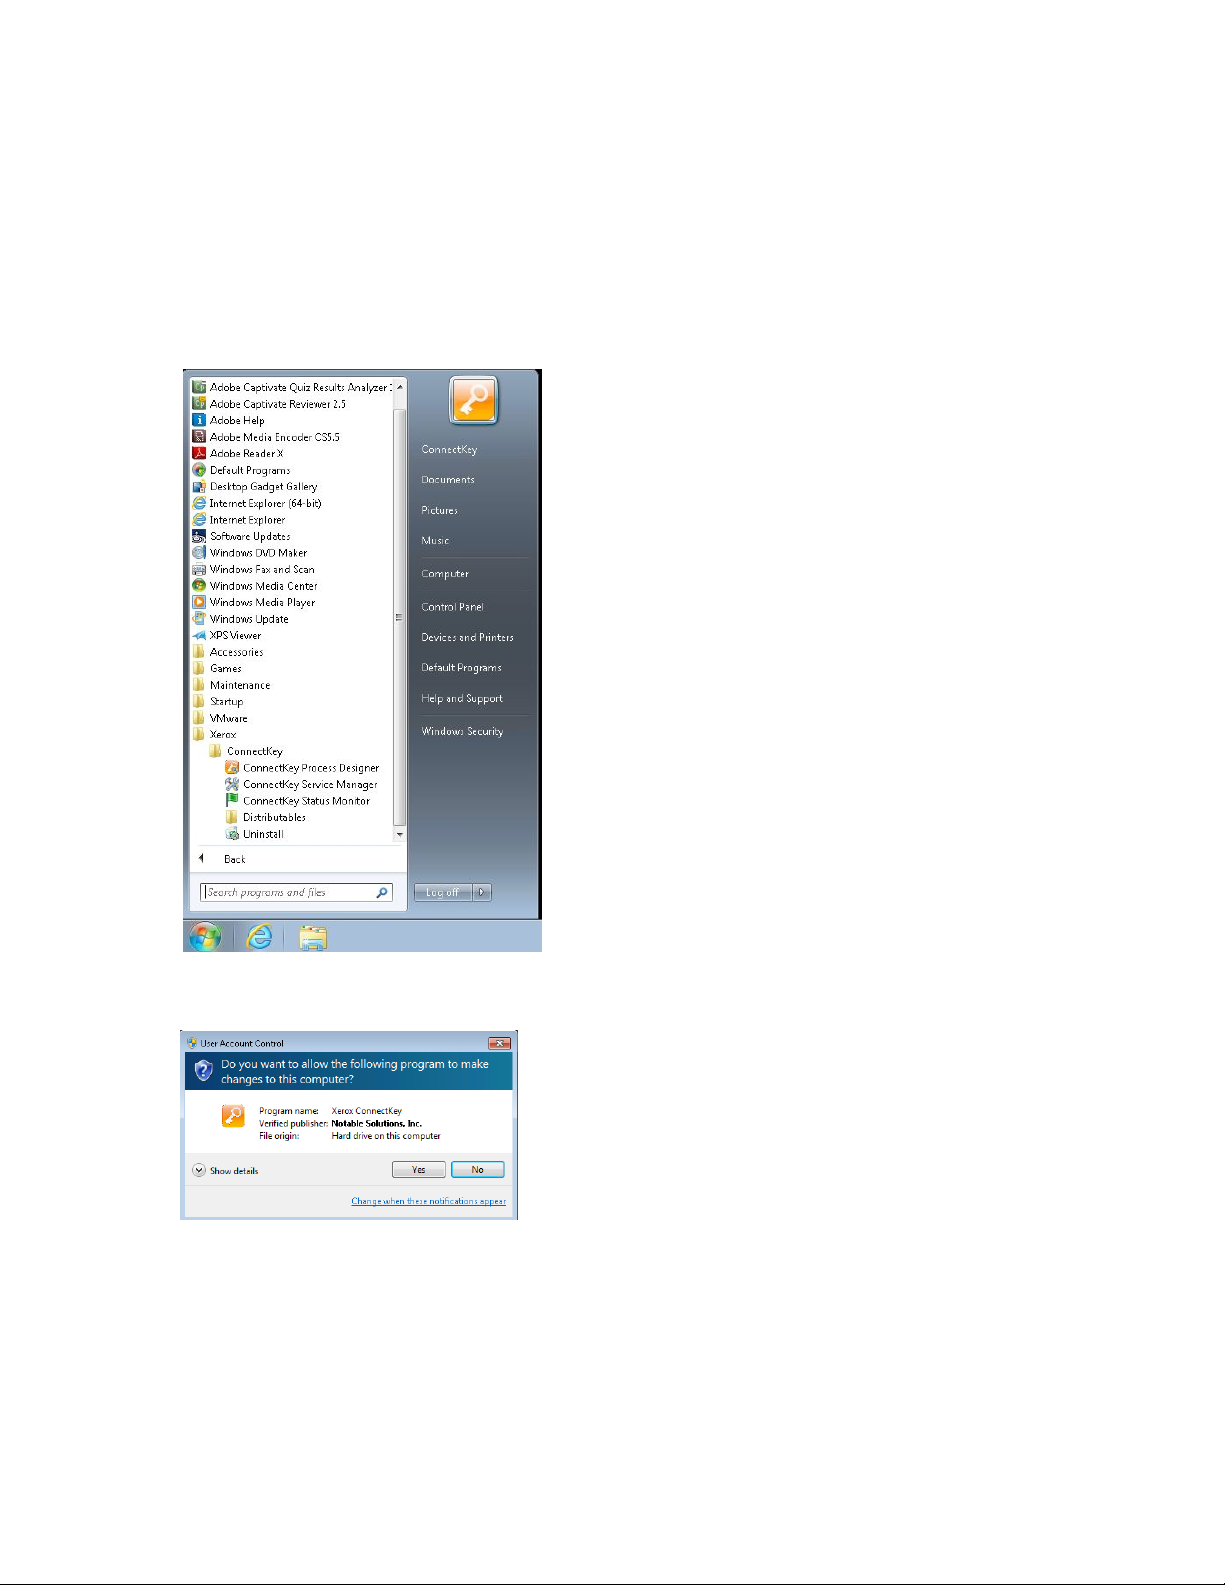
1. Use the Windows Start icon to browse for the shortcut for the Xerox folder and look for the
ConnectKey folder. Right-click ConnectKey Process Designer and choose Run as administrator if
you are using Windows 2008, Windows 2012, Windows 7, or Windows 8. Otherwise, select
ConnectKey Process Designer to launch the application.
2. If prompted to allow the program to make changes to the computer, click Yes.
4-2 Xerox ConnectKey for SharePoint
Installation Guide
Page 25

Licensing
4. The ConnectKey Process Designer launches. Locate the License Manager option from the Tools
menu and click License Manager.
The Xerox ConnectKey License Manager window displays. This is where you can view information
about what components are licensed. Additionally, it is used to generate a license request file, to
launch the Xerox ConnectKey Web License portal, and to load keys. It can also be used to
generate a license report file which can be saved or printed.
5. Click Create Request to open the Save As dialog box. Navigate to a location on the server
where you can easily find this file. You will need this file in step 6 during the web license
registration. Provide any valid Windows file name and click Save. (Save as Type may be left
blank.)
6. Click Web License in the License Manager. This launches your default web browser and loads it
with the Xerox ConnectKey Web License portal.
Note
If the web page does not load, please check firewalls, proxies or other network security settings
that may prohibit the browser from connecting to the Internet.
7. In the Xerox ConnectKey Web License portal enter your email and password and click Login.
8. In the Downloads page, click Skip This Step to skip downloading the software.
9. In the License Activation Page, select a License Type from the menu: Production or 30 Day
Evaluation. If you have purchased the product, select Production. If you are evaluating the
product, select 30 Day Evaluation.
Xerox ConnectKey for SharePoint 4-3
Installation Guide
Page 26

10. Browse to the License Request file that you generated earlier (step 4) and upload it.
11. You can optionally choose to enter a Server Friendly Name, for easy recall of the name.
12. Enter your Xerox Serial Number and click Submit.
13. If requested, enter your INV number, and click Add. Repeat this step until you have entered all
of your INV numbers. (Not all activations require INV Numbers. If the Welcome Letter that
you received with your initial purchase did not contain an INV Number in addition to the Serial
Number, then INV Numbers are not required in your situation.)
14. Click Next.
15. You are now presented with a summary of the product(s) you are about to license. Verify the
printer count and click Submit.
16. Click Download License to download the license key file immediately. You will also receive a
ConnectKey for SharePoint license key file via email.
17. Once you have your license key file, return to the License Manager to load the key file. Click
Load Keys and browse to the location where you stored the license key file.
18. Click OK to close the License Manager.
Congratulations, you have now successfully installed and licensed your ConnectKey for SharePoint
product. Next, you will begin the process of configuring it for scanning. If you will be scanning to a
SharePoint server, proceed to the next chapter “Installing SharePoint Web Service.” Otherwise,
skip that chapter and proceed to the chapter “Next Steps: Deploying ConnectKey for SharePoint.”
4-4 Xerox ConnectKey for SharePoint
Installation Guide
Page 27

5 Installing ConnectKey
Web Service for
SharePoint
Xerox ConnectKey for SharePoint has a supplemental web service add-on that must be used when
routing to SharePoint 2007. It can optionally be used when routing to SharePoint 2010. Use of the
add-on web service, referred to as ConnectKey Web Services, provides more robust functionality. If
you do not intend to scan documents to SharePoint, you can skip this section.
Connection methods that do not require ConnectKey Web Services
• SharePoint 2010 (Microsoft Web Services)
This connection method is used where the ConnectKey Web Services cannot be installed either due to
rd
corporate policy, or when the SharePoint Server is hosted by a 3
of add-ons. The following limitations apply:
File sizes are limited to 200 MB in size
Impersonation is not supported – documents will be routed using the account credentials used
to connect to SharePoint in the button configuration screen
Support for managed metadata fields is not possible
• SharePoint 2013 (Microsoft Web Services)
This connection method is used where the ConnectKey Web Services cannot be installed either due to
corporate policy, or when the SharePoint Server is hosted by a 3
of add-ons. The following limitations apply:
File sizes are limited to 200 MB in size
Impersonation is not supported – documents will be routed using the account credentials used
to connect to SharePoint in the button configuration screen
Support for managed metadata fields is not possible
party and will not allow installation
rd
party and will not allow installation
5
Xerox ConnectKey for SharePoint 5-1
Installation Guide
Page 28

Installing SharePoint Web Service
Connection methods that require ConnectKey Web Services
The following SharePoint Connection Methods require the installation of the ConnectKey Web Service
• SharePoint 2007 (ConnectKey Web Services)
This method connects to a SharePoint 2007 server using the add-on web services provided with
ConnectKey for SharePoint. This is the only method for connecting to SharePoint 2007
• SharePoint 2010 (ConnectKey Web Services)
This method connects to a SharePoint 2010 server using the add-on web services provided with
ConnectKey for SharePoint. It provides the largest features set.
To enable the most functionality with the scan to SharePoint capabilities, it is recommended that you
install the ConnectKey Web Services on your SharePoint server. The web service runs on your
SharePoint server and provides ConnectKey for SharePoint with access to specific functions of the
SharePoint server.
5-2 Xerox ConnectKey for SharePoint
Installation Guide
Page 29

Installation
Prerequisites
Before installing the ConnectKey Web Service, make sure that Xerox ConnectKey for SharePoint is
properly installed and configured.
Supported SharePoint Environments
2007 - Microsoft Office SharePoint Server (MOSS) and Windows SharePoint Services 3.0 (WSS)
2010 - Microsoft SharePoint Foundation and Microsoft SharePoint Server
Installation Steps
There are two versions of the web service. One is for SharePoint 2007 and the other is for SharePoint
2010. Once ConnectKey for SharePoint has been installed, the default location of these ConnectKey
Web Service installers will be C:\Program Files (x86)\XEROX\ConnectKey\Distributables. There will be
subfolders for SharePoint 2007 and 2010.
1. Copy the appropriate installer file for your version of SharePoint to the SharePoint Server and run
it with administrative privileges. Options available are:
• SPS2007WebService.exe (for SharePoint 2007 32-bit Operating System)
• SPS2007WebService_64.exe (for SharePoint 2007 64-bit Operating System)
• SharePoint2010WebService(64).exe (for SharePoint 2010 64-bit Operating System)
2. If the User Account Control dialog displays, click Yes.
3. Click Next to begin the installation.
4. Specify a SharePoint Application that the ConnectKey for SharePoint will access. In the
SharePoint Site virtual directory bin folder window, click Browse to the right of the Destination
folder field.
5. In the opened dialog, specify bin folder of the root directory for the IIS Virtual Directory of the
desired SharePoint Application.
Typically, this value would point to C:\Inetpub\wwwroot\wss\VirtualDirectories\80\bin. By default,
when you create a new SharePoint Application, the SharePoint Central Administration utility uses
the port number that you have specified for the root directory.
For example, if you create a SharePoint Application under port number 12345, the root directory
will be C:\Inetpub\wwwroot\wss\VirtualDirectories\12345.
6. Click Next.
7. After installation completes, a dialog window informs you about it. Click Finish to close the
window.
Note
In order to enable the capability to search your SharePoint server for ConnectKey for SharePoint
scanned files or other scanned file-related information, such as metadata values, indexing must
be enabled on your SharePoint server. For more information on how to enable indexing on your
SharePoint Server 2007 or 2010, refer to the Microsoft SharePoint online Help.
.
Xerox ConnectKey for SharePoint 5-3
Installation Guide
Page 30

Page 31

6 Next Steps: Deploying
ConnectKey for
6
SharePoint
Steps to a Successful Deployment
The ConnectKey Process Designer requires additional configuration before you can begin scanning.
Completing each of the following steps, and referencing the associated documentation will help
ensure a successful deployment of Xerox ConnectKey for SharePoint.
Note
The Xerox ConnectKey for SharePoint Administrator Guide is referred to as the Administration
Guide.
Installation Guide
Xerox ConnectKey for SharePoint 6-1
Page 32

Next Steps: Deploying ConnectKey for SharePoint
6-2 Xerox ConnectKey for SharePoint
Installation Guide
Page 33

7 Basic Troubleshooting
The following are some general troubleshooting tips that should be checked
before contacting Xerox Support. Additionally, there are log files at the following locations that can
be referenced:
• C:\ProgramFiles (x86)\Xerox\ConnectKey\LOG
Software will not download
The ConnectKey for SharePoint software can be downloaded from the Xerox ConnectKey Web
License portal (http://connectkey.weblicense.nsius.com/) using a web browser. If this download fails, it
may be due to one or more of the following factors:
7
• Proxy, antivirus, or firewall settings – Ensure that none of these is causing interference with the
download
• Insufficient disk space – The download package and the associated temp files it produces during
installation requires a minimum of 5 GB of space on the C:\ drive
• General network issues
Software installation will not complete
If the ConnectKey for SharePoint installer fails to complete, it may be due to one or more of the
following factors:
• Insufficient disk space – The download package and the associated temp files it produces during
installation requires a minimum of 5 GB of space on the C:\ drive.
• Microsoft Prerequisites – If a MS Prerequisite is not properly installed, the ConnectKey for
SharePoint installer will fail.
• Insufficient permissions – The installing user does not have local administrative rights to the
server (on Windows 7 and Windows 2008, the user must right-click and “run as administrator”
even if the user is a local admin.
Xerox ConnectKey for SharePoint 7-1
Installation Guide
Page 34

Basic Troubleshooting
Licensing
Contact Xerox Support for any issues related to:
• Could not generate a license request file
• Did not receive or could not load the license key
Note
When creating a user account in the Xerox ConnectKey Web License Portal you cannot use free
mail such as Yahoo, Gmail, etc.
• License is invalid. Licenses are machine specific. If you transfer the license to another machine, if
you transfer your virtual machine between hosts, or if you rebuild a server you must contact
support as the license is invalid. Uninstalling and reinstalling the software on the same machine
does not invalidate the license.
Contact your Xerox Sales Point of Contact for assistance with any issues related to:
• Incorrect number of multifunction printers are shown as licensed in the License Manager after
loading the license key
Where to go for help
If you experience a problem with the Xerox ConnectKey for SharePoint software application, support
is available at the Knowledge Base. Navigate to http://www.xerox.com/connectkeysharepointsupport.
Otherwise, please call your local Customer Support Hotline or local Xerox partner. (You will be asked
for your Serial Number as part of the validation process.)
clicking on the support link at http://www.xerox.com/connectkeysharepoint. Look for “Support” on the
left side of the product landing page.
Contact information can be found by
7-2 Xerox ConnectKey for SharePoint
Installation Guide
Page 35

Page 36

 Loading...