

Page 1

Companion Suite Pro
User manual
Page 2

PLEASE READ THE TERMS AND CONDITIONS OF THIS LICENSE CAREFULLY BEFORE OPENING
THE SEALED ENVELOPE CONTAINING THE SOFTWARE. BY OPENING THIS ENVELOPE, YOU
If you do not accept the terms of this license, promptly return the unopened CD-ROM packaging as well as the other
parts of the product. You will be reimbursed the price you paid for the product. No reimbursements w ill be made for
products whose original CD-ROM packaging has been opened, or when parts are missing, or when the request for
reimbursement takes place more than ten (10) days after the date of delivery that appears on your receipt.
DEFINITION
The Software designates the programs and its associated documentation.
GRANT OF LICENSE
- This license authorises software use for the personal computers.You only have the right to use the software for printout on a single multi-function terminal. You cannot loan or cede the right to use the Software to a third party.
- You are authorised to make one backup copy.
- This license is non-exclusive and non-transferable.
OWNERSHIP
The manufacturer retains ownership of the Software. You only have ownership of the CD-ROM. You may not modify,
adapt, decompile, translate, create a derivative product, lease or sell the Software or the documentation. All rights not
explicitly granted are reserved by the manufacturer.
TERMINATION
This license shall remain valid until it is t ermin ated . You may termin ate the l icen se by destroy ing the prog ram a nd the
documentation along with any copies thereof. This license sh all be terminat ed automatically if you do not respect the
terms of this license agreement. In case of termination, you agree to destroy all the copies of the pro gram and the
documentation.
WARRANTY
The Software is provided on an "as is" basis, with no explicit nor implied warranties, including but not limited to implied
warranties of merchantability and fitness for a particular purpose. The user shall be liable f or all risks involving the
results and performance of the Software. If the program should prove d efec tive, all the re pair and restoratio n expenses
shall be at the user’s expense.
The license holder nonetheless has the following warranty: The CD-ROM on which the Software is recorded will be free
of material or manufacturing defects under normal use and operating conditions for a duration of ninety (90) days from
the date of delivery that appears on your receipt. If a defect on the CD-ROM occurs followi ng an accid ent o r im proper
use, the CD-ROM will not be replaced under the terms of this warranty.
LIABILITY
The only responsibility of your dealer and your only recourse is the replacement of any CD-ROM that do not me et the
terms of the warranty, and which have been returned with a copy of your receipt. Neither the manufacturer nor any other
party involved in the creation, development, sale or delivery of this program shall be held liable for any damages
whatsoever, be they direct, indirect or immaterial including, but not limited to, the loss of information, time, operations,
revenue, or customers arising out of the use or inability to use this program.
EVOLUTION
In our constant efforts to improve the program, the manufacturer reserves the right to modify the characteristics of the
Software without prior notice. If the product evolves, your license does not give you the right to free upgrades.
JURISDICTION
This Agreement is governed by the laws of France. Any litigation arising from the interpretation or execution of this
license shall be submitted to the Paris Tribunal.
Due to the on-going evolution in technology, the manufacturer reserves the right to modify the technical characteristics
indicated for this product, at any time and with no prior notice, and/or discontinue production of this product. All brand
and product names may be registered trademarks of their respective holders and are hereby acknowledged.
SIGNIFY THAT YOU HAVE ACCEPTED THESE TERMS AND CONDITIONS.
LICENSE AGREEMENT FOR THE SOFTWARE
Page 3

Contents
Introduction 1
Required configuration 1
Installation 2
Installing the software on your PC 2
Under Windows 98SE/ME/2000/XP 2
Installation of a network printer 8
Connections 10
Removing the software from your PC 10
Monitoring the multifunction terminal 12
Checking the link between the PC
and the multifunction terminal 12
MF Director 13
Graphic description 13
Activating utilities and applications 15
MF Monitor 17
Graphic description 17
Device management 18
Adding a device connected to the network 18
Manually adding a device connected to the network 20
Adding a device connected via a USB link 23
Selecting the current device 25
Status of the connection 25
Parameters for the device 27
Removing a device 29
Links 31
Printing 33
Printing on the multifunction terminal 33
Faxing a document from an application 35
Analyzing a document 36
Scan To 36
Analyzing from a touch-up program 37
The Address book 38
Adding a contact to the terminal's address book 38
Adding a group to the terminal's address book 39
Managing the address book 41
Changing the information for a contact 41
Page 4

Contents
Changing a group 41
Deleting a contact or a group from the Address book 41
Printing the Address book 41
Importing or exporting a directory 42
Importing a directory 42
Saving your address book 42
Fax communication 43
The Fax window 43
Sending a fax 44
Sending a fax from the hard disk or the terminal 44
Sending a document from an application 46
Receiving a fax 48
Tracking faxes 48
The Outbox 49
Sent items 50
Send log 50
Reception log 50
Fax parameters 51
Accessing fax parameters 51
Description of the Logs and reports tab 51
Description of the Fax parameters tab 52
Cover page 53
Creating a cover page 53
Description of the Cover page tab 55
Creating a cover page template 56
SMS communication 61
The SMS window 61
Sending an SMS 63
Receiving an SMS 64
Tracking SMSs 65
The Outbox 65
Send log 66
Reception log 66
Sent items 66
SMS parameters 67
Accessing SMS parameters 67
Optical Character Recognition (OCR) program 68
Character recognition 68
Page 5

INTRODUCTION
Companion Suite Pro enables you to connect a PC to a compatible multifunction
terminal.
From the PC you can:
• Manage a multifunction terminal, configure it to your requirements,
• Send faxes and SMSs from your PC,
• Scan documents in color or black and white and touch them up on your PC, or
convert them to text using Optical Character Recognition (OCR) software,
REQUIRED CONFIGURATION
Your PC must have at least the following characteristics:
A processor of:
• 500 MHz for Windows 98SE;
• 800 MHz for Windows Me, 2000SP3;
• 1 GHz for Windows XP (Home and
Pro).
RAM of:
• 128 MB minimum for Windows 98SE,
Me and 2000SP3;
• 192 MB minimum for Windows XP
(Home and Pro).
• CD-ROM drive ;
• a network port or USB connector;
• 600 MB free disk space for installation.
FRENCH
- 1 -
Page 6
INSTALLATION
INSTALLING THE SOFTWARE ON YOUR PC
Under Windows 98SE/ME/2000/XP
Turn on your PC. Open an ADMINISTRATOR session except for 98SE and ME
environments.
Open the CD-ROM drive, insert the installation CD-ROM and close the drive.
The installation procedure starts automatically (Autorun).
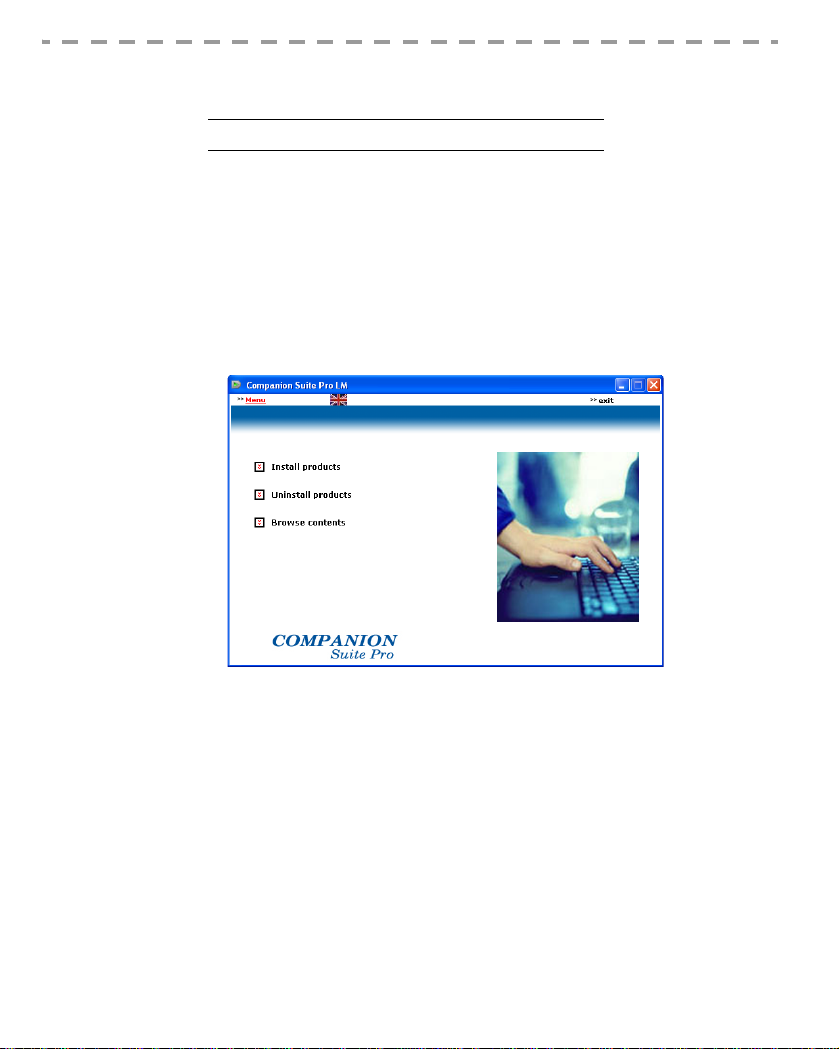
A window entitled COMPANION SUITE PRO LM2 is displayed
Position your cursor on INSTALL PRODUCTS and left-click.
- 2 -
Page 7
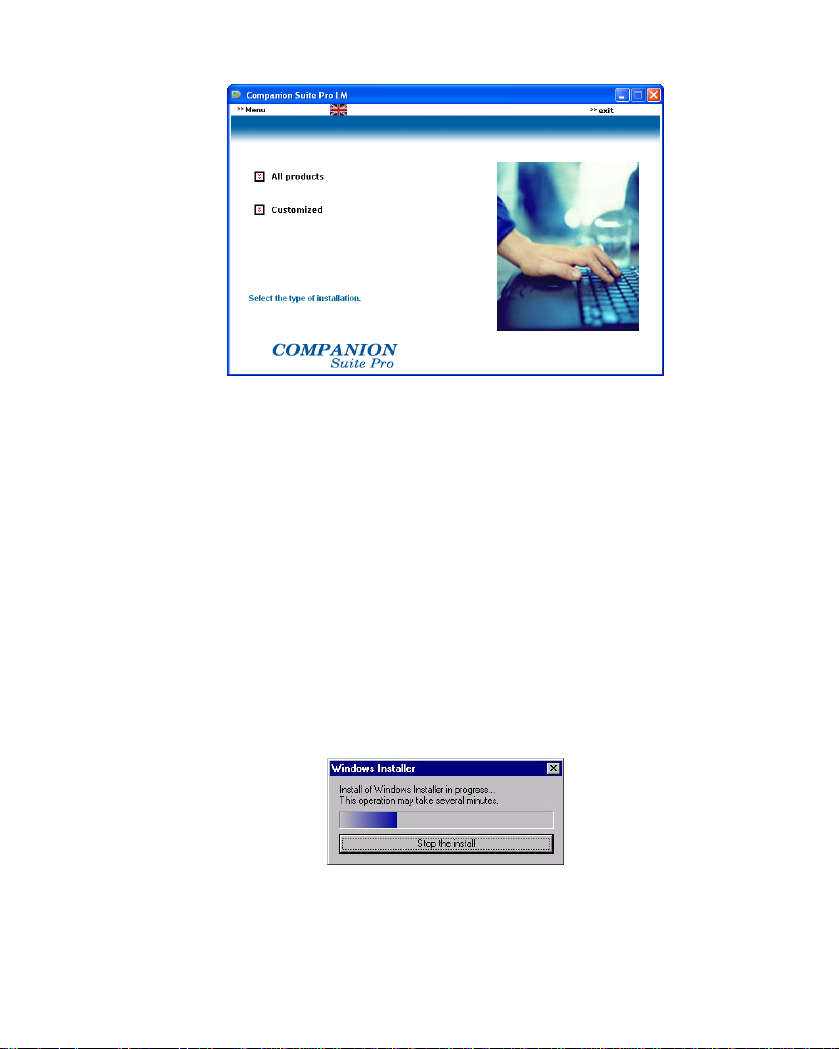
The Install Products screen is displayed.
Place your cursor on ALL PRODUCTS and left-click.
Note: The A
Note: The following two screens are only displayed if your version of
LL PRODUCTS installation procedure copies all the software required for
running the Companion Suite Pro kit onto your hard disk, i.e.:
- Companion Suite Pro (Fax and SMS communication software, Scanner
software, etc.),
- PaperPort
- Omnipage.
You may already have a version of one of the programs which are on the
installation CD-ROM.
In this case, use the C
USTOMIZED installation, select the programs you want
to install on your hard disk and confirm your selection.
Windows Installer is prior to 2.0.
The installation continues and a screen shows you how far it has got.
FRENCH
You can interrupt installation by clicking the S
TOP THE INSTALL button.
After a search and analysis phase of the components on your PC and the
- 3 -
Page 8
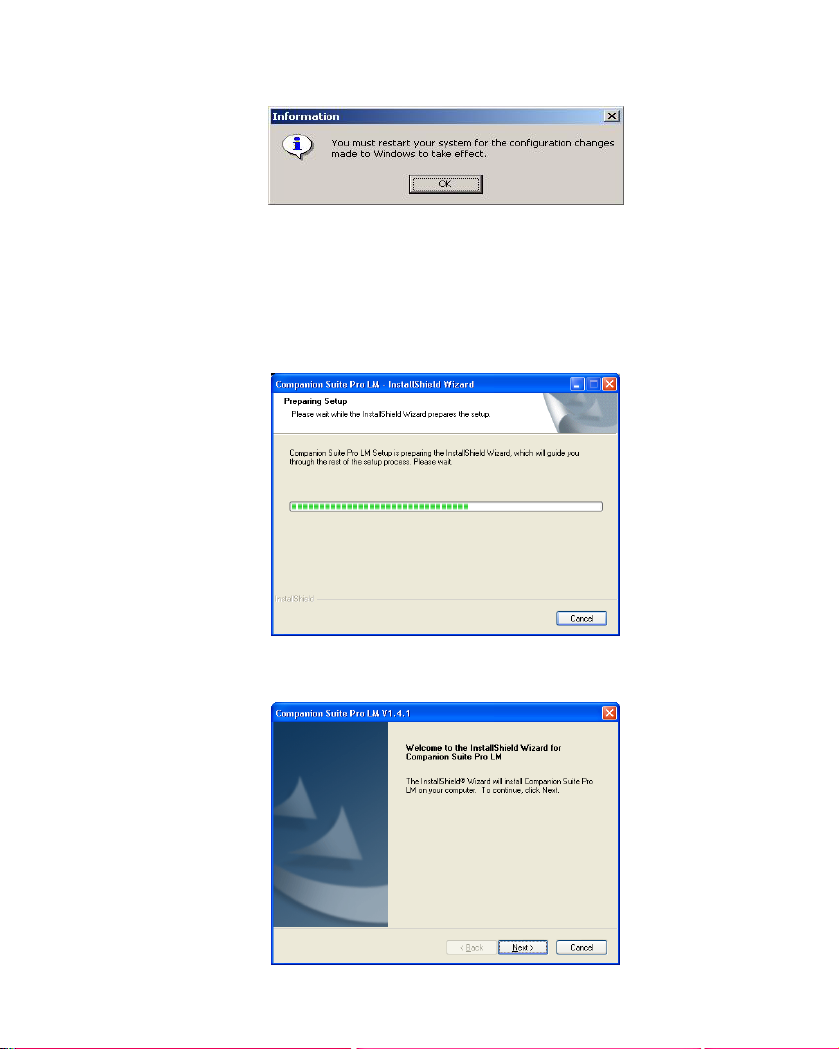
multifunction terminal, you must restart your PC for the modifications to come
into effect.
Click OK.
When your PC has reinitialized, the InstallShield Wizard screen shows you how
far preparation of the wizard has progressed.
You can stop the procedure at any time by clicking the C
ANCEL button.
The wizards stops and the welcome screen is displayed.
- 4 -
Page 9
Click NEXT to start installation of the COMPANION SUITE PRO kit on your PC.
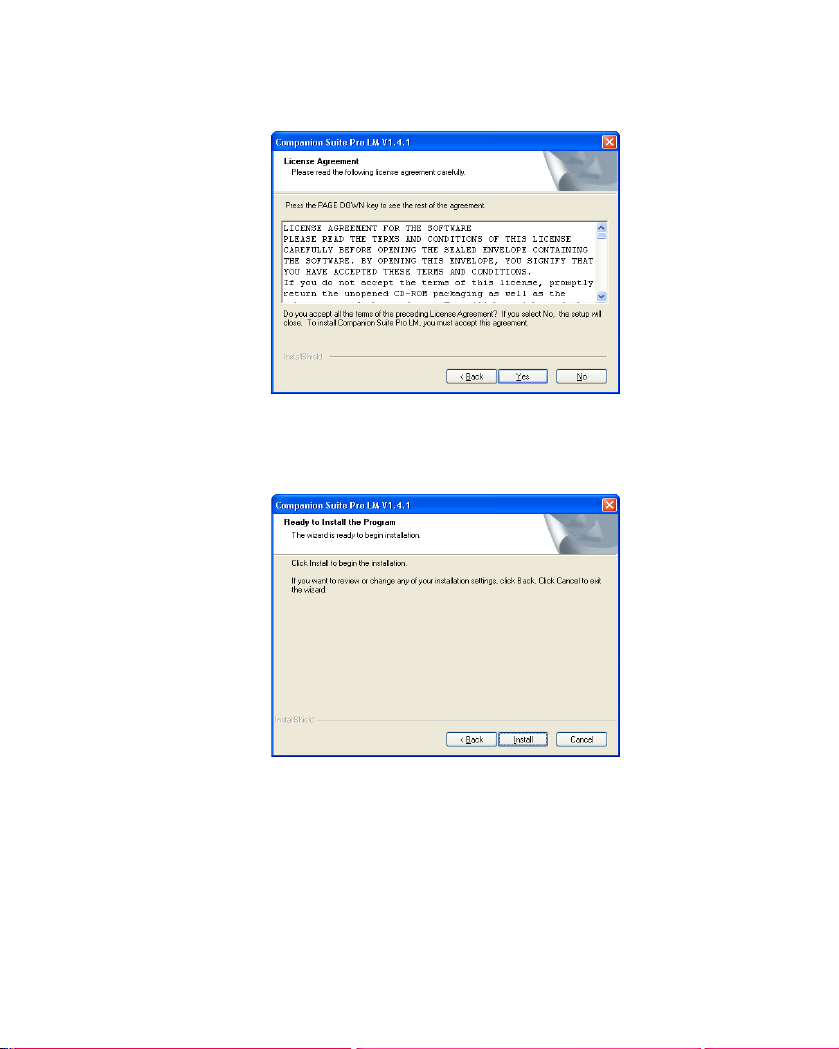
Before copying files onto your hard disk, you must accept the license contract
shown. Use the scroll bar to read the contract fully.
Click YES.
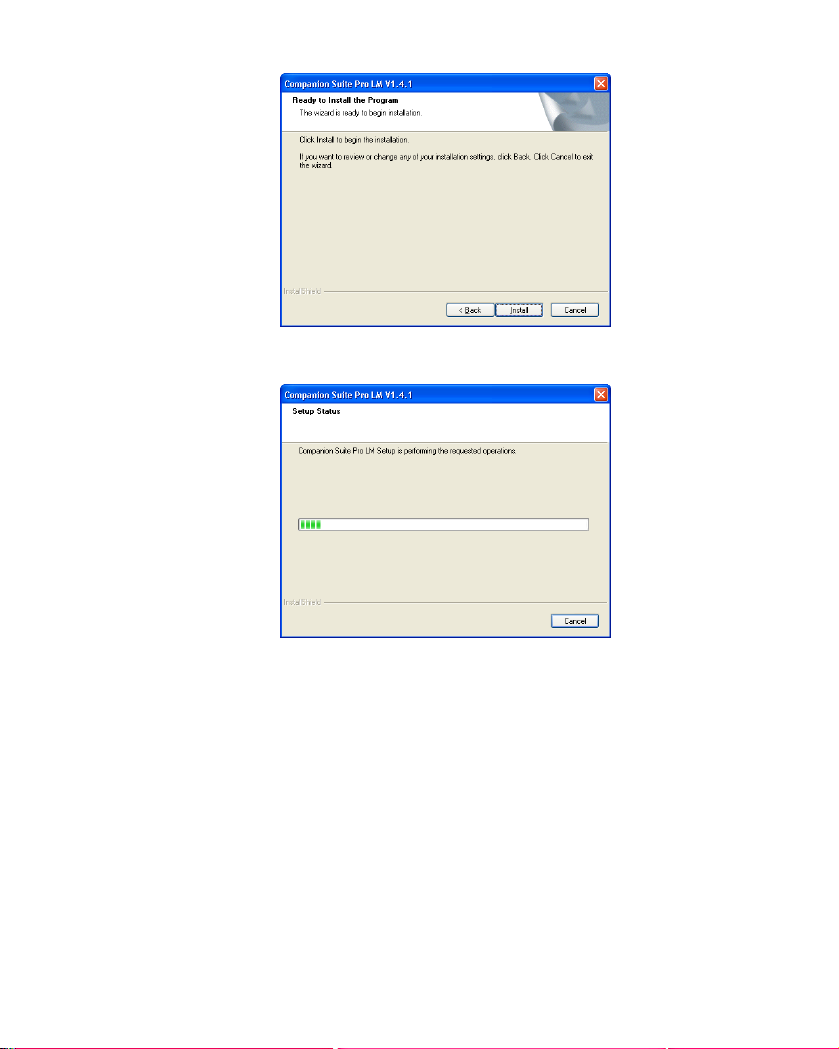
The final installation is ready to be run.
FRENCH
Click INSTALL.
- 5 -
Page 10
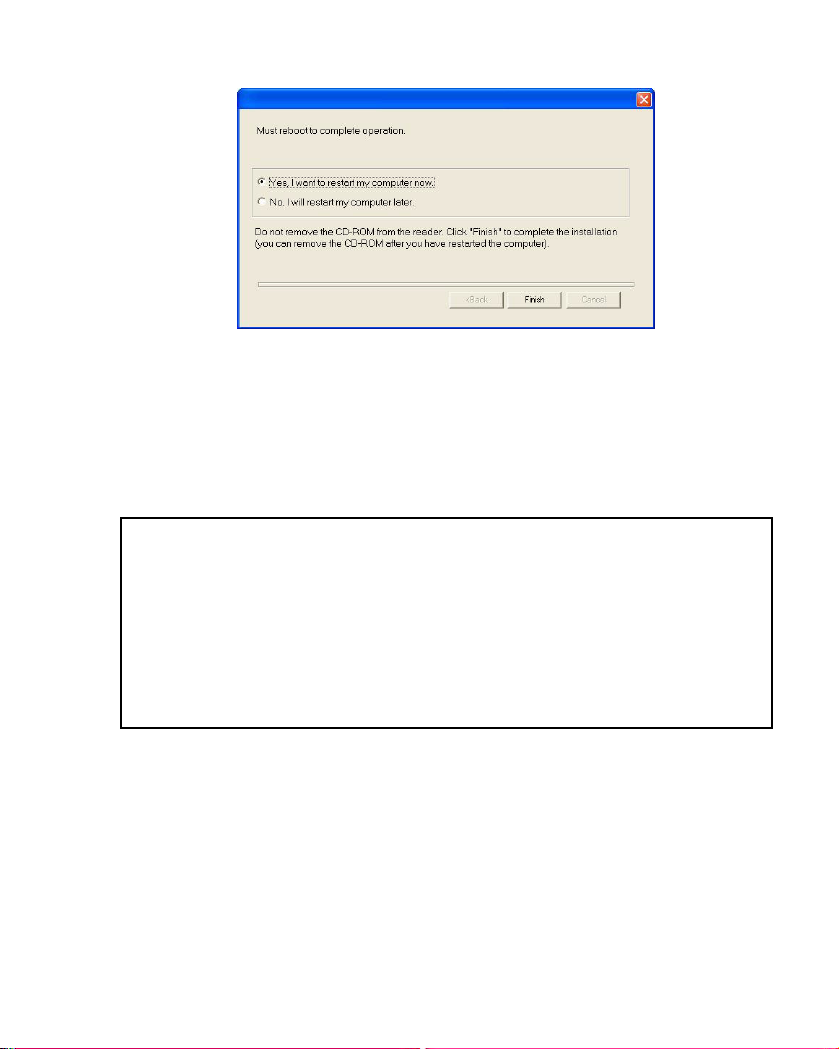
A window shows you how far installation has progressed.
Companion Suite Pro has been install e d on y ou r P C.
Click CONTINUE to copy the utilities and programs which accompany the kit
(PaperPort SE and Omnipage SE).
- 6 -
Page 11
At the end of the installation you must restart your PC for the system files to be
updated.
Make your selection and click FINISH.
Your "Companion Suite Pro" kit has been successfully installed on your PC.
You can start your multifunction terminal's management software by selecting
PROGRAMS > COMPANION SUITE > COMPANION SUITE PRO LM2 > MF DIRECTOR
from the START menu or by clicking the MF DIRECTOR icon on the desktop.
Important: If you have a firewall installed, this will ask you, when
the PC is restarted after installation, whether you wa nt
to authorize the MFServices application to access the
network. Click Yes or Authorize (depending on your
firewall) to authorize MFServices.exe to access the
network. NB: Windows XP with Service Pack 2 and
above has a firewall installed by default
FRENCH
- 7 -
Page 12
INSTALLATION OF A NETWORK PRINTER
Note: Companion Suite Pro LM2 must be installed to ca rry out this operation.
Run the application by selecting PROGRAMS > COMPANION SUITE > COMPANION
UITE PRO LM2 > ADD A PRINTER from the START menu.
S
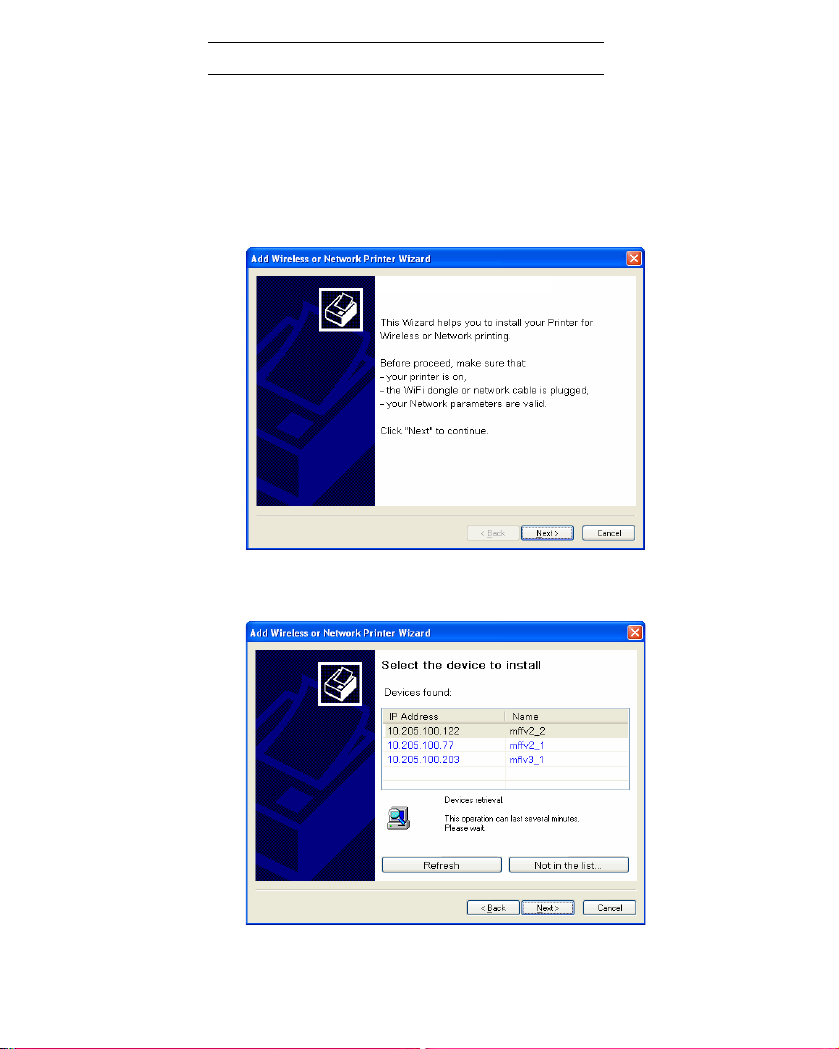
Click NEXT to run the installation procedure
The following screen shows the list of compatible devices detected on the
network.
You can carry out a new search on the network by clicking the
- 8 -
REFRESH button.
Page 13
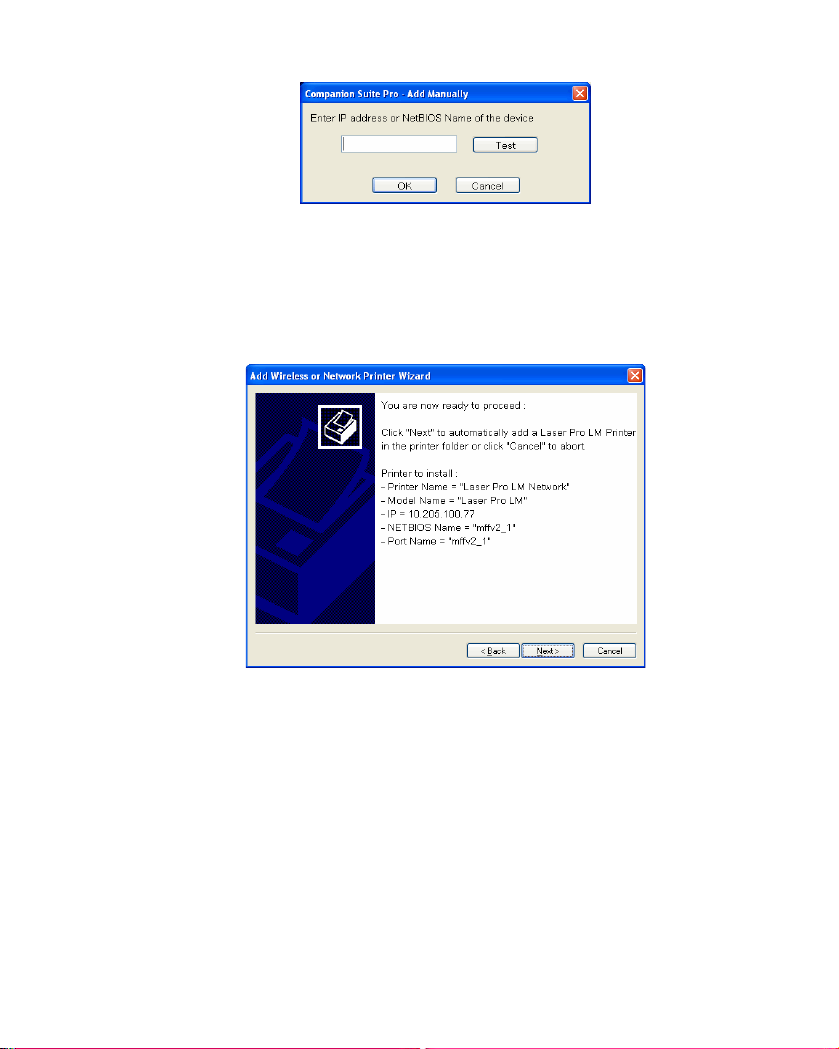
Note: It is possible that a device may not be shown in the list. In this case, click the
OT IN THE LIST button. The following window is displayed :
N
Enter the IP address or the NetBIOS name of the device you want to add.
You can test the connection between the PC and the device by clicking the
T
EST button. Click OK.
Select the device you want to add from the list. Click NEXT.
The following window lists the different properties of the printer about to be
installed. Click N
EXT.
FRENCH
A window showing that installation was successful is displayed. Click
FINISH.
- 9 -
Page 14
CONNECTIONS
If you use a terminal connected to the network:
Connect your PC to the network.
Connect your multifunction terminal to the network.
Check they each have a valid IP address.
If you use a terminal connected via a USB link:
Connect your PC to the multifunction terminal using the USB cable.
REMOVING THE SOFTWARE FROM YOUR PC
Run program deletion by selecting PROGRAMS > COMPANION SUITE > COMPANION SUITE
PRO LM2 > DEINSTALLATION from the START menu.
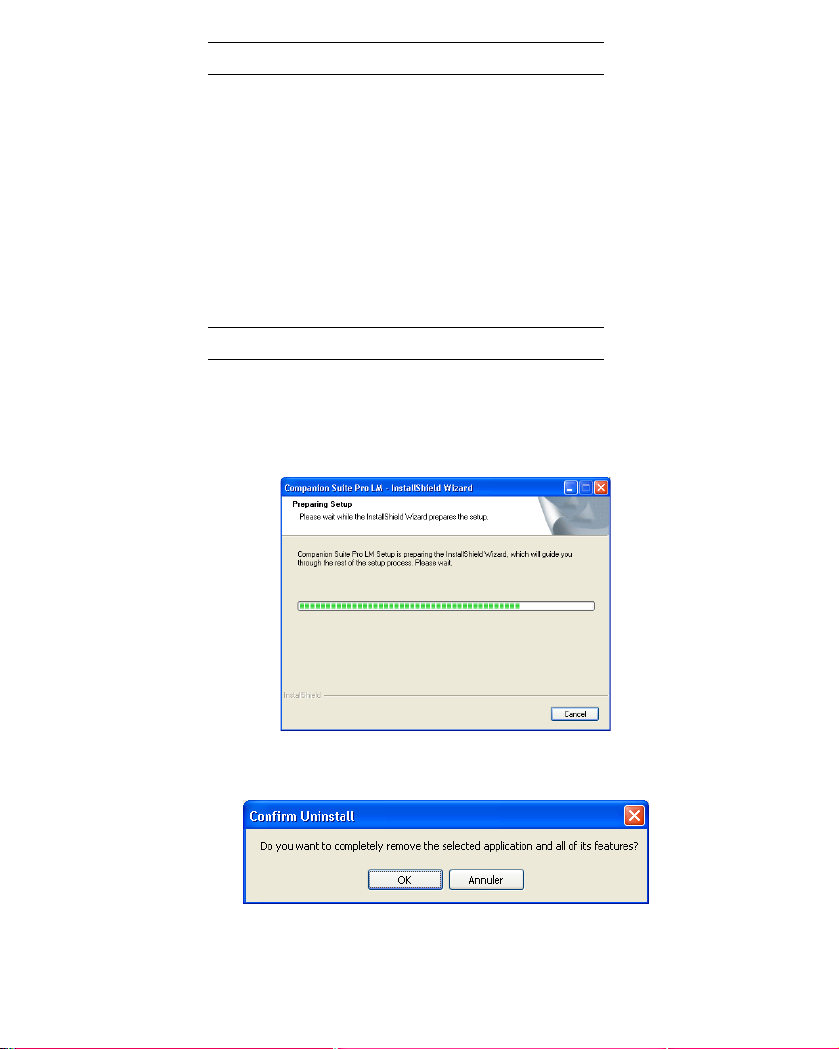
A preparation screen is displayed.
A confirmation screen is displayed. Confirm by clicking OK.
- 10 -
Page 15

A screen shows you how far deinstallation has progressed.
At the end of the procedure, you must restart your system. Close all running
programs, select YES, I WANT TO RESTART MY COMPUTER NOW and click FINISH.
FRENCH
- 11 -
Page 16

MONITORING THE MULTIFUNCTION TERMINAL
The software you have installed contains two applications for managing the
multifunction terminal, MF DIRECTOR and MF MONITOR, which allow you to:
• Check that your multifunction terminal is correctly connected to your PC,
• Gain quick access to image touchup, OCR and fax receive/send software as well as
your device's web pages.
To manage the multifunction terminal, run MF Director by clicking the icon on your
desktop or by selecting
IRECTOR from the START menu.
> MF D
CHECKING THE LINK BETWEEN THE PC
AND THE MULTIFUNCTION TERMINAL
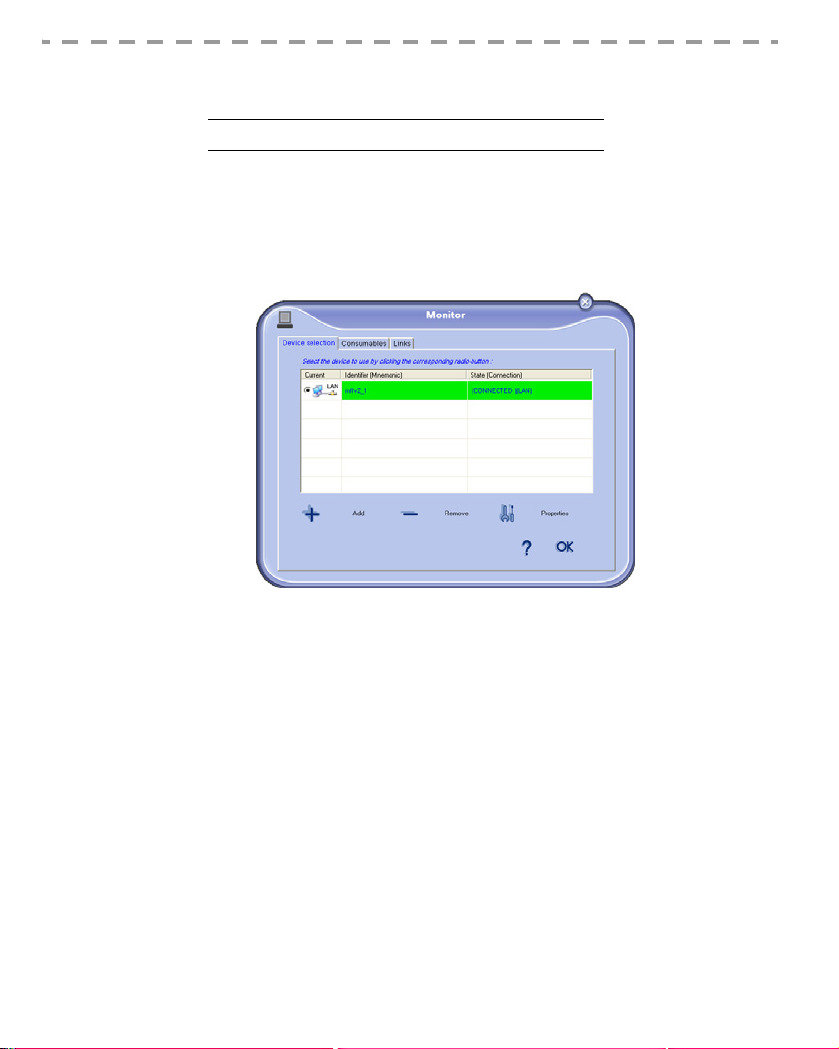
The connection may be checked using the monitor tab whic h lists all the devi ces on
which the PC is registered.
• If the line for a device is green, the PC and the device are connected,
• If the line for the device is red, there is no connection between the PC and the device,
• If the line for the device is yellow, the PC is in the process of co nnecting t o the device.
PROGRAMS > COMPANION SUITE > COMPANION SUITE PROLM2
- 12 -
Page 17
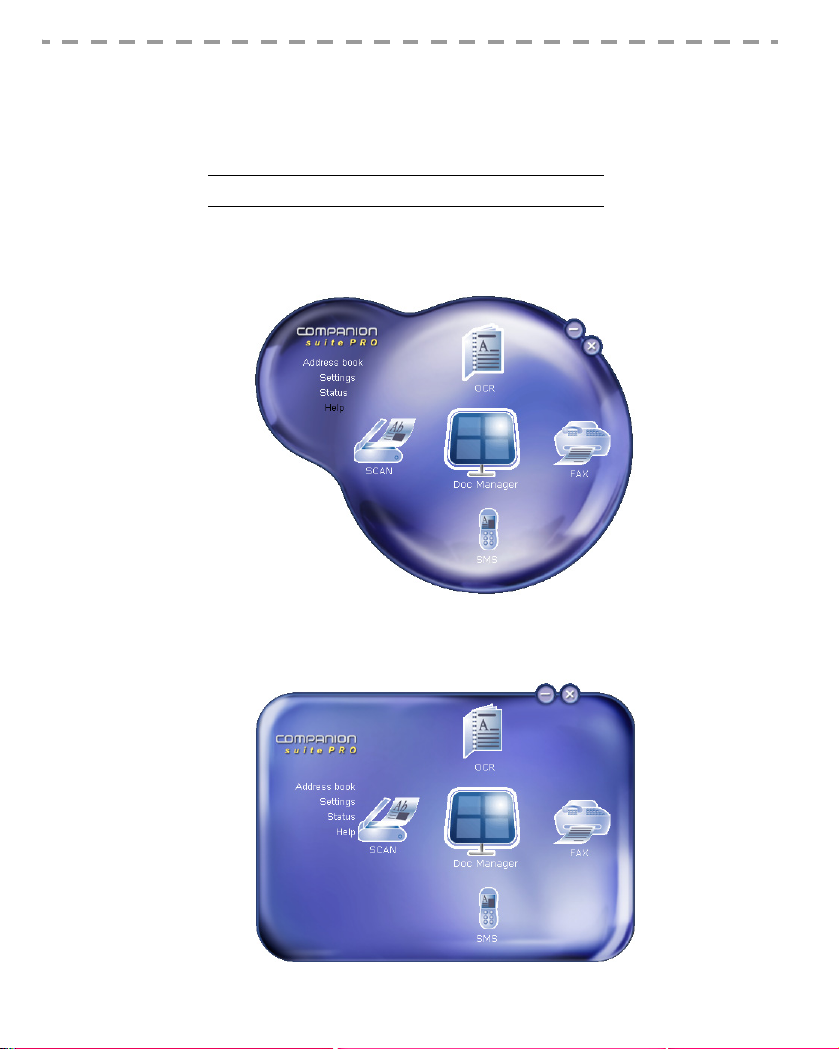
MF DIRECTOR
This graphic interface lets you run utilities and programs to manage your
multifunction terminal.
GRAPHIC DESCRIPTION
Run the application by clicking the icon on your desktop or by selecting
> C
OMPANION SUITE
> C
OMPANION SUITE PRO
LM2 > MF D
IRECTOR
from the
By default, MF DIRECTOR displays as a dark blue rounded shape. By right-clicking,
you can change the shape to square,
START
PROGRAMS
menu.
FRENCH
- 13 -
Page 18
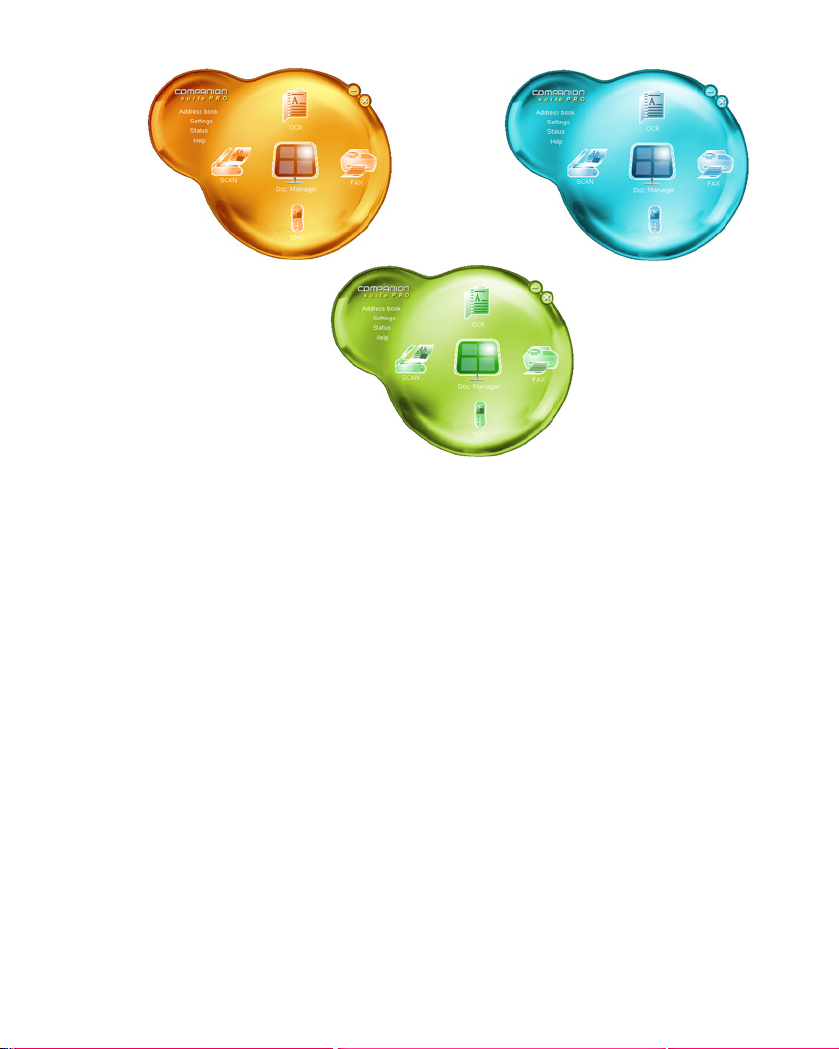
and you can choose from the following colors:
Gold
Light Blue
Light Green
- 14 -
Page 19
ACTIVATING UTILITIES AND APPLICATIONS
The COMPANION SUITE PRO graphic interface lets you run utilities and programs to:
Change the PARAMETERS of the connected terminal. Refer to the manual for the
terminal for details of its parameters.
View the STATUS of the multifunction terminal,
Manage the ADDRESS BOOK,
Get HELP from this documentation,
Run SCAN TO to execute a preconfigured action on the multifunction terminal.
The scan is carried out, the image sent to a Scan To PaperPort directory, and
PaperPort is launched. If PaperPort has not been installed on your PC, the
image file is saved on your desktop. If you have an e-mail application, you can
configure ScanTo to send the image by e-mail,
Run the Optical Character Recognition program (OCR - OmniPage SE) to
process a document scanned from the multifunction terminal,
FRENCH
- 15 -
Page 20
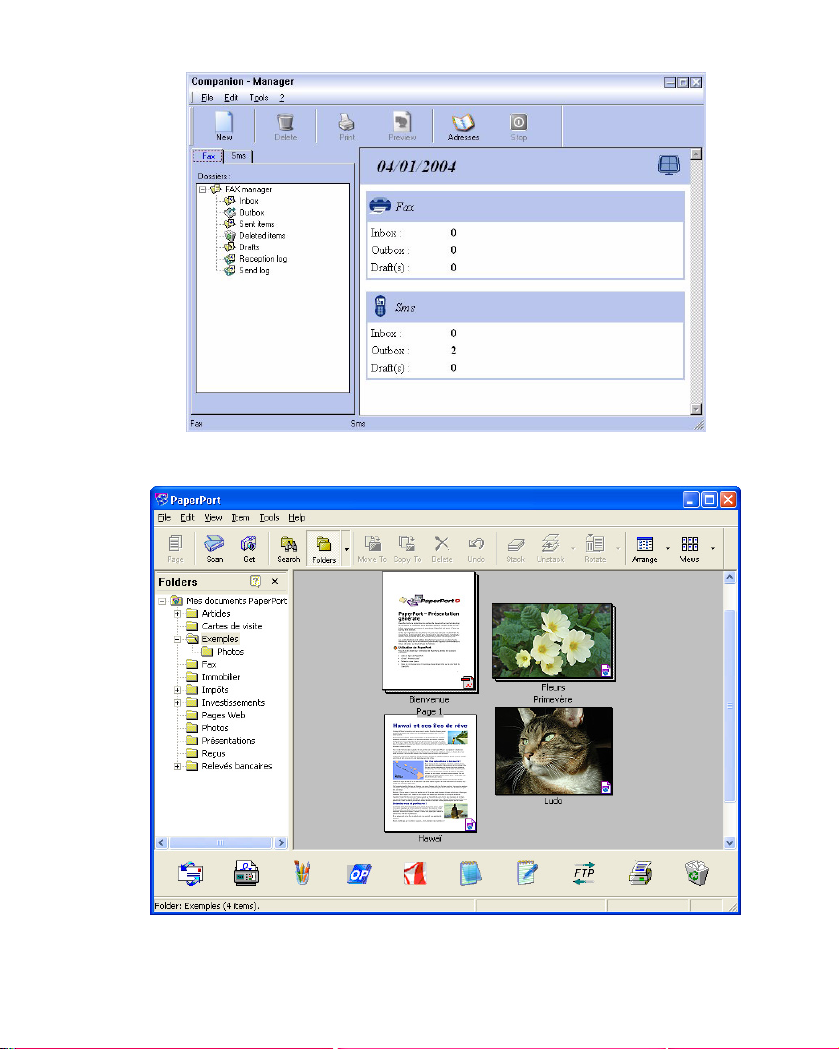
Run the utility to redirect and manage faxes or SMSs (Short Message Service),
To launch PaperPort (Doc Manager).
To run a utility or program from the C
OMPANION SUITE PRO kit, left-click it.
- 16 -
Page 21
MF MONITOR
Run the application by clicking the MF Monitor icon on your desktop or by selecting
PROGRAMS > COMPANION SUITE > COMPANION SUITE PRO LM2 > MF MONITOR from the
START menu.
Using the tabs below, you can configure your multifunction terminal from this screen:
EVICE SELECTION: to add, select and configure devices.
•D
•L
INKS: links to dedicated web sites for managing the multifunction terminal (network
connection only).
FRENCH
GRAPHIC DESCRIPTION
- 17 -
Page 22
DEVICE MANAGEMENT
This tab shows the list of devices managed by the multifunction terminal.
Adding a device connected to the network
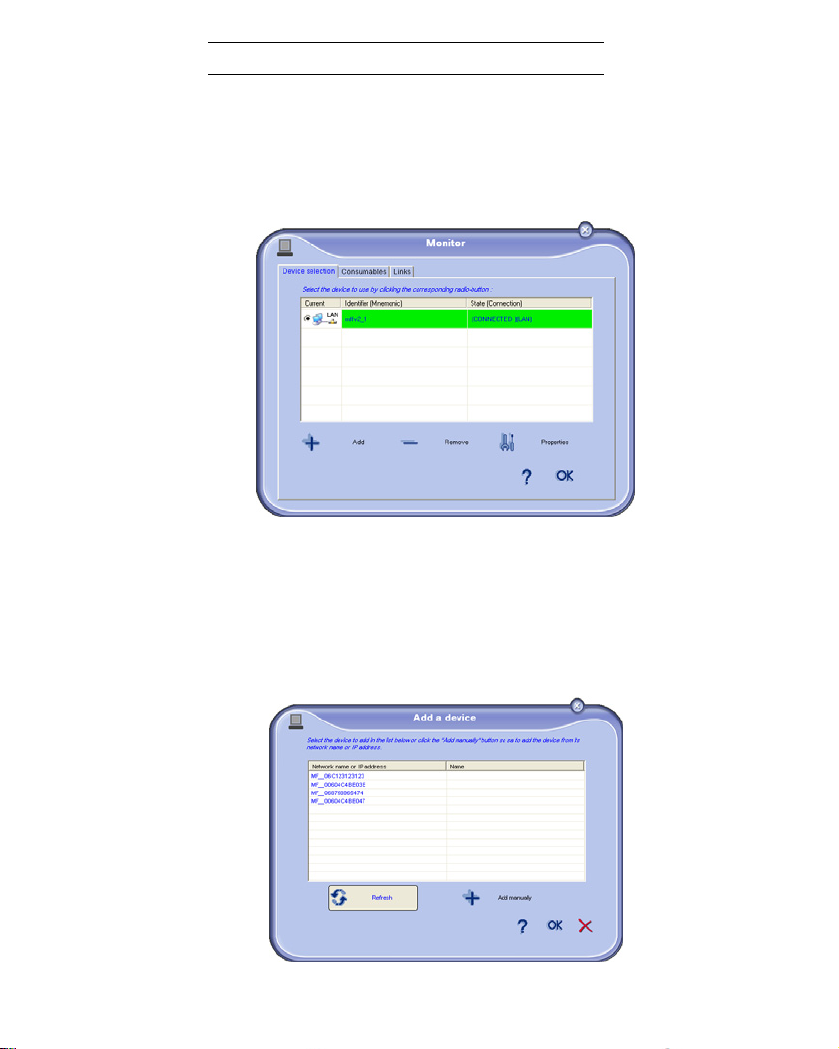
Click the plus sign or ADD to open the hardware add window which shows the
list of devices detected on the network.
Each device detected on the network is listed with:
• Its NetBIOS name (which identifies the hardware uniquely) or its IP address (the
device's identifier on the network)
• Its name (user-defined). To define the name of a device, please refer to the user
manual for the device.
To update the list, click REFRESH.
- 18 -
Page 23

Note: Only devices found on the same local subne twork as the PC are detected
and displayed automatically in the list. To add a device located on a
subnetwork other than that on which your PC is situated, you have to use
manual add.
To add a device shown in the list, click the corresponding line to select it then click OK.
The device registration window is displayed. Enter the name you want the
device to use to designate the PC and which is shown in the menus for the
device and click OK.
FRENCH
A window reminds you that you can configure the ScanTo pa rameters of the
device in the D
registered devices.
EVICE tab by clicking PROPERTIES. Click OK to return to the list of
- 19 -
Page 24

Manually adding a device connected to the network
Add manual lets you add a device directly using its IP address or its NetBIOS name
and manage it on a subnetwork other than the one on which your PC is situated.
To add a device manually, click A
The "Add manually a device" window lets you enter the NetBIOS name or IP address
of a device.
Note: The IP address can vary depending on the configuration of the device. You
are recommended to use the NetBIOS name to identify the device.
When a device is registered using its IP address, a confirmation message asks if you
want to use its NetBIOS name if the device is on the same subnetwork as the PC. To
use the NetBIOS name with devices situated on different subnetworks, the PC and
the device need to be registered on a WINS server.
DD MANUALLY.
- 20 -
Page 25

Click TEST THE CONNECTION to check that the device is defini tely connected to
the PC.
If there is a problem with the connection, an error message is displayed.
Click OK to acknowledge the error message. Check that the device is correctly
connected to the network, or that the NetBIOS name or IP addresses you
entered are correct, then test the connection again.
When the connection test completed successfully, an informa tion message is
displayed.
FRENCH
Click OK to return to the add manual screen, then click OK to add the device.
- 21 -
Page 26

The device registration window is displayed. Enter the name you want the
device to use to designate the PC, then click OK.
An error message is displayed if a problem is found during registration. If this
problem occurs, check that your PC is not already on the device's list of
registered PCs.
Note: Check also that the maximum number of PCs which may be registered on
this device has not been reached.
A window reminds you that you can configure the ScanTo pa rameters of the
device in the DEVICE tab by clicking PROPERTIES.
- 22 -
Page 27

If you try to add a device when the maximum number of d evices has b een reached,
a message warns you that you have to delete a device from the list before you can
add another.
Adding a device connected via a USB link
The connection between the PC and the terminal must be via a shielded USB 2.0
cable with a maximum length of 3 meters.
Warning - You are recommended to install Companion Suite Pro on your PC
first before connecting the USB cable to your terminal.
If you connect the USB cable before installing Companion Suite Pro, the
Plug and Play software recognition system automatically recognizes
that a new device has been added. To install the drivers for your
terminal, follow the instructions shown on the screen. A window asking
where the drivers are located may display. If so, specify the installation
CD-ROM.
FRENCH
- 23 -
Page 28

Identify the connectors of your USB cable, and connect them.
Turn your multifunction terminal on.
The add device wizard is displayed.
Click NEXT.
Select FIND THE APPROPRIATE DRIVER FOR MY DEVICE (RECOMMENDED). Click
EXT.
N
Select the location where the system is to look for the driver. Only check the CD-
DRIVES box if the Windows asks where the drivers are located. Click NEXT.
ROM
The search takes a few moments.
A window indicates that the driver has been found. Click NEXT.
A window tells you that the software has been installed. Click FINISH.
If the Wizard is displayed again, refer to the third step of this procedure and
follow the instructions. This procedure has to be carried out a total of three
times.
You can now use the multifunction terminal to print or scan your d ocuments.
- 24 -
Page 29

Selecting the current device
Only one device at a time may be connected to the PC. The current device may be
selected by clicking the radio button for the line corresponding to the device.
Status of the connection
The status of the connection between the current device and the PC is indicated by
a color:
• Yellow means the connection is in the process of being established
FRENCH
- 25 -
Page 30

• Green means the connection is OK
• Red means the computer cannot connect to the device.
- 26 -
Page 31

Parameters for the device
Select a device by clicking its line in the list and click Properties to configure the
scanning parameters to be applied for this device when you click the Scan To
button.
Choose the scan MODE by selecting from the drop-down menu,
FRENCH
- 27 -
Page 32

Choose the scan RESOLUTION by selecting from the drop-down menu,
Choose the output format of the Scan To function. The possible choices are
given in the table below:
Choice Action
When a ScanTo PC is carried out from the terminal,
PaperPort PDF
PaperPort TIFF
the document is put into PDF format and saved in the
ScanTo directory. To view the PDF, right click the file
and select "Open".
When a ScanTo PC is carried out from the terminal,
the document is put into TIF format and saved in the
ScanTo directory.
e-mail PDF
When a Scan To PC is carried out from the terminal,
your e-mail application is launched and the document
analyzed is attached as an attachment to a new
message.
- 28 -
Page 33

Note: To use the e-mail PDF option, an e-mail client must be configured on your
computer.
If the device supports
DUPLEX (both sides) mode, you can set this mode by checking
the box.
Removing a device
Select the device from the list and click the minus sign or REMOVE.
FRENCH
- 29 -
Page 34

To confirm you want to remove the device, click Yes. To cancel the removal
operation, click No.
The device is no longer displayed in the list.
- 30 -
Page 35

LINKS
Note: The following tabs are only shown when the multifunction terminal is
connected to the terminal.
INKS tab of the Monitor gives access to the dedicated site and to the pages for
The L
displaying and changing the software parameters.
To close the Monitor, click OK or the cross on the top right of the window.
the PARAMETERS link opens a ded icated web page which displays information
relating to the parameters of the terminal. To find out what these parameters
refer to, please refer to the user manual for the multifunction terminal.
FRENCH
- 31 -
Page 36

The STATUS link opens a dedicated web page which displays the status of the
multifunction terminal,
The DIRECTORY link opens a web page dedicated to managing the directory,
- 32 -
Page 37

PRINTING
When the software is installed, two printer drivers are installed on your PC:
• Laser M
•C
ULTIFUNCTION: for printing your documents on the terminal.
OMPANION SUITE FAX: for faxing a document from an application.
PRINTING ON THE MULTIFUNCTION TERMINAL
To print a document on your terminal from your PC, proceed as for any normal print
operation under Windows (use the P
application currently open on the screen). Select the LASER MULTIFUNCTION printer.
If your terminal is fitted with a duplex module (varies with the model), you can print
your documents on both sides.
The configuration parameters for duplex printing are located in different places
depending on the version of Windows installed.
The paths are as follows:
• Under Windows 98 and Me: S
ULTIFUNCTION>PROPERTIES>MORE OPTIONS.
M
RINT command from the FILE menu of the
TART>PARAMETERS>PRINTERS>LASER
FRENCH
- 33 -
Page 38

• Under Windows 2000 and XP: START>PARAMETERS>PRINTERS AND FAX
MACHINES>LASER MULTIFUNCTION>Select the printer, right click and choose
ROPERTIES>PRINT OPTIONS...
>P
Note: If your device does not ha ve a duplex module, you can specify this in the
printer installation parameters so as to adapt the printer options which may
be accessed.
TART > PARAMETERS > PRINTERS AND FAX MACHINES > LASER MULTIFUNCTION
S
> Select the printer, right click and choose > P
PARAMETERS > INSTALLATION OPTIONS.
ROPERTIES > DEVICE
- 34 -
Page 39

Note: Whatever the installation parameters, th e duplex prin t opti ons have no effect
if your device does not have a duplex module.
FAXING A DOCUMENT FROM AN APPLICATION
This function is carried out using the COMPANION SUITE FAX printer. For more details,
please refer to paragraph Sending a document from an application.
FRENCH
- 35 -
Page 40

ANALYZING A DOCUMENT
There are two ways of analyzing a document, either using SCAN TO or directly from
an application.
SCAN TO
The SCAN TO function starts up
• by pressing the ScanTo button on the device
or by clicking the following icon in the MF Director window: ScanTo starts
scanning the document and saves it in a scan folder in the PaperPort directory, then
opens PaperPort. If PaperPort is not installed, the image is saved on the desktop.
If there is a communication error with the scanner, an error message is displayed.
- 36 -
Page 41

ANALYZING FROM A TOUCH-UP PROGRAM
Note: To use a touch-up program other than that supplied on the installation CD-
ROM, it must be compatible with the TWAIN standard (most programs are
compatible).
Run the image touch-up program then run the acquisition command.
The following window is displayed.
Pass-through
scanner
Flatbed
scanner
Select the scanner to be used (flatbed or pass-through).
Set your parameters (contrast, resolution, etc.) before starting the scan.
Once scanned, you can archive or touch-up the document.
FRENCH
- 37 -
Page 42

THE ADDRESS BOOK
You use the Address book to save the phone numbers of your usual contacts. Th is
function makes it easier for you to enter the number of your contact when requesting
to send an SMS or fax. If you want, you can print the list of numbers saved in the
Directory.
You can also create groups of contacts in the address book. This enables you to
group contacts together, for example in the same company or department, to whom
you frequently send common documents.
Note: The software al so enables you to manag e the address books specific to the
operating system or e-mail application installed on your PC. The procedures
for using these will not be described in this manua l - please refer to the online documentation for the programs concerned for more details.
ADDING A CONTACT TO THE TERMINAL'S ADDRESS BOOK
Click the ADDRESS BOOK link in the MF DIRECTOR window.
The address book is displayed.
Select the address book for the terminal.
- 38 -
Page 43

Press NEW and select CONTACT from the menu displayed.
The data entry window for the contact's details is displayed.
Enter the name of your contact, their fax or GSM number, their fax transmission
speed, associated shortcut key, e-mail address and default send format (PDF
or image). Press OK.
The new contact is added to the list.
ADDING A GROUP TO THE TERMINAL'S ADDRESS BOOK
Click the ADDRESS BOOK link in the MF DIRECTOR window.
FRENCH
Select the address book for the terminal.
- 39 -
Page 44

Press NEW and select GROUP from the menu displayed.
Enter the name of the group. The group can include contacts in the address
book or new contacts.
Case 1: the members are in the address book.
Press the S
The selection screen is displayed.
ELECT MEMBERS button.
Select a contact or a group in the ADDRESS BOOK area, press the button (you
can also add a contact to the group by double clicking it directly).
Press OK.
Case 2: you want to add new contacts.
Press the N
EW button, then enter the information for the new contact using the
same procedure as for adding a contact.
- 40 -
Page 45

When the group is completed, press OK.
The new group is added to the list.
MANAGING THE ADDRESS BOOK
When you are in the directory, you can do the following:
• Print the list of contacts in your address book,
• Delete a contact or a group from your address book,
• Look for a contact or a group in the address book by entering the first few letters of
the name,
• View the record of a contact or group if you want to change it.
Changing the information for a contact
Select the contact you want to change.
Click PROPERTIES.
Make the desired changes in the ADDRESS BOOK window.
Click OK.
Changing a group
Select the group from the address book list.
Click PROPERTIES.
Make the desired changes.
Click OK.
FRENCH
Deleting a contact or a group from the Address book
Select the name of the contact or group you want to delete.
Click DELETE.
Note: When a contact is deleted from the directory, it is also automatically deleted
from any groups containing it.
Printing the Address book
Click PRINT.
The list of contacts in the address book is printed on the terminal (if no contact
has been selected).
- 41 -
Page 46

IMPORTING OR EXPORTING A DIRECTORY
Importing a directory
Importing a directory avoids the need to enter contacts one by one.
Select IMPORT from the FILE menu in the ADDRESS BOOK window.
Select the file to be imported and press OPEN.
Saving your address book
This function allows you to save your address book to a file.
Select EXPORT from the FILE menu in the ADDRESS BOOK window.
Enter the name of the file, select its destination folder and press SAVE.
- 42 -
Page 47

FAX COMMUNICATION
Use fax communication to:
• Send documents from one of your terminal's scanners, from the disk or from the
screen as faxes,
• Receive faxed documents,
• Track communications using the Outbox, Inbox, Sent items, Send log and
Reception log.
Parameters are available to change how your terminal deals with fax communication.
You can change these parameters to adapt fax communication to your requirements;
to find out how, please refer to parag rap h Fax parameters.
THE FAX WINDOW
3
1
9
2
4
6
5
10
7
FRENCH
- 43 -
8
Page 48

Key Action
1 Create a new fax
Delete a fax from one of the folders of the Fax
END LOG
2
manager. For the S
and R
command has the effect of deleting the whole log.
3
Print a fax from one of the folders of the Fax
manager.
4 View a fax using the Viewer.
5 Access the address book.
6
7
Stop the transmission of a fax (only active for the
outbox).
View all faxes present in the fax manager folder
selected.
8 Preview faxes.
9 Fax manager folders.
10 Device used for sending the fax.
SENDING A FAX
Sending a fax from the hard disk or the terminal
ECEPTION LOG
, this
Click the icon in the MF DIRECTOR window.
- 44 -
Page 49

Click NEW then FAX.
In the SOURCES area, select SCANNER if your document is in paper format or
MEMORY if the document is a computer file located on your hard disk (this file
must be in TIFF or FAX format).
To send your document to a contact, enter their number in the RECIPIENTS field
and press the button or select a contact (or group) from one in the directory
in the A
Repeat this operation as many times as necessary (use the button to delete
a contact from the Recipient list).
DDRESS BOOK field and press the button.
FRENCH
- 45 -
Page 50

Set any advanced options required (deferred send and resolution) in the
DVANCED OPTIONS tab
A
To attach a cover page, select the COVER PAGE tab then check the WITH COVER
PAGE box. Select the cover page you want to attach from the drop-down menu,
or create a new one. For more information please refer to paragraph Cover
page.
Click OK to send your fax to all the contacts in the recipient list.
Your send request can be viewed in the Outbox if required.
Note: To send a fax, the current device, which you select by clicking the radio
button in front of it in the list of devices added in the P
tab of the Monitor, must be able to send a fax.
ERIPHERAL SELECTION
Sending a document from an application
This method lets you send a document which you created with a desktop application,
directly without printing it beforehand.
- 46 -
Page 51

Select PRINT from the FILE menu of your desktop application.
Select the COMPANION SUITE FAX printer and press OK.
The fax send window is displayed.
FRENCH
To send your document to a contact, enter their number in the RECIPIENTS field
and press the button or select a contact (or group) from one in the directory
in the ADDRESS BOOK field and press the button.
Repeat this operation as many times as necessary (use the Remove button to
delete a contact from the Recipient list).
- 47 -
Page 52

Set any advanced options required (deferred send and resolution) in the
DVANCED OPTIONS tab
A
To attach a cover page, select the COVER PAGE tab then check the WITH COVER
PAGE box. Select the cover page you want to attach from the drop-down menu,
or create a new one. For more information please refer to paragraph Cover
page.
Click OK to send your fax to all the contacts in the recipient list.
Your send request can then be viewed in the Outbox if required.
RECEIVING A FAX
The MF MANAGER and MF DIRECTOR windows send you a message when a fax is
received. The icon is shown at the bottom of the MF M
icon appears on the task bar.
You can print faxes automatically when they are received. To do this, you must define
a parameter, please refer to paragraph Fax parameters.
Note: The multifunction software can be connected to several PCs , but only one
computer can be defined as receiving PC to which faxes are to be sent. To
find out more about how to choose the receiving PC, please refer to the user
manual for the device.
Note: A PC can be receiver for a device which is not its current device.
Note: When a PC is on standby, it cannot receive faxes. The Tools menu of the
Manager can be used to prevent a PC going into standby mode so that it can
always receive faxes.
ANAGER window and the
TRACKING FAXES
Faxes can be tracked by means of the:
• Outbox,
• Inbox,
• Sent items,
• Send log,
• Reception log.
- 48 -
Page 53

These services give you precise information about the communication activity of the
Terminal for both sending and receiving.
The send and reception logs print automatically when their contents fill an A4 sheet.
After this automatic print, the Terminal creates a new log.
The Outbox
The fax outbox contains the following:
• Requests in process of sending,
• Deferred send requests,
• Requests which have already undergone several attempts at sending and which
will soon be tried again,
• Rejected requests (calls which have not succeeded),
FRENCH
Requests are shown in the order in which they are executed.
The terminal automatically tries calls again at an interval of a minimum of 5 minutes.
Rejected requests are put at the end of the list to make them more accessible if you
want to retrieve them (to request they be sent again) or delete them.
- 49 -
Page 54

Sent items
Sent items holds all the faxes you have sent.
Sent Items contains the following information:
• Fax recipient,
• Date the fax was created,
• Date the fax was sent,
• The size of the fax.
Send log
The Send log allows you to keep a history of fax communications (suc cessful or
rejected) dealt with by your terminal. The log is printed
automatically when an A4 page is filled.
Note: The D
The send log contains the following information:
• Fax recipient,
• Date the fax was sent,
• Status (sent, rejected, etc.).
ELETE button deletes the whole log and not only the message(s)
selected.
Reception log
The Reception log allows you to keep a history of fax communications received by
your terminal. The log prints automatically when an A4 page is filled.
Note: The DELETE button deletes the whole log and not only the message(s)
selected.
The reception log contains the following information:
• Fax sender,
• Date the fax was received,
• Status.
- 50 -
Page 55

FAX PARAMETERS
Accessing fax parameters
Click the icon in the MF DIRECTOR window.
Select OPTION > FAX from the TOOLS menu.
Make the necessary settings by referring to the descriptions of the parameters
below and press OK to confirm.
Description of the LOGS AND REPORTS tab
FRENCH
Field Description
Automatic printing of a
received document
Print a reception report
Automatic printing of a
reception log
Automatic printing of the
sent document
The fax is printed automatically when it is
received.
A reception report is printed for each fax
received.
The log is automatically printed when it fills
an A4 page.
The fax is printed automatically when it is
sent.
- 51 -
Page 56

Field Description
Print the send report
A send report is printed when each fax is
sent.
Print the send log
The log is automatically printed when it fills
an A4 page.
Description of the FAX PARAMETERS tab
Field Description
Sending speed Default transmission speed for faxes.
Line number
Dialing prefix
Dialing type
Header
Number of the telephone line to which
your terminal is connected
The Dialing prefix will be automatically
inserted before the number before the fax
is transmitted on this line.
Must be configured according to the type
of telephone switchboard to which your
terminal is connected.
Shows a communication identification line
on documents you send or receive.
- 52 -
Page 57

Field Description
Corrects communication errors arising
from interference on the line. This option
ECM
Number of tries
Interval between tries Time between two transmission attempts.
enables the integrity of documents
received to be guaranteed, but
communication times may be a lot greater
if the line has a lot of interference.
Number of times the Terminal is to try
when the send fails.
COVER PAGE
The cover page is a part of the fax document generated automatically by your
terminal which shows information about the sender, recipient, date and time fax was
requested to be sent, comments, etc.
This page can only be sent at the front of a fax document and in the same
communication as it. A document with a cover page can be sent from a multifunction
terminal or from the CPU. In the latter case, you may supply some of the information
contained in the cover page during the transmission request. A cover page template
must be created before sending a fax which uses it. On the other hand, once created,
the cover page may be used an infinite number of times.
Your terminal allows you to create and customize several cover page templates from
which you can choose when you send a fax.
FRENCH
Creating a cover page
Note: A cover page template must be created before sending a fax which uses it.
Press the NEW button from the COVER PAGE tab.
Select the cover page template you created from the FILE menu.
- 53 -
Page 58

The window containing the cover page template you created is displayed:
Click the icon to show the list of available fields.
- 54 -
Page 59

To add a field, proceed as follows:
- Select the field you want to insert by checking it in the list of availab le fields.
Your mouse cursor changes to a "rubber stamp" icon.
- Click where you want to put the field.
- You can move or increase the size of the field as desired.
Note: Adjust the size of the field boxes to make the text readable.
When you have inserted the fields, save the cover page.
This cover page may be selected from the C
OVER PAGE window in the fax send page.
Description of the COVER PAGE tab
FRENCH
- 55 -
Page 60

Field Description
With the cover page
This is either the default page or you may
select the page you want.
Sender
Recipient: Name,
Company, Department
Comments
Preview
You may enter information about the sender.
You may enter information about the
recipient.
If the word Auto is present in one of the
fields, the field is updated during
transmission if the recipient is in the
directory, favorites, a group or a
distribution list.
This is a text window with all the basic
facilities of a text editor and which enables
you to enter text which will be sent in the
cover page.
The preview lets you see the cover page
you are about to send.
Creating a cover page template
Follow the instructions below:
Creating a cover page enables you to create a template whose fields (fax number,
comments, subject, etc.) will be filled in automatically by the Fax application
according to information supplied for each document recipient.
Creating a cover page template is done in two stages:
• First stage: Create a background image with the desired logos and page
formatting.
• Second stage: Add the fields you want displayed on the cover page: fax n umber,
comments, subject, etc. As mentioned previously, these fields will be filled out by
the fax application when the fax is sent.
For the first stage, there are two ways of creating the background image.
You can either:
• Option (A) : Create the background image in another application (e.g. Word, Excel,
etc.)
OR
• Option (B) : Scan a sheet of paper containing the formatting of the cover page.
- 56 -
Page 61

More information on Options A and B:
• Option (A) : Open the desired application to be used to produ ce the background
(Word, Wordpad, etc.). Draw the background image then print this document on the
"Companion Suite Fax" printer. At this point, the MFSendFax dialog box is
displayed:
FRENCH
- 57 -
Page 62

Add recipients to the list of recipients. Click the "Advanced options" tab and select
Fine Resolution as shown below:
Lastly, click the "Save draft" button in the bottom right corner (this is the button with
the diskette icon). The background image is created in the C:\Program Files \
Companion Suite Pro LM \ Documents \ FAX \ Temporary folder with a .fax extension.
- 58 -
Page 63

• Option (B): Run MFManager, select "New Fax", select the scanner a s source as
shown below:
Add recipients to the list of recipients. Click the "Advanced options" tab and select
Fine Resolution as shown below:
FRENCH
- 59 -
Page 64

Lastly, click the "Save draft" button in the bottom right corner (this is the button with
Î
the diskette icon). The background image is created in the C:\Program Files \
Companion Suite Pro LM \ Documents \ FAX \ Temporary folder with a .fax extension.
Whether option A or option B is used, you end up with a background image with .fax
extension in folder C:\Program Files \ Companion Suite Pro LM \ Documents \ FAX \
Temporary.
You can then go on to the second stage below.
For the second stage:
The background image is created in folder C:\Program Files \ Companion Suite Pro
LM \ Documents \ FAX \ Temporary and you can now add fields to it.
Follow the procedure below:
(a) Launch MFManager, select "New Fax", click the "Cover Page" tab and click the
"with cover page" box.
(b) Click the New button which displays a new window entitled "Cover page
creation".
(c) Click the "Open" button in the toolbar, set the file filter to *.fax and navigate down
to the folder C:\Program Files \ Companion Suite Pro LM \ Documents \ FAX \
Temporary which contains the background image created at the first stage.
(d) Click the "fields" button in the toolbar. A window opens allowing you to add fields
to the background image.
(e) Click the "Save" button to save the cover page template and exit this window.
(f) The "New fax" window is displayed. You can now choose which cover page
template you want to use. If you double click the preview in the bottom right
corner, another window is displayed showing a previe w of the cover page with
the fields filled out with the recipient's details.
- 60 -
Page 65

SMS COMMUNICATION
SMSs are sent using the modem in your multifunction laser printer. For more details
please refer to the user manual for your multifunction laser printer.
Warning - The SMS service is dependent on country and operator.
Your PC kit lets you easily process single or multiple-destination sends using
distribution groups.
Sends are tracked using the Outbox, Send log, and Sent items. You can optionally
track receives using a reception log and Inbox.
THE SMS WINDOW
123456
7
9
10
FRENCH
- 61 -
8
Page 66

Key Action
1 Write an SMS
Delete an SMS from one of the folders of the SMS
END LOG
2
manager. For the S
and R
command has the effect of deleti ng the whole log.
3
Print an SMS from one of the folders of the SMS
manager.
4 View an SMS using the Viewer.
5 Access the address book.
6
7
Stop the transmission of an SMS (only active for
the outbox).
View all SMSs present in the SMS manager folder
selected.
8 Preview SMSs.
9 SMS manager folders.
10 Device used for transmission.
ECEPTION LOG
, this
- 62 -
Page 67

SENDING AN SMS
Click the SMS ICON in the MF DIRECTOR window.
Click NEW then SMS.
Enter your message in the CONTENT OF THE MESSAGE field provided.
You can use the buttons and "smileys" located to the left of the entry field to
customize your message or insert the date and time automatically.
To send your SMS to a contact, enter their number in the TELEPHONE NUMBER
field in the RECIPIENTS section and press the button or select a contact (or
group) from one in the directory shown in the C
button.
Repeat this operation as many times as necessary (use the Remove button to
delete a contact from the Recipient list).
ONTACT LIST and press the
FRENCH
- 63 -
Page 68

Set any advanced parameters required (for deferred send or to give a priority
level to the SMS), by pressing the A
DVANCED PARAMETERS button
Click OK to send your SMS to all the contacts in the RECIPIENT LIST.
Your send request can be viewed in the Outbox if required.
RECEIVING AN SMS
SMSs received arrive directly in the Inbox. When one is received, the icon
appears at the bottom of the MF M
ANAGER window and the icon appears in the
task bar.
you can automatically print SMSs when they are received. To do this, you must define
a parameter, please refer to paragraph SMS parameters.
- 64 -
Page 69

TRACKING SMSS
SMSs can be tracked by means of the:
• Outbox,
• Inbox,
• Sent items,
• Send log,
• Reception log.
These services give you precise information about the communication activity of the
Terminal for both sending and receiving.
The send and reception logs print automatically when their contents fill an A4 sheet.
After this automatic print, the Terminal creates a new log.
The Outbox
The SMS outbox contains the following:
• Requests in process of sending,
• Deferred send requests,
• Requests which have already undergone several attempts at sending and which
will soon be tried again,
• Rejected requests,
FRENCH
- 65 -
Page 70

Send log
The Send log enables you to keep a history of SMS communications
(both successful and rejected) processed by your terminal. The log is printed
automatically when an A4 page is filled.
Note: The D
The send log contains the following information:
• Recipient of the SMS,
• Date the SMS was sent,
• Status (sent, rejected, etc.).
ELETE button deletes the whole log and not only the message(s)
selected.
Reception log
The Reception log allows you to keep a history of SMSs received by your terminal.
The log prints automatically when an A4 page is filled.
Note: The DELETE button deletes the whole log and not only the message(s)
selected.
The reception log contains the following information:
• Sender of the SMS,
• Date the SMS was received,
• Status.
Sent items
Sent items holds all the SMSs you have sent.
Sent Items contains the following information:
• Recipient of the SMS,
• Date the SMS was created,
• Date the SMS was sent,
• Size of the SMS.
- 66 -
Page 71

SMS PARAMETERS
Accessing SMS parameters
Click the SMS ICON in the MF DIRECTOR window.
Select OPTION > SMS from the TOOLS menu.
Make the necessary settings by referring to the descriptions of the parameters
below and press OK to confirm.
Description of the "Logs and reports" tab
Field Description
Automatic printing of a
received document
Print a reception report
The SMS is printed automatically when it
is received.
A reception report is printed for each SMS
received.
FRENCH
Automatic printing of a
reception log
Automatic printing of the
sent document
Print the send report
Print the send log
The log is automatically printed when it fills
an A4 page.
The SMS is printed automatically when it
is sent.
A send report is printed when each SMS is
sent.
The log is automatically printed when it fills
an A4 page.
- 67 -
Page 72

O
PTICAL CHARACTER RECOGNITION
Optical character recognition enables a file of data which can be use d by desktop
applications to be created from a paper document or an image file.
Character recognition can only be done on printed characters such as those from a
printer or typed text. However, you can ask it to keep a block of handwritten text (a
signature for example) by enclosing it with a graphic type field.
If you are not well-acquainted with the software, use th e OCR wizard. This will ta ke
you step-by-step through the recognition process.
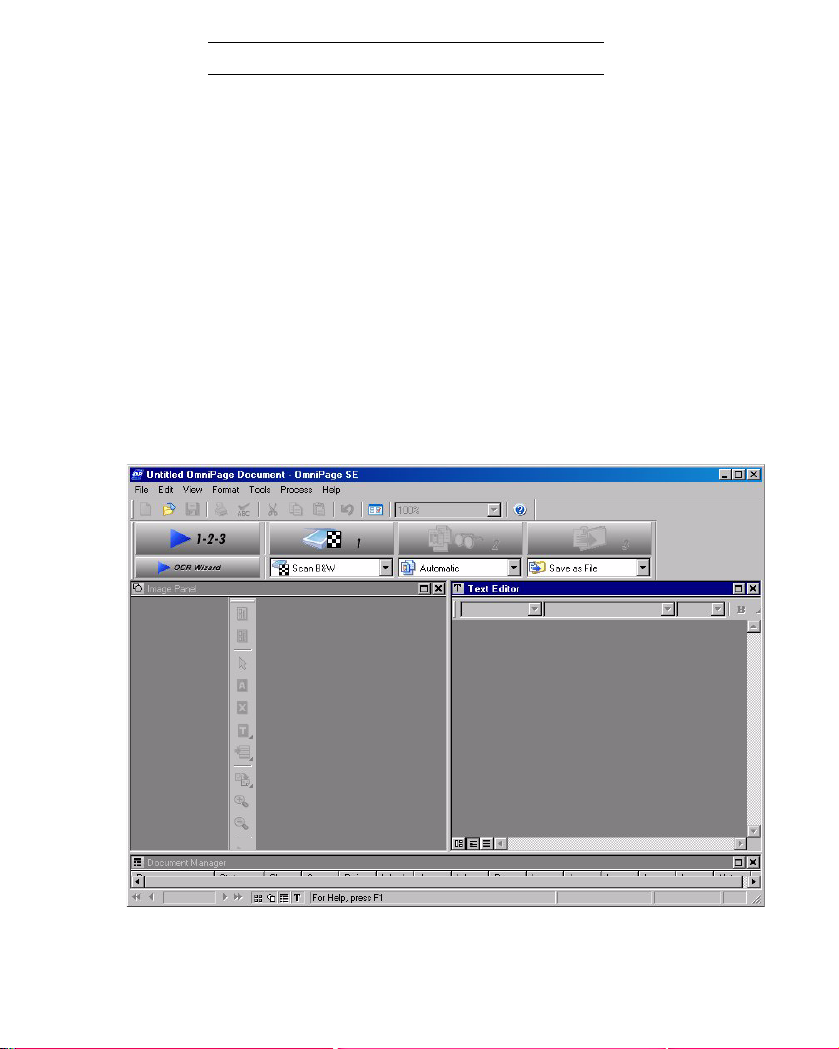
CHARACTER RECOGNITION
Click the OCR icon in the MF DIRECTOR window.
The window of the program is displayed.
(OCR)
PROGRAM
Press the OCR WIZARD button and follow the instructions.
Note: For more details on using the software, please refer to the on-line help for the
product.
- 68 -
 Loading...