

Page 1

Version 1.0
09/10
Xerox® ColorQube™
9301/9302/9303
User Guide
Page 2

©2010 Xerox Corporation. All Rights Reserved. Unpublished rights reserved under the copyright laws of the United States. Contents
of this publication may not be reproduced in any form without permission of Xerox Corporation.
XEROX®, XEROX and Design® and ColorQube® are trademarks of Xerox Corporation in the United States and/or other countries.
Changes are periodically made to this document. Changes, technical inaccuracies, and typographic errors will be corrected in
subsequent editions.
Document version 1.0: September 2010
Page 3

Contents
Copy. . . . . . . . . . . . . . . . . . . . . . . . . . . . . . . . . . . . . . . . . . . . . . . . . . . . . . . . . . . . . . . . . . . . . . . . . . 7
Introduction . . . . . . . . . . . . . . . . . . . . . . . . . . . . . . . . . . . . . . . . . . . . . . . . . . . . . . . . . . . . . . . . . . . . . . . . . . . . 10
Copy Options . . . . . . . . . . . . . . . . . . . . . . . . . . . . . . . . . . . . . . . . . . . . . . . . . . . . . . . . . . . . . . . . . . . . . . . . . . . 11
Image Quality . . . . . . . . . . . . . . . . . . . . . . . . . . . . . . . . . . . . . . . . . . . . . . . . . . . . . . . . . . . . . . . . . . . . . . . . . . 19
Layout Adjustment . . . . . . . . . . . . . . . . . . . . . . . . . . . . . . . . . . . . . . . . . . . . . . . . . . . . . . . . . . . . . . . . . . . . . . 22
Output Format . . . . . . . . . . . . . . . . . . . . . . . . . . . . . . . . . . . . . . . . . . . . . . . . . . . . . . . . . . . . . . . . . . . . . . . . . . 27
Job Assembly . . . . . . . . . . . . . . . . . . . . . . . . . . . . . . . . . . . . . . . . . . . . . . . . . . . . . . . . . . . . . . . . . . . . . . . . . . . 42
Log In / Out . . . . . . . . . . . . . . . . . . . . . . . . . . . . . . . . . . . . . . . . . . . . . . . . . . . . . . . . . . . . . . . . . . . . . . . . . . . . . 46
Fax . . . . . . . . . . . . . . . . . . . . . . . . . . . . . . . . . . . . . . . . . . . . . . . . . . . . . . . . . . . . . . . . . . . . . . . . . . 47
Introduction . . . . . . . . . . . . . . . . . . . . . . . . . . . . . . . . . . . . . . . . . . . . . . . . . . . . . . . . . . . . . . . . . . . . . . . . . . . . 50
Dialing Options . . . . . . . . . . . . . . . . . . . . . . . . . . . . . . . . . . . . . . . . . . . . . . . . . . . . . . . . . . . . . . . . . . . . . . . . . 51
Fax . . . . . . . . . . . . . . . . . . . . . . . . . . . . . . . . . . . . . . . . . . . . . . . . . . . . . . . . . . . . . . . . . . . . . . . . . . . . . . . . . . . . . 58
Image Quality . . . . . . . . . . . . . . . . . . . . . . . . . . . . . . . . . . . . . . . . . . . . . . . . . . . . . . . . . . . . . . . . . . . . . . . . . . 60
Layout Adjustment . . . . . . . . . . . . . . . . . . . . . . . . . . . . . . . . . . . . . . . . . . . . . . . . . . . . . . . . . . . . . . . . . . . . . . 62
Fax Options . . . . . . . . . . . . . . . . . . . . . . . . . . . . . . . . . . . . . . . . . . . . . . . . . . . . . . . . . . . . . . . . . . . . . . . . . . . . . 65
Job Assembly . . . . . . . . . . . . . . . . . . . . . . . . . . . . . . . . . . . . . . . . . . . . . . . . . . . . . . . . . . . . . . . . . . . . . . . . . . . 73
Secure Faxes . . . . . . . . . . . . . . . . . . . . . . . . . . . . . . . . . . . . . . . . . . . . . . . . . . . . . . . . . . . . . . . . . . . . . . . . . . . . 75
Log In / Out . . . . . . . . . . . . . . . . . . . . . . . . . . . . . . . . . . . . . . . . . . . . . . . . . . . . . . . . . . . . . . . . . . . . . . . . . . . . . 76
Server Fax. . . . . . . . . . . . . . . . . . . . . . . . . . . . . . . . . . . . . . . . . . . . . . . . . . . . . . . . . . . . . . . . . . . . 77
Introduction . . . . . . . . . . . . . . . . . . . . . . . . . . . . . . . . . . . . . . . . . . . . . . . . . . . . . . . . . . . . . . . . . . . . . . . . . . . . 80
Dialing Options . . . . . . . . . . . . . . . . . . . . . . . . . . . . . . . . . . . . . . . . . . . . . . . . . . . . . . . . . . . . . . . . . . . . . . . . . 81
Server Fax Options . . . . . . . . . . . . . . . . . . . . . . . . . . . . . . . . . . . . . . . . . . . . . . . . . . . . . . . . . . . . . . . . . . . . . . 84
Image Quality . . . . . . . . . . . . . . . . . . . . . . . . . . . . . . . . . . . . . . . . . . . . . . . . . . . . . . . . . . . . . . . . . . . . . . . . . . 86
Layout Adjustment . . . . . . . . . . . . . . . . . . . . . . . . . . . . . . . . . . . . . . . . . . . . . . . . . . . . . . . . . . . . . . . . . . . . . . 88
Fax Options . . . . . . . . . . . . . . . . . . . . . . . . . . . . . . . . . . . . . . . . . . . . . . . . . . . . . . . . . . . . . . . . . . . . . . . . . . . . . 90
Job Assembly . . . . . . . . . . . . . . . . . . . . . . . . . . . . . . . . . . . . . . . . . . . . . . . . . . . . . . . . . . . . . . . . . . . . . . . . . . . 91
Log In / Out . . . . . . . . . . . . . . . . . . . . . . . . . . . . . . . . . . . . . . . . . . . . . . . . . . . . . . . . . . . . . . . . . . . . . . . . . . . . . 92
Internet Fax. . . . . . . . . . . . . . . . . . . . . . . . . . . . . . . . . . . . . . . . . . . . . . . . . . . . . . . . . . . . . . . . . . 93
Introduction . . . . . . . . . . . . . . . . . . . . . . . . . . . . . . . . . . . . . . . . . . . . . . . . . . . . . . . . . . . . . . . . . . . . . . . . . . . . 96
Internet Fax . . . . . . . . . . . . . . . . . . . . . . . . . . . . . . . . . . . . . . . . . . . . . . . . . . . . . . . . . . . . . . . . . . . . . . . . . . . . 97
Advanced Settings . . . . . . . . . . . . . . . . . . . . . . . . . . . . . . . . . . . . . . . . . . . . . . . . . . . . . . . . . . . . . . . . . . . . . 101
Layout Adjustment . . . . . . . . . . . . . . . . . . . . . . . . . . . . . . . . . . . . . . . . . . . . . . . . . . . . . . . . . . . . . . . . . . . . . 104
Internet Fax Options . . . . . . . . . . . . . . . . . . . . . . . . . . . . . . . . . . . . . . . . . . . . . . . . . . . . . . . . . . . . . . . . . . . 106
Job Assembly . . . . . . . . . . . . . . . . . . . . . . . . . . . . . . . . . . . . . . . . . . . . . . . . . . . . . . . . . . . . . . . . . . . . . . . . . . 109
Log In / Out . . . . . . . . . . . . . . . . . . . . . . . . . . . . . . . . . . . . . . . . . . . . . . . . . . . . . . . . . . . . . . . . . . . . . . . . . . . . 110
ColorQube™ 9301/9302/9303
Contents
3
Page 4

Fax from PC . . . . . . . . . . . . . . . . . . . . . . . . . . . . . . . . . . . . . . . . . . . . . . . . . . . . . . . . . . . . . . . . .111
Introduction . . . . . . . . . . . . . . . . . . . . . . . . . . . . . . . . . . . . . . . . . . . . . . . . . . . . . . . . . . . . . . . . . . . . . . . . . . . 114
Faxing from a PC . . . . . . . . . . . . . . . . . . . . . . . . . . . . . . . . . . . . . . . . . . . . . . . . . . . . . . . . . . . . . . . . . . . . . . . 115
Fax from PC Options. . . . . . . . . . . . . . . . . . . . . . . . . . . . . . . . . . . . . . . . . . . . . . . . . . . . . . . . . . . . . . . . . . . . 117
Print . . . . . . . . . . . . . . . . . . . . . . . . . . . . . . . . . . . . . . . . . . . . . . . . . . . . . . . . . . . . . . . . . . . . . . . .123
Introduction . . . . . . . . . . . . . . . . . . . . . . . . . . . . . . . . . . . . . . . . . . . . . . . . . . . . . . . . . . . . . . . . . . . . . . . . . . . 126
Paper/Output . . . . . . . . . . . . . . . . . . . . . . . . . . . . . . . . . . . . . . . . . . . . . . . . . . . . . . . . . . . . . . . . . . . . . . . . . . 128
Special Pages . . . . . . . . . . . . . . . . . . . . . . . . . . . . . . . . . . . . . . . . . . . . . . . . . . . . . . . . . . . . . . . . . . . . . . . . . . 134
Color Options . . . . . . . . . . . . . . . . . . . . . . . . . . . . . . . . . . . . . . . . . . . . . . . . . . . . . . . . . . . . . . . . . . . . . . . . . . 137
Layout/Watermark . . . . . . . . . . . . . . . . . . . . . . . . . . . . . . . . . . . . . . . . . . . . . . . . . . . . . . . . . . . . . . . . . . . . . 139
Advanced. . . . . . . . . . . . . . . . . . . . . . . . . . . . . . . . . . . . . . . . . . . . . . . . . . . . . . . . . . . . . . . . . . . . . . . . . . . . . . 143
Workflow Scanning. . . . . . . . . . . . . . . . . . . . . . . . . . . . . . . . . . . . . . . . . . . . . . . . . . . . . . . . . .145
Introduction . . . . . . . . . . . . . . . . . . . . . . . . . . . . . . . . . . . . . . . . . . . . . . . . . . . . . . . . . . . . . . . . . . . . . . . . . . . 148
Workflow Scanning Options. . . . . . . . . . . . . . . . . . . . . . . . . . . . . . . . . . . . . . . . . . . . . . . . . . . . . . . . . . . . . 150
Advanced Settings . . . . . . . . . . . . . . . . . . . . . . . . . . . . . . . . . . . . . . . . . . . . . . . . . . . . . . . . . . . . . . . . . . . . . 153
Layout Adjustment . . . . . . . . . . . . . . . . . . . . . . . . . . . . . . . . . . . . . . . . . . . . . . . . . . . . . . . . . . . . . . . . . . . . . 156
Filing Options . . . . . . . . . . . . . . . . . . . . . . . . . . . . . . . . . . . . . . . . . . . . . . . . . . . . . . . . . . . . . . . . . . . . . . . . . . 159
Job Assembly . . . . . . . . . . . . . . . . . . . . . . . . . . . . . . . . . . . . . . . . . . . . . . . . . . . . . . . . . . . . . . . . . . . . . . . . . . 162
Creating Templates . . . . . . . . . . . . . . . . . . . . . . . . . . . . . . . . . . . . . . . . . . . . . . . . . . . . . . . . . . . . . . . . . . . . 163
Scan to Mailbox . . . . . . . . . . . . . . . . . . . . . . . . . . . . . . . . . . . . . . . . . . . . . . . . . . . . . . . . . . . . . . . . . . . . . . . . 169
Scan to Home . . . . . . . . . . . . . . . . . . . . . . . . . . . . . . . . . . . . . . . . . . . . . . . . . . . . . . . . . . . . . . . . . . . . . . . . . . 173
Log In / Out . . . . . . . . . . . . . . . . . . . . . . . . . . . . . . . . . . . . . . . . . . . . . . . . . . . . . . . . . . . . . . . . . . . . . . . . . . . . 176
E-mail . . . . . . . . . . . . . . . . . . . . . . . . . . . . . . . . . . . . . . . . . . . . . . . . . . . . . . . . . . . . . . . . . . . . . .177
Introduction . . . . . . . . . . . . . . . . . . . . . . . . . . . . . . . . . . . . . . . . . . . . . . . . . . . . . . . . . . . . . . . . . . . . . . . . . . . 180
E-mail Options . . . . . . . . . . . . . . . . . . . . . . . . . . . . . . . . . . . . . . . . . . . . . . . . . . . . . . . . . . . . . . . . . . . . . . . . . 181
Advanced Settings . . . . . . . . . . . . . . . . . . . . . . . . . . . . . . . . . . . . . . . . . . . . . . . . . . . . . . . . . . . . . . . . . . . . . 186
Layout Adjustment . . . . . . . . . . . . . . . . . . . . . . . . . . . . . . . . . . . . . . . . . . . . . . . . . . . . . . . . . . . . . . . . . . . . . 189
E-mail Options . . . . . . . . . . . . . . . . . . . . . . . . . . . . . . . . . . . . . . . . . . . . . . . . . . . . . . . . . . . . . . . . . . . . . . . . . 192
Job Assembly . . . . . . . . . . . . . . . . . . . . . . . . . . . . . . . . . . . . . . . . . . . . . . . . . . . . . . . . . . . . . . . . . . . . . . . . . . 195
Log In / Out . . . . . . . . . . . . . . . . . . . . . . . . . . . . . . . . . . . . . . . . . . . . . . . . . . . . . . . . . . . . . . . . . . . . . . . . . . . . 196
Print From... . . . . . . . . . . . . . . . . . . . . . . . . . . . . . . . . . . . . . . . . . . . . . . . . . . . . . . . . . . . . . . . . .197
Introduction . . . . . . . . . . . . . . . . . . . . . . . . . . . . . . . . . . . . . . . . . . . . . . . . . . . . . . . . . . . . . . . . . . . . . . . . . . . 200
Using Print From... . . . . . . . . . . . . . . . . . . . . . . . . . . . . . . . . . . . . . . . . . . . . . . . . . . . . . . . . . . . . . . . . . . . . . . 201
Saving Jobs for use with Print From... . . . . . . . . . . . . . . . . . . . . . . . . . . . . . . . . . . . . . . . . . . . . . . . . . . . . 203
Log In / Out . . . . . . . . . . . . . . . . . . . . . . . . . . . . . . . . . . . . . . . . . . . . . . . . . . . . . . . . . . . . . . . . . . . . . . . . . . . . 207
USB Port . . . . . . . . . . . . . . . . . . . . . . . . . . . . . . . . . . . . . . . . . . . . . . . . . . . . . . . . . . . . . . . . . . . .209
Introduction . . . . . . . . . . . . . . . . . . . . . . . . . . . . . . . . . . . . . . . . . . . . . . . . . . . . . . . . . . . . . . . . . . . . . . . . . . . 212
Scan to USB . . . . . . . . . . . . . . . . . . . . . . . . . . . . . . . . . . . . . . . . . . . . . . . . . . . . . . . . . . . . . . . . . . . . . . . . . . . 213
4
ColorQube™ 9301/9302/9303
Contents
Page 5

Print from USB . . . . . . . . . . . . . . . . . . . . . . . . . . . . . . . . . . . . . . . . . . . . . . . . . . . . . . . . . . . . . . . . . . . . . . . . . 214
Log In / Out . . . . . . . . . . . . . . . . . . . . . . . . . . . . . . . . . . . . . . . . . . . . . . . . . . . . . . . . . . . . . . . . . . . . . . . . . . . . 215
Internet Services . . . . . . . . . . . . . . . . . . . . . . . . . . . . . . . . . . . . . . . . . . . . . . . . . . . . . . . . . . . .217
Introduction . . . . . . . . . . . . . . . . . . . . . . . . . . . . . . . . . . . . . . . . . . . . . . . . . . . . . . . . . . . . . . . . . . . . . . . . . . . 220
Accessing Internet Services . . . . . . . . . . . . . . . . . . . . . . . . . . . . . . . . . . . . . . . . . . . . . . . . . . . . . . . . . . . . . 221
Status . . . . . . . . . . . . . . . . . . . . . . . . . . . . . . . . . . . . . . . . . . . . . . . . . . . . . . . . . . . . . . . . . . . . . . . . . . . . . . . . . 222
Jobs . . . . . . . . . . . . . . . . . . . . . . . . . . . . . . . . . . . . . . . . . . . . . . . . . . . . . . . . . . . . . . . . . . . . . . . . . . . . . . . . . . . 227
Print . . . . . . . . . . . . . . . . . . . . . . . . . . . . . . . . . . . . . . . . . . . . . . . . . . . . . . . . . . . . . . . . . . . . . . . . . . . . . . . . . . . 228
Scan. . . . . . . . . . . . . . . . . . . . . . . . . . . . . . . . . . . . . . . . . . . . . . . . . . . . . . . . . . . . . . . . . . . . . . . . . . . . . . . . . . . 229
Address Book . . . . . . . . . . . . . . . . . . . . . . . . . . . . . . . . . . . . . . . . . . . . . . . . . . . . . . . . . . . . . . . . . . . . . . . . . . 230
Properties. . . . . . . . . . . . . . . . . . . . . . . . . . . . . . . . . . . . . . . . . . . . . . . . . . . . . . . . . . . . . . . . . . . . . . . . . . . . . . 231
Support. . . . . . . . . . . . . . . . . . . . . . . . . . . . . . . . . . . . . . . . . . . . . . . . . . . . . . . . . . . . . . . . . . . . . . . . . . . . . . . . 232
Help . . . . . . . . . . . . . . . . . . . . . . . . . . . . . . . . . . . . . . . . . . . . . . . . . . . . . . . . . . . . . . . . . . . . . . . . . . . . . . . . . . . 233
Paper and Media. . . . . . . . . . . . . . . . . . . . . . . . . . . . . . . . . . . . . . . . . . . . . . . . . . . . . . . . . . . .235
Introduction . . . . . . . . . . . . . . . . . . . . . . . . . . . . . . . . . . . . . . . . . . . . . . . . . . . . . . . . . . . . . . . . . . . . . . . . . . . 238
Trays 1 and 2 . . . . . . . . . . . . . . . . . . . . . . . . . . . . . . . . . . . . . . . . . . . . . . . . . . . . . . . . . . . . . . . . . . . . . . . . . . 239
Tray 3 . . . . . . . . . . . . . . . . . . . . . . . . . . . . . . . . . . . . . . . . . . . . . . . . . . . . . . . . . . . . . . . . . . . . . . . . . . . . . . . . . 241
Tray 4 (Bypass) . . . . . . . . . . . . . . . . . . . . . . . . . . . . . . . . . . . . . . . . . . . . . . . . . . . . . . . . . . . . . . . . . . . . . . . . 242
Tray 5 . . . . . . . . . . . . . . . . . . . . . . . . . . . . . . . . . . . . . . . . . . . . . . . . . . . . . . . . . . . . . . . . . . . . . . . . . . . . . . . . . 244
Tray 6 (Inserter). . . . . . . . . . . . . . . . . . . . . . . . . . . . . . . . . . . . . . . . . . . . . . . . . . . . . . . . . . . . . . . . . . . . . . . . 245
Media Types . . . . . . . . . . . . . . . . . . . . . . . . . . . . . . . . . . . . . . . . . . . . . . . . . . . . . . . . . . . . . . . . . . . . . . . . . . . 247
Storage and Handling . . . . . . . . . . . . . . . . . . . . . . . . . . . . . . . . . . . . . . . . . . . . . . . . . . . . . . . . . . . . . . . . . . 252
Machine and Job Status . . . . . . . . . . . . . . . . . . . . . . . . . . . . . . . . . . . . . . . . . . . . . . . . . . . . .253
Introduction . . . . . . . . . . . . . . . . . . . . . . . . . . . . . . . . . . . . . . . . . . . . . . . . . . . . . . . . . . . . . . . . . . . . . . . . . . . 256
Job Status . . . . . . . . . . . . . . . . . . . . . . . . . . . . . . . . . . . . . . . . . . . . . . . . . . . . . . . . . . . . . . . . . . . . . . . . . . . . . 257
Machine Status . . . . . . . . . . . . . . . . . . . . . . . . . . . . . . . . . . . . . . . . . . . . . . . . . . . . . . . . . . . . . . . . . . . . . . . . 262
Administration and Accounting . . . . . . . . . . . . . . . . . . . . . . . . . . . . . . . . . . . . . . . . . . . . . .267
Tools . . . . . . . . . . . . . . . . . . . . . . . . . . . . . . . . . . . . . . . . . . . . . . . . . . . . . . . . . . . . . . . . . . . . . . . . . . . . . . . . . . 270
Device Settings. . . . . . . . . . . . . . . . . . . . . . . . . . . . . . . . . . . . . . . . . . . . . . . . . . . . . . . . . . . . . . . . . . . . . . . . . 271
Service Settings . . . . . . . . . . . . . . . . . . . . . . . . . . . . . . . . . . . . . . . . . . . . . . . . . . . . . . . . . . . . . . . . . . . . . . . . 285
Network Settings . . . . . . . . . . . . . . . . . . . . . . . . . . . . . . . . . . . . . . . . . . . . . . . . . . . . . . . . . . . . . . . . . . . . . . . 296
Accounting Settings . . . . . . . . . . . . . . . . . . . . . . . . . . . . . . . . . . . . . . . . . . . . . . . . . . . . . . . . . . . . . . . . . . . . 297
Security Settings . . . . . . . . . . . . . . . . . . . . . . . . . . . . . . . . . . . . . . . . . . . . . . . . . . . . . . . . . . . . . . . . . . . . . . . 299
Troubleshooting. . . . . . . . . . . . . . . . . . . . . . . . . . . . . . . . . . . . . . . . . . . . . . . . . . . . . . . . . . . . . . . . . . . . . . . . 301
General Care and Troubleshooting . . . . . . . . . . . . . . . . . . . . . . . . . . . . . . . . . . . . . . . . . . .305
Power Options . . . . . . . . . . . . . . . . . . . . . . . . . . . . . . . . . . . . . . . . . . . . . . . . . . . . . . . . . . . . . . . . . . . . . . . . . 308
General Care . . . . . . . . . . . . . . . . . . . . . . . . . . . . . . . . . . . . . . . . . . . . . . . . . . . . . . . . . . . . . . . . . . . . . . . . . . . 310
Troubleshooting. . . . . . . . . . . . . . . . . . . . . . . . . . . . . . . . . . . . . . . . . . . . . . . . . . . . . . . . . . . . . . . . . . . . . . . . 315
ColorQube™ 9301/9302/9303
Contents
5
Page 6

Further Assistance. . . . . . . . . . . . . . . . . . . . . . . . . . . . . . . . . . . . . . . . . . . . . . . . . . . . . . . . . . . . . . . . . . . . . . 324
Safety and Regulations . . . . . . . . . . . . . . . . . . . . . . . . . . . . . . . . . . . . . . . . . . . . . . . . . . . . . .325
Notices and Safety . . . . . . . . . . . . . . . . . . . . . . . . . . . . . . . . . . . . . . . . . . . . . . . . . . . . . . . . . . . . . . . . . . . . . 328
Safety Labels and Symbols. . . . . . . . . . . . . . . . . . . . . . . . . . . . . . . . . . . . . . . . . . . . . . . . . . . . . . . . . . . . . . 329
Operational Safety Information. . . . . . . . . . . . . . . . . . . . . . . . . . . . . . . . . . . . . . . . . . . . . . . . . . . . . . . . . 330
Basic Regulations . . . . . . . . . . . . . . . . . . . . . . . . . . . . . . . . . . . . . . . . . . . . . . . . . . . . . . . . . . . . . . . . . . . . . . 334
Copy Regulations . . . . . . . . . . . . . . . . . . . . . . . . . . . . . . . . . . . . . . . . . . . . . . . . . . . . . . . . . . . . . . . . . . . . . . 336
Fax Regulations . . . . . . . . . . . . . . . . . . . . . . . . . . . . . . . . . . . . . . . . . . . . . . . . . . . . . . . . . . . . . . . . . . . . . . . . 339
Material Safety Data . . . . . . . . . . . . . . . . . . . . . . . . . . . . . . . . . . . . . . . . . . . . . . . . . . . . . . . . . . . . . . . . . . . 342
Product Recycling and Disposal . . . . . . . . . . . . . . . . . . . . . . . . . . . . . . . . . . . . . . . . . . . . . . . . . . . . . . . . . 343
Energy Program Compliance . . . . . . . . . . . . . . . . . . . . . . . . . . . . . . . . . . . . . . . . . . . . . . . . . . . . . . . . . . . . 345
EH&S Contact Information . . . . . . . . . . . . . . . . . . . . . . . . . . . . . . . . . . . . . . . . . . . . . . . . . . . . . . . . . . . . . 346
6
ColorQube™ 9301/9302/9303
Contents
Page 7

Version 1.0
09/10
Xerox® ColorQube™
9301/9302/9303
Copy
Page 8

©2010 Xerox Corporation. All Rights Reserved. Unpublished rights reserved under the copyright laws of the United States. Contents
of this publication may not be reproduced in any form without permission of Xerox Corporation.
XEROX®, XEROX and Design® and ColorQube® are trademarks of Xerox Corporation in the United States and/or other countries.
Changes are periodically made to this document. Changes, technical inaccuracies, and typographic errors will be corrected in
subsequent editions.
Document version 1.0: September 2010
Page 9

Contents
Introduction . . . . . . . . . . . . . . . . . . . . . . . . . . . . . . . . . . . . . . . . . . . . . . . . . . . . . . . . . . . . . . . . . . . . . . . . . . . . 10
Copy Options . . . . . . . . . . . . . . . . . . . . . . . . . . . . . . . . . . . . . . . . . . . . . . . . . . . . . . . . . . . . . . . . . . . . . . . 11
Output Color . . . . . . . . . . . . . . . . . . . . . . . . . . . . . . . . . . . . . . . . . . . . . . . . . . . . . . . . . . . . . . . . . . . . . . . . 11
Reduce / Enlarge . . . . . . . . . . . . . . . . . . . . . . . . . . . . . . . . . . . . . . . . . . . . . . . . . . . . . . . . . . . . . . . . . . . . 11
Paper Supply . . . . . . . . . . . . . . . . . . . . . . . . . . . . . . . . . . . . . . . . . . . . . . . . . . . . . . . . . . . . . . . . . . . . . . . 13
2-Sided Copying . . . . . . . . . . . . . . . . . . . . . . . . . . . . . . . . . . . . . . . . . . . . . . . . . . . . . . . . . . . . . . . . . . . . 13
Copy Output . . . . . . . . . . . . . . . . . . . . . . . . . . . . . . . . . . . . . . . . . . . . . . . . . . . . . . . . . . . . . . . . . . . . . . . . 14
Folding . . . . . . . . . . . . . . . . . . . . . . . . . . . . . . . . . . . . . . . . . . . . . . . . . . . . . . . . . . . . . . . . . . . . . . . . . . . . . 15
Image Quality . . . . . . . . . . . . . . . . . . . . . . . . . . . . . . . . . . . . . . . . . . . . . . . . . . . . . . . . . . . . . . . . . . . . . . . . . . 19
Original Type . . . . . . . . . . . . . . . . . . . . . . . . . . . . . . . . . . . . . . . . . . . . . . . . . . . . . . . . . . . . . . . . . . . . . . . 19
Image Options . . . . . . . . . . . . . . . . . . . . . . . . . . . . . . . . . . . . . . . . . . . . . . . . . . . . . . . . . . . . . . . . . . . . . . 20
Image Enhancement . . . . . . . . . . . . . . . . . . . . . . . . . . . . . . . . . . . . . . . . . . . . . . . . . . . . . . . . . . . . . . . . 20
Color Presets . . . . . . . . . . . . . . . . . . . . . . . . . . . . . . . . . . . . . . . . . . . . . . . . . . . . . . . . . . . . . . . . . . . . . . . . 21
Color Balance . . . . . . . . . . . . . . . . . . . . . . . . . . . . . . . . . . . . . . . . . . . . . . . . . . . . . . . . . . . . . . . . . . . . . . . 21
Layout Adjustment . . . . . . . . . . . . . . . . . . . . . . . . . . . . . . . . . . . . . . . . . . . . . . . . . . . . . . . . . . . . . . . . . . . . . 22
Original Orientation . . . . . . . . . . . . . . . . . . . . . . . . . . . . . . . . . . . . . . . . . . . . . . . . . . . . . . . . . . . . . . . . . 22
Original Size . . . . . . . . . . . . . . . . . . . . . . . . . . . . . . . . . . . . . . . . . . . . . . . . . . . . . . . . . . . . . . . . . . . . . . . . 23
Book Copying . . . . . . . . . . . . . . . . . . . . . . . . . . . . . . . . . . . . . . . . . . . . . . . . . . . . . . . . . . . . . . . . . . . . . . . 24
Image Shift . . . . . . . . . . . . . . . . . . . . . . . . . . . . . . . . . . . . . . . . . . . . . . . . . . . . . . . . . . . . . . . . . . . . . . . . . 25
Edge Erase . . . . . . . . . . . . . . . . . . . . . . . . . . . . . . . . . . . . . . . . . . . . . . . . . . . . . . . . . . . . . . . . . . . . . . . . . 25
Invert Image . . . . . . . . . . . . . . . . . . . . . . . . . . . . . . . . . . . . . . . . . . . . . . . . . . . . . . . . . . . . . . . . . . . . . . . 26
Output Format . . . . . . . . . . . . . . . . . . . . . . . . . . . . . . . . . . . . . . . . . . . . . . . . . . . . . . . . . . . . . . . . . . . . . . . . . 27
Booklet Creation . . . . . . . . . . . . . . . . . . . . . . . . . . . . . . . . . . . . . . . . . . . . . . . . . . . . . . . . . . . . . . . . . . . . 27
Special Pages . . . . . . . . . . . . . . . . . . . . . . . . . . . . . . . . . . . . . . . . . . . . . . . . . . . . . . . . . . . . . . . . . . . . . . . 29
Annotations . . . . . . . . . . . . . . . . . . . . . . . . . . . . . . . . . . . . . . . . . . . . . . . . . . . . . . . . . . . . . . . . . . . . . . . . 34
Transparency Separators . . . . . . . . . . . . . . . . . . . . . . . . . . . . . . . . . . . . . . . . . . . . . . . . . . . . . . . . . . . . 39
Page Layout . . . . . . . . . . . . . . . . . . . . . . . . . . . . . . . . . . . . . . . . . . . . . . . . . . . . . . . . . . . . . . . . . . . . . . . . 39
Job Assembly . . . . . . . . . . . . . . . . . . . . . . . . . . . . . . . . . . . . . . . . . . . . . . . . . . . . . . . . . . . . . . . . . . . . . . . . . . . 42
Build Job . . . . . . . . . . . . . . . . . . . . . . . . . . . . . . . . . . . . . . . . . . . . . . . . . . . . . . . . . . . . . . . . . . . . . . . . . . . 42
Sample Set . . . . . . . . . . . . . . . . . . . . . . . . . . . . . . . . . . . . . . . . . . . . . . . . . . . . . . . . . . . . . . . . . . . . . . . . . 43
Save Current Settings . . . . . . . . . . . . . . . . . . . . . . . . . . . . . . . . . . . . . . . . . . . . . . . . . . . . . . . . . . . . . . . 44
Retrieve Saved Settings . . . . . . . . . . . . . . . . . . . . . . . . . . . . . . . . . . . . . . . . . . . . . . . . . . . . . . . . . . . . . 45
Log In / Out . . . . . . . . . . . . . . . . . . . . . . . . . . . . . . . . . . . . . . . . . . . . . . . . . . . . . . . . . . . . . . . . . . . . . . . . . . . . 46
ColorQube™ 9301/9302/9303
Copy
9
Page 10
Introduction
Introduction
This guide describes the copying features of the device, including options for Output Color,
Reduce/Enlarge, 2-Sided Copying, Layout Adjustment, Image Quality, Output Format, Job Assembly,
and other copy functions.
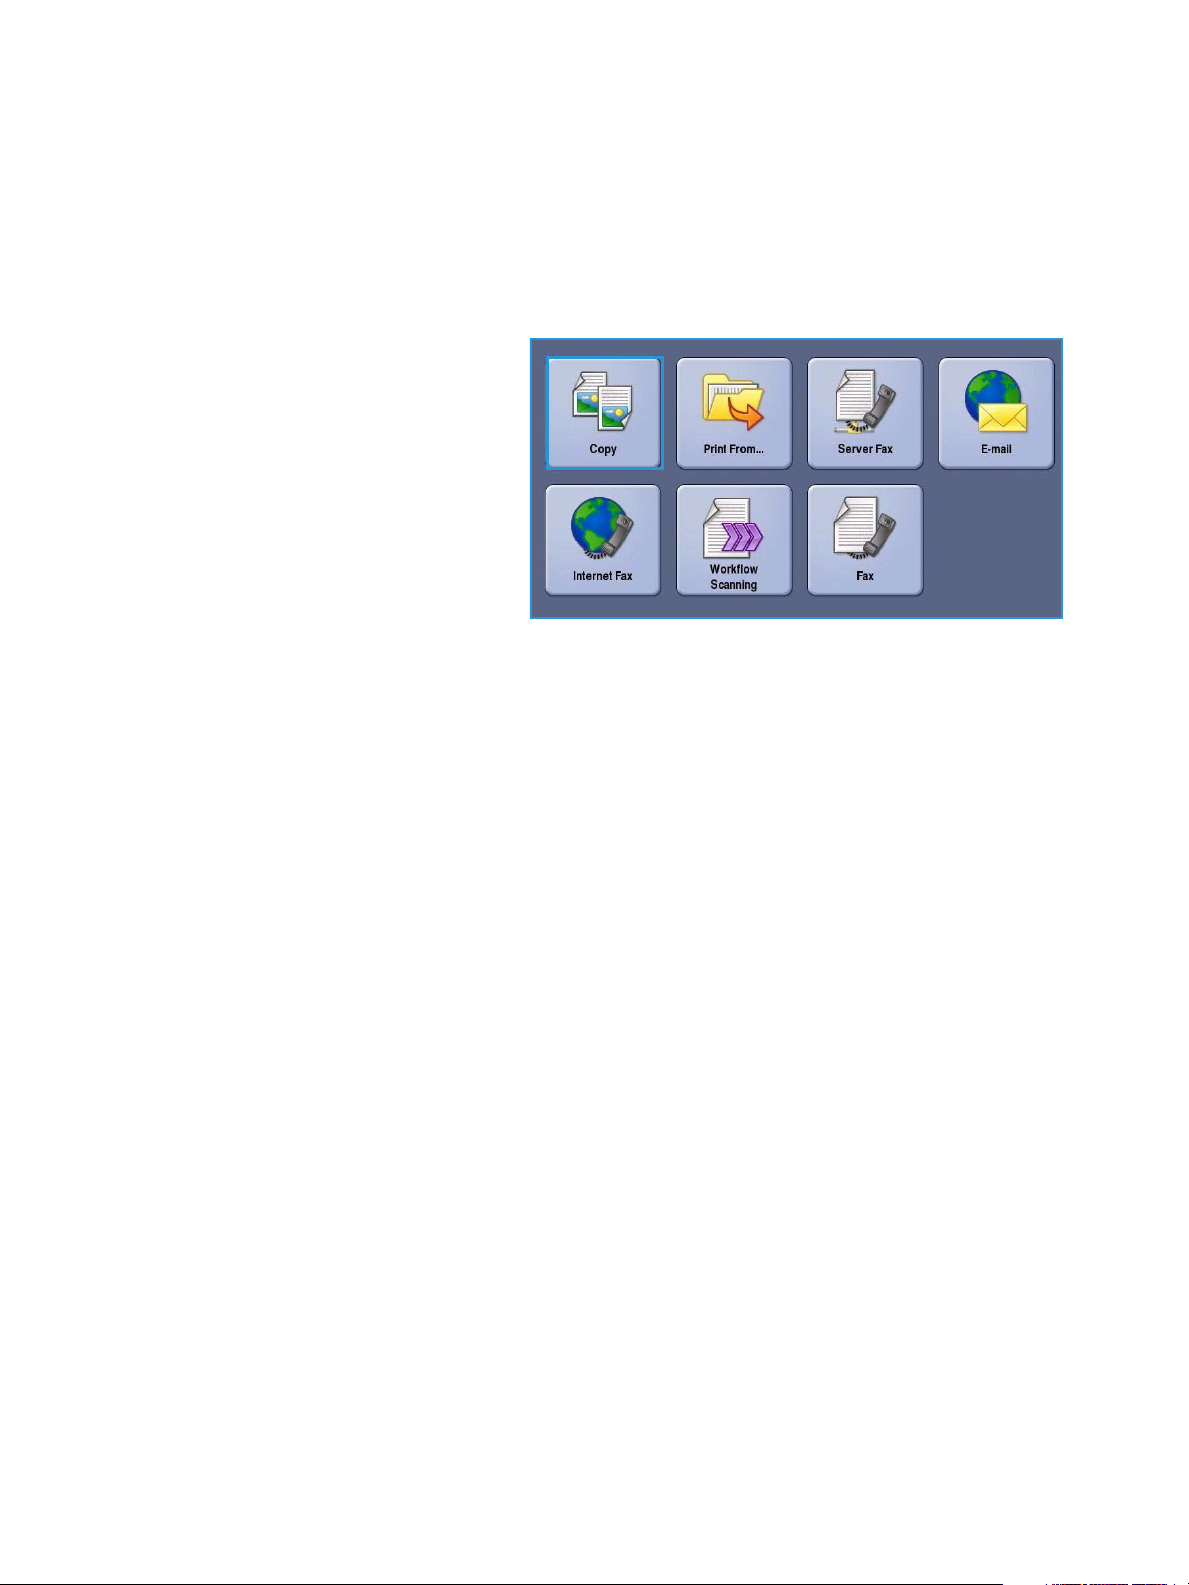
Copy is a standard feature and is selected
by pressing the Services Home button,
then the Copy option.
When Copy is selected, the device scans
your originals and stores the images. It
then prints the images based on the
selections made.
Most feature screens include these buttons
to confirm or cancel your choices.
• Undo resets the current screen to the
values that were displayed when the screen was opened.
• Cancel resets the screen and returns to the previous screen.
• Save saves the selections made and returns to the previous screen.
• Close closes the screen and returns to the previous screen.
Instructions for making a copy and using the basic features are provided in the ColorQube™
9301/9302/9303 How To Sheets. If Authentication or Accounting has been enabled on your device
you may have to enter log in details to access the features, refer to Log In / Out on page 46.
10
ColorQube™ 9301/9302/9303
Copy
Page 11
Copy Options
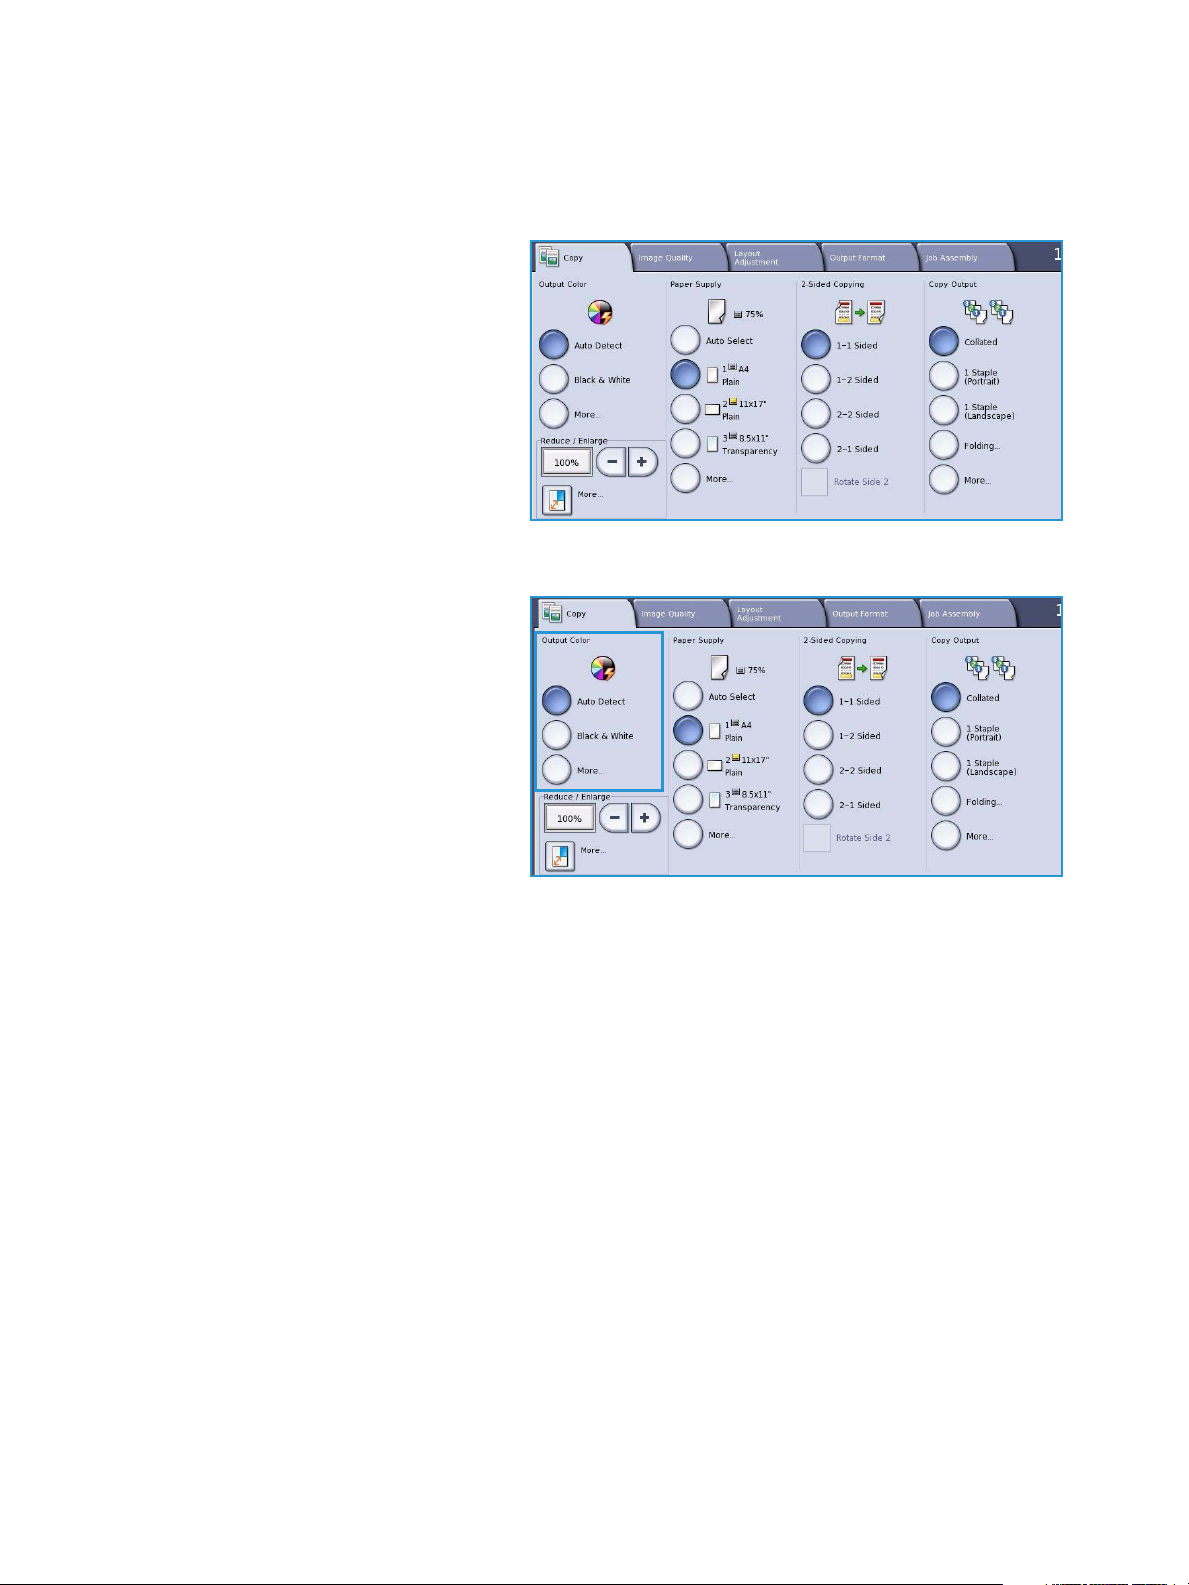
Copy Options
The Copy tab includes basic copying
selections such as Output Color, Reduce /
Enlarge, Paper Supply, 2-Sided Copying
and Copy Output. Each option is described
in detail below.
Output Color
The Output Color options include
selections to automatically detect and
match the color of your original or produce
monotone, full color or a single color output from your original. Use More... to access all the options.
The options are:
• Auto Detect to select output that
matches your original.
• Black & White to select monotone
output regardless of the color of your
original.
• Color to select color output from your
original.
• Single Color to select a single color
output regardless of the color of your
original. Choose from:
•Red
• Green
•Blue
•Cyan
• Green
•Yellow
•Magenta
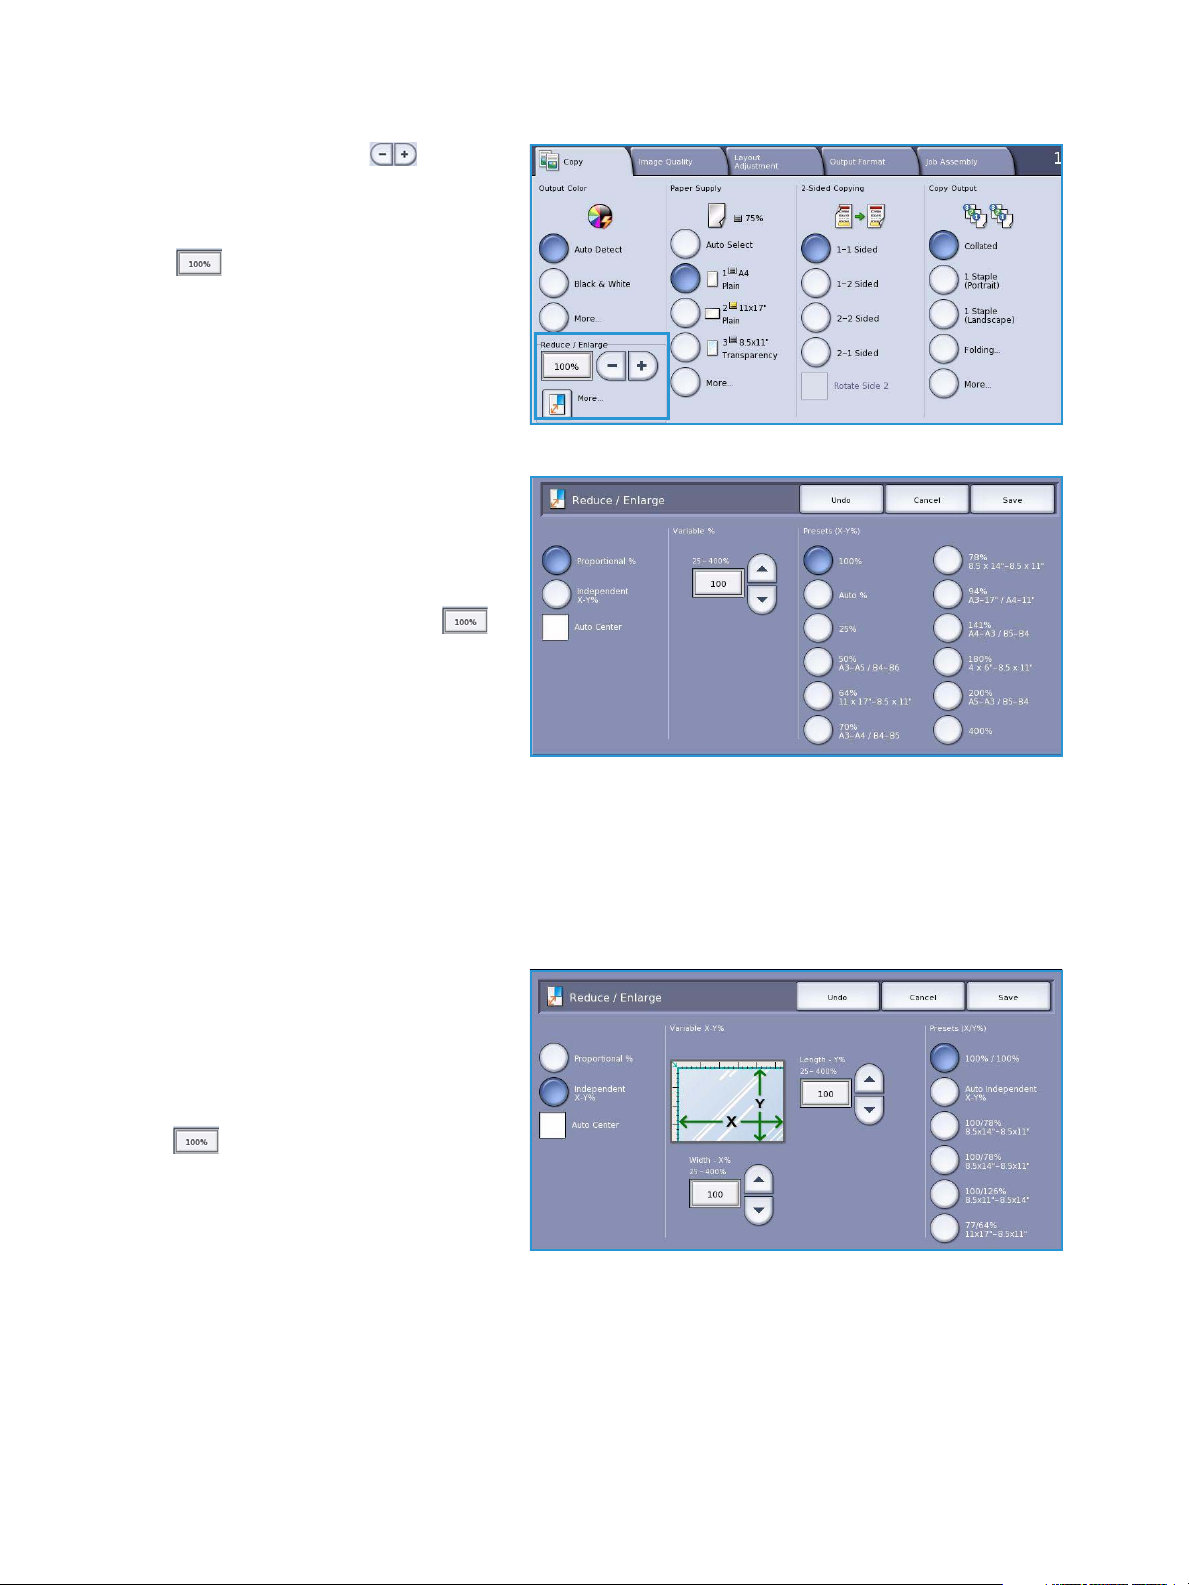
Reduce / Enlarge
A variety of options are available on your device to enable you to reduce or enlarge the output from
your original. This includes selecting a specific ratio, either proportionately or independently, and
choosing from a selection of pre-defined preset buttons. For convenience, easy access to ratio selection
can be found on the Copy tab in the Reduce / Enlarge area. Use More... to access all the options.
Images from originals placed on the document glass can be enlarged or reduced by any ratio between
400% and 25%. Images from originals fed through the document feeder can be enlarged or reduced
by any ratio between 200% and 25%.
ColorQube™ 9301/9302/9303
Copy
11
Page 12
Copy Options
•Use the - / + buttons on the
Copy screen to select the required
reduction or enlargement percentage.
• Alternatively, select the ratio button
and use the numeric keypad to
type in the ratio required.
• Set the ratio window to 100% if you
want your output image to be the
same size as your original.
Proportional %
Selections made on this screen will reduce
or enlarge the image by the same ratio in
both directions so that the image gets
bigger or smaller, but the proportions
remain the same.
• Select the Variable % button
and use the numeric keypad or the
arrow buttons to enter the ratio
required.
•Use the Preset buttons to select
100%, Auto % or commonly used
ratios which can be set up by your Administrator. The selected proportional ratios in percentages
are shown next to the button, together with an example application.
When Auto % is selected, the device chooses the best ratio to reduce or enlarge the original onto
the selected paper size. You must specify a paper tray before using this option.
Independent X-Y%
This selection enables you to set different
reduction or enlargement ratios for the
X (width) and the Y (height) of the image.
This will produce a distorted copy of your
original.
• Select the Variable X-Y% buttons
and use the numeric keypad or
the arrow buttons to enter the Width
- X% and Length - Y% ratios required.
•Use the Pre-set (X/Y%) buttons to
select 100%/100%, Auto
Independent X-Y% or commonly used ratios which can be set up by your Administrator. The
selected X and Y ratios in percentages are shown next to the button, together with an example
application.
Use 100% / 100% to produce an image the same size as your original.
12
ColorQube™ 9301/9302/9303
Copy
Page 13
Copy Options
Auto Independent X-Y% automatically fits the image of your original onto the paper you have
selected. The reduction or enlargement will not be proportional, the device will distort the image
so that it will fit onto the paper. You must specify a paper tray before using this option.
Auto Center
This option can be selected with either the Proportional or Independent options to position the image
in the center of the paper selected.
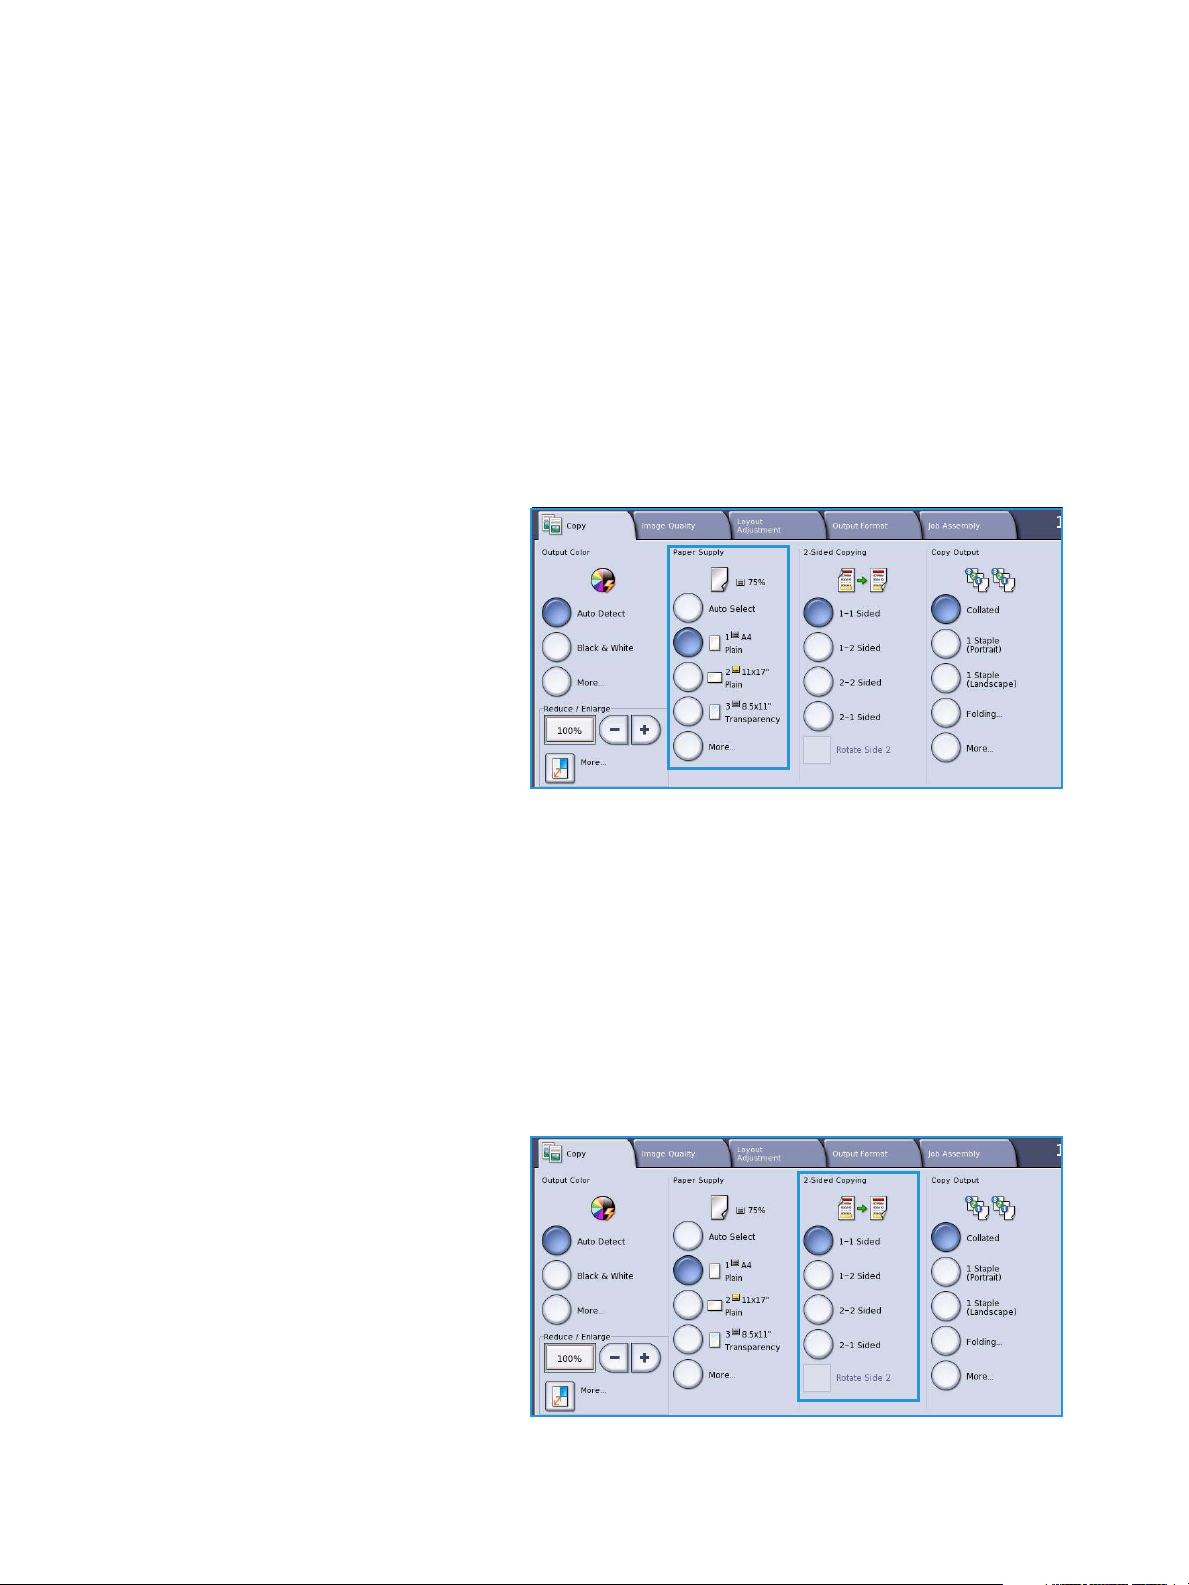
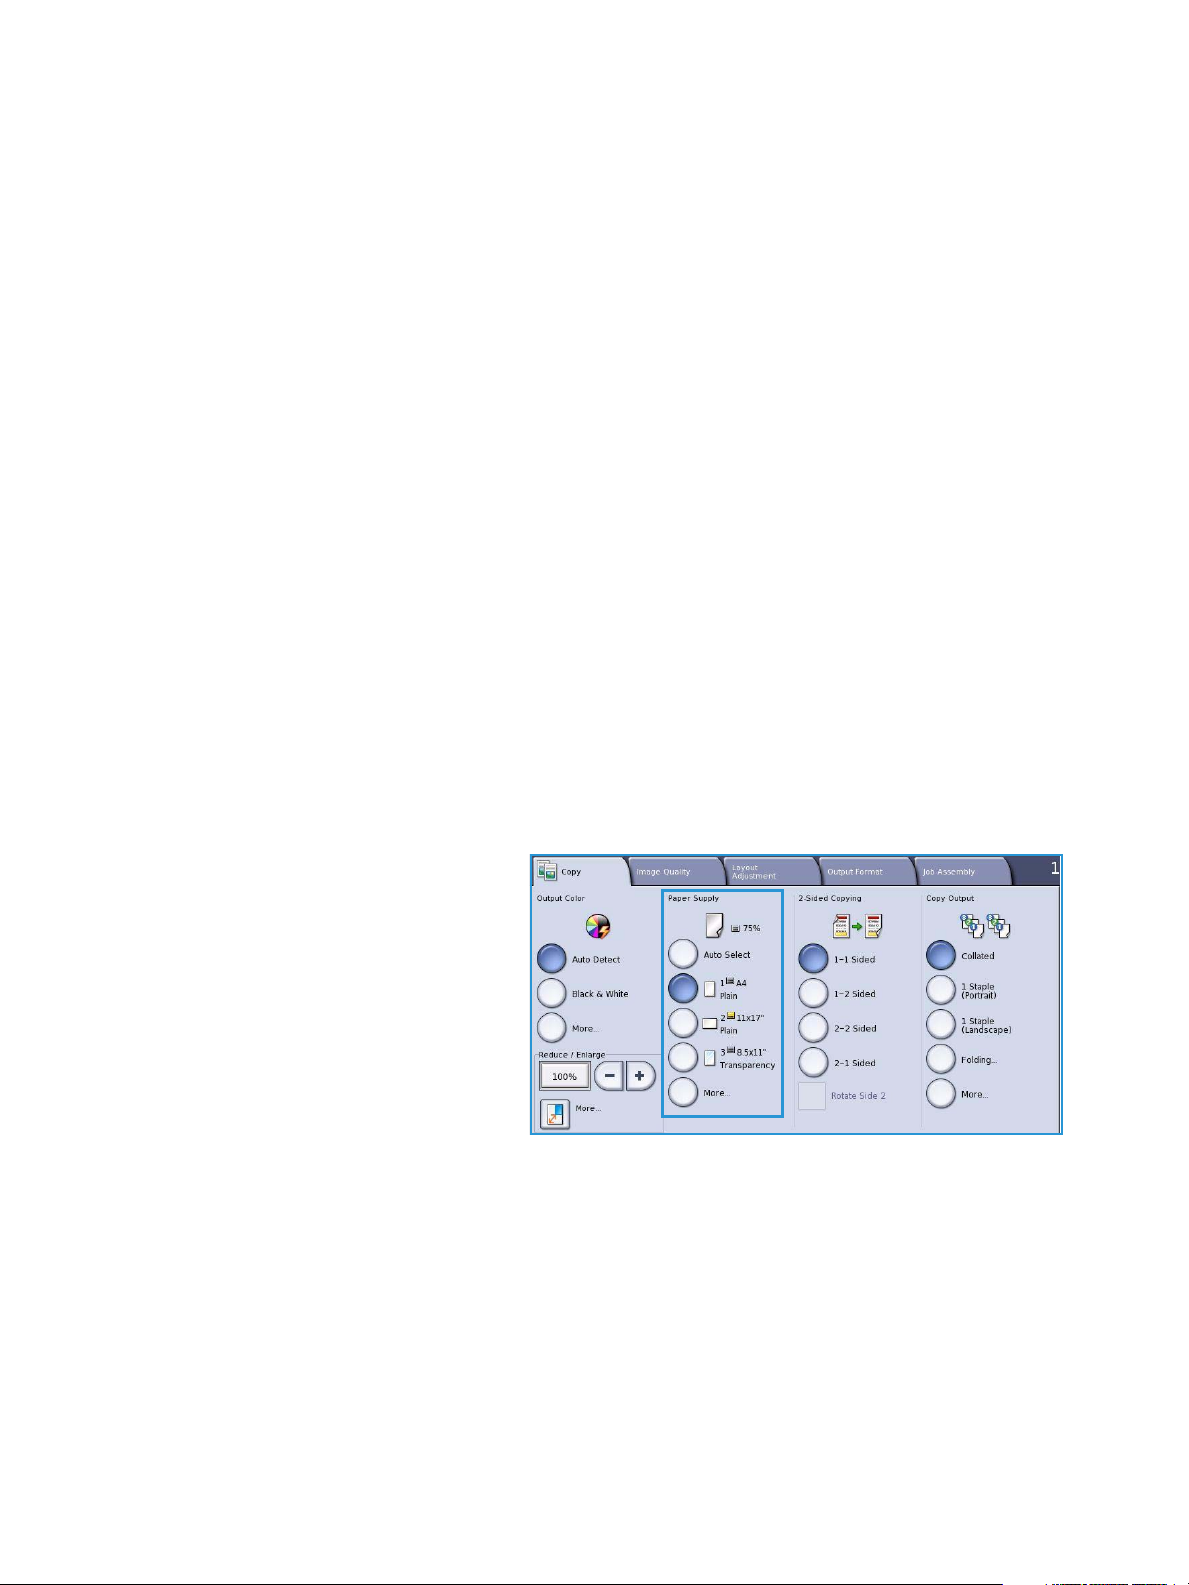
Paper Supply
On the Paper Supply section of the Copy tab you have the option to select a paper tray, the paper size
required or Auto Select. Use More... to access all the options.
• Auto Select automatically selects the
appropriate paper size for each
original based on the size of the
original and any directly selected
magnification ratios.
• Alternatively, you can select a paper
tray that contains the size and type of
paper you require. The size and type
of media loaded in each tray is
displayed.
When the More... button is selected, the
Paper Supply screen is displayed showing all the trays and the confirmed size and type of media loaded
in each tray.
• A user can select which tray to use from this list. The chosen tray is highlighted in blue.
•If the Auto Tray Switching feature has been enabled by your System Administrator and the same
size and type of media is loaded in more than one tray, the device will automatically switch from
one tray to the other when media in the active tray runs out.
2-Sided Copying
The device provides options to make one or two-sided copies from one or two-sided originals using
either the document feeder or the document glass. The options are:
• 1>1 Sided use this option if your
originals are printed on one side and
you want single-sided copies.
• 1>2 Sided use this option if your
originals are printed on one side and
you want 2-sided copies. You can also
select the Rotate Side 2 button to
have the second page rotated 180
o
.
ColorQube™ 9301/9302/9303
Copy
13
Page 14
Copy Options
• 2>2 Sided use this option if you want to make two sided copies from two-sided originals. You can
also select the Rotate Side 2 button to have the second page rotated 180
o
.
• 2>1 Sided this option will make one-sided copies from two-sided originals.
Note If using the document glass to scan originals, the device displays a message when ready to
scan side 2.
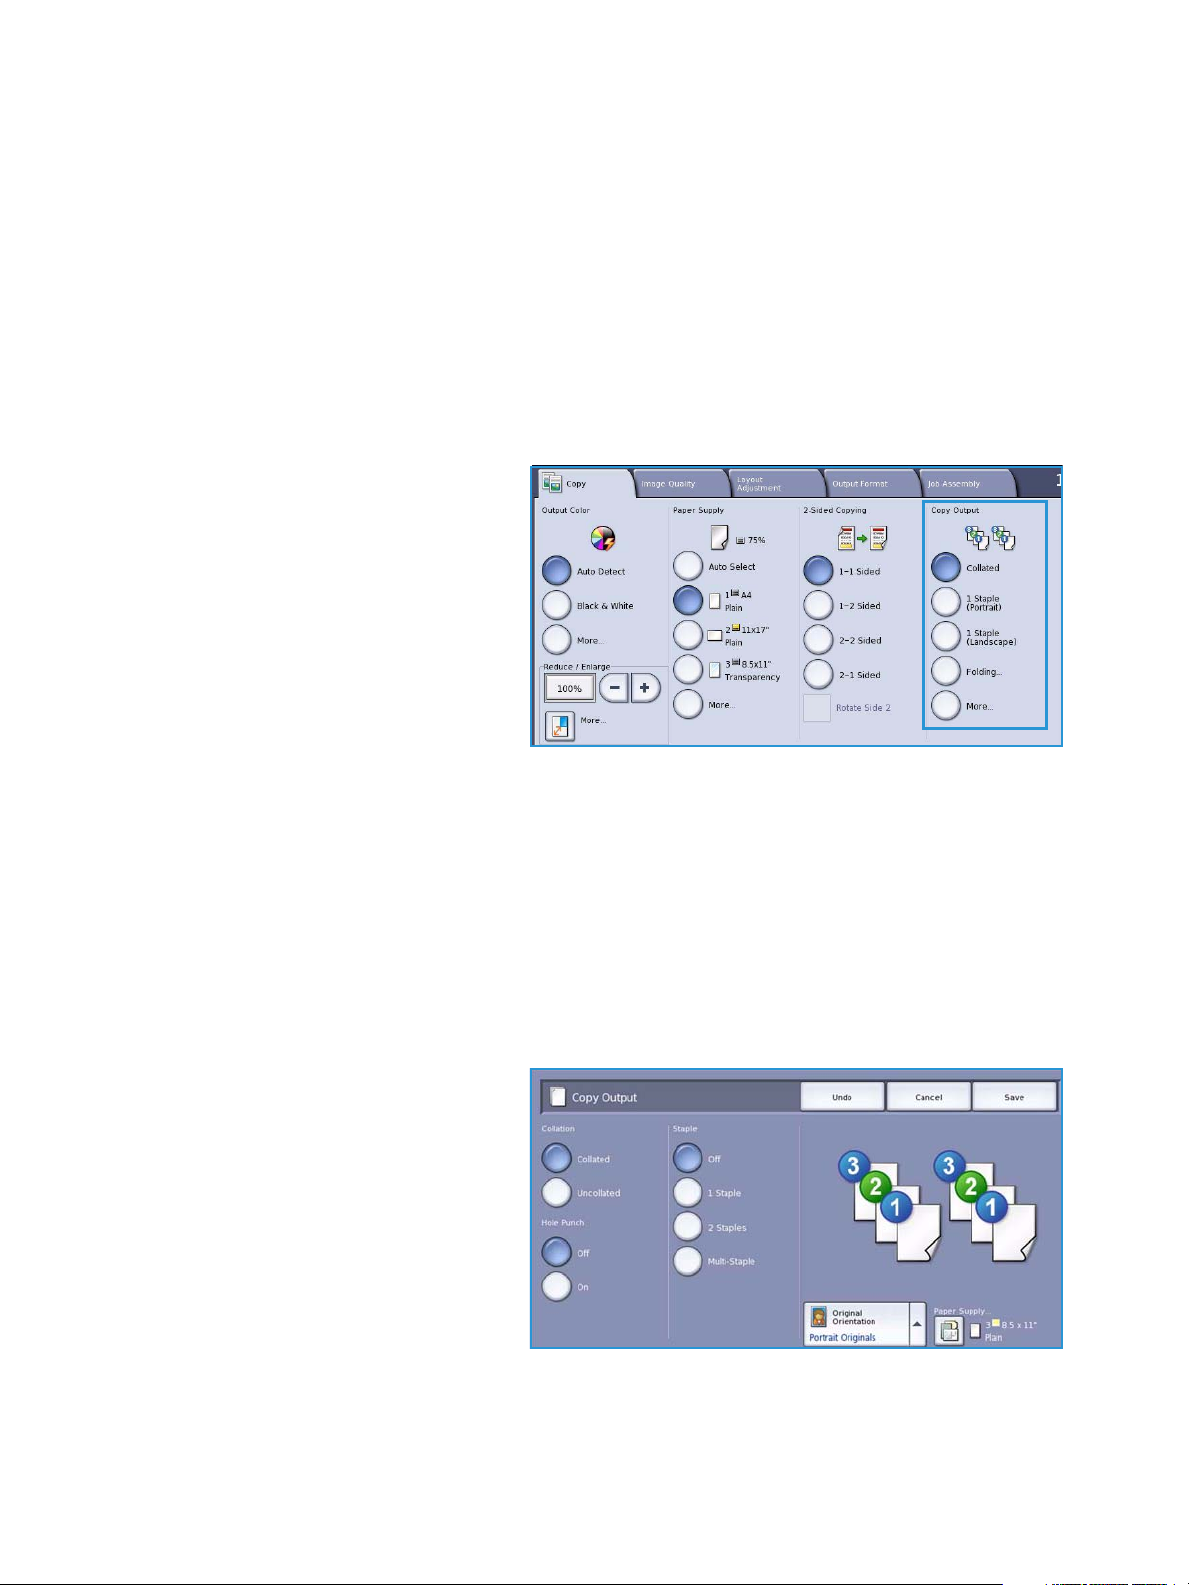
Copy Output
The most commonly used Copy Output options are selected directly from the Copy tab. The options
available are dependent on the finishing device and kits installed. Refer to Finishing Devices on
page 17.
• Collated sorts your copies into sets
1,2,3 1,2,3 1,2,3.
• Uncollated sorts your copies into
stacks 1,1,1 2,2,2 3,3,3.
• 1 Staple (Portrait) staple will be
positioned in one of the short edge
corners depending on how the
originals are loaded.
• 1 Staple (Landscape) the staple will
be positioned in one of the long edge
corners, depending on how the
originals are loaded.
• Folding a new window opens providing access to the folding options. Refer to Foldin g on page 15.
•Use More... to access additional output options.
For information about the Staple options, refer to Stapling Options on page 14.
For information about Hole Punch options, refer to Hole Punching on page 15.
Stapling Options
The stapling options available are dependent on the finishing device available and the configuration
setup. For information about the available finishing devices, refer to Finishing Devices on page 17.
• 1 Staple when this option is selected,
a single staple is positioned in the top
left corner of the output.
• 2 Staple when this option is selected,
two staples are positioned parallel to
the left or top edge of the copies.
• Multi-Staple when this option is
selected, depending on the size of
your copy paper, either three or four
staples will be positioned parallel to
the left edge or your copies. For
example:
• 4 Staples = A4 LEF, A3, 8.5x11” LEF, 11x17”, 8x10” LEF.
14
ColorQube™ 9301/9302/9303
Copy
Page 15

Copy Options
• 3 Staples = 8x10” SEF, 8.5x11” SEF, 8.5x5.5” LEF, A4 SEF, A5 LEF, 8.5x14” SEF, B5 SEF.
Note SEF is Short Edge Feed and LEF is Long Edge Feed.
•Use the Original Orientation option to select the orientation of the originals being scanned. Select
Portrait or Landscape.
•Use the Paper Supply option to select the output media required.
To achieve some of the staple options, the copy paper will need to be loaded in a specific orientation either Long Edge Feed (LEF) or Short Edge Feed (SEF) as shown in this table.
Paper Size and
Orientation
A4, 8.5x11” LEF LEF A4, 8.5x11”
A4, 8.5x11” SEF SEF A4, 8.5x11”
A4, 8.5x11” SEF SEF A4, 8.5x11”
Output Required Original Orientation
Single Staple
Top L e f t
Single Staple
Top L e f t
Single Staple
Bottom Left
Output Tray
Orientation
Note For some selections the device will rotate the image. If you are unable to staple, ensure that
Image Rotation is On in Too ls . Refer to the Administration and Accounting guide for more
information.
Hole Punching
If your device is equipped with one of the optional Hole Punch kits, either 2 Hole, 3 Hole, 4 Hole,
Swedish 4 Hole or 2 Hole Legal Punch will be available.
• Hole punching can only be selected for A4 LEF, Legal SEF and A3 (8.5x11” LEF, Legal SEF and
11x17” SEF) paper and it can be combined with a stapling option if required.
• Each sheet will be punched individually so there is no limit to the number of pages in the set.
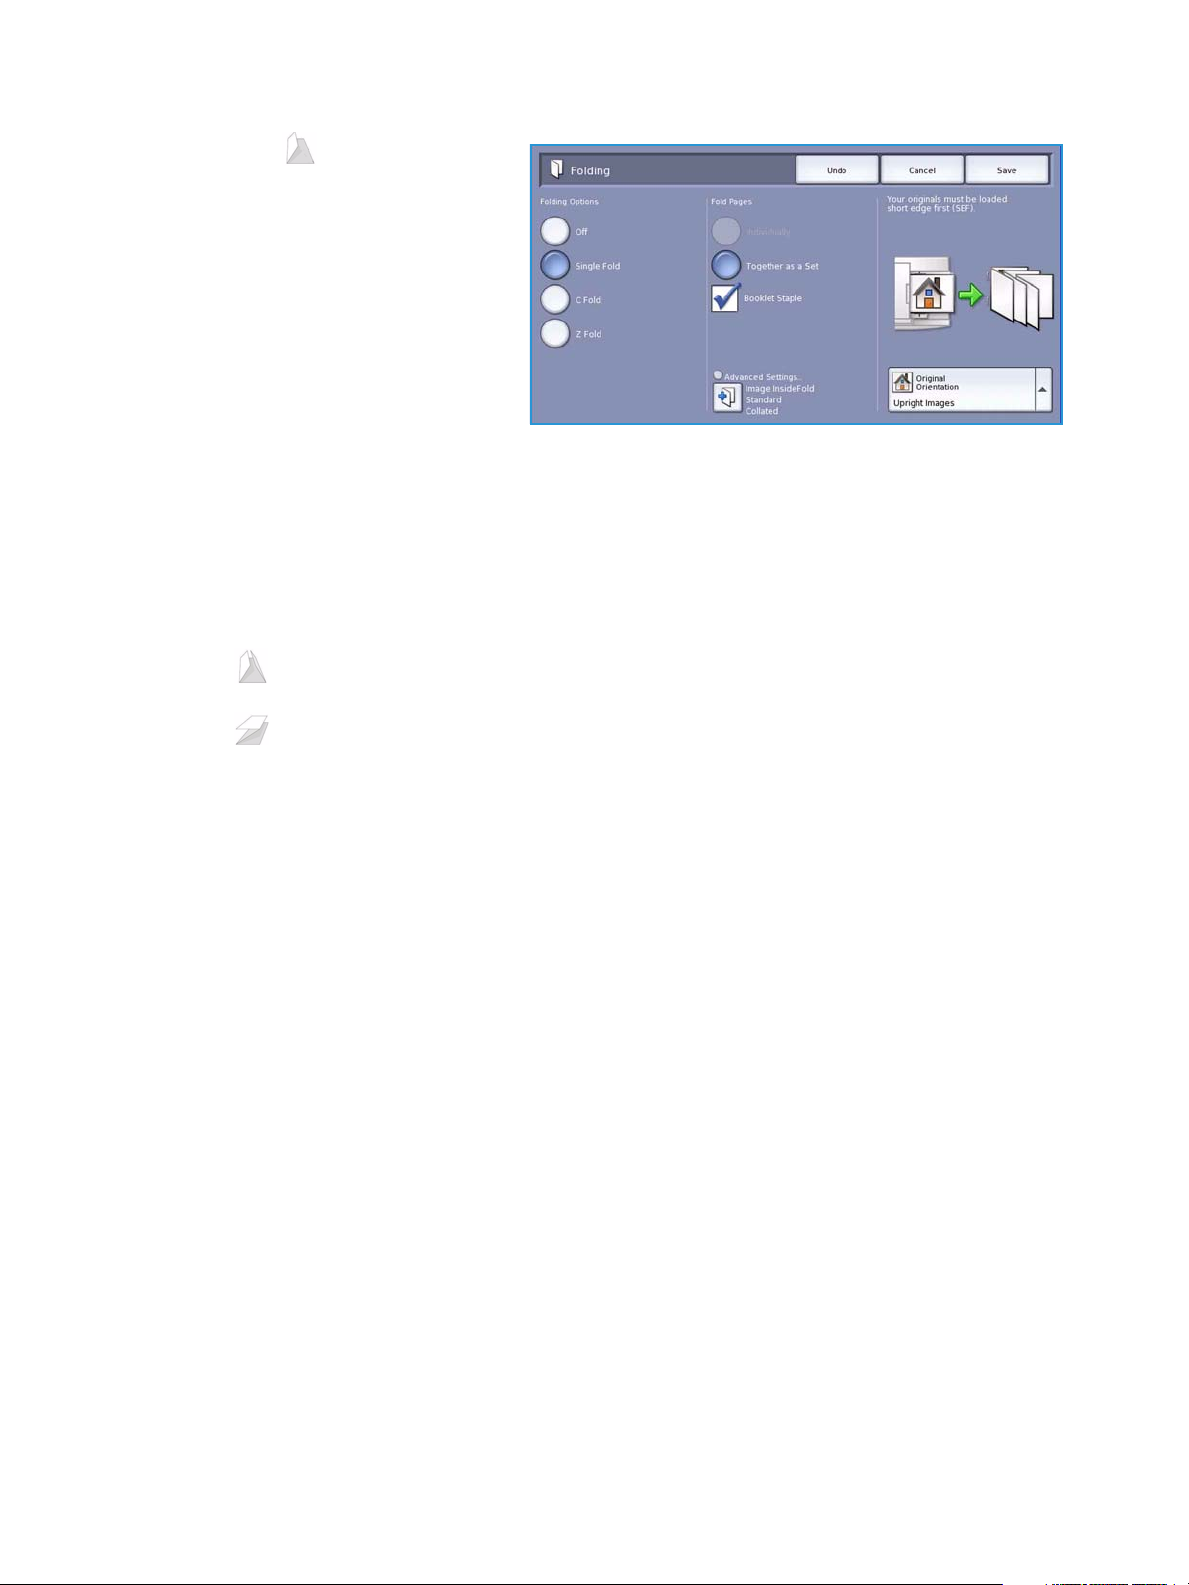
Folding
If the optional Tri-fold Module is installed on your device, A4 or 8.5x11” media in a weight range of 60
to 105 gsm (16 to 28 lb) can be folded in a Single Fold, C Fold or Z Fold. Originals must always be
loaded Short Edge Feed (SEF) and you can select the orientation of your originals - whether the images
are Upright on the page or sideways.
ColorQube™ 9301/9302/9303
Copy
15
Page 16
Copy Options
• Single Fold the page will be
folded in half and you can select the
following options:
• Individually is used to fold each
page individually.
• Together as a Set is used to fold
all the pages together to create
single booklet.
• Booklet Staple is selected to fold
and staple the output. This is
only available with the To ge t he r
as a Set option.
• Advanced Settings are used to select additional layout options:
• Originals options allow you to select if your originals are standard or already formatted
as a booklet.
• Side 1 Image options are used to select if the image on the first side is printed inside or
outside the fold.
• Collation is used to select collated or uncollated output.
• C Fold the page will be folded as shown. Select whether to have the image printed on the
inside or outside of the fold, and Collated for sets or Uncollated for stacks.
• Z Fold the page will be folded as shown. Select whether to have the image printed on the
inside or outside of the fold, and Collated for sets or Uncollated for stacks.
•Use the Original Orientation option to select the orientation of the originals being scanned.
Select Upright Images or Sideways Images. The images will be rotated as required.
16
ColorQube™ 9301/9302/9303
Copy
Page 17
Finishing Devices
5
6
1
2
4
3
1
425
3
6
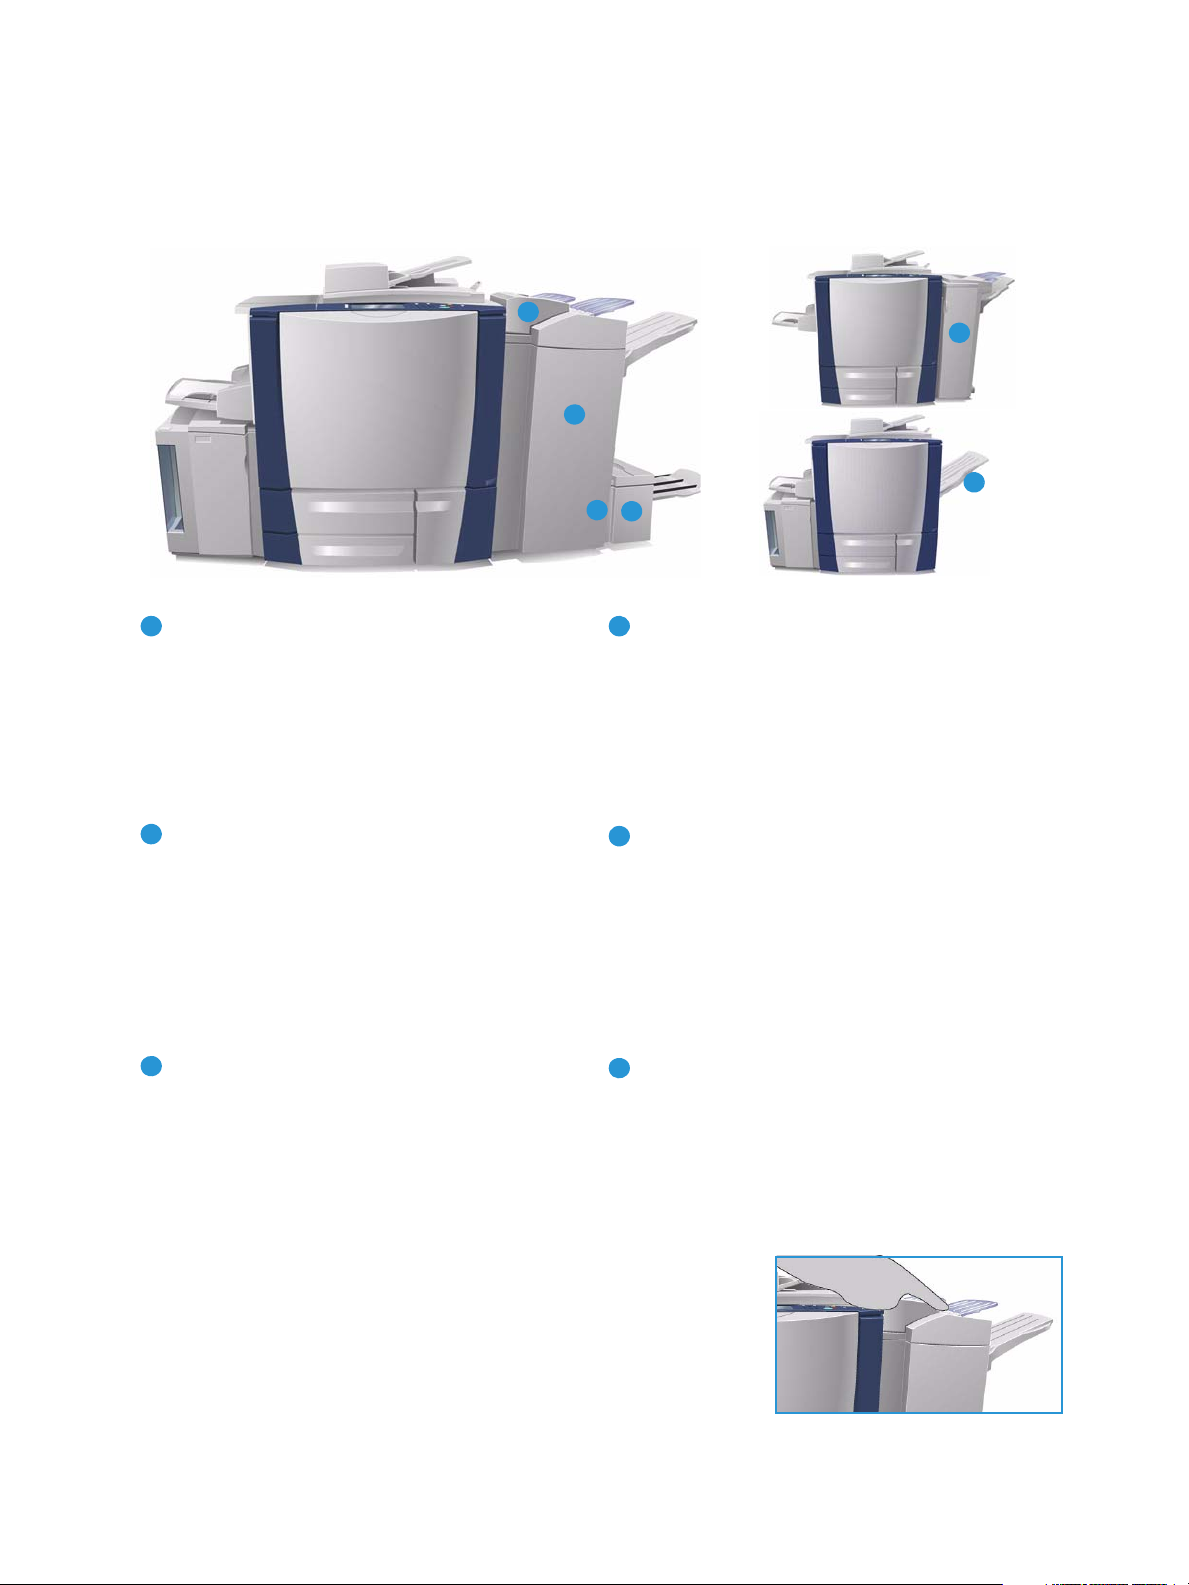
Your device is equipped with one of the following finishing devices:.
Copy Options
High Volume Finisher: The High Volume Finisher
has a comprehensive range of finishing options.
It collates, offsets, stacks and staples your
output. The top tray can receive up to 250 sheets
of paper and the stacker tray up to 3000 sheets
of paper. This finisher can be fitted with the
optional 2, 3 or 4 Hole-Punch kit and the Tray 6
(Post Process Inserter) kit.
Booklet Maker: The High Volume Finisher is also
available with a Booklet Maker which enables
booklets to be folded and stapled. Folded sheets
and booklets are delivered to the booklet tray
which can hold between 10 and 30 booklets,
depending upon the number of pages. If the flap
on the right of the tray is folded down, an
unlimited number of booklets can be collected in
a suitable container.
Tri-fold Module: If you have a High Volume
Finisher with Booklet Maker, a Tri-fold module
can also be fitted. This enables your device to trifold booklets. With the Tri-fold module fitted, the
capacity of the finisher stacker tray is reduced to
2000 sheets. Refer to Fo ld ing on page 15 for
information about the folding options.
Tray 6 (Post Process Inserter): This optional
accessory is a feeder that sits on top of the
finisher unit. It enables pre-printed sheets to be
inserted into sets created by your device. The
inserted sheets do not go through the copy or
print process in the device. For more information
about using Tray 6 (Inserter) refer to the Paper
and Media guide.
Office Finisher: This finisher is capable of
receiving up to 250 sheets of paper in the top
tray and up to 2000 sheets of paper in the
stacker tray. The Office Finisher can be fitted
with the optional 2, 3 or 4 Hole-Punch Kit.
Offsetting Catch Tray (OCT): The Offsetting
Catch Tray holds up to 500 sheets of 80 gsm (20
lb) paper and is located on the right-hand side of
the device.
Note Thick stacks of paper can be removed from your finisher
more easily by using the pause function. Press the button as
shown to lower the stacker tray to a more convenient height.
Then press the button again to return the stacker tray to normal
height. Alternatively, it automatically resets after 30 seconds.
ColorQube™ 9301/9302/9303
17
Copy
Page 18

Copy Options
Convenience Stapler
This optional device is used to manually staple documents.
Documents can be stapled straight or at an angle. The Convenience
Stapler can staple between 2 sheets of 64 gsm (18 lb), and 50 sheets
of 80 gsm (20 lb). The Staple Cartridge holds 5,000 staples.
• To use the Convenience Stapler hold your documents face up and
slide the corner to be stapled into the stapler.
During stapling the indicator light on the top of the stapler is lit.
• The stapler automatically staples the documents.
18
ColorQube™ 9301/9302/9303
Copy
Page 19
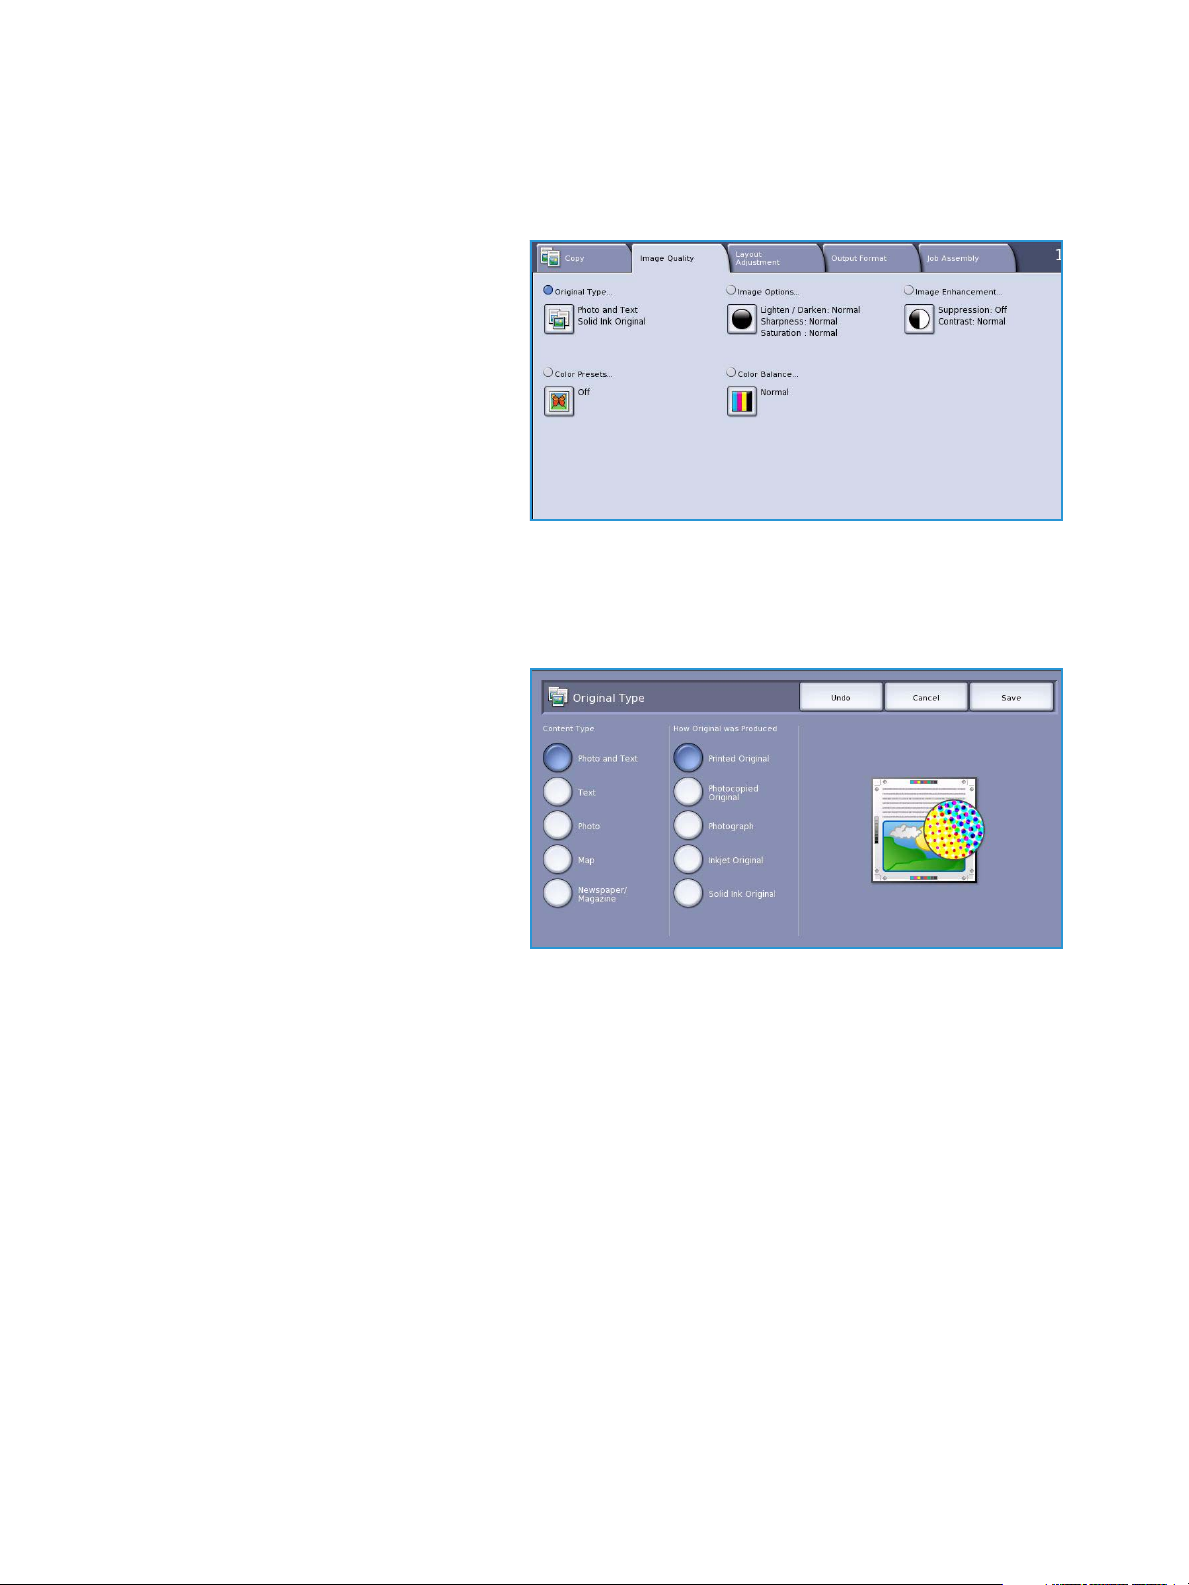
Image Quality
Image Quality
This section describes how to enhance the
quality of your output and the options
available. Options enable you to set the
the type of original, adjust the lightness,
darkness, contrast and sharpness of the
image, and also to customize the settings
for color output.
Original Type
Use this option to define the type of
original being copied. Making the correct selection enhances the quality of your output. The options
are:
Content Type
• Photo & Text is recommended for
originals containing high quality
photographs and halftones. Using
this setting the output will contain
medium quality pictures though the
sharpness of text and line art is
slightly reduced.
• Text produces sharper edges and is
recommended for text and line art.
• Photo is used specifically for originals
containing photos, magazine pictures
or continuous tones without any text or line art. Produces the best quality for photos but reduced
quality text and line art.
• Map is used if your original is a map or contains intricate line art and text.
• Newspaper / Magazine is used if your original is from a magazine or newspaper that contains
photographs or text.
How the Original was Produced
• Printed Original is for originals that have come from a magazine, book or newspaper or that have
been printed on a large printing device.
• Photocopied Original is for originals that are photocopies.
• Photograph is for high quality photographic originals.
• Inkjet Original is for originals that have been produced using an inkjet printer.
• Solid Ink Original is for originals produced by a solid ink printing process, such as output from this
device.
ColorQube™ 9301/9302/9303
Copy
19
Page 20
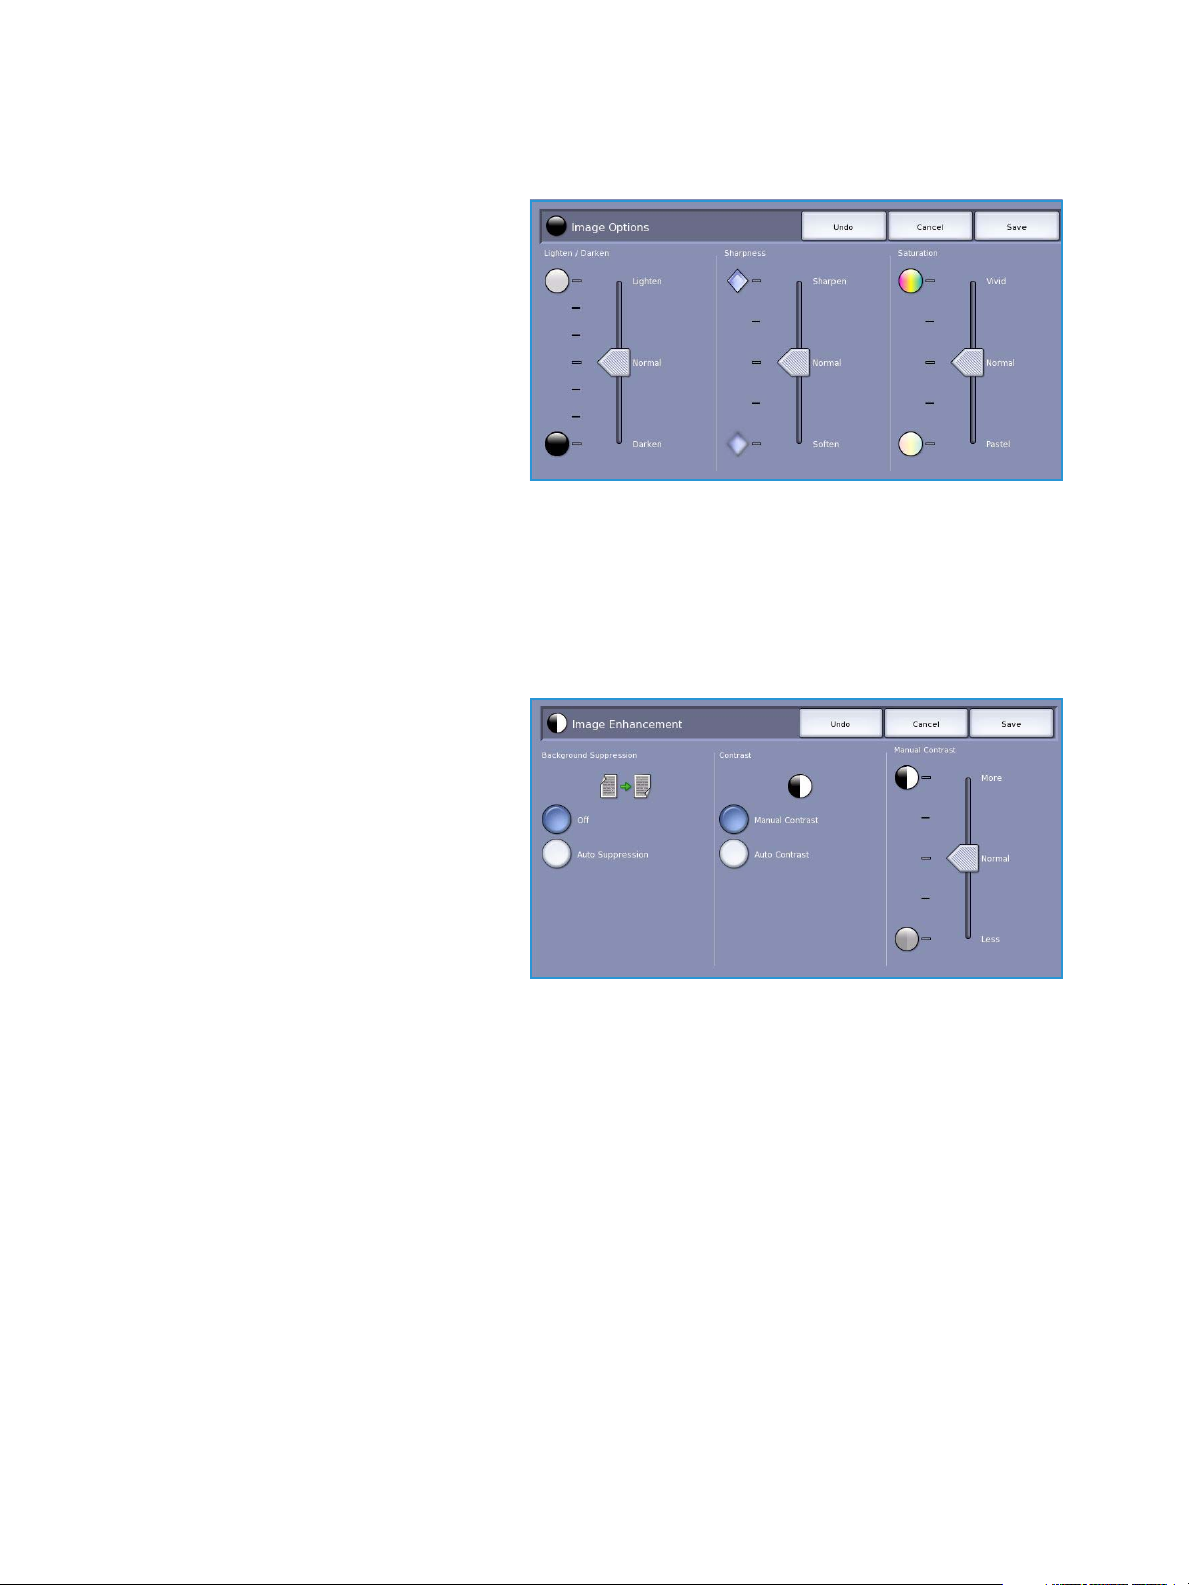
Image Quality
Image Options
Image Options is used to change the
appearance of the copy output. The
options are:
• Lighten / Darken provides manual
control to adjust the lightness or
darkness of the scanned images.
Move the indicator down to darken
the image or up to lighten the image.
• Sharpness provides manual control to
adjust the sharpness of the scanned
images. Move the indicator up to
sharpen the image. Move the indicator down to soften the scanned image.
• Saturation controls the balance between vivid and pastel shades of the image. Move the
indicator towards Vivid for more saturated colors. Move the indicator towards Pastel for less
saturated colors.
Image Enhancement
Image Enhancement provides options for
improving the quality of the output, by
reducing the background or adjusting the
contrast. The options are:
• Background Suppression enhances
originals that have colored
backgrounds, by reducing or
eliminating the background on the
output copy. This option is useful
when your original is on colored
paper.
• Select Auto Suppression to automatically suppress unwanted background.
• Select Off to turn the Background Suppression feature off, particularly when:
•The Darken adjustment does not produce a satisfactory output from light originals.
• The original has a gray or colored border, such as a certificate.
• You want to bring out fine detail that was lost due to a dark edge when using bound
originals.
• Contrast controls the image density on the output and compensates for an original that has too
much or too little contrast on the image.
• Select Manual Contrast to set the level of contrast yourself. Move the indicator towards the
More setting to reproduce more vivid blacks and whites for sharper text and lines but less
detail in pictures. Move the indicator towards the Less setting to reproduce more detail in
light and dark areas of the original.
• Select Auto Contrast to automatically set the contrast level depending on the original being
scanned.
20
ColorQube™ 9301/9302/9303
Copy
Page 21
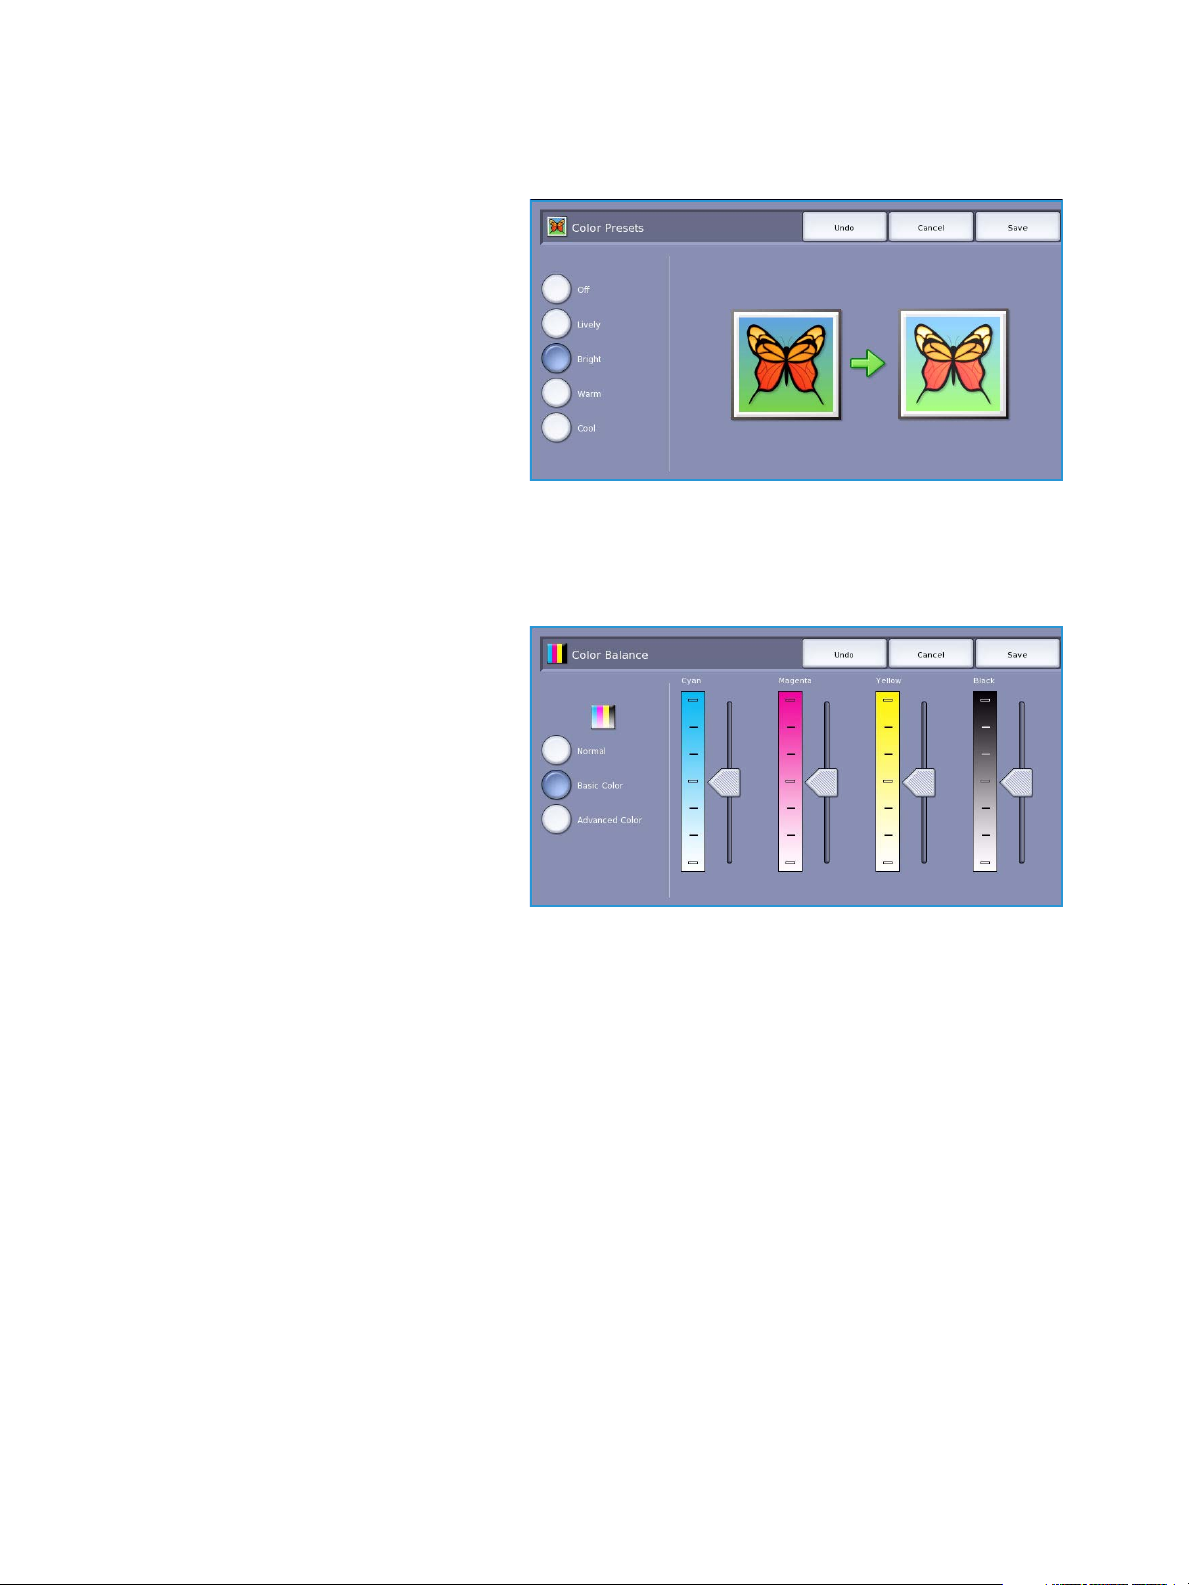
Image Quality
Color Presets
Color Presets provides options for
enhancing the quality of your color copies.
Selecting a color preset option optimises
all the image quality features. The options
are:
• Lively increases the depth of color of
your copies.
• Bright increases the lightness of your
copies.
• Warm brings out the red tones in the
output.
• Cool brings out the blue tones in the output.
Color Balance
Color Balance enables you to adjust the
balance between individual colors and the
overall amount of color on the copies. The
options are:
• Normal leaves the color the same as
the original.
• Basic Color adjusts the individual
density levels for each of the four
process colors - yellow, magenta, cyan
and black. Move the indicator up the
scale for increased density and down
the scale for less density for each color.
• Advanced Color adjusts the highlight, mid-tone and shadow density levels in each of the four
process colors. Select a process color and move the indicator up the scale for increased density and
down the scale for less density for each of the three options.
ColorQube™ 9301/9302/9303
Copy
21
Page 22
Layout Adjustment
Layout Adjustment
Using the Layout Adjustment features you
can change the appearance of your output
image. This includes shifting the image,
producing a mirror image, deleting an area
from any or all of the edges of the original
and copying from book originals.
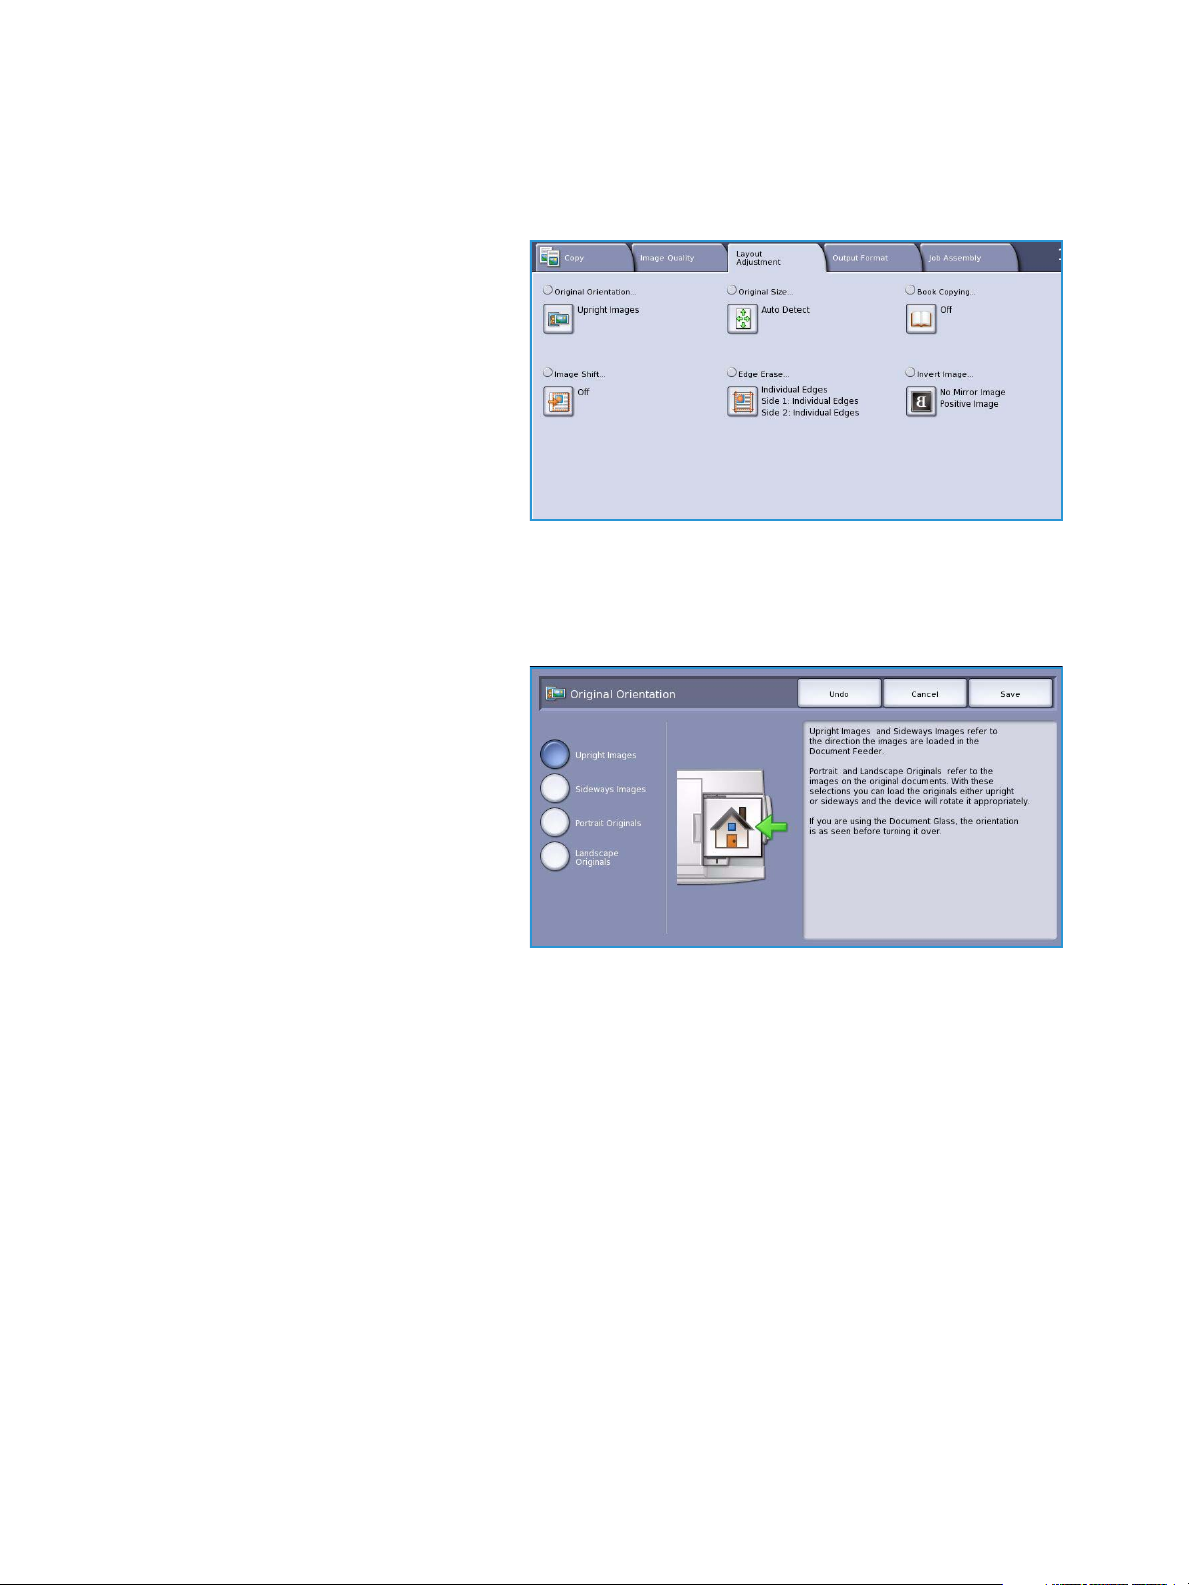
Original Orientation
Use to specify the orientation of the originals being scanned. The options are:
• Upright Images refers to the
direction the images are loaded in the
document feeder. Use this option if
your images are in the orientation
matching the image shown when
loaded in the document feeder.
• Sideways Images refers to the
direction the images are loaded in the
document feeder. Use this option if
your images are in the orientation
matching the image shown when
loaded in the document feeder.
• Portrait Originals refers to the image orientation on the original documents. Use this option to
select a Portrait image orientation. Originals can be fed in any direction.
• Landscape Originals refers to the image orientation on the original documents. Use this option to
select a Landscape image orientation. Originals can be fed in any direction.
Select Save to save your selections and exit.
22
ColorQube™ 9301/9302/9303
Copy
Page 23
Layout Adjustment
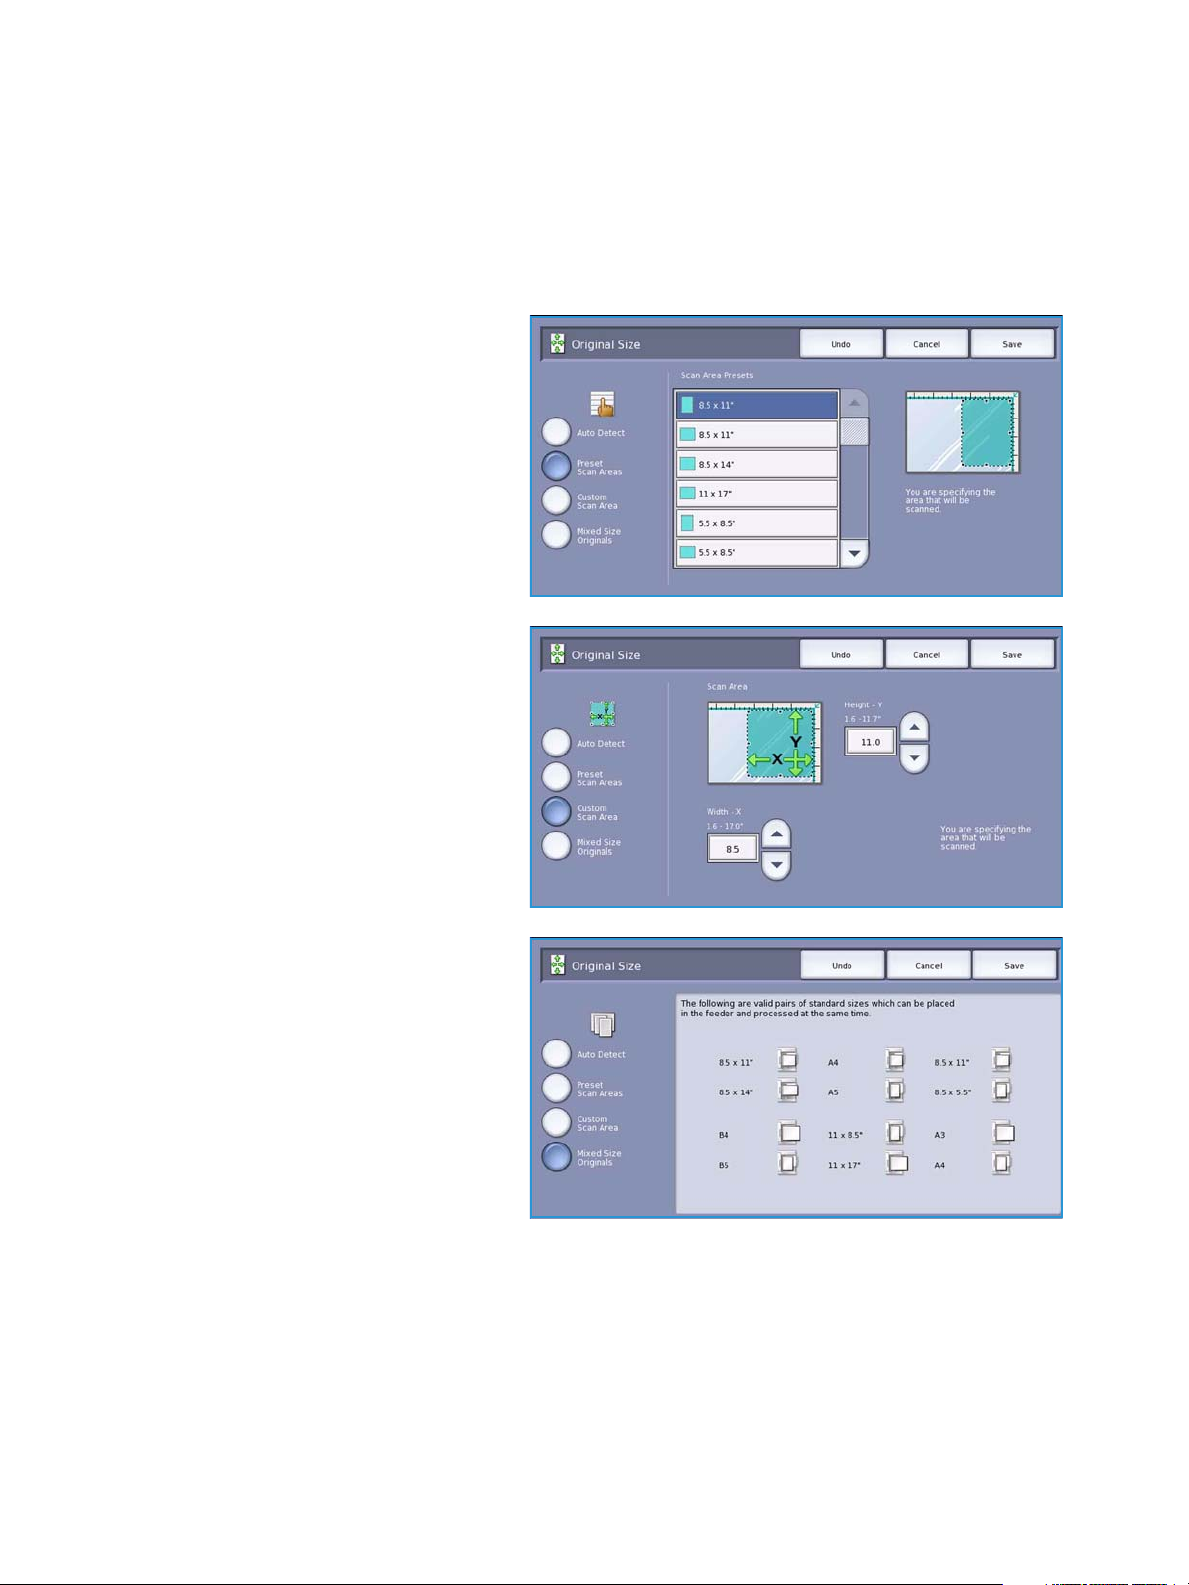
Original Size
Original Size allows you to specify automatic size detection of the originals, mixed size originals, or the
specific size of the image to be scanned. The options are:
• Auto Detect is the default setting and enables automatic size sensing. The size detected is
matched to a standard size paper.
• Preset Scan Areas allows you to
define the size of your original from a
list of pre-set, standard original sizes.
You can view the list by using the
scroll bar.
• Custom Scan Area is used to enter a
specific area for scanning. Measure
the area to be scanned on the original
and enter the X and Y axis
measurements into the fields
provided. Only the area specified is
scanned.
• Mixed Size Originals allows you to
scan documents containing different
size pages. The pages must be the
same width, like A4 LEF and A3 SEF
(8.5x11” LEF and 11x17” SEF). Other
combinations are shown on the
screen. The device detects the size of
the documents and can produce the
following output:
•If Auto Reduce/Enlarge and a
specific Paper Supply is selected,
all the images are reduced or
enlarged and copied onto the same size paper.
•If Auto Paper Supply is selected, the images are copied size for size and a mix of paper sizes
will be output.
ColorQube™ 9301/9302/9303
Copy
23
Page 24
Layout Adjustment
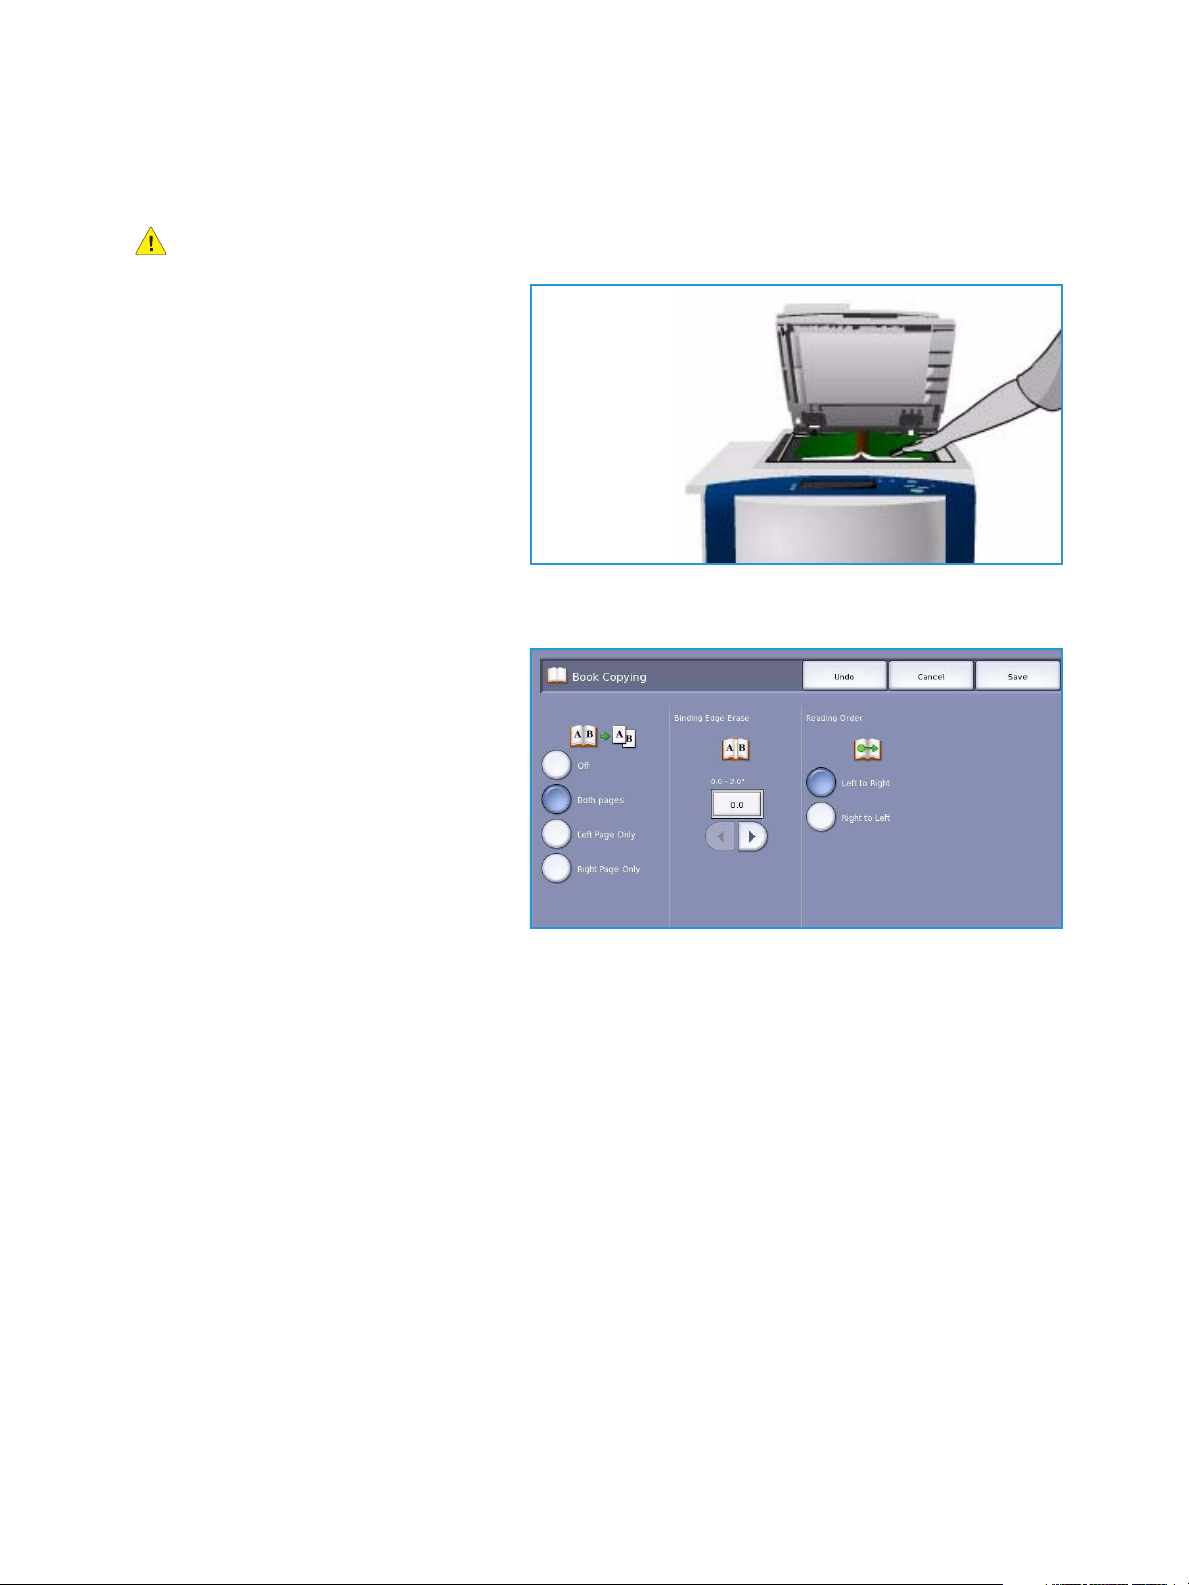
Book Copying
CAUTION: Do Not close the document feeder when scanning bound originals.
This feature enables you to specify which
page or pages of a book are to be scanned.
The book original is placed face down on
the document glass with the spine of the
book lined up with the marker on the rear
edge of the glass. Align the top of the
bound original against the rear edge of
the document glass.
The device will identify the size of the
original during scanning. If the pages have
a black or dark colored border the device
will assume that the pages are smaller than they really are. To overcome this use the Custom Scan
Area feature in Original Size to enter the exact size of the page. Refer to Original Size on page 23.
• Both Pages use to scan both pages,
the left page of the book will be
scanned first. Use the arrow buttons
to specify an amount from 0 to 50
mm (0 to 2”) to be deleted from the
center of the book in order to delete
unwanted marks reproduced from the
gutter of the book.
• Left Page use to scan the left page
only. Use the arrow buttons to specify
an amount from 0 to 25mm (0 to 1”)
to be deleted from the right side of
the page in order to delete unwanted marks reproduced from the gutter of the book.
• Right Page use to scan the right page only. Use the arrow buttons to specify an amount from 0 to
25mm (0 to 1”) to be deleted from the left side of the page in order to delete unwanted marks
reproduced from the gutter of the book.
• Reading Order use to select if the pages read from Left to Right or Right to Left.
Note The Reading Order option may not be displayed if it has not been enabled in Too ls . Refer to
the Administration and Accounting guide for more information.
Select Save to save your selections and exit.
Several pages of a bound document can be copied using the Build Job feature. Refer to Build Job on
page 42 for more information.
24
ColorQube™ 9301/9302/9303
Copy
Page 25
Layout Adjustment
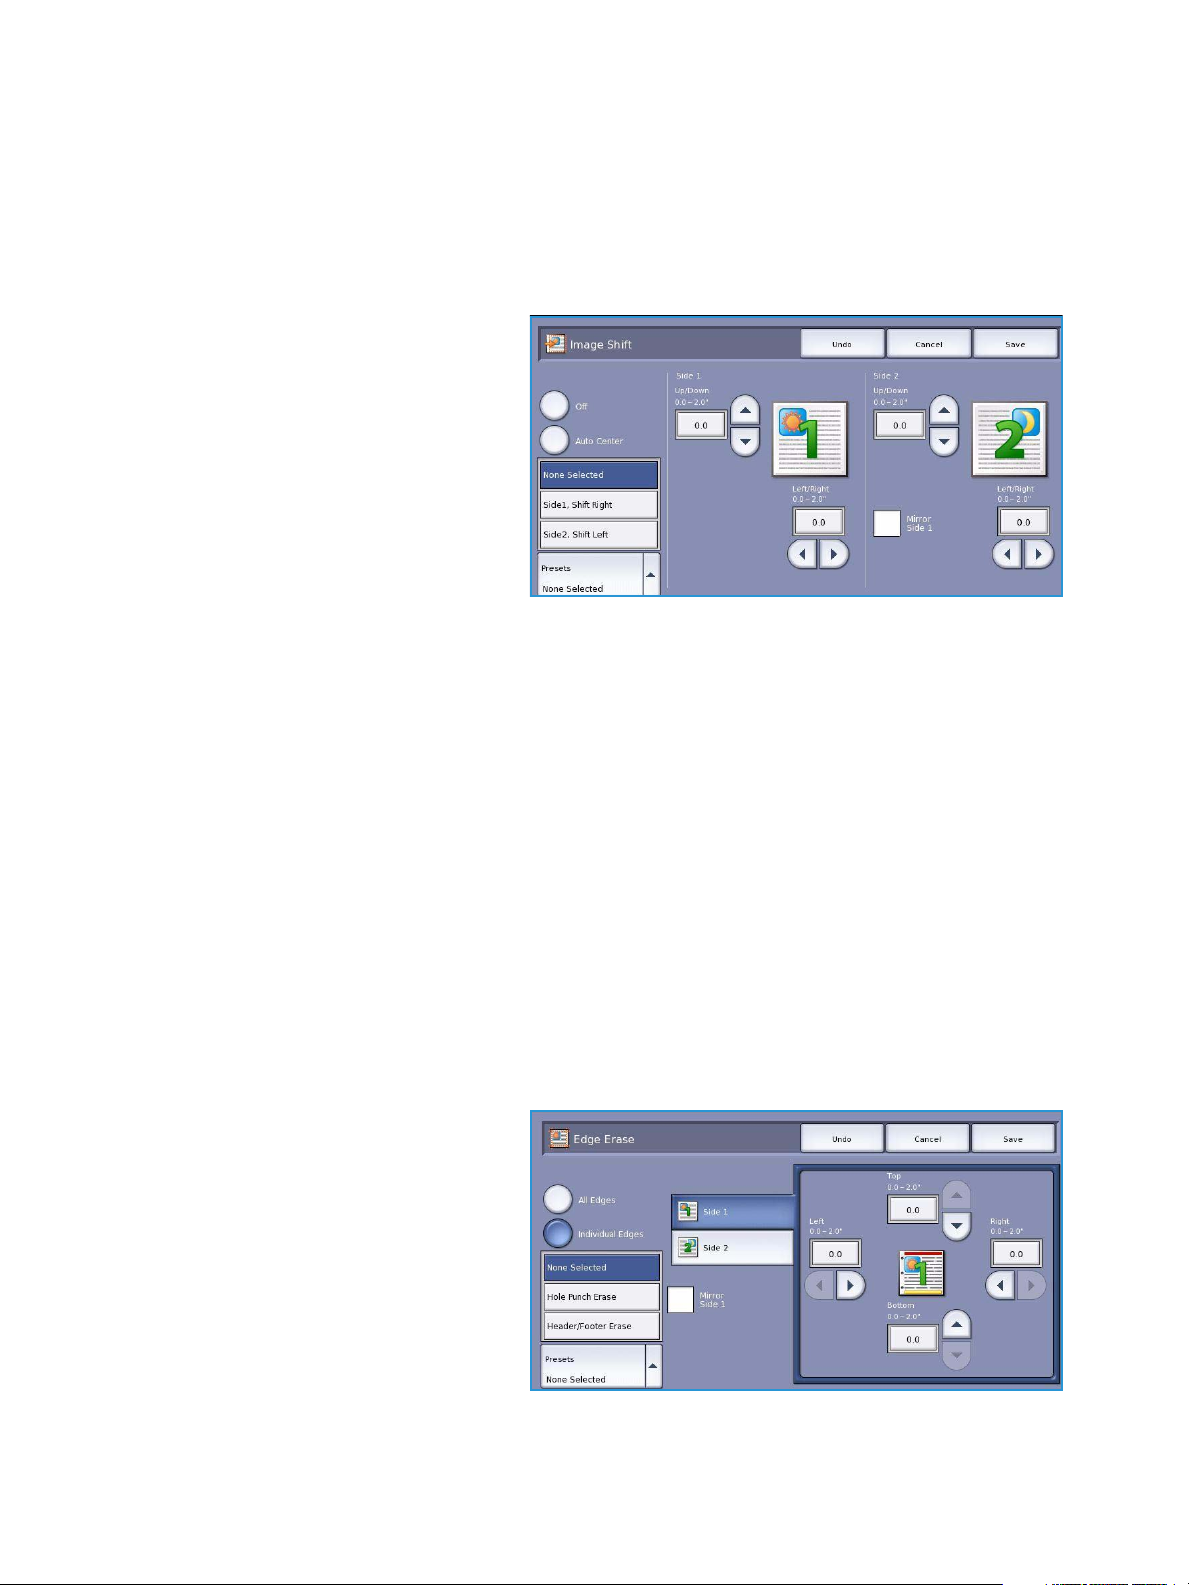
Image Shift
Image Shift allows you to move the position of the image on the output page. The options are:
• Auto Center automatically centers the scanned image on the output paper. To work effectively,
the original should be smaller than the selected output media or alternatively, the image should
be reduced.
• Margin Shift moves the image up /
down or left / right on the page to
give a bigger or smaller top and left
margin. Enter the shift required by
selecting a field or use the arrow
buttons.
Shift is entered in 1 mm (0.1”)
increments up to 50 mm (2.0”).
When copying 2-sided there are two
options:
• Adjust the margin of side two
independently of side one.
• Create a mirror image of side one to provide a binding margin.
• Presets provide access to commonly used shift settings and are customized by the System
Administrator using Tool s.
Edge Erase
Edge Erase enables you to specify how much of the image to erase around the edges of your
document. For example, you can remove the marks caused by punched holes or staples in your original.
Note The device applies an automatic edge deletion to all printed output.
The options are:
• All Edges is used to erase an equal amount from all the edges. Use the arrow buttons to adjust the
amount to be erased from 0 to 50 mm (0 to 2.0”). All marks or defects within the measurement set
are deleted.
• Individual Edges enables an individual amount to be erased from each of the edges, on both the
first and second sides.
Use the arrow buttons to adjust the
amount for each edge, from 0 to
50 mm (0 to 2.0”).
• Mirror Side 1 can be selected to erase
exactly the same amount on the
Side 2 image as selected for Side 1.
• Presets provide access to commonly
used erase settings and are
customized by the System
Administrator using Tool s.
ColorQube™ 9301/9302/9303
Copy
25
Page 26
Layout Adjustment
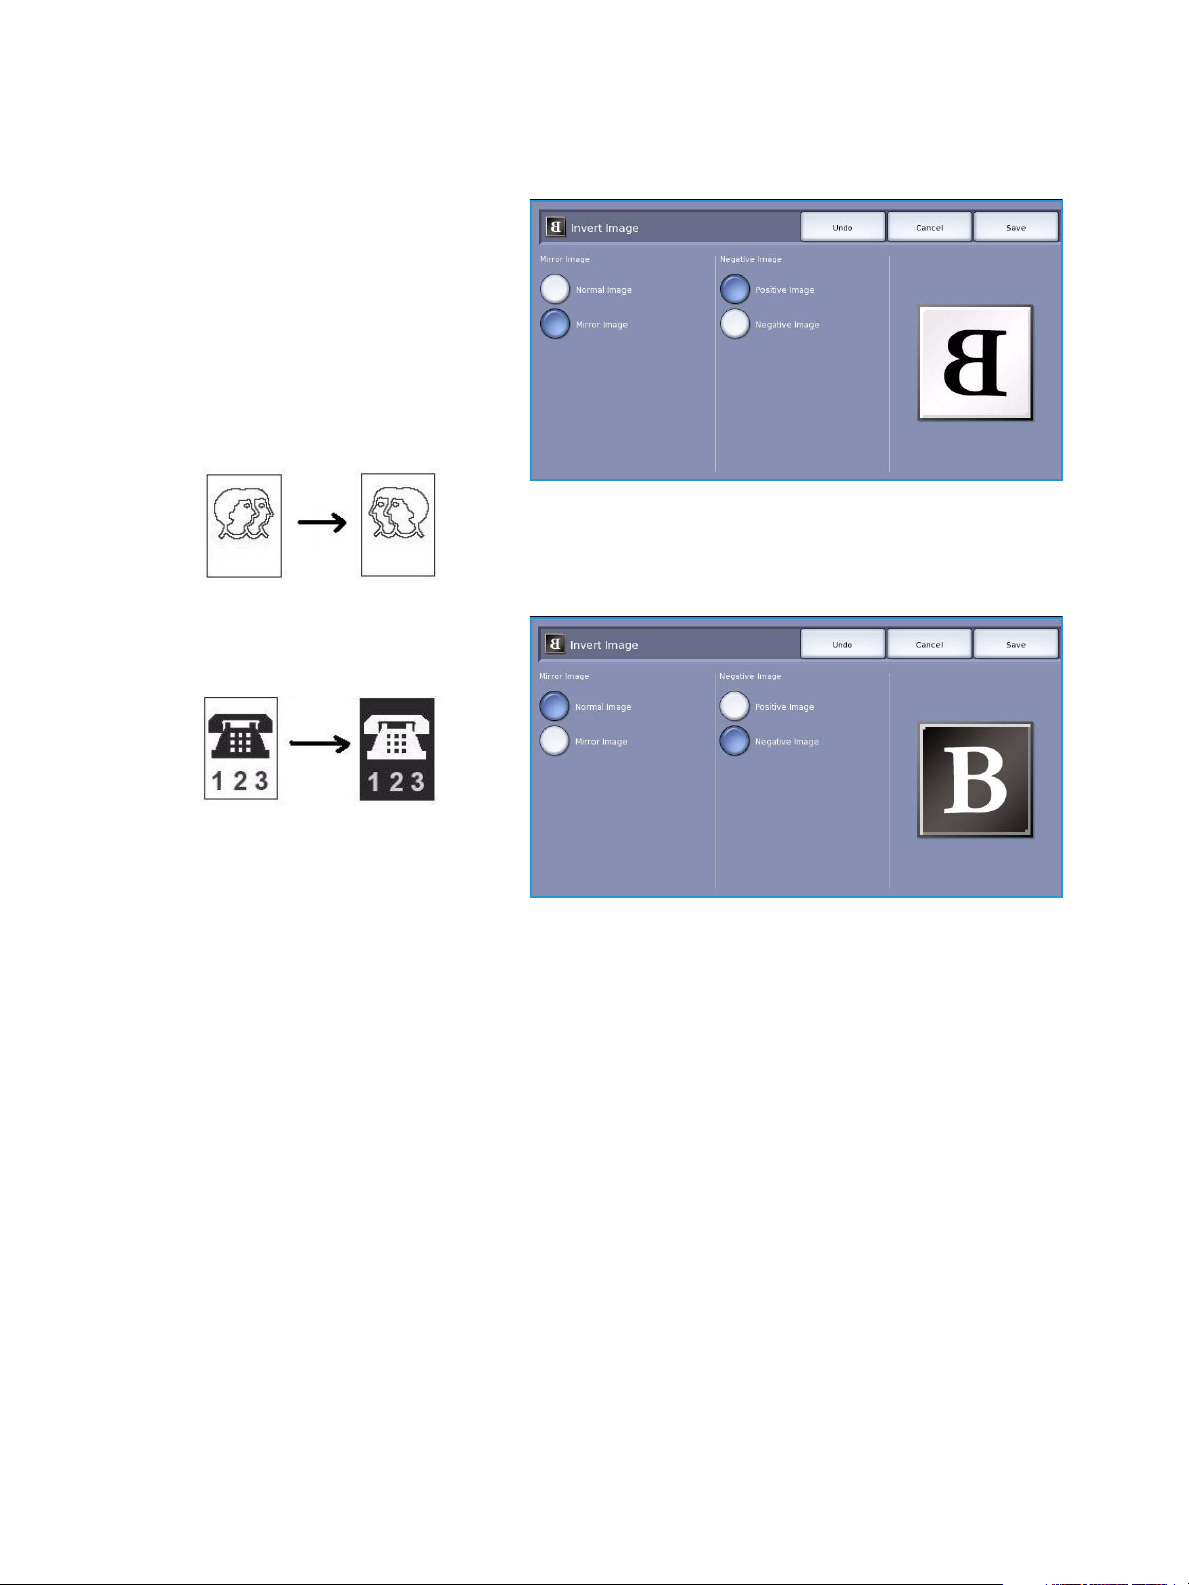
Invert Image
Invert Image allows you to reverse the
image or create a negative. This feature is
useful for originals that have a substantial
amount of dark background or light text
and images, saving on ink usage.
The options are:
• Mirror Image reverses the original
image creating a mirror of the
original.
• Negative Image converts the dark
image areas to light, and the light
image areas to dark.
26
ColorQube™ 9301/9302/9303
Copy
Page 27

Output Format
Output Format
The Output options allow you to
manipulate the copied images and
enhance the appearance and style of your
copy jobs. For example, you can add covers
or annotations, create booklets, combine
several images onto one page and
interleave transparencies.
Booklet Creation
Booklet Creation enables the production of booklets from 1 or 2 sided originals. The device will scan
your originals and automatically reduce and arrange the images in the correct sequence on your
selected copy paper, so that a booklet is created when the copy set is folded in half.
A cover can be inserted onto the booklet automatically
by selecting the Special Pages option from the Output
Form at tab.
If your device is fitted with the High Volume Finisher
with Booklet Maker you can use the Booklet Creation
feature to automatically produce folded and stapled
booklets. The following Booklet Maker specifications
apply:
• Paper Sizes A3, 11x17”, A4, 8.5x11”, 8.5x13” and
8.5x14”.
• All media must be Short Edge Feed (SEF).
• Booklet thickness:
•For Folded and Stapled booklets a maximum of 15 sheets of 80 gsm (20 lb) or equivalent
thickness. For example you can have 13 sheets of 80 gsm (20 lb) and a cover sheet of
160 gsm (43 lb).
•For Folded Only booklets a maximum of 5 sheets of 80 gsm (20 lb) or equivalent thickness.
For example you can have 3 sheets of 80 gsm (20 lb) and a cover sheet of 200 gsm (53 lb).
Refer to Finishing Devices on page 17 for more information.
ColorQube™ 9301/9302/9303
Copy
27
Page 28
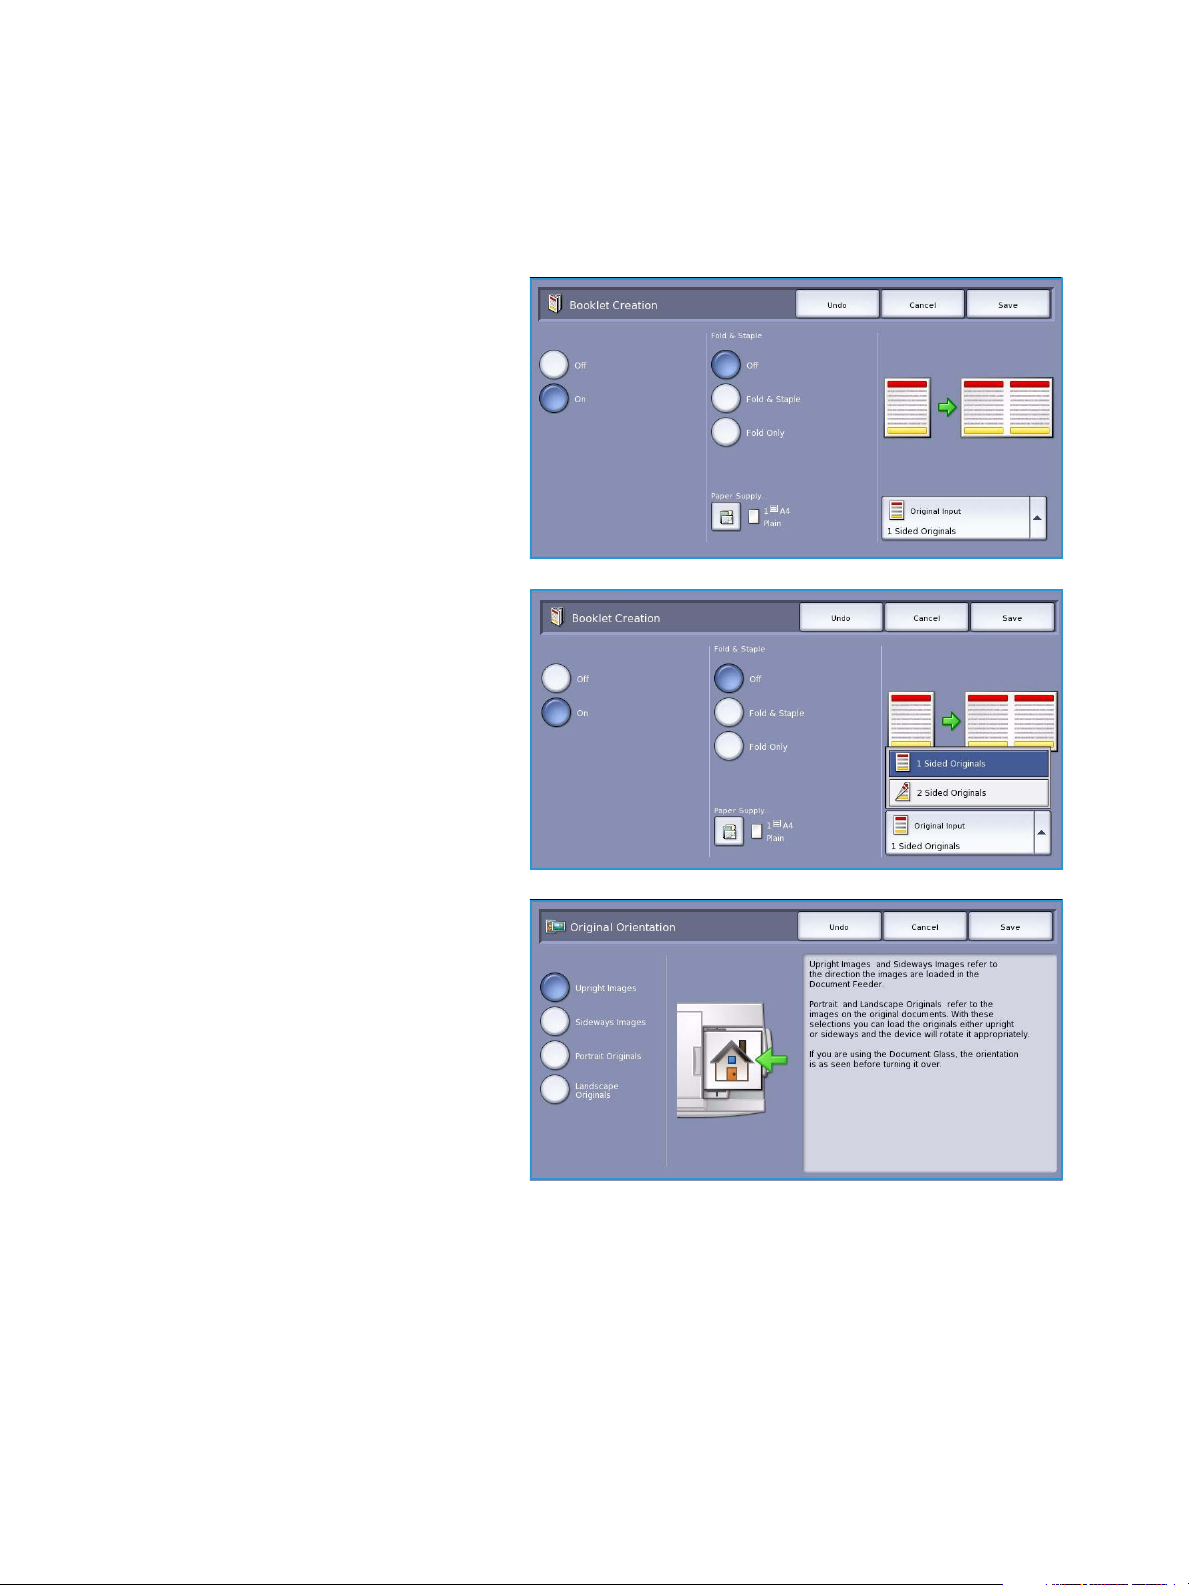
Output Format
To create a booklet:
1. Select Booklet Creation and On.
Note Booklet Creation is not available if Auto Paper is selected. Select an alternative Paper
Supply option.
2. Select the Paper Supply button and
select the tray that contains the paper
you want to use.
If using the High Volume Finisher with
Booklet Maker to fold and staple your
output, a Short Edge Feed (SEF) Paper
Supply must be selected.
3. From the Original Input drop-down
menu, select either 1 Sided Originals
or 2 Sided Originals according to the
originals you are using.
4. If available, select either Fold or Fold
and Staple as required and select
Save to confirm your selections.
5. Load your originals into the document
feeder.
6. Use the Original Orientation option
on the Layout Adjustment tab to
select the correct feed and image
orientation for the originals. Refer to
Original Orientation on page 22.
7. Select Save to confirm your selections
and run the job.
Note The default reading order of
your booklet will be from the left page
to the right page. If a different
reading order is required, the System
Administrator can use Too l s to display a reading order option. Refer to the Administration and
Accounting guide for more information.
28
ColorQube™ 9301/9302/9303
Copy
Page 29
Output Format
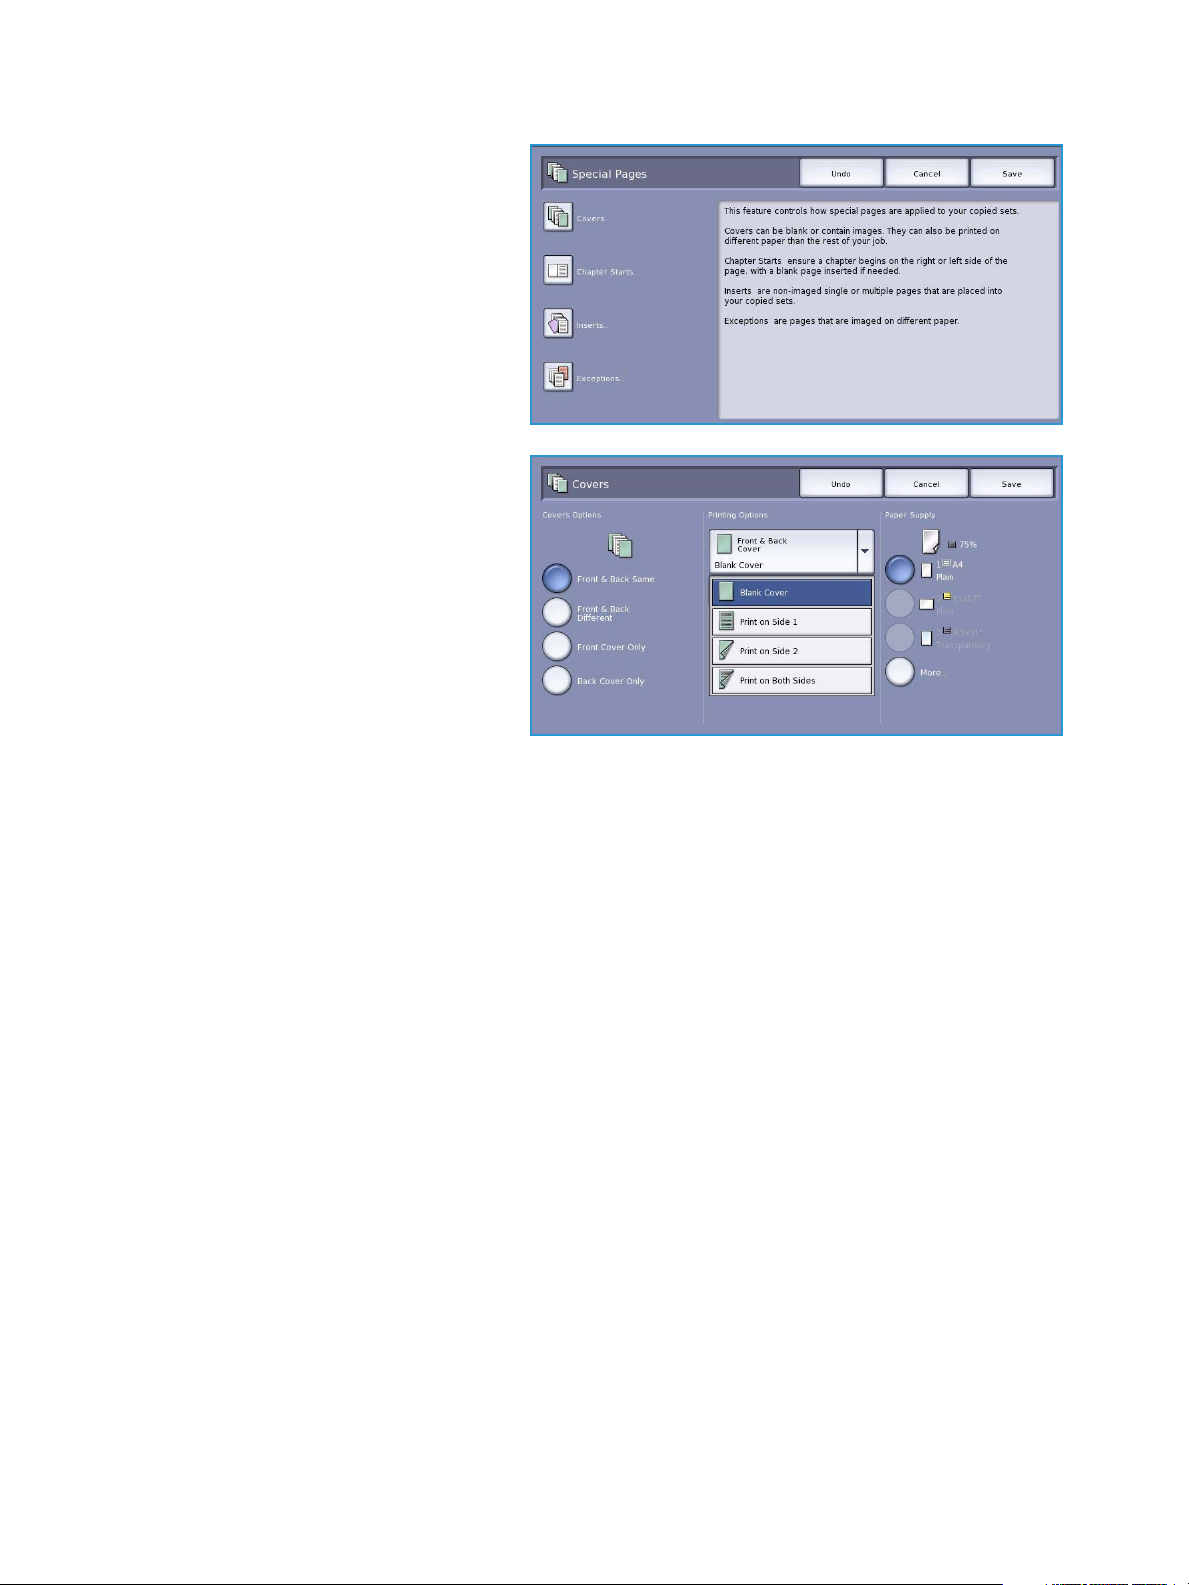
Special Pages
The Special Pages feature controls how you add special pages such as covers and inserts to your copy
job. If you have a High Volume Finisher and the optional Tray 6 (Inserter) installed you can feed the
Covers or Inserts from this tray. Media loaded into Tray 6 (Inserter) is not part of the printing process. If
you require printed Covers, you must use pre-printed media or use another tray. Refer to the Paper and
Media guide for more information.
Note Special Pages cannot be used with Auto Paper Supply, a paper supply must be specified.
The Special Pages options are:
• Covers enables blank or printed pages to be added to the front, back or both sides of your set. The
covers can be a different media to the rest of your job. Refer to Covers on page 29.
• Chapter Starts ensures each chapter starts on a right or left page as required, blank pages are
inserted automatically if needed. Refer to Chapter Starts on page 31.
• Inserts enables blank pages to be inserted at designated places within your copy sets. Single or
multiple pages can be inserted. This option is also used to insert Pre-Cut tabs into your document.
Refer to Inserts on page 32.
• Exceptions are used to program pages that require printing on a different media to the rest of
your job. Refer to Exceptions on page 33.
Note When identifying the page number to enter for Chapter Starts, Inserts and Exceptions,
count each side as a separate page if scanning a 2-sided document.
Covers
Use the following instructions to program Covers:
1. On the Copy tab, select the paper you
want to use for the main body of the
copies.
Note Special Pages is not available if
Auto Paper is selected.
2. If required, load special media into another paper tray ensuring that it is in the same orientation
as the paper you are using for the body of your copies.
Update the Paper Settings screen and Confirm your selections.
ColorQube™ 9301/9302/9303
Copy
29
Page 30
Output Format
3. Select the Output Format tab,
Special Pages button and then
Covers.
4. Select the Covers Option required:
• Front & Back Same is used if the
same media and printing options
are required for both covers.
• Front & Back Different is used
for front and back covers with
different programing
requirements.
• Front Cover Only is used if only a
front cover is required.
• Back Cover Only is used if only a
back cover is required.
5. Select a Printing Option from the drop-down menu for each of the covers required:
• Blank Cover is used if no printing is required.
• Print on Side 1 is used to print the first or last page of your document onto side 1 of the front
or back cover sheet.
• Print on Side 2 is used to print the first or last page of your document onto side 2 of the front
or back cover sheet.
• Print on Both Sides is used to print the first or last two pages of your document onto side 1
and side 2 of the front or back cover sheet.
Note If Front & Back Same is selected, the same programing options are applied to the Front and
Back cover.
6. Select the paper tray that contains the cover media.
7. Select Close to return to the Special Pages screen.
A list of the selected Special Pages is displayed on the screen. To make changes, select the item in
the list you wish to change and use Edit. Use Delete or Delete All to delete unwanted entries.
Select Close Menu to exit from the drop-down menu.
8. Select Save to confirm your selections and run the job.
30
ColorQube™ 9301/9302/9303
Copy
Page 31
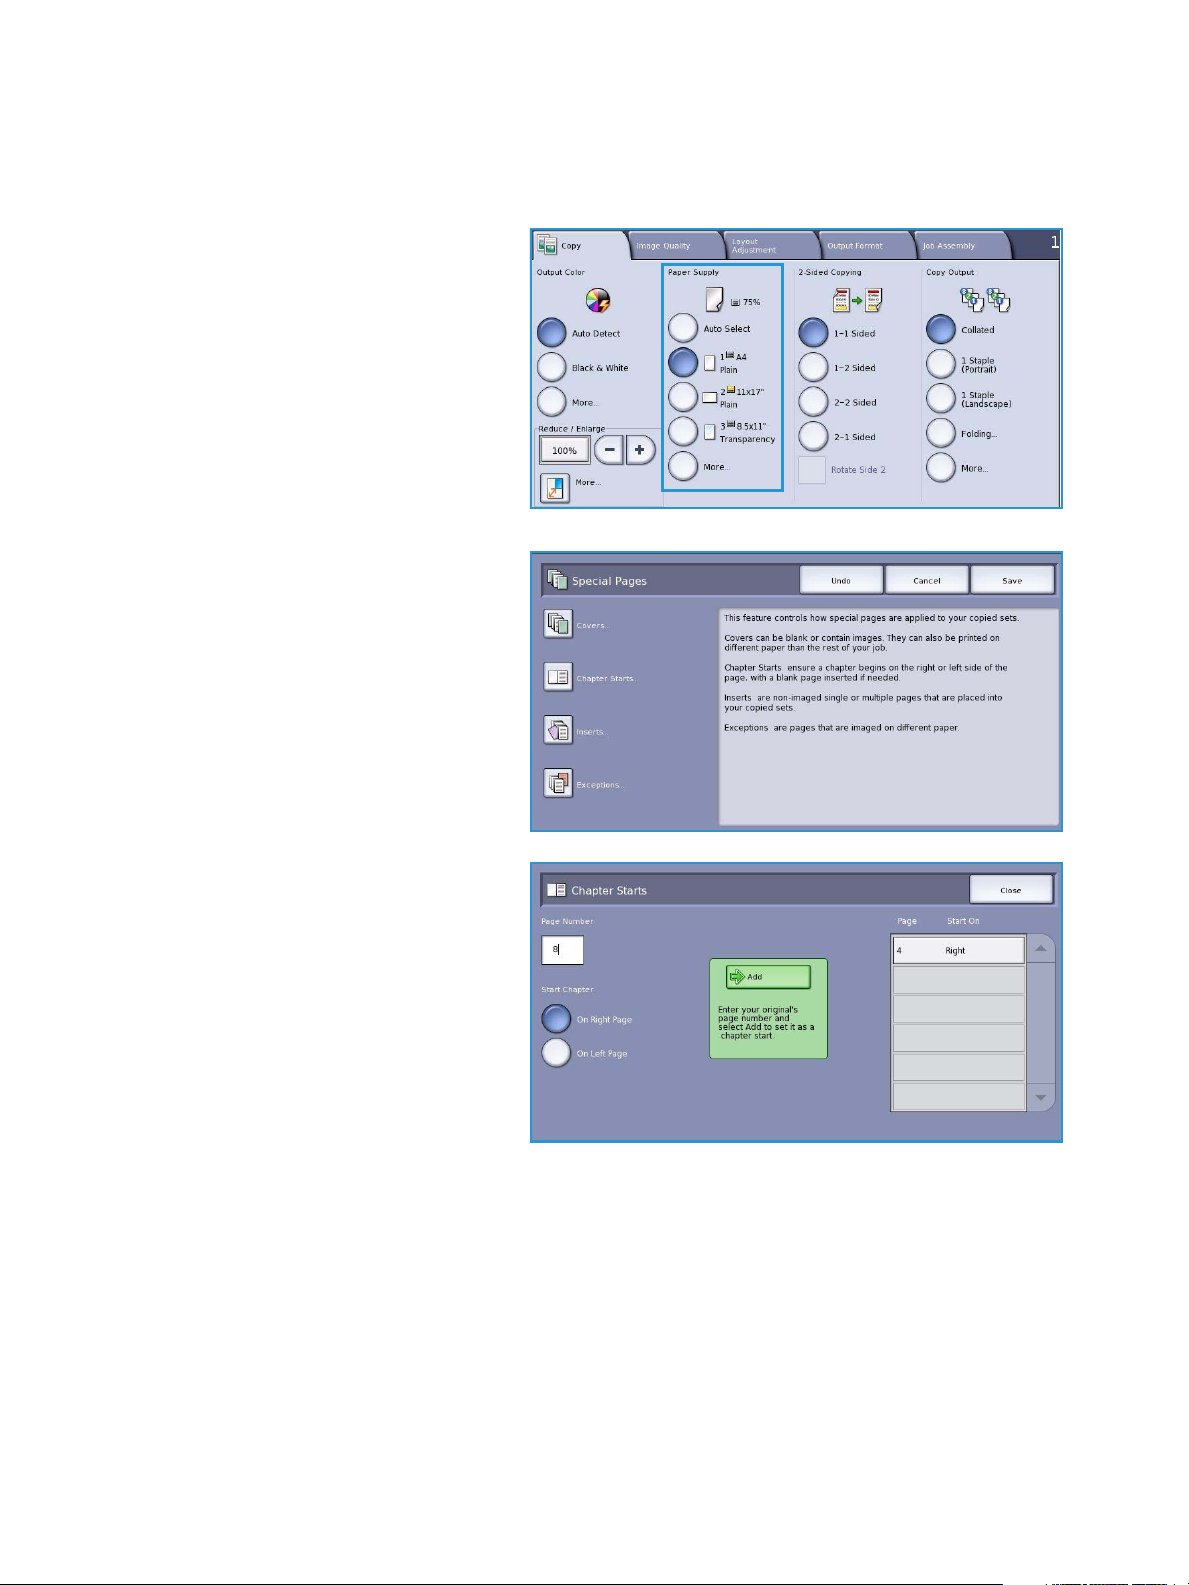
Chapter Starts
Use the following instructions to program Chapter Starts:
1. On the Copy tab, select the paper you
want to use the job.
Note Special Pages is not available if
Auto Paper is selected.
2. Select the Output Format tab,
Special Pages button and then
Chapter Starts.
Output Format
3. Select the Chapter Starts button.
4. Select the Page Number box and use
the numeric keypad to enter a page
number for the chapter start.
5. Select either On Right Page to print
on Side 1, or On Left Page to print on
Side 2.
6. Select the Add button to confirm your
selections and add the programed
Chapter Start to the list on the right.
Add further Chapter Starts as
required.
7. Select Close to return to the Special Pages screen.
A list of the selected Special Pages is displayed on the screen. To make changes, select the item in
the list you wish to change and use Edit. Use Delete or Delete All to delete unwanted entries.
Select Close Menu to exit from the drop-down menu.
8. Select Save to confirm your selections and run the job.
ColorQube™ 9301/9302/9303
Copy
31
Page 32
Output Format
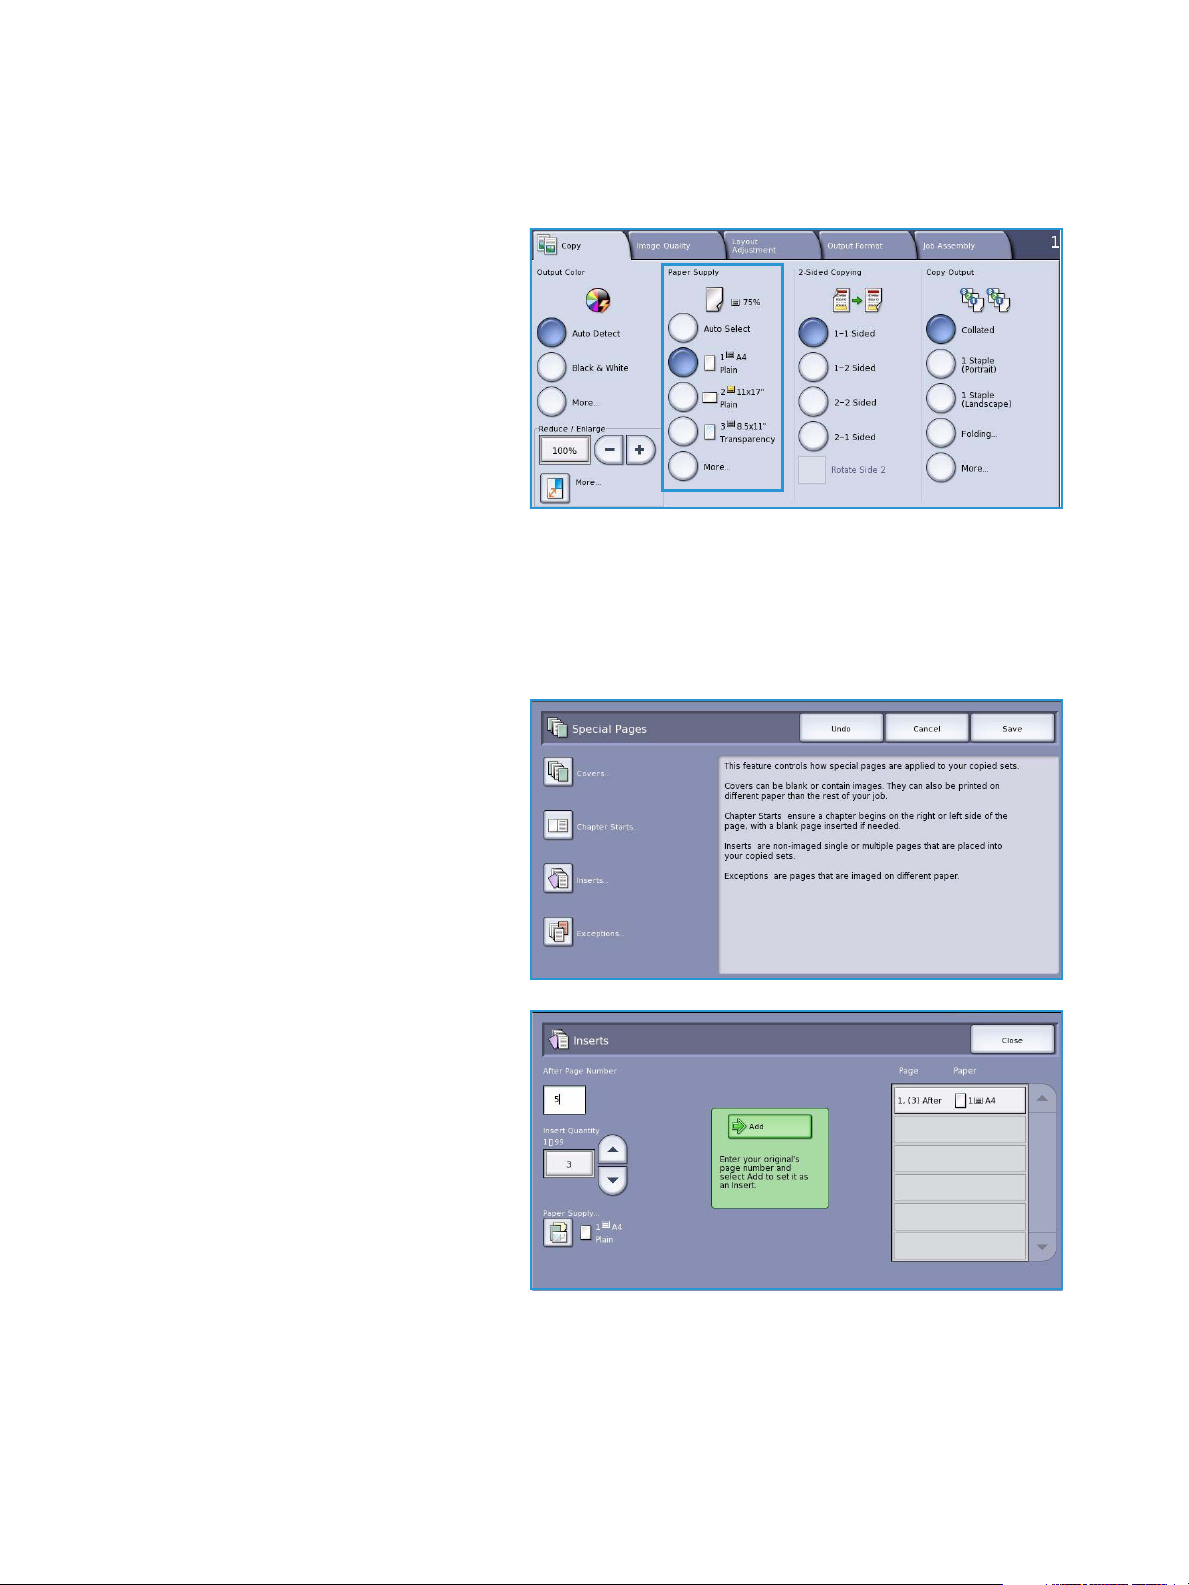
Inserts
Use the following instructions to program Inserts:
1. On the Copy tab, select the paper you
want to use for the main body of the
copies.
Note Special Pages is not available if
Auto Paper is selected.
2. If required, load special media into another paper tray ensuring that it is in the same orientation
as the paper you are using for the body of your copies.
If using tab stock for your inserts, refer to the Paper and Media guide for information about
loading tabs.
Update the Paper Settings screen and Confirm your selections.
3. Select the Output Format tab,
Special Pages button and then
Inserts.
4. Select the After Page Number box
and use the numeric keypad to enter
the page number you want the insert
to follow.
Note To add an insert before page 1
of your document, use the Covers
option. Refer to Covers on page 29.
5. Use the arrow buttons to enter how
many inserts should be added.
6. Select the Paper Supply button and
select the tray that contains the
Inserts media. Select Save to save your selection.
7. Select the Add button to confirm your selections and add the programed Insert to the list on the
right. Add further Inserts as required.
8. Select Close to return to the Special Pages screen.
32
ColorQube™ 9301/9302/9303
Copy
Page 33

Output Format
A list of the selected Special Pages is displayed on the screen. To make changes, select the item in
the list you wish to change and use Edit. Use Delete or Delete All to delete unwanted entries.
Select Close Menu to exit from the drop-down menu.
9. Select Save to confirm your selections and run the job.
Exceptions
Use the following instructions to program Exceptions:
1. On the Copy tab, select the paper you
want to use for the main body of the
copies.
Note Special Pages is not available if
Auto Paper is selected.
2. If required, load special media into
another paper tray ensuring that it is
in the same orientation as the paper
you are using for the body of your
copies.
Update the Paper Settings screen and
Confirm your selections.
3. Select the Output Format tab,
Special Pages button and then
Exceptions.
4. Select the Page Number boxes and
use the numeric keypad to enter the
page number or sequence of pages
you want printed on different media.
5. Select the Paper Supply button and
select the tray that contains the
Exceptions media. Select Save to save
your selection.
6. Select the Add button to confirm your
selections and add the programed
Exceptions to the list on the right. Add
further Exceptions as required
7. Select Close to return to the Special Pages screen.
ColorQube™ 9301/9302/9303
Copy
33
Page 34
Output Format
A list of the selected Special Pages is displayed on the screen. To make changes, select the item in
the list you wish to change and use Edit. Use Delete or Delete All to delete unwanted entries.
Select Close Menu to exit from the drop-down menu.
8. Select Save to confirm your selections and run the job.
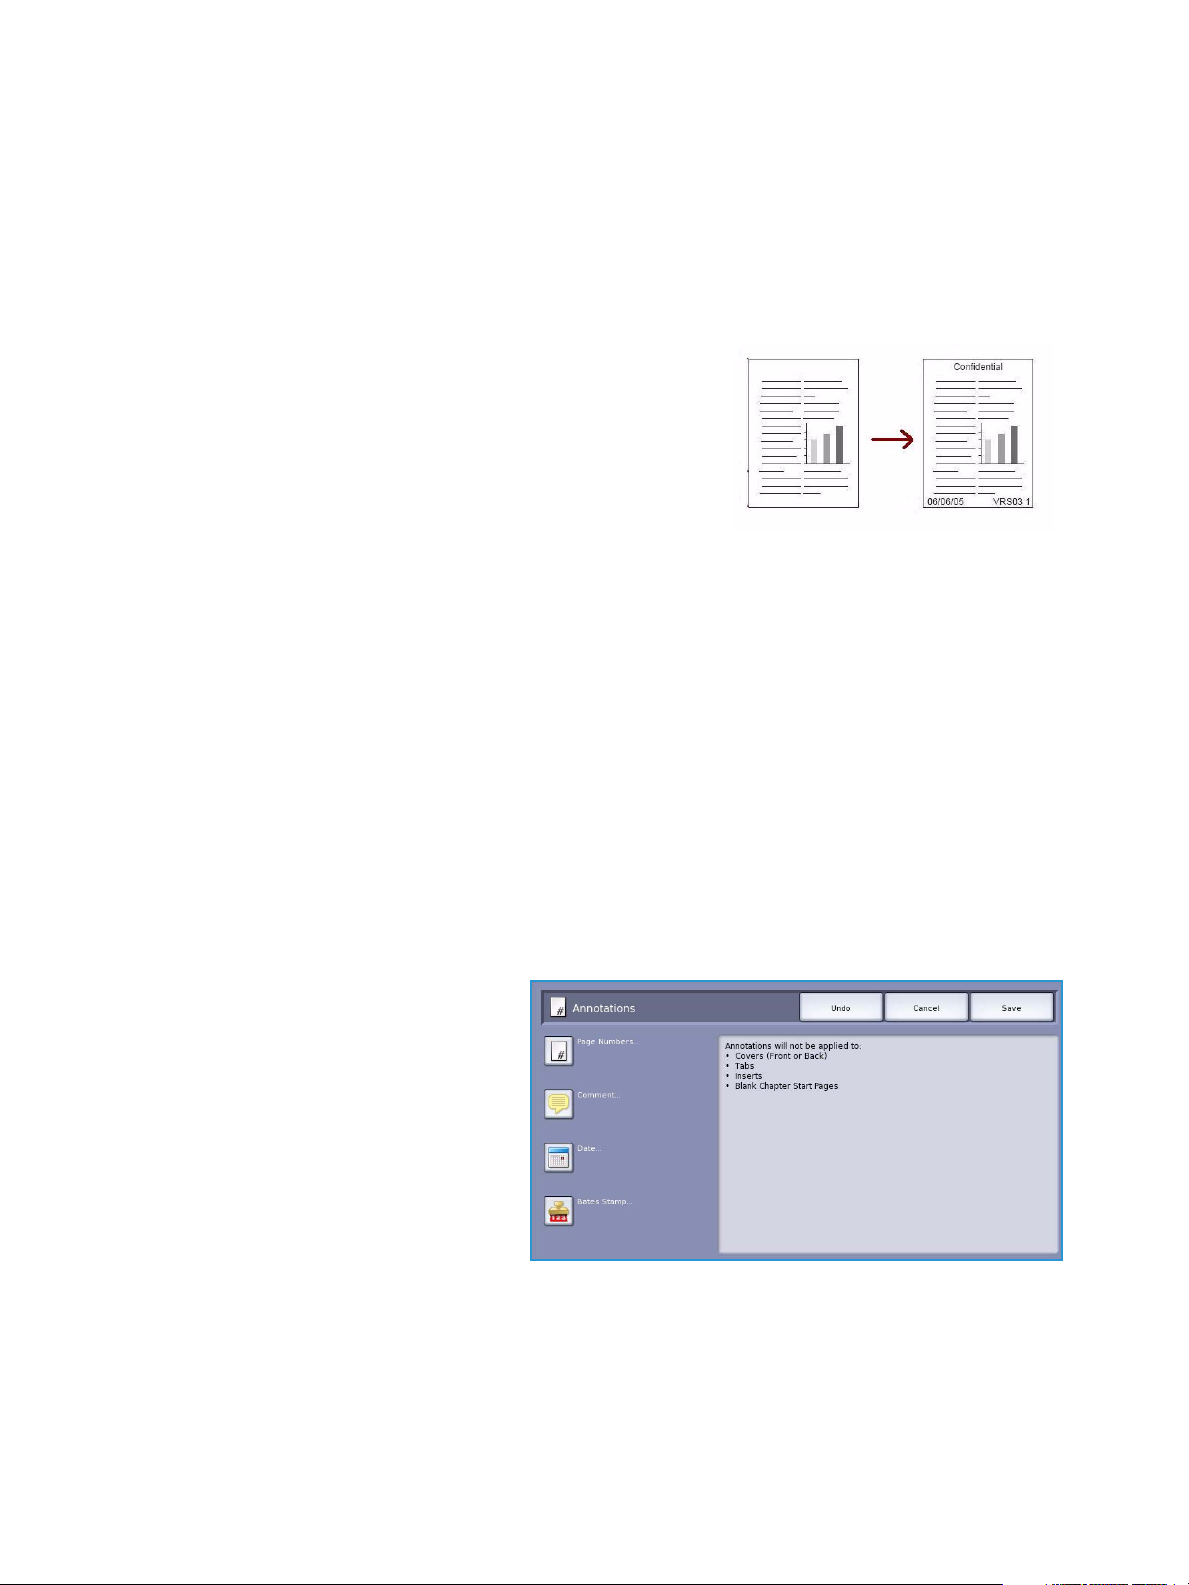
Annotations
The Annotations feature enables you to automatically add a
comment, page number, date or Bates Stamp to your copy
output. You can select any or all of these annotation options and
specify where on the copy output they should appear. You can
also select the appearance of the annotations such as the font
size and font color. The options are:
• Page Numbers to automatically print a page number in a
specified position on the page. Page numbers are
automatically increased by one. For 2 sided copy output the page number is printed on both sides
and counts as two pages.
• Comment to add up to 50 alpha-numeric characters in a specified position on the page. An
existing comment can be added or a new comment can be created or edited.
• Date to add today’s date in a specified format and position on the page. The date printed is the
date set on your device.
• Bates Stamp to add a selected Bates Stamp in a specified position on the page. Bates Stamping
is used primarily in the legal and business fields and consists of a set prefix (such as a case number
or client reference) together with a page number applied to a document as it is being processed.
The prefix can contain up to 8 alpha-numeric characters. You can add a new prefix or choose an
existing one from the list provided.
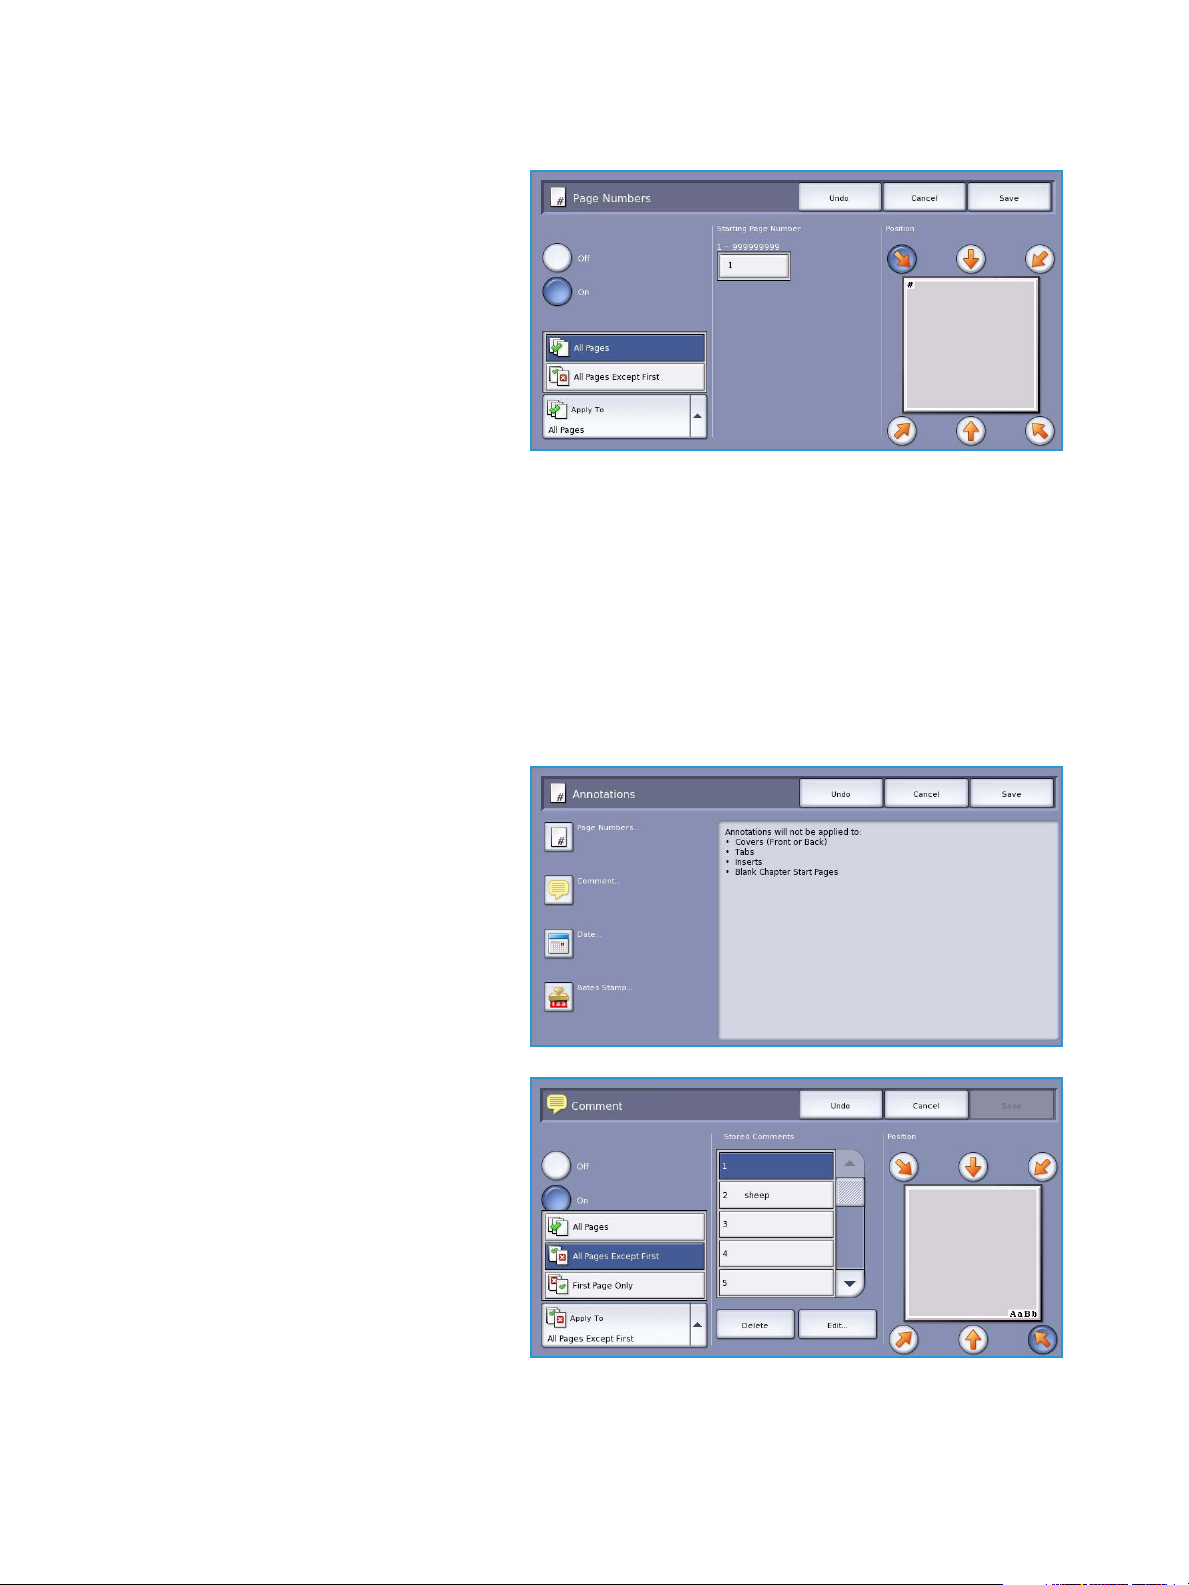
Page Numbers
Use the following instructions to program Page Numbers:
1. Select the Output Format tab,
Annotations button and then Page
Numbers.
34
ColorQube™ 9301/9302/9303
Copy
Page 35
Output Format
2. Select the On button.
3. Specify the position of the page
number by selecting one of the arrow
buttons on the right.
4. Select the Page Number input box
and use the numeric keypad to enter
the starting page number you want
printed on your copy output.
5. From the drop-down menu on the left,
select either All Pages or All Pages
Except First to determine which
pages the page number will apply to.
6. Select Save to store your selections and return to the Annotations screen. Program additional
annotations as required.
7. Program the Format & Style options required for your Annotations. Refer to Format and Style on
page 38 for instructions.
8. Select Save to confirm your selections and run the job.
Comment
Use the following instructions to add a Comment:
1. Select the Output Format tab,
Annotations button and then
Comment.
2. Select the On button.
3. Select one of the arrow buttons to
determine the position of the
comment on the page.
4. Specify whether you want the
comment to appear on All Pages, All
Pages Except First or First Page
Only.
5. Use the scroll bar to browse the list of
available comments and select the
comment you require.
ColorQube™ 9301/9302/9303
Copy
35
Page 36

Output Format
6. To add a new comment to the list, highlight an empty entry and use the keyboard to enter up to
50 alpha-numeric characters. To edit an existing comment, highlight the comment in the list and
select the Edit button. Use the keyboard to edit the entry and select Save to close the keyboard.
7. Select Save to store your selections and return to the Annotations screen. Program additional
Annotations as required.
8. Program the Format & Style options required for your Annotations. Refer to Format and Style on
page 38 for instructions.
9. Select Save to confirm your selections and run the job.
Date
Use the following instructions to add the Date:
1. Select the Output Format tab,
Annotations button and then Date.
2. Select the On button.
3. Select one of the arrow buttons to
determine the position of the date on
the page.
4. Specify the date format by selecting
DD/MM/YYYY, MM/DD/YYYY or
YYYY/MM/DD.
5. Specify whether you want the date to
appear on All Pages, All Pages
Except First or First Page Only.
6. Select Save to store your selections
and return to the Annotations screen. Program additional Annotations as required.
7. Program the Format & Style options required for your Annotations. Refer to Format and Style on
page 38 for instructions.
8. Select Save to confirm your selections and run the job.
36
ColorQube™ 9301/9302/9303
Copy
Page 37

Output Format
Bates Stamp
Use the following instructions to program a Bates Stamp:
1. Select the Output Format tab,
Annotations button and then Bates
Stamp.
2. Select the On button.
3. Select one of the arrow buttons to
determine the position of the Bates
Stamp on the page.
4. Select the Starting Page Number box
and use the numeric keypad to enter
a starting page number. Leading
zeros may be entered to set the
starting page number length, for
example 000000001.
5. Specify whether you want the Bates
Stamp to appear on All Pages or All Pages Except First.
6. Use the scroll bar to browse the list of available prefixes and select the one you require. To add a
new prefix to the list, highlight an empty entry and use the keyboard to enter up to 8 alphanumeric characters. Alternatively to edit an existing prefix, highlight the prefix in the list and
select the Edit button. Use the keyboard to edit the entry and select Save to close the keyboard.
7. Select Save to store your selections and return to the Annotations screen. Program additional
Annotations as required.
8. Program the Format & Style options required for your Annotations. Refer to Format and Style on
page 38 for instructions.
9. Select Save to confirm your selections and run the job.
ColorQube™ 9301/9302/9303
Copy
37
Page 38

Output Format
Format and Style
Once you have programed the Annotations required, use the following instructions to select the format
and style required:
1. Select the Output Format tab,
Annotations button and then Format
& Style.
2. Specify the appearance of annotated
text:
• Opaque the annotated text is
placed on the copy output with a
white border. No copy text is
visible under the annotated text.
• Transparent the annotated text
is placed on the copy output so
that the copy text is visible under
the annotated text.
3. Use the arrow buttons to enter the
Font Point Size which determines the size of all the annotation options used on your copy output.
4. Use the scroll bar to browse the list of font colors and select the one you require.
5. Select the Side 2 Options from the following selections:
• Same as Side 1 settings chosen will apply to both Side 1 and Side 2 of your output.
• Mirror Side 1 Flip on Horizontal output will open from right to left like a book, with the
binding edge on the left. The position of the annotation on Side 2 will mirror Side 1. For
example, if a page number is positioned in the bottom left corner of Side 1, it will appear in
the bottom right corner of Side 2.
• Mirror Side 1 Flip on Vertical output will open from bottom to top like a calendar, with the
binding edge at the top. The position of the annotation on Side 2 will mirror Side 1. For
example, if a page number is positioned in the bottom left corner of Side 1, it will appear in
the bottom right corner of Side 2.
6. Select Save to save your annotation Forma t & Style options.
7. Select Save to confirm your selections and run the job.
38
ColorQube™ 9301/9302/9303
Copy
Page 39
Output Format
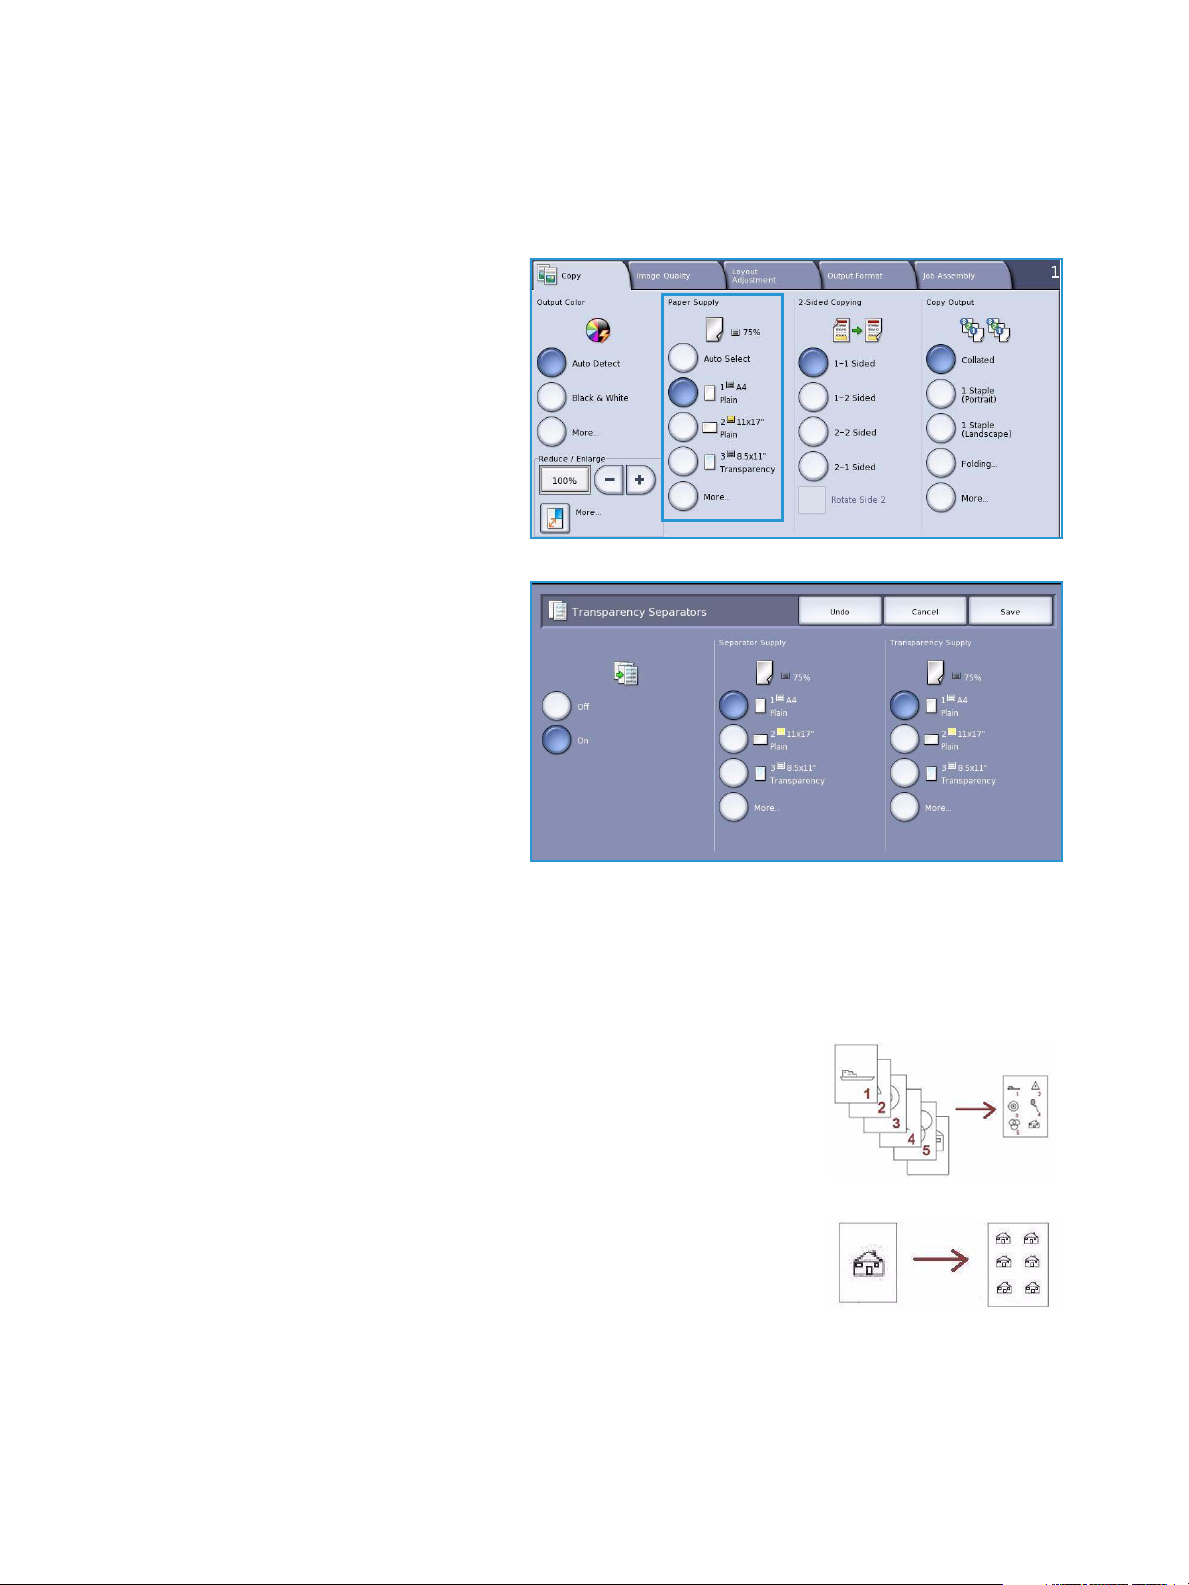
Transparency Separators
Use Transparency Separators to interleave each printed transparency with a blank sheet of paper from
a specified paper tray.
1. Load the transparencies into Tray 4
(Bypass), update the Paper Settings
screen and Confirm your selections.
Refer to the Paper and Media guide
for loading instructions.
Note Transparency Separators is not
available if Auto Paper is selected.
2. Select the Output Format tab, then
Transparency Separators and select
On.
3. Select the paper tray containing the
paper for the separators.
4. Select the tray that contains the
transparencies.
5. Select Save to confirm the selections
and run the job.
Page Layout
The Page Layout feature is ideal for handouts, story boards or for archival purposes. It allows up to 36
images to fit onto one sheet of paper. Your device will reduce or enlarge the images as needed, to
display them either in landscape or portrait orientation on one page, based on the paper supply
selected. The options are:
• Pages per Slide individual images reduced to fit onto one sheet of
paper.
• Repeat Image multiple copies of the same image reduced to fit onto
one sheet of paper. The actual number of rows and columns available
is limited by the minimum reduction value (25%) and your selected
paper output.
Note Some features cannot be used with the Page Layout feature and will be grayed out on the
Tou c h S c re e n.
ColorQube™ 9301/9302/9303
Copy
39
Page 40

Output Format
4 Originals using 2
rows and 2 columns
6 Originals using 3
rows and 2
columns
2 Originals using 2
rows and 1 column
The examples shown here are typical
outputs that can be produced when using
the Page Layout feature.
Note The practical limit is for 16
images on A4 (8.5x11”) paper.
1. On the Copy tab, select the paper you
want to use for the copies.
2. Select the Output Format tab, then
Page Layout.
3. Select the Page Layout option
required:
Pages per Slide
• Select the button that represents
the required number of images
per page.
• Alternatively, select the Specify
Rows & Columns button and use
the arrow buttons to select the
number of rows and columns, from 1 to 15.
• Select either Portrait Originals or Landscape Originals from the drop-down menu on the
right.
Repeat Image
• Select the button that represents
the required number of images
per page.
• Alternatively, select the Specify
Rows & Columns button and use
the arrow buttons to select the
number of rows and columns,
from 1 to 15.
40
ColorQube™ 9301/9302/9303
Copy
Page 41
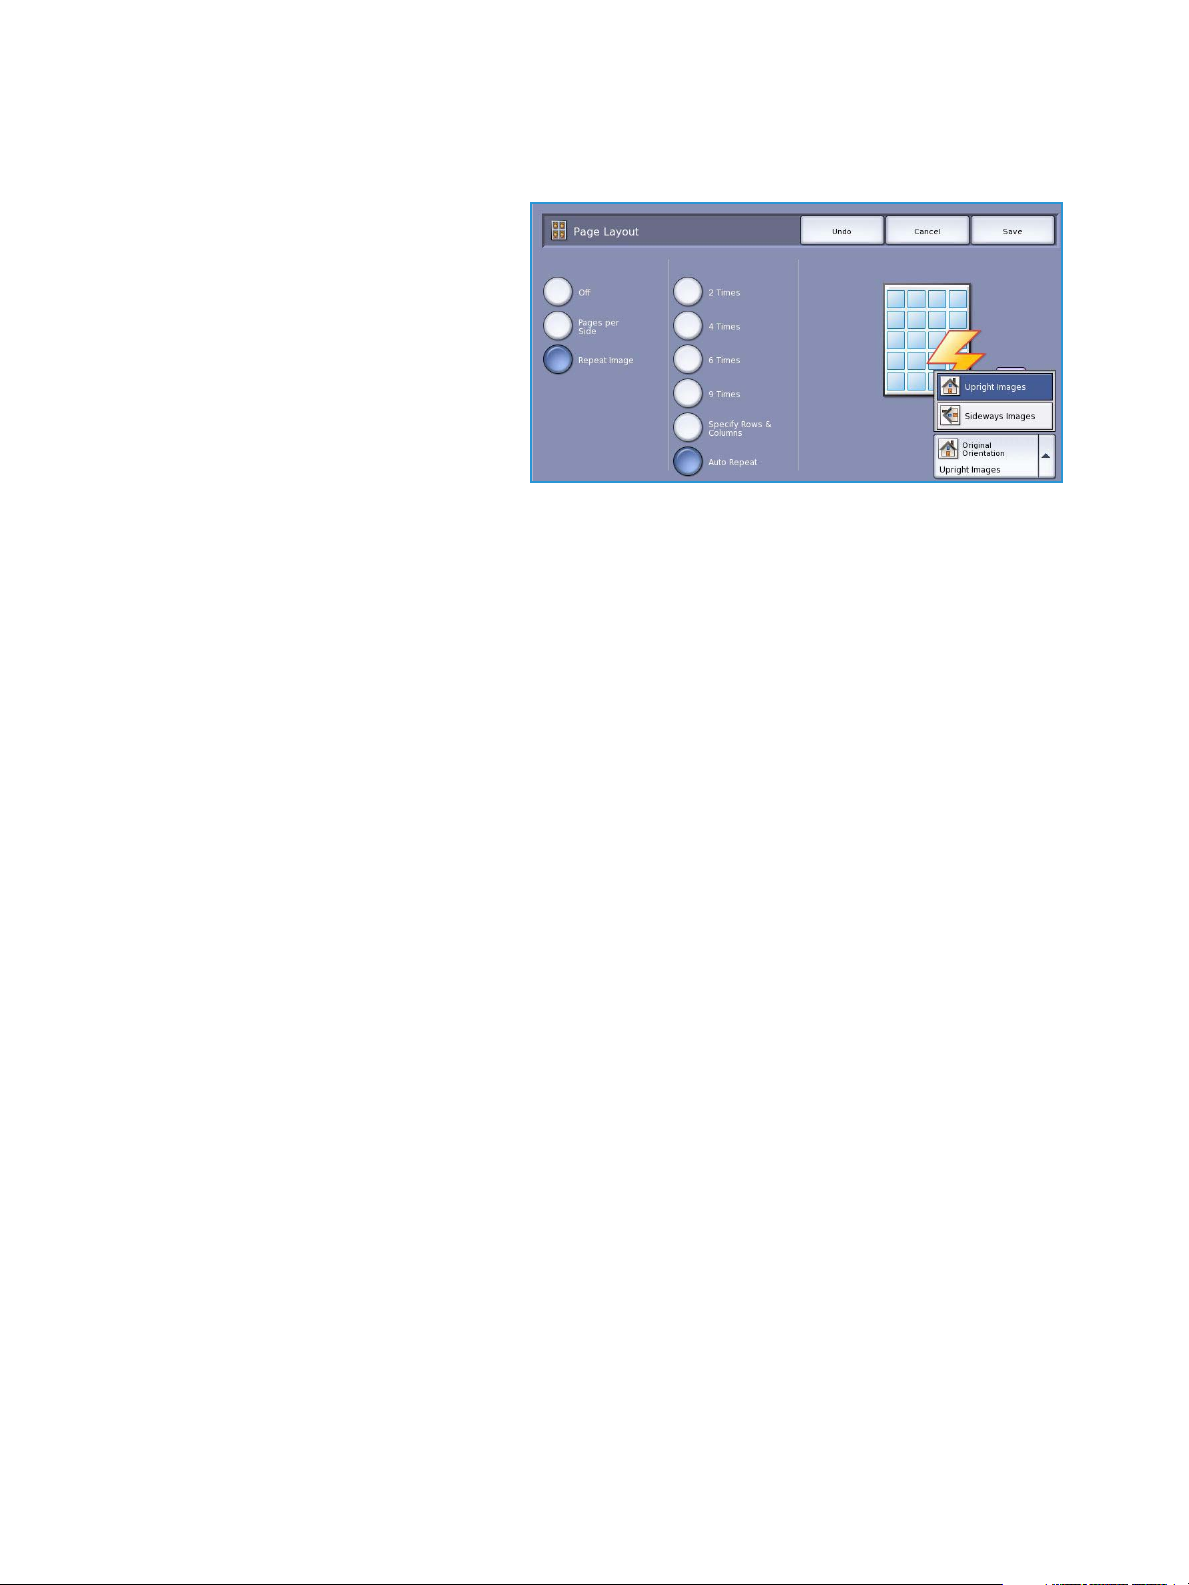
Output Format
• Select either Portrait Originals or Landscape Originals from the drop-down menu on the
right.
•If Auto Repeat is selected, the
size of the original is used to
automatically calculate the
maximum number of rows and
columns that can be
accommodated on the currently
selected paper size.
• To determine how the images are
printed, select either Upright
Images or Sideways images
from the drop-down menu on the
right.
4. When you have made your selections select Save to save your selections and run the job.
ColorQube™ 9301/9302/9303
Copy
41
Page 42

Job Assembly
Some pages
with text and
some with
photos
Some pages
2 sided and
some 1 sided
Var ious
sized
originals
More than
100 pages
Job Assembly
Use the Job Assembly options to program
a job that requires individual selections for
specific pages or sections, produce a
Sample Set before printing the whole job
or for storing and retrieving frequently run
programs.
Build Job
Use this feature to build a job that requires
different settings for each page, or a segment of
pages.
You can select the appropriate settings to be
applied to individual pages or segments of a
completed job. First split the originals into
sections for individual programing.
1. Select Build Job on the Job Assembly tab
and select the On button.
2. Select Display this window between
segments to view the Build Job screen
during scanning. Then select Save.
3. Select the options required for the
first segment of the job.
4. Load the first segment originals and
press Start.
5. Remove the first segment originals.
The Build Job screen displays the first
segment in the list. The following
options can be applied to any
segment:
• Sample Last Segment produces a proof print of the last segment scanned. The proof is
delivered to the output module. If you are satisfied with the proof you can continue
programing the Build Job.
• Delete Last Segment deletes the last segment scanned. You can continue programing the
Build Job.
• Delete All Segments deletes the current Build Job and returns you to the main Build Job
screen.
42
ColorQube™ 9301/9302/9303
Copy
Page 43
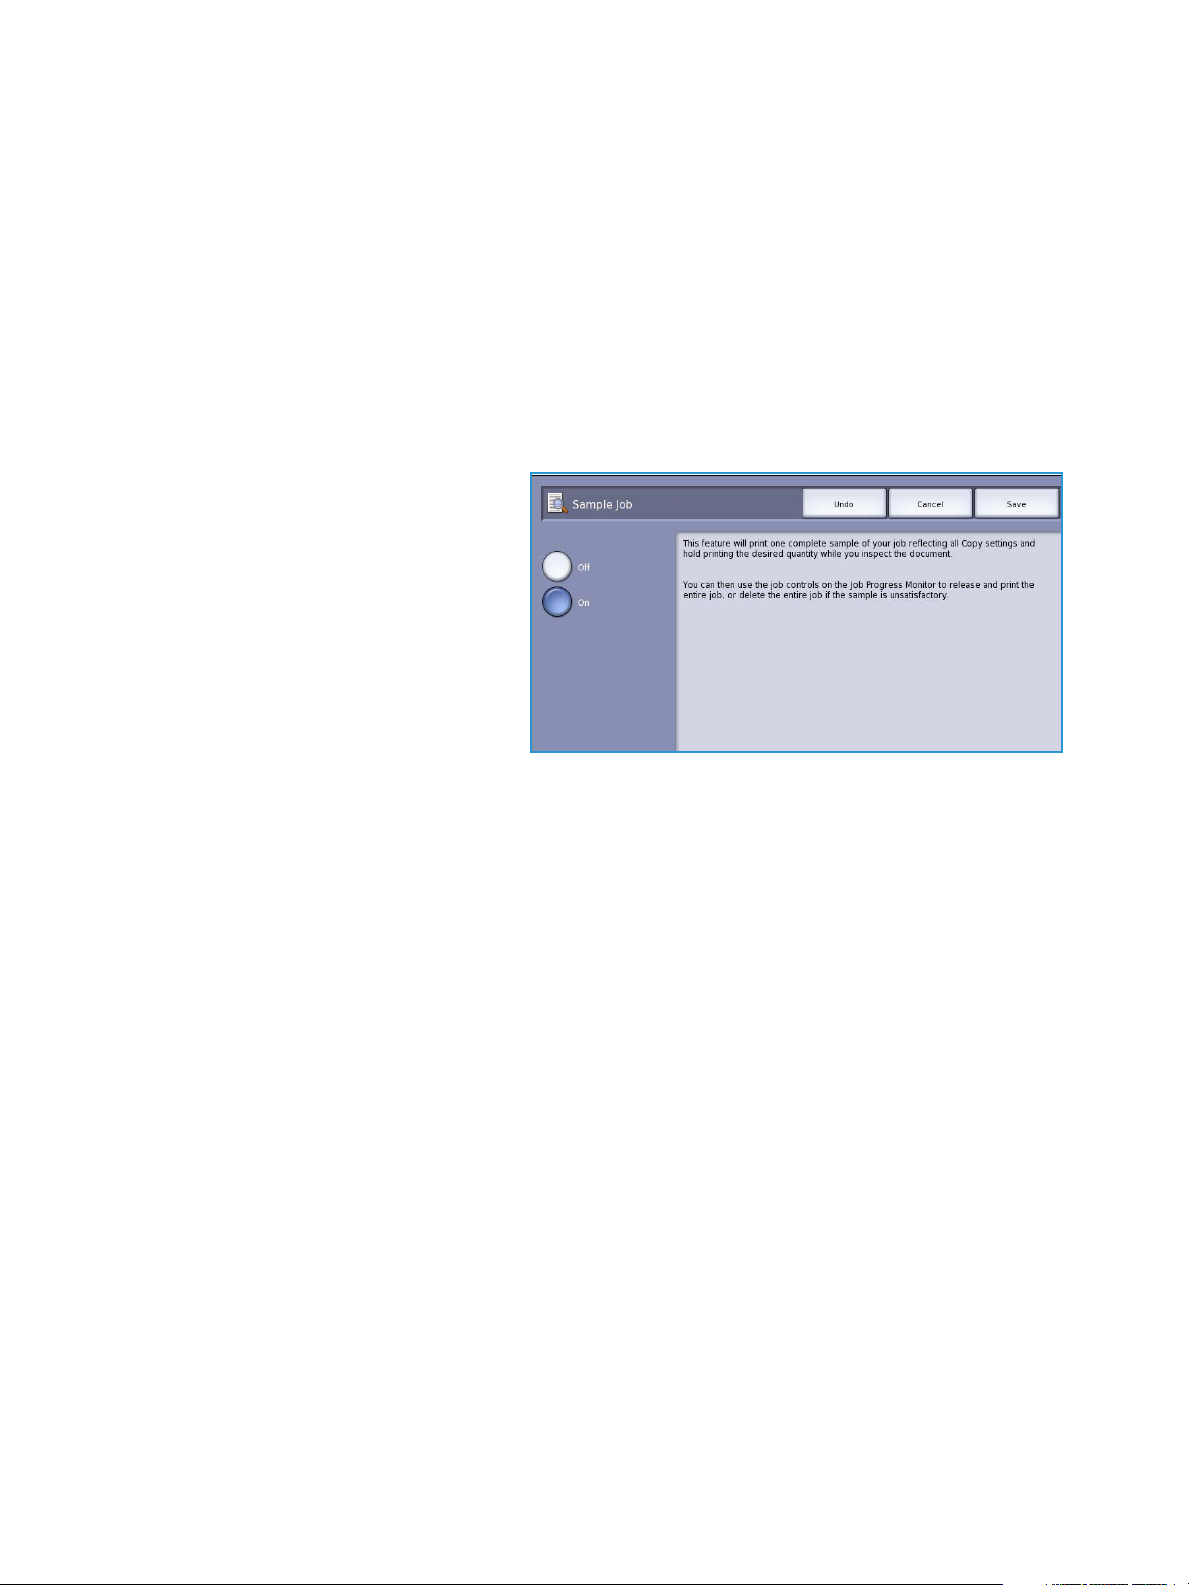
Job Assembly
6. Using Program Next Segment, select the options required for the second segment.
7. Load the second segment originals and press Start.
8. Repeat these steps until all segments of your job have been programed and scanned.
9. After the last segment has been scanned, select Print the Job to indicate you have finished
scanning and the job can be processed and completed.
Sample Set
When copying a large number of sets, use the Sample Set feature to review a proof copy to ensure that
all the print settings are correct before printing the remaining sets.
1. Select the Sample Set button on the Job Assembly tab.
2. Select the On button and then select
Save.
3. Load the originals in the document
feeder and program the job
requirements.
4. Enter the total quantity required and
press the Start button.
One copy set of the job, the Sample
Set, is printed.
The Job Progress screen is displayed
and the job is held in the Job List.
5. If the Sample Set is acceptable, select Release. The programed number of sets will be produced.
If the Sample Set is unacceptable, select Delete and Delete Job to confirm. Your job will be
deleted from the list.
Note If the Job Progress screen is not displayed, access your job by selecting the Job Status
button. Select the job in the list and select Release or Delete.
ColorQube™ 9301/9302/9303
Copy
43
Page 44

Job Assembly
Save Current Settings
Up to ten combinations of commonly used feature selections can be retained in the device memory as
Saved Settings. The device stores only the programing of the job, NOT the image. Each time Saved
Settings are retrieved and used, the image must be scanned.
To S ave
1. Program the required job features.
2. Select the Save Current Settings
button on the Job Assembly tab.
3. Select the Setting drop-down menu
and use the scroll bar to select an
<Available> setting.
4. Use the keyboard to enter a name for
the saved settings.
5. Select Save.
The settings are stored and can be
accessed using the Retrieve Saved
Settings feature.
44
ColorQube™ 9301/9302/9303
Copy
Page 45

Job Assembly
Retrieve Saved Settings
This feature enables you to Retrieve Saved Settings from the device memory and apply them to the
current job. Changes can be made to the retrieved settings, but these will not be stored with the saved
settings.
1. Select the Retrieve Saved Settings
button on the Job Assembly tab.
2. Select the required job settings from the list. If required, use the scroll bar to access all the
settings.
3. Select the Load Settings button, to
retrieve the programing information.
The recalled programing features
become active.
To delete a Settings entry, use the
Delete Settings option and select
Delete to confirm.
4. Modify the selections as required for
this job. These additional
modifications are not saved with the
saved settings.
5. Load your originals and press the Start button.
ColorQube™ 9301/9302/9303
Copy
45
Page 46

Log In / Out
Log In / Out
If Authentication or Accounting has been enabled on the device, you may need to log in before using
some or all of the services. A picture of a lock on a button indicates that you must log in to use that
service.
1. To log in select the Log In/Out button
on the control panel. Selecting a
locked service will also prompt you to
enter a log in name and password.
2. Use the keyboard to enter your User
Name, then select the Next button.
3. Use the keyboard to enter your
Password, then select the Enter
button.
4. If an accounting system is in use on
the device, you may also need to
enter additional information.
•If Xerox Standard Accounting is
enabled, the user will also have
to log in using their Xerox
Standard Accounting details.
•If Network Accounting is enabled, the user must enter a User ID and an Account ID.
•If a Foreig n Device Interfac e (FDI) is installed, you are prompted to access via the device
installed, for example a card reader or coin slot.
Your user details display in the User
Details area on the right side of the
message display.
5. To log out, select the Log In/Out
button again or select the User
Details area and select Log Out from
the drop-down menu.
6. A confirmation screen is displayed,
select Log Out or Cancel.
46
ColorQube™ 9301/9302/9303
Copy
Page 47

Version 1.0
09/10
Xerox® ColorQube™
9301/9302/9303
Fax
Page 48

©2010 Xerox Corporation. All Rights Reserved. Unpublished rights reserved under the copyright laws of the United States. Contents
of this publication may not be reproduced in any form without permission of Xerox Corporation.
XEROX®, XEROX and Design® and ColorQube® are trademarks of Xerox Corporation in the United States and/or other countries.
Changes are periodically made to this document. Changes, technical inaccuracies, and typographic errors will be corrected in
subsequent editions.
Document version 1.0: September 2010
Page 49

Contents
Introduction . . . . . . . . . . . . . . . . . . . . . . . . . . . . . . . . . . . . . . . . . . . . . . . . . . . . . . . . . . . . . . . . . . . . . . . . . . . . 50
Dialing Options . . . . . . . . . . . . . . . . . . . . . . . . . . . . . . . . . . . . . . . . . . . . . . . . . . . . . . . . . . . . . . . . . . . . . . . . . 51
Manual Dialing . . . . . . . . . . . . . . . . . . . . . . . . . . . . . . . . . . . . . . . . . . . . . . . . . . . . . . . . . . . . . . . . . . . . . 51
Speed Dialing . . . . . . . . . . . . . . . . . . . . . . . . . . . . . . . . . . . . . . . . . . . . . . . . . . . . . . . . . . . . . . . . . . . . . . . 51
Dialing Characters . . . . . . . . . . . . . . . . . . . . . . . . . . . . . . . . . . . . . . . . . . . . . . . . . . . . . . . . . . . . . . . . . . 52
Address Book . . . . . . . . . . . . . . . . . . . . . . . . . . . . . . . . . . . . . . . . . . . . . . . . . . . . . . . . . . . . . . . . . . . . . . . 53
Cover Sheet . . . . . . . . . . . . . . . . . . . . . . . . . . . . . . . . . . . . . . . . . . . . . . . . . . . . . . . . . . . . . . . . . . . . . . . . 56
Fax . . . . . . . . . . . . . . . . . . . . . . . . . . . . . . . . . . . . . . . . . . . . . . . . . . . . . . . . . . . . . . . . . . . . . . . . . . . . . . . . . . . . 58
2-Sided Scanning . . . . . . . . . . . . . . . . . . . . . . . . . . . . . . . . . . . . . . . . . . . . . . . . . . . . . . . . . . . . . . . . . . . 58
Original Type . . . . . . . . . . . . . . . . . . . . . . . . . . . . . . . . . . . . . . . . . . . . . . . . . . . . . . . . . . . . . . . . . . . . . . . 58
Resolution . . . . . . . . . . . . . . . . . . . . . . . . . . . . . . . . . . . . . . . . . . . . . . . . . . . . . . . . . . . . . . . . . . . . . . . . . . 59
Image Quality . . . . . . . . . . . . . . . . . . . . . . . . . . . . . . . . . . . . . . . . . . . . . . . . . . . . . . . . . . . . . . . . . . . . . . . . . . 60
Image Options . . . . . . . . . . . . . . . . . . . . . . . . . . . . . . . . . . . . . . . . . . . . . . . . . . . . . . . . . . . . . . . . . . . . . . 60
Image Enhancement . . . . . . . . . . . . . . . . . . . . . . . . . . . . . . . . . . . . . . . . . . . . . . . . . . . . . . . . . . . . . . . . 60
Layout Adjustment . . . . . . . . . . . . . . . . . . . . . . . . . . . . . . . . . . . . . . . . . . . . . . . . . . . . . . . . . . . . . . . . . . . . . 62
Original Size . . . . . . . . . . . . . . . . . . . . . . . . . . . . . . . . . . . . . . . . . . . . . . . . . . . . . . . . . . . . . . . . . . . . . . . . 62
Reduce/Split . . . . . . . . . . . . . . . . . . . . . . . . . . . . . . . . . . . . . . . . . . . . . . . . . . . . . . . . . . . . . . . . . . . . . . . . 63
Book Faxing . . . . . . . . . . . . . . . . . . . . . . . . . . . . . . . . . . . . . . . . . . . . . . . . . . . . . . . . . . . . . . . . . . . . . . . . 63
Fax Options . . . . . . . . . . . . . . . . . . . . . . . . . . . . . . . . . . . . . . . . . . . . . . . . . . . . . . . . . . . . . . . . . . . . . . . . . . . . 65
Confirmation Report . . . . . . . . . . . . . . . . . . . . . . . . . . . . . . . . . . . . . . . . . . . . . . . . . . . . . . . . . . . . . . . . 65
Starting Rate . . . . . . . . . . . . . . . . . . . . . . . . . . . . . . . . . . . . . . . . . . . . . . . . . . . . . . . . . . . . . . . . . . . . . . . 66
Delay Send . . . . . . . . . . . . . . . . . . . . . . . . . . . . . . . . . . . . . . . . . . . . . . . . . . . . . . . . . . . . . . . . . . . . . . . . . 67
Send Header Text . . . . . . . . . . . . . . . . . . . . . . . . . . . . . . . . . . . . . . . . . . . . . . . . . . . . . . . . . . . . . . . . . . . 67
Mailboxes . . . . . . . . . . . . . . . . . . . . . . . . . . . . . . . . . . . . . . . . . . . . . . . . . . . . . . . . . . . . . . . . . . . . . . . . . . 68
Local Polling . . . . . . . . . . . . . . . . . . . . . . . . . . . . . . . . . . . . . . . . . . . . . . . . . . . . . . . . . . . . . . . . . . . . . . . . 70
Remote Polling . . . . . . . . . . . . . . . . . . . . . . . . . . . . . . . . . . . . . . . . . . . . . . . . . . . . . . . . . . . . . . . . . . . . . . 71
Job Assembly . . . . . . . . . . . . . . . . . . . . . . . . . . . . . . . . . . . . . . . . . . . . . . . . . . . . . . . . . . . . . . . . . . . . . . . . . . . 73
Build Job . . . . . . . . . . . . . . . . . . . . . . . . . . . . . . . . . . . . . . . . . . . . . . . . . . . . . . . . . . . . . . . . . . . . . . . . . . . 73
Secure Faxes . . . . . . . . . . . . . . . . . . . . . . . . . . . . . . . . . . . . . . . . . . . . . . . . . . . . . . . . . . . . . . . . . . . . . . . . . . . 75
Log In / Out . . . . . . . . . . . . . . . . . . . . . . . . . . . . . . . . . . . . . . . . . . . . . . . . . . . . . . . . . . . . . . . . . . . . . . . . . . . . 76
ColorQube™ 9301/9302/9303
Fax
49
Page 50
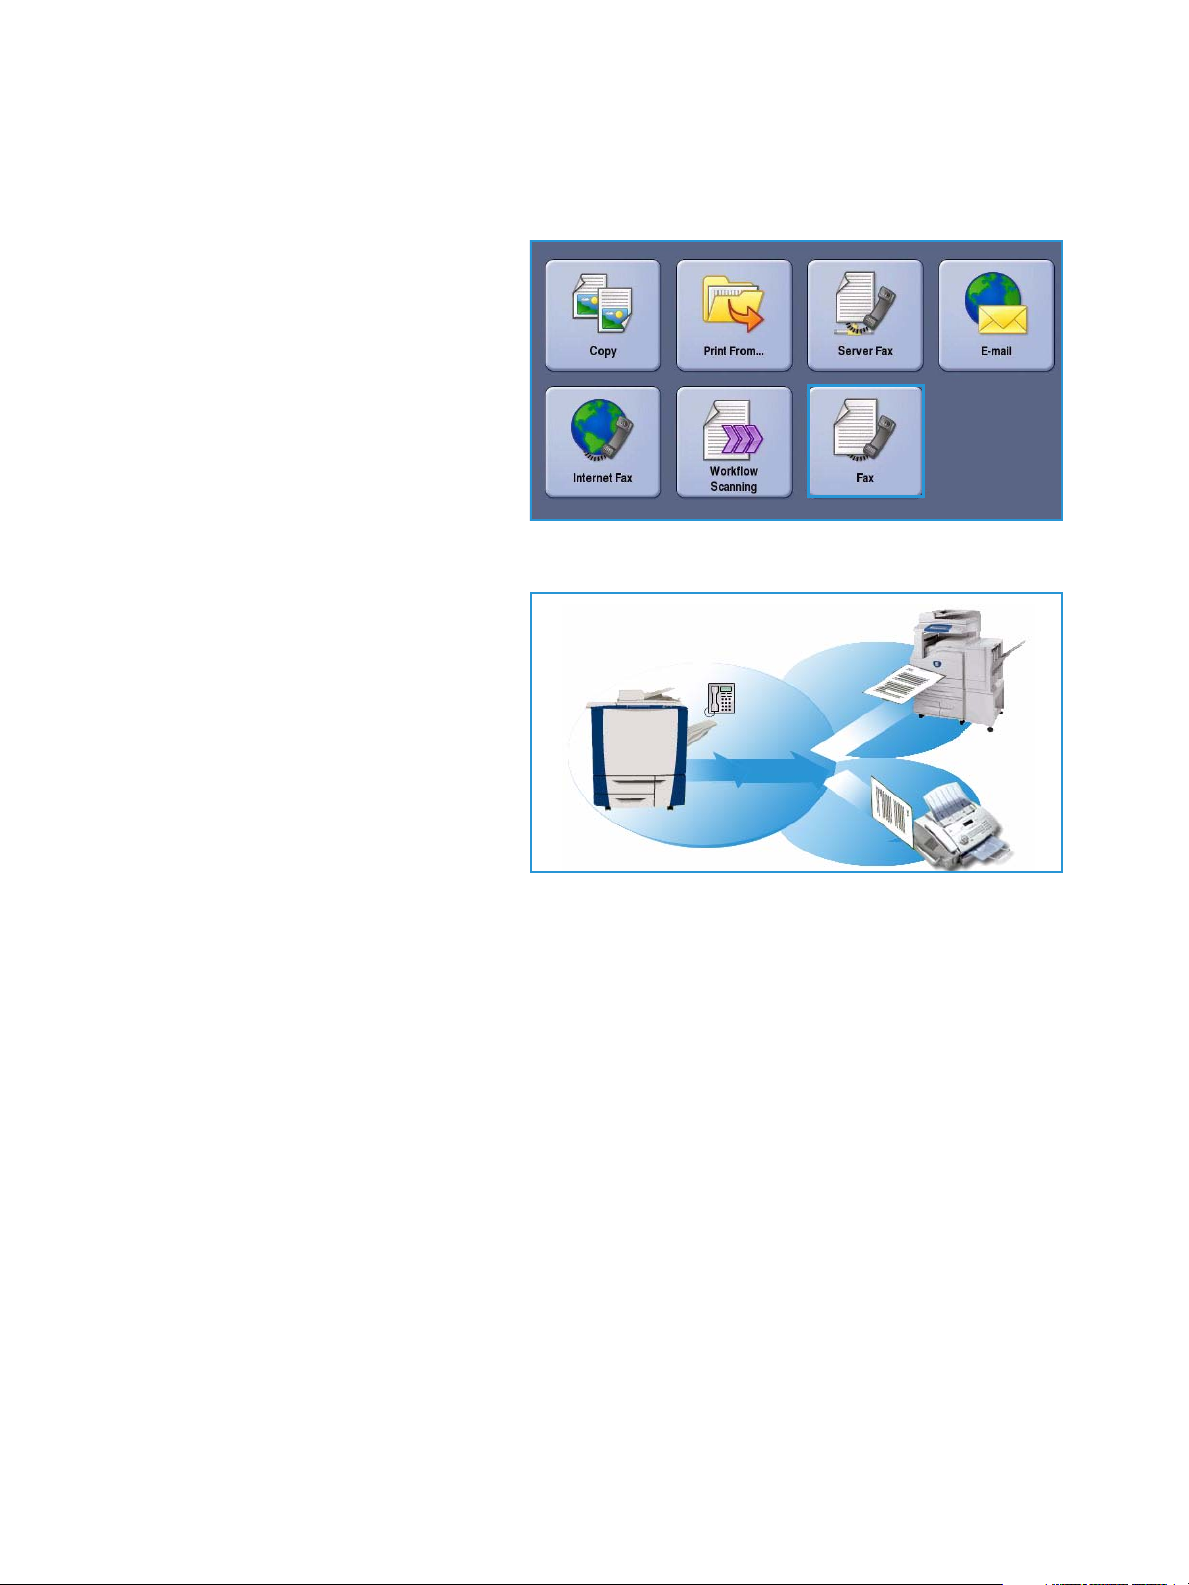
Introduction
Introduction
Fax is an optional feature that can be
installed on your device. If installed, it can
be accessed by selecting the Services
Home button, then the Fax option. Using
Fax enables you to scan your documents
and send them to most types of fax
machines that are connected to the
telephone network.
Your device is connected directly to a
telephone line and therefore gives you
direct control over your fax transmissions.
This type of fax travels over normal telephone lines and will therefore be charged at telephone rates.
The standard Fax option has the ability to
connect to one telephone. An Extended
Fax option is also available which utilizes
two telephone lines. Using two telephone
lines provides the capability to
simultaneously send and receive.
Note This device only faxes in black
and white.
Most feature screens include these buttons
to confirm or cancel your choices.
• Undo resets the current screen to the values that were displayed when the screen was opened.
• Cancel resets the screen and returns to the previous screen.
• Save saves the selections made and returns to the previous screen.
• Close closes the screen and returns to the previous screen.
Instructions for sending a fax and using the basic features are provided in the ColorQube™
9301/9302/9303 How To Sheets. If Authentication or Accounting has been enabled on your device,
you may have to enter log in details to access the features. Refer to Log In / Out on page 76.
50
ColorQube™ 9301/9302/9303
Fax
Page 51

Dialing Options
Dialing Options
The dialing options enable you to enter the destination fax number or numbers. Select the appropriate
dialing option for your fax job.
To access the Dialing Options, select Services Home and Fax.
Dialing Options
The dialing options enable you to enter the destination fax number or numbers. Select the appropriate
dialing option for your fax job.
To access the Dialing Options, select Services Home and Fax.
Manual Dialing
1. Select the fax number field and enter
the fax number required using the
numeric keypad.
2. If special characters are required, use
the Dialing Characters option to
enter the number plus additional
dialing characters. Refer to Dialing
Characters on page 52.
3. Select Add to add the number to the
recipient list. Enter additional
numbers as required.
4. To amend the Recipient List:
• Select the entry in the list. If necessary, use the scroll bar to access all the entries.
•Use Edit to amend the entry. Use Remove to delete the entry from the list, or Remove All to
delete all entries. If removing an entry, a confirmation screen is displayed.
The fax will be sent to all the numbers in the recipient list.
Speed Dialing
If numbers have been entered into the
Address Book they can be accessed via a
Speed Dial number. Each entry in the
Address Book is allocated a 3-digit Speed
Dial number, shown next to the entry. For
more information about the Address Book,
refer to Address Book on page 53.
1. Select the Speed Dial option, a tick is
displayed.
2. Select the fax number entry field.
ColorQube™ 9301/9302/9303
Fax
51
Page 52

Dialing Options
3. Enter the 3-digit speed dial number.
4. Select Add to add the number to the Recipient List. Enter additional numbers as required.
5. Speed Dialing can be combined with Manual Dialing to build the recipient list.
Dialing Characters
Additional dialing characters can be accessed by selecting the Dialing Characters button. Use this
option to enter the fax number if special characters are required. To enter a fax number using the
dialing characters:
1. Select the Dialing Characters button.
2. Use the numeric keypad to enter the
number plus additional dialing
characters.
The following characters are
available:
• Dial Pause [,] use to pause
between numbers. For additional
pause time, add multiple pauses.
If you are using charge code
numbers, enter a pause after the
fax number but before the charge code number.
• Pulse to Tone [:] use to switch between pulse and tone dialing.
• Mask Data [/] use to protect confidential information. For example, if a special charge code
or credit card number is required for a call, simply use the Mask Data character. Select the /
character before entering confidential numbers. After the last confidential numbers, select /
again to turn the mask data off. Characters between the / symbols will appear as *.
• Wait for Dial Tone [=] suspends dialing until an expected network tone is detected. It can
also be used to detect a specific tone when accessing an outside line or other service.
• Optional Readability Characters [Space ( ) - ] these are used for readability purposes but
do not affect the number entered. For example, if you wish to identify the area code of a fax
number, use the Readability Characters (1234) 567890.
If more than one fax line is available, the following characters are also available:
• Line 1 [<1>] selects line 1 to dial the number. Using the line selection identifier temporarily
overwrites the fax settings and is for the current job only.
• Line 2 [<2>] selects line 2 to dial the number. Using the line selection identifier temporarily
overwrites the fax settings and is for the current job only.
If an incorrect entry is made, use the left/right arrows to navigate through the number and use
the C button to delete a character. Use Clear Text to delete all the characters.
3. When you have entered the fax number and dialing characters required, select Add to add the
number to the recipient list.
4. Select Close to return to the fax options.
52
ColorQube™ 9301/9302/9303
Fax
Page 53

Dialing Options
Address Book
The Address Book is used to store individual fax numbers or groups of fax numbers which are used
frequently. Up to 200 individual entries and 40 Group entries can be stored. For each number stored,
transmission settings can also be set. The Address Book can be accessed from all screens where a fax
number requires entering. Use the following instructions to setup and use Individual or Group entries.
If numbers have been entered into the Address Book they can be accessed via the Address Book
button.
1. Select the Address Book button.
A list of individuals entered in the
Address Book is displayed.
2. Select the required recipient and
select Add to Recipients from the
drop-down menu. The number is
added to the Recipients list.
Continue adding recipients as
required.
3. To add a Group entry to the list, select
the Individuals drop-down menu and
select Groups. The available Groups
are displayed. Select the Group
required and select Add to Recipients
from the drop-down menu.
The Group is added to the Recipients
list.
Continue adding Individual or Group
entries as required.
4. To edit an existing entry, select the
entry from the list and select the Edit
Details button. Edit the entry as
required and select Save.
5. To clear an entry from the Address
Book list, select the entry requiring
deletion and select Clear Entry from
the drop-down menu. A confirmation
screen is displayed, select Clear Entry.
6. Select Close to return to the fax
options screen.
The fax will be sent to all the numbers in the Recipients list.
ColorQube™ 9301/9302/9303
Fax
53
Page 54

Dialing Options
Using Chain Dial
The Chain dialing feature allows you to
create a single fax recipient by adding 2 or
more fax numbers together. For example,
an area code may be stored separately to
the telephone number. Chain dialing
combines these 2 entries into a single fax
number.
1. Select Address Book and then the
Chain Dial button.
2. If numbers or special dialing
characters are required before the
Address Book number, use the
numeric keypad to enter the numbers
and characters required.
3. Select the Address Book entry
required and select Add to Recipient.
The recipients fax number is added to
the number in the Recipient entry box.
Continue adding numbers using the
numeric keypad or Address Book until
the number is complete.
4. Select Save to save your number in the list and return to the Address Book screen.
5. Select Close to return to the fax options.
The number displays in the Recipients list.
Setting up the Address Book
Individuals
1. Select the Fax tab and the Address
Book button.
2. Select the Individuals button from
the drop-down menu.
3. Select an empty slot from the list of
entries. If necessary, use the Up and
Down buttons.
4. Enter the name of the recipient in the
Entry Name... field.
Use the backspace key to delete an
incorrect entry, or the Clear Text
button to delete the entire entry.
Select Save.
54
ColorQube™ 9301/9302/9303
Fax
Page 55
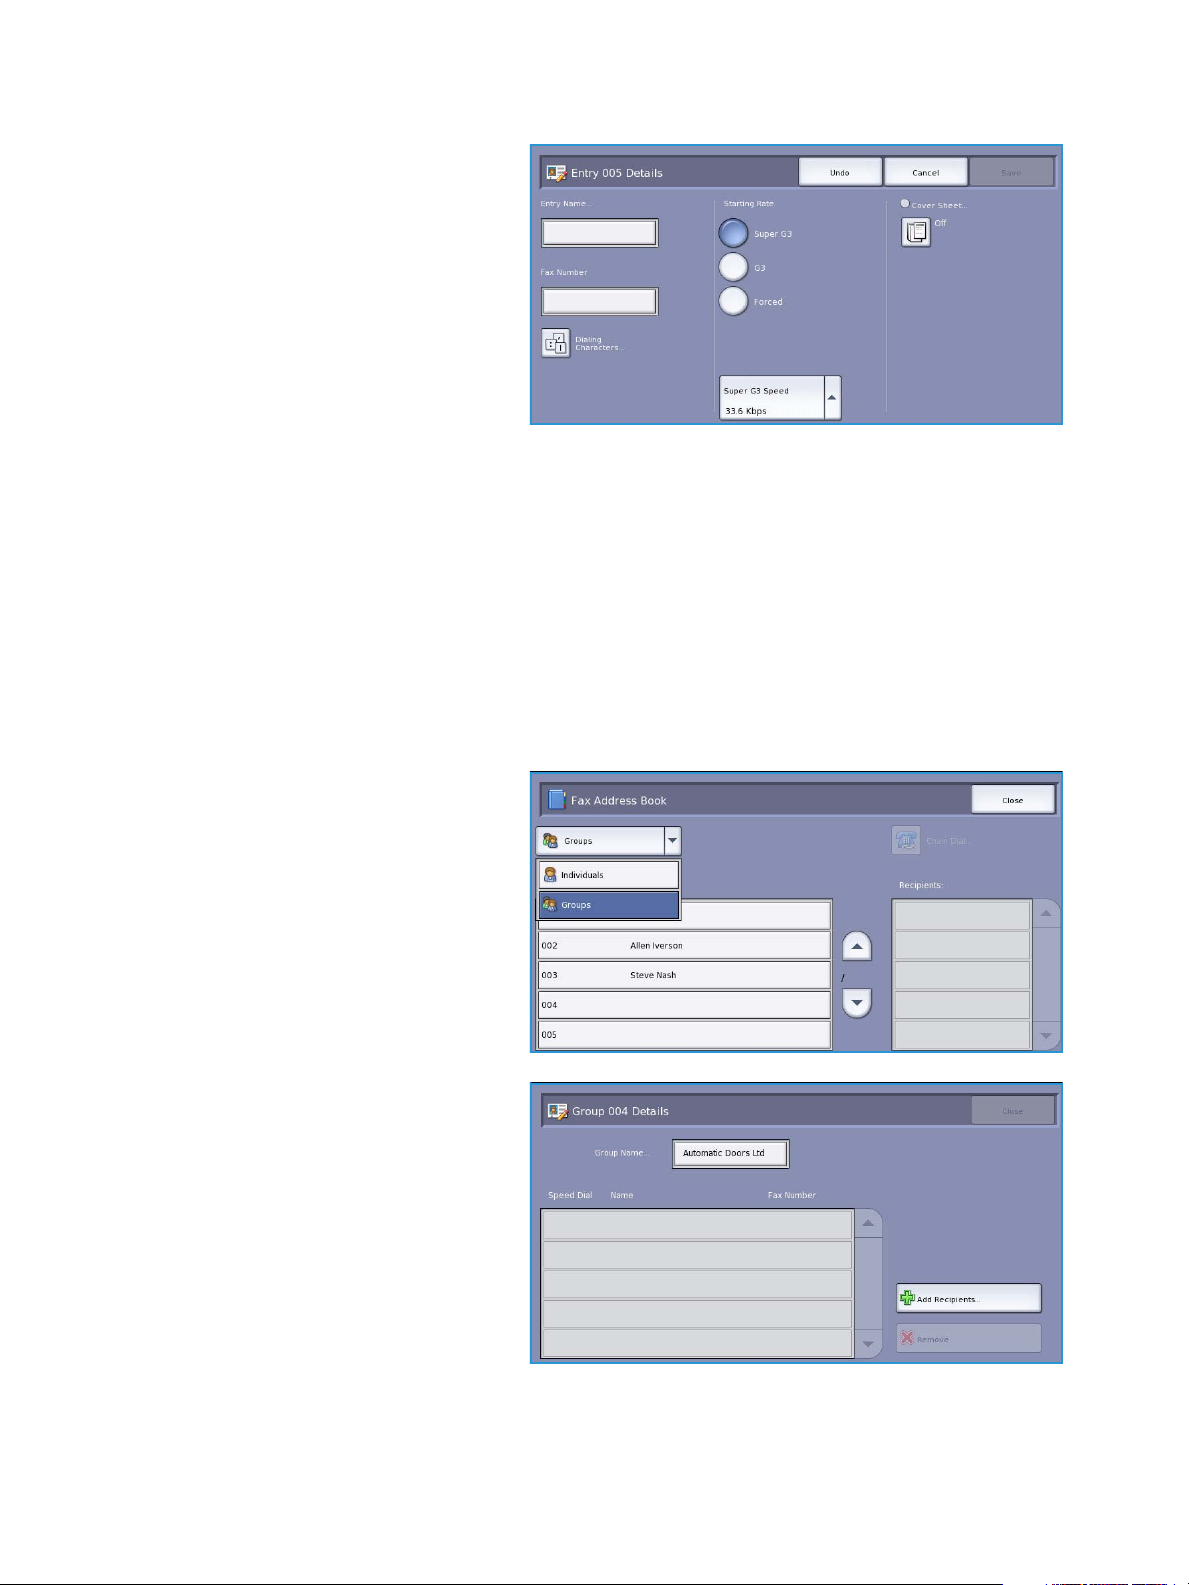
Dialing Options
5. Enter the fax number of the recipient
in the Fax Number field. Use the
Dialing Characters button to enter
the number if special characters are
required. Refer to Dialing Characters
on page 52.
6. Select a Starting Rate for the
recipient. Use the drop-down menu to
select a speed for the option selected.
Refer to Starting Rate on page 66.
7. Select Cover Sheet and select On to
include a cover sheet for the recipient. Complete the details required, refer to Cover Sheet on
page 56 for more information.
8. Select the Save button. The new entry is displayed in the list.
9. To amend an entry, use the Edit Details option. To delete the entry, use the Clear Entry option.
Groups
Group entries allow you to group individual entries under one number, for regularly used broadcast
transmissions. When transmitting a fax you only have to enter the one group number to send to
multiple destinations. Fax numbers can only be added to a group if they are first entered as an
individual entry.
1. To create a Group entry, select the Fax tab and the Address Book button.
2. Select the Groups option from the
drop-down menu.
3. Select an empty slot from the list of
entries. If necessary, use the Up and
Down buttons.
4. Enter the name of the Group in the
Group Name...field.
Use the backspace key to delete an
incorrect entry, or the Clear Text
button to delete the entire entry.
Select Save.
5. Select the Add Recipients button to
add recipients to the Group.
ColorQube™ 9301/9302/9303
Fax
55
Page 56

Dialing Options
6. Individual or Group recipients can be
added to a Group:
To add an individual entry, select
Individuals from the drop-down
menu. Select the entry required and
select Add to Group.
To add a group entry to the new
group, select Group from the dropdown menu. Select the group entry
required and select Add to Group.
7. Continue adding individuals and
groups until all the recipients have been added.
To delete entries from the Group, use Remove or Remove All.
8. Select Save when you have finished adding recipients. The recipients display in the list.
9. Select Close to return to the Address Book screen. The new Group has been created.
10. To amend a Group entry, select the Edit Details option. To delete a Group, use the Clear Entry
option.
Cover Sheet
The Cover Sheet feature attaches a cover sheet to the document being transmitted. This replaces the
routine of manually sending a cover sheet each time you send a document.
The Cover Sheet includes the following information:
• To the recipients name, can be entered at the device.
• From the sender’s name, as entered at the device.
• Comment the comment as specified from the comment list.
• Start Time the date and time of the fax transmission. Depending on the setup, the time is
displayed as a 12 or 24 hour clock. This information is added automatically to the cover
sheet.
• Pages the page count, excluding the cover page. This information is added automatically to
the cover sheet.
• Fax number the number of the sending fax device. This information is added automatically
to the cover sheet.
56
ColorQube™ 9301/9302/9303
Fax
Page 57

Dialing Options
To select a Cover Sheet:
1. Select the Cover Sheet button and
select On.
2. Select the To... field and enter the
name of the recipient using the
keyboard.
• Up to 30 alphanumeric
characters can be entered.
• To delete a character use the
back arrow key, or to clear the
entire entry select Clear Text.
•Use the Keyboards... button to
access additional language keyboards.
• Select Save.
3. Select the From... field and enter the name of the recipient using the keyboard and select Save.
4. Select the comment required from the
list.
If a customized comment is required,
select an <Available> comment and
use Edit to enter the text required.
Then select Save.
5. To delete a comment from the list,
select the comment and select Clear.
A confirmation screen is displayed,
select Confirm.
The cleared comment becomes
<Available>.
6. Select Save to save your selections and exit.
ColorQube™ 9301/9302/9303
Fax
57
Page 58
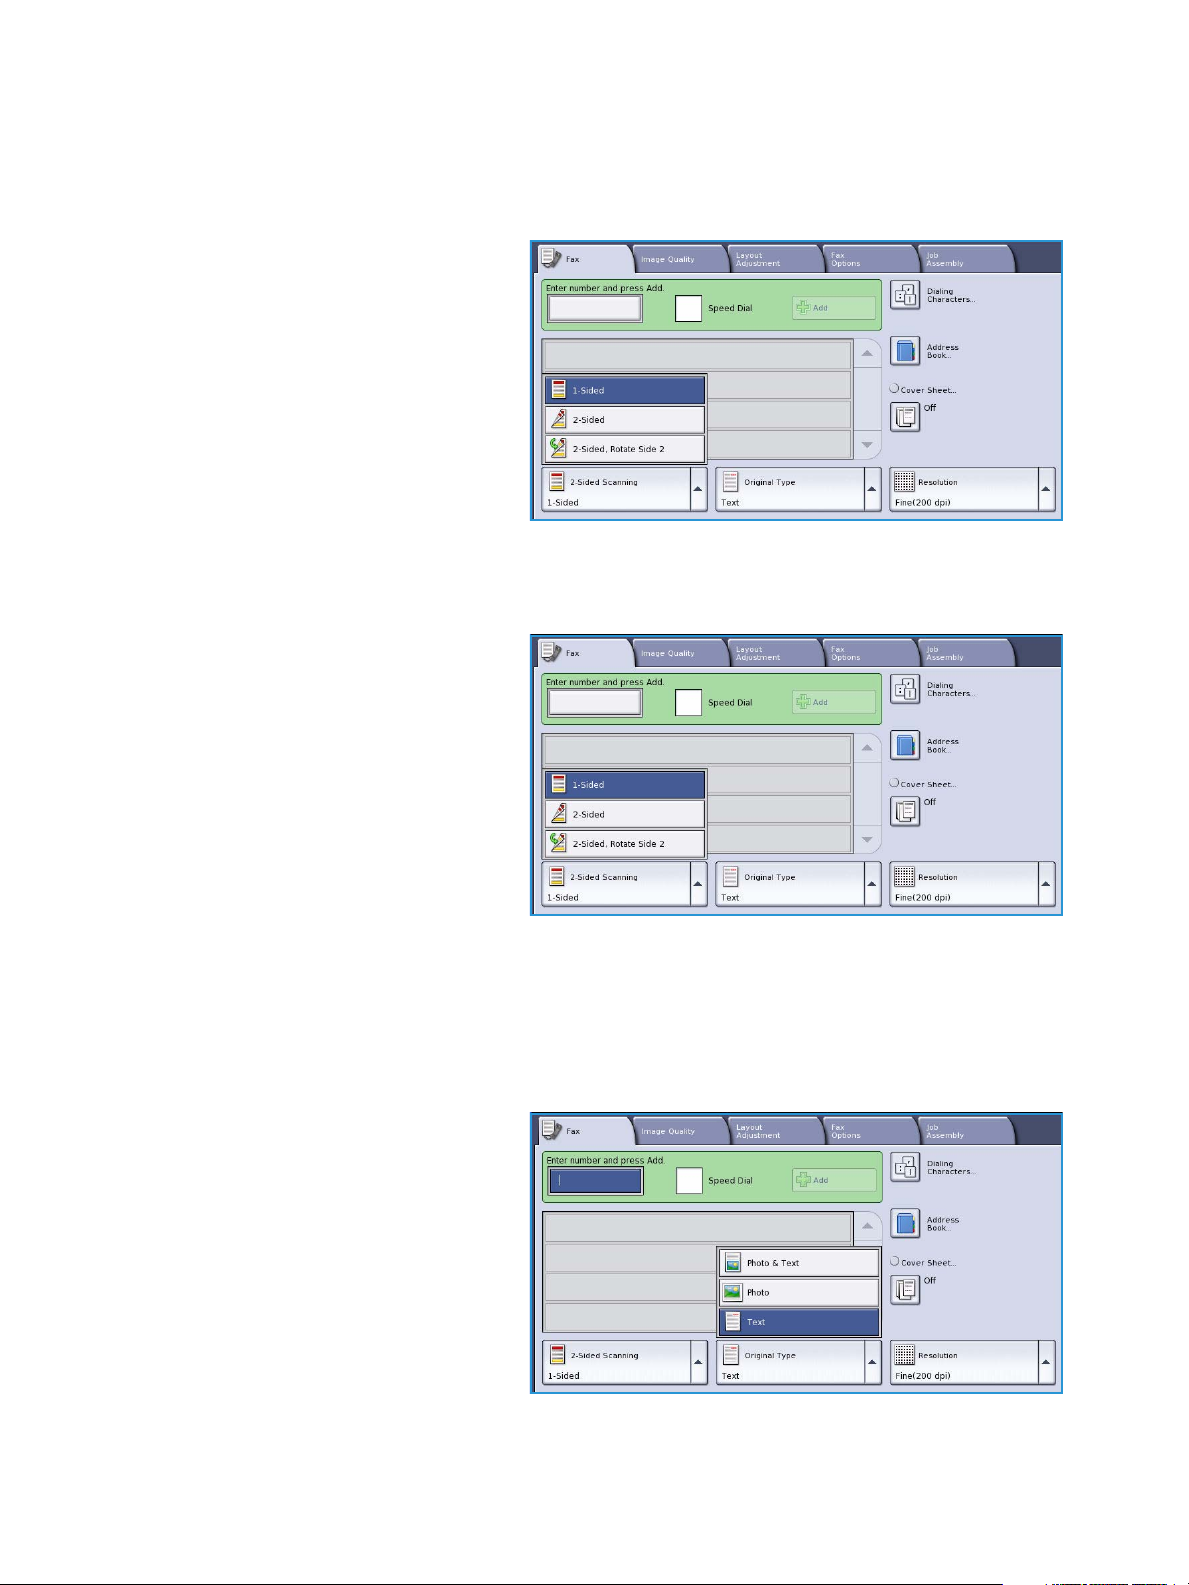
Fax
Fax
These Fax options provide access to fax
features which are required for programing
basic fax jobs. To access the Fax options,
select Services Home and Fax . The Fax
tab is displayed.
2-Sided Scanning
The 2-Sided Scanning option allows you to
set whether 1 or 2 sides of your original
document are scanned. The options are:
• 1Sided is used if your original
documents are single sided.
• 2Sided is used if your original
documents are double sided. The
document feeder must be used to
scan your originals with this option.
• 2-Sided, Rotate Side 2 select if your
original opens up like a calendar. The
document feeder must be used to scan your originals with this option.
Original Type
Use this option to define the type of original being used for scanning. Making the correct selection
enhances the quality of your output image. The options are:
• Photo & Text is recommended for
originals containing high quality
photographs and halftones. Using
this setting the scanned image will
contain medium quality pictures
though the sharpness of text and line
art is slightly reduced.
58
ColorQube™ 9301/9302/9303
Fax
Page 59
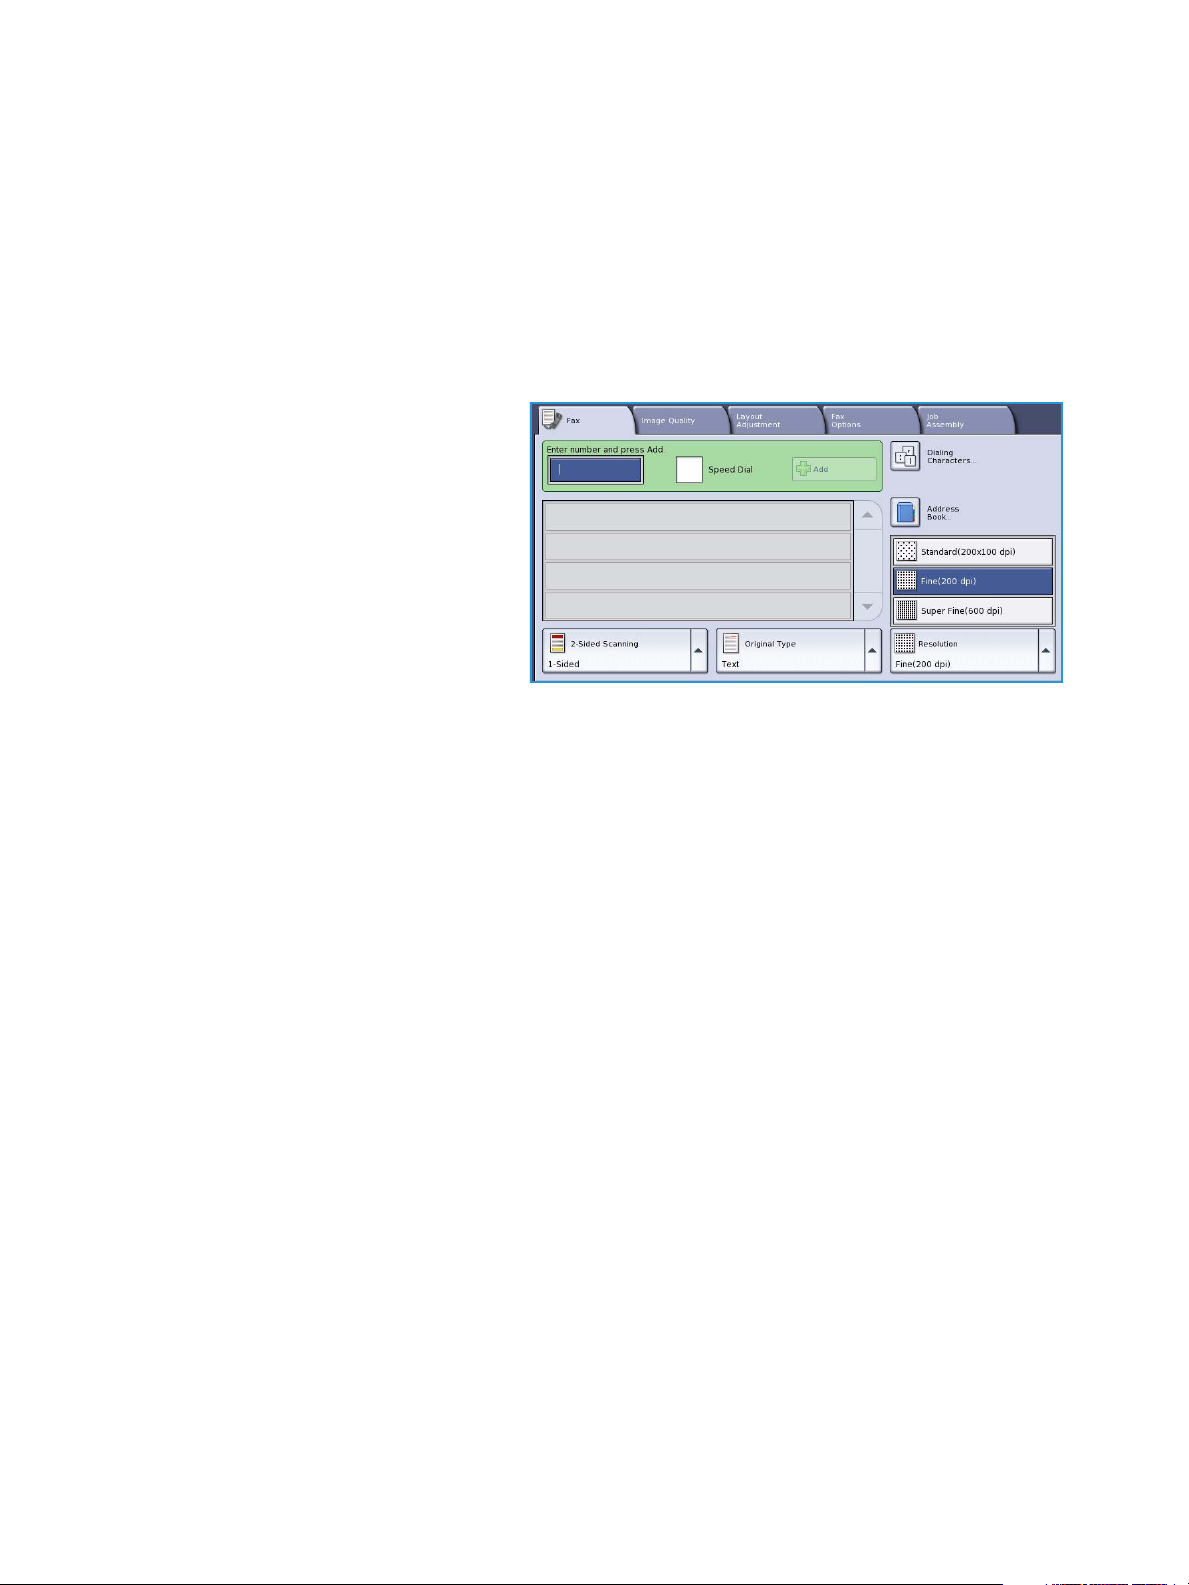
Fax
• Photo is used specifically for originals containing photos, magazine pictures or continuous tones
without any text or line art. Produces the best quality for photos but reduced quality text and line
art.
• Text produces sharper edges and is recommended for text and line art.
Resolution
The Resolution affects the appearance of the fax at the receiving fax terminal. A higher resolution
produces a better quality image. A lower resolution reduces communication time. The options are:
• Standard (200x100 dpi) is
recommended for text originals. It
requires less communication time but
does not produce the best image
quality for graphics and photos.
• Fine (200 dpi) is recommended for
line art and photos. This is the default
resolution and the best choice in most
cases.
• Superfine (600 dpi) is recommended
for photos and halftones, or images
that have gray tones. It requires more communication time, but produces the best image quality.
ColorQube™ 9301/9302/9303
Fax
59
Page 60

Image Quality
Image Quality
The Image Quality options provide access
to the features which enhance the image
quality or output quality. To access the
Image Quality options, select Services
Home and Fax. Then select the Image
Quality tab.
Image Options
Image Options is used to change the
appearance of the output image. The
options are:
• Lighten / Darken provides manual
control to adjust the lightness or
darkness of the scanned images.
Move the indicator down to darken
the image or up to lighten the image.
• Sharpness provides manual control to
adjust the sharpness of the scanned
images. Move the indicator up to
sharpen the image. Move the indicator down to soften the scanned image.
Image Enhancement
Image Enhancement provides options for
improving the quality of the output, by
reducing the background or adjusting the
contrast. The options are:
• Background Suppression enhances
originals that have colored
backgrounds, by reducing or
eliminating the background on the
output. This option is useful when
your original is on colored paper.
• Select Auto Suppression to
automatically suppress unwanted background.
60
ColorQube™ 9301/9302/9303
Fax
Page 61

Image Quality
• Select Off to turn the Background Suppression feature off, particularly when:
•The Darken adjustment does not produce a satisfactory output from light originals.
• The original has a gray or colored border, such as a certificate.
• You want to bring out fine detail that was lost due to a dark edge when using bound
originals.
• Contrast controls the image density on the output and compensates for an original that has too
much or too little contrast on the image.
• Select Manual Contrast to set the level of contrast yourself. Move the indicator towards the
More setting to reproduce more vivid blacks and whites for sharper text and lines but less
detail in pictures. Move the indicator towards the Less setting to reproduce more detail in
light and dark areas of the original.
• Select Auto Contrast to automatically set the contrast level depending on the original being
scanned.
ColorQube™ 9301/9302/9303
Fax
61
Page 62
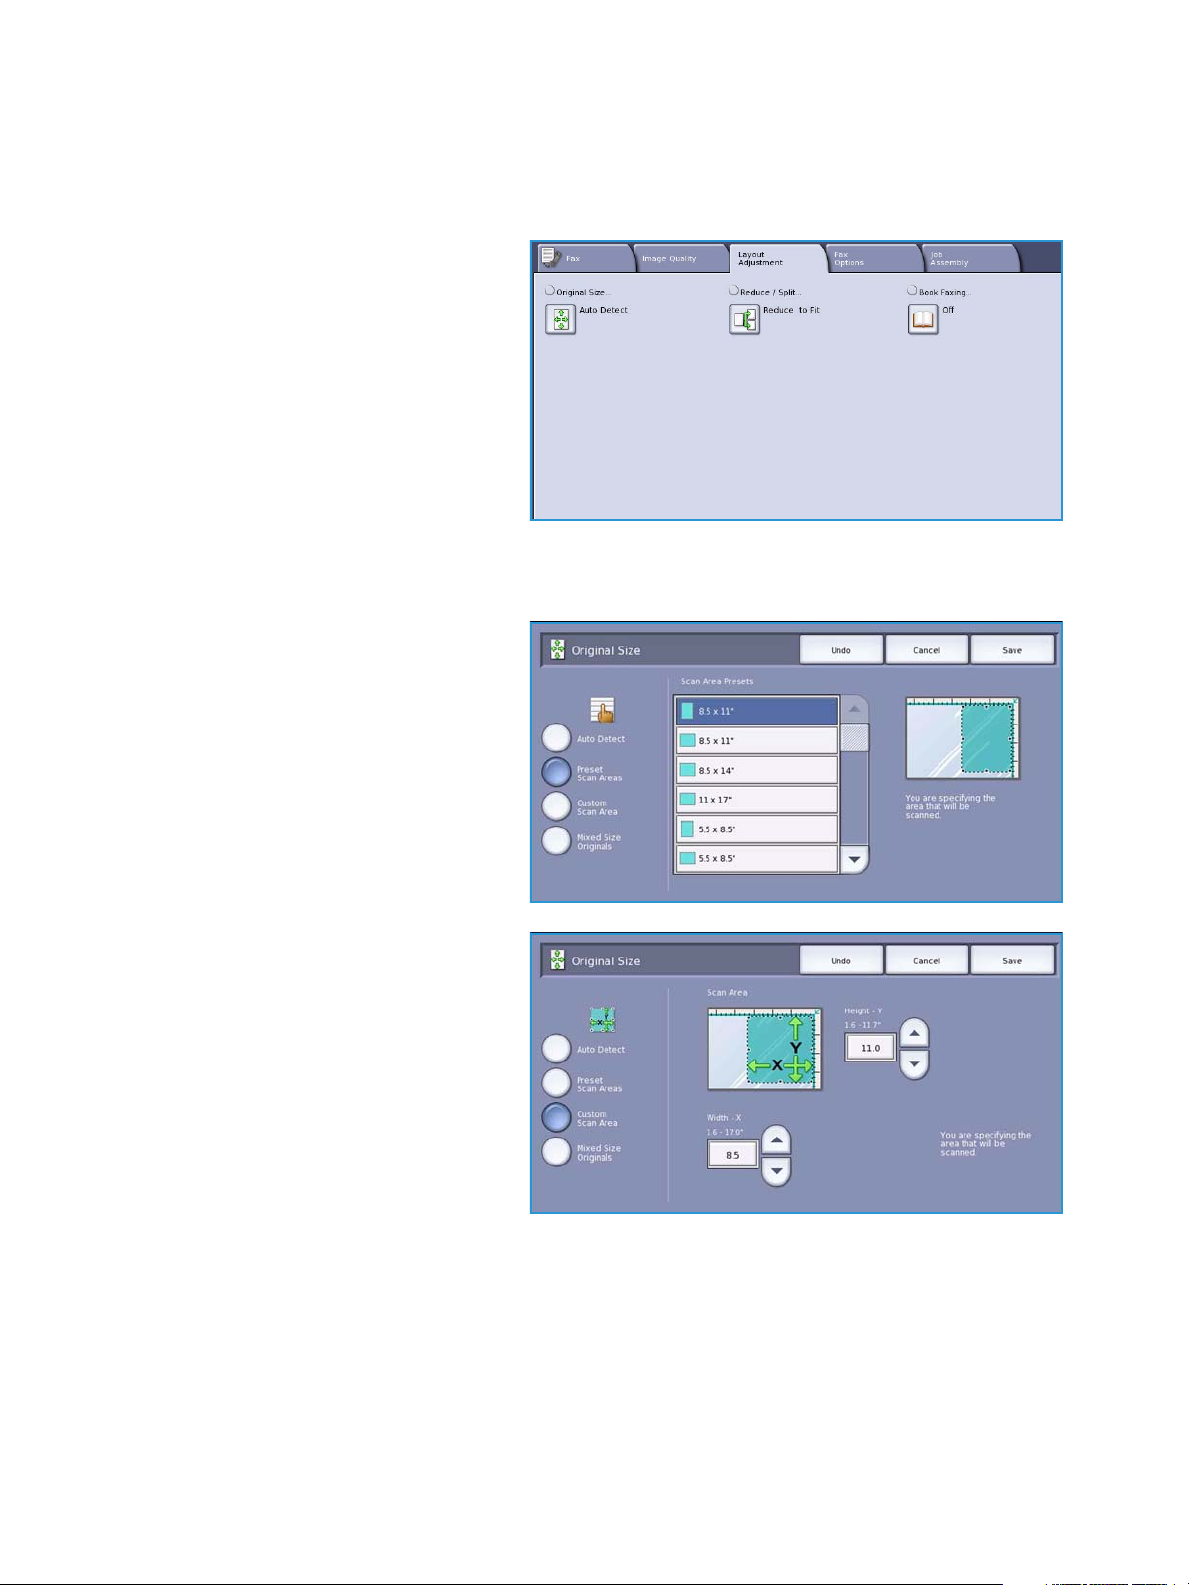
Layout Adjustment
Layout Adjustment
The Layout Adjustment options allow you
to manipulate the scanned image and
enhance the appearance and style of your
faxed document. To access the Layout
Adjustment options, select Services Home
and Fax . Then select the Layout
Adjustment tab.
Original Size
Select Original Size to enter the size of
your document when scanning from the document glass or the document feeder. Your device uses this
information to calculate the size of your original and the scanned image. You can also select Auto
Detect for automatic size detection, or Mixed Size Originals if scanning a mix of sizes. The options are:
• Auto Detect is the default setting and
enables automatic size sensing. The
size detected is matched to a
standard size paper.
• Preset Scan Areas allows you to
define the size of your original from a
list of pre-set, standard document
sizes. You can view the list by using
the scroll bar.
• Custom Scan Area is used to enter a
specific area for scanning. Measure
the area to be scanned on the original
and enter the X and Y axis
measurements into the fields
provided. Only the area specified is
scanned.
62
ColorQube™ 9301/9302/9303
Fax
Page 63
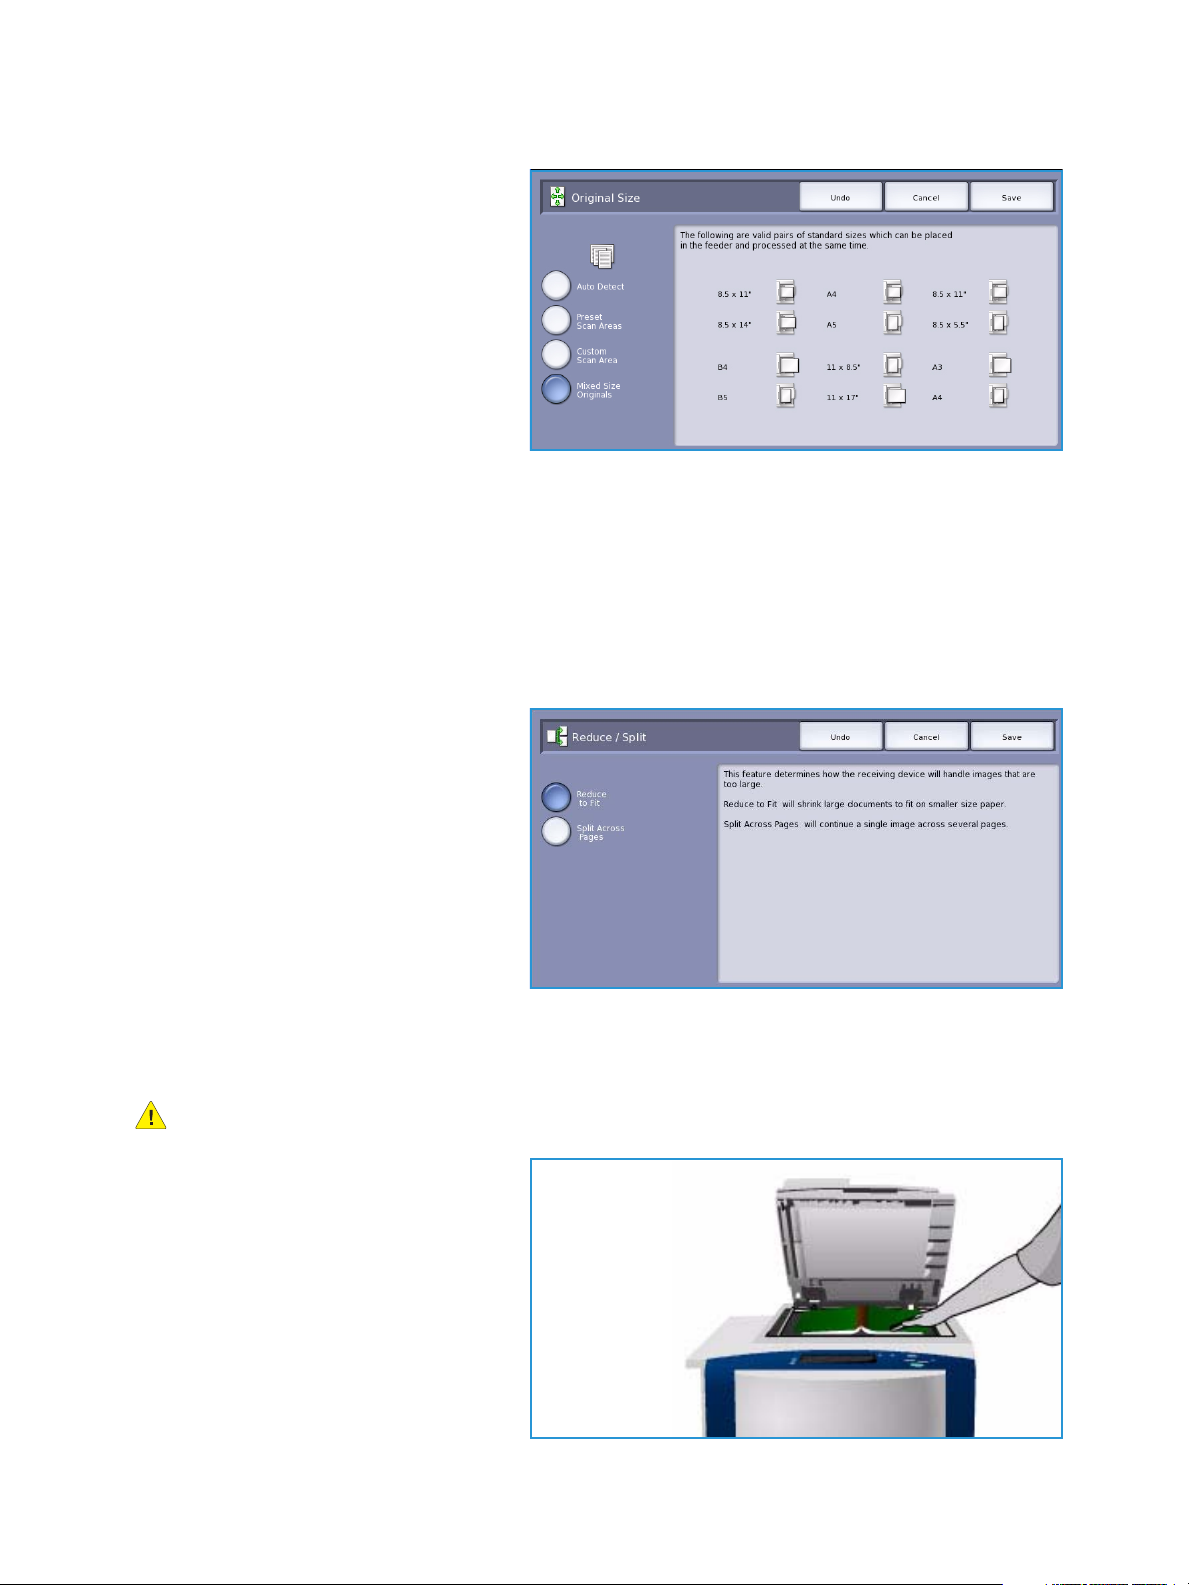
Layout Adjustment
• Mixed Size Originals allows you to
scan documents containing different
size pages. The pages must be the
same width, like A4 LEF and A3 SEF
(8.5x11” LEF and 11x17” SEF). Other
combinations are shown on the
screen.
The device will detect the size of the
documents and determine whether
the receiving fax machine can support
the various paper sizes. If the
receiving fax cannot support the page
sizes, the image is reduced or enlarged to fit.
Select Save to save your selections and exit.
Reduce/Split
Select Reduce/Split to specify how your faxed document is printed if your document paper size is
larger than the receiving fax machine's capabilities. The options are:
• Reduce to Fit this option reduces the
image to fit the paper size of the
receiving fax machine.
• Split Across Pages this option splits
the document into 2 equal parts, or
the majority of the image is put on to
1 page and the remainder on the next
page.
Select Save to save your selections and
exit.
Book Faxing
CAUTION: Do Not close the document feeder when scanning bound originals.
Select Book Faxing to specify which page
or pages of a book are to be scanned. The
book original is placed face down on the
document glass with the spine of the book
lined up with the marker on the rear edge
of the glass. Align the top of the bound
original against the rear edge of the
document glass.
ColorQube™ 9301/9302/9303
63
Fax
Page 64
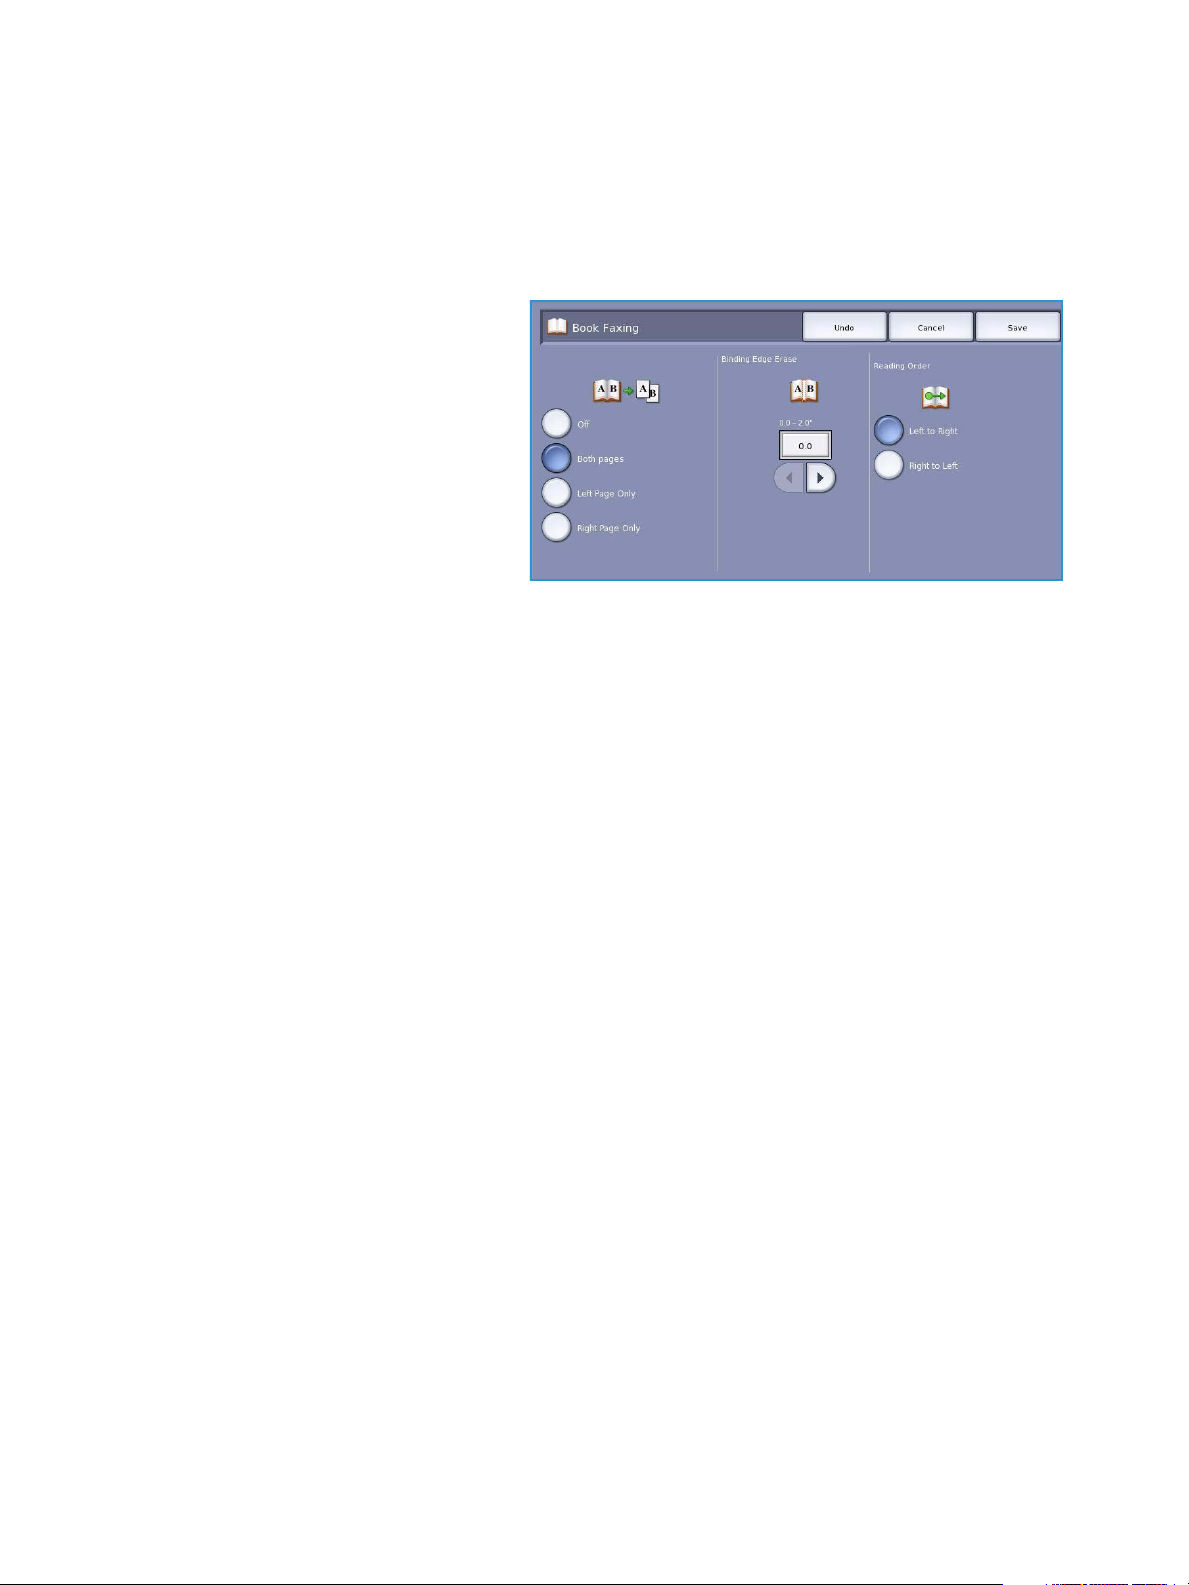
Layout Adjustment
The device will identify the size of the original during scanning. If the pages have a black or dark
colored border the device will assume that the pages are smaller than they really are. To overcome this
use the Custom Scan Area feature in Original Size to enter the exact size of the page. Refer to Original
Size on page 62.
The options are:
• Both Pages use to scan both pages,
the left page of the book will be
scanned first. Use the arrow buttons
to specify an amount from 0 to 50
mm (0 to 2”) to be deleted from the
center of the book in order to delete
unwanted marks reproduced from the
gutter of the book.
• Left Page Only use to scan the left
page only. Use the arrow buttons to
specify an amount from 0 to 25mm
(0 to 1”) to be deleted from the right
side of the page in order to delete unwanted marks reproduced from the gutter of the book.
• Right Page Only use to scan the right page only. Use the arrow buttons to specify an amount
from 0 to 25mm (0 to 1”) to be deleted from the left side of the page in order to delete unwanted
marks reproduced from the gutter of the book.
• Reading Order use to select if the pages read from Left to Right or Right to Left.
Note The Reading Order option may not be displayed if it has not been enabled in Too ls . Refer to
the Administration and Accounting guide for more information.
Select Save to save your selections and exit.
Several pages of a bound document can be faxed using the Build Job feature. Refer to Build Job on
page 73 for more information.
64
ColorQube™ 9301/9302/9303
Fax
Page 65

Fax Options
Fax Options
The Fax Options allow you to specify how
your fax document is transmitted and how
it is printed at the receiving fax machine.
To access the Fax Opti ons, select Services
Home and Fax. Then select the Fax
Options tab.
Confirmation Report
Select Confirmation Report to print a broadcast report to identify the success or failure of a fax job.
The options displayed depend on the settings enabled in Tools. Refer to the Administration and
Accounting guide for more information.
The options are:
Print Confirmation
• Use to print a transmission report
containing details about the fax,
together with a reduced copy of the
first faxed page.
•The Confirmation report is printed
after every transmission.
• When sending a fax to multiple
recipients, one report is printed listing
all of the recipients.
Print On Error Only
• Select this option to print the Confirmation report only if an error occurs with the transmission.
Select Save to save your selections and exit.
ColorQube™ 9301/9302/9303
Fax
65
Page 66
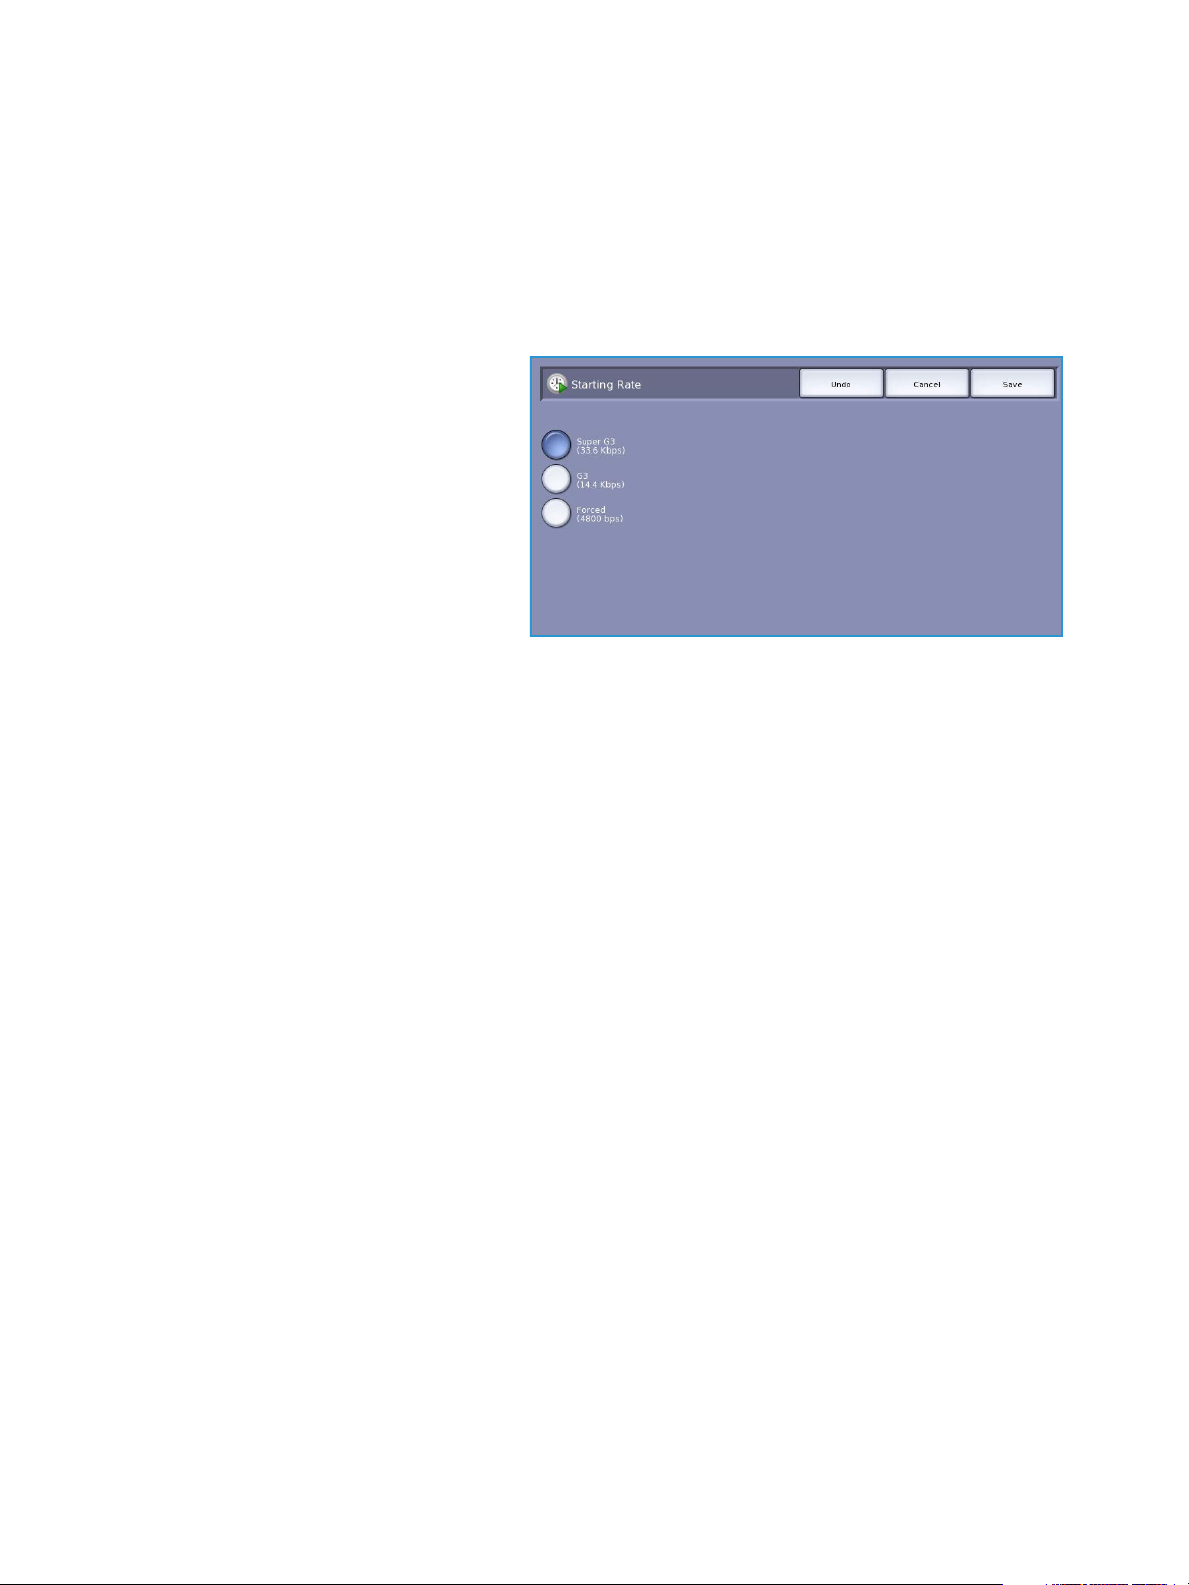
Fax O ption s
Starting Rate
Use Starting Rate to select the speed at which the device starts transmitting your fax job. A high
starting rate should be used in good transmission areas, and a low rate in poor quality areas. The
options are:
Super G3 (33.6 Kbps)
• Determines the transmission rate to
be used based on the maximum
capabilities of the receiving fax
machine.
• This rate minimizes transmission
errors by using Error Correction Mode
(ECM). Initial transmission speed is
33,600 Bits Per Second (bps).
G3 (14.4 Kbps)
• Selects the transmission rate based
on the maximum capabilities of the receiving fax machine.
• Initial transmission speed is 14,400 Bits Per Second (bps). This rate minimizes transmission errors
by using Error Correction Mode (ECM).
Forced (4800 bps)
• Used in areas of low quality communication, when experiencing telephone noise, or when fax
connections are susceptible to errors.
• Forced 4800 bps is a slower transmission rate but is less susceptible to errors. In some regional
areas the use of Forced 4800 bps is restricted.
Select Save to save your selections and exit.
66
ColorQube™ 9301/9302/9303
Fax
Page 67

Fax Options
Delay Send
Select Delay Send to specify the time within the next 24 hours that you want the fax to be
transmitted. Use this feature to transmit faxes during off-peak hours or when sending to another
country or time zone. Delay Send can also be used with Mailbox and Polling options.
The options are:
Specified Time
• Select Specified Time and select
either the Hour or the Minute field to
enter a time to send your fax.
•Use the arrow buttons or numeric
keypad to enter the hours and
minutes.
• If the device is set up to display the
time using a 12 hour clock, you must
also select either the AM or PM
button.
• Select Save to save your selections
and exit.
The fax will be stored in memory and sent at the specified time.
Send Header Text
This feature allows you to include header text information when sending the fax. The information is
printed in the header at the top of each page of the fax transmission. The information included is
displayed on the screen and can be customized using To ols . Refer to the Administration and
Accounting guide.
• Select On to enable the Send Header
Te x t to print on the fax output.
Select Save to save your selections and
exit.
ColorQube™ 9301/9302/9303
Fax
67
Page 68

Fax O ption s
Mailboxes
Mailboxes are areas of device memory
where incoming faxes are stored or from
which outgoing faxes can be polled.
Mailboxes enable you to store all received
fax documents until it is convenient to
retrieve them. Conversely, storing fax
documents in a mailbox for Polling allows
a remote user or users to retrieve the fax
on demand.
Mailboxes must be set up by the System
Administrator before fax documents can
be stored in them. The device can contain up to 200 electronic mailboxes within its memory. To allow a
remote user to fax to your mailbox they must know your mailbox number. To retrieve a document from
your mailbox the remote user must know your mailbox number and if appropriate, your passcode.
The mailbox passcode ensures that the fax documents held in the mailbox are secure and can only be
accessed by an authorized user. The passcode is a 4 digit number. If the mailbox has been set up with
a passcode of 0000 then any combination of numbers, including no numbers, can be entered as the
passcode to gain access to the mailbox.
Select the Mailboxes button. The options are:
Send to Remote Mailbox
This feature enables you to send a fax directly to an individual's private mailbox on a remote machine.
The remote machine must have mailbox capabilities.
1. Select Send to Remote Mailbox.
2. Enter the recipient's fax number using
the control panel, or select the
Address Book option and select the
recipient from the directory.
3. To send to a remote mailbox you
must know the recipients mailbox
number. Enter the Mailbox Number,
between 001 and 200.
4. Enter the 4-digit Mailbox Passcode.
5. Select Save to save your selections
and exit.
6. Use Delay Send to program a specific time to send the fax. Refer to Delay Send on page 67.
7. Load the originals and select Start on the control panel to send the fax to the recipient's mailbox.
A Store to Remote Mailbox message is displayed for information.
If enabled by your System Administrator, a report is printed once the documents are sent to the
remote mailbox.
68
ColorQube™ 9301/9302/9303
Fax
Page 69

Store to Local Mailbox
This feature allows you to store documents
to be polled. The document is stored in
your mailbox and automatically sent to a
remote fax machine when requested.
1. Select the Store to Mailbox button.
2. Enter the Mailbox Number, between
001 and 200.
3. Enter the Mailbox Passcode.
4. Select Save to save your selections
and exit.
5. Load the originals and select Start.
Your fax job is scanned and stored in the mailbox and the Mailboxes screen returns.
Print Local Mailbox Documents
Faxes stored in your mailbox can be
printed.
1. Select the Print Local Mailbox
Documents button.
2. Enter the Mailbox Number, between
001 and 200.
3. Enter the Mailbox Passcode.
4. Select Print All Documents to print
the contents of the mailbox.
Fax Options
The documents may be deleted after
printing, depending on the Mailbox & Polling Policies set.
Delete Local Mailbox Documents
All the faxes stored in your mailbox can be
deleted. Local Mailbox Documents are
faxes you have stored ready for Polling and
faxes that you have received in your
mailbox.
1. Select the Delete Local Mailbox
Documents button.
2. Enter the Mailbox Number, between
001 and 200.
3. Enter the Mailbox Passcode.
4. Select Delete All Documents to
delete the contents of the mailbox. A confirmation screen is displayed, select Delete All or Cancel.
Note The storage time for faxes is set up by the System Administrator.
ColorQube™ 9301/9302/9303
69
Fax
Page 70
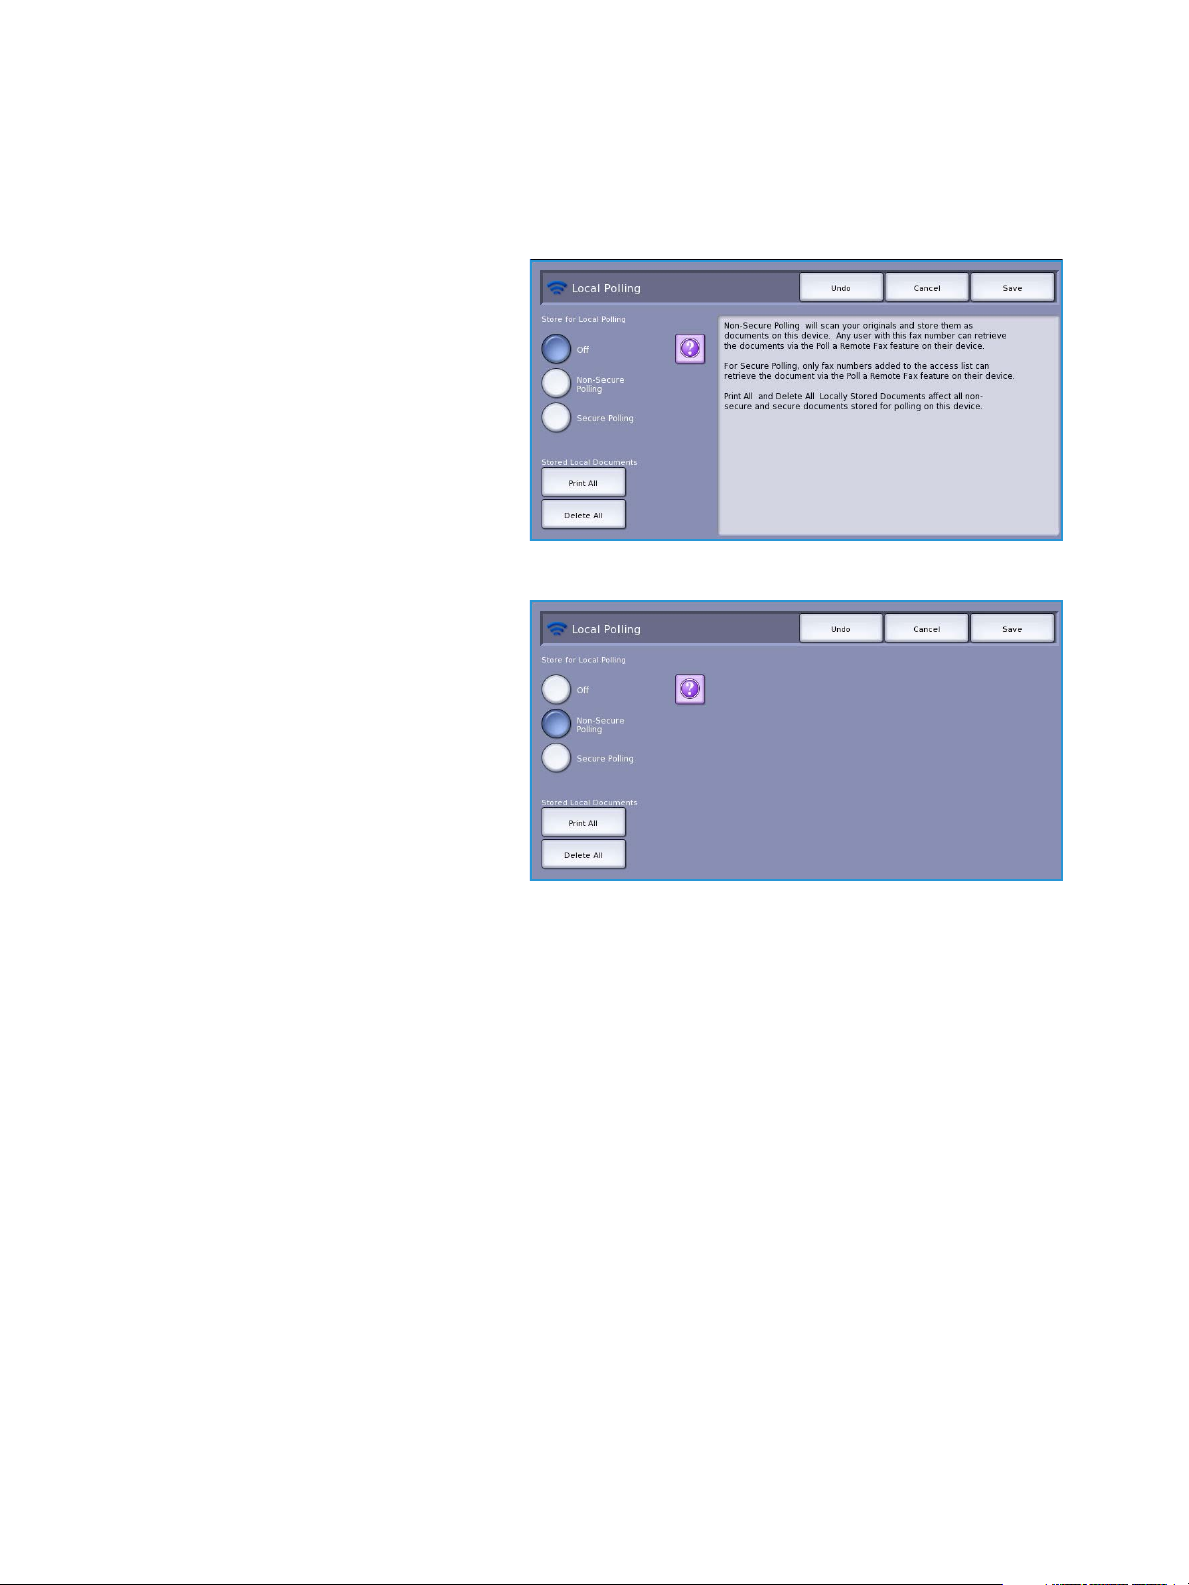
Fax O ption s
5. A confirmation screen is displayed prior to deleting the faxes stored in the selected mailbox.
Local Polling
The Local Polling feature allows a fax
document to be left in the memory of your
device to be retrieved by another fax
machine. If the fax document is in
memory it may be polled once and
deleted, or polled several times, depending
on the Mailbox & Polling Policies set.
Select the Local Polling button. The
options are:
Non-Secure Polling
This feature allows you to scan documents
and store them in the memory of your
device. When a remote fax machine polls
your device, it is able to retrieve the
scanned fax document or documents. No
passcode is required for Non-Secure
Polling.
1. Select the Non-Secure Polling button.
2. Select Save to save your selections
and exit.
3. Load the originals to be stored for
polling and press Start.
The originals are scanned and stored in memory ready to be polled.
70
ColorQube™ 9301/9302/9303
Fax
Page 71

Fax Options
Secure Polling
This feature allows you to scan documents and store them in the memory of your device ready for
polling. Secure Polling is used for sensitive documents, access is only granted if the fax numbers of the
retrieving devices have been entered, or if the Allow All Address Book fax numbers access option is
selected.
1. Select the Secure Polling button.
2. Enter the fax numbers of the devices
retrieving the document or select
Allow All Address Book fax numbers
access. The number of the remote fax
machine must be stored in the
Address Book.
3. Use Add to add more than one
number to the list. Use the Address
Book option to add a specific number
from the directory.
4. Select Save to save your selections and exit.
5. Load the originals to be stored for polling and press Start.
The originals are scanned and stored in memory ready to be polled.
Stored Local Document
Documents stored in memory for local
polling can be printed or deleted.
• Select Print All to print the
documents stored in memory.
• Select Delete All to delete all stored
documents. A confirmation screen is
displayed, select Delete All or Cancel.
Select Save to save your selections and
exit.
Remote Polling
The Remote Polling feature allows you to retrieve a stored document from a remote machine, where
you call or Poll that machine. Your device offers several ways of Polling another fax machine:
• Poll a Remote Fax retrieves a fax from a remote fax machine or machines, immediately or at a
specified time using Delay Send.
• Poll a Remote Mailbox retrieves a fax document from the mailbox of a remote fax machine. The
mailbox number and if applicable, the passcode must be known.
Note If your device does not connect with the remote machine when Polling, it redials the
number. If it does connect and then the transmission fails, it does not redial the number and you
have to start the Polling activity again. Polling a remote machine is not available if the fax line is
set to Send Only or Receive Only.
ColorQube™ 9301/9302/9303
Fax
71
Page 72

Fax O ption s
Select the Remote Polling button. The options are:
Poll a Remote Fax
The Poll a Remote Fax feature allows you to call a remote fax machine. The call locates and retrieves
faxes stored at the remote machine. Remote Polling allows you to poll a remote machine immediately
or at a specified time. More than one remote machine can be polled at a time.
1. Select the Poll a Remote Fax button.
2. Enter the fax numbers of the devices
which are being polled. Use Add to
add more than one number to the list.
Use the Speed Dial or Address Book
option to add a specific number from
the directory. Use the Dialing
Characters option to enter special
characters if required.
3. Use Delay Send to program a specific
time to poll the remote machine.
Refer to Delay Send on page 67.
4. Select Poll Now to commence polling.
The remote device is polled and the retrieved document printed. Select Close to exit.
Poll a Remote Mailbox
The Poll Remote Mailbox feature allows you to call a mailbox which is set up on a remote fax machine.
The call locates and retrieves faxes stored within the Polled mailbox.
1. Select the Poll a Remote Mailbox
button.
2. Enter the fax number of the device
being polled. Use the Address Book
option to add the number if required.
Use the Dialing Characters option to
enter the number if special characters
are required. Refer to Dialing
Characters on page 52.
3. Enter the Mailbox Number, between
001 and 200.
4. Enter the 4-digit Mailbox Passcode.
5. Select Poll Now to commence polling the mailbox.
The remote device is polled and the retrieved document printed. Select Close to exit.
72
ColorQube™ 9301/9302/9303
Fax
Page 73

Job Assembly
Some pages
with text and
some with
photos
Some pages
2 sided and
some 1 sided
Var ious
sized
originals
More than
100 pages
This tab provides access to the Build Job
feature for compiling jobs which have
different originals or programing
requirements within a job. To access the
Job Assembly options, select Services
Home and Fax. Then select the Job
Assembly tab.
Build Job
Use this feature to build a job that requires
different settings for each page, or a segment of
pages.
Job Assembly
You can select the appropriate settings to be
applied to individual pages or segments of a
completed job. First split the originals into
sections for individual programing.
1. Select Build Job on the Job Assembly tab
and select the On button.
2. Select Display this window between
segments to view the Build Job screen
during scanning. Then select Save.
3. Select the options required for the
first segment of the job.
Note The fax destination details
must be entered prior to scanning.
4. Load the first segment originals and
press Start.
5. Remove the first segment originals.
The Build Job screen displays the first segment in the list. The following options can be applied to
any segment:
• Delete Last Segment deletes the last segment scanned. You can continue programing the
Build Job.
• Delete All Segments deletes the current Build Job and returns you to the main Build Job
screen.
6. Using Program Next Segment, select the options required for the second segment.
7. Load the second segment originals and press Start.
ColorQube™ 9301/9302/9303
Fax
73
Page 74

Job Assembly
8. Repeat these steps until all segments of your job have been programed and scanned.
9. After the last segment has been scanned, select Submit the Job to indicate you have finished
scanning and the job can be processed and completed.
74
ColorQube™ 9301/9302/9303
Fax
Page 75
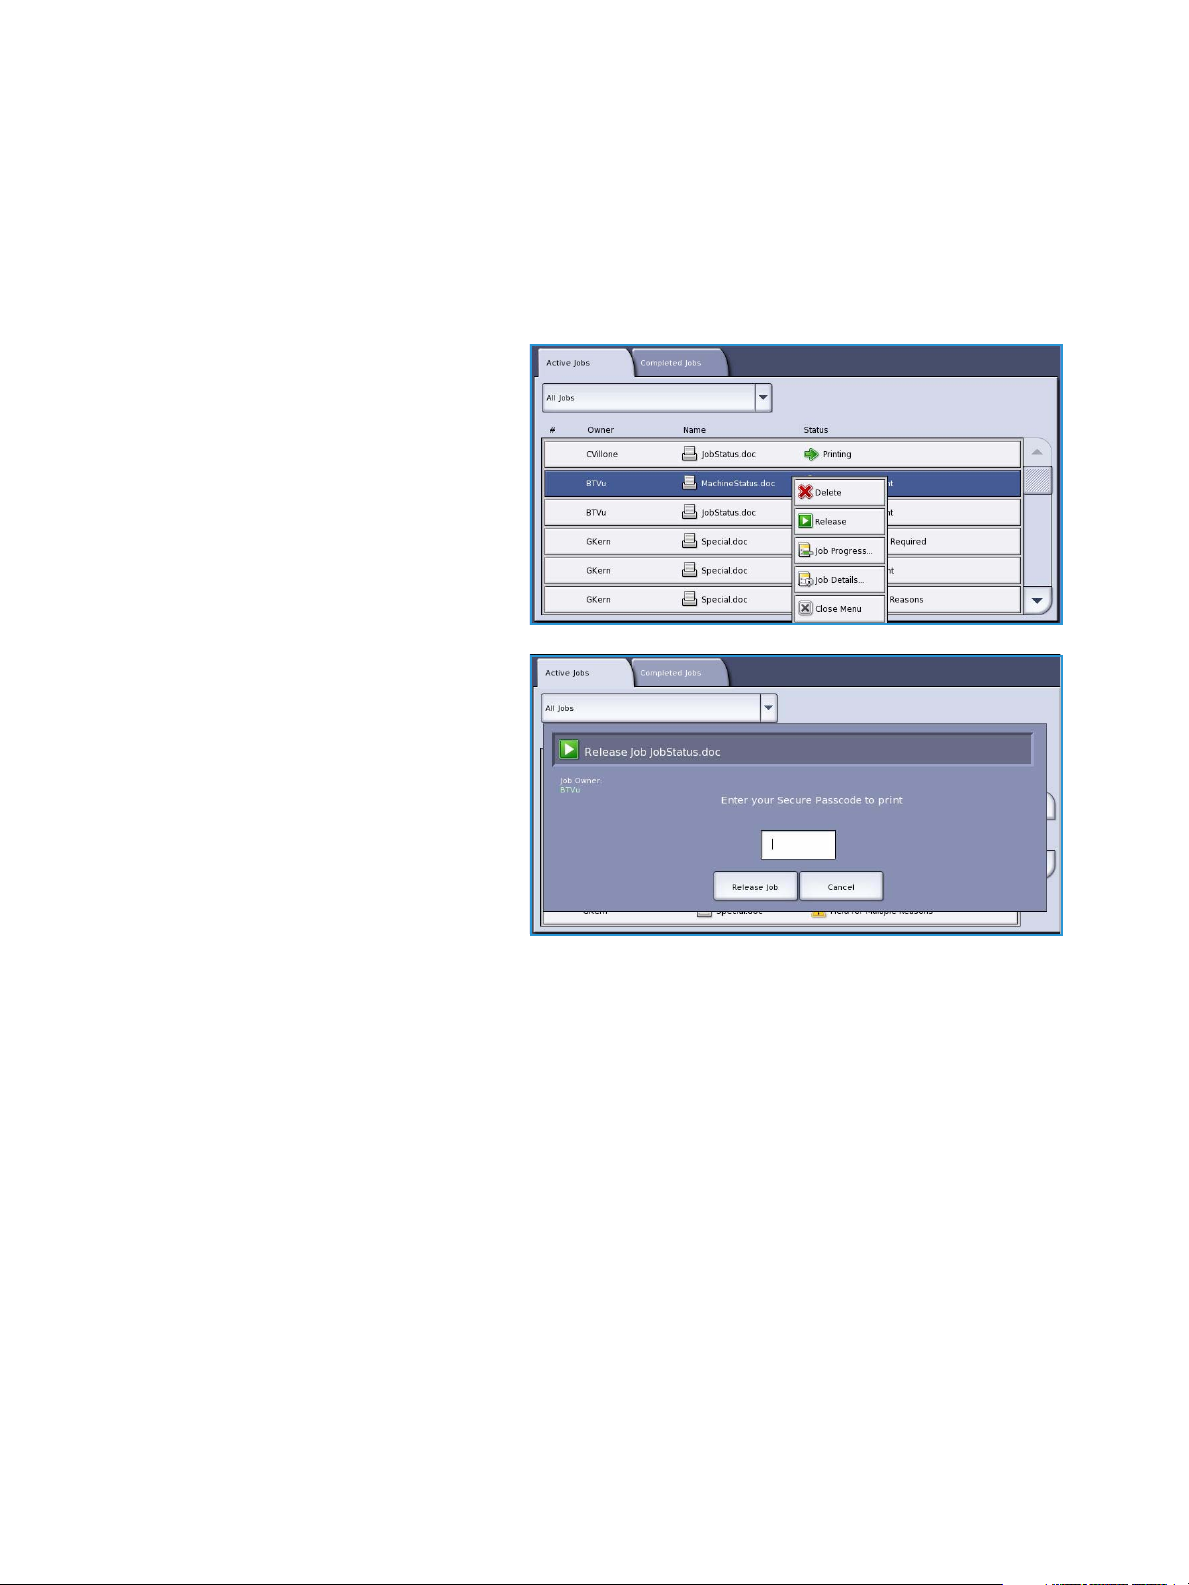
Secure Faxes
Secure Faxes
All incoming faxes are submitted to the Incomplete Jobs list as fax jobs and usually print immediately.
If the administrator has switched on the Secure Receive feature, all incoming faxes require a passcode
in order to release them for printing.
1. To release a Secure Fax for printing,
press the Job Status button and
select the held fax in the list.
2. To release a fax for printing, select the
Release button from the drop-down
menu.
3. Use the numeric keypad to enter the
passcode and select the Release Job
button.
The secure fax job is released for
printing.
ColorQube™ 9301/9302/9303
Fax
75
Page 76

Log In / Out
Log In / Out
If Authentication or Accounting has been enabled on the device, you may need to log in before using
some or all of the services. A picture of a lock on a button indicates that you must log in to use that
service.
1. To log in select the Log In/Out button
on the control panel. Selecting a
locked service will also prompt you to
enter a log in name and password.
2. Use the keyboard to enter your User
Name, then select the Next button.
3. Use the keyboard to enter your
Password, then select the Enter
button.
4. If an accounting system is in use on
the device, you may also need to
enter additional information.
•If Xerox Standard Accounting is
enabled, the user will also have
to log in using their Xerox
Standard Accounting details.
•If Network Accounting is enabled, the user must enter a User ID and an Account ID.
•If a Foreig n Device Interfac e (FDI) is installed, you are prompted to access via the device
installed, for example a card reader or coin slot.
Your user details display in the User
Details area on the right side of the
message display.
5. To log out, select the Log In/Out
button again or select the User
Details area and select Log Out from
the drop-down menu.
6. A confirmation screen is displayed,
select Log Out or Cancel.
76
ColorQube™ 9301/9302/9303
Fax
Page 77

Version 1.0
09/10
Xerox® ColorQube™
9301/9302/9303
Server Fax
Page 78

©2010 Xerox Corporation. All Rights Reserved. Unpublished rights reserved under the copyright laws of the United States. Contents
of this publication may not be reproduced in any form without permission of Xerox Corporation.
XEROX®, XEROX and Design® and ColorQube® are trademarks of Xerox Corporation in the United States and/or other countries.
Changes are periodically made to this document. Changes, technical inaccuracies, and typographic errors will be corrected in
subsequent editions.
Document version 1.0: September 2010
Page 79

Contents
Introduction . . . . . . . . . . . . . . . . . . . . . . . . . . . . . . . . . . . . . . . . . . . . . . . . . . . . . . . . . . . . . . . . . . . . . . . . . . . . 80
Dialing Options . . . . . . . . . . . . . . . . . . . . . . . . . . . . . . . . . . . . . . . . . . . . . . . . . . . . . . . . . . . . . . . . . . . . . . . . . 81
Manual Dialing . . . . . . . . . . . . . . . . . . . . . . . . . . . . . . . . . . . . . . . . . . . . . . . . . . . . . . . . . . . . . . . . . . . . . 81
Dialing Characters . . . . . . . . . . . . . . . . . . . . . . . . . . . . . . . . . . . . . . . . . . . . . . . . . . . . . . . . . . . . . . . . . . 81
Fax Directory . . . . . . . . . . . . . . . . . . . . . . . . . . . . . . . . . . . . . . . . . . . . . . . . . . . . . . . . . . . . . . . . . . . . . . . 82
Server Fax Options . . . . . . . . . . . . . . . . . . . . . . . . . . . . . . . . . . . . . . . . . . . . . . . . . . . . . . . . . . . . . . . . . . . . . . 84
2-Sided Scanning . . . . . . . . . . . . . . . . . . . . . . . . . . . . . . . . . . . . . . . . . . . . . . . . . . . . . . . . . . . . . . . . . . . 84
Original Type . . . . . . . . . . . . . . . . . . . . . . . . . . . . . . . . . . . . . . . . . . . . . . . . . . . . . . . . . . . . . . . . . . . . . . . 84
Resolution . . . . . . . . . . . . . . . . . . . . . . . . . . . . . . . . . . . . . . . . . . . . . . . . . . . . . . . . . . . . . . . . . . . . . . . . . . 85
Image Quality . . . . . . . . . . . . . . . . . . . . . . . . . . . . . . . . . . . . . . . . . . . . . . . . . . . . . . . . . . . . . . . . . . . . . . . . . . 86
Image Options . . . . . . . . . . . . . . . . . . . . . . . . . . . . . . . . . . . . . . . . . . . . . . . . . . . . . . . . . . . . . . . . . . . . . . 86
Image Enhancement . . . . . . . . . . . . . . . . . . . . . . . . . . . . . . . . . . . . . . . . . . . . . . . . . . . . . . . . . . . . . . . . 86
Layout Adjustment . . . . . . . . . . . . . . . . . . . . . . . . . . . . . . . . . . . . . . . . . . . . . . . . . . . . . . . . . . . . . . . . . . . . . 88
Original Orientation . . . . . . . . . . . . . . . . . . . . . . . . . . . . . . . . . . . . . . . . . . . . . . . . . . . . . . . . . . . . . . . . . 88
Original Size . . . . . . . . . . . . . . . . . . . . . . . . . . . . . . . . . . . . . . . . . . . . . . . . . . . . . . . . . . . . . . . . . . . . . . . . 89
Fax Options . . . . . . . . . . . . . . . . . . . . . . . . . . . . . . . . . . . . . . . . . . . . . . . . . . . . . . . . . . . . . . . . . . . . . . . . . . . . 90
Delay Send . . . . . . . . . . . . . . . . . . . . . . . . . . . . . . . . . . . . . . . . . . . . . . . . . . . . . . . . . . . . . . . . . . . . . . . . . 90
Job Assembly . . . . . . . . . . . . . . . . . . . . . . . . . . . . . . . . . . . . . . . . . . . . . . . . . . . . . . . . . . . . . . . . . . . . . . . . . . . 91
Build Job . . . . . . . . . . . . . . . . . . . . . . . . . . . . . . . . . . . . . . . . . . . . . . . . . . . . . . . . . . . . . . . . . . . . . . . . . . . 91
Log In / Out . . . . . . . . . . . . . . . . . . . . . . . . . . . . . . . . . . . . . . . . . . . . . . . . . . . . . . . . . . . . . . . . . . . . . . . . . . . . 92
ColorQube™ 9301/9302/9303
Server Fax
79
Page 80

Introduction
Introduction
Server Fax is a standard feature that can
be enabled. If enabled, it is selected by
pressing the Services Home button, then
the Server Fax option.
Server Fax scans your documents and
sends them to any type of fax machine
that is connected to a telephone network.
Your images are sent from your device to a
Third Party fax server, which relays them
over the telephone network to the fax
number of your choice.
This means that your fax transmissions
are controlled by the server, which may
limit your faxing options. For example,
the server may be set-up to collect and
send all faxes at off peak times.
Most feature screens include these
buttons to confirm or cancel your
choices.
• Undo resets the current screen to
the values that were displayed when
the screen was opened.
• Cancel resets the screen and returns to the previous screen.
• Save saves the selections made and returns to the previous screen.
• Close closes the screen and returns to the previous screen.
Instructions for sending a server fax and using the basic features are provided in ColorQube™
9301/9302/9303 How To Sheets. If Authentication or Accounting has been enabled on your device,
you may have to enter log in details to access the features, refer to Log In / Out on page 92.
80
ColorQube™ 9301/9302/9303
Server Fax
Page 81
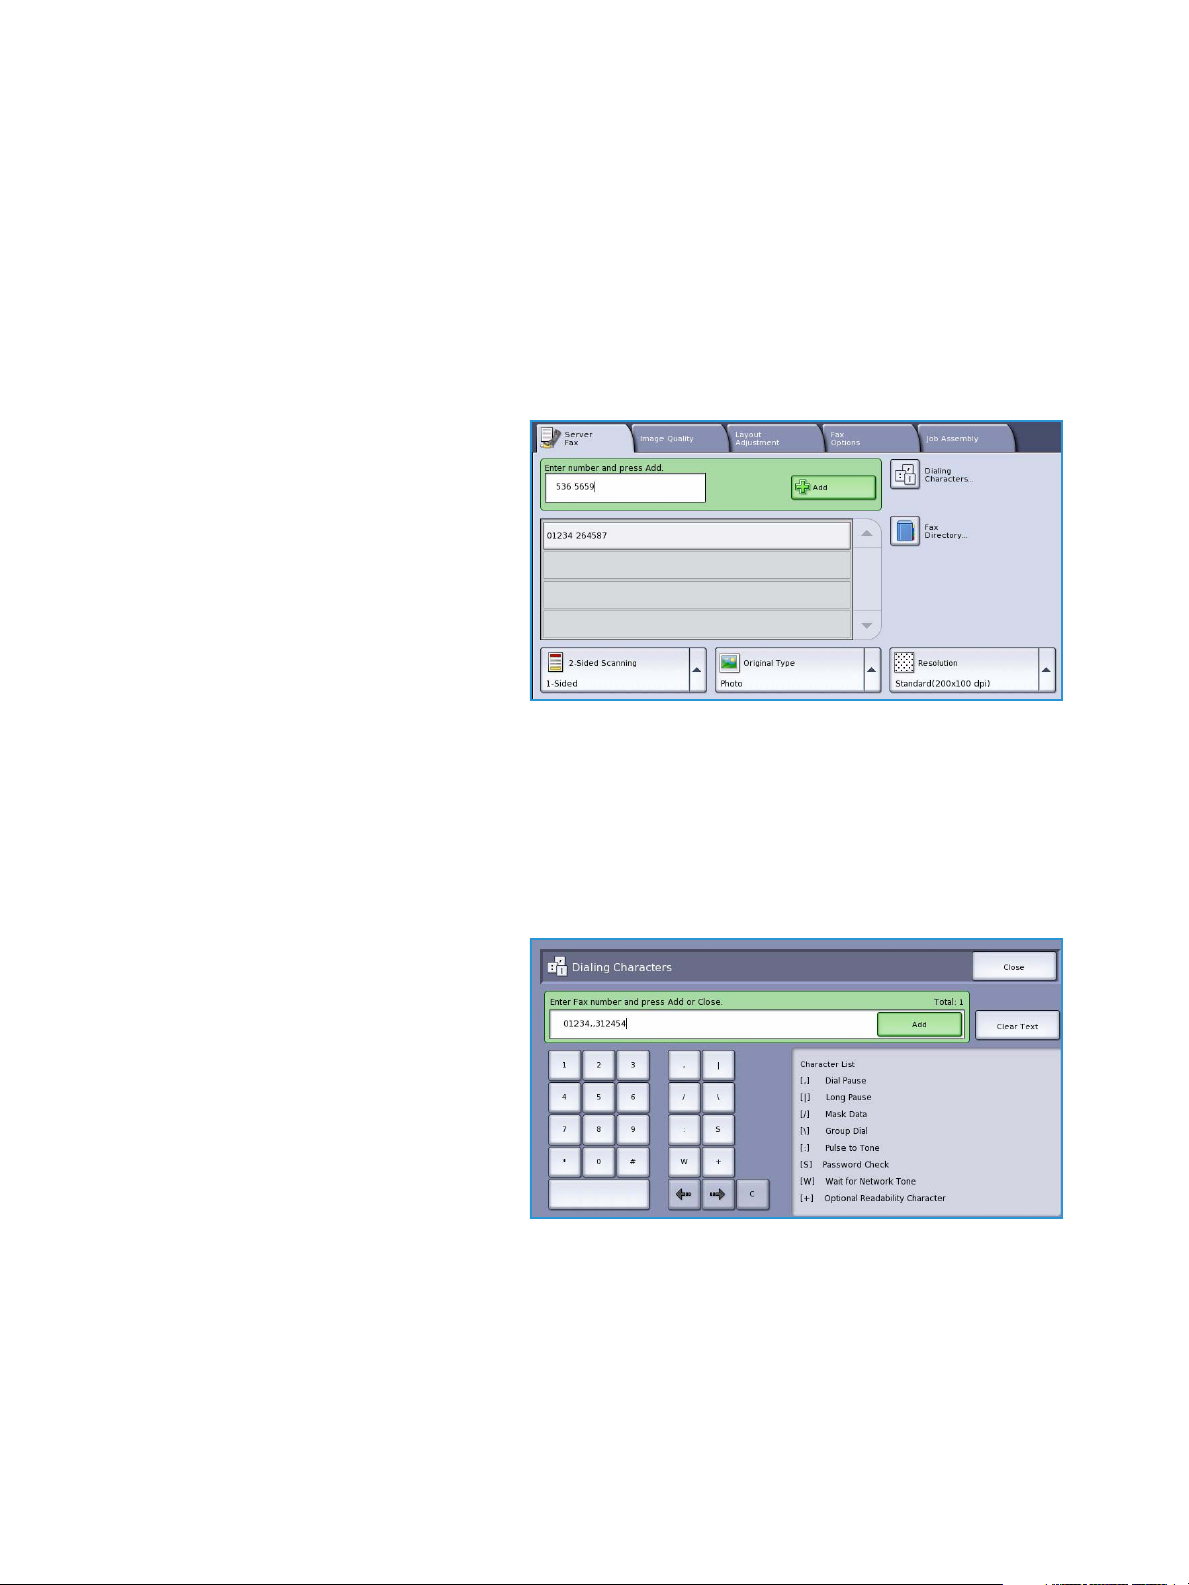
Dialing Options
Dialing Options
The dialing options enable you to enter the destination fax number or numbers. Select the appropriate
dialing option for your fax job.
To access the Dialing Options, select Services Home and Server Fax.
Manual Dialing
1. Select the fax number field and enter
the fax number required using the
numeric keypad.
2. If special characters are required, use
the Dialing Characters option to
enter the number plus additional
dialing characters. Refer to Dialing
Characters on page 81.
3. Select Add to add the number to the
recipient list. Enter additional
numbers as required.
The fax will be sent to all the numbers in the recipient list.
Dialing Characters
Additional dialing characters can be accessed by selecting the Dialing Characters button. Use this
option to enter the fax number if special characters are required. To enter a fax number using the
dialing characters:
1. Select the Dialing Characters button.
2. Use the numeric keypad to enter the
number plus additional dialing
characters.
The following characters are
available:
• Dial Pause [,] use to pause
between numbers. The pause
allows time to switch from an
inside to an outside line during
automatic dialing. For additional
pause time, add multiple pauses. If you are using charge code numbers, enter a pause after
the fax number but before the charge code number.
• Long Pause [
• Mask Data [/] use to protect confidential information. For example, if a special charge code
or credit card number is required for a call, simply use the Mask Data character. Select the /
character before entering confidential numbers. After the last confidential number, select /
again to turn the mask data off. Characters between the / symbols will appear as *.
|] use to enter a long pause between numbers.
ColorQube™ 9301/9302/9303
Server Fax
81
Page 82

Dialing Options
• Group Dial [\] use to add another fax number to the entry if the fax is being transmitted to
multiple recipients.
• Pulse to Tone [:] use to switch between pulse and tone dialing.
• Password Check [S] use for remote terminal identification. This character verifies that the
correct number has been dialled.
• Wait for Network Tone [W] suspends dialing until an expected network tone is detected. It
can also be used to detect a specific tone when accessing an outside line or other service.
• Optional Readability Character [+] this is used for readability purposes and does not affect
the number entered. For example, if you wish to identify the area code of a fax number, use
the Readability Character 01234+567890.
If an incorrect entry is made, use the left/right arrows to navigate through the number and use
the C button to delete a character. Use Clear Text to delete all the characters.
3. When you have entered the fax number and dialing characters required, select Add to add the
number to the recipient list.
4. Select Close to return to the fax options.
Fax Directory
The Fax Directory is used to store individual fax numbers which are used frequently. The Fax Directo ry
can be accessed from all screens where a fax number requires entering. Up to 29 entries can be added.
Using the Fax Directory
If numbers have been entered into the Fax Directory they can be accessed via the Fax Di rect ory
button.
1. Select the Fax Directory button.
A list of fax numbers entered in the
Fax Directory is displayed.
2. Select the required number and select
Add to Recipients from the dropdown menu. The number is added to
the Recipients list.
Continue adding recipients as
required.
3. To edit an entry, select it in the list
and select the Edit button.
Edit the entry as required and select Save.
4. To clear an entry from the list, select the entry requiring deletion and select Clear Entry from the
drop-down menu. A confirmation screen is displayed, select Clear Entry or Cancel.
5. Select Close to return to the fax options.
The fax will be sent to all the numbers in the recipient list.
82
ColorQube™ 9301/9302/9303
Server Fax
Page 83

Setting up the Fax Directory
1. Select the Server Fax tab and the Fax
Directory button.
2. Select an empty slot from the list of
entries. If necessary, use the scroll bar.
Dialing Options
3. Enter the fax number in the Edit Fax
Number field.
Use the C button to delete an
incorrect entry, or the Clear Text
button to delete the entire entry.
Select Save.
The new entry is displayed in the list.
4. To use the entry for the current job,
select the entry in the list and select
Add To Recipients.
The number is added to the
Recipients list.
5. To edit an entry, select it in the list
and select the Edit button.
Edit the entry as required and select
Save.
6. To exit from the Fax Directory, select
Close.
ColorQube™ 9301/9302/9303
Server Fax
83
Page 84

Server Fax Options
Server Fax Options
These Server Fax options provide access to
fax features which are required for
programing basic server fax jobs. To access
the Fax options, select Services Home and
Server Fax. The Server Fax tab is
displayed.
2-Sided Scanning
The 2-Sided Scanning option allows you to
set whether 1 or 2 sides of your original
document are scanned. The options are:
• 1Sided is used if your original
documents are single sided.
• 2Sided is used if your original
documents are double sided. The
document feeder must be used to
scan your originals with this option.
• 2-Sided, Rotate Side 2 select if your
original opens up like a calendar. The
document feeder must be used to scan your originals with this option.
Original Type
Use this option to define the type of original being used for scanning. Making the correct selection
enhances the quality of your output image. The options are:
• Photo & Text is recommended for
originals containing high quality
photographs and halftones. Using
this setting the scanned image will
contain medium quality pictures
though the sharpness of text and line
art is slightly reduced.
84
ColorQube™ 9301/9302/9303
Server Fax
Page 85

Server Fax Options
• Photo is used specifically for originals containing photos, magazine pictures or continuous tones
without any text or line art. Produces the best quality for photos but reduced quality text and line
art.
• Text produces sharper edges and is recommended for text and line art.
Resolution
The Resolution affects the appearance of the fax at the receiving fax terminal. A higher resolution
produces a better quality image. A lower resolution reduces communication time. The options are:
• Standard (200x100 dpi) is
recommended for text documents. It
requires less communication time but
does not produce the best image
quality for graphics and photos.
• Fine (200 dpi) is recommended for
line art and photos. This is the default
resolution and the best choice in most
cases.
ColorQube™ 9301/9302/9303
Server Fax
85
Page 86

Image Quality
Image Quality
The Image Quality options provide access
to the features which enhance the image
quality or output. To access the Image
Quality options, select Services Home and
Server Fax. Then select the Image Quality
tab.
Image Options
Image Options is used to change the
appearance of the output image. The
options are:
• Lighten / Darken provides manual
control to adjust the lightness or
darkness of the scanned images.
Move the indicator down to darken
the image or up to lighten the image.
Image Enhancement
Image Enhancement provides options for
improving the quality of the output, by
reducing the background or adjusting the
contrast. The options are:
• Background Suppression enhances
originals that have colored
backgrounds, by reducing or
eliminating the background on the
output. This option is useful when
your original is on colored paper.
• Select Auto Suppression to
automatically suppress unwanted background.
• Select Off to turn the Background Suppression feature off, particularly when:
•The Darken adjustment does not produce a satisfactory output from light originals.
86
ColorQube™ 9301/9302/9303
Server Fax
Page 87

Image Quality
• The original has a gray or colored border, such as a certificate.
• You want to bring out fine detail that was lost due to a dark edge when using bound
originals.
• Contrast controls the image density on the output and compensates for an original that has too
much or too little contrast on the image.
• Select Manual Contrast to set the level of contrast yourself. Move the indicator towards the
More setting to reproduce more vivid blacks and whites for sharper text and lines but less
detail in pictures. Move the indicator towards the Less setting to reproduce more detail in
light and dark areas of the original.
• Select Auto Contrast to automatically set the contrast level depending on the original being
scanned.
ColorQube™ 9301/9302/9303
Server Fax
87
Page 88

Layout Adjustment
Layout Adjustment
The Layout Adjustment options allow you
to manipulate the scanned image and
enhance the appearance and style of your
faxed document.To access the Layout
Adjustment options, select Services Home
and Server Fax. Then select the Layout
Adjustment tab.
Original Orientation
Use to specify the orientation of the originals being scanned. The options are:
• Upright Images refers to the
direction the images are loaded in the
document feeder. Use this option if
your images are in the orientation
matching the image shown when
loaded in the document feeder.
• Sideways Images refers to the
direction the images are loaded in the
document feeder. Use this option if
your images are in the orientation
matching the image shown when
loaded in the document feeder.
• Portrait Originals refers to the image orientation on the original documents. Use this option to
select a Portrait image orientation. Originals can be fed in any direction.
• Landscape Originals refers to the image orientation on the original documents. Use this option to
select a Landscape image orientation. Originals can be fed in any direction.
Select Save to save your selections and exit.
88
ColorQube™ 9301/9302/9303
Server Fax
Page 89
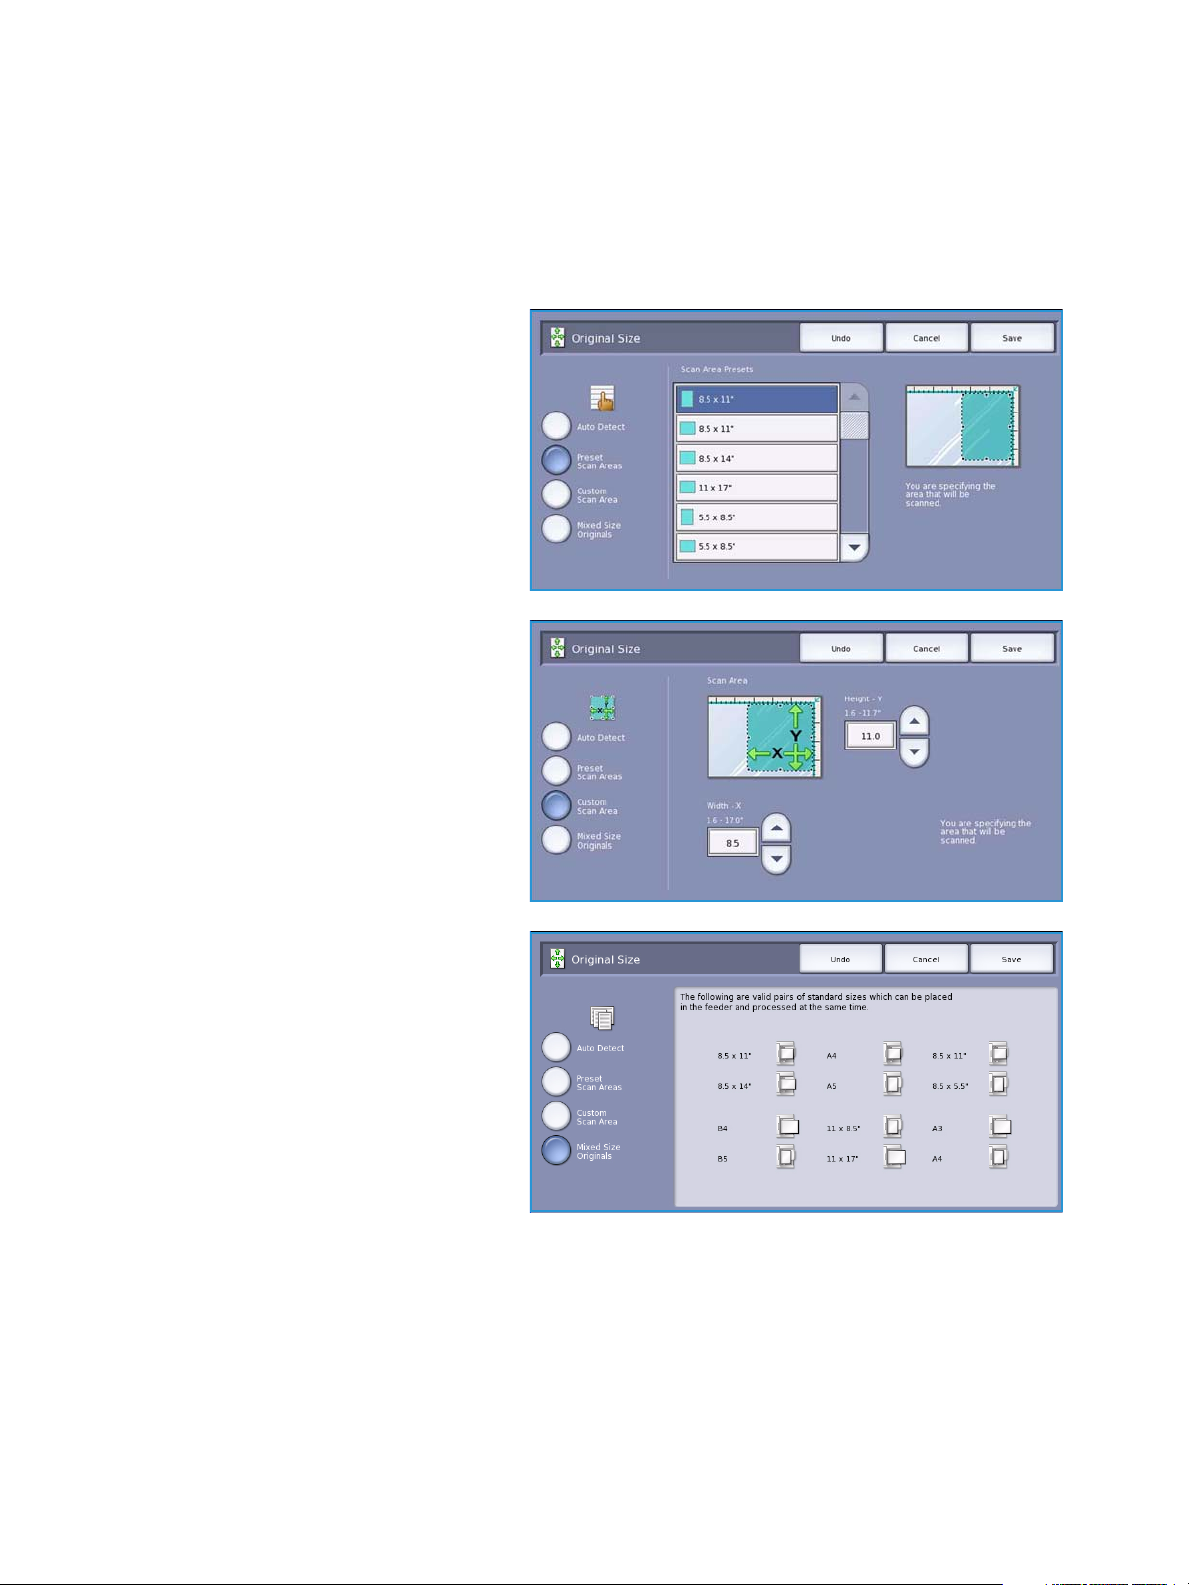
Layout Adjustment
Original Size
Select Original Size to enter the size of your document when scanning from the document glass or the
document feeder. Your device uses this information to calculate the size of your original and the
scanned image. You can also select Auto Detect for automatic size detection, or Mixed Size Originals
if scanning a mix of sizes. The options are:
• Auto Detect is the default setting and
enables automatic size sensing. The
size detected is matched to a
standard size paper.
• Preset Scan Areas allows you to
define the size of your original from a
list of pre-set, standard document
sizes. You can view the list by using
the scroll bar.
• Custom Scan Area is used to enter a
specific area for scanning. Measure
the area to be scanned on the original
and enter the X and Y axis
measurements into the fields
provided. Only the area specified is
scanned.
• Mixed Size Originals allows you to
scan documents containing different
size pages. The pages must be the
same width, like A4 LEF and A3 SEF
(8.5x11” LEF and 11x17” SEF). Other
combinations are shown on the
screen.
The device will detect the size of the
documents and determine whether
the receiving fax machine can support
the various paper sizes. If the
receiving fax cannot support the page
sizes, the image is reduced or enlarged to fit.
Select Save to save your selections and exit.
ColorQube™ 9301/9302/9303
Server Fax
89
Page 90
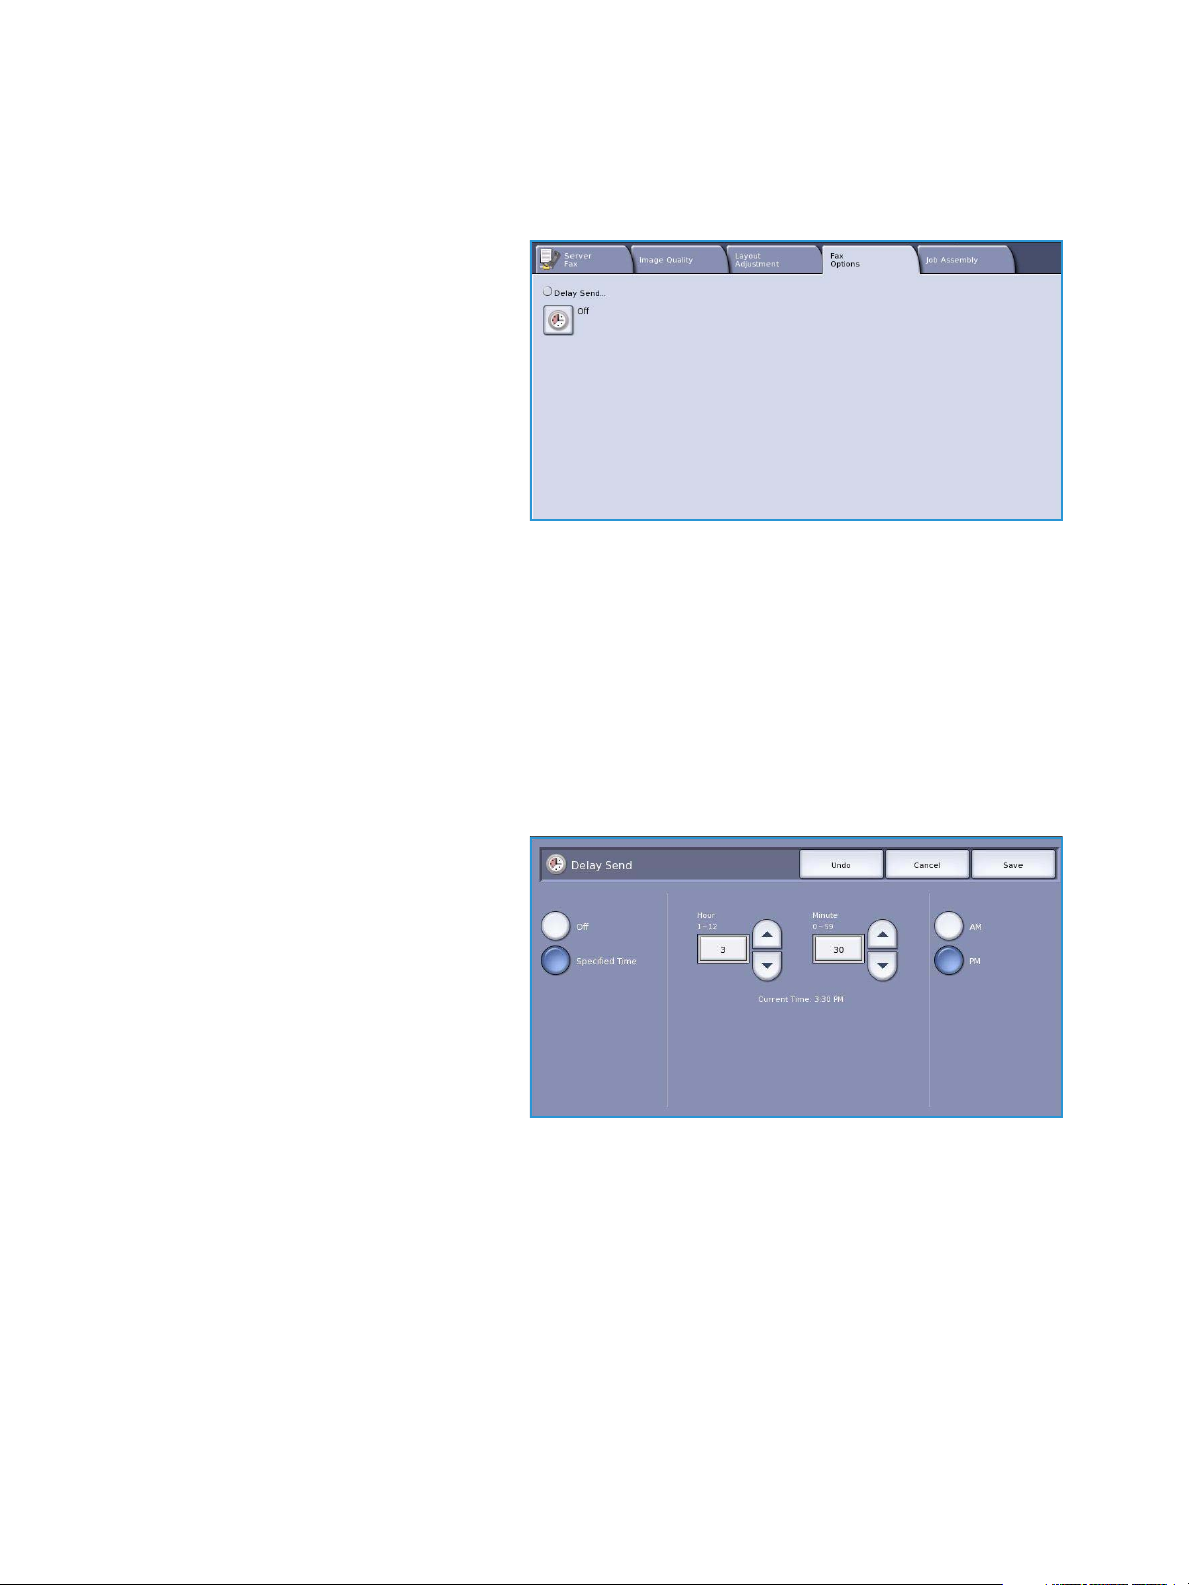
Fax O ption s
Fax Options
The Fax Options allow you to specify when
your fax document is transmitted. To
access the Fax Op tions, select Services
Home and Server Fax. Then select the Fax
Options tab.
Delay Send
Select Delay Send to specify the time within the next 24 hours that you want the fax to be
transmitted. Use this feature to transmit faxes during off-peak hours or when sending to another
country or time zone. Delay Send can also be used with Mailbox and Polling options.
The options are:
Specified Time
• Select Specified Time and select
either the Hour or the Minute field to
enter a time to send your fax.
•Use the arrow buttons or numeric
keypad to enter the hours and
minutes.
• If the device is set up to display the
time using a 12 hour clock, you must
also select either the AM or PM
button.
• Select Save and program and scan
the fax job.
The fax will be stored in memory and sent at the specified time.
90
ColorQube™ 9301/9302/9303
Server Fax
Page 91
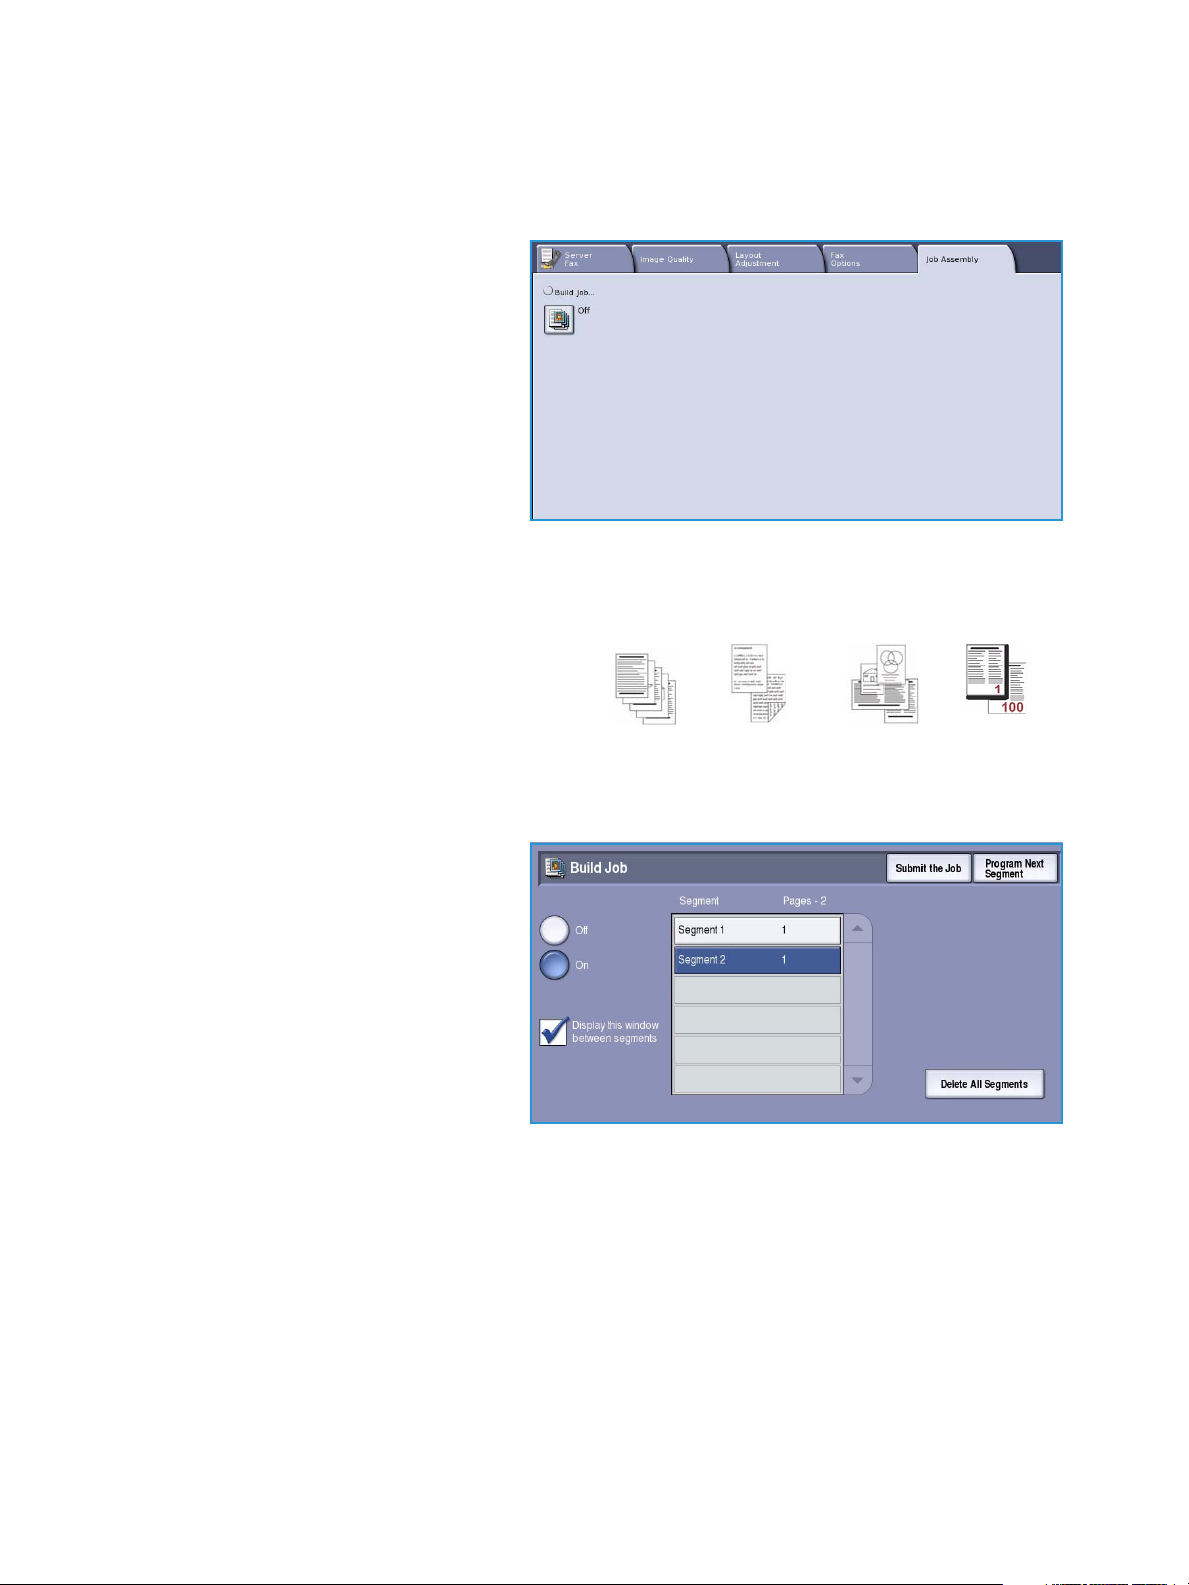
Job Assembly
Some pages
with text and
some with
photos
Some pages
2 sided and
some 1 sided
Var ious
sized
originals
More than
100 pages
This tab provides access to the Build Job
feature for compiling jobs which have
different originals or programing
requirements within a job. To access the
Job Assembly options, select Services
Home and Server Fax. Then select the Job
Assembly tab.
Build Job
Use this feature to build a job that requires
different settings for each page, or a segment of
pages.
Job Assembly
You can select the appropriate settings to be
applied to individual pages or segments of a
completed job. First split the originals into
sections for individual programing.
1. Select Build Job on the Job Assembly
tab and select the On button.
2. Select Display this window between
segments to view the Build Job screen
during scanning. Then select Save.
3. Select the options required for the
first segment of the job.
Note The fax destination details
must be entered prior to scanning.
4. Load the first segment originals and
press Start.
5. Remove the first segment originals. The Build Job screen displays the first segment in the list.
Delete All Segments deletes the current Build Job and returns you to the main Build Job screen.
6. Using Program Next Segment, select the options required for the second segment.
7. Load the second segment originals and press Start.
8. Repeat these steps until all segments of your job have been programed and scanned.
9. After the last segment has been scanned, select Submit the Job to indicate you have finished
scanning and the job can be processed and completed.
ColorQube™ 9301/9302/9303
Server Fax
91
Page 92

Log In / Out
Log In / Out
If Authentication or Accounting has been enabled on the device, you may need to log in before using
some or all of the services. A picture of a lock on a button indicates that you must log in to use that
service.
1. To log in select the Log In/Out button
on the control panel. Selecting a
locked service will also prompt you to
enter a log in name and password.
2. Use the keyboard to enter your User
Name, then select the Next button.
3. Use the keyboard to enter your
Password, then select the Enter
button.
4. If an accounting system is in use on
the device, you may also need to
enter additional information.
•If Xerox Standard Accounting is
enabled, the user will also have
to log in using their Xerox
Standard Accounting details.
•If Network Accounting is enabled, the user must enter a User ID and an Account ID.
•If a Foreig n Device Interfac e (FDI) is installed, you are prompted to access via the device
installed, for example a card reader or coin slot.
Your user details display in the User
Details area on the right side of the
message display.
5. To log out, select the Log In/Out
button again or select the User
Details area and select Log Out from
the drop-down menu.
6. A confirmation screen is displayed,
select Log Out or Cancel.
92
ColorQube™ 9301/9302/9303
Server Fax
Page 93

Version 1.0
09/10
Xerox® ColorQube™
9301/9302/9303
Internet Fax
Page 94

©2010 Xerox Corporation. All Rights Reserved. Unpublished rights reserved under the copyright laws of the United States. Contents
of this publication may not be reproduced in any form without permission of Xerox Corporation.
XEROX®, XEROX and Design® and ColorQube® are trademarks of Xerox Corporation in the United States and/or other countries.
Changes are periodically made to this document. Changes, technical inaccuracies, and typographic errors will be corrected in
subsequent editions.
Document version 1.0: September 2010
Page 95

Contents
Introduction . . . . . . . . . . . . . . . . . . . . . . . . . . . . . . . . . . . . . . . . . . . . . . . . . . . . . . . . . . . . . . . . . . . . . . . . . . . . 96
Internet Fax . . . . . . . . . . . . . . . . . . . . . . . . . . . . . . . . . . . . . . . . . . . . . . . . . . . . . . . . . . . . . . . . . . . . . . . . . . . . 97
New Recipient . . . . . . . . . . . . . . . . . . . . . . . . . . . . . . . . . . . . . . . . . . . . . . . . . . . . . . . . . . . . . . . . . . . . . . 97
From: . . . . . . . . . . . . . . . . . . . . . . . . . . . . . . . . . . . . . . . . . . . . . . . . . . . . . . . . . . . . . . . . . . . . . . . . . . . . . . 98
Subject: . . . . . . . . . . . . . . . . . . . . . . . . . . . . . . . . . . . . . . . . . . . . . . . . . . . . . . . . . . . . . . . . . . . . . . . . . . . . 98
Address Book . . . . . . . . . . . . . . . . . . . . . . . . . . . . . . . . . . . . . . . . . . . . . . . . . . . . . . . . . . . . . . . . . . . . . . . 99
Output Color . . . . . . . . . . . . . . . . . . . . . . . . . . . . . . . . . . . . . . . . . . . . . . . . . . . . . . . . . . . . . . . . . . . . . . . . 99
2-Sided Scanning . . . . . . . . . . . . . . . . . . . . . . . . . . . . . . . . . . . . . . . . . . . . . . . . . . . . . . . . . . . . . . . . . . 100
Original Type . . . . . . . . . . . . . . . . . . . . . . . . . . . . . . . . . . . . . . . . . . . . . . . . . . . . . . . . . . . . . . . . . . . . . . 100
Advanced Settings . . . . . . . . . . . . . . . . . . . . . . . . . . . . . . . . . . . . . . . . . . . . . . . . . . . . . . . . . . . . . . . . . . . . . 101
Image Options . . . . . . . . . . . . . . . . . . . . . . . . . . . . . . . . . . . . . . . . . . . . . . . . . . . . . . . . . . . . . . . . . . . . . 101
Image Enhancement . . . . . . . . . . . . . . . . . . . . . . . . . . . . . . . . . . . . . . . . . . . . . . . . . . . . . . . . . . . . . . . 101
Resolution . . . . . . . . . . . . . . . . . . . . . . . . . . . . . . . . . . . . . . . . . . . . . . . . . . . . . . . . . . . . . . . . . . . . . . . . . 102
Quality / File Size . . . . . . . . . . . . . . . . . . . . . . . . . . . . . . . . . . . . . . . . . . . . . . . . . . . . . . . . . . . . . . . . . . . 103
Layout Adjustment . . . . . . . . . . . . . . . . . . . . . . . . . . . . . . . . . . . . . . . . . . . . . . . . . . . . . . . . . . . . . . . . . . . . 104
Original Orientation . . . . . . . . . . . . . . . . . . . . . . . . . . . . . . . . . . . . . . . . . . . . . . . . . . . . . . . . . . . . . . . . 104
Original Size . . . . . . . . . . . . . . . . . . . . . . . . . . . . . . . . . . . . . . . . . . . . . . . . . . . . . . . . . . . . . . . . . . . . . . . 105
Internet Fax Options . . . . . . . . . . . . . . . . . . . . . . . . . . . . . . . . . . . . . . . . . . . . . . . . . . . . . . . . . . . . . . . . . . . 106
File Format . . . . . . . . . . . . . . . . . . . . . . . . . . . . . . . . . . . . . . . . . . . . . . . . . . . . . . . . . . . . . . . . . . . . . . . . 106
Message . . . . . . . . . . . . . . . . . . . . . . . . . . . . . . . . . . . . . . . . . . . . . . . . . . . . . . . . . . . . . . . . . . . . . . . . . . 107
Reply To . . . . . . . . . . . . . . . . . . . . . . . . . . . . . . . . . . . . . . . . . . . . . . . . . . . . . . . . . . . . . . . . . . . . . . . . . . . 107
Acknowledgement Report . . . . . . . . . . . . . . . . . . . . . . . . . . . . . . . . . . . . . . . . . . . . . . . . . . . . . . . . . . 108
Job Assembly . . . . . . . . . . . . . . . . . . . . . . . . . . . . . . . . . . . . . . . . . . . . . . . . . . . . . . . . . . . . . . . . . . . . . . . . . . 109
Build Job . . . . . . . . . . . . . . . . . . . . . . . . . . . . . . . . . . . . . . . . . . . . . . . . . . . . . . . . . . . . . . . . . . . . . . . . . . 109
Log In / Out . . . . . . . . . . . . . . . . . . . . . . . . . . . . . . . . . . . . . . . . . . . . . . . . . . . . . . . . . . . . . . . . . . . . . . . . . . . 110
ColorQube™ 9301/9302/9303
Internet Fax
95
Page 96

Introduction
Introduction
Internet Fax is a standard feature that can
be enabled. If enabled, it is selected by
pressing the Services Home button, then
the Internet Fax option.
Internet Fax enables the creation of an
electronic image file by scanning an
original hard copy document. The scanned
image is converted into e-mail format to
transmit over the internet or intranet.
Recipients are selected from an address
book or entered manually using the
keyboard. Received Internet Faxes are
automatically sent from the server to the
device as print jobs.
Most feature screens include these buttons
to confirm or cancel your choices.
• Undo resets the current screen to the
values that were displayed when the
screen was opened.
• Cancel resets the screen and returns
to the previous screen.
• Save saves the selections made and returns to the previous screen.
• Close closes the screen and returns to the previous screen.
Instructions for sending an internet fax and using the basic features are provided in ColorQube™
9301/9302/9303 How to Sheets. If Authentication or Accounting has been enabled on your device you
may have to enter log in details to access the features, refer to Log In / Out on page 110.
96
ColorQube™ 9301/9302/9303
Internet Fax
Page 97

Internet Fax
Internet Fax
These Internet Fax options provide access
to features which are required for
programing basic internet fax jobs. To
access the Internet Fax options, select
Services Home and Internet Fax. The
Internet Fax tab is displayed.
New Recipient
Use this option to enter details of all the recipients of the Internet Fax. To enter the recipient details:
1. Select New Recipient.
2. Select To or Cc for the recipient using
the drop-down menu to the left of the
entry box.
3. Using the keyboard, enter the e-mail
address.
• Up to 40 alphanumeric
characters can be entered.
• To delete a character use the
back arrow key, or to clear the
entire entry select Clear Text.
•Use the Keyboards... button to access additional language keyboards.
4. Select Add to add the e-mail address
to the recipient list.
5. Continue adding e-mail addresses
until all the recipient’s have been
added to the list.
Select Close.
All the recipients are displayed in the
recipient list.
ColorQube™ 9301/9302/9303
Internet Fax
97
Page 98

Internet Fax
From:
To enter or edit the sender’s name:
1. Select From.
Note This option may not be
available.
2. If a default name is displayed, select
Clear Text to delete the entry.
3. Using the keyboard, enter the e-mail
address of the sender.
• Up to 40 alphanumeric
characters can be entered.
• To delete a character use the
back arrow key, or to clear the entire entry select Clear Text.
•Use the Keyboards... button to access additional language keyboards.
4. Select Save to save and return to the previous screen, or Cancel to exit.
The e-mail address entered is displayed in the From field.
Subject:
To enter a subject for the internet fax:
1. Select the Subject field.
2. Using the keyboard, enter the subject
of the Internet Fax.
• Up to 40 alphanumeric
characters can be entered.
• To delete a character use the
back arrow key, or to clear the
entire entry select Clear Text.
•Use the Keyboards... button to
access additional language
keyboards.
3. Select Save to save and return to the previous screen, or Cancel to exit.
The subject entered is displayed in the Subject field.
98
ColorQube™ 9301/9302/9303
Internet Fax
Page 99

Internet Fax
Address Book
If the device has been setup to access the Network and Public Address Books, you can use them to
select recipients. For information about setting up address books, refer to the System Administrator
Guide.
1. Select the Address Book button.
A list of e-mail addresses is displayed.
2. Select the e-mail address required
and select Add (To:) or Add (Cc:) from
the drop-down menu.
The e-mail address is added to the
recipient list.
3. Continue adding e-mail addresses as
required.
4. Use the Search option to search for a
specific entry. Select Search and enter
the name required using the keyboard
and select Search.
The matching entries are displayed.
Select the name required and add the
recipient to the list using the dropdown menu.
5. To search different address books, use
the Public Address Book or Network
Address Book option (if available).
Select the Address Book required using the drop-down menu to the left of the field and search
using the same method described.
6. To find out more information about an address in the Address Book, select Details.... Full details of
the e-mail address owner are displayed. Select Close to exit the Details window.
Output Color
The Output Color options include selections to automatically detect and match the color of your
original or produce monotone, full color or grayscale output from your original. The options are:
• Auto Detect to select output that
matches your original.
• Black & White to select monotone
output regardless of the color of your
original.
• Grayscale to use gray scales instead
of color.
• Color to select color output from your
original.
ColorQube™ 9301/9302/9303
Internet Fax
99
Page 100
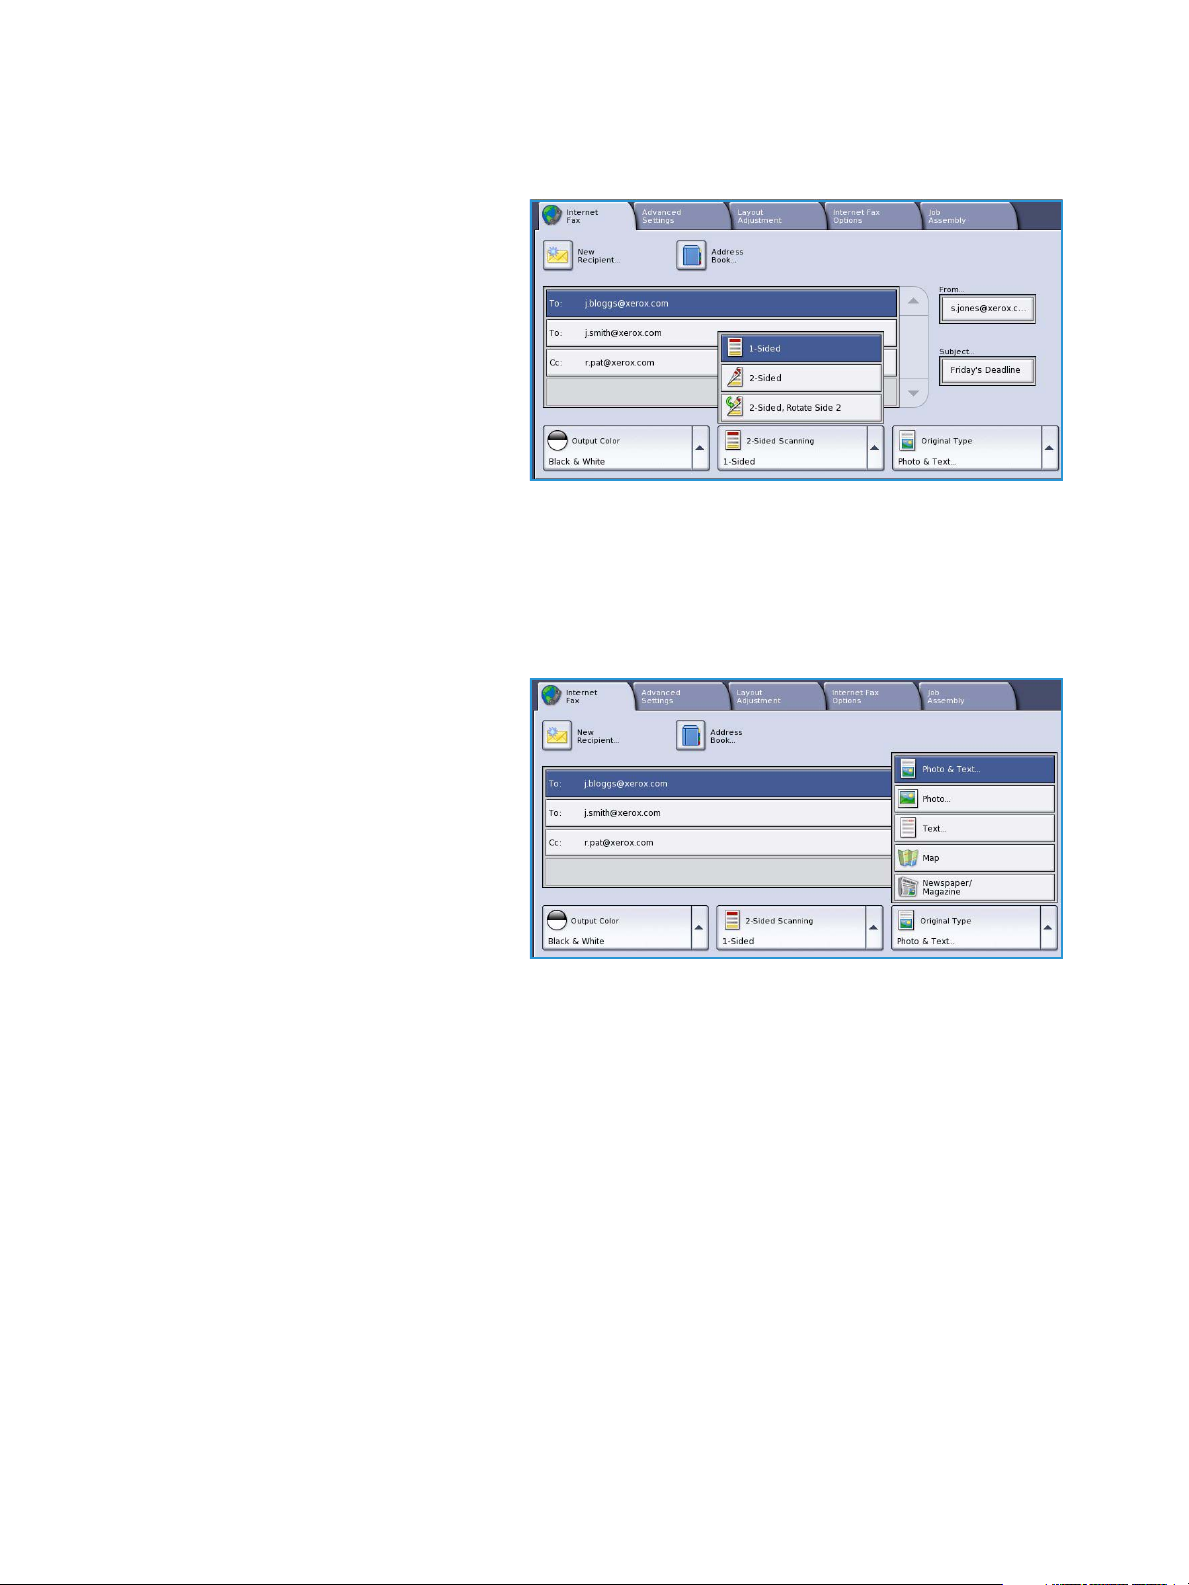
Internet Fax
2-Sided Scanning
The 2-Sided Scanning option allows you to
set whether 1 or 2 sides of your original
document are scanned. The options are:
• 1Sided is used if your original
documents are single sided.
• 2Sided is used if your original
documents are double sided. The
document feeder must be used to
scan your originals with this option.
• 2-Sided, Rotate Side 2 select if your
original opens up like a calendar. The
document feeder must be used to scan your originals with this option.
Original Type
Use this option to define the type of original being used for scanning. Making the correct selection
enhances the quality of your output image. The options are:
• Photo & Text is recommended for
originals containing high quality
photographs and halftones. Using
this setting the scanned image will
contain medium quality pictures
though the sharpness of text and line
art is slightly reduced.
• Photo is used specifically for originals
containing photos, magazine pictures
or continuous tones without any text
or line art. Produces the best quality
for photos but reduced quality text
and line art.
• Text produces sharper edges and is recommended for text and line art.
• Map is used if your original is a map or contains intricate line art and text.
• Newspaper / Magazine is used if your original is from a magazine or newspaper that contains
photographs or text.
How the Original was Produced
• Printed Original is for originals that have come from a magazine, book or newspaper or that have
been printed on a large printing device.
• Photocopied Original is for originals that are photocopies.
• Photograph is for high quality photographic originals.
• Inkjet Original is for originals that have been produced using an inkjet printer.
• Solid Ink Original is for originals produced by a solid ink printing process, such as output from this
device.
100
ColorQube™ 9301/9302/9303
Internet Fax
 Loading...