

Page 1

Xerox® ColorQube™
9201/9202/9203
Quick Use Guide
Page 2

©2009 Xerox Corporation. All Rights Reserved. Unpublished rights reserved under
the copyright laws of the United States. Contents of this publication may not be
reproduced in any form without permission of Xerox Corporation.
®
Xerox
and the sphere of connectivity design are trademarks of Xerox Corporation
in the United States and/or other countries.
Copyright protection claimed includes all forms of matters of copyrightable
materials and information now allowed by statutory or judicial law or hereinafter
granted, including without limitation, material generated from the software
programs which are displayed on the screen such as styles, templates, icons, screen
displays, looks, etc.
Changes are periodically made to this document. Changes, technical inaccuracies,
and typographic errors will be corrected in subsequent editions.
Document version: July 2009
Page 3

Table of Contents
Quick Use Guide . . . . . . . . . . . . . . . . . . . . . . . . . . . . . . . . . . . . . . 5
Purpose of this Guide. . . . . . . . . . . . . . . . . . . . . . . . . . . . . . . . . . 5
Before you get started . . . . . . . . . . . . . . . . . . . . . . . . . . . . . . . . 5
Multifunctional Device Overview . . . . . . . . . . . . . . . . . . . . . . 6
Power On and Off . . . . . . . . . . . . . . . . . . . . . . . . . . . . . . . . . . . . . 9
Load Paper into the Paper Trays . . . . . . . . . . . . . . . . . . . . . .10
Loading Documents. . . . . . . . . . . . . . . . . . . . . . . . . . . . . . . . . .11
Making Copies . . . . . . . . . . . . . . . . . . . . . . . . . . . . . . . . . . . . . . .12
Printing a Document . . . . . . . . . . . . . . . . . . . . . . . . . . . . . . . . .15
Sending a Fax . . . . . . . . . . . . . . . . . . . . . . . . . . . . . . . . . . . . . . .17
Internet Fax . . . . . . . . . . . . . . . . . . . . . . . . . . . . . . . . . . . . . . . . .21
Server Fax . . . . . . . . . . . . . . . . . . . . . . . . . . . . . . . . . . . . . . . . . . .23
Workflow Scanning . . . . . . . . . . . . . . . . . . . . . . . . . . . . . . . . . .25
Sending an E-mail. . . . . . . . . . . . . . . . . . . . . . . . . . . . . . . . . . . .28
Enhance Productivity. . . . . . . . . . . . . . . . . . . . . . . . . . . . . . . . .31
Maintenance and Consumables. . . . . . . . . . . . . . . . . . . . . . .32
Help. . . . . . . . . . . . . . . . . . . . . . . . . . . . . . . . . . . . . . . . . . . . . . . . .36
ColorQube™ 9201/9202/9203
Quick Use Guide
3
Page 4

Table of Contents
4
ColorQube™ 9201/9202/9203
Quick Use Guide
Page 5

®
Xerox
ColorQube™ Series
Quick Use Guide
Thank you for choosing this Multifunctional Device. This guide is for all users
and administrators who will use and maintain the ColorQube™
9201/9202/9203.
Purpose of this Guide
This Quick Use guide will give you an overview of the features and options that
may be available on your device and your resources for maximizing system
performance and productivity.
Before you get started
• The device must be installed.
• The device must be configured for use, see the System Administrator
Guide.
• The device must be set up on a network, see the System Administrator
Guide.
• The drivers must be installed, see the System Administrator Guide.
ColorQube™ 9201/9202/9203
Quick Use Guide
5
Page 6
Multifunctional Device Overview
1
2
4
7
3
6
5
9
10
8
1
62738
4
9
5
10
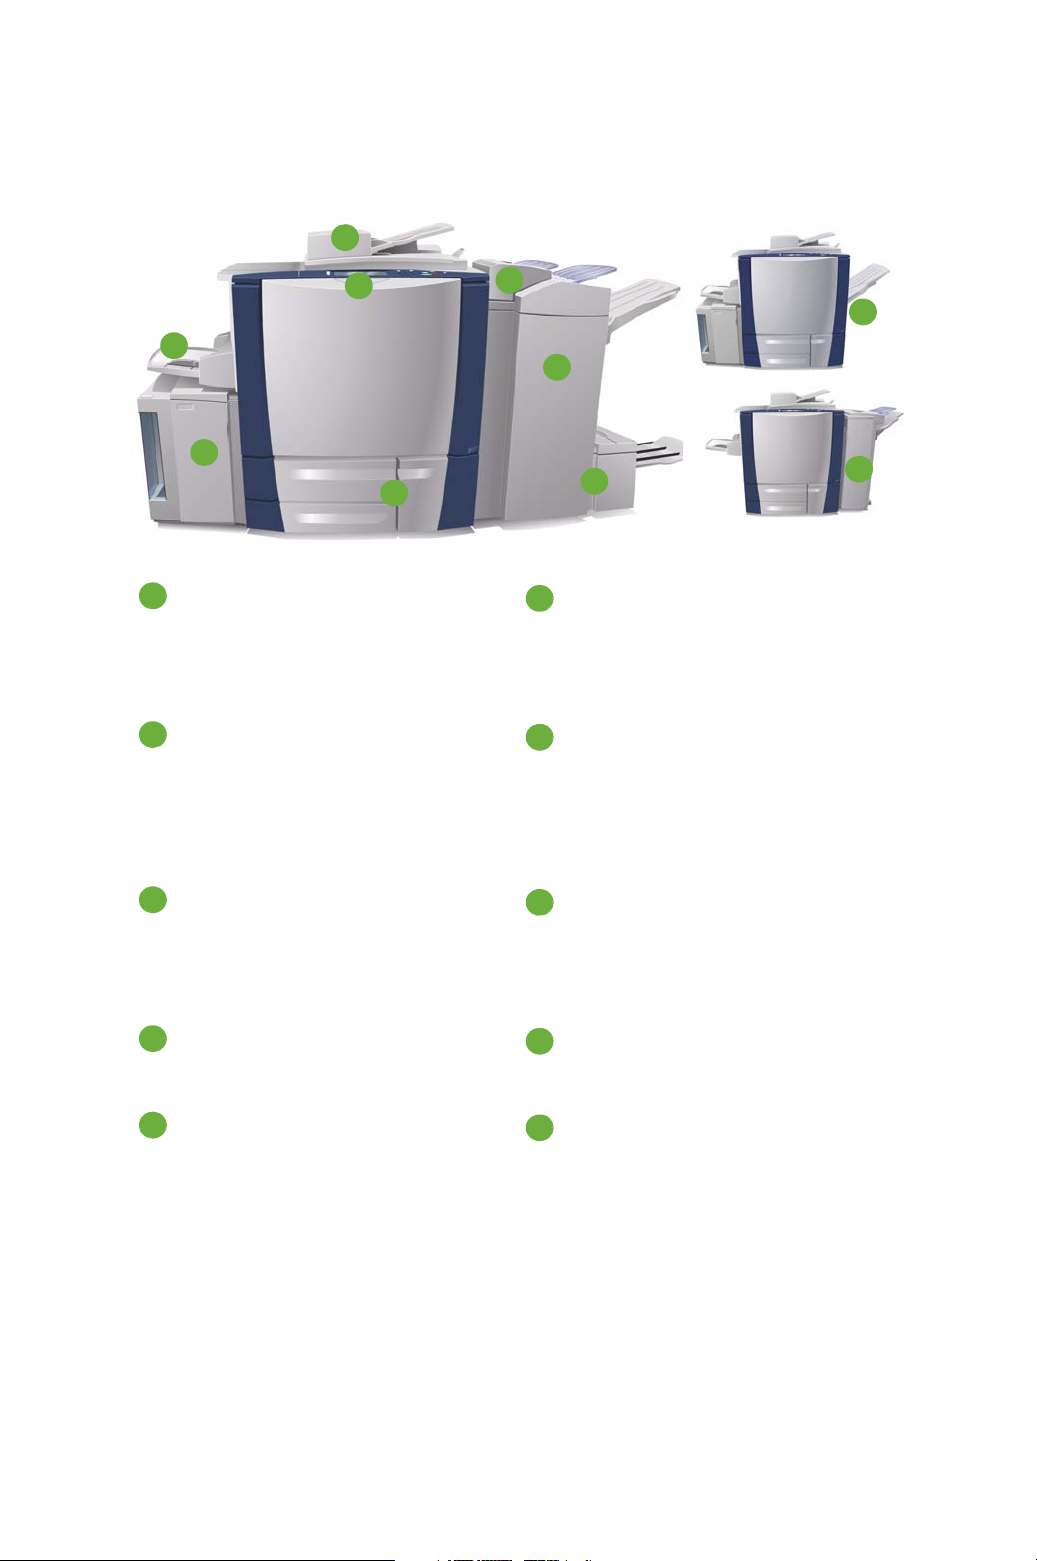
Multifunctional Device Overview
Control Panel: Touch Screen and
Numeric Keypad.
Tray 6 (Post Process Inserter): An
optional paper tray for use with the
High Volume Finisher. It is used to
insert post process sheets into copy
sets.
Document Feeder and Document
Glass: Used for scanning single or
multiple documents. The document
glass can be used for scanning single,
bound, custom size or damaged
High Volume Finisher: This optional
finisher collates, offsets, stacks and
staples your output. Booklet Maker,
Trifold and Hole Punch kits can be
installed with this finisher.
documents.
Paper Trays 1, 2 and 3: These trays
are standard on the device. Trays 1
and 2 are used for media sizes
5.5x8.5” to 11x17” / A5 to A3. Tray 3
is used for 8.5x11” / A4 media.
Tray 4 (Bypass): Used for nonstandard printing media.
Booklet Maker and Trifolder: These
are optional devices which can be
installed with the High Volume
Finisher to staple and fold booklets or
leaflets.
Offset Catch Tray: This optional
device stacks, collates and offsets
your output.
Tray 5: An optional high capacity
paper source which feeds A4 or
8.5x11” Long Edge Feed (LEF) media
as standard. Additional kits can be
purchased to enable different paper
Office Finisher: This optional device
stacks, collates, staples and offsets
your output. Hole punch kits are also
available for this finisher.
sizes to be fed.
For information about all the features and finishing options, refer to the User
Guide.
6
ColorQube™ 9201/9202/9203
Quick Use Guide
Page 7
Multifunctional Device Overview
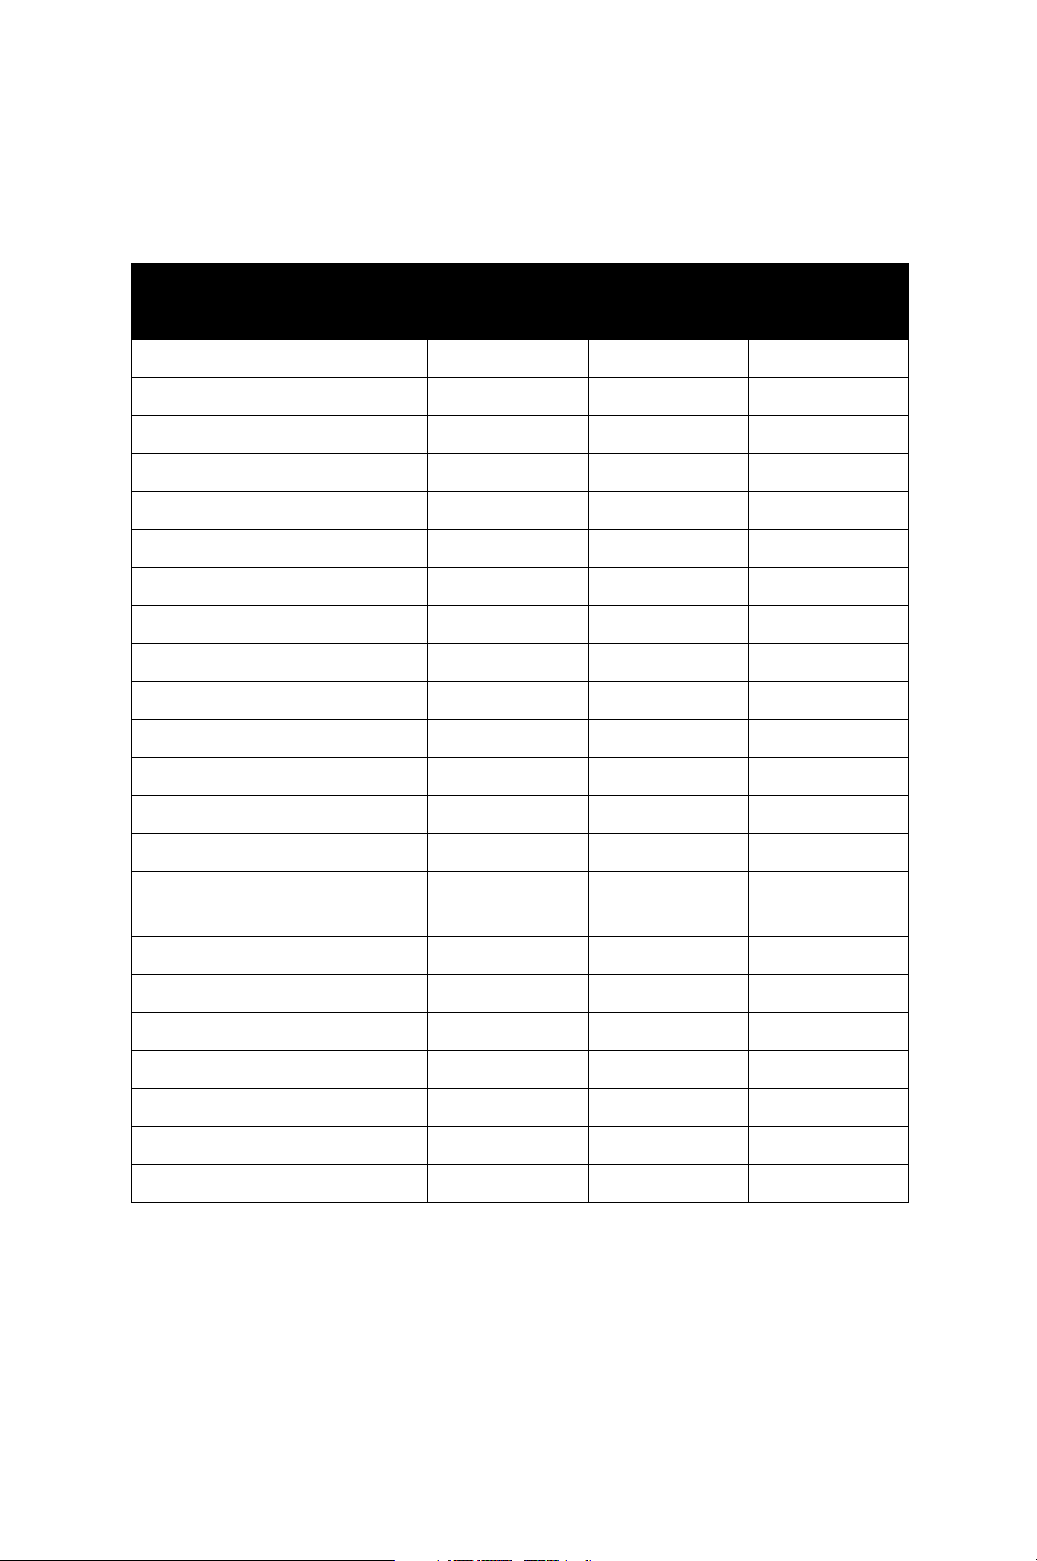
Device Configuration
Following the installation and assembling of the device and hardware options,
the result will be one of the following configurations.
ColorQube™
9201
Digital Copying Standard Standard Standard
Network Printing Standard Standard Standard
Workflow Scanning Standard Standard Standard
E-mail Standard Standard Standard
Fax (1 or 2 line embedded) Option Option Option
Internet Fax & Server Fax Option Option Option
Network Accounting Standard Standard Standard
Tray 1, 2, 3 & 4 (Bypass) Standard Standard Standard
Tray 5 (Paper Feed Platform) Option Option Option
Tray 6 (Post Process Inserter) Option Option Option
80 GB Hard Drive Standard Standard Standard
Office Finisher Option Option Option
Offset Catch Tray Option Option Option
High Volume Finisher (HVF) Option Option Option
ColorQube™
9202
ColorQube™
9203
High Volume Finisher with
Booklet Maker/Trifolder
Foreign Device Interface Option Option Option
User Guide Standard Standard Standard
Quick Use Guide (this guide) Standard Standard Standard
System Administrator Guide Standard Standard Standard
Telephone Cable Standard Standard Standard
Power Cable Standard Standard Standard
Document Folder Standard Standard Standard
Option Option Option
ColorQube™ 9201/9202/9203
Quick Use Guide
7
Page 8
Multifunctional Device Overview
1
2
3
4
5
6
8
9
10
7
12
13
11
16
14
15
1
9
2103114
12513
6
14715816
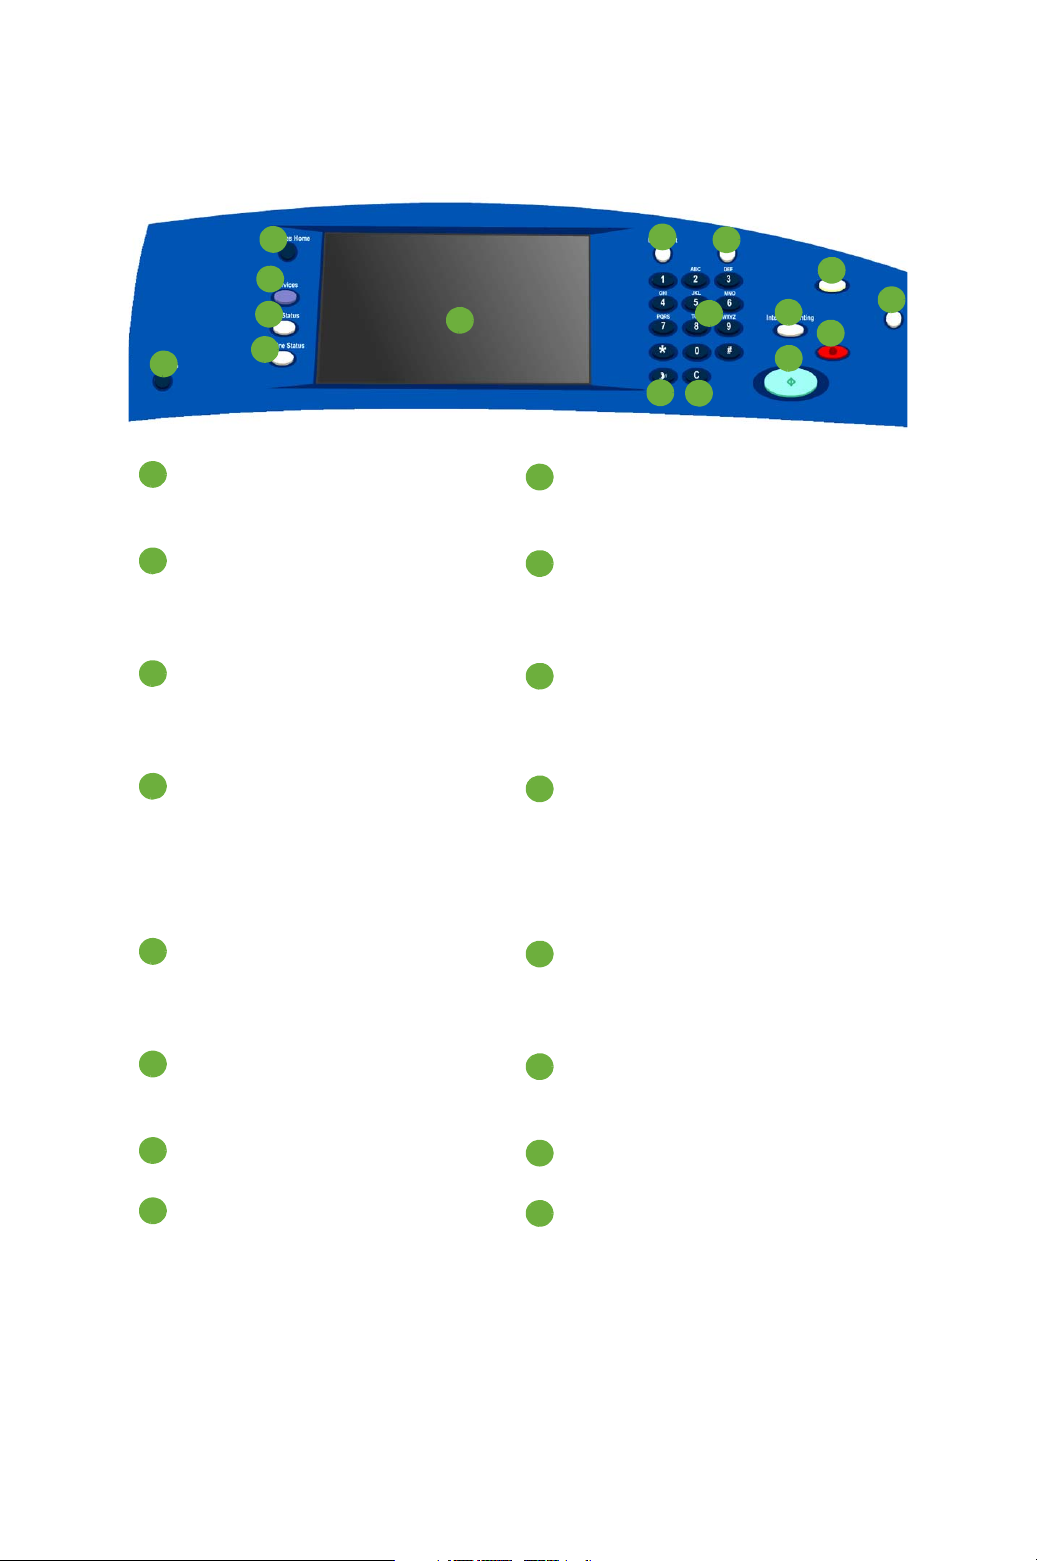
Control Panel Overview
Services Home: Provides access to
the services available on the device.
Services: Returns the display to the
previous copy, fax, or scan feature
screen when the Job Status screen or
Machine Status screen is displayed.
Job Status: Use to check the
progress of active jobs, or display
detailed information about
completed jobs.
Machine Status: Use to check the
device status, the billing meter, and
the status of consumables, or print
various reports. Use this button also
when accessing the System
Administrator mode.
Touch Screen: Use to select
programming features and display
fault clearance procedures and
general device information.
Interrupt: Use to pause the job
which is currently printing, to run a
more urgent copy job.
Start: Use to start a job.
Clear All: Press once to clear a
current entry. Press twice to return to
default settings.
Stop: Stops the job in progress.
Energy Save: Use to select energy
saver mode or perform a quick
restart.
Log In/Out: Use to enter log in
details, and to log out.
Language: Use to select a different
language for the touch screen
options.
Numeric Keypad: Use to enter
alphanumeric characters.
Help: Displays help messages for
device features.
Dial Pause: Use to insert a pause
when dialing a fax number.
‘C’ Cancel Entry: Cancels the
previous entry made on the Numeric
Keypad.
8
ColorQube™ 9201/9202/9203
Quick Use Guide
Page 9

Power On and Off
Power On and Off
1. To p o w er O N : Press the Power ON/OFF switch on the left side of the
device to switch on the device. Some functions will be ready before
others. The device will be ready to scan in approximately 3 minutes.
2. To p o w er O F F: Press the Power ON/OFF switch on the left side of the
device. A confirmation screen will appear, touch the Power Down button.
Note: The device will automatically shut down after 60 seconds if you do
not touch the Power Down button. Power Down will result in the deletion
of any jobs currently in the list. Do not switch on until the device has
completely powered off. Do not physically move the device unless it has
been powered off for more than 30 minutes.
Energy Saver and Quick Restart
The Energy Save button on the control panel can be used for additional power
functions.
Select the Energy Save button on the control panel.
•If Energy Saver is selected, the device will immediately enter the Power
Saver Mode appropriate to its configuration. If there are any jobs in the
job list, a second screen displays.
To re-activate the device when in this mode, touch a button on the touch
screen or control panel.
•If Quick Restart is selected and confirmed the device will restart. Any
copy jobs in the job list will be deleted, print jobs in the job list are
recovered.
•If Cancel is selected the power down options will be cancelled and the
device will be available for use.
ColorQube™ 9201/9202/9203
Quick Use Guide
9
Page 10
Load Paper into the Paper Trays
Energy Saver Options
The device is designed to be energy efficient and automatically reduces its
power consumption after periods of inactivity. The System Administrator can
setup the following Energy Saver options.
• Intelligent Ready wakes up and sleeps automatically based on previous
usage. The device uses algorithms and data gathered on a usage profile
to anticipate periods when the device is likely to be busy. Using this
information it automatically wakes up the device.
• Job Activated wakes up when activity is detected.
• Scheduled wakes up and sleeps at set times on a daily basis. The device
can be set to wake up when activity is detected, or a specific time can be
entered.
• Fast Resume reduces the time taken to wake up. This changes the default
sleep / low power timeouts and increases energy usage.
For information about setting up the Energy Saver options, refer to the System
Administrator Guide.
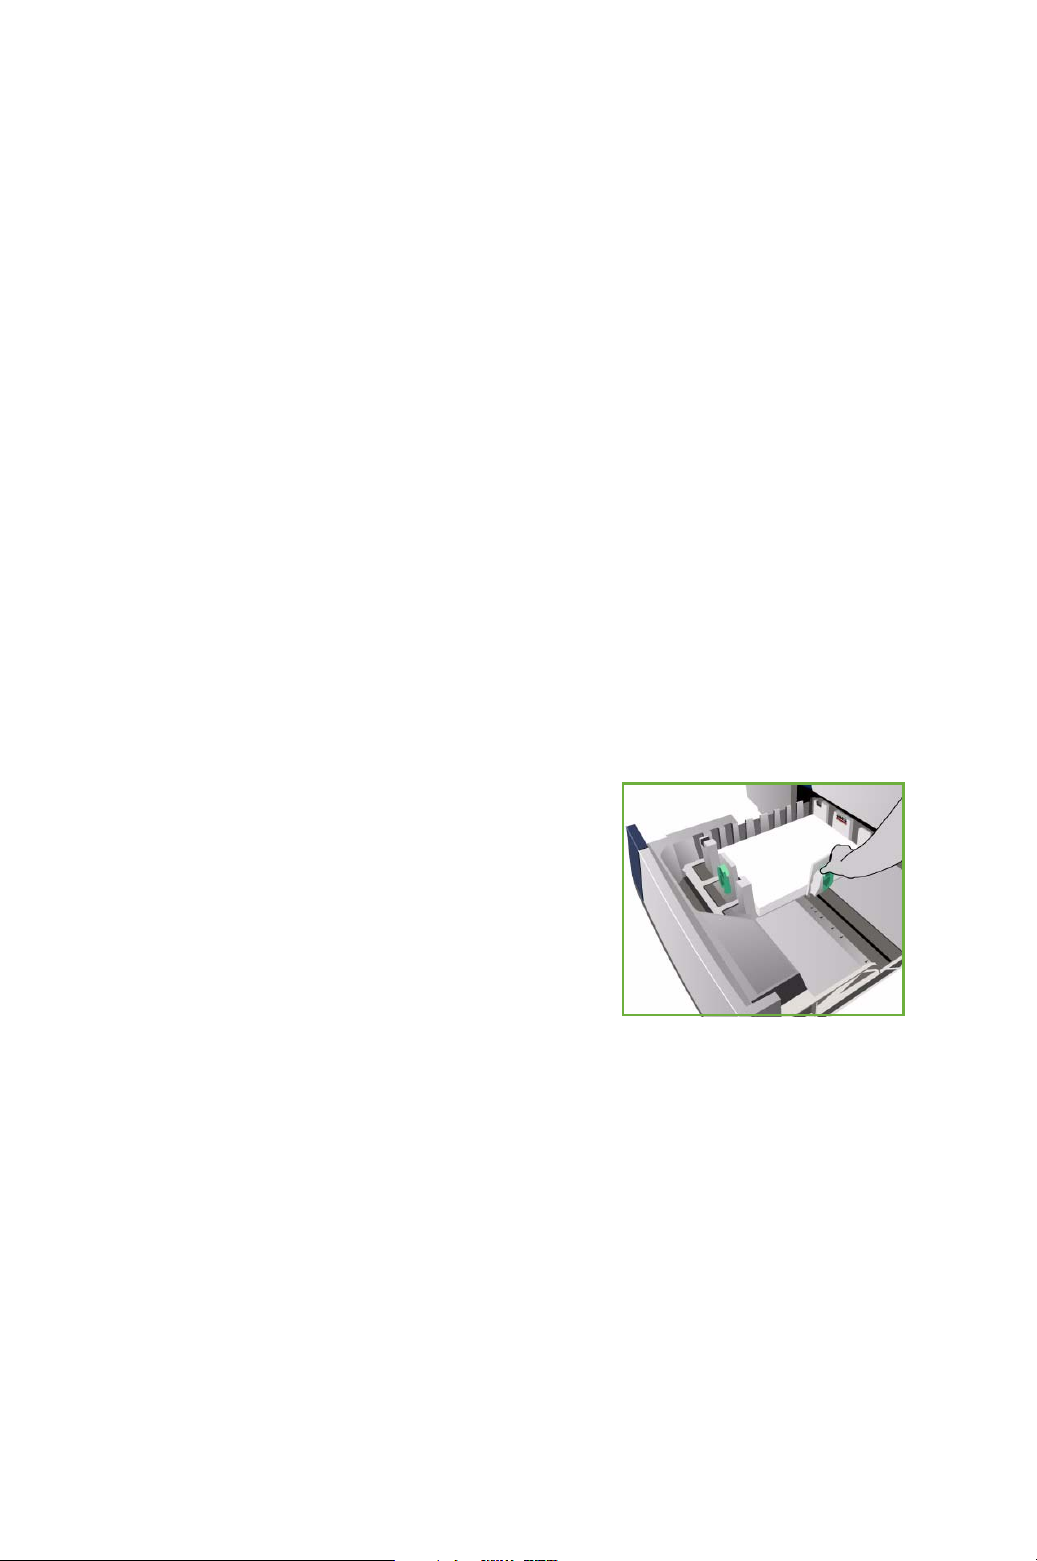
Load Paper into the Paper Trays
1. Open the Paper Tray and load paper into
the tray. Do NOT fill above the Max line.
2. Adjust the guides to hold the paper
against the side of the tray.
3. When you close the tray, the Paper Settings screen is displayed. Input the
size, type and color of the paper you have loaded and touch Confirm.
Note: A paper jam may occur if a tray is opened while it is being used to
feed stock. Do not open Tray 1 if Tray 2 is open.
For further information about loading paper and paper trays, refer to the User
Guide.
10
ColorQube™ 9201/9202/9203
Quick Use Guide
Page 11
Loading Documents
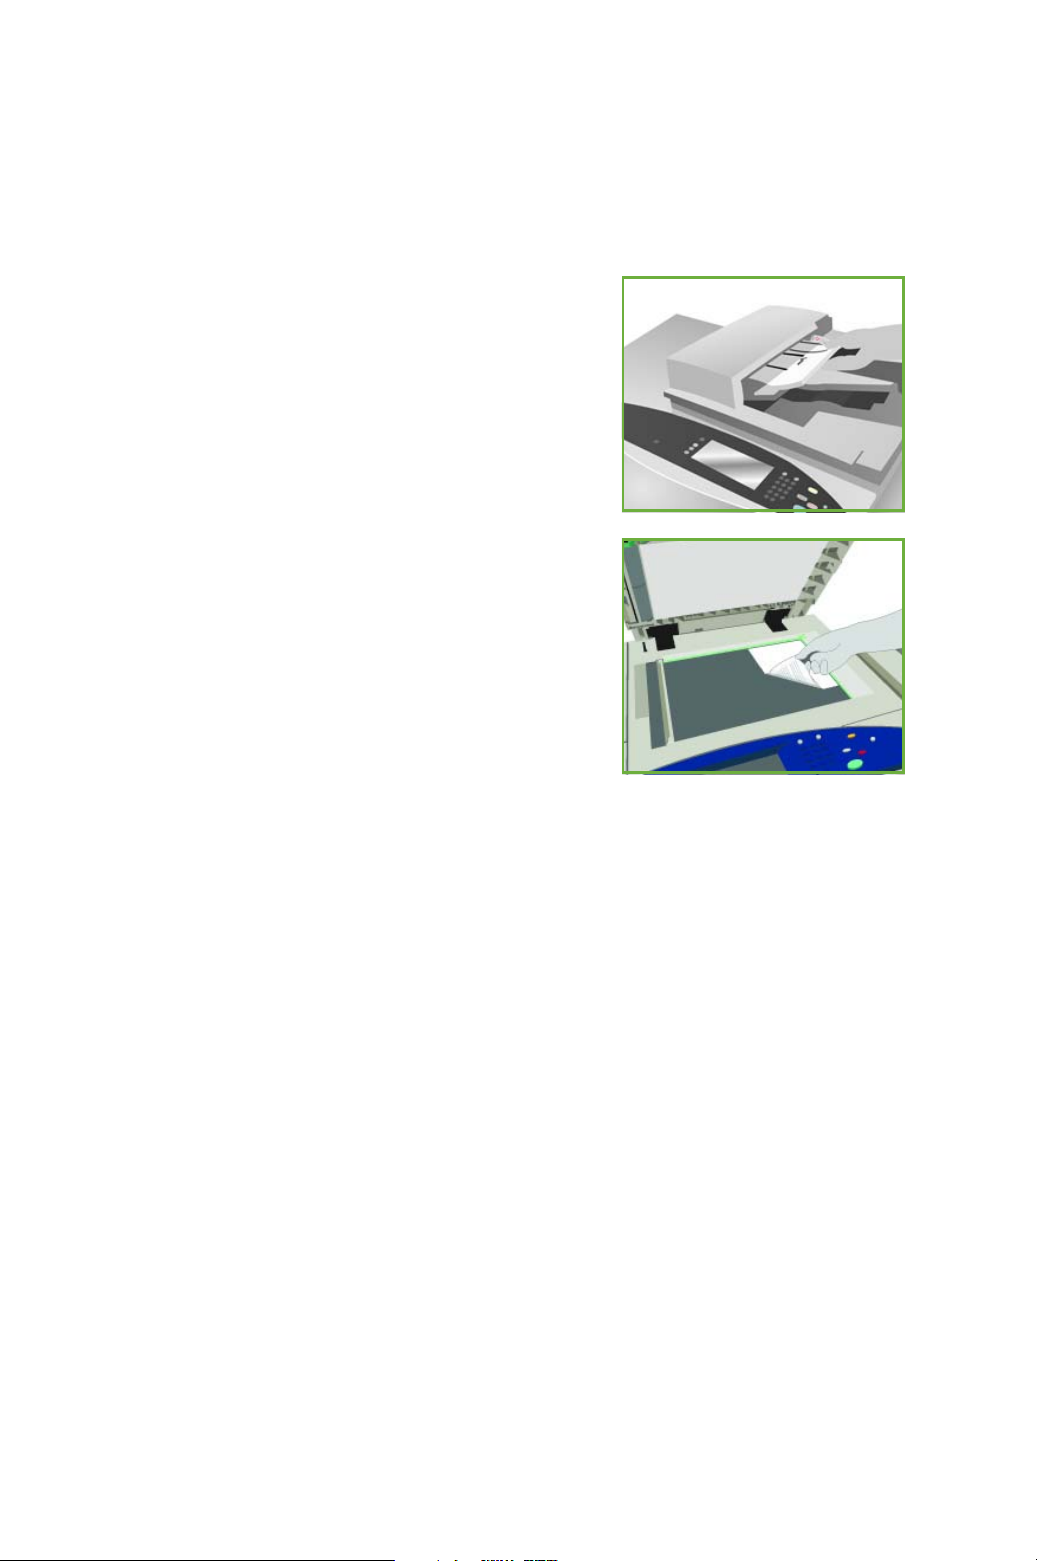
Loading Documents
Original documents can be loaded either into the Document Feeder or onto the
Document Glass.
1. Load your documents face up in the
Document Feeder Input Tray.
Adjust the top and bottom guide to just
touch the documents.
Or...........
2. Lift up the Document Feeder. Place the
document face down onto the Document
Glass and register it to the arrow at the
top right rear corner. Close the Document
Feeder.
Note: Original documents are only
scanned once even when several copies
are selected.
For further information on loading documents, refer to the How To section of
the User Guide.
ColorQube™ 9201/9202/9203
Quick Use Guide
11
Page 12
Making Copies
Making Copies
1. Load your documents face up in the Document Feeder Input Tray. Adjust
the top and bottom guides to just touch the documents.
Or...........
Lift up the Document Feeder. Place the document face down onto the
Document Glass and register it to the arrow at the top right rear corner.
Close the Document Feeder.
2. Press the Clear All (AC) button
once to cancel any previous
screen programing selections.
3. Press the Services Home
button and select the Copy
option.
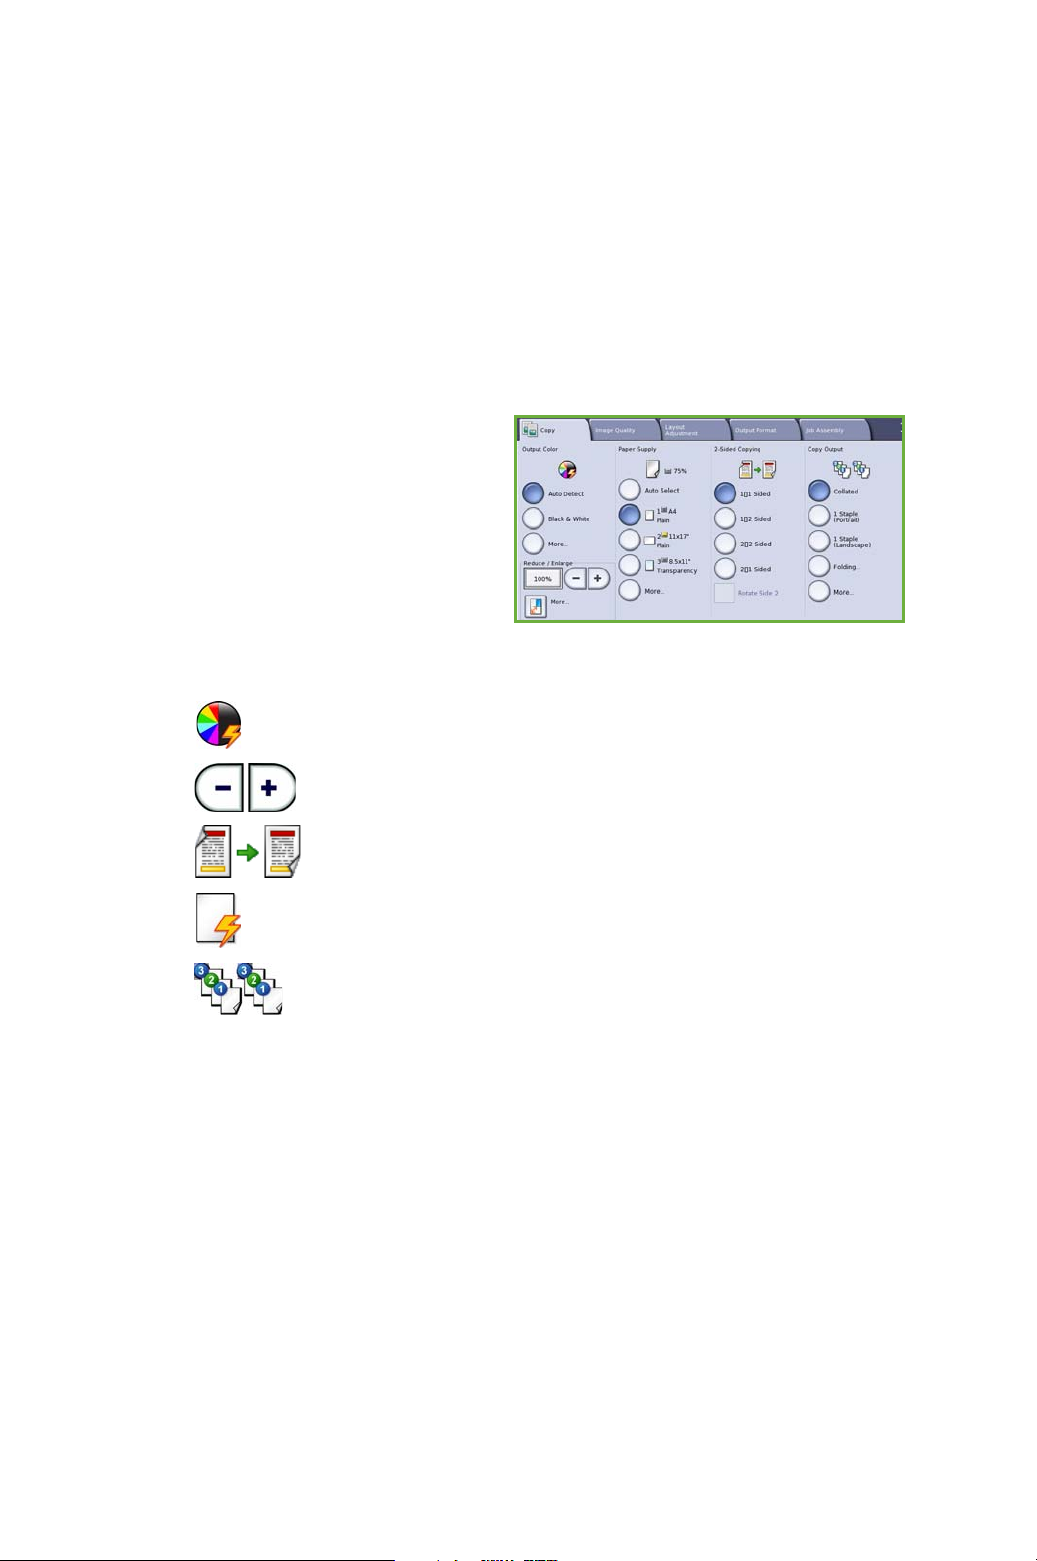
The Copy features are
displayed.
4. Select the required features using the touch screen:
Output Color is used to replicate the original colors or to
change the output to black and white, color or a single color.
Reduce / Enlarge can be used to reduce or enlarge the image
by 25% to 400%.
2-Sided Copying is used to produce 1 or 2 sided copy output.
Paper Supply is used to select the required tray and size of
paper for the copy output.
Copy Output is used to select collate, staple or fold options
(depending on the finishing device available).
5. Enter the copy quantity using the numeric keypad and press Start to scan
the originals.
6. Remove the originals from the Document Feeder or glass when scanning
has completed.
Note: The Copy job enters the job list ready for printing.
7. Select Job Status to view the job list and check the status of your job.
If your job is held in the list it requires additional resources to print. To
identify the resources required, select the job and select Job Details.
Once the resources are available the job will print.
12
ColorQube™ 9201/9202/9203
Quick Use Guide
Page 13

Making Copies
Additional Copy Features
Image Quality tab
You can enhance the copy quality of the output based on the type and quality
of the original being scanned.
• Original Type: Optimizes the quality (e.g. color) of your scanned output
images based on the content in your original documents.
• Lighten / Darken: Adjusts the lightness or darkness of the output.
• Background Suppression: Use to automatically reduce or eliminate the
dark background resulting from copying colored paper or newspaper
originals.
• Color Presets: Use to optimize the image quality features.
• Color Balance: Use to enhance the balance of the overall mixture colors
on the output copies.
Layout Adjustment tab
• Original Orientation: Use to set the direction the originals are loaded in
the Document Feeder.
• Original Size: Use this option to specify how the system determines the
size of the originals, or to select Custom or Mixed Size originals.
• Image Shift: Use this feature to adjust the position of image on the copy
output, for example adjust it nearer or further from the lead edge.
• Book Copying: Allows you to set the options for copying books and other
bound originals.
• Edge Erase: Use this feature to erase spots, unwanted lines, marks and
punched holes that appear on your original but are not required on the
output.
• Invert Image: Use to copy an exact, or a mirrored, or negative copy of
the original.
ColorQube™ 9201/9202/9203
Quick Use Guide
13
Page 14

Making Copies
Output Format tab
• Booklet Creation: Use this feature to convert an ordered set of originals
into booklet format output.
• Special Pages: Use this feature to add special pages to a job, such as
covers, inserts, and chapter starts.
• Annotations: Use to provide customers with the facility to add a
comment, page number and a date to copy output images.
• Transparency Separators: Use this feature to insert a blank page
between each transparency.
• Page Layout: This feature places a defined number of originals on one or
both sides of the paper.
Job Assembly tab
• Build Job: Use to build a job that requires different settings for each
page(s) of the original, into a single copy job.
• Sample Job: Allows you to print one complete set of your job reflecting
all copy settings. The remaining sets are held while you inspect the
document.
• Save Current Setting / Retrieve Saved Setting: Allows you to save the
current copy setting or to retrieve a saved setting.
For further information about copying, refer to the User Guide.
14
ColorQube™ 9201/9202/9203
Quick Use Guide
Page 15

Printing a Document
Printing a Document
1. Ensure that the correct Xerox ColorQube™ driver has been installed on
your PC. To install the print drivers refer to the System Administrator
Guide.
You can also access the Print Drivers by referring to the Print and Fax
Services CD.
2. Open the document to be printed. Click File > Print and select the Xerox
ColorQube™ device from the list of printers displayed.
3. To change the default printing properties click Properties.
The print driver has various tabs that
contain options and properties.
•Use the Paper/Output tab to
choose the type of media, size
and color and output choices
such as 2 sided prints.
•The Special Pages tab allows
you to add covers, inserts and
exceptions.
•The Color Options tab enables
you to select the output color
variation.
•The Layout/Watermark tab has various options to add watermarks
to pages, change image orientation (landscape or portrait) and
enable booklet and multi-up printing.
•The Advanced tab contains various font, document and printing
options.
Choose the options required for your printing job and click OK to print the
document.
4. The print job will be sent to the device and will appear in the Active Jobs
list. To view the list at the device, press the Job Status button on the
control panel.
If your job is held in the list it requires additional resources or a passcode
to print. To identify the resources required, select the job and select Job
Details. Once the resources are available the job will print. If a passcode
is required, select Release and enter the secure passcode.
For further information about printing, refer to the User Guide.
ColorQube™ 9201/9202/9203
Quick Use Guide
15
Page 16

Printing a Document
Additional Print Features
Rotate Image
This feature enables you to rotate the page through 180 degrees. To use this
option, click the Advanced tab and click on Image Options. Select Enabled to
rotate page images 180 degrees from their current orientation. Select Disabled
to disable the feature.
Saved Settings
Frequently used features of a print job can be saved with the Saved Settings
option. This enables you to name, save, and recall almost all selectable features
of a print job. You can store up to 50 different job settings. To use this option,
click the Paper/Output tab. From the Saved Settings drop-down menu, select
Save as... to save current settings. To load a previously saved setting, from the
Saved Settings drop-down menu, select the previously saved setting.
16
ColorQube™ 9201/9202/9203
Quick Use Guide
Page 17

Sending a Fax
Sending a Fax
1. Load your documents face up in the Document Feeder Input Tray. Adjust
the top and bottom guides to touch the documents.
Or...........
Lift up the Document Feeder. Place the document face down onto the
Document Glass and register it to the arrow at the top right rear corner.
Close the Document Feeder.
2. Press the Clear All (AC) button
once to cancel any previous
screen programing selections.
3. Press the Services Home
button and select the Fax
option. The Fax features are
displayed.
4. Enter the recipient’s fax number by:
• Keypad Dial - select the Enter Number area on the touch screen and
enter the number using the numeric keypad.
• Manual Dial - if a telephone handset is attached to the device, select
the Manual Dial key and dial the number using the handset or the
numeric keypad.
• Speed Dial - select the Enter Number area and enter the 3 digit
speed dial number, then select the Speed Dial option.
• Address Book - select the Address Book button to access the fax
address book. Select an entry from the Address Book to add to the
Recipients list. Continue adding recipients as required and select
Close to return to the previous screen.
5. If required, select Add to add the number entered to the Recipients list.
Enter additional numbers as required.
The fax will be sent to all the numbers in the Recipients list.
ColorQube™ 9201/9202/9203
Quick Use Guide
17
Page 18

Sending a Fax
6. Select the required features for your fax job using the touch screen:
Dialing Characters are alphanumeric characters which have a
specific fax function and can be entered as part of the fax number.
Cover Sheet allows you to send a fax with a cover sheet.
2-Sided Scanning is used to select whether your originals are 1
sided or 2 sided.
Original Type is used to define the original document as text, text
and photo, or photo.
Resolution can be used to optimise the resolution settings.
7. Press Start to scan the originals and process the fax job.
Remove the originals from the Document Feeder or Document Glass
when scanning has completed.
Note: The Fax job enters the job list ready for sending.
8. Select Job Status to view the job list and check the status of your job.
18
ColorQube™ 9201/9202/9203
Quick Use Guide
Page 19

Sending a Fax
Additional Fax Features
Image Quality tab
This feature enhances the quality of the output based on the type and quality
of the originals being scanned.
• Image Options: Adjusts the lightness or darkness of the output.
• Image Enhancement: Use to automatically reduce or eliminate the dark
background resulting from faxing colored paper or newspaper.
Layout Adjustment tab
• Original Size: Use this option to specify how the system determines the
size of the originals, or to select Custom or Mixed Size originals.
• Reduce / Split: This feature determines how the receiving device will
handle images that are too large. Set the receiving device to either
reduce a large document to fit on a smaller sized paper, or split a large
document onto several pages.
• Book Faxing: Allows you to set the options for copying books and other
bound originals.
Fax Options tab
• Confirmation Report: Use this feature to request a confirmation report
after a fax is sent.
• Starting Rate: Allows you to set the starting fax transmission speed rate.
• Delay Send: This feature enables you to specify the time the fax is
transmitted.
• Send Header Text: Use this feature to add a header text on the fax
document.
• Mailboxes: Used to store incoming faxes for retrieval and printing at a
later time. Mailboxes are also used to store documents for polling
activities.
• Local Polling: Documents can be stored on your device and retrieved by
another fax device. Security options are available to restrict access to the
documents if required.
• Remote Polling: Poll another device to retrieve scanned documents.
ColorQube™ 9201/9202/9203
Quick Use Guide
19
Page 20

Sending a Fax
Job Assembly tab
• Build Job: Use to build a job that requires different settings for each
page(s) of the original, into a single fax job.
For further information about Fax, refer to the User Guide.
20
ColorQube™ 9201/9202/9203
Quick Use Guide
Page 21

Internet Fax
Internet Fax
1. Load your documents face up in the Document Feeder Input Tray. Adjust
the top and bottom guides to touch the documents.
Or...........
Lift up the Document Feeder. Place the document face down onto the
Document Glass and register it to the arrow at the top right rear corner.
Close the Document Feeder.
2. Press the Clear All (AC) button
once to cancel any previous
screen programing selections.
3. Press the Services Home
button and select the Internet
Fax option. The Internet Fax
features are displayed.
4. Enter the recipient’s e-mail address by selecting the:
• New Recipient button. Ensure To is displayed on the drop-down
menu. Using the touch keyboard, enter the e-mail address of the
recipient. To delete a character use the back arrow key, or to clear the
entire entry select Clear Text. To enter a Copy To e-mail address,
select Cc using the drop-down menu and enter the e-mail address of
the copy recipient.
• Select Add to add the e-mail address to the recipient list. Select Close
to save and return to the previous screen.
• Address Book button - click on an entry from the Address Book and
click on Add to add to the Recipient list and touch the Close button.
5. Select the required features for your fax job using the touch screen:
Output Color is used to replicate the original colors or to change
the output to black and white, grayscale or color.
2-Sided Scanning is used to select whether your originals are 1
sided or 2 sided.
Original Type is used to define the original document as text, text
and photo, or photo.
6. Press Start to scan the originals and process the Internet Fax job. Remove
the originals from the Document Feeder or glass when scanning has
completed.
Note: The Internet Fax job enters the job list ready for sending.
7. Select Job Status to view the job list and check the status of your job.
ColorQube™ 9201/9202/9203
Quick Use Guide
21
Page 22

Internet Fax
Additional Internet Fax Features
Advance Settings tab
This feature enhances the quality of the output based on the type and quality
of the originals being scanned.
• Image Options: Adjusts the lightness or darkness of the output.
• Image Enhancement: Use to automatically reduce or eliminate the dark
background resulting from faxing colored paper or newspaper.
• Resolution: Use to adjust the output resolution, to achieve the required
faxed output.
• Quality / File Size: Use to enhance the quality of the output based on the
type and quality of the output required.
Layout Adjustment tab
• Original Orientation: Set the direction the original documents are
loaded into the Document Feeder.
• Original Size: Use this option to specify how the system determines the
size of the originals, or to select Custom or Mixed Size originals.
Internet Fax Option tab
• File Format: Use this option to determine the type of file created and can
be temporarily changed for the current job.
• Message: Use this option to create a message to accompany the internet
fax.
• Reply To: Use this option to reply to a set e-mail address.
• Acknowledgement Report: By enabling this option, a delivery report will
print to confirm the acknowledgement of the fax.
Job Assembly tab
• Build Job: Use to build a job that requires different settings for each
page(s) of the original, into a single fax job.
For further information about Internet Fax, refer to the User Guide.
22
ColorQube™ 9201/9202/9203
Quick Use Guide
Page 23

Server Fax
Server Fax
1. Load your documents face up in the Document Feeder Input Tray. Adjust
the top and bottom guides to touch the documents.
Or...........
Lift up the Document Feeder. Place the document face down onto the
Document Glass and register it to the arrow at the top right rear corner.
Close the Document Feeder.
2. Press the Clear All (AC) button
once to cancel any previous
screen programing selections.
3. Press the Services Home
button and select the Server
Fax option. The Server Fax
features are displayed.
4. Enter the recipient’s fax number by:
• Keypad Dial - select the Enter Number area on the touch screen and
enter the number using the numeric keypad.
• Fax Directory - select the Fax Director y button, select an entry from
the Fax Directory to add to the Recipient list.
5. Select Add to add the number to the Recipient list.
6. Select the required features for your fax job using the touch screen:
Dialing Characters are alphanumeric characters which have a
specific fax function and can be entered as part of the fax number.
2-Sided Scanning is used to select whether your originals are 1
sided or 2 sided.
Original Type is used to define the original document as text, text
and photo, or photo.
Resolution can be used to optimise the resolution settings.
7. Press Start to scan the originals and process the Server Fax job.
Remove the originals from the Document Feeder or glass when scanning
has completed.
Note: The Server Fax job enters the job list ready for sending.
8. Select Job Status to view the job list and check the status of your job.
ColorQube™ 9201/9202/9203
Quick Use Guide
23
Page 24

Server Fax
Additional Server Fax Features
Image Quality tab
This feature enhances the quality of the output based on the type and quality
of the original being scanned.
• Image Options: Adjusts the lightness or darkness of the output.
• Image Enhancement: Use to automatically reduce or eliminate the dark
background resulting from faxing colored paper or newspapers.
Layout Adjustment tab
• Original Orientation: Set the direction the original documents are
loaded into the Document Feeder.
• Original Size: Use this option to specify how the system determines the
size of the originals, or to select Custom or Mixed Size originals.
Fax Options tab
• Delay Send: This feature enables you to specify the time the fax is
transmitted.
Job Assembly tab
• Build Job: Use to build a job that requires different settings for each
page(s) of the original, into a single fax job.
For further information about Server Fax, refer to the User Guide.
24
ColorQube™ 9201/9202/9203
Quick Use Guide
Page 25

Workflow Scanning
Workflow Scanning
Workflow Scanning allows the user to scan a hard copy original and convert it
into an electronic file. The file is placed into a specified filing location on a
networked server, workstation or the device hard drive. The settings used for
scanning the original are stored in a template.
1. Load your documents face up in the Document Feeder Input Tray. Adjust
the top and bottom guides to touch the documents.
Or...........
Lift up the Document Feeder. Place the document face down onto the
Document Glass and register it to the arrow at the top right rear corner.
Close the Document Feeder.
2. Press the Clear All (AC) button
once to cancel any previous
screen programing selections.
3. Press the Services Home
button and select the
Workflow Scanning option.
The Workflow Scanning
features are displayed.
4. Select a Template for the job from the templates displayed in the list.
All the current settings are changed to the settings in the template.
5. Select the required features for your scanning job using the touch screen.
If required, modify the template settings from the options on the
Workflow Scanning, Advanced Settings, Layout Adjustment and Filing
Options tabs:
Output Color is used to replicate the original colors or to change
the output to black and white, grayscale or color.
2-Sided Scanning is used to select whether your originals are 1
sided or 2 sided. The second side can be rotated.
Original Type is used to define the original document as text, text
and photo, or photo.
Scan Presets is used to set the scan settings to suit how the
scanned image will be used.
ColorQube™ 9201/9202/9203
Quick Use Guide
25
Page 26
Workflow Scanning
6. Press Start to scan the originals and process the Workflow Scanning job.
Remove the originals from the Document Feeder or glass when scanning
has completed.
Note: The Workflow Scanning job enters the job list ready for filing.
7. The scanned images are filed to the location specified on the template
ready for retrieval by the user.
Additional WorkFlow Features
Advanced Settings tab
• Image Options: Use this feature to adjust the lightness or darkness of
the output.
• Image Enhancement: Use to automatically reduce or eliminate the dark
background resulting from scanning colored paper or newspaper.
• Resolution: Adjust the output resolution, to achieve the required scan
output.
• Quality/File Size: Use to enhance the quality of the output based on the
type and quality of the output required.
• Update Template: Update existing templates that have been changed or
new templates have been created since the last update.
Advanced Settings tab
• Original Orientation: Set the direction the originals are loaded in the
Document Feeder.
• Original Size: Use this option to specify how the system determines the
size of the originals, or to select Custom or Mixed Size originals.
• Edge Erase: Use this feature to erase spots, unwanted lines, marks and
punched holes that appear on your original but are not required on the
scanned image.
26
ColorQube™ 9201/9202/9203
Quick Use Guide
Page 27

Workflow Scanning
Filing Options tab
• File Name: Set the file name of the document to be scanned and choose
what to do if a file with the same name already exists.
• File Format: Use this option to set the best file format to save as and to
optimize the file for viewing and printing only.
• Document Management: Allows you to setup customizable fields that
needs to be completed as part of the template.
• Add File Destinations: Add additional scan destinations to the template.
Job Assembly tab
• Build Job: Use to build a job that requires different settings for each
page(s) of the original, into a single scan job.
For further information about Workflow Scanning and creating templates, refer
to the User Guide.
ColorQube™ 9201/9202/9203
Quick Use Guide
27
Page 28
Sending an E-mail
Sending an E-mail
1. Load your documents face up in the Document Feeder Input Tray. Adjust
the top and bottom guides to touch the documents.
Or...........
Lift up the Document Feeder. Place the document face down onto the
Document Glass and register it to the arrow at the top right rear corner.
Close the Document Feeder.
2. Press the Clear All (AC) button
once to cancel any previous
screen programing selections.
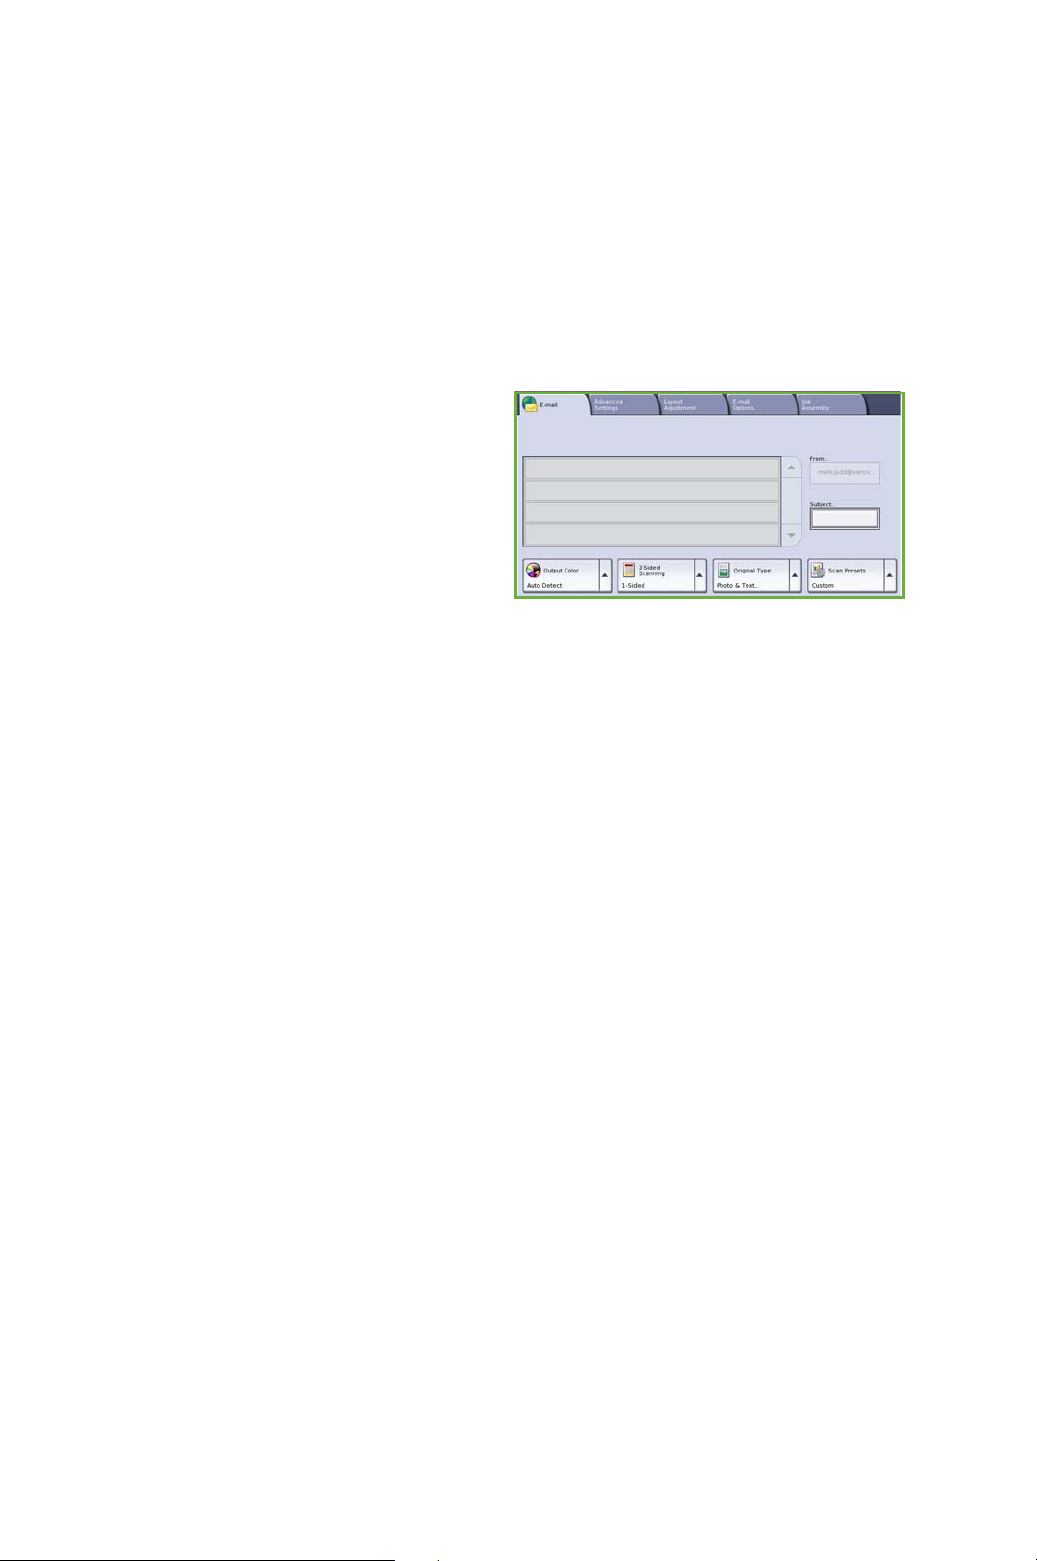
3. Press the Services Home
button and select the E-mail
option. The E-mail features are
displayed.
4. Touch From and enter the address you want to appear in the From field
of the e-mail.
Note: This field may have been preset by the Administrator and may not
be editable.
5. To enter a subject for the e-mail, select the Subject box. Using the touch
keypad, enter the subject. Select Save to save and return to the previous
screen.
6. Enter the recipient’s e-mail address by selecting the:
• New Recipient button. Ensure To is displayed on the drop-down
menu. Using the touch keyboard, enter the e-mail address of the
recipient. To delete a character use the back arrow key, or to clear the
entire entry select Clear Text. To enter a Copy To or Blind Copy To e-
mail address, select Cc or Bcc using the drop-down menu and enter
the e-mail address of the recipient.
• Select Add to add the e-mail address to the Recipient list. Select
Close to save and return to the previous screen.
Continue adding e-mail addresses until all the recipients have been
added to the list.
7. If an address book has been set up, touch Address Book and enter the
name of the recipient. The address book will be searched and the
recipient can be selected from the resulting list of names. Multiple
recipients can be added to the Recipient list in this way.
28
ColorQube™ 9201/9202/9203
Quick Use Guide
Page 29

Sending an E-mail
8. Select the required features for your e-mail using the touch screen:
Output Color is used to replicate the original colors or to change
the output to black and white, grayscale or color.
2-Sided Scanning is used to select whether your originals are 1
sided or 2 sided. The second side can be rotated.
Original Type is used to define the original document as text, text
and photo, or photo.
Scan Presets is used to set the scan settings to suit how the
scanned image will be used.
9. Press Start to scan your originals and process the E-mail job. Remove the
originals from the Document Feeder or glass when scanning has
completed.
Note: The E-mail job enters the job list ready for sending.
10. Select Job Status to view the job list and check the status of your job.
Additional E-mail Features
Advanced Settings tab
• Image Options: Use feature to adjust the lightness or darkness of the
output.
• Image Enhancement: Use to automatically reduce or eliminate the dark
background resulting from scanning colored paper or newspaper.
• Resolution: Use to adjust the output resolution, to achieve the required
scan output.
• Quality/File Size: Use to enhance the quality of the output based on the
type and quality of the output required.
ColorQube™ 9201/9202/9203
Quick Use Guide
29
Page 30

Sending an E-mail
Layout Adjustment tab
• Original Orientation: Set the direction the originals are loaded in the
Document Feeder.
• Original Size: Use this option to specify how the system determines the
size of the originals, or to select Custom or Mixed Size originals.
• Edge Erase: Use this feature to erase spots, unwanted lines, marks and
punched holes that appear on your original but are not required on the
scanned image.
E-mail Options tab
• Attachment Name: Set the file name of the attached job.
• File Format: Use this option to set the best file format to save as and to
optimize the file for viewing and printing only.
• Message: This feature allows you to create a message, to accompany the
e-mail attachment.
• Reply To: Use this feature to set a “reply to” e-mail address, that the
receiving e-mail recipient can respond to.
Job Assembly tab
• Build Job: Use to build a job that requires different settings for each
page(s) of the original, into a single e-mail attachment.
For further information about E-mail, refer to the User Guide.
30
ColorQube™ 9201/9202/9203
Quick Use Guide
Page 31

Enhance Productivity
Enhance Productivity
Your Xerox ColorQube™ series device is a powerful multi functional device with
many digital functions integrated into one sleek system. It is designed to
support large workgroups in different production environments. You can do
more with less and streamline your workflow with these productivity enhancing
features, for example:
• Online address books
• Customization to meet own work processes
• Powerful documentation features for example, Booklet Creation, Special
Pages, Build Job and Annotations
To maximize job productivity, use the Job Status button to access the Active
jobs list and manage your jobs. If a job is urgent, use the Promote option to
prioritize your jobs.
If a job is Held in the list, it may require additional resources or a secure code to
print. The reason for the held status is displayed in Job Details. Once the
requirement has been met or the secure code entered, the job is released for
printing.
For further information about customizing or using your device refer to the User
Guide and the System Administrator Guide.
ColorQube™ 9201/9202/9203
Quick Use Guide
31
Page 32

Maintenance and Consumables
1
1
2
3
2
3
Maintenance and Consumables
There are a number maintenance tasks which need to be performed to ensure
your device performs at optimum levels:
• Replenish the Ink Sticks
• Empty the Waste Ink Tray
• Replace the Cleaning Unit
• Replace the Staple Cartridges (Office Finisher / High Volume Finisher
only)
• Empty the Hole Punch Waste Container (Office Finisher / High Volume
Finisher only)
•Cleaning Tasks
• Print Quality Maintenance
To place an order for consumables or replacement units, please contact your
Xerox Representative giving your Company Name, product number and the
device serial number.
Ink Sticks
Load Solid Ink Sticks in the Ink Loading area ,
up to 6 Solid Ink Sticks per color can be loaded
while the device is running.
When loading Solid Ink Sticks, check that the
correct color is loaded in the correct ink loading
slot.
Waste Ink Tray
The Waste Ink Tray accumulates ink debris
resulting from printhead maintenance. You must
occasionally empty the Waste Ink Tray. The
device will not work if the waste ink tray is full.
The waste ink is non-toxic and can be disposed
of through your normal refuse collection.
Cleaning Unit
The Cleaning Unit applies a silicone oil release agent to the print drum.
Replace the unit using the instructions provided on the touch screen and within
the packaging of the new unit. Recycle the old unit as directed on the
packaging or by your local Xerox Representative.
32
ColorQube™ 9201/9202/9203
Quick Use Guide
Page 33

Maintenance and Consumables
Staple Cartridges and Hole Punch Waste
If your device is equipped with the Office Finisher or High Volume Finisher, you
will be required to replace the staple cartridge or cartridges when the device
displays a message instructing you to do so. If your finisher has the optional
hole punch unit, you will also be required to empty the hole punch waste
container when prompted by the device.
Detailed instructions are provided on the touch screen. Follow the instructions
and labels provided to perform the tasks.
Cleaning Tasks
Performing regular cleaning activities ensures the device is kept free of dust
and debris. The device covers, control panel and touch screen should all be
cleaned using a soft lint-free cloth, lightly dampened with water. Xerox
Cleaning Fluid or Anti-Static Cleaner can be used to clean the document glass,
but must be applied using a cloth and not poured directly on the glass. Remove
any residue with a clean cloth or paper towel.
Print Quality Maintenance
There are a number of tasks which are performed automatically by the device
to maintain print quality. It periodically monitors the quality of the image
being put on the drum and will automatically detect and correct parameters as
required. In addition to this, if a problem occurs the device may need to run
blank sheets through the paper path to clean the system. These pages will be
directed to the top tray and should be discarded. Calibration tasks can also be
performed by the user if image quality problems persist.
For further information about these and all the maintenance tasks, refer to the
User Guide.
ColorQube™ 9201/9202/9203
Quick Use Guide
33
Page 34

Maintenance and Consumables
Troubleshooting
A variety of situations can effect the quality of your output. For optimal
performance, ensure the guidelines in the User Guide are followed. The
animations and fault messages on the device help you to locate and resolve a
problem easily.
Some problems can be resolved by restarting your device. If after rebooting
your device the problem has not been resolved, have a look at some of the
areas below to identify solutions.
Problem Solution
The device will not
power on
Documents will
not feed through
the Document
Feeder
The device will not
print from a
workstation
Cannot send an Email
Avoiding Paper
jams
• Check to see that the device is not in Low Power Mode as
indicated by the green light on the Control Panel. Touch
the user interface screen to re-activate.
• Check to see that the power cord is correctly inserted.
• Ensure you are on the correct Service screen.
• Ensure that all staples or paper clips have been removed
from the originals.
• Ensure the Document Feeder is not overloaded, a
maximum of 100 documents can be loaded.
• Ensure that the edge guides are adjusted to touch the
sides of the originals.
• Make sure that an active network cable is connected to
the workstation.
• Check that the Network Setup is correct. For further
information refer to the System Administrator Guide.
• Check if the device is connected on the network.
• Check that E-mail is enabled. For further information,
refer to the System Administrator Guide.
• If the paper curls excessively, flip the paper over in the
applicable paper tray.
• Use paper from a fresh package.
Cannot fax a
document
The job has been
scanned or sent
from the PC but
does not print
34
ColorQube™ 9201/9202/9203
Quick Use Guide
•Ensure the Fa x feature is enabled.
• Ensure your device is connected to a telephone socket if
using Fax, or the network for other fax services.
• Select the Job Status button and check the status.
•If the job is Held, use the Job Details option to identify
the resources required to enable the job to print.
• If the job is a Secure Print job, select Release and enter
the passcode required.
Page 35

Maintenance and Consumables
Jam Clearance
Paper and media jams happen for a variety of reasons. When a jam occurs, the
machine presents instructions on the screen explaining how to remove the jam.
Paper jams
The display will indicate the location of the jam.
• Follow the instructions on the display to
clear the paper from the paper path.
• Ensure that all clearance doors and covers
are returned to their correct positions.
Note: Paper Clearance areas may vary depending on your device model
and configuration.
Clearing the Document Feeder
The display will indicate when a document jam has occurred.
• Follow the instructions on the display and
remove all the documents from the
Document Feeder and Document Glass as
instructed. The illustration below shows
the Document Feeder jam clearance areas.
• When instructed to do so, re-order the documents as at the start of the
job and reload into the Document Feeder. The documents will be fed
automatically to recover the job integrity.
For further information and help refer to the User Guide.
ColorQube™ 9201/9202/9203
Quick Use Guide
35
Page 36

Help
Help
When using your device, detailed and timely help is available at your fingertips.
You can access Help information and tips from a variety of sources.
On the Device
Press the Help button at any time to access the
online help screens. Messages, screen
instructions and graphics provide additional
information.
Device Reports
Device information can be accessed at the device, to view or print reports: Press
the Machine Status button, touch Machine Information and Information
Pages.
Select the required information from the list and touch Print.
Faults
Faults on the device can be accessed at the device. The screen displays fault
listings, and the device error logs. The fault page is separated into three
options:
• Current Faults
•Current Messages
•Fault History
To access the Faults page: Press the Machine Status button, touch Faults and
select the required option.
36
ColorQube™ 9201/9202/9203
Quick Use Guide
Page 37

Help
Documentation
Most answers to your questions will be provided by the documentation that is
supplied with the ColorQube™ Series.
• User Guide - provides instructions and information about the features on
the device using an interactive program and online guides.
• System Administrator Guide - provides detailed instructions and
information about connecting your device to the network and installing
optional features.
On the Print Driver
Click ? on the printer driver screen or press [F1] on the PC keyboard for
information on the displayed printer driver screen.
On Internet Services
To access Internet Services, open the web browser from your workstation. In
the URL field, enter http:// followed by the IP Address of the device and press
Enter to view the Home page.
Click Index to view the contents of the Internet Services site.
Click Help to take you to the Xerox online support web site.
Further Assistance
For any additional help visit our customer web site at www.xerox.com or
contact the Xerox Welcome and Support Centre quoting the device serial
number.
To locate the device serial number and contact information, press the Machine
Status button on the control panel. The Customer Support information and the
Machine Serial Number is displayed on the Machine Information tab.
ColorQube™ 9201/9202/9203
Quick Use Guide
37
Page 38

Help
38
ColorQube™ 9201/9202/9203
Quick Use Guide
 Loading...