

Printer Attachment Kit
Kit Installation Instructions
PLEASE READ ALL
INSTRUCTIONS THOROUGHLY
Purpose
This kit is intended to provide the capability
to secure the ColorQube 8870 or 8880
printers to a table/desk top, such that it
cannot be easily moved.
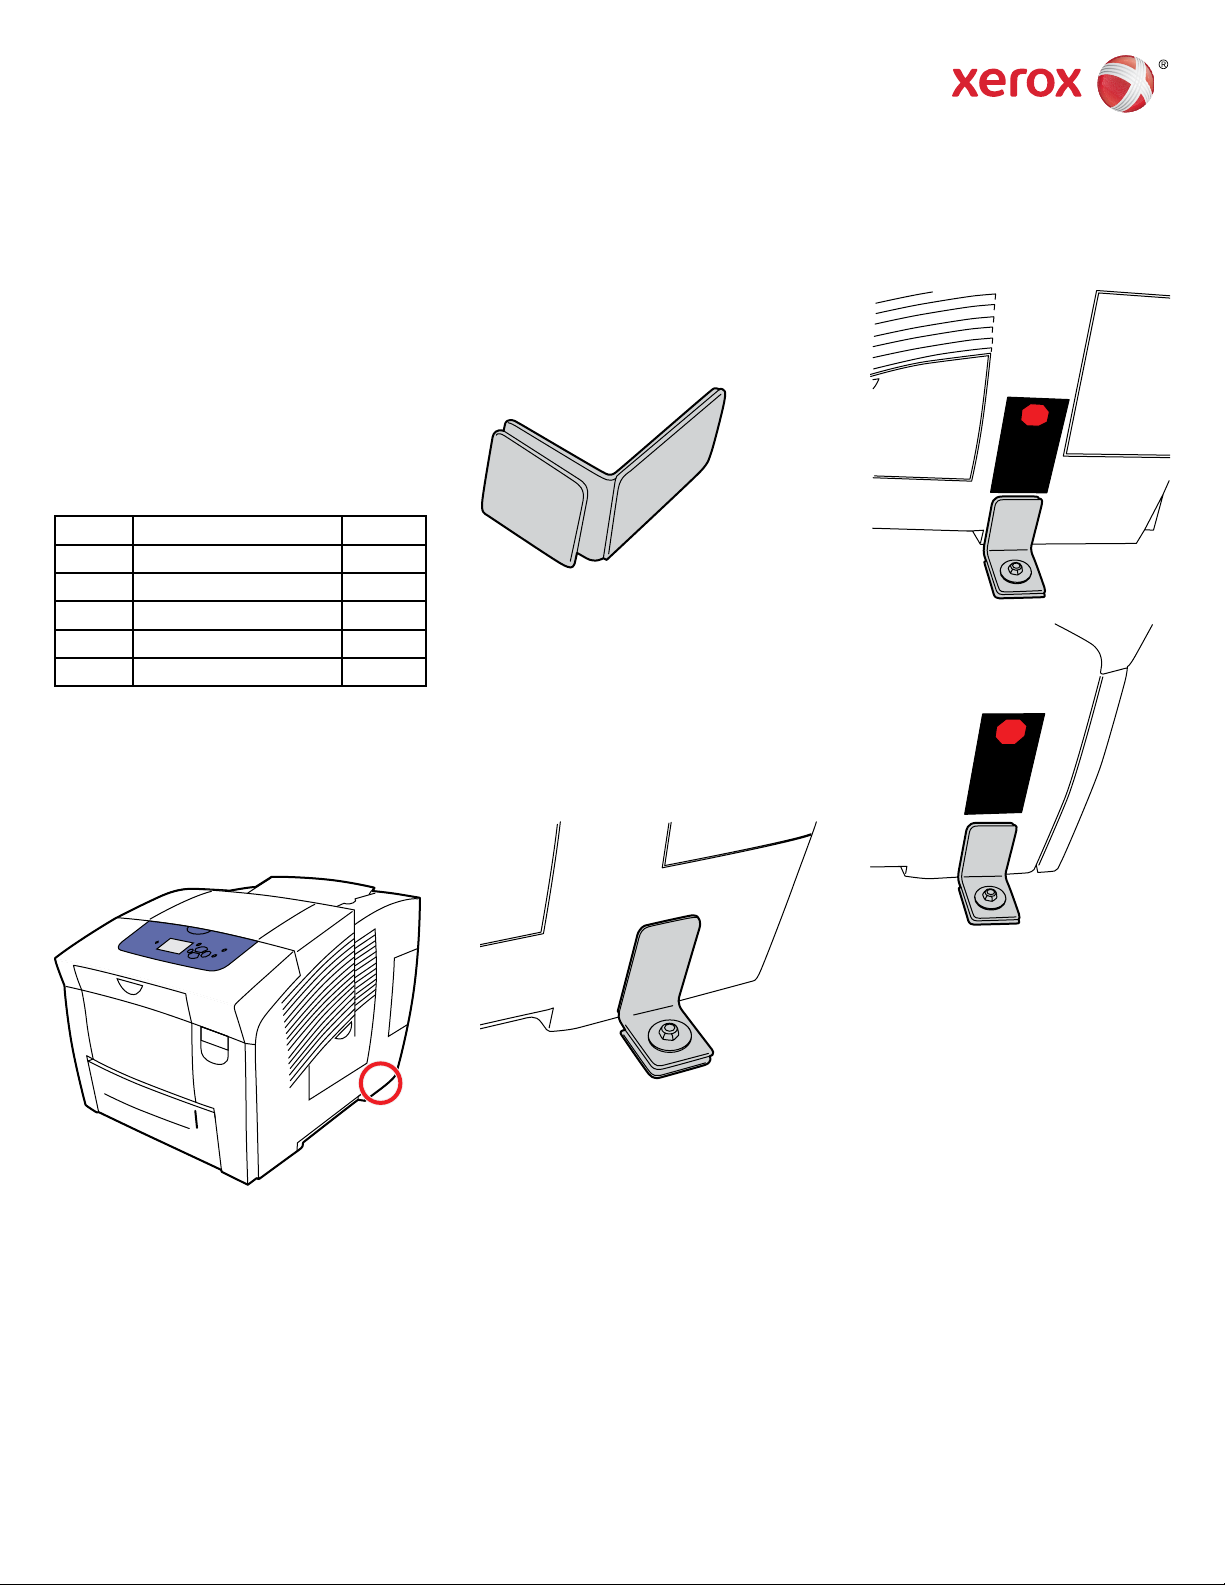
Kit Contents
Item Description Qty
1 Instructions 1
2 Stability Brackets 2
3 Isopropyl Pad 1
4 Scotch Pad 1
5 Warning Labels 2
Procedure
Check off steps as they are completed:
1. Locate area where the Stability Bracket
will be installed. See picture below.
____
2. Using the enclosed Scotch Pad, lightly
rub the areas where both faces of the
Stability Bracket will attach. ____
3. Using the enclosed Isopropyl Pad,
thoroughly clean the area rubbed
with the Scotch Pad. Dry with a clean
cloth or wipe. ____
4. Remove the red backing on both faces
of the Stability Bracket. Carefully align
on the area where it is to attach and
press into place. Hold firmly in place for
30 seconds. See picture below. ____
NOTE: These Brackets will be
PERMANENTLY attached to the
printer and the surface they are
being mounted to.
7. Attach the enclosed Warning Labels,
one directly above each Stability
Bracket, as shown below. ____
Recommended bracket install location for
right side
607E00890f1 Rev A
5. Proceed to next step. ____
6. Repeat steps 1-4, placing the second
Stability Bracket on
the FRONT left side of the printer. ____
www.xerox.com/office/support
Kit de fixation imprimante
Instructions d’installation
du kit
VEUILLEZ LIRE ATTENTIVEMENT
TOUTES LES INSTRUCTIONS
Objet
Ce kit permet de fixer les imprimantes
ColorQube 8870 ou 8880 sur une table
ou un bureau pour empêcher qu’elles ne
bougent.
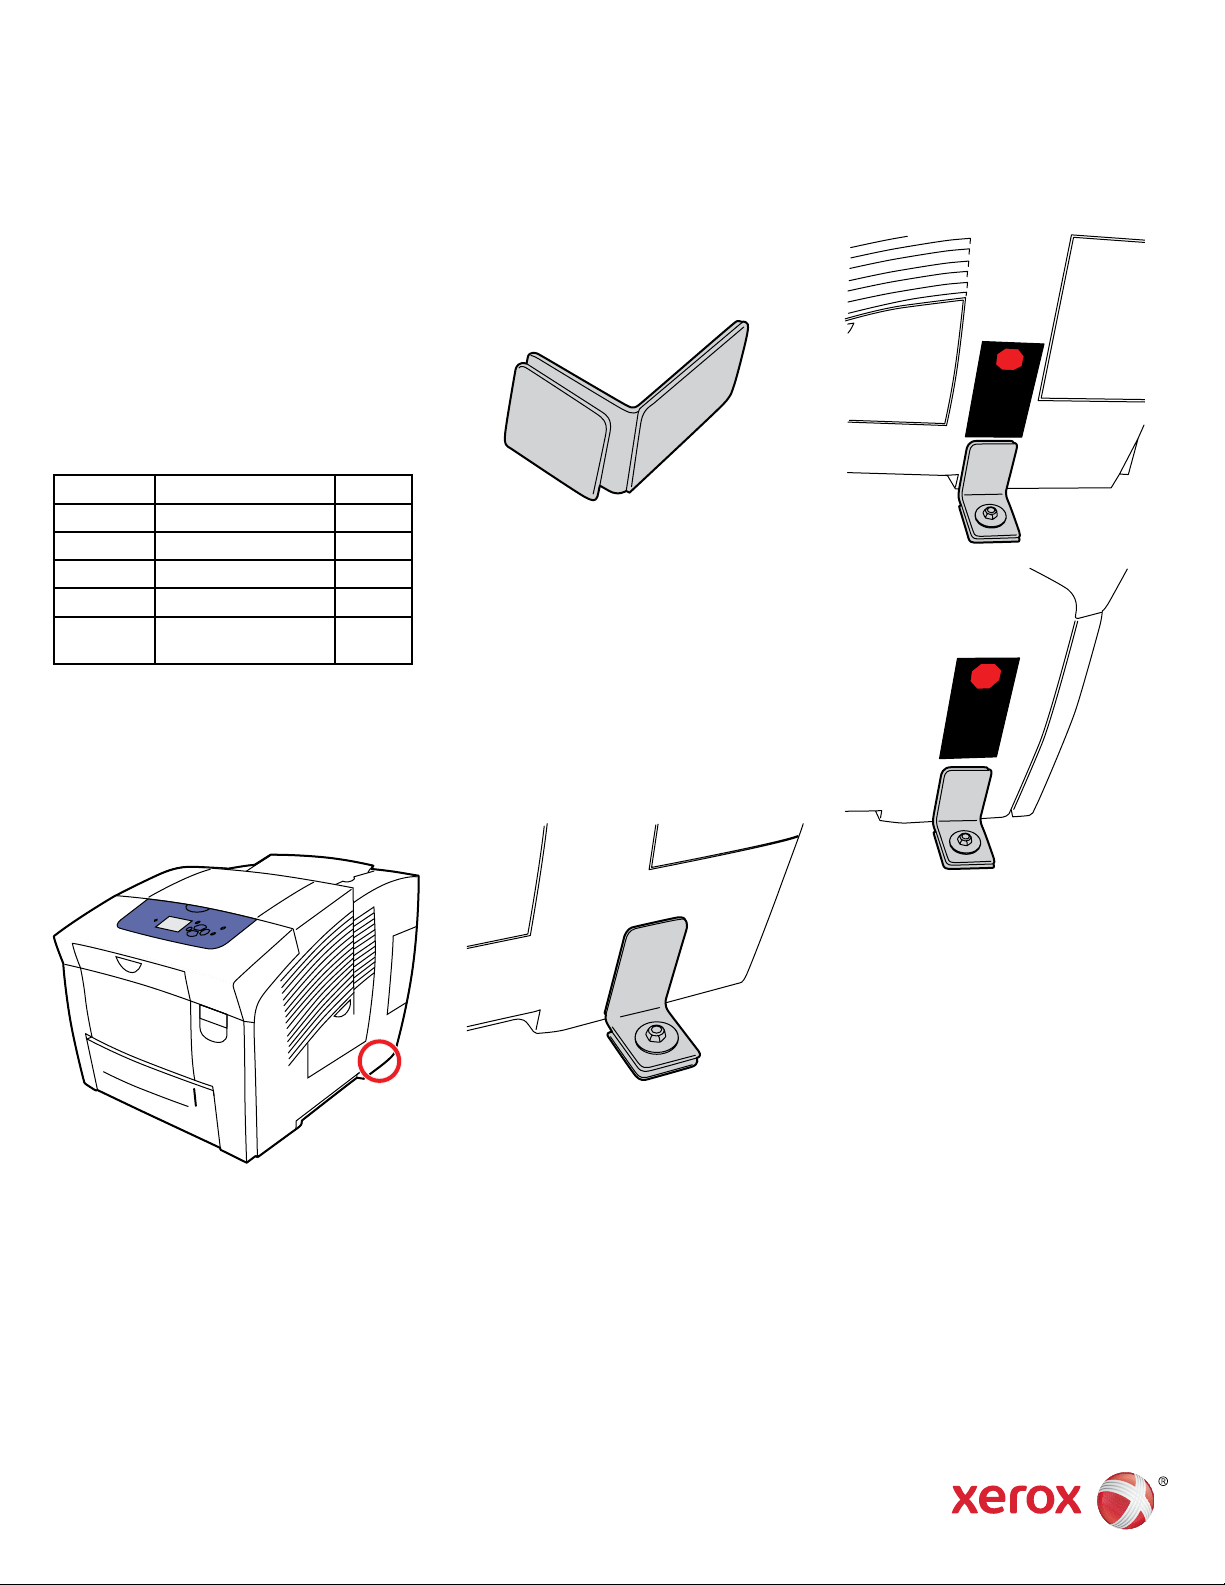
Contenu du kit
Élément Description Qté
1 Instructions 1
2 Supports de stabilité 2
3 Tampon d'isopropyle 1
4 Tampon ScotchPad 1
5 Étiquettes
d'avertissement
2
Procédure
Cochez les étapes une fois exécutées :
1. Repérez l’endroit où vous allez
installer les supports de stabilité. Voir
l’illustration ci-dessous. ____
frottez légèrement les zones sur
lesquelles vous allez fixer les deux
faces des supports de stabilité. ____
3. À l’aide du tampon d’isopropyle,
nettoyez soigneusement les zones
que vous venez de frotter avec
le tampon ScotchPad. Essuyez
avec un chiffon propre. ____
4. Retirez le revêtement rouge sur les
deux faces du support de stabilité.
Placez soigneusement le support à
l’endroit prévu et appuyez pour le
fixer en position. Appuyez fermement
pendant 30 secondes. Voir l’illustration
ci-dessous. ____
REMARQUE Ces supports resteront
fixés de manière PERMANENTE
à l’imprimante et à la surface
sur laquelle ils sont installés.
7. Apposez les étiquettes
d’avertissement, juste au-dessus de
chaque support de stabilité comme
illustré ci-dessus. ____
Emplacement d’installation recommandé Panneau droit
2. À l’aide du tampon ScotchPad fourni,
607E00890f2 Rev A
© 2014 Xerox Corporation. All Rights Reserved.
XEROX® and XEROX and Design® are trademarks of Xerox
Corporation in the United States and/or other countries.
5. Passez à l’étape suivante. ____
6. Répétez les étapes 1 à 4 pour placer
le deuxième support de stabilité
sur l’AVANT du côté gauche de
l’imprimante. ____
 Loading...