

Page 1
CARDIOPERFECT
EXERCISE ECG
QUICK START GUIDE
Page 2
STRESS TEST PATIENT INFORMATION
What is a stress test?
A stress test (or an exercise ECG test) is used to determine how well
your heart and lungs function during physical activity. During the test,
you will walk on a tr
essur
blood pr
progresses, the level of exertion is gradually increased.
Why does it work?
During exercise the body requires more oxygen. As the level of physical
activity increases, the hear
rich blood to the exercising muscles, so the heart beats faster. By
monitoring the electrical signals of the heart as it beats faster, we can
often see coronary problems that cannot be seen when the body is at
est. Because it is non-invasive, the stress test pr
r
fective initial test for coronary heart disease.
ef
How do I prepare for the test?
ou should not eat or smoke for at least two hours before the test. Y
Y
can drink water
with your physician. Some medications you are not allowed to take prior
to the study. Take your approved medications with water only. You
should wear comfortable sneakers or walking shoes, and exercise
clothing, to the test.
What happens during the test?
A nurse or technician will attach ten disposable adhesives patches, or
odes, on your chest. Befor
electr
site will be cleaned with alcohol, then lightly abraded to remove oils
and to ensure that a good electrical connection is made. Wires are then
eadmill or ride on a bicycle while your heart rate,
e, and electrocar
, but no other beverages. Please review your medications
diogram (ECG) are monitored. As the test
t has to work harder to deliver more oxygen-
ovides a safe and cost-
e placing the electrodes, each electrode
ou
attached to each electrode. These wires conduct the electrical signals of
the heart to the test system. A blood pressure cuff will also be placed on
your arm, so that blood pressure can be measured during the test.
After taking one or more resting ECG’s, you will move to the bicycle or
treadmill and start pedaling or walking slowly. At regular intervals, the
resistance of the bicycle—or the speed and elevation of the treadmill—
ease. As the intensity of the exercise increases, your heart rate
will incr
will increase. The test will be stopped if you experience dizziness, fatigue,
or abnormal heart beats. Normally the exercise portion of the test will end
when your heart rate has reached a target level (85% of a predicted
maximum heart rate, based on your age).
When the exer
or walk slowly until your hear
ECG data, along with blood pressure, will still be recorded. Then the wires
and electrodes will be removed.
In some cases dr
accelerate. The str
you will not use the bicycle or treadmill.
Are there any risks?
The exer
a heart attack. All stress tests should be monitored by a health care
ofessional. Immediately notify the attending health car
pr
if any of the following symptoms develop:
• unsteadiness • grayish, cold, or clammy skin
• dizziness • chest pain
• irregular heart beat
ce: Dr. Paul Fiacco, MD, CNY Family Care, E Syracuse, NY
Sour
cise portion of the test ends, you will still continue to pedal
t rate retur
ugs will be used, instead of exer
ess test will still follow the same pattern, except that
cise stress test carries a very slight risk (1 in 100,000) of causing
ns to normal. During this time your
cise, to make the hear
ofessional
e pr
t
Page 3

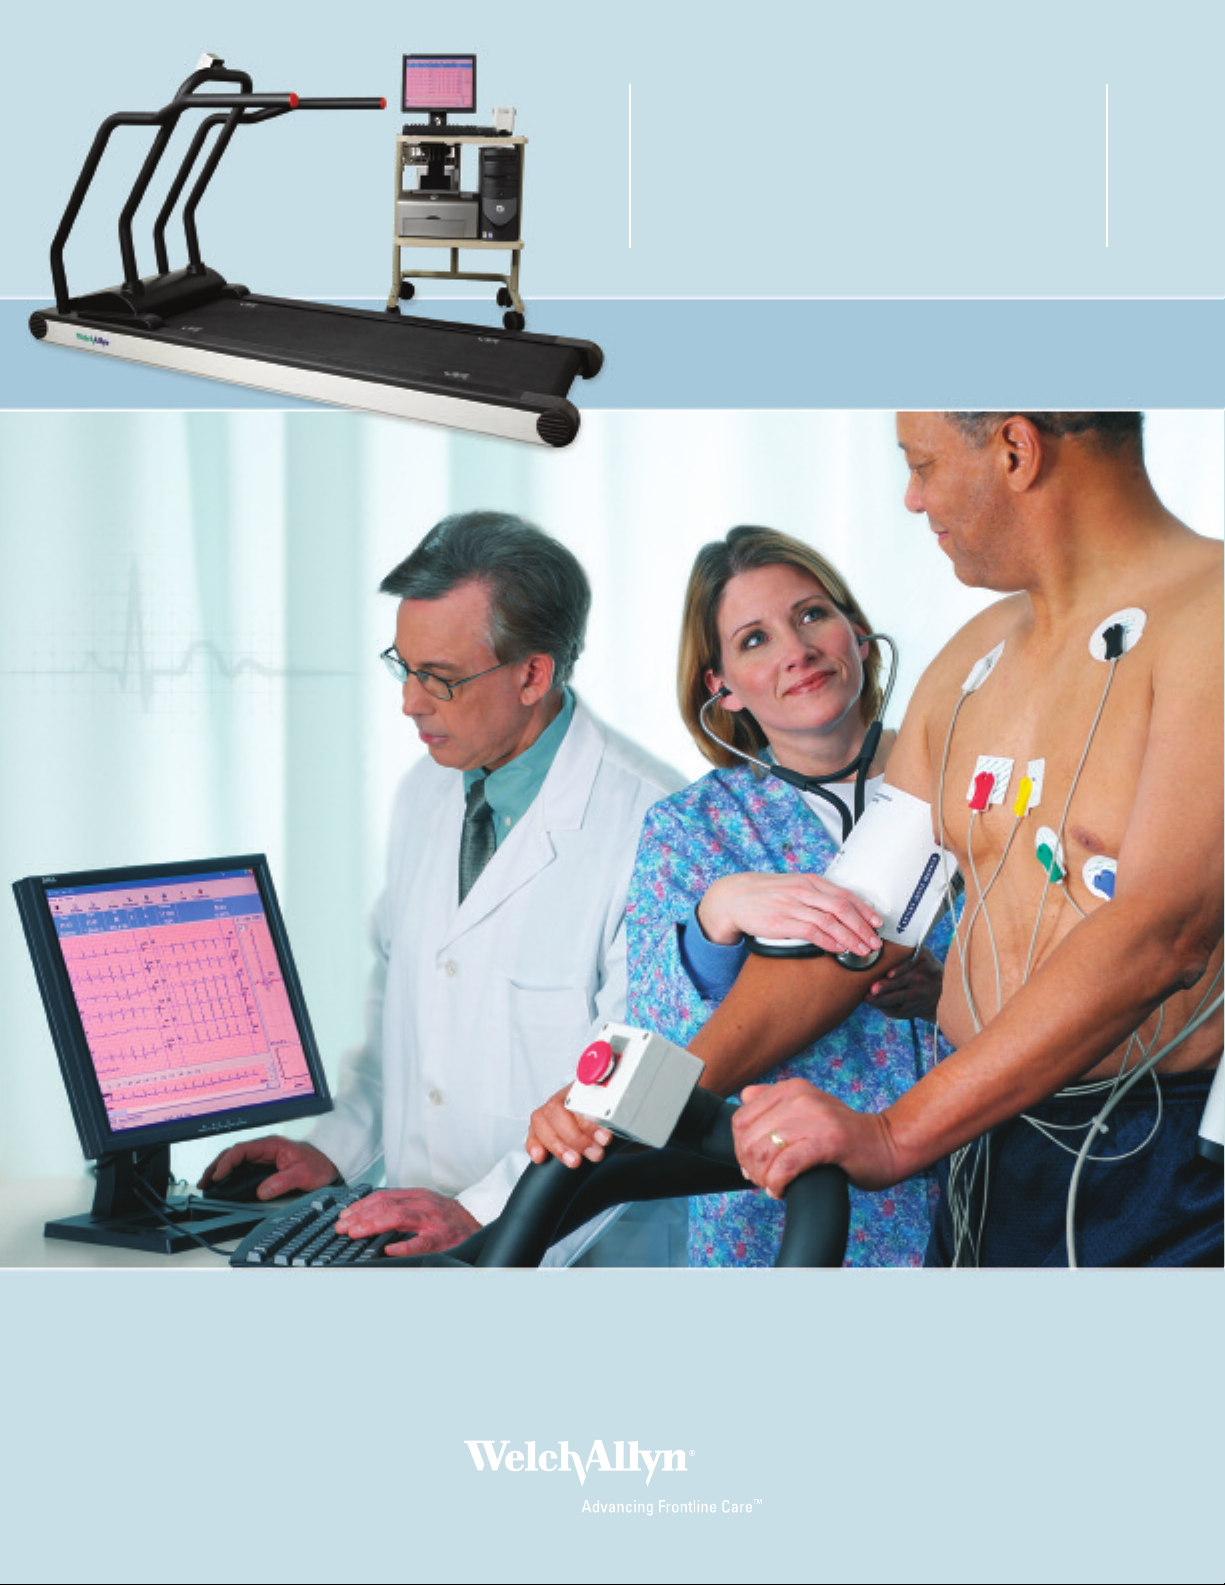
PC-BASED EXERCISE
ECG TEST SYSTEM
QUICK START GUIDE
1 Install Software and USB Drivers
•This Quick Start Guide is intended for use with CardioPerfect Workstation
1.6.0 or higher.
•For complete directions for use and warnings, please consult your user
manual located on the software CD.
2 Connect your Recorder
• Connect the PC interface cable (ProLink) to a USB port on your computer.
• Connect the other end to the black connector on the recorder.
• Connect the patient cable to the blue connector on the recorder.
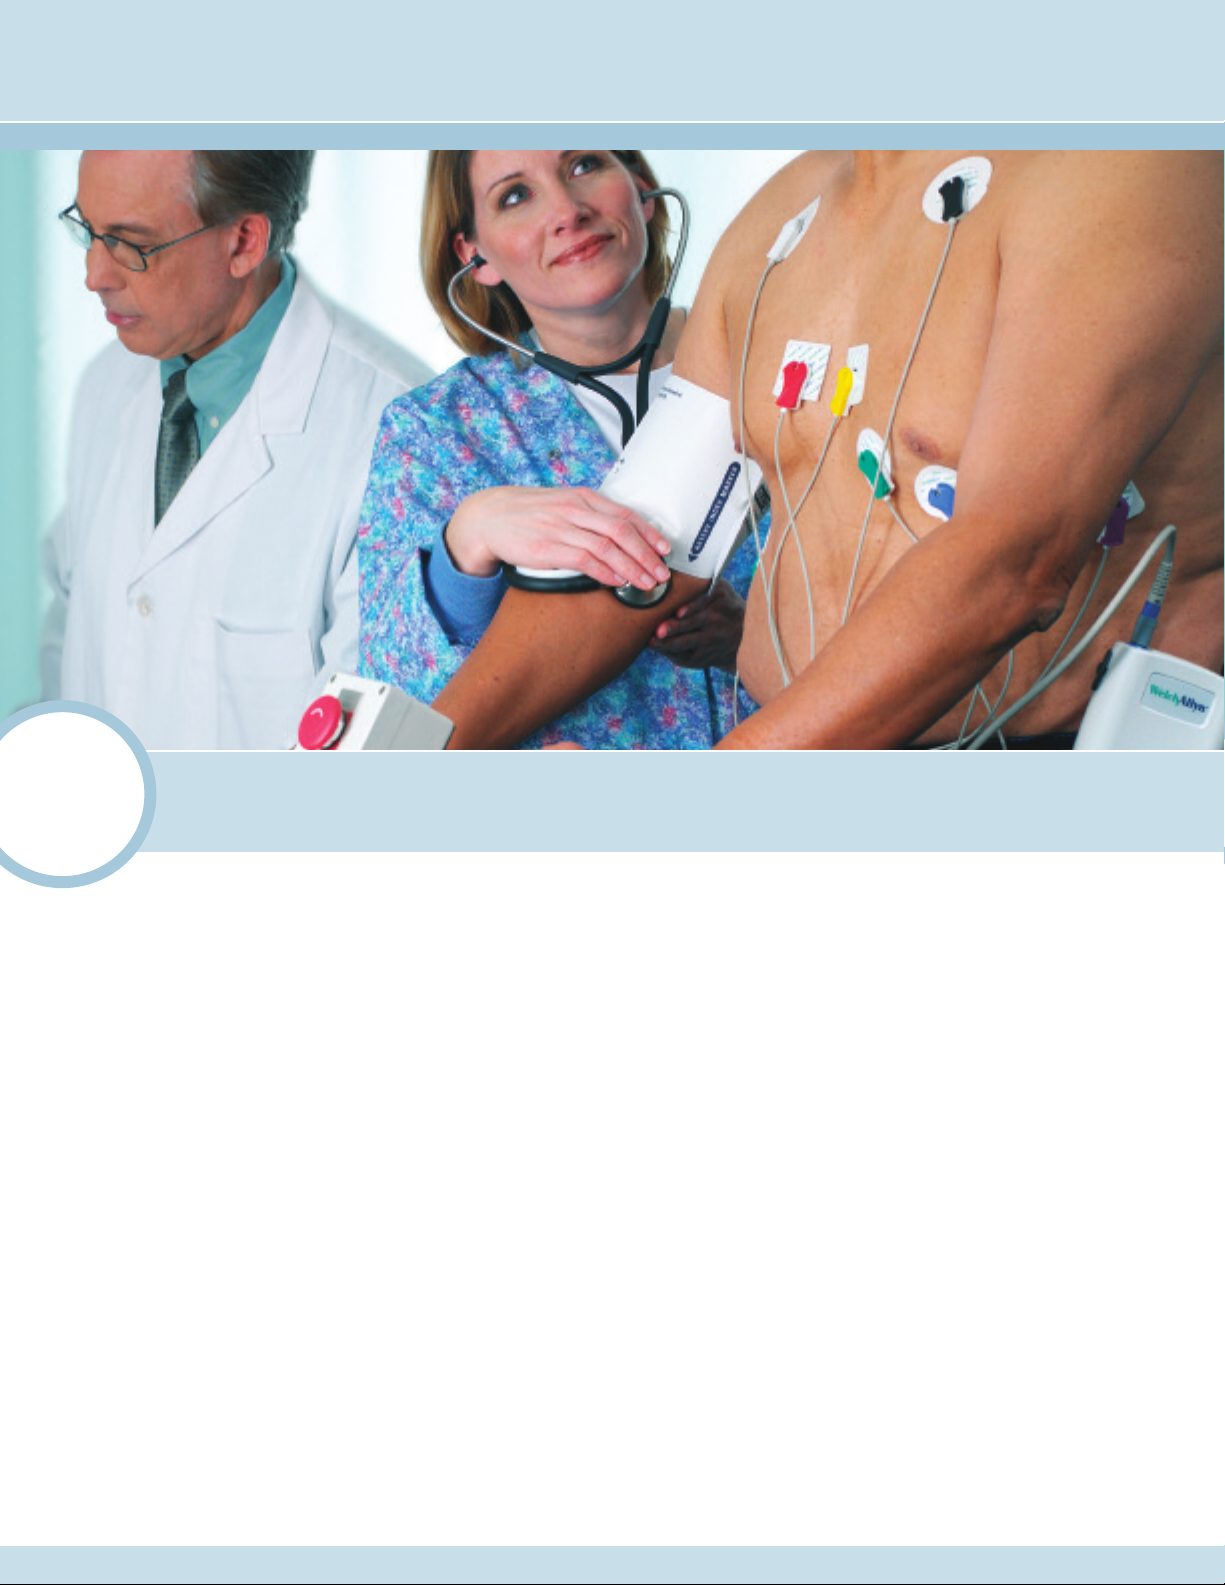
3 Prepare Your Patient
• Skin preparation is a key factor in minimizing noise and artifact on the
stress test recording.
• While precordial leads are placed in their standard locations, arm and leg
leads should be placed on boney surfaces to reduced noise.
• Place arm leads on the clavicles, and leg leads on the lower, protruding tip
of the rib cage.
Skin preparation steps:
• Dry shave to remove all hair from electrode sites.
• Scrub all electrode sites with alcohol wipes.
• Stretch skin and abrade each site with an abrasive pad.
• Skin should be red, with visible abrasion marks, when the
skin preparation is complete.
Source: Prairie Cardiovascular Skin Preparation Guide
Patient Cable Connection
On/Off Switch
Arm lead placement
Leg lead placement
Abrade each site with abrasive pad
PC Interface Connection
4 Place Electrodes and Connect Patient Leads
• Clip the patient leads to the electrodes.
• Stress electrodes should be firmly pressed and smoothed into
place but be careful not to squeeze gel out.
• Position electrodes according to your local protocol.
An example of the AHA guidelines is listed below.
• Dress the leads and patient cable so that they stay as quiet
as possible during the test. Leads should not come in contact
with legs or arms. If the recorder is belt mounted, gather
excess lead lengths and tuck under the belt.
essing patient leads
Dr
Electrode Placement
AHA Electrode Placement
RA and LA electrodes should be placed just
below the right and left clavicle.
RL and LL electrodes should be placed on
the lower edge of the rib cage, or at the level
of the umbilicus at the mid-clavicular line.
V1 Fourth intercostal space at
the right border of the sternum
V2 Fourth intercostal space at
the left border of the sternum
V3 Midway between locations
V2 and V4
V4 At the mid-clavicular line in
the fifth intercostal space
V5 At the anterior axillary line on
the same horizontal level as V4
At the mid-axillar
V6
same horizontal level as V4 and V5
AAMI
V1
IEC
C1
y line on the
l
V2
l
V3
l
l
C2
l
C3
l
V4
l
V5
l
V6
l
RA
l
LA
l
RL
l
LL
l
C4
l
C5
l
C6
l
RA
l
LA
l
R
l
L
l
Page 4

5 Select Patient
• Open the CardioPerfect Workstation Software
by double clicking on the CardioPerfect icon.
• To enter a new patient:
1. Click the Patient button.
2. Fill in Patient Card.
• To select a patient from the database:
1. In the Search box, type the patient name or number (can be a partial entry).
2. Click the
Go button.
3. Click on the patient for whom you want to record the test.
6 Record a Resting ECG (optional)
• Most exercise protocols will record a Resting ECG inside the stress test. You can,
however, record Resting ECG's independent of the Exercise ECG test, if you wish.
• Click on the ECG icon.
• If the new ECG dialog appears, select Physician Names and click OK.
• Click the Record button to start a 12-lead resting ECG.
• Review ECG data and print report
> You can choose from multiple ECG report templates.
> If automatic printing is checked in the ECG Print settings, the report will
print immediately.
> If you did not select Automatic printing in the Settings, click on the down arrow
next to the Print icon and choose “Print Selected Formats“ to initiate printing.
> If you just want to print one type of report, click on the Print icon, and select
the desired report page.
7 Initiate the Stress Test
• Click on the Exercise ECG button—the New exercise ECG window will appear.
• On the Protocol tab, set target heart rate & physician data. Change protocol
selections if required.
• On the T
est Information or T
est Obser
for test, etc. This data can be entered at any time during or after the test.
t the Str
8 Star
• To begin the test, click the start button.
• Take baseline resting ECGs—most stress test protocols will be setup to take one
ess ECG T
est
or more resting ECG snapshots prior to starting the exercise portion of the test.
Follow the protocol prompts.
• Place patient on tr
• Start the exercise portion of the test by clicking the Go to Exercise button.
You will be asked to confir
eadmill.
m this action.
vation tabs, enter data describing reasons
Page 5

9 Monitor and Coach Your Patient
The real time monitor window gives you many ways to track patient and test
status. They include:
• Phase, stage and heartrate
• Blood pressure and workload
• ST changes
Warn your patients when the next stage is approaching to prepare them for
changes in speed and elevation.
10 Add Relevant Data to the Test
Throughout the test you can add relevant data, including:
• Blood pressure – BP can be added at any time by clicking the BP button.
• An event marker, or a comment, can be added by using the Event or
Comment buttons
• Patient perceptions of perceived exertion, chest pain, or dypsnea can be
entered using the Perception button.
• Test information or observations can be entered at any time during or after
the test by clicking on the Test Information or Test Observation tabs.
11 Manually control the test, if required
• Filter settings can be changed at any time during the test using the check boxes
above the waveform display window.
• You can manually control the treadmill or ergometer by clicking on the
Change Load button.
• With the proper Exercise ECG settings, the treadmill can be controlled
instantaneously via the change load window, or by holding the CNTRL key
down and using the arrow keys.
• With the proper Exercise ECG settings, an ergometer can also be controlled
instantaneously via the change load window.
12 Stop the test, enter final data, and print test results
• When test goals are met (i.e.: patient has reached target heart rate), you can go
to the Recover
y Phase by clicking the Go To Recovery button. During Recovery
test data will still be recorded.
• You can stop the test at any time by clicking the Stop Test button. If the Print
after recording box is checked in the Stress ECG Print settings, post test reports
will now print.
ow next to the Print icon and choose
• Or you can click on the down ar
“Print Selected For
• If you just want to print one page, click on the Print icon, and select the
mats to initiate printing.
r
desired report page.
• During Recovery or after the test is stopped, you can enter additional
test data using the Test Information and Test Observation tabs.
13 Edit the test results, after the test is complete
• Test Information and Test Observation data can be added after the test by
clicking the Edit Test button. From this same window, the Physician names can
be edited. Post-test editing can continue until the Interpretation is confirmed.
• Events (User events, Comments, and BP values) can be edited after the test is
complete by clicking Action – Edit Events.
Page 6

LEAD QUALITY PROBLEMS
Condition Causes Actions
A dot is flashing on the Lead Off screen.
OR
Lead-off information is displayed on the screen.
OR
One or more leads prints as a square wave:
Wandering baseline (an upward and
downward fluctuation of the waveforms):
Muscle tremor interference (random, irregular
voltage superimposed on the waveforms). May
resemble or coincide with AC interference:
• Electrode contact may be poor.
• A lead may be loose.
• Electrodes that are dirty, corroded, or loose.
• Insufficient or dried electrode gel.
• Oily skin or body lotions.
• Rising and falling of chest during rapid or
apprehensive breathing.
• Patient is uncomfortable, tense, nervous.
• Patient is cold and shivering.
• Exam bed is too narrow or short to
comfortably support arms and legs.
• Arm or leg electrode straps are too tight.
• Reattach the lead.
• Replace the electrode.
• Verify that the electrode area has been properly
prepared: shaved, cleaned with alcohol or acetone,
llowed to dry.
a
• Verify that electrodes have been properly stored
and handled.
• Clean skin with alcohol or acetone.
• Reposition or replace electrodes.
• Help patient relax.
• If wandering baseline persists, turn the
baseline filter on.
• Help patient get comfortable.
• Check all electrode contacts.
• If interference persists, turn the muscle-tremor
filter on. If interference still persists, the problem
is probably electrical in nature. See the following
suggestions for reducing AC interference.
AC interference (even-peaked, regular voltage
superimposed on the waveforms).
esemble or coincide with muscle tremor
May r
interference:
4341 State Street Road, PO Box 220, Skaneateles Falls, NY 13153-0220 USA
(p) 800.535.6663 (f) 315.685.2174 www
© 2007 Welch Allyn REF 101911 Mat. Number: 708551, Ver: B
.welchallyn.com
• Electrodes that are dirty, corroded, or loose.
• Insufficient or dried electrode gel.
• Patient or technician touching an electrode
during recording.
• Patient touching any metal parts of an exam
table or bed.
• Broken lead wire, patient cable, or power cord.
Electrical devices in the immediate area,
•
lighting, concealed wiring in walls or floors.
• Improperly grounded electrical outlet.
ect AC filter fr
r
Incor
•
AC filter is turned off.
• Verify that the patient is not touching any metal.
• Verify that the AC power cable is not touching the
patient lead cable.
• Verify that the proper AC filter is selected.
• If interference still persists, the noise may be caused
by other equipment in the room or by poorly grounded
power lines. Try moving to another room.
equency setting or
 Loading...