


 Loading...
PrintJet ADVANCED
User Manual

Foreword
Foreword
Revisions |
|
|
Version |
Date |
Change |
1.0 |
01/13 |
First edition |
1.103/13 First revised edition
Contact address
Weidmüller Interface GmbH & Co. KG
Postfach 3030
D - 32720 Detmold
Klingenbergstraße 16
D - 32758 Detmold
Phone |
+49 (0) 5231 14-0 |
Fax |
+49 (0) 5231 14-2083 |
E-Mail info@weidmueller.com
Internet www.weidmueller.com
2 |
1449820000/1.1/03.13 |

Contents
Contents
1 |
Introduction ........................................................................................................... |
7 |
1.1 |
Notational conventions..................................................................................................................... |
8 |
1.2 |
Warranty and liability........................................................................................................................ |
9 |
1.3 |
Copyright ........................................................................................................................................... |
9 |
1.4 |
Guarantee terms................................................................................................................................ |
9 |
2 |
Safety information............................................................................................... |
11 |
|
2.1 |
General safety information............................................................................................................. |
12 |
|
2.2 |
General operating information....................................................................................................... |
13 |
|
2.3 |
Safety measures for environment protection .............................................................................. |
14 |
|
2.4 |
Symbols and information used on the device ............................................................................. |
14 |
|
2.5 |
Intended use .................................................................................................................................... |
15 |
|
2.6 |
Residual risks when using the device .......................................................................................... |
15 |
|
|
2.6.1 |
Hazards due to electricity .................................................................................................. |
16 |
|
2.6.2 |
Hazards due to hot surfaces.............................................................................................. |
17 |
|
2.6.3 |
Hazards due to incorrect spare parts................................................................................. |
17 |
2.7 |
Safety devices and guards............................................................................................................. |
17 |
|
2.8 |
Obligations of the plant operator .................................................................................................. |
17 |
|
2.9 |
Personnel requirements ................................................................................................................. |
18 |
|
|
2.9.1 |
Qualifications required by personnel ................................................................................. |
18 |
|
2.9.2 |
Obligations of personnel .................................................................................................... |
18 |
|
2.9.3 |
Responsibilities .................................................................................................................. |
18 |
3 |
Printer description .............................................................................................. |
19 |
|
3.1 |
Printer |
............................................................................................................................................... |
21 |
|
3.1.1 |
Overview ............................................................................................................................ |
21 |
|
3.1.2 ......................................................................................................................... |
Connectors |
23 |
|
3.1.3 ........................................................................................................................ |
Rating plate |
23 |
3.2 |
MultiCards ..........................................................................................................and MetalliCards |
24 |
|
4 |
Setup .................................................................................................................... |
27 |
4.1 |
Unpacking ........................................................................................................................................ |
28 |
4.2 |
Scope of supply............................................................................................................................... |
28 |
4.3 |
Installing the printer........................................................................................................................ |
28 |
4.4 |
Removing the transport restraints ................................................................................................ |
30 |
4.5 |
Fitting the output rail ...................................................................................................................... |
31 |
1449820000/1.1/03.13 |
3 |

Contents
4.6 |
Positioning the touch panel ........................................................................................................... |
31 |
|
4.7 |
Connecting the power plug............................................................................................................ |
32 |
|
4.8 |
Methods of connecting the printer ................................................................................................ |
34 |
|
|
4.8.1 |
Connection via the network interface................................................................................. |
34 |
|
4.8.2 |
Connection via USB........................................................................................................... |
34 |
4.9 |
Turning on the printer..................................................................................................................... |
35 |
|
4.10 |
Choosing the language for the touch panel ................................................................................. |
36 |
|
4.11 |
Installing the standard version of the M-Print® PRO software .................................................. |
39 |
|
4.12 |
Connection via network cable ....................................................................................................... |
45 |
|
4.13 |
Connection via USB cable.............................................................................................................. |
50 |
|
4.14 |
Installing the network version of the M-Print® PRO software.................................................... |
54 |
|
|
4.14.1 |
Description ......................................................................................................................... |
54 |
|
4.14.2 Tasks to be done on the central computer/server ............................................................. |
55 |
|
|
4.14.3 Tasks to be done on the clients ......................................................................................... |
69 |
|
4.15 |
Activating M-Print® PRO ................................................................................................................ |
71 |
|
4.16 |
Setting up and adjusting a MultiCard for the printer................................................................... |
73 |
|
4.17 |
Running a print test ........................................................................................................................ |
74 |
|
5 |
Operation ............................................................................................................. |
77 |
|
5.1 |
General operation............................................................................................................................ |
78 |
|
|
5.1.1 |
Important information ......................................................................................................... |
78 |
|
5.1.2 |
Inserting MultiCards/MetalliCards...................................................................................... |
79 |
|
5.1.3 |
Processing a single MultiCard/MetalliCard ........................................................................ |
80 |
|
5.1.4 |
Processing a stack of MultiCards ...................................................................................... |
80 |
5.2 |
Software settings ............................................................................................................................ |
81 |
|
|
5.2.1 |
Starting M-Print® PRO ...................................................................................................... |
81 |
|
5.2.2 |
Mapping and calibrating the printer ................................................................................... |
82 |
|
5.2.3 |
Setting the printer correction.............................................................................................. |
87 |
|
5.2.4 |
Setting material-dependent slip ......................................................................................... |
89 |
|
5.2.5 |
Adjusting MultiCards .......................................................................................................... |
91 |
|
5.2.6 |
Printing MultiCards/MetalliCards ....................................................................................... |
95 |
|
5.2.7 |
Curing settings / Heating level ........................................................................................... |
95 |
|
5.2.8 |
Selecting the print quality................................................................................................... |
95 |
5.3 |
Touch panel ..................................................................................................................................... |
96 |
|
|
5.3.1 |
Menu structure of the touch panel ..................................................................................... |
97 |
|
5.3.2 |
Main menu ......................................................................................................................... |
98 |
4 |
1449820000/1.1/03.13 |

Contents
|
5.3.3 |
Submenus .......................................................................................................................... |
99 |
|
5.3.4 |
System Info ........................................................................................................................ |
99 |
|
5.3.5 |
Changing the printer name .............................................................................................. |
100 |
|
5.3.6 |
Changing the IP address and subnet mask and activating DHCP .................................. |
102 |
|
5.3.7 |
Selecting the language .................................................................................................... |
105 |
|
5.3.8 |
Changing the USB port .................................................................................................... |
106 |
|
5.3.9 |
Ink level ............................................................................................................................ |
107 |
|
5.3.10 |
Protocol ............................................................................................................................ |
108 |
|
5.3.11 |
Information ....................................................................................................................... |
109 |
|
5.3.12 |
Tools ................................................................................................................................ |
110 |
|
5.3.13 |
Print jobs .......................................................................................................................... |
111 |
|
5.3.14 |
Templates ........................................................................................................................ |
112 |
|
5.3.15 |
Printing the templates from the USB stick ....................................................................... |
113 |
6 |
Cleaning and maintenance............................................................................... |
115 |
|
6.1 |
Tools menu .................................................................................................................................... |
116 |
|
|
6.1.1 |
Printhead cleaning ........................................................................................................... |
117 |
|
6.1.2 |
Printhead flushing ............................................................................................................ |
118 |
|
6.1.3 |
Executing a sensor check ................................................................................................ |
120 |
|
6.1.4 |
Executing a nozzle check ................................................................................................ |
122 |
6.2 |
Replacing ink cartridges .............................................................................................................. |
124 |
|
6.3 |
Replacing the wastepad ............................................................................................................... |
130 |
|
6.4 |
Replacing the dust filter ............................................................................................................... |
132 |
|
6.5 |
Cleaning the printer enclosure .................................................................................................... |
133 |
|
6.6 |
Cleaning the touch panel ............................................................................................................. |
133 |
|
6.7 |
Updating the printer software ...................................................................................................... |
134 |
|
7 |
Troubleshooting................................................................................................ |
135 |
|
7.1 |
General information ...................................................................................................................... |
136 |
|
7.2 |
General troubleshooting .............................................................................................................. |
136 |
|
7.3 |
List of events ................................................................................................................................. |
138 |
|
8 |
Transporting the printer ................................................................................... |
145 |
|
8.1 |
Decommissioning the printer ...................................................................................................... |
146 |
|
8.2 |
Packing the printer........................................................................................................................ |
146 |
|
8.3 |
Disposing of the printer................................................................................................................ |
147 |
|
1449820000/1.1/03.13 |
5 |

Contents
9 |
Annex ................................................................................................................. |
149 |
9.1 |
Technical data ............................................................................................................................... |
150 |
9.2 |
Ordering data................................................................................................................................. |
151 |
9.3 |
Declaration of conformity............................................................................................................. |
152 |
9.4 |
List of figures................................................................................................................................. |
153 |
9.5 |
List of tables .................................................................................................................................. |
156 |
6 |
1449820000/1.1/03.13 |

Introduction
1 Introduction
1.1 |
Notational conventions..................................................................................................................... |
8 |
1.2 |
Warranty and liability........................................................................................................................ |
9 |
1.3 |
Copyright ........................................................................................................................................... |
9 |
1.4 |
Guarantee terms................................................................................................................................ |
9 |
1449820000/1.1/03.13 |
7 |
Introduction
This user manual provides all the information you need for trouble-free operation of the PrintJet ADVANCED (hereafter called printer or device).
This user manual must be read, understood, and followed by members of staff before commencing work, maintenance tasks, cleaning, and troubleshooting at the printer. This applies, in particular, to any safety information.
After reading the user manual you will be able to
operate the printer safely,
clean the printer correctly,
take appropriate action in the event of a fault.
In addition to this user manual, it is necessary to comply with the general laws and other regulations concerning accident prevention and environmental protection in the country of use.
This user manual is an integral part of the printer.
It must be kept with the printer throughout its service life.
1.1Notational conventions
Passages of this operating manual that require special attention or are a direct hazard warning are shown as follows:

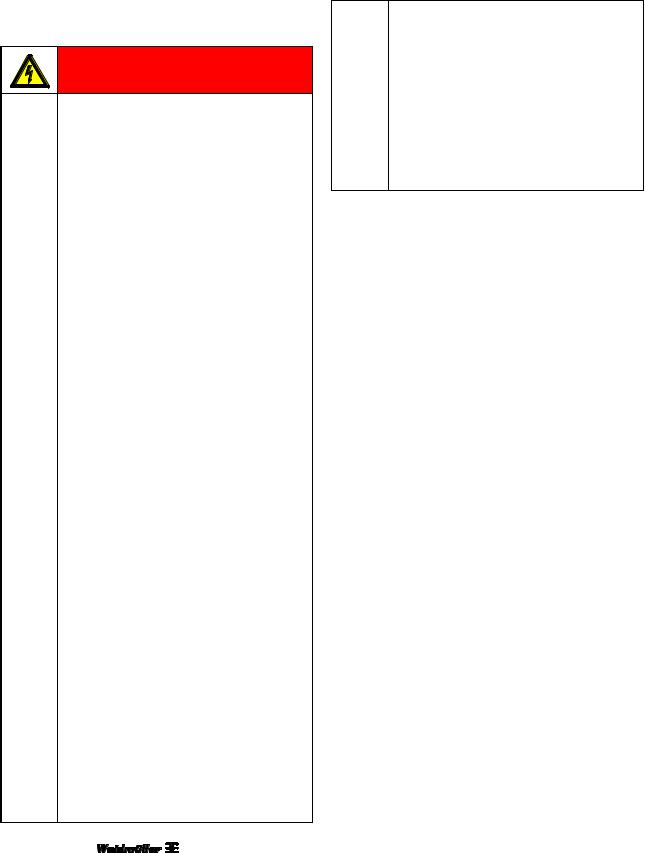
 DANGER
Electrical hazard warning
This warning sign indicates an electrical hazard.
Only qualified and authorized electrical specialists are allowed to work on electrical equipment.

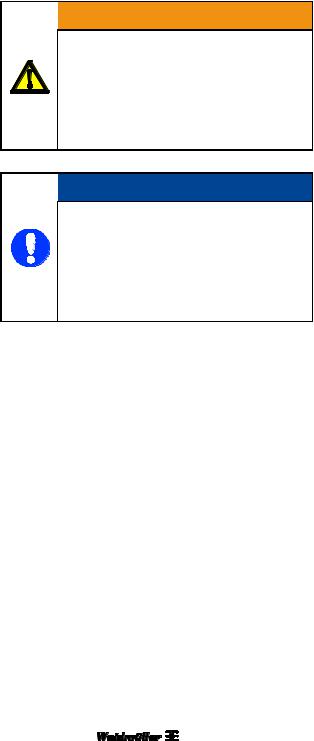
 WARNING
This warning indicates a potential hazard which, unless avoided, could involve a medium risk of death or (serious) injury.

 CAUTION
This warning sign indicates a low risk situation which, if not avoided, could result in minor or moderate injury.
 NOTE
NOTE
This warning indicates a hazard which, unless avoided, could involve a low risk of material damage.
Important information
This symbol indicates information about a printer function or setting, or that due care and attention are required. It also indicates information which must be followed at all times.
The following notational conventions are also used:
Text following this mark represents an item in a list.
-Text following this mark represents subordinated lists.
1Several activities which must be executed in the specified sequence are marked by consecutive numbering.
[ ] |
Buttons which must be actuated in the |
|
software are shown in square brackets. |
|
This symbol or text in " " refers to other |
|
chapters and sections in this user |
|
manual or to other documents. |
8 |
1449820000/1.1/03.13 |
Symbols used in the manual
In this user manual, particular hazards are identified by the following symbols:
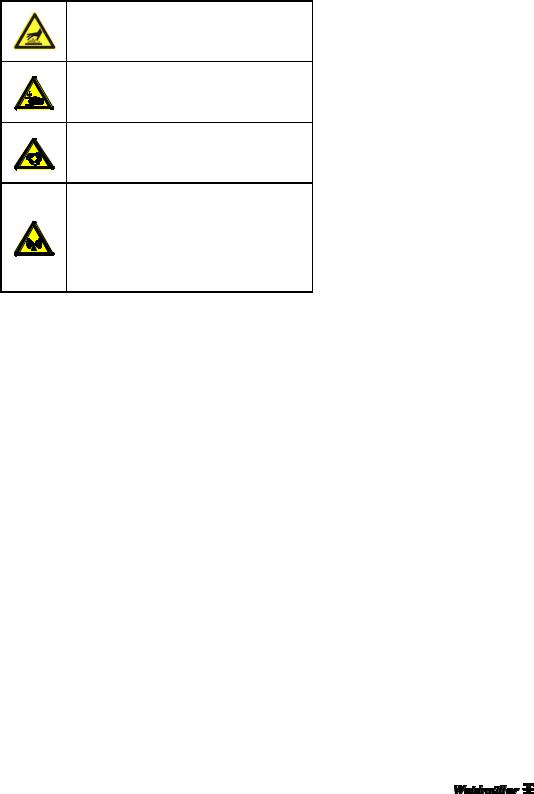
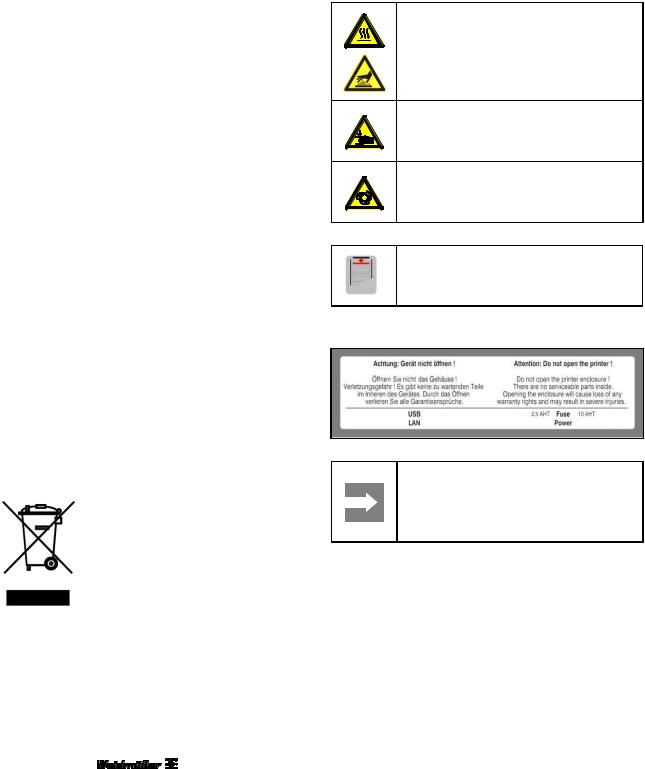
Hot surface warning
This symbol warns of a burn hazard due to hot surfaces.
Crush hazard
This symbol warns of a crush hazard, for instance to your hands.
Automatic start-up warning
This symbol warns of automatic printer startup.
Electromagnetic interference warning!
This symbol warns of electromagnetic interference fields, which may negatively influence operation of the device.
1.2Warranty and liability
The obligations specified in the supply contract, the general and delivery terms and conditions of Weidmüller Interface GmbH & Co. KG, and the legal regulations in force at the time the contract was signed apply.
All the information and instructions in this user manual have been compiled in line with applicable standards and regulations, state-of-the-art technology, and our extensive knowledge and experience.
Warranty and liability claims for personal injury and material damage are excluded if they are attributable to one or more of the following causes:
Unintended or inappropriate use of the printer (also see section "2.5 Intended use"),
Inappropriate installation, commissioning, operation, maintenance or cleaning of the printer
Operation of the printer with defective or incorrectly fitted printer enclosure,
Failure to heed information in the user manual regarding installation, commissioning, operation, maintenance and cleaning of the printer
Introduction
Deployment of untrained personnel
Structural alterations to the printer (modifications or other alterations to the printer are prohibited.) Non-compliance will result in the printer's EC Declaration of Conformity no longer being valid)
Technical modifications
Opening the printer enclosure,
Use of out-of-date ink cartridges,
Use of unapproved spare parts or spare parts that do not satisfy technical requirements
Disasters, effects of extraneous elements and force majeure
We reserve the right to make technical alterations in the course of further development and improvement of features.
1.3Copyright
This operating manual is protected by copyright and intended for internal use only.
This user manual or parts thereof must not be passed or disclosed to any third party or be reproduced or exploited in any form without the prior written consent of Weidmüller Interface GmbH & Co. KG except for internal use.
Contravention results in liability for damages. Further claims remain reserved.
1.4Guarantee terms
The guarantee terms and conditions are contained in the general terms and conditions of Weidmüller Interface GmbH & Co. KG.
1449820000/1.1/03.13 |
9 |
Safety information
2 Safety information
2.1 |
General safety information............................................................................................................. |
12 |
|
2.2 |
General operating information....................................................................................................... |
13 |
|
2.3 |
Safety measures for environment protection .............................................................................. |
14 |
|
2.4 |
Symbols and information used on the device ............................................................................. |
14 |
|
2.5 |
Intended use .................................................................................................................................... |
15 |
|
2.6 |
Residual risks when using the device .......................................................................................... |
15 |
|
|
2.6.1 |
Hazards due to electricity .................................................................................................. |
16 |
|
2.6.2 |
Hazards due to hot surfaces.............................................................................................. |
17 |
|
2.6.3 |
Hazards due to incorrect spare parts................................................................................. |
17 |
2.7 |
Safety devices and guards............................................................................................................. |
17 |
|
2.8 |
Obligations of the plant operator .................................................................................................. |
17 |
|
2.9 |
Personnel requirements ................................................................................................................. |
18 |
|
|
2.9.1 |
Qualifications required by personnel ................................................................................. |
18 |
|
2.9.2 |
Obligations of personnel .................................................................................................... |
18 |
|
2.9.3 |
Responsibilities .................................................................................................................. |
18 |
1449820000/1.1/03.13 |
11 |
Safety information

 WARNING
Failure to observe the safety information below may have serious consequences:
Risk to persons due to electrical and chemical hazards
Failure of functions.
Read the safety and hazard information in this section thoroughly before putting the printer into operation.
In addition to the information specified in this user manual, the plant operator/machine operator must comply with national occupational health and safety regulations.
It is also important to follow in-house rules and regulations.
2.1General safety information
In the following cases, you must disconnect the printer from all sources of power and contact a qualified service technician:
The power cable or plug are worn or damaged.
Liquid has penetrated the PrintJet ADVANCED.
The PrintJet ADVANCED has fallen down or the enclosure has been damaged.
The performance of the PrintJet ADVANCED is not up to the required standard, e.g. poor print quality or insufficient resistance to smearing and scratching.

 CAUTION
Never remove the printer enclosure!
There is a potential risk of injury!
Only qualified service technicians should replace components inside the device.
 NOTE
NOTE
Damage to the device!
The printer enclosure should not be removed.
Opening the enclosure will result in the loss of any warranty rights!
Only qualified service technicians should replace components inside the device.
Always read and understand the user manual before commencing operation and maintenance tasks at the printer.
Only use the printer for its intended purpose (see section "2.5 Intended use").
Keep all safety and warning signs on the printer clean and renew them, if necessary.
Only trained personnel are allowed to use the printer.
Always keep the user manual with the product for future reference. It must be ensured that everyone involved with the device is able to view the user manual at any time.
12 |
1449820000/1.1/03.13 |
2.2General operating information
When selecting the installation site for the printer, ensure the ambient conditions are suitable (also see chapter "9.1 Technical data").
The openings in the enclosure of the printer must not be blocked or covered over.
Do not switch off the printer! The printer automatically goes into standby mode. The operating parameters are only retained while the printer is turned on. These parameters ensure, for example, that the printhead is cleaned optimally.
Switching off the printer may result in the ink cartridge nozzles becoming blocked.
Do not open the ink tank lid during operation.
Print some MultiCards/MetalliCards every week. This is the only way to preserve print quality.
Only use products that have been produced or approved by Weidmüller (M-Print® PRO software, MultiCards/ MetalliCards and ink cartridges). Otherwise no liability can be assumed for the quality and durability of printing.
 NOTE
NOTE
The Weidmüller warranty does not cover faults or damage to the printer resulting from the use of unapproved or unsuitable accessories or consumable materials.
Handling ink cartridges
Keep ink cartridges out of reach of children.
Never allow children to play with ink cartridges.
Printer ink is not suitable for human consumption. No not allow ink to come into contact with the mucous membranes.
If you accidentally swallow any ink, rinse out your mouth and drink plenty of water. Do not induce vomiting.
Always handle used ink cartridges with care as a small amount of ink could remain in the ink supply outlet. If you get ink on your skin, wash thoroughly with soap and water.
Never touch the ink supply outlet of the ink cartridge or the area around it.
Safety information
Do not shake ink cartridges, as this may cause ink to leak.
Do not disassemble or try to refill ink cartridges.
Store unopened ink cartridges in a cool and dry place, preferably in a refrigerator at about 4 °C.
Before using an ink cartridge that has been stored in a colder place, allow the cartridge to stand at room temperature for at least three hours.
Only remove ink cartridges from the printer when they are empty or their use-by date has expired. Removing an ink cartridge can cause leaks in the connection between the ink cartridge and the ink line. This can lead to a faulty ink feed system.
Never use out-of-date ink cartridges.
When the use-by date of the ink approaches (printed on the packaging), a message is displayed at the touch panel. Replace the specified ink cartridge (see section "6.2 Replacing ink cartridges"). For the best printing results, the ink in the cartridge should be used within nine months of installation.
 NOTE
NOTE
Using expired ink reduces the print quality and can cause damage to the printer.
1449820000/1.1/03.13 |
13 |
Safety information
Install ink cartridges in the printer immediately after removing them from the packaging. The print quality can be impaired if an ink cartridge is left unpacked for any length of time before use.
Ink is used when a new ink cartridge is inserted or when the ink tank lid is opened, as the printer always carries out a reliability check.
Always handle ink cartridges with care, otherwise ink could spill and cause soiling.
2.3Safety measures for environment protection
Recycling in accordance with WEEE
B-to-B disposal
Purchasing our product gives you the opportunity to return the device to Weidmüller at the end of its service life.
The EU Directive 2002/96 EC (WEEE) regulates the return and recycling of waste electrical and electronics equipment. In the business-to-business sector (B-to-B), manufacturers of electrical equipment have been obligated since August 13, 2005 to take back and recycle free of charge all electrical equipment sold after that date. After that date, electrical equipment must not be disposed through the 'normal waste disposal channels'. Electrical equipment must then be disposed of and recycled separately.
All devices that fall under the directive must feature this symbol:
2.4Symbols and information used on the device
The following information and symbols are attached to the printer:
Hot surface warning
This symbol warns of a burn hazard due to hot surfaces.
Crush hazard
This symbol warns of a crush hazard, for instance to your hands.
Automatic start-up warning
This symbol warns of automatic printer startup.
Insertion instructions
This symbol displays the correct insertion direction of the MultiCards.
Warning label on the device
Important information
Keep all safety and hazard signs on the device clean and renew them, if necessary.
14 |
1449820000/1.1/03.13 |

2.5Intended use
This printer is only intended for use in applications as described in the user manual. Any other form of usage is not permitted and can lead to accidents or destruction of the device. Using the printer in unapproved applications will lead immediately to the expiration of all guarantee and warranty claims on the part of the operator against the manufacturer.
Using the printer for purposes other than those specified or failure to observe the operating instructions and warning notes can lead to serious malfunctioning that may result in personal injury or damage to property.
Only use the software M-Print® PRO, MultiCards/MetalliCards and inks which have been approved for this marking system by Weidmüller.
Weidmüller can make no guarantee for the print quality and resistance when a different software and other MultiCards/MetalliCards and ink are used.
Claims of any kind for personal injury or material damage arising from unintended use are ruled out.
The plant operator alone is liable for any injury or damage attributable to unintended use.
Intended use also includes:
Heeding all information from the operating manual
Complying with the operating and maintenance conditions.
 NOTE
NOTE
Damage due to unintended use!
Any kind of unintended use of the printer may result in damage.
Safety information
Structural modifications to the device
Construction and acceptance are based on the German Product Safety Act (ProdSG). Never modify the printer.
Non-compliance will invalidate the printer's EC Declaration of Conformity. Such a breach absolves the manufacturer of the printer from warranty.
Replace any defective components of the printer immediately.
Only use original spare parts (ink cartridges, MultiCards/MetalliCards, wastepad). Only they satisfy the technical requirements.
2.6Residual risks when using the device
The device has a state-of-the-art design and complies with recognized safety rules and regulations. However, the printer can still be impaired when used.
Only use the device "as intended".
When using the device, observe the warning signs at the device and the safety information in this user manual.
Any faults that could impair safety must be rectified immediately.
1449820000/1.1/03.13 |
15 |
Safety information
2.6.1Hazards due to electricity
 DANGER
Electrical hazard warning
Touching live parts is a direct risk to life. Damage to the insulation or individual components may result in fatal injury.
Only electrical specialists are allowed to work on the printer's electrical components.
Only connect the device to a properly grounded and fused socket. Do not use a socket already being used by devices that are turned on and off at regular intervals, such as photocopiers or fans.
Do not connect the printer to either a switch-operated or a timer-controlled power outlet.
Never use damaged or worn-out power cables.
If you connect the PrintJet ADVANCED to the power supply via an extension cable, ensure that the total nominal current of all of the devices connected to the extension cable does not exceed the ampere rating for that extension cable. Also ensure that the total nominal current of all the devices plugged into the wall-mounted socket outlet does not exceed the ampere rating for that power outlet.
Regularly inspect the printer's electrical components for defects, such as loose connections or damage to the insulation.
If there is damage, immediately switch off the printer's power supply and have the damage repaired.
Never bypass fuses or take them out of operation.
When replacing fuses, pay attention to the correct amperage.
Keep moisture away from live parts as it can cause short-circuits. Pay particular attention to this when cleaning the printer.
Have extension and device cables with plugs and sockets tested by an electrical specialist, or by a trained person using suitable inspection facilities, at least every 6 months.
Modifications carried out after testing must comply with DIN EN 60204-1.
16 |
1449820000/1.1/03.13 |

Safety information
2.6.2Hazards due to hot surfaces
 CAUTION
Burn hazard due to hot surfaces
Contact with hot components can cause burns.
Make sure all components have cooled down to the ambient temperature prior to carrying out any work.
2.6.3Hazards due to incorrect spare parts
 NOTE
NOTE
Incorrect or faulty spare parts may cause damage, malfunctions, or total failure, and may also give rise to safety hazards.
Use original spare parts only.
Purchase spare parts from Weidmüller. The necessary details about spare parts are given in section "9.2 Ordering data“.
2.8Obligations of the plant operator
The device is used in an industrial plant. The device operator is therefore subject to the legal requirements concerning occupational health and safety.
In addition to the safety information in this user manual, it is necessary to comply with the safety, accident prevention, and environmental protection regulations in force in the country of use. The following applies in particular:
The operator must clearly define and arrange the responsibilities for installation, commissioning, operation, maintenance, and cleaning.
The operator must ensure that all personnel working on or with the printer have read and understood this user manual.
The operator must provide sufficient lighting at the control points of the printer in accordance with local occupational health and safety regulations.
Furthermore, the operator is responsible for keeping the printer in a perfect working order. The following therefore also applies:
The operator must ensure that all messages on maintenance indicated at the touch panel and described in this user manual are adhered to.
2.7Safety devices and guards
Only operate the printer with the printer enclosure in place and the ink tank lid closed.
Do not remove the printer enclosure. Opening the enclosure will cause a loss of all warranty rights.
1449820000/1.1/03.13 |
17 |
Safety information
2.9Personnel requirements
2.9.1Qualifications required by personnel

 WARNING
Injury hazard due to inadequate qualifications
Inappropriate handling of the printer can lead to injuries.
All activities must therefore be carried out by qualified personnel only.
 NOTE
NOTE
Damage to the device due to inadequate qualifications
Inappropriate handling can lead to material damage.
All activities must therefore be carried out by qualified personnel only.
2.9.2Obligations of personnel
Before working on or with the device, all persons undertake the following:
To comply with basic regulations concerning health, safety and accident prevention
To read the safety information and warnings in this user manual and to confirm with their signature that they have understood the issues
2.9.3Responsibilities
The responsibilities of personnel for installation, commissioning, operating, maintenance, and cleaning must be clearly defined.
Personnel require the following qualifications for the various activities:
Skilled personnel
Skilled personnel are able to do their work and recognize/avoid potential hazards on their own as a result of their training, knowledge and experience and their familiarity with regulations.
Electrical specialists
Electrical specialists are able to work independently on electrical equipment and recognize/avoid potential hazards as a result of their training, knowledge, and experience, as well as their familiarity with standards and regulations.
Electrical specialists have been trained for their specific task and know the relevant standards and regulations.
18 |
1449820000/1.1/03.13 |

Printer description
3 Printer description
3.1 |
Printer |
............................................................................................................................................... |
21 |
|
3.1.1 |
Overview ............................................................................................................................ |
21 |
|
3.1.2 ......................................................................................................................... |
Connectors |
23 |
|
3.1.3 ........................................................................................................................ |
Rating plate |
23 |
3.2 |
MultiCards ..........................................................................................................and MetalliCards |
24 |
|
1449820000/1.1/03.13 |
19 |

Printer description
Combined with the marking software M-Print® PRO, the ink-jet printer PrintJet
ADVANCED is a marking system for MultiCards and MetalliCards.
This system can be used for the individual marking of equipment quickly and conveniently. The PrintJet ADVANCED uses a brilliant permanentlyreadable printing process to print MultiCardformatted markers for switching devices, machines, terminal blocks, cables, wires, and valves. A secure and permanent label is ensured through high-level resistance to smearing and scratching, UV-stability, and the high printing resolution for all markers. The PrintJet ADVANCED allows you to print very small
fonts. Even the smallest characters are easy to read, permitting you to increase the markers' information density.
The MultiCards can be fed individually or inserted as stack (of up to 30 MultiCards) into the loader.
MetalliCards should only be inserted individually. Stack processing is not intended for MetalliCards. The MetalliCard is inserted into an inlay for processing.
The MultiCard fed into the printing unit is printed with a thermally-hardened ink and then transferred to a fixation unit.
In the fixation unit, the ink is then hardened with a special heat radiator. The duration of this process is varies for MultiCards and MetalliCards.
Finally, the MultiCard/MetalliCard is fed out of the PrintJet ADVANCED onto the output rail and can be removed.
The MultiCard/MetalliCard can be used immediately. Please note that the MultiCards and MetalliCards become hot due to the fixation process. If necessary, let them cool down before removing them from the output rail.
The PrintJet ADVANCED should not be switched off. If the PrintJet ADVANCED is not used, it automatically goes into standby/energy-saving mode. This optimizes the cleaning cycles and thus increases the availability of the printer.
20 |
1449820000/1.1/03.13 |
Printer description
3.1Printer
3.1.1Overview
Figure 1 |
Front view of the printer |
ATouch panel
BInk tank lid
COutput rail
1449820000/1.1/03.13 |
21 |
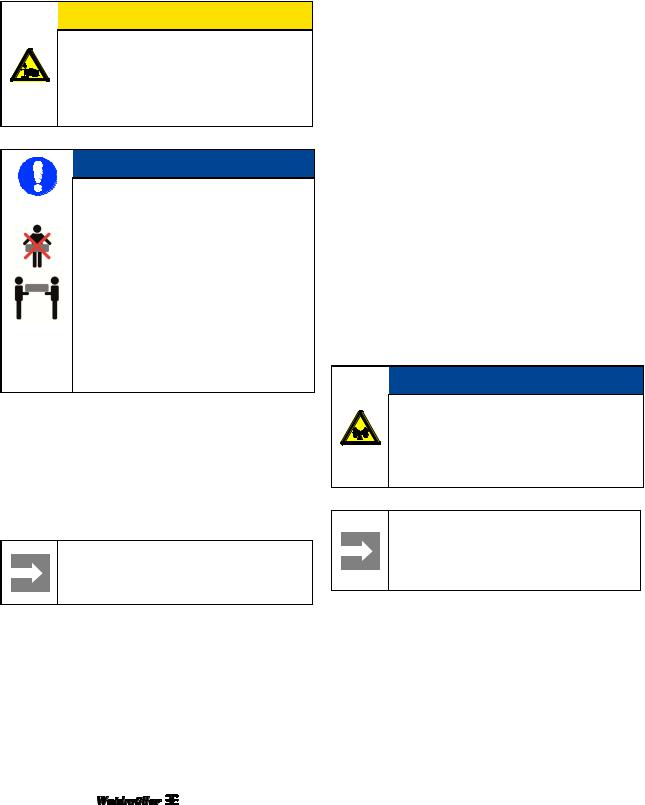
Printer description
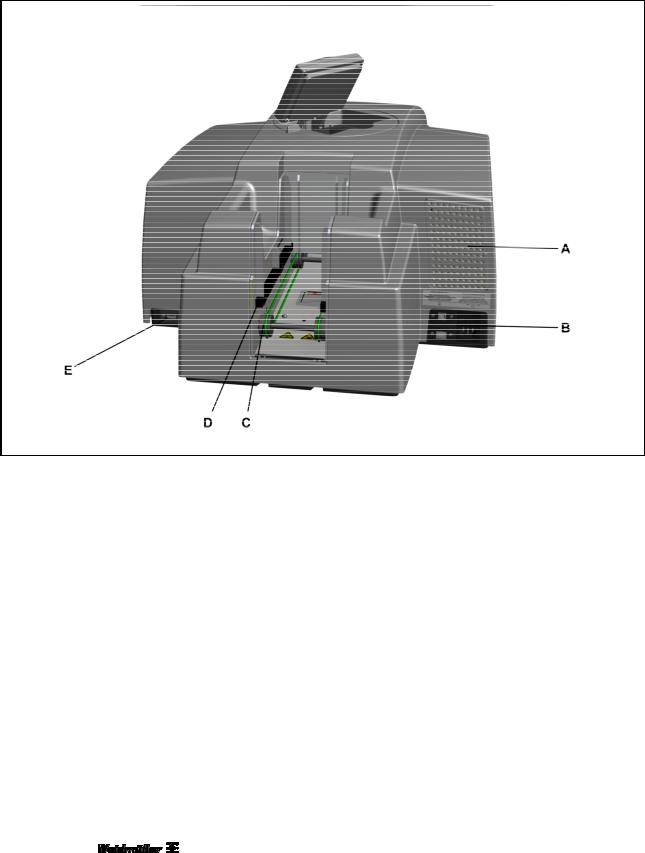
Figure 2 Rear view of the printer
AFilter cover
BConnectors
CMultiCard/MetalliCard input
DStack input (loader)
EInterface USB master for connecting a USB stick
22 |
1449820000/1.1/03.13 |

Figure 3 Open ink tank lid
AInk cartridges
BWastepad
CInk tank lid (open)
3.1.2Connectors
Figure 4 |
Connectors |
ALeft-hand fuse (2.5 ampere)
BRight-hand fuse (10 ampere)
CMains power supply connection
DNetwork interface (RJ45 connector)
EUSB slave for connecting the PC
Printer description
3.1.3Rating plate
Figure 5 |
Rating plate |
The rating plate contains information on the mains voltage, article number, serial number, and MAC address (address of the network card).
1449820000/1.1/03.13 |
23 |
Printer description
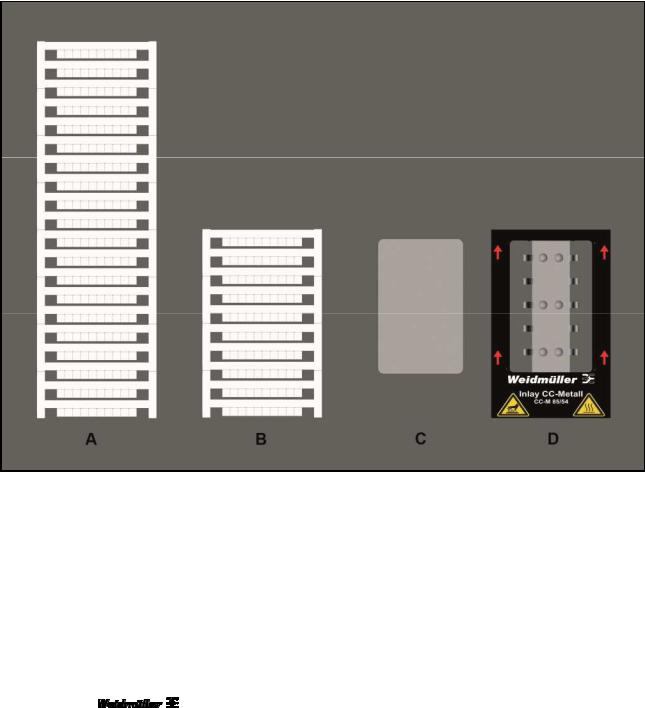
3.2MultiCards and MetalliCards
MultiCards made from plastic and MetalliCards made from aluminum or stainless steel can be printed with the PrintJet ADVANCED printer.
The marking system, consisting of the PrintJet ADVANCED printer and the M-Print® PRO software, has been designed by Weidmüller for MultiCards or MetalliCards.
Figure 6 MultiCards/MetalliCard
AExample: MultiCard
BExample: Half MultiCard
CExample: MetalliCard
DExample: Inlay for MetalliCards
The MultiCards can be inserted individually or in stacks. MetalliCards should only be inserted individually.
24 |
1449820000/1.1/03.13 |
Printer description
MultiCards can be halved. To receive a half MultiCard, bend the complete MultiCard in the middle and break in half.
Complete and half MultiCards should not be mixed in a stack.
It is, however, possible to process different MultiCard types in a stack, e.g. DEK 5/5 and SM 27/27.
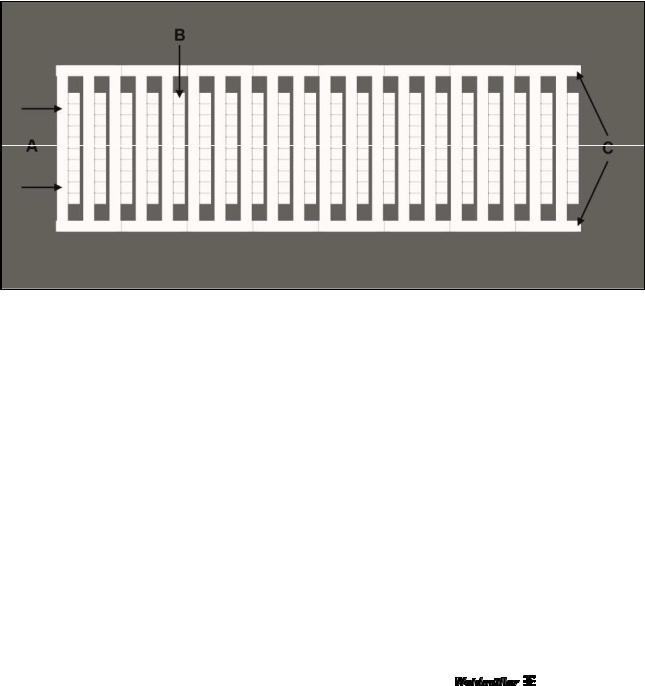
Description of the MultiCard
Figure 7 Description of the MultiCard
AFirst project marker surface
BMarker area
CSide strip
1449820000/1.1/03.13 |
25 |

Setup
4 Setup
4.1 |
Unpacking ........................................................................................................................................ |
28 |
|
4.2 |
Scope of supply............................................................................................................................... |
28 |
|
4.3 |
Installing the printer........................................................................................................................ |
28 |
|
4.4 |
Removing the transport restraints ................................................................................................ |
30 |
|
4.5 |
Fitting the output rail ...................................................................................................................... |
31 |
|
4.6 |
Positioning the touch panel ........................................................................................................... |
31 |
|
4.7 |
Connecting the power plug............................................................................................................ |
32 |
|
4.8 |
Methods of connecting the printer ................................................................................................ |
34 |
|
|
4.8.1 |
Connection via the network interface................................................................................. |
34 |
|
4.8.2 |
Connection via USB........................................................................................................... |
34 |
4.9 |
Turning on the printer..................................................................................................................... |
35 |
|
4.10 |
Choosing the language for the touch panel ................................................................................. |
36 |
|
4.11 |
Installing the standard version of the M-Print® PRO software .................................................. |
39 |
|
4.12 |
Connection via network cable ....................................................................................................... |
45 |
|
4.13 |
Connection via USB cable.............................................................................................................. |
50 |
|
4.14 |
Installing the network version of the M-Print® PRO software.................................................... |
54 |
|
|
4.14.1 |
Description ......................................................................................................................... |
54 |
|
4.14.2 Tasks to be done on the central computer/server ............................................................. |
55 |
|
|
4.14.3 Tasks to be done on the clients ......................................................................................... |
69 |
|
4.15 |
Activating M-Print® PRO ................................................................................................................ |
71 |
|
4.16 |
Setting up and adjusting a MultiCard for the printer................................................................... |
73 |
|
4.17 |
Running a print test ........................................................................................................................ |
74 |
|
1449820000/1.1/03.13 |
27 |
Setup
4.1 Unpacking |
4.2 Scope of supply |

 CAUTION
Crush hazard during transport
Because of its weight the printer must always be carried by two people. Always hold the printer at the front and rear when carrying it.
 NOTE
NOTE
Because of its weight the printer must always be carried by two people. Always hold the printer at the front and rear when carrying it.
Always transport the printer in a horizontal position. If transported improperly, ink may escape and soil or damage the device.
1Open the packaging.
2Take out all the accessories.
3Two people must lift the printer with the polystyrene packaging material out of the box.
4Remove the polystyrene packaging material.
Important information
Keep the original packaging for any future transport.
When you have taken the PrintJet ADVANCED and all accessories out of the packaging, make sure you have all the following items:
Power cable
USB cable
1 MultiCard DEK 5/5
10 MetalliCards CC-M 85/54 AL
10 primer cloths
1 Inlay CC 85/54
Output rail
DVD with the M-Print® PRO software
Quick guide
User Manual
4.3Installing the printer
 NOTE
NOTE
Do not use the device near potential sources of electromagnetic interference, such as loudspeakers or the base stations of cordless telephones, as this can impair its function.
Important information
When installing the printer, make sure you provide the necessary operating and maintenance spaces.
28 |
1449820000/1.1/03.13 |

 NOTE
NOTE
The printer must be placed on a flat, stable surface. The printer will not operate properly if it is tilted or at an angle.
Avoid locations that are subject to strong fluctuations in temperature and humidity.
Also see section “9.1
Technical data”.
Do not expose the printer to direct sunlight, strong light or excessive heat.
Avoid locations that are subject to impact shocks or vibrations.
Do not use a table joined to other tables in order to avoid the transmission of vibration.
Avoid installation sites that are subject to a large amount of dust.
Setup
1Pay attention to the information given above.
2Place the printer on a surface that extends beyond the base area of the printer on all sides.
3Leave enough space in front of the output rail to allow the printer to output MultiCards/MetalliCards without hindrance.
4Install the printer in such a way that it is sufficiently ventilated on all sides.
5Install the printer near a power socket so that the plug can be readily removed in the event of a fault.
1449820000/1.1/03.13 |
29 |
Setup
Figure 8 Operating and maintenance spaces
A250 mm
B200 mm output rail
C100 mm
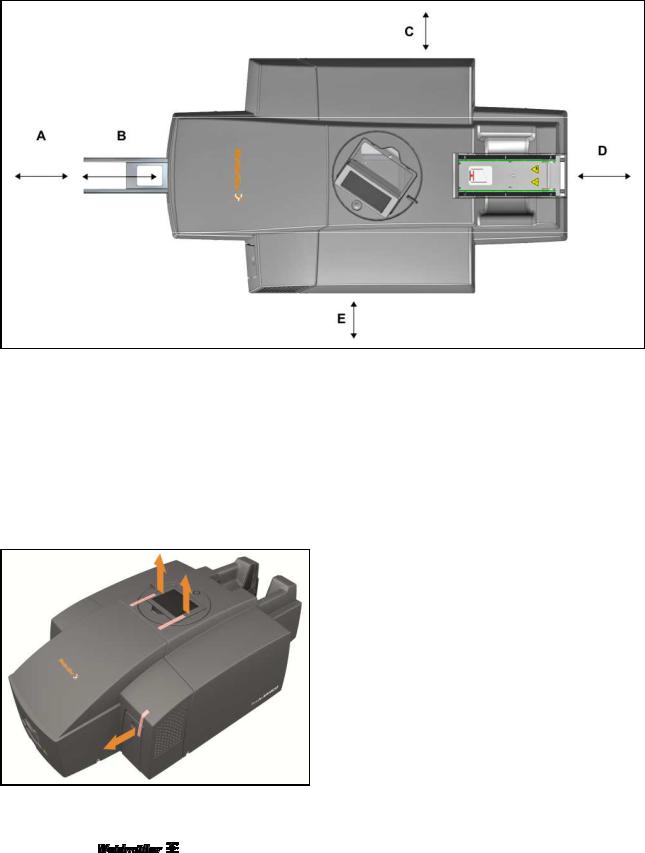
4.4Removing the transport restraints
D250 mm
E100 mm
Weight: approx. 37.2 kg
1Remove the transport restraints from the touch panel.
2Remove the transport restraint from the ink tank lid.
Figure 9 Transport restraints
30 |
1449820000/1.1/03.13 |
Loading...