How it Works
Log In / Sign Up
0
My Files
0
My Downloads
185800
History
Account Settings
Log Out
Buy Points
How it Works
FAQ
Contact Us
Questions and Suggestions
Users
show menu
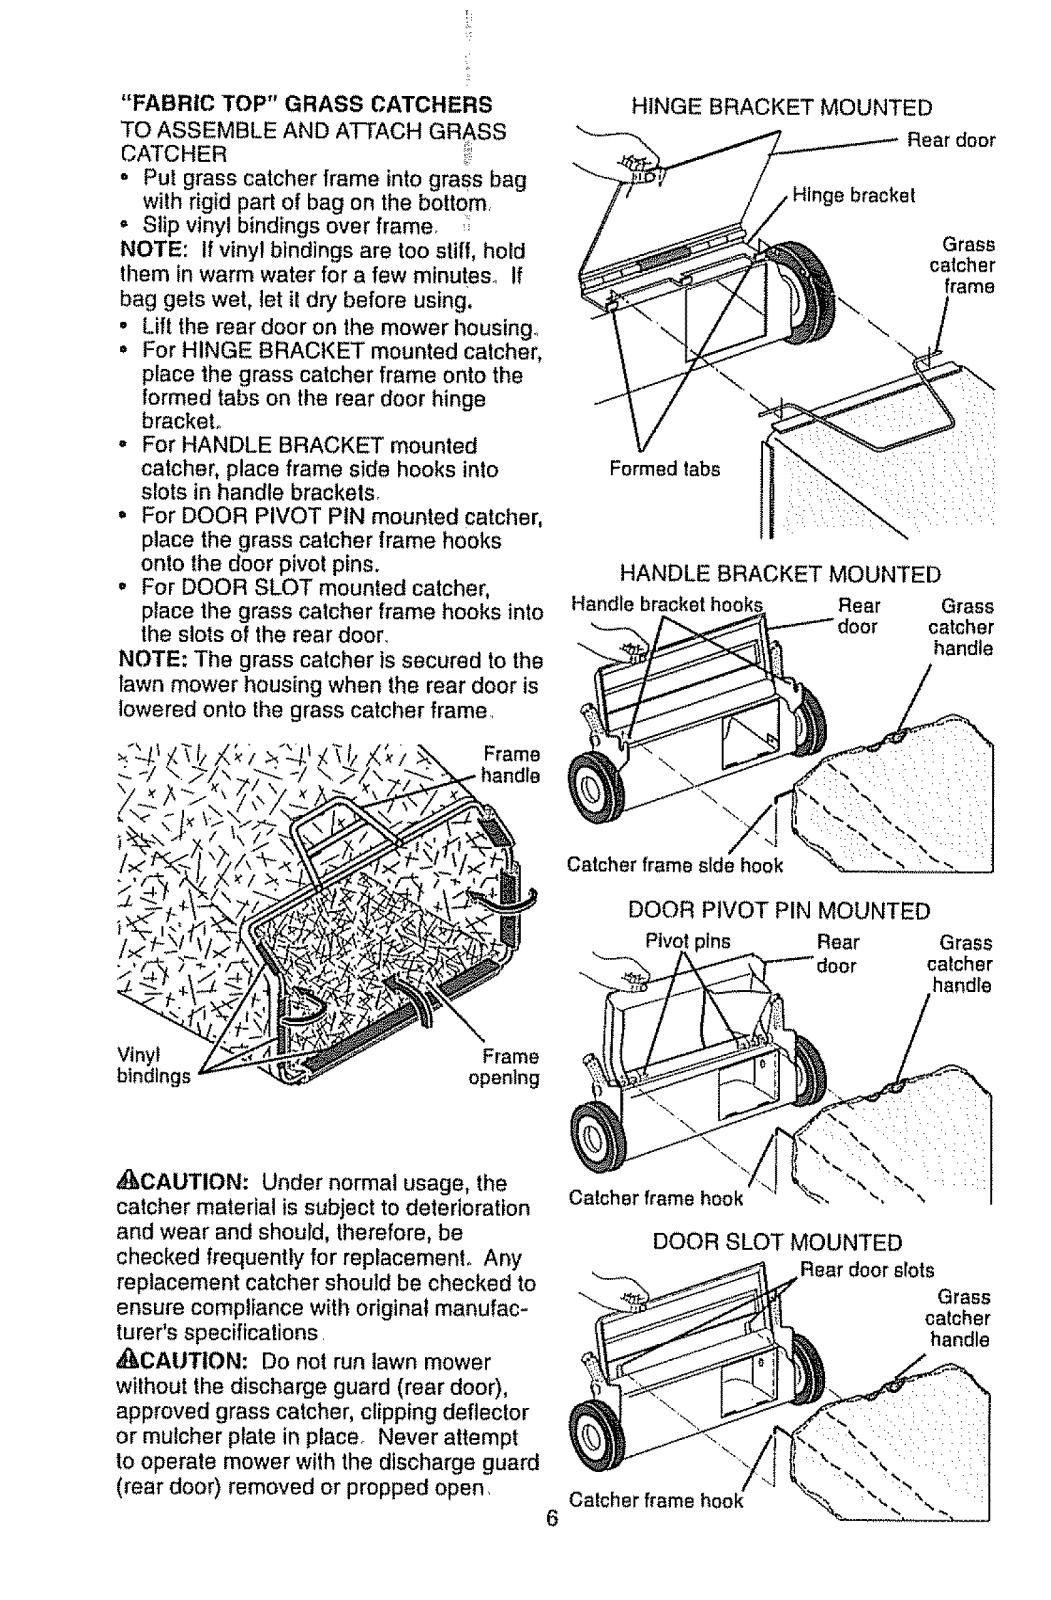
Weed Eater
Loading...
#
600
60614
2
96112009000
96112011602
961140007
F
FL20
FL21 LE
FL25C
FL26
FX26
FX26SC
G
GA2010
GBI 30V
GTI 15T
H
HT1700
R
RTE113C
RTE115
RTE115C
T
TE475Y
Twist-n-edge
W
W25CB
2
W25SBK
WE EL-11
WEF500G
WT3100
Loading...
Loading...
Nothing found
96112009000
Operator's Manual
20 pgs
2.2 Mb
0
Owner’s Manual
20 pgs
2.3 Mb
0
Table of contents
Loading...
Weed Eater 96112009000, 96132005600, 96132005500, 96132005400, 96112009300 Owner’s Manual
...
Weed Eater 96112009000, 96132005600, 96132005500, 96132005400, 96112009300, 96112009200, 96112009100 Owner’s Manual
Download
0
(
0
)
Loading...
+
14
hidden pages
Unhide
You need points to download manuals.
1 point = 1 manual.
You can buy points or you can get point for every manual you upload.
Buy points
Upload your manuals


 Loading... Loading...