

Page 1
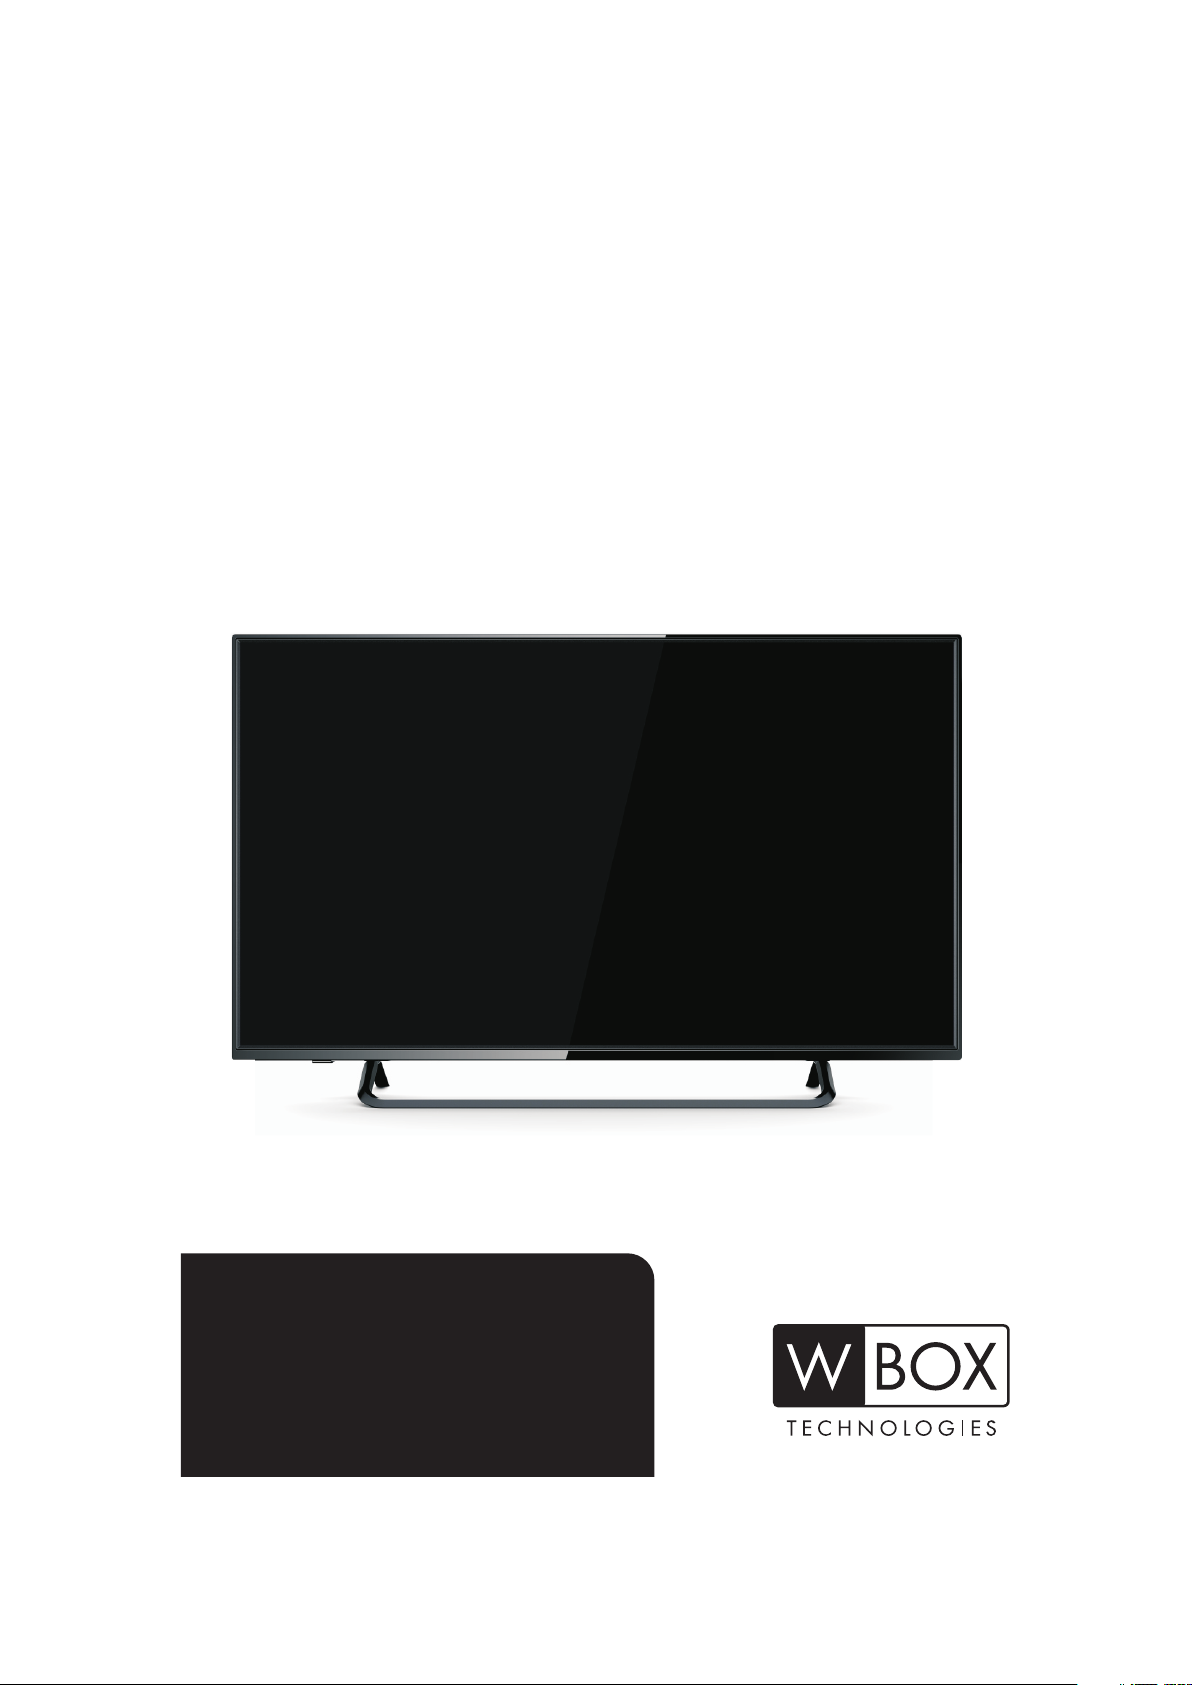
43" LED TV
0E-43LED
Page 2

Contents
Features… … … ………… … … … … ………… … … …1
Safety Warning and Notice…………… … … ………1
Mounting and Connecting… … …… … …… … ……3
Packing list………… … … … … … … … ……………3
Mounting the TV set… … …… … … …… … … ……4
Connecting peripheral equipment… … … … … … 4
Panel Control Keys… … … … … … … … … … … … …7
Remote Control……………………… … … … … … …7
General Operating Instructions……………………8
Power on… … ………… … ………… … ………… …8
Installation guide-setting……… … … … … … ……8
Standby ………… ………… ………… … ……… … …9
Signal source selection … … … … … … … … … … …9
OSD menu operation ………………………………9
Picture … ………… ………… ………… ……… ……10
Sound …………………………… … … … … … … …11
Setting … ………… ………… … ………… …………11
TV……… ……… ……… ……… ……… ……… ……15
Troubleshooting… … … … … … …… … … … … … … 16
Technical Specifications… … … … … … … … … … 17
Base Installation Instructions… … … … … … … …18
Warranty… … … … … … … … … … … … … … … … …19
Features
1. LED panel with no glint feature and low radiation can reduce eye' fatigue and protect eyes.
2. High-quality LED TV with LED backlight panel is built with high brightness, high contrast, wide viewing
angle, and super fast response time. Super fast response time can greatly eliminate the shadowing of moving
images.
3. De-interlacing image disposal is adopted. Today's most advanced technique for movement compensation,
can completely improve the picture.
4. 3-D digital comb filter, dynamic interlaced scanning technology, and 3-D noise reduction function;
5. ATSC/NTSC digital-analog integrated tuner, supporting auto scan.
6. Power is designed to save energy.
7. All functions can be conveniently operated with the remote control.
8. With High Definition Component and HDMI,supports signal in of 1080p@60Hz max.
9. HDMI2 support MHL feature.
10. Input ports include VGA, YPbPr, HDMI, and AV.
11. Output ports include earphone and coaxial-OUT.
12. High quality speakers provide audiovisual enjoyment.
13. Dynamic contrast technology can obviously improve the definition and contrast of the picture.
14. Timing function sets the length of time until the TV turns off.
15. TV/Monitor comes with two-in-one and multiple input ports to easily switch between modes.
16. Auto Adjustment can help you setup the picture for best performance in a few.
17. Ultra-thin and super narrow design.
Safety Warning and Notice
Thank you for choosing W Box Technologies LED TV with LED Backlight. In order to ensure safety and to
extend the life of the product, please read the entire manual carefully and understand its content. This product
was designed to ensure the safety of its users, and all products are strictly tested before leaving the factory.
Users should follow all operation, maintenance and safety instructions, as incorrect use can lead to harmful
injury. Always comply with the following precautions to avoid dangerous situations. Please retain this manual
for future reference.
Warning
Indicates the behaviors that must be
prohibited
May result in possibility of
accident or death
Attenti on
Indicates the operations that must be
performed
1
May result in personal injury or
property losses
Page 3

Safety Warning and Notice
Under Following Conditions
Power failure or unstable voltage.
●
Abnormal sound or smell from the device.
●
AC power cord is damaged.
●
TV set is damaged due to falling impact.
●
Any liquid or foreign matters gets onto the TV set.
●
● If coal gas or other flammable gases leak, do not unplug the power cord of the TV set or other electric
appliances; instead, close the valve of the gas immediately and open the doors and windows.
Warning
Only use 240V 60/50Hz power supply.
● 100- AC
● This TV must be connected to a three pin socket outlet for safety.
● All cables can be connected or pulled out only after power supply is turned off.
● Do not attempt to fix the TV set in an unstable position, it may fall, become damaged, or
even catch fire.
● Do not place TV set in the following environments:
1. With direct sunshine, moisture, excessive heat, excessive cold or heavy dust;
2. With flammable or explosive substances;
3. With flammable or corrosive gases;
4. In bathroom, kitchen, etc.
● Do not use damaged or improper power socket, and ensure the plug and socket are
connected properly.
● Keep the power plug and socket free of dust and metal materials.
● Do not damage the power cord:
1. It is prohibited to refit the power cord;
2. Do not place heavy objects on the power cord;
3. Keep the power cord away from heat source;
4. Do not drag the power cord when unplugging.
● Do not connect too many appliances to one power strip, or else it may cause fire due to high
power consumption.
● Do not let open flame (e.g. lit candle) near the TV set, or it may cause electric shock
or fire.
● Do not place water or other liquids on the TV set as electric shock or fire could occur.
● To avoid short circuit, electric shock and damaging the product, do not penetrate any sharp
objects, metal or liquid into the signal connector or air vents.
● The vents on the case are designed to release heat so the inside components of the unit do
not reach high temperatures and can operate for long periods of time. Do not cover any of the
holes.
Turn off the TV set immediately,
unplug the power cord from the
power outlet, and contact
authorized maintenance
personnel.
Do not touch the plug with wet hands, it may cause electric shock.
Do not turn on the TV set in thunderstorm weather; instead, unplug the power plug and antenna
connector to avoid lightning strike.
Do not disassemble the TV set by yourself, it may cause electric shock or fire. Contact
qualified personnel for maintenance.
2
Page 4

Safety Warning and Notice
Attenti on
Do not let children climb on or hang on the TV set.
●
Keep small accessories away from children's reach to avoid swallowing.
●
If the TV set won't be used for a long time, turn off the device and unplug the power cord.
●
Before cleaning the TV set, unplug the power cord and wipe with soft cloth; do not use chemicals
●
or any foreign substances to the device. Incorrect cleaning (such as cleaning fluid, water, etc) may
lead to damage of product's appearance, erasing products printing information and may flow into
the machine and damage components and display.
To adjust the position or angle of the TV set, disconnect all wires and move slowly to
●
avoid dropping off.
Do not rub with hard object, knock at, bend or squeeze the screen.
●
Do not use TV set immediately after moving from place of low temperature to place of high
●
temperature, this may cause fogging inside the machine and failures.
If the screen is broken and the liquid splashes on skin, please wash with clean water immediately
●
for 15 minutes, and go to see your doctor.
To carry the TV set in your hands, grasp the corners and hold the bottom, do not apply force
●
on the panel.
Displaying the same image for a long period of time or an active image with fixed words or icons
●
can leave image persistence on screen which will not disappear after powering the machine off for
a long time. This is not covered by warranty.
● Healthy TV watching:
1. Watch the TV in appropriate light; poor light or long time watching may cause discomfort to
your eyes.
2. If a headset is used, adjust the volume appropriately to avoid damage to hurting your hearing.
●
Unplug the power cord of the device to cut off the power supply.
●
If a power plug or appliance coupler is used as disconnecting device, it should ensure easy
operation.
Power plug should be connected properly. Loose power plugs may cause spark and fire.
●
All the technical specifications in the user manual and on the packaging are subject to changes
●
without prior notice. If there is slight deviation between the user manual and actual operation,
the latter shall prevail.
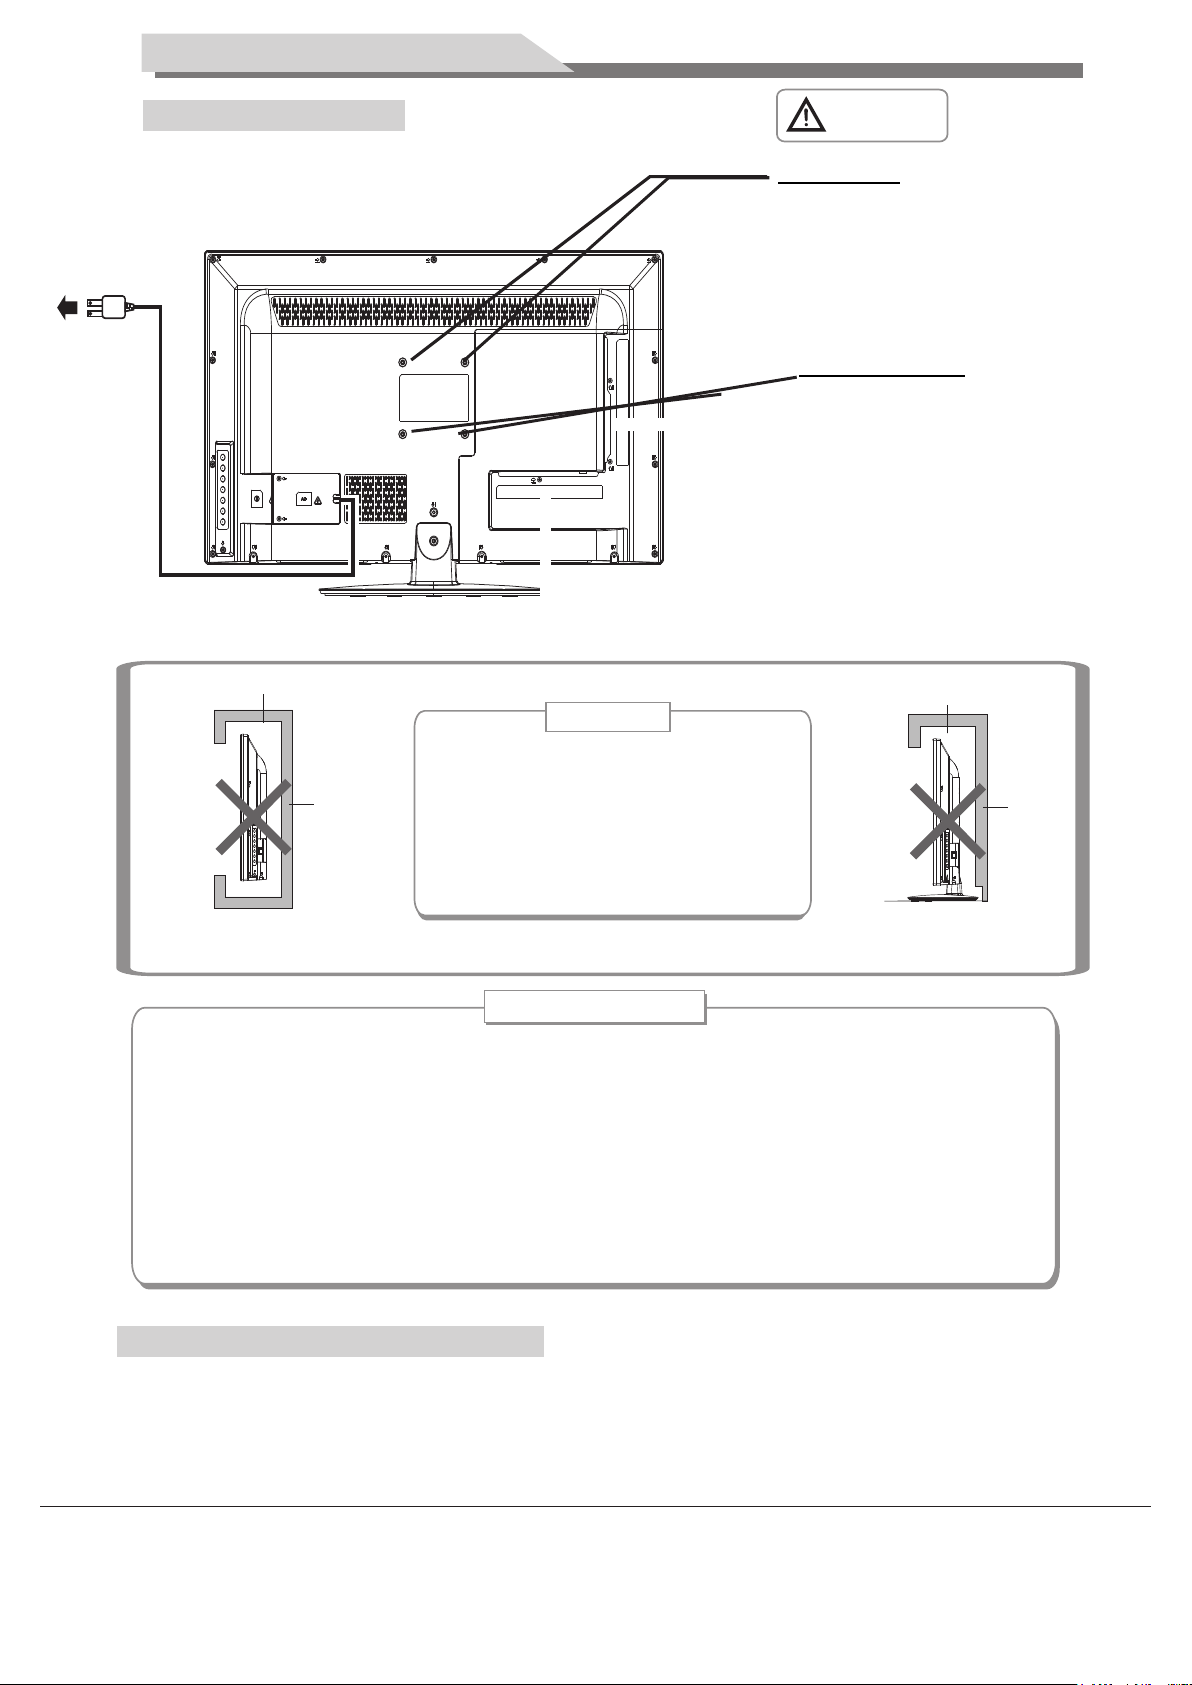
Mounting and Connecting
Packing list
1. The TV set.
2. User Manual.
3. Remote control.
4. Power cord (or attached to TV set).
3
Page 5
Mounting and Connecting
Mounting the TV set
Mount on the wall
Do not obstruct the air circulation
Wal l
Ventilation
Keep minimal space around the TV, as
●
shown in the figure.
Do not cover the air vents or insert any
●
object into the enclosure.
Do not put the device in limited space,
●
e.g. bookcase or embedded closet,
unless the TV set is properly ventilated.
Attenti on
Top Mounting Requires (2) M6 x
32mm
Pan-Head Screws. See Hardware Pack
Inluded.
Bottom Mounting Requires (2) M6 x
15mm Pan-Head Screws. See
Hardware Pack Inluded.
Do not obst ruc t the a ir ci rcu lat ion
Wal l
Tips on Installation
The TV set should be mounted near the AC power socket for easy plugging and unplugging.
●
For your safety, please select appropriate wall mount bracket or base.
●
To avoid injury, it is required to place the TV set on stable plane, or fix on firm wall.
●
Ask qualified personnel to mount the TV set on the wall. Improper mounting may result in an unstable
●
TV set.
Do not place the TV set at any place susceptible to mechanical vibration.
●
Do not place the TV set at any place where insects may enter.
●
Do not mount the TV set against air conditioner, internal panel of the display may
●
create moisture and cause failure.
Do not place the TV set at any place with strong magnetic field, to avoid electromagnetic damage.
●
Connecting peripheral equipment
You can connect various devices to the TV set and view high quality images. If the video device has HDMI,
YPbPr/YCbCr, AV, PC and other video output/input ports, you can select one of them and connect to
corresponding input or output ports of the TV set. After connected, press [SOURCE] key, then the menu of
signal source will be displayed on the screen. Press [▲] and [▼] key to select the input signal, and press [OK]
key to confirm. The connecting mode is shown in the figure.
4
Page 6
Mounting and Connecting
Y Yello w (V IDEO si gn al ca bl e)
W Whit e( AUD IO -L sig na l cab le )
R Red (AU DI O-R s ig na l cab le )
Connecting power supply
To power socket
(100-240VAC 60/50Hz)
HDMI input connection
Connect to the AV device
with HDMI interface
AV1 input connection
Connect to the devices
with AV output interface
(e.g. DVD, VCR, game console)
Audio cable
Video cable
AV2 input connection
Connect to the devices
with AV output interface
(e.g. DVD, VCR, game console)
USB interface
R
W
Y
HDMI signal cable
HDMI signal cable
ARC function connection
Connect to the audio devices
with ARC function
HDMI signal cable
HDMI signal cable
VGA input connection
VGA cable
PC audio cable
5
Audio cable
Video cable
W
R
Coaxial cable
Connect to the audio devices
with coaxial interface
Coaxial-out connection
Y
Page 7

Mounting and Connecting
Remark:
1. The VIDEO-2 and component Y signal of the device share the same input interface. AV2 and
component audio share the same input interface.
2. When connecting to equipment with MHL function, please select HDMI2 as input signal
source.
3. SERVICE/USB: USB interface (is used only for software upgrade).
4. If an earphone is inserted, the speaker of the TV set turns off automatically.
5. The peripheral equipment and cables described in this manual should be purchased
separately.
G Green ( Y si gn al cabl e)
B Blue (P b/ Cb si gn al c abl e)
W Whit e( AUD IO -L sig na l cab le )
R Red (AU DI O-R a nd P r/ Cr si gn al cabl es )
MHL function connection
Mobile phone or other
equipments with MHL function
MHL sign al ca ble
Component input connection
Connect to the device with
output interfaceYPbPr/YCbCr
YPbPr/ cableYCbCr
Audio cable
Earphone port
W
R
B
G
R
Warning
When connecting outdoor antenna to signal port of the TV set, please
turn off the main power switch on the TV set first. The wired network
antenna connected to the TV set must be isolated from the protective
grounding, or can cause fire or other hazards.
the
6
R F
Antenna connection
Page 8

Panel Control Keys
3
4
5
1
1) Power LED indicator and remote receiving window.
2) Power switch(optional): Press '' I '' end to turn power on, and press ''O'' end to turn power off.
3) SOURCE: Press this key to enter the menu of signal source and choose signal source.
4) CH+/CH-: Press these two keys to select the channel. In OSD menu, press the two keys to adjust the items,
which have the same functions as ▲/▼ key on the remote control.
5) VOL+/VOL-: Press these two keys to add or reduce volume. In OSD menu, press the two keys to adjust the
analog value of selected item, which have the same functions as t/u key on the remote control.
6) MENU: Press this key to enter main menu.
7)
Standby: To switch the TV on or back to standby.
Note: Different models may have different appearances; please refer to the actual device.
2
6
7
Remote Control
Installing battery
Remove the battery cover, and insert two AAA (1.5V) batteries; make sure that the polarity of the battery is
consistent with the marks "+/-" in the battery slot.
Operating Notes for Remote Control
1. Aim the remote control at the remote receiving sensor. Any article placed between the remote control and
remote receiving sensor could affect the normal operation.
2. Do not shake the remote control or operate or put it under direct sunlight, as heat could deform the
remote control.
3. If the remote receiving sensor is located under direct sunlight or strong light, the remote control could fail to
work. Please change the light angle or TV angle or get closer to the remote receiving sensor to operate the
remote control.
4. Low battery power could affect the remote control distance, please replace the battery. If the remote control
is going to be idle for a long period of time or the battery is used up, remove the battery to avoid any leakage,
eroding or damage to the remote control.
5. Do not use any batteries with any other specifications. Do not mix old and new batteries. Always replace both
batteries together.
6. Do not charge, disassemble, heat or burn the used battery as this may cause it to short circuit. Please
comply with the relevant environmental protection regulations to dispose of the waste battery.
7
Page 9

Remote Control
Keys on Remote Control
Name
POWER ( )
SOURCE
MUTE ( )
Numerical
F1(3D)
DASH
SMART S
SMART P
Cursor ( , , , )
VOL+/VOL-
CH+/CH-
MENU
EXIT
EPG
INFO
Return( )
MTS(optional)
CH. LIST
FAV
WIDE
CC
OK
Function Description
Shift between work state and standby state
Display the signal source selection menu
Turn on/off the sound
Numerical keys
Freeze image: On/Off
Select digital TV programs
Shift among sound modes
Shift among picture modes
/ : select functions. / : adjust the analog value
Increase or decrease the volume
Select the previous or next channel
Display the main menu
Return to the previous menu
Display electronic program guide (Digital TV programs)
Display the channel information
Quickly return to the channel you selected last time
Select different ATV sounds: Stereo/SAP/MONO or select DTV
sounds from MTS
Display the channel list
Display your favorite channel list
Switch picture ratio
Select CC modes
Confirm the operation
Note: Actual remote control may differ in appearance from the above figure.
General Operating Instructions
Power on
Insert the power plug into the power socket. Press the [ ] button on the TV(If it doesn't have this button, you
can skip this step), and then press [ ] key on the remote control or on the panel to turn on the TV.
Installation guide-setting
When you turn on the TV for the first time, the first page will be the setting menu below.
1. Menu Language: Menu language selection. Press [t] and [u] on the remote control or [VOL-] and [VOL+]
on the panel to select an menu language, and then press [OK] to confirm your selection and enter the next
item "Time Zone."
8
Page 10

General Operating Instructions
2. Time Zone: Press [t] and [u] on the remote control or
[VOL-] and [VOL+] on the panel to select your time zone,
and then press [OK] to confirm your selection and enter
the next item "DST."
3. DST: Daylight Saving Time, press [u] on the remote
control to select from On/Off to enable or disable
daylight saving.
4. Antenna: Press [u] to select the TV receiving mode from
Menu Lang uage
Time Zone
DST
Antenna
Auto Scan
Setup Wizard
English
Pacific
Off
Air
Air/Cable repeatedly.
5. Auto Scan: Auto channel scan selection. Press [u] on the
remote control to enter the auto channel scan page and
Select Move
MENU
start scanning. You can also press [EXIT] to skip this operation and exit this page. Refer to the section TV
for detailed operation steps.
Standby
Press [ ] on the remote control or on the panel to enter the standby state.
★Special Attention
1. If there is no signal input after turning on the TV, the system will automatically enter
the standby state a few minutes later.
2. If you are not going to use the TV soon, press the power button to turn
off the power.
Signal source selection
Press [SOURCE] on the remote control or on the panel to enter the menu "Input
Source". Press [▲] and [▼] on the remote control or [CH+] and [CH-] on the panel to
select a signal source, and then press [OK] on the remote control to enter the signal
input source you've selected.
INPUT SOUR CE
TV
AV1
AV2
YPBPR
PC
HDMI1
HDMI2
HDMI3
Exit
OSD menu operation
Press [MENU] on the remote control or panel to display the
main menu:
1. Press [t] and [u] on the remote control or [VOL-] and
[VOL+] on the panel to select a functional menu.
2. Press [▼] on the remote control or [CH-] on the panel to
enter the functional menu.
3. Press [▲] and [▼] on the remote control or [CH+] and
[CH-] on the panel to select an adjustment item from the
functional menu.
4. Press [t] and [u] on the remote control or [VOL-] and [VOL+] on the panel to change the analog value.
When there is an icon " " on the screen, you can press [u] on the remote control or [VOL+] on the panel to
enter the next sub-menu or press [MENU] to exit the current menu.
5. No matter which menu you have chosen, you can press [MENU] to exit the current menu, press [EXIT] to
exit the entire menu, press [SOURCE] to display the menu "Input Source", and then press [SOURCE] to exit
the menu "Input Source."
6. In menu operation, each disabled option will be automatically hidden with a purple icon. When you change
the OSD menu setting value, the new setting value will automatically take effect upon the disappearance of
the menu even if you do not press the relevant key to exit the OSD menu.
7. The operating instructions provided in this User's Manual for the menu "Picture," "Sound," "Setting" and
9
Pic ture Mode
Con trast
Bri ghtne ss
Sat urati on
Tint
Sha rpnes s
Adv anced Video
Select
Personal
Move
MENU
50
50
50
50
50
Return
Page 11

General Operating Instructions
"TV" are all based on TV Input Source. The operating steps for any other Input Source are nearly the same
as TV Input Source.
Note: [t], [ u], [▲] and [ ▼] in this Manual stand for the direction cursor keys on the remote control unless
specifically defined. The operating instructions in the text below are all based on keys on the remote control.
Please review and understand the keys on the panel.
Below is a list of menu options. You will find detailed operating instructions later in the manual.
In TV Mo de
TV
Personal
Antenna
Auto Scan
Favorite
Show/ Hide
Channel No.
Channel Label
DTV Signal:
50
50
50
50
50
MENU
Return
Menu Language
Parental Controls
Time
Closed Caption
Menu Settings
VGA Settings
Restore Default
Pictu re
Picture Mode
Contrast
Brightness
Saturation
Sound
Tint
Sharpness
Advanced Video
Sound Mode
Bass
Treble
Balance
Surround
SPDIF
Audio Language
Setting
Picture
1. Press [MENU] to display the main menu.
2. Press [▼] to enter the menu "Picture" and press [▲] and
[▼] to move the cursor to select an adjustment item.
3. Press [t] and [u] to change the analog value. When there
is an icon " " on the screen, you can press [u] to enter
the next sub-menu or press [MENU] to exit the current
menu.
★ Special Attention
All the analog values adjusted by the user will be auto saved as personal mode.
Pic ture Mode
Con trast
Bri ghtne ss
Sat urati on
Tint
Sha rpnes s
Adv anced Video
Select
Move
★ Remote Control Shortcut Keys
Press [SMART P] to directly shift among Standard, Dynamic, Soft and Personal.
Function:
Picture Mode
Contrast
Brightness
Saturation
Tint
Sharpness
Advanced Video
Select from four image modes: Standard/Dynamic/Soft/Personal
Standard: Moderate color and brightness
Dynamic: Brilliant, bright, and dynamic image
Soft: Soft and bright image
Personal: Set the value as you prefer
Adjust the image contrast and change the image level feeling with an analog value of 0-100
Adjust the screen brightness with an analog value of 0-100
Adjust the image brilliance with an analog value of 0-100
Adjust the image hue to be warmer or cooler with an analog value of 0-100 only in NTSC
system
Adjust the image definition and sharpen or soften the image with an analog value of 0-100
Color Temp.: Adjust the white chroma of the image, selecting from Cool/Normal/Warm
repeatedly
Scale Mode: Select picture scale: Auto/Subtitle/Cinema/4:3/Full mode
Noise Reduction: Set the noise reduction level: Off/Weak/Middle/Strong/Auto
10
Page 12

General Operating Instructions
Sound
1. Press [MENU] to display the main menu.
2. Press [t] and [u] to move the cursor to select the menu
"Sound," press [▼] to enter the menu "TV" and press [▲]
and [▼] to move the cursor to select an adjustment item.
3. Press [t] and [u] to change the analog value or state.
Function:
Sound Mode
Bass
Treble
Balance
Surround
SPDIF
Audio Language
Select
Personal
English
Move
Off
RAW
MENU
75
70
50
Return
Sound Mode
Bass
Treble
Balance
Select from five sound modes: Standard/Music/Movie/Sports/Personal
Adjust bass value of 0-100
Adjust treble value of 0-100
Adjust the sound output proportion of the left and right sound channels within 0-100.
When you set the analog value as 0, there will be no sound from the right speaker. When
you set the analog value as 100, there will be no sound from the left speaker. When you
set the analog value as 50, both speakers will have the same volume.
Surround
SPDIF
Audio Language
Enable or disable surround sound
Select SPDIF mode, selecting from RAW/PCM
Digital TV language selection: English/French/Spanish
Note: This item is adjustable only in DTV mode. It is not adjustable in ATV mode.
The default value is English.
Volume Adjustment
Press [VOL+] and [VOL-] to adjust the volume. Press [VOL+] to increase the volume and press [VOL-] to
decrease the volume.
Mute
If you want to turn off the sound for a-while, press [MUTE] to enable the mute function and you will
see a mute icon appear on the screen. Press [MUTE] again to disable the mute function.
★
Special Attention
Please set the balance value as 50 in general cases.
★Remote Control Shortcut Keys
Press [SMART S] to directly shift among Standard/Music/Movie/Sports/Personal.
Setting
1. Press [MENU] to display the main menu.
2. Press [t] and [u] to move the cursor to select the menu
"Setting," press [▼] to enter the menu "Setting" and press
[▲] and [▼] to move the cursor to select an adjustment
item.
3. Press [t] and [u] to change the analog value. When
there is an icon " " on the screen, you can press [u] to
enter the next sub-menu or press [MENU] to exit the
current menu.
11
Menu Language
Parental Controls
Time
Closed Caption
Menu Settings
VGA Settings
Restore Default
Select
Move
English
MENU
Return
Page 13

General Operating Instructions
Menu Language:
Select the OSD menu language. There are many languages
that can be selected.
Parental controls
Set the level of the TV program or movie. Press [▼] to
select the menu "Parental Control" and press [u] or [OK] to
enter it as shown below. Each time you enter
this menu, you will need to input the correct password.
Generally, the initial password provided
by the manufacturer is 0000. You can follow the
instructions below to set the password.
Change Password
System Lock
Input Lock
US
Set the parental controls access password. The message "Enter New password" asks
you to input a new password. The message "Confirm password" asks you to confirm the
new password you've just entered. If the two passwords you've entered are exactly the
same, your new password is set successfully.
Press [t] and [u] to select the state of System Lock: On/Off. Before you select the "on"
option, the item below will be automatically hidden in a purple icon.
Press [u] or [OK] to ente, press [▲] and [▼] to move the cursor to select an
adjustment source, Press [t] and [u] on the remote control to Lock or Unlock.
TV: Set the TV program ratings. Press
[u] or [OK] to enter it as shown below.
Press [▲], [▼], [t] and [u] on the
remote control to move the cursor and
press [OK] to confirm the TV program
rating setting and mark it with a tick.
Any program marked with a tick will
not be played. If you want to cancel or
reset the TV program rating, please
follow the above steps again. Press
[MENU] to return to the previous menu
and press [EXIT] to exit the entire menu.
TV-Y: applicable to all children
TV-Y7: applicable to children no younger than 7
TV-G: applicable to all people
TV-PG: requires parental guidance
TV-14: accompanied by parents
TV-MA: only applicable to adults
ALL: select all TV programs
FV: fantasy violence
V: violence
S: sex scene
L: indecent language
D: suggestive dialogue
Cha ng e Passw or d
Sys te m Lock
Inp ut Lock
US
Can ad a
RRT Set ting
Res et RRT
Select
ALL FV
TV - Y
TV - Y 7
TV - G
TV - P G
TV - 1 4
TV - M A
:Bl oc k
Select
On
Move
TV RAT IN G
V
Pr ess OK to Bl ock or Unb lo ck
Move
MENU
L
S
MENU
Return
D
Return
12
Page 14

General Operating Instructions
US
Canada
MPAA: Stands for Motion Picture Association of America. Press [▲],
[▼] to select rate
G: GENERAL AUDIENCES: Nothing
that would offend parents for
:Bl oc k
G
PG
PG-13
R
NC-17
X
N/A
Pre ss to Loc k
Select
Pre ss to Unl ock
Move
MENU
Return
viewing by children
PG:PARENTAL GUIDANCE
SUGGESTED: Parents urged to
give "parental guidance." May
contain some material not suitable
for children.
PG-13: PARENTS STRONGLY
CAUTIONED: Parents are urged to be cautious. Some
material may be inappropriate for children under age 13.
R: RESTRICTED: Contains some adult material. Not suitable for children.
NC-17: NO ONE 17 AND UNDER ADMITTED: Clearly adult. Children are not permitted
N/A: movies without rating
Canadian English: Canada Video Rating System, similar to MPAA Guidelines
G: Suitable for viewing by all ages
PG: Parental guidance is advised
Themes or content may not be
suitable for children
14A: Suitable for people 14 years of
age or older. Those under 14
should view with an adult.
Parents cautioned
18A: Suitable for people 18 years of
age or older. Persons under 18
:Bl oc k
C
C8+
G
PG
14+
18+
EXEMPT
Pre ss to Loc k Pres s to Unlo ck
Select
Move
MENU
Return
should view with an adult. Parents strongly cautioned
R: Restricted to 18 years and over. Content not suitable for minors
EXEMPT: Contains material not subject to classification such as documentaries,
nature, travel, music, arts and culture, sports and educational and
instructional information
Canadian French:
G: General rating, applicable to all
people
13+: Applicable to children
above 13
G
8ans+
13ans+
16ans+
18ans+
EXEMPT
13
:Bl oc k
Pre ss to Loc k Pre ss t o Unloc k
Select
Move
MENU
Return
Page 15

General Operating Instructions
Canada
16+: Applicable to children above 16
18+: Only applicable to people no younger than 18
EXEMPT: Exempt programming
RRT Setting
Set the rating region table that defines the rating standard
for a particular geographic region and/or country. The
menu may vary depending on the local broadcasting
system. This setting is not available in the United states.
Reset RRT
Reset all options in the filtering options.
Sleep Timer
Time Zone
Auto Sync
DST
Clock
Off
Atla nt ic
Off
Off
1980 1 6 3:16 A M
Time
Press [▼] to select the menu "Time" and then press [u] or
[OK] to enter it, as shown below.
Sleep Timer
Set a time for the system to auto enter the standby state: Off/5min/10min/15min/30min/60min/
90min/120min/180min/240min
Time Zone
Auto Sync
DST
Clock
Time zone selection: Eastern/Central/Mountain/Pacific/ Alaska/Hawaii/Atlantic
Auto sync clock from digital stream; Selection: On/Off
Daylight Saving Time; Selection: On/Off
DTV program clock information
Select
Move
MENU
Closed Caption
Press [▼] to select the menu "Closed Caption" and then press [u] or [OK] to enter it, as shown below.
CC Mode
Basic Selection
Advance Selection
Option
Press [t] or [u] to select On/CC On Mute/Off
Caption mode, selection: CC1/CC2/CC3/CC4/Text1/Text2/Text3/Text4/Off
Selection: service 1/service 2/service 3/service 4/service 5/service 6/Off, It is enable
only in DTV source
Caption Option
Return
Menu Settings
Press [▼] to select the menu "Menu Settings" and then press [u] or [OK] to enter it, as shown below.
Transparency
OSD Time
To adjust the OSD menu transparency
Set the OSD menu display time: 5sec/15sec/30sec/45sec/60sec
VGA Settings
Use for adjusting display images when in PC mode. Only for
PC mode.
Note: Under PC source mode, if there is no signal input, the
device will enter power saving state after one minute. When
PC signals are connected, the device will wake up and
display normally.
14
H-Positi on
V-Position
Clock
Phase
Auto
Select
Move
MENU
0
0
10 0
0
Return
Page 16

General Operating Instructions
Note:
(1). The PC screen varies according to Windows version and video card.
(2). If nonstandard video format is selected, the PC screen display will be abnormal.
1. Press [▲] or [▼] to move the cursor and select VGA Settings, press [u] or [OK] to enter the VGA menu, and
press [▲] or [▼] to move the cursor and select desired item in the VGA Settings.
2. Press [MENU] to return to previous menu, and press [EXIT] to hide the menu.
Function:
H-Position
V-Position
Clock
Phase
Auto
Restore Default
Restore the system default, please press [▼] to select the menu "Restore Default" and press [u] or [OK] to
conduct the restore operation.
TV
1. Press [MENU] to display the main menu.
2. Press [t] or [u] to move the cursor to select the menu
"TV," press [▼] to enter the menu "TV" and press [▲] and
[▼] to move the cursor to select an item.
3. When there is an icon " " on the screen, you can press
[u] to enter the next sub-menu or press [MENU] to exit
the current menu.
Antenna
Press [▲] or [▼] to select the menu "Antenna" and then press [t] or [u] to select Air and Cable repeatedly.
Move the screen to left/right (range: 0-100)
Move the screen up/down (range: 0-100)
Adjust when image flashes and has vertical stripe (range: 0-100)
Reduce the water wave in line to increase image sharpness (range: 0-100)
The PC screen of the machine can adjust automatically according to the PC video signal
Move
AirAntenna
MENU
Return
Auto Scan
Favorite
Show/Hide
Channel No.
Channel Label
DTV Signal :
Select
Auto Scan
Press [▼] to move the cursor to select "Auto Scan," press [u] or [OK] to enter the menu "Auto Scan", press
[t] or [u] to select "Yes", and press [OK] to start auto scanning . When scanning is finished, it will stop at the
channel where the auto scan began.
Friendly Tip: Select Auto Scan for new products. The system will automatically scan channels in your area.
Please wait a few minutes for auto scan to complete, do not disconnect the power or turn off the TV.
Favorite
Press [▲] or [▼] to move the cursor to select "Favorite" and then press [u] or [OK] to enter the menu "Favorite
List." Press [▲] and [▼] to select a channel as your favorite channel, then press [OK], the channel which you
selected will be added to the "Favorite channel list"; Press [OK] again to delete the channel from the "Favorite
channel list".
Show/Hide
Press [▲] or [▼] to move the cursor to select "Show/Hide" and then press [u] or [OK] to enter the menu
15
Page 17

General Operating Instructions
"Show/Hide." Press [▲] and [▼] to select a channel, then press [OK], the channel which you selected will hide.
Press [OK] again to display the channel.
Channel No.
Press [▲] or [▼] to move the cursor to select "Channel No ." and then press [t] or [u] to select Channel.
Channel Label
Press [▲] or [▼] to move the cursor to select "Channel Label" and then press [u] or [OK] to enter the menu
"Channel Label,"press [▲], [▼], [t] or [u] to edit channel label.
DTV Signal:
Display the signal intensity of programme in DTV system.
Troubleshooting
Failure Reason
The TV image has snowflakelike spots, and noise
The screen has no display, no
audio, and the indicator isn't
on
The TV image has spot, line
or stripe interference
Image ghosting occurs
The image doesn't have color
The TV has no audio
DTV screen has mosaic
The PC has no display,
prompts no signal input, and
the red indicator flashes
The remote control distance
is short, or out of order
PC display is blurry
PC image shifts, can't fill the
screen, or exceeds the screen
Can't operate the device
1. Antenna connector is loose, or
cable is damaged
2. Antenna type isn't suitable
3. Antenna orientation or position isn't
proper
4. Weak signal
1. Power plug is loose, or power
supply isn't connected
2. The power button is not turned on
The signal is interfered with by neon
light, electric hair dryer, etc.
1. The TV signal is reflected by a large
building such as a tower block or hotel, etc.
2. Antenna orientation isn't properly positioned
Color saturation is too low
1. The volume is too low
2. The audio is mute
The signal is weak
The signal cable is loose or has fallen
off
1. The signal receiver of the remote
control is blocked by certain object
2. The battery voltage of the remote
control is low
1. The adjustment isn't properly set
2. The display mode isn't properly set
1. The adjustment isn't properly set
2. The display mode isn't properly set
External influences (e.g. lighting,
static, etc.) will interfere with the
normal operation
Solution
1. Check whether antenna connector is loose,
whether cable is intact
2. Check antenna type (VHF/UHF)
3. Adjust antenna orientation and position
4. Use signal amplifier
1. Check whether the power cord is connected
properly
2. Check if " " button on the front panel is on
Do not use the electric hair dryer near the device,
and adjust the antenna direction to reduce
interference
1. Use high-directional antenna
2. Adjust the antenna orientation
Enter "Picture" to increase the color saturation
1. Adjust the volume properly
2. Press the "MUTE" key on the remote control to
cancel the mute state
Check whether the antenna plug is loose and
whether the cable is intact
Check whether the signal cable is loose or has
fallen off, and reconnect it properly
1. Move the object that blocks the signal receiver
2. Replace the battery
1. Use automatic adjustment function
2. Use recommended mode
1. Use automatic adjustment function
2. Use recommended mode
Disconnect the power supply first,connect the
power supply after about 1-2 minutes, then turn
on the TV again
16
Page 18

Technical Specifications
Master un it
Panel size
Max. Resolution
Best Resolution
Pixel Pitch
Active Area
Power Supply
Power Consumption of Speaker
Dimension ( L H W) and Weight× ×
Panel size
43"
The base
Excluding base
Including base
38"x22"x3"(968×565×77(mm
38"x24"x3"(968×616×77(mm
Operating environment: temperature: 5℃~40℃; RH: 10%~85%; atmospheric pressure: 86kPa~104kPa
Storage environment: temperature: -20℃~55℃; RH: 5%~95%; atmospheric pressure: 86kPa~104kPa
Technical specifications for TV
1. Supported Systems: ATV: NTSC M; DTV: ATSC
2. TV(RF): 75Ω Imbalance
3. AV Video-Input: 75Ω, 1VP-P, RCA
4. AV Audio-Input: 20KΩ, 500mV RMS
5. YPbPr/HDMI Video Input: 480i, 480p, 576i, 576p, 720p, 1080i, 1080p
43"
1920×1080
1920×1080@60Hz
0.019"x0.019"(
37.05"x 20.8" (941.18mm×
0.4902mm×0.4902mm)
529.20mm)
100-240VAC 60/50Hz 8W
+8W
Unpacking Packing Net Weight
3
)
3
42"x26"x6"(1085×667×
)
/
150(mm3)
/
17.6lbs (8.0kg)/22.04lbs (10.0kg)
Gross Weight
VGA display mode
NO.
1
2
3
4
5
6
7
8
Mode Reso luti on
VGA
SVGA
XGA
WXGA
WUXGA
720×400
640×480
800×600
1024×768
1280×720
1360×768
1600×900
1920×1080
Recommend ed mod e:19 20X1 080@ 60Hz
Refresh rate
70Hz
60Hz
60Hz
60Hz
60Hz
60Hz
60Hz
60Hz
Power management
Mode
Normal working
Standby
Power C onsu mpti on
43"
≤75W
≤0.5W
17
Page 19

Base Installation Instructions
Put machine flat on table first. Install base in machine back cover bottom as arrow direction in the figure, and
make the positioning hole on top of V cover of base aligned with the positioning raised stand on the bottom of
machine back cover, then fasten screws. (notice that base has to be adjusted at figure status, otherwise it
cannot be installed in.)
Base
Remark: The actual base and machine appearance may be different from pictures; please refer to the actual
device.
Screws
Mount on the base
30cm
10cm
10cm
7cm
18
Page 20

Warranty
1.Limited Warranty
a.Gener al
Subject to th e term s and co ndit ions o f this L imit ed Warra nty, from th e date o f sale t hrou gh the p erio d of
time fo r prod uct ca tego ries s peci fied i n Sect ion 1( b), ADI w arra nts it s W Box Technol ogie s prod ucts t o be
free fr om def ects i n mate rial s and wo rkma nshi p unde r norm al use a nd ser vice , norm al wea r and te ar
excep ted. E xcep t as req uire d by law, t his Li mite d Wa rran ty is on ly mad e to Buy er and m ay not b e
trans ferr ed to an y thir d part y.
ADI sha ll hav e no obl igat ion un der th is Lim ited War rant y or oth erwi se if:
(i) The p rodu ct is im prop erly i nsta lled , appl ied or m aint aine d;
(ii) The pr oduc t is ins tall ed out side o f stat ed ope rati ng par amet ers, altered, or improperly services or
repai red;
(iii) Damage is cau sed by o utsi de nat ural o ccur renc es, su ch as li ghtn ing, p ower s urge s, fir e, flo ods, a cts
of natu re, or t he lik e.
(iv) Defe cts re sult ing fr om una utho rize d modi fica tion , misu se, vandalism, or other causes
unrel ated t o defe ctiv e mate rial s or wor kman ship , or fai lure s rela ted to b atte ries o f any ty pe use d in
conne ctio n with t he pro duct s sold h ereu nder.
ADI onl y warr ants t hose p rodu cts br ande d as W Box Techno logi es pro duct s and so ld by ADI . Any oth er
products br ande d by thi rd par ties a re war rant ed by th e thir d part y manu fact urer f or a per iod as d efin ed by
the thi rd par ty man ufac ture r, and ADI a ssig ns to Bu yer th ose wa rran ties a nd onl y thos e warr anti es
exten ded by s uch th ird pa rty ma nufa ctur ers or v endo rs for n on-A DI bra nded p rodu cts. AD I does n ot its elf
warra nt any n on-A DI bra nded p rodu ct and s ells o nly on a n as is ba sis in a ccor danc e with AD I’s t erms a nd
condi tion s of sal e.
b.Specif ic Warranties for product categories are as follows:
Product C ategor ies
Soundbars
Wal k Thr ough M etal D etec tors
Intru sion W irel ess Co mmun icat ion Acc esso ries
Analog Came ras
Televisions
CCTV Po wer Su ppli es
In Ceil ing Sp eake rs
Ampli fier s
Magnetic Lo cks
Request to Ex it Dev ices
Surge P rote ctio n
UPS (un inte rrup tibl e powe r supp lies )
Volume Controls
Warr anty Per iod
12 months
12 months
12 months
24 months
24 months
24 months
24 months
24 months
24 months
24 months
24 months
24 months
24 months
19
Page 21

Warranty
Product C ategor ies
Intru sion Au dio De vice s
Monitors
Video Baluns
DVR's , NVR' s
IP Cameras
Racks
TV Moun ts
PIR’s
Analog Cabl es
B Connector s
Bus Terminals
Exten sion C ords
HDMI Ca bles
Jacks , Cord s and In trus ion Co mmun icat ion Acc esso ries
Patch C able s
Raceway Con duit
Wire Tie s
Magnetic Co ntac ts
Warr anty Per iod
30 months
30 months
30 months
60 Months
60 Months
60 Months
60 Months
84 months
Limited Lif etim e
Limited Lif etim e
Limited Lif etim e
Limited Lif etim e
Limited Lif etim e
Limited Lif etim e
Limited Lif etim e
Limited Lif etim e
Limited Lif etim e
Limited Lif etim e
2.EXCLUSION OF WARRANTIES, LIMITATION OF LIABILITY
HERE ARE NO WA RRAN TIES O R COND ITIO NS, EX PRES S OR IMP LIED , OF MER CHAN TABI LITY, OR
FITNE SS FOR A PARTIC ULAR P URPO SE OR OT HERWISE , WHIC H EXTE ND BEY OND THE
DESCR IPTI ON ON THE FACE H EREO F. TO THE FUL LEST EXTE NT PE RMIT TED BY LAW, IN NO CA SE
SHALL ADI BE L IABL E TO AN YONE F OR ANY (I) CON SEQU ENTI AL, IN CIDE NTAL , INDI RECT,
SPECI AL, OR P UNIT IVE DA MAGE S ARISI NG OUT OF OR RE LATI NG IN ANY WAY TO THE P RODU CT
AND.O R FOR BR EACH O F THI S OR ANY OTHER WAR RANT Y OR CO NDIT ION, E XPRE SS OR IM PLIE D,
OR UPON AN Y OTH ER BAS IS OF LI ABIL ITY WHATS OEVE R, EVE N IF TH E LOSS O R DAMA GE IS
CAUSE D BY ADI’S OWN N EGLI GENC E OR FAULT AND EV EN IF ADI H AS BEE N ADVIS ED OF THE
POSSI BILI TY OF S UCH LO SSES O R DAMA GES.
Any pro duct d escr ipti on (wh ethe r in wri ting o r made o rall y by ADI or AD I’s a gent s), sp ecif icat ions ,
sampl es, mo dels , bull etin , draw ings , diag rams , engi neer ing sh eets , or sim ilar m ater ials u sed in
conne ctio n with t he Buy er ’s or der ar e for th e sole p urpo se of id enti fyin g ADI’s prod ucts a nd sha ll not b e
const rued a s an exp ress w arra nty or c ondi tion . Any sug gest ions b y ADI or ADI ’s ag ents r egar ding u se,
applicati ons or s uita bili ty of th e prod ucts s hall n ot be co nstr ued as a n expr ess wa rran ty or co ndit ion
unless conf irme d to be su ch in wr itin g by ADI. AD I does n ot rep rese nt tha t the pr oduc ts it se lls ma y not be
compr omis ed or ci rcum vent ed; th at the p rodu cts wi ll pre vent a ny per sona l inju ry or pr oper ty los s by
burgl ary, robbe ry, fi re or ot herw ise, o r that t he pro duct s will i n all ca ses pr ovid e adeq uate w arni ng or
prote ctio n. Buy er und erst ands a nd wil l caus e its cu stom er to un ders tand t hat a pr oper ly ins tall ed and
maintaine d prod uct is n ot ins uran ce or gu aran tee th at suc h will n ot cau se or le ad to pe rson al inj ury or
property lo ss.
CONSE QUEN TLY ADI SHAL L HAVE NO LI ABIL ITY FOR ANY PERSO NAL INJU RY, PROPERTY DAMAG E
OR OTHE R LOSS B ASED O N ANY CL AIM AT ALL INC LUDI NG A CLAIM THAT THE P RODU CT FAI LED
TO GIV E WA RNIN G.
However, if ADI is held l iabl e whet her di rect ly or in dire ctly f or any l oss or d amag e with r espe ct to th e
products it s ells , rega rdle ss of ca use or o rigi n, its m axim um lia bili ty sha ll not i n any ca se exc eed th e
purch ase pr ice of t he pro duct , whic h shal l be fix ed as li quid ated d amag es and n ot as a pe nalt y and sh all
be the co mple te and e xclu sive r emed y agai nst ADI .
20
Page 22

Warranty
3.Limitation on Liability to Buyer ’s Customers
Buyer a gree s to lim it lia bili ty to it s cust omer s to the f ulle st ext ent pe rmit ted by l aw. Buy er ack nowl edge s
that ADI s hall o nly be d eeme d to giv e cons umer s of its p rodu cts su ch sta tuto ry war rant ies as m ay be
requi red by l aw and a t no tim e shal l Buye r repr esen t to its c usto mers a nd/o r user s of ADI pr oduc ts tha t ADI
provi des an y addi tion al war rant ies. B y acce ptin g the pr oduc ts, to t he ful lest e xten t perm itte d by law,
Buyer a ssum es all l iabi lity f or, and a gree s to ind emni ty and h old ADI h arml ess ag ains t and de fend AD I
from, a ny and a ll sui ts, cl aims , dema nds, c ause s of act ion an d judg ment s rela ting t o dama ges, w heth er
for per sona l inju ry or to p erso nal pr oper ty, su ffe red by a ny per son, f irm, c orpo rati on or bu sine ss
assoc iati on, in clud ing bu t not li mite d to, Bu yer’s c usto mers a nd/o r user s of the p rodu cts be caus e of any
failu re of th e prod ucts t o dete ct and /or wa rn of th e dang er for w hich t he goo ds wer e desi gned o r any ot her
failu re of th e prod ucts w heth er or no t such d amag es are c ause d or con trib uted t o by the s old or j oint
concu rrin g negl igen ce or fa ult of AD I.
4.Returns
Subject to th e term s and co ndit ions l iste d belo w, duri ng the a ppli cabl e warr anty p erio d, ADI wi ll rep lace
Produ ct or pr ovid e a cred it at pu rcha se at it s sole o ptio n free o f char ge any d efec tive p rodu cts re turn ed
prepaid. Any o blig atio ns of ADI t o repl ace Li mite d Life time w arra nty pr oduc ts pur suan t to thi s warr anty
which resul t from d efec t are li mite d to the a vail abil ity of r epla ceme nt pro duct . ADI res erve s the ri ght to
replace any s uch pr oduc ts wit h the th en cur rent ly ava ilab le pro duct s, or pr ovid e a cred it in it s sole
discr etio n. In th e even t Buye r has a pr oble m with a ny ADI pr oduc t, ple ase ca ll you r loca l ADI bra nch fo r
retur n inst ruct ions :
For US ca ll 1-8 00-2 33-6 261
For Can ada ca ll 877 -234 -737 8
For Pue rto Ri co cal l 787- 793- 8830
Be sure t o have t he mod el num ber an d the na ture o f the pr oble m avai labl e. In th e even t of rep lace ment ,
the ret urn pr oduc t will b e cred ited t o Buye r ’s acc ount a nd a new i nvoi ce iss ued fo r the re plac emen t item .
ADI res erve s the ri ght to i ssue a c redi t only i n lieu o f repl acem ent.
If any W Bo x Techn olog ies pr oduc t is fou nd to be i n good w orki ng ord er or su ch pro duct ’s in abil ity to
funct ion pr oper ly is a re sult o f user d amag e or abu se, th e prod uct wi ll be re turn ed to Bu yer in t he sam e
condi tion a s rece ived a nd Buy er sha ll be re spon sibl e for an y retu rn fre ight c hang es.
5.Governing Law
The law s of Sta te of Ne w York app ly to th is Lim ited War rant y.
6.Governing Law
Where a ny ter m of thi s Limi ted Warr anty i s proh ibit ed by su ch law s, it sh all be n ull an d void , but th e
remai nder o f the Li mite d Wa rran ty sha ll rem ain in f ull fo rce an d eff ect.
21
Page 23

Made in China
0E-32LED
 Loading...