

Page 1
NB Spray Guns
Owner’s Manual
0900 • Form No. 0276712C
© 1999 Wagner Corporation-All rights reserved
0276712C.qrk 9/28/00 7:01 AM Page 1
Page 2
2 © 1999 Wagner Corporation - All rights reserved.
Limited Warranty - HVLP PAINT SPRAY EQUIPMENT
This product, manufactured by Wagner Corporation (Wagner), is warranted against defects in material and workmanship for one
(1) year following date of purchase if operated in accordance with Wagner’s printed recommendations and instructions. This
warranty does not cover damage resulting from improper use, accidents, user’s negligence or normal wear. This warranty does
not cover any defects or damages caused by service or repair performed by anyone other than a Wagner Authorized Service
Center.
ANY IMPLIED WARRANTY OF MERCHANTABILITY OR FITNESS FOR A PARTICULAR PURPOSE IS LIMITED TO ONE YEAR
FOLLOWING DATE OF PURCHASE. WAGNER SHALL NOT IN ANY EVENT BE LIABLE FOR ANY INCIDENTAL OR
CONSEQUENTIAL DAMAGES OF ANY KIND, WHETHER FOR BREACH OF THIS WARRANTY OR ANY OTHER REASON.
THIS WARRANTY DOES NOT APPLY TO ACCESSORIES.
THIS PRODUCT IS DESIGNED FOR HOME USAGE ONLY. IF USED FOR COMMERCIAL OR RENTAL PURPOSES THIS
WARRANTY APPLIES ONLY FOR 30 DAYS FROM DATE OF PURCHASE.
If any product is defective in material and/or workmanship during the applicable warrany period, return it with proof of purchase,
transportation prepaid to any Wagner Authorized Service Center (Service Center listing is enclosed with this product). Wagner’s
Authorized Service Center will either repair or replace the product (at Wagner’s option) and return it to you, postage prepaid.
SOME STATES DO NOT ALLOW LIMITATIONS ON HOW LONG AN IMPLIED WARRANTY LASTS OR THE EXCLUSION OF
INCIDENTAL OR CONSEQUENTIAL DAMAGES, SO THE ABOVE LIMITATION AND EXCLUSION MAY NOT APPLY TO YOU.
THS WARRANTY GIVES YOU SPECIFIC LEGAL RIGHTS, AND YOU MAY ALSO HAVE OTHER RIGHTS WHICH VARY FROM
STATE TO STATE.
R
Wagner Corporation
1770 Fernbrook Lane
Minneapolis, Minnesota 55447
Telephone (612) 553-7000
EXPLOSION HAZARD - Incompatible materials. May
cause property damage or severe injury.
•DO NOTuse bleach.
• DO NOT use halogenated hydrocarbon solvents.
• Halogenated hydrocarbon solvents such as methylene
chloride and 1,1,1 - Trichlorethane are not compatible
with aluminum and may cause an explosion. If unsure of
a material’s campatibility with aluminum, contact your
coatings supplier.
GENERAL - May cause property damage or severe injury.
• Read all instructions and safety precaution before
operating.
• Comply with all appropriate local, state and national
codes governing ventilation, fire preventive, and
operation.
• The United States Government Safety Standards have
been adopted under Occupational Safety and Health Act.
These standards, particularly the General Standards,
Part 1910 and construction Standard, Part 1926, should
be consulted.
• This equipment is designed to be used with authorized
parts only. When using this equipment with parts that do
not comply with the minimum specifications and safety
devices of the equipment manufacturer, the user
assumes all risks and liabilities.
• Before each use, check all hoses for cuts, leaks,
abrasion or bulging of cover or damage or movement of
couplings. If any of these conditions exist, replace the
hose immediately. Never repair a paint hose.
• Never aim the spray gun at any part of the body.
Hazardous vapors - Paints, solvents, insecticidzes, and
other materials may be harmful if inhaled causing severe
nausea, fainting, or poisoning.
• Use a respirator or mask whenever there is a chance
that vapors may be inhaled. Read all instructions with
the mask to insure that it will provide the necessary
protection against the inhalation of harmful vapors.
Explosion or fire - Solvent and paint fumes can explode
or ignite causing property damage and or severe injury.
• Exhaust and fresh air introduction must be provided to
keep the air within the spray area free from accumulation
of flammable vapors.
• Avoid all ignition sources such as static electricity sparks
open flames such as pilot lights, hot objects such as
cigarettes, and sparks from connecting and
disconnecting power cords and working light switches.
• Fire extinguishing equipment must be present and in
working order.
• Power cord must be connected to a grounded circuit.
• Follow the material and solvent manufacturer’s safety
precautions and warnings.
• Cleaning solvents must have a flashpoint above 100° F
(37.8° C) Flashpoint is the temperature at which a fluid
begins to give off sufficient amount of flammable vapor
that could ignite when exposed to a flame or spark.
Contact your coatings supplier for more information.
Skin burn - Heated parts can cause severe skin burn
injury.
• Quick disconnect fittings on hose and spray gun become
hot during use. Avoid skin contact with quick disconnect
fittings when they are hot. Allow quick disconnect fittings
to cool before disconnecting spray gun from hose.
0276712C.qrk 9/28/00 7:01 AM Page 2
WARNING
Page 3
© 1999 Wagner Corporation - All rights reserved. 3
R
INTRODUCTION
This owner’s manual is dedicated to providing all the information needed to properly operate and maintain your Wagner NB
spray gun. Please review all the information contained in this operating manual before using the equipment.
All the Wagner systems are made of the highest quality materials right here in the U.S.A. This assures you of the very best
spray equipment available on the market today. Wagner units are made to be rugged, dependable and efficient, providing you
with the quality and dependability you have come to expect from Wagner.
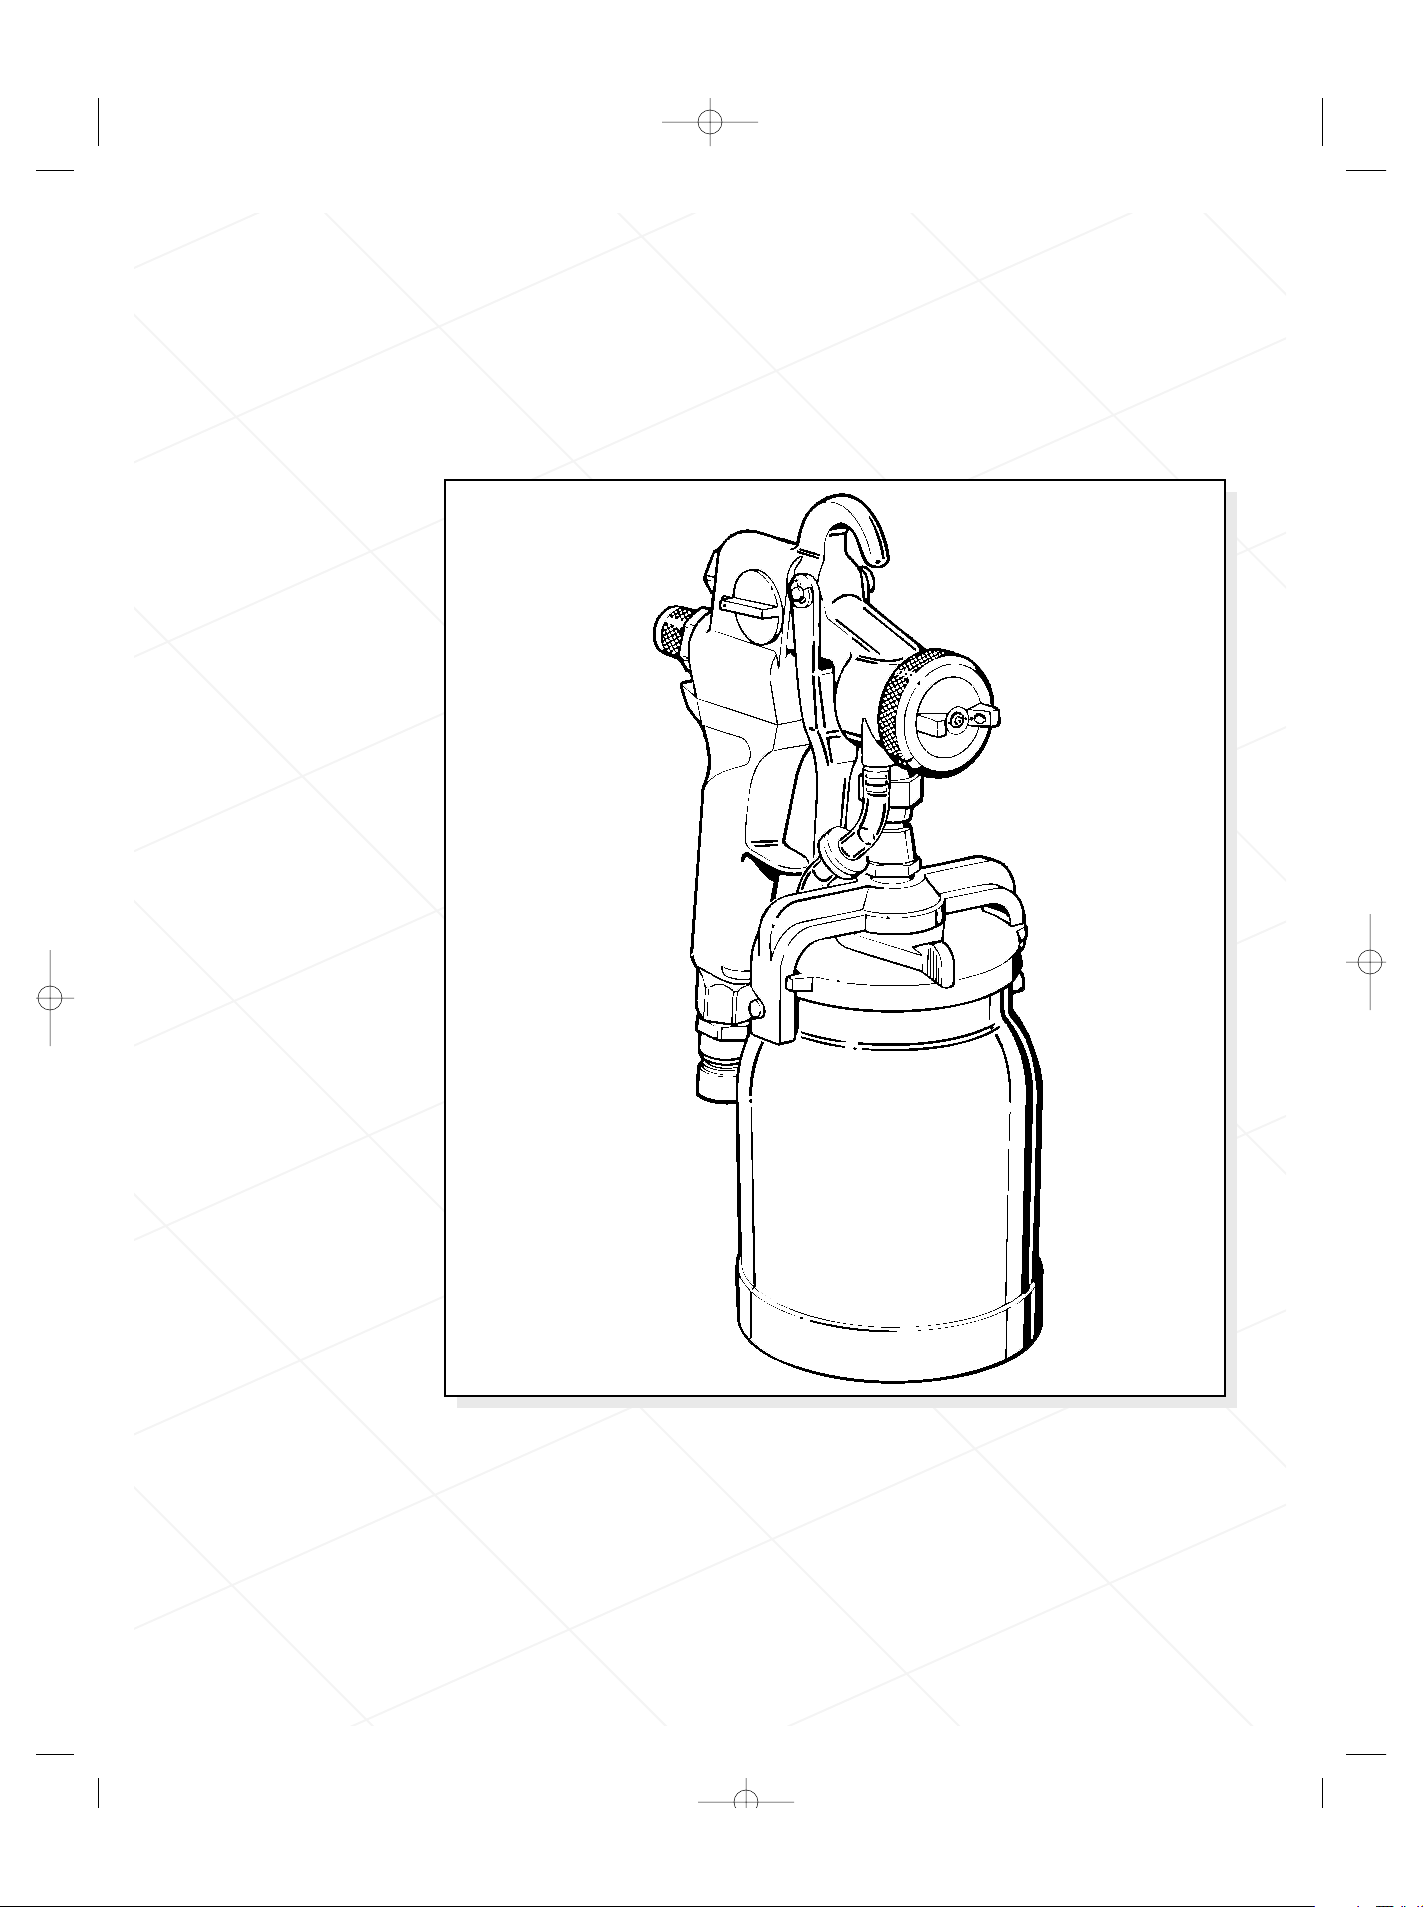
HOW THE NB MODEL SPRAY GUN WORKS
The NB is a specially designed Non-Bleeder HVLP spray gun. The unique design of the gun allows for totally controlled
spraying without a large cloud of overspray. The spray pattern can be adjusted to allow the operator to spray with a tight round
pattern of 1/4 of an inch all the way up to a wide spray pattern up to 12 inches.
One Quart Cup Set Up
A one quart cup can be used with all the Wagner HVLP systems
whenever the user wants to spray up to one quart of material at a
time.
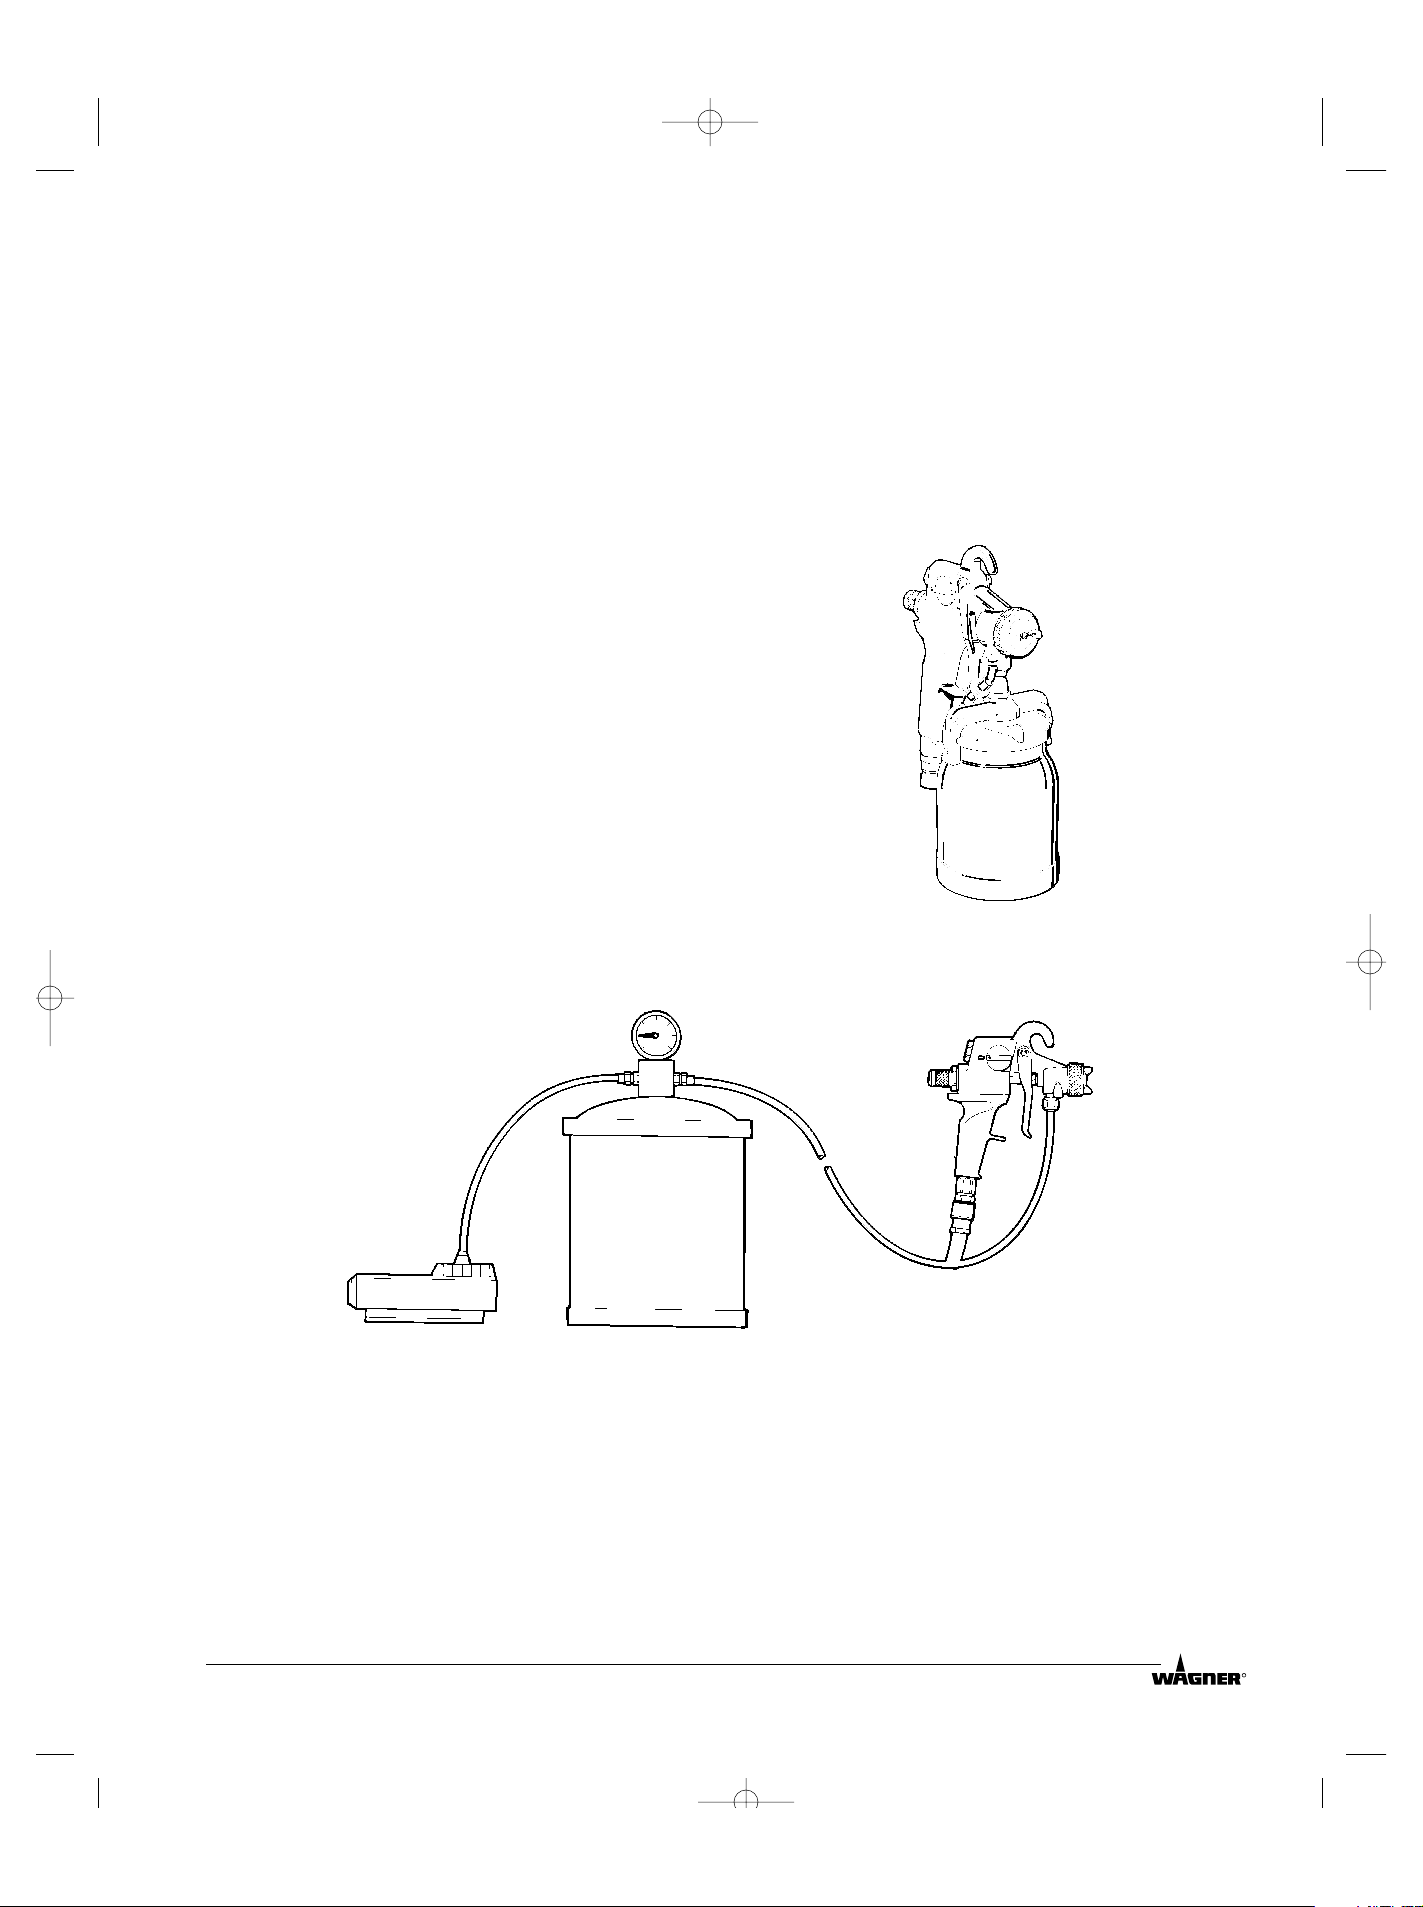
Pressure Pot Set Up
A pressure pot system is used for larger quantities of material in continuous run operations. Always follow instructions and
warnings provided with the pressure pot and air compressor.
Set Up Before Spraying
Surface Prep
All objects to be sprayed should be thoroughly cleaned before spraying material on them. Areas not to be sprayed may, in
certain cases, need to be masked.
Spray Area Prep
Always spray in a well ventilated area.
Material Prep
Most material will need to be reduced and strained to assure proper sprayability and the best possible
professional finish.
PRESSURE POT
MATERIAL
HOSE
HVLP AIR
INLET
AIR HOSE
COMPRESSOR
NBC SPRAY GUN
0276712C.qrk 9/28/00 7:01 AM Page 3
Page 4

4 © 1999 Wagner Corporation - All rights reserved.
R
Spray Pattern
The spray pattern is adjusted by turning the ears of the air cap into either a
vertical, horizontal or diagonal position as shown in figure 1. The positions
of the air cap and the corresponding spray patterns are illustrated in figure
2. Never trigger the gun while adjusting the spray pattern.
Pattern Selection
Spray Pattern Size
To change the spray pattern size, but not the spray pattern shape, screw
the air cap ring in or out accordingly. Figure 3 shows how to obtain a
larger or smaller spray pattern size. Turning the ring clockwise will make
the pattern bigger. Turning the ring counterclockwise will make the
pattern smaller. As you reduce the spray pattern size you will need to
move closer to the surface.
Material Flow and Air Flow Adjustments
Figure 4 shows how to adjust the material flow and the air flow on
the NB spray gun. Each individual job and material may require
slight adjustments to these settings. For your individual needs
spray first on a test surface.
Full air flow
Reduced
Air Flow
More fluid
Less fluid
Figure 4
Air Cap Ring
Larger Pattern
Smaller Pattern
Figure 3
Round
Pattern
Diagonal
Tip Position
Vertical
Pattern
Horizontal
Tip Position
Horizontal
Pattern
Vertical
Tip Position
Round Pattern
Figure 2
Vertical Pattern Horizontal Pattern
Air Cap
Figure 1
0276712C.qrk 9/28/00 7:01 AM Page 4
Page 5

© 1999 Wagner Corporation - All rights reserved. 5
R
Choosing a Projector Set
A projector set consists of a needle assembly, fluid nozzle and air cap (see figure 5). The NB spray gun comes standard with a
#3 projector set. You should choose a projector set based on two things: type material to be sprayed and the finish desired.
The chart below should be helpful to you in making the correct choice.
Pro Set No. Pro Set Part No. Material to be used
#2 0276161 Low viscosity stains, varnish, automotive coatings
#3 0276162 Medium viscosity laquers, latex, enamel, oils, etc.
#4 0276163 Medium viscosity laquers, latex, enamel, oils, etc.
#5 0276164 High viscosity materials, gels, and adhesives
How to Change Projector Sets
1. Remove air cap ring, air cap, and spring plate. 2. Remove fluid nozzle.
3. Remove material adjustment knob and spring. 4. Remove needle. If the needle does not pull out easily,
loosen packing nut to prevent needle or packing damage.
NOTE: Reverse the above procedure to install the
new projector set. If packing nut was
loosened follow adjustment procedures on
page 7.
Material adjustment knob
Spring
Spring Plate
Air Cap Ring
Air Cap
Needle Assembly
Fluid Nozzle
Air Cap
Figure 5
0276712C.qrk 9/28/00 7:01 AM Page 5
Page 6

6 © 1999 Wagner Corporation - All rights reserved.
R
How to Prepare Material for Spraying
Before spraying, the material being used must be thinned with the proper solvent as specified by the material manufacturer.
Follow the material manufacturers recommendation and thinning procedures.
How to Spray Properly
Position the spray gun perpendicular to and 1 to 8 inches from the spray surface, depending on the spray pattern size
desired. Spray parallel to the surface with smooth passes at a consistent speed as illustrated in figure 6. Doing this will help
avoid irregularities in the finish, i.e. runs and sags. Always apply a thin coat of material on the first pass and allow to dry before
applying a second, slightly heavier coat.
Always squeeze the trigger of the spray gun after you begin your spray pass and release it before the pass is done. For best
results, make the spray passes about 20 inches long and overlap each pass by 4 or 5 inches. Remember to keep the gun at
right angles to the spraying surface.
NOTE: If any problems occur with the quality of the
surface finish refer to the troubleshooting
chart on page 8 for problem identification and
suggested solution(s).
Incorrect
Correct
Begin
pass
End
pass
Trigger
gun
Release
trigger
Even
stroke
Figure 6
0276712C.qrk 9/28/00 7:01 AM Page 6
Page 7

© 1999 Wagner Corporation - All rights reserved. 7
R
Maintenance
For maximum performance, the spray gun must be cleaned thoroughly after every use.
1. Empty the material from the one quart cup after use.
2. Pour a small amount of appropriate solvent in the cup, attach cup to gun,
shake and spray solvent through the gun in a well ventilated area. Do not
restrict nozzle when cleaning with a hand or other body parts as back
flushing of the system is not necessary.See figure 7 for proper cleaning of
the check valve and air tube.
3. Repeat above step once or twice until the solvent appears clear. Then
wipe exterior of the cup and gun with appropriate solvent until it is clean.
Be sure to remove the needle, fluid nozzle and air cap and clean them
thoroughly, making sure that the air holes and material passages are
completely clean. Never use metal tools or picks to clean air cap or
nozzle.
4. When threaded parts are removed, it is suggested that the thread be
lubricated with petroleum jelly before reassembling. Do not use any
lubricants containing silicone.
NOTE: If your gun is supplied with a cup assembly, you have received
a black thiakol seal assembled to the gun and 2 white
polyethylene seals as service parts. The black is usable with
most solvents. If the black seal becomes swelled, remove and
replace with white to complete the job. The black will return to
its original size after a period of time.
NOTE: If material leaks from around or through the packing nut,
tighten the packing nut slightly and trigger the gun to see if
the leaking has stopped. If leaking continues, repeat as above
until there is no longer a leak. Be careful not to overtighten the
packing nut, overtightening will cause the needle to stick in
the packing. If adjusting the packing does not stop, the leak
the packing may need to be replaced.
NOTE: The cup gasket must be replace periodically due to normal
wear and tear. It is important to inspect these gaskets during
each cleaning (see figure 7).
Packing Nut
Figure 8
Cup Gasket
Figure 7
0276712C.qrk 9/28/00 7:01 AM Page 7
Page 8

8 © 1999 Wagner Corporation - All rights reserved.
R
Problem
Little or no paint flow
Cause
1. Dried paint blocking fluid nozzle
2. No air pressure in paint cup or
pot
3. Valve in air tube plugged
4. No fluid pressure
5. Blockage in material hose
Solution
1. Disassemble and clean
2. Inspect all air tubes, cup or pot
gasket, clean or replace.
3. Replace valve assembly
4. Check material supply
5. Clean by flushing with solvent.
Paint leaking
1. Improper size needle or nozzle
2. Damaged needle or nozzle
3. Loose Nozzle
4. Loose packing nut
5. Needle not closing properly
6. Gun is tilted too much
1. Replace
2. Replace
3. Tighten
4. Tighten
5. a) Loosen packing nut
b) Replace needle spring
c) Remove dried paint from
needle.
6. Don’t tilt gun when not spraying
Poor spray pattern
1. Air holes in air cap ears are clogged.
2. Nozzle is clogged
3. Damaged nozzle or needle
1. Remove and clean air holes
2. Clean with appropriate solvent
3. Remove and replace.
Pulsating spray
1. Loose or damaged packing
1. Tighten or replace
Pattern is heavy in the middle
1. Too much fluid pressure
1. Reduce pressure
Gun spitting paint 1. Valve in air tube is not operating
properly
2. Material too thick
1. Replace valve assembly
2. Thin material
Paint build up on the air cap 1. Improper adjustment of cap 1. Adjust properly (refer to gun
adjustments section of manual)
Too much overspray
1. Air pressure too high
2. Material too thin
3. Spray gun too far from surface
1. Reduce air pressure
2. Add unthinned paint
3. Move closer
TROUBLESHOOTING
0276712C.qrk 9/28/00 7:01 AM Page 8
Page 9

© 1999 Wagner Corporation - All rights reserved. 9
R
1
2
3
4
5
6
7
10
11
14
16
17
15
8
9
12
13
18
20
21
23
24
29
25
26
22
19
27
28
30
31
32
33
34
35
36
37
38
39
40
Item Part No. Description Qty.
1 0275577 Knob, Material
2 0275576 Spring, Needle 1
3 0276453 Needle Assembly, #3 1
4 0275300 Housing, Material Adjustment 1
5 0275501 Seal, Rear Air Valve 1
6 0275578 Spring, Air Valve 1
7 0275495 Air Valve 1
8 0275498 Ring, Snap, Air Valve Seal 1
9 0275583 Seal, Front Air Valve 1
10 0275482 Plug, Air 1
11 0277909 Gun Body, Service 1
12 0275581 Ring, Snap 1
13 0275536 Pin, Trigger 1
14 0275250 Spring Plate Assembly 1
15 0276451 Nozzle, Fluid, #3 1
16 0276452 Air Cap, #3 1
17 0275582 Ring, Retaining 1
18 0275480 Fitting, Cup Assembly 1
19 0275247 Cup Assembly 1
20 0275242 Fluid Tube Assembly 1
21 0275570 Bridge, Cup 1
Item Part No. Description Qty.
22 0275571 Lever, Cup Locking
23 0275497 Lid, Cup 1
24 0275572 Nut, Locking 1
25 0275520 Gasket, Cup (Thiakol-Black) 1
0275562 Gasket, Cup (White) 1
26 0275573 Cup, One Quart 1
27 0276397 Air Tube 2
28 0276248 Valve, Check 1
29 0275490 Trigger 1
30 0275586 Fitting, Air Tube 1
31 0275579 Packing 1
32 0275519 Nut, Needle Packing 1
33 0275489 Handle 1
34 0275473 Tube, Handle 1
35 0275472 Nut, Handle Tube 1
36 0275481 Quick Disconnect, Male 1
37 0275537 E-Clip, Trigger Pin 1
38 0275575 Valve, Air Control 1
39 0275584 O-Ring, Air Control Valve 2
40 0275496 Seal, Air Valve 1
NBC SPRAY GUN
0276712C.qrk 9/28/00 7:01 AM Page 9
Page 10

10 © 1999 Wagner Corporation - All rights reserved.
R
Item
Part No. Description Qty.
1 0275577 Knob, Material 1
2 0275576 Spring, Needle 1
3 0279208 Needle Assembly, #2 1
4 0275300 Housing, Material Adjustment 1
5 0275501 Seal, Rear Air Valve 1
6 0275578 Spring, Air Valve 1
7 0275495 Air Valve 1
8 0275498 Ring, Snap, Air Valve Seal 1
9 0275583 Seal, Front Air Valve 1
10 0275482 Plug, Air 1
11 0277909 Gun Body, Service 1
12 0275581 Ring, Snap 1
13 0275536 Pin, Trigger 1
14 0275250 Spring Plate Assembly 1
15 0276446 Nozzle, Fluid, #2 1
16 0276640 Air Cap, #3 1
17 0275582 Ring, Retaining 1
18 0275480 Fitting, Cup Assembly 1
19 0275247 Cup Assembly 1
20 0275242 Fluid Tube Assembly 1
21 0275570 Bridge, Cup 1
22 0275571 Lever, Cup Locking 1
Item
Part No. Description Qty.
23 0275497 Lid, Cup 1
24 0275572 Nut, Locking 1
25 0275520 Gasket, Cup (Thiakol-Black) 1
0275562 Gasket, Cup (White) 1
26 0275573 Cup, One Quart 1
27 0276397 Air Tube 2
28 0276248 Valve, Check 1
29 0275490 Trigger 1
30 0275586 Fitting, Air Tube 1
31 0275579 Packing 1
32 0275519 Nut, Needle Packing 1
33 0275489 Handle 1
34 0275473 Tube, Handle 1
35 0275472 Nut, Handle Tube 1
36 0276424 Fitting 1
37 0275537 E-Clip, Trigger Pin 1
38 0275575 Valve, Air Control 1
39 0275584 O-Ring, Air Control Valve 2
40 0275496 Seal, Air Valve 1
41 0275538 Gauge 1
42 0276423 Regulator 1
43 0275696 Nipple 1
1
2
3
4
5
6
7
10
11
14
16
17
15
8
9
12
13
18
20
21
23
24
29
25
26
22
19
27
28
30
31
32
33
34
35
36
37
38
39
40
42
43
41
NBC SPRAY GUN (REGULATOR)
0276712C.qrk 9/28/00 7:01 AM Page 10
 Loading...