

Page 1
2006 © VTech
Printed in China
91-02195-000
Page 2
Page 3

Nitro Vision™
INSTRUCTION MANUAL
TABLE OF CONTENTS
SECTION 1 INTRODUCTION
CHAPTER 1 INTRODUCTION
CHAPTER 2 INCLUDED IN THIS PACKAGE
SECTION 2 SET-UP
CHAPTER 1 GETTING STARTED
CHAPTER 2 CONNECTING TO A TELEVISION
CHAPTER 3 PRODUCT FEATURES
SECTION 3 ACTIVITIES
CHAPTER 1 MAIN UNIT
CHAPTER 2 CARTRIDGE 1: LANGUAGE LAUNCHER
CHAPTER 3 CARTRIDGE 2: SCIENCE & NATURE
CHAPTER 4 CARTRIDGE 3: DISCOVER THE WORLD
CHAPTER 5 CARTRIDGE 4: MATH EXPLORER
SECTION 4 CARE & MAINTENANCE
CHAPTER 1 CARE & MAINTENANCE
CHAPTER 2 TROUBLESHOOTING
CHAPTER 3 TECHNICAL SUPPORT
CHAPTER 4 OTHER INFO
2
Page 4
INTRODUCTION
Thank you for purchasing your VTech® Nitro Vision™.
Your Nitro Vision™ is an electronic learning tool that challenges young minds with 41
activities in different categories as diverse as Language Skills, Math, Spanish, Science,
Geography and History.
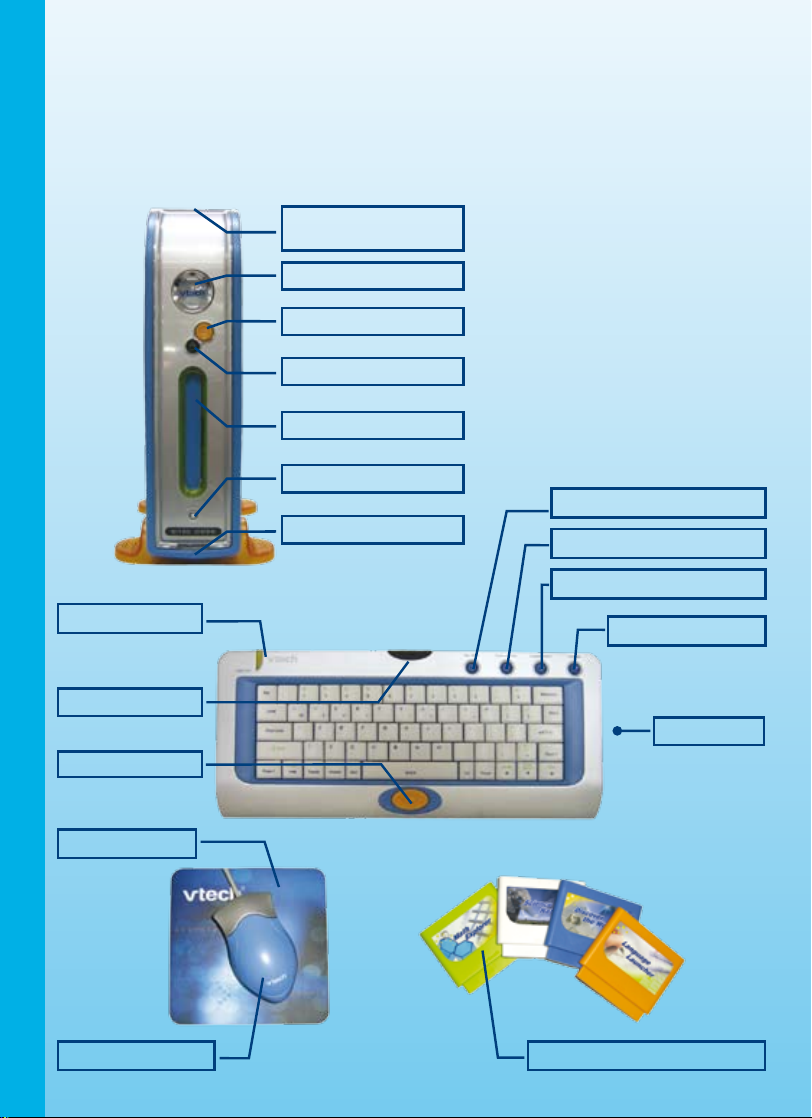
Cartridge Storage
Compartment
Power Indicator Light
ON/OFF Button
Infrared Receiver
Cartridge Slot
Reset Button
Main Menu Hot Key
Battery Compartment
Personal Profile Hot Key
Progress Report Hot Key
Caps Lock Light
INTRODUCTION
Infrared Emitter
Cursor Key
Mouse Pad
Interactive Mouse
3
Cartridge Hot Key
Mouse Jack
4 Bonus Activity Cartridges
Page 5
INCLUDED IN THIS PACKAGE
• Nitro Vision™ Console
• Interactive Infrared (IR) Keyboard
• Mouse Pad
• Interactive Mouse
• 4 Bonus Activity Cartridges: Language Launcher, Science & Nature,
Discover the World, Math Explorer
• Instruction Manual
WARNING: All packing materials such as tape, plastic sheets, wire ties and tabs are not
part of this toy and should be discarded for your child’s safety.
SET-UP
GETTING STARTED
Before playing for the first time, be sure you have inserted 3 “C”-sized batteries into the
console unit, and 2 “AA”-sized batteries into the IR keyboard.
USING THE MOUSE
1. Plug the mouse into the mouse jack on the right side of the infrared
keyboard.
2. Move the mouse in the direction you want the cursor to move.
3. Click the mouse button to make a selection.
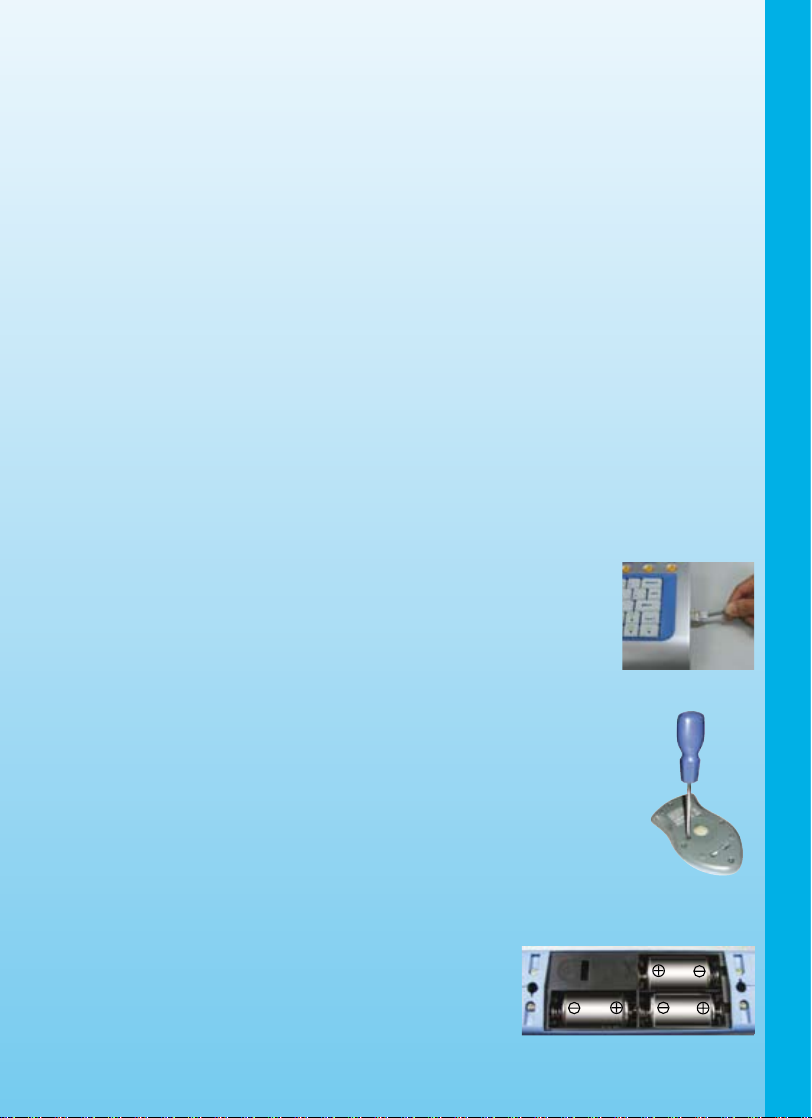
CLEANING THE MOUSE
1. Following the arrows, use a screwdriver to open the cover on the bottom
of the mouse.
2. Take the ball out of the mouse and use a dry cloth to clean the mouse
and the ball.
3. Place the ball back in the mouse, replace the mouse cover and screw
the cover closed.
BATTERY INSTALLATION
The Nitro Vision™ console unit operates on 3 “C”-sized batteries or a VTech® 9V adaptor
(sold separately).
1. Make sure the unit is turned OFF.
2. Locate the battery cover on the bottom of the unit and
open it.
3. Insert 3 “C”-sized batteries as illustrated.
SET-UP / INTRODUCTION
4
Page 6
4. Close the battery cover.
NOTE: For best performance, use new alkaline batteries.
RECHARGEABLE BATTERIES ARE NOT RECOMMENDED.
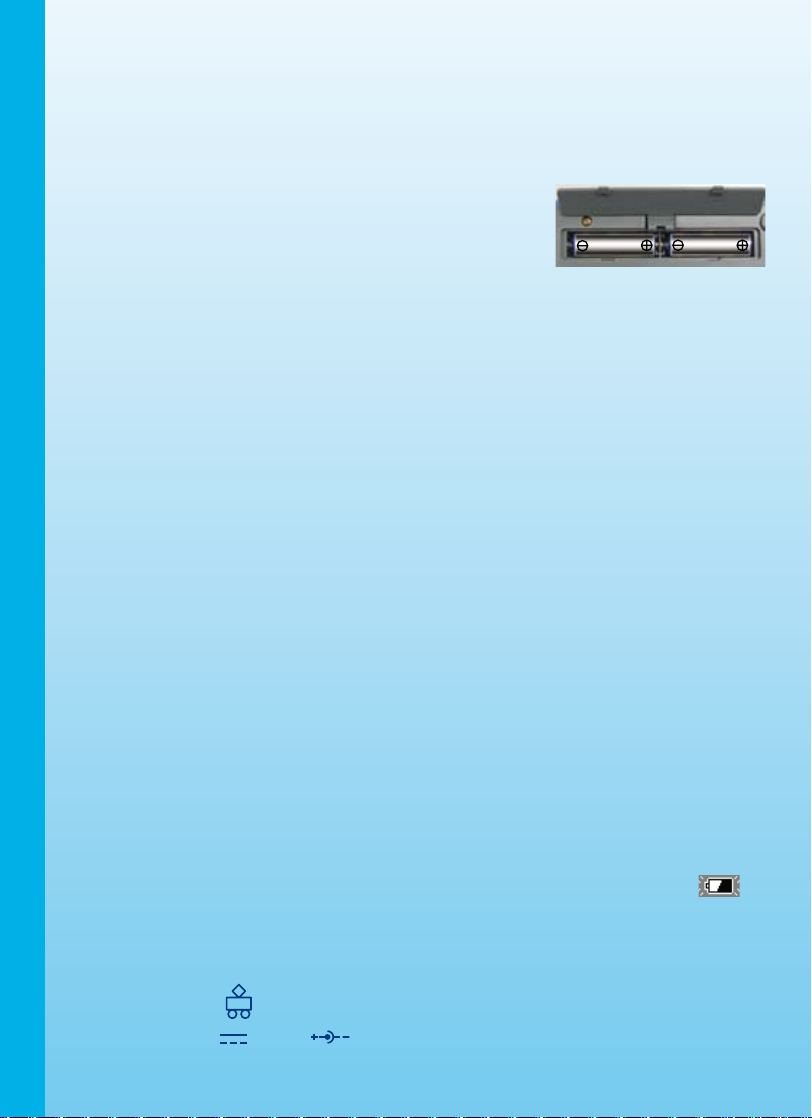
The Nitro Vision™ Infrared Keyboard operates on 2 “AA”-sized batteries (sold
separately).
1. Locate the battery cover on the bottom of the unit and
open it.
2. Insert 2 “AA”-sized batteries as illustrated.
3. Close the battery cover.
NOTE: For best performance, use new alkaline batteries. Please replace batteries when
any of the following events occur:
1. The IR keyboard does not register that a key has been pressed.
2. The Caps Lock light does not light up when the Caps Lock is activated.
3. The IR emitter on the keyboard does not light up when a key is pressed.
RECHARGEABLE BATTERIES ARE NOT RECOMMENDED.
BATTERY NOTICE
• Install batteries correctly observing the polarity (+, -) signs to avoid leakage;
• Do not mix old and new batteries;
SET-UP
• Do not mix batteries of different types: alkaline, standard (carbon-zinc) or rechargeable
(nickel-cadmium);
• Remove the batteries from the equipment when the unit will not be used for an extended
period of time;
• Always remove exhausted batteries from the equipment;
• Do not dispose of batteries in fire;
• Do not attempt to recharge ordinary batteries;
• The supply terminals are not to be short-circuited;
• Only batteries of the same and equivalent type as recommended are to be used.
WE DO NOT RECOMMEND THE USE OF RECHARGEABLE BATTERIES.
Notice: When the Nitro Vision™ is running on batteries, you may see this icon
appear on the TV screen. This indicates that battery power is low. Please
replace the batteries as soon as possible.
AC ADAPTOR
• Use a standard 9V 300mA AC/DC adaptor. We recommend the use of a VTech®
9V AC/DC adaptor.
5
Page 7

• Make sure the unit is turned OFF.
• Locate the adaptor jack on the back of the unit.
• Insert the adaptor plug into the unit’s adaptor jack.
• Plug the adaptor into a wall outlet.
NOTE: The use of an adaptor will override the batteries. When the
toy is not going to be in use for an extended period of time,
unplug the adaptor.
Standard Guidelines for Adaptor Toys
• Please make sure the adaptor is out of reach by children;
• Never clean a plugged-in toy with liquid;
• Never use more than one adaptor;
• The toy is not intended for use by children under 3 years old;
• Only use the recommended adaptor with the toy;
• The adaptor is not a toy;
• Do not leave the toy plugged in for extended periods of time.
NOTICE TO PARENTS
Regularly examine the adaptor, checking for damage to the cord, plug, transformer or other
parts. Do not use the adaptor if there is any damage to it.
CONNECTING TO A TELEVISION
SET-UP
NOTE: Before you connect Nitro Vision™ to a TV, check to make sure that the unit is
working. Once you have turned the unit ON, the power indicator light (VTech® logo) should
glow. If the VTech® logo does not glow, check to see that the adaptor is connected correctly,
or that the batteries are installed correctly. If the batteries are not installed correctly,
Nitro Vision™ will not function and damage to the unit could result. Make sure that both
your TV and the Nitro Vision™ console unit are turned OFF before you begin making
connections.
Connect Nitro Vision™ to your TV or VCR by plugging the Nitro Vision™ console unit’s
colored cables into the matching color video and audio input jacks on your TV set or VCR.
FOR TVS WITH STEREO AUDIO INPUTS
- Connect the yellow plug on the Nitro Vision™ cable to the
yellow video input terminal on your TV.
- Connect the white plug on the Nitro Vision™ cable to the white
audio input terminal on your TV.
6
Page 8

FOR TVS WITH A MONO AUDIO INPUT
- Connect the yellow plug on the Nitro Vision™ cable to the
yellow video input terminal on your TV.
- Connect the white plug on the Nitro Vision™ cable to the white
audio input terminal on your TV.
CONNECTING TO A VCR
If there are no video IN and audio IN terminals on your TV set, you can connect Nitro
Vision™ to a VCR.
- Connect the yellow plug on the Nitro Vision™ cable to the yellow
video input terminal on your VCR.
- Connect the white plug on the Nitro Vision™ cable to the white
audio input terminal on your VCR.
SET-UP
CARTRIDGES
Please take the cartridge out of the storage compartment in the top of the unit before
the cartridge.
- Make sure the Nitro Vision™ console unit is turned OFF.
- Insert a cartridge into the cartridge slot on the front of the main console
unit. The cartridge should lock into place. Please use carefully when
inserting or removing the cartridge from the slot.
- Turn on the TV.
- Set your TV input mode to accept input from the port to which
Vision™ is connected. In many cases this will involve setting the TV
to “video” mode; however, since all TVs vary, please refer to your TV
or VCR manual for further details.
Nitro Vision™ on by pressing the ON Button.
- Turn
NOTE: When Nitro Vision™ is running any activity, inserting a cartridge into the cartridge
slot is NOT RECOMMENDED. Inserting a cartridge will cause Nitro Vision™ to
reset. Please make sure the Nitro Vision™ unit is turned OFF when inserting any
cartridge.
Nitro Vision™ bonus activity cartridges are only to be used with the Nitro Vision™ console
unit.
7
Nitro
using
Page 9

PRODUCT FEATURES
PLAY MODES
With Nitro Vision™ you can choose five different categories of play and learning:
Main Unit
Cartridge 1: Language Launcher
Cartridge 2: Science & Nature
Cartridge 3: Discover the World
Cartridge 4: Math Explorer
One/Two Player Mode
Press the Player button on the keyboard to switch between one-player and two-player
modes. The activities that can be played with two players are:
Cartridge 2: Science & Nature
1) Science Quiz
2) Animal Quiz
3) Human Body Quiz
4) Who Invented What?
Cartridge 3: Discover the World
5) World Wonders Quiz
6) Space & Planet Quiz
7) Earth Challenge
8) Ocean Quiz
TURNING THE UNIT ON AND OFF
Pressing the ON/OFF button will turn the unit ON. Pressing the ON/OFF
button again will turn the unit OFF.
RESETTING THE UNIT
Pressing the Reset button on the main console unit will reset the unit.
ACTIVITIES
MAIN MENU
When the unit is turned ON, you will see a short opening scene and enter the Main Menu.
Icons for different activities will be shown in the Main Menu. You can choose an activity in
one of these ways:
1) Use the arrow keys to choose the activity you want. Then press the Enter button to
select the activity.
2) Use the cursor keys to choose the activity you want. Then press the Enter button or click
PRODUCT FEATURES / ACTIVITIES
8
Page 10

the mouse to select the activity.
3) Use the mouse to choose the activity you want by clicking on the activity icon on the
screen.
CARTRIDGES
Make sure the unit is turned OFF. Insert a cartridge into the cartridge slot on the front of
the main console unit. Then turn the unit ON. You will see a short opening scene and enter
the Main Menu. You will now see the cartridge icon in the Main Menu. When you select the
cartridge icon and press the Enter key, or click on the cartridge icon with the mouse, you
will enter the Cartridge Menu. Icons for different activities will be shown in the Cartridge
Menu. You can choose an activity in one of these ways:
1) Use the arrow keys to choose the activity you want. Then press the Enter button to
select the activity.
2) Use the cursor keys to choose the activity you want. Then press the Enter button or click
the mouse to select the activity.
3) Use the mouse to choose the activity you want by clicking on the activity icon on the screen.
LEVEL SELECTION
1) Press the Level button on the keyboard to go to the Level Selection screen. Use the arrow
keys or mouse to select Level 1 (easy), Level 2 (medium) or Level 3 (hard).
2) Pressing the Personal Profile button will take you to the Auto Leveling Selection Screen.
Use the arrow keys or mouse to select Auto Leveling ON or OFF.
ANSWERS
In most activities, the answer will be provided after a certain number of tries.
ACTIVITIES
KEYBOARD LAYOUT
In addition to a full QWERTY keyboard, you will also find the hot keys and function keys
described below:
9
Page 11

IR RECEIVER RANGE
TV
KEYBOARD HOT KEYS
MAIN MENU
Press this key to go to the Main Menu.
ACTIVITIES
PERSONAL PROFILE
Press this key to go to your Personal Profile.
PROGRESS REPORT
Press this key to go to your Progress Report.
CARTRIDGE
Press this key to go to the Cartridge Menu.
FUNCTION KEYS
Esc Key: Press the Escape key to exit the current activity.
Level Key: Press the Level key to select an activity’s level of difficulty
10
Page 12

(easy, medium or hard).
Caps Lock Key: Press the Caps Lock key to type capital letters. Press it
again to type lowercase letters.
Shift Key: Press the Shift key to capitalize letters. This key can also
access the alternate function of another key, when both
keys are pressed at the same time.
Status Key: Press the Shift and Status keys at the same time to get the
status of the current game.
Help Key: Press the Help key to see a helpful instruction for the current
activity.
Repeat Key: Press the Repeat key to repeat an instruction.
Answer Key: Press the Answer key to see the correct answer to the
current question. The player will not receive points if this
key is pressed.
Hint Key: Press the Hint key to get helpful hints about the current activity.
The player’s score will be reduced if this key is pressed.
Space Bar: When typing, use the space bar to insert a space between
words or numbers.
Sym.: Press the Symbol key to access the symbol menu. Use the
mouse to select and input a symbol.
Player: Press the Player key to choose between one-player and
ACTIVITIES
Arrow Keys: Press the arrow keys to move the cursor up, down, left or
Player 1 or Player 2: Press the Player 1 or Player 2 key to switch between player
Enter: Pr e s s th e Enter key af ter choosing to ent e r your
Delete: Press the Delete key to delete the character or space to the
Backspace: Press the Backspace key to delete the character or space
Cursor Keypad: Press the cursor keypad to move the cursor up, down, left
two-player modes.
right. Press one of these keys and the Shift key to access
the Page Up, Page Down, Home and End functions.
one and player two in two-player mode.
selection.
right of the cursor.
to the left of the cursor.
or right.
AUTOMATIC POWER OFF
To save power, Nitro Vision™ automatically shuts down if it does not receive any input after
20 minutes. Press the On/Off button to turn on your unit. We recommend that you turn off
11
Page 13

the unit when finished playing. Remove the batteries and unplug the adaptor if your Nitro
Vision™ will not be used for an extended period of time.
ACTIVITIES
Your Nitro Vision™ offers a total of 41 activities, including 31 activities from bonus
cartridges.
MAIN MENU
Activity
No.
1 My Notepad My Notepad allows you to type notes, memos and lists. You
2 Calculator This tool is for addition, subtraction, multiplication and division.
3 Personal
4 Photo Gallery Browse through many colorful photos.
Activity Name Activity Description
can save what you write and view it later.
Use the mouse to click on the on-screen numbers. Or you can
also type numbers on the keyboard.
Tip: click on the “C” icon to clear the calculator between
operations.
Personalize your Nitro Vision™ by storing information about
Profile
yourself in the Personal Profile. You can enter your information
or set your preferences for volume (music and voice), auto
leveling status, mouse sensitivity and appearance.
ACTIVITIES
5 Progress
Report
6 Typing Tutor Practice your typing skills in the exciting Typing Tutor. Quickly
This function shows how well you are doing in most activities.
type the whole word before it reaches the top of the screen.
12
Page 14

GAME ZONE
Activity
No.
7 What Looks
8 Switcheroo Test your addition and subtraction skills. Rearrange the
9 Speedy
10 Music Builder Add up music notes to match the value of the note in the
Activity Name Activity Description
Look at two similar pictures and find five differences between
Different?
Shapes
them. Hurry before time runs out!
numbers to form a correct equation. Press the Enter key when
you have finished.
Count all the cars with different shapes on them. Press the
Enter key to count them.
question. When the notes add up to the correct amount, those
notes will disappear.
CARTRIDGE 1
LANGUAGE LAUNCHER (CARTRIDGE COLOR: ORANGE)
ACTIVITIES
Activity
No.
11 Spanish
12 Spanish Quiz Test your Spanish skills. Try to match up the English and
13 Reading
14 Literature Guess the rhyming word to complete the poem. Use the Hint
15 Word Builder Improve your vocabulary with this game. Read the clues and
Activity Name Activity Description
Listen and learn Spanish! Choose an English word and then
Lessons
Comprehension
learn it in Spanish.
Spanish words.
Read the stories and answer the questions to improve your
reading comprehension skills.
button to see a letter clue.
guess the word. Hurry, before time is up!
13
Page 15

16 Letter
Launcher
17 Synonyms &
Antonyms
18 Spelling
Scramble
Boost your spelling skills. Press the Enter key to choose a
letter to complete a word.
Test your synonym and antonym knowledge. Match the words
with the correct synonyms or antonyms.
Rearrange the letters to spell the secret word.
CARTRIDGE 2
SCIENCE & NATURE (CARTRIDGE COLOR: WHITE)
Activity
No.
19 Science Starter Learn about physical and life sciences. Choose a topic and
20 Science Quiz Test your knowledge of physical and life sciences. Choose an
21 Animal World Find out cool facts about animals. Choose an animal and
22 Animal Quiz Take a quiz on animal facts. Choose an answer in the multiple-
23 The Human
24 Human Body
25 Great
26 Who Invented
Activity Name Activity Description
read all about it.
answer in the multiple-choice questions before time is up.
learn all about it.
choice questions before time is up.
Learn about the human body. Choose a topic and find out
Body
Quiz
Inventions
What?
interesting facts.
Test yourself on human body facts. Choose an answer in the
multiple-choice questions before time is up.
How much do you know about inventions? Explore these
topics and learn more.
Test what you’ve learned about great inventions. Choose an
answer in the multiple-choice questions before time is up.
ACTIVITIES
14
Page 16
CARTRIDGE 3
DISCOVER THE WORLD (CARTRIDGE COLOR: BLUE)
Activity
No.
27 Wonders of the
28 World
29 Space
30 Space &
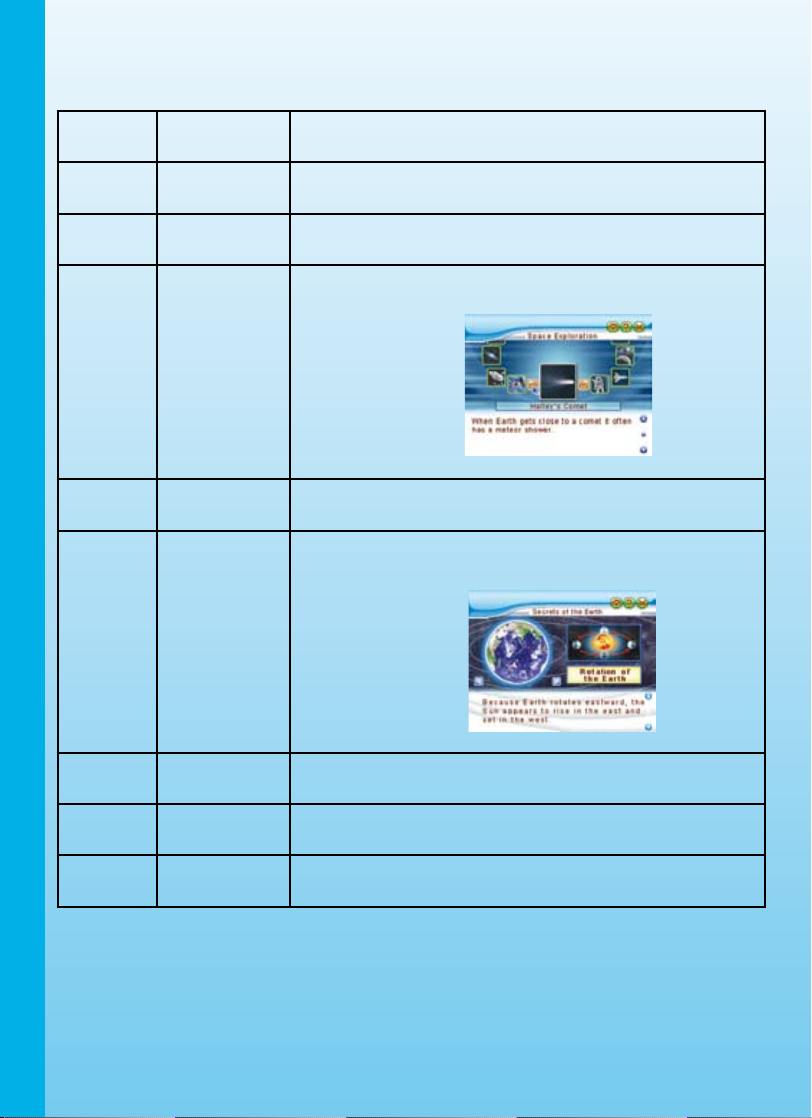
31 Secrets of the
Activity Name Activity Description
World
Wonders Quiz
Exploration
Planet Quiz
Earth
ACTIVITIES
Our world has many spectacular sights. Choose a topic and
learn about the famous wonders of our world.
Test what you know about the wonders of the world. Choose
an answer in the multiple-choice questions before time is up.
Take a trip into space by choosing a topic and learning cool
space facts.
Quiz yourself on space and planet facts. Choose an answer in
the multiple-choice questions before time is up.
Our Earth has many mysteries. Choose a topic and learn all
about our planet Earth.
32 Earth
Challenge
33 Ocean
Wonders
34 Ocean Quiz Test your ocean knowledge. Choose an answer in the
15
Test what you’ve learned about our planet Earth. Choose an
answer in the multiple-choice questions before time is up.
The ocean is a deep place full of surprises. Choose a topic
and learn more about the ocean.
multiple-choice questions before time is up.
Page 17

CARTRIDGE 4
MATH EXPLORER (CARTRIDGE COLOR: GREEN)
Activity
No.
35 Geometry Quiz yourself about geometry. Choose an answer in the
36 Number Puzzle Improve your logical thinking. Fill in numbers on the grids.
37 Shape Puzzle Play a fun logic game. Fill in shapes on the grids. There can
38 Multiplication &
39 Add It Up Put your math skills to the test. Line up numbers that add up
Activity Name Activity Description
multiple-choice questions before time is up.
There can only be one of each number in each horizontal or
vertical row.
only be one of each shape in each horizontal or vertical row.
Test your multiplication and division skills. Rearrange the
Division Drills
numbers to make equations.
to the sum shown at right. If you are correct, those numbers
will disappear.
40 Measure It Count all the cars with measurement units on them. Press the
Enter key to count them.
41 Odd & Even
Road Rally
Count all the cars with odd or even numbers on them. Press
the Enter key to count them.
CARE & MAINTENANCE
1. Keep your Nitro Vision™ clean by wiping it with a slightly damp cloth. Never use solvents
or abrasives.
2. Keep the unit out of direct sunlight and away from direct sources of heat.
3. Remove the batteries when not using the unit for an extended period of time.
4. Avoid dropping the unit. NEVER try to dismantle it.
5. Always keep the Nitro Vision™ away from water.
ACTIVITIES / CARE & MAINTENANCE
16
Page 18

WARNING
A very small percentage of the public, due to an existing condition, may experience epileptic
seizures or momentary loss of consciousness when viewing certain types of flashing colors
or patterns, especially on television.
While Nitro Vision™ does not contribute to any additional risks, we do recommend that
parents supervise their children while they play video games. If your child experiences
dizziness, altered vision, disorientation, or convulsions, discontinue use immediately and
consult your physician.
Please note that focusing on a television screen at close range and handling a keyboard for
a prolonged period of time may cause fatigue or discomfort. We recommend that children
take a 15-minute break for every hour of play.
TROUBLESHOOTING
Problem Possible Reason Solution
The
Nitro Vision™
power light does not
come on when the ON
button is pressed.
The
Nitro Vision™
power light is ON, but
there is no picture on
the screen.
WARNING / TROUBLESHOOTING
The
Nitro Vision™
power light is ON, but
there is no picture (or
incorrect picture) on
the TV, and pressing
the OFF button has
no effect.
The TV picture is
black and white.
17
1. Incorrect or
missing power
connection
2. Program needs
to be reset
1. Incorrect TV
connection
2. Incorrect TV
mode selected
1. Program needs
to be reset
1. Non-matching
color system
2. Cable connection
problem
1. Check that new batteries are correctly
installed, or an AC/DC adaptor (9V 300mA,
center-positive) is properly connected to the
main unit.
2
.1 Disconnect all power supplies
(batteries and adaptor).
2.2 Remove the cartridge.
2.3 Then reconnect power supplies.
1. Make sure that the yellow plug of the main
unit is connected to the video IN terminal
(usually yellow) on the TV.
2. Make sure that the TV is set to “video” mode.
Some TVs have several video inputs - please
make sure you have selected the video input
that matches the video port connected to the
Nitro Vision™
1.1 Disconnect all power supplies (batteries
and adaptor).
1.2 Remove the cartridge.
1.3 Then reconnect power supplies.
1. Make sure that the TV is set to the correct
TV system (e.g. NTSC or Auto).
2. Make sure that the yellow video cable is
firmly connected to the video input on the
TV.
unit.
Page 19

There is a picture on
the TV, but no sound.
The IR keyboard does
not work.
The mouse does not
work.
1. TV setting 1. Raise the volume of the TV, and make sure
it is not set to “Mute.”
2. Cable connection
problem
1. Incorrect or
missing power
connection
2. IR Keyboard
needs to be reset
Low battery
2. Make sure that the white audio cable is
firmly connected to the audio input on the
TV.
1. Check that new batteries are correctly
installed in the IR keyboard.
2. Disconnect all power supplies (batteries),
then reconnect power supplies.
Click on the mouse button to activate the
mouse. If there is no change, please replace
the batteries in the keyboard with new alkaline
batteries.
TECHNICAL SUPPORT
If you have a problem that cannot be solved by using this manual, we encourage you to
visit us online or contact our Consumer Services Department with any problems and/or
suggestions that you might have.
A support representative will be happy to assist you. Before requesting support, please be
ready to provide or include the information below:
- The name of your product or model number (the model number is typically located on
the back or bottom of your product).
- The specific problem you are experiencing.
- The actions you took right before the problem occurred.
Internet: www.vtechkids.com
Phone: 1-800-521-2010 in the U.S. or 1-877-352-8697 in Canada
OTHER INFO
DISCLAIMER AND LIMITATION OF LIABILITY
VTech® Electronics North America, L.L.C. and its suppliers assume no responsibility for any
damage or loss resulting from the use of this handbook. VTech® Electronics North America,
L.L.C. and its suppliers assume no responsibility for any loss or claims by third parties that
may arise through the use of this software. VTech® Electronics North America, L.L.C. and
its suppliers assume no responsibility for any damage or loss caused by deletion of data
as a result of malfunction, dead battery, or repairs. Company: VTech® Electronics North
America, L.L.C.
Address: 1155 West Dundee Rd., Suite 130, Arlington Heights, IL 60004 USA
Phone: 1-800-521-2010 in the U.S. or 1-877-352-8697 in Canada
TROUBLESHOOTING / TECHNICAL SUPPORT / INFO
18
Page 20

NOTICE: This equipment has been tested and found to comply with the limits for a Class B
digital device, pursuant to Part 15 of the FCC Rules. These limits are designed to provide
reasonable protection against harmful interference in a residential installation. This equipment
generates, uses and can radiate radio frequency energy and, if not installed and used in
accordance with the instructions, may cause harmful interference to radio communications.
However, there is no guarantee that interference will not occur in a particular installation. If
this equipment does cause harmful interference to radio or television reception, which can
be determined by turning the equipment off and on, the user is encouraged to try to correct
the interference by one or more of the following measures:
-- Reorient or relocate the receiving antenna.
-- Increase the separation between the equipment and receiver.
-- Connect the equipment into an outlet on a circuit different from that to which the receiver
is connected.
-- Consult the dealer or an experienced radio/TV technician for help.
COPYRIGHT NOTICES
© 2006 VTech® Electronics North America, L.L.C. All Rights Reserved. VTech and the
VTech® logo are registered trademarks of VTech®. Nitro Vision is trademark of VTech®
Electronics North America, L.L.C. All other trademarks are property of their respective
owners.
IMPORTANT NOTE
Creating and developing the Nitro Vision™ product is accompanied by a responsibility
that we at VTech® take very seriously. We make every effort to ensure the accuracy of the
information that forms the value of our products. However, errors sometimes can occur. It is
important for you to know that we stand behind our products and encourage you to call our
OTHER INFO
Consumer Services Department at 800-521-2010 in the U.S. or 1-877-352-8697 in Canada
with any problems and/or suggestions that you might have. A service representative will
be happy to help you.
Caution: Changes or modifications not expressly approved by the party responsible for
compliance could void the user’s authority to operate the equipment.
19
 Loading...