

TRENDnet TK-803R User Manual

Quick Installation Guide
TK-803R
TK-1603R

Table of Contents
Table of Contents
English .....................................................................................................
1. Before You Start
2. How to Install .....................................................................................
3. Operation ...........................................................................................
Specifications ............................................................................................
Troubleshooting .........................................................................................
................................................................................
1
1
2
4
31
32
Version 10.27.2006
1. Before You Start
System Requirements
PS/2 or USB Keyboard
PS/2 or USB Mouse
VGA Compatible Monitor
KVM cables
Windows 98SE/ME/2000/2003 Server, Linux, and Mac
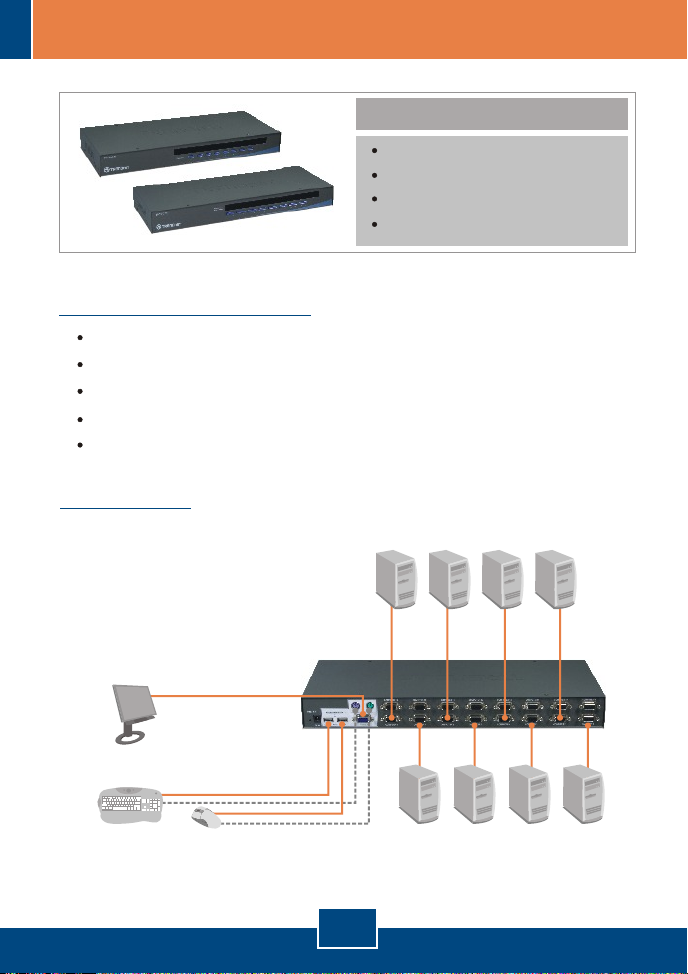
Application
8/16 Ports Rack Mount
USB KVM Switch
(TK-803R/TK-1603R)
Package Contents
TK-803R/TK-1603R
Quick Installation Guide
Rack mount kit
AC Power Adapter (9V DC, 1A)
PC 2PC 4PC 6PC 8
Monitor
USB or PS/2
Keyboard
USB or PS/2
Mouse
PC 1PC 3PC 5PC 7
1
English
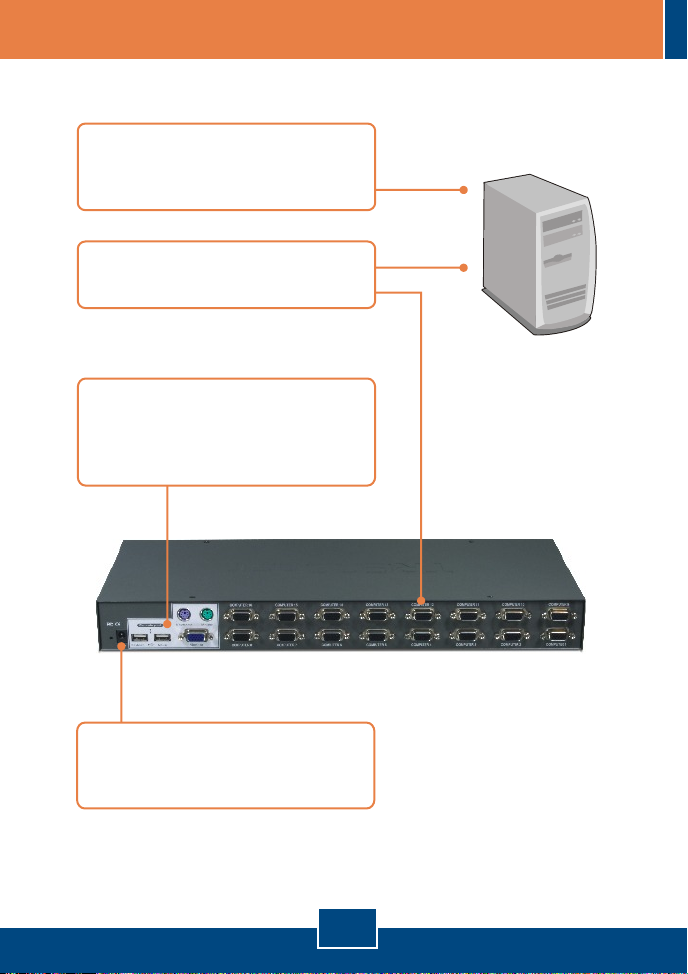
2. How to Install
1. Turn OFF all computers and their
peripherals, and then disconnect all
power cords.
2. Use the KVM cables to connect
each computer to the KVM switch.
3. Connect the shared PS/2 or USB
keyboard, monitor, and PS/2 or
USB mouse to the KVM switch's
Console Port. (TK-1603R shown)
4. Connect the included AC Power
Adapter to the KVM switch and
then to a power outlet.
English
2
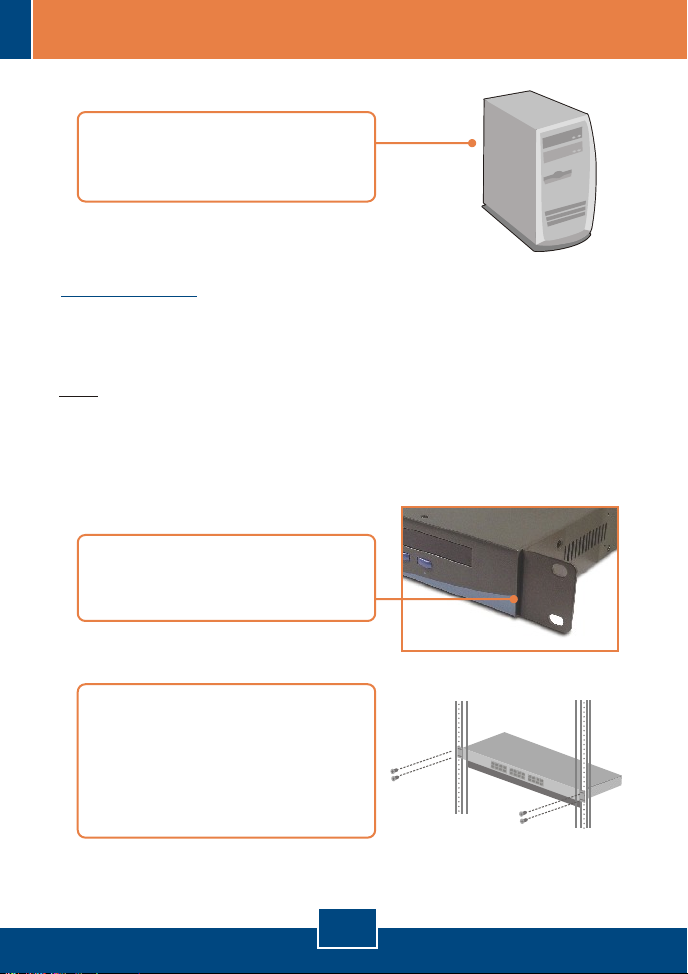
5. Turn ON the connected computers
one-by-one and wait until each
computer's desktop appears.
Rack Mount
The KVM Switch can be mounted in an EIA standard-size, 19-inch rack, which
can be placed in a wiring closet with other equipment.
Note: If you would like to mount the KVM switch to a EIA 19” equipment rack,
install the included mounting brackets to the sides of the KVM switch, secure
them with the screws provided, and then mount the KVM switch to the
equipment rack with the hardware provided by the equipment rack
manufacturer.
6. Attach the mounting brackets to
both sides of the switch and secure
them with the provided screws.
7. Carefully position the switch onto
the rack. Align the bracket to the
screw holes on the rack, then use
the screws provided with the
equipment rack to mount the
switch.
Your installation is now complete.
3
English
 Loading...