


MIDIChildRestraintSeat
Owner’smanual
Betriebsanleitung
Manueldupropriétaire
Manualedell’utente
Manualdelpropietario
Instructieboekje
CONTENTS
1.OVERVIEW OF COMPONENTS
2.SAFETY INSTRUCTIONS BEFORE USING YOUR Lexus or Toyota MIDI
3.BASIC INSTRUCTIONS
4.USE IN THE VEHICLE
5.SECURING YOUR CHILD
6.CARE AND MAINTENANCE
7.INFORMATION REGARDING DISPOSAL
Definitions
Key points in these instructions are highlighted as follows:
 WARNING!
Indicates when incorrect use may lead to a fatality or serious injuries.
 CAUTION
Please read these instructions carefully before using your Lexus or Toyota MIDI. Keep the manual in a safe place (e.g. in the special compartmentatthebackoftheToyotaISOFIX BASE), so that you always have it to hand. Also follow the instructions provided by your vehicle manufacturer, and drive carefully at all times.
 CAUTION
Indicates when incorrect use may lead to injuries.
! Note:
Highlights practical tips for using the Lexus or Toyota MIDI.
Indicates permitted usage.
Indicates non-permitted usage.
 CAUTION
Please remember that in the case of an accident, the Lexus and Toyota MIDI child car seat cannot always prevent your child from injury.
EN
DE
FR
IT
ES
NL
The product purchased may differ in part from the description given in these instructions. For the latest version of the manual, visit the web site http://www.toyota-tech.eu or http://www.lexus-tech.eu.
Lexus or Toyota MIDI 1
1.OVERVIEW OF COMPONENTS [figure MIDI_001]
A. I – Lexus or Toyota MIDI (front and rear view)
(1)Adjustable inner padding
(2)Shoulder straps with shoulder pads
(3)Seatbelt buckle with padding
(4)Lap belt with lap pads
(5)Belt loosening lever with central pull strap
(6)Cover
(7)Belt connection section
(8)Slider to adjust inner padding
B. II – Lexus or Toyota MIDI (view from below)
(9)Connection bolt in foot area
(10)Connection rod in foot area
(11)Connection bolt in seat area
(12)Connection rod in seat area
C. Toyota ISOFIX BASE (ISO view)
(13)Support leg
(14)Button to adjust support leg
(15)ISOFIX connectors
(16)Release slider for the ISOFIX connectors
(17)Button to adjust ISOFIX length
(18)Rear connection arms with connection hooks
(19)Release element for rear connection hooks
(20)Front connection hooks
BEFORE USING THE SEAT FOR THE FIRST TIME
Before you first use the Lexus or Toyota MIDI, please ensure you are in possession of each of the following items:
A.Lexus or Toyota MIDI,
B.Toyota ISOFIX BASE,
C.Instruction manuals for the Lexus or Toyota MIDI and the Toyota ISOFIX BASE,
D.Vehicle list for the Toyota ISOFIX BASE,
E.Feeder.
If any item is missing or damaged, do not use the seat. Contact your Lexus or Toyota dealer.
IN CASE OF AN EMERGENCY
[MIDI_002] In emergencies such as accidents, keep calm and try not to panic. Remove your child from the vehicle as follows:
1.Press the release button on the seatbelt buckle, and take the strap off the child.
2.Carefully remove your child from the Lexus or Toyota MIDI.
! Note: If the strap is not released when the button is pressed, cut through it, before removing your child from the Lexus or Toyota MIDI.
2.SAFETY INSTRUCTIONS BEFORE USING YOUR Lexus or Toyota MIDI
 CAUTION
1.The Lexus and Toyota MIDI, used in conjunction with the Toyota ISOFIX BASE, is an ISOFIX CHILD RESTRAINT SYSTEM. It is approved to Regulation No 44, 04 series of amendments for general use in vehicles fitted with ISOFIX anchorage systems.
2.It will fit vehicles with positions approved as ISOFIX positions (as detailed in the vehicle handbook), depending on the category of the child seat and of the fixture.
3.The mass groups and the ISOFIX size classes for which this device is intended are: A, B, B1, C, D and E.
 CAUTION
The Lexus or Toyota MIDI has only been tested and approved to the ECE R44/04 European standard for child restraint systems, when used in conjunction with the Toyota ISOFIX BASE.
! Note: Securing the Lexus or Toyota MIDI via the Toyota ISOFIX BASE and the vehicleʼs ISOFIX points, is classed as a “semi universal” installation, and is only suitable for certain seats in certain vehicles. The vehicle list supplied provides an overview of all suitable vehicles and seats at the time of going to print. For an updated list, please see the website http://www.toyota-tech.eu or http:// www.lexus-tech.eu..
2 Lexus or Toyota MIDI
 CAUTION
Please note that ECE R44/04 certification ceases to apply if any changes are made to the Lexus or Toyota MIDI or the Toyota ISOFIX BASE without approval from Toyota Motor Europe NV/SA.
The certification sticker, featuring a symbol (the letter E in a circle) and certification number, is found on the exterior of the Lexus or Toyota MIDI and on the underside of the Toyota ISOFIX BASE [ECE].
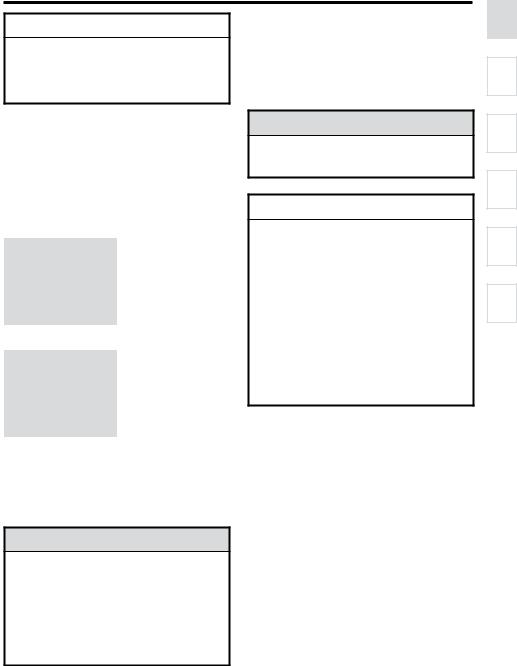
The Lexus and Toyota MIDI meets the following ISOFIX size classes:
Lexus and Toyota MIDI class 0+
WEIGHT |
2 to 13 kg |
AGE |
approx. 0 to 15 |
|
months |
DIRECTION |
Backwards-Facing |
ISOFIX size classes |
C, D, E |
Lexus and Toyota MIDI class 1 |
|
|
|
WEIGHT |
9 to 18 kg |
AGE |
approx. 9 months to |
|
3.5 years |
DIRECTION |
Forwards-Facing |
ISOFIX size classes |
A, B, B1 |
! Note: The ages stated here are intended as a guide only. Please always follow the instructions given in Section 5 – Securing your child (Step 1
– Adjusting and fastening the inner padding and strap).
 WARNING!
The Lexus or Toyota MIDI must only be secured via the Toyota ISOFIX BASE and the vehicleʼs ISOFIX points. The seat has not been designed to be used with a threepoint seatbelt and should not be secured in this way. Failure to observe this notice may seriously risk your child’s safety, and the safety of other passengers, in the event of an accident.
! Note: The ISOFIX points installed in the vehicle are metal brackets positioned between the base and back of the seat. They may be covered by the seat cover or plastic caps. Please see your vehicle‘s manual for further information on where the points are found, and how they can be uncovered.
 WARNING!
Children sitting in the Lexus or Toyota MIDI must always be secured via the integrated strap system.
 CAUTION
The Lexus or Toyota MIDI may not be used on the front passenger seat in a backwardsfacing position with the airbag activated. If the passenger airbag has been deactivated and the vehicleʼs manufacturer has approved the seat as suitable for use with Lexus or Toyota MIDI of class 0+ and 1, you may use the Lexus or Toyota MIDI in this position. When using the Lexus or Toyota MIDI in this way,alwaysfollowthevehiclemanufacturerʼs instructions regarding:
•Deactivating the passenger airbag
•The suitability of the passenger seat
•Whether the seat is fitted with ISOFIX points.
The Lexus or Toyota MIDI child seat may not be distributed or used for commercial purposes in the USA, Canada or Australia.
CHECKLIST – INSTALLATION IN THE VEHICLE [MIDI_003]
Vehicle seat
Labeled by the vehicle manufacturer as suitable for this class of Lexus or Toyota MIDI
Not labeled by the vehicle manufacturer as suitable for this class of Lexus or Toyota MIDI
Vehicle seat direction
Forwards
Backwards
Sideways
EN
DE
FR
IT
ES
NL
Lexus or Toyota MIDI 3

Vehicle safety system for securing the Toyota ISOFIX BASE
ISOFIX system
Three-point safety belt
Two-point safety belt
Child seat direction
Against the direction of travel
With the direction of travel
WARNING NOTES:
[MIDI_004] Never leave your child unattended in the vehicle.
[MIDI_005] Always seat your child in the Lexus or Toyota MIDI before the start of your journey – never during travel. Never remove your child from the seat while the vehicle is in motion.
[MIDI_006 + MIDI_007] Check that the safety straps have not become twisted, and that they lie snug to the childʼs shoulders and lap, when fastening your child into the Lexus or Toyota MIDI. Pull the lap belt down as far as possible, so that the lap area of your child is protected. If the lap belt runs across your child’s stomach, there is a risk of internal injuries in the event of an accident.
[MIDI_008] Check that the top of your child’s head is lower than the top edge of the headrest. If the headrest is too low, there is a greater risk of injury in the case of an accident. As soon as the top of your childʼs head reaches or exceeds the top edge of the seat, when the inner padding is at its highest point, you should switch to the junior Lexus or Toyota MIDI (child safety seat of class 2 and 3).
[MIDI_041] Always ensure that the AIRPADS are positioned correctly in the inner pockets of the adjustable inner padding. Failure to observe this notice may seriously risk your child’s safety in the event of an accident.
[MIDI_009] Secure your Lexus or Toyota MIDI in place whenever it is in the vehicle, regardless of whether a child is using it. This prevents the seat from flying forwards in the event of an accident or when braking sharply.
[MIDI_010] Take care not to damage the vehicleʼs seatbelts, or the straps of the Lexus or Toyota MIDI, with knives or other sharp objects. The Lexus or Toyota MIDI cannot properly protect children from injury if the straps have been cut or in some way damaged.
[MIDI_011] Using the Lexus or Toyota MIDI in any way other than described in these instructions can cause serious injury. Do not remove any components or replace them with parts that have not been approved by Toyota Motor Europe NV/ SA.
[MIDI_012] After an accident, replace the Lexus or Toyota MIDI with a new seat. Accidents can cause damage to the seat that may not be visible to the naked eye. Failure to observe this notice may seriously risk your child’s safety in the event of an accident.
[MIDI_013] The Lexus or Toyota MIDI can heat up when placed in direct sunlight. To prevent burns, ensure that an adult checks all plastic and metal parts of the seat before use.
[MIDI_014] Position the Lexus or Toyota MIDI so that static parts (plastic elements, etc.) do not get stuck in vehicle doors during normal use of the vehicle.
[MIDI_015] Do not leave any sharp, pointy or heavy objects around the vehicle. In the case of an accident, these objects may fly around the cabin, injuring children or other passengers. Luggage and other potentially dangerous items should also be secured in place.
Always secure your child with the Lexus or Toyota MIDI straps, even if you are not using the seat in the car (e.g. when carrying your child around in it, or putting the seat down somewhere).
Never leave your child in the Lexus or Toyota MIDI (whether attended or not) on a raised, slanted or uneven surface, such as a table, a baby-changing table, steps or a ramp.
[MIDI_016] Only use the Lexus or Toyota MIDI with original covers, AIRPADS and side crash pads. These are key safety components and have been developed specially for use in the seat.
! Note: Do not leave your child sitting in the Lexus or Toyota MIDI for too long. We recommend a limit of one to two hours. It is very important
for muscle development that children regularly change their position. As such, you should also remove your child from the Lexus or Toyota MIDI when taking breaks.
4 Lexus or Toyota MIDI
! Note:The Lexus or Toyota MIDI should not be used for any more than six years after
purchase. Plastics deteriorate generally over time, particularly when exposed to direct sunlight. This deterioration is not always visible to the naked eye, and can compromise the performance of the seat.
Should you have any other queries as to the use of this product, please contact your Lexus or Toyota dealer.
3. BASIC INSTRUCTIONS
 CAUTION
Always place the Lexus or Toyota MIDI child car seat and the Toyota ISOFIX BASE on a flat, stable surface.
 CAUTION
Be careful that your fingers and other body parts do not get caught in any moving sections of the seat.
Lexus or Toyota MIDI
ADJUSTING THE POSITION OF THE INNER PADDING AND SHOULDER STRAP
The inner padding and shoulder straps of the Lexus or Toyota MIDI should be adjusted to the size of your child, so as to provide maximum comfort and maximum protection in the case of an accident.
These components can be set to six different positions, via a special adjustment mechanism.
! Note: If you need to adjust the inner padding and/or shoulder straps, first ensure that the Lexus or Toyota MIDI is correctly installed in the vehicle.
 WARNING!
Always ensure that the AIRPADS are positioned correctly in the inner pockets of the adjustable inner padding. Failure to observe this notice may seriously risk your child’s safety in the event of an accident.
|
|
Step 1 |
Unlock the adjustable inner padding |
[MIDI_017] Fully depress the slider to adjust the inner padding on the back of the Lexus or Toyota MIDI.
|
|
Step 2 |
Adjust and fasten the inner padding |
Keep the slider pressed down, and at the same time, slide the inner padding up or down, to adjust this and the shoulder straps to the size of your child. Then release the slider again. The slider is locked in place when the metal arms click into the slots on each side.
 CAUTION
Whenever you adjust the seat, check that the slider is locked into position again. To do this, gently try to move the slider up or down, without pushing it in.
It may be necessary to adjust the inner padding further, according to your childʼs size. For further information on this, please see Section 5 – Securing your child (Step 1 – Adjusting and fastening the inner padding and strap).
Loosening the straps and opening the buckle
Before placing your child in the Lexus or Toyota MIDI or removing your child from it, loosen the straps and open the buckle. The Lexus or Toyota MIDI features a central lever that is used to loosen the straps.
|
|
Step 1 |
Unblock the straps |
[MIDI_018] To loosen the straps, pull the lever up and hold it in this position.
|
|
Step 2 |
Loosen straps |
At the same time, pull the shoulder straps gently forwards as far as possible.
|
|
Step 3 |
Open the buckle |
[MIDI_019] To open the buckle, press the red button on it, and remove the tongues.
The two tongues are held together magnetically, and can be easily separated by pulling them apart.
EN
DE
FR
IT
ES
NL
Lexus or Toyota MIDI 5
Toyota ISOFIX BASE
ADJUSTING THE SUPPORT LEG
|
|
Step 1 |
Fold out the support leg |
[MIDI_020] Take hold of the support leg on the bottom of the ISOFIX BASE. Pull it out of the transportation position, and swing it out as far as it will go. When it reaches full extension, the support leg is locked into place by a spring.
|
|
Step 2 |
Unlock and adjust the support leg |
[MIDI_021] Press the button on the height adjustment mechanism as far in as possible, and slide the support leg up or down. When the desired position is reached, release the button and check that the support leg is locked in place. This is indicated by a click, and a green marking on the top of the button.
 WARNING!
If the support leg is not set at the correct height, there is a risk of serious injury to the child or other passengers in the case of an accident.
|
|
Step 3 |
Fold in and lock the support leg |
[MIDI_022] To be able to fold in the support leg, you must first position it in the second height setting from the top. Pull the support leg down as far as possible, against the pull of the spring. Then swing it towards the bottom of the base. To fix it in place, you must press the support leg into the transportation position. If you hear a click, it is firmly in position.
ADJUSTING THE ISOFIX CONNECTORS
The two ISOFIX connectors on the ISOFIX BASE must be adjusted, according to the position of the ISOFIX points in the vehicle. Each of the connectors can independently be set to one of six different lengths, with the various settings indicated by figures 1 to 5 on the top of them. Setting six is obtained when the connectors are at full extension, and is indicated by the absence of any figure.
|
|
Step 1 |
Unlock the ISOFIX length adjuster |
[MIDI_023] Press the left-hand button on the ISOFIX length adjuster as far in as possible and hold it in position. The adjuster is positioned on the inner side of the ISOFIX BASE.
|
|
Step 2 |
Adjust the ISOFIX connector |
At the same time, pull the left-hand ISOFIX connector, positioned on the outside of the ISOFIX BASE, into the required position.
|
|
Step 3 |
Lock the ISOFIX length adjuster |
Release the button and connector, and check whether the latter is locked in place. This is indicated by a click, and a green marking on the button.
! Note: The two ISOFIX connectors must be adjusted independently. Repeat steps 1 to 3 for the right-hand connector.
 WARNING!
[MIDI_024] When securing the ISOFIX BASE in the vehicle, ensure that both ISOFIX connectors are set to the same position. To do this, check that the figures on the top of the connectors match up (or that both are blank). Failure to observe this notice may seriously risk your child’s safety, and the safety of other passengers, in the event of an accident.
|
|
Step 4 |
Unlock the ISOFIX connectors |
[MIDI_025] Unlock the left and right-hand ISOFIX connectors, by taking hold of the release sliders on each, and pulling them down towards the support leg. The connectors have been correctly unlocked if you can see a red marking on the top of each slider. If green markings are shown, the connectors are still locked in place.
6 Lexus or Toyota MIDI
RELEASING THE REAR CONNECTION HOOKS
[MIDI_026] The Lexus or Toyota MIDI is attached to the ISOFIX BASE via connection hooks at the front and rear. To free the Lexus or Toyota MIDI from the ISOFIX BASE, you need only to release the rear hooks. The rear hooks unlock together, so you only need to push down one of the release elements on the exterior of the connection arms. The connection hooks have been correctly unlocked if you can see a red marking on the top of each release element. If green markings are shown, the hooks are still locked in place.
4. USE IN THE VEHICLE
 WARNING!
[MIDI_009]NeverusetheToyotaISOFIXBASE on its own, or without properly securing the Lexus or Toyota MIDI. Failure to observe this notice may seriously risk your child’s safety, and the safety of other passengers.
! Note: Long-term use of the Toyota ISOFIX BASE and Lexus or Toyota MIDI may result in wear and tear of the vehicle seat.
Securing the Toyota ISOFIX BASE
|
|
Step 1 |
Fold out the support leg |
Fold out the support leg as explained in Section 3
– Basic instructions (Adjusting the support leg), and ensure that it is properly locked in place.
! Note: Check the support leg is locked in place by lightly shaking it with your hand.
|
|
Step 2 |
Place on the vehicle seat |
[MIDI_027] Place the Toyota ISOFIX BASE on the seat of the vehicle.
Ensure that:
•The ISOFIX connectors are pointing to the back of the car seat.
•The support leg is pointing to the vehicle floor.
|
|
Step 3 |
Pull out the ISOFIX connectors |
[MIDI_023] Press in the button on the inner side of each rear connection arm as far as possible, and fully extend the connectors. Follow the instruction in Section 3 – Basic instructions (Adjusting the ISOFIX connectors).
! Note: The connectors have been fully extended when no figure is displayed on the top of them.
|
|
Step 4 |
Connect the ISOFIX system |
[MIDI_028] Point the open ISOFIX connectors on the Toyota ISOFIX BASE towards the ISOFIX points of the vehicle. Slide the connectors into the vehicleʼs ISOFIX points, until each one clicks into place, and the green markings are visible on the release sliders.
! Note: [MIDI_029] If the vehicleʼs ISOFIX points are difficult to reach, use the feeder supplied to guide them out. This makes connecting the system much easier, and protects the seat cover.
 WARNING!
Ensure that both ISOFIX connectors are fully secured to the vehicleʼs ISOFIX points. Failure to observe this notice may seriously riskyourchild’ssafety,andthesafetyofother passengers. You can check the connectors are properly secured to the ISOFIX points, by lightly shaking the Toyota ISOFIX BASE.
|
|
Step 5 |
Fit the base against the back of the |
|
vehicle seat |
[MIDI_030] Press the two buttons to adjust the length of the ISOFIX connectors and adjust them as recommended in your vehicle’s owner manual. If your seat back is adjustable, adjust it as recommended in your vehicle’s owner manual. In case there is no specific installation recommendation in your vehicle’s owner manual, push the ISOFIX BASE until it sits flush against the seat back.
EN
DE
FR
IT
ES
NL
Lexus or Toyota MIDI 7
 WARNING!
[MIDI_031] When fixing the Toyota ISOFIX BASE to the vehicle seat, ensure that both ISOFIX connectors are set correctly and to the same position. Check this by lightly shaking the Toyota ISOFIX BASE, and check that the figures on the top of the connectors match up (or that both are blank). Failure to observe this notice may seriously risk your child’s safety.
|
|
Step 6 |
Adjust the support leg |
[MIDI_032] Set the height of the support leg as recommended in your vehicle’s owner manual, following the instructions in Section 3 – Basic instructions (Adjusting the support leg).
In case there is no specific installation recommendation in your vehicle’s owner manual, adjust it so that its base lies on the vehicle floor and by minimizing the clearance between the seat cushion and the ISOFIX BASE.
 WARNING!
Ensure that the support leg is locked into position, the green marking on top of the button must be visible, and that it lies flush against the floor. Failure to observe this notice may seriously risk your child’s safety, and the safety of other passengers.
! Note: Check the support leg is locked in place by gently pushing and pulling it.
! Note: If you notice that the Toyota ISOFIX BASE can still be moved around on the vehicle seat, repeat all the steps in Section 4 – Use in the vehicle (Securing the Toyota ISOFIX BASE), until the base is firmly secured to the vehicle seat.
Securing the Lexus or Toyota MIDI in a backwards-facing position [MIDI_033]
Step 1 Check the Toyota ISOFIX BASE
 WARNING!
The Lexus or Toyota MIDI must only be secured via the Toyota ISOFIX BASE. As such, ensure that the Toyota ISOFIX BASE is attached firmly and correctly to the vehicle seat. If you notice that the Toyota ISOFIX BASE can still be moved around, repeat all the steps in Section 4 – Use in the vehicle (Securing the Toyota ISOFIX BASE).
 WARNING!
[Airbag Warning] NEVER fit the Lexus or Toyota MIDI in a backwards-facing position on the front seat with the airbag activated. There is a SERIOUS RISK OF INJURY OR DEATH, and it is therefore FORBIDDEN BY LAW. Depending on the vehicle, you may be able to deactivate the airbag yourself, or may need to contact your local dealer/garage for assistance.
Step 2 Lock the seat into the Toyota ISOFIX BASE
[MIDI_034] Turn the Lexus or Toyota MIDI against the direction of travel, and place it above the middle of the Toyota ISOFIX BASE. Press the two connection bolts in the foot area of the Lexus or Toyota MIDI into the rear connection hooks of the Toyota ISOFIX BASE. For guidance, use the arrows on the outside of the seat and on the rear connection arms of the Toyota ISOFIX BASE. The bolts are properly locked into the rear connection hooks when each one clicks into place, and you can see a green marking on the top of each hookʼs release element.
[MIDI_035] To secure the connection rod in the seat area of the Lexus or Toyota MIDI with the front connection hooks of the Toyota ISOFIX BASE, press down from above on the back section of the Lexus or Toyota MIDI, until you hear a click.
! Note: [MIDI_055] In backward-facing position the shoulder pads should not be used. Open the shoulder harness cover and remove the shoulder pads.
8 Lexus or Toyota MIDI
 WARNING!
Do not use the Lexus or Toyota MIDI if it is not correctly secured to the Toyota ISOFIX BASE. It is properly locked in place when you can see a green marking on the top of each rear hookʼs release element.
! Note: [MIDI_036] Check the Lexus or Toyota MIDI is correctly secured to the Toyota ISOFIX BASE, by gently shaking the seat in each direction. If the seat is not properly secured to the base, repeat Step 2 – Lock the seat into the Toyota ISOFIX BASE until it is in the correct position.
Securing the Lexus or Toyota MIDI in a forwards-facing position [MIDI_037]
Step 1 Check the Toyota ISOFIX BASE
 WARNING!
The Lexus or Toyota MIDI must only be secured via the Toyota ISOFIX BASE. As such, ensure that the Toyota ISOFIX BASE is attached firmly and correctly to the vehicle seat. If you notice that the Toyota ISOFIX BASE can still be moved around, repeat all the steps in Section 4 – Use in the vehicle (Securing the Toyota ISOFIX BASE).
Step 2 Lock the seat into the Toyota ISOFIX BASE
[MIDI_038] Turn the Lexus or Toyota MIDI so that it faces the direction of travel, and place it above the middle of the Toyota ISOFIX BASE. Press the two connection bolts in the seat area of the Lexus or Toyota MIDI into the rear connection hooks of the Toyota ISOFIX BASE. For guidance, use the arrows on the outside of the seat and on the rear connection arms of the Toyota ISOFIX BASE. The bolts are properly locked into the rear connection hooks when each one clicks into place, and you can see a green marking on the top of each hookʼs release element.
[MIDI_039] To secure the connection rod in the foot area of the Lexus or Toyota MIDI with the front connection hooks of the Toyota ISOFIX BASE, press down from above on the seat section of the Lexus or Toyota MIDI, until you hear a click.
! Note: [MIDI_056] In forward-facing position the shoulder pads should be used. Open the shoulder harness cover and insert the shoulder pads.
 WARNING!
Do not use the Lexus or Toyota MIDI if it is not correctly secured to the ISOFIX BASE. It is properly locked in place when you can see a green marking on the top of each rear hook's release element.
! Note: [MIDI_036] Check the Lexus or Toyota MIDI is correctly secured to the ISOFIX BASE, by gently shaking the seat in each direction. If the seat is not properly secured to the base, repeat Step 2 – Lock the seat into the ISOFIX BASE until it is in the correct position.
Removing the Lexus or Toyota MIDI from the Toyota ISOFIX BASE
|
|
Step 1 |
Release the rear connection hooks |
[MIDI_040] The rear hooks unlock together, so you only need to push down one of the release elements on the Toyota ISOFIX BASE rear connection arms. At the same time, tilt the Lexus or Toyota MIDI forwards (in the direction of travel), so that the connection bolts of the seat come out of the rear connection hooks of the base.
|
|
Step 2 |
Free the seat from the front |
|
connection hooks and remove |
Free the connection rod of the Lexus or Toyota MIDI from the front hooks of the base by sliding the Lexus or Toyota MIDI backwards, against the direction of travel. You should now be able to lift the seat from the base, and remove it from your vehicle.
Removing the Toyota ISOFIX BASE
|
|
Step 1 |
Unlock the ISOFIX connectors |
[MIDI_025] Separate the connectors on the ISOFIX BASE from the ISOFIX points in the vehicle, by moving the release slider on each connector forwards (in the direction of travel). The components have been separated if a red marking can be seen on the top of each connector.
EN
DE
FR
IT
ES
NL
Lexus or Toyota MIDI 9
|
|
Step 2 |
Retract the ISOFIX connectors |
Press the left-hand button on the ISOFIX length adjuster as far in as possible. The button is positioned on the inner side of the base. At the same time, push the left-hand connector back into the Toyota ISOFIX BASE.
The two ISOFIX connectors must be adjusted independently. Repeat step two for the right-hand connector.
! Note: The connectors have been fully retracted when all numbers figure is displayed on the top of them.
|
|
Step 3 |
Fold in the support leg and remove it |
Fold the support leg in, as described in Section 3
– Basic instructions (Adjusting the support leg). You should now be able to remove the base from your vehicle.
5. SECURING YOUR CHILD
! Note: For safety reasons, children should always get in and out from the passenger side of the vehicle, or directly onto a sidewalk.
|
|
Step 1 |
Adjust and fasten the inner padding |
|
and straps |
[MIDI_018 + MIDI_019] Before sitting your child in the Lexus or Toyota MIDI, loosen and open the straps, as described in Section 3 – Basic instructions (Loosening the straps and opening the buckle), and move them out of the way.
[MIDI_006 + MIDI_007] Once your child is sat in the seat, place the shoulder straps over the shoulders and the lap belt over your childʼs lap, taking care not to twist or tangle the straps.
 CAUTION
[MIDI_041] Check that the inner padding and shoulder strap connection are correctly positioned. The wings of the inner padding with the AIRPADS protect the head, and should therefore be positioned behind your childʼs head, and above the shoulders.
! Note: The shoulder strap connections are correctly positioned for the Lexus or Toyota MIDI in a:
[MIDI_042] Backwards-facing position if they are a little below your childʼs shoulders. If this is not the case, move the adjustable inner padding up or down accordingly.
[MIDI_055] Open the shoulder harness cover and remove the shoulder pads.
[MIDI_043] Forwards-facing position if they are a little above your childʼs shoulders.
If this is not the case, move the adjustable inner padding up or down accordingly.
[MIDI_056] Open the shoulder harness cover and insert the shoulder pads.
|
|
Step 2 |
Close the belt buckle |
[MIDI_044 a + b] To secure the straps on the Lexus or Toyota MIDI, bring the two magnetic belt tongues together again.
Push the tongues firmly into the buckle, until you hear them click into place.
 WARNING!
Before every journey, always ensure that the tongues and buckle are locked together. You can check this by pulling the tongues up, without pressing the red button on the buckle.
|
|
Step 3 |
Adjust the lap belt |
 WARNING!
Pull the lap belt down as far as possible, so that the lap area of your child is protected. If the lap belt runs across your child’s stomach, there is a risk of internal injuries in the event of an accident.
Ensure that the cushion behind the buckle has not slipped out of place, so that it no longer protects your child against the buckleʼs plastic components.
10 Lexus or Toyota MIDI
|
|
Step 4 |
Tighten the straps |
[MIDI_045 a + b] To tighten the straps, pull the end of central pull strap forwards (not up or down).
 CAUTION
Ensure that the belt tension is correct by placing your fingers beneath the shoulder straps and lap belt of the Lexus or Toyota MIDI after tightening them.
|
|
Step 5 |
Check the side crash pads |
 WARNING!
[MIDI_041] Always ensure that the AIRPADS are positioned correctly in the inner pockets of the adjustable inner padding. Failure to observe this notice may seriously risk your child’s safety in the event of an accident.
|
|
Step 6 |
Check the size of the seat |
 WARNING!
[MIDI_008] Before every use, check that your childʼs head is fully covered by the side bolsters of the Lexus or Toyota MIDI, all the way to the top. If the head is not fully protected, your child is at greater risk in an accident. Once your child becomes too tall for the Lexus or Toyota MIDI, we recommend switching to the next seat up.
Checklist – securing your child:
Please ensure that:
•the height of the inner padding and shoulder straps are adjusted to your child (as described in these instructions).
•the lap belt does not run over your childʼs stomach.
•the buckle and tongues are correctly secured.
•the straps fit snugly around your child and are not twisted.
•your childʼs head is fully covered by the side bolsters of the Lexus or Toyota MIDI, all the way to the top.
•the AIRPADS are always positioned correctly in the inner pockets of the adjustable inner padding.
Removing your child
[MIDI_046 a - d] Before you can lift your child out of the Lexus or Toyota MIDI, you must loosen the straps and open the buckle. To do this, follow the instructions in Section 3 – Basic instructions (Loosening the straps and opening the buckle). You can then lift your child from the Lexus or Toyota MIDI.
6. CARE AND MAINTENANCE
Removing the covers
|
|
Step 1 |
Remove the shoulder straps |
[MIDI_047] To remove the covers, you must first unhook the shoulder straps from the belt connection section of the pull strap, on the bottom of the Lexus or Toyota MIDI.
[MIDI_048] Then pull the shoulder straps entirely out of the inner padding and shoulder pads.
! Note:You cannot pull the shoulder straps out of the inner padding by only pulling at the shoulder pads.
|
|
Step 2 |
Open the belt buckle |
[MIDI_049] Open the buckle, pull the tongues out, and lay the shoulder straps out of the way.
|
|
Step 3 |
Remove the inner padding |
[MIDI_050] Remove the inner padding from the back plate, by first placing it in the highest position. Then pull the lower pouch on the rear of the padding down and away from the back plate. Following this, pull the inner padding up and away from the back plate.
|
|
Step 4 |
Remove the side crash pads |
|
(AIRPADS) |
 WARNING!
The AIRPADS in the adjustable inner padding are not washable and must be removed from the adjustable inner padding before washing.
EN
DE
FR
IT
ES
NL
Lexus or Toyota MIDI 11

[MIDI_051] To do this, lie the inner padding down, with its front side on an even surface. You can then reach into the back through the opening of the cover. Remove theAIRPADS in the side wings of the padding, as shown in the illustration.
|
|
Step 5 |
Remove the cover |
After removing the inner padding, return the back plate to its lowest position. Fold out the plastic compo-nents around the edge of the cover. Now thread the straps and buckle out of the cover, and pull the whole cover away from the seat.
Reattaching the covers
To fully reattach all Lexus or Toyota MIDI covers, please follow the instructions for “Removing the covers” in reverse.
 WARNING!
[MIDI_052] After threading the shoulder straps back into the back plate, ensure they run over the two metal bolts.
[MIDI_053] Similarly, check that the straps are not twisted or tangled in the belt connection section of the central pull strap on the bottom of the Lexus or Toyota MIDI.
 WARNING!
[MIDI_054] Always ensure that the AIRPADS are positioned correctly in the inner pockets of the adjustable inner and that the strap system is fully functional and properly setup. Check that the Lexus or Toyota MIDI has not been damaged. Should you have any queries on this matter, please contact Lexus or Toyota dealer. Failure to observe this notice may seriously risk your child’s safety in the event of an accident.
Cleaning and care
The covers of your Lexus or Toyota MIDI (the adjustable inner padding and seat cover) are removable and washable.
[MIDI_055] The shoulder harnesses of your child car seat are removable and washable by hand. The shoulder pads can be cleaned with clear water.
! Note: Always check the care instructions on the cover labels, to see whether or not they are machine washable. These instructions should take precedence over any others.
 WARNING!
The AIRPADS in the adjustable inner padding are not washable and must be removed from the padding before washing.
 WARNING!
After every wash, always ensure that the AIRPADS are positioned correctly in the inner pockets of the adjustable inner padding. Failure to observe this notice may seriously risk your child’s safety in the event of an accident.
Plastic components can be cleaned with water or a mild soapy solution. To avoid the build-up of mold, store the Lexus or Toyota MIDI in a well-ventilated, dry place.
7.INFORMATION REGARDING DISPOSAL
Please follow local regulations when disposing of Lexus or Toyota MIDI packaging and the seat itself, observing any information stated on the packaging and seat components regarding the materials.
12 Lexus or Toyota MIDI
INHALT
1. GESAMTANSICHT DER EINZEL-KOMPONENTEN
2.SICHERHEITSHINWEISE VOR BENUTZUNG DES Lexus oder Toyota MIDI
3.GRUNDLEGENDE HANDHABUNG
4.BENUTZUNG IM FAHRZEUG
5.SICHERN IHRES KINDES
6.PFLEGE UND AUFBEWAHRUNG
7.HINWEISE ZUR ENTSORGUNG
Begriffsklärung
In diesem Bedienungshandbuch sind wichtige Themen mit den folgenden Zeichen gekennzeichnet:
 WARNUNG!
Eine fehlerhafte Handhabung kann tödlich sein oder zu ernsthaften Verletzungen führen.
 ACHTUNG!
Eine fehlerhafte Handhabung kann zu Verletzungen führen.
! Hinweis:
Praktische Tipps zur Benutzung des Lexus oder Toyota MIDI.
erlaubte Anwendung
Verbot
 ACHTUNG!
BittelesenSiediesesBedienungshandbuchvor Benutzung des Lexus oder Toyota sorgfältig durch und folgen Sie den Anweisungen. Bewahren Sie das Bedienungshandbuch sorgfältig auf (z.B. im Fach für das Bedienungshandbuch im hinteren Bereich der Toyota ISOFIX BASE), damit Sie es immer benutzen können, wenn Sie es benötigen. Folgen Sie zusätzlich den Anweisungen des Fahrzeug-herstellers in dessen Fahrzeug der Lexus oder Toyota MIDI eingebaut wird und fahren Sie stets umsichtig.
 ACHTUNG!
Wir weisen Sie darauf hin, dass der Lexus oder Toyota MIDI Kindersitz im Falle eines Unfalles Ihr Kind nicht immer vor Verletzungen schützen kann.
EN
DE
FR
IT
ES
NL
Das gekaufte Produkt kann u.U. von der Beschreibung in diesem Bedienungshandbuch abweichen. Besuchen Sie die Website unter http://www.toyota-tech.eu oder http://www.lexus-tech.eu für das aktuellste Bedienungshandbuch.
Lexus oder Toyota MIDI 13
1.GESAMTANSICHT DER EINZELKOMPONENTEN [Abbildung MIDI_001]
A. I – Lexus oder Toyota MIDI (Frontund Rückansicht)
(1)verstellbares Innenkissen
(2)Schultergurte mit Schulterpolstern
(3)Gurtschloss mit Stoffpolster
(4)Beckengurte mit Beckenpolstern
(5)Gurtlösehebel mit zentralem Zuggurt
(6)Bezug
(7)Gurtverbindungsteil
(8)Verstellschieber für das Innenkissen
B. II – Lexus oder Toyota MIDI (Ansicht von unten)
(9)Rastbolzen im Fußbereich
(10)Raststange im Fußbereich
(11)Rastbolzen im Gesäßbereich
(12)Raststange im Gesäßbereich
C. Toyota ISOFIX BASE (ISO-Ansicht)
(13)Stützfuß
(14)Druckknopf zur Stützfußhöhenverriegelung
(15)ISOFIX-Konnektoren
(16)Entriegelungsschieber des ISOFIX-Konnektors
(17)Druckknopf zur ISOFIX-Längsverstellung
(18)hintere Rastarme mit Rasthaken
(19)Entriegelungselement der hinteren Rasthaken
(20)vordere Rasthaken
Vor dem ersten Gebrauch
Bitte versichern Sie sich vor dem ersten Gebrauch des Lexus oder Toyota, dass die folgenden Artikel vorhanden sind.
A.Lexus oder Toyota MIDI,
B.Toyota ISOFIX BASE,
C.Bedienungshandbücher für den Lexus oder Toyota MIDI und die Toyota ISOFIX BASE,
D.Fahrzeugliste für die Toyota ISOFIX BASE,
E.Einführtrichter.
SolltenArtikel fehlen oder beschädigt sein, benutzen Sie bitte den Kindersitz nicht und wenden Sie sich an Ihren Lexus oder Toyota Händler.
Im Notfall
[MIDI_002] In Notfällen wie Unfällen etc. sollten Sie Ruhe bewahren und eine Panik vermeiden. Retten Sie Ihr Kind wie folgt:
1.GurtdurchDrückenderVerschlusstastedesGurt-
schlossesöffnenunddenGurtvomKindentfernen.
2.NehmenSieIhrKindvorsichtigausdemLexusoder ToyotaMIDI.
! Hinweis: Wenn der Gurt nicht durch Drücken der Verschluss-taste geöffnet werden kann, schneiden Sie die Gurtbänder durch und nehmen Sie Ihr Kind aus dem Lexus oder Toyota MIDI.
2.SICHERHEITSHINWEISE VOR BENUTZUNG DES Lexus oder Toyota MIDI
 ACHTUNG!
1.Der Lexus oder Toyota MIDI mit der Toyota ISOFIX BASE ist ein ISOFIX-Kinderrückhalte- system. Es ist nach ECE-Regelung 44, Änderungsserie 04, genehmigt für die allgemeine Verwendung in Fahrzeugen mit ISOFIX-Verankerungssystemen.
2.EspasstfürFahrzeugemitalsISOFIX-Positionen genehmigten Einbaupositionen (nach Angabe in der Fahrzeugbetriebsanleitung), in Abhängigkeit von der Kategorie des Kindersitzes und der Prüfvorrichtung.
3.Die Gewichtsklasse und die ISOFIXGrößenklasse, für die diese Einrichtung bestimmt ist, ist:A, B, B1, C, D und E.
 ACHTUNG!
Der Lexus oder Toyota MIDI ist nur im Zusammenhang mit der Toyota ISOFIX BASE geprüft und offiziell zugelassen gemäß dem Euro-päischen Standard für Kinderrückhaltesysteme ECE-R44/04.
! Hinweis: Die Befestigung des Lexus oder Toyota MIDI im Fahrzeug mit der Toyota ISOFIX BASE zur Verbindung mit den fahrzeugseitigen ISOFIX-Verankerungen entspricht den Bedingungen der „Semi-Universal“-Zulassung. Eine derartige Befestigung ist nur auf bestimmten Sitzen einzelner Fahrzeuge geeignet. Sie finden in der beiliegenden Fahrzeugliste eine Über-sicht der Fahrzeuge und Fahrzeugsitze, die zum Zeit-punkt der Produktion für diese Befestigung geeignet sind. Zusätzlich können Sie auf der Website http:// www.toyota-tech.eu oder http://www.lexus-tech.eu die aktuellste Fahrzeugliste ab-rufen.
14 Lexus oder Toyota MIDI
 ACHTUNG!
Bitte beachten Sie, dass die Zulassung nach ECE-R44/04 erlischt, wenn Sie nicht von der Toyota Motor Europe NV/SA genehmigte Änderungen am Lexus oder Toyota MIDI oder der Toyota ISOFIX BASE vornehmen.
Der Zulassungs-Aufkleber mit dem Konformitätszeichen (Buchstabe E in einem Kreis) und der Zulas-sungsnummer befindet sich auf der Außenseite des Lexus oder Toyota MIDI und auf der Unterseite der Toyota ISOFIX BASE [ECE].
Der Lexus oder Toyota MIDI erfüllt die folgenden ISOFIX-Größenklassen:
Lexus und Toyota MIDI klasse 0+
GEWICHT |
2 bis 13 kg |
ALTER |
ca. 0 bis 15 Monate |
Ausrichtung |
rückwärts gerichtet |
ISOFIX- |
C, D, E |
Größenklassen |
|
Lexus und Toyota MIDI klasse 1 |
|
|
|
GEWICHT |
9 bis 18 kg |
ALTER |
ca. 9 Monate bis 3,5 |
|
Jahre |
Ausrichtung |
vorwärts gerichtet |
ISOFIX- |
A, B, B1 |
Größenklassen |
|
! Hinweis: DieAltersangabe ist nur ein unverbindlicher Richtwert. Bitte richten Sie sich immer nach den Vorgaben in Kapitel 5 – Sichern Ihres Kindes (Schritt 1 – Innenkissen und Gurte einstellen und anlegen).
 WARNUNG!
Die Befestigung des Lexus oder Toyota MIDI im Fahrzeug muss ausschließlich mit der Toyota ISOFIX BASE und der Verbindung mit den fahrzeugseitigen ISOFIX-Verankerungen erfolgen. Eine Befestigung des Lexus oder Toyota MIDI im Fahrzeug über den 3-Punkt- Sicherheitsgurtisttechnischnichtvorgesehen und daher unzulässig. Bei Missachtung dieses Warnhinweises gefährden Sie die Sicherheit Ihres Kindes oder anderer Fahrzeuginsassen bei einem Unfall.
! Hinweis: Die fahrzeugseitigen ISOFIXVerankerungen sind Metallbügel, die sich zwischen der Fahrzeugsitzfläche und der Fahrzeugsitzlehne befinden und können durch den Sitzbezug oder Kunststoffkappen abgedeckt sein. Bitte lesen Sie im Bedienungshandbuch Ihres Fahrzeuges nach, wo und wie Sie die ISOFIXVerankerungen finden und freilegen können.
 WARNUNG!
Kinder müssen im Lexus oder Toyota MIDI mithilfe des integrierten Gurtsystems gesichert werden.
 ACHTUNG!
Der Lexus oder Toyota MIDI darf rückwärts gerichtet nicht auf einem Beifahrersitz mit aktiviertem Beifahrer-Airbag verwendet werden. Wenn der Beifahrer-Airbag deaktiviert ist und der Fahrzeughersteller den Beifahrer-sitz als geeignet für die Autokindersitzklasse 0+ und 1 kenn-zeichnet, dann können Sie den Lexus oder Toyota MIDI auf dem Beifahrersitz verwenden. Beachten Sie bei der Verwendung des Lexus oder Toyota MIDI auf dem Beifahrer-sitz immer die Hinweise des Fahrzeugherstellers
•zur Deaktivierung des Beifahrer-Airbags,
•ob der Beifahrersitz als geeignet gekennzeichnet ist
•und ob dieser mit ISOFIX-Verankerungen aus-gestattet ist.
Der Kindersitz Lexus oder Toyota MIDI darf in den USA, in Kanada oder Australien weder gewerbsmäßig vertrieben, noch verkauft oder benutzt werden.
Checkliste – Installation im Fahrzeug [MIDI_003]
Fahrzeugsitze
vom Fahrzeughersteller als geeignet für die
entsprechenden Autokindersitzklassen des Lexus oder Toyota MIDI gekenn-zeichnet
nicht vom Fahrzeughersteller als geeignet für die entsprechenden Autokindersitzklassen des Lexus oder Toyota MIDI gekenn-zeichnet
Fahrzeugsitzrichtung
Vorwärts
Rückwärts
Seitlich
EN
DE
FR
IT
ES
NL
Lexus oder Toyota MIDI 15

Sicherheitssysteme des Fahrzeugsitzes zur Befestigung mit der Toyota ISOFIX BASE
ISOFIX-System
3-Punkt-Sicherheitsgurt
2-Punkt-Sicherheitsgurt
Kindersitzausrichtung
gegen die Fahrtrichtung
in Fahrtrichtung
WARNHINWEISE:
[MIDI_004]LassenSieIhrKindniemalsunbeaufsichtigtim Fahrzeug.
[MIDI_005]SetzenSieihrKindimmervorBeginnund niemalswährendderFahrtindenLexusoderToyotaMIDI. NehmenSieesnichtwährendderFahrtheraus.
[MIDI_006+MIDI_007]AchtenSiedarauf,dasskeine GurtbänderverdrehtsindunddiesefestumdieSchultern sowieimBeckenbereichanliegen,wennSieIhrKindim LexusoderToyotaMIDIanschnallen.
BringenSiedieBeckengurtetiefan,damitderBeckenbereichIhresKindesgeschütztist.SolltendieBeckengurteüberdenBauchIhresKindeslaufen,gefährdenSie beieinemUnfalldieSicherheitIhresKindes.
[MIDI_008]AchtenSiedarauf,dassderScheitelIhres KindesunterhalbderSchalenoberkantedesKindersitzes liegt.ÜbersteigtderScheitelIhresKindesdie Schalenoberkante,gefährdenSiedieSicherheitIhres KindesbeieinemUnfall.SobaldinderoberstenPosition desInnenkissensderScheitelIhresKindesdie Schalenoberkanteerreichtoderübersteigt,istes notwendigaufdenJuniorLexusoderToyotaMIDI (KindersitzderKlasse2und3)zuwechseln.
[MIDI_041]AchtenSiebeijedemGebrauchdarauf,dass dieAIRPADSkorrektindiedafürvorgesehenen InnentaschendesverstellbarenInnenkissenseingelegt sind.BeiMissachtungdiesesWarnhinweisesgefähr-den SiedieSicherheitIhresKindesbeieinemUnfall.
[MIDI_009]SichernSiedenLexusoderToyotaMIDIbei jedemGebrauchimFahrzeuggegendasnachvorn SchleudernbeieinerplötzlichenBremsung,auchwennIhr KindnichtimLexusoderToyotaMIDIsitzt.Sovermeiden Sie,dassderLexusoderToyotaMIDIbeieinemUnfall odereinerplötzlichenBremsungnachvornegeschleudert wird.
[MIDI_010]BeschädigenSiedieGurtenichtmitMessern oderanderenscharfenGegenständen(wederdie Fahrzeug-SicherheitsgurtenochdieGurtedesLexusoder ToyotaMIDI).DerAutokindersitzLexusoderToyotaMIDI kannseineFunktion(z.B.Verringerungdes Verletzungsrisikos)nichtvollständigerfüllen,wenndie GurtebeschädigtsindoderSchnitteaufweisen.
[MIDI_011]UmdieRückhaltewirkungnichtnegativzu beeinflussen,nehmenSiedenLexusoderToyotaMIDI nichtandersauseinanderalsindiesem Bedienungshandbuchbeschrieben.Entfernenoder ersetzenSiebittekeineTeiledurchMaterialien,dienicht vonderToyotaMotorEuropeNV/SAfreigegebensind.
[MIDI_012]ErsetzenSienacheinemUnfalldenLexus oderToyotaMIDIdurcheinenneuenLexusoderToyota MIDI,denndurcheinenUnfallkönnenamLexusoder ToyotaMIDIu.U.Schädenentstehen,dienichtvonaußen erkennbarsind.BeiMissachtungdiesesWarnhinweises gefährdenSiedieSicherheitIhresKindesbeieinemUnfall.
[MIDI_013]DerLexusoderToyotaMIDIerhitztsichunter starkerSonneneinwirkung.Umzuvermeiden,dasssich einKindanaufgeheiztenTeilenverbrennenkann,sollte einErwachsenerdieKunststoff-undMetallteiledesLexus oderToyotaMIDIvordemGebrauchaufHitzeüberprüfen.
[MIDI_014]InstallierenSiedenAutokindersitzLexusoder ToyotaMIDIso,dassdiestabilenTeile(Kunststoff-teile usw.)nichtindenFahrzeugtüreneingeklemmtwerden können.
[MIDI_015]LassenSiekeinescharfen,spitzenoder schwerenGegenständeimFahrzeugliegen.Beieinem UnfallkönntendieseGegenständeherumgeschleudert werdenundgefährlicheVerletzungenbeiKindernoder anderenFahrzeuginsassenverursachen.Auch Gepäck-stückeoderandereloseGegenstände,dieimFall einerKollisionherumgeschleudertwerden,können Ver-letzungenbeiKindernoderanderen Fahrzeuginsassenverursachenundmüssendemzufolge gutgesichertsein.
SichernSieIhrKindimmermitdenGurtendesLexusoder ToyotaMIDI,auchwennSiedenLexusoderToyotaMIDI nichtimAutoverwenden,zumBeispielwäh-rendSieden LexusoderToyotaMIDImitIhremKindherum-tragenoder abstellen.
StellenSiedenLexusoderToyotaMIDImitIhremKindauf keinenFall(be-oderunbeaufsichtigt)auferhöhte,schräge oderunebeneFlächen(z.B.aufeinenTisch,eine Wickelkommode,eineTreppe,eineRampeusw.).
[MIDI_016]BenutzenSiedenLexusoderToyotaMIDImit denOriginalbezügenunddenoriginalenAIRPADSund seitlichenCrash-Polstern.DieseStrukturensowiedie BezügesindwesentlicherBestandteilderschützen-den AusstattungundspeziellfürdieAnwendungimLexusoder ToyotaMIDIentwickelt.
! Hinweis: Lassen Sie Ihr Kind nicht zu lange im Lexus oder Toyota MIDI sitzen. Wir empfehlen einen Zeitraum von jeweils maximal 1 bis 2 Stunden. Es ist für die Muskelentwicklung Ihres Kindes sehr wichtig, seine Position regelmäßig zu verändern und es z.B. bei Pausen aus dem Lexus oder Toyota MIDI zu nehmen.
16 Lexus oder Toyota MIDI
! Hinweis:Der Lexus oder Toyota MIDI ist für eine maximale Nutzungsdauer von ca. 6 Jahren nach dem Kauf ausgelegt. Kunststoffe unterliegen einem generellenAlterungsprozess (besonders unter direkter Sonneneinstrahlung). Durch diesenAlterungsprozess können negative Eigenschaftsänderungen am Lexus oder Toyota MIDI ent-stehen, die nicht mit denAugen wahrnehmbar sind.
Bei weiteren Fragen zu diesen Anleitungen wenden Sie sich bitte an Ihren Lexus oder Toyota Händler.
3.GRUNDLEGENDE HANDHABUNG
 ACHTUNG!
Achten Sie immer auf eine stabile Unterlage bei der Benutzung des Autokindersitzes Lexus oder Toyota MIDI und der Toyota ISOFIX BASE.
ACHTUNG!
Klemmen Sie Ihre Finger oder andere KörperteilenichtimDreh-undAusziehbereich beweglicher Teile des Kindersitzes ein.
Lexus or Toyota MIDI
Innenkissenund Schultergurtpositionen verstellen
Je nach Größe Ihres Kindes muss das Innenkissen und die Schultergurtposition des Autokindersitzes Lexus oder Toyota MIDI angepasst werden, um Ihrem Kind optimalen Komfort im Gebrauch und maximalen Schutz bei einem Unfall zu gewährleisten.
Das Innenkissen und die Schultergurte des Lexus oder Toyota MIDI lassen sich über einen Verstellmechanismus in 6 Positionen verrasten.
! Hinweis: Wenn Sie die Innenkissenbzw. Schultergurtposition verstellen müssen, dann achten Sie darauf, dass die Position des Lexus oder Toyota MIDI der Einbaulage im Fahrzeug entspricht.
 WARNUNG!
Achten Sie bei jedem Gebrauch darauf, dass dieAIRPADSkorrektindiedafürvorgesehenen Innen-taschen des verstellbaren Innenkissens eingelegt sind. Bei Missachtung dieses Warnhinweises gefährden Sie die Sicherheit Ihres Kindes bei einem Unfall.
Schritt 1 Entriegeln des verstellbaren Innenkissens
[MIDI_017] Drücken Sie den Verstellschieber für das Innenkissen auf der Rückseite desAutokindersitzes Lexus oder Toyota MIDI bis zumAnschlag zusammen.
Schritt 2 Verstellen und Verriegeln des Innenkissens
Halten Sie den Verstellschieber gedrückt und schieben Sie gleichzeitig das Innenkissen nach oben oder unten, um die Position des Innenkissens und der Schultergurte auf die Größe Ihres Kindes anzupassen. Lassen sie den Verstellschieber für das Innenkissen wieder los. Der Verstellschieber ist in seiner Position verriegelt, wenn die Metallstange auf beiden Seiten in die Rastleisten einrastet.
 ACHTUNG!
Bitte kontrollieren und vergewissern Sie sich bei jedem Verstellvorgang, ob der Verstellschieber verrastet ist. Dazu können Sie den Verstellschieber leicht (mit geringer Handkraft) nach oben und unten bewegen ohne diesen zusammenzudrücken.
Möglicherweise muss das Innenkissen noch weiter an die Größe Ihres Kindes angepasst werden. Hinweise zum Einstellen der richtigen Position entnehmen Sie bitte dem Kapitel 5 – Sichern Ihres Kindes (Schritt 1
– Innenkissen und Gurte einstellen und anlegen).
Gurte lösen und Gurtschloss öffnen
Bevor Sie Ihr Kind in denAutokindersitz Lexus oder Toyota MIDI legen oder herausnehmen, müssen die Gurte gelockert und das Gurtschloss geöffnet werden. Der Lexus oder Toyota MIDI ist mit einem zentralen Gurtlöse-hebel ausgestattet, der zum Lösen der Gurte verwendet wird.
Schritt 1 Klemmung der Gurte lösen
[MIDI_018] Um die Gurte zu lösen, ziehen Sie den Gurtlösehebel nach oben und halten Sie diesen in Position.
Schritt 2 Gurte lockern
Ziehen Sie gleichzeitig die Schultergurte bis zum Anschlag sanft nach vorne.
Schritt 3 Gurtschloss öffnen
[MIDI_019] Zum Öffnen des Gurtschlosses die rote Verschlusstaste am Gurtschloss drücken und die Gurtschlosslaschen herausziehen.
Die beiden Gurtschlosslaschen werden magnetisch zusammen gehalten und können einfach auseinander gezogen und seitlich abgelegt werden.
EN
DE
FR
IT
ES
NL
Lexus oder Toyota MIDI 17
Toyota ISOFIX BASE
Einstellen des StützfuSSes
Schritt 1 Ausklappen des Stützfußes
[MIDI_020] Greifen Sie den Stützfuß auf der Unter-seite der Toyota ISOFIX BASE, ziehen Sie den Stützfuß aus der Transportposition und schwenken Sie den Stützfuß bis zumAnschlag auf. Sobald Sie den Anschlag erreicht haben, wird der Stützfuß am Ende des Schwenkbereiches durch eine Federkraft verrastet.
Schritt 2 Entriegeln und Verstellen des Stützfußes
[MIDI_021] Halten Sie den Druckknopf der Stützfußhöhenverriegelung bis zumAnschlag gedrückt und schieben Sie den Stützfuß nach oben oder unten.
Sobald Sie die gewünschte Stützfußposition erreicht haben, lassen Sie den Druckknopf los und vergewissern Sie sich, dass der Stützfuß korrekt in der Höhe verrastet ist. Dies ist der Fall, wenn Sie ein Klick-Geräusch hören und auf der Oberseite des Druckknopfes eine grüne Markierung sehen.
 WARNUNG!
Wenn der Stützfuß nicht korrekt in der Höhe verrastet ist, dann kann es im Falle eines Unfalles zu schweren Verletzung des Kindes oder anderer Fahrzeuginsassen kommen.
Schritt 3 Stützfuß einklappen und fixieren
[MIDI_022] Um den Stützfuß einklappen zu können, müssen Sie den Stützfuß in die 2. Höhenposition (von oben) bringen.Anschließend ziehen Sie den Stützfuß gegen die Federkraft bis zumAnschlag nach unten und schwenken gleichzeitig den Stützfuß in Richtung der Basis-Unterseite. Zur Fixierung müssen Sie den Stützfuß in die Transportposition drücken. Die Transportposition ist erreicht, wenn Sie ein Klick-Geräusch hören.
Einstellen der ISOFIX-Konnektoren
Entsprechend der Lage der ISOFIX-Verankerungen im Fahrzeugsitz müssen die beiden ISOFIX-Konnektoren der Toyota ISOFIX BASE eingestellt werden. Um dies zu gewährleisten, können die beiden ISOFIXKonnektoren unabhängig voneinander in 6 Positionen verrastet werden. Die Rastpositionen sind durch die Ziffern 1 bis 5 auf den beiden Oberseiten der beiden ISOFIX-Konnektoren gekennzeichnet. Position 6 ent-spricht dem vollenAuszug der ISOFIXKonnektoren. Sie erkennen den vollenAuszug eines ISOFIX-Konnektors, wenn auf der Oberseite des ISOFIX-Konnektors keine Ziffer zu sehen ist.
Schritt 1 Entriegeln der ISOFIX-Längsverstellung
[MIDI_023] Drücken Sie den linken Druckknopf zur ISOFIX-Längsverstellung auf der Innenseite der Toyota ISOFIX BASE bis zum Anschlag und halten Sie diesen in Position.
Schritt 2 Verstellen der ISOFIX-Konnektoren
Ziehen Sie gleichzeitig den linken ISOFIXKonnektor auf der linkenAußenseite der Toyota ISOFIX BASE in die gewünschte Position.
Schritt 3 Verriegeln der ISOFIX-Längsverstellung
Anschließend lassen Sie den Druckknopf und den ISOFIX-Konnektor los und überprüfen Sie, ob der ISOFIX-Konnektor in seiner Position verrastet ist.
Dies ist der Fall, wenn Sie am Druckknopf eine grüne Markierung sehen und ein Klick-Geräusch hören.
! Hinweis: Die beiden ISOFIX-Konnektoren müssen getrennt voneinander eingestellt werden. Wiederholen Sie daher die Schritte 1 bis 3 für den rechten ISOFIX-Konnektor.
 WARNUNG!
[MIDI_024] Vergewissern Sie sich, dass beim Befesti-gen der Toyota ISOFIX BASE im Fahrzeug beide ISOFIX-Konnektoren in der gleichen Rastposition stehen. Kontrollieren Sie dies über die Ziffern 1 bis 5 auf den beiden Oberseiten der ISOFIX-Konnektoren bzw. den vollen Auszug der ISOFIX-Konnektoren. Bei Missachtung dieses Warnhinweises gefährdenSiedieSicherheitIhresKindesoder anderer Fahrzeuginsassen bei einem Unfall.
Schritt 4 Entriegeln der ISOFIX-Konnektoren
[MIDI_025] Entriegeln Sie den linken und rechten ISOFIX-Konnektor, indem Sie von oben in die jeweiligen Entriegelungsschieber der ISOFIXKonnektoren eingreifen und die Schieber in Richtung des Stützfußes ziehen. Sie erkennen die entriegelten Zustände der ISOFIX-Konnektoren, wenn Sie auf den Oberseiten der Entriegelungsschieber 2 rote Markierungen (1 rote Markierung pro Seite) sehen. Sollten grüne Markierungen zu sehen sein, sind die ISOFIXKonnektoren verriegelt.
18 Lexus oder Toyota MIDI
Entriegeln der hinteren Rasthaken
[MIDI_026] Der Lexus oder Toyota MIDI wird auf der Toyota ISOFIX BASE in die vorderen und die hinteren Rasthaken eingeklinkt. Um den Lexus oder Toyota MIDI von der Toyota ISOFIX BASE zu lösen, müssen nur die hinteren Rasthaken entriegelt werden. Die Entriegelung der beiden hinteren Rasthaken ist synchronisiert. Deshalb müssen Sie nur eines der beiden Entriegelungselemente an den Außenseiten der hinteren Rastarme nach unten drücken. Sie erkennen die entriegelten Zustände der beiden hinteren Rast-haken, wenn Sie oberhalb der Entriegelungselemente 2 rote Markierungen (1 rote Markierung pro Seite) sehen. Sollten auf den Außenflächen der Entriegelungs-elemente grüne Markierungen zu sehen sein, sind die hinteren Rasthaken verriegelt.
4. BENUTZUNG IM FAHRZEUG
 WARNUNG!
[MIDI_009] Achten Sie darauf, dass Sie die Toyota ISOFIX BASE nicht unbefestigt oder ohne Lexus oder Toyota MIDI verwenden. Bei Missachtung dieses Warnhinweises gefährden Sie die Sicherheit Ihres Kindes oder anderer Fahrzeuginsassen.
! Hinweis: Durch die dauerhafte Verwendung der Toyota ISOFIX BASE und des Lexus oder Toyota MIDI können Abnutzungsspuren auf dem Fahrzeugsitz nicht aus-geschlossen werden.
Befestigen der Toyota ISOFIX BASE
Schritt 1 Ausklappen des Stützfußes
Klappen Sie den Stützfuß wie in Kapitel 3 – Grundlegende Handhabung (Einstellen des Stützfußes) beschrieben aus und vergewissern Sie sich, dass der Schwenkbereich des Stützfußes fest verrastet ist.
! Hinweis: Kontrollieren Sie die feste Verrastung des Stützfußschwenkbereichs, indem Sie mit geringer Handkraft am Stützfuß rütteln.
Schritt 2 Aufsetzen auf den Fahrzeugsitz
[MIDI_027] Setzen Sie anschließend die Toyota ISOFIX BASE auf den Fahrzeugsitz. Achten Sie dabei darauf, dass:
•die ISOFIX-Konnektoren zur Fahrzeuglehne ausgerichtet sind
•und der ausgeklappte Stützfuß zum Fahrzeugboden zeigt.
Schritt 3 Ausziehen der ISOFIX-Konnektoren
[MIDI_023] Drücken Sie die Druckknöpfe zur ISOFIX-Längsverstellung auf der Innenseite der hinteren Rastarme bis zum Anschlag und ziehen Sie gleichzeitig die ISOFIX-Konnektoren maximal aus. Gehen Sie dabei wie in Kapitel 3 – Grundlegende Handhabung (Einstellen der ISOFIX-Konnektoren) beschrieben vor.
! Hinweis: Sie erkennen den maximalen Auszug der ISOFIX-Konnektoren, wenn keine Ziffern auf den Oberseiten der ISOFIXKonnektoren sichtbar sind.
Schritt 4 Verbinden des ISOFIX-Systems
[MIDI_028] Richten Sie die geöffneten ISOFIXKonnektoren des Toyota ISOFIX BASE vor den beiden fahrzeugseitigen ISOFIX-Verankerungen aus. Schieben Sie die ISOFIX-Konnektoren auf die fahrzeug-seitigen ISOFIX-Verankerungen bis Sie 2 Klick-Geräusche (1 Klick-Geräusch pro ISOFIXKonnektor) hören und an beiden Entriegelungsschiebern die grünen Markierungen zu sehen sind.
! Hinweis: [MIDI_029] Wenn die beiden fahrzeugseitigen ISOFIX-Verankerungen schwer zu erreichen sind, dann schieben Sie bitte die beiliegenden Einführtrichter über die beiden fahrzeugseitigen ISOFIX-Verankerungen. Dadurch wird das Verbinden des ISOFIX-Systems erleichtert und der Fahrzeugsitzbezug geschont.
 WARNUNG!
Kontrollieren Sie, dass beide ISOFIXKonnektoren mit den fahrzeugseitigen ISOFIX-Verankerungen fest verbunden sind. Bei Missachtung dieses Warnhinweises gefährdenSiedieSicherheitIhresKindesoder anderer Fahrzeuginsassen. Kontrollieren Sie den festen Verbund der ISOFIX-Konnektoren und fahrzeugseitigen ISOFIX-Verankerungen, indem Sie mit geringer Handkraft an der Toyota ISOFIX BASE rütteln.
Schritt 5 Anpassen an die Fahrzeuglehne
[MIDI_030] Drücken Sie die beiden Druckknöpfe zur Längsverstellung der ISOFIX-Konnektoren und stellen Sie diese gemäß der Empfehlung der Betriebsanleitung Ihres Fahrzeugs ein.
Wenn Ihre Rückenlehne einstellbar ist, stellen Sie diese gemäß der Empfehlung der Betriebsanleitung Ihres Fahrzeugs ein.
Sollte die Betriebsanleitung Ihres Fahrzeugs keine spezifische Einbauempfehlung enthalten, schieben Sie die Toyota ISOFIX BASE bis zurAnlage an die Rückenlehne.
EN
DE
FR
IT
ES
NL
Lexus oder Toyota MIDI 19
 WARNUNG!
[MIDI_031] Kontrollieren Sie, dass nach dem Ver-spannen der Toyota ISOFIX BASE mit dem Fahrzeugsitz beide ISOFIX-Konnektoren korrekt und in den gleichen Rastposition verrastet sind. Rütteln Sie dazu mit geringer Handkraft an der Toyota ISOFIX BASE und kontrollieren Sie, ob Sie auf der Oberseite der beiden ISOFIX-Konnektoren die gleichen Zahlenvon1bis5oderkeineZahlenerkennen. Bei Missachtung dieses Warnhinweises gefährden Sie die Sicherheit Ihres Kindes.
Schritt 6 Anpassen des Stützfußes
[MIDI_032] Stellen Sie die Stützfußhöhe gemäß der Empfehlung der Betriebsanleitung Ihres Fahrzeugs, wie in Kapitel 3 – Grundlegende Handhabung (Einstellen des Stützfußes) beschrieben. Sollte die Betriebsanleitung Ihres Fahrzeugs keine spezifische Einbauempfehlung enthalten, stellen Sie ihn so ein, dass die Unterseite des Stützfußes auf dem Fahrzeugboden fest aufliegt und das Spiel zwischen dem Sitzpolster und der Toyota ISOFIX BASE minimiert wird.
 WARNUNG!
Achten Sie darauf, dass die Stützfußhöhe korrekt verrastet ist, die grüne Markierung oben am Druckknopf sichtbar ist und der Stützfuß fest auf dem Fahrzeugboden steht. Bei Missachtung dieses Warnhinweises gefährden Sie die Sicherheit Ihres Kindes oder anderer Fahrzeuginsassen.
! Hinweis: Kontrollieren Sie die korrekte Höhenverrastung des Stützfußes, indem Sie mit geringer Handkraft am Stützfuß drücken und ziehen.
! Hinweis: Wenn Sie feststellen, dass sich die Toyota ISOFIX BASE auf dem Fahrzeugsitz verschieben lässt, dann wiederholen Sie alle Schritte in diesem Kapitel 4 – Benutzung im Fahrzeug (Befestigen der Toyota ISOFIX BASE) bis die Toyota ISOFIX BASE fest mit dem Fahrzeugsitz verbunden ist.
Befestigen des rückwärts gerichteten Lexus oder Toyota MIDI [MIDI_033]
Schritt 1 Kontrolle der Toyota ISOFIX BASE
 WARNUNG!
Die Befestigung des Lexus oder Toyota MIDI im Fahrzeug muss ausschließlich auf der Toyota ISOFIX BASE erfolgen. Vergewissern Sie sich daher, dass die Toyota ISOFIX BASE sicher auf dem Fahrzeugsitz steht und korrekt befestigt ist. Wenn Sie feststellen, dass sich die Toyota ISOFIX BASE auf dem Fahrzeugsitz verschieben lässt, dann wiederholen Sie alle Schritte des Kapitels 4 – Benutzung im Fahrzeug(BefestigenderToyotaISOFIXBASE).
|
WARNUNG! |
|
||
[Airbag |
Warning] |
AUF |
KEINEN |
FALL |
einen rückwärts gerichteten Lexus oder |
||||
Toyota MIDI auf den Frontsitz mit aktivem |
||||
Airbag |
anbringen. |
Es |
besteht |
HOHE |
VERLETZUNGSbzw. TÖDLICHE GEFAHR |
||||
und ist GESETZLICH VERBOTEN! Der Airbag |
||||
kann ab-hängig vom Fahrzeug von Ihnen |
||||
selbst oder mit Hilfe Ihres Autohändlers bzw. |
||||
Ihrer Autowerkstatt deaktiviert werden. |
|
|||
|
|
|||
Schritt 2 |
Verrasten mit der Toyota ISOFIX |
|||
|
BASE |
|
|
|
[MIDI_034] Richten Sie den Lexus oder Toyota MIDI entgegen der Fahrtrichtung aus und positionieren Sie den Lexus oder Toyota MIDI mittig über der Toyota ISOFIX BASE.Anschließend drücken Sie die beiden Rastbolzen im Fußbereich des Lexus oder Toyota MIDI in die beiden hinteren Rasthaken der Toyota ISOFIX BASE. Orientieren Sie sich dabei an den Pfeilen auf denAußenseiten des Lexus oder Toyota MIDI und den hinteren Rastarmen der Toyota ISOFIX BASE. Die Verbindung zwischen Rastbolzen und den hinteren Rasthaken ist korrekt verrastet, wenn Sie an den beiden hinteren Rasthaken der Toyota ISOFIX BASE 2 KlickGeräusche (1 Klick-Geräusch pro Seite) hören und an beiden Entriegelungselementen der hinteren Rasthaken grüne Markierungen erkennbar sind.
[MIDI_035] Um die Raststange im Gesäßbereich des Lexus oder Toyota MIDI mit den vorderen Rasthaken der Toyota ISOFIX BASE zu verbinden, müssen Sie den Rückenlehnenbereich des Lexus oder Toyota MIDI von oben auf die Toyota ISOFIX BASE drücken, bis Sie ein Klick-Geräusch hören.
! Hinweis: [MIDI_055] Die Schulterpolster sind bei einer rückwärts gerichteten Ausrichtung nicht zu verwenden. Öffnen Sie die Abdeckung der Schultergurte und entfernen Sie die Schulterpolster.
20 Lexus oder Toyota MIDI
 WARNUNG!
Verwenden Sie den Lexus oder Toyota MIDI auf keinen Fall, wenn der Lexus oder Toyota MIDI nicht korrekt mit der Toyota ISOFIX BASE verbunden ist. Sie erkennen die korrekte Verrastung,wenn2grüneMarkierungenanden beiden Entriegelungselementen der hinteren Rasthaken sichtbar sind.
! Hinweis: [MIDI_036] Kontrollieren Sie die korrekte Verrastung des Lexus oder Toyota MIDI mit der Toyota ISOFIX BASE, indem Sie mit geringer Handkraft den Lexus oder Toyota MIDI in alle Richtungen rütteln. Sollte der Lexus oder Toyota MIDI nicht korrekt mit der Toyota ISOFIX BASE verbunden sein, dann
wiederholen Sie den Schritt 2 – Verrasten mit der Toyota ISOFIX BASE bis zur korrekten Verrastung.
Befestigen des vorwärts gerichteten Lexus oder Toyota MIDI [MIDI_037]
Schritt 1 Kontrolle der Toyota ISOFIX BASE
 WARNUNG!
Die Befestigung des Lexus oder Toyota MIDI im Fahrzeug muss ausschließlich auf der Toyota ISOFIX BASE erfolgen. Vergewissern Sie sich daher, dass die Toyota ISOFIX BASE sicher auf dem Fahrzeugsitz steht und korrekt befestigt ist. Wenn Sie fest-stellen, dass sich die Toyota ISOFIX BASE auf dem Fahrzeugsitz verschieben lässt, dann wiederholen Sie alle Schritte des Kapitels 4 – Benutzung im Fahrzeug (Befestigen der Toyota ISOFIX BASE).
Schritt 2 Verrastenmit der ToyotaISOFIX BASE
[MIDI_038] Richten Sie den Lexus oder Toyota MIDI in Fahrtrichtung aus und positionieren Sie den Lexus oder Toyota MIDI mittig über der Toyota ISOFIX BASE.
Anschließend drücken Sie die beiden Rastbolzen im Gesäßbereich des Lexus oder Toyota MIDI in die beiden hinteren Rasthaken der Toyota ISOFIX BASE. Orientieren Sie sich dabei an den Pfeilen auf den Außenseiten des Lexus oder Toyota MIDI und den hinteren Rastarmen der Toyota ISOFIX BASE. Die Verbindung zwischen Rastbolzen und den hinteren Rasthaken ist korrekt verrastet, wenn Sie an den beiden hinteren Rasthaken der Toyota ISOFIX BASE 2 Klick-Geräusche (1 Klick-Geräusch pro Seite) hören und an beiden Entriegelungselementen der hinteren Rasthaken grüne Markierungen erkennbar sind.
[MIDI_039] Um die Raststange im Fußbereich des Lexus oder Toyota MIDI mit den vorderen Rasthaken der Toyota ISOFIX BASE zu verbinden, müssen Sie die Sitzfläche des Lexus oder Toyota MIDI von oben auf die Toyota ISOFIX BASE drücken, bis Sie ein KlickGeräusch hören.
! Hinweis: [MIDI_056] Die Schulterpolster müssen bei einer vorwärts gerichteten Ausrichtung verwendet werden. Öffnen Sie die Abdeckung der Schultergurte und legen Sie die Schulterpolster ein.
 WARNUNG!
Verwenden Sie den Lexus oder Toyota MIDI auf keinen Fall, wenn der Lexus oder Toyota MIDInichtkorrektmitderToyotaISOFIXBASE verbunden ist. Sie erken-nen die korrekte Verrastung, wenn 2 grüne Markie-rungen an den beiden Entriegelungselementen der hinteren Rasthaken sichtbar sind.
! Hinweis: [MIDI_036] Kontrollieren Sie die korrekte Ver-rastung des Lexus oder Toyota MIDI mit der Toyota ISOFIX BASE, indem Sie mit geringer Handkraft den Kindersitz in alle Richtungen rütteln. Sollte der Lexus oder Toyota MIDI nicht korrekt mit der Toyota ISOFIX BASE verbunden sein, dann wiederholen Sie den Schritt 2 – Verrasten mit der Toyota ISOFIX BASE bis zur korrekten Verrastung.
Demontage des Lexus oder Toyota MIDI von der Toyota ISOFIX BASE
Schritt 1 Entriegeln der hinteren Rasthaken
[MIDI_040] Die Entriegelung der beiden hinteren Rasthaken ist synchronisiert. Deshalb müssen Sie nur eines der beiden Entriegelungselemente an den hinteren Rastarmen der Toyota ISOFIX BASE bis zumAnschlag drücken. Kippen Sie gleichzeitig den Lexus oder Toyota MIDI nach vorne (in Fahrtrichtung), so dass die Rastbolzen des Lexus oder Toyota MIDI aus den hinteren Rasthaken der Toyota ISOFIX BASE geschwenkt werden.
Schritt 2 Aushaken aus den vorderen Rasthaken und Herausnehmen
Haken Sie die Raststange des Lexus oder Toyota MIDI aus den vorderen Rasthaken der Toyota ISOFIX BASE indem Sie den Lexus oder Toyota MIDI nach hinten schieben (entgegen der Fahrtrichtung).Anschließend können Sie den Kindersitz von der Toyota ISOFIX BASE heben und aus Ihrem Fahrzeug nehmen.
Demontage der Toyota ISOFIX BASE
Schritt 1 Entriegeln der ISOFIX-Konnektoren
[MIDI_025] Trennen Sie die Verbindungen zwischen den beiden ISOFIX-Konnektoren der Toyota ISOFIX BASE und den fahrzeugseitigen ISOFIXVerankerungen, indem Sie die Entriegelungsschieber an den beiden ISOFIX-Konnektoren nach vorne ziehen (in Fahrtrichtung). Die Verbindungen sind getrennt, wenn Sie auf beiden Oberseiten der ISOFIX-Konnektoren 2 rote Markierungen (1 rote Markierung pro ISOFIX-Konnektor) sehen.
EN
DE
FR
IT
ES
NL
Lexus oder Toyota MIDI 21
Schritt 2 Einfahren der ISOFIX-Konnektoren
Drücken Sie den linken Druckknopf zur ISOFIXLängsverstellung auf der Innenseite der Toyota ISOFIX BASE bis zumAnschlag und schieben Sie gleichzeitig den linken ISOFIX-Konnektor vollständig in die Toyota ISOFIX BASE.
Die beiden ISOFIX-Konnektoren müssen getrennt voneinander eingestellt werden. Wiederholen Sie daher Schritt 2 für den rechten ISOFIX-Konnektor.
! Hinweis: Sie erkennen den minimalen Auszug der ISOFIX-Konnektoren, wenn alle Ziffern von 1 bis 5 auf beiden Oberseiten der ISOFIXKonnektoren zu sehen sind.
Schritt 3 Einklappen der Fußstütze und Heraus-nehmen
Klappen Sie den Stützfuß wie im Kapitel 3 – Grundlegende Handhabung (Einstellen des Stützfußes) beschrieben ein.Anschließend können Sie die Toyota ISOFIX BASE aus Ihrem Fahrzeug nehmen.
5. SICHERN IHRES KINDES
! Hinweis: Zur Sicherheit Ihres Kindes lassen Sie Ihr Kind möglichst auf der Gehwegseite beziehungsweise am Fahrbahnrand einund aussteigen.
Schritt 1 Innenkissen und Gurte einstellen und anlegen
[MIDI_018 + MIDI_019] Bevor Sie Ihr Kind in den Autokindersitz Lexus oder Toyota MIDI setzen, lösen und öffnen Sie bitte die Gurte wie in Kapitel 3 – Grundlegende Handhabung (Gurte lösen und Gurtschloss öffnen) beschrieben und legen Sie die Gurtbänder seitlich ab.
[MIDI_006 + MIDI_007] Wenn Sie Ihr Kind in den Lexus oder Toyota MIDI gesetzt haben, führen Sie die Schultergurte über die Schultern und die Beckengurte über das Becken Ihres Kindes, ohne die Gurte zu verdrehen oder zu vertauschen.
 ACHTUNG!
[MIDI_041] Überprüfen Sie, ob das Innenkissen und die Schultergurtanbindung korrekt positioniert sind. Die Flügel des Innenkissens mitdenAIRPADS,diedenKopfschützen,sollen sich bei richtiger Einstellung neben dem Kopf und über den Schultern Ihres Kindes befinden. Die Schultergurtanbindungen sind richtig positioniert, wenn sich im:
! Hinweis: The shoulder strap connections are correctly positioned for the Lexus or Toyota MIDI in a:
[MIDI_042] rückwärts gerichteten Lexus oder Toyota MIDI
die Schultergurtanbindungen etwas unterhalb der Schultern Ihres Kindes befinden. Wenn dies nicht der Fall ist, ändern Sie das verstellbare Innenkissen entsprechend nach oben oder nach unten.
[MIDI_055] Öffnen Sie dieAbdeckung der Schultergurte und entfernen Sie die Schulterpolster.
[MIDI_043] vorwärts gerichteten Lexus oder Toyota MIDI die Schultergurtanbindungen etwas oberhalb der Schultern Ihres Kindes befinden. Wenn dies nicht der Fall ist, ändern Sie das verstellbare Innenkissen entsprechend nach oben oder nach unten.
[MIDI_056] Öffnen Sie dieAbdeckung der Schultergurte und legen Sie die Schulterpolster ein.
Schritt 2 Schließen des Gurtschlosses
[MIDI_044 a + b] Zum Schließen der Gurte am Lexus oder Toyota MIDI müssen Sie die beiden magnetischen Gurtschlosslaschen wieder zusammenfügen.
Drücken Sie die beiden Gurtschlosslaschen fest in das Gurtschloss, bis Sie ein Klick-Geräusch hören.
 WARNUNG!
Bitte überprüfen Sie vor jedem Gebrauch, ob die Gurtlaschen und das Gurtschloss korrekt verschlossen sind. Kontrollieren Sie dies, indem Sie die Gurtlaschen nach oben ziehen, ohne die roteVerschlusstasteamGurtschlosszudrücken.
Schritt 3 Einstellen des Beckengurtes
 WARNUNG!
Bringen Sie die Beckengurte tief an, damit der Beckenbereich Ihres Kindes geschützt ist. Sollten die Beckengurte über den Bauch Ihres Kindes laufen, gefährden Sie bei einem Unfall die Sicherheit Ihres Kindes.
Achten Sie bitte auch darauf, dass sich das Stoffpolster hinter dem Gurtschloss nicht verschoben hat und Ihr Kind vor den Kunststoffteilen des Gurtschlosses geschützt ist.
22 Lexus oder Toyota MIDI
 Loading...