

Page 1

Quick Start Guide – Topcon NW400
1. Power on Computer and Camera.
To avoid communication issues, verify that
the computer is on before powering on the
camera.
2. Ensure RetinaVue Software is Running.
When the computer starts up, it should
automatically launch the application. If the
RetinaVue Network Client application is not
already open, double-click the desktop
icon.
RetinaVue TM Network Client
(f) Select the Refresh button.
3. Begin a New Exam & Acquire Images.
(a) First, turn off the lights in the room so
that the patient’s pupils can begin to
dilate.
(b) Click the New Exam button in the
RetinaVue Network Client software.
(c) Complete all required fields. Required
fields are outlined in red.
(d) Click the NEXT button to save the
patient information. A message should
be displayed indicating the patient has
been added to the camera. Press OK.
(g) Select the patient from the result list and
then select the button in the bottom left
corner to return to the exam window.
(h) Use the chinrest up / down buttons on
the right of the camera screen to align
the patient’s eye within the blue lines.
The blue square on the left can be used
for minor adjustments.
(e) On the Topcon camera screen, select
the Patient field in the top left corner.
IMPORTANT: The patients eye should line up
with the line on the outside of the head rest
support (patient left side). The bridge of the
Technical Support available 8:00 AM – 8:00 PM EST Monday – Friday
technicalsupport@welchallyn.com I +1 (800) 535-6663, Option 2
Revision date: 2016-03; 723672 DIR 80020430 Ver. C
Page 2
patient’s nose should be in the center of the
forehead rest.
(i) Press the Capture START button in the
bottom right corner.
(j) The camera will automatically align with
the patient’s pupil. If the patient’s pupil is
smaller than the two outside semi
circles, the camera will switch to small
pupil mode.
RetinaVue TM Network Client
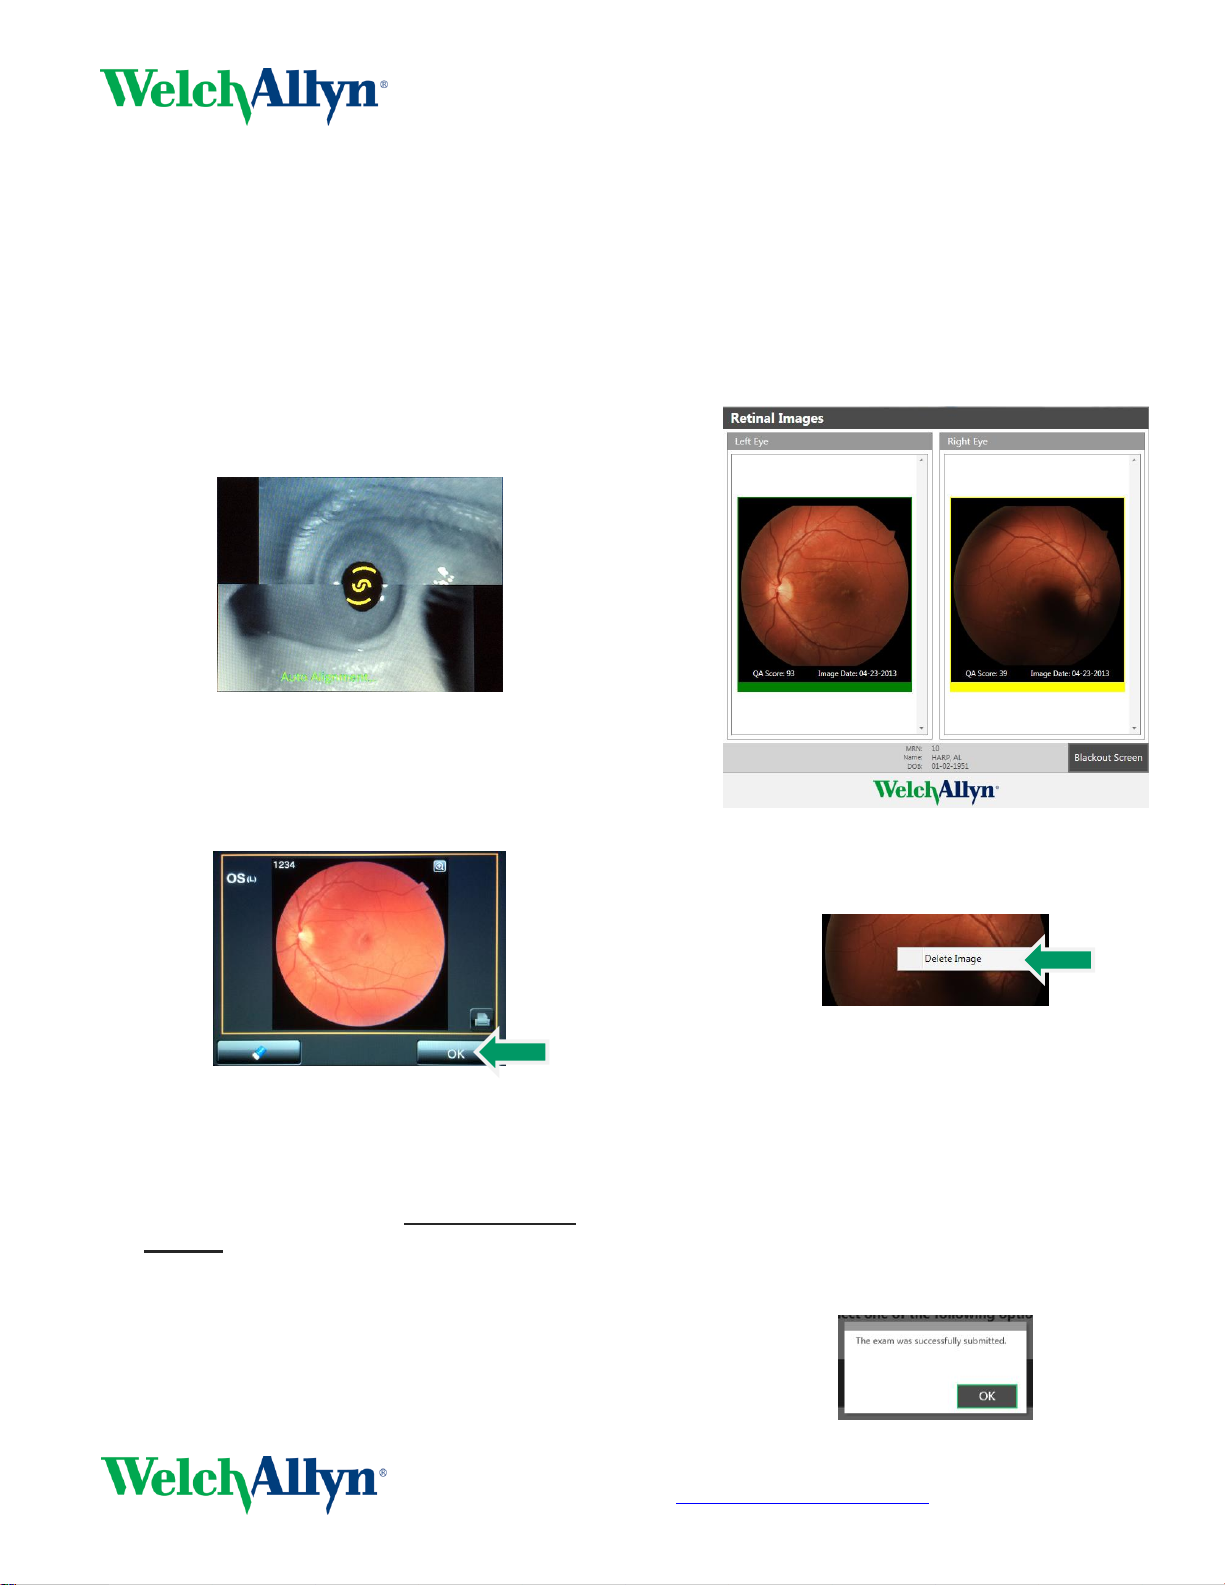
Quick Start Guide – Topcon NW400
images will appear in the patient’s exam
with a color coded quality indicator.
(b) Below each image, you will see a bar
that is green, yellow or red.
Green = Good quality
Yellow = OK quality
Red = Poor – Acquire New Image
(k) Once an image has been acquired, the
image will be displayed on the screen. If
the image appears normal, press OK. If
the image is too dark or the patient
blinked, repeat steps h through j.
(l) After selecting OK, the image will be
transferred to the RetinaVue Network
application.
(m)The camera will automatically move to
the patients other eye. Wait at least 1
minute and then repeat steps h through
j to acquire an image of the other eye.
4. Check Image Quality and Submit.
(c) If an image needs to be removed from
the exam, right click on the image and
click Delete Image.
(d) After acquiring at least one green or
yellow quality image for each eye being
imaged, press the NEXT button.
(e) If all required fields have been
populated and an internet connection is
available, press the Submit Exam
button. Once the exam has been
submitted, a message will be displayed
indicating the exam was successfully
submitted. Press OK.
(a) Once the images have been captured,
the camera will automatically export
them to the RetinaVue software. The
Technical Support available 8:00 AM – 8:00 PM EST Monday – Friday
technicalsupport@welchallyn.com I +1 (800) 535-6663, Option 2
Revision date: 2016-03; 723672 DIR 80020430 Ver. C
 Loading...