

Teka DW6, DW6 58 FI Use And Maintenance Manual
Use and Maintenance Manual
DW6 58 FI
Code: 0120505878

Index
Safety i n fo r ma ti o n
Installation
Getting to know your dishwasher
How to fill the salt
How to fill rinse aid
How to fill the detergent
Not suitable for the dishwasher
Arranging crockery, glasses, etc. in the dishwasher
Programme overview
Washing dishes
How to keep your dishwasher in shape
Care and maintenance
Fault finding
Technical data
Important information
2
4
6
7
9
9
10
11
13
14
19
20
21
25
25
1
Safety information
At time of delivery
Check packaging and dishwasher immediately for signs of transport damage. If the appliance is
damaged, do not p ut it into us e but c ontact y our supp lier o r c ustom er serv ice without del ay.
Please dispose of packaging materials properly.
Durin g in s t a lla tio n
Site the dishwasher and connect it up in accordanc e with t he installation ins t ructions .
The dishwasher must not be connected to the electricity supply while installation is being carried out .
Ensure that the domestic wiring is proper ly ear thed.
The mains electricity supply must conform t o the det ails shown on the dis hwasher nam eplate.
Do not connect the dishwasher to the elec t ricit y supply via an extens ion cabl e.
After the appliance has been installed,the mains plug should still be easily accessible.
During installation, the powe r su pply cord m ust not be excessively or dangerously ben t or flatt ened.
During normal use
The dishwasher must only b e used by adults for the washing of househo ld dishes a nd cooking utensils.
This appliance cannot be installed outdoor, not even if the area in which it is installed is covered by a
roof; it is also ver y da ngero us to le ave i t exposed to t he r ain a nd elements.
Do not place any heavy objects or stand on the door when it is open. The appliance could tip forward.
The water inside the dishwasher is not suit able for drinki ng.
Do not use solvents of any kind inside your dishwasher . T hey could cause an explosion da nger.
Open the door very carefully if the dis hwash er is oper ating. There is a r isk of water s quirting out.
Do not touch the heat ing eleme nt durin g or a ft er a wash cy cle .
Fundamental rules to follow when using the appliance:
- Never touch t he dish washer whe n bar ef oot or wit h wet hands or feet;
- We discourage t he use of extens ion c ords and m ultiple sockets;
- If the applianc e is not oper at ing p roper ly or maint enan ce m ust b e per f ormed, disconnec t the
appliance from the power sup ply.
If your f am ily inclu d es chil d ren
Keep detergents out of the reach of children, who must also be kept away from the dishwasher when
it is open.
Attention
The appliance is not for use by young children of infirm persons without supervision. Young
children should be supervised to ensu re that they do not play wit h the appliance.
2
If a fault o ccu rs
If the applia nce malf unc tions , turn off wa t er supply t o the appliance and disconn ect t he plug f r om
the wall socket. Then, consult the section entitled, "Finding fault" .If you cannot solve the problem,
contact a s erv ic e c enter.
To maintain the EFFICIENCY and SAFETY of this appliance,we recommend:
- call only the Serv ice Centers author ized by t he man ufacture r.
- always use original Spare Parts.
Warning
If the supply cord is damaged, it must be replaced by the manufacturer or its service agent
or a similarly qualified person in order to avoid a haz ard.
When disposing of old appliances
Appliances which are no longer being used must be made inoperable by cutting the power supply
cord and removing the door lock .
Take the appliance to a designated wast e disposal center.
Dangerous voltage
Warning
Children could get locked in the appliance (risk of suffocation) or
get stuck in other positions. Therefore: Remove the mains plug,
cut the mains wire and set aside. Damage the door lock so that
the door can no longer be closed.
3

Installation
Positioning the appliance
Change the ap plianc e in t he de sir ed lo cation . The bac k sho uld r est against the wa ll be hind it, and the
sides , along the adja cent ca binet s or wall. The d ish wash er is equ ipp ed wi th w ater supp ly an d dr ain
hoses that can be positioned to the right or the left to facilitate proper installation.
Levelling the appliance
Once the appliance is pos it ioned , adjust the feet (screwing them
in or out) to adjust the dishwasher, making it level. In any case,
o
the appliance s hould not be inclined more than 2
ance is levelled, it will help ensure proper perf ormance.
Cold w at er c on n ectio n
Connect the water supp ly ho se to a t hrea d ed 3/4 ( gas ) co nnec t or ,
making sure that it is fas t ened tight ly in pl ace (se e fig. A).
Some models are fitted with an "A quas top" water supply hos e
(see fig.B) in which the small filter is already housed in the
threaded end.
If the water pipes are new or have not been used for an extended peri od of t ime, l et th e wat er run t o m ake sur e th at th e
water is clear and free of impurities. If this precaution is not
taken, ther e is a ris k th at th e wat er inle t can get bl ocked an d
damage the appliance.
. If the appli-
fig.A
Warning
The appliance is to be connected to the
water mains using new hose-sets and
that old hose-sets should not be reused.
Anti-Flooding protection
If dishwasher is equipped with a system that stops the supply of water in the event of a problem with the
water supply hose, or l eaks wit hin t he unit, in or der to pre vent damage to your home. If for any re ason
the box c ont ain ing the elect r ic al c om ponen t s happe ns t o get d am aged, r em ove the plug f or the appliance from the socket immediately. In order to guarantee that the anti-flooding feature operates properly,
the "A" box with water supply hose must be attached to the water supply tap as shown in fig.B. No other
type of connection is acceptable. The water supply hose must not, under any circumstances, be cut, as
it cont ains elec tri cal p arts whic h ar e liv e. I f the leng th o f the hos e is not a dequ ate to ma ke a p rop er
connection, the hose must be replaced with one which is long enough. This hose is available upon
request from specialis ed retail ers and s ervice c enter.
fig.B
4
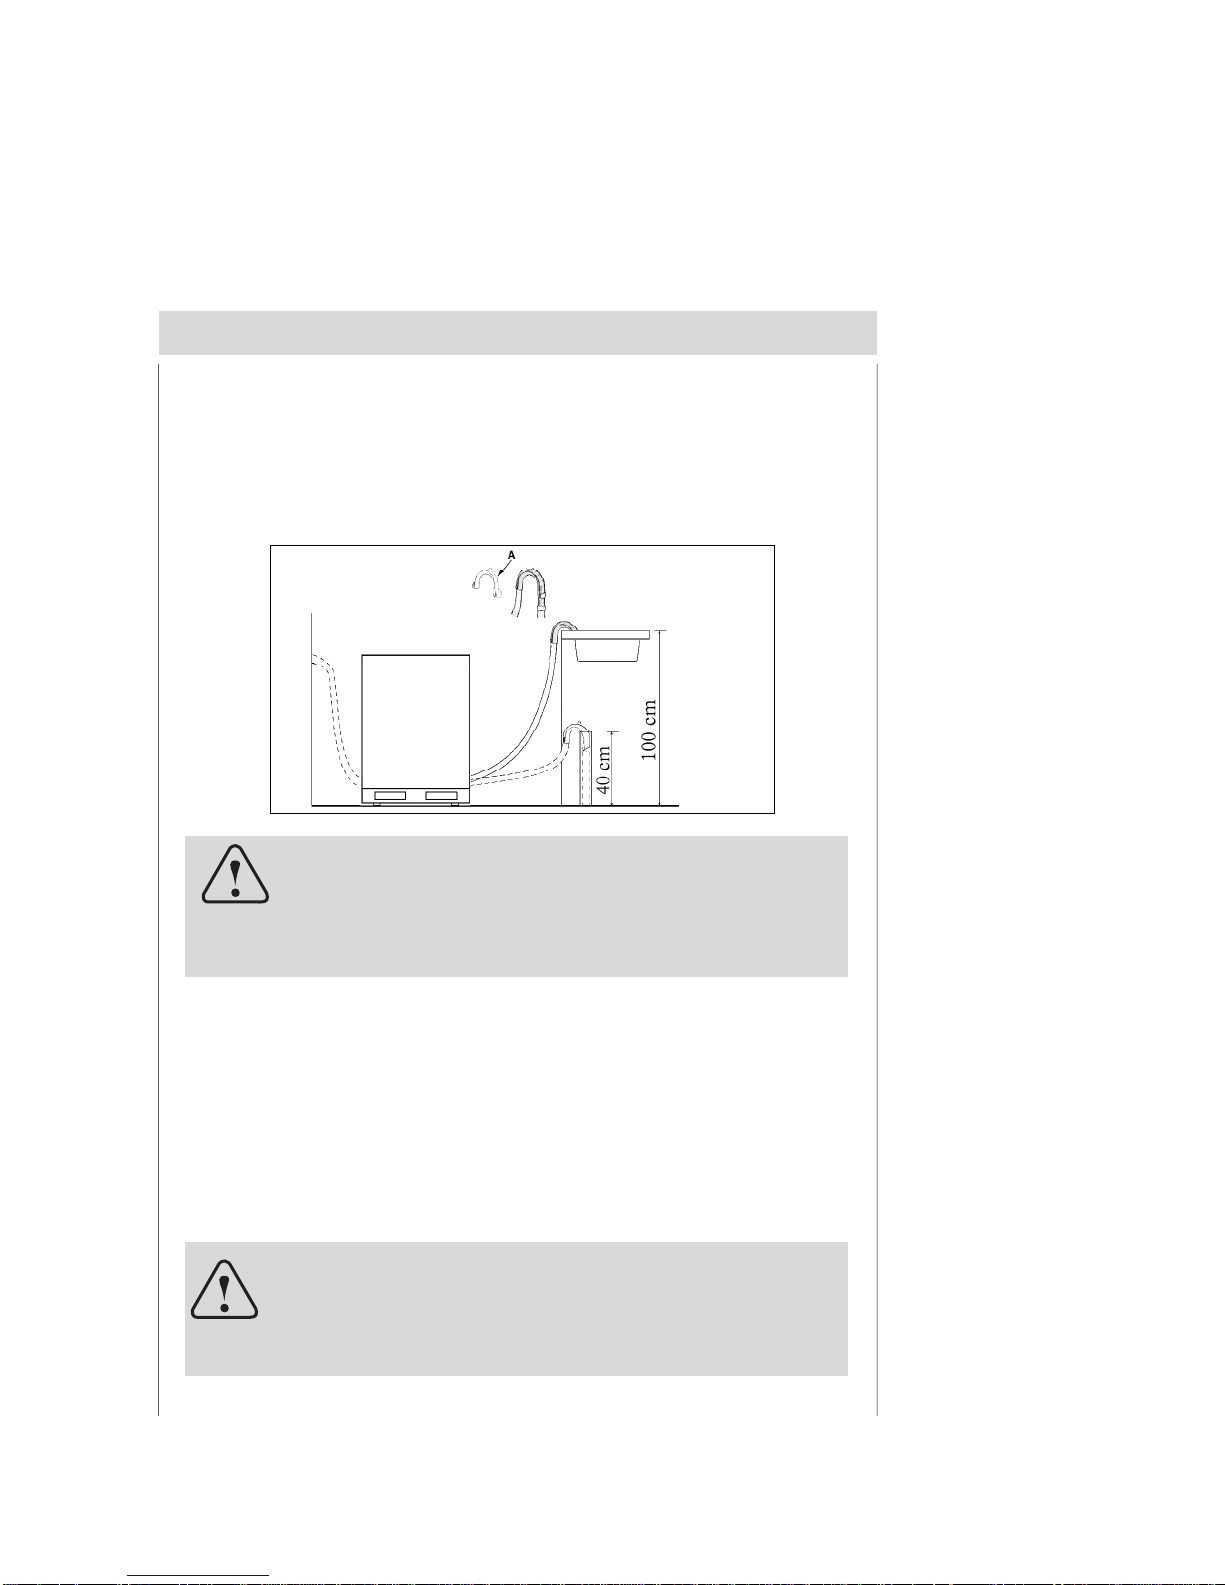
Drain hose co nnect ion
Insert the drain hose int o a dr ain pipe with a minimum diameter of 4cm, or let it run int o the sink, making
sure to avoid bending or crimping it. If necessary, fit a syphon trap (U-bend) with a connecting piece for
the drain hos e ( f ig .C). T h e free end of the ho s e must be at a height between 40 an d 100 cm and must not
be immers ed in w at e r.
fig.C
Attention:
The connecting piece for syphon trap (U-bend) must be solidly
fastened to the wall to prevent the drain hose from moving and
allowing water to spill outside the drain.
Electrical Co nn ect ion
After making sure that the voltage and frequency v alues for the current in the home correspond to those
on the rat ing plate ( locate d on the stainl ess steel inne r door of the ap pli ance) and that t he elec tric al
system is correc t f or the max imum v olt age on t he r ati ng pl at e, inse rt t he p lug int o an electrical socket
which is earthed properly (the earthing of the appliance is a safety requirement mandated by law).
If the electrical socket to which the appliance must be connected is not appropriate for the plug, replace
the who le cab le, r athe r than using adapt or s or t he sim ilar lik e as the y c ould c ause o verhea tin g and
burns.
Caution:
The dishwasher plug must be accessible even when the appliance is installed as a built-in unit so that maintenance can be
done safely.
5
Getting to know your dishwasher
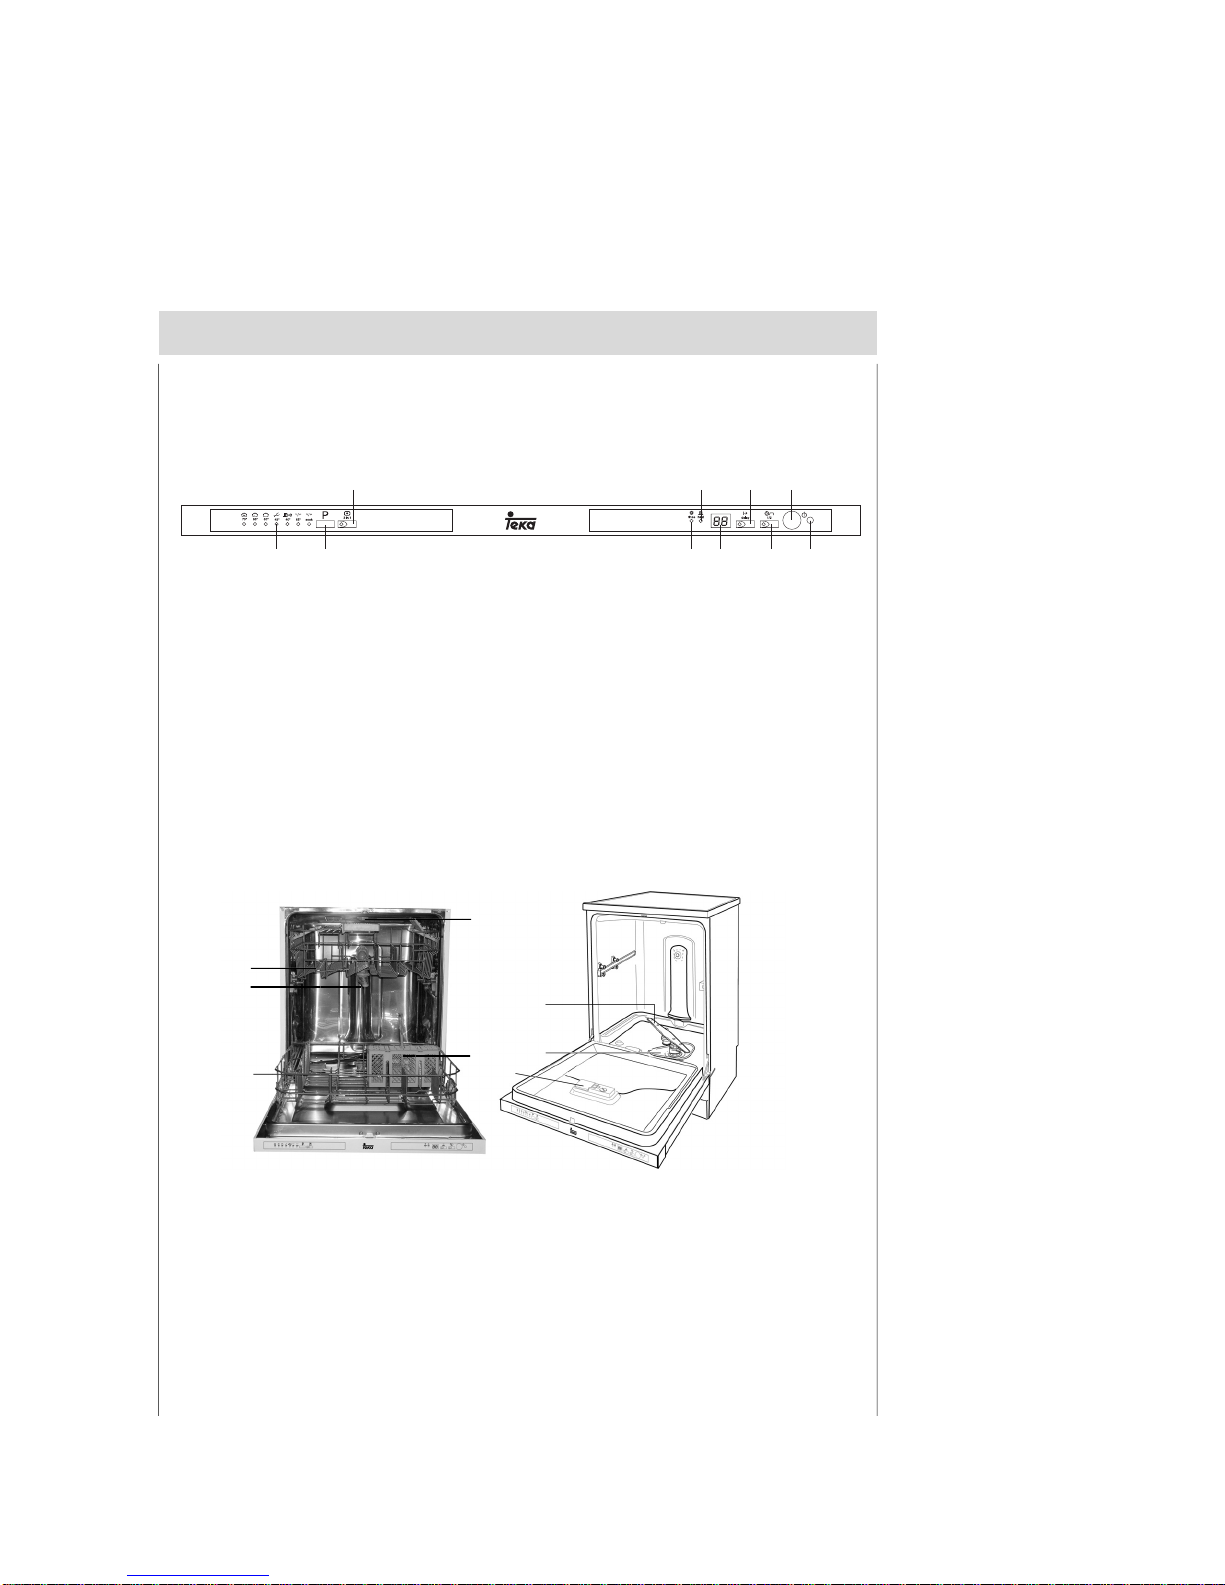
Close-up view (control panel)
EGI
ACB
Programme Indicator
A
Programme Button
B
"3 in 1" Button
C
Low Rinse Aid Indicator
D
Heat Indicator
E
Dishwasher in terio r
a
c
b
DHFJ
Time-remaining Indicator
F
Delayed Start Button
G
" 1/2 " Button
H
ON-OFF Button
I
ON-OFF Indicator
J
e
f
g
d
h
a
Upper Rack
b
Lower Rack
c
Top Spray Arm
d
Silverware Basket
e
Third Sprayer
f
Bottom Spray Arm
g
Washing Filter
h
Detergent and Rinse Aid Dispenser
6
How to fill the salt
Salt
The hardness of the water varies f rom place to plac e. If hard water is use d in the dishw asher , deposits
will form on the dishes and utensils.
The appliance is equipped with a special softener that uses a salt specifically designed to eliminate lime
and minerals from the water.
Loading the salt into the container
Always use salt intended for use with dishwashers.
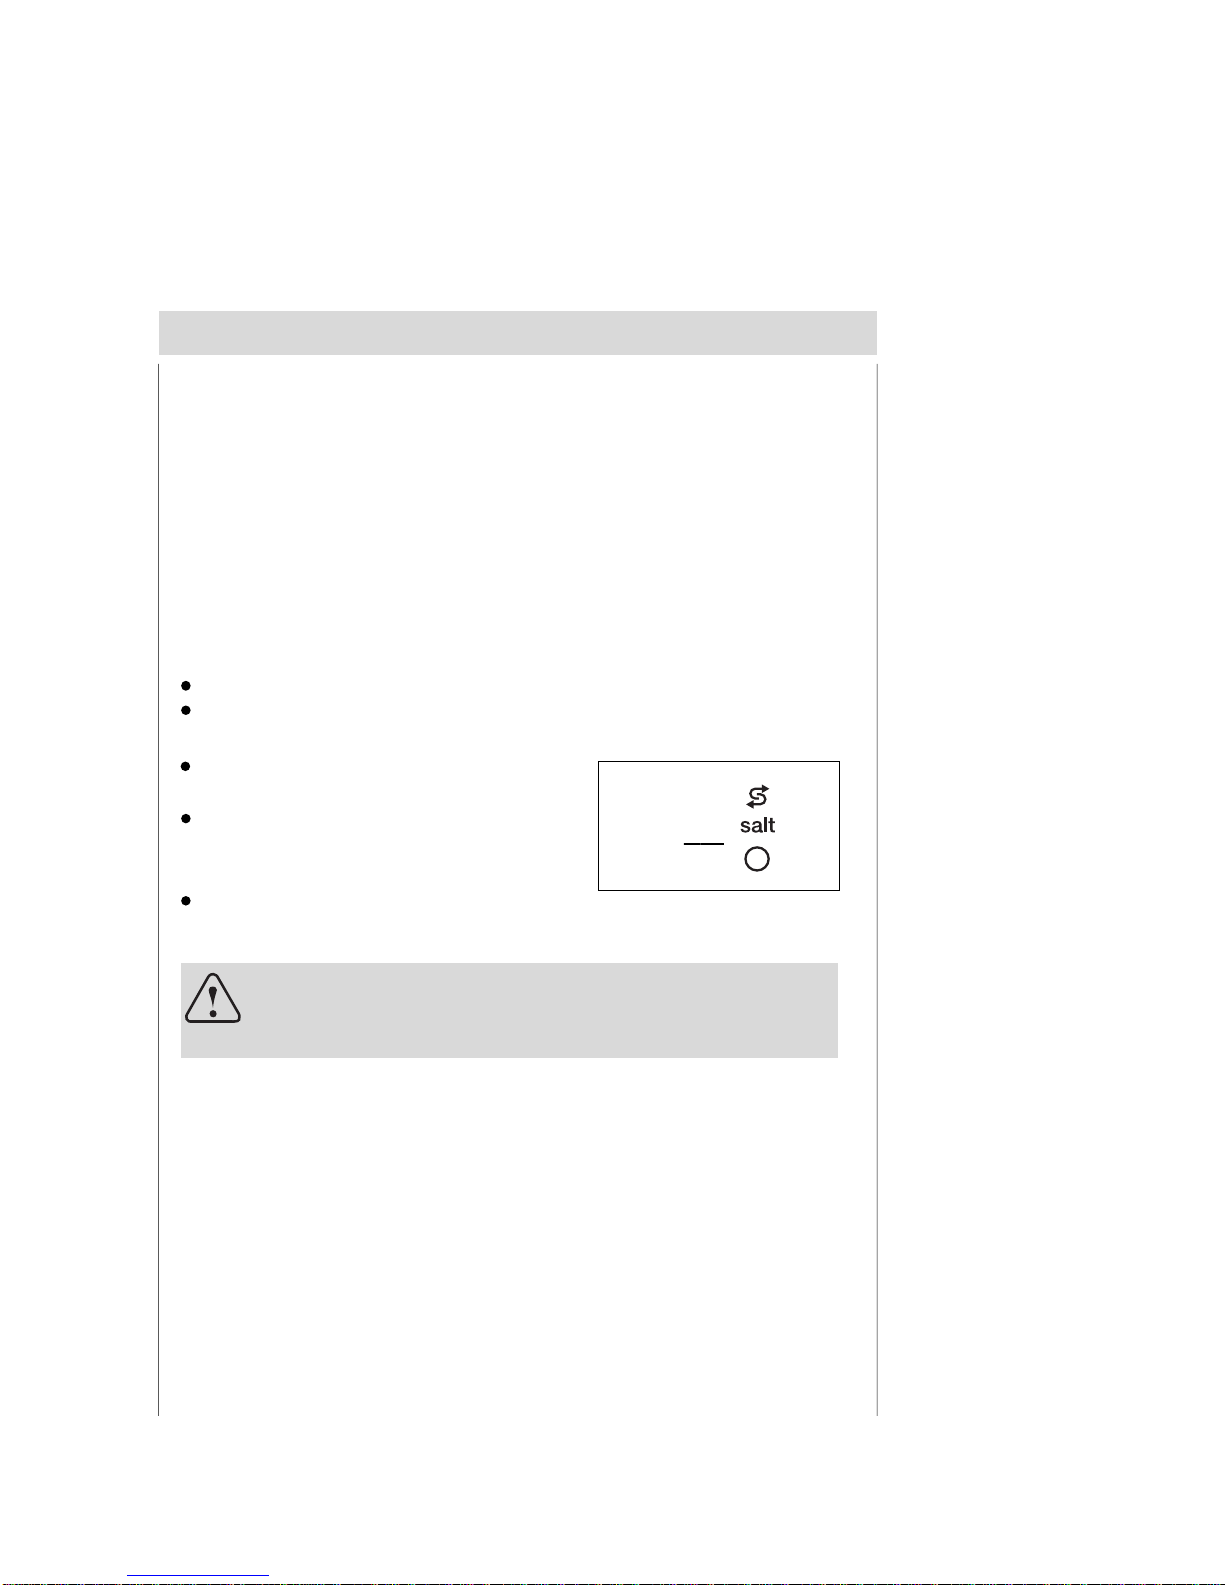
The salt container is located beneath the lower rack and should be filled as follows:
When the low salt indicator “E” lights, you must fill the salt.
Remove the lower rack and then unscrew and remove
the cap from the salt container;
If you are filling the container for the first time , fill it with
water;
Place the end of the funnel (supplied) into the hole and
introduce about 2 kg of salt. It is nor m al for a s m all am ount
of water to come out of the salt container.
Carefully screw the cap back on.
E
Important
To prevent the formation of rust, load the salt just before beginning a
wash cycle.
7
Adjusting salt consumption
The dishwasher is designed to allow for adjusting the amount
of salt consumed based on the hardness of the water used.
This is intended to optimize and customize the level of salt
consumption so that it remains at a minimum.
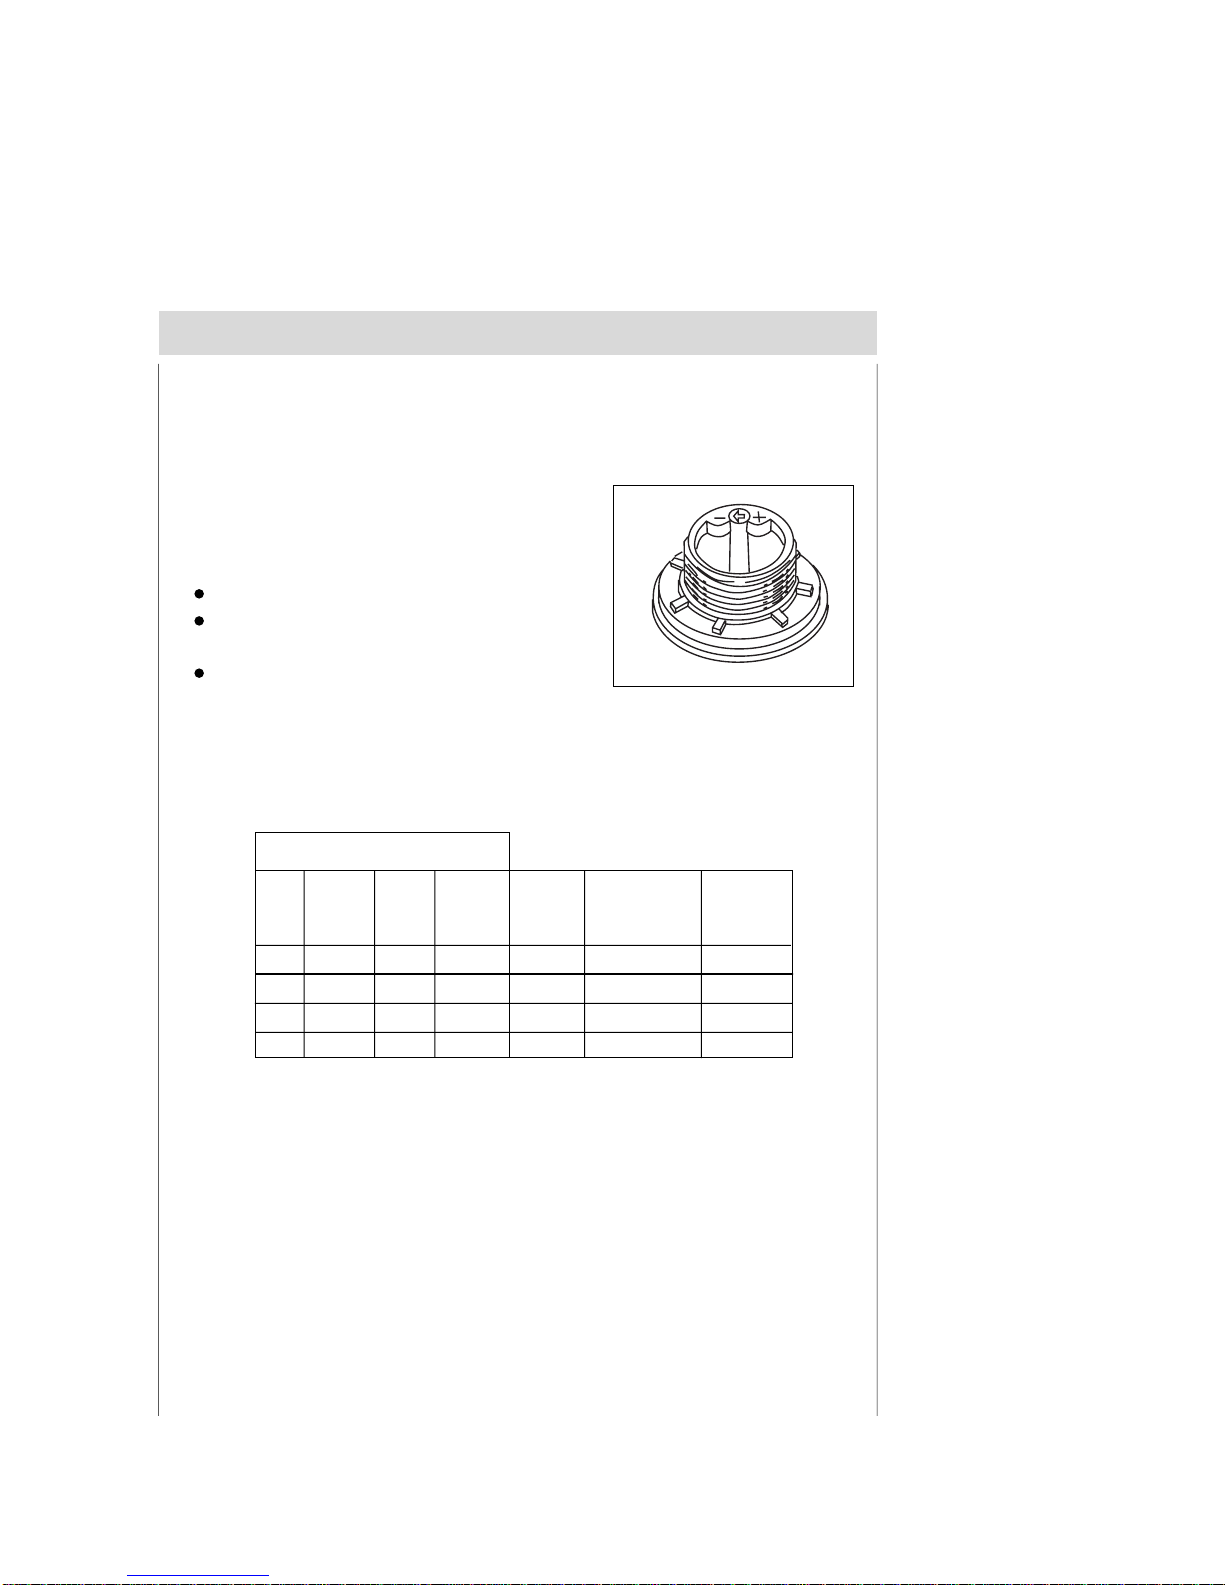
To adjust salt consumption, proceed as follows:
Unscrew the cap from the salt container;
There is a ring on the container with an arrow on it (see
figure to the side),
If necessary, rotate the ring in an anticlockwise direc tion
from the "-" setting towards the "+" sign, based on the
hardness of the water being used.
It is recommended that adjustments be made in accordance with the following table:
Water Hardness
Clarke
Level
degrees
0 - 14 0 - 17
1
2
36 - 71 45 - 89 4,5 - 8,9
3
4
ºdH
mmol/l
0 - 1,7
1,8 - 4,418 - 4414 - 36
>89>71 >8,9
Selector
position
/
"-"
middle
Salt
consumption
(Grams/cycle)
20
40
60"+"
Autonomy
(cycles/2kg)
/0
60
40
25
8
 Loading...