

Page 1

Z
UD-501
USB D/A Converter
OWNER’S MANUAL
MODE D’EMPLOI
MANUAL DEL USUARIO
D01181800A
Page 2
IMPORTANT SAFETY PRECAUTIONS
CAUTION: TO REDUCE THE RISK OF ELECTRIC SHOCK, DO NOT
REMOVE COVER (OR BACK). NO USER-SERVICEABLE PARTS
INSIDE. REFER SERVICING TO QUALIFIED SERVICE PERSONNEL.
The lightning flash with arrowhead symbol, within an
equilateral triangle, is intended to alert the user to the
presence of uninsulated “dangerous voltage” within the
product’s enclosure that may be of sufficient magnitude to
constitute a risk of electric shock to persons.
The exclamation point within an equilateral triangle is
intended to alert the user to the presence of important
operating and maintenance (servicing) instructions in the
literature accompanying the appliance.
WARNING: TO PREVENT FIRE OR SHOCK HAZARD,
DO NOT EXPOSE THIS APPLIANCE TO RAIN OR
MOISTURE.
For U.S.A.
This equipment has been tested and found to comply
with the limits for a Class B digital device, pursuant to Part
15 of the FCC Rules. These limits are designed to provide
reasonable protection against harmful interference in a
residential installation. This equipment generates, uses,
and can radiate radio frequency energy and, if not installed
and used in accordance with the instructions, may cause
harmful interference to radio communications. However,
there is no guarantee that interference will not occur in a
particular installation. If this equipment does cause harmful
interference to radio or television reception, which can be
determined by turning the equipment off and on, the user
is encouraged to try to correct the interference by one or
more of the following measures:
• Reorient or relocate the equipment and/or the receiving
antenna.
• Increase the separation between the equipment and
receiver.
• Connect the equipment into an outlet on a circuit different
from that to which the receiver is connected.
• Consult the dealer or an experienced radio/TV technician
for help.
CAUTION
o
DO NOT REMOVE THE EXTERNAL CASES OR CABINETS TO
EXPOSE THE ELECTRONICS. NO USER SERVICEABLE PARTS
ARE INSIDE.
o
IF YOU ARE EXPERIENCING PROBLEMS WITH THIS PRODUCT,
CONTACT TEAC FOR A SERVICE REFERRAL. DO NOT USE THE
PRODUCT UNTIL IT HAS BEEN REPAIRED.
o
USE OF CONTROLS OR ADJUSTMENTS OR PERFORMANCE OF
PROCEDURES OTHER THAN THOSE SPECIFIED HEREIN MAY
RESULT IN HAZARDOUS RADIATION EXPOSURE.
IN NORTH AMERICA USE ONLY ON 120 V SUPPLY.
CAUTION
Changes or modifications to this equipment not expressly
approved by TEAC CORPORATION for compliance will void
the user’s warranty.
For Canada
Industry Canada’s Compliance Statement:
This Class B digital apparatus complies with Canadian
ICES-003.
Cet appareil numérique de la classe B est conforme à la
norme NMB-003 du Canada.
“DSD” is a registered trademark.
Microsoft, Windows XP, Windows Vista and Windows 7 are either registered trademarks or trademarks of Microsoft Corporation in the United
States and/or other countries.
Apple, Macintosh and Mac OS X are trademarks of Apple Inc., registered in the U.S. and other countries.
Other company names and product names in this document are the trademarks or registered trademarks of their respective owners.
2
Page 3
Front side
IMPORTANT SAFETY INSTRUCTIONS
1) Read these instructions.
2) Keep these instructions.
3) Heed all warnings.
4) Follow all instructions.
5) Do not use this apparatus near water.
6) Clean only with dry cloth.
7) Do not block any ventilation openings. Install in accordance with
the manufacturer's instructions.
8) Do not install near any heat sources such as radiators, heat
registers, stoves, or other apparatus (including amplifiers) that
produce heat.
9) Do not defeat the safety purpose of the polarized or groundingtype plug. A polarized plug has two blades with one wider than
the other. A grounding type plug has two blades and a third
grounding prong. The wide blade or the third prong are provided
for your safety. If the provided plug does not fit into your outlet,
consult an electrician for replacement of the obsolete outlet.
10) Protect the power cord from being walked on or pinched
particularly at plugs, convenience receptacles, and the point
where they exit from the apparatus.
11) Only use attachments/accessories specified by the manufacturer.
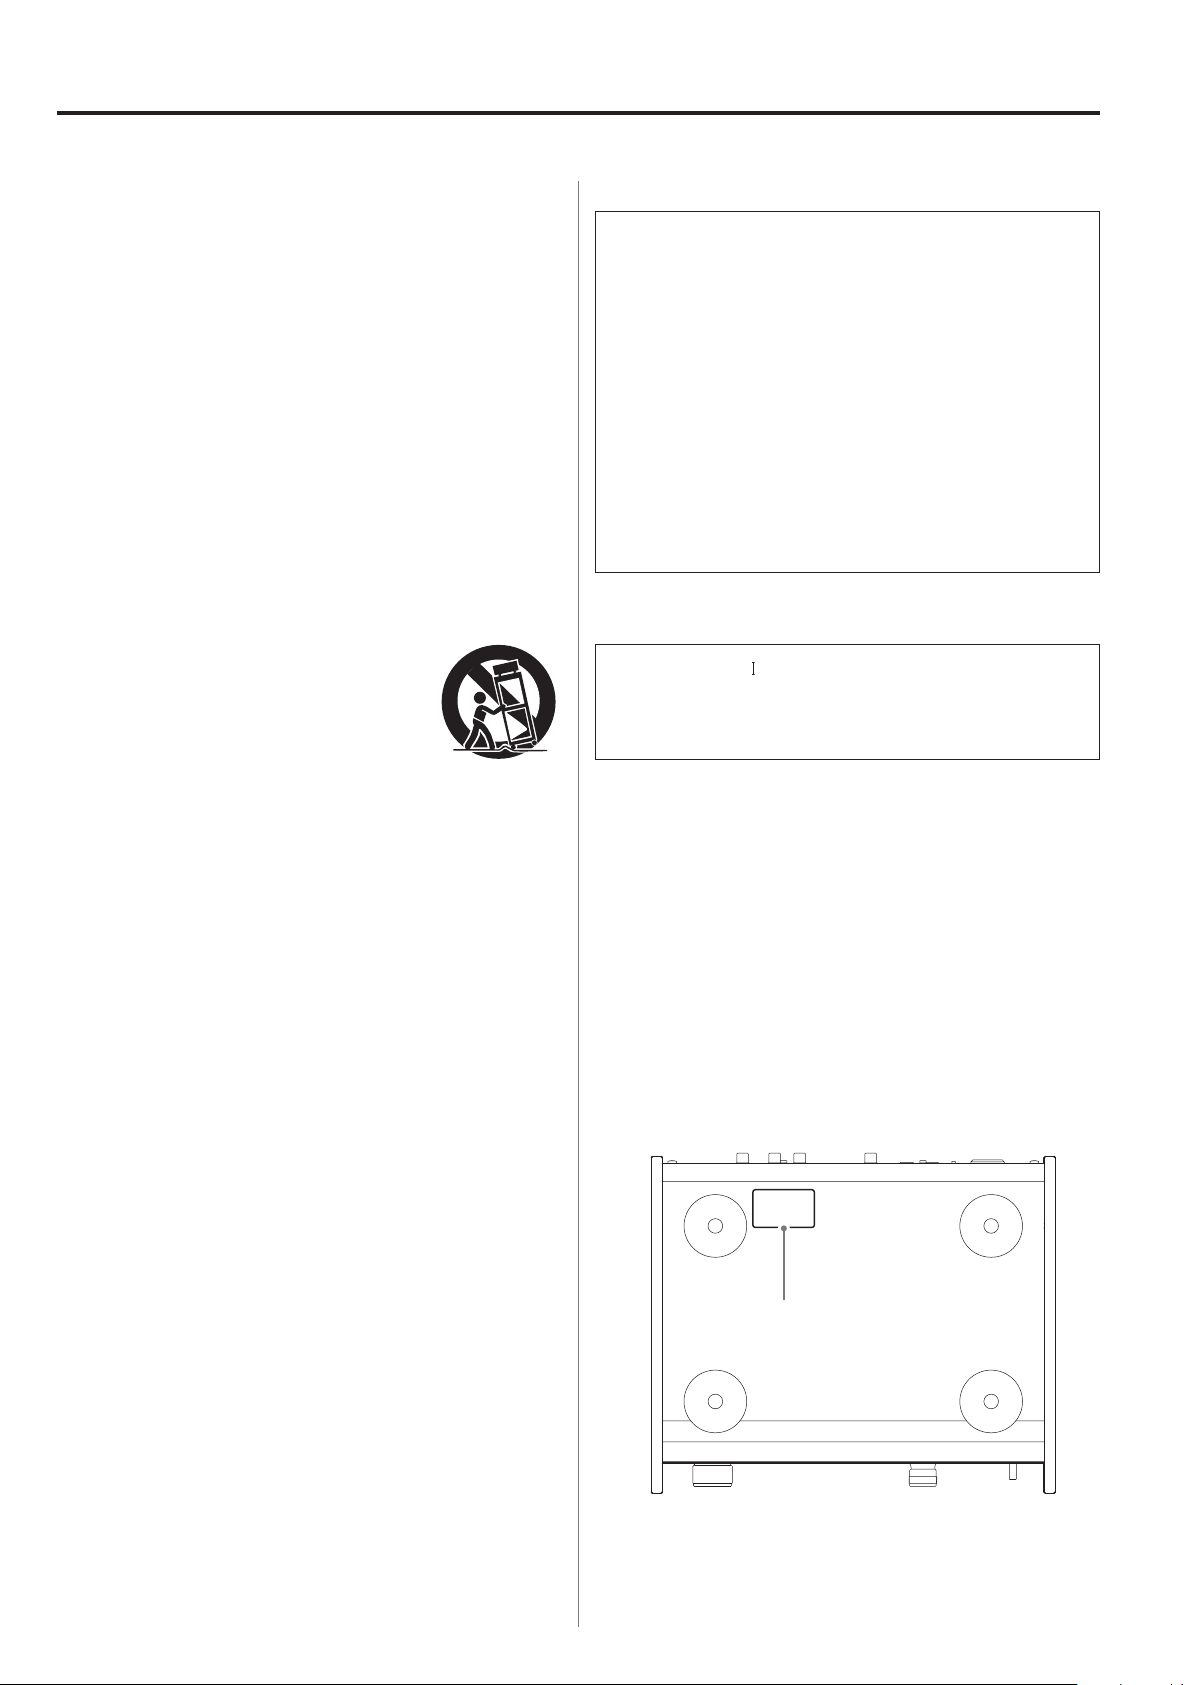
12) Use only with the cart, stand, tripod, bracket, or
table specified by the manufacturer, or sold with
the apparatus. When a cart is used, use caution
when moving the cart/apparatus combination
to avoid injury from tip-over.
13) Unplug this apparatus during lightning storms
or when unused for long periods of time.
14) Refer all servicing to qualified service personnel. Servicing is
required when the apparatus has been damaged in any way, such
as power-supply cord or plug is damaged, liquid has been spilled
or objects have fallen into the apparatus, the apparatus has been
exposed to rain or moisture, does not operate normally, or has
been dropped.
o
The apparatus draws nominal non-operating power from the
AC outlet with its POWER or STANDBY/ON switch not in the ON
position.
o
The mains plug is used as the disconnect device, the disconnect
device shall remain readily operable.
o
Caution should be taken when using earphones or headphones
with the product because excessive sound pressure (volume) from
earphones or headphones can cause hearing loss.
CAUTION
o
Do not expose this apparatus to drips or splashes.
o
Do not place any objects filled with liquids, such as vases, on
the apparatus.
o
Do not install this apparatus in a confined space such as a book
case or similar unit.
o
The apparatus should be located close enough to the AC outlet
so that you can easily reach the power cord plug at any time.
o
If the product uses batteries (including a battery pack or
installed batteries), they should not be exposed to sunshine, fire
or excessive heat.
o
CAUTION for products that use replaceable lithium batteries:
there is danger of explosion if a battery is replaced with an
incorrect type of battery. Replace only with the same or equivalent type.
WARNING
Products with Class construction are equipped with a power supply cord that has a grounding plug. The cord of such a product
must be plugged into an AC outlet that has a protective grounding connection.
Nameplate
3
Page 4

For European Customers
Pb, Hg, Cd
Disposal of electrical and electronic equipment
(a) All electrical and electronic equipment should be disposed
of separately from the municipal waste stream via collection
facilities designated by the government or local authorities.
(b) By disposing of electrical and electronic equipment correctly,
you will help save valuable resources and prevent any potential negative effects on human health and the environment.
(c)
Improper disposal of waste electrical and electronic equipment
can have serious effects on the environment and human health
because of the presence of hazardous substances in the
equipment.
(d)
The Waste Electrical and Electronic Equipment (WEEE)
symbol, which shows a wheeled bin that has been
crossed out, indicates that electrical and electronic
equipment must be collected and disposed of separately
from household waste.
(e)
Return and collection systems are available to end users. For
more detailed information about the disposal of old electrical and electronic equipment, please contact your city office,
waste disposal service or the shop where you purchased the
equipment.
Disposal of batteries and/or accumulators
(a) Waste batteries and/or accumulators should be disposed of
separately from the municipal waste stream via collection
facilities designated by the government or local authorities.
(b) By disposing of waste batteries and/or accumulators correctly,
you will help save valuable resources and prevent any potential negative effects on human health and the environment.
(c)
Improper disposal of waste batteries and/or accumulators can
have serious effects on the environment and human health
because of the presence of hazardous substances in them.
(d) The WEEE symbol, which shows a wheeled bin that
has been crossed out, indicates that batteries and/or
accumulators must be collected and disposed of separately from household waste.
If a battery or accumulator contains more than the specified
values of lead (Pb), mercury (Hg), and/or cadmium (Cd) as
defined in the Battery Directive (2006/66/EC), then the chemical symbols for those elements will be indicated beneath the
WEEE symbol.
(e) Return and collection systems are available to end users. For
more detailed information about the disposal of waste batteries and/or accumulators, please contact your city office, waste
disposal service or the shop where you purchased them.
4
Page 5

Contents
Included items
Thank you for choosing TEAC. Read this manual carefully
to get the best performance from this unit.
Included items .........................................5
Before use .............................................6
Maintenance ...........................................6
Names and functions of parts ..........................7
Connecting equipment ................................8
Basic operation ...................................... 10
Display ...............................................11
Playing back music on a computer ....................13
Settings ..............................................15
Troubleshooting ..................................... 18
Specifications ........................................ 20
Check to be sure the box contains all the included items
shown below.
Please contact the store where you purchased this unit
if any of these items are missing or have been damaged
during transportation.
Power cord × 1
RCA audio cable × 1
Owner's manual (this document) × 1
Keep this manual in a safe place for future reference.
o
Warranty card × 1
EN
5
Page 6

Before use Maintenance
V
Placement precautions
Do not put anything on top of the unit.
o
Avoid placing the unit in direct sunlight or close to any
o
source of heat, such as a radiator, heater, open fireplace
or amplifier. Also avoid locations that are subject to vibrations or exposed to excessive dust, cold or moisture.
Place the unit in a stable location near the audio sys-
o
tem that you will use with it.
Do not move the unit during use.
o
The voltage supplied to the unit should match the volt-
o
age printed on the rear panel. If you are in any doubt
regarding this matter, consult an electrician.
As the unit could become warm during operation,
o
always leave sufficient space around it for ventilation.
When placing this unit, position it so that it is at least 3
cm (1.2") from walls and other devices in order to allow
good heat dissipation. When installing it in a rack, leave
at least 5 cm (2") open above the unit and 10 cm (4")
open behind it.
If the surface of the unit becomes dirty, wipe it with a
soft dry cloth. If the unit becomes very dirty, dampen a
soft cloth slightly with a diluted neutral cleanser and thoroughly wring out any excess fluid before using the cloth
to wipe the unit.
Q For your safety, disconnect the power cord from
the socket before cleaning.
Never spray liquid directly on the unit.
o
Do not use thinner or alcohol as they could damage
o
the surface of the unit.
Avoid allowing rubber or plastic materials to touch this
o
product for long periods of time, because they could
damage the cabinet.
Do not open the body of the unit as this might result
o
in damage to the circuitry or cause electric shock. If a
foreign object should get into the unit, contact your
dealer or a TEAC service center.
When removing the power plug from the wall outlet,
o
always pull directly on the plug; never yank on the cord.
Depending on the electromagnetic waves of television
o
broadcasts, interference might appear on television
screens when this unit’s power is on. This does not
mean that this unit or the TV is malfunctioning. If this
occurs, turn this unit’s power off.
6
Page 7

Names and functions of parts
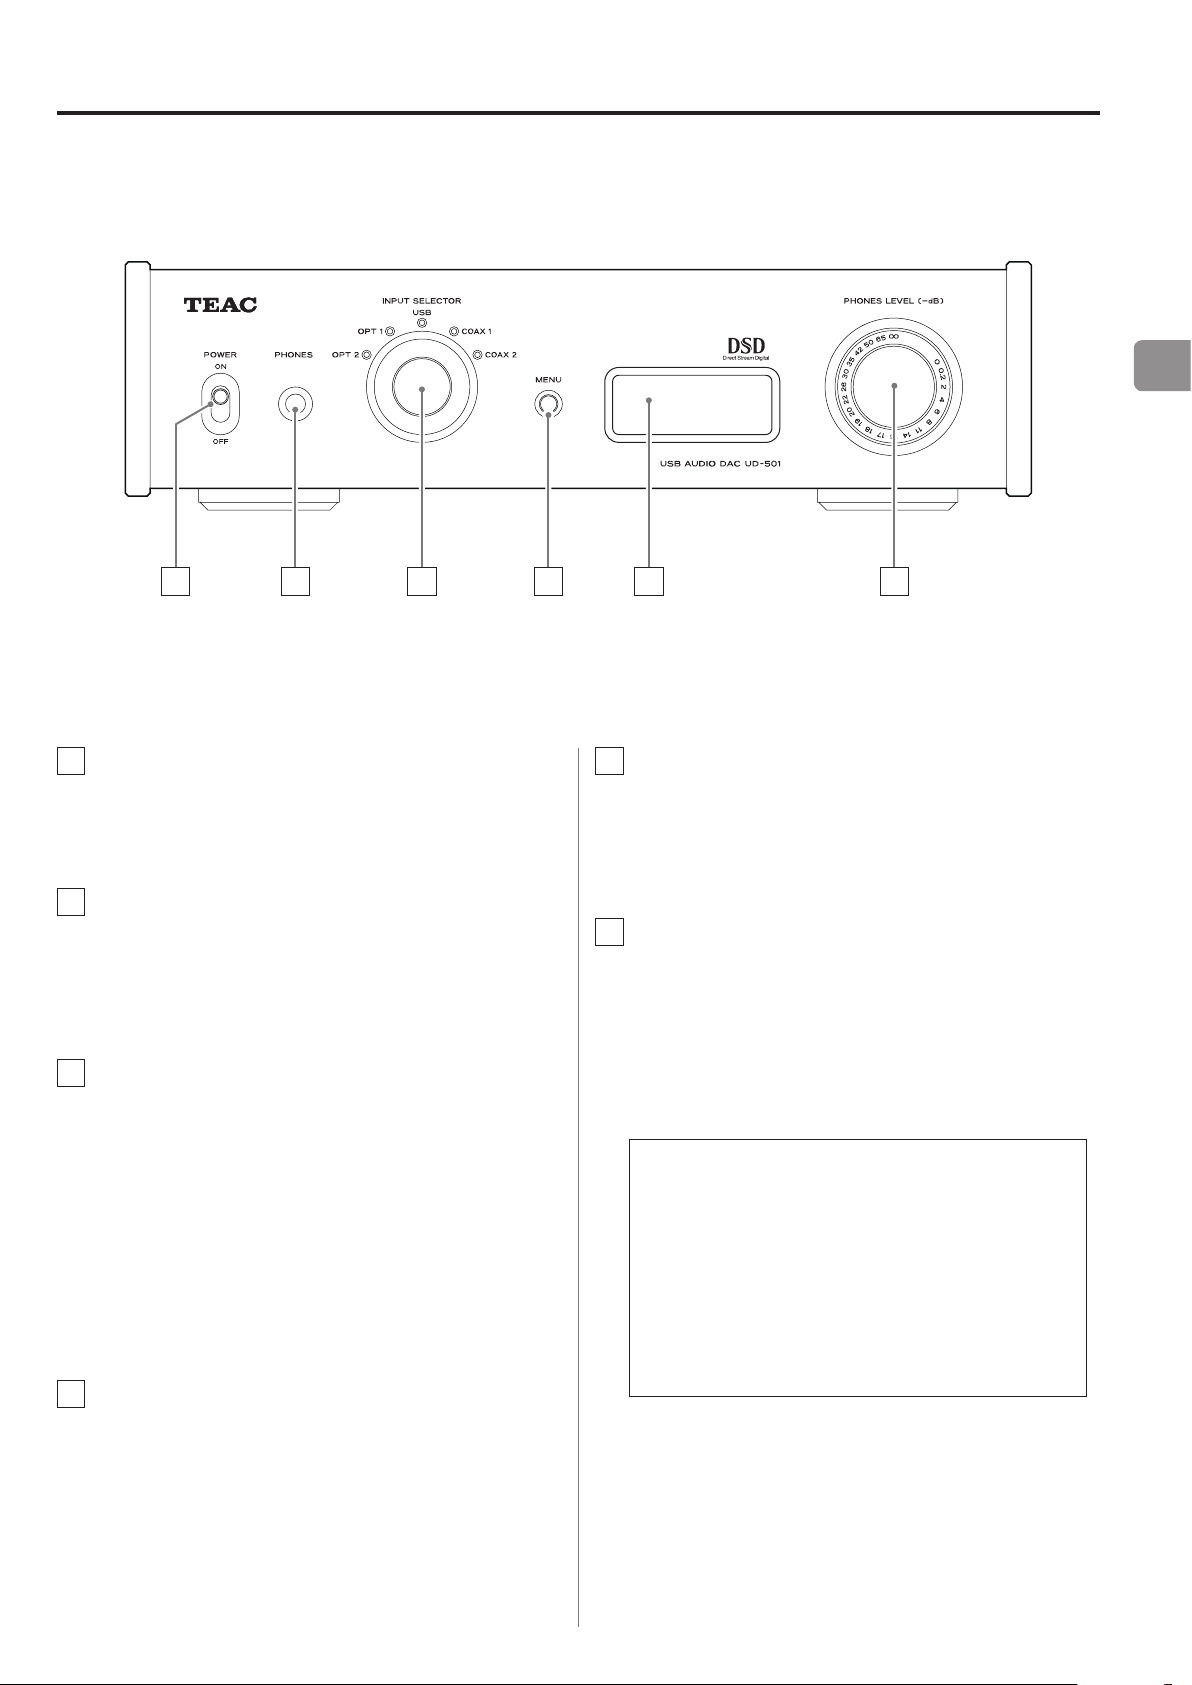
A B C D E F
EN
A
POWER switch
Use to turn the power ON and OFF.
B
PHONES jack
Connect headphones with a standard 6.3 mm (1/4" )
stereo plug here.
C
INPUT SELECTOR knob
Use to select the input source. The indicator lights
next to the selected input source.
Use to change setting values when a menu item is
shown.
If you turn this knob when the unit has entered
o
standby because of the automatic power saving
function, the unit's power will turn ON again.
E
Display
This display shows information about the audio playing back and menu screens.
F
PHONES LEVEL knob
Use to adjust the headphones output volume. Turn
right to increase and left to decrease the volume.
This knob does not adjust the output level from the
o
analog LINE OUT connectors.
The maximum volume level is 0 and the minimum
level is −∞ (negative infinity). When using head
phones, before turning the power on, use the
PHONES LEVEL knob to set the headphones volume
level to its minimum (−∞). Failure to do so might
cause sudden loud noises, which could harm your
hearing or result in other trouble.
-
D
MENU button
Press to enter setting mode (page 15).
If you press this button when the unit has entered
o
standby because of the automatic power saving
function, the unit's power will turn ON again.
7
Page 8

Digital audio
Digital audio
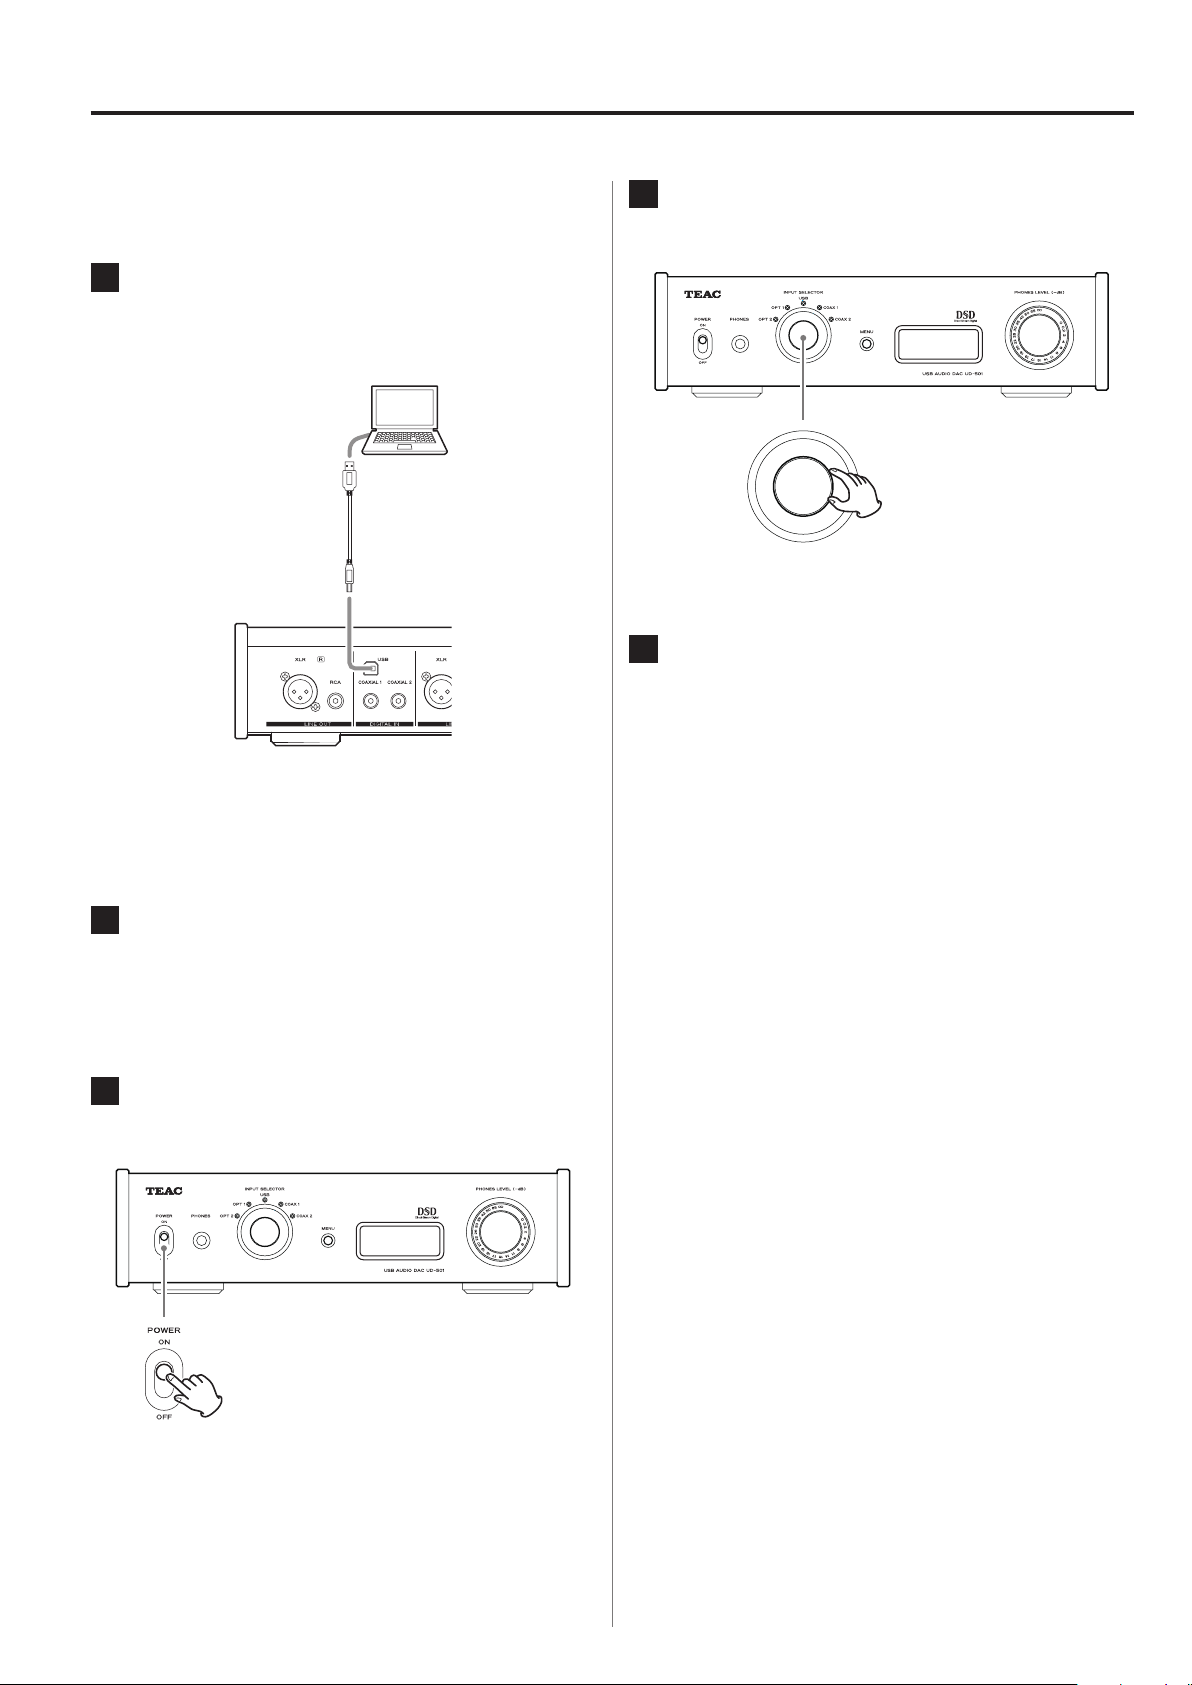
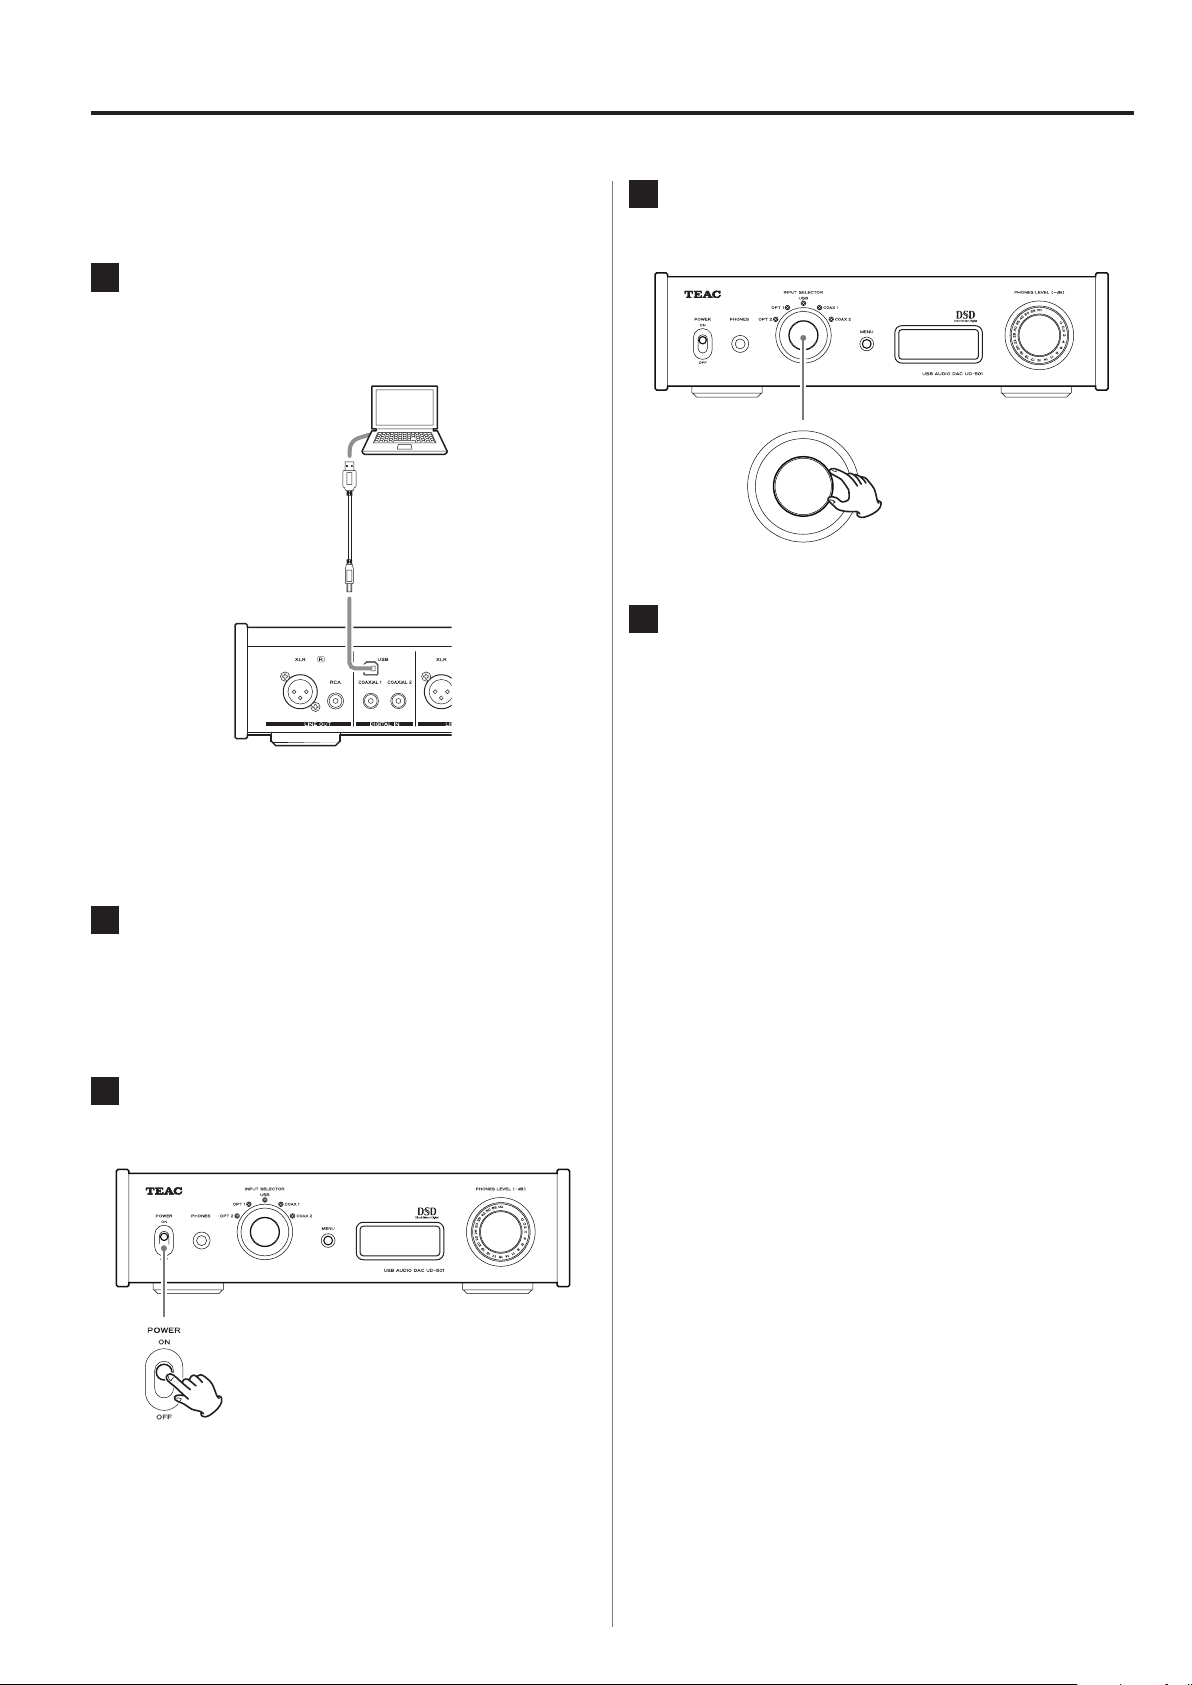
Connecting equipment
Personal computer
If using a Windows OS,
install the dedicated
driver on the computer
before connecting this
unit to it. (page 13)
A
output device
DIGITAL OUT
(COAXIAL)
RCA coaxial digital cable
USB cable
B C D
A
output device
DIGITAL OUT
(OPTICAL)
Optical digital cable
F
The polarity of the
XLR connectors can
be set so that either
2 or 3 is HOT (p.16).
E
Included power cord
Connect a set of
cables of one type
or the other.
RCA audio cable
XLR cable
Wall socket
LRLR
Audio input
(LINE IN, etc.)
Stereo amplier or powered speaker
8
Page 9

A
White (L)
White (L)
Analog audio output connectors
(LINE OUT)
These are a two-channel analog audio output pair.
Connect these XLR connectors and RCA jacks to stereo amplifiers or powered speakers.
Use the included cables or commercially-available
cables to make these connections.
XLR: Balanced XLR cables
RCA: RCA audio cable
Connect the R connector of this unit with the R
connector of the amplifier. Likewise, connect the L
connector of this unit with the L connector of the
amplifier.
Red (R)
B
USB input connector (DIGITAL IN)
Use to input digital audio from a computer. Connect it
to a computer's USB connector.
Use a commercially available USB cable for connection.
Red (R)
D
Optical digital audio input connectors
Use to input digital audio. Connect the optical digital
audio output connectors of digital audio devices to
them.
Use commercially available optical digital cables to
make the connections.
E
AUTO POWER SAVE switch
Use to turn the automatic power saving function ON
and OFF. When ON, the unit will automatically enter
standby mode if there is no digital input for 30 minutes or more.
To turn the power on again when in standby mode,
o
press the MENU button, turn the INPUT SELECTOR
knob or shift the POWER switch to OFF once and
then back to ON.
Wait a few seconds after shifting the POWER switch
o
to OFF before shifting it back to ON.
F
Power inlet (~IN)
EN
CAUTION
Before connecting a computer that is running
a Windows OS, you must install the dedicated
driver on the computer (page 13).
Proper connection is not possible with a computer that does not have this driver installed.
C
RCA coaxial digital audio input connectors
(DIGITAL IN)
Use these to input digital audio. Connect the coaxial
digital audio output jacks of digital audio devices to
them.
Use commercially available RCA coaxial digital cables
to make the connections.
Insert the included power cord here. After completing all other connections, insert the power plug into a
power outlet.
Unplug the cord from the outlet when not using the
unit for a long time.
V Use only the included power cord. Use of a differ-
ent cord could cause fire or electric shock.
V
Do not turn the power on until after
making all connections.
Carefully read the manuals of the devices that
o
you are connecting and follow their instructions
when making connections.
Do not bundle connecting cables with power
o
cords. Doing so could cause noise.
Connect all plugs completely.
o
9
Page 10
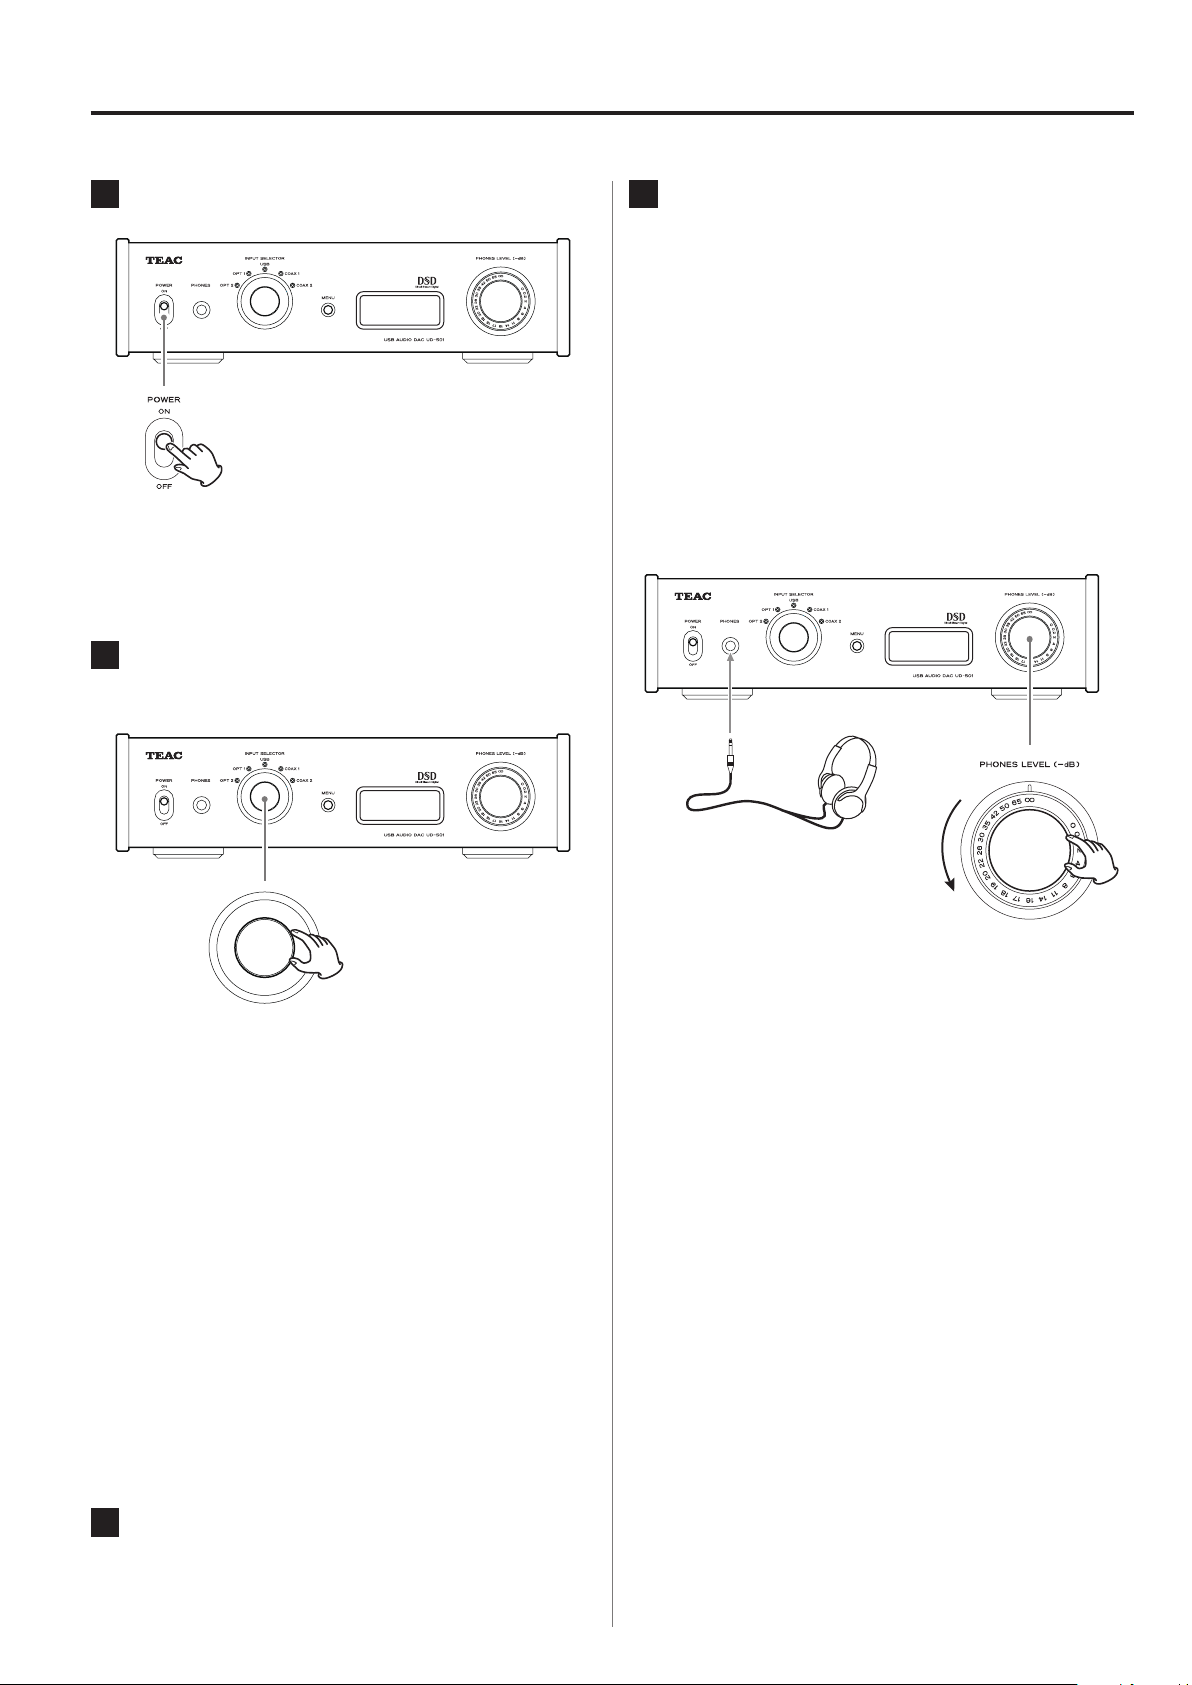
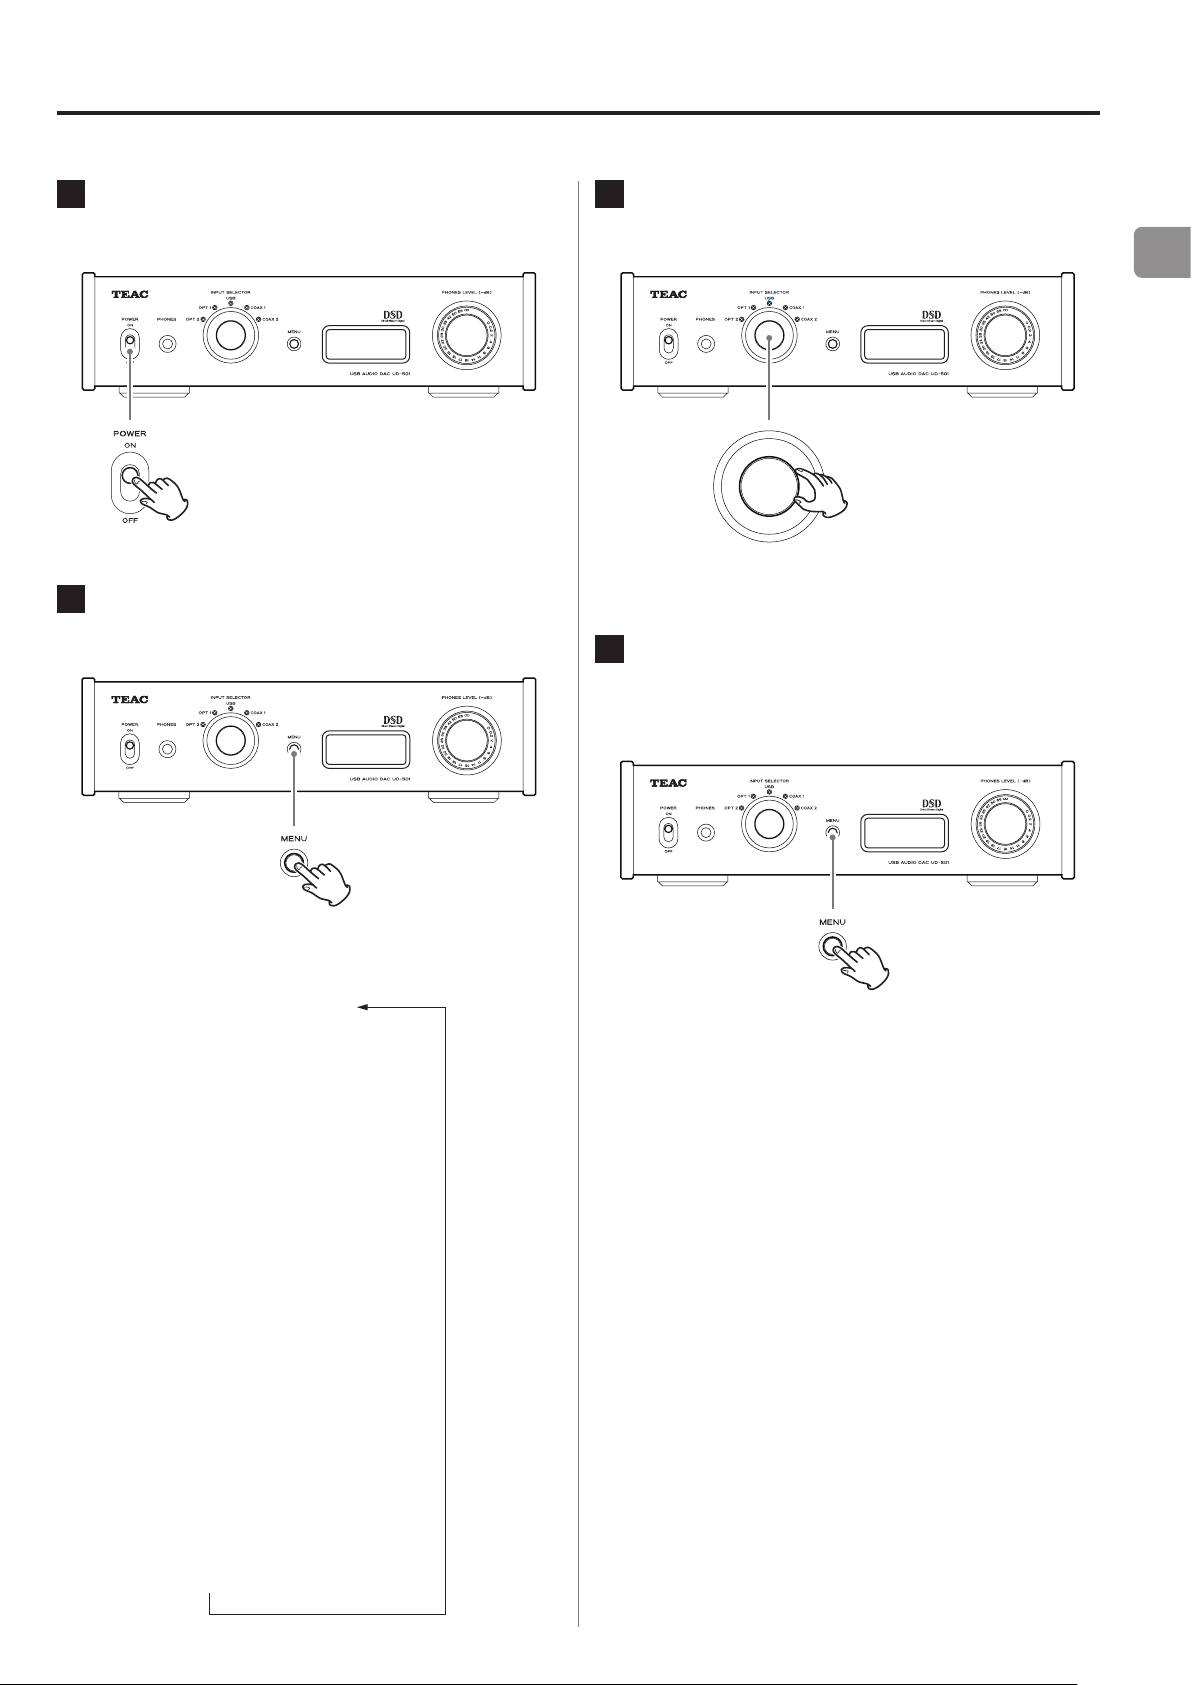
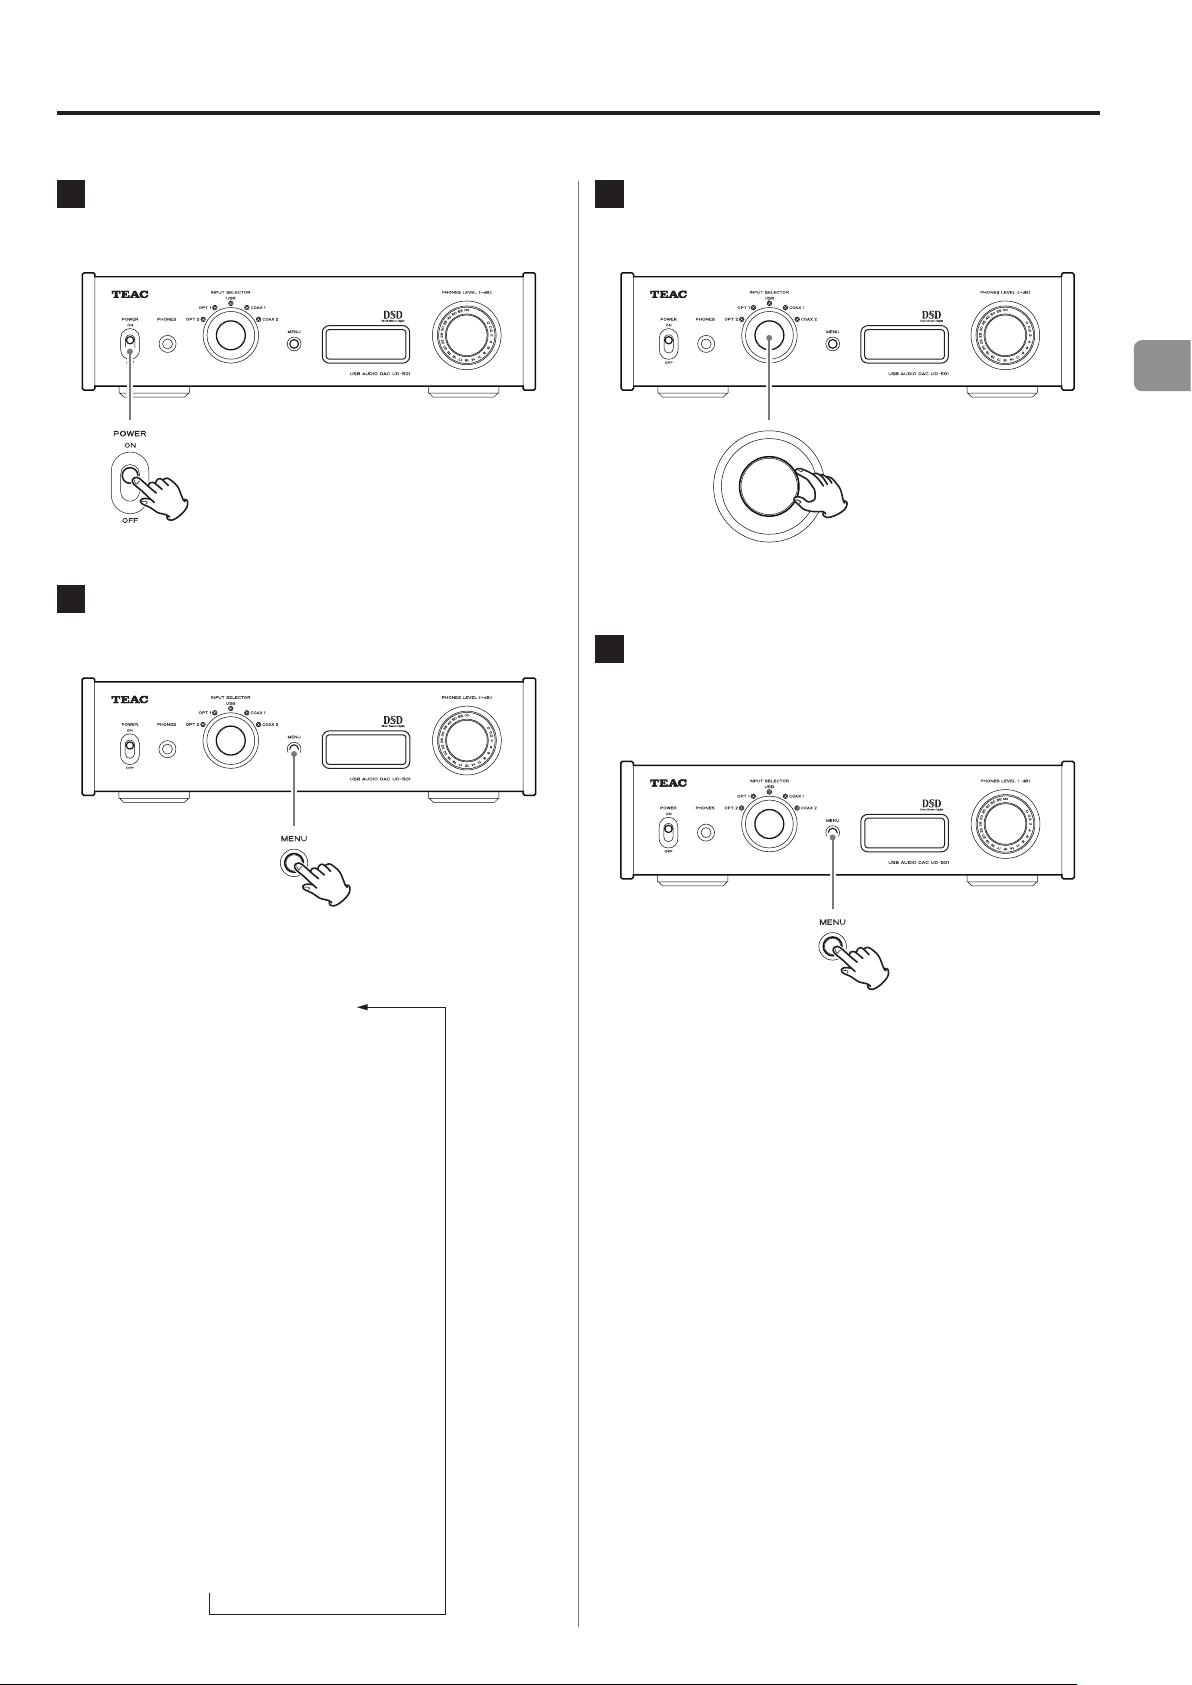
Basic operation
1
Shift the POWER switch to its ON position.
If a stereo amplifier is connected to this unit, always
o
turn its power ON very last.
2
Use the INPUT SELECTOR knob to set the
input source.
4
Adjust the volume.
Use the stereo amplifier or other device connected to
this unit to adjust the volume
When using headphones connected to this unit, turn
the PHONES LEVEL knob to adjust the volume.
When using headphones
Before connecting headphones to this unit, turn the
PHONES LEVEL knob counterclockwise to minimize the
volume.
The indicator for the selected input source lights.
If the input signal is not a digital audio signal or
o
is an audio signal format that is not supported by
this unit, such as Dolby Digital, DTS or AAC, “NOT
AUDIO!” will appear on the screen and no audio will
be output. Set the digital output of the connected
device to PCM audio output.
To use a computer running a Windows OS to play
o
back audio files when this unit is set to “USB”, you
must first install a dedicated driver on the computer before connecting them (page 13).
DSD data can only be played back via USB.
o
3
Operate the playback device.
−∞ dB: Minimum volume
0 dB: Maximum volume
Refer to the operation manual of that device.
10
Page 11
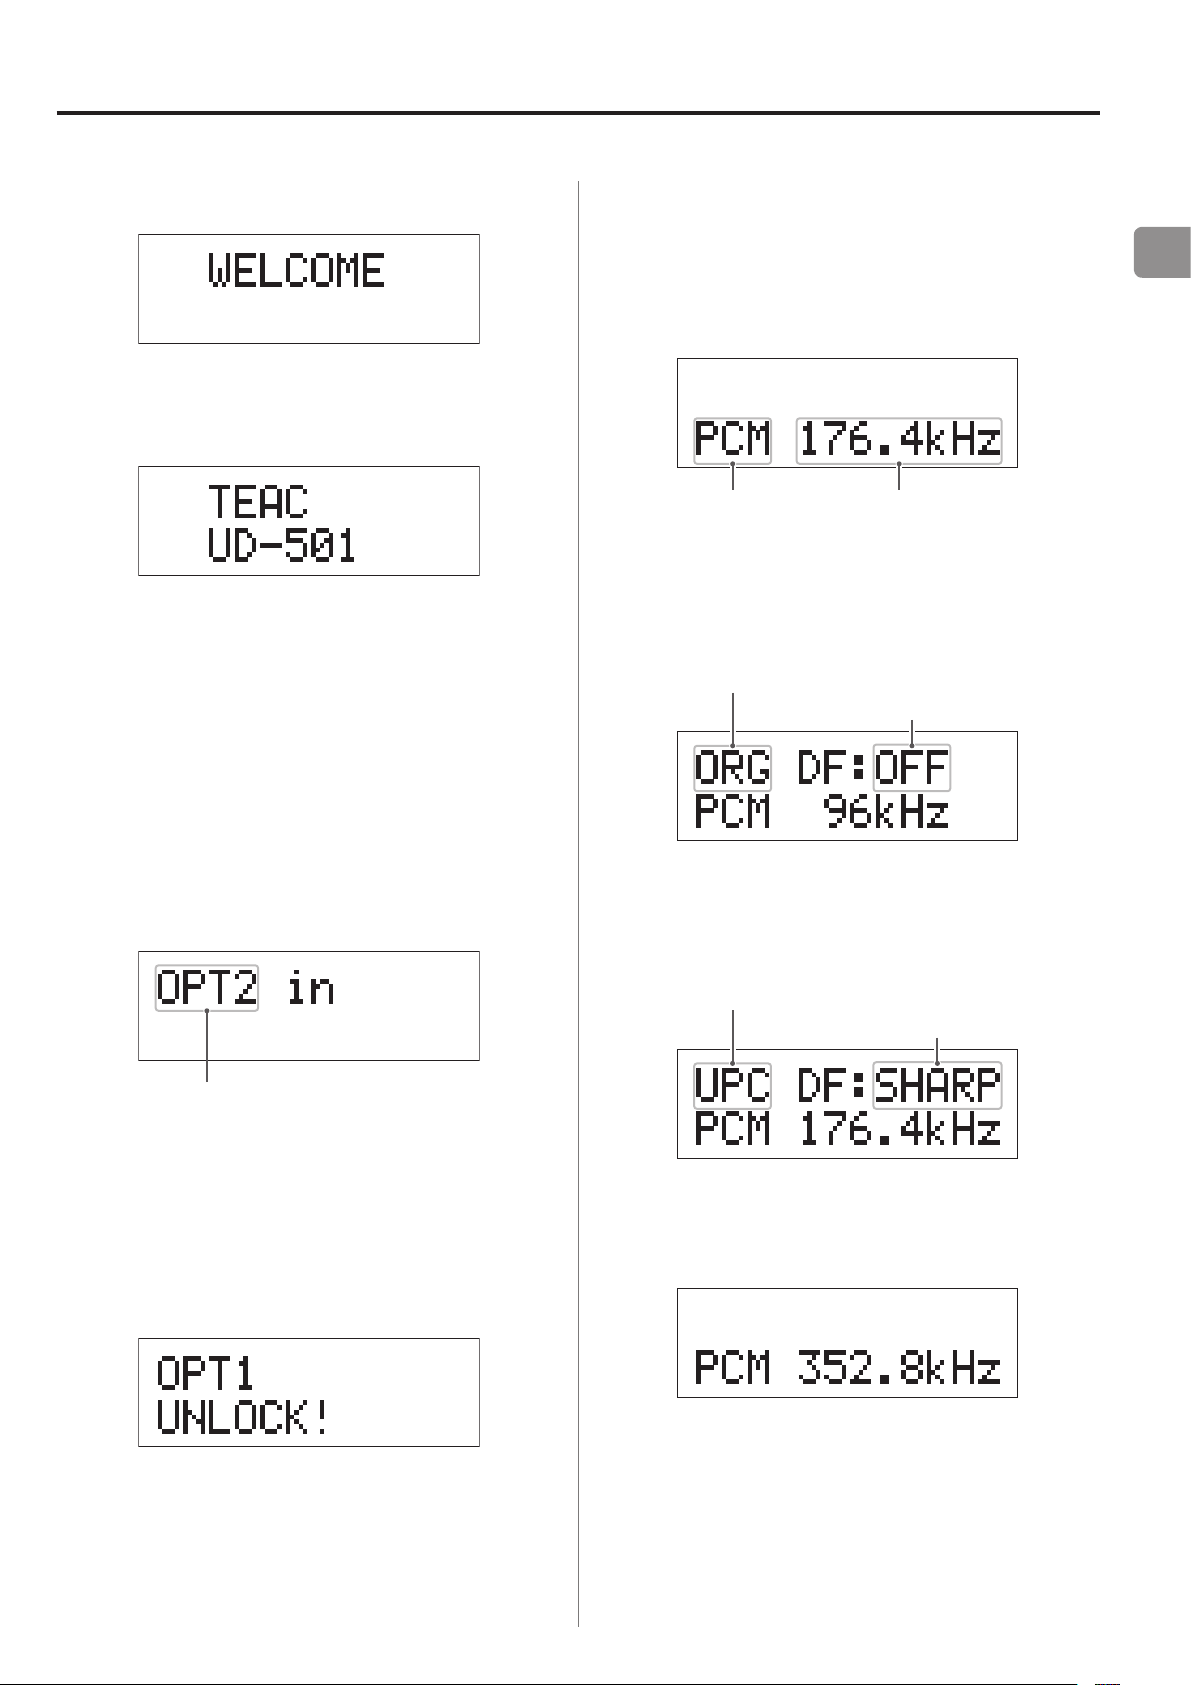
Display (1)
Input source name
Sampling frequencySignal type
Upconverter is disabled
Upconverter is enabled
When the POWER is turned ON
c
After the above messages appear, the input source will be
shown on the display.
Input source information display
During PCM audio input
When MODE DISP=OFF
Example
When MODE DISP=ON, UPCONV=OFF, DF=OFF
Example
Digital lter setting
EN
When selecting an input source
The name of the input source is shown on the display
when you change input source.
Example: when OPT2 is selected
Error indications
When the unit cannot lock the input signal, an “UNLOCK!”
error message blinks on the screen.
Example
When MODE DISP=ON, UPCONV=ON, DF=SHARP
Example
Digital lter setting
When the input signal is locked at 352.8 kHz
Example
When the input signal is locked at 352.8 kHz or 384 kHz,
o
the upconverter and PCM digital filter are bypassed, so
MODE DISP, UPCONV and DF will not be shown regardless of their settings.
11
Page 12
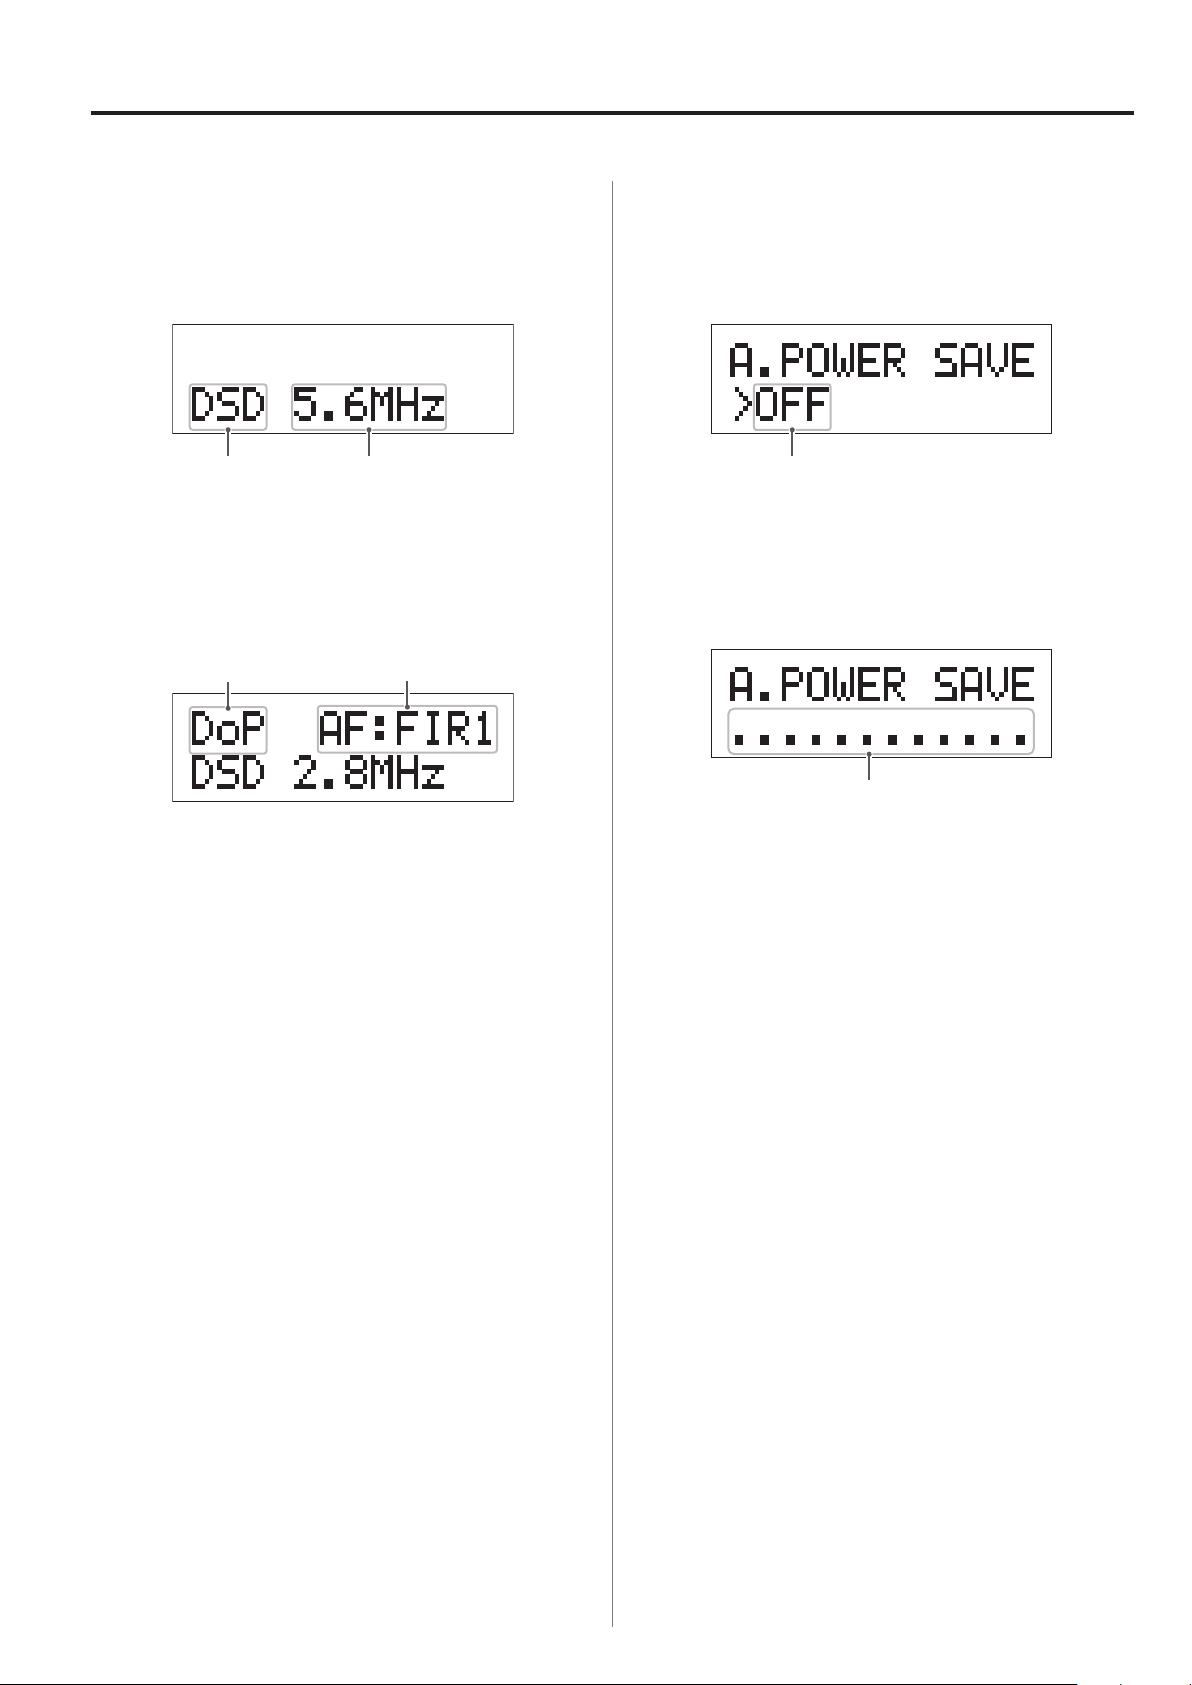
Display (2)
Sampling frequencySignal type
DSD analog FIR
Reception method
Switch setting
Time until standby
During DSD audio input
When MODE DISP=OFF
Example
When MODE DISP=ON, DSD AF=FIR1
Example
lter setting
Automatic power saving status
When you shift the AUTO POWER SAVE switch on the rear
panel of the unit, the new setting is shown for about 2
seconds.
12 seconds before the automatic power saving function
puts the unit in standby mode, a countdown is shown on
the display.
Reception method
Nothing shown: DSD received without conversion (native)
DoP: DSD signal received by DoP (DSD over PCM) method
One dot disappears each second until they have all disappeared and the unit enters standby.
12
Page 13

Playing back music on a computer (1)
Installing the driver on a computer
When using Mac OS X
This unit can be used with the following Mac OS:
Mac OS X 10.6 (Snow Leopard)
(Mac OS X 10.6.4 or later)
Mac OS X 10.7 (Lion)
Mac OS X 10.8 (Mountain Lion)
(As of October, 2012)
This unit will run with the standard OS driver, so there is
no need to install a special driver.
When using Windows OS
Installing the driver on the computer
In order for this unit to play back audio files stored on a
computer, you must first install a driver on the computer.
Please download this driver from the following web
address.
Driver software download page
http://www.teac.co.jp/audio/software_teac_e.html
About the transmission mode
This unit connects using high-speed asynchronous mode.
Transmittable sampling frequencies are 44.1 kHz, 48 kHz,
88.2 kHz, 96 kHz, 176.4 kHz and 192 kHz.
When properly connected, you will be able to select
“TEAC USB AUDIO DEVICE” as an audio output from the
computer OS.
In asynchronous mode, the audio data sent from the
o
computer is processed using this unit's clock, allowing
data transmission jitter to the reduced.
Downloading playback applications
If you need, you can download free playback application
software that supports DSD files (Mac and Windows versions) from the following TEAC web page.
Application software download page
http://www.teac.co.jp/audio/software_teac_e.html
EN
USB connection is supported on Windows computers
running Windows XP, Windows Vista, and Windows 7.
Compatibility with other operating systems is not
guaranteed.
CAUTION
Install the driver before connecting the unit with
the computer by USB.
If you connect this unit with a computer before
installing the driver, it will not work properly.
Moreover, if the computer is running Windows
XP, its operation could become noticeably
slower, requiring it to be restarted.
For instructions about driver installation procedures,
o
please see our download page.
Depending on the combination of hardware and soft-
o
ware, proper operation might not be possible even
with the above operating systems.
13
Page 14
Playing back music on a computer (2)
Playing back audio files on a computer
1
Connect this unit to a computer using a
USB cable.
USB cable
4
Turn the INPUT SELECTOR knob to select
“USB ”.
5
Start playback of an audio file on the
computer.
Use a cable with a connector that matches that of
o
this unit.
2
Turn the computer power on.
Confirm that the operating system has started
o
properly.
3
Press the POWER button to turn this unit
on.
By maximizing the output volume from the computer
and adjusting the volume output from the stereo
amplifier, better sound quality can be achieved.
Minimize the stereo amplifier volume before beginning playback. Then, gradually increase it.
When using headphones with this unit, turn the
PHONES LEVEL knob counterclockwise to minimize
the volume before starting playback. Then, gradually
increase it.
The computer cannot control this unit, nor can this unit
o
control the computer.
Do not do any of the following when playing back an
o
audio file via USB. Doing so could cause the computer
to malfunction. Always quit the music playback software before doing any of the following.
u Unplugging the USB cable
u Turning this unit's power off
u Changing the current input selection
14
When playing back an audio file via USB, computer
o
operation sounds will also be output. If you do not
want these sounds to be output, make appropriate settings on the computer to turn them off.
If you connect this unit with the computer or change
o
its input to “USB” after starting the music playback software, audio files might not play back correctly. If this
should occur, restart the audio playback software or
restart the computer.
Page 15
Settings (1)
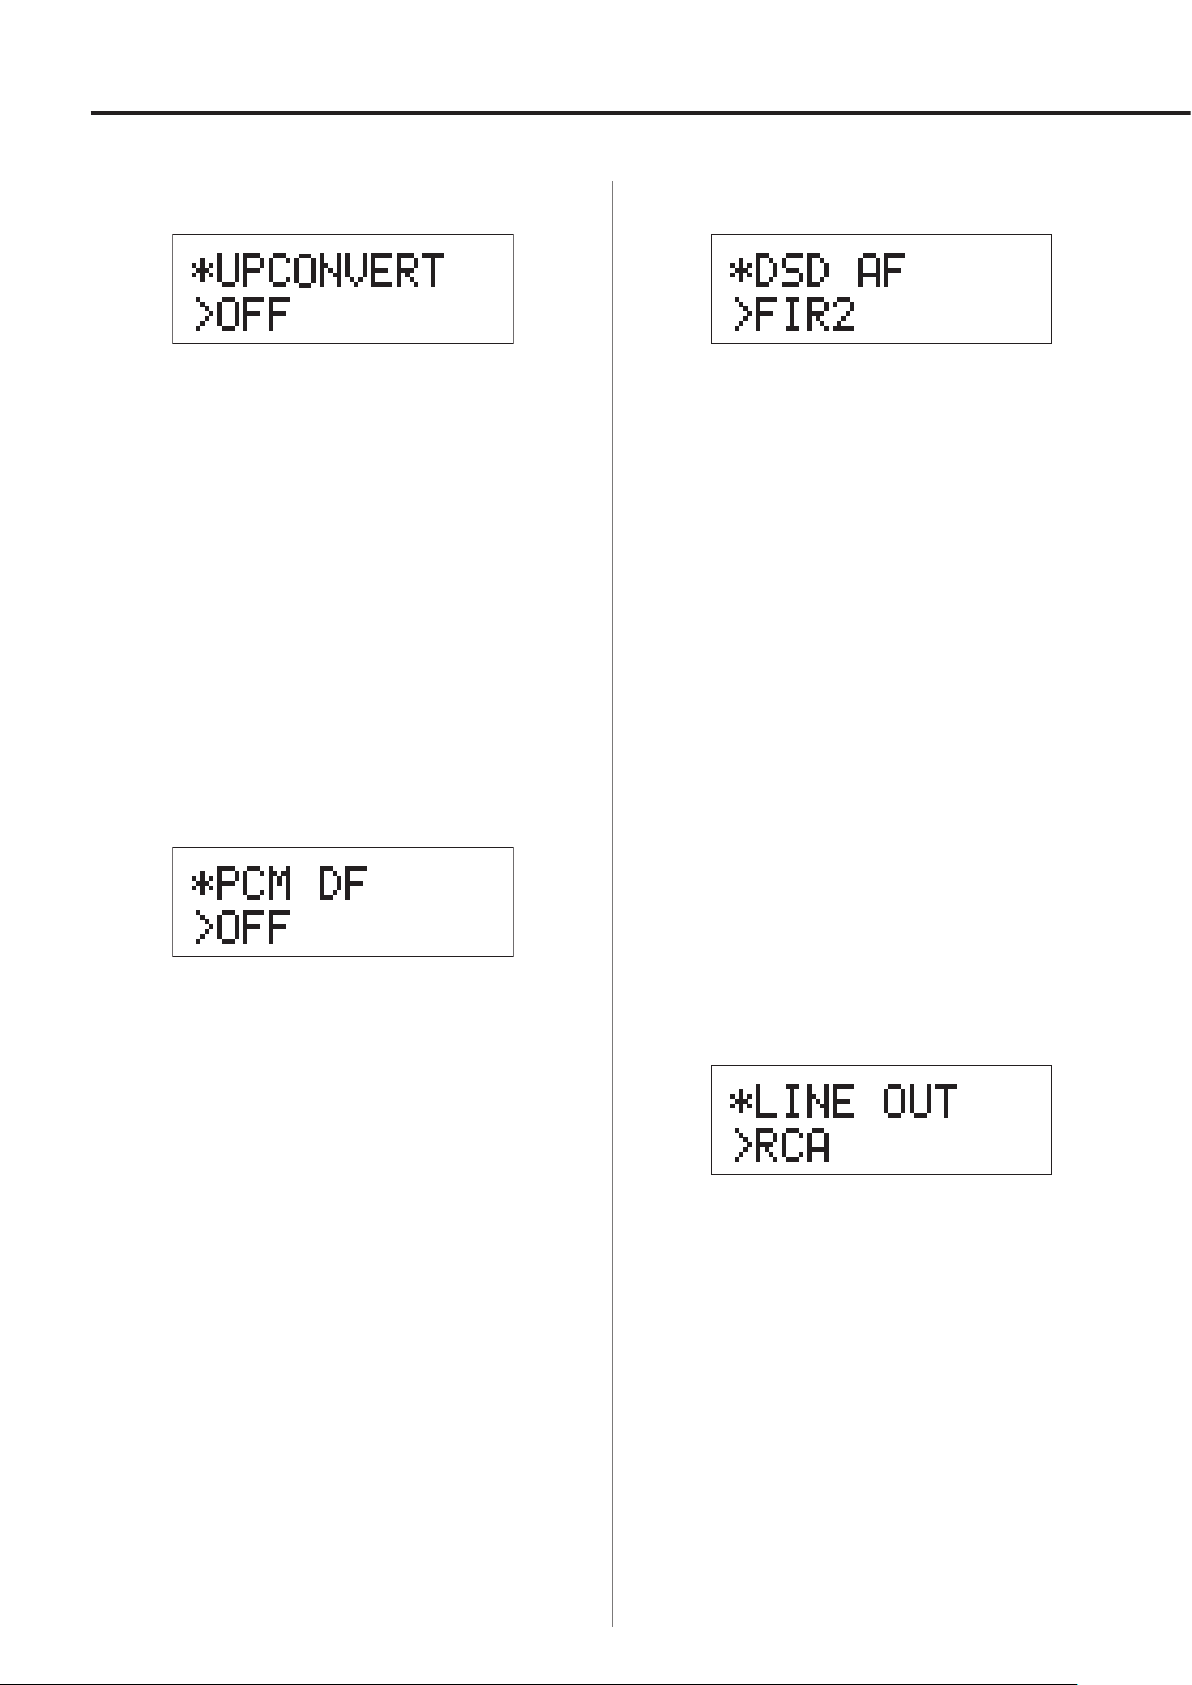
*UPCONVERT
*PCM DF
*DSD AF
*LINE OUT
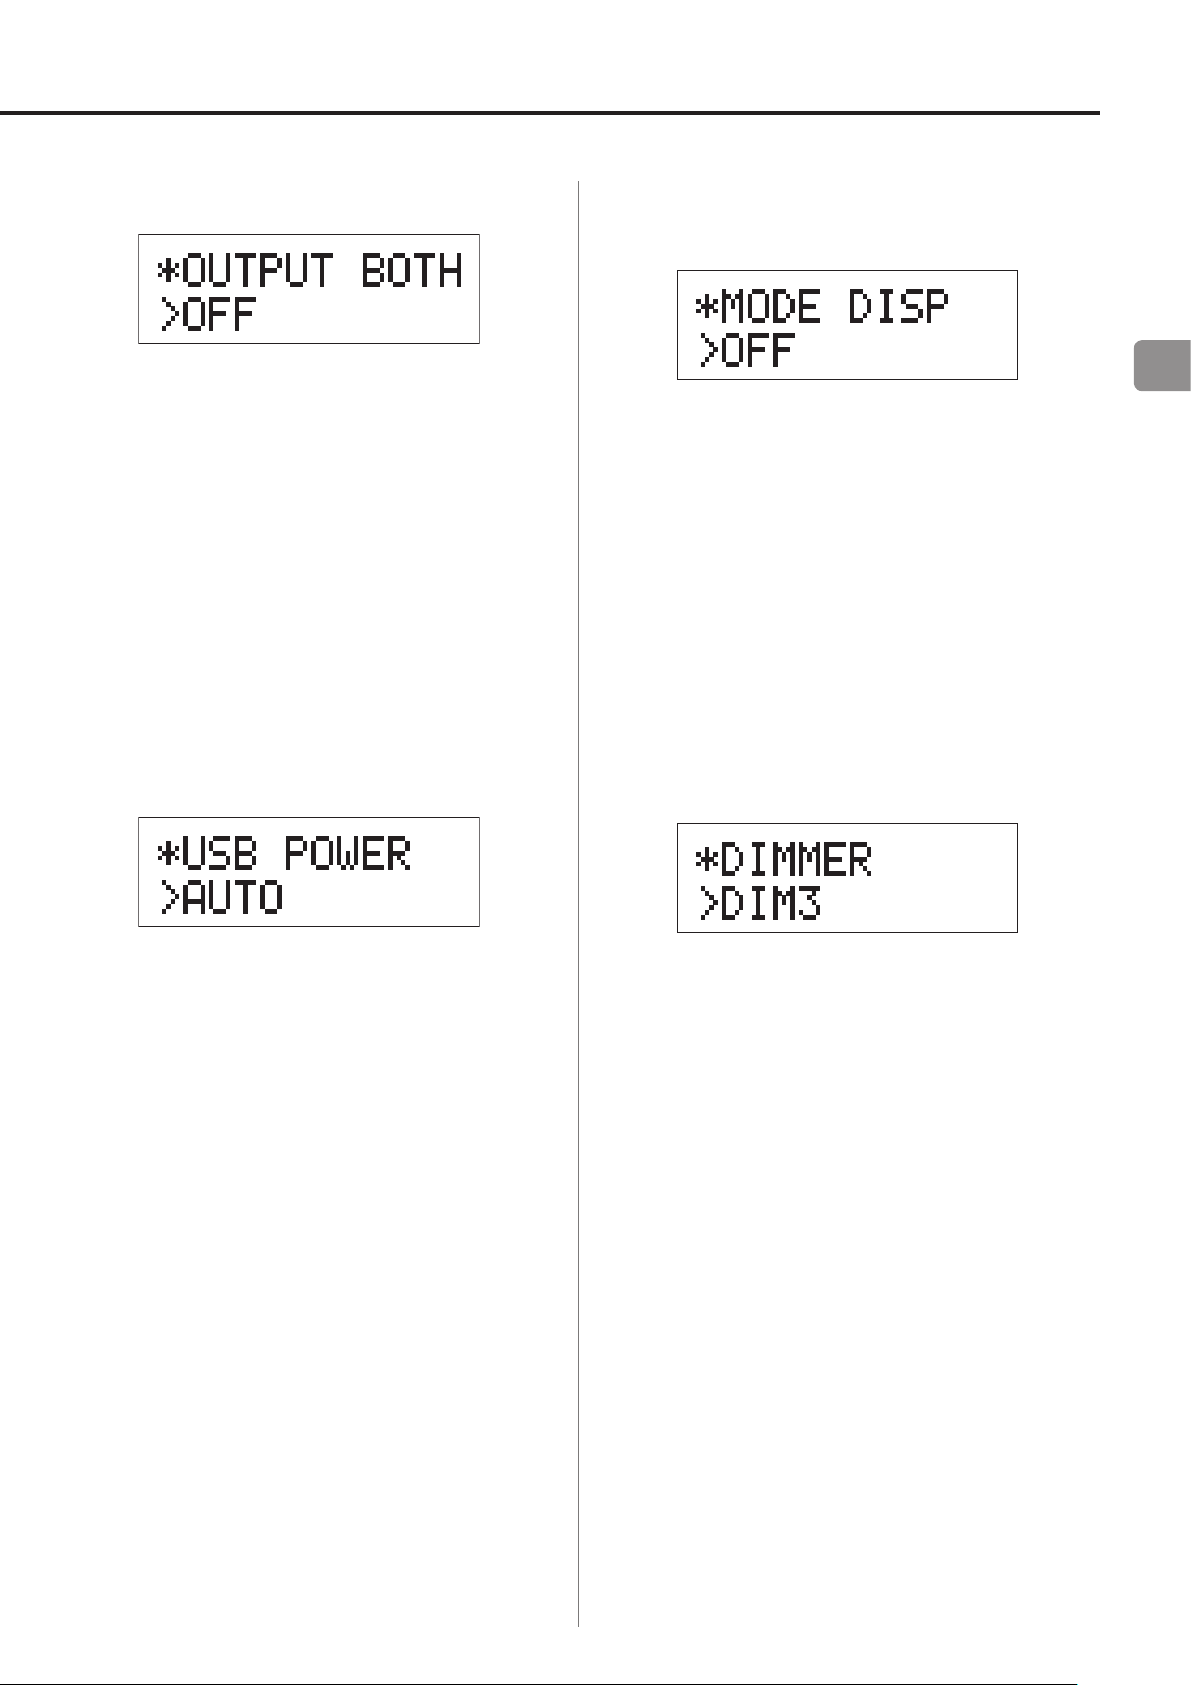
*OUTPUT BOTH
*USB POWER
*MODE DISP
*DIMMER
Input source status
1
Press the POWER button to turn this unit
on.
2
Press the MENU button to show the
setting items.
3
Turn the INPUT SELECTOR knob to change
the setting value.
The currently set value is shown on the display.
o
4
When you are done changing settings,
press the MENU button to show the input
source again.
EN
Press the MENU repeatedly to cycle through the
menu items as shown below.
x
If you do not do anything for 10 seconds, the dis-
o
play will return to showing the input source.
x
You can also press the MENU for 2 seconds or lon-
o
x
x
x
x
x
ger to show the input source.
x
15
Page 16

Settings (2)
Upconverter
Use to activate the upconversion circuit when receiving
PCM format signals.
OFF
Disable the upconverter.
ON
Enable the upconverter.
D/D upconversion to 192 kHz of PCM signals with sampling frequencies of less than 192 kHz is followed by D/A
conversion.
PCM digital filter
DSD analog FIR filter
Use to set the analog filter used when receiving DSD format signals.
FIR1
fc=185 kHz, Gain=−6.6 dB
FIR2
fc=90 kHz, Gain=+0.3 dB
FIR3
fc=85 kHz, Gain=−1.5 dB
FIR4
fc=94 kHz, Gain=−3.3 dB
NOTE
fc: Cutoff frequency
Gain: Filter stage gain
Use to set the digital filter when receiving PCM format
signals.
OFF
Disable the digital filter.
SHARP
Use a digital filter with a sharp rolloff.
SLOW
Use a digital filter with a slow rolloff.
When receiving signals at 352.8 kHz or 384 kHz, the
o
digital filter will be disabled during playback regardless
of this setting.
Line output
Use to select the analog audio output connectors used.
RCA
Output through the RCA jacks.
XLR2
Output through the XLR connectors with 2: HOT polarity.
XLR3
Output through the XLR connectors with 3: HOT polarity.
16
Page 17
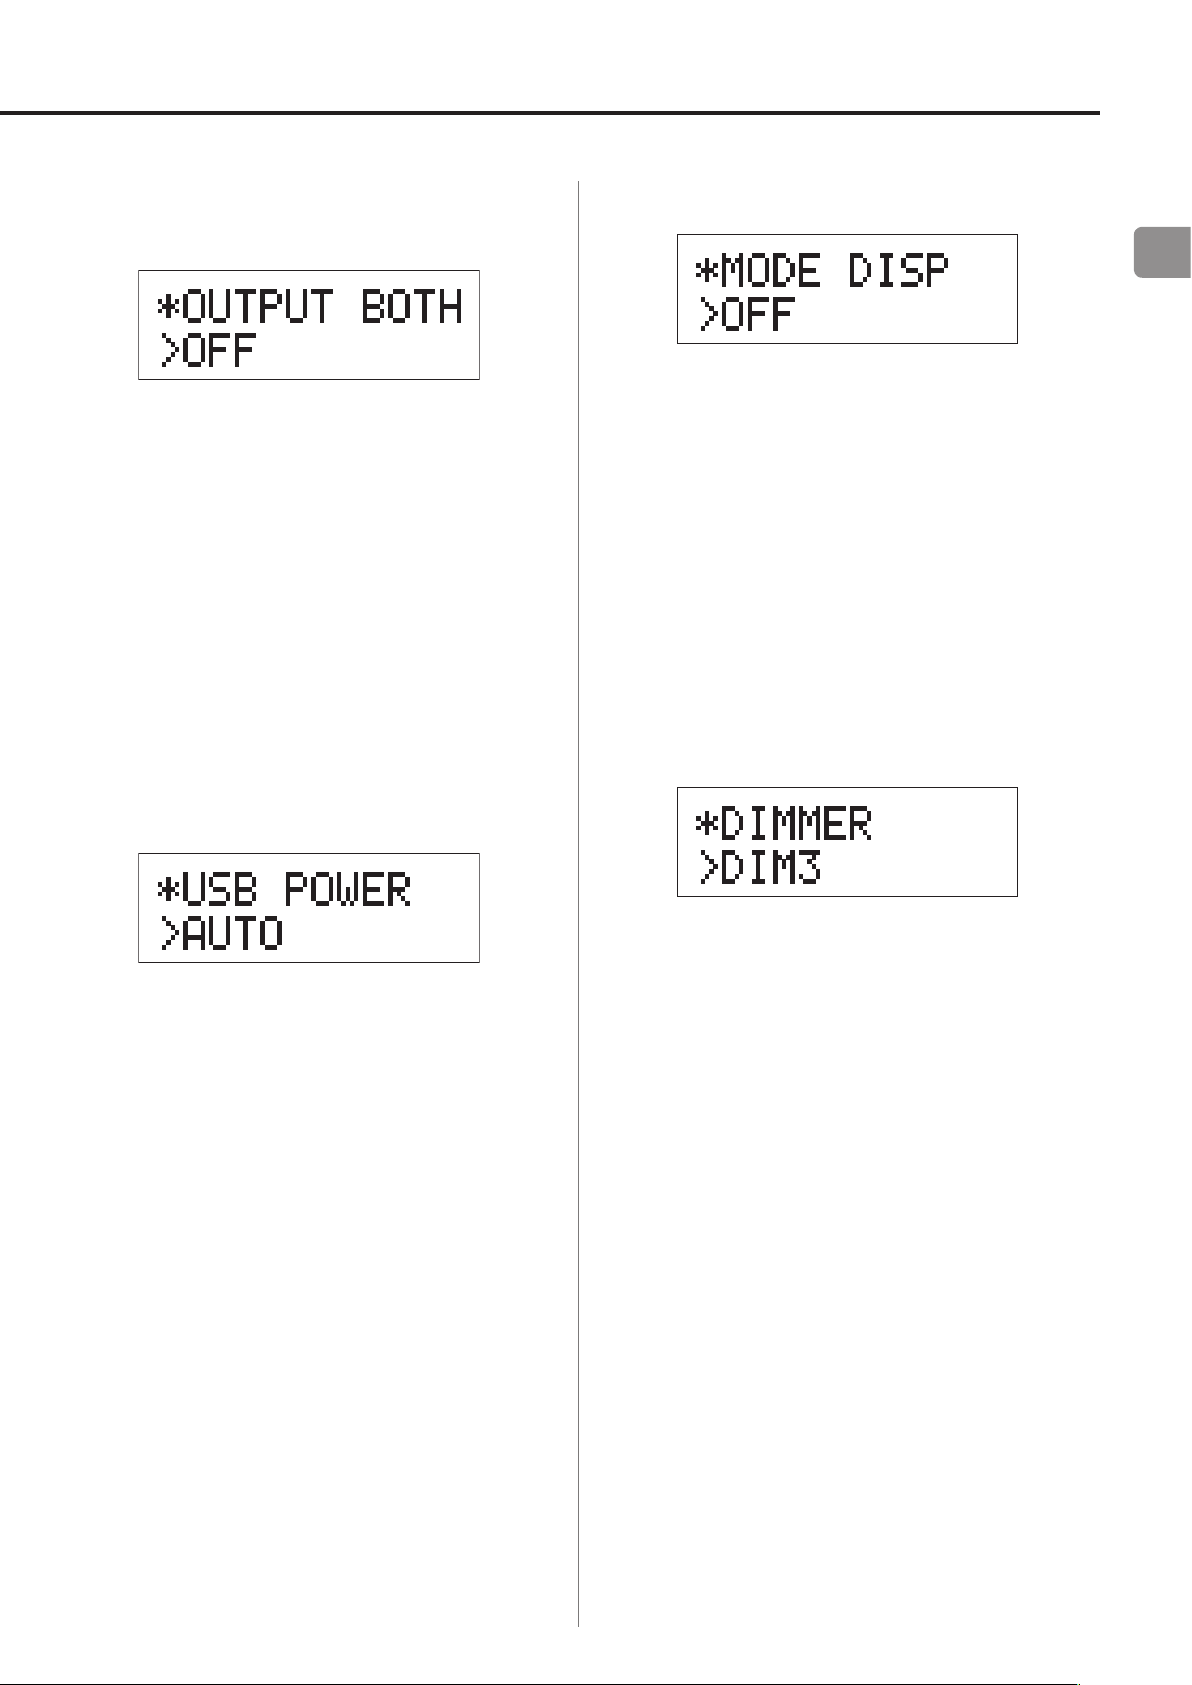
Simultaneous headphones and line
Setting mode (UPCONV, DF, AF) display
output
OFF
Simultaneous output is not possible.
When you connect headphones, the analog audio outputs will be disabled.
ON
Simultaneous output is possible.
Even when you connect headphones, the analog audio
outputs stay enabled.
EN
Use to set whether or not the setting mode (upconverter,
filter, DSD reception method, etc.) is also shown when the
input source is shown on the display.
OFF
Setting mode not shown.
ON
Setting mode shown.
Display brightness
USB input circuit power
AUTO
The USB port is powered only when the input is USB.
When any other input is active, the USB port is not
powered.
ON
The USB port is always powered.
DIM3
Ordinary brightness
DIM2
Slightly dim
DIM1
Even dimmer
DISP OFF
Display off
17
Page 18

Settings (3)
Troubleshooting
Restoring settings to their factory
defaults
While pressing and holding the MENU button, set the POWER switch to ON.
Press and hold the MENU button until “SETUP CLR”
o
appears on the display. The factory default settings are
the setting values shown in the screen images used in
the explanations in this manual.
If you experience a problem with this unit, please check
the following items before requesting service. If it still
does not operate correctly, contact the retailer where you
purchased the unit or TEAC customer support (see the
back cover for contact information).
General
The power will not turn on.
e Check that the power cord is completely plugged
into the power outlet. If the outlet is switched,
confirm that the switch is in the ON position.
e Connect a different electrical device to the outlet
to confirm that it is supplying power.
e If the automatic power saving function has
caused the unit to enter standby, turn the INPUT
knob or press the MENU button to turn the
power ON again.
No sound is output.
e If a stereo amplifier is connected to this unit,
adjust its volume.
If you are using headphones connected to this
unit, use the PHONES LEVEL knob to adjust the
volume.
e Use the INPUT SELECTOR knob to select the input
that is connected to the source that you want to
hear.
e
Reconfirm the connections with other equipment.
There is a humming noise.
e
If a connecting cable is near a power cord, fluorescent light or similar cause of interference, increase
the distance between them as much as possible.
18
Page 19

There is no sound from one side of the headphones.
e Confirm that the headphones plug is inserted
completely.
Connections with a computer
Computer does not recognize this unit.
e This unit can be connected with computers run-
ning the following operating systems.
Apple Macintosh
Mac OS X 10.6 (Snow Leopard)
(Mac OS X 10.6.4 or later)
Mac OS X 10.7 (Lion)
Mac OS X 10.8 (Mountain Lion)
(As of October, 2012)
Functions with the standard OS driver.
o
Microsoft Windows
Windows XP (32/64-bit)
Windows Vista (32/64-bit)
Windows 7 (32/64-bit)
Requires installation of a dedicated driver
o
(page 13).
Audio files cannot be played back.
e
Connect the computer with this unit and switch
to “USB” before starting the music playback software and music file playback.
If you connect this unit and the computer, or
switch the input to USB after launching the music
playback software, the audio data might not play
back properly.
Since this unit uses a microcontroller, external noise and
other interference can cause the unit to malfunction. If
this should occur, unplug the unit's power from the outlet
and wait a little while before plugging the power in again
and retrying the operation.
EN
Operation with other operating systems cannot
be guaranteed.
Noise occurs.
e Starting other applications during playback of a
music file may interrupt playback or cause noise.
Do not start other applications during playback.
e
When the unit is connected to a computer via a
USB hub, for example, noise might be heard. If this
occurs, connect the unit directly to the computer.
19
Page 20

Specifications
Analog audio outputs
Connectors ···························· XLR jacks × 1 pair
RCA jacks × 1 pair
Output impedance ·····························XLR: 88 Ω
RCA: 22 Ω
Maximum output level (1/full-scale, into 10 kΩ)
XLR: 4.0 Vrms
RCA: 2.0 Vrms
Frequency range· · · · · · · · · · · · · · · · · · · · 5 Hz – 80 kHz (−3 dB)
S/N ratio ···········································115 d B
Distortion ·································0.0015% (1 kHz)
Headphones output
Connector ···················Standard 6.3 mm stereo jack
Digital audio inputs
COAXIAL digital ·············RCA jacks × 2 (0.5 Vp-p/75 Ω)
OPTICAL digital ·············Optical digital connectors × 2
(–24.0 to –14.5 dBm peak)
USB ·································Type B connector × 1
(USB 2.0 compliant)
PCM data sampling frequency
COAXIAL digital ······32 kHz, 44.1 kHz, 48 kHz, 88.2 kHz,
96 kHz, 176.4 kHz, 192 kHz
OPTICAL digital ···············32 kHz, 44.1 kHz, 48 kHz,
88.2 kHz, 96 kHz,
USB ··················44.1 kHz, 48 kHz, 88.2 kHz, 96 kHz,
176.4 kHz, 192 kHz, 352.8 kHz, 384 kHz
Quantization bit rates
COAXIAL digital/OPTICAL digital ·············· 16/24-bit
USB ·······································16/24/32-bit
Maximum output ·········· 100 mW + 100 mW (into 32 Ω)
DSD data sampling frequency
USB ········································2.8/5.6 MHz
20
Page 21

General
Power supply
Europe model ····················AC 220 – 240 V, 50 Hz
U.S.A./Canada model ···················AC 120 V, 60 Hz
Power consumption ································ 13 W
Standby power consumption ·······················0.1 W
Included accessories
Power cord × 1
RCA audio cable × 1
Owner's Manual (this document) × 1
Warranty card × 1
EN
External dimensions ·······290 mm × 81.2 mm × 244 mm
(11 3/ 8” x 3 1/4” x 9 5/8” )
(W × H × D including protrusions)
Weight ·································4.0 kg (8 15/16 lb)
Operating temperature range ·············· +5°C to +35°C
Operating humidity range ·····5 – 85% (no condensation)
Storage temperature range ···············−20°C to +55°C
Specifications and appearance are subject to change
o
without notice.
Weight and dimensions are approximate.
o
Illustrations in this owner’s manual might differ slightly
o
from production models.
21
Page 22

Pb, Hg, Cd
INSTRUCTIONS DE SÉCURITÉ IMPORTANTES
o N'exposez pas cet appareil aux gouttes ni aux éclaboussures.
o Ne placez pas d'objet rempli de liquide sur l'appareil, comme
par exemple un vase.
o N’installez pas cet appareil dans un espace confiné comme une
bibliothèque ou un meuble similaire.
o L’appareil tire un courant nominal de veille de la prise secteur
quand son interrupteur POWER ou STANDBY/ON n’est pas en
position ON.
o L’appareil doit être placé suffisamment près de la prise de
courant pour que vous puissiez à tout moment atteindre
facilement la fiche du cordon d’alimentation.
o La fiche secteur est utilisée comme dispositif de déconnexion
et doit donc toujours rester disponible.
o Les produits de Classe sont équipés d'un cordon d'alimentation
ayant une fiche de terre. Le cordon de ces produits doit être
branché dans une prise de terre.
o Si le produit utilise des batteries (y compris un pack d'accus ou
des piles), elles ne doivent pas être exposées au soleil, au feu ou
à une chaleur excessive.
o PRÉCAUTION pour les produits utilisant des batteries au
lithium remplaçables: il existe un danger d'explosion en cas de
remplacement par un type de batterie incorrect. Remplacez-les
uniquement par des modèles identiques ou équivalents.
o Des précautions doivent être prises pour l'emploi d'écouteurs
ou d'un casque avec le produit car une pression acoustique
(volume) excessive dans les écouteurs ou dans le casque peut
provoquer une perte d’audition.
Pour les consommateurs européens
Mise au rebut des équipements électriques et électroniques
(a) Tout équipement électrique et électronique doit être traité
séparément de la collecte municipale d'ordures ménagères
dans des points de collecte désignés par le gouvernement ou
les autorités locales.
(b) En vous débarrassant correctement des équipements
électriques et électroniques, vous contribuerez à la sauvegarde
de précieuses ressources et à la prévention de potentiels effets
négatifs sur la santé humaine et l'environnement.
(c)
Le traitement incorrect des déchets d'équipements électriques
et électroniques peut avoir des effets graves sur l'environnement
et la santé humaine en raison de la présence de substances
dangereuses dans les équipements.
(d) Le symbole de déchets d'équipements électriques et
électroniques (DEEE), qui représente une poubelle à
roulettes barrée d'une croix, indique que l'équipement
électrique et électronique doit être collecté et traité
séparément des déchets ménagers.
(e) Des systèmes de retour et de collecte sont disponibles
pour l'utilisateur final. Pour des informations plus détaillées
sur la mise au rebut des vieux équipements électriques et
électroniques, veuillez contacter votre mairie, le service
d'ordures ménagères ou le magasin dans lequel vous avez
acquis l'équipement.
Mise au rebut des batteries et/ou accumulateurs
(a)
Les batteries et/ou accumulateurs hors d'usage doivent être
traités séparément de la collecte municipale d'ordures ménagères
dans des points de collecte désignés par le gouvernement ou les
autorités locales.
(b) En vous débarrassant correctement des batteries et/ou
accumulateurs hors d'usage, vous contribuerez à la sauvegarde
de précieuses ressources et à la prévention de potentiels effets
négatifs sur la santé humaine et l'environnement.
(c) Le
traitement incorrect des batteries et/ou accumulateurs hors
d'usage peut avoir des effets graves sur l'environnement et la
santé humaine car ils contiennent des substances dangereuses.
(d) Le symbole de déchets d'équipements électriques et
électroniques (DEEE), qui représente une poubelle à
roulettes barrée d'une croix, indique que les batteries
et/ou accumulateurs doivent être collectés et traités
séparément des déchets ménagers.
Si une batterie ou un accumulateur contient plus que les
valeurs spécifiées de plomb (Pb), mercure (Hg) et/ou cadmium
(Cd) telles que définies dans la directive sur les batteries
(2006/66/EC), alors les symboles chimiques de ces éléments
seront indiqués sous le symbole DEEE.
(e) Des systèmes de retour et de collecte sont disponibles pour
l'utilisateur final. Pour des informations plus détaillées sur la
mise au rebut des batteries et/ou accumulateurs, veuillez
contacter votre mairie, le service d'ordures ménagères ou le
magasin dans lequel vous les avez achetés.
22
Page 23

Sommaire
Éléments fournis
Nous vous remercions d’avoir choisi TEAC. Lisez ce mode
d'emploi avec attention pour tirer les meilleures performances de cette unité.
Éléments fournis ..................................... 23
Avant l’utilisation ....................................24
Entretien ............................................24
Nomenclature et fonctions des parties ............... 25
Branchement de l'équipement ......................26
Fonctionnement de base ............................28
Écran ................................................29
Lecture de musique sur un ordinateur ............... 31
Réglages ............................................33
Guide de dépannage ................................36
Caractéristiques techniques. . . . . . . . . . . . . . . . . . . . . . . . . . 38
Vérifiez que l'emballage contient bien tous les éléments
indiqués ci-dessous.
Veuillez contacter le magasin dans lequel vous avez
acheté cette unité si l'un de ces éléments manque ou a
été endommagé durant le transport.
Cordon d’alimentation x 1
Câble audio RCA × 1
Mode d’emploi (ce document) × 1
Conservez ce mode d'emploi dans un endroit sûr pour
o
référence ultérieure.
Carte de garantie × 1
FR
23
Page 24

Avant l’utilisation Entretien
V
Précautions de placement
Ne posez rien sur l’unité.
o
Évitez d'exposer l'unité directement au soleil et de la pla-
o
cer près d'une quelconque source de chaleur telle qu'un
radiateur, une bouche de chauffage, une cheminée
ou un amplificateur. Évitez aussi les endroits sujets aux
vibrations ou exposés à une poussière excessive, au froid
et à l’humidité.
Placez l'unité sur une surface stable près du système
o
audio que vous allez utiliser avec elle.
Ne déplacez pas l'unité durant l'utilisation.
o
La tension d’alimentation de l'unité doit correspondre
o
à la tension imprimée sur son panneau arrière. Si vous
avez des doutes à ce sujet, consultez un électricien.
Il est possible que l’unité chauffe durant l’utilisation,
o
laissez donc toujours un espace suffisant autour d'elle
pour sa ventilation. Quand vous posez cette unité,
positionnez-la pour qu'elle soit au moins à 3 cm des
murs et autres appareils afin de permettre une bonne
dissipation thermique. Si vous l'installez dans un rack,
laissez au moins 5cm de libre au-dessus de l'unité et
10cm derrière elle.
Si la surface de l’unité est sale, essuyez-la avec un chiffon
sec et doux. Si l’unité est très sale, humidifiez légèrement
un chiffon doux avec un détergent neutre dilué et essorez-le bien pour éliminer tout liquide excessif avant de
vous en servir pour nettoyer l'unité.
Q Pour votre sécurité, débranchez le cordon
d'alimentation de la prise secteur avant tout
nettoyage.
Ne vaporisez jamais du liquide directement sur l'unité.
o
N’utilisez pas de diluant ni d'alcool car ils peuvent
o
endommager la surface de l’unité.
Évitez un contact prolongé de l'unité avec des maté-
o
riaux caoutchouteux ou plastiques car ceux-ci peuvent
endommager le boîtier.
N’ouvrez pas le boîtier de l'unité car cela peut endom-
o
mager le circuit ou causer un choc électrique. Si un
objet étranger pénètre dans l’unité, consultez votre
revendeur ou un service après-vente TEAC.
Quand vous débranchez le cordon d'alimentation de
o
la prise secteur, tirez toujours sur la prise, jamais sur le
cordon.
En fonction des ondes électromagnétiques de télédif-
o
fusion, des parasites peuvent apparaître sur les écrans
de télévision quand cette unité est sous tension. Ce
n'est pas un mauvais fonctionnement de cette unité
ou du téléviseur. Si cela se produit, éteignez cette
unité.
24
Page 25
Nomenclature et fonctions des parties
A B C D E F
FR
A
Interrupteur d'alimentation POWER
Sert à mettre sous et hors tension.
B
Prise PHONES
Branchez ici un casque à fiche jack 6,35mm stéréo
standard.
C
Bouton INPUT SELECTOR
Sert à sélectionner la source d'entrée. Le voyant de la
source d'entrée sélectionnée s'allume.
Sert à changer les valeurs de réglage quand un paramètre de menu est affiché.
Si vous tournez ce bouton alors que la fonction
o
d'économie automatique d'énergie a fait passer
l'unité en veille, l'unité se rallume.
D
Touche MENU
E
Écran
Cet écran affiche des informations sur l'audio lu et
des pages de menu.
F
Bouton PHONES LEVEL
Sert à régler le volume de sortie pour casque.
Tournez-le vers la droite pour monter le volume et
vers la gauche pour le baisser.
Ce bouton ne règle pas le niveau de sortie par les
o
prises de sortie analogique LINE OUT.
Le volume maximal est 0, et le volume minimal
est −∞ (moins l'infini). Si vous utilisez un casque,
avant de mettre sous tension, utilisez le bouton PHONES LEVEL pour ramener le niveau de
volume du casque à son minimum (−∞). Ne pas
le faire peut entraîner des bruits forts et soudains
risquant d'altérer votre audition ou de causer
d'autres problèmes.
Appuyez sur cette touche pour passer en mode de
réglage (page 33).
Si vous appuyez sur cette touche alors que la
o
fonction d'économie automatique d'énergie a fait
passer l'unité en veille, l'unité se rallume.
25
Page 26

Appareil à sortie
Appareil à sortie
Branchement de l'équipement
Ordinateur personnel
Si vous utilisez un
système Windows,
installez le pilote dédié
sur l’ordinateur avant de
lui raccorder l’unité
(page 31).
A
audio numérique
SORTIE NUMÉRIQUE
(COAXIALE)
Câble numérique coaxial RCA
Câble USB
B C D
A
audio numérique
SORTIE NUMÉRIQUE
(OPTIQUE)
Câble numérique optique
F
La polarité des
connecteurs XLR
peut être réglée
pour avoir le point
chaud sur la broche
2 ou 3 (p.34).
E
Cordon d’alimentation fourni
Branchez un jeu de
câbles de l’un ou
l’autre des types.
Câble audio RCA
Câble XLR
Prise secteur
26
LRLR
Entrée audio
(LINE IN, etc.)
Amplicateur stéréo ou enceintes ampliées
Page 27

A
Blanc (G)
)
Blanc (G)
Rouge (D
Prises de sortie audio analogique
(LINE OUT)
C'est la paire de sorties audio analogiques pour deux
canaux. Reliez ces prises XLR et RCA aux amplificateurs stéréo ou enceintes amplifiées.
Faites ces connexions au moyen des câbles fournis
ou de câbles du commerce.
XLR: câbles XLR symétriques
RCA: câble audio RCA
Reliez la prise R (droite) de cette unité à la prise R de
l'amplificateur. De même, reliez la prise L (gauche) de
cette unité à la prise L de l'amplificateur.
)
B
Prise d'entrée USB (DIGITAL IN)
Rouge (D
D
Prises d'entrée audio numérique optique
Servent à recevoir l'audio numérique. Branchez-y les
prises de sortie audio numérique optique d'appareils
audio numériques.
Utilisez des câbles numériques optiques du commerce pour faire les connexions.
E
Commutateur AUTO POWER SAVE
Sert à mettre en ou hors service la fonction d'économie automatique d'énergie. Sur ON, l'unité passe
automatiquement en mode de veille si elle reste
au moins 30minutes sans rien recevoir en entrée
numérique.
Pour rallumer l'unité passée en mode de veille,
o
appuyez sur la touche MENU, tournez le bouton
INPUT SELECTOR ou basculez l'interrupteur d'alimentation POWER sur OFF avant de le ramener sur ON.
FR
Sert à recevoir l'audio numérique d'un ordinateur.
Reliez-la à la prise USB d'un ordinateur.
Pour le branchement, utilisez un câble USB du
commerce.
ATTENTION
Avant de brancher un ordinateur fonctionnant sous
système d'exploitation Windows, vous devez installer le pilote dédié sur l'ordinateur (page 31).
Une connexion correcte n'est pas possible avec un
ordinateur sur lequel ce pilote n'a pas été installé.
C
Prises d'entrée audio numérique coaxiale
RCA (DIGITAL IN)
Servent à recevoir l'audio numérique. Branchez-y les
prises de sortie audio numérique coaxiale d'appareils
audio numériques.
Utilisez des câbles numériques coaxiaux RCA du
commerce pour faire les connexions.
Attendez quelques secondes après avoir basculé
o
l'interrupteur d'alimentation POWER sur OFF avant
de le ramener sur ON.
F
Prise d'entrée secteur (~IN)
Branchez ici le cordon d'alimentation fourni. Après
avoir terminé tous les autres branchements, insérez
la fiche du cordon d'alimentation dans une prise
secteur.
Débranchez le cordon de la prise secteur en cas de
non-utilisation prolongée de l'unité.
V
N'utilisez que le cordon d’alimentation fourni.
L'emploi d'un autre cordon peut entraîner un
incendie ou un choc électrique.
V
Ne mettez sous tension qu’une fois
toutes les connexions effectuées.
Lisez attentivement les modes d'emploi des
o
appareils que vous branchez et suivez leurs instructions quand vous faites les branchements.
Ne regroupez pas les câbles de connexion avec
o
des cordons d'alimentation. Cela pourrait entraîner des bruits.
Branchez à fond toutes les fiches.
o
27
Page 28

Fonctionnement de base
1
Basculez l'interrupteur d'alimentation
POWER en position ON.
Si un amplificateur stéréo est connecté à cette
o
unité, allumez-le toujours en tout dernier.
2
Utilisez le bouton INPUT SELECTOR pour
choisir la source d'entrée.
3
Faites jouer l'appareil source.
Référez-vous au mode d'emploi de cet appareil.
4
Réglez le volume.
Utilisez l'amplificateur stéréo ou l'autre appareil
connecté à cette unité pour régler le volume.
Si vous avez branché un casque à cette unité, réglez
son volume en tournant le bouton PHONES LEVEL.
Si vous utilisez un casque
Avant de brancher un casque à cette unité, tournez le
bouton PHONES LEVEL dans le sens anti-horaire pour
minimiser le volume.
Le voyant de la source d'entrée sélectionnée s'allume.
Si le signal entrant n'est pas un signal audio numé-
o
rique ou est à un format non pris en charge par
cette unité, comme du Dolby Digital, DTS ou AAC,
«NOT AUDIO!» apparaît à l'écran et aucun signal
audio n'est produit. Réglez la sortie numérique de
l'appareil connecté pour une sortie audio PCM.
Pour employer un ordinateur fonctionnant sous
o
système d'exploitation (OS) Windows afin de lire
des fichiers audio quand cette unité est réglée sur
«USB», vous devez installer un pilote dédié sur
l'ordinateur avant de les relier (page 31).
Les données DSD ne peuvent être lues que par USB.
o
28
−∞ dB: volume minimal
0 dB: volume maximal
Page 29

Écran (1)
Nom de la source d'entrée
Fréq. d'échantillonnageType de signal
Convertisseur ascendant désactivé
Convertisseur ascendant activé
À la mise sous tension
c
Après l'apparition des messages ci-dessus, la source d'entrée s'affiche à l'écran.
Affichage d'informations sur la source
d'entrée
Durant l'entrée d'audio PCM
Quand MODE DISP = OFF
Exemple
Quand MODE DISP = ON, UPCONV = OFF, DF = OFF
Exemple
Réglage du ltre numérique
FR
À la sélection d'une source d'entrée
Le nom de la source d'entrée s'affiche à l'écran quand
vous en changez.
Exemple: quand OPT2 est sélectionnée
Indications d'erreur
Si l'unité ne parvient pas à verrouiller le signal d'entrée,
un message d'erreur «UNLOCK!» clignote à l'écran.
Exemple
Quand MODE DISP = ON, UPCONV = ON, DF = SHARP
Exemple
Réglage du ltre numérique
Quand le signal d'entrée est verrouillé à 352,8kHz
Exemple
Quand le signal d'entrée est verrouillé à 352,8kHz ou
o
384kHz, le convertisseur ascendant et le filtre numérique PCM sont court-circuités, donc MODE DISP,
UPCONV et DF ne s'afficheront pas, quels que soient
leurs réglages.
29
Page 30

Écran (2)
Fréq. d'échantillonnageType de signal
Réglage du ltre
Méthode
de réception
Nouveau réglage
Temps avant mise en veille
Durant l'entrée d'audio DSD
Quand MODE DISP = OFF
Exemple
Quand MODE DISP=ON, DSD AF=FIR1
Exemple
FIR analogique DSD
Statut de l'économiseur d'énergie
Quand vous basculez le commutateur AUTO POWER
SAVE en face arrière de l'unité, le nouveau réglage s'affiche durant environ 2secondes.
12secondes avant que la fonction d'économie automatique d'énergie ne fasse passer l'unité en mode de veille,
un compte à rebours s'affiche.
Méthode de réception
Rien d'affiché: DSD reçu sans conversion (natif)
DoP: signal DSD reçu par méthode DoP (DSD par PCM)
Un point disparaît chaque seconde jusqu'à ce qu'ils aient
tous disparu et l'unité passe alors en veille.
30
Page 31

Lecture de musique sur un ordinateur (1)
Selon la combinaison ordinateur et logiciel, un bon
Installation du pilote sur un ordinateur
Avec Mac OS X
Cette unité peut être utilisée avec les versions suivantes
de Mac OS :
Mac OS X 10.6 (Snow Leopard)
(Mac OS X 10.6.4 ou ultérieur)
Mac OS 10.7 (Lion)
Mac OS X 10.8 (Mountain Lion)
(en date d'octobre 2012)
Cette unité fonctionnera avec le pilote standard du
système d'exploitation (OS), donc il n'y a pas besoin d'installer un pilote spécial.
o
fonctionnement peut ne pas être possible même avec
les systèmes d'exploitation ci-dessus.
À propos du mode de transmission
Cette unité se connecte en mode asynchrone haute
vitesse.
Les fréquences d'échantillonnage transmissibles sont
44,1kHz, 48kHz, 88,2kHz, 96kHz, 176,4kHz et 192kHz.
Quand la connexion est correcte, vous pouvez sélectionner «TEAC USB AUDIO DEVICE» comme sortie audio
dans le système d'exploitation de l'ordinateur.
FR
Avec Windows OS
Installation du pilote sur l'ordinateur
Pour que cette unité puisse lire les fichiers audio conservés sur un ordinateur, vous devez d'abord installer un
pilote sur l'ordinateur. Veuillez télécharger ce pilote à
l'adresse web suivante.
Page de téléchargement du pilote logiciel
http://www.teac.co.jp/audio/software_teac_e.html
La connexion USB est prise en charge sur les ordinateurs
sous Windows XP, Windows Vista et Windows 7.
compatibilité avec d'autres systèmes d'exploitation n'est
pas garantie.
La
ATTENTION
Installez le pilote avant de relier l'unité à l'ordinateur par USB.
Si vous connectez cette unité à l'ordinateur
avant d'installer le pilote, elle ne fonctionnera
pas correctement. De plus, si l'ordinateur utilise
Windows XP, son fonctionnement deviendra
nettement plus lent, ce qui nécessite de le faire
redémarrer.
En mode asynchrone, les données audio envoyées
o
depuis l'ordinateur sont traitées au moyen de l'horloge
de cette unité, ce qui permet de réduire la gigue de
transmission des données.
Téléchargement d'applications de
lecture
Si vous en avez besoin, vous pouvez gratuitement télécharger un logiciel de lecture prenant en charge les
fichiers DSD (versions Mac et Windows) depuis la page
web TEAC suivante.
Page de téléchargement du logiciel application
http://www.teac.co.jp/audio/software_teac_e.html
Pour des instructions sur les procédures d'instal-
o
lation du pilote, veuillez consulter notre page de
téléchargement.
31
Page 32
Lecture de musique sur un ordinateur (2)
Lecture de fichiers audio sur un ordinateur
1
Branchez cette unité à l'ordinateur à l'aide
d'un câble USB.
Câble USB
4
5
Tournez le bouton INPUT SELECTOR afin
de sélectionner «USB».
Lancez la lecture d'un fichier audio sur
l'ordinateur.
Utilisez un câble ayant une fiche qui correspond à
o
la prise de cette unité.
2
Mettez l'ordinateur sous tension.
Vérifiez que son système d'exploitation a normale-
o
ment démarré.
3
Basculez l’interrupteur d’alimentation
POWER pour allumer cette unité.
Une meilleure qualité sonore peut être obtenue en
réglant au maximum le volume sur l'ordinateur et en
réglant le volume final sur l'amplificateur stéréo.
Minimisez le volume de l'amplificateur stéréo avant
de lancer la lecture. Puis montez-le progressivement.
Si vous utilisez un casque avec cette unité, tournez le
bouton PHONES LEVEL dans le sens anti-horaire pour
minimiser le volume avant de lancer la lecture. Puis
montez-le progressivement.
L'ordinateur ne peut pas contrôler cette unité et cette
o
unité ne peut pas contrôler l'ordinateur.
N'essayez aucune des opérations suivantes pendant
o
la lecture d'un fichier audio par USB. Cela pourrait
entraîner un mauvais fonctionnement de l'ordinateur.
Quittez toujours le logiciel de lecture de musique
avant d'entamer une des actions suivantes.
u Débrancher le câble USB
u Éteindre cette unité
u Changer la sélection d'entrée actuelle
32
Lors de la lecture d'un fichier audio par USB, les sons du
o
système de l'ordinateur seront aussi produits. Si vous
ne souhaitez pas que ces sons soient produits, faites les
réglages appropriés sur l'ordinateur pour les couper.
Si vous branchez cette unité à l'ordinateur ou si vous
o
réglez son entrée sur «USB» après avoir lancé le logiciel de lecture de musique, les fichiers audio peuvent
ne pas être lus correctement. Si cela se produit, faites
redémarrer le logiciel de lecture audio ou l'ordinateur.
Page 33
Réglages (1)
*UPCONVERT
*PCM DF
*DSD AF
*LINE OUT
*OUTPUT BOTH
*USB POWER
*MODE DISP
*DIMMER
Statut de source d'entrée
1
Basculez l’interrupteur d’alimentation
POWER pour allumer cette unité.
2
Appuyez sur la touche MENU pour
afficher les paramètres de réglage.
3
Tournez le bouton INPUT SELECTOR pour
changer la valeur de réglage.
La valeur actuellement réglée s'affiche à l'écran.
o
4
Une fois vos réglages finis, appuyez sur la
touche MENU pour réafficher la source
d'entrée.
FR
Appuyez plusieurs fois sur la touche MENU pour faire
défiler les paramètres de menu comme ci-dessous.
x
Si vous ne faites rien durant 10secondes, l'écran
o
retourne à l'affichage de la source d'entrée.
x
Vous pouvez aussi maintenir la touche MENU pres-
o
x
sée au moins 2 secondes pour afficher la source
d'entrée.
x
x
x
x
x
33
Page 34
Réglages (2)
Convertisseur ascendant
Sert à activer le circuit de conversion ascendante quand
des signaux au format PCM sont reçus.
OFF
Désactive le convertisseur ascendant.
ON
Active le convertisseur ascendant.
La conversion ascendante N/N en 192kHz de signaux
PCM ayant une fréquence d'échantillonnage inférieure à
192kHz est suivie par la conversion N/A.
Filtre numérique PCM
Filtre RIF analogique DSD
Sert à régler le filtre analogique utilisé quand des signaux
au format DSD sont reçus.
FIR1
fc = 185 kHz, Gain = -6,6 dB
FIR2
fc = 90 kHz, Gain = +0,3 dB
FIR3
fc = 85 kHz, Gain = -1,5 dB
FIR4
fc = 94 kHz, Gain = -3,3 dB
NOTE
fc: fréquence de coupure
Gain: gain de l'étage de filtrage
Sert à régler le filtre numérique quand des signaux au format PCM sont reçus.
OFF
Désactive le filtre numérique.
SHARP
Met en service un filtre numérique avec une pente
abrupte.
SLOW
Met en service un filtre numérique avec une pente
douce.
Quand des signaux à 352,8kHz ou 384kHz sont reçus,
o
le filtre numérique est désactivé durant la lecture quel
que soit ce réglage.
Sortie ligne
Sert à sélectionner les prises de sortie audio analogique
utilisées.
RCA
Sortie par les prises RCA.
XLR2
Sortie par les prises XLR avec point chaud sur la broche2.
XLR3
Sortie par les prises XLR avec point chaud sur la broche3.
34
Page 35
Sorties ligne et casque simultanées
Affichage du mode de réglage
(UPCONV, DF, AF)
FR
OFF
La sortie simultanée n'est pas possible.
Quand vous branchez un casque, les sorties audio analogiques sont coupées.
ON
La sortie simultanée est possible.
Même si vous branchez un casque, les sorties audio analogiques restent en service.
Alimentation du circuit d'entrée USB
Sert à déterminer si le mode de réglage (convertisseur
ascendant, filtre, méthode de réception DSD etc.) est
aussi affiché quand la source d'entrée est à l'écran.
OFF
Le mode de réglage n'est pas affiché.
ON
Le mode de réglage est affiché.
Luminosité de l'écran
AUTO
Le port USB n'est alimenté que si l'entrée sélectionnée
est l'USB. Quand une autre entrée est active, le port USB
n'est pas alimenté.
ON
Le port USB est toujours alimenté.
DIM3
Luminosité ordinaire
DIM2
Légèrement atténuée
DIM1
Plus atténuée
DISP OFF
Pas d'affichage
35
Page 36

Réglages (3)
Guide de dépannage
Restauration des réglages d'usine par
défaut
En maintenant pressée la touche MENU, basculez l'interrupteur d'alimentation POWER
sur ON.
Maintenez la touche MENU pressée jusqu'à ce que
o
«Setup CLR » (effacement de la configuration) s'affiche à l'écran. Les réglages d'usine par défaut sont les
valeurs de réglage qui apparaissent dans les images
d'écran employées par ce mode d'emploi.
Si vous avez des problèmes avec cette unité, veuillez
vérifier les points suivants avant de demander une intervention. Si elle ne fonctionne toujours pas correctement,
contactez le revendeur qui vous a vendu l'unité ou le service clientèle TEAC (coordonnées au dos).
Générales
L'unité ne s'allume pas.
e Vérifiez que le cordon d'alimentation est complè-
tement enfoncé dans la prise secteur. Si la prise a
un commutateur, vérifiez que celui-ci est en position ON.
e Branchez un autre appareil électrique à la prise
pour vérifier qu'elle fournit bien du courant.
e Si la fonction d'économie automatique d'énergie
a fait passer l'unité en veille, tournez le bouton INPUT SELECTOR ou appuyez sur la touche
MENU pour rallumer l'unité.
Aucun son n'est produit.
e Si un amplificateur stéréo est branché à cette unité,
réglez son volume. Si vous utilisez un casque branché à cette unité, utilisez le bouton PHONES LEVEL
pour régler son volume.
e Avec INPUT SELECTOR, sélectionnez l'entrée à
laquelle est branchée la source que vous désirez
entendre.
e
Re-vérifiez les branchements aux autres
équipements.
Il y a un bruit de ronflement.
e
Si un câble de liaison est proche d'un cordon
d'alimentation, d'un éclairage fluorescent ou
d'une cause de parasites similaire, écartez-les
autant que possible l'un de l'autre.
36
Page 37

Il n'y a pas de son d'un côté du casque.
e Vérifiez que la fiche du casque est enfoncée à
fond.
Branchements à un ordinateur
L'ordinateur ne reconnaît pas cette unité.
e Cette unité peut être branchée à des ordinateurs
ayant les systèmes d'exploitation suivants.
Apple Macintosh
Mac OS X 10.6 (Snow Leopard)
(Mac OS X 10.6.4 ou ultérieur)
Mac OS X 10.7 (Lion)
Mac OS X 10.8 (Mountain Lion)
(en date d'octobre 2012)
Fonctionne avec le pilote standard du système
o
d'exploitation.
Les fichiers audio ne peuvent pas être lus.
e
Connectez l'ordinateur et cette unité puis basculez sur l'entrée «USB» avant d'ouvrir le logiciel de
lecture de musique et de lancer la lecture.
Si vous branchez cette unité à l'ordinateur ou si
vous réglez son entrée sur USB après avoir lancé
le logiciel de lecture de musique, les données
audio peuvent ne pas être lues correctement.
Comme cette unité utilise un microcontrôleur, du bruit
ou d'autres interférences externes peuvent entraîner son
mauvais fonctionnement. Si cela se produit, débranchez
le cordon d'alimentation de la prise secteur et attendez
un instant avant de le rebrancher puis essayez à nouveau
l'opération.
FR
Microsoft Windows
Windows XP (32/64bits)
Windows Vista (32/64bits)
Windows 7 (32/64bits)
Nécessite l'installation d'un pilote dédié
o
(page 31).
Le fonctionnement avec d'autres systèmes d'exploitation n'est pas garanti.
Du bruit se produit.
e Lancer d'autres applications durant la lecture
d'un fichier musical peut interrompre la lecture
ou causer du bruit. Ne lancez pas d'autres applications durant la lecture.
e
Quand l'unité est branchée à un ordinateur via
un concentrateur (hub) USB, du bruit peut être
entendu. Si cela se produit, branchez l'unité directement à l'ordinateur.
37
Page 38

Caractéristiques techniques
Sorties audio analogiques
Connecteurs ·························Prises XLR × 1 paire
Prises RCA × 1 paire
Impédance de sortie ···························XLR : 88Ω
RCA: 22Ω
Niveau maximal de sortie (1/pleine échelle, sous 10kΩ)
XLR: 4,0Vrms
RCA: 2,0Vrms
Réponse en fréquence ···············5 Hz - 80 kHz (-3 dB)
Rapport signal/bruit ······························ 115dB
Distorsion ·······························0,0015% (1 kHz)
Sortie casque
Connecteur· · · · · · · · · · · · · · · · · ·Jack 6,3 mm stéréo standard
Entrées audio numériques
Numérique COAXIAL ·······Prises RCA × 2 (0,5Vc-c/75Ω)
Numérique OPTICAL ··· Connecteurs numériques opt. × 2
(−24,0 à −14,5dBm en crête)
USB ···························Connecteur de type B × 1
(conforme USB 2.0)
Fréquence d'échantillonnage des données PCM
Numérique COAXIAL ··········32 kHz, 44,1 kHz, 48 kHz,
88,2 kHz, 96 kHz, 176,4kHz, 192 kHz
Numérique OPTICAL ··········32 kHz, 44,1 kHz, 48 kHz,
88,2 kHz, 96 kHz
USB ················· 44,1 kHz, 48 kHz, 88,2 kHz, 96 kHz,
176,4 kHz, 192 kHz, 352,8 kHz, 384 kHz
Résolution de quantification
Numérique COAXIAL/Numérique OPTICAL ··16/24bits
USB ······································16/24/32bits
Sortie maximale ··········100 mW + 100 mW (sous 32Ω)
Fréquence d'échantillonnage des données DSD
USB ······································· 2,8/5,6 MHz
38
Page 39

Générales
Alimentation électrique
Modèle Europe ··················CA 220 – 240 V, 50 Hz
Modèle U.S.A./Canada ··················CA 120 V, 60 Hz
Consommation électrique ·························· 13 W
Consommation en veille ····························0,1 W
Accessoires fournis
Cordon d’alimentation x 1
Câble audio RCA × 1
Mode d’emploi (ce document) × 1
Carte de garantie × 1
FR
Dimensions externes ·····290 mm × 81,2 mm × 244 mm
(L × H × P hors tout)
Poids ··············································4,0 kg
Température de fonctionnement ···········+5°C à +35°C
Hygrométrie de fonctionnement ················ 5 – 85%
(sans condensation)
Température de stockage ·················· -20°C à +55°C
Caractéristiques techniques et aspect sont sujets à
o
changements sans préavis.
Le poids et les dimensions sont des valeurs
o
approchées.
Les illustrations de ce mode d'emploi peuvent légère-
o
ment différer des modèles de production.
39
Page 40
Pb, Hg, Cd
o No exponga este aparato a salpicaduras ni goteras.
o No coloque objetos que contengan líquidos, como por
ejemplo jarrones, sobre el aparato.
o No instale este aparato en lugares cerrados tales como
estanterías o similares.
o Este aparato libera corriente nominal no válida para el
funcionamiento a través de la toma de corriente, aún cuando el
interruptor de encendido y activación (POWER o STANDBY/ON)
no esté en la posición de encendido (ON).
o Este aparato debe situarse lo suficientemente cerca de una
toma de electricidad como para poder alcanzar fácilmente el
cable de corriente en cualquier momento.
o El enchufe que se conecta a la red es el dispositivo de
desconexión, por lo que deberá permanecer siempre en
prefecto estado de uso.
o Los productos con construcción de Clase están equipados con
un cable de alimentación que tiene conexión de tierra. El cable
de estos productos deberá conectarse a una toma de corriente
que tenga conexión de protección de tierra.
o Si el producto utiliza pilas (esto incluye las pilas instaladas y los
"packs" de pilas), se evitará su exposición directa al sol, al fuego
o a cualquier otra fuente de calor excesivo.
o PRECAUCIÓN con los productos que emplean baterías de
litio reemplazables: existe peligro de explosión si la batería se
reemplaza por otra de tipo incorrecto. Reemplácela sólo por
otra igual o de tipo equivalente.
o Deberá llevar cuidado si utiliza auriculares con este producto,
ya que una excesiva presión sonora (volumen) procedente de
los mismos puede causar perdidas de audición.
Para consumidores europeos
Deshacerse de aparatos eléctricos y electrónicos
(a) Todos los aparatos eléctricos y electrónicos deben ser
eliminados separados del resto de basura común y
únicamente en los "puntos limpios" o bajo los procedimientos
especificados por el gobierno o autoridades municipales
locales.
(b) Con la eliminación correcta de los equipos eléctricos
y electrónicos estará ayudando a conservar recursos muy
valiosos y a evitar los posibles efectos negativos en la salud
humana y en el medio ambiente.
(c) La eliminación incorrecta de los equipos eléctricos y
electrónicos puede producir efectos muy dañinos en el medio
ambiente y en la salud humana a causa de las sustancias
peligrosas que pueden encontrarse en estos equipos.
(d) El símbolo de Eliminación de Aparatos Eléctricos y
Electrónicos (WEEE en inglés), identificado por un
cubo de basura con ruedas tachado, indica que
los equipos eléctricos y electrónicos deben ser
eliminados de forma totalmente independiente con
respecto a la basura doméstica.
(e) Existen sistemas para la eliminación y recogida de este tipo
de aparatos a disposición del usuario final. Si necesita más
información acerca de la forma de deshacerse de aparatos
eléctricos y electrónicos antiguos, póngase en contacto con su
Ayuntamiento, con la correspondiente empresa del servicio de
recogida de residuos o con el comercio en el que adquirió ese
aparato.
Deshacerse de pilas y/o acumuladores
(a) Las pilas y/o acumuladores gastados deben ser eliminados
separados del resto de basura común y únicamente en los
"puntos de recogida" o bajo los procedimientos especificados
por el gobierno o autoridades municipales locales.
(b) Con la eliminación correcta de las pilas y/o acumuladores
gastados estará ayudando a conservar recursos muy valiosos y
a evitar los posibles efectos negativos en la salud humana y en
el medio ambiente.
(c) La eliminación incorrecta de las pilas y/o acumuladores
gastados puede producir efectos muy dañinos en el medio
ambiente y en la salud humana con motivo de las sustancias
peligrosas que pueden encontrarse en estos equipos.
(d) El símbolo WEEE, identificado por un cubo de
basura con ruedas tachado, indica que las pilas y/o
acumuladores gastados deben ser eliminados de
forma totalmente independiente con respecto a la
basura doméstica.
Si una pila o un acumulador contienen más cantidad de
los valores especificados de plomo (Pb), mercurio (Hg), y/o
cadmio (Cd) según está definido en la Directiva relativa a
las pilas (2006/66/EC), entonces los símbolos químicos
correspondientes a estos elementos estarán indicados debajo
del símbolo WEEE.
(e) Existen sistemas para la eliminación y recogida a disposición
del usuario final. Si necesita más información acerca de la
forma de eliminar pilas y/o acumuladores gastados, póngase
en contacto con su Ayuntamiento, con la correspondiente
empresa del servicio de recogida de residuos o con el
comercio donde se adquirieron.
40
Page 41

Índice
Accesorios incluidos
Gracias por elegir TEAC. Lea detenidamente este manual
para obtener el mejor rendimiento posible de esta unidad.
Accesorios incluidos ..................................41
Antes de su utilización ............................... 42
Mantenimiento ...................................... 42
Nombres y funciones de las partes ...................43
Conexión del equipo ................................44
Funcionamiento básico .............................. 46
Pantalla .............................................. 47
Reproducción de música de un ordenador ........... 49
Ajustes .............................................. 51
Solución de posibles fallos ...........................54
Especificaciones .....................................56
Compruebe la caja para asegurarse de que contiene
todos los accesorios que se enumeran más abajo.
Por favor, póngase en contacto con el establecimiento
donde adquirió esta unidad en el caso de que cualquiera
de estos accesorios falte o haya sufrido desperfectos
durante el transporte.
Cable de corriente × 1
Cable de audio RCA × 1
Manual del usuario (este documento) × 1
Conserve este manual en un lugar seguro para futuras
o
consultas.
Tarjeta de garantía × 1
ES
41
Page 42

Antes de su utilización Mantenimiento
V
Precauciones de emplazamiento
No ponga nada encima de la unidad.
o
Evite colocar la unidad donde le dé la luz solar directa
o
o cerca de una fuente de calor, como por ejemplo un
radiador, un calefactor, una chimenea o un amplificador.
Evite también lugares sujetos a vibraciones y a polvo,
calor, frío o humedad excesivos.
Coloque la unidad en un emplazamiento estable cerca
o
del equipo de audio con el que la vaya a utilizar.
No mueva la unidad cuando esté en uso.
o
El voltaje suministrado a la unidad deberá coincidir con
o
el voltaje impreso en el panel posterior. Si tiene dudas
al respecto, consulte a un electricista.
Como la unidad puede calentarse durante el
o
funcionamiento, deje siempre suficiente espacio a
su alrededor para la ventilación. Cuando instale esta
unidad, deje un pequeño espacio (al menos 3 cm)
entre ella y las paredes u otros dispositivos con el fin
de permitir una buena disipación del calor. Cuando la
instale en un rack, por ejemplo, deje al menos 5 cm de
espacio abierto por encima y 10 cm por detrás.
Si la superficie de esta unidad se ensucia, límpiela con
un paño suave y seco. Si la unidad se ensucia mucho,
humedezca ligeramente un paño suave con un líquido
limpiador suave diluido y páselo eliminando cualquier
exceso de líquido que pueda quedar antes de utilizar el
paño para limpiar la unidad.
Q Por seguridad, desconecte el cable de corriente
de la toma de electricidad antes de proceder a la
limpieza.
Nunca aplique ni rocíe líquidos directamente sobre
o
esta unidad.
No use disolvente ni alcohol, ya que pueden dañar la
o
superficie de la unidad.
Evite que materiales de goma o plástico estén en
o
contacto con este producto durante largos periodos de
tiempo porque podrían dañar la carcasa.
No abra la carcasa porque podría causar daños en los
o
circuitos o una descarga eléctrica. En caso de que se
introduzca un objeto extraño en la unidad, contacte
con su distribuidor o con un servicio técnico TEAC
autorizado.
Cuando desenchufe el cable de corriente de una toma
o
de electricidad, tire siempre directamente del conector,
nunca del cable.
Dependiendo de las ondas electromagnéticas de las
o
emisiones de televisión, podrían aparecer interferencias
en las pantallas de las televisiones cuando la unidad
está encendida. Esto no significa que esta unidad o
la televisión estén funcionando mal. Si esto ocurre,
apague esta unidad.
42
Page 43

Nombres y funciones de las partes
A B C D E F
ES
A
Interruptor POWER
Úselo para encender (ON) y apagar (OFF).
B
Terminal PHONES
Conecte aquí unos auriculares con un conector
estándar estéreo de 6.3 mm (1/4").
C
Mando INPUT SELECTOR
Úselo para seleccionar la fuente de entrada. Se
iluminará el indicador situado junto a la fuente
seleccionada.
Úselo para cambiar los valores de los ajustes cuando
en pantalla se muestre un apartado del menú.
Si gira este mando cuando la unidad ha entrado en
o
reposo (standby) a causa de la función de ahorro
de energía automático, la unidad se volverá a
encender otra vez.
D
Botón MENU
Pulse este botón para entrar en el modo de ajustes
(página 51).
Si pulsa este botón cuando la unidad ha entrado en
o
reposo (standby) a causa de la función de ahorro
de energía automático, la unidad se volverá a
encender otra vez.
E
Pantalla
Esta pantalla muestra la información sobre la
reproducción de audio y las pantallas de los menús.
F
Mando PHONES LEVEL
Úselo para ajustar el volumen de salida de los
auriculares. Gírelo a la derecha para aumentar el
volumen y hacia la izquierda para disminuirlo.
Este mando no ajusta el nivel de salida de los
o
terminales de salida de audio analógico LINE OUT.
El volumen máximo es 0 y el volumen
mínimo es −∞ (menos infinito). Cuando
utilice los auriculares, antes de encender la
unidad, use el mando PHONES LEVEL para
poner el nivel de volumen de los auriculares
en el mínimo (−∞). Si no lo hace, podría
causar ruido repentino a alto volumen, lo cual
puede originars daños a sus oídos u otros
problemas.
43
Page 44

Dispositivo de
Dispositivo de
Conexión del equipo
Ordenador personal
Si utiliza un S.O.
Windows, instale el
“driver” controlador en el
ordenador antes de
conectar a él esta
unidad (página 49).
A
salida de audio digital
SALIDA DIGITAL
(COAXIAL)
Cable digital coaxial RCA
Cable USB
B C D
salida de audio digital
SALIDA DIGITAL
(ÓPTICA)
A
Cable digital óptico
F
La polaridad de los
conectores XLR
puede jarse para
que el VIVO sea
o bien 2 o bien 3
(página 52).
E
Cable de corriente incluido
Conecte un juego de
cables de un tipo o
del otro.
Cable de audio RCA
Cable XLR
Toma de electricidad
44
LRLR
Entrada de audio
(LINE IN, etc.)
Amplicador estéreo o altavoces autoamplicados
Page 45

A
Blanco (L)
Blanco (L)
Terminales de salida de audio analógico
(LINE OUT)
D
Terminales ópticos de entrada de audio
digital
Son un par de salidas de audio analógico de dos
canales. Conecte los terminales XLR y los terminales
RCA a un amplificador estéreo o a altavoces
autoamplificados.
Use los cables incluido u otros de los disponibles
en establecimientos comerciales para realizar estas
conexiones.
XLR: Cables XLR balanceados
RCA: Cables de audio RCA
Conecte el terminal R (derecha) de esta unidad con
el terminal R del amplificador. Igualmente, conecte el
terminal L (izquierda) al terminal L del amplificador.
Rojo (R)
B
Terminal de entrada USB (DIGITAL IN)
Utilícelo para introducir audio digital desde un
ordenador. Conéctelo al terminal USB de un
ordenador.
Para la conexión, use un cable USB de los disponibles
en establecimientos comerciales.
PRECAUCIÓN
Antes de conectar la unidad a un ordenador
que esté corriendo bajo un sistema operativo
Windows, debe instalar el "driver" controlador
específico en dicho ordenador (página 49).
No es posible la conexión correcta con un
ordenador que no tenga este "driver" controlador
instalado.
Rojo (R)
Utilícelos para introducir audio digital. Conéctelos con
los terminales ópticos de salida de audio digital de los
dispositivos de audio digital.
Para hacer las conexiones, use cables digitales ópticos
de los disponibles en establecimientos comerciales.
E
Interruptor AUTO POWER SAVE
Utilícelo para activar (ON) y desactivar (OFF) la función
de ahorro de energía automático.
Cuando está activado, la unidad automáticamente
entra en modo de reposo (standby) si no hay ninguna
entrada de señal digital durante 30 minutos o más.
Para encender la unidad otra vez desde el modo de
o
reposo, pulse el botón MENU, gire el mando INPUT
SELECTOR o cambie el interruptor POWER a OFF
(apagado) una vez y después vuelva a ponerlo en
ON (encendido).
Espere unos segundos tras cambiar el interruptor
o
POWER a OFF antes de volver a ponerlo en ON.
F
Receptáculo del cable de corriente (~IN)
Inserte aquí el cable de corriente incluido. Después
de terminar todas las demás conexiones, enchufe el
cable de corriente a una toma de electricidad.
Desenchufe el cable de corriente de la toma de
electricidad si no va a usar la unidad durante un largo
periodo de tiempo.
V Use solamente el cable de corriente incluido. El
uso de un cable de corriente diferente podría
causar fuego o una descarga eléctrica.
ES
C
Terminales coaxiales de entrada de audio
digital RCA (DIGITAL IN)
Utilícelos para introducir audio digital. Conéctelos con
los terminales coaxiales de salida de audio digital de
los dispositivos de audio digital.
Para hacer las conexiones, use cables digitales
coaxiales RCA de los disponibles en establecimientos
comerciales.
V
No encienda la corriente hasta después
de haber hecho todas las conexiones.
Lea atentamente los manuales de los dispositivos
o
que está conectando y siga sus instrucciones
cuando haga las conexiones.
No agrupe los cables de las conexiones con los
o
cables de corriente. Si lo hace puede originarse
ruido. Inserte todos los conectores hasta el fondo.
45
Page 46

Funcionamiento básico
1
Cambie el interruptor POWER a su posición
de encendido (ON).
Si esta unidad está conectada a un amplificador
o
estéreo, enciéndalo siempre el último.
2
Use el mando INPUT SELECTOR para
seleccionar la fuente de entrada.
3
Ponga en funcionamiento el dispositivo
de reproducción.
Remítase al manual de instrucciones de ese
dispositivo.
4
Ajuste el volumen.
Utilice el amplificador estéreo u otro dispositivo
conectado a esta unidad para ajustar el volumen.
Cuando utilice unos auriculares conectados a esta
unidad, gire el mando PHONES LEVEL para ajustar el
volumen.
Cuando utilice auriculares
Antes de conectar los auriculares a esta unidad, gire el
mando PHONES LEVEL hacia la izquierda (en dirección
contraria a las agujas del reloj) para poner el volumen al
mínimo.
El indicador correspondiente a la fuente de entrada
seleccionada se iluminará.
Si la señal de entrada no es una señal de audio
o
digital o es un formato de señal de audio que no
sea soportado por esta unidad, como por ejemplo
Dolby Digital, DTS o AAC, “NOT AUDIO!” aparecerá
en la pantalla y no se escuchará audio ninguno.
Configure la salida digital del dispositivo conectado
como salida de audio PCM.
Para utilizar un ordenador que corra bajo un
o
sistema operativo Windows para reproducir
archivos de audio cuando esta unidad está
puesta en “USB”, primero debe instalar un "driver"
controlador específico en el ordenador antes de
conectar la unidad y el ordenador (página 49).
Los datos DSD solamente se pueden reproducir
o
mediante USB.
46
−∞ dB: volumen mínimo
0 dB: volumen máximo
Page 47

Pantalla (1)
Nombre de la fuente de entrada
Frecuencia de muestreoTipo de señal
El sobreconvertidor está desactivado
El sobreconvertidor está desactivado
Cuando se enciende la unidad
c
Después de que aparezcan los mensajes anteriores, la
fuente de entrada se mostrará en la pantalla.
Pantalla de información sobre la fuente
de entrada
Durante la entrada de audio PCM
Cuando MODE DISP=OFF
Ejemplo:
ES
Cuando MODE DISP=ON, UPCONV=OFF, DF=OFF
Ejemplo:
Ajuste del ltro digital
Cuando se selecciona una fuente de
entrada
El nombre de la fuente de entrada se muestra en la
pantalla cuando se cambia la fuente de entrada.
Ejemplo: cuando se selecciona OPT2
Indicaciones de error
Cuando la unidad no puede acoplar la señal de entrada,
en la pantalla parpadea el mensaje de error “UNLOCK!”
(¡sin acoplar!).
Ejemplo:
Cuando MODE DISP=ON, UPCONV=ON, DF=SHARP
Ejemplo:
Ajuste del ltro digital
Cuando la señal de entrada está acoplada a 352.8 kHz
Ejemplo:
Cuando la señal de entrada está acoplada a 352.8 kHz o
o
384 kHz, el sobreconvertidor y el filtro digital PCM son
ignorados, así MODE DISP, UPCONV y DF no aparecen
en pantalla independientemente de sus ajustes.
47
Page 48

Pantalla (2)
Frecuencia de muestreoTipo de señal
Ajuste del ltro
Método de
recepción
Ajuste del interruptor
Tiempo hasta el modo de reposo
Durante la introducción de audio DSD
Cuando MODE DISP=OFF
Ejemplo:
Cuando MODE DISP=ON, DSD AF=FIR1
Ejemplo:
FIR analógico DSD
Estado del ahorro de energía automático
Cuando cambie el interruptor AUTO POWER SAVE del
panel frontal de la unidad, el nuevo ajuste se mostrará en
pantalla durante unos 2 segundos.
12 segundos antes de que la función de ahorro de
energía automático ponga la unidad en modo de reposo
(standby), en la pantalla se mostrará una cuenta atrás.
Método de recepción
No se muestra nada: DSD recibido sin conversión (nativo)
DoP: señal DSD recibida por el método DoP (DSD sobre
PCM)
Cada segundo desaparece un punto hasta que hayan
desaparecido todos y la unidad entre en modo de reposo.
48
Page 49

Reproducción de música de un ordenador (1)
Dependiendo de la combinación de hardware y
Instalación del "driver" controlador en
un ordenador
Cuando utilice Mac OS X
Esta unidad se puede usar con las siguientes versiones de
Mac OS:
Mac OS X 10.6 (Snow Leopard)
(Mac OS X 10.6.4 o posterior)
Mac OS X 10.7 (Lion)
Mac OS X 10.8 (Mountain Lion)
(a partir de Octubre 2012)
o
software, podría no darse un funcionamiento correcto
incluso con los sistemas operativos antes citados.
Acerca del modo de transmisión
Esta unidad se conecta usando el modo asíncrono de alta
velocidad.
Las frecuencias de muestreo transmisibles son 44.1 kHz,
48 kHz, 88.2 kHz, 96 kHz, 176.4 kHz y 192 kHz.
ES
Esta unidad funcionará con el "driver" controlador
estándar del Mac OS, por lo que no hay necesidad de
instalar un "driver" controlador especial.
Cuando utilice un sistema operativo Windows
Instalación del "driver" controlador en el ordenador
Para que esta unidad reproduzca archivos de audio de
un ordenador, primeramente deberá instalar un "driver"
controlador en el ordenador. Por favor, descargue dicho
"driver" controlador desde la dirección web que le
facilitamos a continuación.
Página de descarga del software del "driver" controlador:
http://www.teac.co.jp/audio/software_teac_e.html
La conexión USB es soportada en ordenadores Windows
que corran bajo Windows XP, Windows Vista, y Windows 7.
La compatibilidad con otros sistemas operativos no está
garantizada.
Una vez conectado correctamente, podrá seleccionar
“TEAC USB AUDIO DEVICE” como salida de audio desde el
sistema operativo del ordenador.
En el modo asíncrono, los datos de audio enviados
o
desde el ordenador se procesan usando el reloj de esta
unidad, permitiendo una transmisión de datos con la
fluctuación reducida al mínimo.
Descarga de aplicaciones de reproducción
Si lo necesita, puede descargar gratuitamente software de
aplicaciones de reproducción que soportan archivos DSD
(versiones Mac y Windows) desde la siguiente página web
de TEAC.
Página de descarga del software de aplicaciones:
http://www.teac.co.jp/audio/software_teac_e.html
PRECAUCIÓN
Instale el "driver" controlador antes de conectar
la unidad con el ordenador mediante USB.
Si conecta esta unidad con un ordenador antes
de instalar el "driver" controlador, no funcionará
correctamente. Es más, si el ordenador corre
bajo Windows XP, su funcionamiento podría
ralentizarse notablemente, requiriendo ser
reiniciado.
Para más instrucciones acerca de los procedimientos de
o
instalación del "driver" controlador, por favor consulte
nuestra página de descarga.
49
Page 50
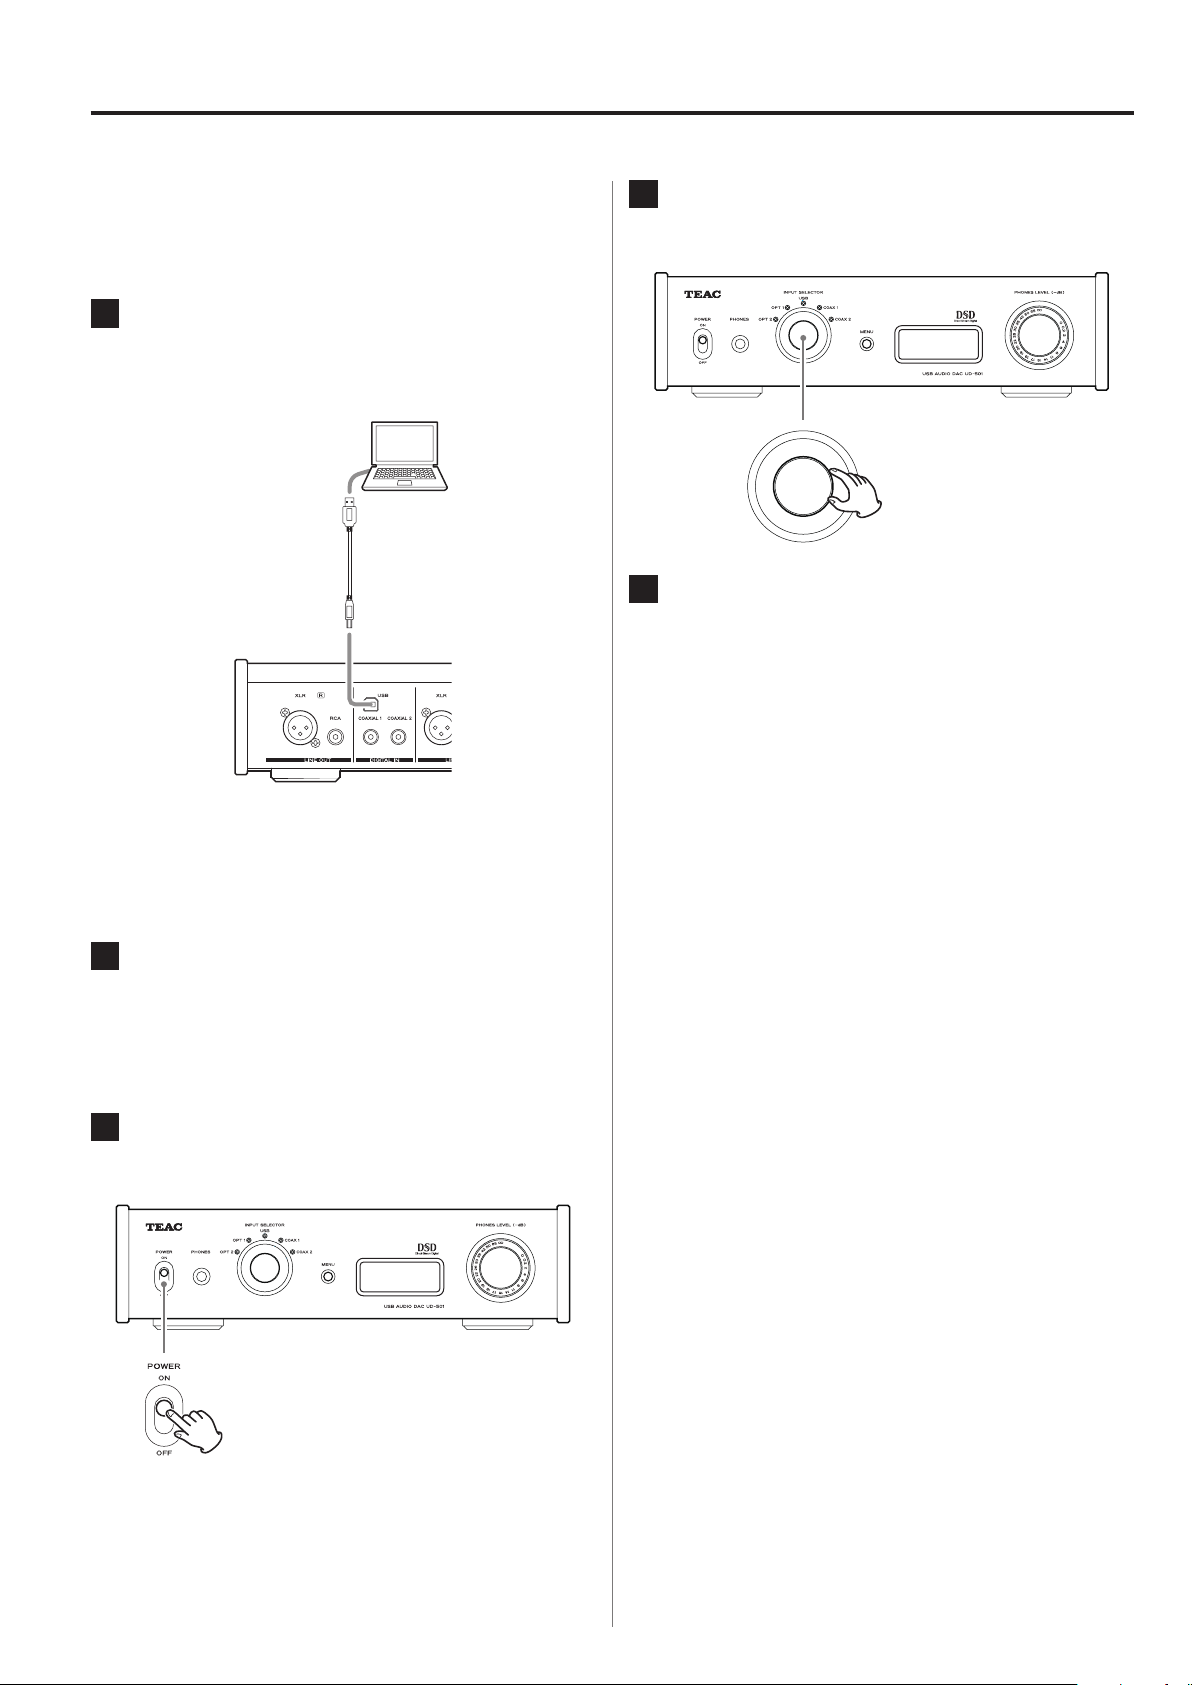
Reproducción de música de un ordenador (2)
4
Reproducción de archivos de audio de
un ordenador
1
Conecte esta unidad a un ordenador
usando un cable USB.
Cable USB
Use un cable con un conector adecuado para el
o
puerto USB de esta unidad.
Gire el mando INPUT SELECTOR para
seleccionar USB.
5
Comience la reproducción de un archivo
de música en el ordenador.
Poniendo el volumen de salida del ordenador al
máximo nivel y ajustando el volumen de salida del
amplificador estéreo, se puede obtener mejor calidad
de sonido. Ponga el volumen del amplificador estéreo
al mínimo antes de comenzar la reproducción y
después vaya subiendo el nivel gradualmente.
Cuando utilice auriculares con esta unidad, gire el
mando PHONES LEVEL hacia la izquierda (en dirección
contraria a las agujas del reloj) para poner el volumen
al mínimo antes de comenzar la reproducción.
Después, súbalo gradualmente.
2
Encienda el ordenador.
Confirme que el sistema operativo se ha iniciado
o
correctamente.
3
Pulse el botón POWER para encender (ON)
esta unidad.
El ordenador no puede controlar esta unidad ni esta
o
unidad puede controlar el ordenador.
No lleve a cabo ninguna de las siguientes acciones
o
cuando se esté reproduciendo un archivo de audio
mediante USB. Si lo hace podría causar anomalías de
funcionamiento en el ordenador. Salga del software
de reproducción de música siempre que vaya a llevar a
cabo cualquiera de las siguientes acciones:
u Desconectar el cable USB
u Apagar esta unidad
u Cambiar la selección de entrada vigente
Cuando esté reproduciendo un archivo de audio
o
mediante USB, también se escucharán los sonidos de
funcionamiento del ordenador. Si no quiere que se
escuchen dichos sonidos, haga los ajustes apropiados
en el ordenador para desactivarlos.
Si conecta esta unidad con el ordenador o cambia su
o
entrada a "USB" después de haber iniciado el software
de reproducción de música, los archivos de audio
podrían no reproducirse correctamente. Si esto ocurre,
reinicie el software de reproducción de música o
reinicie el ordenador.
50
Page 51
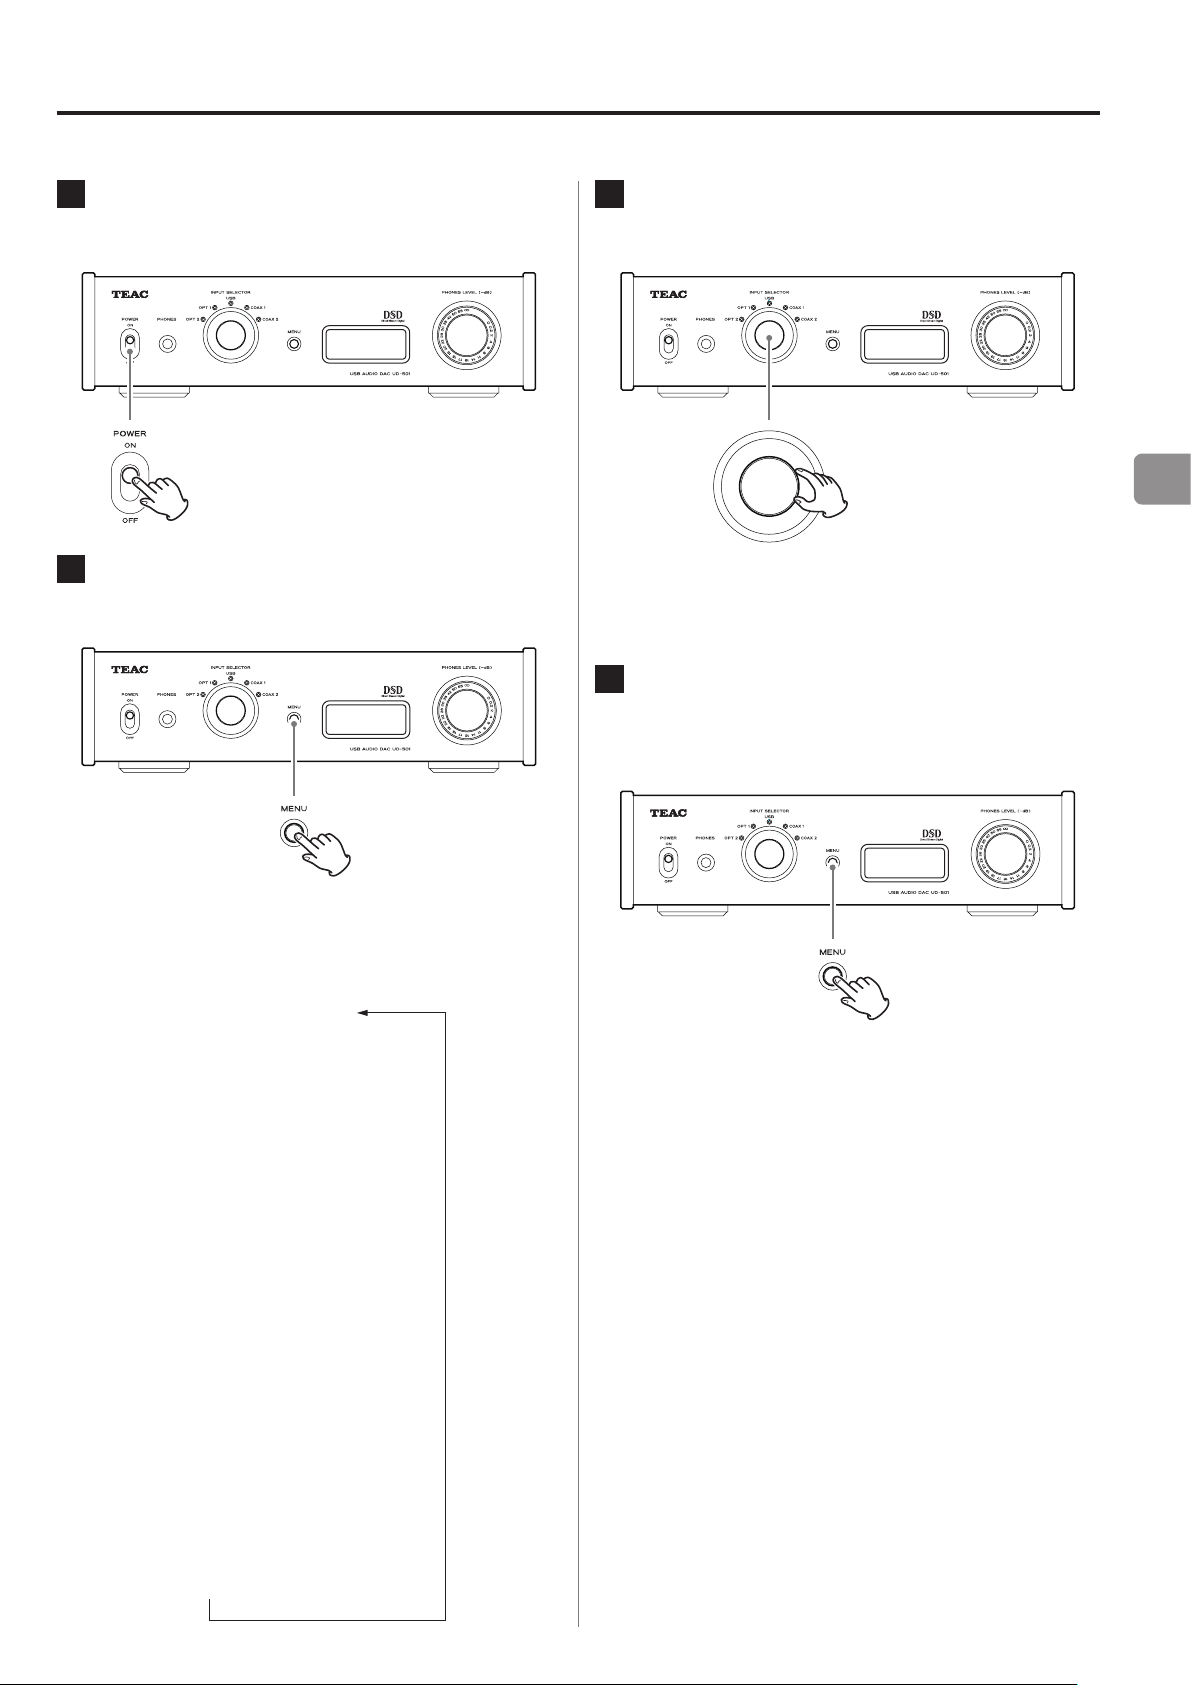
Ajustes (1)
*UPCONVERT
*PCM DF
*DSD AF
*LINE OUT
*OUTPUT BOTH
*USB POWER
*MODE DISP
*DIMMER
Estado de la fuente de entrada
1
Pulse el botón POWER para encender esta
unidad.
2
Pulse el botón MENU para mostrar los
apartados que se pueden configurar.
3
Gire el mando INPUT SELECTOR para
cambiar el valor del ajuste.
El valor actualmente vigente se muestra en la
o
pantalla.
4
Cuando haya terminado de cambiar la
configuración, pulse el botón MENU para
mostrar la fuente de entrada.
ES
Pulse el botón MENU repetidamente para recorrer
cíclicamente los apartados del menú como se
muestran a continuación:
x
Si no hace nada durante 10 segundos, la pantalla
o
x
x
x
x
x
x
volverá a mostrar la fuente de entrada.
También puede pulsar el botón MENU durante 2
o
segundos o más para mostrar la fuente de entrada.
x
51
Page 52

Ajustes (2)
Sobreconvertidor
Se utiliza para activar el circuito de sobreconversión
cuando se reciban señales en formato PCM.
OFF
Desactiva el sobreconvertidor.
ON
Activa el sobreconvertidor.
La sobreconversión D/D a 192 kHz de señales PCM con
frecuencias de muestreo de menos de 192 kHz es seguida
por una conversión D/A.
Filtro digital PCM
Filtro FIR analógico DSD
Se utiliza para determinar el filtro digital usado cuando se
reciben señales en formato DSD.
FIR1
fc=185 kHz, Gain=−6.6 dB
FIR2
fc=90 kHz, Gain=+0.3 dB
FIR3
fc=85 kHz, Gain=−1.5 dB
FIR4
fc=94 kHz, Gain=−3.3 dB
NOTE
fc: frecuencia de corte
Gain: ganancia de la etapa de filtro
Se utiliza para configurar el filtro digital cuando se reciben
señales en formato PCM.
OFF
Desactiva el filtro digital.
SHARP
Utiliza un filtro digital con una pendiente de caída
pronunciada.
SLOW
Utiliza un filtro digital con una pendiente de caída lenta.
Cuando se reciban señales a 352.8 kHz o 384 kHz, el
o
filtro digital se desactivará durante la reproducción
independientemente de su ajuste.
Salida de línea
Se utiliza para seleccionar los conectores de salida de
audio analógico que se estén utilizando.
RCA
La salida es a través de los terminales RCA.
XLR2
La salida es a través de los terminales XLR con la polaridad
del VIVO en el pin 2.
XLR3
La salida es a través de los terminales XLR con la polaridad
del VIVO en el pin 3.
52
Page 53
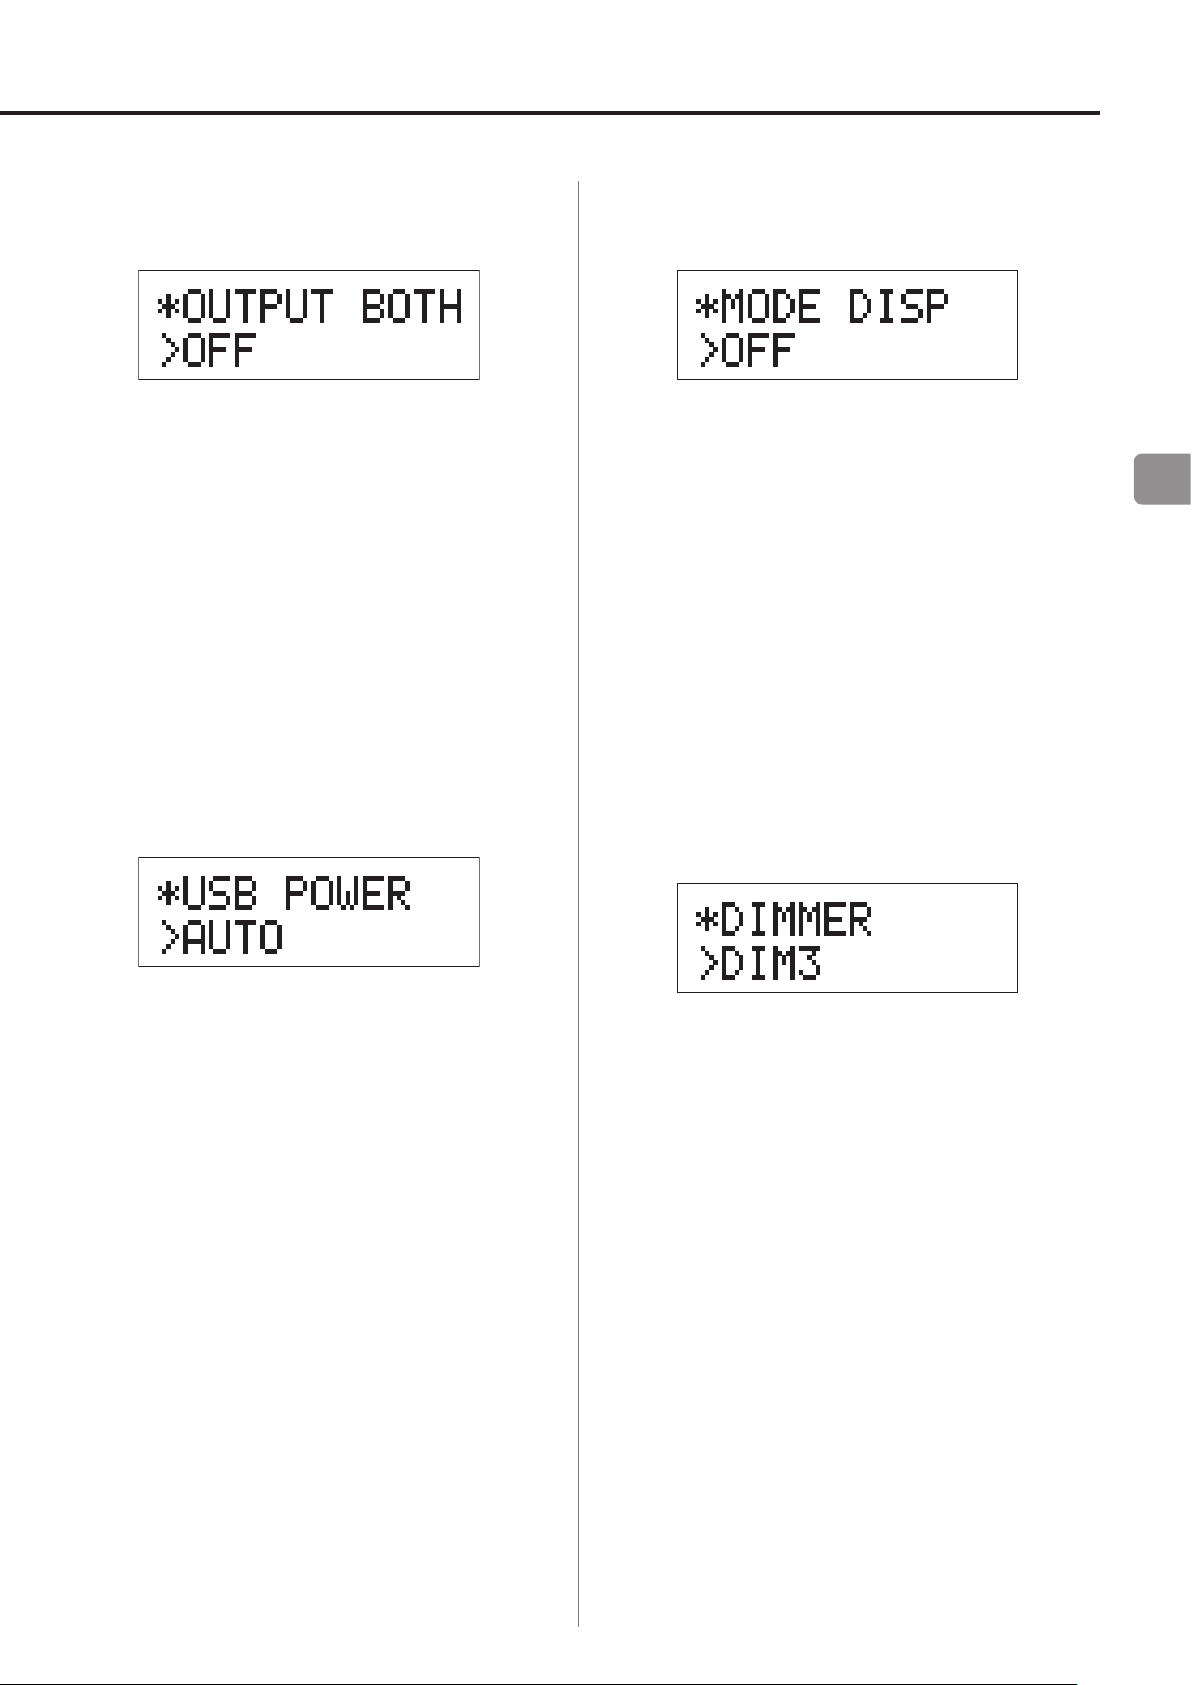
Salida simultánea de auriculares y de
Pantalla de modo de ajuste (UPCONV,
línea
OFF
La salida simultánea no es posible.
Cuando conecte los auriculares, las salidas de audio
analógico se desactivarán.
ON
La salida simultánea es posible.
Aunque conecte los auriculares, la salidas de audio
analógico permanecen activas.
DF, AF)
Se utiliza para seleccionar si el modo de ajuste
(sobreconvertidor, filtro, método de recepción DSD, etc.)
también se muestra cuando se muestra la fuente de
entrada en la pantalla.
OFF
No se muestra el modo de ajuste.
ON
Se muestra el modo de ajuste.
ES
Corriente en el circuito de entrada USB
AUTO
El puerto USB contiene corriente solamente cuando la
fuente de entrada es USB. Cuando esté activa cualquier
otra entrada, el puerto USB no recibe corriente.
ON
El puerto USB siempre recibe corriente.
Brillo de la pantalla
DIM3
Brillo normal
DIM2
Ligeramente atenuado
DIM1
Atenuación media
DISP OFF
Pantalla apagada
53
Page 54
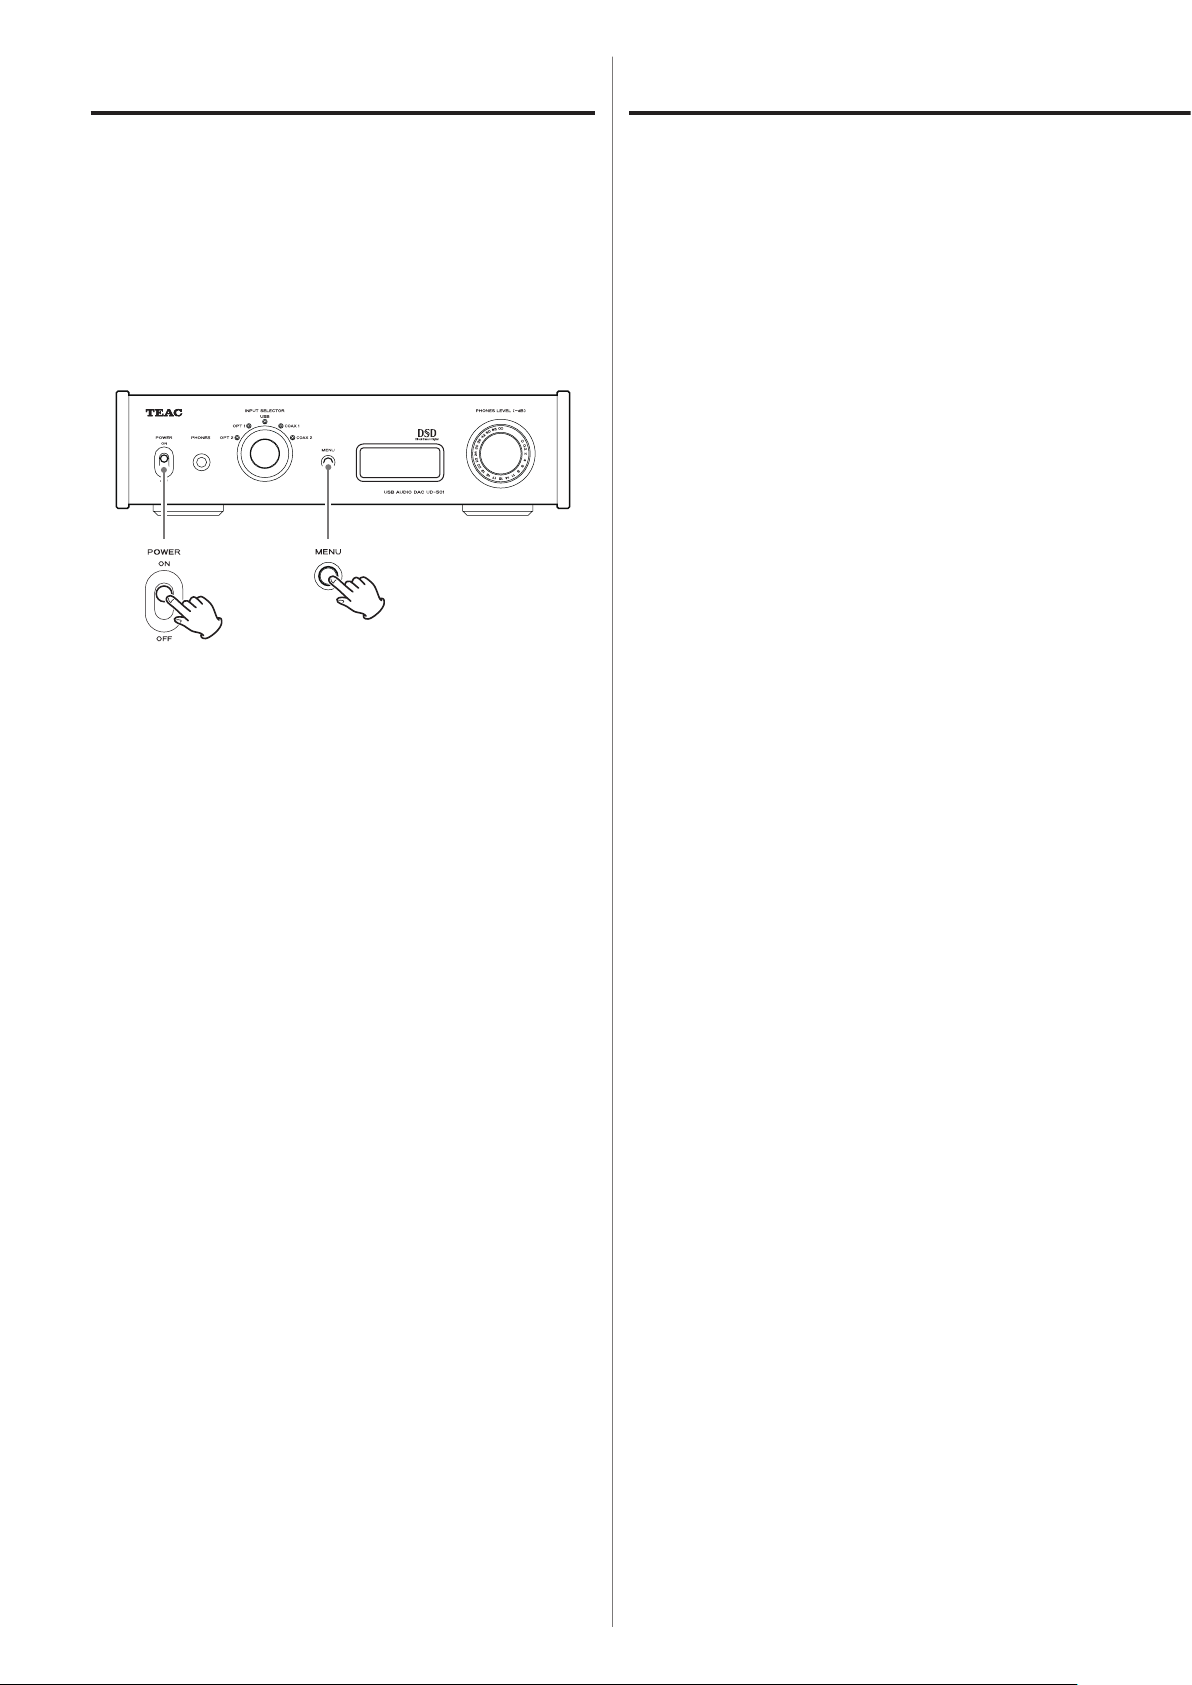
Ajustes (3)
Solución de posibles fallos
Restablecer los ajustes a sus valores de
fábrica por defecto.
Mientras pulsa y mantiene pulsado el botón
MENU, ponga el interruptor POWER en ON
(encendido).
Pulse y mantenga pulsado el botón MENU hasta que
o
“SETUP CLR” aparezca en la pantalla. La configuración
de fábrica por defecto son los valores de los ajustes
mostrados en las imágenes de pantallas utilizadas en
las explicaciones de este manual.
Si se presenta un problema con esta unidad, por favor
compruebe los siguientes puntos antes de solicitar
asistencia técnica. Si aún así no funciona correctamente,
póngase en contacto con el establecimiento donde
compró la unidad o con el servicio de soporte al cliente
de TEAC (consulte las contraportada donde encontrará la
información de contacto).
General
La unidad no se enciende.
e Compruebe que el enchufe del cable de corriente
está insertado completamente en la toma de
electricidad. Si la toma de electricidad a su vez
tiene un interruptor, confirme que el interruptor
está en la posición de encendido.
e Conecte otro aparato eléctrico a la toma de
electricidad para confirmar que tiene corriente.
e Si la función de ahorro de energía automático ha
hecho que la unidad entre en modo de reposo
(standby), gire el mando INPUT o pulse el botón
MENU para volver a encender (ON) la unidad otra
vez.
No sale sonido.
e Si esta unidad está conectada a un amplificador
estéreo, ajuste su volumen.
Si está usando unos auriculares conectados a esta
unidad, use el mando PHONES LEVEL para ajustar
el volumen.
e Utilice el mando INPUT SELECTOR para
seleccionar la entrada que está conectada a la
fuente que desee escuchar.
e
Revise las conexiones con el resto de componentes
del equipo.
54
Hay un ruido o zumbido.
e
Si algún cable de conexión está cerca de un cable
de corriente, de un fluorescente o de otra causa
similar de interferencias, aumente la distancia
entre ellos todo lo que sea posible.
Page 55

No hay sonido en un lado de los auriculares.
e Confirme que el conector de los auriculares está
bien insertado en su totalidad.
Conexiones con un ordenador
El ordenador no reconoce esta unidad.
e Esta unidad solo se puede conectar con
ordenadores que corran bajo los siguientes
sistemas operativos:
Apple Macintosh
Mac OS X 10.6 (Snow Leopard)
(Mac OS X 10.6.4 o posterior)
Mac OS X 10.7 (Lion)
Mac OS X 10.8 (Mountain Lion)
(a partir de Octubre 2012)
Funciona con el "driver" controlador estándar
o
del sistema operativo.
No se pueden reproducir los archivos de música.
e
Conecte el ordenador con esta unidad y ponga
la entrada en "USB" antes de iniciar el software de
reproducción de música y de reproducir ningún
archivo de música.
Si conecta esta unidad y el ordenador o
selecciona USB como entrada después de haber
lanzado el software de reproducción de música,
los datos de audio podrían no reproducirse
correctamente.
Puesto que esta unidad utiliza un micro controlador,
podría no funcionar correctamente algunas veces
a causa del ruido y de otras interferencias externas
a la unidad. Si se da el caso, desenchufe el cable de
corriente de la toma de electricidad y espere un rato
antes de volver a enchufarlo y reintente la operación
.
ES
Microsoft Windows
Windows XP (32/64 bits)
Windows Vista (32/64 bits)
Windows 7 (32/64 bits)
Requiere la instalación de un "driver"
o
controlador específico (página 49).
El funcionamiento con otros sistemas operativos
no está garantizado.
Hay ruido.
e Iniciar otras aplicaciones durante la reproducción
de un archivo de música puede interrumpir
la reproducción o causar ruido. No inicie otras
aplicaciones durante la reproducción.
e
Cuando esta unidad está conectada con el
ordenador mediante un "hub" (distribuidor)
USB, por ejemplo, puede escucharse ruido. Si se
da el caso, conecte la unidad directamente al
ordenador.
55
Page 56

Especificaciones
Salidas de audio analógico
Terminales ························conectores XLR × 1 par
conectores RCA × 1 par
Impedancia de salida ···························XLR: 88 Ω
RCA: 22 Ω
Nivel de salida máximo (1/plena escala, a 10 kΩ)
XLR: 4.0 Vrms
RCA: 2.0 Vrms
Rango de frecuencias ···············5 Hz – 80 kHz (−3 dB)
Relación señal/ruido ·······························115 dB
Distorsión ································0.0015% (1 kHz)
Salida de auriculares
Terminal ·················jack estéreo estándar de 6.3 mm
Entradas de audio digital
Digital COAXIAL ·········
Digital OPTICAL ··············conectores digitales ópticos × 2
USB ···································conector Tipo B × 1
Frecuencia de muestreo de datos PCM
Digital COAXIAL ······32 kHz, 44.1 kHz, 48 kHz, 88.2 kHz,
Digital
USB ··················· 44.1 kHz, 48 kHz, 88.2 kHz, 96 kHz,
Velocidades de bits de cuantización
Digital COAXIAL/
USB
OPTICAL
······································16/24/32 bits
················32 kHz, 44.1 kHz, 48 kHz,
conectores RCA × 2 (
(de −24.0 a −14.5 dBm pico)
96 kHz, 176.4 kHz, 192 kHz
176.4 kHz,
Digital OPTICAL
192 kHz, 352.8 kHz, 384 kHz
0.5Vp-p/75Ω)
(especificaciones USB 2.0)
88.2 kHz, 96 kHz
·············16/24 bits
Salida máxima ················100 mW + 100 mW (a 32 Ω)
Frecuencia de muestreo de datos DSD
USB
········································2.8/5.6 MHz
56
Page 57

General
Alimentación
Modelo para Europa ·············CA 220 – 240 V, 50 Hz
Modelo para U.S.A./Canadá ············CA 120 V, 60 Hz
Consumo de corriente ······························ 13 W
Consumo de corriente en reposo (standby) ··········0.1 W
Accesorios incluidos
Cable de corriente × 1
Cable de audio RCA × 1
Manual del usuario (este documento) × 1
Tarjeta de garantía × 1
Dimensiones externas ·····290 mm × 81.2 mm × 244 mm
(ancho × alto × profundo incluyendo salientes)
Peso ················································4.0 kg
Margen de temperatura de funcionamiento
de +5°C a +35°C
Rango de humedad de funcionamiento
5 – 85% (sin condensación)
Rango de temperatura de almacenamiento
de −20°C a +55°C
Las especificaciones y el diseño está sujetos a cambio
o
sin previo aviso.
El peso y las dimensiones son aproximados.
o
Las ilustraciones que aparecen en este manual del
o
usuario pueden diferir ligeramente de los modelos de
producción.
ES
57
Page 58

58
Page 59

59
Page 60

Z
TEAC CORPORATION
TEAC AMERICA, INC. 7733 Telegraph Road, Montebello, California 90640 U.S.A. Phone: (323) 726-0303
TEAC MEXICO, S.A. DE C.V.
TEAC EUROPE GmbH Bahnstraße 12, D-65205 Wiesbaden-Erbenheim, Deutschland Phone: 0611-71580
This device has a serial number located on its rear panel. Please record the serial number
and retain it for your records.
Model name: UD-501 Serial number:
1-47 Ochiai, Tama-shi, Tokyo 206-8530 Japan Phone: (042) 356-9156
Río Churubusco 364, Colonia Del Carmen, Delegación Coyoacàn, CP 04100, México DF, México Phone: (5255) 5010-6000
1012.MA-1864A
 Loading...