

Page 1
Instructions for Use
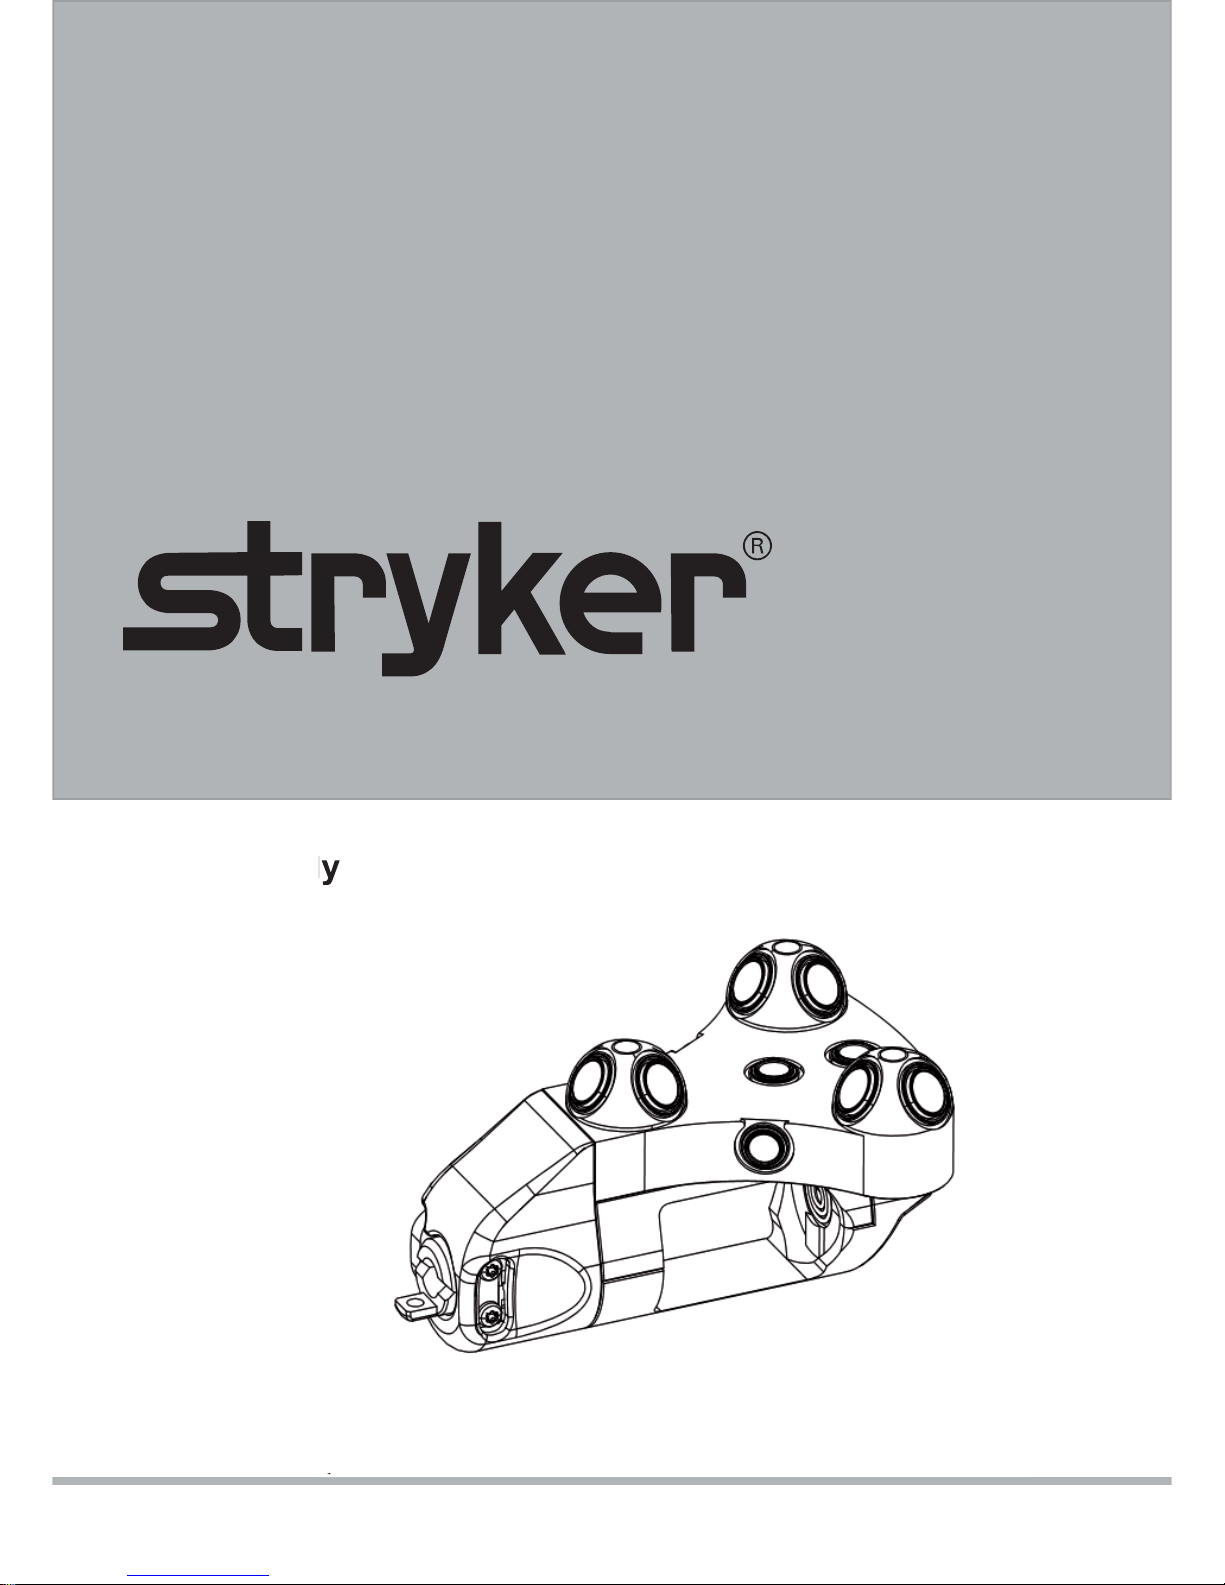
nGenius Universal Tracker
REF 6000-014-000
2007-11-21 6000-014-700 Rev. B www.stryker.com
CPT Use Only
C
Page 2

www.stryker.com
Intended Use
The nGenius Universal Tracker is part of the Stryker Navigation System. It is used in combination with the
Navigation System camera to track the position and orientation of instruments or rigid anatomical structures to which the nGenius Universal Tracker may be attached via a pin or mechanical adapter.
The medical purpose is determined by the application modules. Refer to the intended use of the relevant
application module for detailed information.
User/Patient Safety
WARNINGS:
• Read and understand this information. Familiarization with the Stryker Navigation System prior
to use is important. Only trained personnel are to
use this system.
• The instruments should only be used in accordance with the instructions for use contained in
this manual by authorized persons who have
been fully trained in their safe and effective use.
The failure to follow these instructions will void
your warranty.
• Prior to each use, instruments should be operated and inspected for any loose components, damage or malfunction. DO NOT use if any of these
conditions exist. Contact Stryker Navigation
Service immediately in such case. See contact
information in the address fi eld.
• Do not service instruments. They contain no
parts that the user can service. If service is required, contact Stryker Navigation Customer
Service.
• Performing procedures with instruments other
than those specifi ed in these instructions or out-
side of their intended use compromises navigation accuracy.
1
Manufactured and Distributed by:
Stryker Leibinger GmbH & Co. KG
Bötzinger Straße 41
79111 Freiburg, Germany
t: +49 761 4512-0
Distributed by:
Stryker Navigation
4100 East Milham Avenue
Kalamazoo, MI 49001 USA
t: +1 269 323 7700
t: 800 253 3210 (toll-free within the US)
• The health care provider performing any procedure is responsible for determining the appropriateness of the instruments and the specifi c
technique for each patient. Stryker, as a manufacturer, DOES NOT recommend surgical procedure.
• Clean and sterilize the nGenius Universal Tracker
before fi rst and every use as instructed in this
manual.
• This equipment is not suitable for use in the presence of fl ammable anesthetic mixture with air or
with oxygen or nitrous oxide.
• Use Instrument Battery REF 6000-006-000 only.
Load a new battery before fi rst and every use as
instructed in this manual. Have several new batteries available.
• Remove Instrument Battery before storing or
sterilizing the nGenius Universal Tracker.
• Prior to surgery, this equipment should be
checked with the Stryker Navigation System to
ensure that it is functioning properly.
• During surgery, if fl uids such as saline solution
enter the battery holder, the electronics can fail
and communications with the system will cease.
Page 3
www.stryker.com
CAUTIONS:
• DO NOT apply any physical impact to the tracker,
especially with a mallet or similar tool. Any impact
will cause product damage or operational failure
due to battery movement.
• To avoid malfunction, DO NOT scratch or damage the LEDs or photodiode covers in any way.
2
• Use only Stryker approved components and
accessories, unless otherwise specifi ed. Other
accessories may result in increased electromagnetic emissions or decreased electromagnetic
immunity of the system. DO NOT modify any
component or accessory. Failure to comply may
result in patient and/or health care staff injury.
• Ensure the line of sight between the tracker and
the camera is NOT blocked. The infrared Light
Emitting Diodes (LEDs) and photodiodes must be
in view of the camera for the Navigation System
to function properly.
• Excessive infrared radiation from external sources can infl uence localization of the instruments
by the Navigation System. Refer to the Navigati-
on System II-Camera Instructions For Use.
• Mount and detach the tracker as instructed in this
manual.
• Attach the nGenius Universal Tracker only to
devices with a generic interface pin (see fi gure
3). Refer also to the NavLock Instructions for Use
REF 6000-999-700.
• In case of the slightest suspicion of incompatibility or risks, do not use the nGenius Universal
Tracker.
• Ensure the generic interface pin is fully inserted
into the tracker´s notch and snaps into position.
• Take special precautions regarding electromagnetic compatibility (EMC) when using this
medical electronic equipment. Install and put the
equipment into service according to the EMC information in the EMC Specifi cations Manual REF
6000-005-760. This medical equipment meets all
requirements in the EN/IEC 60601-1-2 standard
and can be installed in a normal environment.
The equipment must not be placed or installed
close to strong electromagnetic sources which
may infl uence the function of this equipment.
• Prior to proceeding, verify that the nGenius Universal Tracker is fi rmly attached to the instrument
with no movement after attachment, as instructed
in this manual. If the tracker moves relative to
the instrument, navigation is inaccurate.Fixate
the tracker again, recalibrate and re-validate the
instrument.
• To prevent incorrect treatment, regularly perform
landmark tests.
• Use the nGenius Universal Tracker only with
instruments which have less then 250 mm tip
offset.
• Always validate the instrument after calibration.
• Remove any NavLock / NavLock Lite adapter
from both tracker and instrument before cleaning
and sterilization.
• Recalibrate the instrument, if the tracker with the
instrument has been subjected to a shock.
• Avoid placing fi ngers on or near the LED domes
and keep other objects at least 25 mm away from
the LED domes when tracking.
Page 4

www.stryker.com
Troubleshooting Guidelines
Green status light does not come on when battery is inserted:
• Battery installed in wrong orientation. Reinstall.
• Battery power low. Replace battery.
• Tracker damaged. Return for service.
Green status light fl ashes rapidly when battery is inserted:
• Tracker defective. Return for service.
Green status light illuminates continuously:
• Battery power low. Replace battery.
Tracker cannot be initialized:
• LEDs are not facing Navigation System camera. Ensure that LEDs are facing Navigation System camera. Retry.
• Battery power low. Replace battery.
• LEDs or photodiodes damaged. Return for service.
Navigated Instrument cannot be validated using the nGenius Universal Tracker:
• LEDs are not facing Navigation System camera. Ensure the LEDs are facing Navigation System came-
ra. Retry.
• Instrument tip damaged or bent. Replace by another instrument. Return the broken instrument for ser-
vice.
• Incorrect instrument selected. Compare the reference number displayed on the monitor with the num-
ber
on the selected instrument.
Communication with the system fails after Navigation software is restarted:
• Remove and reinsert battery. Reinitialize tracker.
Sporadic electrical interference is experienced:
• Electrical noise present. Turn off all electrical equipment not used in the operating room. Relocate elec-
trical equipment; increase spatial distance. Plug equipment into different operating room outlets.
Line of sight between tracker and camera is interrupted:
• Message on the system monitor: - NOT VISIBLE - Remove obstruction and system will resume com-
muni cation.
3
Page 5
www.stryker.com
Specifi cations*
Model: REF 6000-014-000 nGenius Universal Tracker
Size: 74.2 mm [2.92 in] length, 46.2 mm [1.82 in] width, 36.1 mm [1.42 in] height
Weight: 49 g [1.73 oz] without Instrument Battery
Material: Titanium (electronics housing), PPSU (battery holder, front cover, SELECT button), stainless
steel (interface release button)
Power supply:
3V ---, internally powered (lithium battery)
Enclosure protection: IPX0 Ordinary Equipment
LED classifi cation: Class1, IEC 60825-1 Edition 1.2 2001-08, Safety of Laser Products Part 1:
Equipment Classifi cation Requirements and User’s Guide
Operation
Storage and
Transportation
RF-ID operating frequency: 125 kHz
4
Only use the manual cleaning method. Refer to the
Guide for Cleaning and Steam-Based Sterilization
REF 6000-005-750 for cleaning safety and caution notes, cleaning equipment as well as detailed
cleaning and inspection instructions.
For the nGenius Universal Tracker follow the
procedure for Manual Cleaning and Disinfection
of Instruments with Electronics as described in
section 5.
The nGenius Universal Tracker is a Cleaning
Group IV instrument as defi ned in the Guide for
Cleaning and Steam-Based Sterilization.
Sterilization Instructions*
Only use the Sterrad® Sterilizer. Follow the
Sterrad® protocol instructions.
Do not steam sterilize.
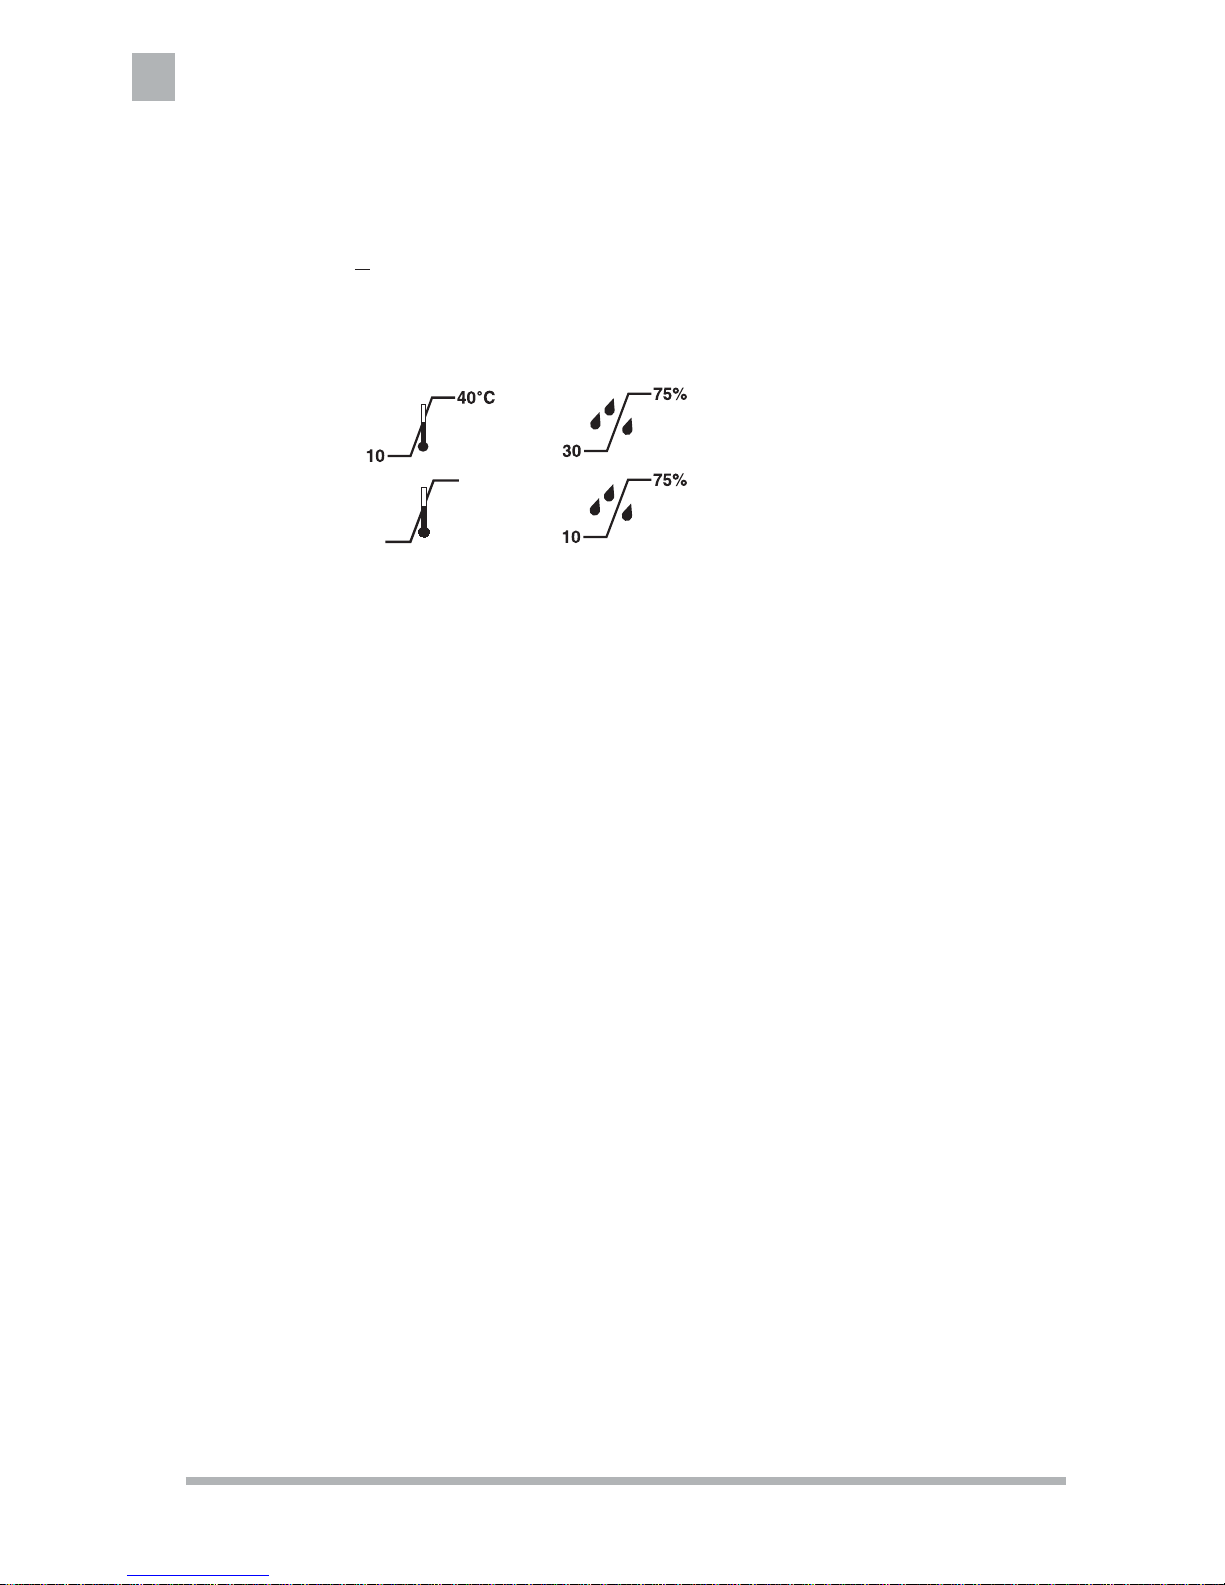
-20°C
75°C
* Specifi cations listed are approximate and may vary slightly from unit to unit.
Cleaning and Inspection Instructions
Page 6

www.stryker.com
5
Function and Features
SELECT Button
• Press for tracker initialization or software function selection when tracker is initialized.
Validation Disk
• Use to validate other navigated instruments.
Interface
• Use to attach the tracker to devices fi tted with a generic interface pin.
Release Button
• Press to attach devices to the interface and detach from the interface.
Green Status Light
• Flashes rapidly during tracker initialization.
• Flashes every few seconds during normal operation.
• Illuminates continuously if battery power is low.
Battery Holder
• Designed to hold the Instrument Battery REF 6000-006-000.
Infrared Light Emitting Diodes (LED)
• Emit infrared signals that are received by the Navigation System camera for position tracking and wireless communication.
Photodiodes
• Receive infrared signals sent from the Navigation System camera for wireless communication.
Automatic Device Identifi cation
• The interface contains a sensor for automatic identifi cation of devices with generic interface pins equip-
ped with an RF-ID transponder.
Regulatory Compliance (US and Canada)
This device complies with part 15 of the FCC Rules. Operation is subject to the following two conditions:
(1) This device may not cause harmful interference, and (2) this device must accept any interference
received, including interference that may cause undesired operation.
FCC Statement
This equipment has been tested and found to comply with the limits for a Class B digital device, pursuant
to Part 15 of the FCC Rules. These limits are designed to provide reasonable protection against harmful
interference in a residential installation. This equipment generates, uses and can radiate radio frequency
energy and, if not installed and used in accordance with the instructions, may cause harmful interference
to radio communications. However, there is no guarantee that interference will not occur in a particular installation. If this equipment does cause harmful interference to radio or television reception, which can be
determined by turning the equipment off and on, the user is encouraged to try to correct the interference
by one or more of the following measures:
-- Reorient or relocate the receiving antenna.
-- Increase the separation between the equipment and receiver.
-- Connect the equipment into an outlet on a circuit different from that to which the receiver is connected.
-- Consult the dealer or an experienced radio/TV technician for help.
Please also refer to the Declaration of Conforrnity in accordance with the Radio and Telecommunications
Terminal Equipment Act (FTEG) and Directive 1999/5/EC (R&TTE Directive) provided with this device.
Page 7
www.stryker.com
6
Instructions
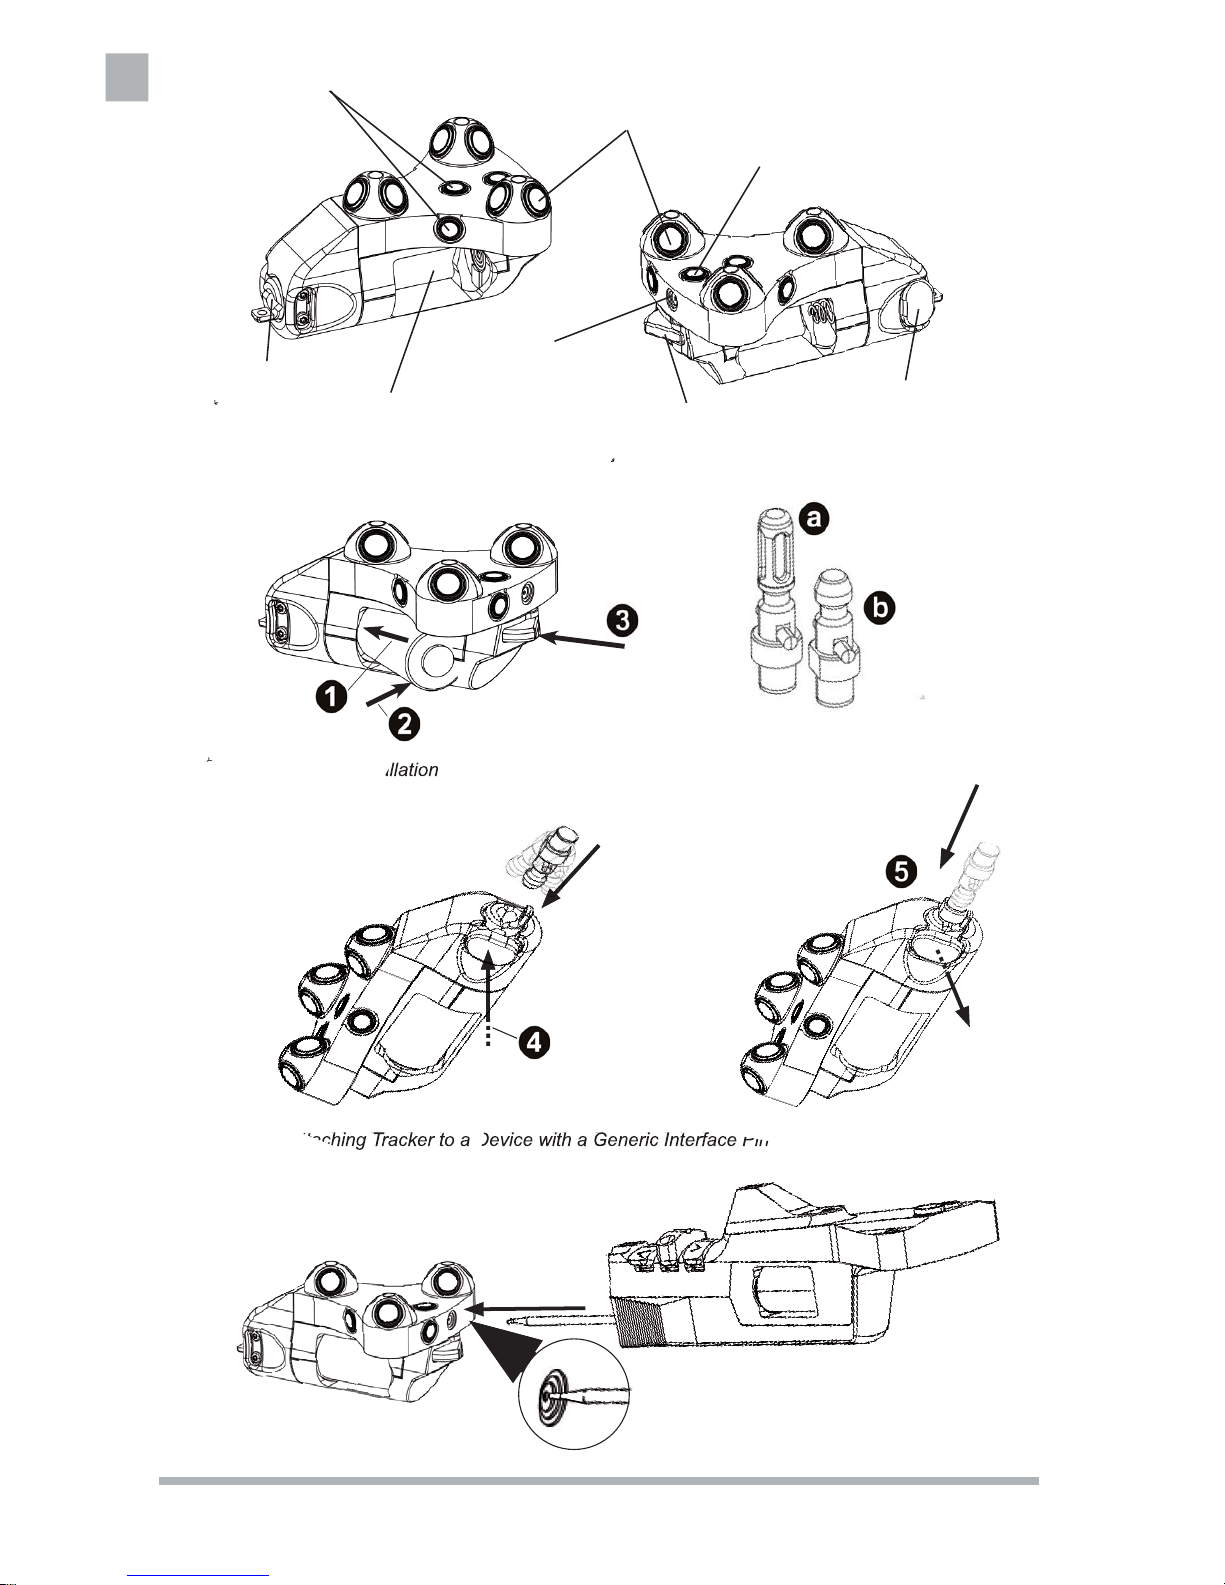
1 Install Battery
• Remove Instrument Battery REF 6000-006-000
from the sterile package.
• Just prior to surgery, load the battery into the battery holder, pressing in the negative end fi rst (1)
and then the positive end (2) against the spring.
See fi gure 2.
• The green status light lights up for 2-3 seconds
to indicate that the tracker is operative. Then, the
light turns off.
2 Initialize Tracker
• Align the tracker in such a way that the LEDs are
facing the camera.
• Once in system setup mode and prompted by the
software interface, press the SELECT button (3)
to initialize the tracker (see fi gure 2).
• The status light fl ashes rapidly during initializa-
tion. When initialization is complete, the light
stops fl ashing.
• Release the SELECT button.
• Once initialized, verify that the status light fl ashes
every 2-3 seconds and the software recognizes
the tracker.
3 Attaching the nGenius Universal Tracker to
a Device with Generic Interface Pin
The nGenius Universal Tracker is compatible to
devices fi tted with generic interface pins with (a)
and without (b) an RF-ID transponder as shown in
fi gure 3.
To attach or detach the tracker follow the visual
instructions in fi gure 4.
4 Using the nGenius Universal Tracker to
Validate Navigated Instruments
• Initialize both the nGenius Universal Tracker and
the navigated instrument.
• Aim the LEDs of both the nGenius Universal
Tracker and the navigated instrument towards
the Navigation System camera and follow the
instructions in fi gure 5.
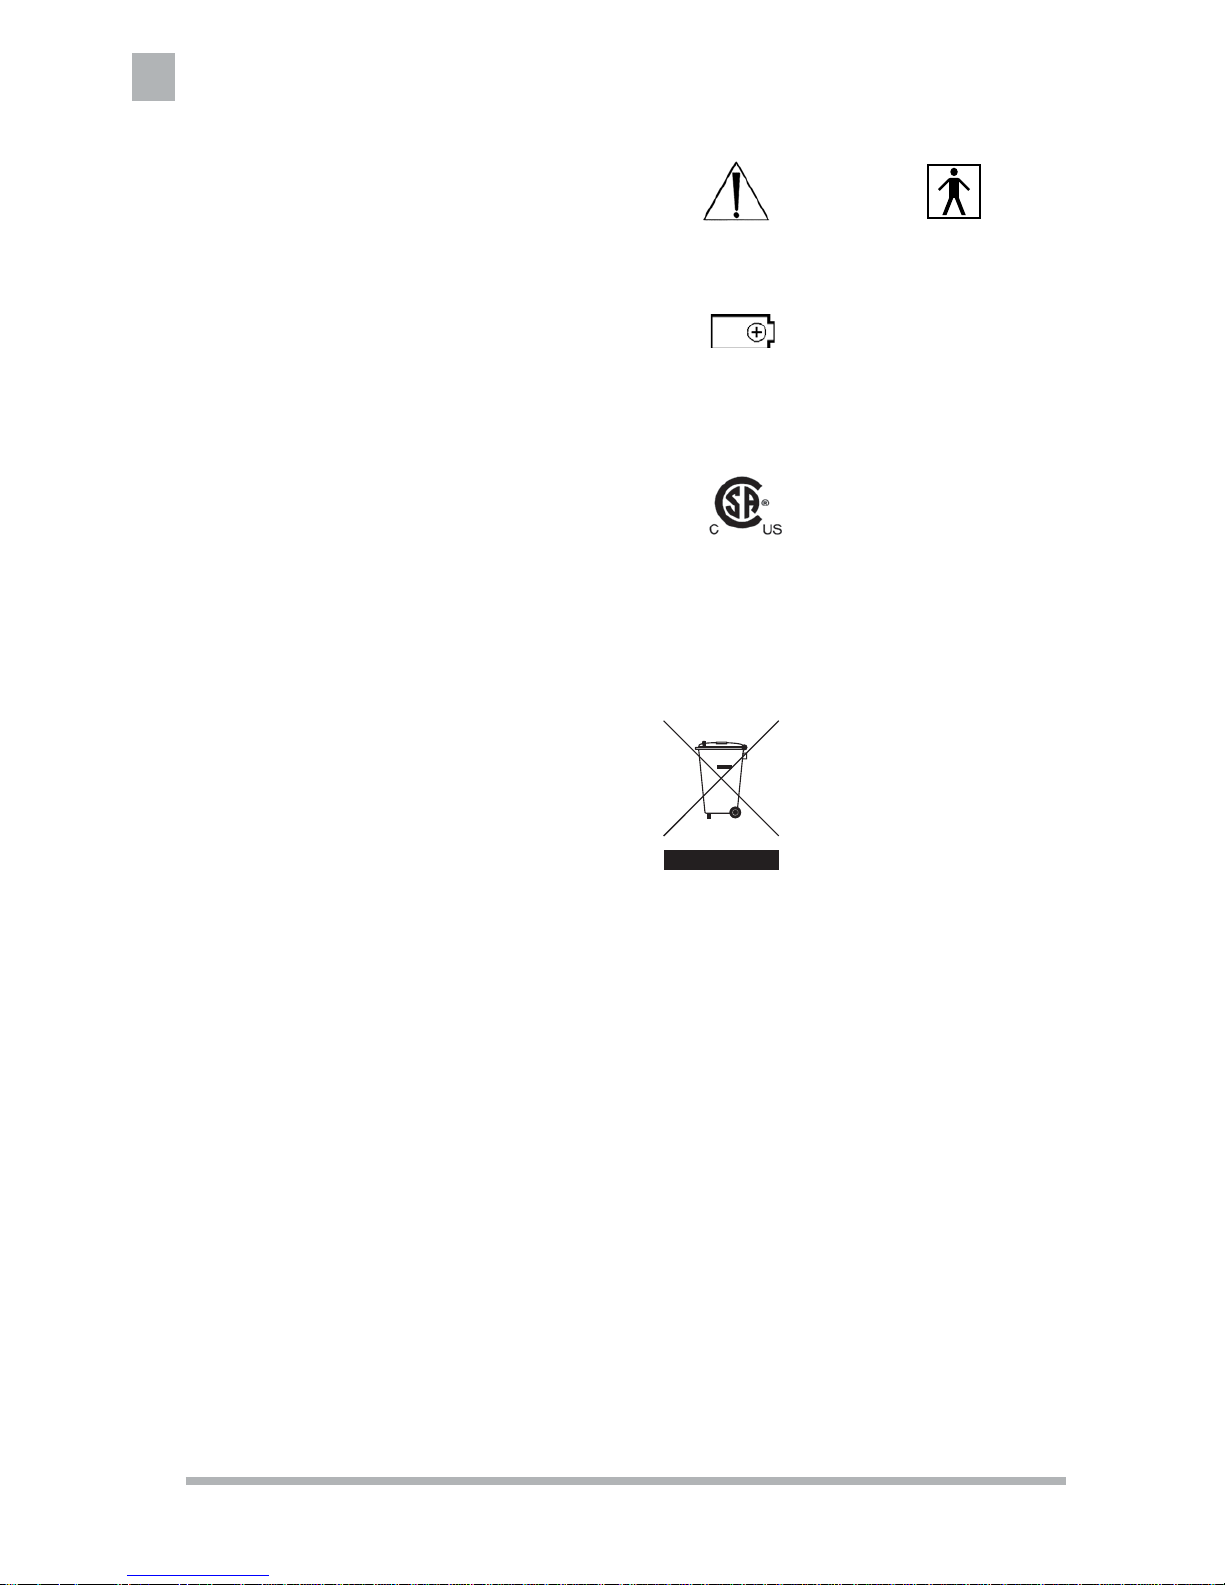
Symbol Defi nitions
Precautionary
Information
Type BF
Applied
Part
CSA International
CAN/CSA-C22.2 No. 601.1-M90
UL 60601-1
IEC 60601-1
Battery
+ Positive Terminal
In accordance with European
Directive 2002/96/EC on Waste
Electrical and Electronic Equipment, this symbol indicates that
the product must not be disposed
of as unsorted municipal waste.
The product should be collected
separately. Refer to your local distributor for return and/or collection
systems available in your country.
CE corresponds with the Directive 93/42/EEC
corresponds with the Directive 1995/5/EC
Page 8
www.stryker.com
7
Battery Holder
Interface
Photodiodes (4x)
Infrared LEDs (9x)
Status Light
Release Button
SELECT Button
Validation Disc
Figure 1: Functional Parts
Figure 2: Battery Installation
Figure 3: Generic Interface Pins
Figure 4: Attaching Tracker to a Device with a Generic Interface Pin
Figure 5: Instrument Validation
 Loading...