Page 1

Operation Manual
Page 2

Manual by Ludvig Carlson, Anders Nordmark, Roger Wiklander
VST System Link chapter by Rodney Orpheus
Quality Control: C. Bachmann, H. Bischoff, S. Pfeifer, C. Schomburg
The information in this document is subject to change without notice and does not represent a commitment on the part of Steinberg Media Technologies GmbH. The software
described by this document is subject to a License Agreement and may not be copied
to other media except as specifically allowed in the License Agreement. No part of this
publication may be copied, reproduced or otherwise transmitted or recorded, for any
purpose, without prior written permission by Steinberg Media Technologies GmbH.
All product and company names are ™ or ® trademarks of their respective owners.
Windows 2000 and Windows XP are trademarks of Microsoft Corporation. The Mac
logo is a trademark used under license. Macintosh and Power Macintosh are registered
trademarks.
© Steinberg Media Technologies GmbH, 2004.
All rights reserved.
Page 3

Table of Contents
Page 4

9 Playback and the
Transport panel
10 Background
13 Operations
15 Options and Settings
19 Recording
20 Background
21 Basic recording methods
25 Audio recording specifics
33 MIDI Recording Specifics
43 Options and Settings
47 The Project Window
48 Background
50 Window Overview
58 Operations
90 Options
95 Folder tracks
96 About folder tracks
97 Using folders
103 Using Markers
104 About markers
105 The Marker Window
108 Using the Marker track
115 Fades and
Crossfades
116 Creating Fades
119 The Fade Dialogs
122 Creating Crossfades
124 The Crossfade Dialog
127 The Mixer
128 About this chapter
129 Overview
137 The audio channel strips
139 The MIDI channel strips
140 The Common panel
141 The Master section
142 The VST Outputs window
143 Basic mixing procedures
147 Audio specific procedures
158 MIDI specific procedures
159 Utilities
165 Audio effects
166 Background
168 Using effects
181 The included effects
182 Installing and managing
effect plug-ins
189 Automation
190 Background
193 Automation subtrack
operations
198 Using Write/Read
automation
200 Working with automation
curves
206 Tips and common methods
207 Options and Settings
209 Remote Controlling
the Mixer
210 Background
210 Operations
217 Audio processing and
functions
218 Background
219 Audio processing
CUBASE LE
4 Table of Contents
Page 5

237 The Sample Editor
238 Background
238 Opening the Sample Editor
238 Window overview
244 Operations
253 Options and settings
255 The Audio Part Editor
256 Background
256 Opening the Audio Part
Editor
257 Window overview
260 Operations
262 Common methods
264 Options and Settings
265 Working with
hitpoints and slices
266 Background
267 Using Hitpoints
270 Editing hitpoints
279 Creating slices
280 Creating Groove Quantize
maps
281 Divide audio events
281 Using the Close Gaps
function
283 The Pool
284 Background
286 Window Overview
290 Operations
306 Options and Settings
307 MIDI devices and
patches
308 About program change and
bank select
309 Opening the MIDI Device
Manager
310 Installing a MIDI Device
313 Selecting a patch for an
installed device
314 Renaming patches in a
device
315 Defining a new device
318 Exporting and importing
device setups
319 MIDI realtime
parameters
320 Introduction
321 The Inspector – General
handling
322 Basic track settings
324 Track parameters
328 The Channel section
329 Merge MIDI in Loop
331 MIDI processing and
quantizing
332 Introduction
333 Quantizing
343 Other MIDI menu functions
348 Dissolve Part
351 The MIDI Editors
352 About editing MIDI
353 Opening a MIDI editor
354 The Key Editor – Overview
358 Key Editor operations
378 The List Editor – Overview
379 List Editor operations
385 The Score Editor –
Overview
388 Score Editor operations
Table of Contents 5
CUBASE LE
Page 6

404 Common MIDI editor
options and settings
405 Working with drum maps
413 The Input Transformer
414 Introduction
417 Setting up filter conditions
423 Specifying actions
427 The Tempo Track
Editor
428 Background
428 Opening the Tempo Track
Editor
428 Window overview
432 Operations
437 Options and settings
438 The Beat Calculator
441 Working with System
Exclusive messages
442 Introduction
442 Bulk dumps
445 Recording System Exclusive
parameter changes
446 Editing System Exclusive
messages
449 Export Audio
Mixdown
450 Background
451 Mixing down to an audio file
453 File Format Specifics
461 Synchronization
467 VST System Link
468 Introduction
469 Preparations
477 Activating VST System Link
484 Application examples
487 Video
488 Background
489 Operations
492 Options
493 ReWire
494 Introduction
495 Launching and quitting
496 Activating ReWire channels
497 Using the transport and
tempo controls
498 How the ReWire channels
are handled in Cubase LE
499 Routing MIDI via ReWire2
500 Considerations and
limitations
501 File Handling
502 File Operations
516 Options and Settings
519 Key Commands
520 Background
521 The Key Commands dialog
526 Setting up tool modifier keys
527 Troubleshooting/FAQ
528 Frequently Asked Questions
462 Background
463 Synchronization Setup
466 Options
CUBASE LE
6 Table of Contents
Page 7

531 Menu reference
532 About this chapter
532 Cubase LE menu
(Mac OS X only)
533 File menu
537 Edit menu
543 Project menu
544 Audio menu
548 MIDI menu
553 Pool menu
556 Transport menu
559 Devices menu
561 Window menu
562 Help menu
563 Index
Table of Contents 7
CUBASE LE
Page 8

CUBASE LE
8 Table of Contents
Page 9

1
Playback and the Transport
panel
Page 10
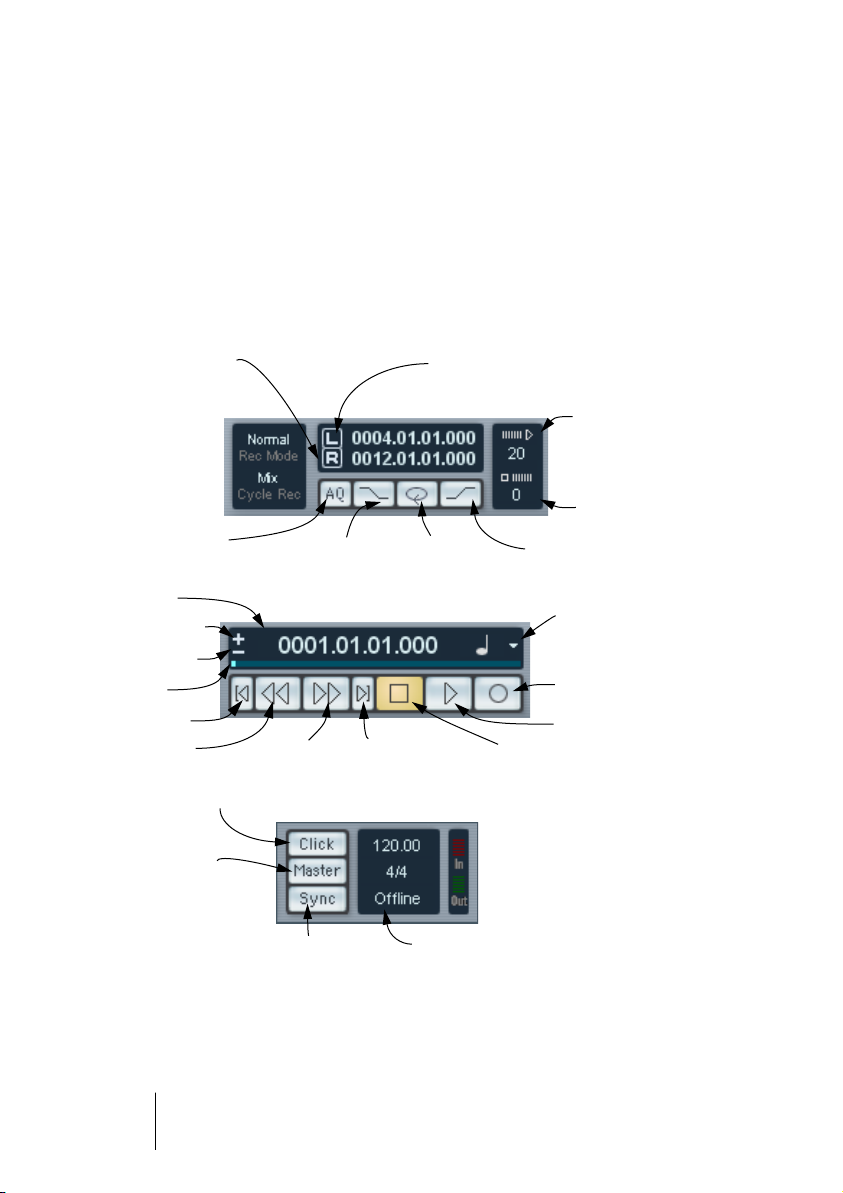
Background
This chapter describes the various methods available for controlling
Playback and Transport functions in Cubase LE.
The Transport panel
Below you can find a brief description of each item on the Transport
panel.
Right locator: punch out
point and end of Cycle
Activates Auto Quantize
Position display
Nudge position right
Nudge position left
Position slider
Go to project start
Metronome click on/off
Tempo follows Tempo
track on/off
Left locator: record start point, punch
in point and beginning of Cycle
Cycle on/off
Fast forwardRewind Stop
Go to project end
Preroll setting
Postroll setting
Activates punch outActivates punch in
Display format
pop-up
Record
Play
Synchronization on/off
CUBASE LE
1 – 10 Playback and the Transport panel
The tempo and time signature display
Page 11
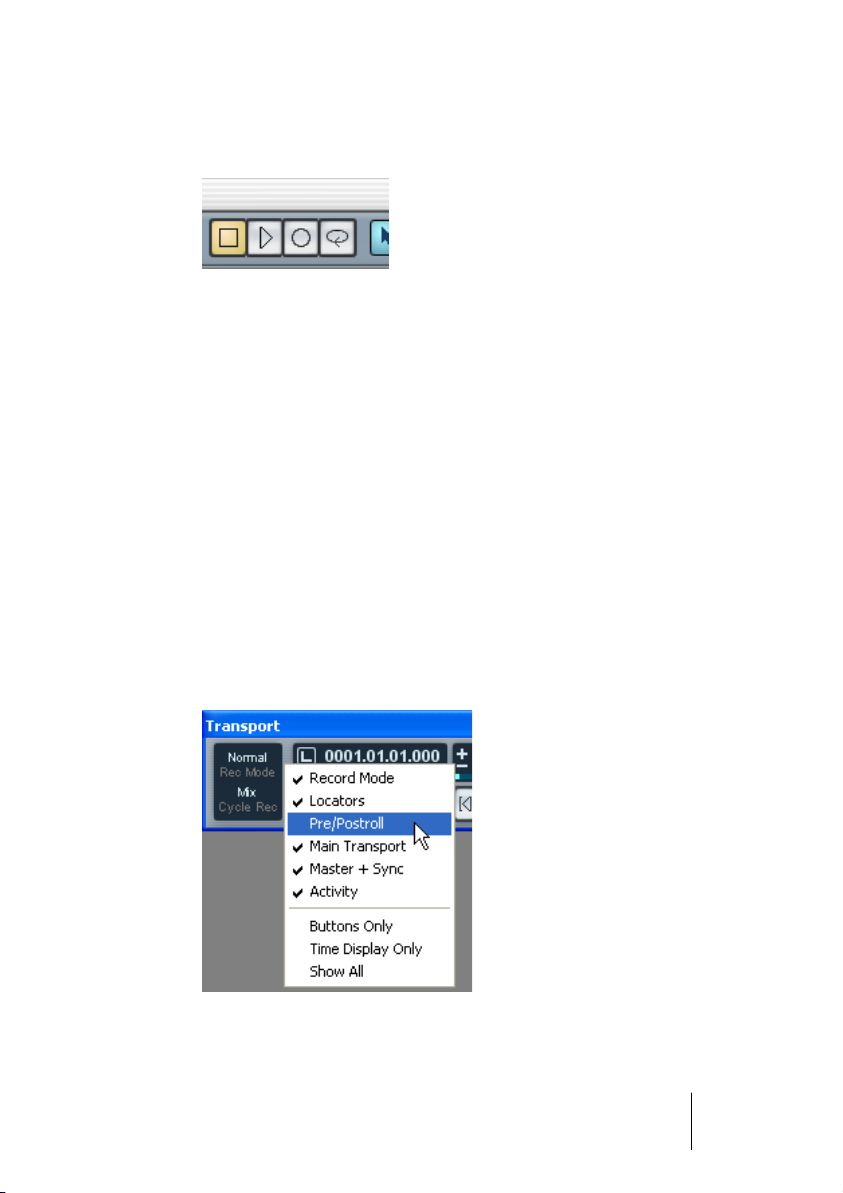
•
The main Transport functions (Play/Stop/Cycle/Record) are also
available on the toolbar.
In addition, various play options are available on the Transport menu.
Hiding and showing
The Transport panel is shown by default when you launch a new project.
To hide or show it, select the “Transport Panel” item from the Transport
menu (or use the corresponding key command, by default [F2]).
About Preroll and Postroll
These items are described in the Recording chapter – see page 44.
Resizing
You can change the size of the Transport panel by deciding which
parts of it you wish to be visible. If you right-click (Win) or [Ctrl]-click
(Mac) anywhere within the Transport panel area, a pop-up menu will
appear. On this menu, you can check or uncheck elements of the
Transport panel as desired.
CUBASE LE
Playback and the Transport panel 1 – 11
Page 12
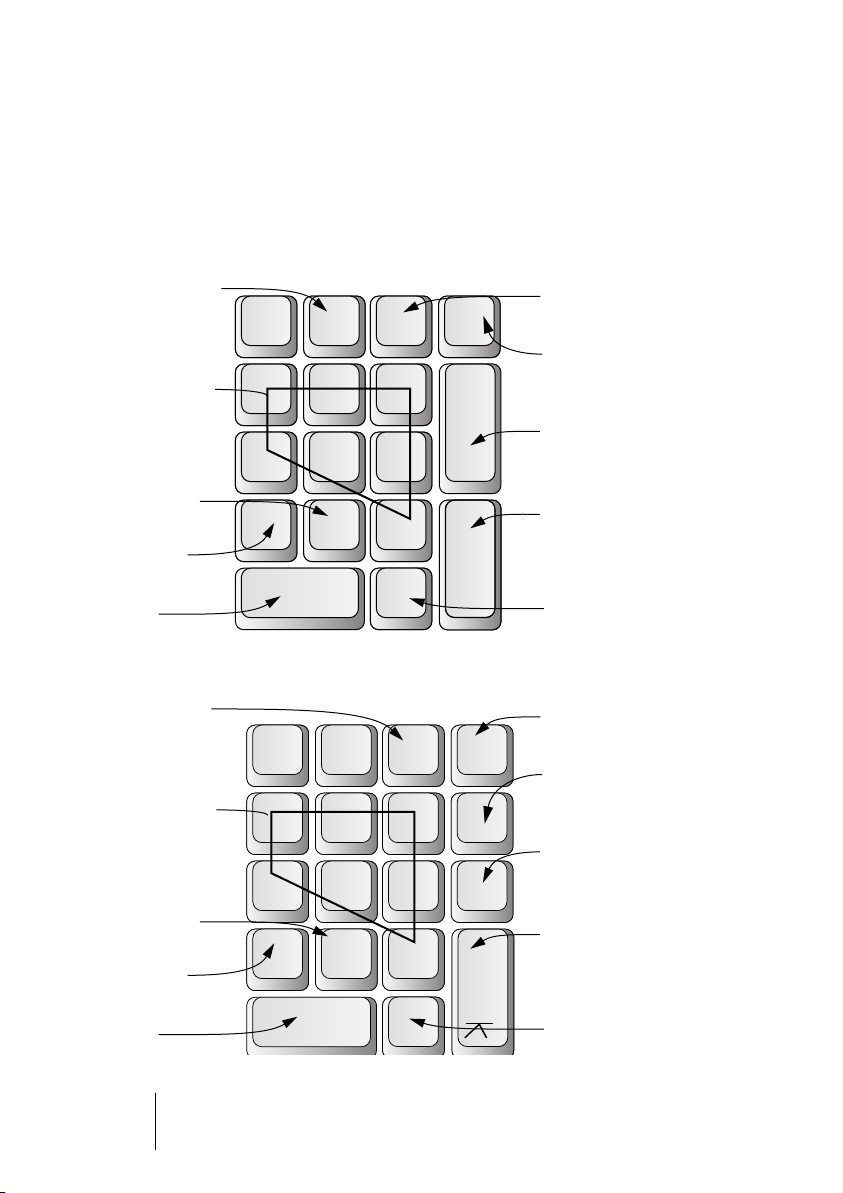
The numeric keypad
In the default Key Command settings, the numeric keypad on the
computer keyboard is assigned various Transport panel operations
The keypads are slightly different on PC and Macintosh computers:
PC:
Cycle On/Off
Go to Marker
number 3-9
Go to right
locator
Go to left
locator
Stop
Mac:
Cycle On/Off
Go to Marker
number 3-9
Num
Lock
x —
7 8 9
4 5 6+
1 2 3
0
num
lock
,
= / *
Enter
7 8 9 –
Record
Rewind On/Off
Fast Forward On/Off
Play
Return to Zero
Record
Rewind On/Off
Fast Forward On/Off
4 5 6 +
Go to right
locator
Go to left
locator
Stop
CUBASE LE
1 – 12 Playback and the Transport panel
1 2 3
0
Play
enter
,
Return to Zero
Page 13

Operations
Setting the Project cursor position
There are several methods you can use to move the project cursor po-
sition:
• By using Fast Forward and Rewind.
• By dragging the project cursor.
• By clicking in the ruler.
Double clicking in the ruler will start or stop playback, moving the cursor at the same
time.
• If the option “Locate When Clicked in Empty Space” is activated in the Preferences (Transport page) you can click anywhere in an empty section of the
Project window to move the cursor position.
• By changing the value in the position display.
• By using the position slider.
The range of the slider relates to the Length setting in the Project Setup dialog. Hence,
moving the slider all the way to the right will take you to the end of the project.
• By using the nudge position buttons (see page 14).
• By using markers (see page 104).
• By using playback options (see page 16).
• By using functions on the Transport menu.
The following functions are available:
Function Description
Locate Selection Moves the project cursor to the beginning of the current se-
lection. For this to be available, you must have selected one
or more events or parts, or made a selection range.
Locate Next/
Previous Marker
Locate Next/
Previous Event
This moves the project cursor to the closest marker to the right
or left (see page 104).
This moves the project cursor forwards or backwards respectively, to the closest beginning or end of any event on the selected track(s).
❐
If Snap is activated when dragging the project cursor, the Snap value is
taken into account. This can be helpful for finding exact positions quickly.
CUBASE LE
Playback and the Transport panel 1 – 13
Page 14
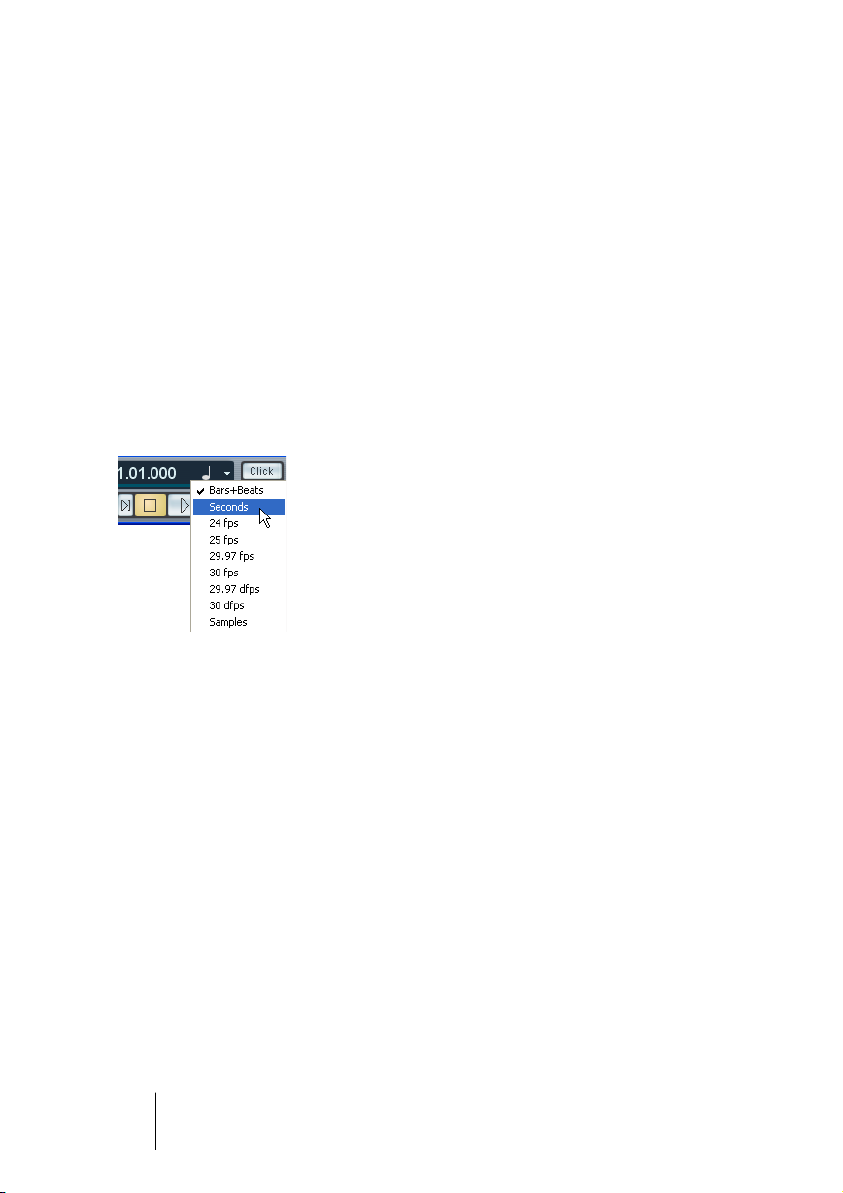
About the Transport panel display format
The time unit shown in the ruler can be independent from the time unit
shown in the Transport panel. This means that you can display timecode in the transport position display and bars and beats in the ruler,
for example. The following rules apply:
•
If you change the display format from the Transport panel, this will apply “globally” in the project.
This is the same as changing the display format in the Project Setup. Thus, to have different display formats in the ruler and the Transport panel, you should change the format in the ruler.
•
The Transport panel display format is set on the pop-up menu to the
right in the position display.
•
The setting here also determines the time format displayed for the left
and right locators.
Using the nudge position buttons
The + and – buttons to the left of the Position slider allows you to
nudge the project cursor position to the right or left, respectively. The
increments depend on the display format selected on the Transport
panel:
• If the Seconds format is selected, the position will be nudged by whole seconds.
• If any frame-based format is selected, the position will be nudged by frames.
• If Bars+Beats is selected, the position will be nudged by ticks. There are 480
ticks per beat.
• If the Samples format is selected, the position will be nudged by samples.
CUBASE LE
1 – 14 Playback and the Transport panel
Page 15

Options and Settings
The “Return to Start Position on Stop” preference
You have the option to set the behavior of the project cursor when you
press Stop. This is done in the Preferences dialog on the Transport
page:
1.
Open the Preferences dialog from the File menu (on the Mac, the
Preferences are located on the Cubase LE menu) and select the
Transport page.
2.
Activate or deactivate the “Return to Start Position on Stop” item.
•
If activated (ticked), the project cursor will automatically return to the
position where recording or playback last was activated from, when
you press Stop.
•
If deactivated, the project cursor will remain at the position where you
hit Stop.
Pressing Stop
playback last was activated from.
3.
Click OK to close the Preferences dialog and apply the changes.
About track disable/enable
again
will return the project cursor to the position where recording or
For audio tracks, the track context menu contains an item named “Disable Track”. This shuts down all disk activity for the track, as opposed
to using Mute, which merely turns down the output volume for a track.
If you often record “alternative takes”, you can easily build up a large
number of takes that are actually still “playing back” from the hard disk
during playback, although the tracks may be muted. This puts an unnecessary load on your disk system, so using “Disable Track” is recommended for such situations.
•
Select “Disable Track” when you have recorded many alternative
takes of a performance on separate tracks, that you want to keep for
later evaluation and/or editing.
Select “Enable Track” from the track context menu to re-enable disabled tracks.
CUBASE LE
Playback and the Transport panel 1 – 15
Page 16

Playback functions
Apart from the standard transport controls on the Transport panel, you
can also find a number of functions that can be used to control playback on the Transport menu. The items have the following functionality:
Option Description
Play from Selection Start This activates playback from the beginning of the currently
selected range.
Play from Selection End This activates playback from the end of the currently se-
lected range.
Play until Selection Start This activates playback two seconds before the start of the
currently selected range and stops at the selection start.
Play until Selection End This activates playback two seconds before the end of the
selected range and stops at the selection end.
Play until Next Marker This activates playback from the project cursor and stops at
the next marker.
Play Selection Range This activates playback from the start of the selected range
and stops at the selection end.
Loop Selection This activates playback from the start of the selected range
and continuously starts over again upon reaching the selection end.
❐
The functions listed above (except “Play to Next Marker”) are only available if you have selected one or more events or made a selection range.
CUBASE LE
1 – 16 Playback and the Transport panel
Page 17

About Chase
Chase is basically a function that makes sure your MIDI instruments
sound as they should when you locate to a new position and start
playback. This is accomplished by having the program transmitting a
number of MIDI messages to your instruments each time you move to
a new position in the project, making sure all MIDI devices are set up
correctly with regard to Program Change, controller messages (such
as MIDI Volume) etc.
For example, let’s say you have a MIDI track with a Program Change
event inserted at the beginning. This event makes a synth switch to a
piano sound.
In the beginning of the first chorus you have another Program Change
event which makes the same synth switch to a string sound.
You now play back the song. It begins with the piano sound and then
switches to the string sound. In the middle of the chorus you stop and
rewind to some point between the beginning and the second Program
Change. The synth will now still play the string sound although in this
section it really should be a piano!
The Chase function takes care of that. If Program Change events are
set to be chased, Cubase LE will track the music back to the beginning, find the first Program Change and send this out, so that the synth
is set to the right sound.
The same thing can apply to other event types as well. The Chase
Events Filter settings in the Preferences dialog (MIDI-Chase Events
Filter page) determine which event types will be chased when you locate to a new position and start playback.
• Event types for which the checkbox is activated in this dialog will not be
chased.
CUBASE LE
Playback and the Transport panel 1 – 17
Page 18

CUBASE LE
1 – 18 Playback and the Transport panel
Page 19

2
Recording
Page 20

Background
This chapter describes the various recording methods that you can
use in Cubase LE. As it is possible to record both audio and MIDI
tracks in Cubase LE, both of these recording methods are covered in
this chapter.
Before you start
This chapter assumes that you are reasonably familiar with certain basic recording concepts, and that the following initial preparations have
been made:
•
You have properly set up, connected and calibrated your audio hardware.
This is described in the Getting Started book.
•
You have opened a project and set the project setup parameters to
your specifications.
Project Setup parameters determine the record format, sample rate, project length etc.
that affect the resulting audio recordings you make during the course of the project.
See page 58.
•
If you plan to record MIDI, your MIDI equipment should be set up and
connected correctly.
See the Getting Started book.
CUBASE LE
2 – 20 Recording
Page 21
Basic recording methods
This section describes the general methods used for recording. However, there are additional preparations and procedures that are specific
to audio and MIDI recording respectively. Make sure to read these sections before you start recording (see page 25 and page 33).
Record enabling a track
Cubase LE can record on a single track or on several tracks (audio
and/or MIDI) simultaneously. To make a track ready for recording,
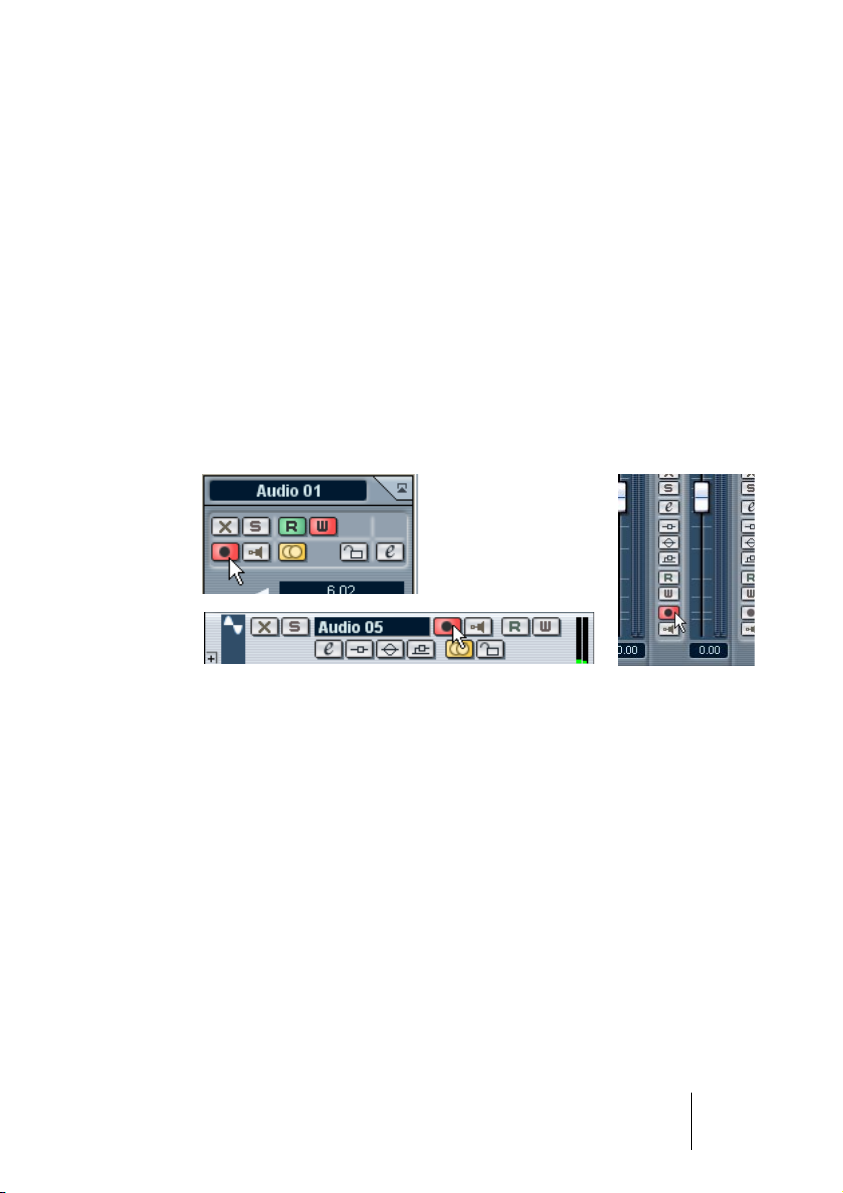
click the Record Enable button for the track in the Track list, in the Inspector or in the Mixer. When activated, the button(s) turn red, indicating record ready mode.
Record Enable in the Inspector, Track list and Mixer.
• If the option “Enable Record on Selected Track” is activated in the Preferences dialog (Editing page), tracks are automatically record enabled
when you select them in the Track list.
• You can have a maximum of 48 audio tracks in a project. However, the
exact number of audio tracks you can record simultaneously depends on
your computer CPU and hard disk performance.
Furthermore, it would be pointless to record more audio tracks than you have audio inputs, since this would only result in duplicate tracks and audio files (see page 25).
CUBASE LE
Recording 2 – 21
Page 22
Manually activating recording
You activate recording by clicking the Record button on the Transport
panel or toolbar, or by using the corresponding key command (by default [*] on the numeric keypad).
Recording can be activated from Stop mode (from the current cursor
position or from the left locator) or during playback:
• If you activate recording from Stop mode, and the option “Start Record at Left
Locator” is activated on the Transport menu, recording will start from the left
locator.
The preroll setting or the metronome count-in will be applied (see page 44).
• If you activate recording from Stop mode, and the “Start Record at Left Locator” is deactivated, recording will start from the current project cursor position.
• If you activate recording during playback, Cubase LE will immediately enter
Record mode and start recording at the current project cursor position.
This is known as “manual punch in”.
Automatically activating recording
Cubase LE can automatically switch from playback to recording at a
given position. This is known as “automatic punch in”. A typical use for
this would be if you need to replace a section of a recording, and want
to listen to the previously recorded audio up to the recording start position.
1. Set the left locator to the position at which you want recording to start.
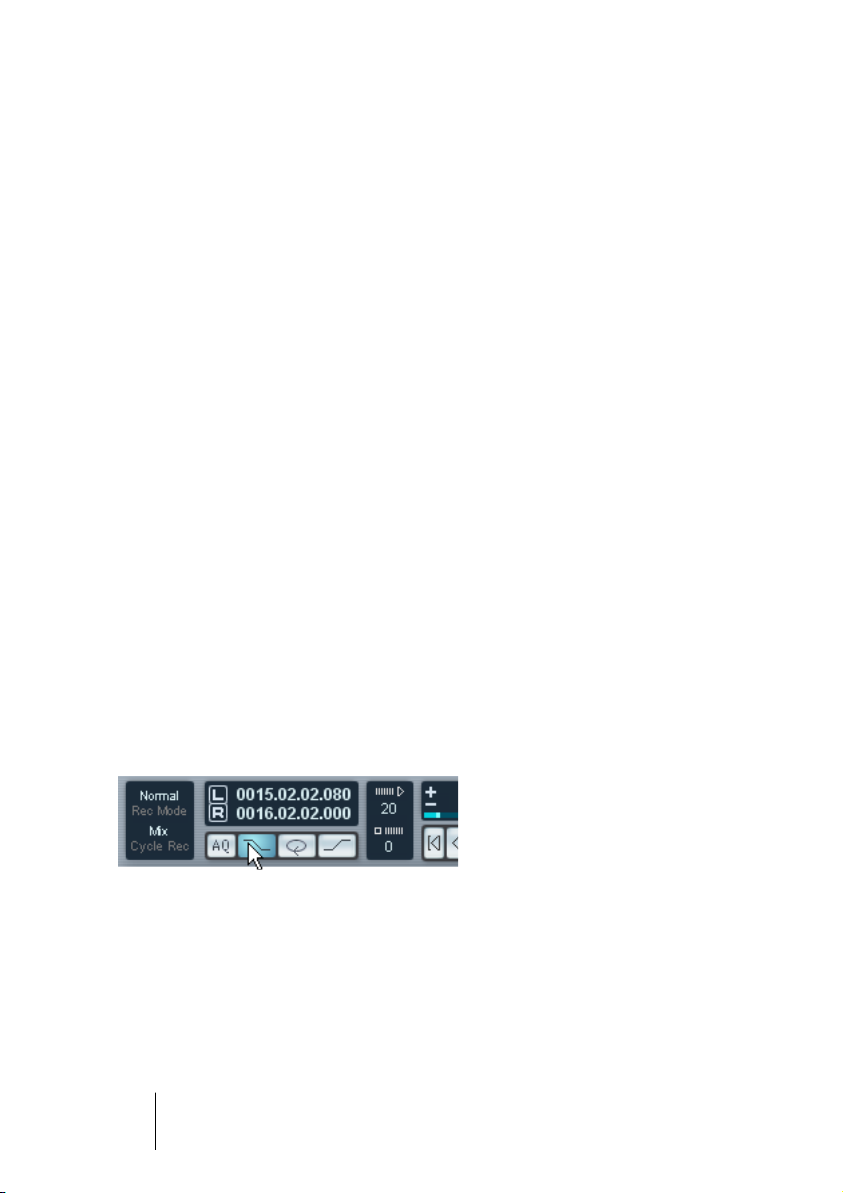
2. Activate the Punch In button on the Transport panel.
Punch In activated.
3. Activate playback from some position before the left locator.
When the project cursor reaches the left locator, recording is automatically activated.
CUBASE LE
2 – 22 Recording
Page 23
Stopping recording
Again, this can be done automatically or manually:
• If you click the Stop button on the Transport panel (or use the corre-
sponding key command, by default [0] on the numeric keypad), recording is deactivated and Cubase LE goes to Stop mode.
• If you click the Record button or use the key command for recording,
by default [*], recording is deactivated but playback continues.
This is known as “manual punch out”.
• If the Punch Out button is activated on the Transport panel, recording
will be deactivated when the project cursor reaches the right locator.
This is known as “automatic punch out”. By combining this with automatic punch in,
you can set up a specific section to record – again very useful if you want to replace a
certain part of a recording. See also page 43.
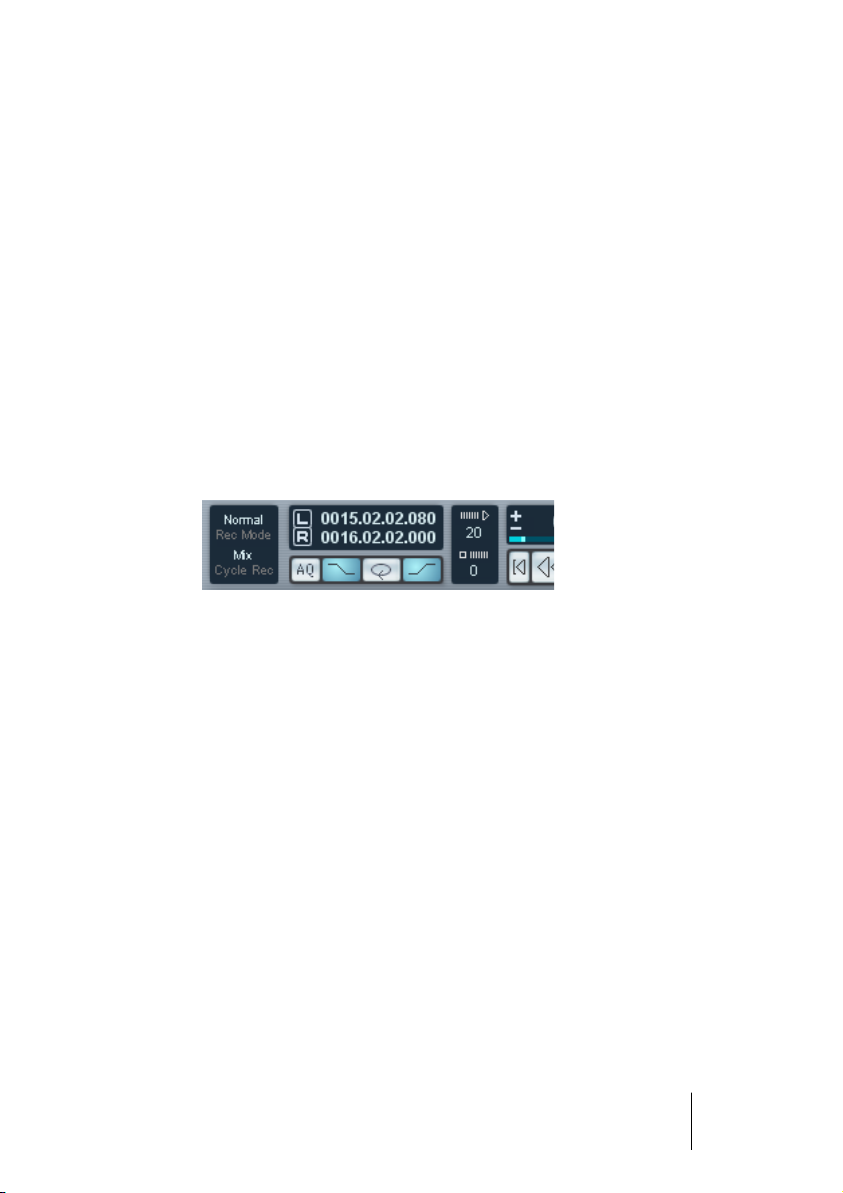
Punch In and Out activated.
CUBASE LE
Recording 2 – 23
Page 24
Cycle recording
Cubase LE can record and play back in a cycle – a loop. You specify
where the cycle starts and ends by setting the left and right locators.
When cycle is active, the selected section is seamlessly repeated until you hit Stop or deactivate cycle mode.
• To activate cycle mode, click the cycle button on the Transport panel.
If you now activate Play, the section between the left and right locator is repeated indefinitely until you stop.
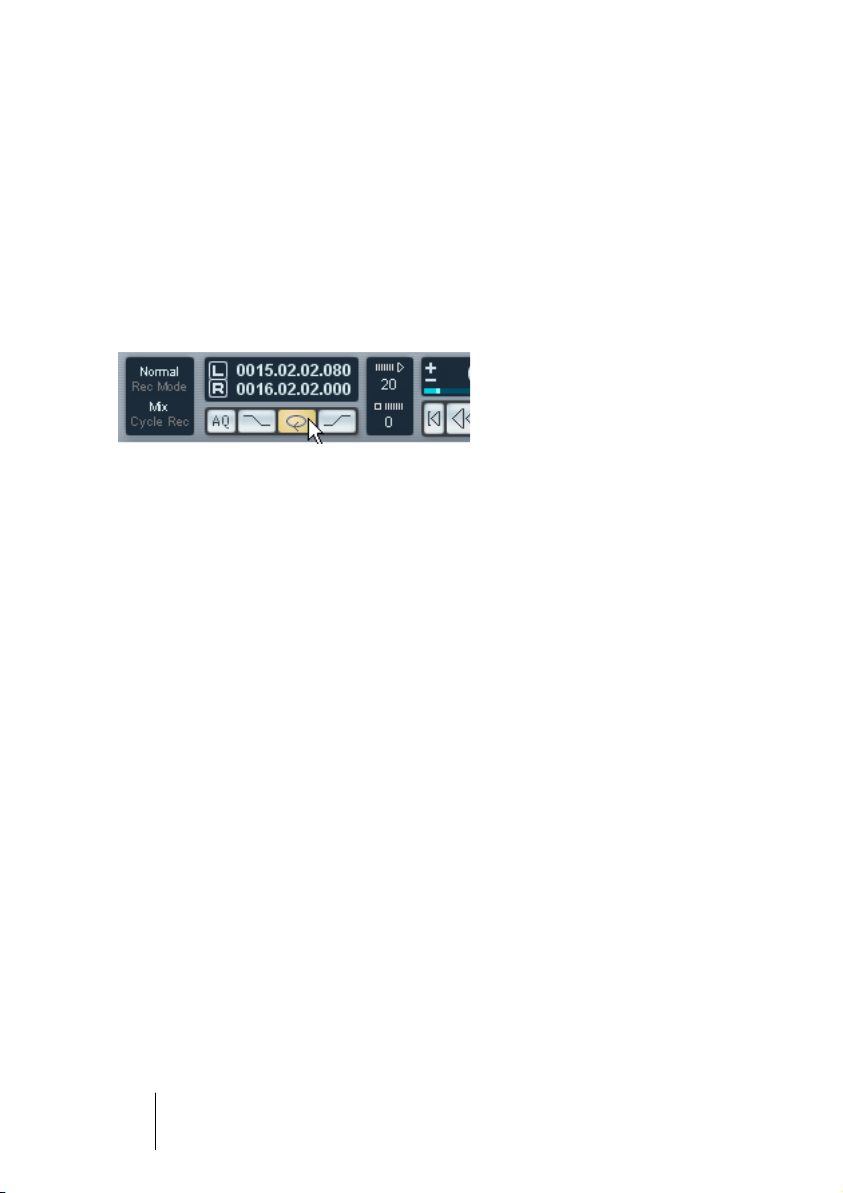
Cycle activated.
• To record in Cycle mode, you can start recording from the left locator,
from before the locators or from within the cycle, from Stop mode or
during playback.
As soon as the project cursor reaches the right locator, it will jump back to the left locator and continue recording a new lap.
• The results of cycle recording are different for audio (see page 32)
and MIDI (see page 38).
CUBASE LE
2 – 24 Recording
Page 25
Audio recording specifics
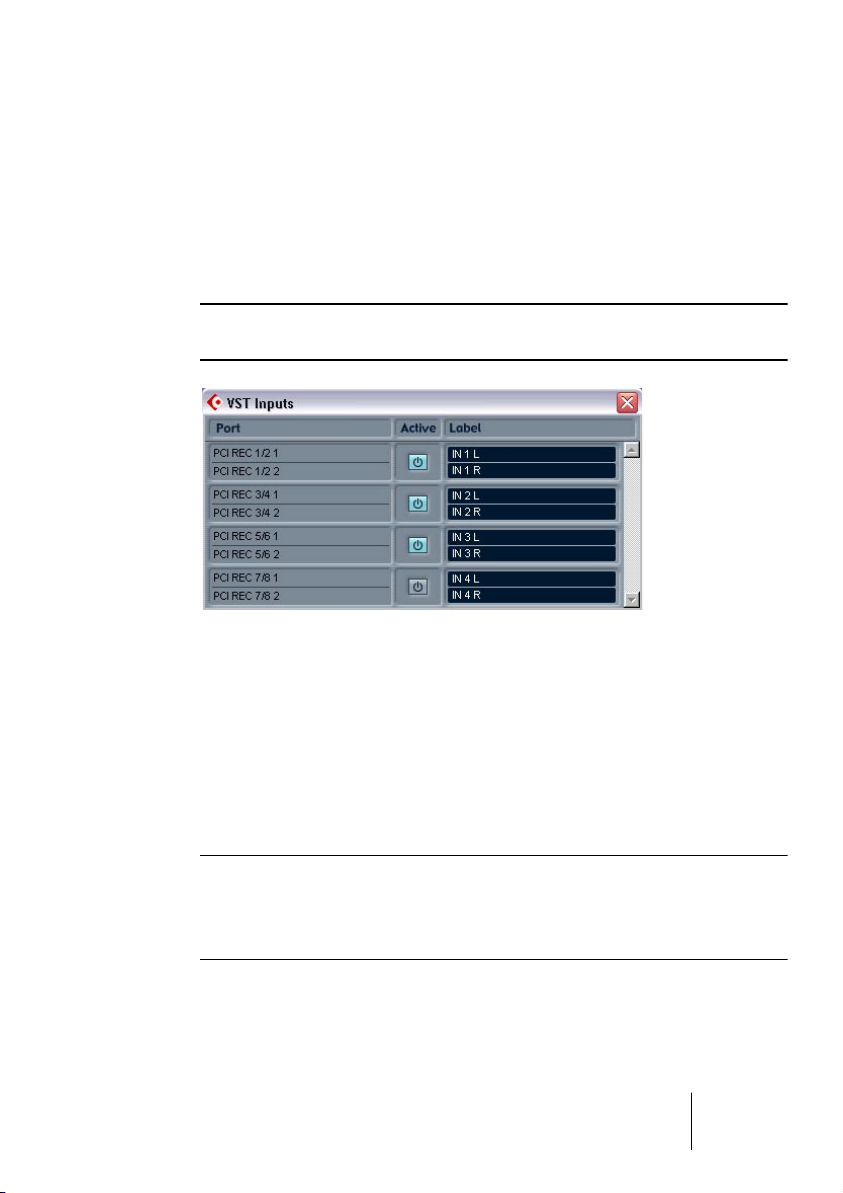
Activating and selecting VST inputs
Cubase LE allows you to use audio hardware with multiple inputs and
route different inputs to different audio channels. To activate inputs,
first open the VST Inputs window on the Devices menu.
❐
Note that active inputs use processing power! Make it a habit to only activate audio inputs that you actually intend to use.
The VST Inputs window is divided into three columns:
• The left column contains the available physical input ports on the audio hardware.
• The middle column indicates which input pairs are activated. You turn input
pairs on or off by clicking the buttons in this column.
• The right column shows the names that will be used for each input throughout
the program. You can rename an input by clicking in this column and typing a
new name.
❐
If you deactivate an input pair that is currently used (selected as input
source for one or several audio channels), you will be asked whether you
want Cubase LE to remap these inputs (change the input source selection for the channels in question).
CUBASE LE
Recording 2 – 25
Page 26
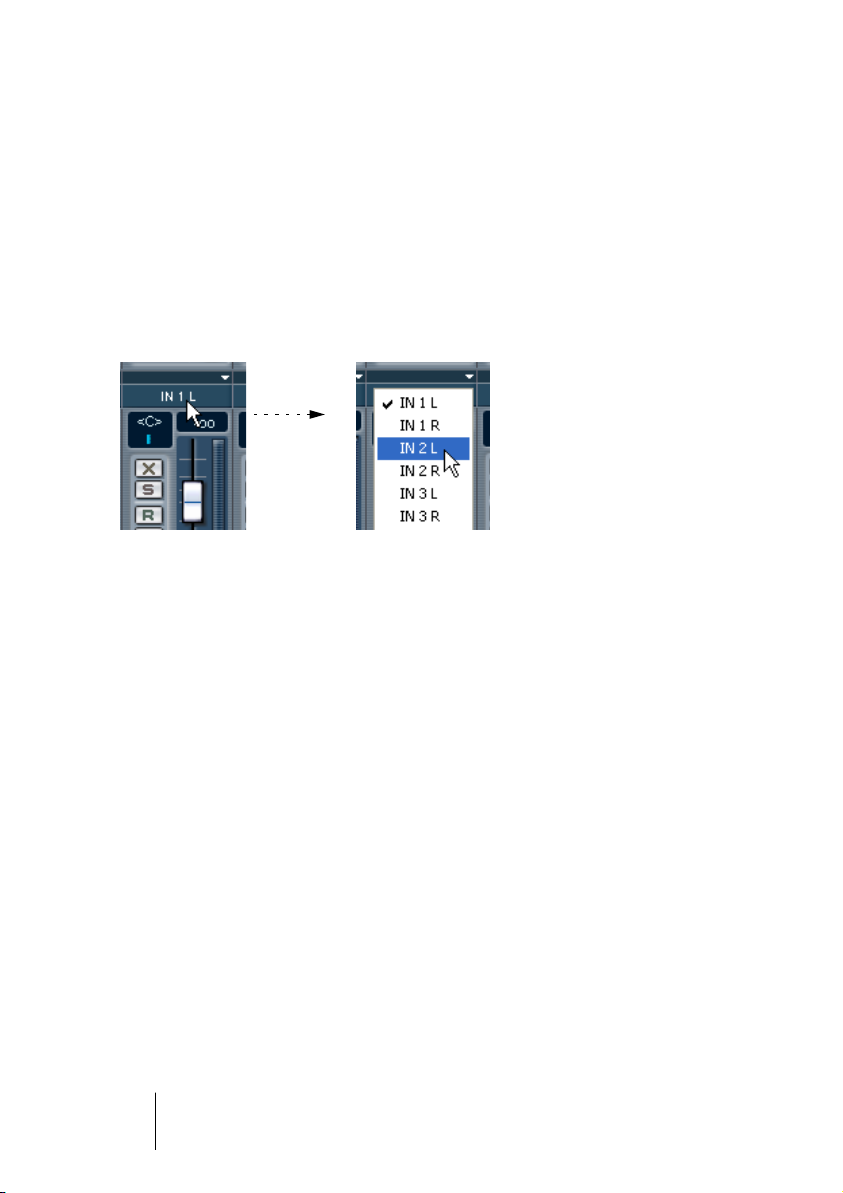
Routing activated VST inputs to a channel
Selecting an input source for a track’s corresponding channel is done
in the Mixer. Proceed as follows:
1. Open the Mixer from the Devices menu.
2. Locate the mixer channel strip for the audio track on which you plan to
record.
3. Pull down the input pop-up for the channel strip and select the input
to which the signal source you want to record is connected.
Selecting a recording file format
The format of recorded files is set in the Project Setup dialog on the
Project menu. There are three settings: sample rate, record format (bit
depth) and record file type. While the sample rate is set once and for
all when you start working on a new project, the bit depth and file type
can be changed at any time.
Record format (bit depth)
The available options are 16 bit and 24 bit. Use the following guidelines:
• Normally, select record format according to the bit depth delivered by your audio hardware.
For example, if your audio hardware has 20 bit A/D converters (inputs), you may want
to record at 24 bit resolution, to capture the full bit depth. On the other hand, if your
hardware has 16 bit inputs, it’s pointless to record with a higher bit depth – this will
only make the audio files larger, with no difference in audio quality.
• The higher the bit depth, the larger the files and the more strain is put on the
disk system.
If this is an issue, you may want to lower the record format setting.
CUBASE LE
2 – 26 Recording
Page 27
Record file type
The Record File Type setting determines which type of files will be created when you record:
File Type Description
Wave File Wave files have the extension “.wav” and are the most common file
format on the PC platform.
AIFF File Audio Interchange File Format, a standard defined by Apple Com-
puter Inc. AIFF files have the extension “.aif” and are used on most
computer platforms.
Setting up tracks for mono or stereo recording
One of the initial decisions you have to make before you start recording audio is whether the recording should be stereo or mono. This is
determined by the stereo/mono status of the audio track selected for
recording:
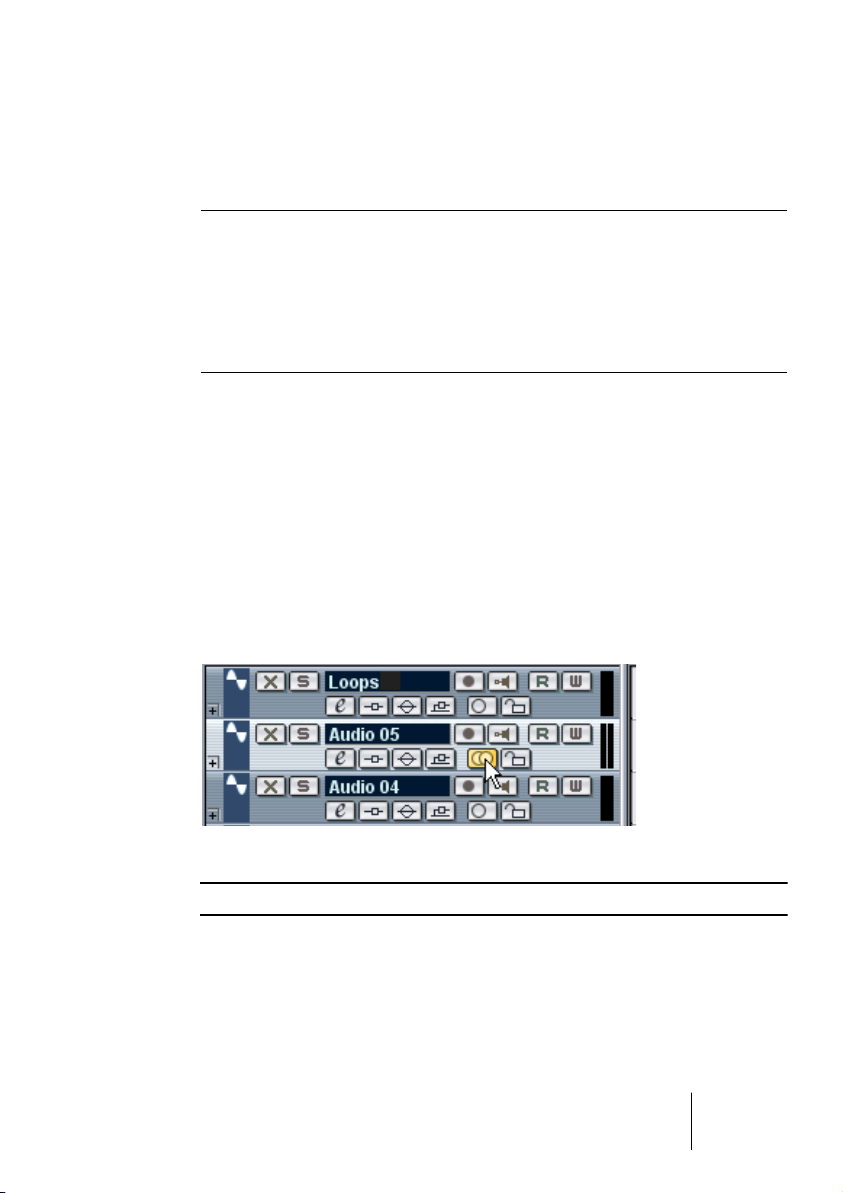
• To set a track to mono or stereo, click the Stereo/Mono button in the
Track list or in the Inspector.
A lit stereo button indicates a stereo track, while a dark mono button indicates a mono
track.
The Stereo/Mono button.
❐
For more details about mono/stereo track compatibility, see page 70.
Recording 2 – 27
CUBASE LE
Page 28
Monitoring
In this context, “monitoring” means listening to the input signal during
recording. There are three fundamentally different ways to do this: via
Cubase LE, externally (by listening to the signal before it reaches Cubase LE) or by using ASIO Direct Monitoring (which is a combination of
both of the other methods – see page 29).
Monitoring via Cubase LE
If you monitor via Cubase LE, the input signal is mixed in with the audio
playback. The advantage of this is that you can adjust the monitoring
level and panning in the Mixer, and add effects and EQ to the monitor
signal just as during playback. The disadvantage of monitoring via Cubase LE is that the monitored signal will be delayed according to the latency value (which depends on your audio hardware and drivers).
Therefore, monitoring via Cubase LE requires an audio hardware configuration with a low latency value (see the Getting Started book).
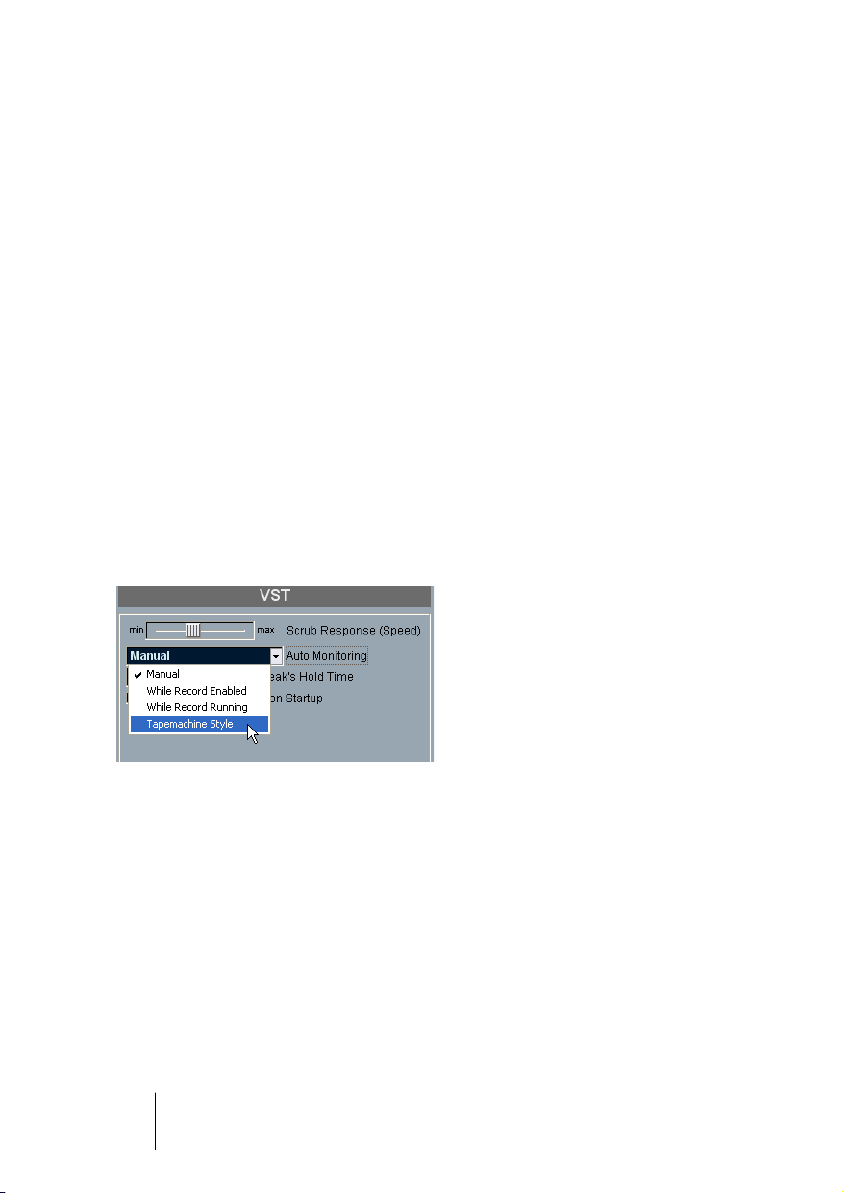
When monitoring via Cubase LE, you can select one of four modes in
the Preferences dialog (VST page):
• Manual.
This option allows you to turn input monitoring on or off by clicking the Monitor button
in the Inspector, the Track list or in the Mixer.
• While Record Enabled.
With this option you will hear the audio source connected to the channel input whenever the track is record enabled.
• While Record Running.
This option switches to input monitoring only during recording.
• Tapemachine Style.
This option emulates standard tapemachine behavior: input monitoring in stop mode
and during recording, but not during playback.
CUBASE LE
2 – 28 Recording
Page 29

External monitoring
External monitoring (listening to the input signal before it goes into
Cubase LE) requires some sort of external mixer for mixing the audio
playback with the input signal. This can be a stand-alone physical
mixer or a mixer application for your audio hardware, if this has a mode
in which the input audio is sent back out again (usually called “Thru”,
“Direct Thru” or similar).
When using external monitoring, you cannot control the level of the
monitor signal from within Cubase LE, or add VST effects or EQ to the
monitor signal. The latency value of the audio hardware configuration
does not affect the monitor signal in this mode.
• If you want to use external monitoring, you need to make sure that monitoring via Cubase LE isn’t activated as well.
Select the “Manual” monitoring mode in the Preferences dialog (VST page) and simply
don’t activate the Monitor buttons.
ASIO Direct Monitoring
If your audio hardware is ASIO 2.0 compatible, it may support ASIO
Direct Monitoring. In this mode, the actual monitoring is done in the
audio hardware, by sending the input signal back out again. However,
monitoring is controlled from Cubase LE. This means that the audio
hardware’s direct monitoring feature can be turned on or off automatically by Cubase LE, just as when using internal monitoring.
• To activate ASIO Direct Monitoring, open the Device Setup dialog on the Devices menu and use the Direct Monitoring checkbox on the Setup tab for the
VST Multitrack device.
If the checkbox is greyed out, this means that your audio hardware (or its current
driver) doesn’t support ASIO Direct Monitoring. Consult the audio hardware manufacturer for details.
• When ASIO Direct Monitoring is activated, you can select a monitoring mode
in the Preferences dialog (VST page), as when monitoring via Cubase LE (see
page 28).
• Depending on the audio hardware, it may also be possible to adjust monitoring level and panning from the Mixer.
Consult the documentation of the audio hardware if in doubt.
• VST effects and EQ cannot be applied to the monitor signal in this mode,
since the monitor signal doesn’t pass through Cubase LE.
CUBASE LE
Recording 2 – 29
Page 30

• Depending on the audio hardware, there may be special restrictions as to
which audio outputs can be used for direct monitoring.
For details on the routing of the audio hardware, see its documentation.
• The latency value of the audio hardware configuration does not affect the
monitor signal when using ASIO Direct Monitoring.
Setting input levels
When monitoring a channel signal source in stop mode, the meters
show the level at the input selected for the audio channel. So if the
connected signal source is sounding you should see activity in both
the Track list meter and in the mixer strip for that channel.
❐
Note that it is not possible to set input gain with the mixer fader!
Check the levels coming in to Cubase LE, and if necessary, adjust the
input level in one of the following ways:
• Adjust the output level of the sound source or external mixer.
• Use the audio hardware’s own application program to set the input
levels, if this possibility is provided.
See the documentation of the audio hardware.
• If your audio hardware supports the ASIO Control Panel function, it
may be possible to make input level settings.
To open the ASIO Control Panel, open the Device Setup dialog on the Devices menu
and click the Control Panel button on the Setup tab for the VST Multitrack device.
❐
Input levels should be as high as possible, without exceeding 0dB.
CUBASE LE
2 – 30 Recording
Page 31

Recording
Recording is done using any of the general recording methods (see
page 21). After you finish recording, an audio file has been created in
the Audio folder within the projects folder. In the Pool, an audio clip is
then created for the audio file, and an audio event that plays the whole
clip appears on the recording track. Finally, a waveform image is calculated for the audio event. If the recording was very long, this may take a
while.
• If the option “Create Images During Record” is activated in the Preferences dialog (Audio page), the waveform image will be calculated and
displayed during the actual recording process.
This should only be activated if you have a fairly powerful computer system, since the
real-time calculation uses some extra processing power.
Undoing recording
If you decide that you don’t like what you just recorded, you can delete
it by selecting Undo from the Edit menu. The following will happen:
• The event(s) you just created will be removed from the Project window.
• The audio clip(s) in the Pool will be moved to the Trash folder.
• The recorded audio file(s) will not be removed from the hard disk.
However, since their corresponding clips are moved to the Trash folder, you can delete
the files by opening the Pool and selecting “Empty Trash” from the Pool menu.
About overlap and audio tracks
If you record again where something has already been recorded, you
get a new event that overlaps the previous one(s). When you play
back, only the events that are actually visible are played back.
❐
One audio track can only play back one audio event at a time.
The functions “Move to Front” and “Move to Back” on the Edit menu
(see page 76) are useful for managing overlapping events, as is the
“To Front” function (see below).
CUBASE LE
Recording 2 – 31
Page 32
Recording audio in cycle mode
When you record audio in Cycle mode, the following will happen:
• One continuous audio file is created during the entire recording process.
• For each recorded lap of the Cycle, one audio event is created.
The events will have the name of the audio file plus the text “Take *”, where “*” indicates the number of the take.
• The last take (the last recorded lap) will be on top (and will thus be the one
you hear when you activate playback).
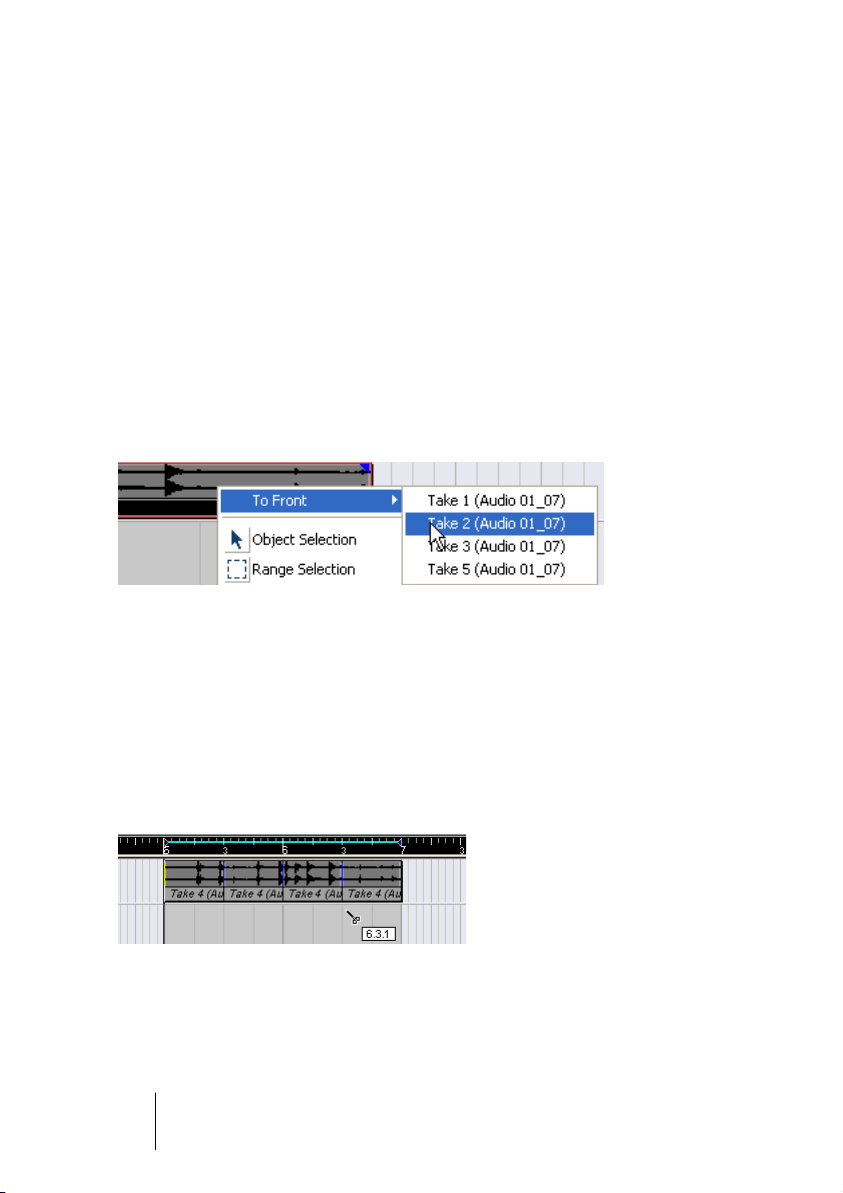
To select another take for playback, proceed a follows:
1. Right-click (Win) or [Ctrl]-click (Mac) the event and select “To Front”
from the pop-up menu that appears.
A submenu appears, listing all the other (obscured) events.
2. Select the desired take.
The corresponding event is brought to front.
This method allows you to quickly combine the best parts of each
take, in the following way:
1. Use the Scissors tool to split the events in several sections, one for
each part of the take.
For example, if you recorded four lines of vocals (in each take), you can split the events
so that each line gets a separate event.
The events after splitting. Note that since the original take events overlap each
other, clicking with the Scissors tool will split all takes at the same position.
CUBASE LE
2 – 32 Recording
Page 33
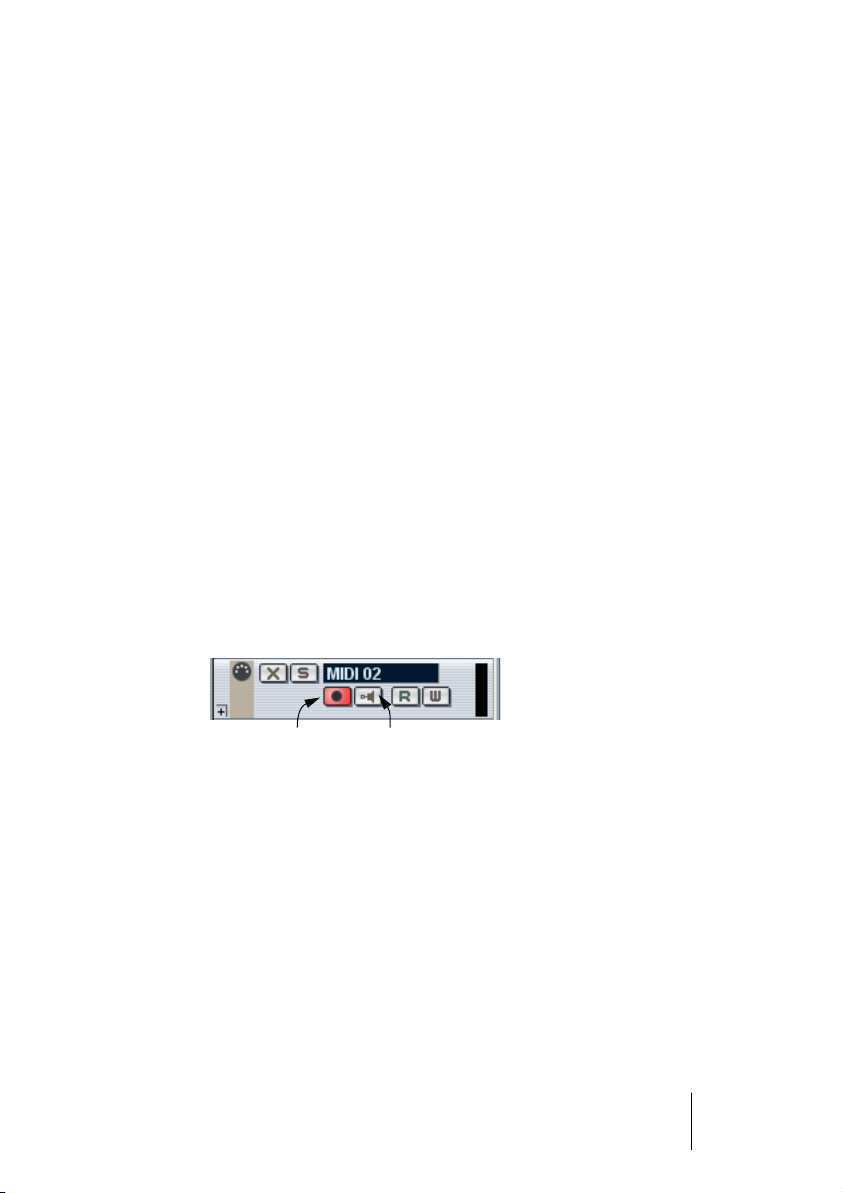
2. For each section of the take, use the “To Front” function to bring the
best take to the front.
This way, you can quickly combine the best sections of each take, using the first vocal
line from one take, the second line from another take and so on.
You can also compile a “perfect” take in the Audio Part Editor, as described on page 262.
MIDI Recording Specifics
Activating MIDI Thru
As described in the Getting Started book, the normal way to work
with MIDI is to have MIDI Thru activated in Cubase LE, and Local Off
selected in your MIDI Instrument(s). In this mode, everything you play
during recording will be “echoed” back out again on the MIDI output
and channel selected for the recording track.
1. Make sure the option “MIDI Thru Active” is activated in the Prefer-
ences dialog (MIDI page).
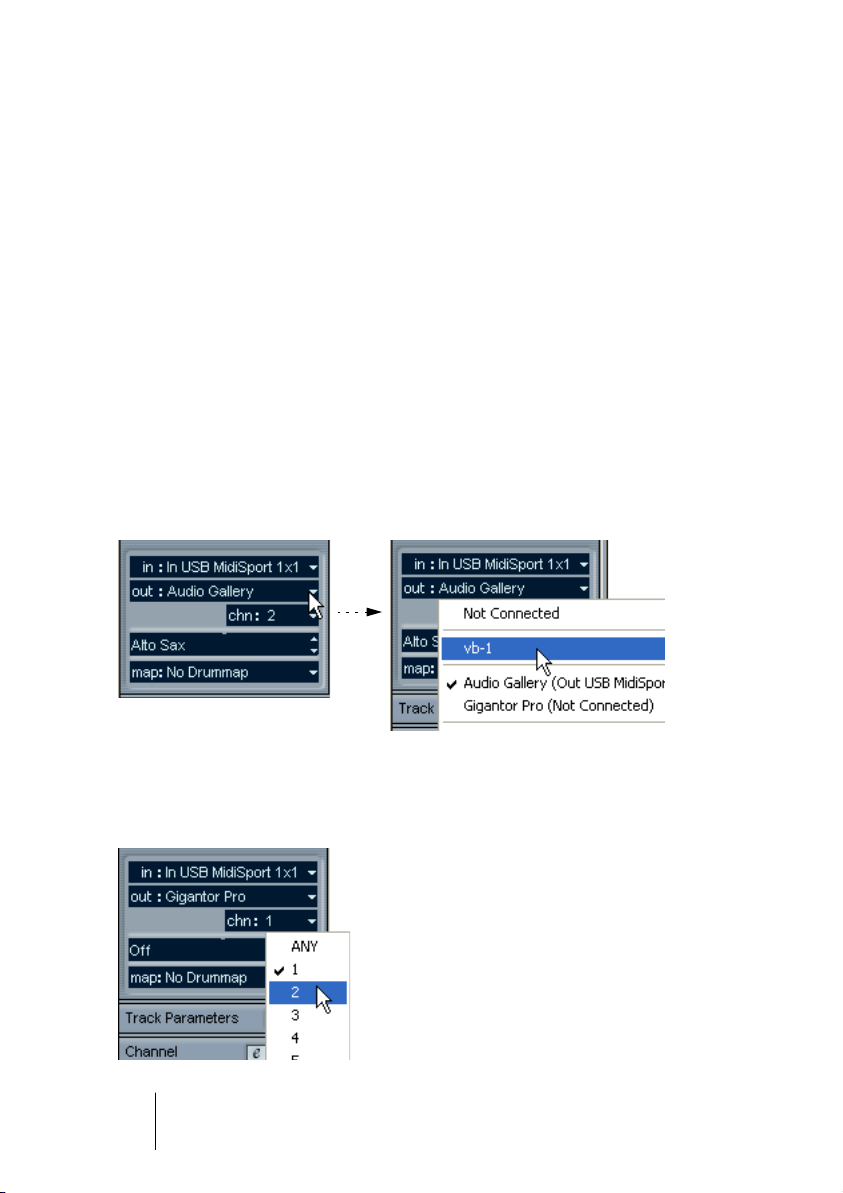
2. Record Enable the track(s) on which you want to record.
Now, incoming MIDI is “echoed” back out again, for all Record Enabled MIDI tracks.
Record Enable button. Monitor button.
• If you just want to use the thru function for a MIDI track without recording, activate the monitor button for the track instead.
This is useful e.g. if you want to try out different sounds or play a VST instrument in real
time without recording your playing.
CUBASE LE
Recording 2 – 33
Page 34

Setting MIDI channel, input and output
Setting the MIDI channel in the instrument
Most MIDI synthesizers can play several sounds at the same time,
each on a different MIDI channel. This is the key to playing back several sounds (bass, piano etc.) from the same instrument. Some devices (such as General MIDI compatible sound modules) always
receive on all 16 MIDI channels. If you have such an instrument,
there’s no specific setting you need to make in the instrument. On
other instruments you will have to use the front panel controls to set
up a number of “Parts”, “Timbres” or similar so that they receive on
one MIDI channel each. See the manual that came with your instrument for more information.
Naming MIDI ports in Cubase LE
MIDI inputs and outputs can often be shown with unnecessarily long
and complicated names. If you wish, you can rename your MIDI ports
to more descriptive names:
1. Open the Device Setup dialog from the Devices menu.
2. Select the Windows MIDI or DirectMusic (Windows) or MIDI System
(Mac OS X) device in the Device list.
The available MIDI inputs and outputs are listed under the Setup tab. Under Windows,
which device to choose depends on your system.
3. To change the name of a MIDI port, click in the Device column and
type in a new name.
After closing the dialog, the new names will appear on the MIDI “in:” and “out:” pop-ups.
CUBASE LE
2 – 34 Recording
Page 35

Setting the MIDI input in the Inspector
You select MIDI inputs for tracks in the Inspector – the area to the left
of the track list in the Project window:
1. If the Inspector is hidden, click the Inspector button on the toolbar.
2. Select the track by clicking in the Track list.
The Inspector shows the settings for the selected track (for details, see page 52).
3. Click the tab in the upper right corner of the Inspector to make sure
the topmost section is shown.
4. Pull down the “in” pop-up and select an input.
The available MIDI inputs are shown. The items on the menu depend on the type of
MIDI interface you are using etc.
CUBASE LE
Recording 2 – 35
Page 36
• If you select the “All MIDI Inputs” option, the track will receive MIDI
data from all available MIDI inputs.
• If you hold down [Ctrl]/[Command] and select a MIDI input, this is se-
lected for all MIDI tracks.
Setting the MIDI channel and output
The MIDI channel and output settings determine where the recorded
MIDI is routed during playback, but are also relevant for MIDI Thru in
Cubase LE. Channel and output can be selected in the Track list or in
the Inspector.
1. To show the settings in the Inspector, proceed as when selecting a
MIDI input (see above).
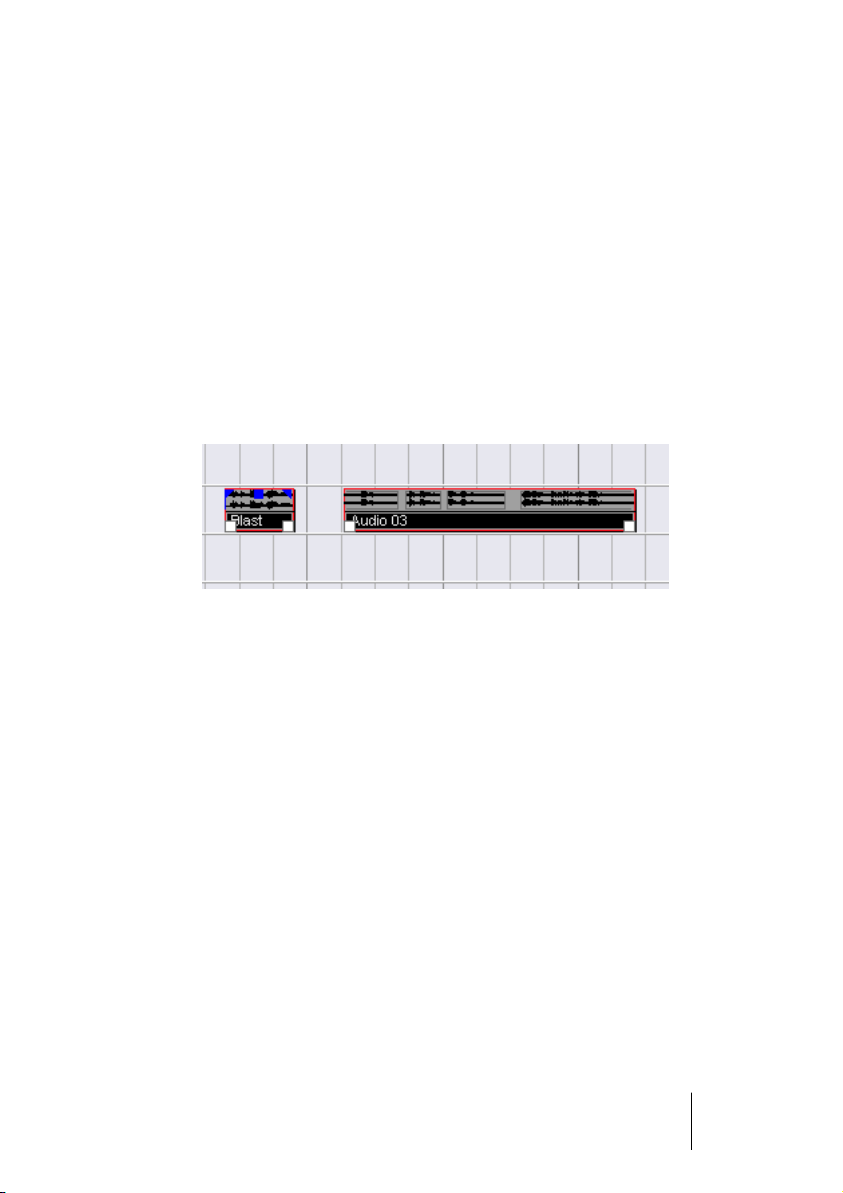
2. Pull down the “out:” pop-up and select an output.
The available MIDI outputs are shown. The items on the menu depend on what type of
MIDI interface you are using etc.
• If you hold down [Ctrl]/[Command] and select a MIDI output, this is
selected for all MIDI tracks.
3. Use the “chn” pop-up menu to select a MIDI channel for the track.
CUBASE LE
2 – 36 Recording
Page 37

• If you set the track to MIDI channel “Any”, each MIDI event on the
track will be sent out on the channel stored in the event itself.
In other words, the MIDI will be played back on the channel(s) used by the MIDI input
device (the MIDI instrument you play during recording).
Selecting a sound
You can select sounds from within Cubase LE, by instructing the program to send Program Change and Bank Select messages to your
MIDI device. This is done using the “prg” and “bnk” value fields in the
Inspector or Track list.
However, it is also possible to select sounds by name. For descriptions of how to set this up, see page 308.
Recording
Recording MIDI is done according to the basic recording methods
(see page 21). When you finish recording, a part containing MIDI
events is created in the Project window.
About overlap and the Rec Mode setting
MIDI tracks are different from audio tracks when it comes to overlapping parts:
• All events in overlapping parts are always played back.
If you record several parts at the same locations (or move parts so that they overlap),
you will hear the events in all parts on playback, even though some of the parts are obscured in the Project window.
When recording overlapping parts, the result depends on the Rec
Mode setting on the Transport bar:
• If Rec Mode is set to “Normal”, overdub recording works as with audio tracks, i.e. if you record again where something has already been
recorded, you get a new part that overlaps the previous one(s).
• If Rec Mode is set to “Merge”, the overdubbed events are added to
the existing part.
CUBASE LE
Recording 2 – 37
Page 38

About punch in and out on MIDI tracks
Performing and setting up manual and automatic punch in/out recording for MIDI tracks is done in exactly the same way as for audio tracks.
There is one thing to note, however:
• Punching in and out on recordings with Pitch Bend or controller data
(modulation wheel, sustain pedal, volume etc.), may lead to strange effects (apparently hanging notes, constant vibrato etc.).
In this case, you may need to use the Reset command on the MIDI menu (see page 40).
About the Auto Quantize function
If Auto Quantize is activated on the Transport panel (the “AQ” button),
the notes you record are automatically quantized according to the current Quantize settings. For more information about quantizing, see
page 333.
Recording MIDI in Cycle mode
When you record MIDI in Cycle mode, the result depends on which
Cycle Rec mode is selected on the Transport panel:
Cycle Rec mode: Mix
For each completed lap, everything you record is added to what was
previously recorded, in the same part. This is useful for building up
rhythm patterns, for example. Record a hi-hat part on the first lap, the
bass drum part on the second lap etc.
Cycle Rec mode: Overwrite
For each completed lap, everything you record replaces what was
previously recorded in the same part.
CUBASE LE
2 – 38 Recording
Page 39

Recording different types of MIDI messages
❐
You can decide exactly which event types should be recorded by using
the MIDI filters – see page 42.
Notes
With MIDI, when you press and release a key on your synth or other
MIDI keyboard, a Note On (key down) and a Note Off (key up) message are sent out. The MIDI note message also contains the information which MIDI channel was used. Normally, this information is
overridden by the MIDI channel setting for the track, but if you set the
track to MIDI channel “Any”, the notes will be played back on their
original channels.
Continuous Messages
Pitch bend, aftertouch and controllers (like modulation wheel, sustain
pedal, volume etc.) are considered as MIDI Continuous events (as opposed to the momentary key down and key up messages). If you move
the Pitch bend wheel on your synthesizer while recording, this movement is recorded together with the key (Note On and Note Off messages), just as you’d expect. But the continuous messages can also
be recorded after the notes have been recorded (or even before).
They can also be recorded on their own tracks, separately from the
notes to which they belong.
Say for instance that you record one or several bass parts on track 2. If
you now set another track, like track 55, to the same output and MIDI
channel as track 2 you can make a separate recording of just pitch
bends for the bass parts. This means that you activate recording as
usual and only move the pitch bend wheel during the take. As long as
the two tracks are set to the same output and MIDI channel it will appear to the MIDI instrument as if the two recordings were made at the
same time.
CUBASE LE
Recording 2 – 39
Page 40

Program Change Messages
Normally, when you switch from one program to another on your keyboard (or whatever you use to record), a number corresponding to
that program is sent out via MIDI as a Program Change message.
These can be recorded on the fly with the music, recorded afterwards
on a separate track, or manually entered in the Key or List Editors.
System Exclusive Messages
System Exclusive (SysEx) is a special type of MIDI message used to
send data that only make sense to a unit of a certain make and type.
Every major MIDI manufacturer has its own SysEx identity code and
these are part of practically all SysEx messages. SysEx can be used to
transmit a list of the numbers that make up the settings of one or more
sounds in a synth. For more about viewing and editing SysEx messages, see page 441.
The Reset function
The Reset function on the MIDI menu sends out note-off messages
and resets controllers on all MIDI channels. This is sometimes necessary if you experience hanging notes, constant vibrato, etc.
• Cubase LE can also automatically perform a MIDI Reset after record-
ing, during playback (after each part) and/or on stop.
You turn these functions on or off in the Preferences dialog (MIDI page).
CUBASE LE
2 – 40 Recording
Page 41

MIDI Preferences
The following options and settings in the Preferences dialog (MIDI
page) affect MIDI recording and playback:
“Note On” Priority
When this is activated, MIDI Note On messages are given priority over
other types of MIDI messages, ensuring tight timing even if you use a
lot of continuous MIDI data.
Length Correction
Adjusts the length of notes so that there always is a short time between the end of one note and the start of another (of the same pitch
and on the same MIDI channel).
Snap Record Parts to Bars
When this is activated, recorded MIDI parts will automatically be
lengthened to start and end at whole bar positions. If you are working
in a Bars+Beats-based context, this can make editing (Moving, Duplicating, Repeating, etc.) easier.
Solo Record in Editors
If this is activated and you open a part for editing in a MIDI editor, its
track is automatically Record Enabled. Furthermore, Record Enable is
deactivated for all other MIDI tracks until you close the editor again.
This makes it easier to record MIDI data when you’re editing a part –
you will always be sure the recorded data ends up in the edited part
and not on any other track.
Record Catch Range
When you record starting at the left locator, this setting helps you
make sure the very start of the recording is included. A very annoying
scenario is when you have recorded a perfect MIDI take, only to find
out that the very first note wasn’t included – because you started playing a little bit too early! If you raise the Record Catch Range, Cubase
LE will catch the events played just before the recording start point,
eliminating this problem.
CUBASE LE
Recording 2 – 41
Page 42

Filtering MIDI
The MIDI–Filter page in the Preferences dialog allows you to prevent
certain MIDI messages from being recorded and/or “thruput” (echoed
by the MIDI Thru function).
The dialog is divided into four sections:
Section Description
Record Activating any of these options prevents that type of MIDI message from
being recorded. It will, however, be thruput, and if already recorded, it
will play back normally.
Thru Activating any of these options prevents that type of MIDI message from
being thruput. It will, however, be recorded and played back normally.
Channels If you activate a channel button, no MIDI messages on that MIDI channel
will be recorded or thruput. Already recorded messages will, however,
be played back normally.
CUBASE LE
2 – 42 Recording
Page 43

Section Description
Controller Allows you to prevent certain MIDI controller types from being recorded
or thruput.
To filter out a controller type, select it from the list at the top of the section and click “Add”. It will appear on the list below.
To remove a controller type from the list (allow it to be recorded and
thruput), select it in the lower list and click “Remove”.
Options and Settings
Recording-related Preferences
A couple of settings in the Preferences dialog (Transport page) are
relevant for recording. Set these according to your preferred method
of work:
Deactivate Punch In on Stop
If this is activated, punch in on the Transport panel is automatically deactivated whenever you enter Stop mode.
Stop after Automatic Punchout
If this is activated, playback will automatically stop after automatic
punch out (when the project cursor reaches the right locator and
punch out is activated on the Transport panel). If the postroll value on
the Transport panel is set to a value other than zero, playback will continue for the set time before stopping (see below).
CUBASE LE
Recording 2 – 43
Page 44

About Preroll and Postroll
The preroll and postroll value fields on the Transport panel have the
following functionality:
• By setting a preroll value, you instruct Cubase LE to “roll back” a short section
whenever playback is activated.
This applies whenever you start playback, but is perhaps most relevant when recording
from the left locator (punch in activated on the Transport panel) as described below.
• By setting a postroll value, you instruct Cubase LE to play back a short section after automatic punch out, before stopping.
This is only relevant when punch out is activated on the Transport panel and “Stop
after Automatic Punchout” is activated in the Preferences dialog (Transport page).
• To enable or disable the pre/postroll function, select the option “Use Pre/
Post-Roll” on the Transport menu.
An example:
1. Set the locators to where you want to start and end recording.
2. Activate punch in and punch out on the Transport panel.
3. Activate the option “Stop after Automatic Punchout” in the Prefer-
ences dialog (Transport page).
4. Set suitable preroll and postroll times by clicking in the corresponding
fields on the Transport panel and typing in time values.
5. Make sure Click is deactivated on the Transport panel.
If the Click is activated when you record from the left locator in stop mode, the preroll
setting is disregarded and the metronome precount is used instead (see page 45).
6. Pull down the Transport menu and tick the option “Use Pre/Post-Roll”.
7. Activate recording.
The project cursor “rolls back” by the time specified in the preroll field and playback
starts. When the cursor reaches the left locator, recording is automatically activated.
When the cursor reaches the right locator, recording is deactivated, but playback continues for the time set in the postroll field before stopping.
CUBASE LE
2 – 44 Recording
Page 45

Using the metronome
The metronome will output a click that can be used as a timing reference. The two parameters that govern the timing of the metronome
are tempo and time signature, and these are edited in the Tempo
Track window (see page 432).
• To activate the metronome, click the Click button on the Transport
panel, or use the corresponding key command (by default [C]).
Metronome settings
You make settings for the metronome in the Metronome Setup dialog,
opened from the Transport menu.
The metronome can use either an audio click played back via the audio hardware, send MIDI data to a connected device which will play
back the click or do both.
CUBASE LE
Recording 2 – 45
Page 46

The following metronome parameter settings can be made in the dialog:
Parameter Description
MIDI Click on/off Selects whether or not the metronome will sound via MIDI.
MIDI Output Use the pop-up to select a MIDI output for the metronome click.
Channel Selects the MIDI channel for the metronome click.
High Note Sets the MIDI note number for the “high note” (the first beat in a
bar).
High Velocity Sets the velocity value for the “high note” (the first beat in a bar).
Low Note Sets the MIDI note number for the “low note” (the other beats).
Low Velocity Sets the velocity value for the “low note” (the other beats).
Audio Click On/Off Selects whether or not the metronome will sound via the audio
hardware.
Audio Click Volume
slider
Precount on/off Turns on or off the metronome count-in before recording starts
Precount Bars Sets the number of bars the metronome will count in before it
From Master Track When this is activated, the precount will be in the time signature
Use Signature If “From Master Track” is deactivated, you can use these fields to
Click during Allows you to specify whether the metronome should be heard
Use Count Base If this option is activated, you use the field to the right to specify
Adjusts the volume for the audio click.
(when starting recording from stop mode).
starts recording if precount is activated.
set in the Master Tempo track.
set a time signature for the precount.
during playback, recording or both (when Click is activated on the
Transport bar).
the “rhythm” of the metronome. Normally, the metronome plays
one click per beat, but setting this to e.g. “1/8” gives you eighth
notes – two clicks per quarter note beat. It’s also possible to create unusual metronome rhythms such as triplets etc.
CUBASE LE
2 – 46 Recording
Page 47

3
The Project Window
Page 48

Background
The Project window is the main window in Cubase LE. This provides
you with an overview of the project, allowing you to navigate and perform large scale editing. Each project has one Project window.
About tracks
The Project window is divided vertically into tracks, with a time line
running horizontally from left to right. The following track types are
available:
Track type Description
Audio For recording and playing back audio events and audio parts. Each au-
dio track has a corresponding audio channel in the Mixer. You can use
up to 48 audio tracks in a project.
An audio track can have one automation “subtrack” for automating mixer
channel parameters or insert effect settings etc.
Folder Folder tracks function as containers for other tracks, allowing you to edit
several tracks at the same time amongst other things. See page 95.
Group
Channel
MIDI For recording and playing back MIDI parts. Each MIDI track has a corre-
Marker The Marker track displays markers, and allows you to move and rename
Master
Automation
Plug-in
Automation
Video For playing back video events. A project can only have one Video track.
Group channels function as subgroups: by routing several audio channels to a Group channel, you can mix them with a single set of controls,
apply the same effects to them, etc. (see page 154).
A Group channel track contains no events as such, but displays settings
and automation curves for the corresponding Group channel. Each
Group channel track has a corresponding channel strip in the Mixer.
You can have up to four group channels in a project.
sponding MIDI channel strip in the Mixer. You can use up to 64 MIDI
tracks in a project. A MIDI track can have one automation “subtrack” for
automating mixer channel parameters, etc.
them directly in the Project window (see page 108). There can only be
one Marker track in the project.
Contains an automation curve for master volume or global effect input
levels. There can only be one Master Automation track in the project.
Each send effect, master effect or VST Instrument can have its own individual Plug-in Automation track, allowing for automation of all plug-in parameters. An automation track for a plug-in is automatically created the
first time you automate any of its parameters. See page 198.
CUBASE LE
3 – 48 The Project Window
Page 49
About parts and events
Events are the basic building blocks in Cubase LE. Different event
types are handled differently in the Project window:
• Video events and automation events (curve points) are always viewed and rearranged directly in the Project window.
• MIDI events are always gathered in MIDI parts, containers for one or more
MIDI events. MIDI parts are rearranged and manipulated in the Project window. To edit the individual MIDI events in a part, you have to open the part in
a MIDI Editor (see page 352).
• Audio events can be displayed and edited directly in the Project window, but
you can also work with audio parts containing several events. This is useful if
you have a number of events which you want to treat as one unit in the project.
An audio event and an audio part.
CUBASE LE
The Project Window 3 – 49
Page 50
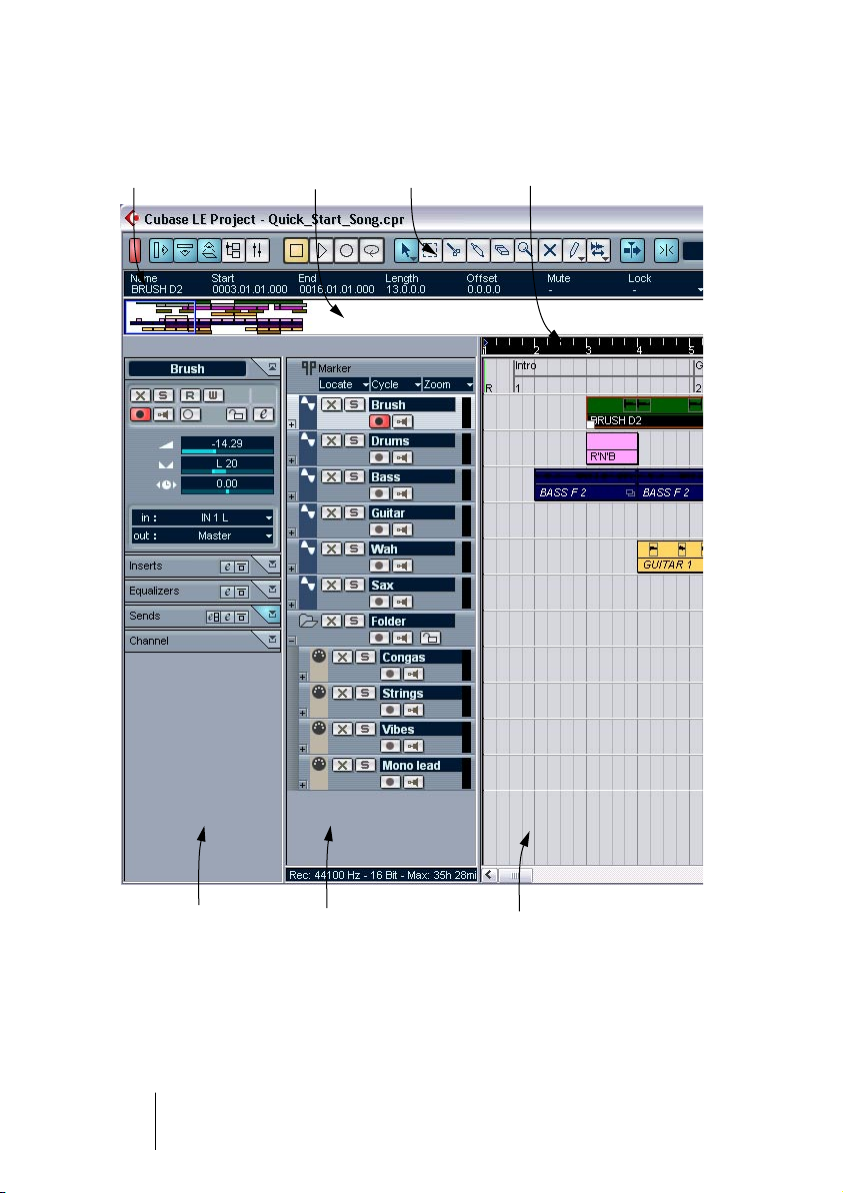
Window Overview
The toolbarThe info line Overview line The ruler
The Inspector
CUBASE LE
3 – 50 The Project Window
Track list with various
track types.
The event display, showing
audio parts and events, MIDI
parts, automation, markers, etc.
Page 51
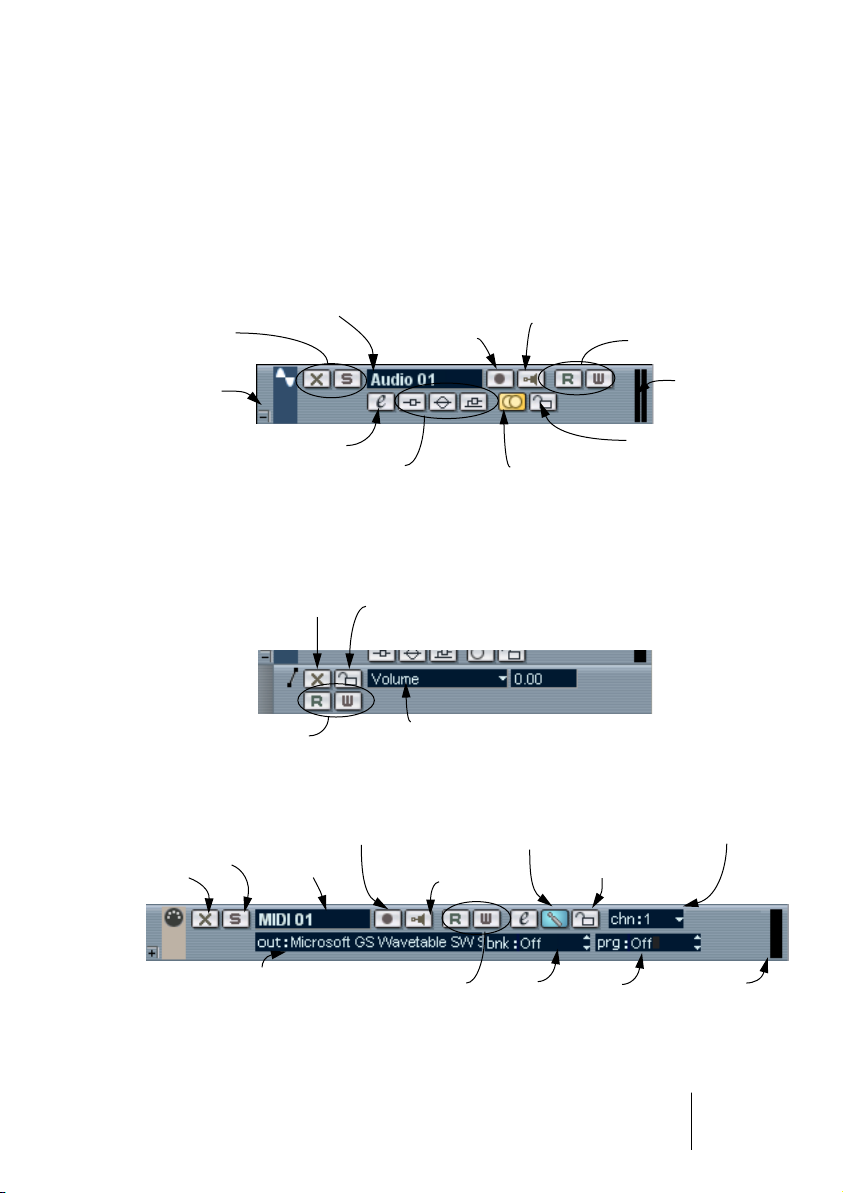
The Track list
The Track list is the area to the left in the Project window. It contains
name fields and various settings for the tracks. Different track types
have different controls in the Track list. To see all the controls you may
have to resize the track in the Track list (see page 61):
• The Track list area for an audio track:
Mute & Solo
Track name
Show/hide
automation
Edit channel settings
Indicates whether effect sends, EQ or insert
effects are activated for the track. Click to bypass.
Record Enable
Monitoring on/off
Stereo on/off
Automation Read/
Write buttons
Output activity
indicator
Lock track button
• The Track list area for the automation subtrack (revealed by clicking
the + button on a track):
Mute Lock track button
Automation Read/Write
buttons
Automation parameter (click to select parameter)
• The Track list area for a MIDI track:
MIDI channel
Mute
Solo
Record Enable
Track name
Drum map assign button
Monitoring on/off
Lock track button
MIDI Output Bank Program
Automation Read/
Write buttons
The Project Window 3 – 51
Output activity
indicator
CUBASE LE
Page 52

The Inspector
The area to the left of the Track list is called the Inspector. This can
show additional controls and parameters for the track you have selected in the Track list. If several tracks are selected (see page 67),
the Inspector shows the setting for the first (topmost) selected track.
To hide or show the Inspector, click the Inspector icon in the toolbar.
The Inspector icon.
The contents and usage of the Inspector depends on the selected
track’s class, as described below.
• For some track classes, the Inspector is divided in sections. You can
hide or show sections by clicking the tabs in their top right corner.
Clicking the tab for a hidden section brings it to view and hides the other sections.
[Ctrl]/[Command]-clicking the tab allows you to hide or show a section without affecting other sections. Finally, [Alt]/[Option]-clicking a tab shows or hides all sections in
the Inspector.
• Folding a section does not affect the functionality but merely hides the
section from view.
In other words, if you have set up a track parameter or activated an effect, your settings
will still be active even if you fold the Inspector section.
CUBASE LE
3 – 52 The Project Window
Page 53
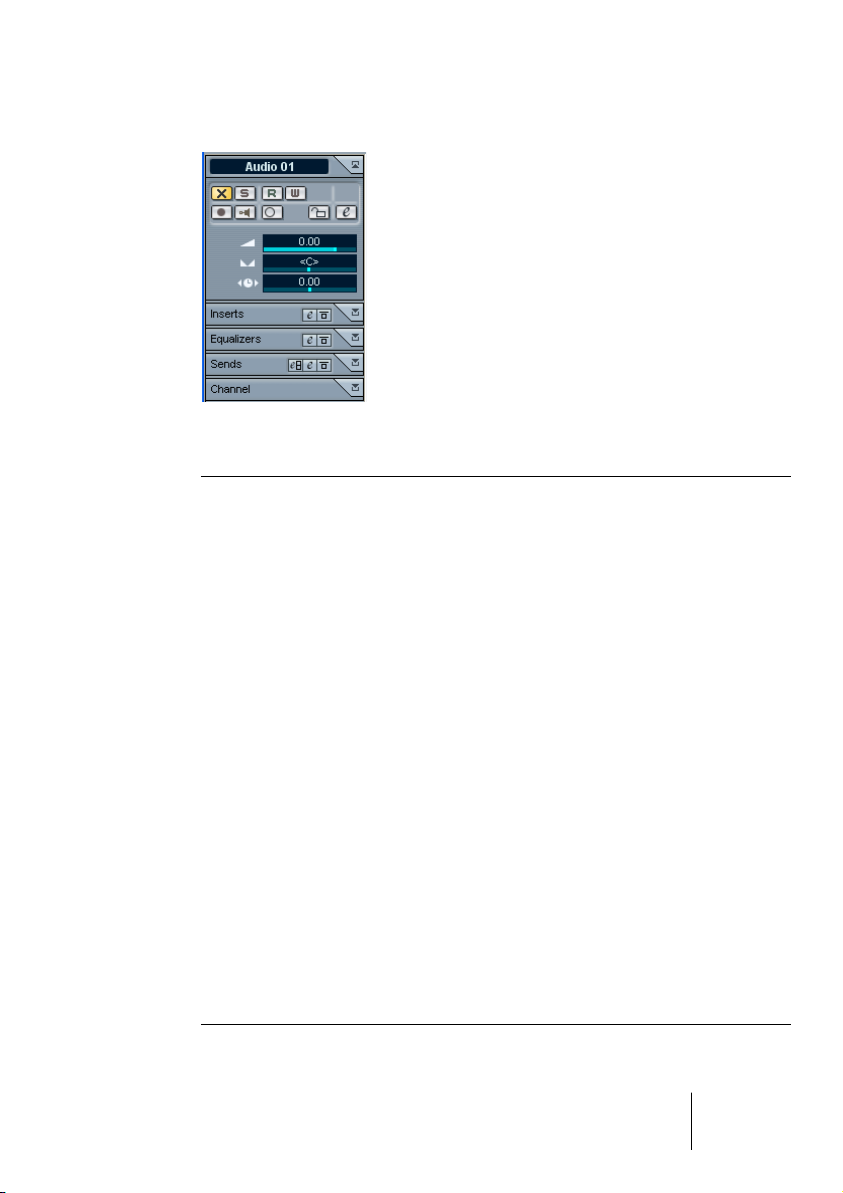
Audio tracks
For audio tracks, the Inspector contains the same controls as the
Track list, as well as some additional buttons and parameters:
Parameter Description
Edit button Opens the Channel Settings window for the track, allowing you to
view and adjust effect and EQ settings, etc. See page 147.
Volume Use this to adjust the level for the track. Changing this setting will
move the track’s fader in the Mixer window, and vice versa. See
page 143 to learn more about setting levels.
Delay This adjusts the playback timing of the audio track. Positive values
delay the playback while negative values cause the track to play earlier. The values are set in milliseconds.
Pan Use this to adjust the panning of the track. As with the Volume set-
ting, this corresponds to the Pan setting in the Mixer.
Inserts section Allows you to add up to 2 insert effects to the track, see page 173.
The Edit button at the top of the section opens the Channel Settings
window for the track.
Equalizers
section
Sends section Allows you to route the track to one or several send effects (up to
Channel section Shows a duplicate of the corresponding Mixer channel strip.
Lets you adjust the EQs for the track. You can have up to four bands
of EQ for each track, see page 149. The Edit button at the top of the
section opens the Channel Settings window for the track.
four), see page 168. There are two edit buttons at the top of this
section – the left opens the VST Send Effects window and the right
opens the Channel Settings window for the track.
CUBASE LE
The Project Window 3 – 53
Page 54
MIDI tracks
When a MIDI track is selected, the Inspector contains a number of parameters and effects, affecting the MIDI events in real time (e.g. on
playback). This is described in a separate chapter, see page 321.
Marker tracks
When a marker track is selected, the Inspector shows the marker list.
See page 105.
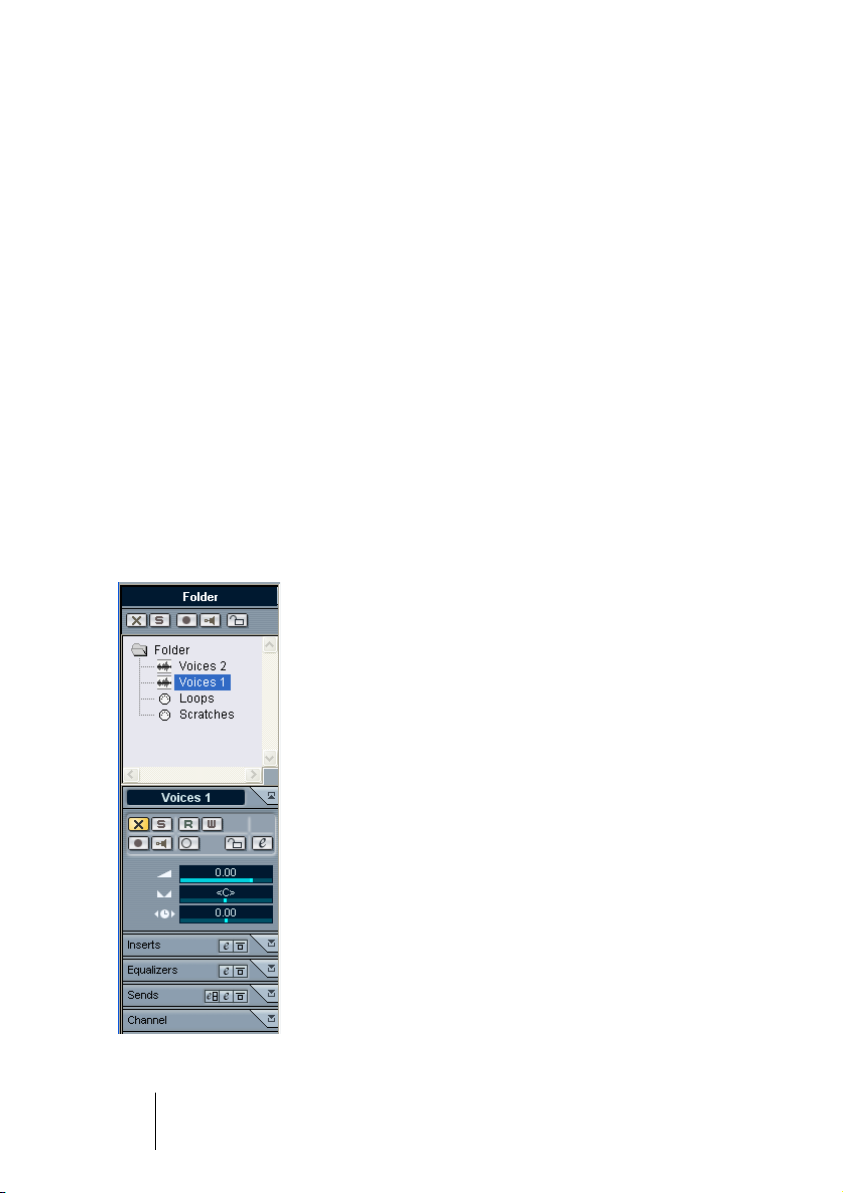
Folder tracks
When a folder track is selected, the Inspector shows the folder and its
underlying tracks, much like a folder structure in the Windows Explorer
or Mac OS X Finder.
• You can click one of the tracks shown under the folder in the Inspector
to have the Inspector show the settings for that track.
This way, you don’t have to “open” a folder track to access the settings for the tracks
within it.
Here, an audio track within the folder is selected.
CUBASE LE
3 – 54 The Project Window
Page 55

Other tracks
For the remaining track classes, the Inspector isn’t used.
The toolbar
The toolbar contains tools and shortcuts for opening other windows
and various project settings and functions:
Active project
indicator
Show/hide
Inspector
Transport controls
(Stop, Play, Record and Cycle)
Snap on/off
Show/hide info line
Show/hide Overview
Snap mode
Open Pool
Project window tools Autoscroll on/off
Grid pop-up menu
Open Mixer
Color pop-up menu
Quantize value
CUBASE LE
The Project Window 3 – 55
Page 56

The info line
The info line shows information about the currently selected event or
part in the Project window. You can edit almost all values in the info
line using regular value editing. Length and position values are displayed in the format currently selected for the ruler (see page 57).
• To hide or show the info line, click the corresponding icon on the toolbar.
The following elements can be selected for display and editing on the
info line:
• Audio events.
• Audio parts.
• MIDI parts.
• Video events.
• Markers.
• Automation Curve Points.
❐
Note that the info line will only display information if a single element is
selected.
CUBASE LE
3 – 56 The Project Window
Page 57
The ruler
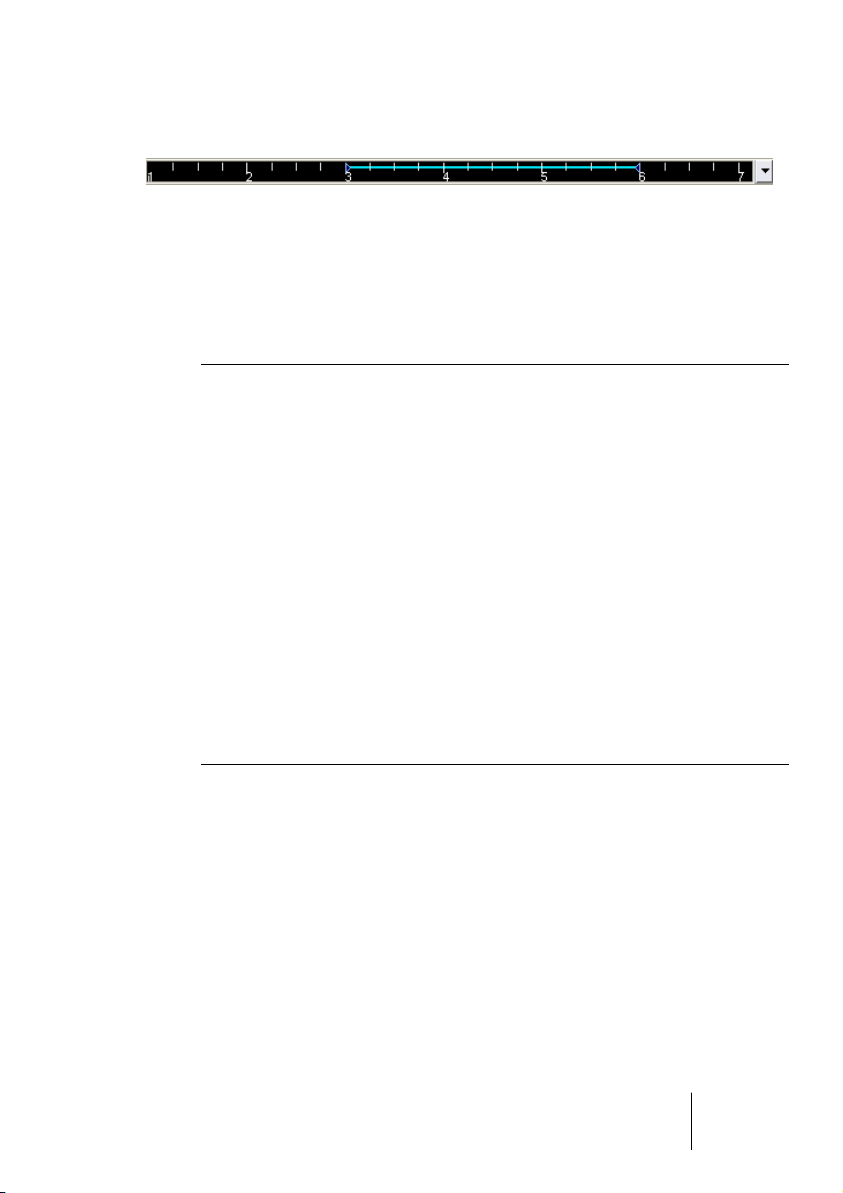
The ruler at the top of the event display shows the timeline. Initially, the
Project window ruler uses the display format specified in the Project
Setup dialog (see page 58), as do all other rulers and position displays in the project. However, you can select an independent display
format for the ruler by clicking on the arrow button to the right of it and
selecting an option from the pop-up menu that appears.
Option Positions and lengths displayed as
Bars+Beats Bars, beats, sixteenth notes and ticks, with 120 ticks per sixteenth
note.
Seconds Hours, minutes, seconds and milliseconds.
24 fps Hours, minutes, seconds and frames, with 24 frames per second.
25 fps Hours, minutes, seconds and frames, with 25 frames per second.
29.97 fps Hours, minutes, seconds and frames, with 29.97 frames per second.
30 fps Hours, minutes, seconds and frames, with 30 frames per second.
29.97 dfps Hours, minutes, seconds and frames, “Drop frame” with 29.97 frames
per second.
30 dfps Hours, minutes, seconds and frames, “Drop frame” with 30 frames per
second.
Samples Samples.
• The selection you make here affects the ruler, the info line and tool tip
position values (appear when you drag an event in the Project window).
You can also select independent formats for other rulers and position displays.
• To set the display format globally (for all windows), use the display for-
mat pop-up on the Transport panel, or hold down [Ctrl]/[Command]
and select a display format in any ruler.
CUBASE LE
The Project Window 3 – 57
Page 58

Operations
Creating a new project
You create a new project in the following way:
1. Select “New Project” from the File menu.
A dialog appears, listing a number of project templates, including any custom templates that you have created (see page 505).
2. Select a template and click OK.
A file dialog appears, allowing you to specify a location for the project folder. This will
contain all files related to the project.
3. Select an existing folder or type the name of a new one. Click OK.
A Project window appears. The new project will be based on the selected template,
and include tracks, events and settings from the template.
The Project Setup dialog
General settings for the project are made in the Project Setup dialog.
This is opened by selecting “Project Setup...” from the Project menu.
CUBASE LE
3 – 58 The Project Window
Page 59

The following settings are available in the Project Setup dialog:
Setting Description
Start The start time of the project. Allows you to have the project start at
another time than zero. Also used for setting the sync start position
when synchronizing Cubase LE to external devices (see page 463).
Length The length of the project.
Frame Rate Used if you are synchronizing Cubase LE with external equipment. If
Cubase LE is master, this determines the frame rate of the sent sync
signal. See page 466.
Display Format This is the global display format used for all rulers and position dis-
plays in the program. However, you can make independent display
format selections for the individual rulers and displays if you like.
For descriptions of the different display format options, see page 57.
Display Offset Offsets the time positions displayed in the ruler etc., allowing you to
compensate for the Start Position setting. Typically, if you synchronize Cubase LE to an external source starting at a frame other than
zero, you set the Start Position to this value. However, if you still
want the display in Cubase LE to start at zero, set the Display Offset
to the same value too.
Sample Rate This is the sample rate by which Cubase LE records and plays back
audio files.
Record Format When you record audio files in Cubase LE, they are recorded with
this resolution. See page 26.
Record File Type Determines which file types should be created when you record au-
dio. See page 26.
Stereo Pan Law Decides whether panning should use power compensation or not.
This is explained on page 146.
❐
While most settings in the Project Setup can be changed at any time, you
should select a sample rate once and for all when starting with a new
project! All audio files must be of this sample rate to play back correctly.
CUBASE LE
The Project Window 3 – 59
Page 60

Zoom and view options
Zooming in the Project window is done according to the standard
Zoom procedures (see the Getting Started book), with the following
special notes:
• When using the vertical zoom sliders, the tracks are scaled relatively.
In other words, if you have made any individual track height adjustments (see below),
the relative height differences are maintained.
The following options are available on the Zoom submenu on the Edit
menu:
Option Description
Zoom In Zooms in one step, centering on the project cursor.
Zoom Out Zooms out one step, centering on the project cursor.
Zoom Full Zooms out so that the whole project is visible. “The whole project”
means the timeline from the project start to the length set in the
Project Setup dialog (see above).
Zoom to Selection Zooms in horizontally so that the current selection fills the screen.
Zoom to Event This option is available only in the Sample Editor (see page 244).
Zoom In Vertical Zooms in one step vertically.
Zoom Out Vertical Zooms out one step vertically.
Zoom In Tracks Zooms in selected track(s) one step vertically.
Zoom Out Tracks Zooms out selected track(s) one step vertically.
Zoom Tracks
Exclusive
This zooms in vertically on the selected track(s) and minimizes the
height of all other tracks.
• You can zoom the contents of parts and events vertically, using the
Waveform Zoom slider in the top right corner of the event display.
This can be useful to better view quiet audio passages.
CUBASE LE
3 – 60 The Project Window
Page 61

❐
To get an approximate reading on the level of the audio events by viewing the waveforms, make sure the slider is all the way down. Otherwise,
zoomed waveforms may be mistaken for clipped audio.
• If you activate the option Quick Zoom in the Preferences (Event Dis-
play page), the contents of parts and events will not be continuously
redrawn when you zoom manually.
Instead, the contents are redrawn once you have stopped changing the zoom – activate this if screen redraws are slow on your system.
Resizing tracks in the Track list
• You can change the height of an individual track by clicking on its lower border in the Track list and dragging up or down.
To change the height of all tracks, hold down [Ctrl]/[Command] and resize one of the
tracks in the same way. If “Snap Track Heights” is activated on the Track scale pop-up
(see below), the track height will change in larger increments when you resize it.
• You can also change the width of the Track list area, by dragging the border
between the Track list and the event display.
• The controls shown for tracks in the Track list are adaptable to track size. This
means that when resizing a track’s height or width some of the controls will be
dynamically placed where they best “fit in”.
• You can use the Track scale pop-up (opened by clicking the arrow button
above the vertical zoom control) to set the number of tracks to view in the current Project window.
The track height will be adjusted to show only the number of tracks specified on the
pop-up menu. By selecting “Zoom N Tracks” from the pop-up you can manually set the
number of tracks to fit in the current Project window.
CUBASE LE
The Project Window 3 – 61
Page 62

Zoom presets and Cycle markers
The pop-up menu to the left of the horizontal zoom control allows you
to select, create and organize zoom presets. These are useful if you
want to toggle between different zoom settings (e.g. one where the
whole project is displayed in the project window and another with a
high zoom factor for detailed editing). With this pop-up menu, you can
also zoom in on the area between cycle markers in the project.
Zoom presets
Cycle markers
The upper part of the menu lists the zoom presets:
• To store the current zoom setting as a preset, select Add from the
pop-up menu.
A dialog appears, allowing you to type in a name for the preset.
• To select and apply a preset, select it from the pop-up menu.
• The “Zoom to Locators” preset is always available. Selecting this op-
tion zooms in on the range between the left and right locators, so that
only this range is shown in the event display.
CUBASE LE
3 – 62 The Project Window
Page 63

• If you want to delete a preset, select “Organize…” from the pop-up
menu.
In the dialog that appears, select the preset in the list and click the corresponding button in order to delete the preset. The preset is removed from the list.
• If you want to rename a preset, select “Organize…” from the pop-up
menu.
In the dialog that appears, select the desired preset in the list and click the Rename
button. A second dialog opens, allowing you to type in a new name for the preset.
Click OK to close the dialogs.
❐
Zoom presets are global for all projects, i.e. they are available in all
projects you open or create.
The middle part of the pop-up lists the cycle markers you created for
the project:
• If you select a cycle marker form this menu, the event display is
zoomed in to encompass the marker area (see page 111).
• You cannot edit the cycle markers in this pop-up menu. For information on editing markers, see “Using Markers”.
❐
Only the cycle markers you created in the current project are available on
the menu.
CUBASE LE
The Project Window 3 – 63
Page 64

Adjusting how parts and events are shown
The Preferences dialog on the File menu (on the Mac, the Preferences
dialog is located on the Cubase LE menu) contains several settings
for customizing the display in the Project window.
On the Event Display page you will find common settings for all track
types:
Option Description
Colorize Event
Background
Quick Zoom If this is activated, the contents of parts and events are redrawn
Transparent Events When this is activated, events and parts will be transparent,
Show Data on Small
Track Heights
Show Event Names Determines whether the names of parts and events should be
Determines whether the backgrounds or “contents” (waveforms, etc.) of parts and events will be colorized. See page 68.
once you have stopped changing the zoom.
showing the waveforms and MIDI events only.
If this is activated, the contents of events and parts will be
shown, even if the height of a track is very small.
shown in the Project window.
The Event Display–Audio page contains settings for audio events:
Option Description
Interpolate Audio
Images
Wave Image Style Determines whether audio waveforms should be displayed as
Show Event Volume
Curves Always
If the option is deactivated, single sample values are drawn as
“steps”. If the option is activated they are interpolated to form
“curves”.
solid images, frames or “inverted” images (solid+frame). This
selection affects all waveform images in the Project window,
Sample Editor and Audio Part Editor.
Note that the “Framed” and “Solid and Framed” styles are more
demanding for the computer. If the system feels slower in these
modes, please switch back to “Solid” wave image style.
If this is activated the “volume curves” created with the volume
and fade handles are always shown – if not, the curves are only
shown for selected events.
CUBASE LE
3 – 64 The Project Window
Page 65

The Event Display–MIDI page contains settings for MIDI parts:
Option Description
Default Edit Action Determines which editor should be opened when you double
click a MIDI part or select it and press [Ctrl]/[Command]-[E]: the
Key, List or Score editor.
Part Data Mode Determines how events in MIDI parts should be shown in the
Project window: as lines, as score notes or as drum notes.
Show Controllers Governs whether non-note events (controllers, etc.) should be
shown in MIDI parts in the Project window.
Note Name Style Determines how MIDI note names (pitches) should be displayed
in editors, etc.
The Event Display–Video page contains settings for video events:
Option Description
Show Video
Thumbnails
Video Cache Size This determines how much memory is available for video thumb-
When this is activated, thumbnail frames of the video contents
are shown on the Video Track.
nails. If you have long video clips and/or work with a large zoom
factor (so that a lot of frames are shown in the thumbnails), you
may have to raise this value.
CUBASE LE
The Project Window 3 – 65
Page 66

Zooming and navigating in the overview line
By clicking the Show Overview button on the toolbar, an extra pane
appears under the toolbar, the project overview line.
Show Overview button
In the overview line, events and parts on all tracks are displayed as
boxes. You can use the overview line to zoom in or out, and for navigating to other sections of the project. This is done by moving and resizing the track view rectangle in the overview line:
The track view rectangle
• The track view rectangle indicates the section of the project currently displayed in the event display.
• You can zoom in or out vertically by resizing the track view rectangle.
Resizing is done by dragging the edges of the rectangle.
• You can drag the track view rectangle to view other sections of the project.
The number of tracks shown will not change.
CUBASE LE
3 – 66 The Project Window
Page 67

Handling tracks
To add a track to the Project, select “Add Track” from the Project
menu and select a track type from the submenu that appears. The
new track is added below the currently selected track in the Track list.
• The “Add Track” menu is also available as a separate item on the
Quick Menu.
• There is an additional option at the bottom of the Add Track submenu,
called “Multiple...”. Selecting this brings up a dialog allowing you to
add more than one track in one operation.
You can set whether audio, MIDI or group tracks should be created by selecting from
the pop-up in the dialog. The number of tracks to add is entered in the “Count” value
field.
Once you have created tracks, you can manipulate and rearrange them
in various ways:
• To rename an audio or MIDI track, double click in the name field and
type in a new name.
If you hold down any modifier key when pressing [Return] to close the name field, all
events on the track will get the name you entered.
• To select a track, click on it in the Track list.
A selected track is indicated by a light grey color in the Track list.
This track is selected.
It is possible to select several tracks, by pressing [Ctrl]/[Command]. To select a continuous range of tracks, use [Shift]-clicking.
• To move a track, click and drag it up or down in the list.
• To duplicate a track, complete with all contents and channel settings,
right-click in the Track list and select “Duplicate track” from the context menu.
The duplicated track will appear above the original track.
CUBASE LE
The Project Window 3 – 67
Page 68

• You can colorize the contents of selected track(s), or selected parts
and events by clicking the Color button on the toolbar and selecting a
color from the pop-up menu that appears.
If one or several tracks are selected, all events and parts on the track(s) will get the selected color, as will any events and parts you add to the track later. If individual events
or parts are selected, only these will be affected. Individually colorized events and/or
parts will keep the applied color even if the track they belong to is later set to another
color. The option “Colorize Event Background” in the Preferences dialog (User Interface–Event Display page) determines whether the backgrounds or waveforms of
events will be colorized.
• To remove the selected tracks, select “Remove Selected Tracks” from
the Project menu.
You can also right-click directly on a track in the Track list and select “Remove Track”
from the context menu that appears.
Adding events to a track
There are a number of ways to add events to a track:
• By recording (see page 21).
This is possible for audio and MIDI tracks.
• By selecting “Audio File...” or “Video File...” from the Import submenu on the
File menu.
This opens a file dialog, allowing you to locate the file you wish to import. When you
import a file this way, a clip is created for the file and an event that plays the whole clip
is added to the selected track, at the position of the project cursor.
You can also import MIDI files by using the Import submenu, but this works in a slightly
different way (see page 507).
• By grabbing audio CD tracks and converting these to audio files, see page 511.
• By using Copy and Paste on the Edit menu.
This allows you to copy all kinds of events between different projects. You can also use
Copy and Paste for copying events within the project, from the Audio Part Editor or
Sample Editor.
• By drawing.
Some types of events (markers and automation events) can be drawn directly into the
Project window. For audio and MIDI tracks, you can draw parts (see page 71).
CUBASE LE
3 – 68 The Project Window
Page 69
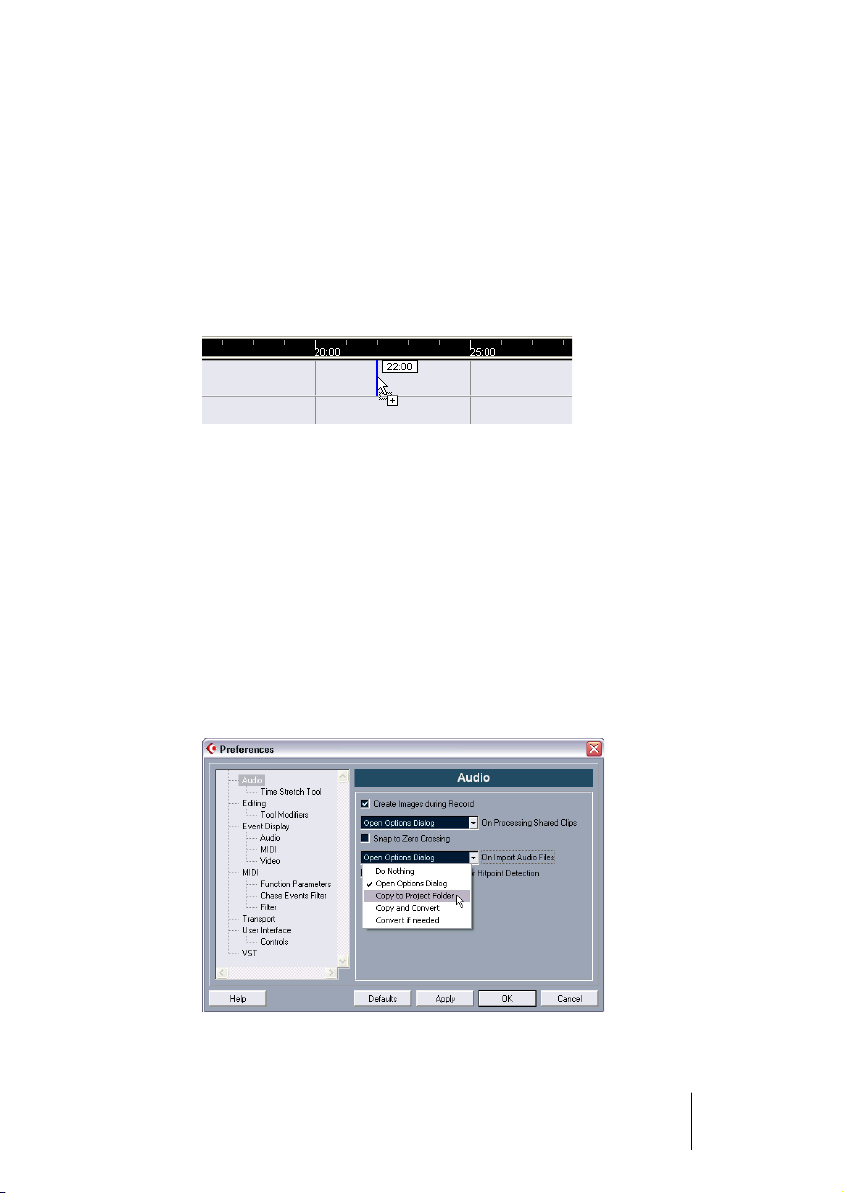
• By dragging files and dropping them on the track at the desired position.
You can create events by dragging and dropping from the following locations:
The Desktop.
The Pool.
The Project window of another open project.
The Audio Part Editor of any open project.
The Sample Editor of any open project – press [Ctrl]/[Command] and drag to create
an event of the current selection.
The “Find media” dialog.
While you drag the clip in the Project window, its position will be indicated by a
marker line and a numerical position box. See also page 291.
Audio file import options
When you are importing audio files, you can choose to copy the file
into the project’s audio folder and have the project make reference to
the copied file instead. This helps you keep your project “self-contained”. Furthermore, you may want all files in the project to have the
same sample rate and sample size (resolution).
There is a setting for this in the Preferences dialog (Audio page). Select one of the options on the “On Import Audiofile” pop-up:
CUBASE LE
The Project Window 3 – 69
Page 70

About Stereo/Mono
Audio tracks can be either stereo or mono. You can change this setting manually as described below, but it can also be done automatically, according to the following rules:
• Whenever a file is imported, copied or moved to a track, Cubase LE
sets the stereo/mono status of the track according to its contents: If
the majority of events on the track are in stereo, the track is set to stereo and vice versa.
This means that if you import a file to an empty track, the track is automatically set to
stereo or mono according to the imported file.
Stereo events on mono tracks (or vice versa) are indicated by the label “Mono/stereo mismatch”, and will not be played back:
A stereo file on a mono track.
To manually change the stereo/mono status, click the stereo button in
the Track list or Inspector. A lit button with double circles indicates
stereo, a dark button with a single circle indicates mono.
Setting the track to stereo.
CUBASE LE
3 – 70 The Project Window
Page 71
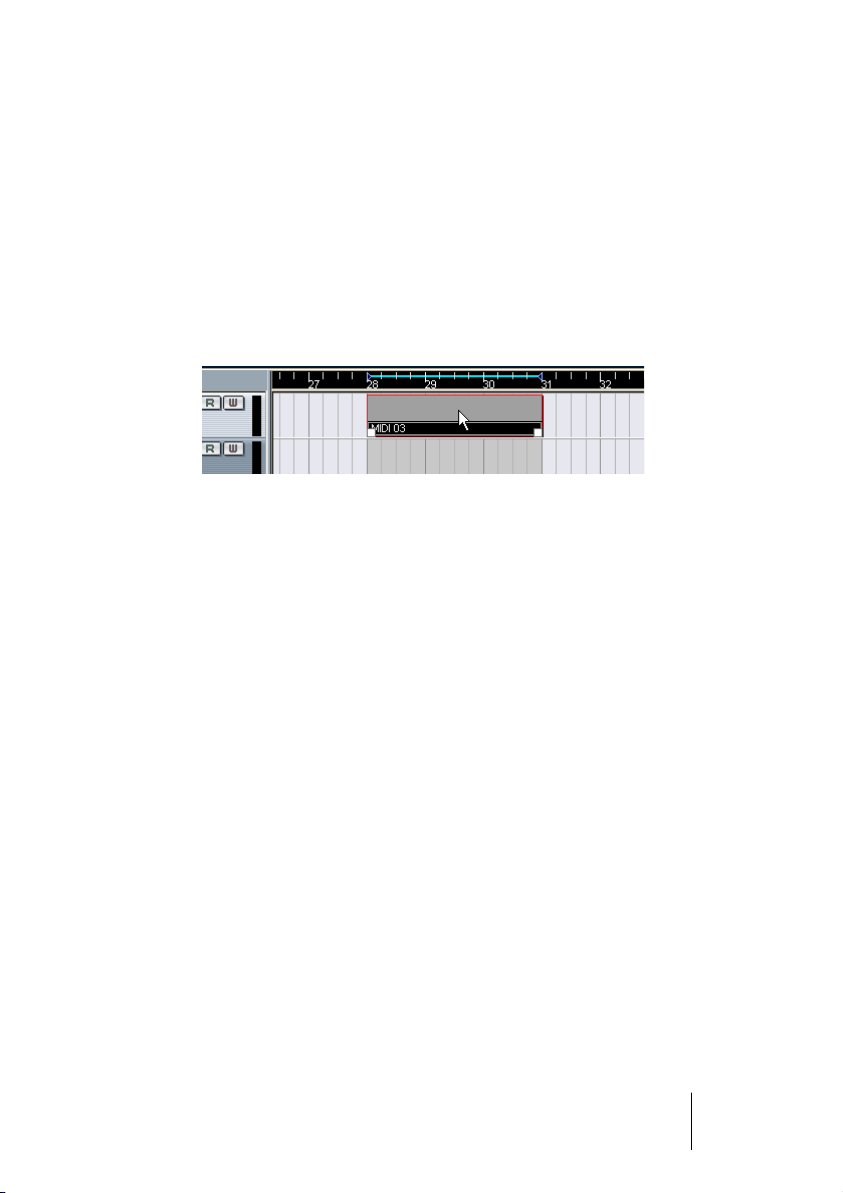
Creating parts
Parts are containers for MIDI or audio events. If you record MIDI, a
MIDI part is automatically created, containing the recorded events.
You can also create empty audio or MIDI parts and later add events to
them. There are two ways to do this:
• Draw a part on a MIDI or audio track with the Pencil tool.
• Double click with the Arrow tool on a MIDI or audio track, between the
left and right locator.
To add events to a MIDI part, you use the tools and functions in a MIDI
editor (see page 354). Adding events to audio parts is done in the Audio Part Editor (see page 257) by pasting or by using drag and drop.
• You can also gather existing audio events into a part, by using the
“Events to Part” function on the Audio menu.
This creates an audio part containing all selected audio events on the same track. To
remove the part and make the events appear as independent objects on the track
again, select the part and use the “Dissolve Part” function on the Audio menu.
CUBASE LE
The Project Window 3 – 71
Page 72
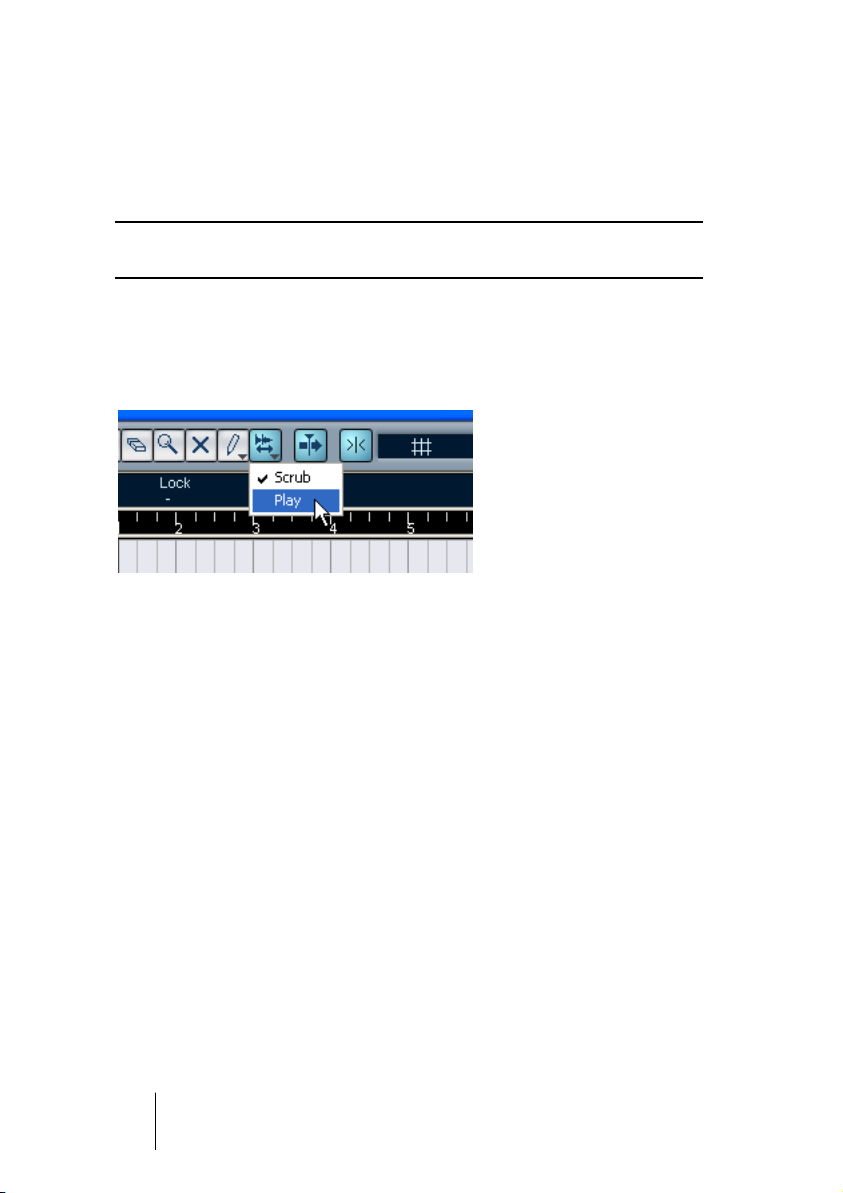
Auditioning audio parts and events
Audio parts and events can be auditioned in the Project window with
the Speaker tool:
❐
When auditioning, audio will be routed directly to Bus 1, bypassing the
audio channel’s settings, effects and EQs.
1. Select the Speaker tool.
Note that the Speaker tool and the Scrub tool share the same icon. If the rightmost tool
icon on the toolbar isn’t a Speaker symbol, first click on the icon to select it, then click
again and select “Play” from the pop-up menu that appears.
2. Click where you want playback to start, and keep the mouse button
pressed.
Only the track on which you click is played back, starting at the click position.
3. Release the mouse button to stop playback.
CUBASE LE
3 – 72 The Project Window
Page 73
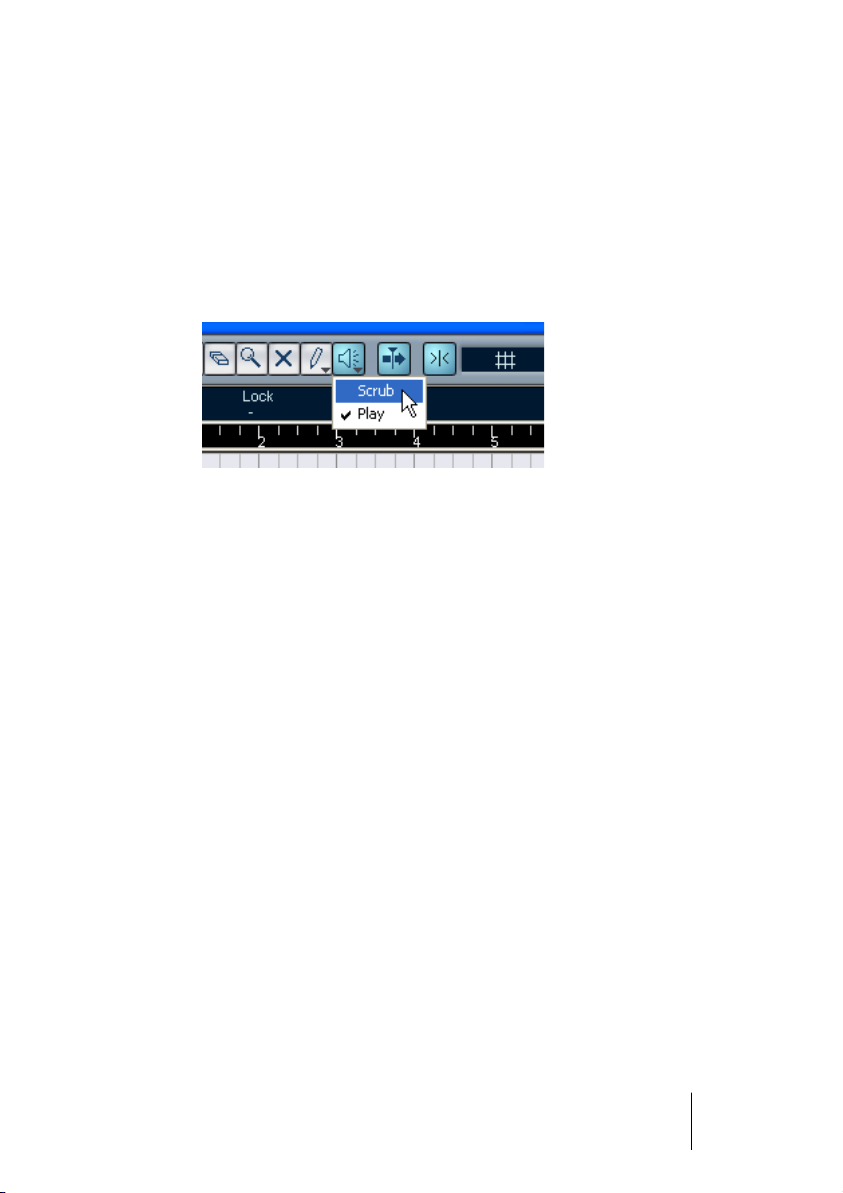
Scrubbing
The Scrub tool allows you to locate positions in the audio by playing
back, forwards or backwards, at any speed:
1. Select the Scrub tool.
Note that the Speaker tool and the Scrub tool share the same icon. If the rightmost tool
icon on the toolbar isn’t a “Scrub symbol”, first click on the icon to select it, then click
again and select “Scrub” from the pop-up menu that appears.
2. Click at the desired position and keep the mouse button pressed.
The project cursor is moved to the position at which you click.
3. Drag to the left or right.
The project cursor follows the mouse pointer and the audio is played back. The speed
and pitch of the playback depends on how fast you move the pointer.
• You can adjust the responsiveness of the Scrub function in the Prefer-
ences dialog (VST page).
CUBASE LE
The Project Window 3 – 73
Page 74

Editing parts and events
This section describes techniques for editing in the Project window. If
not explicitly stated, all descriptions apply to both events and parts,
even though we use the term “event” for convenience.
❐
When you are using the tools for editing parts and events, you can in many
cases get additional functions by pressing modifier keys (e.g. pressing
[Alt]/[Option] and dragging with the Pencil tool creates a copy of the
dragged event or part). On the following pages, the default modifier keys
are described, but you can customize these if needed. This is done in the
Preferences dialog on the Editing – Tool Modifiers page (see page 526).
Selecting events
Selecting events is done using any of the following methods:
• Use the Arrow tool.
The standard selection techniques apply.
• Use the Select submenu on the Edit menu.
The options are:
Option Description
All Selects all events in the Project window.
None Deselects all events.
In Loop Selects all events that are partly or wholly between the left
and right locator.
From Start to Cursor Selects all events that begin to the left of the project cursor.
From Cursor to End Selects all events that end to the right of the project cursor.
All on Selected Tracks Selects all events on the selected track.
Select Event This is available in the Sample Editor (see page 238).
Left/Right Selection
Side to Cursor
These two functions are only used for range selection editing
(see page 86).
❐
Note that these functions work differently when the Range Selection tool
is selected (see page 86).
CUBASE LE
3 – 74 The Project Window
Page 75

• Select all events on a track by right-clicking in its Track list and select-
ing “Select All Events” from the pop-up menu that appears.
• You can also use the arrow keys on the computer keyboard, to select
the closest event to the left, right, above or below.
If you press [Shift] and use the arrow keys, the current selection will be kept, allowing
you to select several events.
• If the option “Auto Select Events under Cursor” is activated in the
Preferences dialog (Editing page), all events currently “touched” by
the project cursor are automatically selected.
This can be helpful when rearranging your project, since it allows you to select whole
sections (on all tracks) simply by moving the project cursor.
• It is also possible to select ranges, regardless of the event and track
boundaries.
This is done using the Range Selection tool (see page 86).
Moving events
To move events in the Project window, use any of the following methods:
• Click and drag to a new position.
All selected events will be moved, maintaining their relative positions. You can only
drag events to tracks of the same type. If Snap is activated, this determines to which
positions you can move the events (see page 90).
Note also, that you can restrict movement to be either horizontal or vertical only, by
holding down [Ctrl]/[Command] while dragging.
❐
You will note that there is a slightly delayed response when you move an
event by dragging. This helps you avoid accidentally moving events
when you click on them in the Project window. You can adjust this delay
with the Drag Delay setting in the Preferences dialog (Editing page).
• Use the “Move to” functions on the Edit menu.
The following functions are available:
Function Description
Move to Cursor Moves the selected event to the project cursor position. If there are
several selected events on the same track, the first event will start at
the Cursor, and the following will be lined up end-to-start after the
first one.
CUBASE LE
The Project Window 3 – 75
Page 76

Function Description
Move to Origin Moves the selected events to their original positions, i.e. the posi-
tions at which they were originally recorded.
Move to Front,
Move to Back
This function doesn’t actually change the position of the events, but
moves the selected events to the front or back, respectively. This is
useful if you have overlapping events, and want to see one that is
partially obscured.
For audio events, this is an extra important feature, since only the
visible sections of events will be played back. Moving an obscured
audio event to front (or moving the obscuring event to back) will allow you to hear the whole event on playback.
• Select the event and edit the Start position in the info line.
With this method, you can only move one event at a time.
Duplicating events
Events can be duplicated in the following ways:
• Hold down [Alt]/[Option] and drag the event to a new position.
If Snap is activated, this determines to which positions you can copy the events (see
page 90).
❐
If you hold down [Ctrl]/[Command] as well, movement direction is restricted to either horizontal or vertical. That means if you drag an event
vertically it can not be moved horizontally at the same time.
• Audio and MIDI parts can also be duplicated by pressing [Alt]/[Op-
tion] + [Shift] and dragging.
This creates a shared copy of the part. If you edit the contents of a shared copy, all
other shared copies of the same part are automatically edited in the same way.
Shared copies are indicated by the part name in italics and an icon in the lower right
corner of the part.
CUBASE LE
3 – 76 The Project Window
Page 77

Note:
• When you duplicate audio events, the copies are always shared. This means
that shared copies of audio events always refer to the same audio clip (see
page 219).
• You can convert a shared copy to a real copy by selecting “Convert to Real
Copy” from the Edit menu. This creates a new version of the clip (that can be
edited independently) and adds this to the Pool. Note that no new files are
created by this operation – for that you need to use the “Freeze Edits” function (see page 235).
• Selecting “Duplicate” from the Edit menu creates a copy of the selected event and places it directly after the original.
If several events are selected, all of these are copied “as one unit”, maintaining the relative distance between the events.
• Selecting “Repeat...” from the Edit menu opens a dialog, allowing you to
create a number of copies (regular or shared) of the selected event(s).
This works just like the Duplicate function, except that you can specify the number of
copies.
• Selecting “Fill Loop” from the Edit menu creates a number of copies
starting at the left locator and ending at the right locator.
The last copy is automatically shortened to end at the right locator position.
Original Copies
Using Cut, Copy and Paste
You can cut or copy selected events, and paste them in again, using
the functions on the Edit menu.
• When you paste an event it is inserted on its original track, positioned
so that its Snap point is aligned with the project cursor position.
See page 90 for information about the Snap point.
• If you use the “Paste at Origin” function, the event is pasted at its original position (the position from which you cut or copied it).
CUBASE LE
The Project Window 3 – 77
Page 78

Renaming events
By default, audio events show the name of their clip, but you can enter
a separate descriptive name for separate events if you like. This is done
by selecting the event and typing in a new name in the “Description”
field in the info line.
• You can also give all events on a track the same name as the track by
changing the track name, holding down a modifier key and pressing
[Return].
See page 67.
Splitting events
You can split events in the Project window in the following ways:
• Click with the Scissors tool on the event you want to split.
If Snap is activated, this determines the exact split position (see page 90).
• Select “Split at Cursor” from the Edit menu.
This splits the selected events at the position of the project cursor. If no events are selected, all events (on all tracks) that are intersected by the project cursor will be split.
• Select “Split Loop” from the Edit menu.
This splits events on all tracks at the left and right locator positions.
❐
If you split a MIDI part so that the split position intersects one or several
MIDI notes, the result depends on the option “Split MIDI Events” in the
Preferences dialog (MIDI–Function Parameters page). If the option is activated, the intersected notes will be split (creating new notes at the beginning of the second part). If it is deactivated, the notes will remain in
the first part, but “stick out” after the end of the part.
Gluing events together
Clicking on an event with the Glue Tube tool glues it together with the
next event on the track. The result is a part containing the two events,
with one exception:
• If you first split an event and then glue the two sections together again
(without moving or editing them first), they become a single event again.
In other words, gluing can create a single event if the two events are lined up end to
start and play a continuous section of the same clip.
CUBASE LE
3 – 78 The Project Window
Page 79

Resizing events
Resizing events means to move their start or end positions individually. In Cubase LE, there are three types of resizing:
Resizing type Description
Normal Sizing The contents of the event stay fixed, and the start or
end point of the event is moved to “reveal” more or
less of the contents.
Sizing Moves Contents The contents follow the moved start or end of the
event (see the figure below).
Sizing Applies Time Stretch The contents will be time stretched to fit the new event
length (see separate description on page 80).
To select one of the resizing modes, select the Arrow tool and then
click again on the Arrow tool icon on the toolbar. This opens a pop-up
menu from which you can select one of the resizing mode options.
The icon on the toolbar will change shape, indicating the selected resizing mode.
CUBASE LE
The Project Window 3 – 79
Page 80
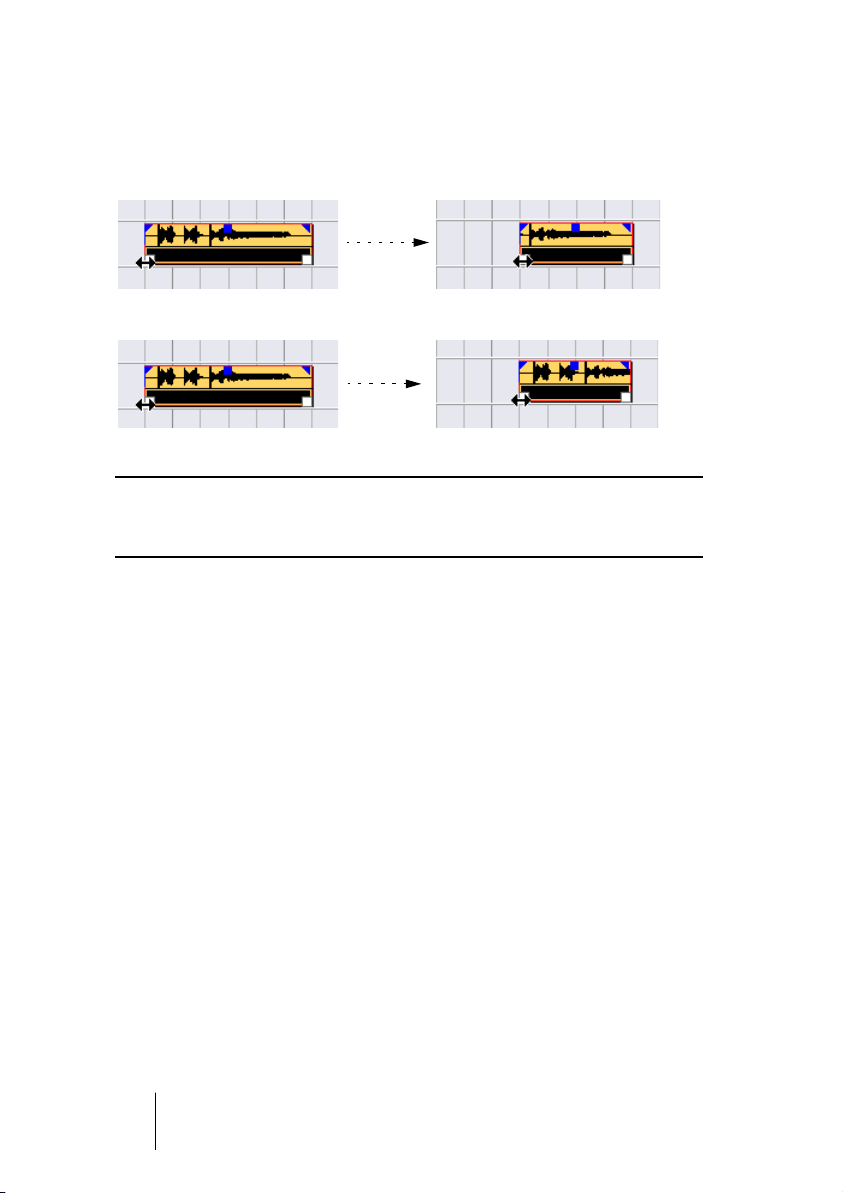
The actual resizing is done by clicking and dragging the lower left or
right corner of the event. If Snap is activated, the Snap value determines the resulting length (see page 90).
Normal sizing.
Sizing moves contents.
❐
If the event is selected, there will be resize handles in the lower left and
right corners. However, you can resize unselected events in the same
way – just click and drag one of the lower corners.
• If several events are selected, all will be resized in the same way.
• You can also resize events with the Scrub tool.
This works just the same as when resizing with the Arrow tool, but the audio under the
pointer is played back (scrubbed) while you drag.
Resizing events using time stretch
If you want to resize a part and make its contents “fit” the new size,
you should use this option. Proceed as follows:
1. Click the Arrow icon on the toolbar and select the “Sizing applies
timestretch” option from the pop-up menu.
2. Point close to the end point of the part you want to stretch.
CUBASE LE
3 – 80 The Project Window
Page 81

3. Click and drag left or right.
When you move the mouse, a tooltip information shows the current mouse position
and length of the part. Note that the snap value applies, as with any part operation.
4. Release the mouse button.
The part is “stretched” or “compressed” to fit the new length.
• For MIDI parts, this means that the events are moved, so that the relative distance between events is maintained.
• For audio parts, this means that the events are moved, and that the
referenced audio files are time stretched to fit the new length.
A dialog box shows the progress of the time stretch operation.
• You can adjust the quality settings for the time stretch algorithm on the
Preferences page (Audio–Time Stretch Tool page).
For more general information about time stretch, see page 233.
Sliding the contents of an event or part
You can move the contents of an event or part without changing its position in the Project window. By default, this is done by pressing [Ctrl]/
[Command]+[Alt]/[Option], clicking in the event or part and dragging
to the left or right.
❐
When sliding the contents of an audio event, you cannot slide past the
start or end of the actual audio clip. If the event plays the whole clip, you
cannot slide the audio at all.
CUBASE LE
The Project Window 3 – 81
Page 82
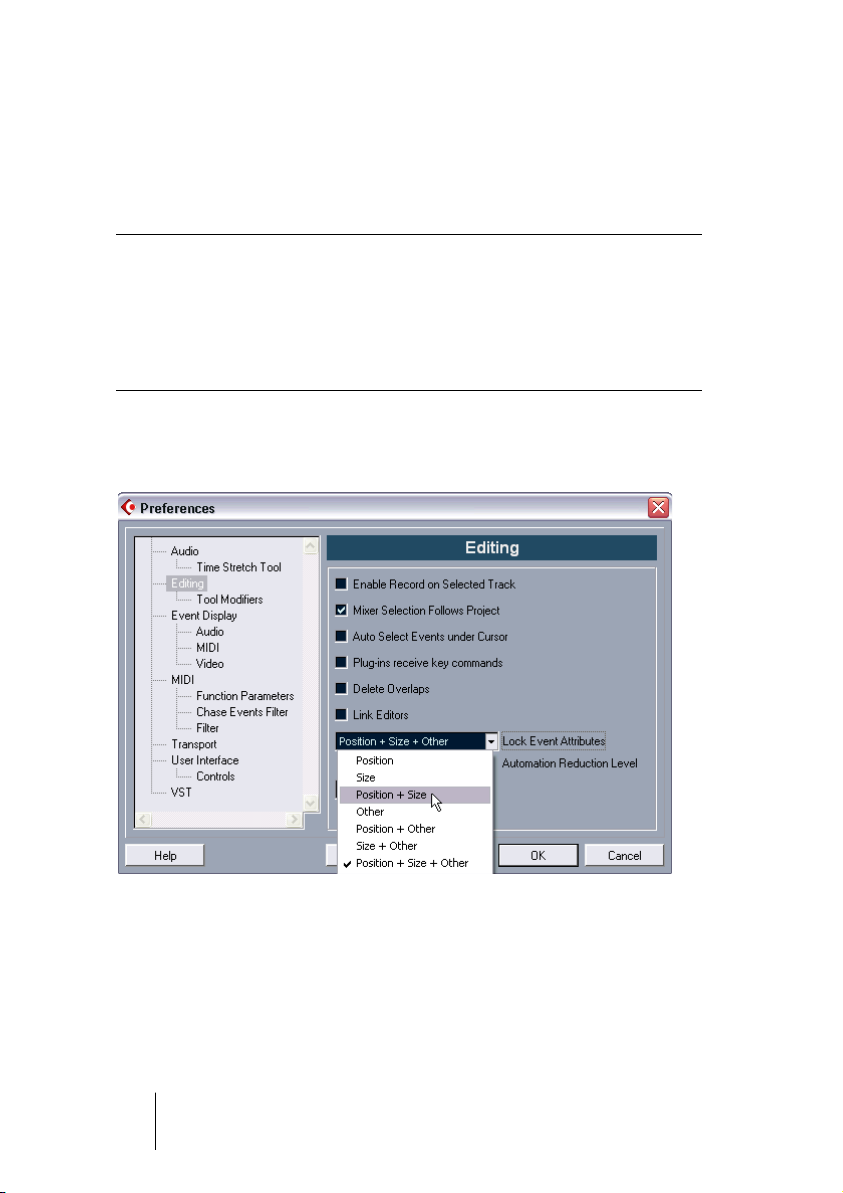
Locking events
If you want to make sure you don’t edit or move an event by accident,
you can lock it. Locking can affect one (or any combination) of the following properties:
Lock Options Description
Position If this is locked, the event cannot be moved.
Size If this is locked, the event cannot be resized.
Other If this is locked, all other editing of the event is disabled. This in-
cludes adjusting the fades and event volume, processing, etc.
• To specify which of these properties should be affected by the Lock
function, use the “Lock Event Attributes” pop-up menu in the Preferences dialog (Editing page).
CUBASE LE
3 – 82 The Project Window
Page 83
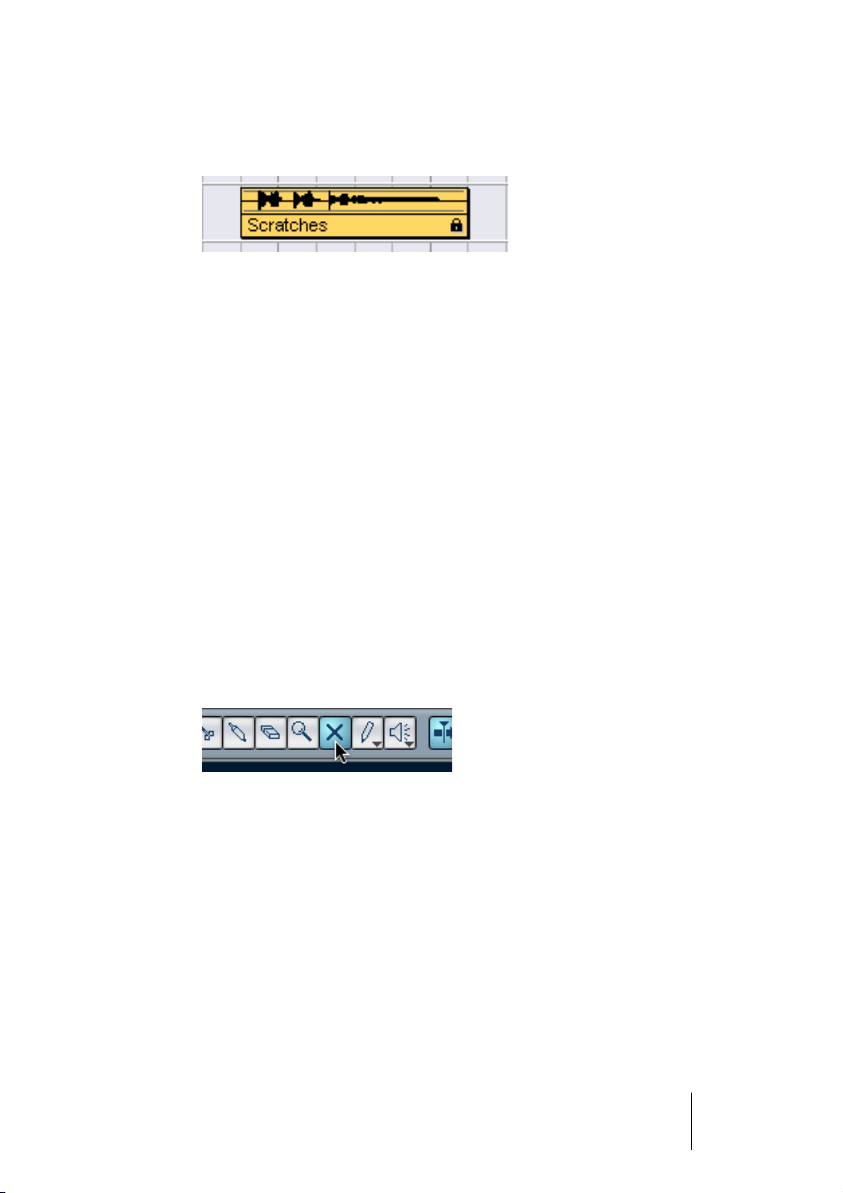
• To lock events, select them and select “Lock...” from the Edit menu.
The events will be locked according to the options specified in the Preferences dialog.
The padlock symbol indicates that one or more of the lock options are activated for
the event.
• You can adjust the lock options for a locked event by selecting it and
selecting “Lock...” from the Edit menu again.
This opens a dialog in which you can activate or deactivate the desired lock options.
• To unlock an event (turn off all lock options), select it and select “Unlock” from the Edit menu.
• It is also possible to lock a whole track, by clicking the padlock symbol
in the Track list or in the Inspector.
This disables all editing of all events on the track.
Muting events
You can Mute individual events in the Project window in the following
way:
• To mute or unmute a single event, click on it with the Mute tool.
The Mute tool.
• To mute several events, click on an unmuted event with the Mute tool,
keep the mouse button pressed and drag the pointer over the desired
events.
All events “touched” by the Mute tool will be muted.
• To unmute several events, click on a muted event with the Mute tool,
keep the mouse button pressed and drag the pointer over the desired
events.
All events “touched” by the Mute tool will be unmuted.
CUBASE LE
The Project Window 3 – 83
Page 84
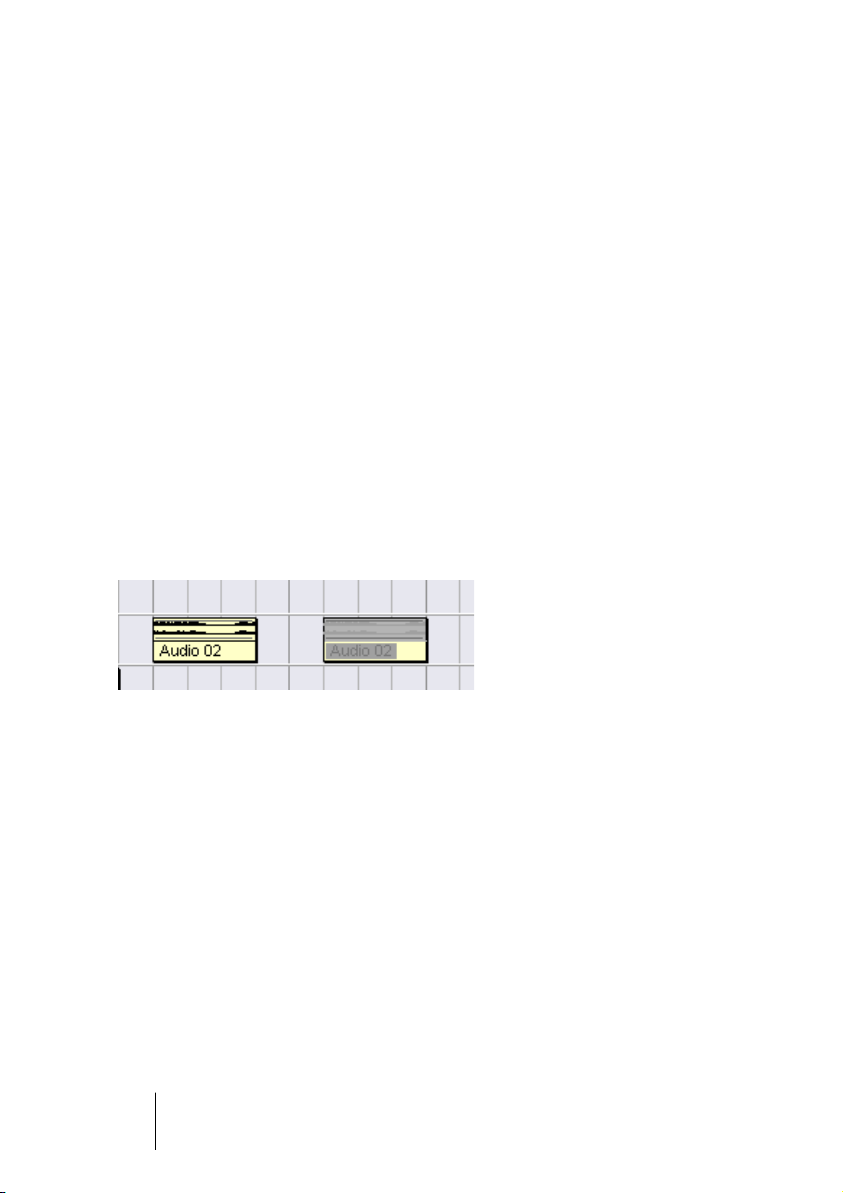
• You can click in an empty area with the Mute tool and drag a selection
rectangle around the events you want to mute or unmute.
This changes the mute status of all events in the selection rectangle. If you hold down
a modifier key when releasing the mouse button, you can force all events to be muted
or unmuted, regardless of their previous status. The default modifier keys are [Shift] for
mute and [Ctrl]/[Command] for unmute.
• You can mute events by selecting them and selecting “Mute” from the
Edit menu.
Similarly, you can unmute the selected events by selecting “Unmute” from the Edit
menu.
• If a single event is selected, you can also change its Mute status in the
info line.
• You can also Mute whole tracks by clicking the Mute (“X”) button in
the Track list, the Inspector or the Mixer.
Clicking the Solo (“S”) button for a track mutes all other tracks.
Muted events can be edited as usual (with the exception of adjusting
fades), but are not played back.
Muted events are “greyed out”.
CUBASE LE
3 – 84 The Project Window
Page 85

Removing events
To remove an event from the Project window, use any of the following
methods:
• Click on the event with the Eraser tool.
If you press [Alt]/[Option], all following events on the same track will be deleted.
• Select the event(s) and press [Backspace], or select “Delete” from
the Edit menu.
Creating new files from events
As described in the Getting Started book, an audio event plays a section of an audio clip, which in turn refers to one or more audio files on
the hard disk. However, in some situations you may want to create a
new file that consists only of the section played by the event. This is
done with the function Bounce Selection on the Audio menu:
1. Select one or several audio events.
2. Set up fade in, fade out and event volume (on the info line or using the
volume handle) as desired.
These settings will be applied to the new file. For details on fades and event volume, see
page 116.
3. Select “Bounce Selection” from the Audio menu.
You are asked whether you want to replace the selected event or not.
• If you click “Replace”, a new file is created, containing only the audio
in the original event. A clip for the new file is added to the Pool, and
the original event is replaced by a new event playing the new clip.
• If you click “No” a new file is created and a clip for the new file is
added to the Pool.
The original event is not replaced.
You can also apply the Bounce Selection function to an audio part. In
that case, the audio from all events in the part will be combined into a
single audio file. If you choose “Replace” when asked, the part will be
replaced with a single audio event playing a clip of the new file.
CUBASE LE
The Project Window 3 – 85
Page 86
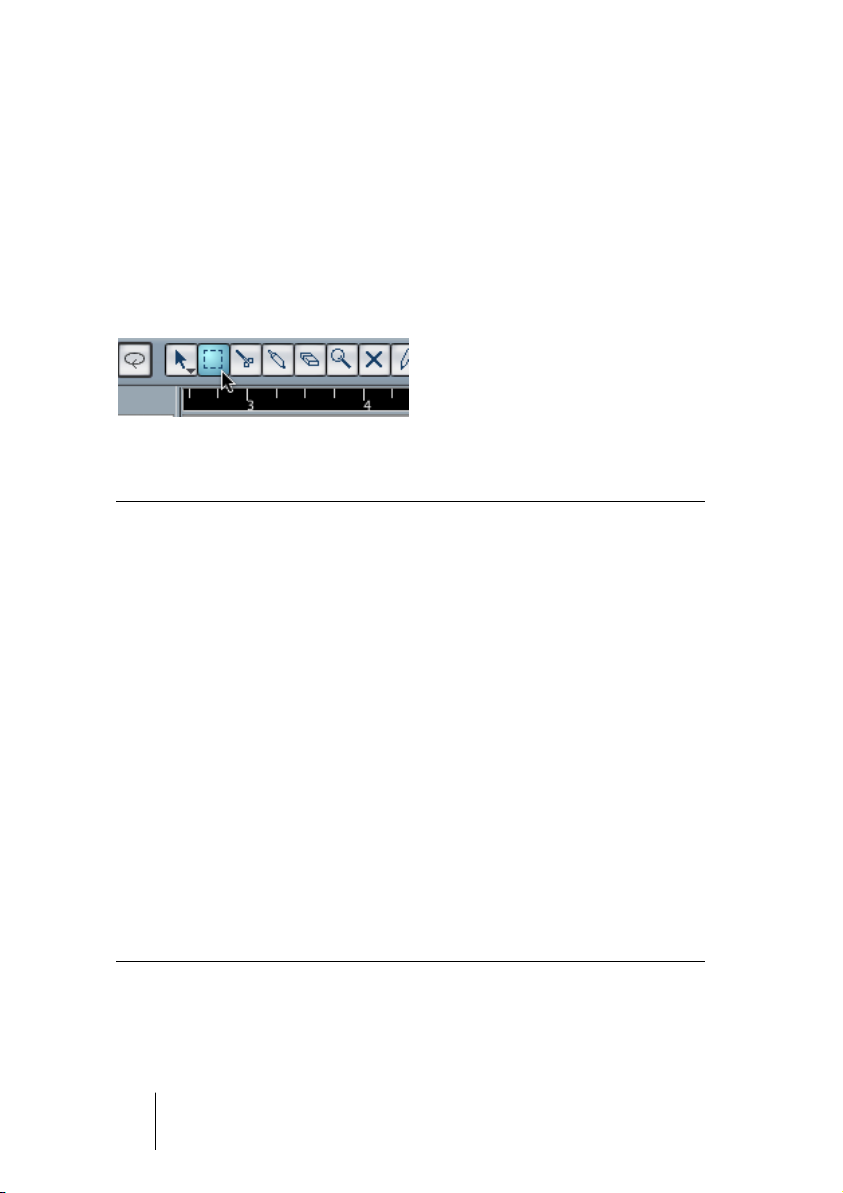
Range editing
Editing in the Project window isn’t necessarily restricted to handling
whole events and parts. You can also work with selection ranges,
which are independent from the event/part and track boundaries.
Creating a selection range
To make a selection range, drag a rectangle with the Range selection
tool.
When the Range selection tool is selected, the Select submenu on
the Edit menu has the following items for making selection ranges:
Option Description
All Makes a selection that covers all tracks, from the start of the
project to the end (as defined by the Length setting in the
Project Setup dialog).
None Removes the current selection range.
In Loop Makes a selection between the left and right locator, on all
tracks.
From Start to Cursor Makes a selection on all tracks, from the start of the project to
the project cursor.
From Cursor to End Makes a selection on all tracks, from the project cursor to the
end of the project.
All on selected Tracks Only used for event selection (see page 74).
Select event This is available in the Sample Editor (see page 249).
Left Selection Side
to Cursor
Right Selection Side
to Cursor
Moves the left side of the current selection range to the project
cursor position.
Moves the right side of the current selection range to the
project cursor position.
• Double clicking on an event with the Range Selection tool creates a
selection range encompassing the event.
If you hold down [Shift] you can double click several events in a row, and the selection
range will expand to encompass them all.
CUBASE LE
3 – 86 The Project Window
Page 87
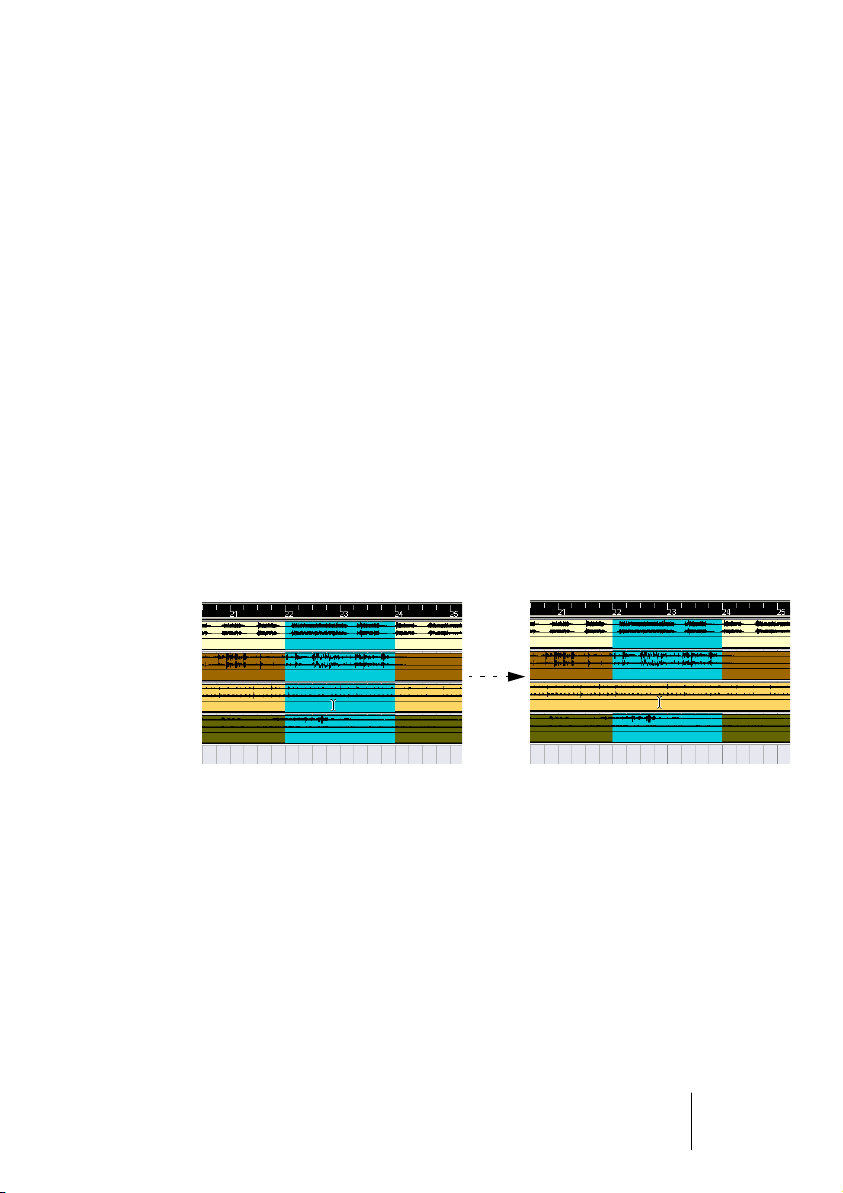
Adjusting the size of the selection range
You can adjust the size of a selection range in the following ways:
• By dragging its edges.
The pointer takes the shape of a double arrow when you move it over an edge of the
selection range.
• By holding down [Shift] and clicking.
The closest selection range edge will be moved to the position at which you clicked.
• By adjusting the selection range start or end position numerically on
the info line.
Making selection ranges for several non-contiguous tracks
As described above, selection ranges can cover several tracks. However, it is also possible to exclude tracks from a selection range:
1. Create a selection range from the first to the last desired track.
2. Press [Ctrl]/[Command] and click in the selection range on the tracks
you want to exclude from the selection.
3. In the same manner, you can add a track to the selection range by
[Ctrl]/[Command]-clicking in the selection range area on the track.
Moving and duplicating
• To move a selection range, click and drag it to a new position.
This will move the contents of the selection range to the new position. If the range intersected events or parts, these will be split before moving, so that only the sections
within the selection range are affected.
• To duplicate a selection range, hold down [Alt]/[Option] and drag.
You can also use the Duplicate, Repeat and Fill Loop functions, just as when duplicating events (see page 76).
CUBASE LE
The Project Window 3 – 87
Page 88

Using Cut, Copy and Paste
When working with selection ranges, you can either use Cut, Copy
and Paste on the Edit menu, or use the functions “Cut Time” and
“Paste Time” on the Range submenu on the Edit menu. These work
differently to their related functions on the Edit menu:
Function Description
Cut Cuts out the data in the selection range and moves it to the
Clipboard. The selection range is replaced by empty track
space in the Project window, meaning that events to the right
of the range keep their positions.
Copy Copies the data in the selection range to the clipboard.
Paste Pastes the clipboard data at the start position and track of the
current selection. Existing events are not moved to make room
for the pasted data.
Paste at Origin Pastes the clipboard data back at its original position. Existing
events are not moved to make room for the pasted data.
Cut Time Cuts out the selection range and moves it to the Clipboard.
Events to the right of the removed range are moved to the left
to fill out the gap.
Paste Time Pastes the clipboard data at the start position and track of the
current selection. Existing events are moved to make room for
the pasted data.
Paste Time at Origin Pastes the clipboard data back at its original position. Existing
events are moved to make room for the pasted data.
CUBASE LE
3 – 88 The Project Window
Page 89

Deleting selection ranges
Again, you can either use “regular” Delete or “Delete Time”:
• If you use the Delete function on the Edit menu (or press [Backspace]),
the data within the selection range is replaced by empty track space.
Events to the right of the range keep their position.
• If you use “Delete Time” on the Edit menu’s Range submenu, the selection range is removed and events to the right are moved to the left
to close up the gap.
Other functions
On the Range submenu on the Edit menu, you will find three more
range editing functions:
Function Description
Split Splits any events or parts that are intersected by the selection
range, at the positions of the selection range edges.
Crop All events or parts that are partially within the selection range are
cropped, that is, sections outside the selection range are removed.
Events that are fully inside or outside the selection range are not affected.
Insert Silence Inserts empty track space at the start of the selection range. The
length of the inserted silence equals the length of the selection
range. Events to the right of the selection range start are moved to
the right to “make room”. Events that are intersected by the selection range start are split, and the right section is moved to the right.
CUBASE LE
The Project Window 3 – 89
Page 90

Options
Snap
The Snap function helps you to find exact positions when editing in the
Project window. It does this by restricting horizontal movement and positioning to certain positions. Operations affected by Snap include moving, duplicating, drawing, sizing, splitting, range selection, etc.
• You turn Snap on or off by clicking the Snap icon in the toolbar.
Snap activated.
• When you are moving audio events with Snap activated, it isn’t necessarily the beginning of the event that is used as Snap position reference. Instead, each audio event has a Snap Point, which you can set to a relevant
position in the audio (such as a downbeat, etc.).
The Snap Point is preferably set in the Sample Editor since it will allow for a higher degree of precision (see page 247). You can however also set the Snap Point directly in
the Project Window, in the following way:
1. Select the event.
2. Place the project cursor at the desired position within a selected au-
dio event.
3. Pull down the Audio menu and select “Snap Point To Cursor”.
The Snap Point is set at the cursor position.
The Snap Point for an event is displayed as a blue line in the Project window.
CUBASE LE
3 – 90 The Project Window
Page 91

Exactly how Snap works depends on which mode is selected on the
Snap mode pop-up menu.
The following sections describe the different Snap modes:
Grid
In this mode, the Snap positions are set with the Grid pop-up menu to
the right. The options depend on the format selected for the ruler. For
example, if the ruler is set to show bars and beats, the grid can be set
to bars, beats or the quantize value set with the next pop-up menu to
the right. If a time- or frame-based ruler format is selected, the grid popup menu will contain time- or frame-based grid options, etc.
When seconds is selected as ruler format, the grid pop-up menu contains timebased grid options.
Events
In this mode, the start and end positions of other events and parts become “magnetic”. This means that if you drag an event to a position
near the start or end of another event, it is automatically aligned with
the start or end of the other event. For audio events, the position of the
Snap point is also magnetic (see page 247).
• Note that this includes marker events on the marker track.
This allows you to snap events to marker positions, and vice versa.
CUBASE LE
The Project Window 3 – 91
Page 92

Shuffle
Shuffle mode is useful when you want to change the order of adjacent
events. If you have two adjacent events and drag the first one to the
right, past the second event, the two events will change places.
The same principle works when changing the order of more than two
events:
12345
Dragging event 2 past event 4...
52431
...changes the order of events 2, 3 and 4.
Magnetic Cursor
When this mode is selected, the project cursor becomes “magnetic”.
Dragging an event near the cursor causes the event to be aligned with
the cursor position.
Grid + Cursor
This is a combination of the “Grid” and “Magnetic Cursor” snap
modes.
Events + Cursor
This is a combination of the “Events” and “Magnetic Cursor” snap
modes.
Events + Grid + Cursor
This is a combination of the “Events”, “Grid” and “Magnetic Cursor”
snap modes.
CUBASE LE
3 – 92 The Project Window
Page 93

Snap to Zero Crossing
When this option is activated in the Preferences dialog (Audio page),
all audio edits are done at zero crossings (positions in the audio
where the amplitude is zero). This helps you to avoid pops and clicks
which might otherwise be caused by sudden amplitude changes.
❐
This setting is global for all windows in all open projects. It is also available as an icon on the Sample Editor.
Auto scroll
Auto scroll activated.
When this option is activated, the waveform display will scroll during
playback, keeping the project cursor visible in the window.
• If the option “Stationary Cursors” is activated in the Preferences dia-
log (Transport page), the project cursor will be positioned in the middle of the screen (if possible).
CUBASE LE
The Project Window 3 – 93
Page 94

CUBASE LE
3 – 94 The Project Window
Page 95

4
Folder tracks
Page 96
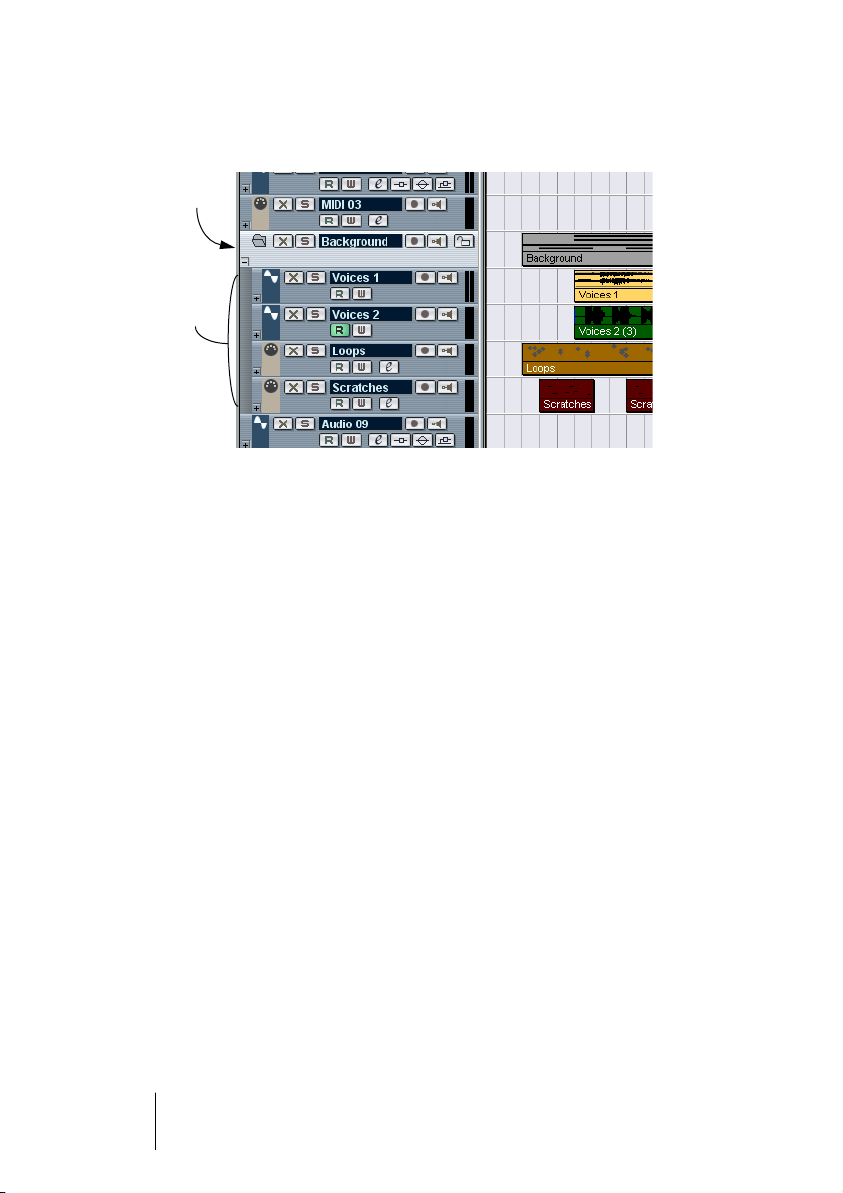
About folder tracks
A folder track
Tracks in the
folder
Just as the name implies, a folder track is a folder that contains other
tracks. Moving tracks into a folder is a way to structure and organize
tracks in the Project window. For example, grouping several tracks in
a folder track makes it possible for you to “hide” tracks (thus giving
you more working space on the screen). You can solo and mute several tracks in a quicker and easier way, and perform editing on several
tracks as one entity. Folder tracks can contain any type of track including other folder tracks.
CUBASE LE
4 – 96 Folder tracks
Page 97
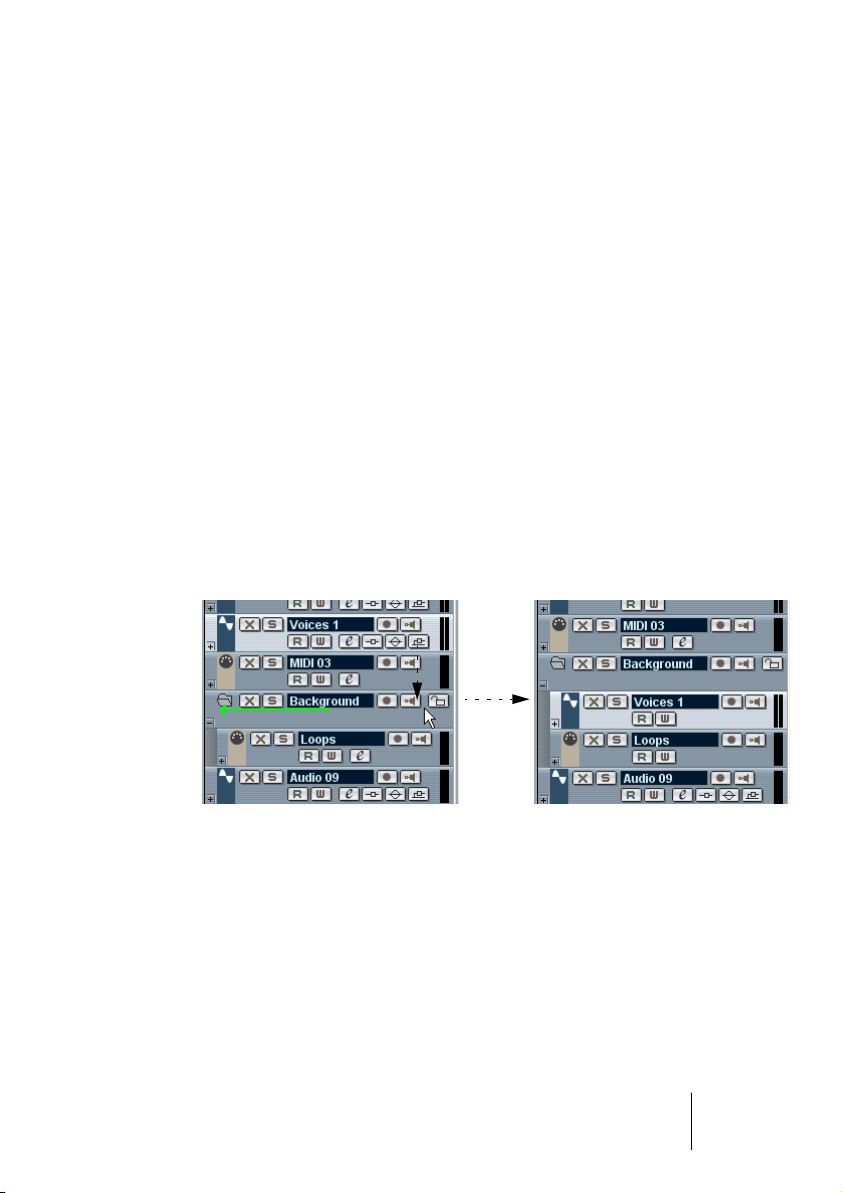
Using folders
Creating a folder track
Folder tracks are created just like any other track: Select “Add Track”
from the Project menu and select “Folder” from the submenu that appears.
Moving tracks into a folder
You can move any type of track into a folder by using drag and drop:
1. In the Track List, click on a track that you want to move into a folder,
and drag it onto a folder track.
A green arrow pointing to a folder appears when you drag the track onto the folder
track in the list.
2. Release the mouse button.
The track is now placed in the folder track, and all parts and events on the track will be
represented by a corresponding folder part (see page 99), that displays a graphical
representation of all parts and events in the folder.
Since you can move any type of track into a folder track, it is possible to
create sub-folders by moving one folder track into another. This is
called “nesting”. For example, you could have a folder containing all the
vocals in a project, and each vocal part could have a nested folder containing all the takes, in a subfolder for easier handling etc.
Removing tracks from a folder
To remove a track from a folder, simply drag it out of the folder and release it in the Track list.
Folder tracks 4 – 97
CUBASE LE
Page 98
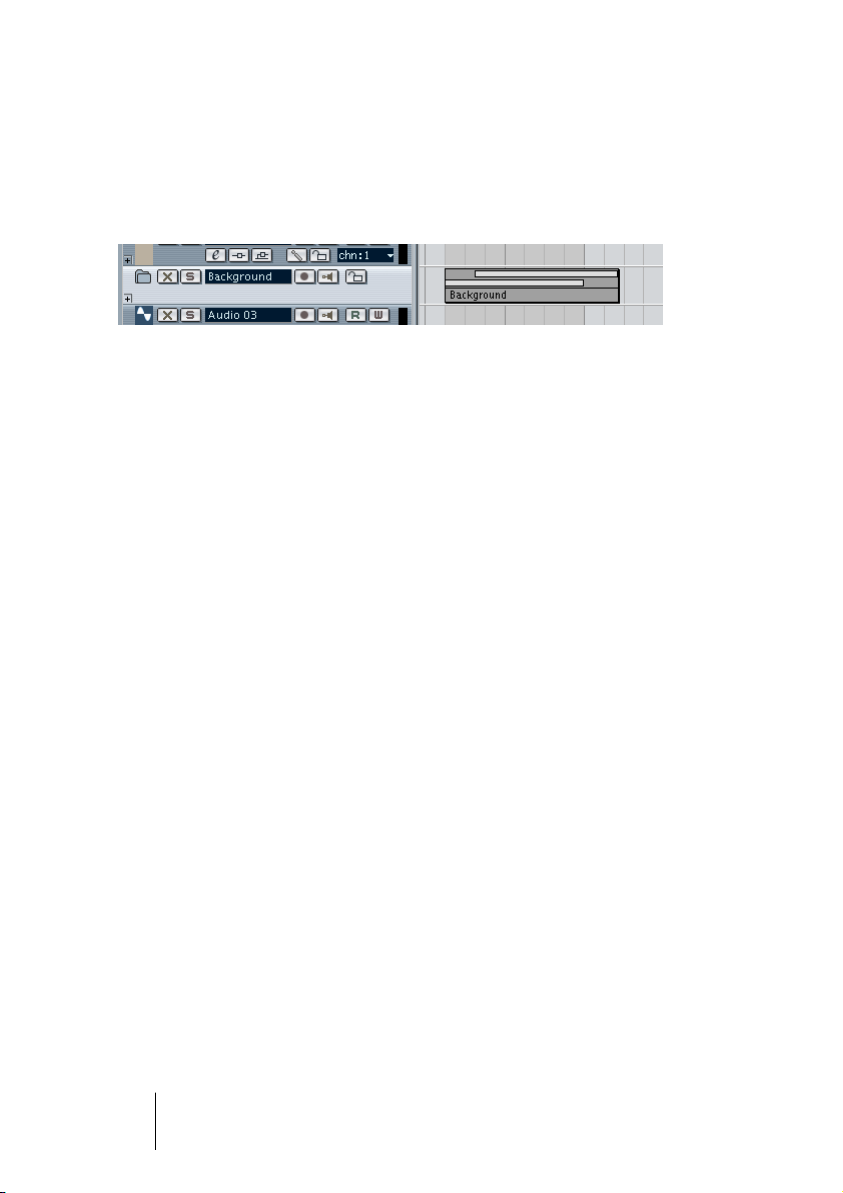
Hiding/Showing tracks in a folder
You can hide or show the tracks located in a folder by clicking on the
“Show/Hide” button (the plus sign) in the Track list for the folder track.
Hidden tracks are still played back as usual.
When a folder is “closed” this way, the folder part(s) still give you a
graphic representation of the parts and events within the folder.
Muting and soloing folder tracks
One of the main advantages of using folder tracks is that they provide
you with a way to mute and solo several tracks as one unit. Muting and
soloing a folder track affects all tracks in the folder. You can also solo
or mute individual tracks in the folder.
Muting a folder track
You can mute a folder track (and thereby mute all tracks within it) the
same way you mute other tracks by clicking in the Mute (“X”) button in
the Track list.
Soloing a folder track
You can solo a folder track (all tracks outside the folder are muted) the
same way you solo other tracks, by selecting it and clicking the Solo
button.
Soloing or muting tracks within a folder
This can be done by showing the tracks in the folder and using the
Mute and Solo buttons in the Track list as usual for any tracks inside
the folder.
CUBASE LE
4 – 98 Folder tracks
Page 99
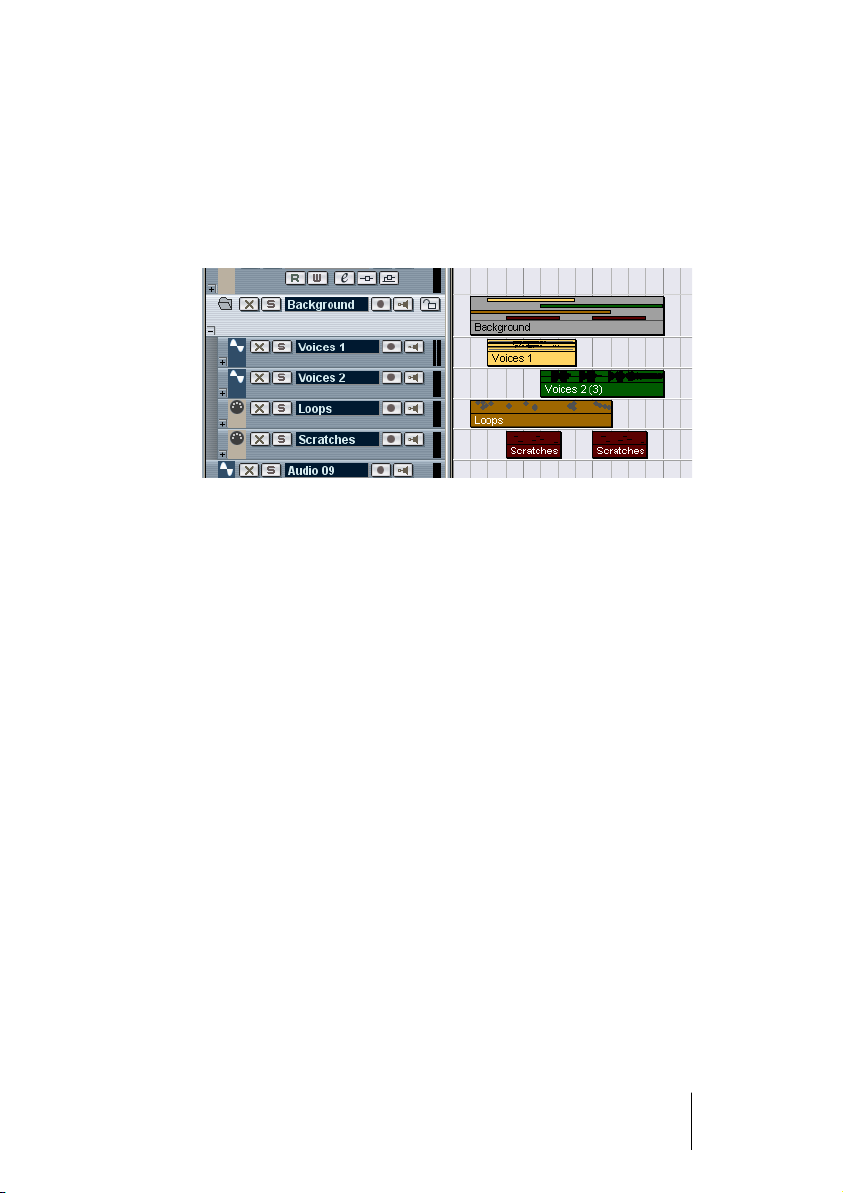
About folder parts
The parts contained in a folder track are shown as folder parts, a
graphic representation of the contained events and parts horizontal
and vertical position, as well as their respective length. If part colors
are used, these are also taken into account in the folder part.
CUBASE LE
Folder tracks 4 – 99
Page 100

Handling folder parts
When several tracks have been put into a folder track the parts and
events on the tracks may end up in several separate folder parts. A
new folder part is created automatically if there is a gap between parts
and events on the tracks, or in certain circumstances if there is an
overlap between the folder part and an event on a track within the
folder. This works as follows:
• When an event overlaps with a folder part more than half of its total
length, it will be included in the folder part.
If the overlap is half its length or less it will be placed in a new folder part.
The MIDI part overlaps the folder part, by more than half its length, so it is included
in the folder part.
If you move the MIDI part slightly to the right, more than half of the part is positioned
outside the folder part, so a new folder part is created.
• If a part “belongs” to a specific folder part, but is placed in a separate
folder part due to the overlap, you can simply select both the folder
parts if you wish to move the position of the parts together.
CUBASE LE
4 – 100 Folder tracks
 Loading...