

Page 1
pool/spa control system
IntelliTouch
®
Pool and Spa Control System
Personality Kit
Installation Guide
IMPORTANT SAFETY INSTRUCTIONS
READ AND FOLLOW ALL INSTRUCTIONS
SAVE THESE INSTRUCTIONS
Page 2

© 2008 Pentair Water Pool and Spa, Inc. All rights reserved
This document is subject to change without notice
1620 Hawkins Ave., Sanford, NC 27330 • (919) 566-8000
10951 West Los Angeles Ave., Moorpark, CA 93021 • (805) 523-2400
Trademarks and disclaimers
IntelliTouch®, QuickTouch, MobileTouch®, ScreenLogic® and Pentair Water Pool and Spa® are trademarks and/or
registered trademarks of Pentair Water Pool and Spa, Inc. and/or its affiliated companies in the United States and/or
other counties. Crestron® is registered trademark of Crestron Inc. AMX® is registered trademark of AMX Inc.
Liton™ is trademark of Liton Inc. Unless noted, names and brands of others that may be used in this document are
not used to indicate an affiliation or endorsement between the proprietors of these names and brands and Pentair
Water Pool and Spa, Inc. Those names and brands may be the trademarks or registered trademarks of those parties
or others.
P/N 520101 - Rev D - 10/01/08
Page 3

Contents
IMPORTANT SAFETY PRECAUTIONS ............................................................... iii
Introduction .............................................................................................................. 1
IntelliTouch System Overview ................................................................................. 1
In the home .................................................................................................. 1
Around the pool ........................................................................................... 1
At the equipment pad ................................................................................... 1
IntelliTouch System Components ............................................................................ 2
Load or Power Center .................................................................................. 2
IntelliTouch Personality Kits ......................................................................... 2
IntelliTouch Personality Kit Contents............................................................ 3
In this Installation Guide .......................................................................................... 3
IntelliTouch Interfaces.............................................................................................. 4
IntelliTouch in your home ............................................................................. 6
IntelliTouch Interface Kits......................................................................................... 7
PC Interface (iTC15 Kit - P/N 520500) ........................................................ 7
Personal Digital Assistant (PDA) (iTC25 Kit - P/N 520501) ......................... 7
In-Wall Touch Screen (iTC35 Kit - P/N 520502)........................................... 7
Digital Wireless Tablet (iTC45 Kit - P/N 520503).......................................... 7
IntelliTouch ScreenLogic Interface Accessory Kits ................................................. 7
Installation Steps Summary..................................................................................... 8
Tools required .............................................................................................. 8
Accessory Equipment ............................................................................................. 9
Plumbing Requirements .......................................................................................... 10
Equipment Location ..................................................................................... 11
High Voltage Connections ....................................................................................... 14
Power Center and Load Center Description ................................................ 14
Power Center (without Sub-panel) ............................................................... 14
Load Center (with built-in Sub-panel)........................................................... 15
Installing the Outdoor Control Panel ........................................................................ 16
Connecting the Pre-Installed Relays ....................................................................... 17
Installing Auxiliary Relays ....................................................................................... 18
Installing the Valve Actuator .................................................................................... 19
Installing and Connecting Temperature Sensors ..................................................... 20
Water Temperature Sensor .......................................................................... 20
Ambient Air Temperature (Freeze Protection) Sensor ................................. 20
Solar Temperature Sensor (Optional) .......................................................... 20
Connecting IntelliTouch to a Standard Gas Heater .................................................. 21
Connecting the Transformer .................................................................................... 21
i
IntelliTouch Personality Kit Installation Guide
Page 4

ii
Contents (Continued)
Installing the Indoor Control Panel ........................................................................... 22
Drill Control Panel Wall Mounting Holes ....................................................... 22
Cabling the Indoor Control Panel at the Load Center................................... 23
Cabling the Indoor Control Panel ................................................................. 24
MobileTouch Wireless Controller ............................................................................. 26
Mounting and Connecting the MobileTouch Transceiver Module ................. 26
Connecting the Transceiver to the Personality Board .................................. 28
Using the MobileTouch Wireless Controller ................................................. 28
Setting up the MobileTouch Wireless Controller........................................... 29
Charging the MobileTouch Wireless Controller ............................................ 31
System Start-Up ..................................................................................................... 32
Check Electronics ....................................................................................... 32
System Test ................................................................................................. 32
Testing the auxiliary relays .......................................................................... 32
Solar System Installation ............................................................................. 33
Solar System Start-Up ................................................................................ 33
System Wiring Diagram (Power Center/Load Center) ................................. 34
Glossary.................................................................................................................. 36
Technical Support
Sanford, North Carolina (8 A.M. to 5 P.M. ET.)
Moorpark, California (8 A.M. to 5 P.M. PS.)
Phone: (800) 831-7133
Fax: (800) 284-4151
Web sites
http://www.pentairpool.com and staritepool.com
Download the IntelliTouch® User’s Guide (PDF) from the Web
http://www.pentairpool.com/owners_manuals/controls/IntelliTouch_Pool_Spa_Cntrls_Instll_Guide.pdf
Related IntelliTouch Manuals
IntelliTouch Load Center Installation Guide (P/N 520100)
IntelliTouch Expansion Center Kit User’s Guide (P/N 520471)
IntelliTouch i-Link Protocol Interface Adapter User’s Guide (P/N 520450)
ScreenLogic® User’s Guide (P/N 520493)
ScreenLogic Video & Lighting Protocol Adapter User’s Guide (P/N 520936)
IntelliTouch Personality Kit Installation Guide
Page 5
IMPORTANT SAFETY PRECAUTIONS
Important Notice:
Attention Installer: This manual contains important information about the installation, operation
and safe use of this product. This information should be given to the owner and/or operator of this
equipment.
WARNING - Before installing this product, read and follow all warning notices and instructions
which are included. Failure to follow safety warnings and instructions can result in severe injury,
death, or property damage. Call (800) 831-7133 for additional free copies of these instructions.
WARNING - Water temperature in excess of 100 degrees Fahrenheit may be hazardous to your
health. Prolonged immersion in hot water may induce hyperthermia. Hyperthermia occurs when the
internal temperature of the body reaches a level several degrees above normal body temperature of
98.6° F (37° C). The symptoms of hyperthermia include drowsiness, lethargy, dizziness, fainting,
and an increase in the internal temperature of the body.
iii
The effects of hyperthermia include: 1) Unawareness of impending danger. 2) Failure to perceive
heat. 3) Failure to recognize the need to leave the spa. 4) Physical inability to exit the spa. 5) Fetal
damage in pregnant women. 6) Unconsciousness resulting in danger of drowning.
WARNING - To reduce the risk of injury, do not permit children to use this product unless they
are closely supervised at all times.
WARNING - The use of alcohol, drugs, or medication can greatly increase the risk of fatal
hyperthermia in hot tubs and spas.
WARNING - Control System is intended to control heaters with built-in high limit circuits ONLY.
Failure to do so may cause property damage or personal injury.
WARNING - Do not use this product to control an automatic pool cover. Swimmers may become
entrapped underneath the cover.
WARNING - For units intended for use in other than single-family dwellings, a clearly labeled
emergency switch shall be provided as part of the installation. The switch shall be readily accessible
to the occupants and shall be installed at least 10 feet (3.05 m) away, adjacent to, and within sight of,
the unit.
CAUTION - Except for listed spa-side remote controls, install a minimum of five (5) feet from
the inside wall of the pool and spa.
IntelliTouch Personality Kit Installation Guide
Page 6

iv
IMPORTANT SAFETY PRECAUTIONS (Continued)
FCC Regulatory Safety Notice - The MobileTouch wireless control panel device has been
tested and found to comply with the limits for a Class B digital device, pursuant to Part 15 of the
FCC Rules. These limits are designed to provide reasonable protection against harmful interference
in a residential installation. This device generates, uses and can radiate radio frequency energy and,
if not installed and used in accordance with the instructions, may cause harmful interference to radio
communications. However, there is no guarantee that interference will not occur in a particular
installation. If this equipment does cause harmful interference to radio or television reception, which
can be determined by turning the equipment off and on, the user is encouraged to try to correct the
interference by one or more of the following measures:
• Reorient or relocate the receiving antenna.
• Increase the separation between the equipment and receiver.
• Connect the equipment into an outlet on a circuit different from that to which the receiver is
connected.
• Consult the dealer or an experienced radio/TV technician for help.
• Modifications not expressly approved by the party responsible for FCC compliance could
void the user’s authority to operate the equipment.
General Installation Information
1. All work must be performed by a licensed electrician, and must conform to all national, state,
and local codes.
2. Install to provide drainage of compartment for electrical components.
3. If this system is used to control underwater lighting fixtures, a ground-fault interrupter
(GFCI) must be provided for these fixtures. Conductors on the load side of the ground-fault
circuit-interrupter shall not occupy conduit, junction boxes or enclosures containing other
conductors unless such conductors are also protected by a ground-fault circuit-interrupter.
Refer to local codes for details.
4. A terminal bar stamped is located inside the supply terminal box. To reduce the risk of
electric shock, this terminal must be connected to the grounding means provided in the
electric supply service panel with a continuous copper wire equivalent in size to the circuit
conductors supplying this equipment (no smaller than 12 AWG or 3.3 mm). The bonding
lug(s) provided on this unit are intended to connect a minimum of one No. 8 AWG for US
installation and two No. 6 AWG for Canadian installations solid copper conductor between
this unit and any metal equipment, metal enclosures or electrical equipment, metal water
pipe, or conduit within 5 feet (1.5 m) of the unit.
5. The electrical supply for this product must include a suitably rated switch or circuit breaker
to open all ungrounded supply conductors to comply with Section 422-20 of the National
Electrical Code, ANSI/NFPA 70.1987. The disconnecting means must be readily accessible
to the tub occupant but installed at least 10 ft. (3.05 m) from the inside wall of the pool.
6. Supply conductor must be sized to support all loads. Maximum supply conductor current
must be 125 Amps at 125 VAC or 63 Amps at 240 VAC.
IntelliTouch Personality Kit Installation Guide
Page 7

Introduction
Welcome! Your Pentair IntelliTouch Pool and Spa and Control System will change the way you view pool
and spa controls. This innovation in pool and spa automation offers complete freedom for you while
having full automation control over your pool, spa, lights, heater, pump, cleaners and much more. You
can now schedule multiple start and stop times to control your lights, heater, spa jets, and filter pumps.
Using the IntelliTouch Indoor Control Panel or MobileTouch
pool, spa, and lights from anywhere inside or outside your home. Optional controllers are also available
such as the wireless Digital Tablet or Personal Digital Assistant (PDA), and in-wall Touch Screen that
can interface with your PC. IntelliTouch is a scalable system that can be upgraded to a completely
integrated home automation solution including audio, security, climate, irrigation and more. For more
information about using these interfaces, refer to the IntelliTouch ScreenLogic® Interface Accessory Kits
on page 7.
IntelliTouch System Overview
An IntelliTouch system can include five (5) to 40 high voltage relays circuits that can be used to control
any combination of pumps, lights, water features. A maximum of ten (10) relays can be housed in an
IntelliTouch Load Center or Power Center. Up to three (3) Load Centers or Power Centers can be
connected to a main Load Center for a maximum of 40 relays. User-configurable circuits can be used to
control equipment. The “Feature Macro” circuits feature allows any number of circuits to be combined
and controlled by a single button.
®
wireless control panel you can control your
1
An optional IntelliTouch Dimmer Module (P/N 520406) can be installed for use to dim any high voltage
®
incandescent light such as Pentair Amerlite
and Pentair SpaBrite® lights. The dimmer module supports
multiple lights from 100 watts up to 1,000 watts and installs in a standard relay location. Any number of
dimmers (up to 10 maximum) may be used with a maximum combined load of 4,000 watt in a single
Load Center.
In the home
The IntelliTouch system can utilize multiple wired and wireless controllers including the Digital Tablet,
Personal Digital Assistant (PDA), the wired in-wall Touch Screen, Indoor Control Panel, and the wireless
MobileTouch remote control panel. Your existing home PC can also be used to control the IntelliTouch
system via the ScreenLogic interfaces. A maximum of four (4) ScreenLogic interfaces can be used, for
example, four Tablets, or four PDA’s, or four in-wall Touch Screen’s, or four PC’s in any combination.
Around the pool
Located near your spa, the IntelliTouch, iS10 or iS4 spa-side remote provide control buttons for various
pool and spa functions. The iS10 spa-side remote also provides a temperature display.
At the equipment pad
The pool pump, filter, and various IntelliTouch remote controllers and interfaces are connected to the
IntelliTouch Load Center and/or Power Center enclosure which are located at the equipment pad. The
Load Center enclosure is where the high voltage lines from the circuit breaker panel junction box at the
home are connected to. The pool service person can periodically check pool operations from the Load
Center.
Also at the equipment pad there are system pool and spa pipes connected to the pump, heater and
filtration system. Mounted on top the valves are motorized valve actuators used to automatically change
the direction flow of water through the plumbing system. There are also temperature sensors and a
cable that connects to the heater.
IntelliTouch Personality Kit Installation Guide
Page 8

2
IntelliTouch System Components
The main required components of an IntelliTouch system is a Load Center or Power Center,
IntelliTouch Personality Kit, and Interface:
Load or Power Center
•
Load Center: Provides a larger footprint (17" W x 23" H) Includes built-in sub panel (125 AMPS)
capable of holding up to eight 1” breakers. Also includes five 25 AMP three HP relays, 110/240 V
transformer with secondary side circuit protection. Multiple knockouts for different sizes of conduit
are supplied as well as a GFCI side knockout. The Load Center provides ample space for all high
and low voltage wiring needs.
• Power Center: Offers a smaller footprint (17" W x 17" H) than the Load Center. The Power Center
does not include a circuit breaker base. Users should choose this enclosure if they already have
existing circuit breakers/sub-panel for their equipment.
• Expansion Kits: Models i5X and i10X, offer five or ten additional Auxiliary Circuits for systems
i9+3, i9+3S and i10+3D. Each IntelliTouch Expansion Kit requires a Load Center (P/N 520136) or
Power Center (P/N 520137). Up to three Expansion Kits and Load or Power Centers may be
added to a system, for control of up to 38 Auxiliary Circuits (40 auxiliary circuits for i10+3D).
IntelliTouch Personality Kits
There are several types of IntelliTouch control systems available for different pool/spa configurations:
• Shared Equipment: Pool and spa combinations with shared filtration system – Pool owners
can enjoy the convenience of motorized valves for water flow separation between pool and spa.
The Personality Kit models are:
• i5+3 (P/N 520505) – Four auxiliary circuits plus filter pump operation (create a Feature
circuit for valve actuators without using an existing output auxiliary circuit, and special
light functions for color lighting). Five relays are included in the Load Center.
• i7+3 (P/N 520507) – Six auxiliary circuits plus filter pump operation and the +3 option
(create a Feature circuit for valve actuators without using an existing output auxiliary
circuit, and special light functions for color lighting). Two relays are included in the kit
and five in the Load Center.
• i9+3 (P/N 520509) – Eight auxiliary circuits plus filter pump operation and the +3 option
(create a Feature circuit for valve actuators without using an existing output auxiliary
circuit, and special light functions for color lighting). Four relays are included in the kit
and five in the Load Center.
• Dual Equipment: Pool and Spa with Dual Sets of Equipment – The IntelliTouch i10+3D
(P/N 520510) is designed to operate two sets of pool equipment. Each set of a equipment (Pool or
Spa) can control one temperature setting. This IntelliTouch Personality Kit can control up to 10
pumps and/or lighting circuits, plus two heater circuits. The Personality Kit includes, eight auxiliary
circuits plus a filter pump.
The +3 option (create a Feature Macro circuit for valve actuators without using an existing output
auxiliary circuit). Five relays are included in the kit and five in the Load Center. You can create a
Feature circuit for valve actuators without using an existing output auxiliary circuit, and special
light functions for color lighting.
IntelliTouch Personality Kit Installation Guide
Page 9

• Single Equipment: Pool Only or Spa Only Applications – The IntelliTouch i5S+3 (P/N 520506)
and i9+3S provide advanced automation for a single body of water. The i5S+3 Personality Kits
includes four auxiliary circuits plus filter pump operation. Five relays are included in the Load
Center. The i9+3S (P/N 520508) Personality Kits includes eight auxiliary circuits plus filter pump
operation and the +3 option (create a Feature Macro circuit for valve actuators without using an
existing output aux circuit). Four relays are included in the kit and five in the Load Center. You can
create a Feature circuit for valve actuators without using an existing output auxiliary circuit, and
special light functions for color lighting. This model also allows HI-TEMP and LO-TEMP settings.
IntelliTouch Personality Kit Contents
The following items are included in the IntelliTouch Personality Kit. If any item is missing or damaged
in the IntelliTouch kit, contact your authorized dealer, or contact Pentair Technical Support (page 9).
• An IntelliTouch interface (see page 4)
• Outdoor Control Panel. Includes a motherboard and a Personality circuit board.
• Power Relays - (Models i5+3, i5S+3 no relays, i7+3 Qty. 2, i9+3, i9+3S Qty 4, i10+3D Qty 5,
i5x (no relays, i10x (5 relays)
3
• Valve Actuators - Qty 2 (Models i5+3, i7+3, i9+3)
• Temperature Sensors - Water Sensor (with long cable, including o-ring and hose clamp),
Air Sensors (with short cable). For i10+3D only, two Water Sensor (with long cable)
• Wiring Diagram Label for models i5S+3 and i9+3S and i10+3D. For models i5+3, i7+3, i9+3,
refer to the Load Center and Power Center inside front door.
• Load Center or Power Center parts bag: Includes relay screws. (see page 2)
• Label Sheet - A set of adhesive labels for custom identification (used to label the outdoor
control panel buttons). Use a pair of fine-tip tweezers to remove the labels from the sheet.
• IntelliTouch Personality Kit Installation Guide (this manual)
In this Installation Guide
Use the information in this manual for installing the IntelliTouch Personality Kit contents.
• For Load Center and Power Center installation instructions, refer to the Load Center and
Power Center Installation Guide (P/N 520100).
• For Accessory installation and operation instructions, refer to the User’s Guide provided
with the accessory.
Note: For IntelliTouch Indoor and MobileTouch Controller, refer to the IntelliTouch System
User’s Guide (P/N 520102).
IntelliTouch Personality Kit Installation Guide
Page 10
4
IntelliTouch Interfaces
Choose one or more of the following interface options to control pool and spa operations.
• iTC15 Kit (P/N 520500) – Includes Protocol Interface Adapter and wireless router that connects to
existing Desktop or Laptop PC. This allows control of IntelliTouch pool and spa systems via PC
(requires PC with an Ethernet connection, and Windows XP operating system).
• iTC25 Kit (P/N 520501) – Includes Wireless Personal Digital Assistant (PDA) with 3.5" color touch
screen custom configured for IntelliTouch systems, wireless router, and a Protocol Interface
Adapter.
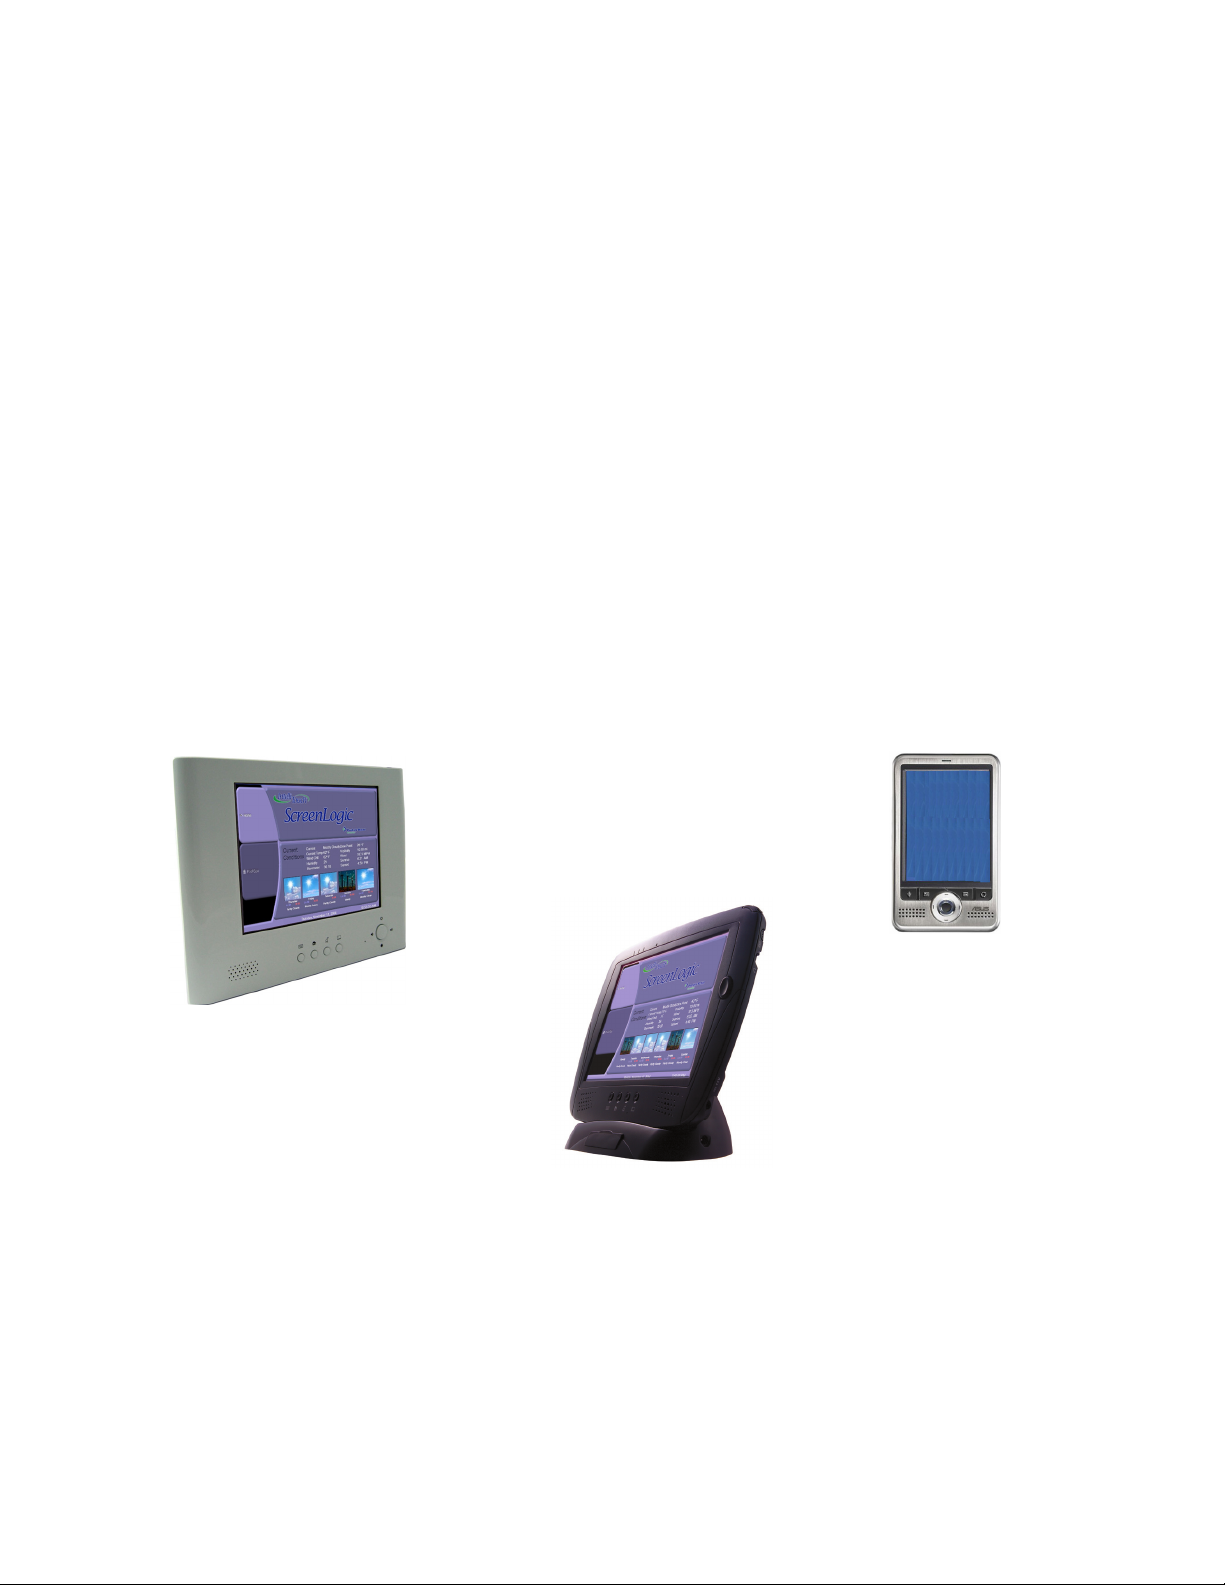
• iTC35 Kit (P/N 520502) – Includes in-wall color touch screen with Ethernet (RJ45) connection
and Protocol Interface Adapter and wireless router. The in-wall Touch screen is custom configured
for IntelliTouch systems. Requires an Ethernet cable to router.
• iTC45 Kit (P/N 520503) – Includes wireless Tablet with color touch screen, Protocol Interface
Adapter, and wireless router. The Tablet is custom configured for IntelliTouch
systems.
In-Wall Touch Screen
PDA
Digital Tablet
IntelliTouch Personality Kit Installation Guide
Page 11
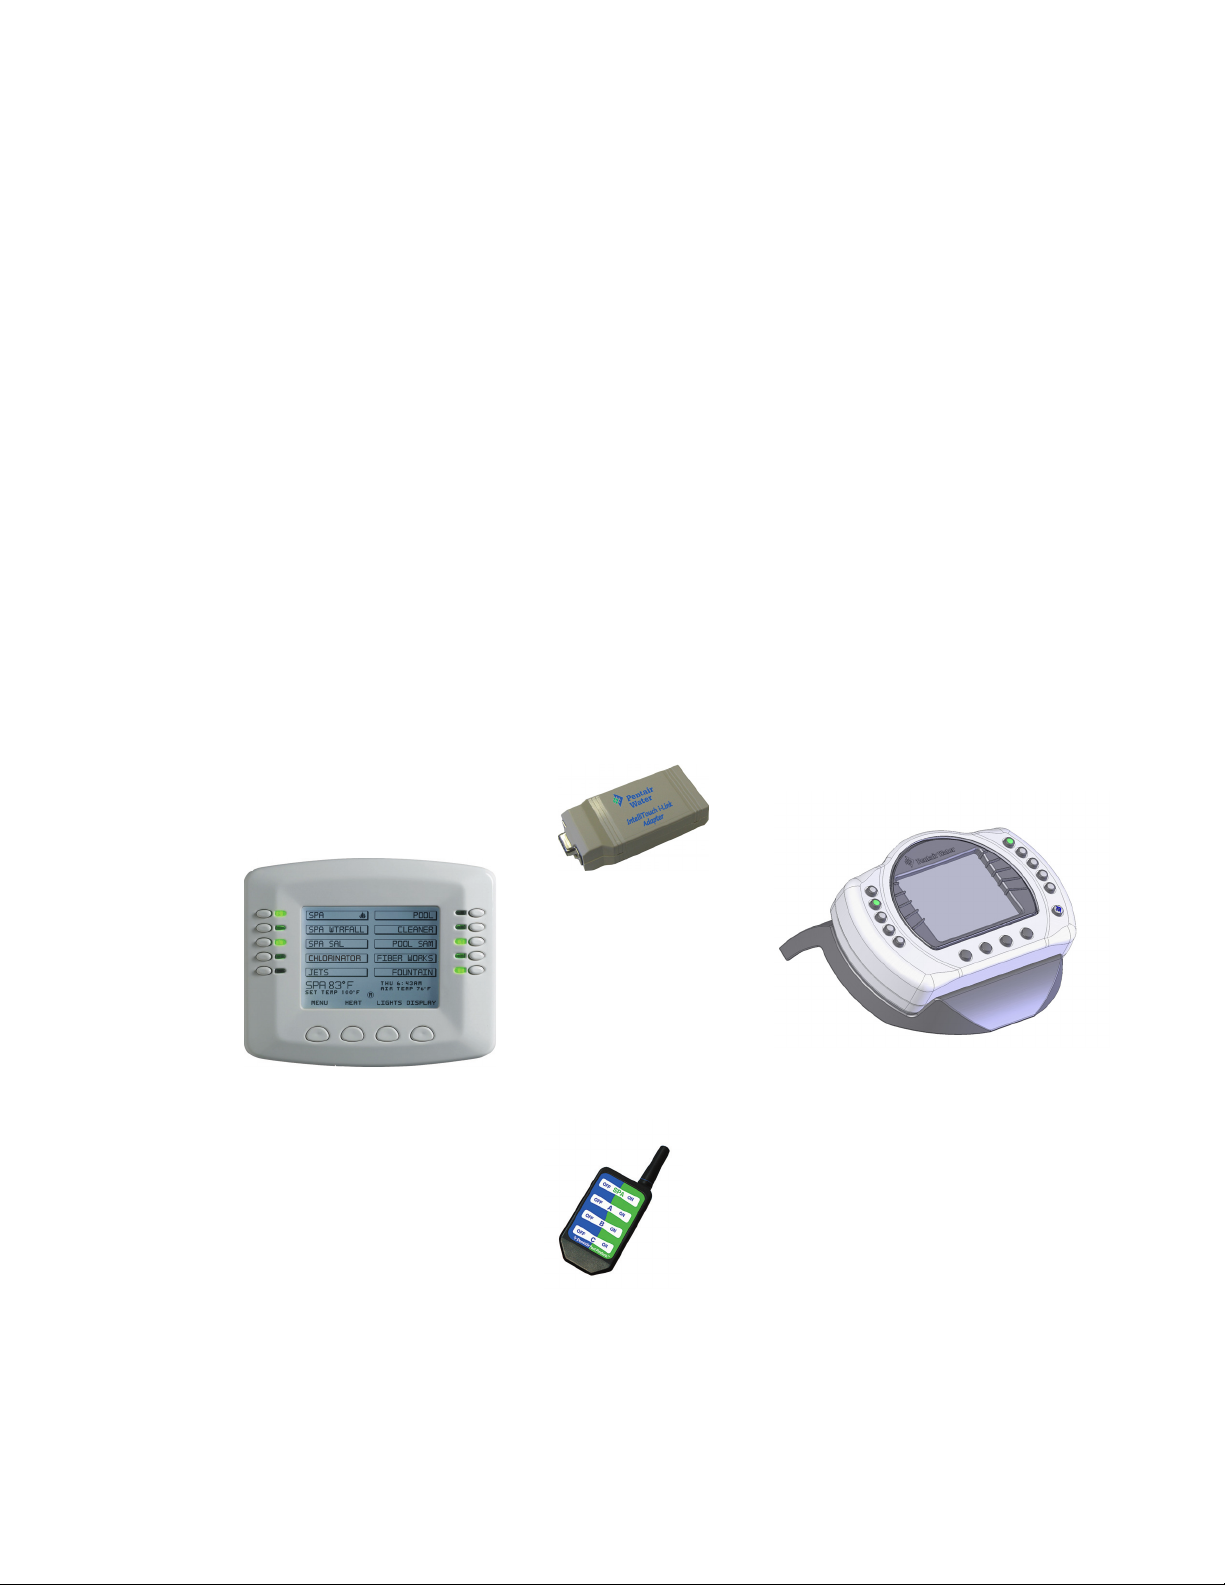
• Indoor Control Panel (P/N 520138) – 3.75’’ monochrome backlit LCD control panel. Connects to
the Personality board in the Load Center.
• MobileTouch Kit (P/N 520906) – 3.75’’ monochrome backlit LCD wireless control panel with
Transceiver antenna. Allows any IntelliTouch wired system to also have a wireless remote with all
the capabilities of the Indoor Control Panel. With an average range of 300 feet, pool owners have
system control anywhere around the home or yard. Powered by a rechargeable lithium-ion battery.
Includes a cradle for recharging. The MobileTouch control panel
without the Transceiver antenna (P/N 520907) is also available.
®
• QuickTouch
Wireless Remote (QT4) - (P/N 520148): Four-function wireless remote for pool and
spa functions of your choice. This controller transmitter operates up to 150 feet range from the
Load Center or Power Center.
• iS10 and iS4: 10-function (iS10) and 4-function (iS4) Spa-Side remote controller for pool and spa
functions of your choice. The controllers can operate up to 150 feet range from the Load or Power
Center.
• i-Link
™
Protocol Interface Adapter (P/N 520442): Allows home automation systems such as
Crestron®, AMX®, Liton™ and others to control IntelliTouch.
5
Indoor Control Panel
i-Link™ Protocol
Interface Adapter
MobileTouch® Wireless Controller
QuickTouch®
wireless remoter
(QT4)
IntelliTouch Personality Kit Installation Guide
Page 12
6
3
1
4
6
2
5
7
8
9
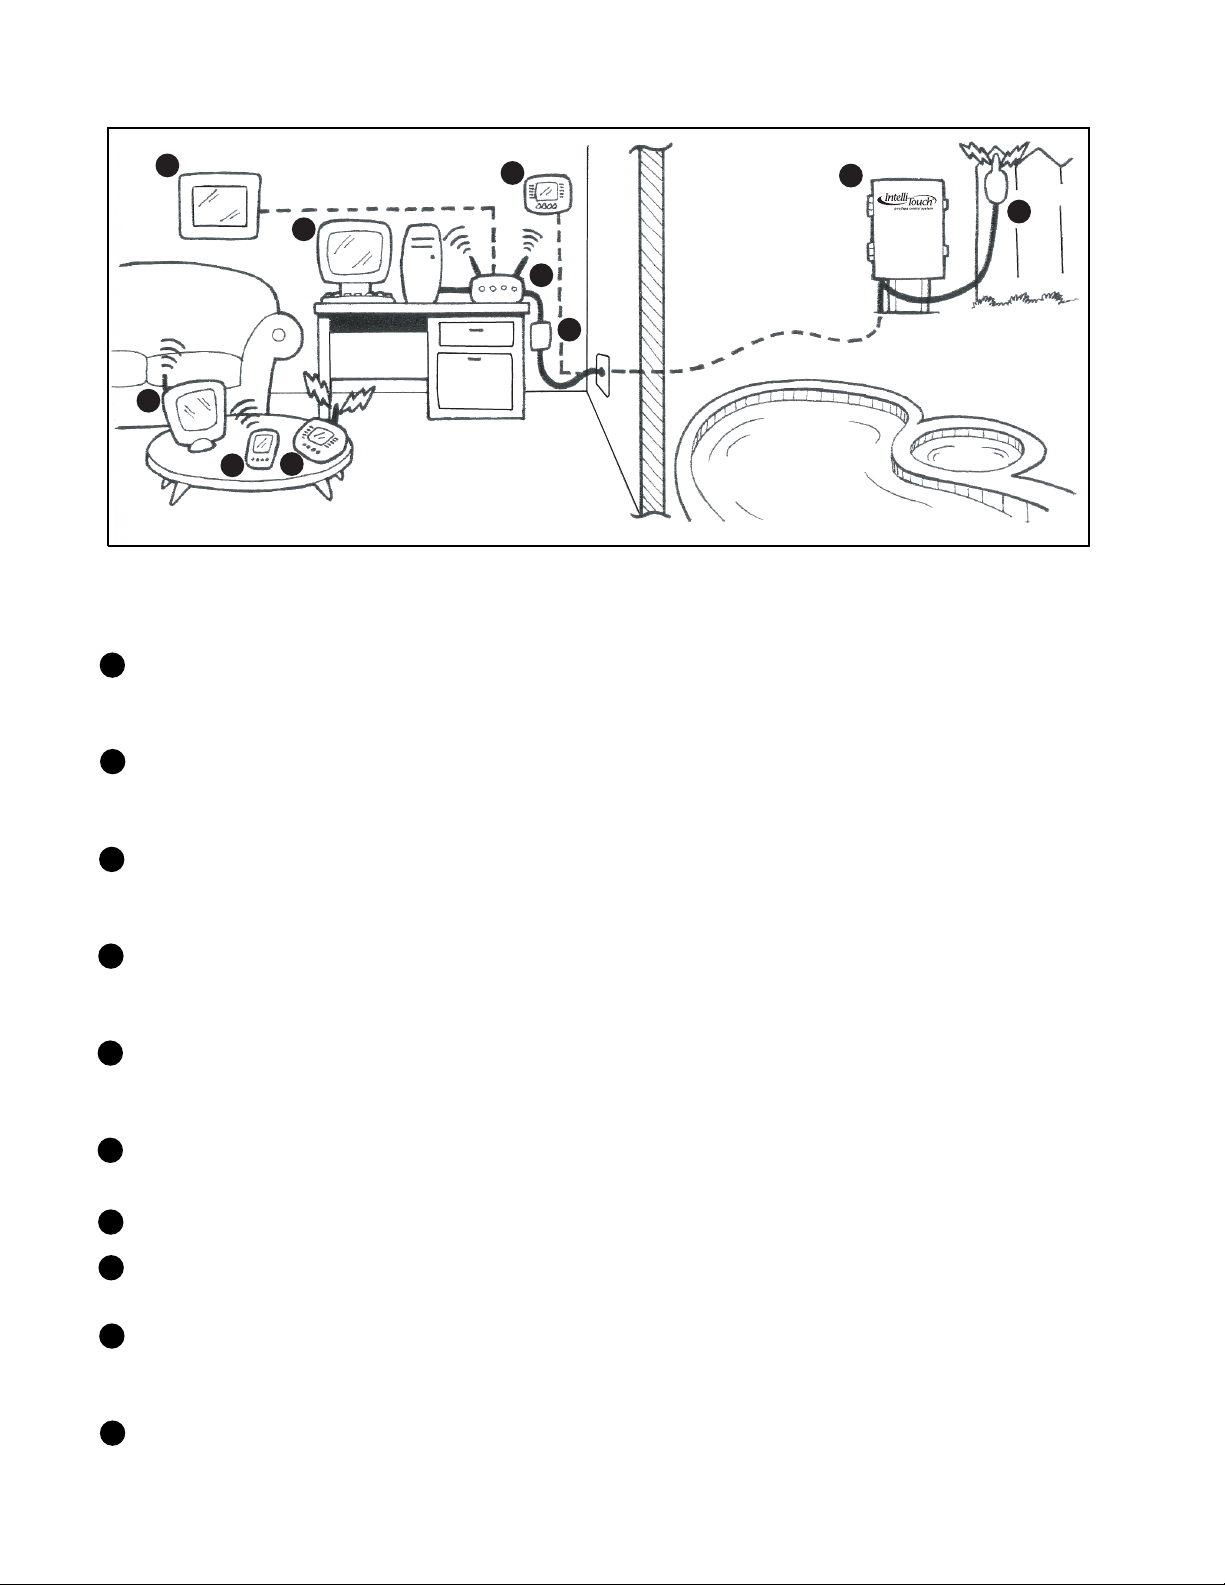
IntelliTouch in and around your home
1
Personal Computer (PC): Existing home owner’s PC or Laptop. Connects to a wireless router
and the IntelliTouch Protocol adapter for control of IntelliTouch pool/spa systems. Requires a PC/
Laptop (Windows XP) with Ethernet/RJ45 adapter installed.
10
2
Personal Digital Assistant (PDA): This wireless PDA with a color touch screen enables you to
control your pool and spa features using the IntelliTouch ScreenLogic interface. The PDA is
custom configured for IntelliTouch systems.
3
In-wall Touch Screen: A color display with Ethernet (RJ45) connector. Connects to the provided
wireless router and Protocol adapter via Ethernet (RJ45) for control of IntelliTouch pool and spa
systems. The in-wall Touch Screen is custom configured for IntelliTouch systems.
4
Wireless Tablet: This control panel consists of a color touch screen. Receives and transmits
commands via wireless router and Protocol adapter for control of IntelliTouch pool/spa systems.
The Tablet is custom configured for IntelliTouch systems.
5
Indoor Control Panel: This control panel consists of a 3.75’’ monochrome backlit LCD and
connects to the Personality Board in the Load Center or Power Center for control of IntelliTouch
pool and spa systems.
6
MobileTouch: This wireless control panel has a 3.75’’ monochrome backlit LCD. Receives and
transmits commands via the Transceiver antenna located at the Load or Power Center.
7
Wireless router: Connects to the PC or Laptop via Ethernet connection to the Protocol adapter.
Protocol adapter: Connects to wireless router via Ethernet connection and to Personality board
8
(Load/Power Center) via a four-wire 22-AWG cable.
9
Load Center or Power Center. The main control center. Includes the Outdoor Control Panel that
controls pump, heater, and light relays. Receives commands via Protocol adapter, and wireless
and wired control panels connected to the Personality board.
10
MobileTouch Transceiver antenna: Connects to the Personality circuit board. Sends and
receives commands to and from the MobileTouch wireless control panel.
IntelliTouch Personality Kit Installation Guide
Page 13

IntelliTouch Interface Kits
The following items are included in your IntelliTouch interface kit.
PC Interface (iTC15 Kit - P/N 520500)
• Protocol adapter for use with existing Desktop or Laptop PC
• Wireless router (802.11b/g) with AC adapter
• IntelliTouch ScreenLogic User’s Guide
• CD-ROM containing IntelliTouch ScreenLogic PC user interface software
Personal Digital Assistant (PDA) (iTC25 Kit - P/N 520501)
• Personal Digital Assistant (PDA) with built-in Wi-Fi 802.11 wireless LAN adapter with antenna.
Refer to the manufacturers documentation for kit contents
• Wireless router (802.11b/g) with AC adapter
• Protocol adapter
• IntelliTouch ScreenLogic User’s Guide
• CD-ROM containing IntelliTouch ScreenLogic PC user interface software
In-Wall Touch Screen (iTC35 Kit - P/N 520502)
• In-wall Digital Tablet, and AC adapter
• Wireless router (802.11b/g) with AC adapter
• Protocol adapter
• IntelliTouch ScreenLogic User’s Guide
• CD-ROM containing IntelliTouch ScreenLogic PC user interface software
7
Digital Wireless Tablet (iTC45 Kit - P/N 520503)
• Digital Tablet (with internal battery pack), stylus, built-in Wi-Fi 802.11 wireless LAN adapter with
antenna.
• Wireless router (802.11b/g) with AC adapter
• Protocol adapter
• IntelliTouch ScreenLogic User’s Guide
• CD-ROM containing IntelliTouch ScreenLogic PC user interface software
IntelliTouch ScreenLogic Interface Accessory Kits
Up to a total of four ScreenLogic interfaces can be used with an IntelliTouch system, as
shown above. If you need additional interfaces, first order one of the ScreenLogic interface
kits, then order one or more of the following accessory interfaces accessory kits:
• PDA, CD-ROM and manual (P/N 520497)
• In-Wall Touch Screen, CD-ROM and manual (P/N 520498)
• Tablet, CD-ROM and manual (P/N 520499)
Note: The above Accessory Kits interfaces do not include a Protocol adapter or wireless router.
IntelliTouch Personality Kit Installation Guide
Page 14

8
Installation Steps Summary
Note: The following installation instructions assume that the Load Center or Power Center is
installed at the equipment pad. For Load Center and Power Center installation instructions, refer to
the Load Center and Power Center Installation Guide (P/N 520100).
The recommended installation steps for the Personality Kit parts are as follows:
1
Install the Outdoor Control Panel (page 16): Install the Personality board in the Load Center
or Power Center. Also, review the high voltage connection locations in the Power/Load Center.
2
Connect pre-installed relays (page 17): Connect the relay plugs to the Personality board.
The four relays are pre-installed in the Power/Load Center.
3
Install auxiliary relays (page 18): Install and connect the relay(s). The number of relays
included in the Personality Kit depend on the Outdoor Control Panel model (i5, i5S (none),
i7+3 (Qty. 2), i9+3, i9+3S (Qty. 4), i10+3D (Qty. 5).
4
Install Valve Actuators (page 19): Install the valve actuators on the valve assembly and
connect to the Personality board.
5
Install Temperature Sensors (page 20): Install the water and air sensors and connect the
cable plugs to the Personality board.
6
Install Heat Thermostat (page 21): Connect the heater thermostat cable plug to the Personality
board.
7
Connect the Transformer (page 21): Connect the transformer cable plug to the Personality
board.
8
Install the Indoor Control Panel (page 22): Wall-mount the Indoor Control Panel and connect
to the Personality board.
9
Install the MobileTouch Wireless Control Panel (page 26): Mount the transceiver and
connect to the Personality board.
10
Affixing the System Wiring Diagram Label (page 31): Affix the wiring diagram on the inside of
the front door of the Power/Load Center (for models i5S, i9+3S, i10+3D only).
Tools required
• 3/16 in. diameter drill (for mounting Indoor Control Panel).
• 5/16 in. diameter drill (for mounting Water Temperature Sensor).
IntelliTouch Personality Kit Installation Guide
Page 15

Accessory Equipment
520142 i5X Expansion Kit five Auxiliaries.
520142 i10X Expansion Kit ten Auxiliaries.
520906 MobileTouch Wireless Control Panel and Transceiver.
520149 iS10+3 Ten-Function Spa-Side remote, Surface/recessed-mount faceplate, 150 ft. cable.
520355 Colored Faceplate Kit for surface-mount. Tan, Grey, or Black with label set.
520354 Colored Faceplate Kit for recessed-mount. Tan, Grey, or Black with label set.
520335 Mud box recessing iS10 into deck or tile.
520138 Indoor Control Panel, White.
520198 Two-Speed Three HP Relay up to three additional valve actuators.
520285 Valve module for controlling three additional actuators.
520106 Three HP Power Relay.
687000 Two Telephone remote control for any single circuit, usually Spa mode.
520148 QuickTouch Four-Function Wireless Remote Kit, Transmitter and Receiver.
520406 Dimmer Module. Supports up to 4,000 Watts maximum load (four dimmers handling
1,000 Watts each).
9
IntelliTouch Personality Kit Installation Guide
Page 16

10
Plumbing Requirements
It is important that the pool and spa plumbing system be in accordance with local codes and the
Recommended Hydraulic Schematics (page 11, 12 and 13). Before starting, please review the
diagrams and the following recommended guidelines:
1
The spa should be at or above the level of the pool.
If the spa is attached to the pool, provide a dam between the two bodies of water to allow the spa
to overflow into the pool. If the spa is not attached to the pool, an overflow, sufficient in size to
carry a full pump-flow, must be installed at the water level in the spa.
2
Plumb a three-port Intake Valve on the suction-side of the filter pump, so that the center port of
the valve is connected to the pump inlet. Connect the spa suction to one side of the Intake Valve,
and the pool suction to the other side.
3
Plumb a three-port Return Valve on the return-side of the heater, so that the return water will
enter the valve through the center port.
Connect the spa return to one side of Return Valve, and the pool return to the other side.
4
If required, install a spa make-up line (consisting of a manual gate or ball valve, for elevated
spas install a check valve) to bypass the pool return line. This will enable some of the
chemically-balanced water from the pool to cycle through the spa. The manual valve will allow
the amount of bypass to be adjusted.
5
If the spa is to be constructed in concrete, special provision should be made at this time for the
installation of the Spa-Side remote Control.
Select a convenient location in the deck or above water level in the spa wall (where the
Spa-Side remote will not be submerged by the spa water), and install a 6 in. to 12 in. length of
one inch PVC pipe to provide a receptacle for the Spa-Side remote. The pipe should be level
and protrude beyond the finished surface of the spa. It will be cut back later at installation time.
Reduce the pipe size down to ½ in. or ¾ in. conduit, and run it to the proposed Load/Power
Center location at the equipment pad. Use sweep elbows for turns.
The Spa-Side remote will not be installed until the spa construction is completed.
6
For systems which incorporate a skimmer, it is possible to balance the amount of suction
between the skimmer and main drain for maintenance purposes. This is easily accomplished by
installing a manual three-port mixing valve at the suction line. Plumb one port to the skimmer and
the other to the main drain.
If a “non-booster pump” pressure-side pool cleaner is being used, plumb a manual three-port
7
valve between the filter pump and filter, with the third port plumbed to the pool cleaner line, and
install a motorized two-port Pool Cleaner Valve at this line. The motorized valve will
automatically open whenever the Control System activates the pool cleaner.
8
If a booster pump pool cleaner is being used, plumb the booster pump so that its suction-side is
connected to the pool return, after the heater, and as close to the ground as practical.
IntelliTouch Personality Kit Installation Guide
Page 17

9
Plumb the solar feed and return lines between the filter and the heater. Install a three-port valve
at the feed line. Use a solar valve (model SOL-2T), to allow automatic draining of the panels.
A solar booster pump should be used when the distance to the panels exceed 200 ft., or the
10
panels are elevated higher than 25 ft.
Glazed solar panels require a drain valve (model HW-5B) to allow draining of the panels. This
11
prevents damage from overheating water. Install a drain valve at the solar feed line and connect
to the pool fill line.
12
Salt Chlorine Generator (SCG): IntelliChlor IC40 or IC20 salt chlorine generator cell with check
valve at the heater output. Refer to IntelliChlor User’s Guide (P/N 520589) for plumbing
requirements.
Equipment Location
All equipment, with the exception of the Spa-Side remote, must be located at least 10 ft. from the
water’s edge.
11
MobileTouch® wireless remote controller
INTELLICHLOR®
Recommended Hydraulic Schematic for Shared Equipment System
IntelliTouch Personality Kit Installation Guide
Page 18

12
PUMP
AIR
INTAKE
JET
1
2
SPA
LIGHT
REMOTE
SPA-SIDE
SPA
FILTER
PUMP
LOAD CENTER or POWER CENTER
SOLAR
SENSOR
11
WATER
SENSOR
FILTER
CVA-24
3
INTELLICHLOR®
2
VACUUM
HEATER
RELIEF
FILTER
PUMP
WATER
SENSOR
SKIMMER
FREEZE
SENSOR
FILTER
MAIN
DRAIN
MobileTouch® wireless remote controller
VACUUM
SENSOR
4
SOLAR
HW-5B
SOLAR
PUMP
5
6
CVA-24
RELIEF
HEATER
7
CLEANER
PUMP
CVA-24
POOL
LIGHT
POOL
WATERFALL
2
8
Recommended Hydraulic Schematic for Dual Equipment System
IntelliTouch Personality Kit Installation Guide
Page 19

13
MobileTouch® Wireless Controller
MobileTouch® Wireless Controller
IntelliTouch®,
EasyTouch®, SunTouch
Load/Power Center
IntelliTouch®,
EasyTouch®, SunTouch
Load/Power Center
TM
INTELLICHLOR®
TM
INTELLICHLOR® SCG
Recommended Hydraulic Schematic for Single Body System
IntelliTouch Personality Kit Installation Guide
Check Valve
2
Page 20

14
High Voltage Connections
WARNING - It is required that the main power into the home be switched OFF at the main circuit
breaker box whenever the high voltage cover-panel is removed. The main power must also be
switched OFF to access the Power/Load Center enclosure low voltage raceway.
Power Center and Load Center Description
Power Center and Load Center enclosures are identical with the exception of the circuit breaker
base (Sub-panel). For details, refer to the Load Center illustration, see page 15. Not shown is the
high voltage cover-panel and the front door. See the WARNING information above before opening
the cover-panel.
Power Center (without Sub-panel)
The Power Center is connected to an electrical circuit breaker panel (Sub-panel) installed
at the equipment pad. The AC power is provided from the Main-panel (located at the house) to the
Sub-panel. The Power Center is installed next to the Sub-panel. For complete Power/Load Center
installation instructions, refer to the Load/Power Center User’s Guide (P/N 520100).
Low voltage
compartment
High voltage
cover panel
attachment
screw holes
Power relays
Auxiliary,
2-Speed Pump
(1-3) or Dimmer
relay locations
Front door
removal screw
Low voltage
raceway
Enclosure
Mounting bracket
Low voltage
circuit breakers
System
transformer
Spring latch
Outdoor control
panel attachment
screw holes
Grounding screw
terminals
GFCI knockout
(approved rainproof
cover required)
Mounting bracket
IntelliTouch Personality Kit Installation Guide
Power Center Enclosure
(17” H x 17” W x 4.8” D)
Page 21

Load Center (with built-in Sub-panel)
The Load Center is installed at the equipment pad. The AC power for the Load Center is provided
from the Main-panel located at the house. For complete Power/Load Center installation
instructions, refer to the Load/Power center User’s Guide (P/N 520100).
Up to three additional Expansion Centers (i5x or i10x) can be added to a base
Note:
Power/Load Center: i9+3, i9+3S, i10+3D. For more information about using multiple
Power/Load Center, refer to the IntelliTouch Systems User’s Guide (P/N 520102) and the
IntelliTouch Installation Guide (P/N 520101).
15
Low voltage
compartment
High voltage
cover panel
attachment
screw holes
Auxiliary,
2-Speed Pump
(1-3) or Dimmer
relay locations
Power relays
Front door
removal screw
Enclosure mounting bracket
Low voltage
circuit breakers
Spring latch
System
transformer
Outdoor control
panel attachment
screw holes
Circuit breaker
base 125 AMP
(Sub-panel)
Spring latch
Low voltage
raceway
Mounting
bracket
Grounding screw
terminals
GFCI knockout
(approved
rainproof cover
required)
High voltage compartment
Load Center Enclosure
(23” H x 17” W x 4.8” D)
IntelliTouch Personality Kit Installation Guide
Page 22

16
Installing the Outdoor Control Panel
The Outdoor Control Panel includes a motherboard and Personality board. The Personality board
is mounted on top of the Motherboard which mounts on the back of the Outdoor Control Panel.
The control panel installs in the top part of the Power/Load Center enclosure. The Power/Load
Center receives control inputs from the Personality board and distributes high voltage power to
Pentair Valve Actuators (PVA), control pumps, lights, and heater operations. The IntelliTouch remote
Indoor Control Panel also controls these and other functions, such as pool and spa lights.
To install the Outdoor Control Panel:
1. Unlatch the front door spring latches, and open the front door of the Power/Load Center.
2. Remove the screws securing the high voltage cover-panel, and remove it from the
enclosure.
3. Remove the Outdoor Control Panel from the Personality Kit and its packaging.
4. Mount the Outdoor Control Panel in the top part of the Power/Load Center. Secure the lower
edge of the control panel with the two retaining screws. Once secured, the Control Panel
can hinge out and down to access the Personality board for low voltage connections.
5. When finished with the low voltage connections on the Personality board, close the hinged
control panel and secure it with the two access screws.
6. Install the cover-panel and secure it with the two screws.
7. Close the front door of the Power/Load Center. Fasten the two spring latches.
Outdoor Control Panel
Access screw
Cover-panel screw
(Cover-panel not shown)
Retaining screw
Access screw
Cover-panel
screw
Retaining screw
IntelliTouch Personality Kit Installation Guide
Power Center
Page 23

Connecting the Pre-Installed Relays
There are five pre-installed relays in the Load/Power Center. To connect the pre-installed relay cable
plugs to the Personality board:
• Route the power relay cable plugs up through the high voltage compartment to the
Personality Board. Insert the plug into the two-pin sockets, beginning with FLTR PUMP, then
AUX1, AUX2, AUX3, and AUX4. For the two-pin socket locations, refer to the diagram
shown below and the System Wiring Diagrams on pages 32 and 33.
• Dual Equipment: Pool and Spa with Dual Sets of Equipment – The IntelliTouch i10+3D
(P/N 520510) is designed to operate two sets of pool equipment. Each set of a equipment (Pool or
Spa) can control one temperature setting. This IntelliTouch Personality Kit can control up to 10 pumps
and/or lighting circuits, plus two heater circuits. The Personality Kit includes, eight auxiliary circuits
plus a filter pump.
• Single Equipment: Pool Only or Spa Only Applications – The IntelliTouch i5S+3 (P/N 520506) and i9+3S
provide advanced automation for a single body of water. The i5S+3 Personality Kits includes four auxiliary
circuits plus filter pump operation. Five relays are included in the Load Center. The i9+3S (P/N 520508)
Personality Kits includes eight auxiliary circuits plus filter pump operation and the +3 option (create a Feature
Macro circuit for valve actuators without using an existing output aux circuit). Four relays are included in the
kit and five in the Load Center. You can create a Feature circuit for valve actuators without using an existing
output auxiliary circuit, and special light functions for color lighting. This model also allows HI-TEMP and LOTEMP settings.
17
FLTR PUMP,
AUX1, AUX2,
AUX3, AUX4
Personality
Board
Feed each relay
cable plug up
through holes
IntelliTouch Personality Kit Installation Guide
Page 24

18
Installing Auxiliary Relays
Install additional axillary relays as needed. Depending on the Personality Kit there may be as many
as five additional relays.
To install a relay:
1. At the Power/Load Center, install the relays below the pre-installed relays. Secure in place
with two retaining screws.
2. Route the relay cable plug up through the holes into the high voltage compartment to the
Personality board.
3. Insert each auxiliary relay plug into the one of the two-pin sockets, beginning with AUX5,
AUX6, AUX7 and AUX8 on the Personality board. For wiring details, refer to the System
Wiring Diagrams on pages 32 and 33.
Note:
Install the optional Two-Speed Pump relay (P/N 520198) cable plug into the 2SPD
two-pin socket on the Personality board. For installation and operation information, refer to
the Two-Speed Relay User’s Guide (P/N 520210).
Personality Board
Relay Retaining
Screws
Optional Relays (3x)
IntelliTouch Personality Kit Installation Guide
Page 25

Installing Valve Actuators
For shared equipment systems there are two motorized valve actuators (CVA-24T, P/N 263045).
To install the valve actuators:
1. Remove the valve knob, handle and the four screws, from the valve cover (indicated with
arrows).
2. Align the splines of the actuator shaft over the shaft of the valve.
3. If the actuator is not aligned with the mounting holes on the valve cover, rotate the actuator
(while still attached to the valve) until the actuator is positioned correctly over the valve.
4. Secure the actuator with the screws provided. Only use self-tapping screws when required.
5. Mount the valve handle and knob onto the actuator.
Valve actuator
Valve Module Expansion
Board: Three additional valve
actuators can be added to the
system if necessary using a
Valve Module Expansion board
(P/N 520285). The expansion
board attaches to the edge of
the Personality board. For
installation and operation
information, refer to the
IntelliTouch Valve Actuator
Installation Guide (P/N 520294).
Screw
Screw
Screw
19
6. At the Load Center, route the cable up through the 1” grommet and low voltage raceway to
Personality board (see page 15).
5. Connect the Valve A actuator cable plug into the INTAKE (suction) 3-pin socket, and Valve
B actuator cable plug into the RETURN three-pin socket on left side of the Personality
board. For wiring details, refer to the System Wiring Diagrams, page 32 and 33. Excess
cable can be coiled in the enclosure low voltage raceway left side compartment. Do not coil
the wire in upper low voltage compartment.
For Solar Heating use VLV A (3-pin socket). Use VLA B (3-pin socket) for an optional
auxiliary relay.
Adjusting the valve position
If the valve rotates to the wrong position, adjust the switch on the back of the actuator
between ON1 and ON2 positions. This will rotate the valve to the correct position. The
following diagram shows the standard plumbing and valve actuator position.
▼
IN OUT
▼
IN
▼
▼
OUT
OUT (Valve A - Suction)
IN (Valve B - Return)
IntelliTouch Personality Kit Installation Guide
Page 26

20
Installing and Connecting Temperature Sensors
Water Temperature Sensor
To install the water sensor:
1. Select a convenient location to mount the water sensor in the plumbing system between the
filter pump and filter. Drill a 5/16" diameter hole in one side of the pipe,
2. Insert tip of sensor into the hole. Use the band clamp to secure the sensor to the pipe.
Tighten the clamp just enough so that the o-ring begins to flatten. Do not overtighten
3. Run 22 gauge two-conductor cable (included in kit) between the sensor and the Personality
board. Route the wire up through the Load Center low voltage raceway to the Personality
board.
4. Fasten the cable to the plumbing with cable ties.
5. Cut off the excess wire and the strip conductors ¼ inch. Use waterproof connectors
(provided) to connect the sensor to cable. Insert the wires into the WATER SENSOR screw
terminals (J5) on right-side of the Personality board. For wiring details, refer to the System
Wiring Diagrams, page 32 and 33.
Ambient Air Temperature Sensor (for freeze protection)
To install the air sensor:
1. Mount the sensor in the open air, in a shaded area, away from air conditioners. During the
winter months, to avoid freeze damage to pool and spa equipment, mount the air sensor in a
shaded area to assure proper temperature readings. The main screen displays the current
ambient air temperature.
2. Route the wire through the low voltage raceway to the motherboard.
3. Fasten the cable to the plumbing with cable ties.
4. Cut off the excess wire and the strip conductors ¼ in. Insert the wires into the AIR screw
terminals (J5) on right side of the Personality board. For wiring details, refer to the System
Wiring Diagrams, page 32 and 33.
Solar Temperature Sensor (Optional)
Run a two-conductor cable between the sensor and the IntelliTouch Load Center.
To install the solar sensor:
1 Mount the sensor on a flat surface, with the same exposure to sun as the solar collectors
(next to the collectors is recommended) or any sunny location. Do not let the sensor touch
the panels. WARNING: DO NOT DRILL HOLE AND CLAMP SENSOR INTO SOLAR
PIPE. For glazed panels, install the sensor between collector and glazing.
2 If necessary, splice a two-conductor extension wire to the sensor. Run two-conductor cable
between the sensor and the Load Center. Use waterproof connectors to connect the sensor
to the cable. Use twisted pair 20 AWG outdoor rated sensor wiring and be sure the wire
connections are protected from the environment. Use shielded cable for long runs or runs
near other electrical wiring.
3 Strip the conductors ¼ in. Insert the wires into the SOLAR SENSOR screw terminals (J5)
on right side of the Personality board. For wiring details, refer to the System Wiring
Diagrams, page 32 and 33.
IntelliTouch Personality Kit Installation Guide
Page 27

Connecting IntelliTouch to a Standard Gas Heater (Pentair MiniMax,
MasterTemp)
To connect a Pentair MiniMax, or MasterTemp, or to the IntelliTouch Load Center:
The following instructions are for gas heaters and heat pumps with low voltage thermostats. To
connect the heater thermostat cable plug to the Personality board:
1. Switch the power OFF to the heater.
2. Remove the factory installed jumper from the heater’s “Ext Switch” connector. CAUTION
IMPORTANT: DO NOT disconnect or wire around the thermostat, pressure switch, high
limit switch, or other safety devices. At the heater, connect the wires in accordance with
heater manufacturer’s instructions. For older heaters without instructions for remote
operation, connect the wires to the Fireman’s switch connections in series with the
thermostat, pressure switch, and other safety switches.
3. Run a two-conductor cable from the heater thermostat “Ext Switch” connector to the low
voltage raceway to the Personality board in the Load Center. NOTE: Use 105° C
temperature rated wire for connection to the heater. When connecting wires inside the
heater, be cautious of HOT internal parts of the heater. Refer to the minimum temperature
rating for wires recommended by the manufacturer. See the heater owners manual for
details.
4. Strip the conductors ¼ in. Insert the two wires into the GAS HEATER (J30) two-screw
terminal on the left side of the Personality board. For wiring details, refer to the System
Wiring Diagrams on pages 32 and 33.
CAUTION: Be sure that the wires from the heater to the Load Center are not near or
touching any line voltage wires in the heater. Failure to follow these instructions may cause
the heater to malfunction.
21
5. Set the Power (Thermostat Select) switch to either “Pool” or “Spa.”
6. Set the “Pool” and “Spa” thermostats to their maximum position.
Connecting the Transformer
To connect the transformer wire harness onto the
Personality board:
• Connect the transformer plug onto connector
J2 on the right side of Personality board. The
plug is keyed onto the pins so that the six
wires point towards back of the board. From
left to right the wire colors should be blue,
orange, red. For the connector location, refer
to the diagram shown below and the System
Wiring Diagrams for models i5, i7+3, and
i9+3, page 32 and 33.
IntelliTouch Personality Kit Installation Guide
Page 28

22
Installing the Indoor Control Panel
The Indoor Control Panel controls pool, spa, lights and other functions of the IntelliTouch system
from inside the home or a sheltered area. Select a convenient wall location inside the house or
other weather-protected area for mounting the Control Panel.
Drill Control Panel Wall Mounting Holes
To drill the control panel mounting holes:
1. The Control Panel is 5-¾ in. wide. Using the cutout template below, mark the three screw
locations on the wall for the mounting holes. Drill the three mounting holes. If the screws
are not being screwed into studs, drill 3/16 in. holes and insert wall anchors (included in the
kit) as required.
2. Drill a hole ¼ in. within the gray area shown in the template for the communication cable to
feed through.
Edge of Control Panel
Cut-out Here
DRILL HOLE FOR
COMMUNICATION CABLE
ANYWHERE IN SHADED AREA
3/16" Hole for Plastic Anchor
Edge of Control Panel
Indoor Control Panel Template
Flathead Screw & Sheave
3/16" Hole for Plastic Anchor
3/16" Hole for Plastic Anchor
Cut-out Here
IntelliTouch Personality Kit Installation Guide
Page 29

Cabling the Indoor Control Panel at the Load Center
To connect the Indoor Control Panel cable to the Personality board:
1. Turn off the main system power before making any connections.
2. Run a UL approved four conductor cable (22 AWG) from the Indoor Control Panel to the
Load Center. The preferred wire color scheme is: Red, yellow, green, and black.
CAUTION Do NOT short GND or +15V connections (Red or Black) to data lines (Green or
Yellow). The Control Panel board may be permanently damaged. Do NOT reverse GND or +15V or
system will not operate.
3. Route the cable up through the low voltage raceway to the Personality board. To access the
Personality board, refer to Installing the Outdoor Control Panel, page 16.
4. Strip back the communication cable conductors ¼ in. Insert the wires into the screw
terminals (provided in the kit). Secure the wires with the screws. Make sure to match the
color-coding of the wires: Red = +15, Yellow = +DT, Green = -DT, and GND = Black.
5. Insert the cable plug onto either of the COM PORTS (J7 or J8) connectors located on the
left side of the Personality board. For connector locations, refer to the Wiring Diagrams on
pages 32 and 33.
23
6. Proceed with Cabling the Indoor Control Panel, page 24.
BLK
GRN
YEL
RED
Personality board
(Connector J7 or J8)
IntelliTouch Personality Kit Installation Guide
Page 30

24
Cabling the Indoor Control Panel
To connect the communication cable to the Indoor Control Panel:
1. Route the cable through the house wall to the location of the Indoor Control Panel. Pull a
working length of the communication cable out of the house wall.
2. Drill the flathead screw (provided) through the mounting sheave and into the wall.
Sheave
3. Remove the control panel front cover: From the front of the control panel, insert the tip of
a small flat-blade screw driver into the notch on the top edge of the control panel cover and
gently pry the cover off from the control panel base.
Notch
Front cover
Indoor Control Panel (front view)
IntelliTouch Personality Kit Installation Guide
Notch
Page 31

4. Strip the leads of the communication cable wires ¼ in. Insert the wires into the screw
terminals (provided in the Personality Kit). Make sure to match the color-coding of the wires
(see front of circuit board). An optional cable clip feature has been built into the back plate to
help guide the communication cable.
5. Insert the screw terminal connector onto the circuit board socket.
6. Mount the control panel on the wall. Slide the control panel back plate over the mounting
sheave and slide down. Rotate back plate as necessary to make level. The bottom mounting
holes should be visible through cutouts in the controller board.
7. Feed the cable back into the wall so that the remainder left outside the wall fits behind the
back plate.
8. Install the pan head screws into the wall to secure the back plate.
9. Mount the control panel cover over back plate and snap in place to secure. Remove the
clear protective plastic sheet from the control panel LCD.
25
1 GND BLACK
2 -D GREEN
3 +D YELLOW
4 15V RED
Screw Terminal
Connector
Indoor Control Panel (rear view)
IntelliTouch Personality Kit Installation Guide
Page 32

26
MobileTouch Wireless Controller
The MobileTouch wireless controller provides wireless control of the IntelliTouch system. The
MobileTouch controller kit consists of:
• Hand-held wireless LCD control panel
• Cradle AC adapter for recharging the unit
• Transceiver antenna module
Mounting and Connecting the MobileTouch Transceiver Module
The Transceiver module is a two-way radio device with an attached antenna that communicates to
and from the IntelliTouch system via the MobileTouch hand-held wireless controller. Mount the
Transceiver module at a convenience location (on a flat vertical surface) near the Load Center or
Power Center, at a minimum of 5 ft. above ground level to optimize the functional operating range of
the MobileTouch wireless control panel.
CAUTION To avoid signal interference, mount the Transceiver module antenna a minimum of
10 ft. away from the Load Center or Power Center, any metal surface/structure, or air blower located
in the immediate area of the equipment pad.
The MobileTouch wireless controller has an operating range of up to 300 ft. from the MobileTouch
transceiver antenna (line of sight) which is typically located near the IntelliTouch load center. The
optimum wireless transmit and receive range may be affected by physical obstructions, (especially
those containing metal), weather conditions, and geographical features.
To mount the Transceiver module:
1.
2. Remove the two retaining screws located on the underside of the transceiver. Carefully slide
3. Remove the Transceiver circuit board. Slide the circuit board up and out of the back plate.
4. Position the back plate against the mounting surface so that the transceiver is oriented in an
5. Feed a UL approved four 22 AWG conductor cable through the knockout hole at the bottom
6. Position the back plate over the mounting points and secure it with the four mounting screws
7. Carefully slide the Transceiver circuit board back into the back plate.
8. Strip back the wires ¼ inch. The recommended wire color scheme is red, yellow, green, and
9. Slide the Transceiver circuit board case into the back plate. Secure the case using the two
10. Proceed with Connecting the Transceiver Module Cable to the Personality Board, on
CAUTION - Switch the main power off at the Load Center or Power Center.
the transceiver case up and off the Transceiver back plate.
upright position (with the antenna pointing upwards). Use a pencil to mark the four mounting
points. Drill four 3/16 in. diameter holes into the mounting surface and insert the four plastic
anchors (provided in the Personality Kit).
of the enclosure. Do not run wire through the drain holes. If the knockout hole is not being
used to run wire through, drill a hole through the bottom of the back plate and seal it using a
fitting with a few feet of conduit or some other sealant between the case and the cable.
(provided in the Personality Kit).
black. Insert the wires into the screw terminals (provided in the Personality Kit). Connect the
screw terminal connector onto the circuit board. For wiring details, see page 20.
retaining screws.
page 28.
IntelliTouch Personality Kit Installation Guide
Page 33

CAUTION Water damage may occur if the case retaining screws are not secured or a new
hole is drilled for the cable and not sealed. Do not seal drain holes.
Case
27
Antenna
Transceiver Circuit Board
Mounting point (4x)
Back plate
Knockout hole
1DNGKLB
2TD-NRG
3TD+LEY
4V51DER
Screw terminals
Retaining screws
Transceiver Module
IntelliTouch Personality Kit Installation Guide
Page 34

28
Connecting the Transceiver to the Personality Board
To connect the Transceiver Module cable:
1.
CAUTION - Switch the main power off at the Load Center or Power Center.
2. At the Load Center or Power Center, route the Transceiver module cable up through the low
voltage raceway to the Personality board. To access the Personality board, refer to Installing
the Outdoor Control Panel, page 16.
3. Strip back the cable conductors ¼ inch. Insert the wires into the screw terminals (provided
in the Personality Kit). Secure the wires with the screws. Make sure to match the colorcoding of the wires: GND = Black, Green = -DT, Yellow = +DT, and Red = +15
4. Insert the screw terminal connector onto either of the COM PORTS (J7 and J8) connectors
located on the left side of the Personality board. For wiring details, refer to the Wiring
Diagrams for models i5, i7+3, and i9+3, page 32 and 33.
Note:
Multiple wires may be inserted into a single screw terminal.
Personality Board (Left-side)
BLK
GRN
YEL
RED
Using the MobileTouch Wireless Controller
Do not leave the MobileTouch wireless controller in direct sunlight for extended periods of time.
If the control panel LCD screen darkens, place it in the shade for five minutes or until the screen
returns to normal before using. Do not adjust the contrast, the screen will become too light to see
when it cools down to its normal operating temperature.
WARNING Do not plug in the cradle AC adapter into an AC wall outlet power source within five
(5) feet of the pool and spa. Canadian installations require a minimum of three meters from pool
water. Do not recharge outdoors.
CAUTION The hand-held LCD control panel is NOT intended to be submersible. Remove unit
immediately if dropped in water.
IntelliTouch Personality Kit Installation Guide
Page 35

Setting up the MobileTouch Wireless Controller
The following describes how to assign the MobileTouch wireless controller a communication address
for the first time and to add a MobileTouch controller to a system with a controller already installed.
To manually setup a MobileTouch wireless controller:
1. On the Outdoor Control Panel, press the Reset button.
First Time MobileTouch install: The three red System Control LEDs will be lit (solid). Wait a few
2.
seconds then press the “F” Filter button. For model i10+3 press the “P” Pool Filter Pump
button.
Add a MobileTouch with existing MobileTouch installed: The three red System Control LEDs will be
lit (solid). Wait a few seconds then press the “V” button or “1” button.
29
3. The three red System Control LEDs and the auxiliary button LEDs will begin cycling.
the LEDs stop cycling.
The three System Control LEDs will start to blink on and off. The system
is ready to enable the MobileTouch wireless controller. Continue with step 4.
Note: Press V or 1 button to add a MobileTouch
controller with existing MobileTouch controller(s)
already installed.
Three System
Control LEDs
F button
(i5+3, i5S+3 i7+3,
i9+3S, i9+3D)
P button (i10+3D)
Auxiliary LEDs
Reset button
Go to the Advanced screen.
Getting There
MENU SETUP ADVANCED
Wait until
4. From the MobileTouch controller Advanced
screen, press the lower buttons 2 and 4 at
the same time. The Service Personnel screen
will be displayed.
Press button 2 and 4 at the same time
to access the Service Personnel screen
IntelliTouch Personality Kit Installation Guide
Page 36

30
Setting up the MobileTouch Wireless Controller (Continued)
5. Press the button next to LOCK ON ADDRESS to access the next screen.
6. Press the button next to LOCK ON ADDRESS to assign a unique frequency for the MobileTouch
controller to avoid inference from other wireless devices within range of the MobileTouch
transceiver.
7. After selecting “Lock On Address” the MobileTouch controller is now ready to operate the
IntelliTouch system. The “Service Personnel” screen will be displayed.
8. Press Exit to return to the main screen or proceed with Step 9 if you are adding multiple
MobileTouch controllers while the IntelliTouch outdoor control panel LEDs are flashing.
9. To add another MobileTouch controller at this time, repeat Steps 4 through 8 for each
controller, if not, continue with Step 10.
10. Return the Load Center or Power Center. The System Control LEDs will be flashing. Press the
Reset button. When the “Auto” LED is illuminated the process is complete and the system is ready
for operation.
IntelliTouch Personality Kit Installation Guide
Page 37

Charging the MobileTouch Wireless Controller
When you are not using the MobileTouch controller, place it in the cradle to recharge the battery. This
allows the battery to be fully charged at all times.
To charge the MobileTouch controller battery:
• Plug the AC adapter into an AC wall outlet. Insert the AC Adapter plug into the bottom of the cradle
and place the MobileTouch controller in the cradle.
Note: When the MobileTouch controller is placed in the cradle the display and backlight will be on.
After five minutes the backlight will shut off. The MobileTouch controller and display are always on
when seated in the cradle. To turn the backlight on, press any button.
Charging the battery:
• If the battery screen icon displays one or no bars or the screen is blank, this may indicate that the
battery cannot power the device and needs recharging. During battery recharge, the battery icon
bars scroll from right to left. A complete battery charge takes about 3 to 4 hours. After a complete
battery recharge, the battery icon is replaced with a power plug icon, indicating the battery is fully
charged and is now operating on AC power from the cradle. Note: If the battery requires
replacement, only use Pentair replacement battery (P/N 520815Z).
Using the MobileTouch Wireless Controller
The range of the MobileTouch wireless controller can be up to 300 feet from its transceiver antenna
(line of sight). The transceiver antenna is typically located outside near the IntelliTouch Load Center.
The device can be used all day at full power with a complete battery charge (3 to 4 hours).
To use the MobileTouch wireless controller:
31
1. Remove the MobileTouch wireless controller from the cradle. The controller can also be used while
seated in the cradle with AC power connected to the cradle.
2. Press the Power button on the front right-side to switch the unit ON. The main screen is displayed.
The LCD backlight will turn off in five minutes if not in use. The battery icon displays three bars,
indicating the battery is fully charged. Press the controller’s power switch to switch Off the device.
MAIN SCREEN CHECK BATTERY ICONS
Ample battery charge. Bars
scroll right to left during
battery recharge.
Sufficient charge left in the
batteries to operate device.
Batteries will deplete soon.
Cradle
Plug icon displays when
the battery is fully charged
and device is operating on
AC power from cradle.
MobileTouch Wireless Controller
Power On/Off button
IntelliTouch Personality Kit Installation Guide
Page 38

32
System Start-Up
The following information describes basic start-up procedures. For more detailed troubleshooting
information, refer to the
Power/Load Center check the following:
Check Electronics
Check that the following plugs are seated correctly on the Personality board:
• Relay connectors - FLTR PUMP - AUX1 - AUX10
• Temperature sensors connectors WATER, SOLAR, AIR
• Transformer wire harness J2 attached to the Personality board.
• Heater control connector ELEC HTR or two-wire screw terminal.
Refer to Summary Installation Steps (page 8) and Power/Load System Wiring Diagrams, page 25
and 26.
System Test
IntelliTouch Systems User’s Guide (P/N 520102)
. Before you power up the
The following describes how to test the Outdoor Control Panel to activate the heater, valves and
pumps. This test assumes that all system equipment has been properly installed and connected to
the Power/Load Center.
Testing Valve Actuators and Pumps
Use the following steps to test the valve actuators (CVA24T) for proper rotation. For Outdoor Control
Panel System i5, i7+3, i9+3 (shared equipment).
To test the valve actuators and pump:
1. Power up the Power/Load Center.
2. Press the SYSTEM CONTROL button on the Outdoor Control Panel until the SERVICE light
is on. .
3. Press the V (Valve) button to select POOL.
4. Press the F (Filter Pump) button to activate the filter pump. Water will be removed from the
pool and returned to the pool.
5. Set both valve actuators (CVA-24T) for suction and return. Use the toggle switch on the rear
of the CVA-24 to withdraw and return water from the pool.
Note:
With the filter pump operating, if the water is not being removed and returned to the
pool, it may be necessary to reverse the RETURN with VLV A (or VLV B) plugs on the
Personality board.
Testing the auxiliary relays
Affix the auxiliary relay labels to the appropriate buttons on the Outdoor Control Panel. If necessary,
write the function on the control panel.
• Toggle the filter pump, each auxiliary circuit, heater and solar and verify the function. Press
the SYSTEM CONTROL button to set the system in “AUTO” mode when done.
IntelliTouch Personality Kit Installation Guide
Page 39

Solar System Installation
• To ensure maximum flow of water through the solar panels, a solar booster pump should be
added if panels are installed at a very high elevation.
• It is recommended that the solar panels are mounted in a way that gravity will allow draining
whenever the filter pump is not on.
• For systems with glazed panels, damage can occur from overheating if the filter pump is still
running after the solar has turned off. To enable glazed panels to automatically drain
whenever the solar turns off (even if the filter pump is still running), a 1/2" motorized solar
drain valve should be plumbed from the solar feed line, through a check valve, to a zero psi
point (such as pool fill line or jet air intake).
Solar System Start-Up
1. Switch power on to the IntelliTouch Load Center.
2. If pool cleaner protection has been added to the system, the pool cleaner pump motor
should be activated whenever the pool cleaner timer is on. Momentarily turn pool cleaner on
and off to check the motor is operating correctly.
33
3. Check that Solar Valve is in “solar bypass” position, diverting water away from solar panels.
If Solar Valve is staged incorrectly (diverting water to the solar panels), reverse switch on
back of Valve Actuator (change from ON1 to ON2, or vice-versa). The Valve Actuator will
automatically rotate to the correct position.
4. Check that Solar Valve has rotated from the “solar bypass” position to the “solar” position,
diverting water through the solar panels.
5. The system is now ready to be operated as desired.
Pool Cleaner Protection
Recommended for use in pool systems which utilize a “booster pump” pool cleaner. This feature
automatically turns off the pool cleaner pump for a few minutes whenever solar is initiated. This will
protect the pump from damage caused by air in the solar panels at system start-up.
Affixing the System Wiring Diagram Label
To affix the wiring diagram label on the enclosure inside front door:
1. Open the enclosure front door.
2. Peel the backing off the wiring diagram label.
3. Position the label in middle of the inside of the front door. Apply even pressure on the surface
of the label to secure in place.
IntelliTouch Personality Kit Installation Guide
Page 40

34
IntelliTouch Personality Kit Installation Guide
System Wiring Diagram
(Power Center)
Page 41

35
System Wiring Diagram
(Load Center)
IntelliTouch Personality Kit Installation Guide
Page 42

36
Glossary
Expansion Kit: A kit that includes additional auxiliaries to an existing Personality Kit. Requires a
Load Center for each Expansion Kit.
Feature Circuits: Programmable circuits that may control relays and/or valve actuators. For details,
see the IntelliTouch Systems User’s Guide (P/N 520102)
High Voltage Compartment: Large lower right compartment of Load Center for all high voltage
wiring including circuit breakers, relays, and GFCI.
Indoor Control Panel: This 14 button remote controller with LCD (liquid crystal display) is wired to
the Personality board in the Power/Load Center. The control panel can be wall mounted inside a
house to control IntelliTouch Systems.
iS4: Four function Spa-Side remote. Can be spa wall or deck mounted.
iS10: Up to ten function spa-side remote with temperature changing capability. Can be spa wall or
deck mounted.
Load Center: Metal enclosure with power relays, transformer, and circuit breakers. The Load Center
is Installed prior to Personality Kit installation. Used for distributing power for controlling IntelliTouch
Systems. Also known as the “sub-panel.”
Low Voltage Compartment: Top compartment of Load Center for all low voltage wiring.
Low Voltage Raceway: Vertical space in the left side of Power/Load Center for low voltage cabling.
MobileTouch Controller: Wireless controller for the IntelliTouch Systems with all the functionality of
the Indoor Control Panel.
Mud Box: Enclosure to provide mounting features for iS10 spa-side remote that is cast into gunite,
concrete, or other spa wall/deck construction.
Outdoor Control Panel: Control panel with flexible hinge installed in upper portion of Power/Load
Center to control IntelliTouch systems.
Personality Board: The circuit board mounted on top of the Outdoor Control Panel motherboard.
The Personality board defines the system capabilities.
Personality Kit: Set of parts to define the capability of a system; may include: Outdoor Control
Panel, temperature sensors, actuators, control panel (Indoor or MobileTouch), additional relays,
actuators.
Power Center: Same as Load Center with the exception of the circuit breaker base.
Relay Circuits: The circuits that control the relays on the Personality Board. Connectors on top
edge of the circuit board.
Screw Terminal Connector: Removable connector that may attach to circuit board with multiple
sockets (anywhere from 2 to 12) to receive wires from controllers and sensors; wires held by screw
terminals; multiple wires of a small enough gauge (usually 22 AWG) may be coupled to a single
socket of a terminal connector.
Transceiver: Circuit board with attached antenna that can send and receive radio frequency
(wireless) transmissions. Used with the MobileTouch wireless controller.
IntelliTouch Personality Kit Installation Guide
Page 43

Notes
37
IntelliTouch Personality Kit Installation Guide
Page 44

38
Notes
IntelliTouch Personality Kit Installation Guide
Page 45

Page 46

*520101*
P/N 520101 - Rev D
 Loading...