

Page 1
V 2.0
RD-8
RD-8
RD-8RD-8
Setup Guide
Setup Guide
Setup GuideSetup Guide
Revised: 04-12-00
Page 2

Fostex RD-8 Setup Guide
Fostex RD-8 Setup Guide
Fostex RD-8 Setup GuideFostex RD-8 Setup Guide
Contents:
1111 Connecting The System 2
2222 Digital 328 Setup 4
Digital 328 v2 and
Digital 328 v2 and
Digital 328 v2 andDigital 328 v2 and
3333 RD-8 Setup 7
4444 Additional Information 10
Fostex RD-8 Setup Guide
1
Page 3

Connecting The System
g
Connecting The System
Connecting The SystemConnecting The System
1
Audio Connections
Audio Connections
Audio ConnectionsAudio Connections
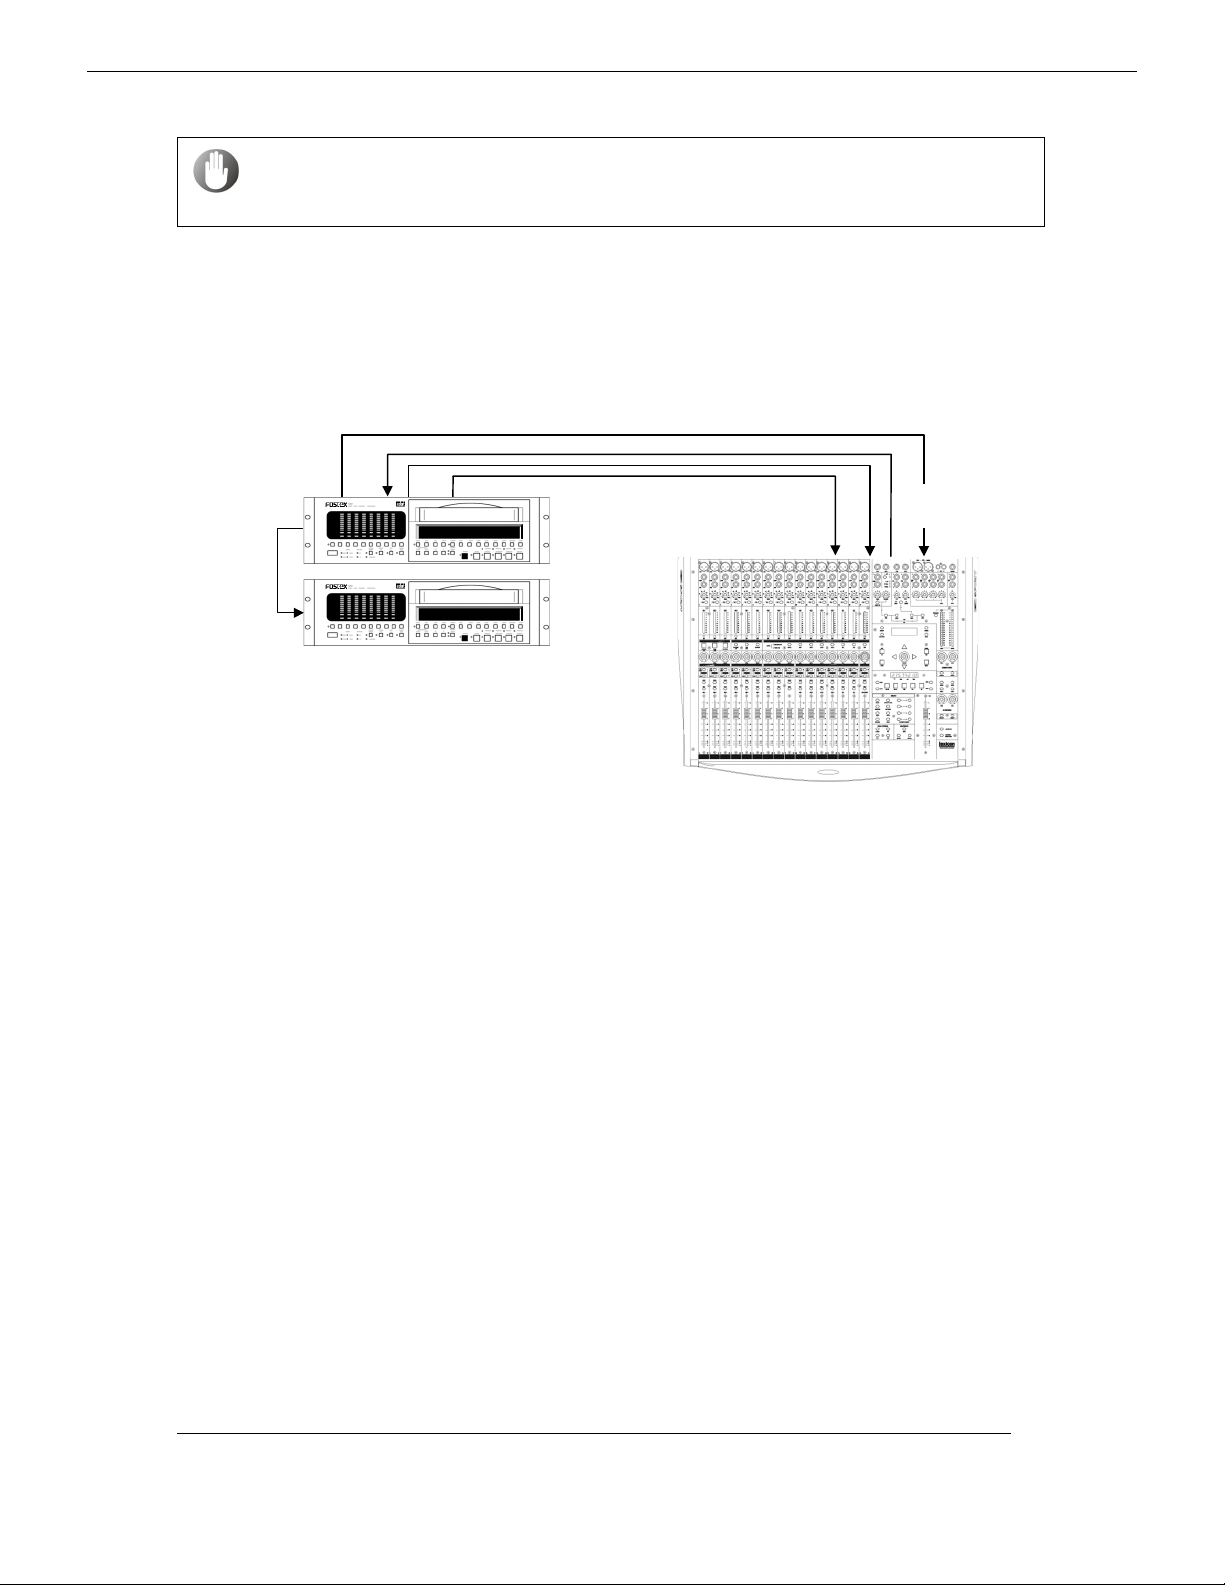
Connect audio connections as shown in the diagram below. Toslink Optical cables must be
connected from the ADAT Out ports of both the RD-8s to the ADAT In ports of the 328 and vice
versa.
The ADAT connections allow digital transfer of either direct outputs for input channels 1-16 to the
RD-8s, or the Digital 328’s 8 Group outputs.
328 ADAT 1 Out Î RD-8 1 ADAT In
RD-8 1 ADAT Out Î 328 ADAT 1 In
Synchronization Connections
Synchronization Connections
Synchronization ConnectionsSynchronization Connections
328 ADAT 2 Out Î RD-8 2 ADAT In
RD-8 2 ADAT Out Î 328 ADAT 2 In
Toslink Optical cables
2
Besides the audio connections, a BNC Wordclock cable must be connected from the Master RD-8
Wordclock Out to the 328 Wordclock input to synchronize the transmission of the samples.
If 2 RD-8s are synchronized, the Wordclock MUST be generated by the
NOTE
Master RD-8. If only 1 RD-8 is used, it can receive Wordclock
enerated by the 328.
Spirit Digital 328 v2
Page 4
It must be decided whether MIDI Time Code (MTC) or Longitudinal
Timecode (LTC or SMPTE) is to be used to transmit the timecode from
the Master RD-8 to the 328.
If LTC is to be used, MIDI connections must still be made, in order to enable the transmission of
MIDI Machine Control (MMC). MMC is responsible for the transmission of the Transport and
Locate Controls between the RD-8s and 328. In the following diagram only the SMPTE/LTC cable
is optional.
RD-8 SMPTE Out Î
328 SMPTE In
Master RD-8 Sync
Out Î Slave RD-8
Sync In
To summarize, the connections required are as follows:
BNC Wordclock cable:
Master RD-8 Wordclock out
MIDI Cables:
328 MIDI Out
Master RD-8 MIDI Out
Î
328 Wordclock In
Î
Master RD-8 MIDI In
Î
328 MIDI In
Master RD-8
Wordclock Out Î
328 Wordclock In
Digital 328
328 MIDI Out Î BRC MIDI In
BRC MIDI Out Î 328 MIDI In
SMPTE Cable:
Master RD-8 Timecode Out
Sync Cable:
Master RD-8 Sync Out
Optical Cables:
Master RD-8 Optical Out
328 8 Track A Optical Out
Slave RD-8 Optical Out Î
328 8 Track B Optical Out
Î
328 Timecode In
Î
Slave RD-8 Sync In
Î
328 8 Track A Optical In
Î
Master RD-8 Optical In
328 8 Track B Optical In
Î
Slave RD-8 Optical In
Fostex RD-8 Setup Guide
3
Page 5

<T
Ch17->24 >
Digital 328 Setup
Digital 328 Setup
2
Wordclock
Wordclock
WordclockWordclock
Tape Ports
Tape Ports
Tape PortsTape Ports
Digital 328 SetupDigital 328 Setup
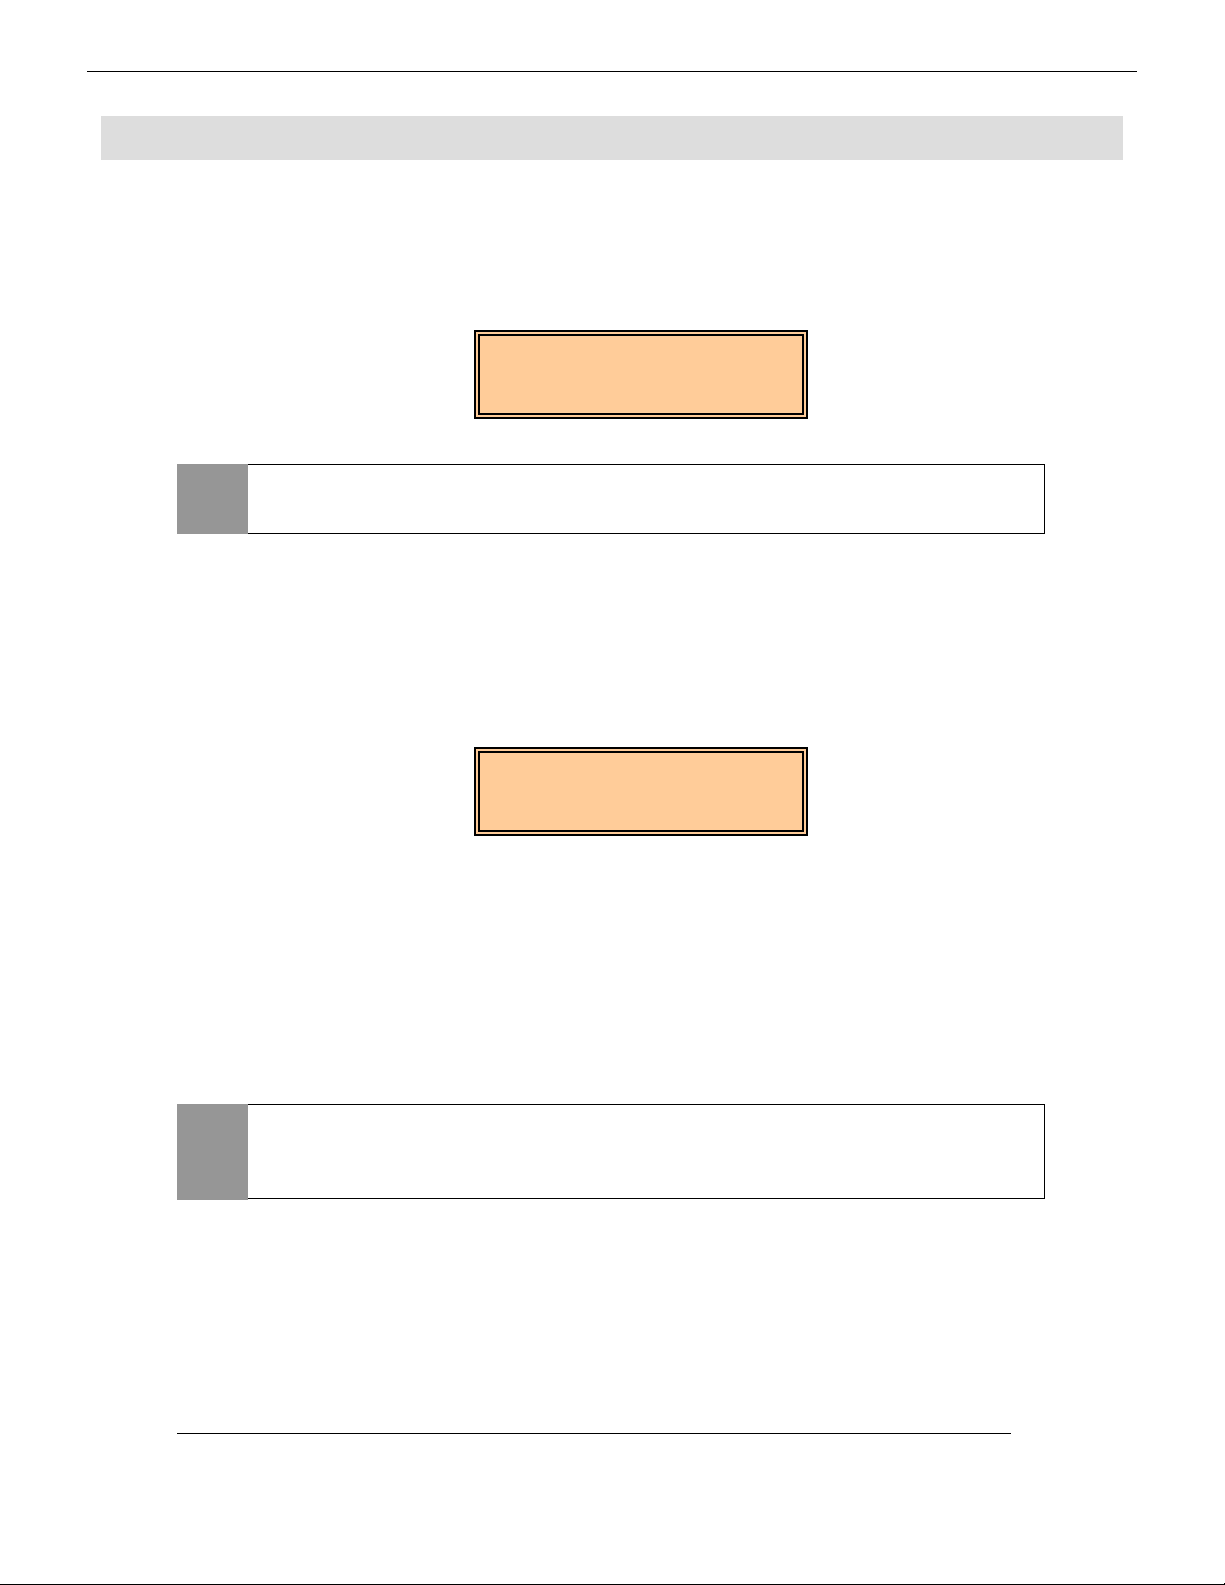
In a configuration using 2 RD-8s, the Master RD-8 must be made to be the Wordclock Master
device. To set the 328 to slave to this clock, enter the 328 Menu pages by pressing the
<MENU> button on the right hand side of the LCD display. Using the encoder beneath the
display, scroll up or down until the ‘Clock Source Sel’ menu is highlighted, and press <ENTER>.
Here, the clock source must be set to the external BNC source. Use the encoder to set the clock
source, press <ENTER> to set the sample rate and <MENU> to return to the menu pages.
To ensure that the Digital 328 Tape Ports are set to ADAT, enter the 328 Menu pages by pressing
the <MENU> button on the right hand side of the LCD display. Using the encoder beneath the
display, scroll up or down until the ‘Tape Port Select’ menu is highlighted. Press <ENTER> and
keep pressing the Up cursor arrow until the ‘<Tape Ch17-24 >’ menu page is displayed. Using
the encoder, set the Bank Source to ADAT. Press the Down cursor arrow once, to set the
wordlength. The RD-8 is a 16-bit device, and so a wordlength of 16-bit should be selected here.
The wordlength is set on the 328 with the encoder. Press <ENTER> to set the wordlength and
<MENU> to return to the menu pages.
<Wordclock Src.>
External: BNC
4
<Tape Ch17->24 >
Bank Source:ADAT
ape
Wordlength: 16
Spirit Digital 328 v2
Page 6

<T
Ch25->32 >
F
Fost
8
Fost
RD8
Fost
RD8
F
MIDI
MIDI
MIDIMIDI
To configure the 328 to send the MMC controls to the RD-8s and vice versa, RD-8 must be
selected in the Tape Machine Setup menu. Enter the Menu pages by pressing the <MENU>
button, and scroll up or down with the encoder until the ‘Tape Mach Setup’ menu is highlighted.
Press <ENTER>, scroll until Fostex RD-8 is highlighted and press <ENTER> again.
ape
Bank Source:ADAT
<Tape Ch25->32 >
Wordlength: 16
<Tape Mach Setup>
ostex RD8
Once Fostex RD-8 has been selected, the timecode source must be selected.
ex
Timecode Src:MTC
NOTE
The frame rate must also be selected. The options are 24 frame, 25 frame, 30 drop frame and
30 non-drop frame. Whichever is selected here must also be selected later when setting up the
Master RD-8 to generate the timecode.
If no SMPTE cable has been connected, MTC must be selected; if a
SMPTE cable has been connected, LTC must be selected.
or
Timecode Src:LTC
ex RD-
ex
rame Rate: 25
Fostex RD-8 Setup Guide
5
Page 7

Once the 328 has been set up, it is very advisable to store a User
Setup of the above settings:
Enter the Menu pages by pressing the <MENU> button and scroll through the menus until ‘User
Setups’ is highlighted. Press <ENTER> and scroll through to find a vacant setup location. Press
<STORE> in the Snapshot section of the Select Panel on the 328. The Setup will now be
stored. To edit the parameters of the setup, while the setup is highlighted in the display, press
<ENTER>. To recall the setup, highlight it in the Setup menu in the LCD and press the
<RECALL> button in the snapshot section of the Select Panel.
< Setup#01 >
ID :2 RD8S
Before proceeding to the RD-8 setup, RECALL THE SETUP as
illustrated above and SWITCH OFF THE 328.
6
Spirit Digital 328 v2
Page 8

Firstly, turn on the Slave RD-8. Allow a few seconds for the RD-8 to boot correctly. Next turn on
R
MIDI
ClockS
l
the Master RD-8. Allow a few more seconds for the Master RD-8 to boot and recognize the Slave
RD-8.
Master RD-8
Master RD-8 Sstup
Master RD-8 Master RD-8
Sstup
SstupSstup
Fostex RD-8 Setup
Fostex RD-8 Setup
Fostex RD-8 SetupFostex RD-8 Setup
3
To set the Sample Rate
Press <HOME>, <F1> on the Master RD-8. The display will show the current sample rate. To
select a sample rate of 44.1kHz press <F1> or to set a sample rate of 48.0kHz press <F3>.
NOTE
To set MIDI as remote control source:
Press <DATA EDIT> if not already lit and then press <REMOTE LOCAL>. The red REMOTE
LED only should be lit and the display will show the Remote In menu page. <F3> should then
be pressed to set the Master RD-8 MIDI input as the remote source.
:
SampleRate 48K
44.1K 48K
Before selecting the sample rate, it is necessary to decide whether
work is to be carried out at 44.1kHz or 48.0kHz.
emote In:
ADAT RS422 MIDI
To set the Clock Source to Internal:
Press <DATA EDIT> if not lit and then press <CHASE ON/OFF>. The red CHASE LED should
be lit. If the display does not now show the ClockSrc page, press <HOME>. The display should
now show the ClockSrc menu page. Using the Up and Down cursor keys, the clock should be set
to Internal.
rc Intern
To activate the Digital Inputs, press <DIGITAL IN>, and to set the Input Monitor to Auto press
INPUT MONITOR <AUTO>.
Fostex RD-8 Setup Guide
7
Page 9
R
ADAT
Slave RD-8 Setup
Slave RD-8 Setup
Slave RD-8 SetupSlave RD-8 Setup
To set the Sample Rate
Press <HOME>, <F1> on the Slave RD-8. The display will show the current sample rate. To
select a sample rate of 44.1kHz press <F1> or to set a sample rate of 48.0kHz press <F3>.
:
SampleRate 48K
44.1K 48K
NOTE
To set the Master RD-8 as the remote control source:
Press <DATA EDIT> if not already lit and then press <REMOTE LOCAL>. The red REMOTE
LED only should be lit and the display will show the Remote In menu page. <F1> should then
be pressed to set the Master RD-8 MIDI input as the remote source.
The sample rate of the Slave RD-8 must be set to the same value as
selected on the Master RD-8.
emote In:
ADAT RS422 MIDI
8
The Slave RD-8 must be set to Chase the Timecode of the Master RD-8. TO do this, press
<CHASE ON/OFF> so that the red LED is lit.
To activate the Digital Inputs, press <DIGITAL IN>, and to set the Input Monitor to Auto press
INPUT MONITOR <AUTO>.
The Slave RD-8 will automatically slave to the wordclock of the Master
NOTE
RD-8, the clock being transmitted via the Sync Cable connecting the
two machines.
Spirit Digital 328 v2
Page 10

Timecode Setup
Timecode Setup
Timecode SetupTimecode Setup
Remember: SMPTE can only be selected if the SMPTE cable is
connected between the BRC and the 328.
On the Master RD-8, with the <DATA EDIT> LED lit, press <GEN SET> to enter the Timecode
Generator menu pages. Set the Generator Source to Internal by pressing <F1>:
To set the Frame Rate, and the method of generation (whether free running or record arm
dependent) pages 5-20 to 5-36 of the RD-8 manual should be consulted.
Gen Source: Int
INT EXT
To complete the setup, turn on the 328 again.
Fostex RD-8 Setup Guide
9
Page 11

4
Additional Information
Additional Information
Additional InformationAdditional Information
For more information on the RD-8 setup, the RD-8 manual should be consulted. For quick
reference the following pages may be of use:
Sample Rate setup 4-26
Remote Control setup 5-4
Clock Source setup 4-19
Digital In setup 4-18
Input Monitor setup 4-18
10
Spirit Digital 328 v2
Page 12

Spirit by Soundcraft
Harman International Industries Ltd., Cranborne House,
Cranborne Road, Potters Bar, Herts EN6 3JN, England.
Tel: +44 (0)1707 665000 Fax: +44 (0)1707 665461
web: http://www.spiritbysoundcraft.com
e-mail: spiritsupport@soundcraft.com
spiritdig@harman.com (US)
Fostex RD-8 Setup Guide
11
 Loading...