

Page 1
3-246-852-12 (1)
FM/AM Cassette
Car Stereo
Operating Instructions
Mode d’emploi
Owner’s Record
The model and serial numbers are located on the bottom of the unit.
Record the serial number in the space provided below.
Refer to these numbers whenever you call upon your Sony dealer regarding this
product.
Model No. XR-CA350X Serial No.
For installation and connections, see the supplied installation/connections
manual.
En ce qui concerne l’installation et les connexions, consulter le manuel
d’installation/connexions fourni.
XR-CA350X
US
FR
2003 Sony Corporation
Page 2

Warning
This equipment has been tested and found to
comply with the limits for a Class B digital
device, pursuant to Part 15 of the FCC Rules.
These limits are designed to provide
reasonable protection against harmful
interference in a residential installation. This
equipment generates, uses, and can radiate
radio frequency energy and, if not installed
and used in accordance with the instructions,
may cause harmful interference to radio
communications. However, there is no
guarantee that interference will not occur in a
particular installation. If this equipment does
cause harmful interference to radio or
television reception, which can be determined
by turning the equipment off and on, the user
is encouraged to try to correct the interference
by one or more of the following measures:
— Reorient or relocate the receiving antenna.
— Increase the separation between the
equipment and receiver.
— Connect the equipment into an outlet on a
circuit different from that to which the
receiver is connected.
— Consult the dealer or an experienced radio/
TV technician for help.
You are cautioned that any changes or
modifications not expressly approved in this
manual could void your authority to operate
this equipment.
Welcome !
Thank you for purchasing this Sony Cassette
Player.
In addition to the cassette playback and radio
operations, you can expand your system by
connecting an optional CD/MD unit*1.
When you operate this unit or a connected
optional CD unit with the CD TEXT function,
the CD TEXT information will appear in the
display when you play a CD TEXT disc*2.
*1You can connect a CD changer, an MD changer,
a CD player, or an MD player.
*2A CD TEXT disc is an audio CD that includes
information such as the disc name, artist name,
and track names.
This information is recorded on the disc.
The “XM Ready” logo indicates that this
product will control a Sony XM tuner module
(sold separately).
Please see your nearest authorized Sony dealer
for details on the XM tuner module.
For instructions on XM tuner operation, please
refer to the XM tuner module’s included
instruction manual.
2
Page 3
Precautions
•If your car was parked in direct sunlight
resulting in a considerable rise in
temperature inside the car, allow the unit to
cool off before operating it.
•If no power is being supplied to the unit,
check the connections first. If everything is in
order, check the fuse.
•If no sound comes from the speakers of a
2-speaker system, set the fader control to the
center position.
•When a tape is played back for a long period,
the cassette may become warm because of
the built-in power amplifier. However, this is
not a sign of malfunction.
If you have any questions or problems
concerning your unit that are not covered in
this manual, please consult your nearest Sony
dealer.
To maintain high quality sound
If you have drink holders near your audio
equipment, be careful not to splash juice or
other soft drinks onto the car audio. Sugary
residues on this unit or cassette tapes may
contaminate the playback heads, reduce the
sound quality, or prevent sound reproduction
altogether.
Cassette cleaning kits cannot remove sugar
from the tape heads.
Notes on Cassettes
Cassette care
•Do not touch the tape surface of a cassette, as
any dirt or dust will contaminate the heads.
•Keep cassettes away from equipment with
built-in magnets such as speakers and
amplifiers, as erasure or distortion on the
recorded tape could occur.
•Do not expose cassettes to direct sunlight,
extremely cold temperatures, or moisture.
•Slack in the tape may cause the tape to be
caught in the machine. Before you insert the
tape, use a pencil or similar object to turn the
reel and take up any slack.
Slack
•Distorted cassettes and loose labels can cause
problems when inserting or ejecting tapes.
Remove or replace loose labels.
•The sound may become distorted while
playing the cassette. The cassette player head
should be cleaned after each 50 hours of use.
Cassettes longer than 90 minutes
The use of cassettes longer than 90 minutes is
not recommended except for long continuous
play. The tape used for these cassettes is very
thin and tends to stretch easily. Frequent
playing and stopping of these tapes may cause
them to become entangled in the cassette deck
mechanism.
3
Page 4

Table of Contents
This Unit Only
Location of controls ................................................. 5
Getting Started
Resetting the unit ................................................ 6
Detaching the front panel .................................. 6
Setting the clock .................................................. 7
Cassette Player
Listening to a tape ............................................... 7
Radio reception during fast-forwarding or
rewinding of a tape
— Automatic Tuner Activation (ATA) ....... 8
Radio
Storing stations automatically
— Best Tuning Memory (BTM) ................... 8
Storing only the desired stations ...................... 9
Receiving the stored stations ............................. 9
Other Functions
Adjusting the balance and fader ..................... 10
Attenuating the sound ..................................... 10
Changing the sound and display settings ..... 10
Setting the equalizer
— EQ3............................................................ 11
With Optional Equipment
CD/MD Unit
Playing a CD or MD ......................................... 12
Playing tracks repeatedly
— Repeat Play .............................................. 13
Playing tracks in random order
— Shuffle Play .............................................. 13
Additional Information
Maintenance....................................................... 14
Removing the unit ............................................ 15
Specifications ..................................................... 16
Troubleshooting guide ..................................... 17
4
Page 5
Location of controls
SOURCE
MODE
RELEASE
SEL
DISC
ATT
123456
Refer to the pages listed for details.
1 SOURCE (Radio/CD/MD) button
8, 9, 11, 12
2 MODE button
During radio reception:
Band select 8, 9
During CD/MD playback:
CD/MD unit select 12
3 Volume +/– button 7, 10, 11
4 Z (eject) button 7, 8, 9, 12
5 Display window
6 m/M (fast winding)/DIR (tape
transport direction change) buttons 7, 8
7 SEEK button
Seek 9
Automatic Music Sensor 13
Manual search 13
8 DSPL (display mode change) button
7, 12
9 EQ3 button 11
q; RELEASE (front panel release) button
6, 14
qa SEL (select) button 7, 10, 11, 12
qs RESET button (located on the front side
of the unit behind the front panel) 6
DIR
SEEK
REP
SHUF
ATA
BTM
XR-CA350X
qd ATT (attenuate) button 10
qf Number buttons 10, 12
During radio reception:
Preset number select 9
During CD/MD playback:
(1) DISC – 13
(2) DISC + 13
(3) REP 13
(4) SHUF 13
qg BTM/ATA button 8
qh SENS button 9
qj OFF button* 6
* Warning when installing in a car
without ACC (accessory) position on
the ignition key switch
Be sure to press (OFF) on the unit for 2
seconds to turn off the clock display after
turning off the engine.
When you press (OFF) momentarily, the
clock display does not turn off and this
causes battery wear.
EQ3
DSPL
OFFSENS
5
Page 6

Getting Started
Resetting the unit
Before operating the unit for the first time, or
after replacing the car battery or changing the
connections, you must reset the unit.
Remove the front panel and press the RESET
button with a pointed object, such as a ballpoint pen.
RESET button
Note
Pressing the RESET button will erase the clock
setting and some memorized functions.
Detaching the front panel
You can detach the front panel of this unit to
protect the unit from being stolen.
1 Press (OFF).
2 Press (RELEASE), then slide the front
panel a little to the left, and pull it off
towards you.
(OFF)
Attaching the front panel
Attach part A of the front panel to part B of
the unit as illustrated and push the left side
into position until it clicks.
A
B
Notes
• Be sure not to attach the front panel upside
down.
• Do not press the front panel too hard against the
unit when attaching it.
• Do not press too hard or put excessive pressure
on the display window of the front panel.
• Do not expose the front panel to direct sunlight
or heat sources such as hot air ducts, and do not
leave it in a humid place. Never leave it on the
dashboard of a car parked in direct sunlight or
where there may be a considerable rise in
temperature.
Caution alarm
If you turn the car ignition off without
removing the front panel, the caution alarm
will beep for a few seconds.
If you connect an optional power amplifier and
do not use the built-in amplifier, the beep
sound will be deactivated.
(RELEASE)
Notes
• Be sure not to drop the panel when detaching it
from the unit.
• If you detach the panel while the unit is still
turned on, the power will turn off automatically
to prevent the speakers from being damaged.
• When carrying the front panel with you, use the
supplied front panel case.
66
Page 7
Setting the clock
The clock uses a 12-hour digital indication.
Example: To set the clock to 10:08
1 Press (DSPL) for 2 seconds.
The hour indication flashes.
1 Press either side of the volume button
to set the hour.
to go forward
to go back
2 Press (SEL).
The minute indication flashes.
3 Press either side of the volume button
to set the minute.
to go forward
to go back
2 Press (DSPL).
Cassette Player
Listening to a tape
Insert a cassette.
Playback starts automatically.
The side facing up is played.
The side facing down is played.
Tip
To change the tape‘s playback direction, press m
and M.
To stop playback and eject the
cassette
Press Z.
Fast-winding the tape
During playback, press m or M.
Direction
indicator*
FWD
REV
* The indicator will flash while fast-winding the
tape.
To advance
M
m
To rewind
m
M
The clock starts.
After the clock setting is complete, the
display returns to normal play mode.
To start playback during fast-forwarding or
rewinding, press the other fast-winding button
partially until the locked button is released.
77
Page 8
Radio reception during
fast-forwarding or
rewinding of a tape
— Automatic Tuner Activation (ATA)
When fast-forwarding or rewinding with the
m or M button, the radio will turn on
automatically.
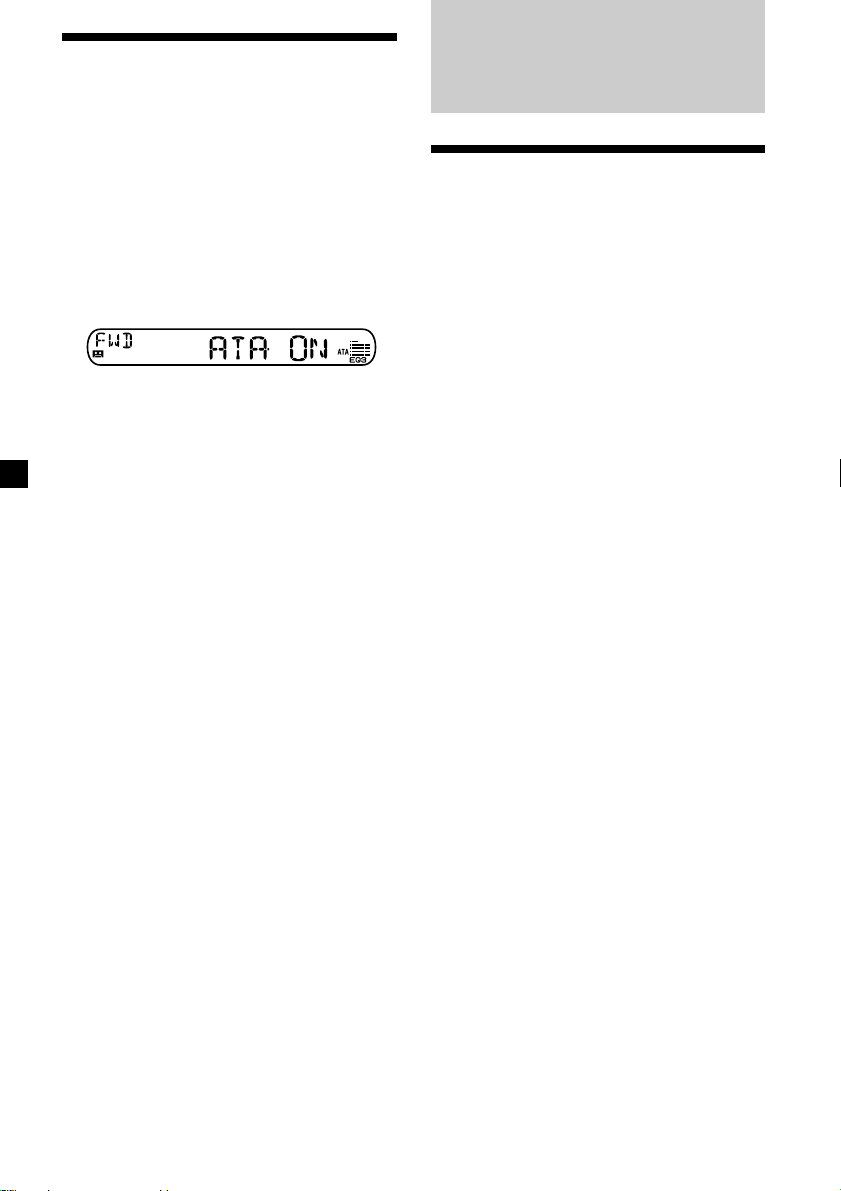
During playback, press (BTM) (ATA)
repeatedly until “ATA-ON” in the display
appears.
ATA-ON y ATA-OFF
ATA mode starts.
Radio
Storing stations
automatically
— Best Tuning Memory (BTM)
The unit selects the stations with the strongest
signals and stores them in the order of their
frequencies. You can store up to 6 stations on
each band (FM1, FM2, FM3, AM1, and AM2).
Caution
When tuning in stations while driving, use
Best Tuning Memory to prevent accidents.
To return to normal play mode, select “ATAOFF.”
1 Press (SOURCE) repeatedly to select the
radio.
In case of tape playback, press Z to eject the
tape.
Each time you press (SOURCE), the source
changes as follows:
Radio t CD* t MD*
* If the corresponding optional equipment is
not connected, this item will not appear.
2 Press (MODE) repeatedly to select the
band.
Each time you press (MODE), the band
changes as follows:
FM1 t FM2 t FM3 t AM1 t AM2
3 Press (BTM) (ATA) for 2 seconds.
The unit stores stations in the order of their
frequencies on the number buttons.
A beep sounds when the setting is stored.
Notes
• The unit does not store stations with weak
signals. If only a few stations can be received,
some number buttons will retain their former
setting.
• When a number is indicated in the display, the
unit starts storing stations from the one currently
displayed.
88
Page 9
Storing only the desired
stations
You can preset up to 18 FM stations (6 each for
FM1, 2, and 3) and up to 12 AM stations (6
each for AM1 and 2) in the order of your
choice.
1 Press (SOURCE) repeatedly to select the
radio.
In case of tape playback, press Z to eject the
tape.
2 Press (MODE) repeatedly to select the
band.
3 Press either side of (SEEK) to tune in the
station that you want to store on the
number button.
If you cannot tune in a preset
station
— Automatic tuning/ Local Seek Mode
Automatic tuning:
Press either side of (SEEK) to search for
the station.
Scanning stops when the unit receives a
station. Press either side of (SEEK)
repeatedly until the desired station is
received.
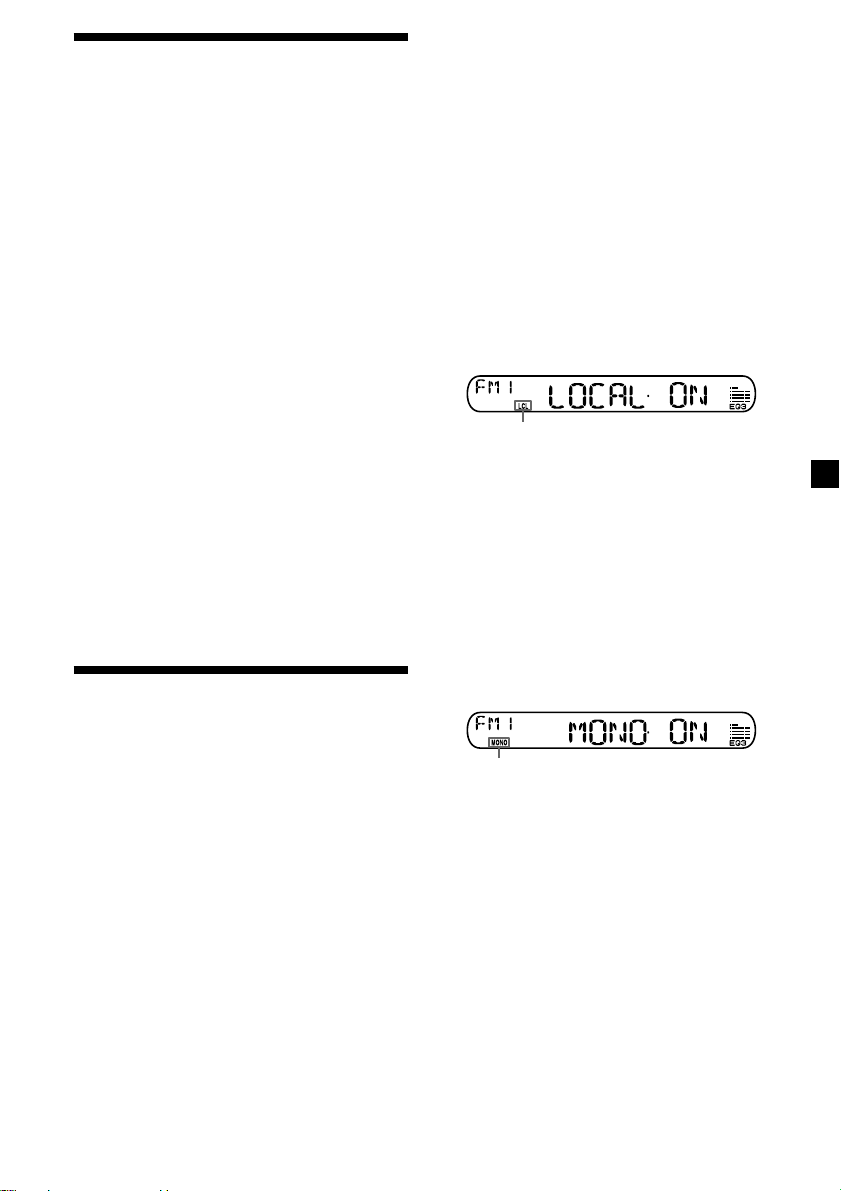
Local Seek Mode:
If the automatic tuning stops too
frequently, press (SENS) repeatedly until
“LOCAL-ON” appears.
“LCL” indicator is displayed.
4 Press the desired number button ((1) to
(6)) until “MEM” appears.
The number button indication appears in
the display.
Note
If you try to store another station on the same
number button, the previously stored station will
be erased.
Receiving the stored
stations
1 Press (SOURCE) repeatedly to select the
radio.
In case of tape playback, press Z to eject the
tape.
2 Press (MODE) repeatedly to select the
band.
3 Press the number button ((1) to (6)) on
which the desired station is stored.
Only the stations with relatively strong
signals will be tuned in.
Tip
If you know the frequency of the station you want
to listen to, press either side of (SEEK) until the
desired frequency appears (manual tuning).
If FM stereo reception is poor
— Monaural Mode
During radio reception, press (SENS)
repeatedly until “MONO-ON” appears.
“MONO” indicator is displayed.
The sound improves, but becomes
monaural (“ST” disappears).
To return to normal radio reception mode,
select “MONO-OFF.”
99
Page 10

Other Functions
Adjusting the balance and
fader
You can adjust the balance and fader.
Changing the sound and
display settings
The following items can be set:
•A.SCRL (Auto Scroll)* (page 12).
•M.DSPL (Motion Display)
– the demonstration mode which appears
when the tape is ejected and no source is
selected (e.g., tuner is turned off).
•BEEP – to turn the beep sound on or off.
1 Press (SEL) repeatedly until “BAL” or
“FAD” appears.
Each time you press (SEL), the item
changes as follows:
LOW* t MID* t HIGH* t
BAL (left-right) t FAD (front-rear)
* When EQ3 is activated (page 11).
2 Press either side of the volume button to
adjust the selected item.
Adjust within 3 seconds after selecting the
item.
Attenuating the sound
Press (ATT).
After “ATT-ON” momentarily flashes, the
“ATT” indication appears in the display.
To restore the previous volume level, press
(ATT) again.
“ATT-OFF” flashes momentarily.
1 Press (SEL) and the desired preset
number button simultaneously.
(SEL) + (3): A.SCRL*
(SEL) + (4): M.DSPL
(SEL) + (6): BEEP
* When no CD or MD is playing, this item will
not appear.
2 Press (SEL) and the preset number
button repeatedly to select the desired
setting (Example: ON or OFF).
10
Page 11
Setting the equalizer
— EQ3
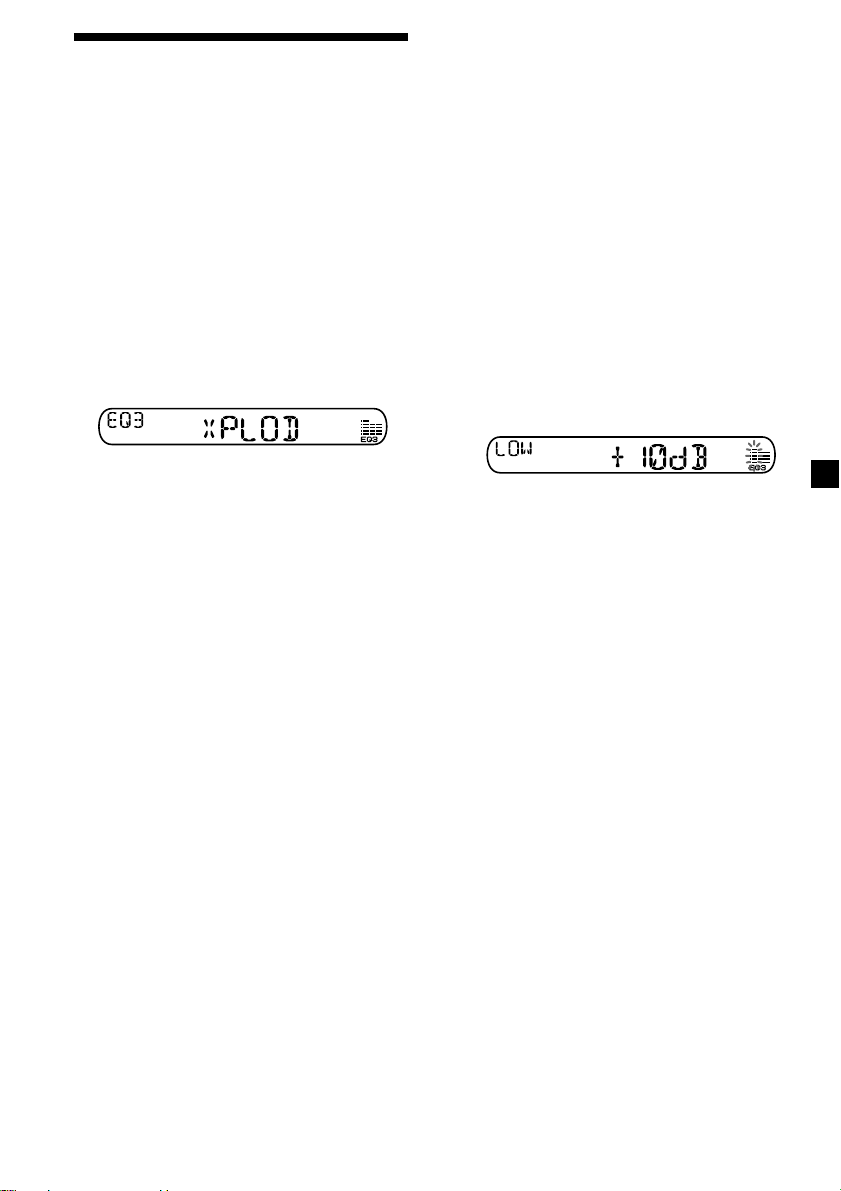
You can select an equalizer curve for 7 music
types (XPLOD, VOCAL, CLUB, JAZZ, NEW
AGE, ROCK, CUSTOM, and OFF (equalizer
OFF)).
You can store a different equalizer setting for
each source.
Selecting the equalizer curve
1 Press (SOURCE) to select a source (Radio,
CD or MD) or insert a cassette.
2 Press (EQ3) repeatedly to select the
desired equalizer curve.
Each time you press (EQ3), the item
changes.
To cancel the equalizing effect, select
“OFF.”
Adjusting the equalizer curve
You can store and adjust the equalizer settings
for different tone ranges.
1 Press (SOURCE) to select a source (Radio,
CD or MD) or insert a cassette.
2 Press (EQ3) repeatedly to select the
desired equalizer curve.
3 Adjusting the equalizer curve.
1 Press (SEL) repeatedly to select the
desired tone range.
Each time you press (SEL), the tone
range changes.
LOW t MID t HI (t BAL t FAD)
2 Press either side of the volume button
repeatedly to adjust to the desired
volume level.
The volume level is adjustable by 1 dB
steps from –10 dB to +10 dB.
3 Repeat step 1 and 2 to adjust the
equalizer curve.
To restore the factory-set equalizer
curve, press (SEL) for 2 seconds.
After 3 seconds, the display returns to
normal play mode.
Note
When EQ3 is set to “OFF,” you cannot adjust the
equalizer settings.
11
Page 12

With Optional Equipment
CD/MD Unit
This unit can control external CD/MD units.
If you connect an optional CD unit with the
CD TEXT function, the CD TEXT information
will appear in the display when you play a CD
TEXT disc.
Playing a CD or MD
1 Press (SOURCE) repeatedly to select CD
or MD.
In case of tape playback, press Z to eject the
tape.
2 Press (MODE) until the desired unit
appears.
CD/MD playback starts.
When a CD/MD unit is connected, all the
tracks play from the beginning.
Tip
With the optional MG Memory Stick System-up
Player MGS-X1 connected to this unit, press
(SOURCE) to select “MD,” then press (MODE) to
select the unit number of the MD (MD1 or MD2,
etc.).
Automatically scrolling a display
item — Auto Scroll
If the disc name, artist name, or track name on
a CD TEXT disc or MD exceeds 8 characters
and the Auto Scroll function is on, information
automatically scrolls across the display as
follows:
• The disc name appears when the disc has
changed (if the disc name is selected).
• The track name appears when the track has
changed (if the track name is selected).
If you press (DSPL) to change the display
item, the disc or track name of the CD TEXT or
MD disc is scrolled automatically whether you
set the function ON or OFF.
During playback, press (SEL) and (3) to
select “A.SCRL-ON.”
To cancel Auto Scroll, select “A.SCRL-OFF.”
Note
For some discs with very many characters, the
following cases may happen:
— Some of the characters are not displayed.
— Auto Scroll does not work.
Changing the display item
Each time you press (DSPL) during CD, CD
TEXT, or MD playback, the item changes as
follows:
Elapsed playback time t
Disc name*
Clock
*1If you have not labeled the disc or if there is no
disc name prerecorded on the MD, “NO NAME”
appears in the display.
2
If you play a CD TEXT disc, the artist name
*
appears in the display after the disc name. (Only
for CD TEXT discs with the artist name.)
3
If the track name of a CD TEXT disc or MD is not
*
prerecorded, “NO NAME” appears in the
display.
1
/Artist name*2 t Track name*3 t
12
Page 13

Locating a specific track
— Automatic Music Sensor (AMS)
During playback, press either side of
(SEEK) momentarily for each track you
want to skip.
To locate succeeding tracks
SEEK
To locate preceding tracks
Locating a specific point in a track
— Manual Search
During playback, press and hold either
side of (SEEK). Release when you have
found the desired point.
To search forward
Playing tracks repeatedly
— Repeat Play
You can select:
•REP-TRACK – to repeat a track.
•REP-DISC – to repeat a disc.
During playback, press (3) (REP)
repeatedly until the desired setting
appears.
REP-TRACK t REP-DISC t REP-OFF
Repeat Play starts.
To return to normal play mode, select “REPOFF.”
SEEK
To search backward
Switching to other discs
During playback, press (1) (DISC –) or
(2) (DISC +) button.
The desired disc in the current unit begins
playback.
(1) (DISC –): For preceding discs
(2) (DISC +): For succeeding discs
Disc number
Track number
Playing tracks in random
order — Shuffle Play
You can select:
•SHUF-DISC – to play the tracks on the
current disc in random order.
•SHUF-CHGR – to play the tracks in the
current unit in random order.
•SHUF-ALL* – to play all the tracks in all the
units in random order.
During playback, press (4) (SHUF)
repeatedly until the desired setting
appears.
SHUF-DISC t SHUF-CHGR t SHUF-ALL*
t SHUF-OFF
Shuffle Play starts.
* “SHUF-ALL” is only available when you
connect two or more optional CD/MD units.
To return to normal play mode, select “SHUFOFF.”
13
Page 14

Additional
Information
Maintenance
Fuse replacement
When replacing the fuse, be sure to use one
matching the amperage rating stated on the
original fuse. If the fuse blows, check the
power connection and replace the fuse. If the
fuse blows again after replacement, there may
be an internal malfunction. In such a case,
consult your nearest Sony dealer.
Cleaning the connectors
The unit may not function properly if the
connectors between the unit and the front
panel are not clean. In order to prevent this,
open the front panel by pressing (RELEASE),
then detach it and clean the connectors with a
cotton swab dipped in alcohol. Do not apply
too much force. Otherwise, the connectors may
be damaged.
Main unit
Fuse (10 A)
Warning
Never use a fuse with an amperage rating
exceeding the one supplied with the unit as
this could damage the unit.
Back of the front panel
Notes
• For safety, turn off the engine before cleaning
the connectors and remove the key from the
ignition switch.
• Never touch the connectors directly with your
fingers or any metal device.
14
Page 15

Removing the unit
1 Remove the protection collar.
1 Detach the front panel (page 6).
2 Engage the release keys together
with the protection collar.
Orient the release
key correctly.
3 Pull out the release keys to remove
the protection collar.
2 Remove the unit.
1 Insert both release keys together until
they click.
Face the hook
inwards.
2 Pull the release keys to unseat the
unit.
3 Slide the unit out of the mounting.
15
Page 16

Specifications
AUDIO POWER SPECIFICATIONS
POWER OUTPUT AND TOTAL HARMONIC DISTORTION
22 watts per channel minimum continuous average power into 4
ohms, 4 channels driven from 20 Hz to 20 kHz with no more than
5 % total harmonic distortion.
Other specifications
Cassette player section
Tape track 4-track 2-channel stereo
Wow and flutter 0.13 % (WRMS)
Frequency response 30 – 15,000 Hz
Signal-to-noise ratio 55 dB
Tuner section
FM
Tuning range FM tuning interval:
Antenna terminal External antenna connector
Intermediate frequency 10.7 MHz/450 kHz
Usable sensitivity 9 dBf
Selectivity 75 dB at 400 kHz
Signal-to-noise ratio 67 dB (stereo),
Harmonic distortion at 1 kHz
Separation 35 dB at 1 kHz
Frequency response 30 – 15,000 Hz
87.5 – 107.9 MHz
(at 200 kHz step)
69 dB (mono)
0.5 % (stereo),
0.3 % (mono)
AM
Tuning range AM tuning interval:
Antenna terminal External antenna connector
Intermediate frequency 10.7 MHz/450 kHz
Sensitivity 30 µV
530 – 1,710 kHz
(at 10 kHz step)
Power amplifier section
Outputs Speaker outputs
Speaker impedance 4 – 8 ohms
Maximum power output 45 W × 4 (at 4 ohms)
(sure seal connectors)
General
Outputs Audio output
Inputs BUS control input terminal
Tone controls Low:
Power requirements 12 V DC car battery
Dimensions Approx. 178 × 50 × 178 mm
Mounting dimensions Approx. 182 × 53 × 161 mm
Mass Approx. 1.2 kg (2 lb 10 oz)
Supplied accessories Parts for installation and
Optional accessories BUS cable (supplied with
Optional equipment CD changer (10 discs)
Design and specifications are subject to change
without notice.
Power antenna relay
control lead
Power amplifier control
lead
BUS audio input terminal
±10 dB at 60 Hz (Xplod)
Mid:
±10 dB at 1 kHz (Xplod)
High:
±10 dB at 10 kHz (Xplod)
(negative ground)
1
/8 × 2 × 7 1/8 in)
(7
(w/h/d)
1
/4 × 2 1/8 × 6 3/8 in)
(7
(w/h/d)
connections (1 set)
Front panel case (1)
an RCA pin cord)
RC-61 (1 m), RC-62 (2 m)
CDX-656
CD changer (6 discs)
CDX-T69
MD changer (6 discs)
MDX-66XLP
XM Satellite Radio Receiver
XT-XM1
MG-MS System-up Player
MGS-X1
Source selector
XA-C30
AUX-IN Selector
XA-300
16
Page 17

Troubleshooting guide
The following checklist will help you remedy the problems you may encounter with your unit.
Before going through the checklist below, check the connections and operating procedures.
General
Problem
No sound.
The contents of the memory
have been erased.
Indications do not appear
in the display.
Tape playback
Problem
The sound is distorted.
Cause/Solution
•Cancel the ATT function (page 10).
•Set the fader control to the center position for 2-speaker
systems.
•Adjust the volume with (+).
• The power cord or battery has been disconnected.
• The RESET button was pressed.
t Store again into the memory.
• Remove the front panel and clean the connectors. See
“Cleaning the connectors” (page 14) for details.
• The clock display disappears if you press (OFF) for 2
seconds.
t Press (OFF) again for 2 seconds to display the clock.
Cause/Solution
The tape head is contaminated.
t Clean the head with a commercially available dry-type
cleaning cassette.
Radio reception
Problem
Preset tuning is not possible.
Automatic tuning is not
possible.
The stations cannot be
received.
The sound is hampered by
noises.
The “ST” indication flashes.
CD/MD playback
Problem
The sound skips.
Cause/Solution
• Store the correct frequency in the memory.
• The broadcast signal is too weak.
•The broadcast signal is too weak.
t Use manual tuning.
•The local seek mode is set to ON.
t Set the local seek mode to OFF (page 9).
Connect an power antenna control lead (blue) or accessory
power supply lead (red) to the power supply lead of a car’s
antenna booster. (When your car has built-in FM/AM antenna
in the rear/side glass only.)
•Tune in the frequency accurately.
•The broadcast signal is too weak.
t Set to monaural mode (page 9).
Cause/Solution
A dirty or defective disc.
17
Page 18

Error displays (when an optional CD/MD unit is connected)
The following indications will flash for about 5 seconds, and an alarm sound will be heard.
Display
NO MAG
Cause
The disc magazine is not inserted in
the CD/MD unit.
No disc is inserted in the CD/MD unit.
Solution
Insert the disc magazine in the CD/
MD unit.
Insert discs in the CD/MD unit.
NO DISC
A CD is dirty or inserted upside
2
down.*
1
An MD does not play because of some
ERROR
BLANK
RESET
NOT READY
HI TEMP
*1 When an error occurs during playback of a CD or MD, the disc number of the CD or MD does not appear
in the display.
*2 The disc number of the disc causing the error appears in the display.
If the above-mentioned solutions do not help improve the situation, consult your nearest Sony
dealer.
*
problem.*
A CD/MD cannot play because of
some problem.
No tracks have been recorded on an
1
*
MD.*
The CD/MD unit cannot be operated
because of some problem.
The lid of the MD unit is open or MDs
are not inserted properly.
The ambient temperature is more than
50°C (122°F).
2
2
Clean or insert the CD correctly.
Insert another MD.
Insert another CD/MD.
Play an MD with tracks recorded on
it.
Press the RESET button of the unit.
Close the lid or insert the MDs
properly.
Wait until the temperature goes
down below 50°C (122°F).
18
Page 19

19
Page 20

Félicitations !
Précautions
Nous vous remercions pour l’achat de ce
lecteur de cassette Sony.
En plus de la lecture de cassettes et de l’écoute
d’émissions de radio, vous pouvez étendre les
possibilités de votre système en raccordant une
un appareil CD/MD disponible en option*1.
Lorsque vous faites fonctionner cet appareil ou
un appareil CD en option raccordé et doté de
la fonction CD TEXT, les informations CD
TEXT apparaissent dans la fenêtre d’affichage
pendant la lecture d’un disque CD TEXT*2.
*1Vous pouvez également connecter un changeur
CD, un changeur MD, un lecteur CD ou un
lecteur MD.
2
Un disque CD TEXT est un disque audio qui
*
contient des informations telles que le titre du
disque, le nom de l’artiste et le titre des plages.
Ces informations sont enregistrées sur le disque.
Le logo “XM Ready” indique que ce produit
commande un tuner XM Sony (vendu
séparément).
Consultez votre revendeur agréé Sony le plus
proche pour obtenir plus d'informations sur le
tuner XM.
Pour en savoir plus sur le fonctionnement du
tuner XM, reportez-vous au manuel utilisateur
fourni avec le tuner XM.
•Si votre voiture est garée en plein soleil et si
la température à l’intérieur de l’habitacle a
considérablement augmenté, laissez refroidir
l’appareil avant de l’utiliser.
•Si l’appareil n’est pas alimenté, vérifiez
d’abord les connexions. Si tout est en ordre,
vérifiez le fusible.
•Si aucun son n’est émis par les haut-parleurs
d’une chaîne à 2 haut-parleurs, réglez la
commande d’équilibre avant-arrière à la
position médiane.
•Si la cassette est lue pendant une longue
durée, il se peut qu’elle s’échauffe en raison
de la proximité de l’amplificateur de
puissance intégré. Il ne s’agit cependant pas
d’un dysfonctionnement.
Si vous rencontrez des problèmes ou si vous
avez des questions concernant le
fonctionnement de cet appareil qui ne sont pas
abordés dans le présent mode d’emploi,
consultez votre détaillant Sony.
Pour préserver la qualité sonore
Si des porte-gobelets se trouvent à proximité
de votre installation audio, veillez à ce
qu’aucune éclaboussure de jus de fruit ou de
boisson gazeuse ne soit projetée sur votre
autoradio. Des résidus de sucre sur cet
appareil ou sur la bande magnétique d’une
cassette risquent d’encrasser les têtes de
lecture, entraînant ainsi une altération de la
qualité sonore ou empêchant carrément la
reproduction sonore.
Les cassettes de nettoyage ne permettent pas
d’éliminer les résidus de sucre sur les têtes de
lecture.
2
Page 21

Remarques à propos des
cassettes
Entretien des cassettes
• Ne touchez pas la bande magnétique d’une
cassette parce que la poussière et les
souillures entraînent un encrassement des
têtes.
• Gardez les cassettes à l’écart des appareils
intégrant des aimants, tels que des hautparleurs et des amplificateurs qui risquent de
provoquer une distorsion ou un effacement
des cassettes enregistrées.
• N’exposez pas les cassettes au rayonnement
direct du soleil, aux températures
extrêmement froides ou à l’humidité.
• Si la bande magnétique de la cassette est
détendue, elle risque de s’emmêler dans le
mécanisme interne de l’appareil. Avant
d’introduire une cassette, tendez
correctement la bande magnétique en
tournant les bobines à l’aide d’un stylo ou
d’un objet similaire.
Bande
détendue
Cassettes de plus de 90 minutes
Les cassettes d’une durée supérieure à
90 minutes sont déconseillées, sauf dans le cas
d’une lecture continue de longue durée. La
bande magnétique de ces cassettes est très fine
et a par conséquent tendance à se détendre
plus facilement. Des opérations de lecture et
d’arrêt répétées avec de telles cassettes
risquent par conséquent d’emmêler la bande
magnétique dans le mécanisme d’entraînement
de la platine.
•Les cassettes déformées et les étiquettes qui
se décollent risquent de poser des problèmes
lors de l’introduction ou de l’éjection. Retirez
ou remplacez les étiquettes qui se décollent.
•Le son peut comporter des distorsions
pendant la lecture d’une cassette. La tête du
lecteur de cassette doit être nettoyée toutes
les 50 heures d’utilisation.
3
Page 22

Table des matières
Description de cet appareil
Emplacement des commandes .............................. 5
Préparation
Réinitialisation de l’appareil.............................. 6
Dépose de la façade ............................................ 6
Réglage de l’horloge ........................................... 7
Lecteur de cassettes
Lecture d’une cassette ........................................ 7
Réception radio en cours d’avance rapide ou de
rembobinage d’une cassette
— ATA (Activation automatique du
syntoniseur) .................................................... 8
Radio
Mémorisation automatique des stations
— Mémorisation des meilleurs accords
(BTM) ............................................................... 8
Mémorisation des stations souhaitées
uniquement..................................................... 9
Réception des stations mémorisées .................. 9
Autres fonctions
Réglage de la balance gauche-droite et de
l’équilibre avant-arrière .............................. 10
Atténuation du son ........................................... 10
Modification des réglages du son et de
l’affichage ...................................................... 10
Réglage de l’égaliseur
— EQ3............................................................. 11
Avec appareils optionnels
Appareil CD/MD
Lecture d’un CD ou d’un MD ......................... 12
Lecture de plages répétée
— Lecture répétée ........................................ 13
Lecture de plages dans un ordre quelconque
— Lecture aléatoire ...................................... 13
Informations supplémentaires
Entretien ............................................................. 14
Démontage de l’appareil .................................. 15
Spécifications ..................................................... 16
Dépannage ......................................................... 17
4
Page 23

Emplacement des commandes
SOURCE
MODE
RELEASE
SEL
DISC
REP
ATT
123456
SHUF
Pour plus de détails, reportez-vous aux pages indiquées.
1 Touche SOURCE (Radio/CD/MD)
8, 9, 11, 12
qd Touche ATT (atténuation du son) 10
qf Touches numériques 10, 12
2 Touche MODE
En cours de réception radio :
Sélection de la bande 8, 9
En cours de lecture de CD/MD :
Sélection de l’appareil CD/MD 12
3 Touche volume +/– 7, 10, 11
4 Touche Z (éjection) 7, 8, 9, 12
5 Fenêtre d’affichage
6 Touches m/M (avance rapide)/
DIR (changement du sens de défilement
de la bande) 7, 8
7 Touche SEEK
Recherche 9
Détecteur automatique de musique
13
Recherche manuelle 13
8 Touche DSPL (modification du mode
d’affichage) 7, 12
9 Touche EQ3 11
0 Touche RELEASE (pour enlever la
façade) 6, 14
qg Touche BTM/ATA 8
qh Touche SENS 9
qj Touche OFF* 6
* Attention lors de l’installation dans
une voiture dépourvue de la position
ACC (accessoire) sur le contacteur
d’allumage
Après avoir coupé le moteur, n’oubliez
pas d’appuyer sur (OFF) sur l’appareil
pendant 2 secondes pour désactiver
l’affichage de l’horloge.
Lorsque vous appuyez brièvement sur
(OFF), l’affichage de l’horloge ne s’éteint pas
et cela provoque une usure de la batterie.
qa Touche SEL (sélection) 7, 10, 11, 12
qs Touche RESET (située sur la face avant
de l’appareil, derrière la façade) 6
DIR
SEEK
ATA
BTM
XR-CA350X
En cours de réception radio :
Sélection d’une présélection 9
En cours de lecture CD/MD :
(1) DISC – 13
(2) DISC + 13
(3) REP 13
(4) SHUF 13
EQ3
DSPL
OFFSENS
5
Page 24

Préparation
Réinitialisation de
l’appareil
Avant la première mise en service de
l’appareil, ou après avoir remplacé la batterie
du véhicule ou modifié les raccordements,
vous devez réinitialiser l’appareil.
Retirez la façade et appuyez sur la touche
RESET à l’aide d’un objet pointu comme un
stylo à bille.
Touche RESET
Remarque
Le fait d’appuyer sur la touche de réinitialisation
(RESET) efface les paramètres de l’horloge ainsi
que certaines fonctions enregistrées.
Fixation de la façade
Fixez la partie A de la façade à la partie B de
l’appareil comme illustré et poussez le côté
gauche en position jusqu’au déclic.
A
B
Remarques
• Veillez à ne pas installer la façade à l’envers.
• N’appuyez pas trop fort sur la façade lorsque
vous l’installez sur l’appareil principal.
• N’appuyez pas trop fort et n’exercez pas une
trop forte pression sur la fenêtre d’affichage de
la façade.
• N’exposez pas la façade au rayonnement direct
du soleil ou aux sources de chaleur comme des
conduits d’air chaud et ne la laissez pas à un
endroit humide. Ne la laissez jamais sur le
tableau de bord d’une voiture garée en plein
soleil ou à un endroit où la température risque
d’augmenter considérablement.
Dépose de la façade
Vous pouvez déposer la façade de cet appareil
afin d’empêcher qu’il ne soit volé.
1 Appuyez sur (OFF).
2 Appuyez sur (RELEASE), puis faites
glisser légèrement la façade vers la
gauche et enlevez-la en tirant vers vous.
(OFF)
(RELEASE)
Remarques
• Veillez à ne pas échapper la façade quand vous
la détachez de l’appareil.
• Si vous enlevez la façade alors que l’appareil est
toujours sous tension, l’appareil se met
automatiquement hors tension pour éviter
d’endommager les haut-parleurs.
• Lorsque vous transportez la façade, glissez-la
dans l’étui fourni spécialement prévu à cet effet.
6
Alarme d’avertissement
Si vous coupez le contact de la voiture sans
ôter la façade, l’alarme retentira pendant
quelques secondes.
Si vous raccordez un amplificateur de
puissance en option et si vous n’utilisez pas
l’amplificateur intégré, le bip sonore sera
désactivé.
Page 25

Réglage de l’horloge
L’horloge à affichage numérique fonctionne
suivant un cycle de 12 heures.
Exemple : Pour régler l’horloge à 10:08
1 Appuyez sur (DSPL) pendant 2 secondes.
L’indication des heures se met à clignoter.
1 Appuyez sur l’un des côtés de la
touche volume pour régler l’heure.
pour avancer
pour reculer
Lecteur de cassettes
Lecture d’une cassette
Introduisez une cassette.
La lecture démarre automatiquement.
La face supérieure est reproduite.
La face inférieure est reproduite.
2 Appuyez sur (SEL).
L’indication des minutes se met à clignoter.
3 Appuyez sur l’un des côtés de la
touche volume pour régler les
minutes.
pour avancer
pour reculer
2 Appuyez sur (DSPL).
L’horloge démarre.
Une fois le réglage de l’horloge terminé, la
fenêtre d’affichage revient au mode de
lecture normal.
Conseil
Pour changer le sens de lecture de la cassette,
appuyez sur m et M.
Pour arrêter la lecture et éjecter la
cassette
Appuyez sur Z.
Avance rapide de la bande
En cours de lecture, appuyez sur
m ou M.
Indicateur
de
direction*
FWD
REV
* L’indicateur se mettra à clignoter pendant
l’avance rapide de la cassette.
Pour entamer la lecture en cours d’avance
rapide ou de rembobinage, appuyez sur l’autre
touche d’avance rapide jusqu’à ce que la
touche de verrouillage soit relâchée.
Pour avancer
M
m
Pour
rembobiner
m
M
7
Page 26

Réception radio en cours
d’avance rapide ou de
rembobinage d’une
cassette
— Activation automatique du syntoniseur
(ATA)
La radio s’allume automatiquement lorsque les
touches m ou M sont utilisées pour
l’avance ou le retour rapide.
En cours de lecture, appuyez plusieurs
fois sur (BTM) (ATA) jusqu’à ce que
l’indication “ATA-ON” apparaisse dans la
fenêtre d’affichage.
ATA-ON y ATA-OFF
Le mode ATA démarre.
Pour revenir en mode de lecture normal,
sélectionnez “ATA-OFF”.
Radio
Mémorisation
automatique des stations
— Mémorisation des meilleurs accords (BTM)
L’appareil sélectionne les stations qui offrent les
signaux les plus puissants et les mémorise par
ordre de fréquence. L’appareil peut mémoriser
jusqu’à 6 stations pour chaque bande de
fréquences (FM1, FM2, FM3, AM1 et AM2).
Attention
Pour syntoniser des stations pendant que vous
conduisez, nous vous conseillons d’utiliser la
fonction de mémorisation du meilleur accord
(BTM) de façon à éviter les accidents.
1 Appuyez plusieurs fois sur (SOURCE)
pour sélectionner la radio.
Si une cassette est en cours de lecture,
pressez Z pour l’éjecter.
Chaque fois que vous appuyez sur
(SOURCE), la source change comme suit :
Radio t CD* t MD*
* Si l’appareil en option correspondant n’est
pas connecté, le paramètre ne s’affiche pas.
2 Appuyez plusieurs fois sur (MODE) pour
sélectionner la bande de fréquence.
Chaque fois que vous appuyez sur
(MODE), la bande change comme suit :
FM1 t FM2 t FM3 t AM1 t AM2
3 Appuyez sur (BTM) (ATA) pendant
2 secondes.
L’appareil mémorise les stations sous les
touches numériques dans l’ordre de leur
fréquence.
Un bip retentit lorsque le réglage est
mémorisé.
Remarques
• L’appareil ne mémorise pas les stations émettant
avec de faibles signaux. Si seules quelques
stations peuvent être captées, certaines touches
numériques conserveront leur réglage préalable.
• Si un numéro est indiqué dans la fenêtre
d’affichage, l’appareil commence la
mémorisation des stations à partir de la station
affichée.
8
Page 27

Mémorisation des stations
souhaitées uniquement
Vous pouvez présélectionner jusqu’à
18 stations FM (6 en FM1, 2 et 3), 12 stations
AM (6 en AM1 et 2), dans l’ordre de votre
choix.
1 Appuyez plusieurs fois sur (SOURCE)
pour sélectionner la radio.
Si une cassette est en cours de lecture,
pressez Z pour l’éjecter.
2 Appuyez plusieurs fois sur (MODE) pour
sélectionner la bande de fréquence.
3 Appuyez sur l’un des côtés de (SEEK)
pour syntoniser la station que vous
souhaitez sauvegarder sous la touche
numérique.
4 Appuyez sur la touche numérique
((1) à (6)) jusqu’à ce que “MEM”
s’affiche.
Le numéro de la touche numérique de
présélection apparaît dans la fenêtre
d’affichage.
Remarque
Si vous essayez de mémoriser une autre station
sous une touche numérique déjà utilisée, la station
précédemment mémorisée est supprimée.
Si vous ne parvenez pas à syntoniser
une station présélectionnée
— Recherche automatique des fréquences/
Mode recherche locale
Recherche automatique des fréquences :
Appuyez sur l’un des côtés de
(SEEK) pour rechercher la station.
Le balayage s’arrête lorsque l’appareil capte
une station. Appuyez plusieurs fois sur l’un
des côtés de (SEEK) jusqu’à ce que la
station souhaitée soit captée.
Mode recherche locale :
Si la recherche automatique des
fréquences s’arrête trop souvent, appuyez
plusieurs fois sur la touche (SENS) jusqu’à
ce que “LOCAL-ON” s’affiche.
L’indicateur “LCL” est affichée.
Seules les stations dont les signaux sont
suffisamment puissants seront accordées.
Conseil
Si vous connaissez la fréquence de la station que
vous voulez écouter, appuyez sur l’un des côtés de
(SEEK) jusqu’à ce que la fréquence voulue
apparaisse (syntonisation manuelle).
Si la réception FM est faible
— Mode mono
Réception des stations
mémorisées
1 Appuyez plusieurs fois sur (SOURCE)
pour sélectionner la radio.
Si une cassette est en cours de lecture,
pressez Z pour l’éjecter.
2 Appuyez plusieurs fois sur (MODE) pour
sélectionner la bande de fréquence.
3 Appuyez sur la touche numérique
((1) à (6)) sous laquelle la station
souhaitée est présélectionnée.
En cours de réception radio, appuyez
plusieurs fois sur la touche (SENS)
jusqu’à ce que “MONO-ON” s’affiche.
L’indicateur “MONO” est affichée.
Le son s’améliore, mais passe en mono
(“ST” disparaît).
Pour retourner au mode normal, sélectionnez
“MONO-OFF”.
9
Page 28

Autres fonctions
Réglage de la balance
gauche-droite et de
l’équilibre avant-arrière
Vous pouvez régler la balance gauche-droite et
l’équilibre avant-arrière.
1 Appuyez plusieurs fois sur (SEL) jusqu’à
ce que l’indication “BAL” ou “FAD”
apparaisse.
Chaque fois que vous appuyez sur (SEL),
la source change comme suit :
LOW* t MID* t HIGH* t
BAL (gauche-droite) t FAD (avant-arrière)
* Lorsque EQ3 est activé (page 11).
2 Appuyez sur l’un des côtés de la touche
de volume pour régler le paramètre
sélectionné.
Effectuez ce réglage dans les 3 secondes
après avoir sélectionné le paramètre.
Modification des réglages
du son et de l’affichage
Les paramètres suivants peuvent être réglés :
•A.SCRL (défilement automatique)* (page 12).
•M.DSPL (affichage animé)
– Le mode démonstration apparaît lorsque la
cassette est éjectée et qu’aucune source n’est
sélectionnée (par exemple, le récepteur est
éteint).
•BEEP – pour activer ou désactiver le bip
sonore.
1 Appuyez simultanément sur la touche
(SEL) et sur la touche numérique de
présélection souhaitée.
(SEL) + (3): A.SCRL*
(SEL) + (4): M.DSPL
(SEL) + (6): BEEP
* Lorsqu’aucun CD ou MD n’est en cours de
lecture, ce paramètre n’apparaît pas.
2 Appuyez plusieurs fois sur (SEL) et la
touche numérique de présélection pour
sélectionner le réglage souhaité
(exemple : ON ou OFF).
Atténuation du son
Appuyez sur (ATT).
“ATT-ON” clignote momentanément puis
l’indication “ATT” s’affiche.
Pour restaurer le niveau précédent du volume,
appuyez à nouveau sur (ATT).
L’indication “ATT-OFF” apparaît brièvement.
10
Page 29

Réglage de l’égaliseur
— EQ3
Vous pouvez sélectionner une courbe
d’égaliseur pour 7 types de musique (XPLOD,
VOCAL, CLUB, JAZZ, NEW AGE, ROCK,
CUSTOM, et OFF (égaliseur réglé sur OFF)).
Vous pouvez sauvegarder un réglage
d’égaliseur différent pour chaque source.
Sélection de la courbe d’égaliseur
1 Appuyez sur (SOURCE) pour sélectionner
une source (Radio, CD ou MD) ou insérez
une cassette.
2 Appuyez plusieurs fois sur (EQ3) pour
sélectionner la courbe d’égaliseur
souhaitée.
A chaque pression sur la touche (EQ3), la
rubrique change.
Pour annuler l’effet de l’égaliseur,
sélectionnez “OFF”.
Réglage de la courbe d’égaliseur
Vous pouvez mémoriser et régler les
paramètres de l’égaliseur pour différentes
plages de tonalit.
1 Appuyez sur (SOURCE) pour sélectionner
une source (Radio, CD ou MD) ou insérez
une cassette.
2 Appuyez plusieurs fois sur (EQ3) pour
sélectionner la courbe d’égaliseur
souhaitée.
3 Réglage de la courbe d’égaliseur.
1 Appuyez plusieurs fois sur (SEL) pour
sélectionner la plage de tonalité
souhaitée.
A chaque pression sur (SEL), la gamme
de tonalité change.
LOW t MID t HI (t BAL t FAD)
2 Appuyez plusieurs fois sur les côtés
de la touche de volume pour régler le
niveau de volume souhaité.
Le niveau de volume peut être réglé par
incréments de 1 dB, de –10 dB à +10 dB.
3 Répétez les étapes 1 et 2 pour
régler la courbe de l’égaliseur.
Pour restaurer la courbe par défaut de
l’égaliseur, appuyez sur (SEL) pendant
2 secondes.
Après 3 secondes, l’affichage revient en
mode de lecture normal.
Remarque
Lorsque EQ3 est réglé à “OFF”, vous ne pouvez pas
régler les paramètres de l’égaliseur.
11
Page 30

Avec appareils optionnels
Appareil CD/MD
Cet appareil peut commander des appareils
CD et MD externes.
Si vous raccordez un appareil CD en option
dotée de la fonction CD TEXT, les informations
CD TEXT apparaissent dans la fenêtre
d’affichage pendant la lecture des disques CD
TEXT.
Défilement automatique d’une
rubrique d’affichage
— Défilement automatique
Lorsqu’un titre de disque, un nom d’artiste ou
un titre de plage d’un disque CD TEXT ou
d’un MD dépasse 8 caractères et que la
fonction de défilement automatique est
activée, les informations défilent
automatiquement dans la fenêtre d’affichage
comme suit :
• Le titre du disque lorsque le disque a changé (si
le titre du disque est sélectionné).
• Le titre de la plage lorsque la plage a changé (si
le titre de la plage est sélectionné).
Lecture d’un CD ou d’un MD
1 Appuyez plusieurs fois sur (SOURCE)
pour sélectionner le CD ou le MD.
Si une cassette est en cours de lecture,
pressez Z pour l’éjecter.
2 Appuyez sur (MODE) jusqu’à ce que
l’appareil souhaité apparaisse.
La lecture CD ou MD commence.
Si un appareil CD ou MD est raccordé, toutes
les plages sont lues depuis le début.
Conseil
Avec le MG Memory Stick System-up Player
MGS-X1 en option raccordé à cet appareil,
appuyez sur la touche (SOURCE) pour sélectionner
“MD“, puis appuyez sur la touche (MODE) pour
sélectionner le numéro d’unité du MD (MD1 ou
MD2, etc.).
Changement des paramètres
affichés
Chaque fois que vous appuyez sur (DSPL) en
cours de lecture CD, CD TEXT ou MD, le
paramètre change selon la séquence suivante :
Temps de lecture écoulé t
Titre du disque*1/Nom de l’artiste*2 t
Titre de la plage*
1
*
Si vous n’avez pas attribué d’identification au
disque ou si le MD ne comporte pas de titre
préenregistré, l’indication “NO NAME” apparaît
dans la fenêtre d’affichage.
*2Si vous reproduisez un disque CD TEXT, le nom
de l’artiste apparaît dans la fenêtre d’affichage
après le titre du disque. (Uniquement pour les
disques CD TEXT avec le nom de l’artiste.)
3
Si le titre d’une plage d’un disque CD TEXT ou
*
d’un MD n’a pas été préalablement enregistré,
l’indication “NO NAME” apparaît dans la
fenêtre d’affichage.
3
t Horloge
Si vous appuyez sur (DSPL) pour modifier la
rubrique d’affichage, le nom du disque ou de
la plage du disque CD TEXT ou MD défile
automatiquement que vous ayez réglé la
fonction à ON ou à OFF.
Pendant la lecture, appuyez sur (SEL) et
(3) pour sélectionner “A.SCRL-ON”.
Sélectionnez “A.SCRL-OFF” pour annuler le
défilement automatique.
Remarque
Sur certains disques comportant de très nombreux
caractères, les situations suivantes peuvent se
produire :
—Certains caractères ne sont pas affichés.
—La fonction de défilement automatique est
inopérante.
12
Page 31

Recherche d’une plage déterminée
— Détecteur automatique de musique (AMS)
En cours de lecture, appuyez brièvement
sur l’un des côtés de (SEEK) pour chaque
plage que vous souhaitez sauter.
Pour rechercher parmi les plages
suivantes
SEEK
Pour rechercher parmi les plages
précédentes
Recherche d’un passage déterminé
sur une plage
— Recherche manuelle
En cours de lecture, appuyez et
maintenez enfoncé n’importe quel côté
de (SEEK). Relâchez-le lorsque vous avez
trouvé le passage souhaité.
Pour chercher vers l’avant
SEEK
Pour chercher vers l’arrière
Changement de disque
En cours de lecture, appuyez sur la
touche (1) (DISC –) ou (2) (DISC +).
La lecture du disque souhaité dans
l’appareil démarre.
(1) (DISC –) : Pour les disques précédents
(2) (DISC +) : Pour les disques suivants
Numéro de disque
Numéro de plage
Lecture de plages répétée
— Lecture répétée
Vous pouvez sélectionner :
• REP-TRACK – pour répéter une plage.
• REP-DISC – pour répéter un disque.
En cours de lecture, appuyez plusieurs
fois sur (3) (REP) jusqu’à ce que le
réglage souhaité apparaisse.
REP-TRACK t REP-DISC t REP-OFF
La lecture répétée démarre.
Pour revenir en mode de lecture normal,
sélectionnez “REP-OFF”.
Lecture de plages dans un
ordre quelconque
— Lecture aléatoire
Vous pouvez sélectionner :
• SHUF-DISC – pour reproduire les plages du
disque en cours dans un ordre aléatoire.
•SHUF-CHGR – pour reproduire les plages de
l’unité en cours dans un ordre aléatoire.
• SHUF-ALL* – pour reproduire toutes les
plages de tous les appareils dans un ordre
aléatoire.
En cours de lecture, appuyez plusieurs
fois sur (4) (SHUF) jusqu’à ce que le
réglage souhaité apparaisse.
SHUF-DISC t SHUF-CHGR t SHUF-ALL*
t SHUF-OFF
La lecture aléatoire peut ne pas bien
fonctionner.
* “SHUF-ALL” est uniquement accessible
lorsque vous raccordez deux unités CD/MD en
option ou plus.
Pour revenir en mode de lecture normal,
sélectionnez “SHUF-OFF”.
13
Page 32

Informations
supplémentaires
Entretien
Remplacement du fusible
Lors du remplacement d’un fusible, veillez à
utiliser un fusible dont l’intensité est identique
à celle inscrite sur le fusible d’origine. Si le
fusible grille, vérifiez le raccordement de la
source d’alimentation et remplacez le fusible.
Si le fusible grille une nouvelle fois après avoir
été remplacé, cela peut révéler une défaillance
interne de l’appareil. Le cas échéant, consultez
un détaillant Sony.
Fusible (10 A)
Avertissement
N’utilisez jamais de fusible dont l’intensité
dépasse celle du fusible fourni avec l’appareil,
car vous risqueriez d’endommager l’appareil.
Nettoyage des connecteurs
Si les connecteurs situés entre l’appareil et la
façade ne sont pas propres, le système peut ne
pas bien fonctionner. Pour éviter cela, ouvrez
la façade en appuyant sur (RELEASE),
déposez-la ensuite et nettoyez-la à l’aide d’un
coton-tige imprégné d’alcool. N’exercez pas
une pression trop importante. Vous risqueriez
sinon d’endommager le connecteur.
Autoradio
Dos de la façade
Remarques
• Pour des raisons de sécurité, coupez le moteur
avant de nettoyer les connecteurs et retirez la clé
du contact.
• Ne touchez jamais les connecteurs directement
avec les mains ou avec un ustensile métallique.
14
Page 33

Démontage de l’appareil
1 Retirez le cadre de sûreté.
1 Retirez la façade (page 6).
2 Insérez les clés de déblocage
simultanément dans le cadre de
sûreté.
Orientez correctement
la clé de déblocage.
3 Tirez sur les clés de déblocage pour
retirer le cadre de sûreté.
2 Retirez l’appareil.
1 Insérez les deux clés de déblocage
simultanément jusqu’au déclic.
Tournez le crochet
vers l’intérieur.
2 Tirez sur les clés de déblocage pour
extraire l’appareil.
3 Faites glisser l’appareil en dehors de
son support.
15
Page 34

Spécifications
Lecteur de cassette
Pistes sonores 4 pistes 2 canaux stéréo
Pleurage et scintillement 0,13 % (WRMS)
Réponse en fréquence 30 – 15.000 Hz
Rapport signal/bruit 55 dB
Radio
FM
Plage de syntonisation Intervalle d’accord FM :
Borne d’antenne Connecteur d’antenne
Fréquence intermédiaire 10,7 MHz/450 kHz
Sensibilité utile 9 dBf
Sélectivité 75 dB à 400 kHz
Rapport signal-bruit 67 dB (stéréo),
Distorsion harmonique à 1 kHz
Séparation 35 dB à 1 kHz
Réponse en fréquence 30 – 15.000 Hz
87,5 – 107,9 MHz
(par pas de 200 kHz)
externe
69 dB (mono)
0,5 % (stéréo),
0,3 % (mono)
AM
Plage de syntonisation Intervalle d’accord AM :
Borne d’antenne Connecteur d’antenne
Fréquence intermédiaire 10,7 MHz/450 kHz
Sensibilité 30 µV
530 – 1.710 kHz
(par pas de 10 kHz)
externe
Amplificateur de puissance
Sorties Sorties pour haut-parleurs
Impédance de haut-parleurs
Puissance de sortie maximum
(connecteurs de sécurité)
4 – 8 ohms
45 W × 4 (à 4 ohms)
Caractéristiques générales
Sorties Sortie audio
Entrées Connecteur d’entrée de
Commandes de tonalité Bas:
Puissance de raccordement
Dimensions Approx. 178 × 50 × 178 mm
Dimensions de montage Approx. 182 × 53 × 161 mm
Poids Approx. 1,2 kg (2 liv 10 on)
Accessoires fournis Eléments d’installation et
Accessoires optionnels Câble BUS (fourni avec un
Appareils optionnels
Fil de commande de relais
d’antenne électrique
Fil de commande
d’amplificateur de
puissance
commande BUS
Connecteur d’entrée audio
BUS
±10 dB à 60 Hz (Xplod)
Moyen:
±10 dB à 1 kHz (Xplod)
Haut:
±10 dB à 10 kHz (Xplod)
Batterie de voiture
12 V CC (masse négative)
1
/8 × 2 × 7 1/8 po)
(7
(L/H/P)
1
/4 × 2 1/8 × 6 3/8 po)
(7
(L/H/P)
de raccordement (1 jeu)
Etui pour la façade (1)
cordon à broche RCA)
RC-61 (1 m), RC-62 (2 m)
Changeur de CD (10 disques)
CDX-656
Changeur CD (6 disques)
CDX-T69
Changeur MD (6 disques)
MDX-66XLP
Récepteur radio satellite XM
XT-XM1
Lecteur du système
MG-MS
MGS-X1
Sélecteur de source
XA-C30
Sélecteur AUX-IN
XA-300
16
La conception et les spécifications sont sujettes à
modifications sans préavis.
Page 35

Dépannage
La liste de contrôles suivante vous aidera à remédier aux problèmes que vous pourriez rencontrer
avec cet appareil.
Avant de parcourir la liste ci-dessous, vérifiez les connexions et les procédures d’utilisation.
Généralités
Problème
Pas de son.
Le contenu de la mémoire a été
effacé.
Aucune indication n’apparaît
dans la fenêtre d’affichage.
Lecture cassette
Problème
Distorsion du son.
Cause/Solution
• Annulez la fonction ATT (page 10).
• Pour un système à 2 haut-parleurs, réglez la commande
d’équilibre avant-arrière sur la position médiane.
• Réglez le volume à l’aide de la touche (+).
• Le cordon d’alimentation ou la batterie a été déconnecté.
• La touche de réinitialisation (RESET) a été enfoncée.
t Recommencez la procédure d’enregistrement dans la
mémoire.
• Déposez la façade et nettoyez les connecteurs. Pour plus de
détails, voir la procédure “Nettoyage des connecteurs”
(page 14).
•L’affichage de l’horloge disparaît si vous appuyez sur (OFF)
pendant 2 secondes.
t Appuyez de nouveau sur la touche (OFF) pendant 2
secondes pour afficher l’horloge.
Cause/Solution
La tête de lecture de cassette est souillée.
t Nettoyez la tête à l’aide d’une cassette de nettoyage de type
sec disponible dans le commerce.
Réception radio
Problème
Impossible de syntoniser une
présélection.
La syntonisation automatique
est impossible.
Impossible de capter les
stations.
Le son est parasité.
L’indication “ST” clignote.
Lecture CD/MD
Problème
Pertes de son.
Cause/Solution
• Mémorisez la fréquence correcte.
• Le signal d’émission est trop faible.
• Le signal d’émission est trop faible.
t Utilisez la syntonisation manuelle.
• Le mode de recherche locale est réglé à ON.
t Réglez le mode de recherche locale à OFF (page 9).
Raccordez un fil de commande d’antenne électrique (bleu) ou
un fil d’alimentation électrique d’accessoire (rouge) au fil
d’alimentation électrique de l’amplificateur d’antenne de la
voiture. (Lorsque votre voiture dispose d’une antenne FM/AM
dans la vitre arrière/latérale uniquement.)
• Syntonisez la fréquence correctement.
• Le signal d’émission est trop faible.
t Sélectionnez le mode mono (page 9).
Cause/Solution
Disque souillé ou défectueux.
17
Page 36

Affichage des erreurs (lorsqu’une unité CD/MD en option est raccordée)
Les indications suivantes clignotent pendant environ 5 secondes et une alarme retentit.
Affichage
NO MAG
NO DISC
ERROR
BLANK
RESET
NOT R EADY
HI TEMP
*1Si une erreur se produit pendant la lecture d’un CD ou d’un MD, le numéro de disque du CD ou du MD
n’apparaît pas dans la fenêtre d’affichage.
2
*
Le numéro du disque qui pose un problème apparaît dans la fenêtre d’affichage.
Si les solutions proposées ci-dessus ne permettent pas de remédier au problème, consultez votre
détaillant Sony.
Cause
Le chargeur de disques n’est pas
introduit dans l’appareil CD/MD.
Il n’y a aucun disque dans l’appareil
CD/MD.
Un CD est souillé ou a été introduit à
l’envers.*
1
Impossible de reproduire un MD en
*
raison d’un problème.*
Lecture d’un CD/MD impossible en
raison d’un problème.
1
*
Aucune plage n’a été enregistrée sur
un MD.*
L’appareil CD/MD ne peut
fonctionner en raison d’un problème.
Le couvercle de l’appareil de MD est
ouvert ou les MD ne sont pas bien en
place.
La température ambiante dépasse
50 °C (122 °F).
2
2
2
Solution
Introduisez le chargeur de disques
dans l’appareil CD/MD.
Introduisez des disques dans
l’appareil CD/MD.
Nettoyez ou introduisez
correctement le CD.
Introduisez un autre MD.
Introduisez un autre CD/MD.
Lisez un MD sur lequel des plages
ont été enregistrées.
Appuyez sur la touche de
réinitialisation (RESET) de l’appareil.
Fermez le couvercle ou remettez les
MD en place correctement.
Attendez que la température baisse
sous 50 °C (122 °F).
Sony Corporation Printed in Malaysia
18
 Loading...