

Page 1
A
B
SOURCE
AMS
VOL
SEEK
DISC
ATT
PRESET
Features
With this rotary commander, you can control your car audio
equipment easily as you would control the headlight or the wiper
switch of your car while driving.
Use this rotary commander with master units which have the special
input jack for the rotary commander.
Note
This rotary commander cannot be used for units which are designed for the
rotary commander RM-X38/X33/X32 and S commander RM-X1S.
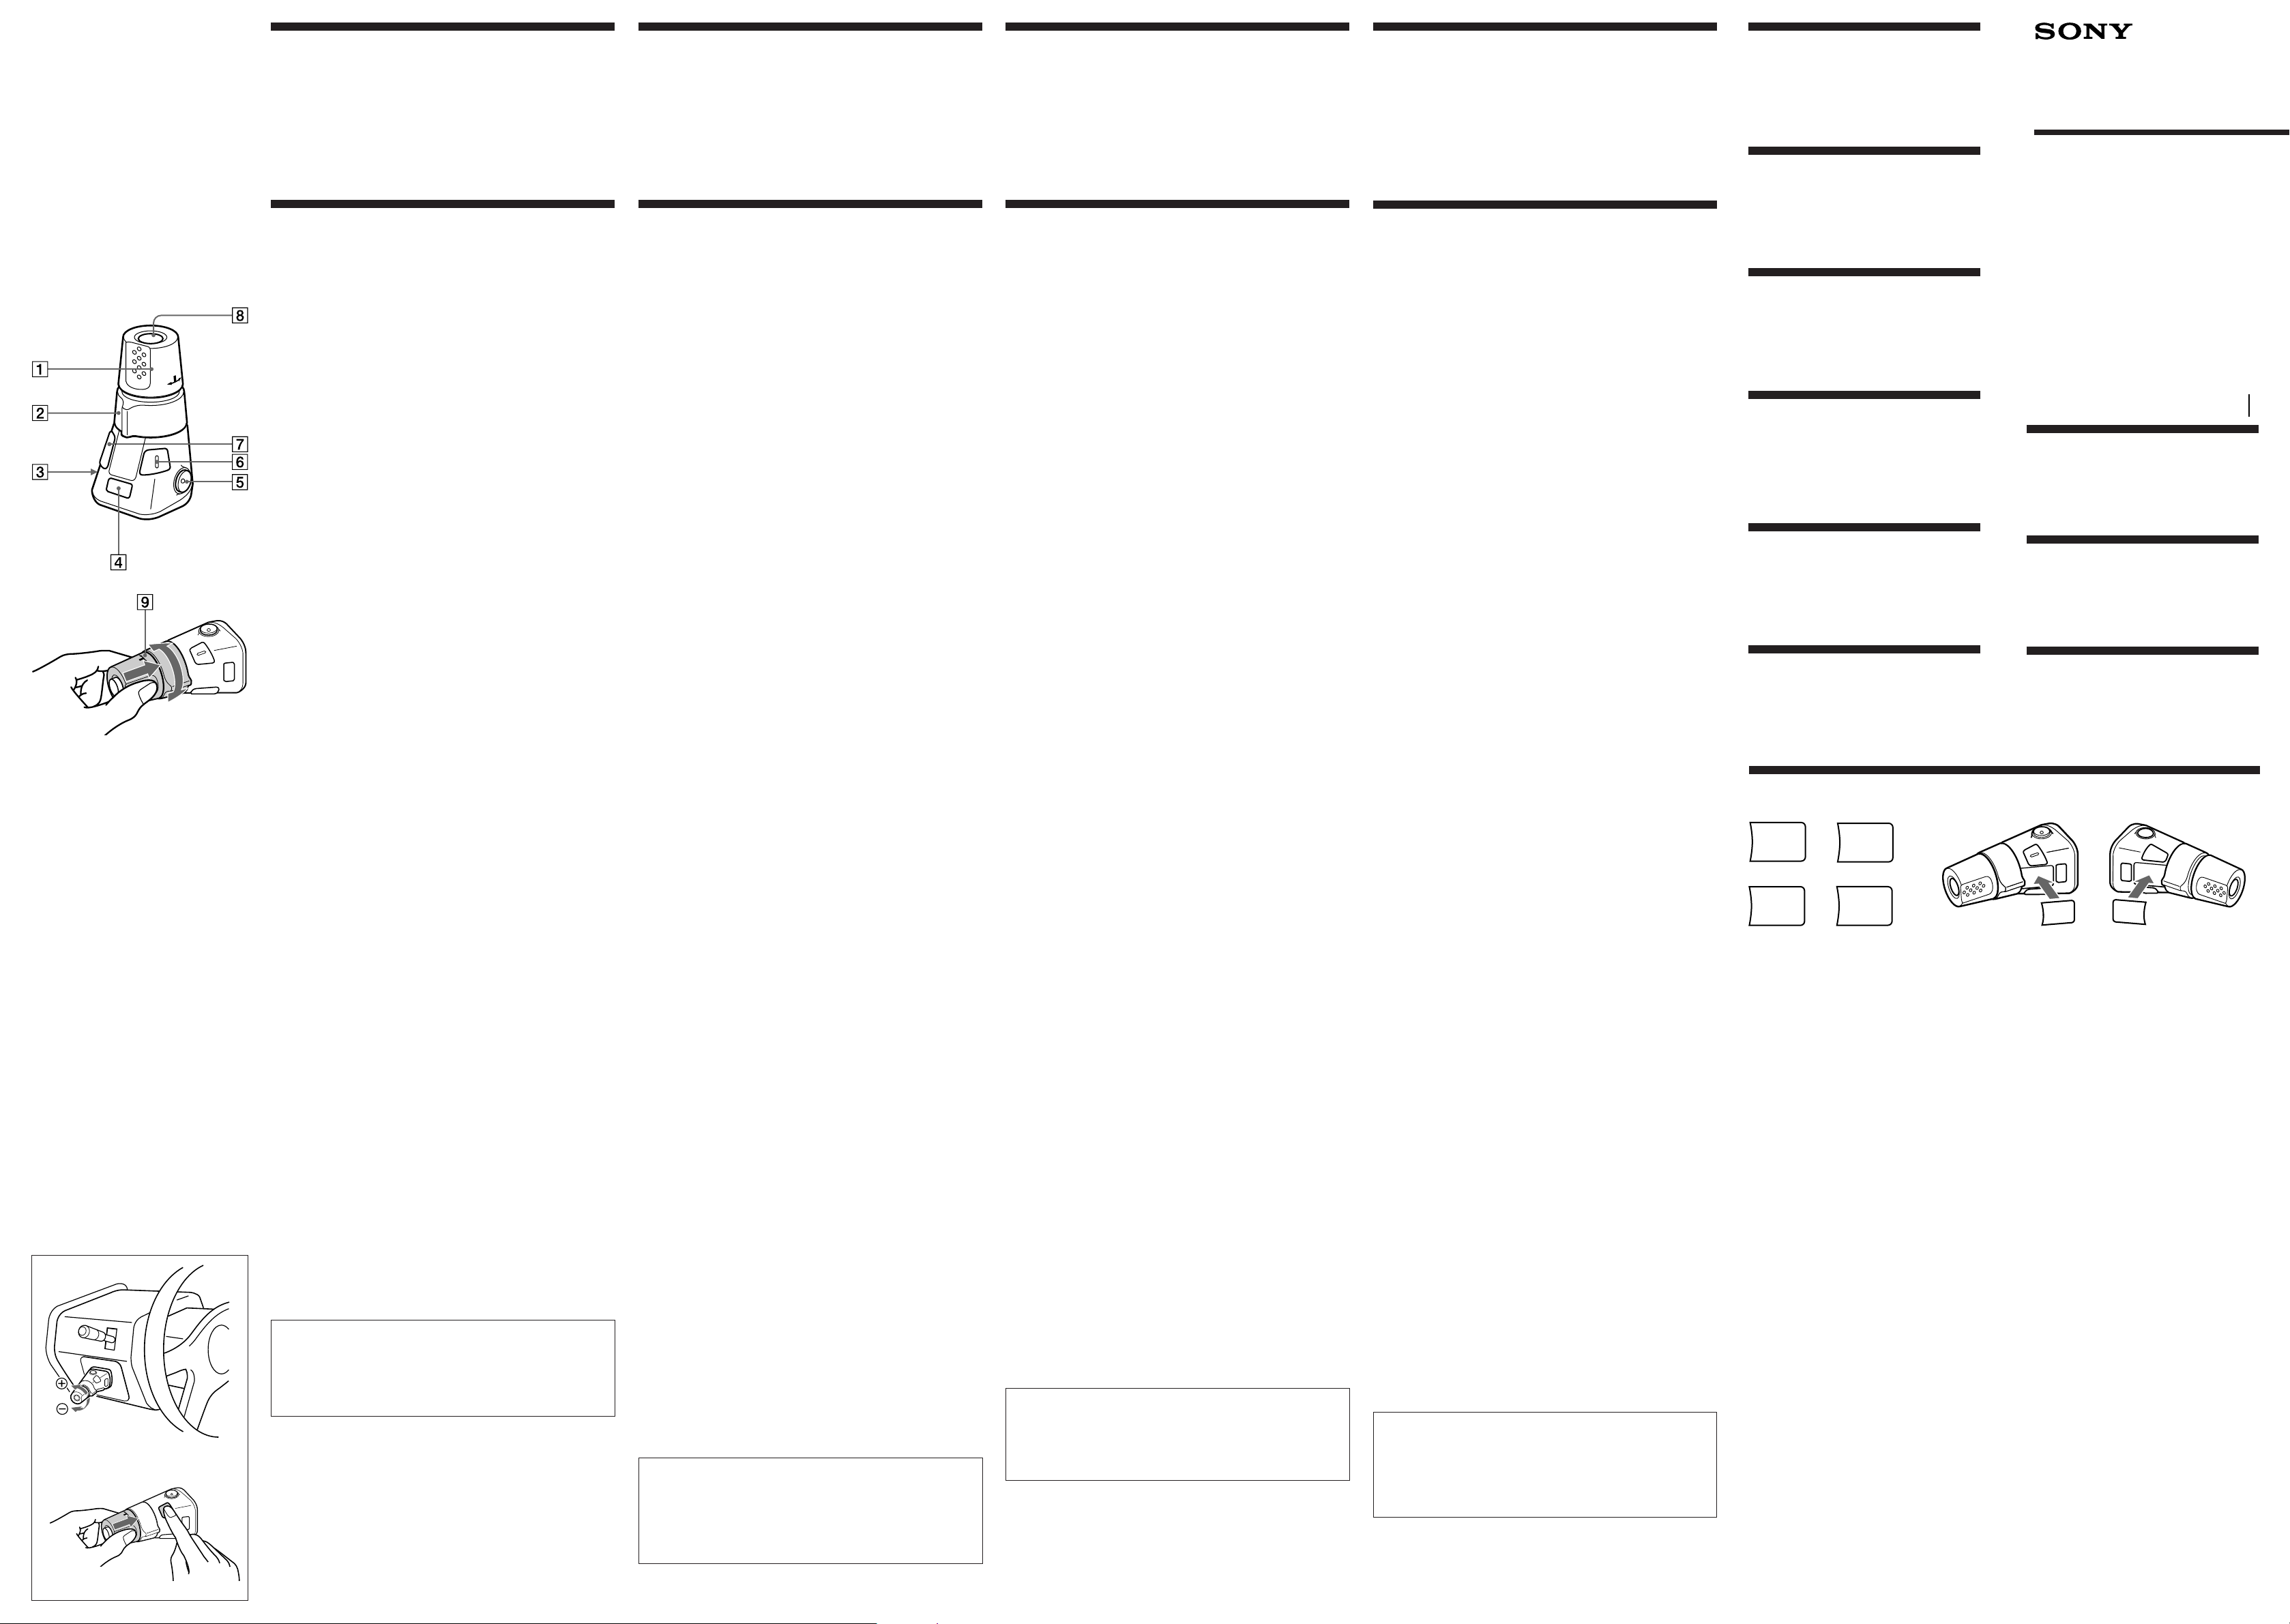
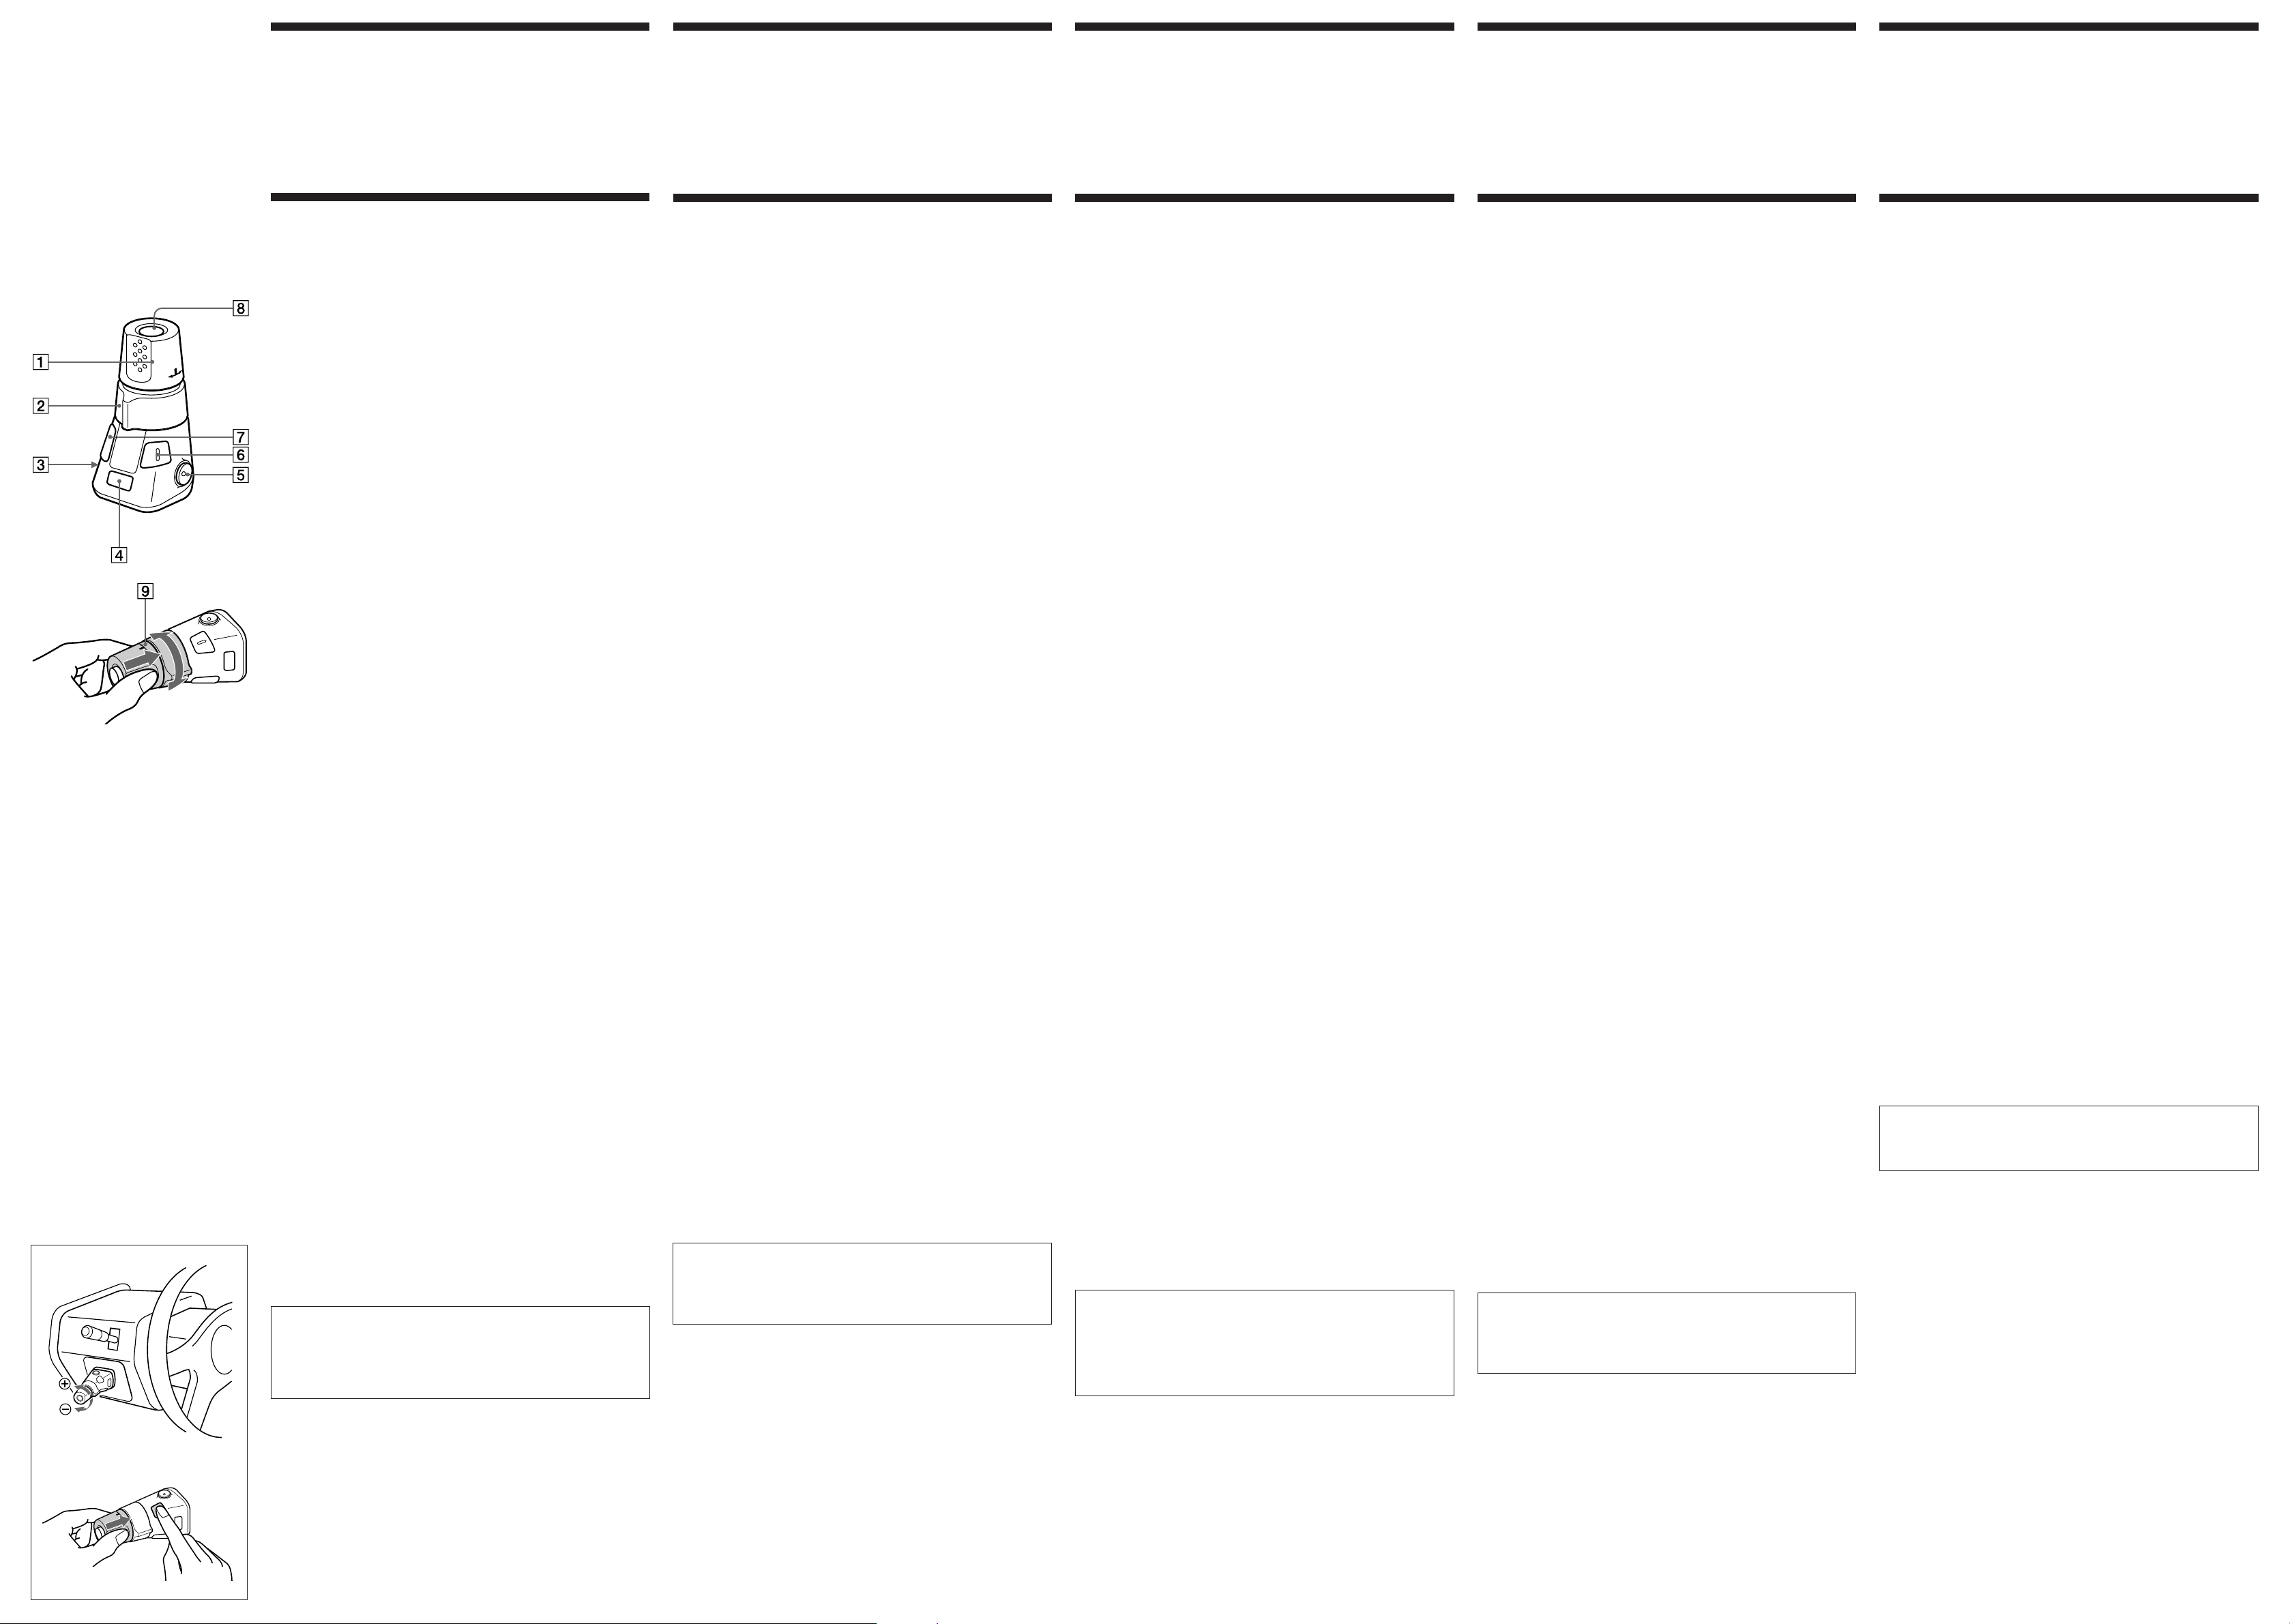
Location and Function of Controls
The following buttons and controls (except the SOURCE and MODE
button) share the same functions as those on the master unit or the
wireless remote commander.
For more information about the functions of each button or control,
refer to the operating instructions of your Sony car audio equipment.
1VOL (volume) control
2SEEK/AMS control
During tape or CD/MD playback:
• AMS* function: Locates the beginning of the tracks. Rotate the
control the number of times you wish to skip the tracks.
To skip several tracks at once, rotate the control momentarily and
release. Within one second, rotate it again and hold it in this
position. When the desired track is reached, release.
* Automatic Music Sensor.
• Manual search: Locates the desired part of a track. Rotate the
control either left or right, and keep it in the rotated position until
the desired part is located.
During radio/TV reception:
• Automatic tuning: Automatically tunes to a station. When a
station is tuned in, the search stops automatically. Rotate the
control momentarily several times until a desired station is tuned
in.
• Manually searches a station. Rotate the control either left or right,
and keep it in the rotated position until the desired station is
tuned in. If you rotate again within one second, you can continue
manual search for another station.
3OFF button
Press to turn off the unit.
4MODE button
• Changes the playback side of the cassette.
• Selects CD units when several CD units are connected.
For example: CD1 n CD2 n ···
• Selects MD units when several MD units are connected.
For example: MD1 n MD2 n ···
• Changes the preset groups.
FM/AM model:
For example: FM1 n FM2 n AM n ···
FM/MW/LW(SW) model:
For example: FM1 n FM2 n MW n LW(SW) n ···
• Changes the TV/video mode (Only in the U.S.A. and Canada
models).
5ATT button
Press to attenuator the sound momentarily.
The 6 and 7 buttons activate the different
function for the master unit.
—The master unit with the SEL button.
6SEL button*
7DSPL button* (models with DSPL button on the master
unit)
FILE button* (models with FILE button on the master unit)
Attach that label which matches the functions of the connected master
unit.
Refer to the master unit operating instructions.
—The master unit with the SOUND button.
6SOUND button*
7LIST button* (models with LIST button on the master unit)
DSPL button* (models with DSPL button on the master
unit)
Attach that label which matches the functions of the connected master
unit.
Refer to the master unit operating instructions.
* Functions in the same way as the button on the master unit.
8SOURCE button
Press to select program sources.
9PRESET/DISC control
Press and rotate the VOL control. (The VOL control and the SEEK/
AMS control turn together.)
• Fast-winds the tape. To resume normal playback, press the MODE
button.
• Changes the disc when (a) CD/MD unit(s) is (are) connected.
• Receives the stations memorized on the preset number buttons on
the master unit.
Changing the operative direction
The operative direction of controls is factory preset as in the
illustration (A).
If you need to mount the rotary commander on the right of the steering
column, you can reverse the operative direction of controls.
Press the 6 button more than two seconds while pressing the VOL
control (B).
When the POWER SELECT switch on your master unit is set to the
B (OFF) position, your master unit cannot be operated with the
commander unless on of the operational buttons is pressed or a
disc/cassette is inserted to activate the master unit. Depending on
the type of the master unit, you can turn on the master unit with the
SOURCE button of the rotary commander. For details, refer to the
Operating Instructions of the master unit.
Caractéristiques
Ce satellite de commande vous permet de contrôler d’une façon
extrêmement simple et tout en roulant le fonctionnement de votre
équipement audio de voiture comme s’il s’agissait des phares ou des
essuie-glaces.
Utilisez ce satellite de commande avec des appareils principaux dotés
d’une prise d’entrée spéciale pour satellite de commande.
Remarque
Ce satellite de commande ne peut être utilisé avec des appareils conçus pour
les satellites de commande RM-X38/X33/X32 et la commande S RM-X1S.
Emplacement et fonction des commandes
Les touches et les commandes suivantes (à l’exception des touches
SOURCE et MODE) remplissent les mêmes fonctions que celles de
l’appareil principal ou de la télécommande.
Pour des informations plus détaillées sur les fonctions de chacune des
touches et des commandes, reportez-vous au mode d’emploi de votre
équipement audio de voiture Sony.
1Commande VOL (volume)
2Commande SEEK/AMS
En cours de lecture de cassette ou CD/MD:
•Fonction AMS*: Localise le début des plages. Tournez la
commande autant de fois que vous souhaitez sauter de plage.
Pour sauter plusieurs plages à la fois, tournez brièvement le
satellite et relâchez-le. Tournez-le à nouveau dans la seconde et
maintenez-le dans cette position. Relâchez-le dès que vous êtes
arrivé à la plage de votre choix.
* Détecteur automatique de musique (Automatic Music Sensor)
•Recherche manuelle: Localise un passage déterminé sur une
plage. Tournez la commande vers la gauche ou vers la droite et
maintenez-la dans cette position jusqu’à ce que vous ayez trouvé
le passage voulu.
En cours de réception radio/télévisée:
•Syntonisation automatique: Syntonise automatiquement une
station émettrice. Dès qu’une station est syntonisée, la recherche
est interrompue automatiquement.Tournez plusieurs fois
brièvement le satellite jusqu’à ce que la station de radio voulue
soit syntonisée.
•Recherche manuelle d’une station. Tournez la commande vers la
gauche ou vers la droite et maintenez-la dans cette position
jusqu’à ce que la station voulue ait été syntonisée. Si vous tournez
encore la commande dans la seconde, vous pouvez poursuivre la
recherche manuelle d’une autre station.
3Touche OFF
Appuyez sur cette touche pour mettre l’appareil hors tension.
4Touche MODE
•Change la face de lecture de la cassette.
•Sélectionne les unités CD lorsque plusieurs unités CD sont
raccordés. Par exemple: CD1 n CD2 n ···
•Sélectionne les unités MD lorsque plusieurs unités MD sont
raccordés. Par exemple: MD1 n MD2 n ···
•Change les groupes présélectionnés.
Modèle FM/AM:
Par exemple: FM1 n FM2 n AM n ···
Modèle FM/PO/GO(OC):
Par exemple: FM1 n FM2 n PO n GO(OC) n ···
•Commute le téléviseur/vidéo (Modèles pour les U.S.A. et le
Canada uniquement).
5Touche ATT
Appuyez sur cette touche pour atténuer temporairement le son.
Les touches 6 et 7 activent les différentes
fonctions de l’appareil principal.
—Appareil principal doté d‘une touche SEL.
6Touche SEL*
7Touche DSPL* (modèles dont l’appareil principal comporte
une touche DSPL)
Touche FILE* (modèles dont l’appareil principal comporte
une touche FILE)
Apposez l’étiquette correspondant aux fonctions de l’appareil
principal raccordé.
Reportez-vous au mode d’emploi de l’appareil principal.
—Appareil principal doté d‘une touche SOUND.
6Touche SOUND*
7Touche LIST* (modèles dont l’appareil principal comporte
une touche LIST)
Touche DSPL* (modèles dont l’appareil principal comporte
une touche DSPL)
Apposez l’étiquette correspondant aux fonctions de l’appareil
principal raccordé.
Reportez-vous au mode d’emploi de l’appareil principal.
* Fonctionne de la même manière que la touche de l’appareil
principal.
8Touche SOURCE
Appuyez sur cette touche pour sélectionner les sources audio/
vidéo.
9Commande PRESET/DISC
Pressez et tournez la commande VOL. (La commande VOL et la
commande SEEK/AMS tournent ensemble.)
•Fait avancer rapidement la bande. Pour reprendre la lecture
normale, appuyez sur la touche MODE.
•Change le disque une ou plusieurs unités CD/MD sont
raccordées.
•Capte les stations émettrices mémorisées sous les touches de
présélection de l’appareil principal.
Inverser le sens de fonctionnement
Le sens de fonctionnement des commandes est réglé par défaut comme
indiqué dans l’illustration (A).
Si vous devez monter le satellite du côté droit de la colonne de
direction, vous pouvez inverser le sens de fonctionnement des
commandes.
Appuyez sur la touche 6 pendant au moins deux secondes tout en
appuyant sur la commande VOL (B).
Lorsque le sélecteur POWER SELECT de votre appareil principal est
réglé sur la position B (OFF), votre appareil principal ne peut être
commandé à l’aide du satellite, sauf si l’une des touches de
commande est pressée ou si un disque/cassette est introduit de
manière à activer l’appareil principal. Selon le type de l’appareil
principal, vous pouvez mettre l’appareil principal sous tension à
l’aide de la touche SOURCE du satellite de commande. Pour plus de
détails, reportez-vous au mode d’emploi de l’appareil principal.
Funktionen
Mit diesem Joystick können Sie das Audiogerät in Ihrem Auto
während der Fahrt genauso mühelos bedienen wie zum Beispiel den
Schalter für Scheinwerfer oder Scheibenwischer.
Diesen Joystick können Sie an Hauptgeräte anschließen, die über eine
spezielle Eingangsbuchse für den Joystick verfügen.
Hinweis
Dieser Joystick kann nicht mit Geräten verwendet werden, die für den
Anschluß der Joysticks RM-X38/X33/X32 und des S-Steuerteils RM-X1S
konzipiert wurden.
Lage und Funktion der Teile und
Bedienelemente
Die folgenden Tasten und Bedienelemente (außer den Tasten SOURCE
und MODE) entsprechen in ihrer Funktionsweise denen des
Hauptgeräts bzw. der schnurlosen Fernbedienung.
Nähere Erläuterungen zu den Funktionen der einzelnen Tasten und
Regler finden Sie in der Bedienungsanleitung zu Ihrem SonyAudiogerät.
1Lautstärkeregler VOL
2Regler SEEK/AMS
Bei der Wiedergabe von Kassetten oder CD/MD:
•AMS*-Funktion: Sucht den Anfang von Musikstücken. Drehen Sie
den Regler so oft, wie Sie Titel überspringen wollen.
Um mehrere Musikstücke auf einmal zu überspringen, drehen Sie
den Regler zunächst einmal kurz und lassen ihn dann los. Dann
drehen Sie ihn innerhalb einer Sekunde nochmals und halten ihn in
dieser Position. Wenn das gewünschte Musikstück erreicht ist,
lassen Sie ihn los.
* Automatic Music Sensor (Automatischer Musiksensor)
•Manuelle Suchfunktion: Zum Suchen einer bestimmten Stelle in
einem Musikstück. Drehen Sie den Regler nach links oder rechts,
und halten Sie ihn in dieser Position, bis Sie die gewünschte Stelle
gefunden haben.
Beim Radio-/Fernsehempfang:
•Automatischer Sendersuchlauf: Sucht automatisch einen Sender.
Wenn ein Sender gefunden ist, stoppt die Suche automatisch.
Drehen Sie den Regler mehrere Male kurz, bis der gewünschte
Sender empfangen wird.
•Manueller Sendersuchlauf: Drehen Sie den Regler nach links oder
rechts, und halten Sie ihn in dieser Position, bis Sie den gewünschten
Sender gefunden haben.
Wenn Sie innerhalb einer Sekunde nochmals drehen, können Sie
die manuelle Suche nach einem anderen Sender fortsetzen.
3Taste OFF
Zum Ausschalten des Geräts.
4 Taste MODE
•Wechselt die Wiedergabeseite der Kassette.
•Wählt das CD-Gerät aus, wenn mehrere CD-Geräte angeschlossen
sind. Beispiel: CD1 n CD2 n ···
•Wählt das MD-Gerät aus, wenn mehrere MD-Geräte
angeschlossen sind. Beispiel: MD1 n MD2 n ···
•Wechselt zwischen den voreingestellten Gruppen.
UKW/AM-Modell:
Beispiel: UKW1 n UKW2 n AM n ···
UKW/MW/LW(KW)-Modell:
Beispiel: UKW1 n UKW2 n MW n LW(KW) n ···
•Wechselt zwischen TV- und Videomodus (nur bei den Modellen
für USA und Kanada).
5Taste ATT
Zum kurzfristigen Dämpfen des Tons.
Mit den Tasten 6 und 7 aktivieren Sie je nach
Hauptgerät unterschiedliche Funktionen.
—Bei einem Hauptgerät mit de Taste SEL.
6Taste SEL*
7Taste DSPL* (Modelle mit Taste DSPL am Hauptgerät)
Taste FILE* (Modelle mit Taste FILE am Hauptgerät)
Bringen Sie den Aufkleber an, der den Funktionen des
angeschlossenen Hauptgeräts entspricht.
Schlagen Sie dazu in der Bedienungsanleitung zum Hauptgerät nach.
—Bei einem Hauptgerät mit der Taste SOUND.
6Taste SOUND*
7Taste LIST* (Modelle mit Taste FILE am Hauptgerät)
Taste DSPL* (Modelle mit Taste DSPL am Hauptgerät)
Bringen Sie den Aufkleber an, der den Funktionen des
angeschlossenen Hauptgeräts entspricht.
Schlagen Sie dazu in der Bedienungsanleitung zum Hauptgerät nach.
* Funktioniert genauso wie die Taste am Hauptgerätt.
8Taste SOURCE
Zum Auswählen der Programmquellen.
9Regler PRESET/DISC
Drücken und drehen Sie den Regler VOL. Der Regler VOL und der
Regler SEEK/AMS drehen sich zusammen.
•Zum Spulen des Bandes. Um die Wiedergabe wieder
fortzusetzen, drücken Sie die Taste MODE.
•Wechselt die CD/MD, wenn ein oder mehrere CD/MD-Geräte
angeschlossen sind.
•Schaltet auf Empfang der Sender, die am Hauptgerät auf den
Stationstasten gespeichert sind.
Wechseln der Drehrichtung der Regler am Joystick
Werkseitig ist die Drehrichtung der Regler am Joystick wie auf
Abbildung (A) gezeigt eingestellt. Wenn Sie den Joystick jedoch an der
rechten Seite der Lenksäule anbringen, können Sie die Drehrichtung
der Regler ändern.
Halten Sie die Taste 6 mehr als zwei Sekunden lang gedrückt, und
drücken Sie dabei den Regler VOL (B).
Wenn der Schalter POWER SELECT am Hauptgerät in der Position
B (OFF) steht, können Sie das Hauptgerät nur über den Joystick
steuern, wenn Sie am Hauptgerät eine der Funktionstasten drücken
oder eine CD/Kassette einlegen, so daß sich das Hauptgerät
einschaltet. Je nach dem Typ können Sie das Hauptgerät aber auch
mit der Taste SOURCE am Joystick einschalten. Einzelheiten dazu
finden Sie in der Bedienungsanleitung zu Ihrem Hauptgerät.
Características
Con este mando rotativo, puede controlar el equipo de audio para
automóvil con la misma facilidad con la que controla los faros o el
interruptor del limpiaparabrisas mientras conduce.
Utilice este mando rotativo con las unidades principales que
dispongan de una toma de entrada especial para dicho mando.
Nota
Este mando rotativo no puede utilizarse con unidades diseñadas para el
mando rotativo RM-X38/X33/X32 y el mando S RM-X1S.
Localización y función de los controles
Los siguientes botones y controles (excepto los botones SOURCE y
MODE) realizan las mismas funciones que los de la unidad principal o
del mando a distancia sin cable.
Si desea más información sobre las funciones de cada botón o control,
consulte el manual de instrucciones del equipo de audio Sony para
automóvil.
1Control VOL (volumen)
2Control SEEK/AMS
Durante la reproducción de cintas o de CD/MD:
•Función AMS*: localiza el comienzo de los temas. Gire el control
tantas veces como temas desee omitir.
Para omitir varios temas de una vez, gire el control durante un
instante y suéltelo. En el intervalo de un segundo, gírelo de nuevo
y mantenga fija esta posición. Cuando llegue al tema que desee,
suéltelo.
* Sensor automático de música
•Búsqueda manual: localiza la parte deseada de un tema. Gire el
control hacia la izquierda o hacia la derecha y manténgalo en la
posición girada hasta que localice la parte que desee.
Durante la recepción de radio/TV:
•Sintonización automática: sintoniza emisoras automáticamente.
Una vez sintonizada la emisora, la búsqueda se detiene
automáticamente. Gire el control varias veces durante un instante
hasta que sintonice la emisora que desee.
•Busca emisoras manualmente. Gire el control hacia la izquierda o
hacia la derecha y manténgalo en la posición girada hasta que
sintonice la emisora que desee. Si vuelve a girarlo en un espacio de
tiempo de un segundo, es posible continuar la búsqueda manual
de otra emisora.
3Botón OFF
Púlselo para apagar la unidad.
4Botón MODE
•Cambia la cara de reproducción del cassette.
•Selecciona unidades de CD cuando hay varios conectadas.
Por ejemplo: CD1 n CD2 n ···
•Selecciona unidades de MD cuando hay varios conectadas.
Por ejemplo: MD1 n MD2 n ···
•Cambia los grupos programados.
Modelo FM/AM:
Por ejemplo: FM1 n FM2 n AM n ···
Modelo FM/MW/LW(SW):
Por ejemplo: FM1 n FM2 n MW n LW(SW) n ···
•Cambia el modo de TV/vídeo (sólo modelos para EE.UU. y
Canadá).
5Botón ATT
Púlselo para atenuar el sonido momentáneamente.
Los botones 6 y 7 activan las diferentes
funciones de la unidad principal.
—Unidad principal con botón SEL.
6Botón SEL*
7Botón DSPL* (modelos con botón DSPL en la unidad
principal)
Botón FILE* (modelos con botón FILE en la unidad
principal)
Adhiera la etiqueta que corresponda a las funciones de la unidad
principal conectada.
Consulte el manual de instrucciones de la unidad principal.
—Unidad principal con botón SOUND.
6Botón SOUND*
7Botón LIST* (modelos con botón LIST en la unidad
principal)
Botón DSPL* (modelos con botón DSPL en la unidad
principal)
Adhiera la etiqueta que corresponda a las funciones de la unidad
principal conectada.
Consulte el manual de instrucciones de la unidad principal.
* Funciona de la misma manera que el botón de la unidad principal.
8Botón SOURCE
Púlselo para seleccionar las fuentes de programa.
9Control PRESET/DISC
Pulse y gire el control VOL. (Los controles VOL y SEEK/AMS giran
juntos.)
•Avanza o retrocede la cinta rápidamente. Para reanudar la
reproducción normal, pulse el botón MODE.
•Cambia el disco cuando hay conectadas una o varias unidades de
CD/MD.
•Recibe las emisoras memorizadas en los botones numéricos
programados de la unidad principal.
Cambio de la dirección de funcionamiento
La dirección de funcionamiento de los controles viene ajustada de
fábrica como se muestra en la ilustración (A).
Si necesita instalar el mando rotativo en la parte derecha de la columna
de dirección, es posible invertir la dirección de funcionamiento de los
controles.
Pulse el botón 6 durante más de dos segundos mientras presiona el
control VOL (B).
Cuando el selector POWER SELECT de la unidad principal se
encuentra en la posición B (OFF), no es posible utilizar la unidad
principal con el mando, a menos que pulse uno de los botones de
control o inserte un disco/cinta para activarla. Dependiendo del tipo
de unidad principal de que disponga, será posible activarla con el
botón SOURCE del mando rotativo. Para obtener información
detallada, consulte el Manual de instrucciones de la unidad
principal.
3-861-879-11 (1)
Specifications
Dimensions Approx. 43 × 83 × 49 mm (w/
Mass Approx. 70 g (2.47 oz.)
Supplied accessories Screw (1)
Spécifications
Dimensions Approx. 43 × 83 × 49 mm (l/h/
Masse Approx. 70 g (2,47 onces)
Accessoires fournis Vis (1)
3
h/d) (1
/4 × 3 3/8 × 1 15/16 in.)
Mounting hardware (1)
Labels (8)
Cramper (1)
3
/4 × 3 3/8 × 1 15/16 pouces)
p) (1
Matériel de montage (1)
Etiquettes (8)
Agrafe (1)
Rotary
Commander
Operating Instructions
Mode d’emploi
Bedienungsanleitung
Manual de instrucciones
Gebruiksaanwijzing
Bruksanvisning
Istruzioni per l’uso
Technische Daten
Abmessungen ca. 43 × 83 × 49 mm (B/H/T)
Gewicht ca. 70 g
Mitgeliefertes Zubehör
Schraube (1)
Montageteil (1)
Aufkleber (8)
Klammer (1)
Manual de instruções
ィマ・ホサ。ゥム
RM-X4S
Sony Corporation 1998 Printed in China
Especificaciones
Dimensiones 43 × 83 × 49 mm. aprox. (an/al/
Peso 70 g. aprox.
Accesorios suministrados
f)
Tornillo (1)
Ferretería de montaje (1)
Etiquetas (8)
Fijador de cables (1)
Specifiche
Dimensioni Appross. 43 × 83 × 49 mm (l/a/p)
Peso Appross. 70 g
Accessori in dotazioneVite (1)
Staffa di montaggio (1)
Etichette (8)
Morsetto (1)
Specificaties
Afmetingen Ong. 43 × 83 × 49 mm (b/h/d)
Gewicht Ong. 70 g
Meegeleverde accessoires
Schroef (1)
Bevestigingselementen (1)
Labels (8)
Klemband (1)
Specifikationer
Mått Ca 43 × 83 × 49 mm (b/h/d)
Vikt Ca 70 g
Medföljande tillbehör Skruv (1)
Monteringsdel (1)
Etiketter (8)
Krampa (1)
Especificações
Dimensöes Aprox. 43 × 83 × 49 mm (l/a/p)
Peso Aprox. 70 g
Acessórios fornecidos Parafuso (1)
Material de montagem (1)
Etiquetas (8)
Braçadeira (1)
ウWョ
、リ、o ャ43×83× 49mm。]ェーェ/シe。^
ュォカq ャ70g
ェ™トンケs・ チウオキーv(1)
ヲwクヒケDィ(1)
シミテア(8)
コa(1)
Labels/Etiquettes/Aufkleber/Etiquetas/Labels/Etiketter/Etichette/Etiquetas/
シミテア
SOUND
MODE
DSPL
SEL
MODE
DSPL
Eight button name labels are supplied with the rotary
commander. Attach the appropriate label for the functions of
the connected master unit and the installing position of the
rotary commander.
If you have the master unit with the SEL button:
Use the FILE label for a master unit with custom file function,
for other units use the DSPL label.
If you have the master unit with the SOUND button:
Use the SOUND label.
Refer to “The rotary commander labels” or “Attaching the
label to the rotary remote” in the master unit operating
instructions.
Huit étiquettes d’identification de touche sont fournies avec le
satellite de commande. Apposez les étiquettes correspondant
aux fonctions de l’appareil principal raccordé et à la position
de montage du satellite de commande.
Si votre appareil principal est doté d’une touche SEL:
Utilisez l’étiquette FILE pour un appareil principal à fonction
de personnalisation de lecture et l’étiquette DSPL pour les
autres appareils.
Si votre appareil principal est doté d’une touche SOUND:
Utilisez l’étiquette SOUND.
Consultez les sections “Etiquettes du satellite de commande”
ou “Apposition des étiquettes sur le satellite de
télécommande” dans le mode d’emploi de l’appareil principal.
Mit dem Joystick werden acht Aufkleber mit Tastennamen
geliefert. Bringen Sie den Aufkleber an, der den Funktionen
des angeschlossenen Hauptgeräts und der Montageposition
des Joystick in Ihrem Auto entspricht.
Bei einem Hauptgerät mit der Taste SEL:
Verwenden Sie den FILE-Aufkleber für ein Hauptgerät mit
Anwenderprogramm-Speicherfunktion, für andere Geräte
verwenden Sie den DSPL-Aufkleber.
Bei einem Hauptgerät mit der Taste SOUND:
Verwenden Sie den SOUND-Aufkleber.
Schlagen Sie dazu bitte unter den Erläuterungen zu den
Etiketten bzw. zum Anbringen der Etiketten am Joystick in der
Bedienungsanleitung zum Hauptgerät nach.
Se suministran ocho etiquetas de nombre de botón con el
mando rotativo. Adhiera la etiqueta adecuada correspondiente
a las funciones de la unidad principal conectada y a la posición
de instalación del mando rotativo.
Si la unidad principal dispone del botón SEL:
Utilice la etiqueta FILE para una unidad principal con la
función de archivo personalizado y, para otras unidades,
utilice la etiqueta DSPL.
Si la unidad principal dispone del botón SOUND:
Utilice la etiqueta SOUND.
Consulte “Etiquetas del mando rotativo” o “Fijación de la
etiqueta al mando a distancia giratorio” en el manual de
instrucciones de la unidad principal.
SOUND
MODE
LIST
SEL
MODE
FILE
SOUND
MODE
LIST
Bij de bedieningssatelliet worden acht functielabels geleverd.
Bevestig het juiste label voor de functies van de aangesloten
speler en de montagepositie van de bedieningssatelliet.
Als op uw speler de toets SEL aanwezig is:
Gebruik het label FILE voor een speler met een custom filefunctie (functie gebruikersbestand). Gebruik voor andere
apparaten het label DSPL.
Als op uw speler de toets SOUND aanwezig is:
Gebruik het label SOUND.
Zie “De labels van de bedieningssatelliet” of “De label
bevestigen aan de bedieningssatelliet” in de handleiding bij de
speler.
Åtta etiketter medföljer vridkontrollen. Fäst rätt etikett för rätt
funktion (på den anslutna huvudenheten) på motsvarande
ställe på vridkontrollen.
Om du har en huvudenhet med knappen SEL:
Använd FILE för den huvudenhet som har funktionen för eget
minne. För andra enheter använder du etiketten DSPL.
Om du har en huvudenhet med knappen SOUND:
Använd etiketten SOUND.
Se “Ettiketter för den roterbara fjärrkontrollen” eller “Fästa
etiketten på vridkontrollen” i bruksanvisningen till
huvudenheten.
Assieme al comando a rotazione sono fornite apparecchi
etichette di identificazione dei tasti. Applicare l’etichetta
corrispondente alle funzioni dell’apparecchio collegato e alla
posizione di montaggio del comando a rotazione.
Se l’apparecchio principale è provvisto del tasto SEL:
Utilizzare l’etichetta FILE se sull’apparecchio principale è
presente la funzione di schedario personalizzato e l’etichetta
DSPL negli altri casi.
Se l’apparecchio principale è provvisto del tasto SOUND:
Utilizzare l’etichetta SOUND.
Consultare la sezione “Etichette del comando a rotazione” o la
sezione sul collegamento dell’etichetta al comando a rotazione
nelle istruzioni d’uso dell’apparecchio principale.
O comando rotativo é fornecido com oit etiquetas com o nome
das teclas. Cole no comando a etiqueta que indica as funções
do aparelho principal ligado e a posição de instalação do
comando rotativo.
Se o aparelho principal estiver equipado com a tecla SEL:
Utilize a etiqueta FILE para um aparelho principal equipado com
a função de ficheiro personalizado e a etiqueta DSPL para os
outros aparelhos.
Se o aparelho principal estiver equipado com a tecla SOUND:
Utilize a etiqueta SOUND.
Consulte as secções “Etiquetas do telecomando rotativo” ou
“Colar a etiqueta no telecomando rotativo” nas instruções de
funcionamento do aparelho principal.
アロツ爿ャササアアセケェ™ヲウ 8アiゼァ@チ荐 Wコルシミテア-スミォモゥメウsアオオロェコ・Dセ
ェコ・¥ッ爻MササアアセケェコヲwゥずmソワヲXセAェコシミテアィマ・ホヲpェG・DセウSELチ茖R
ケウシニセレヲロスs・¥ッ爼コ・DセM・ホFILEシミテア。Mィ茹L・Dセ ホDSPLシミ
テアヲpェG・DセウSOUNDチ茖R
スミィマ・ホ SOUND シミナメ-
スミームキモ・Dセマ・ホサ。ゥム、、ェコ。ァアロツ爿ャササアアセケェコシミテア。ィゥホ。ァヲpヲb
アロツ爿ャササアアセケ、WカKシミテア。ィ、@ク-
MODE
SOUND
LIST
Page 2
Kenmerken
Met deze bedieningssatelliet kunt u de audio-apparatuur in uw auto
gemakkelijk bedienen zonder het stuur los te laten, net zoals u bijvoorbeeld de
koplampen of ruitewisser bedient.
Gebruik de bedieningssatelliet met hoofdtoestellen die zijn voorzien van de
speciale aansluiting voor de bedieningssatelliet.
Opmerking
Deze bedieningssatelliet kan niet worden gebruikt in combinatie met toestellen die
zijn ontworpen voor de Rotary Commander RM-X38/X33/X32 en S Commander
RM-X1S.
Funktioner
Med vridkontrollen kan du använda ljudutrustningen lika lätt som du slår på
och av helljuset eller vindrutetorkarna.
Använd vridkontrollen tillsammans med huvudenheter som har ett speciell
uttag för vridkontroller.
Observera
Den här vridkontrollen kan inte användas tillsammans med enheter som är
anpassade för vridkontrollen RM-X38/X33/X32 eller S-kontrollen RM-X1S.
Caratteristiche
Con questo dispositivo è possibile controllare l’impianto audio dell’auto
altrettanto facilmente quanto i tergicristalli o i fari durante la guida.
Utilizzare questo comando a rotazione con apparecchi principali dotati
dell’apposita presa di ingresso per questo dispositivo di comando.
Nota
Questo comando a rotazione non può essere utilizzato per apparecchi predisposti
per il comando a rotazione RM-X38/X33/X32 e comando S RM-X1S.
Características
Este comando rotativo permite-lhe controlar o equipamento áudio com a
mesma facilidade com que controla os manípulos das luzes ou do limpavidros de seu automóvel durante a condução.
Utilize este comando rotativo com os aparelhos principais equipados com o
jack de entrada especial para o comando rotativo.
Nota
Este comando rotativo não pode ser utilizado com aparelhos concebidos para o
comando rotativo RM-X38/X33/X32 e para o comando S RM-X1S.
ッSシx
・Hヲケアロツ爿ャササアアセケ。Mアzッ爬bセrセp、ァ、、。MゥMアアィTィョォe、隍jソOゥホィΖ @シヒェコ
アアィTィョュオナTクヒクm、ァゼァ@-
・uヲウィ罔ウアMィムアロツ爿 ャササアアセケィマ・ホェコッSョΧ。、f、ァュオナTクヒクm・DセM、˜ッ 爭Hヲケアロツ爿
ォャササアアセケゼチa-
オ
ャーアロツ爿ャササアアセケRM-X38/X33/X32・H、ホSササアアセケRM-X1S オ・ヲモウ]ュpェコュオナTクヒクm。M、」ッ爭 H
・サアロツ爿ャササアアセケゼチa
-
A
SOURCE
AMS
VOL
SEEK
DISC
ATT
PRESET
Positie en functie van de bedieningselementen
De volgende toetsen en bedieningselementen (behalve de toetsen SOURCE en
MODE) hebben dezelfde functie als die op het hoofdtoestel of de draadloze
afstandsbediening.
Meer informatie over de functies van elke toets of bedieningselement vindt u
in de handleiding van uw Sony audio-apparatuur voor in de auto.
1VOL (volume) regeling
2SEEK/AMS-regeling.
Tijdens cassette- of CD/MD-weergave:
•AMS* functie: Hiermee kunt u het begin van een track zoeken. Draai
evenveel keren als u nummers wilt overslaan.
Om meerdere nummers ineens over te slaan, draait u even aan de knop en laat
u dez vervolgens los. Draai er binnen de seconde opnieuw aan en houd de
knop in deze stand. Wanneer het gewenste nummer is bereikt, laat u de knop
los.
* Automatic Music Sensor
•Handmatig zoeken: Hiermee kunt u het gewenste gedeelte van een track
zoeken. Draai de regelaar naar links of naar rechts tot u het gewenste
gedeelte hebt gevonden.
Tijdens radio/TV-ontvangst:
•Automatisch afstemmen: Hiermee wordt automatisch op een zender
afgestemd. Wanneer op een zender is afgestemd, stopt het zoeken
automatisch. Draai enkele malen aan de knop tot de gewenste zender wordt
ontvangen.
•Handmatig een zender zoeken. Draai de regelaar naar links of naar rechts en
houd de regelaar in die stand tot de gewenste zender wordt ontvangen.
Wanneer u binnen de seconde opnieuw draait, kunt u handmatig naar
een andere zender blijven zoeken.
3OFF-toets
Indrukken om het toestel uit te schakelen.
4MODE-toets
•Om van kant te wisselen.
•Om CD-toestellen te kiezen wanneer verschillende CD-toestellen zijn
aangesloten. Bijvoorbeeld: CD1 n CD2 n ···
•Om MD-toestellen te kiezen wanneer verschillende MD-toestellen zijn
aangesloten. Bijvoorbeeld: MD1 n MD2 n ···
•Om de vooraf ingestelde groepen te wijzigen.
Model FM/AM:
Bijvoorbeeld: FM1 n FM2 n AM n ···
Model FM/MW/LW(SW):
Bijvoorbeeld: FM1 n FM2 n MW n LW(SW) n ···
•Om van TV/video-mode te wisselen (enkel voor U.S.A. en Canada).
5ATT-toets
Druk op deze toets als u het geluid tijdelijk wilt dempen.
De toetsen 6 en 7 activeren de verschillende functies
van de speler.
—Hoofdtoestel met SEL toets.
6SEL-toets
7DSPL-toets* (modellen met DSPL toets op het hoofdtoestel)
FILE-toets* (modellen met FILE toets op het hoofdtoestel)
Breng het juiste label aan dat de functies van het aangesloten hoofdtoestel
aangeeft.
Raadpleeg de handleiding van het hoofdtoestel.
—Een speler hebt met de toets SOUND.
6SOUND toets*
7LIST-toets* (modellen met LIST toets op het hoofdtoestel)
DSPL-toets* (modellen met DSPL toets op het hoofdtoestel)
Breng het juiste label aan dat de functies van het aangesloten hoofdtoestel
aangeeft.
Raadpleeg de handleiding van het hoofdtoestel.
* Deze toets werkt op dezelfde manier als de toets op het hoofdtoestel.
8SOURCE-toets
Druk op deze toets als u een programmabron wilt kiezen.
9PRESET/DISC-regeling
VOL-knop indrukken en vooraf ingestelde. (De VOL-knop en de SEEK/
AMS-knop draaien samen.)
•Om snel vooruit te spoelen. Als u wilt terugkeren naar normale
weergave, drukt u op de MODE-toets.
•Om van disc te wisselen wanneer (een) CD/MD-toestel(len) is (zijn)
aangesloten.
•Om zenders te ontvangen die zijn opgeslagen onder de voorkeuzetoetsen
op het hoofdtoestel.
De bedieningsrichting wijzigen
De standaardinstelling van de bedieningsrichting is weergegeven in illustratie
(A).
Als u de bedieningssatelliet aan de rechterzijde van de stuurkolom monteert is
het desgewenst mogelijk om de instelling van de bedieningsrichting om te
draaien.
Druk toets 6 tenminste twee seconden in, terwijl u de toets VOL (B)
ingedrukt houdt.
Wanneer de POWER SELECT schakelaar op uw hoofdtoestel in de stand
B (OFF) staat, kan uw hoofdtoestel pas worden bediend met de
bedieningssatelliet als een van de werkingstoetsen wordt ingedrukt of als
een disc/cassette wordt ingebracht om het hoofdtoestel te activeren.
Afhankelijk van het type kan het hoofdtoestel worden aangezet met de
toets SOURCE op de bedieningssatelliet. Raadpleeg de handleiding van
het hoofdoestel voor meer gedetailleerde informatie.
Kontrollernas placering och funktion
Följande knappar och kontroller (förutom SOURCE- och MODE-knapparna)
har samma funktioner som motsvarande knappar och kontroller på
huvudenheten och den trådlösa fjärrkontrollen.
Det finns mer information om knapparna och kontrollerna i bruksanvisningen
till Sonys billjudutrustning.
1VOL-knapp
2SEEK/AMS-knapp
Under uppspelning av kassettband eller CD-/MD-skiva:
•AMS*-funktionen: Letar efter början på alla spår. Vrid kontrollen det
antal gånger du vill hoppa över spår.
Vill du hoppa över flera spår samtidigt vrider du kontrollen och släpper
den i sedan med en gång. Inom en sekund vrider du den igen och håller
den där. När du har kommit till önskat spår släpper du vridkontrollen
igen.
* Automatic Music Sensor
•Manuell sökning: Letar efter önskat avsnitt av ett spår. Vrid kontrollen åt
vänster eller åt höger och håll den i det läget tills önskat avsnitt har
hittats.
Under radio-/TV-mottagning:
•Automatisk inställning: Automatisk kanalinställning. När en kanal
påträffas avslutas sökningen automatiskt. Vrid kontrollen upprepade
gånger tills du har hittat önskad kanal.
•Manuell kanalsökning. Vrid kontrollen åt vänster eller åt höger och håll
den i det läget tills du har hittat önskad kanal. Du kan fortsätta att
manuellt söka efter nästa kanal genom att inom en sekund vrida
kontrollen ännu en gång.
3OFF-knapp
Trycker du på när du vill stänga av enheten.
4MODE-knapp
•Byter uppspelningssida på kassetten..
•Väljer CD-spelare när flera CD-spelare är anslutna.
Till exempel: CD1 n CD2 n ···
•Väljer MD-spelare när flera MD-spelare är anslutna.
Till exempel: MD1 n MD2 n ···
•Växlar mellan de förinställda grupperna.
FM/AM-modell:
Till exempel: FM1 n FM2 n AM n ···
FM/MW/LW(SW)-modell:
Till exempel: FM1 n FM2 n MW n LW (SW) n ···
•Växlar mellan TV/videoläge (endast modeller i USA och KANADA).
5ATT-knapp
Trycker du på när du tillfälligt vill dämpa ljudet.
Med knapparna 6 och 7 aktiveras de olika funktionerna
på huvudenheten.
—Huvudenheten med SEL-knapp.
6SEL-knapp*
7DSPL-knapp* (på modeller med DSPL-knapp på huvudenheten)
FILE-knapp* (på modeller med FILE-knapp på huvudenheten)
Fäst den etikett som motsvarar den anslutna enhetens funktion.
Se bruksanvisningen till huvudenheten för mer information.
—På huvudenheten finns knappen SOUND.
6SOUND-knapp*
7LIST-knapp* (på modeller med LIST-knapp på huvudenheten)
DSPL-knapp* (på modeller med DSPL-knapp på huvudenheten)
Fäst den etikett som motsvarar den anslutna enhetens funktion.
Se bruksanvisningen till huvudenheten för mer information.
* Fungerar på samma sätt som knappen på huvudenheten.
8SOURCE-knapp
Trycker du på när du vill välja programkälla.
9PRESET/DISC-kontroll
Tryck på och vrid VOL-kontrollen. (VOL-kontrollen och SEEK/AMSkontrollen vrids samtidigt.
•Bandet snabbspolas. Återgå till normal uppspelning genom att trycka på
MODE-knappen.
•Byter skiva när en eller flera CD-/MD-spelare är anslutna.
•Tar emot de kanaler som har lagrats på förinställda nummerknappar på
huvudenheten.
Att observera angående vridriktning för vridkontrollens
reglage.
Reglagens riktning är fabriksinställda enligt bild (A). Om du vill montera
vridkontrollen till höger om styrkolumnen kan du ändra vridriktningen på
reglagen. Tryck på knapp 6 i minst två sekunder samtidigt som du trycker
ned VOL-kontrollen (B).
När POWER SELECT-reglaget på huvudenheten är i läget B (OFF) kan du
endast styra huvudenheten med fjärrkontrollen om du har aktiverat den
genom att trycka på någon av knapparna eller sätta i en CD-skiva eller ett
kassettband. Beroende på vilken typ av huvudenhet du använder kan slå
av den med SOURCE-knappen på vridkontrollen. Mer information finns i
bruksanvisningen som medföljer huvudenheten.
Localizzazione e funzione dei comandi
I tasti e i comandi seguenti (ad eccezione dei tasti SOURCE e MODE) hanno le
stesse funzioni di quelli sull’apparecchio principale o sul telecomando.
Per maggiori informazioni relative alle funzioni di ciascun tasto o comando,
fare riferimento al manuale di istruzioni del vostro impianto audio.
1Comando VOL (volume)
2Comandi SEEK/AMS
Durante la riproduzione cassetta o la riproduzione CD/MD:
•Funzione Sensore Musicale Automatico (AMS)*: Localizza l’inizio delle
piste. Ruotare il comando per il numero di volte quante sono le piste che
si desiderano saltare.
Per saltare vari brani, ruotare per un attimo il comando, quindi rilasciarlo.
Dopo un secondo, ruotarlo nuovamente e mantenerlo in questa posizione.
Una volta raggiunto il brano desiderato, rilasciarlo.
* Sensore Musicale Automatico
•Ricerca manuale: Localizza la sezione desiderata di una pista. Ruotare il
comando a destra o a sinistra e tenerlo nella posizione ruotata fino a che
non sia stata localizzata la sezione desiderata.
Durante la ricezione radio/TV:
•Sintonia automatica: Sintonizza automaticamente una stazione. La ricerca
si arresta automaticamente non appena una stazione è sintonizzata.
Ruotare per un attimo il comando numerose fino a che non viene
sintonizzata la stazione desiderata.
•Ricerca manuale di una stazione. Ruotare il comando a destra o a sinistra
e mantenerlo in posizione ruotata fino a che la stazione desiderata non
viene sintonizzata. E’ possibile continuare la ricerca manuale di un’altra
stazione ruotando nuovamente il comando nello spazio di un secondo.
3Tasto OFF
Premere il tasto OFF per spegnere l’apparecchio.
4Tasto MODE
•Cambia il lato di riproduzione della cassetta.
•Seleziona gli apparecchi CD se sono collegati diversi apparecchi CD.
Ad esempio: CD1 n CD2 n ···
•Seleziona apparecchi MD se sono collegati diversi apparecchi MD.
Ad esempio: MD1 n MD2 n ···
•Cambia i gruppi preimpostati.
Modello FM/AM:
Per esempio: FM1 n FM2 n AM n ···
Modello FM/MW/LW(SW):
Per esempio: FM1 n FM2 n MW n LW (SW) n ···
•Cambia il modo TV/video (Solo per i modelli degli U.S.A e Canada).
5Tasto ATT
Premere per attenuare il suono momentaneamente.
I tasti 6 e 7 attivano la funzione opportuna
sull’apparecchio principale.
—L’apparecchio principale è provvisto del tasto SEL.
6Tasto SEL*
7Tasto DSPL* (modelli con il tasto DSPL sull’apparecchio
principale)
Tasto FILE* (modelli con il tasto FILE sull’apparecchio principale)
Applicare l’etichetta corrispondente alle funzioni dell’apparecchio principale
collegato.
Fare riferimento al manuale d’uso dell’apparecchio principale.
—L’apparecchio principale è provvisto del tasto SOUND.
6Tasto SOUND*
7Tasto LIST* (modelli con il tasto LIST sull’apparecchio principale)
Tasto DSPL* (modelli con il tasto DSPL sull’apparecchio
principale)
Applicare l’etichetta corrispondente alle funzioni dell’apparecchio principale
collegato.
Fare riferimento al manuale d’uso dell’apparecchio principale.
* Funziona allo stesso modo del tasto sull’apparecchio principale.
8Tasto SOURCE
Premere questo tasto per selezionare i segnali d’ingresso.
9Comando PRESET/DISC.
Premere e ruotare il comando VOL. (I comandi VOL o SEEK/AMS ruotano
assieme.
•Avvolge rapidamente la cassetta. Per ripristinare la riproduzione
normale, premere il tasto MODE.
•Cambia il disco quando uno o più apparecchi sono collegati.
•Cambia le stazioni memorizzate sui tasti numerici preimpostati
sull’apparecchio principale.
Modifica della direzione operativa
La direzione operativa dei comandi è preimpostata in fabbrica secondo
quanto illustrato (A). Se fosse necessario montare il comando a rotazione a
destra del volante, è possibile invertire la direzione operativa dei comandi.
Premere il tasto 6 per oltre due secondi premendo contemporaneamente il
comando VOL (B).
Quando l’interruttore POWER SELECT sull’apparecchio principale è
impostato sulla posizione B (OFF), l’apparecchio principale non può essere
controllato con il comando a rotazione, a meno che non venga premuto uno
dei tasti operativi oppure non venga inserito un disco o una cassetta per
attivare l’apparecchio principale. A seconda del tipo di apparecchio
principale, è possibile accendere l’apparecchio con il tasto SOURCE del
comando a rotazione. Per ulteriori informazioni, fare riferimento al Manuale
d’uso dell’apparecchio principale.
Localização e Função dos Comandos
As teclas e os controlos indicados (excepto as teclas MODE e SOURCE)
partilham as mesmas funçöes dos comandos e das teclas do aparelho principal
ou do telecomando. Para mais informaçöes sobre as funçöes de cada tecla ou
comando, consulte o manual das instruçöes de funcionamento do
equipamento áudio da Sony para automóveis.
1Comando VOL (volume)
2Comando SEEK/AMS
Durante a reprodução de cassetes ou de CDs/MDs:
•Função AMS*: Localiza o início das faixas. Rode o comando o número de
vezes que desejar saltar as faixas.
Para saltar várias faixas de uma vez, rode o comando momentaneamente e
solte-o. Passado de um segundo, rode-o novamente e segure-o nesta
posição. Quando atingir a faixa pretendida, solte-o.
* Sensor de Música Automático
•Busca manual: Localiza a parte desejada de uma faixa. Rode o comando
para a esquerda ou para a direita e mantenha-o na mesma posição até
que tenha localizado a parte desejada.
Durante a recepção de rádio/TV:
•Sintonização automática: Sintoniza automaticamente uma estação.
Quando a estação estiver sintonizada, a busca pára automaticamente.
Rode o comando momentaneamente várias vezes até sintonizar a estação
pretendida.
•Busca automática de uma estação. Rode o comando para a esquerda ou
para a direita, mantendo-o na mesma posição até que a estação desejada
seja sintonizada. Se voltar a rodar o controlo num intervalo de um
segundo, pode continuar a efectuar a pesquisa manual de outra estação.
3Tecla OFF
Carregue nesta tecla para clesligar o aparelho.
4Tecla MODE
•Muda o lado de reprodução da cassete.
•Selecciona os dispositivos de CD no caso de estarem vários ligados.
Por exemplo: CD1 n CD2 n ···
•Selecciona os dispositivos de MD no caso de estarem vários ligados.
Por exemplo: MD1 n MD2 n ···
•Muda os grupos pré-programados.
Modelo FM/AM:
Por exemplo: FM1 n FM2 n AM n ···
Modelo FM/MW/LW(SW):
Por exemplo: FM1 n FM2 n MW n LW (SW) n ···
•Muda o modo de TV/Video (Apenas para os modelos dos E.U.A. e
Canadá).
5Tecla ATT
Carregue na tecla para baixar o som por momentos.
As teclas 6 e 7 activam as várias funções do aparelho
principal.
—Aparelho principal equipado com a tecla SEL.
6Tecla SEL*
7Tecla DSPL* (modelos cujo aparelho prinicpal possua a tecla
DSPL)
Tecla FILE* (modelos cujo aparelho prinicpal possua a tecla FILE)
Cole a etiqueta que indica as funções do aparelho principal que está ligado.
Consulte as instruções de funcionamento do aparelho principal.
—Aparelho principal equipado com a tecla SOUND.
6Tecla SOUND*
7Tecla LIST* (modelos cujo aparelho prinicpal possua a tecla LIST)
Tecla DSPL* (modelos cujo aparelho prinicpal possua a tecla
DSPL)
Cole a etiqueta que indica as funções do aparelho principal que está ligado.
Consulte as instruções de funcionamento da unidade principal.
* Funciona de forma idêntica à tecla do aparelho principal.
8Tecla SOURCE
Carregue para seleccionar as fontes do programa.
9Controlo PRESET/DISC.
Carregue e rode o comando VOL. (Os controlos VOL e SEEK/AMS rodam
em simultâneo.
•Rebobina rapidamente a fita. Para voltar à reprodução normal, carregue
na tecla MODE.
•Muda o disco no caso de estar ligado um dispositivo de CD/MD (ou
dispositivos de CD/MD).
•Recebe as estaçöes memorizadas nas teclas numéricas pré-definidas do
aparelho principal.
Alterar a direcção de funcionamento dos comandos
A direcção de funcionamento dos comandos vem pré-definido de fábrica
como se mostra na figura (A). Se precisar de montar o telecomando rotativio
do lado direito da coluna da direcção, pode inverter a direcção de
funcionamento dos comandos. Carregue em 6 durante mais de dois
segundos ao mesmo tempo que carrega em VOL (B).
Se o interruptor POWER SELECT do aparelho estiver na posição B (OFF),
o aparelho não pode ser activado pelo telecomando a não ser que carregue
numa das teclas de funcionamento ou introduza uma cassete/disco para
activar o aparelho. Dependendo do tipo de aparelho, pode ligar o aparelho
com a tecla SOURCE do telecomando. Para mais informações, consulte as
instruções de funcionamento do aparelho.
アアィケェコヲずm、ホ・¥ッ
、UヲCゼァ@チ茫Mアアィロカs。]SOURCE、ホMODEチ莢」・˜。^。Mィ茹¥ッ爻M・DセホオL
スuササアアセケェコ・¥ッ牀ロヲP-
ヲUュモゼァ@チ茫 ホアアィ ケェコクヤイモサ。ゥMスミームャンSonyィTィョュオナTクヒクm、ァィマ・ホサ。ゥム-
1VOL。]ュオカq。^アアィケ
2SEEK/AMS。]エMァ茖™ュオシヨキPェセ。^アアィ ケ
ヲbソ©ュオアaゥホCD/MDシスゥァ、、。G
•AMS*・¥ッ爍Gッ犇Mァ莠qヲアーツI-ュnク、エXヲアォKアロツ犇Xヲクヲケアアィケ-
ュYュn、@、UクLヲnエXュココqヲアョノ。Mスミウsトロツ牾アィロカs、陦MオMォ皓}、アオオロ
ヲb1ャζチ・H、コ。M、Sュォキsアロツ爲ティマアロァ皚Oォbュお モェコヲずm-キΙ茯くnヲャナ・ェココq
ヲアョノ。M、筰}アロカs-
*
AMSァYャーAutomatic MusicSensor、ァチYシg-
•、箍ハエMァ茖Gッ犇Mァ荐ア、、ャYャqクィ-・ェ・kアロツ爬 ケアアィケェスィぉ茯く nヲャナ・ェココqヲアャq
クィャー、
ヲbヲャュオ。™ケqオオヲャ、ァ、、。G
•ヲローハスユソモ・¥ッ爍Gッ爬ローハエMァ荵q・x-ュYァ茯ぎ Yュモケq・x。M・サセKヲローハーア、Uィモ-
シニヲクウsトロツ爬ケアアィケェスィこオヲャィくnヲャナ・ェコケq・xャー、
•ッ爨箍ハスユソモケq・x-・ェ・kアロツ爬ケアアィケェスィぉ茯くnヲャナ・ェコケq・xャー、ュYヲb1ャζ
トチ・H、コ。M、SヲAヲクアロツ爼コクワ。MォKッ狷˜ト Mァ荀U、@ュモケq・x-
3OFF。]ケqキス、チツ。^チ
ィム、チツ・サササアアセケケqキス、ァ・ホ-
4MODE。]ゼァ@ェャコAツ犇ォ。^チ
•ッ爰ワソ©ュオアaェコシスゥ ア-
•ュYウsアオヲh・xCDョノィムソワCD、ァ・ホ-
ィメヲp。GCD1nCD2n ···
•ュYウsアオヲh・xMDョノィムソワMD、ァ・ホ-
ィメヲp。GMD1nMD2n ···
•ァワケwスユェiャq-
FM/AMセャ。G
ィメヲp。GFM1nFM2nAMn ···
FM/MW/LW (SW) セ ャ。G
ィメヲp。GFM1nFM2nMWnLW(SW)n ···
•ッ爰ワケqオ™ソ©シv、ァゥ M、隕。。]・uュュゥ熙ホ・[ョウ、jセャ。^-
5ATT。]ョオ。^チ
ィムシネョノョオ、ァ・ホ-
6ゥM7チ荵ウ・Dセウ、」ヲPェコ・¥ッ
—
ヲb・DセウSEL チ莪ノ/
6SEL。]ソワ。^チ
7DSPLチ°]アaDSPLチ茗コセ ャ。^
FILEチ°]アaFILEチ 茗コセ ャ。^
ソワサPウsアオオロェコ・Dセ¥ッ牀ロヲPェコシミテアィマ・ホスミームキモ・Dセコィマ・ホサ。ゥム-
—
ヲb・Dセウ SOUNDチ莪ノ/
6SOUNDチ
7LISTチ °]アaLISTチ 茗コセ ャ。^
DSPL チ °]アaDSPLチ茗コセャ。^
ソワサPウsアオオロェコ・Dセ¥ッ牀ロヲPェコシミテアィマ・ホスミームキモ・Dセコィマ・ホサ。ゥム-
*ゥM・Dセコヲケチ茹¥ッ牀ロヲP-
8SOURCE。]ュオキスソワ。^チ
ィムソワュnヲャナ・ェコュオキス、ァ・ホ-
9PRESET/DISC。]ケwスユ。™コミ、^アアィケ
ォ」ヲケアアィケィテアロツVOLアアィケ-。]VOLアアィケアNゥMSEEK/AMSアアィケウsーハ
ゼァ@-。^
•ッ爰ヨウtィa-ュnォざ・ュアヤウtォラョノ。Mォ」MODEチ
•ュYウsアオCD/MDーロ、犇ォセケ。]、@・xゥホヲh・x。^ョノッ爰 ワーロ、
•ッ爬ャナ・ヲsタxゥDセコケwスユクケスXチ荳フェコケq・x-
アロツ狃サアアセケェコゼァ@、隕Vカキェセ
ヲpケマ。]A。^ゥメ・ワ。Mアアィケャー、uシtウ]ゥwェコゼァ@、隕VヲpェGアzサンュnアNアロツ狃サアアセケヲwクヒヲbツ爬VャWェコ・kテ茗コクワ。Mアz・i・Hュヒツ爲萓゙ァ@、隕Vュnァ ワ、隕Vョノ。Mスミ、@ュアォVOLアアィケ。M、@ュアォ」6チ荐ワ、ヨ2ャζチ・H、W
。]B。^-
。@。@キΙ筵DセWェコPOWERSELECTカ}テ]ゥwゥァB。ィ。]OFF。^ヲずmョノ。Mー」ォD
ォU、@ュモゼァ@チ茫ホクヒ、J、@ュモーロコミ。™・dアa・HソEャ。・DセMァォhォK、」ッ爭ホササアアセケゼ
ァ@・DセヲウィヌセャャO・i・ホアロツ狃サアアセケェコSOURCEチ茹エカ}・Dセqキスェコ-クヤイモサ。
ゥMスミームキモ・Dセコィマ・ホサ。ゥム-
B
 Loading...